
Acrylic vs Oil Paint: A Personal Guide to Choosing Your Medium
Confused about acrylic vs oil paint? I dive into drying times, textures, and techniques with personal insights to help you pick the perfect medium for your artistic journey.
Acrylic vs. Oil Paint: The Definitive Guide for Artists – Unpacking the Great Debate
Ah, the age-old artistic dilemma, isn't it? "Acrylic or oil?" It’s a question that echoes through every art supply store aisle, in hushed studio conversations, and even within the quiet confines of our own creative minds. But it's so much more than a simple technical query; it's a profound dive into how we connect with our work, our preferred rhythm of creation, and even the very fabric of our artistic temperament. For me, and for countless artists I know, this isn't merely a choice of materials; it's a pivotal decision that profoundly shapes the very narrative our art breathes into existence. Believe me, I've spent countless hours grappling with this very question, pondering it deeply in my studio late into the night (usually with a cooling cup of herbal tea in hand, let's be honest!), and engaging in endless, passionate debates with fellow creatives.
I remember when I first started out, feeling completely overwhelmed by the sheer array of choices in the art store. Acrylics seemed so friendly and approachable, promising quick results and easy cleanup, while oils had this grand, intimidating aura of the Old Masters—a medium revered through centuries. It felt like choosing between a quick, energetic sprint and a long, meditative marathon, each with its own unique rewards and challenges.
Over the years, I've dabbled in both, sometimes passionately diving deep, sometimes with a frustrated sigh as I grappled with their quirks. I've come to appreciate each for what they bring to the canvas (and indeed, to my artistic soul). My journey has taught me that the "best" paint isn't a fixed concept; it's a dynamic relationship between the artist and the medium. There's no single "right" answer, but understanding their distinct personalities can truly transform your creative process and open up new avenues for expression. In this comprehensive guide, we're going to unpack every facet of acrylic and oil paints, diving deep into their properties, techniques, and practical considerations to help you find your perfect artistic partner. So, let's discover which personality resonates most with your artistic vision, or perhaps, how both can enrich your practice. We'll explore everything from their historical origins and chemical makeup to their handling characteristics, archival qualities, and even their impact on your studio's aroma. By the end, you'll not only understand the science and art behind these two titans of the palette but also gain clarity on which one (or both!) will best serve your unique creative journey.
This article aims to be the ultimate, most comprehensive, and engaging source of information on acrylic and oil paints, answering all your questions and providing an authoritative guide to help you master your chosen medium.
Introduction: The Artist's Eternal Dilemma – Your Creative Compass
"Which paint should I use?" It's a question that can feel like the first tentative brushstroke on an intimidatingly blank canvas, isn't it? For artists, choosing between acrylic and oil paint is more than a technical decision; it's a commitment that shapes your creative rhythm, your workflow, and even the very narrative your art breathes into existence. This comprehensive guide, forged from countless hours of studio exploration, passionate debates with fellow creatives, and a fair share of artistic frustrations and triumphs, is designed to bring you the most in-depth comparison of these two titans of the palette. We're here to cut through the noise and help you navigate this pivotal choice.

The Science Behind the Mediums: Unpacking the Composition – The DNA of Your Colors
Before we dive into the nitty-gritty of how these paints behave, it's worth taking a moment to understand what they are. At their core, both acrylics and oils are composed of three fundamental elements: pigment, binder, and solvent/vehicle.
- Pigment: This is where the magic of color originates—the finely ground particles that bestow upon your paint its unique hue. The size, quality, and origin of these particles are critical, influencing everything from a color's opacity to its lightfastness and overall brilliance. Think of the intense vibrancy of cadmium red, the serene depth of ultramarine blue, or the luminous purity of titanium white; these pigments are truly the pulsating heart of your color palette.
- Natural vs. Synthetic: Historically, pigments were derived from natural sources like minerals (e.g., lapis lazuli for ultramarine), plants, and even insects. The journey from ancient caves to the Renaissance master's palette is a story of material innovation. Modern chemistry has since given us an incredible array of stable, vibrant synthetic pigments that have revolutionized the artist's palette, often offering superior lightfastness, consistency, and a broader spectrum of available hues. Understanding the origin can sometimes give you a clue about its properties; for instance, natural earth pigments are often incredibly stable but may have lower tinting strength than their modern synthetic counterparts. It's truly fascinating to trace the lineage of a color, from ancient mineral deposits to sophisticated chemical compounds, and seeing how artists throughout history were limited by their available palette, pushing the boundaries of what was possible with the colors they had.
- Organic vs. Inorganic: Pigments are also broadly categorized as organic (derived from carbon-based compounds, often brighter, more transparent, and with high tinting strength, like Phthalo Blue) or inorganic (mineral-based, often more opaque, muted, and very stable, like Ultramarine Blue). Both have their place and contribute to the vast spectrum of colors available to us, each bringing its own unique character and handling properties to your canvas. The pigment chosen directly influences a color's opacity, lightfastness, and brilliance.
Understanding Pigment Characteristics: A Quick Reference
Characteristic | Description | Impact on Your Art |
|---|---|---|
| Opacity | How much light passes through the pigment. Opaque pigments block light, while transparent ones allow it to pass through. | Dictates layering, glazing, and covering power. Opaque for bold statements, transparent for luminous depth. |
| Lightfastness | The resistance of a pigment to fading or discoloration when exposed to light over time. Rated by ASTM (I, II, III). | Crucial for archival quality; ensures your colors remain true for decades, not just years. |
| Tinting Strength | A pigment's ability to retain its color when mixed with white or other colors. | Influences how much pigment you need to achieve a desired color mixture. High tinting strength means a little goes a long way. |
| Particle Size | The fineness or coarseness of the ground pigment particles. | Affects paint texture, transparency, and how smoothly the paint spreads. Finer particles often lead to smoother, more transparent paints. |
| Chemical Stability | The pigment's resistance to chemical reactions that could alter its color or physical properties. | Ensures the paint won't react negatively with other mediums or environmental factors over time, maintaining color integrity. |
- Binder: This is the glue that holds the pigment particles together and adheres them to your chosen surface. The type of binder is the defining characteristic that separates acrylic from oil paints, and it's what dictates their drying time, flexibility, and overall handling.
- For acrylics, the binder is an acrylic polymer emulsion – essentially plastic particles suspended in water. As the water evaporates, these plastic particles fuse together to form a flexible, durable paint film. This plastic-based binder is what gives dried acrylics their characteristic flexibility and resistance to cracking, making them incredibly durable over time. It's truly a marvel of modern chemistry, capable of forming a resilient, non-yellowing film that stands the test of time. I often think of it as liquid plastic, and that helps me understand its fantastic adhesive properties.
- For oils, the binder is a drying oil, most commonly linseed oil, but sometimes other oils like poppy oil, walnut oil, or safflower oil. Each of these alternative oils offers subtle differences that artists meticulously choose for specific effects: Linseed oil is robust and forms a strong film, but has a slight yellowing tendency over centuries, especially if stored in the dark. Poppy oil yellows less, making it favored for delicate blues and whites, though it dries slower. Walnut oil provides excellent flexibility and also yellows less than linseed, while safflower oil is often chosen for its pale color and slow drying, ideal for whites and pale hues. These oils don't merely evaporate; they undergo a fascinating chemical reaction with oxygen (oxidation) to harden and form a solid, durable paint film. This intricate process is considerably slower and is precisely what imbues oils with their characteristic, wonderfully extended drying time. Historically, binders like egg yolk were used for mediums like tempera, showcasing the evolution of paint chemistry over centuries. Understanding these subtle differences empowers you to choose not just a color, but a specific drying trajectory and final aesthetic for your work.
- Solvent/Vehicle: This is the liquid that carries the pigment and binder, allowing the paint to be spreadable. It evaporates as the paint dries, though its role differs significantly between the two mediums.
- In acrylics, the vehicle is primarily water. This simple fact is the secret behind their effortless cleanup and impressively swift drying. As the water evaporates, the binder cures and the plastic particles fuse together. It's worth noting, however, that while water is the primary vehicle, certain specialized acrylic mediums can introduce other components that slightly alter this perception, sometimes offering a more oil-like feel or extended working time.
- In oils, the vehicle is typically the binder oil itself, often thinned with additional solvents to adjust consistency and flow. Common choices include turpentine (a natural, pine-derived solvent with a distinct aroma) or odorless mineral spirits (OMS) (a petroleum-derived solvent that's less aromatic). These solvents serve to thin the paint and increase its flow, but they evaporate as the paint dries. Crucially, the oil binder still needs to undergo its slower oxidation process to fully dry. The choice of solvent impacts not only paint handling and drying time but also your studio environment and cleanup routine, which we'll delve into later.
Understanding these basic components is like knowing the ingredients in a recipe; it helps you predict how the final dish (your artwork!) will turn out, and how to best manipulate it. This foundational knowledge really changed how I thought about my materials, turning them from mysterious concoctions into understandable tools. It's the difference between blindly following instructions and truly creating with intention, giving you the power to bend the materials to your artistic will, rather than being dictated by them.

The Fundamental Divide: Drying Time and What It Means for You
This, for me, is the big one, the cornerstone difference that informs almost everything else about how you'll paint. We're talking about drying time, or more specifically, open time. Open time refers to how long the paint remains wet and workable on your palette and on the canvas before it begins to set. How long do you have to work, to blend, to layer, to rework? The answer dictates so much of your artistic approach – it's truly the pulse of your creative rhythm, and understanding it is paramount to choosing your medium wisely.

The Chemistry of Drying: Evaporation vs. Oxidation
Before we dive into the practical implications, let's quickly clarify the fundamental science. Acrylics dry primarily through evaporation. As the water vehicle leaves the paint film, the acrylic polymer particles coalesce and fuse together, forming a solid plastic matrix. This is a physical process, hence the speed. Oils, conversely, dry through oxidation, a chemical reaction where the oil binder absorbs oxygen from the air and polymerizes, hardening into a durable film. This chemical transformation is inherently much slower and is why you'll be waiting days or weeks, rather than minutes. Understanding this core difference is like knowing the engine under the hood – it explains why they behave so differently.
Acrylics: The Sprinters of the Art World
Acrylic paints are inherently water-based, which is the secret to their famous quick-drying nature. We're talking minutes, sometimes even mere seconds, depending on the thickness of your application, the ambient temperature of your studio, the relative humidity, or if you're working in a dry, well-ventilated environment. A hot, dry day will see acrylics seize up almost instantly, while a humid climate can extend their open time slightly. For a long time, especially when I was used to the leisurely pace of other mediums, I actually found this intimidating. "How can I blend seamlessly? How can I create those soft, elusive gradients?" I'd fret, feeling the paint seize up on my palette. But then I realized its immense power: speed, spontaneity, and the unparalleled ability to layer without waiting for days, which frankly, is a godsend on a tight deadline or when inspiration strikes fast.
With acrylics, you can achieve a crisp, clean layer over a previous one almost immediately. This makes them fantastic for building up complex textures, working in quick bursts of creativity, or for artists like me, who often embrace a more abstract expressionist approach where speed, intuition, and bold marks are key. The speed also makes them ideal for quickly blocking in compositions or creating dynamic underpaintings. If you're looking to extend that precious "open time" for blending, don't despair! Acrylic mediums like retarders or slow-drying gels can give you a little more wiggle room, allowing for softer transitions. Open acrylics, for instance, are formulated to stay wet for much longer, sometimes hours, offering a blending window closer to that of oils, without the solvents. I've found these to be a true game-changer when I want the flexibility of oils but the convenience of acrylics. Beyond mediums, techniques like misting your palette and canvas with water or working on a stay-wet palette can significantly aid in extending workability. Want to try a new technique with acrylics? Have a look at how to blend acrylic paint on canvas for beginners or even dry brush technique acrylic painting. The history of acrylic painting is quite fascinating, evolving from industrial innovation to a versatile artistic medium that's still revealing its full potential. Understanding these various formulations and additives empowers you to truly control the medium, bending its inherent speed to your creative will.
Factors Influencing Acrylic Drying Time
Factor | Impact | Your Control |
|---|---|---|
| Paint Thickness | Thicker applications take longer to dry; thin washes dry almost instantly. | Vary application, use fluid acrylics for thin, heavy body for thick. |
| Humidity | High humidity extends drying time; low humidity accelerates it. | Use a humidifier/dehumidifier in your studio; mist your palette/canvas with water. |
| Temperature | Warmer temperatures accelerate drying; cooler temperatures slow it down. | Adjust studio temperature; avoid direct heat sources like hair dryers (unless used very carefully and on cool setting). |
| Airflow/Ventilation | Good airflow accelerates drying (water evaporates faster). | Ensure adequate ventilation in your studio, but avoid strong drafts if you want extended open time. |
| Surface Absorbency | More absorbent surfaces (e.g., raw canvas) will draw water out of the paint faster, accelerating drying. | Prime your canvas with gesso to control absorbency. |
| Mediums & Additives | Retarders and slow-drying gels extend open time; flow improvers don't significantly affect it. | Incorporate appropriate acrylic mediums to manipulate drying. |
Controlling Your Acrylic Drying Environment: Practical Studio Tips
Beyond just understanding the factors, actively controlling your studio environment can be a game-changer for acrylics. If you desire a longer open time for blending, consider working in a cooler, slightly more humid environment, and keep a spray bottle of water nearby to lightly mist your palette and even the canvas surface. Conversely, if you need rapid drying for quick layering or stencil work, increasing airflow with a fan (directed away from the wet paint to prevent blowing dust onto the surface) or working in a warmer, drier space can be beneficial. I've often found that simply having a consistent approach to my studio climate helps immensely in predicting paint behavior and avoiding frustrating surprises.
The Dance of Fluidity and Consistency in Acrylics
It’s not just about how fast they dry, but how they move and interact with your brush that truly defines their character. This is where acrylics reveal another layer of their remarkable versatility. Acrylics come in a wide range of consistencies, from highly fluid fluid acrylics (perfect for staining, pouring, or watercolor-like effects) to heavy body acrylics (which are thick and retain brushstrokes beautifully, ideal for impasto). Then there are soft body acrylics in between. This means you can choose an acrylic that suits your immediate need, or use various acrylic mediums to thin them for washes, thicken them for texture, or extend their volume and transparency for glazes. This adaptability is one of their greatest strengths, allowing for a huge range of expression within a single medium. The consistency you choose, or create with mediums, profoundly impacts the final texture and appearance of your brushstrokes.
Oils: The Marathon Runners, Slow and Steady
Oil paints, on the other hand, are oil-based, and this fundamental difference dictates their entire behavior. They dry through a process of oxidation (a chemical reaction with oxygen), not simple evaporation, which means they take ages to dry. We're talking days, weeks, sometimes even months for very thick layers – a fact that used to utterly baffle my impatient younger self! I know, I know, that sounds daunting, especially in our fast-paced world. But this very slow drying time is their magic, their superpower. It allows for incredible, seamless blending, subtle transitions that whisper rather than shout, and a wonderfully forgiving nature where you can work and rework areas for extended periods, sometimes over several sessions. It’s a medium that truly teaches you patience and the beauty of a slow, unfolding creative process. Interestingly, different pigments in oil paints dry at wildly different rates – for example, earths like umbers, ochres, and siennas contain metallic oxides that act as natural siccatives, drying much faster (sometimes in a day or two) than cadmiums, blacks, or whites (which can take weeks). Understanding these inherent variations can be a powerful strategic tool, allowing you to choose pigments deliberately for quick-drying underpaintings or areas you want to tackle more swiftly, while reserving slower-drying colors for detailed, wet-into-wet work. You can also manipulate drying times with a diverse array of oil painting mediums. For example, alkyd mediums can significantly accelerate drying times, sometimes reducing them to a day or less, perfect for artists who crave a faster pace, especially when building up quick underlayers. Conversely, thicker, resin-based mediums might slow drying slightly while simultaneously enhancing body and texture. Each medium is a tool, a way to bend the inherent properties of oil to your specific creative will. This extended working time is what allows for the creation of incredibly subtle atmospheric effects and complex color mixtures directly on the canvas, a hallmark of classical realism and impressionism. Factors like humidity, temperature, and even the type of surface can also subtly influence drying, although oxidation remains the primary mechanism. Beyond the binder and mediums, it's fascinating to observe that individual pigments themselves have an inherent drying rate in oil. For example, certain pigments like Burnt Umber contain metallic oxides that act as natural siccatives (driers), causing them to dry much faster, sometimes in a day or two. Conversely, pigments like Ivory Black, Cadmium Yellow, and many whites (especially those bound with poppy or safflower oil) are notoriously slow dryers, sometimes taking weeks to become touch-dry. Understanding these inherent variations allows for a more strategic approach to your painting process, ensuring you're not caught off guard by unexpected drying times.
Think about the luminous quality of old master paintings; that unparalleled depth, richness, and ethereal glow often come from countless layers of slowly blended oil paint, patiently built up over time. If you're into delicate glazing techniques or the spontaneous, wet-into-wet alla prima technique, oils are your best friend. They invite you to slow down, to observe deeply, to deliberate over every brushstroke, transforming painting into a meditative experience. I find myself in a completely different headspace when I pick up my best oil painting brushes for artists and set up my palette, often with a renewed sense of respect for the materials. If you're curious about the origins, the history of oil painting is a deep dive into centuries of artistic development, revealing a rich tapestry of innovation and mastery.
Essential Oil Painting Mediums
Medium Type | Purpose | Impact on Drying Time | Application | Common Examples |
|---|---|---|---|---|
| Linseed Oil | Increases flow, gloss, and transparency; most common | Slows | Glazes, mixing, extends paint | Refined Linseed Oil, Cold-Pressed Linseed Oil |
| Poppy/Walnut Oil | Less yellowing, subtle flow | Slows significantly | Whites, light colors, delicate glazes | Poppy Oil, Walnut Oil |
| Alkyd Mediums | Accelerates drying, increases gloss and flexibility | Speeds up (hours to 1-2 days) | Underpaintings, quick layering, impasto | Galkyd, Liquin |
| Stand Oil | Creates a smooth, enamel-like finish; levels brushstrokes | Slows | Glazing, fine detail, smooth surfaces | Winsor & Newton Stand Oil |
| Dammar Varnish (as medium) | Increases gloss and film strength | Speeds up slightly | Traditional glazes, enriching colors | Dammar Resin (diluted with solvent) |
| Impasto Mediums | Adds body and texture for thick applications | Varies by formulation | Sculptural effects, pronounced brushstrokes | Gamblin Solvent-Free Gel, Winsor & Newton Impasto Medium |
Building Layers and "Fat Over Lean"
Ah, the cardinal rule of oil painting: fat over lean! This isn't just a suggestion; it's absolutely crucial for the longevity of your artwork. It means applying layers of paint with more oil (fat) over layers with less oil (lean). Why does this matter? Lean layers, typically thinned with solvent or containing less oil, dry faster and are less flexible. Fat layers, with more oil or thicker, more flexible mediums, dry slower and remain more elastic. If you reverse this—lean over fat—the faster-drying, less flexible top layer will inevitably crack and fissure as the slower-drying, more flexible bottom layer continues to cure and contract. Imagine building a house on a shifting foundation; it's a recipe for disaster and a heartbreaking sight for any artist. Think of it like this: you lay a solid, stable, lean foundation first, then build up with richer, more flexible materials. Mastering this seemingly simple yet absolutely crucial principle is a true rite of passage for oil painters, ensuring your creative efforts stand the test of time and remain vibrant for generations. Neglecting it is one of the most common, and devastating, mistakes beginners make, leading to premature cracking and degradation of the paint film.

A Brief History of Drying Oils in Art
The use of drying oils as paint binders dates back centuries, with evidence suggesting their application in Buddhist cave paintings in Afghanistan as early as the 7th century, long before their widespread adoption in Europe during the Renaissance. While linseed oil eventually became the dominant choice due to its robustness and availability, earlier artists experimented with various plant oils. The shift from egg tempera to oil paint in Europe was a gradual revolution, largely credited to early Netherlandish painters like Jan van Eyck, who capitalized on the slow-drying nature of oils to achieve unprecedented luminosity, depth, and realistic detail. This historical context highlights not just the evolution of materials, but also the profound impact these materials had on artistic expression and the very possibilities of painting. Understanding this lineage connects us to a continuous tradition of innovation and mastery.
Drying Time Comparison Table
Feature | Acrylic Paint | Oil Paint |
|---|---|---|
| Drying Mechanism | Water evaporation | Oxidation (curing of oils) |
| Drying Time | Fast (minutes to hours); influenced by thickness, environment | Slow (days to weeks, thick layers months); influenced by pigments, mediums |
| Blending | Requires speed; wet-on-wet difficult without specific mediums (e.g., retarders, open acrylics) | Excellent; allows extensive wet-on-wet blending and reworking over sessions |
| Layering | Quick, distinct layers possible; ideal for rapid build-up | Requires patience; "fat over lean" rule is crucial for durability |
| Workability | Limited open time; spontaneity, quick decision-making | Extended open time for manipulation; meditative, deliberate process |
| Environmental Factors | Dries faster in dry, warm, ventilated spaces | Dries faster in warm, well-lit, ventilated spaces; humidity less of a factor |

The Impact of Drying Time on Your Artistic Process
The fundamental difference in drying time dictates not just how you paint, but often what you paint and even where you paint. For instance, acrylics are fantastic for plein air painting if you want to capture a fleeting moment quickly, or for layered, graphic works in a studio with limited space. Their speed also makes them ideal for underpaintings or initial blocking in of compositions. Oils, with their extended open time, are ideal for nuanced observational studies, portraits, or any piece where subtle shifts in light and shadow are paramount, inviting a deep, prolonged engagement. This choice isn't just about chemistry; it's about workflow, patience, and the very narrative you want your art to tell. Think about a quick urban sketch versus a meticulously rendered still life – the drying time will inherently guide your approach, almost acting as a silent collaborator in your creative process.
Texture and Application: What Does It Feel Like to Paint? – The Tactile Experience
Beyond drying time, the tactile experience of painting—how the paint feels under your brush or palette knife—is profoundly different.

Acrylics: Versatile but Unique Feel
Acrylics are incredibly versatile, a chameleon of the art world! You can thin them with water to achieve watercolor-like washes, or use them straight from the tube (especially heavy body varieties) for luscious impasto effects. They come in various consistencies – from highly fluid to thick, pasty heavy body – and can be further manipulated depending on the acrylic medium you add. However, they tend to dry with a slightly plastic-like sheen, and while you can create truly beautiful and varied textures, that initial "buttery" glide and movement isn't quite the same as oils. Many artists, myself included, use a dazzling array of acrylic mediums to alter their consistency, gloss, transparency, or even to incorporate fascinating textural elements like sand, glass beads, or pumice, truly pushing the boundaries of what acrylics can achieve. From fluid retarders that extend drying time to pouring mediums that create mesmerizing cells, the world of acrylic additives is vast. For instance, gel mediums (which come in various viscosities from soft to extra heavy) can add incredible body and transparency, allowing for sculpted surfaces, impressive impasto, and vibrant, luminous layered glazes. This versatility makes acrylics surprisingly capable of achieving effects traditionally associated with oils, but with their own unique character and a fraction of the drying time. You can even learn how to prepare a canvas for acrylic painting to get the best out of them, ensuring optimal adhesion and longevity for your textured masterpieces. Different best acrylic paint brushes for artists will also yield different textural results, from soft washes with synthetic brushes to sharp, bold marks with hog bristle. Don't underestimate their range; from delicate details to bold abstract strokes, acrylics can adapt. You can also explore specific basic brushstrokes for acrylic painting to truly understand how different applications create diverse textures. For example, using a heavy gel medium can transform a fluid acrylic into a sculptural paste, perfect for creating deep textures that catch the light, while a flow improver allows for smoother, more even washes without breaking down the paint's binder. Beyond brushes, a palette knife can unlock a whole new dimension of texture with acrylics. Using the flat of the blade to spread thick paint, you can create smooth, broad swaths of color, or use the edge for sharp, defined lines. Scraping back into wet paint with the knife can reveal underlying layers, adding unexpected depth. For impressive impasto, loading a good amount of heavy body acrylic or gel medium onto the knife and applying it in bold, confident gestures can yield wonderfully sculptural effects, making the paint almost three-dimensional on the canvas.
Sub-types of Acrylics for Different Textures
Beyond standard heavy body and fluid acrylics, the market is brimming with specialized acrylics designed for specific textural effects. You'll find acrylic inks, which are intensely pigmented and very fluid, great for washes, calligraphy, and delicate staining. Acrylic gouache offers a matte, opaque finish similar to traditional gouache paint but with the permanence of acrylic, making it ideal for graphic illustration or flat color areas. And for the ultimate in texture, there are acrylic modeling pastes and gel mediums which can be built up to create incredible sculptural surfaces, often acting as a foundation for further paint layers or used on their own for striking dimensionality. The sheer variety ensures that whatever textural vision you have, there's an acrylic formulation to help you achieve it. For those interested in expanding their tools, essential gouache painting supplies for beginners can offer further insights into this opaque, versatile medium.
The Versatility of Acrylic Application
Acrylics are incredibly adaptable to a vast range of applications. They can be used for thin washes that mimic watercolors, poured to create mesmerizing abstract effects, or applied thickly for dramatic impasto. Their ability to dry quickly means you can build up many layers in a single session, creating complex optical mixtures and textures. I often use them for detailed stencil work, knowing I can apply a crisp, clean layer without worrying about smudging or bleeding. This versatility extends to mixed media work, where they serve as an excellent base for collage, found objects, or other materials due to their strong adhesion and relatively quick cure time. Beyond brushes, tools like rollers, sponges, and even unconventional implements can create unique textures with acrylics, broadening their expressive potential.
Oils: The Buttery Dream
Oil paints truly live up to their name – they have a unique, luscious texture straight from the tube that many artists describe as a "buttery dream." They feel incredibly smooth and rich, allowing for seamless transitions and incredibly refined brushstrokes. The way they move and spread on the canvas, almost melting under the brush, is truly satisfying and a hallmark of the medium. They retain brushstrokes beautifully, making them ideal for expressive, textured works where every mark carries a story, from delicate glazing techniques to bold impasto effects created with a palette knife. The depth and luminosity they achieve through their slow drying and unique refractive qualities are often unparalleled, creating a visual richness that is hard to replicate. Beyond traditional brushes, you can even explore tools like oil sticks to achieve painterly drawing effects or bold, textural applications directly onto the canvas, or use solvents like turpentine to create thin, transparent washes. A palette knife with oils is a revelation; it allows for incredibly thick, sculptural applications that truly stand out from the canvas, capturing light and shadow in a way a brush cannot. From broadly scraping on a layer of color to create a textured ground, to applying precise peaks and valleys of pure pigment, the knife becomes an extension of your hand for direct, expressive mark-making. Winsor & Newton Artists' Oil Colour is a brand I've worked with extensively, and the quality, consistency, and pigment load are just superb, a true joy to paint with. For beginners, there are some fantastic best oil paints for beginners that offer a great starting point without breaking the bank. The versatility of oils for creating nuanced textures and vibrant optical effects is truly a painter's playground. I find the very act of pushing and pulling the thick paint across the canvas to be a deeply satisfying, almost meditative, tactile experience that other mediums can't quite replicate. It's like sculpting with color, truly.
"Short" vs. "Long" Paint: Understanding the Flow
Oil paint also has a fascinating characteristic often described as being "short" or "long." A short paint feels stiffer and holds its shape exceptionally well, making it ideal for creating bold impasto or for executing crisp, defined brushstrokes where you want the mark to stand proud. Think of a thick, sculptural mark that holds its peak. A long paint, often achieved by adding more medium like linseed oil or an alkyd, is far more fluid, almost stringy, perfect for delicate lines, ethereal smooth blends, and subtle glazes that seem to melt into the canvas. This allows for paints to flow off the brush in a continuous, even stream. Understanding and manipulating this aspect allows you to have incredible control over the texture and flow of your paint, truly dictating how it interacts with your brush and the canvas. This is part of the deep satisfaction many artists find in the tactile experience of working with oils.
Choosing the Right Brushes for Oil: Crafting Your Mark
The brush you choose for oil painting profoundly influences the texture and character of your marks. Hog bristle brushes are a classic for oils, known for their stiffness and ability to hold a lot of paint. They create strong, expressive brushstrokes and are excellent for impasto or laying down thick color. For smoother blending and more delicate work, sable brushes (or high-quality synthetic alternatives) are prized for their softness, fine points, and ability to create subtle gradients and precise details. Synthetic brushes, designed specifically for oils, offer a fantastic balance of durability, responsiveness, and easier cleanup, mimicking natural hair without the ethical concerns. I've found that having a diverse collection of shapes—flats, rounds, filberts, and brights—allows me to tackle any textural challenge, from broad washes to intricate details. Each brush becomes a specific tool in my tactile dialogue with the canvas. You can explore this further with guides like best oil painting brushes for artists.

Texture and Application Comparison Table
Feature | Acrylic Paint | Oil Paint |
|---|---|---|
| Texture from Tube | Varies (fluid to heavy body); can be manipulated | Buttery, smooth, rich consistency |
| Brushstrokes | Holds well, can be softened with mediums | Retains crisp brushstrokes, blends beautifully |
| Impasto | Excellent with heavy body or gel mediums | Naturally lends itself to thick, textured applications |
| Glazing | Achieved with transparent mediums | Traditional, luminous glazing effects possible |
| Flexibility | Highly flexible when dry | Can become brittle over time if not layered correctly ("fat over lean" ensures durability) |
| Tool Adaptability | Wide range (brushes, knives, sponges, rollers) | Primarily brushes and palette knives, but also oil sticks and rags |
Color and Pigment: How Do They "Sing"? – The Soul of Your Palette
The way colors behave and appear in each medium is another crucial distinction, impacting the overall mood and vibrancy of your art.
Acrylics: Bright and Consistent
Acrylics are known for their vibrant, intense colors, often bursting with a crisp clarity. They often dry slightly darker than they appear when wet, a phenomenon artists call "color shift," which can be a bit frustrating at first – you learn to adjust your mixing accordingly! I've certainly had my share of surprises. However, modern acrylics boast excellent lightfastness, meaning they resist fading significantly over time, a crucial archival quality. The industry standard for lightfastness is rated by the ASTM (American Society for Testing and Materials), typically on a scale of I (Excellent), II (Very Good), and III (Fair). Always look for pigments rated ASTM I or II for professional, archival work to ensure your colors remain true for generations. A huge plus is that acrylics generally don't yellow with age, which is fantastic for preserving bright whites, delicate pastels, and clear colors in your artwork exactly as you intended. Professional-grade acrylics also tend to have a higher pigment load, meaning more pure color particles and less filler, resulting in more intense, opaque, and vibrant colors that cover surfaces beautifully. This allows for incredible saturation and brilliant hues. Brands like Golden vs. Liquitex offer fantastic professional-grade acrylics, each with their own unique handling characteristics and subtle differences in how their colors sing. It's worth noting that the history of acrylic painting shows a continuous evolution in pigment technology, leading to the incredibly stable and brilliant colors we enjoy today. The high pigment load in artist-grade acrylics means you achieve strong, saturated color with less paint, offering excellent value in the long run.
Transparency, Opacity, and Tinting Strength: A Closer Look
Understanding how transparent, opaque, and tinting strength properties manifest in each medium is crucial for effective color mixing and layering.
Characteristic | Acrylic Paint | Oil Paint |
|---|---|---|
| Opacity | Varies by pigment; can be very opaque or made transparent with mediums. | Varies by pigment; generally offers a wide range from transparent to opaque. |
| Transparency | Excellent for glazes when thinned with clear mediums, maintaining vibrancy. | Renowned for luminous, deep glazes due to the refractive quality of the oil binder. |
| Tinting Strength | Generally high, especially in artist-grade acrylics, meaning a little goes a long way. | Can be very high, allowing for powerful color mixtures and subtle shifts. |
| Light Interaction | Dries to a consistent sheen; light tends to reflect off the surface. | Oil's higher refractive index allows light to penetrate deeper, creating inner luminosity. |
Navigating Acrylic's Color Shift and Transparency
The "color shift" in acrylics is a real consideration, but it's something you learn to anticipate and work with over time. A common, and I've found, indispensable trick, is to diligently keep a swatch sheet of your wet and dry colors for reference. This practice quickly attunes your eye to the specific color shift of your chosen paints, helping you predict how a vibrant wet blue will appear once dry. Alternatively, you can learn to consistently mix your colors a shade or two lighter than your desired dry outcome, accounting for the darkening. It's a minor adjustment, but one that makes a huge difference in achieving your intended vibrancy and avoiding frustrating surprises. Beyond this, acrylics offer incredible control over transparency and opacity. Straight from the tube, many heavy body acrylics are opaque, providing excellent coverage. However, with the addition of water or clear acrylic mediums, you can achieve beautiful transparent glazes, mimicking watercolor effects or building up luminous layers. This versatility makes them adaptable for a wide range of aesthetic outcomes, from bold graphic statements to subtle, atmospheric works. This versatility makes them adaptable for a wide range of aesthetic outcomes, from bold graphic statements to subtle, atmospheric works. Mastering basic brushstrokes for acrylic painting also allows you to control the thickness and hence the opacity of your application. The fast drying time also means that optical color mixing, where adjacent colors are placed side-by-side or in thin, overlapping layers and blend in the viewer's eye rather than directly on the canvas, becomes a powerful technique. Think of Impressionist paintings, where small dabs of pure color create a vibrant, shimmering effect from a distance. With acrylics, you can achieve similar vibrancy and depth through rapid layering and careful juxtaposition of colors, creating a lively visual effect that feels dynamic and alive. This approach encourages a playful experimentation with color theory and perception.

Oils: Deep, Luminous, and Rich
Oil paints, by contrast, tend to retain their color intensity and value from wet to dry, a welcome predictability that makes it easier to achieve your desired final result. Their depth and luminosity are truly legendary, a quality that creates an almost ethereal interplay of light and shadow on the canvas that is incredibly hard to replicate with other mediums. This richness is often attributed to the way the oil binder encases the pigment particles, allowing light to penetrate and reflect in a unique manner, giving the colors a remarkable inner glow. However, it's worth noting that some traditional oil paints (especially those made with linseed oil) can yellow slightly over many, many years, particularly if stored in dark conditions. Modern formulations and the strategic use of specific oils like poppy or walnut oil (which have lower refractive indices and are less prone to yellowing than linseed) can significantly mitigate this historical concern. For artists truly aiming for lasting purity of color, especially in whites and cool tones, these alternative binders are invaluable. Ultimately, professional-grade oil paints, particularly those using advanced resin binders, offer remarkable color stability for centuries. Holbein vs. Winsor Newton oil paints is a comparison worth exploring if you're diving deep into brands, as each offers distinct pigment quality and handling, and each can bring a unique voice to your palette. The careful balance of pigment and binder in professional oils delivers a richness that has captivated artists for centuries. For example, learning how to mix realistic skin tones in oil paint truly showcases the subtle blending and luminous depth possible with this medium. The slow drying also allows for continuous on-palette and on-canvas color mixing, enabling complex, subtle color relationships to develop over time.
The Luminous Depth and Archival Purity of Oils
The unparalleled luminosity of oil paint is often what draws artists to the medium. This isn't just about surface sheen; it's about how light interacts with the pigment suspended in the oil binder. The higher refractive index of the oil allows light to penetrate deeper into the paint film and bounce back, creating an optical depth and richness that is truly mesmerizing. When it comes to archival purity, while traditional linseed oil can yellow over extreme periods, especially in the dark, advancements in paint chemistry and alternative drying oils like poppy and walnut oil have greatly improved color stability. For vibrant blues, purples, and whites, many artists opt for these less-yellowing oils. Professional-grade oil paints, combined with proper varnishing techniques, are designed to maintain their brilliant color and luminous qualities for centuries, a legacy that truly stands the test of time. Understanding what is oil painting from a technical perspective helps appreciate this enduring quality. The deep, resonant quality of oil colors makes them ideal for classical realism, portraiture, and atmospheric landscapes, where subtle shifts in light and shadow are paramount.
Advanced Layering Techniques in Oils: Building Luminous Depth
While "fat over lean" is the golden rule, the true magic of oil painting often lies in its varied layering techniques, each contributing to that celebrated luminous depth. Glazing, as mentioned, involves applying thin, transparent layers of paint (thinned with mediums like linseed oil) over a dry underpainting. This allows light to travel through the upper layers, reflect off the lower ones, and create an incredible optical mixture and glow. It's like painting with colored light! Scumbling is another beautiful technique, where a thin, opaque or semi-opaque layer of paint is dry-brushed lightly over a darker, dry layer, allowing the underlying color to show through and creating a soft, shimmering, atmospheric effect. Then there's impasto layering, where thick applications of paint (often straight from the tube or mixed with impasto mediums) are built up over time, creating a rich, sculptural surface that captures and plays with light. Each technique, when applied thoughtfully, transforms the flat canvas into a world of depth and texture. Mastering these methods is a journey into the heart of oil painting's enduring appeal. You can delve deeper into this with the definitive guide to oil painting techniques.
Color and Pigment Comparison Table
Feature | Acrylic Paint | Oil Paint |
|---|---|---|
| Color Shift | Dries slightly darker (color shift) | Retains color and value from wet to dry; more predictable |
| Vibrancy | Can be very vibrant, intense, clear; excellent for bold, graphic statements | Deep, rich, luminous, subtle color transitions; ideal for realistic rendering and atmospheric effects |
| Yellowing | Generally does not yellow over time; stable for bright whites | Some traditional oils (linseed) may yellow slightly; can be mitigated with poppy/walnut oils or modern formulations |
| Transparency | Achieved with mediums or thin application; can be manipulated for glazing | Natural transparency, excellent for depth and glazes; optical effects of light transmission |
| Lightfastness | Excellent in professional grades; pigment stability is high | Excellent in professional grades, traditionally high; long-term color integrity |
| Color Mixing | Dries quickly, making on-palette mixing and blending challenging | Extended open time allows for extensive on-palette and on-canvas color mixing and blending |
| Refractive Qualities | Dries to a consistent, slightly plastic-like sheen, less light penetration | Higher refractive index of oil allows deeper light penetration, creating renowned luminosity and depth |

Color Mixing and Optical Effects – The Magic of Blending
Beyond their inherent hue, how colors interact and blend is a huge part of the painting experience. This is where the drying time differences truly impact your approach.
Acrylic Color Mixing: Speed and Layering
With acrylics, the rapid drying time means you're often working quickly to blend colors directly on the canvas, employing techniques like misting the surface with a spray bottle or utilizing a dedicated stay-wet palette to extend your blending window. Alternatively, you're mixing on your palette and applying the colors swiftly, relying on precise application rather than prolonged manipulation. While seamless gradients can be challenging without retarders or open acrylics, this speed is a massive advantage for layering. You can build up distinct, vibrant layers almost immediately without muddling the colors beneath. This lends itself to bold, graphic, or expressionistic styles, where each layer retains its crisp identity. I've found it fantastic for creating complex color interactions through transparent glazes, knowing each layer will dry quickly and allow me to build depth without waiting around. The fast drying also encourages optical mixing, where juxtaposed colors blend in the viewer's eye, adding vibrancy without overworking the paint. Techniques like how to layer colors in acrylic painting become essential skills to master with this medium.
Oil Color Mixing: Blending and "Wet-into-Wet"
Oils, on the other hand, truly excel at on-canvas blending. Their extended open time allows for hours, sometimes even days, of seamless transitions and subtle shifts in hue and value. This is the realm of the classic "wet-into-wet" or alla prima technique, where you blend fresh paint directly into wet paint already on the canvas, creating incredibly smooth gradients and soft edges. Beyond alla prima painting, oils are unparalleled for glazing, where thin, transparent layers build luminous depth and subtle color shifts over time, and scumbling, a dry-brush technique creating a broken, textured layer of opaque color over a darker one, adding luminosity and atmosphere. It's a meditative dance of color, where patience is your greatest ally. This makes them ideal for realistic rendering, capturing atmospheric effects, and achieving those delicate, ethereal glows that define so many masterworks. Mastering glazing techniques in oil painting is a rewarding journey, transforming your understanding of light and color. I often find myself lost in the subtle magic of oils, pushing colors around for hours until they sing just right. It's truly a unique conversation with the canvas.
Varnishing and Protecting Your Artwork: The Final Shield – Securing Your Artistic Legacy
Once your masterpiece is complete and fully dry, the conversation isn't over. For archival integrity and to unify the appearance of your painting, varnishing is a crucial, often overlooked, final step. Think of it as the ultimate protective layer, akin to a clear coat on a cherished possession.
Why Varnish?
- Protection: Varnish shields your artwork from dust, dirt, pollutants, UV radiation, and minor abrasions. It's sacrificial; it can be cleaned or removed and reapplied, protecting the paint layers beneath.
- Unification: Varnish creates a uniform sheen across the painting, reducing areas of uneven gloss (something I've definitely grappled with!). It deepens darks, enriches colors, and crucially, creates a uniform sheen across the painting, reducing areas of uneven gloss (something I've definitely grappled with!). This unified finish brings the entire composition together visually, presenting a polished and professional look. Varnishes come in various finishes—matte, satin, and gloss—allowing you to choose the final aesthetic of your artwork. A gloss varnish will deepen colors, enhance saturation, and provide a reflective, vibrant surface that truly makes the paint pop. A matte varnish will soften colors slightly, reduce glare, and provide a more subtle, non-reflective finish, often favored for abstract or contemporary works where surface texture is paramount. Satin varnish offers a beautiful middle ground, providing a soft sheen without excessive reflection. It also acts as a barrier, preventing external elements from directly contacting the delicate paint film. This is particularly important for mixed media pieces, where different materials might dry with varying sheens.
Varnishing Comparison Table
Feature | Acrylic Varnish | Oil Varnish |
|---|---|---|
| Application Time | After a few days to weeks (fully cured) | After 6-12 months (thin layers) to 2+ years (impasto) |
| Isolation Coat | Crucial for protection and even sheen | Not typically used, but can be considered |
| Types | Water-based, brush-on or spray-on | Natural resins (Dammar, Mastic) or modern synthetics (Alkyd/Acrylic) |
| Finishes | Matte, Satin, Gloss | Matte, Satin, Gloss |
| Removability | Removable with ammonia-based cleaners | Removable with mineral spirits or mild solvents |
| Yellowing | Generally non-yellowing | Natural resins can yellow over time; synthetics are non-yellowing |
| UV Protection | Many contain UV inhibitors for added protection | Often contain UV filters, especially modern synthetic varnishes |
Varnishing Acrylics
Before varnishing acrylics, a crucial, often overlooked, step is applying an isolation coat. This is a permanent, non-removable clear layer (typically a soft gel gloss medium thinned slightly with water) that sits between your paint layers and the removable varnish. It serves two vital purposes: it evens out the surface absorbency and sheen before varnishing, and more importantly, it protects the paint surface during future varnish removal. This means if your varnish gets dirty or needs to be replaced decades down the line, it can be removed without touching the original paint layers, a true archival safeguard. Learning how to apply gesso to canvas a beginners guide often covers foundational techniques similar to applying an isolation coat, emphasizing even, smooth application.
Acrylics, once fully cured (which can take a few days to weeks depending on thickness and environmental conditions), benefit immensely from a layer of acrylic varnish. These varnishes are typically water-based and come in various finishes (matte, satin, gloss). Applying them is generally straightforward, but a steady hand and an even coat are important. You can find comprehensive guides on how to varnish an acrylic painting to ensure you do it right. For optimal results, ensure your studio is dust-free during application to prevent specks from embedding in the wet varnish. Always apply varnish in thin, even layers using a soft, wide brush, working in one direction to minimize brushstrokes. Multiple thin coats are always better than one thick coat, as it allows for proper drying and prevents cloudiness or uneven sheen. And remember, patience is key – allow each layer to dry completely before applying the next.
Types of Acrylic Varnishes and Application Tips
Acrylic varnishes come in a few key forms: brush-on and spray-on. Brush-on varnishes offer more control over thickness but require a steady hand to avoid streaks. Spray-on varnishes are excellent for achieving an even, thin coat, particularly on textured surfaces, but require good ventilation. Most acrylic varnishes are removable with appropriate solvents (like ammonia-based cleaners) which is crucial for conservation – it means the varnish can be replaced if it gets dirty or yellows over time, protecting the original paint layers. Always ensure your painting is completely dry before varnishing (this can take 24 hours to a week, depending on thickness, humidity, and airflow), and apply in thin, even coats to avoid pooling or streaking. If you're working with very textured pieces, a spray varnish can be a lifesaver for getting into all the nooks and crannies without disturbing the surface. Remember, each layer needs to dry completely before the next to ensure a strong, durable film.
Varnishing Oils
Oil paintings require more patience before varnishing due to their extended drying time. A good rule of thumb is to wait 6-12 months for thinner paintings, and even longer (up to two years) for very impasto works, to ensure complete oxidation. A simple test is the "thumbnail test": gently press your thumbnail into the thickest part of the paint; if it leaves an impression, the paint is still too soft to varnish. Varnishing too early can trap solvents and hinder the curing process, leading to long-term issues like cracking or yellowing. Traditional oil varnishes often contain natural resins, while modern synthetic varnishes offer greater clarity and non-yellowing properties. Learning how to varnish an oil painting is a rite of passage for many oil painters, and it truly makes a difference to the finished work's presentation and longevity. This waiting period is critical; it's the final act of patience in a medium that demands it. If you find your oil painting has dulled or has "sunk-in" areas while waiting for full curing, you can consider applying a very thin retouch varnish. This is a temporary, diluted varnish (usually a single thin coat of a picture varnish diluted with solvent) that revives the colors and brings back a uniform sheen. It allows the paint film to continue breathing and curing underneath, serving as a cosmetic fix until a final, more durable varnish can be applied after the full drying period. It's a useful trick for artists who need to present their work sooner.
Oil Varnishes: Natural Resins vs. Synthetics
Historically, natural resin varnishes like dammar or mastic were common for oils, prized for their rich luster. However, these can yellow and become brittle over time, and their removal can be tricky, sometimes requiring stronger solvents that could potentially harm the underlying paint. Modern synthetic varnishes, such as those based on acrylic resins (e.g., Gamblin Gamvar), offer superior clarity, non-yellowing properties, and are generally easier to remove with milder solvents like mineral spirits. These advancements mean that the archival quality of your oil paintings can be even better preserved than works of old. Always make sure to apply varnish in a dust-free environment and allow each thin coat to dry thoroughly before applying the next. A final, unifying layer of varnish truly elevates the finished piece, bringing out its full depth and brilliance.
Remember, a well-varnished painting is a protected painting, ensuring your creative efforts stand the test of time.
The Practical Bits: Tools, Cleanup, and Longevity – Studio Setup and Long-Term Care
Now for the less glamorous but equally important stuff: how you clean up, what you need, and how long your masterpiece will last.

Acrylics: Easy Cleanup, Low Fumes
This is where acrylics truly shine for many artists, myself included, especially on days when I'm feeling a bit lazy or when working in a shared space. They clean up effortlessly with just water and soap! No harsh solvents are required, and they produce significantly fewer (if any) strong fumes, though it's always wise to check individual product labels for specific mediums, as some might have a faint odor. This characteristic makes them incredibly ideal for home studios, small apartments, or for artists with sensitivities to chemicals, children, or pets. You can use pretty much any brush with them, from natural bristles to synthetics, though dedicated best acrylic paint brushes for artists are always a good idea for optimal performance and longevity. Proper and timely cleaning of brushes is absolutely crucial with acrylics; if paint dries on them, it's often there for good, quickly ruining a good brush! I've lost a few good brushes to procrastination, I confess. The trick is to never let the paint dry in the ferrule (the metal part connecting the bristles to the handle). Keep a jar of water handy to rinse frequently during painting, and immediately after your session, wash brushes thoroughly with soap and lukewarm water until all traces of color are gone. Reshape the bristles and allow them to dry flat or brush-side-up to prevent water from seeping into the ferrule. This also extends to your palette: while plastic or glass palettes are easy to clean, disposable paper palettes or even a simple ceramic tile can save you frustration, as dried acrylic on a traditional wooden palette can be difficult to remove. Investing in a stay-wet palette can be a game-changer for extending open time and minimizing waste. This ease of cleanup truly lowers the barrier to entry and encourages more spontaneous creativity.
Acrylic Brush Care and Surface Preparation
The quick-drying nature of acrylics is a double-edged sword. While it allows for rapid layering, it also means you need to be diligent with brush cleaning. I've learned the hard way that a few minutes of procrastination can permanently stiffen expensive brushes! Keep a jar of water handy while painting to rinse brushes frequently, and use soap and water for a thorough wash immediately after your session. For surfaces, acrylics are incredibly forgiving, adhering to almost anything slightly porous and grease-free. However, for professional, archival results, applying two or three coats of gesso to your canvas or panel is always recommended. This provides a uniform, slightly absorbent surface that enhances paint adhesion and vibrancy. You can even explore different types of gesso, such as clear or colored gesso, to influence your initial painting surface, or check out our guide on best gesso for canvas preparation review to find the right one for you. Remember, good brush care (see cleaning and caring for your paint brushes) and proper surface preparation are cornerstones of a successful painting practice. For acrylics, preparing your canvas is straightforward: just use a good gesso, a versatile primer that works beautifully.
Choosing Your Palette: A Foundation for Mixing
The humble palette is more than just a surface for your paint; it's where your colors come alive and mix. For acrylics, I often prefer a stay-wet palette, which consists of a sponge and permeable paper that keeps paints moist for hours or even days, dramatically extending their open time and reducing waste. Alternatively, simple plastic palettes, ceramic tiles, or even a sheet of freezer paper work well for quick sessions, as dried acrylic can be peeled off or scraped away. For oils, traditional wooden palettes (often sealed or seasoned) are popular for their rich tone, which can help in color judgment, and the way they allow the oils to 'breathe' slightly. Glass palettes are also fantastic; they offer a perfectly smooth, non-absorbent surface, are incredibly easy to clean (just scrape off dried paint), and don't influence color perception. Disposable paper palettes are always an option for both mediums when convenience is key, though they generate more waste. The best palette is ultimately the one that complements your workflow and helps you see and mix your colors clearly.
Oils: Solvents, Ventilation, and Traditional Care
Oil paints, adhering to tradition, generally require solvents (like traditional turpentine or odorless mineral spirits, often abbreviated as OMS, or even citrus-based solvents) for thinning the paint and, crucially, for cleanup. However, it's not all about solvents for brush cleaning! Many artists opt for specialized, non-toxic brush cleaning soaps or even natural oils (like safflower oil) to clean their brushes at the end of a session, which can significantly reduce solvent use in the studio. This means proper ventilation is absolutely vital in your studio space to avoid inhaling fumes, which can cause headaches or more serious health issues over time, and you'll need to be especially mindful of disposing of solvent-soaked rags, as they can be a fire hazard. Beyond ventilation, general studio safety is paramount. Always avoid eating, drinking, or smoking in your studio to prevent accidental ingestion of paint or solvents. Wear gloves, especially if you have sensitive skin or are working with potentially toxic pigments (always check the pigment information for cadmium or cobalt, for example). Keep your workspace tidy to prevent tripping hazards, and always have appropriate fire safety measures in place, particularly when working with flammable solvents. It's definitely a bit more of a ritual, a commitment to a specific process, but one that many artists find deeply satisfying and, more importantly, safe. However, for those seeking the luscious qualities of oils without the solvent hassle, there are modern, water-mixable oil paints that beautifully bridge this gap, offering many traditional oil characteristics with easier, water-based cleanup – a fantastic innovation! This is a great option for artists in shared spaces or those with chemical sensitivities. You'll also need to understand what are painting mediums a beginners guide for oils, as they often rely on these for specific effects like enhancing flow, increasing transparency for glazing techniques, or accelerating drying time, all while adhering to the critical "fat over lean" principle. And don't forget to learn how to varnish an oil painting for protection and to unify the final appearance. The learning curve for oil cleanup is a bit steeper, but the rewards are often worth the effort. For more detailed brush care, exploring cleaning and caring for your paint brushes can be incredibly helpful.
Detailed Oil Brush Cleaning: A Ritual of Care
Cleaning oil brushes requires a bit more dedication than acrylics, but it's a satisfying ritual that extends the life of your valuable tools. Start by wiping off as much excess paint as possible with a rag or paper towel. Then, use a solvent (like OMS or turpentine, always in a well-ventilated area) to rinse out the remaining paint, wiping the brush frequently. Once most of the paint is removed, wash the brushes thoroughly with a specialized brush soap or mild dish soap and warm water, working up a lather to get deep into the bristles. Rinse until the water runs clear. Finally, reshape the bristles and allow them to dry flat or brush-side-up. For brushes used with alkyd mediums, a more thorough cleaning might be needed as they dry faster. I've found that a dedicated brush cleaning system, often a jar with a screen at the bottom, helps settle pigment and keeps my solvent cleaner for longer.
Solvent Alternatives and Historical Pigment Toxicity
For artists concerned about traditional solvents, the advent of water-mixable oils has been a game-changer. These use a special emulsifier in the binder, allowing them to be thinned and cleaned with water, drastically reducing the need for harsh chemicals. Beyond solvents, it's worth noting that historically, some oil pigments contained highly toxic heavy metals (like lead white or vermilion, made from mercury). While modern formulations have largely replaced these with safer alternatives, always check the safety data sheet (SDS) for any pigments you use, particularly if they are older or from less reputable brands. Knowledge is power, and knowing what you're working with ensures a safer, more enjoyable creative practice.
Longevity and Archival Qualities: Crafting a Legacy
Substrate Preparation: The Foundation of Forever Art
No matter how brilliant your paint, its longevity depends heavily on the surface it's applied to. This is where substrate preparation comes in. For both acrylics and oils, priming your surface with gesso is paramount. Gesso creates a stable, slightly absorbent ground that protects your canvas or panel from the paint's potential corrosive effects (especially with oils) and ensures optimal adhesion. For oils, it also provides a barrier against the oil soaking into the fibers of the canvas, which can lead to brittle areas. Understanding how to prepare a canvas for oil painting or how to prepare a canvas for acrylic painting is a fundamental skill that underpins the archival quality of your finished work. Beyond the traditional white acrylic gesso, you can find clear gesso (great for allowing the texture or color of your support to show through), black gesso, or even tinted gessos that provide a mid-tone ground, which can be fantastic for judging values and creating luminous effects from the start. Different gessos also offer varying degrees of tooth (texture), which can influence how the paint grabs the surface. Some artists even prefer to stretch their own canvases to have ultimate control over the support, choosing between linen or cotton, and different weaves for varying textures. The choice of canvas material (e.g., linen for its strength and fine weave, or cotton for its affordability) also plays a role in the final aesthetic and longevity. You can explore best gesso for canvas preparation review to find the perfect ground for your work.
Storage and Display: Preserving Your Legacy
Once your artwork is completed, cured, and varnished, how you store and display it plays a significant role in its long-term preservation. This is a topic I've learned to take seriously, as an artist who wants my work to last for generations.

- Environment: Both acrylic and oil paintings crave stable environments. Avoid extreme fluctuations in temperature and humidity, which can cause canvases to expand and contract, leading to cracking or warping. Critically, keep paintings away from direct sunlight. Even if your pigments boast excellent lightfastness, prolonged exposure to UV radiation will inevitably cause fading and degradation over time. Investing in UV-protective glass for framed works, especially those on paper, is a wise move. Maintaining a consistent temperature between 68-72°F (20-22°C) and relative humidity between 40-55% is ideal.
- Handling: Always handle paintings by the frame or stretcher bars, not the canvas surface itself, to avoid damaging the paint film. When stacking, place archival paper or glassine between works to prevent sticking. Use white cotton gloves to avoid transferring oils from your skin to the artwork.
- Framing: Proper framing not only enhances the presentation but also offers an additional layer of protection from dust and physical damage. For works on paper, archival matting and UV-protective glass are essential. Taking these steps ensures your efforts endure, allowing future generations to enjoy the narratives your art tells. For valuable or sentimental pieces, consider museum-quality archival framing.
Displaying Your Artwork: The Final Presentation
Once your masterpiece is complete and ready to be shared, how you choose to display it is the final act of presentation. For paintings on canvas, whether acrylic or oil, careful consideration of lighting is crucial. Avoid direct, harsh spotlights that can create distracting reflections or excessive shadows. Natural, indirect light is always ideal, but if using artificial light, opt for full-spectrum LED bulbs that accurately render colors and have low UV output to prevent long-term fading. Ensure adequate spacing around the artwork to allow it to 'breath' and be appreciated in its own right, rather than being crowded by other elements. For works on paper or delicate pieces, framing under museum-grade, UV-protective glass is an investment in its preservation, shielding it from dust, pollutants, and harmful light exposure. Remember, the goal is to present your art in a way that enhances its beauty and secures its legacy for years to come.
When used correctly with professional-grade materials and sound techniques, both acrylics and oils are incredibly archival, meaning your artwork can last for centuries. Modern acrylics are highly stable, flexible, and resistant to cracking, making them very durable and resilient to environmental changes. Oils, of course, have proven their longevity over centuries, as evidenced by countless masterpieces hanging in museums worldwide, still captivating viewers today. The key to true archival quality for both mediums lies in several factors: using quality pigments and binders, ensuring proper surface preparation (like applying a good gesso to your how to prepare a canvas for oil painting or acrylics), and applying protective varnishes. Understanding these foundational techniques, right down to potentially stretching a canvas for painting yourself, gives you immense control over your artwork's future. It's a commitment to longevity, ensuring your creative voice can resonate through time. But beyond your immediate control, environmental factors play a massive role.
Environmental Factors and Long-Term Stability
While proper materials and techniques are crucial, the environment in which your art is stored and displayed also plays a huge role in its longevity. Extremes in temperature and humidity are the enemy of all artworks, causing canvases to expand and contract, which can lead to cracking, especially in older, more brittle oil paint films. Direct sunlight, even through a window, can fade pigments over time, regardless of their lightfastness rating. This is why museums meticulously control their environments. For your home studio or gallery, simply avoiding direct sunlight, keeping paintings away from heat sources or damp walls, and framing works under UV-protective glass (especially for works on paper) can make a world of difference. Think of it as creating a mini-museum for your own masterpieces! Even seemingly innocuous elements like fluorescent lights can emit UV radiation, gradually damaging pigments over time. Consider LED lighting with low UV output for display.

Tools, Cleanup, and Longevity Comparison Table
Feature | Acrylic Paint | Oil Paint |
|---|---|---|
| Cleanup | Water and soap; easy, no harsh solvents | Solvents (turpentine, mineral spirits, citrus-based); water-mixable oils offer alternative |
| Fumes/Toxicity | Generally low odor, less toxic; safer for shared spaces | Requires ventilation, solvents can be toxic; some pigments also toxic; solvent-free methods gaining popularity |
| Tools | Brushes (synthetic recommended), palette knives, sponges, various mediums, spray bottles | Brushes (natural bristles often preferred), palette knives, specific oils and mediums, mahl sticks |
| Durability | Flexible, non-yellowing, stable; less prone to cracking over time | Durable, can become brittle if not layered correctly ("fat over lean" crucial) |
| Archival | Highly archival with quality materials; stable film, resistant to environmental shifts | Highly archival with quality materials, proven over centuries; proper technique and varnishing essential |
| Drying Time for Cleanup | Crucial to clean brushes before paint dries | Can be cleaned with solvents for longer periods; specialized soaps/oils for brush conditioning |

So, Which One Should You Choose? My Honest Take – Finding Your Artistic Partner
This is where the personal journey comes in. There's no objective "better" medium. It truly depends on your personality, your artistic goals, and your current lifestyle. I've found that this choice is less about right or wrong, and more about alignment—which medium best supports the story you want to tell and the way you want to tell it. Your personal artistic style, whether you lean towards expressive abstract art, detailed realism, or something in between, will naturally guide your medium preference. Similarly, the subject matter you choose can influence your decision. A vibrant, fast-paced urban landscape might call for the quick energy of acrylics, while a nuanced portrait or a serene still life could thrive under the extended blending capabilities of oils.
When I Reach for Acrylics...
I often grab my Liquitex Basics acrylic paint when I'm feeling energetic, want to experiment quickly, or have limited time to dedicate to a session. If I'm working on a large abstract piece that requires many layers, bold textural elements, and fast decision-making, acrylics are undoubtedly my go-to. Their quick drying time means I can build up complex compositions without waiting around, allowing for a dynamic, intuitive process. This makes them perfect for creating vibrant underpaintings for subsequent oil layers in mixed media works, or for blocking in large areas of color. They're incredibly forgiving in that you can paint over mistakes easily without long waits, making them perfect for playful exploration and iterative development. I also find them perfect for creating vibrant, layered underpaintings that will later serve as a foundation for other mediums. Plus, the sheer ease of cleanup means I can start and stop more readily, which is a huge bonus on busy days when my studio time is fragmented. It’s also my preference for preparing a canvas for acrylic painting quickly, allowing me to get right into the creative flow. When I'm working quickly, I sometimes even reach for a spray bottle to keep the paint workable on the canvas, a little trick to extend that precious open time. This spontaneous nature makes them fantastic for capturing fleeting moments or for artists who enjoy a dynamic, immediate response to their canvas. For intricate detail work or crisp lines, the quick drying time is a godsend, preventing accidental smudges.
When I Crave Oils...
When I want to truly slow down, get lost in the nuanced dance of color, and build up those rich, luminous colors that seem to glow from within, I instinctively reach for my oils. It's a more meditative experience, a deep conversation with the canvas that unfolds over hours, days, or even weeks. I absolutely adore the buttery feel, the subtle blending capabilities that allow for seamless gradients, and the unparalleled depth and richness you can achieve through careful layering and glazing techniques. This makes them my top choice for detailed portraiture, nuanced still life compositions, or expressive landscapes where capturing atmospheric perspective is key. It's for those precious days when I have the time and the mental space to really immerse myself, without the pressure of rushing. Learning the definitive guide to oil painting techniques can truly open up a new world of artistic possibilities. I also find oils incredibly rewarding when I want to achieve very specific textures and effects, from delicate impasto created with a brush to bold, sculptural marks often using a palette knife. This slower pace allows for introspection, letting the painting guide you rather than forcing your will upon it, rather than rushing a moment of inspiration. There's a certain magic in returning to a painting day after day, seeing how the colors have settled and contemplating the next brushstroke. The ability to continually rework and refine areas without the pressure of immediate drying fosters a deeply contemplative and satisfying creative flow.
Beyond the Basics: Common Mistakes to Avoid
No artist starts as a master, and mistakes are simply part of the learning process. But hey, if I can share some common pitfalls I've either experienced myself or seen others struggle with, maybe it'll save you a bit of frustration!
- For Acrylics: A big one is letting paint dry on your brushes. Seriously, clean them immediately – I've learned this the hard way more times than I care to admit! Another is overworking a section; because they dry so fast, endless blending attempts can lead to muddy colors or a frustrating, plastic-y texture, especially if you're trying to achieve smooth gradients too slowly. My tip? If a section isn't working, let it dry, and then paint over it! Embrace the layering, not the endless blending of wet paint. A common error is also using too much water, which can break down the binder and create a weak paint film, leading to poor adhesion and dull colors. Always use specialized acrylic mediums for thinning instead of just water when aiming for archival quality. And lastly, don't forget to prime your surface properly with gesso; it makes a huge difference to how the paint accepts and adheres to the canvas.
- For Oils: The most critical mistake is ignoring the "fat over lean" rule. It seems pedantic, but it's the foundation of archival oil painting. Applying thin, fast-drying paint over thick, slow-drying paint is a recipe for cracking and heartbreak. Also, don't varnish too soon! Patience, my friend, patience. Another common mistake is using too much solvent in paint layers, which can strip the oil from the paint and lead to brittle, underbound films that lack luminosity. Balance is key, and referring to guides like what are painting mediums a beginners guide is essential. Finally, always be mindful of your ventilation; solvents are no joke for your health, so ensure a well-ventilated space or explore solvent-free oil painting options.
My ultimate advice? Try both! Don't commit to one exclusively, as if pledging allegiance to a single flag. Many artists, myself included, fluidly work in both mediums, sometimes even incorporating them into dynamic mixed media pieces, where acrylics might form an underpainting for subsequent oil layers. Understand their unique strengths and weaknesses, let your artistic intuition guide you, and embrace the joy of continuous discovery. The world of paint types for artists is vast and wonderfully diverse; there's no need to limit your exploration. Experimentation is, after all, the heartbeat of artistic growth.
Can You Mix Them? The Rules of the Road
While you can't literally mix wet acrylic and wet oil paint (they'll separate like oil and water, for obvious reasons!), you can layer them effectively. The golden rule is: oil over dry acrylic, never acrylic over oil. Acrylic, once dry, forms a stable, flexible, non-porous surface that provides an excellent ground for oil paint. This opens up incredible possibilities for mixed media, allowing you to quickly block in compositions, establish textures, or create vibrant underpaintings with acrylics, then bring in the luminous depth and blending capabilities of oils on top. Think of the acrylic layer as a resilient, fast-drying foundation upon which the more delicate and slow-drying oils can safely reside. It's a fantastic way to get the best of both worlds! This technique is particularly useful in abstract art, where diverse textures and quick layering can be achieved before adding the rich optical effects of oils. I often use acrylics for initial washes and bold compositional lines, then switch to oils for the nuanced color work and subtle blending, truly leveraging the strengths of both mediums. Imagine starting with a highly textured acrylic background, perhaps incorporating collage elements, and then adding rich, luminous oil glazes on top to unify and deepen the composition. Or using fast-drying acrylics to block in a complex underpainting, then bringing in the subtle shifts of light and shadow with oils. The possibilities are truly endless, allowing for a dynamic interplay between speed and deliberation, texture and luminosity. It's a fantastic way to break free from perceived limitations and expand your creative vocabulary.
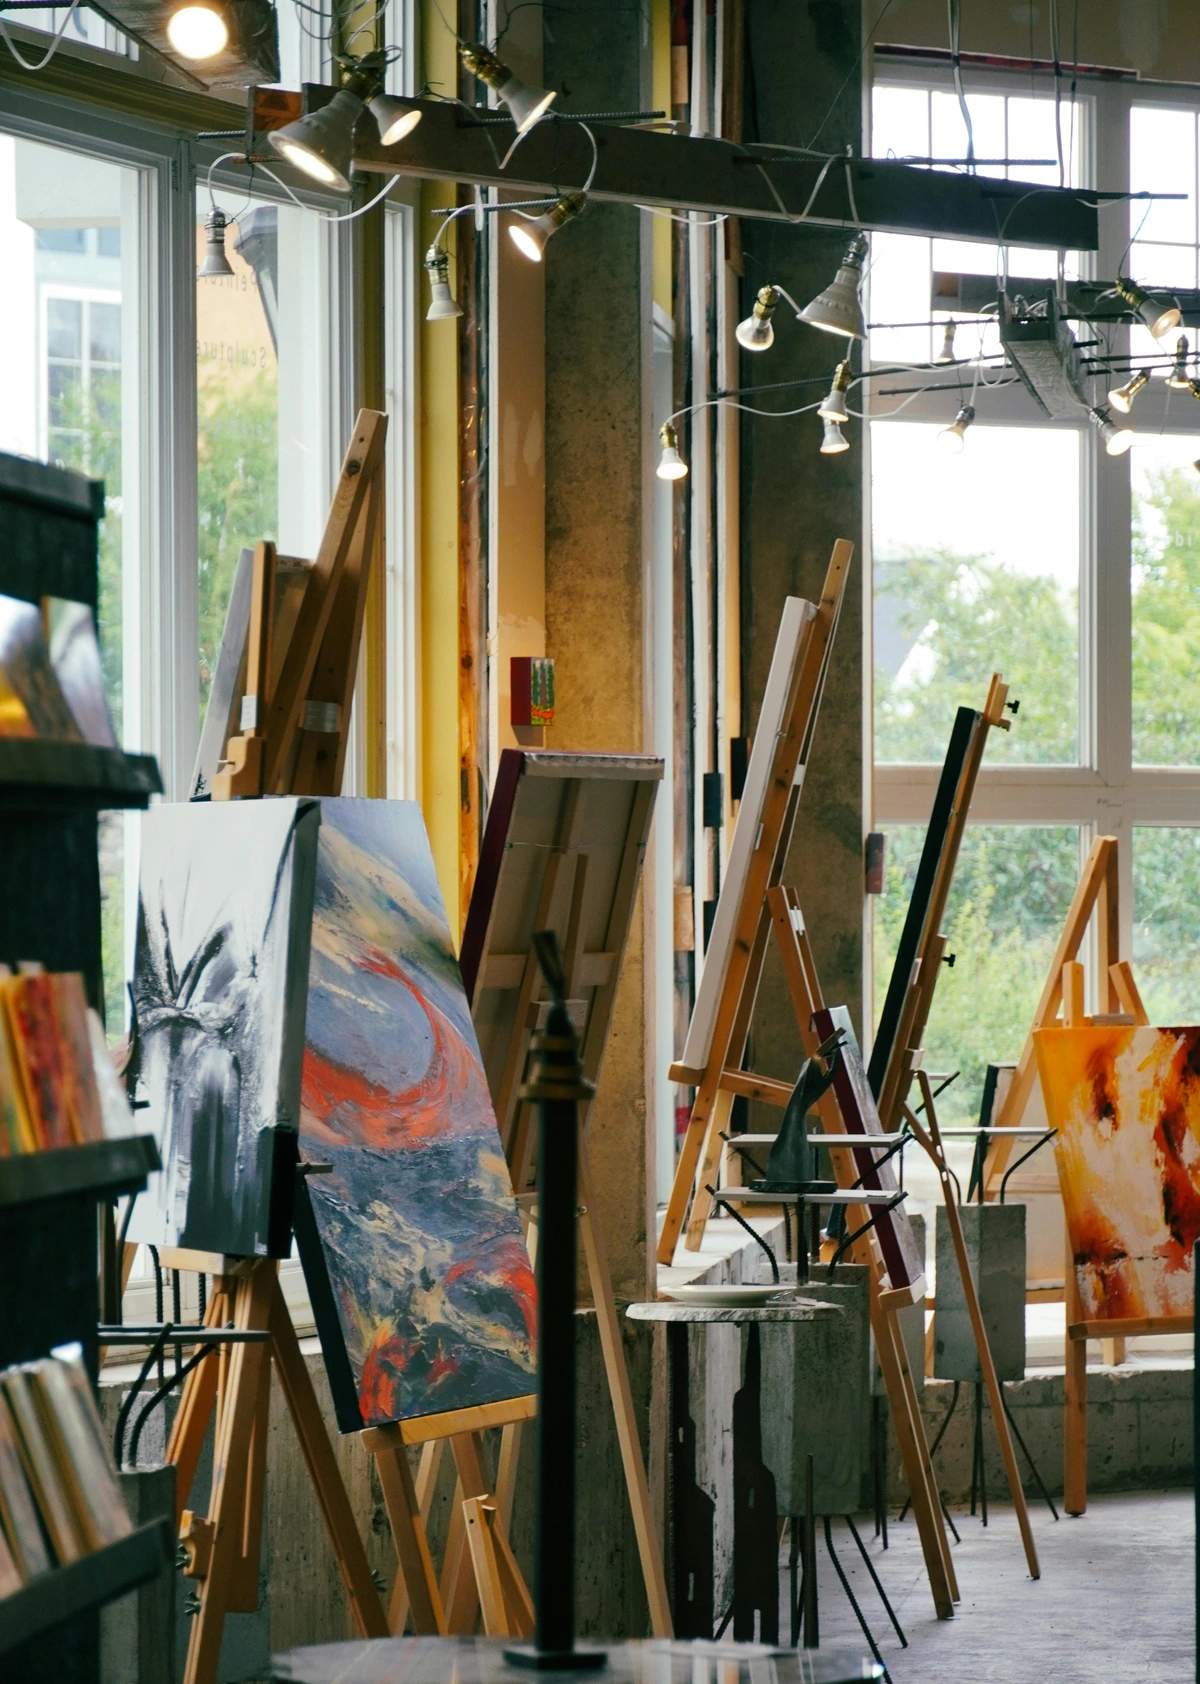
Frequently Asked Questions (FAQ)
What are the different consistencies of acrylic paint?
Acrylic paints come in various consistencies to suit different artistic needs. Heavy body acrylics are thick, buttery, and retain brushstrokes and texture beautifully, ideal for impasto or bold marks. Soft body acrylics have a smoother, creamier consistency, similar to yogurt, making them great for general painting, smooth blending, and detailed work without much thinning. Fluid acrylics are thinner, with a consistency like heavy cream, perfect for washes, staining, pouring techniques, or fine detail when used with a pen. Then there are acrylic inks, which are highly pigmented and very liquid, almost like watercolor, designed for delicate washes, airbrushing, or calligraphy. Understanding these different formulations allows you to choose the right tool for your desired effect, or combine them for layered textures. You can explore best acrylic mediums for abstract artists for further insights.
Can I mix acrylic and oil paints together?
No, you cannot directly mix wet acrylic and wet oil paints together. They are fundamentally incompatible because one is water-based and the other is oil-based—they simply won't emulsify or blend properly, leading to a messy, unstable mixture. However, as detailed in our "Can You Mix Them? The Rules of the Road" section, you can layer oil paint over dry acrylic. Always remember the crucial rule: oil over dry acrylic, never acrylic over oil. Respecting their chemical differences is key to creating stable, lasting artwork. This understanding is vital for any artist exploring mixed media techniques.
How do I protect my artwork during storage?
Protecting your finished artwork during storage is vital for its longevity. Always ensure paintings are completely dry and varnished before storage. Store them vertically, if possible, rather than stacking them flat, which can cause pressure damage or sticking. If stacking is unavoidable, place sheets of glassine paper, archival tissue, or even clean, acid-free cardboard between each painting to create a barrier. Store artwork in a stable environment, away from extreme temperature fluctuations, direct sunlight, and high humidity, as these can cause cracking, warping, or fading. Avoid storing them in basements or attics, which often have inconsistent climates. A controlled environment, similar to what's recommended for display, is best.
Can I reactivate dry paint?
This is where the two mediums differ significantly. Dry acrylic paint cannot be reactivated with water; once it's dry, it's permanent and insoluble. This is a blessing for layering but means any paint that dries on your palette or brushes is there to stay. On the flip side, this permanence is what makes acrylics so fantastic for building up crisp, distinct layers without fear of disturbing the underlying work. Oil paints, however, can be reactivated with solvents for an extended period, sometimes even weeks after they appear dry to the touch. This allows for endless reworking and blending opportunities, though eventually, once fully cured (which can take months to years), they too become permanent and resistant to solvents.

What is a limited palette and why should I use one?
A limited palette involves intentionally restricting the number of colors you use in a painting, typically to a few primaries plus white, and perhaps an earth tone or black. While it might seem counterintuitive to limit your options, this practice is a powerful way to deepen your understanding of color mixing, value, and color harmony. It forces you to explore the full range of possibilities within those few chosen hues, leading to more cohesive and harmonious artworks. It also teaches you to truly understand your pigments, how they interact, and how to achieve subtle color shifts with fewer ingredients. Many master painters throughout history worked with incredibly limited palettes, demonstrating the immense expressive power that can be found in restraint. It's an excellent exercise for beginners and seasoned artists alike to hone their color skills. You can delve into the nuances of color with the definitive guide to color theory in art.
How do I choose the right brushes for each medium?
Choosing brushes can feel overwhelming! For acrylics, I generally recommend synthetic brushes. They are durable, hold their shape well with water-based paints, and are easy to clean. Hog bristle brushes can work for heavy body acrylics if you want strong texture, but be mindful of their longevity with water. For oils, many artists prefer natural hair brushes (like hog bristle or sable) because they hold more paint and distribute it beautifully, creating those buttery strokes. However, synthetics specifically designed for oils are also excellent and increasingly popular, offering durability and easier cleaning. Ultimately, it comes down to personal preference and the marks you want to make! Do you want crisp lines, soft blends, or bold impasto? The brush is your extension. Check out guides like best acrylic paint brushes for artists and best brushes for oil painting for more detailed advice. Remember, good brush care, as outlined in cleaning and caring for your paint brushes, is crucial for the longevity of your tools.
What is an underpainting and how is it used?
An underpainting is an initial layer of paint applied to a canvas or surface before the main painting, typically monochromatic or in a limited color palette. Its purpose is to establish the composition, values (lights and darks), and forms of your artwork. For both acrylics and oils, an underpainting serves as a foundational map, allowing you to work out structural issues without getting distracted by color. With acrylics, their fast drying time makes them ideal for quick underpaintings, allowing you to rapidly block in tones and then move on to oil layers for luminous color. With oils, a lean underpainting (thinned with solvent) is crucial, adhering to the "fat over lean" rule, providing a stable, fast-drying base for subsequent richer layers. Underpaintings are a powerful technique for ensuring a strong structural foundation for your finished piece, giving your artwork depth and cohesion from the very beginning. Learn more about its strategic use in what is underpainting in painting.
What about odor and ventilation for acrylics vs. oils?
This is a major practical consideration for many artists. Acrylics are generally low-odor and water-based, making them suitable for studios with limited ventilation or for artists sensitive to chemical fumes. While some acrylic mediums might have a faint smell, it's usually negligible, making them a fantastic choice for shared spaces or home studios. Oil paints, especially when thinned with traditional solvents like turpentine, produce strong fumes that require adequate ventilation to prevent headaches or respiratory issues. This is why many oil painters prioritize good air circulation in their studios, often using exhaust fans or working near open windows. Modern innovations like water-mixable oils and solvent-free painting methods have significantly reduced the odor and ventilation requirements for oil painting, making them a safer and more accessible option for many. Always ensure good airflow, regardless of the medium, as general studio hygiene contributes to a healthier artistic practice. I've found that proper air purification, in addition to ventilation, can make a significant difference in studio comfort.
Can I paint on different surfaces without priming?
While it might be tempting to skip the priming step, it's generally not recommended for professional, archival results, especially with oils. Acrylics are more forgiving and will adhere to a wide range of surfaces (wood, paper, metal, etc.) without priming, but for optimal adhesion, consistent absorbency, and protection of the support, applying gesso is always best. For oils, priming is absolutely crucial. Oil paint applied directly to raw canvas or wood can cause the oil to seep into the fibers, which can eventually lead to the paint film cracking, becoming brittle, and the canvas degrading over time. Gesso acts as a barrier, protecting the support and providing an ideal surface for the oil to adhere to. So, while you can technically paint on some unprimed surfaces with acrylics, for lasting artwork, always prime! You can explore this further with how to choose the right canvas for acrylic vs. oil.
Can I use student-grade paints for professional work?
While student-grade paints are fantastic for practice, learning, and developing your skills, I generally advise against using them for professional work that you intend to sell or keep for a long time. The reason is simple: student-grade paints typically have a lower pigment load, use more fillers, and sometimes utilize less lightfast pigments. This can result in duller colors, weaker paint films, and a higher risk of fading over time. For professional pieces, investing in artist-grade paints ensures richer color, superior handling, and crucial archival quality that will stand the test of time. It's a balance of budget and ambition, but for lasting work, artist-grade is the way to go. You can find more detail in what is the difference between student and artist grade paint. Remember, your time and effort are valuable; using quality materials ensures that investment in your art truly endures. After all, you wouldn't build a house with flimsy materials, would you?
Which is more expensive, acrylic or oil paint?
Generally, professional-grade oil paints tend to be slightly more expensive per tube than professional-grade acrylics, particularly for certain pigments. However, this isn't always a hard and fast rule, as prices vary widely based on brand, pigment, and overall quality. When considering the total cost, you also need to factor in the price of specific mediums and solvents for oils, whereas acrylics primarily just need water (though specialized acrylic mediums can also add up!). For beginners, student-grade versions of both are quite affordable and offer an excellent starting point for experimentation. Check out best oil paints for beginners and specific acrylic reviews like Liquitex Basics acrylic paint review for detailed comparisons. It's an investment in your art, so weigh your options based on your budget and long-term artistic goals. Many artists find that investing in a few high-quality primary colors and mixing their own secondaries and tertiaries is a cost-effective strategy for professional-grade paints.
What are common mistakes beginners make with acrylics vs. oils?
Oh, this is a fun one! We all make mistakes, and learning from them is crucial. For acrylics, common pitfalls include letting paint dry on your brushes (a real pain to clean!), overworking areas to the point of muddiness because of the fast drying time, and not using enough water or medium to achieve desired consistency (which can weaken the paint film). For oils, the biggest mistake by far is violating the "fat over lean" rule, which can lead to cracking. Other common errors include varnishing too early (leading to long-term curing issues), using too much solvent (which can make paint brittle and dull), and not allowing adequate ventilation (a serious health concern). The key is to be patient with yourself and the medium, and to view every "mistake" as a valuable learning opportunity, a stepping stone on your artistic journey.
What's the Real Difference Between Student-Grade and Artist-Grade Paints?
This is a fantastic and crucial question! The core difference lies in the pigment load and quality of ingredients. Student-grade paints are designed to be more affordable, often containing a lower concentration of pigment, using more fillers (like chalk or clay), and sometimes less expensive, less lightfast pigments. This results in less vibrant colors, often requiring more paint for coverage, and potentially less archival longevity. Artist-grade (or professional-grade) paints, on the other hand, boast a much higher pigment concentration, purer binders, and superior lightfastness. They offer richer, more intense colors, better coverage, smoother handling, and excellent archival properties, meaning your artwork will last longer without fading or degrading. While the initial cost is higher, you often use less artist-grade paint to achieve superior results, making the long-term value quite competitive. This translates to more vivid, durable artwork that truly stands the test of time. I often tell my students to start with student-grade sets to get comfortable, then gradually invest in artist-grade tubes for their core palette colors as their skills and commitment grow. Think of it like this: student-grade paints are perfect for sketching and practice, while artist-grade paints are for creating works intended to last for generations. You can find more detail in what is the difference between student and artist grade paint.
Is one healthier or safer than the other?
Acrylic paints are generally considered safer and healthier because they are water-based and typically non-toxic (though always check individual product labels, of course!). They produce far fewer fumes, making them suitable for smaller, less ventilated studios. This means less concern about inhaling volatile organic compounds (VOCs), which can be a significant health factor for artists working in confined spaces. Oil paints, due to their reliance on solvents like turpentine or mineral spirits for thinning and cleanup, absolutely require proper ventilation and careful handling to avoid inhaling fumes, which can cause headaches or more serious health issues over time. Some pigments in both oil and acrylic paints can also be toxic (e.g., cadmium, cobalt), so it's always essential to check safety data sheets, avoid ingesting them, and prevent prolonged skin contact. For general studio health and ease of use, acrylics usually win, but with proper precautions and knowledge, oils can be used safely too. Many artists are also exploring solvent-free oil painting methods (using oil painting mediums like linseed oil or walnut oil for thinning and specialized brush cleaners) to enhance safety and reduce environmental impact. It's really about being informed and proactive. Always maintain good studio hygiene, wear gloves if you have sensitive skin, and if you're unsure about a product's safety, err on the side of caution or consult its Material Safety Data Sheet (MSDS). Your health is paramount, so never cut corners on safety precautions.
Which medium is better for beginners?
Many artists, myself included, often recommend acrylics for beginners. Their fast drying time allows for quick corrections and experimentation without long waits, which can be incredibly encouraging for those just starting out. Coupled with easy water cleanup and generally lower toxicity, acrylics offer a forgiving and approachable entry point into painting. However, if you're drawn to the traditional look and feel of oils, the meditative pace, and are prepared for the slower process and mindful solvent use (or embrace water-mixable oils!), there's absolutely no reason not to start there. It really boils down to personal preference, learning style, and what sparks your initial excitement to create art. I've found that the best medium for a beginner is the one that excites them and makes them want to pick up a brush every day. Don't feel pressured to stick with one; the artistic journey is about exploration, and there are countless online tutorials and resources for both mediums to help you get started. Don't let perceived difficulty deter you from exploring a medium that genuinely calls to you; every artist starts somewhere. For a head start, check out guides like basic brushstrokes for acrylic painting or the definitive guide to oil painting techniques.
What is the environmental impact of acrylics vs. oils?
This is a increasingly important question for conscious artists, and honestly, the answer is complex. Traditional oil paints often involve solvents like turpentine, which are petroleum-derived and release VOCs (Volatile Organic Compounds) into the air, contributing to air pollution. Disposing of solvent-soaked rags also poses environmental and fire hazards. However, modern innovations like water-mixable oils significantly reduce the need for harsh solvents. Acrylics, while water-based for cleanup, are essentially plastic (acrylic polymer emulsion). This means they contribute to microplastic pollution when brushes are rinsed down the drain. Some brands are developing more eco-friendly alternatives, but it's a trade-off. Ultimately, responsible waste disposal (e.g., letting paint water evaporate and discarding solids, never pouring solvents down the drain) and choosing brands with sustainability in mind are crucial for minimizing your artistic footprint, regardless of the medium.
What kind of surfaces can I paint on with each medium?
Both acrylics and oils are incredibly versatile when it comes to surfaces, but preparation is key! Acrylics can adhere to almost anything non-greasy and slightly porous: canvas, wood, paper, fabric, plastic, metal, and even glass (with proper priming). The flexibility of the dried acrylic film means it's suitable for supports that might experience some movement. Oils, however, require a sealed and properly primed surface to protect the support from the corrosive effects of the oil. Traditional supports include linen or cotton canvas and wood panels, always prepared with several coats of gesso (often acrylic-based gesso works perfectly under oils!). You can dive deeper into this topic with guides like how to choose the right canvas for acrylic vs. oil. Remember, proper surface preparation is the cornerstone of archival artwork, regardless of your chosen medium. Beyond just the material, consider the texture and flexibility of your surface. A smooth panel will yield different results than a coarsely woven canvas, and a rigid support might be preferable for very thick impasto work to prevent cracking over time, especially with oils.
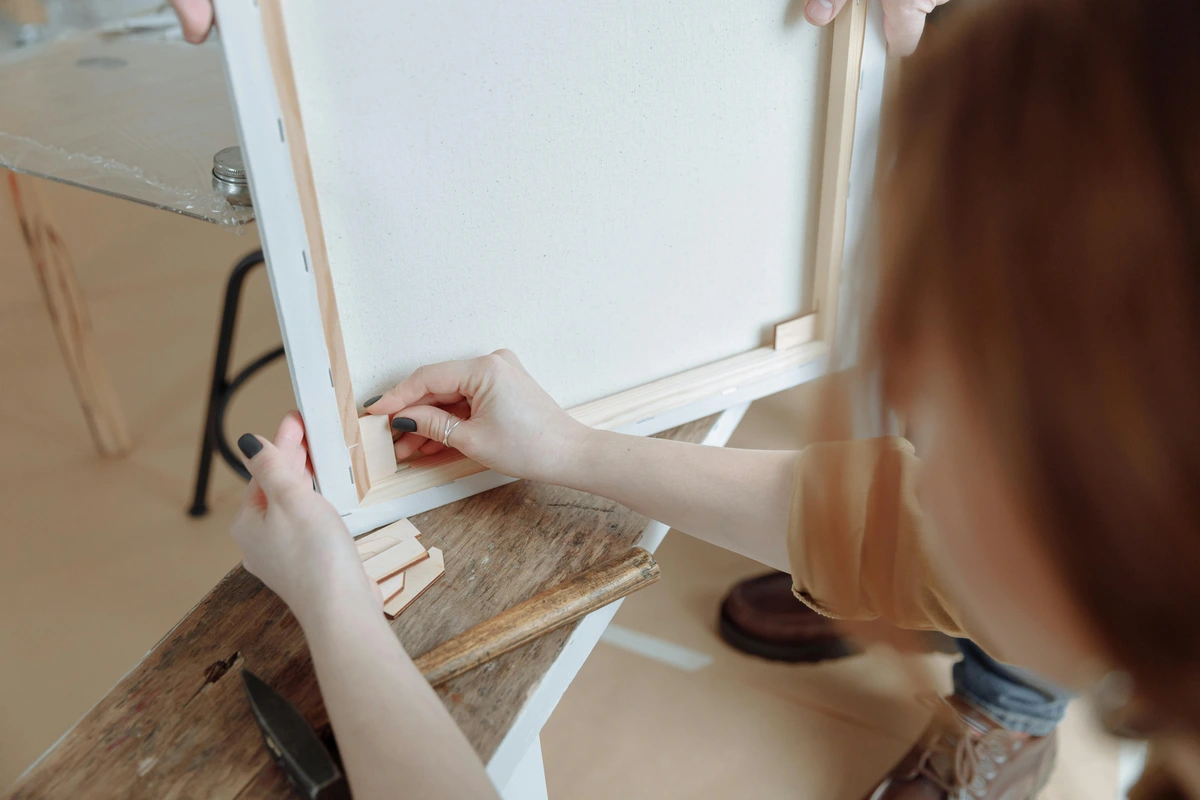
Can I use a hair dryer to speed up acrylic drying?
While technically you can use a hair dryer to speed up the surface drying of acrylics, I generally advise against it, or at least to use it sparingly and on a low, cool setting. Excessive heat can cause the paint film to dry too quickly on the surface while remaining wet underneath. This rapid surface drying can lead to several problems: cracking, bubbling, loss of adhesion, and a less durable, more brittle film in the long run. It can also create an uneven drying process that negatively impacts adhesion and flexibility. Patience is usually a virtue here, allowing the paint to cure naturally from the inside out, but if you must, use it gently and from a distance to avoid damaging your paint's integrity. Think of it as rushing a cake out of the oven – the outside might look done, but the inside is still raw.
How does brand quality affect the paint?
Brand quality significantly impacts the performance, vibrancy, and archival properties of both acrylic and oil paints. Student-grade paints, while affordable, typically have a lower pigment concentration, often using fillers and less expensive binders, resulting in less intense colors and a weaker film. Professional-grade paints, on the other hand, boast a much higher pigment load, purer binders, and often superior lightfastness, leading to more vibrant, consistent, and durable results. Investing in artist-grade paints, even just a few core colors, can make a noticeable difference in your artistic experience and the longevity of your work. Comparing brands like Golden vs. Liquitex for acrylics or Holbein vs. Winsor Newton oil paints reveals the nuances of professional quality. While student-grade paints are excellent for practice and experimentation, for pieces you intend to keep or sell, professional quality is always worth the investment for its durability and color integrity. Beyond color, the consistency and handling of professional paints are often superior, allowing for smoother application, better blending, and more satisfying textural effects. It's truly a difference you can feel and see, both on the brush and in the finished artwork. You can learn more about this by checking out what is the difference between student and artist grade paint.
Can I paint on fabric or clothing with these mediums?
While you can use specially formulated fabric paints (which are typically acrylic-based) for textiles, standard acrylic and oil paints are not generally recommended for painting on fabric or clothing that will be washed. Regular acrylics, while flexible, can crack or stiffen unpleasantly on fabric after washing, and oils will simply never fully cure or adhere permanently enough to withstand laundering, leading to a sticky mess. For wearable art, always opt for dedicated fabric paints or textile mediums to ensure durability and washability. For decorative, non-washable fabric items, acrylics can work, but always do a test patch first to ensure adhesion and desired texture. This is one area where specialized products truly make a difference.
What about other paint types like watercolors or gouache?
While this guide focuses on acrylics and oils, the world of paint is wonderfully diverse! Other popular mediums include watercolor paint, known for its transparency and luminosity when thinned with water, allowing for delicate washes and glowing layers. Then there's gouache paint, which is an opaque watercolor, offering vibrant, matte colors and excellent coverage. There are also traditional mediums like tempera (egg-based) and encaustic (wax-based), each with centuries of history and unique handling properties. Each has its own unique characteristics, drying times, and handling properties. Understanding acrylics and oils often provides a solid foundation for exploring these other exciting avenues of artistic expression, but it's important to remember that each medium has its own set of rules and best practices. Think of them as different languages, each capable of telling a beautiful story. For example, the quick drying and layering of acrylics share some practical similarities with traditional tempera, while the slow blending of oils resonates with the luminous depth of encaustic.
Final Strokes
Choosing between acrylic and oil paint isn't a lifelong commitment; it's an exhilarating invitation to explore different facets of your creativity, your patience, and your desire for expression. Each medium truly has its own distinct personality, its quirks that you'll learn to love (or at least tolerate!), and its profound joys that resonate deeply with different artistic temperaments. I've found that my preference can even shift depending on my mood, the subject matter, or what kind of narrative I want to tell through my art. Sometimes I crave the fast, vibrant energy of acrylics for a spontaneous burst of creation, and other times, I yearn for the meditative, luminous depth of oils, allowing a piece to slowly unfold. Don't let the choice paralyze you with indecision. The most important thing is to simply pick up a tube, grab a brush or a palette knife, and start making marks. Experiment fearlessly. The paint will not only tell you what it wants to do, but more importantly, it will help you discover what you truly want to express. Happy painting, fellow artist, and remember, the journey of an artist is one of continuous discovery – so grab those tubes and start creating! After all, the canvas is waiting for your unique story.
What are other types of painting mediums?
Beyond acrylics and oils, the world of painting mediums is rich and diverse, each offering unique qualities and historical significance. Exploring these can further broaden your artistic horizons.
- Watercolors: Known for their transparency and luminosity, watercolor paint creates delicate washes and vibrant glazes, allowing the paper's white to shine through. They are reactivated with water, offering a fluid and often unpredictable beauty that is both challenging and rewarding. For an in-depth exploration, check out essential watercolor supplies for beginners and basic watercolor techniques for beginners.
- Gouache: Often described as opaque watercolor, gouache paint provides strong, matte colors with excellent coverage. It can be thinned for washes or used thickly for bold, graphic effects, and is also reactivable with water, allowing for reworkability. Our reviewing the best gouache sets for beginners offers some great starting points.
- Tempera: A historical medium, often egg-based (egg tempera), known for its sharp detail, fine lines, and fast drying time. The history of tempera painting spans centuries, from ancient Egyptian art to the Renaissance masters. It dries to a beautiful, luminous matte finish, offering a distinct visual quality from oils or acrylics, and requires specific layering techniques to achieve its renowned depth.
- Encaustic: One of the oldest painting mediums, what is encaustic painting involves using heated beeswax mixed with colored pigments. It's known for its rich, luminous colors, incredible textural possibilities (from smooth to highly sculptural), and remarkable durability. Learn more about the history of encaustic painting and how artists like me explore encaustic wax.
- Fresco: A technique of mural painting executed upon freshly laid, or wet, lime plaster. Water is used as the vehicle for the pigment to merge chemically with the plaster as it dries. With the history of fresco painting dating back to antiquity, it's a monumental art form known for its incredible permanence and subtle luminosity. Explore what is fresco painting history techniques and modern interpretations for a deeper dive into this ancient art form.
- Casein: An incredibly versatile medium made from milk protein (casein) as a binder, it's water-soluble but dries to a permanent, matte, and opaque finish. Casein paints can be used for thin washes similar to watercolor, or thickly like gouache, offering incredible detail and a unique luminosity. Learn more about what is casein paint to discover its rich history and properties.
- Digital Painting: While not a physical medium in the traditional sense, digital painting has revolutionized how artists create. Using software and drawing tablets, artists can simulate the effects of oils, acrylics, watercolors, and more, offering unparalleled undo capabilities, endless color mixing, and the ability to work without physical mess. It's a powerful tool that has carved its own significant niche in the contemporary art world.
Each of these mediums invites a different approach, a unique rhythm, and a distinct visual language. Don't be afraid to dabble! They each offer a unique dialogue with the artist, a distinct way of seeing and interpreting the world.
Choosing between acrylic and oil paint isn't a lifelong commitment; it's an exhilarating invitation to explore different facets of your creativity, your patience, and your desire for expression. Each medium truly has its own distinct personality, its quirks that you'll learn to love (or at least tolerate!), and its profound joys that resonate deeply with different artistic temperaments. I've found that my preference can even shift depending on my mood, the subject matter, or what kind of narrative I want to tell through my art. Sometimes I crave the fast, vibrant energy of acrylics for a spontaneous burst of creation, and other times, I yearn for the meditative, luminous depth of oils, allowing a piece to slowly unfold. Don't let the choice paralyze you with indecision. The most important thing is to simply pick up a tube, grab a brush or a palette knife, and start making marks. Experiment fearlessly. The paint will not only tell you what it wants to do, but more importantly, it will help you discover what you truly want to express. Happy painting, fellow artist, and remember, the journey of an artist is one of continuous discovery – so grab those tubes and start creating! After all, the canvas is waiting for your unique story. As I always say, the most important brushstroke is the next one.
If you enjoyed this, you might also like to see some of my artwork at the den-bosch-museum or learn more about my artistic journey on my timeline.


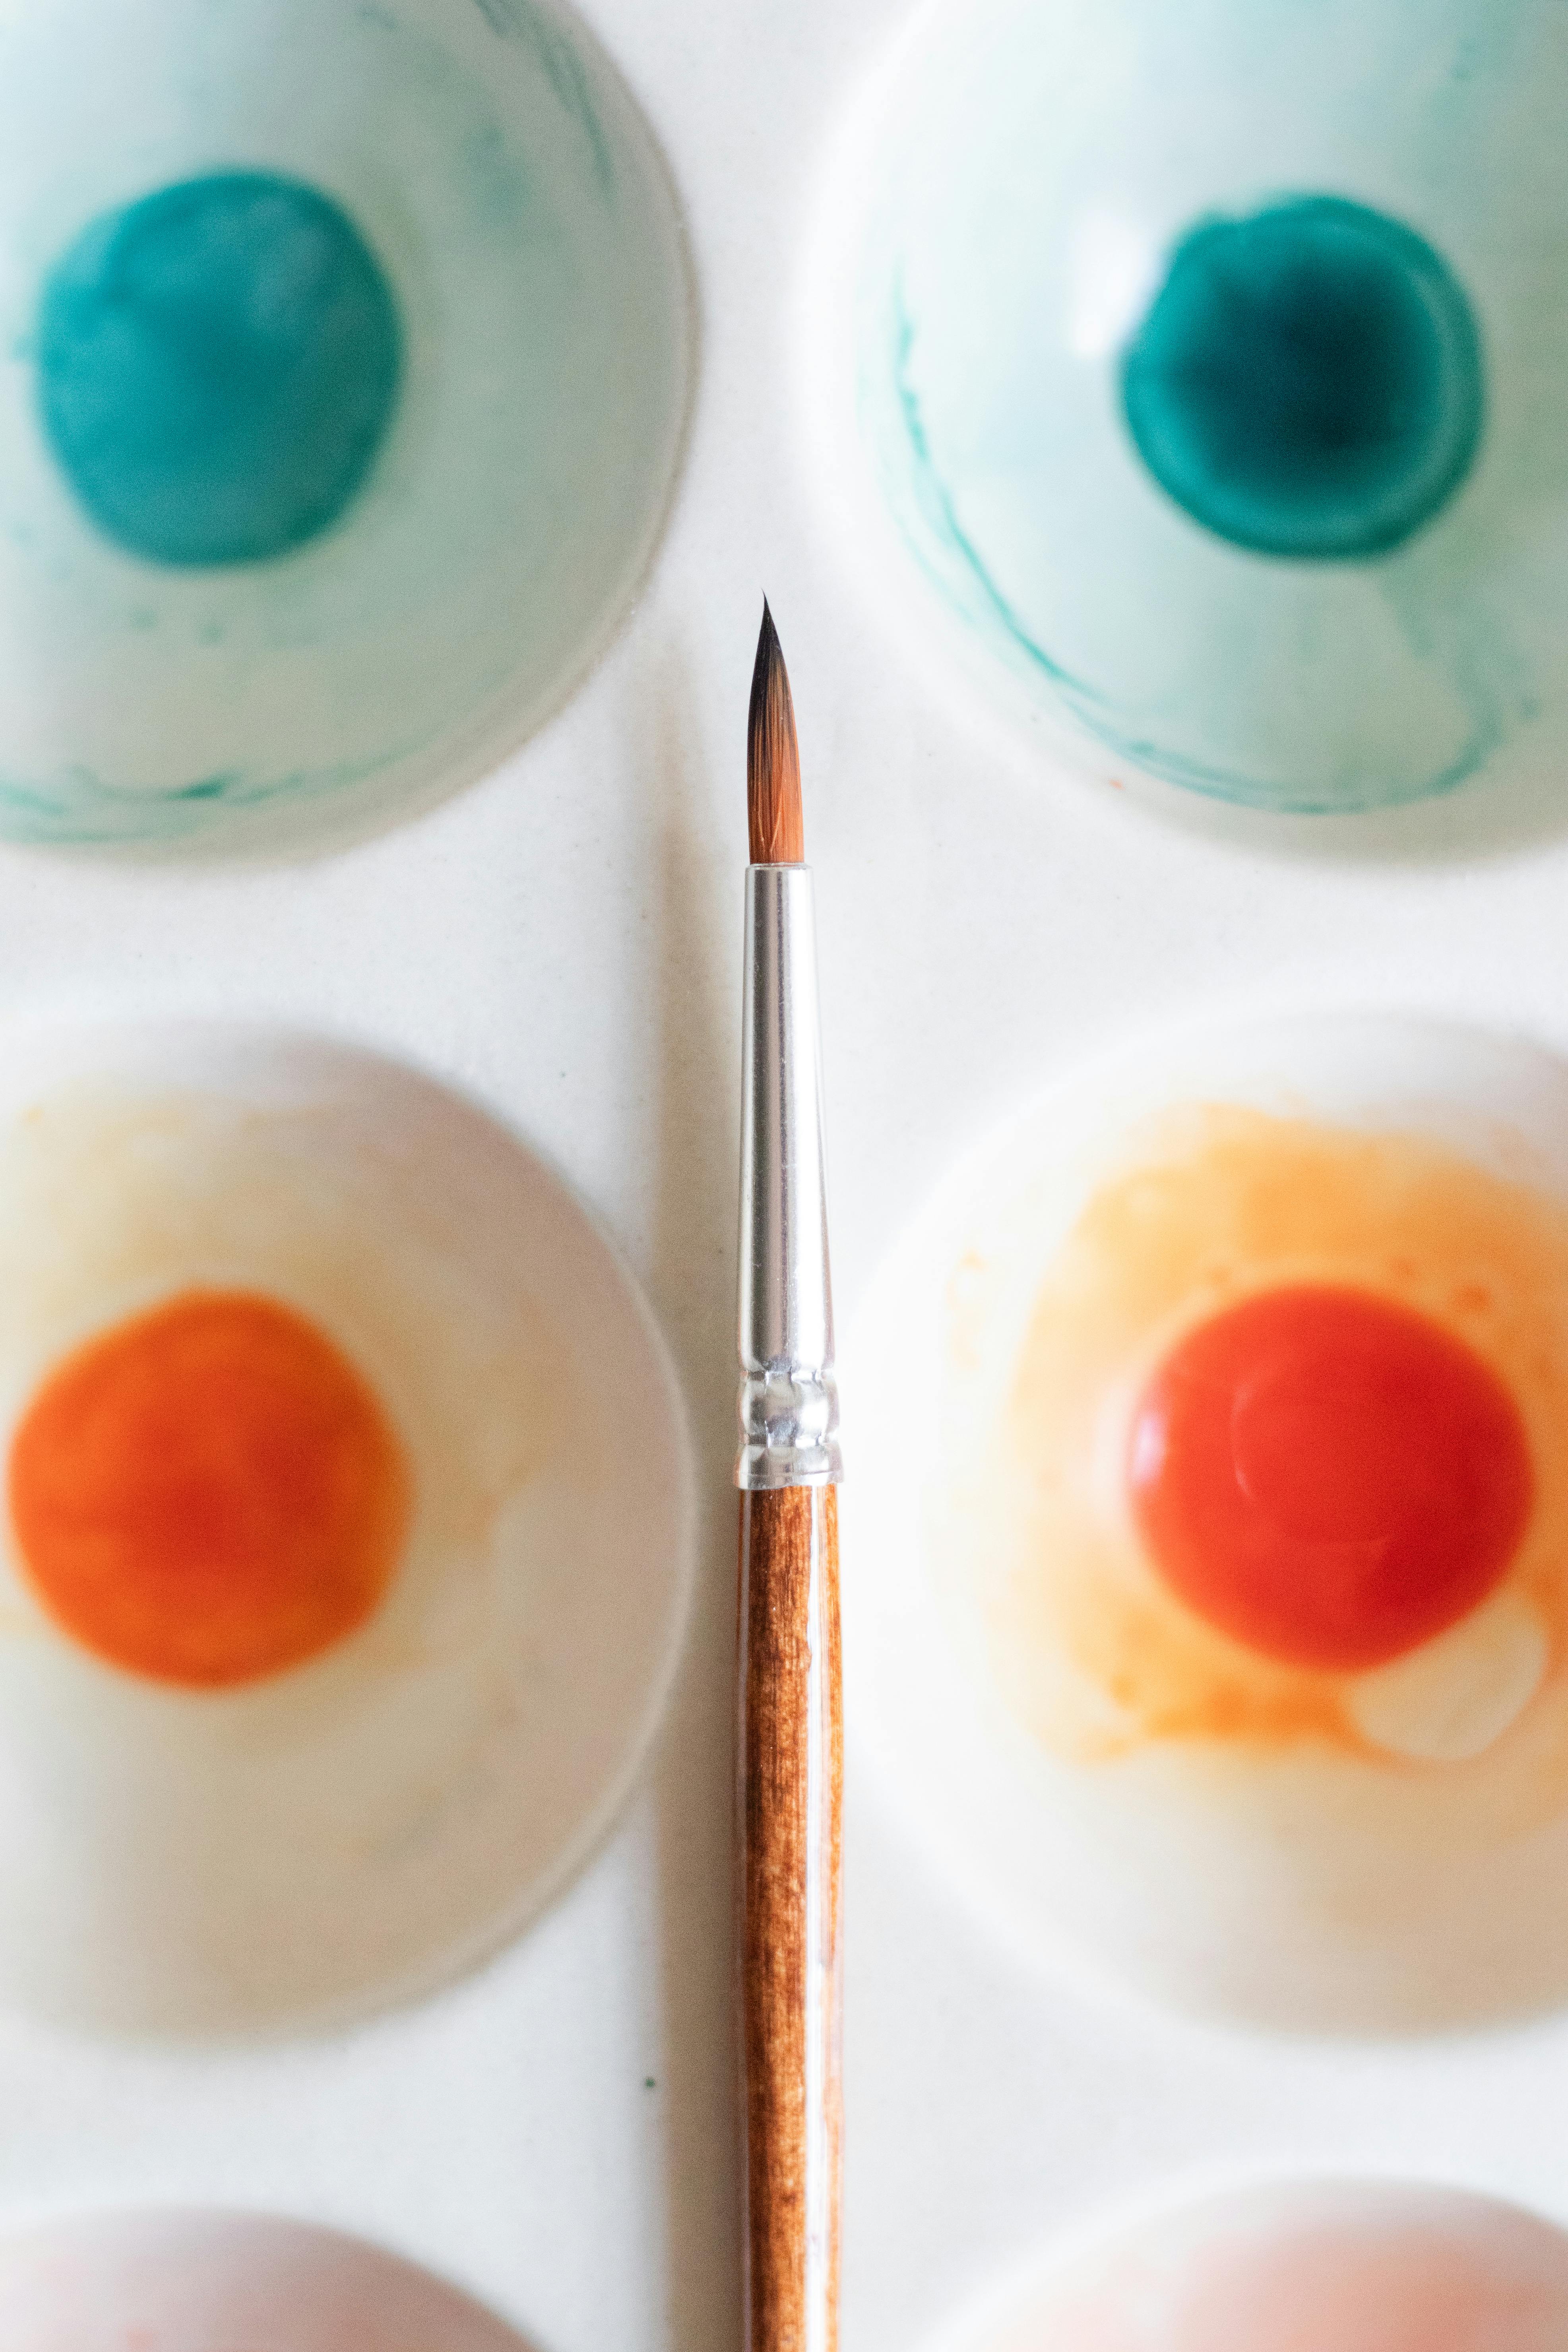
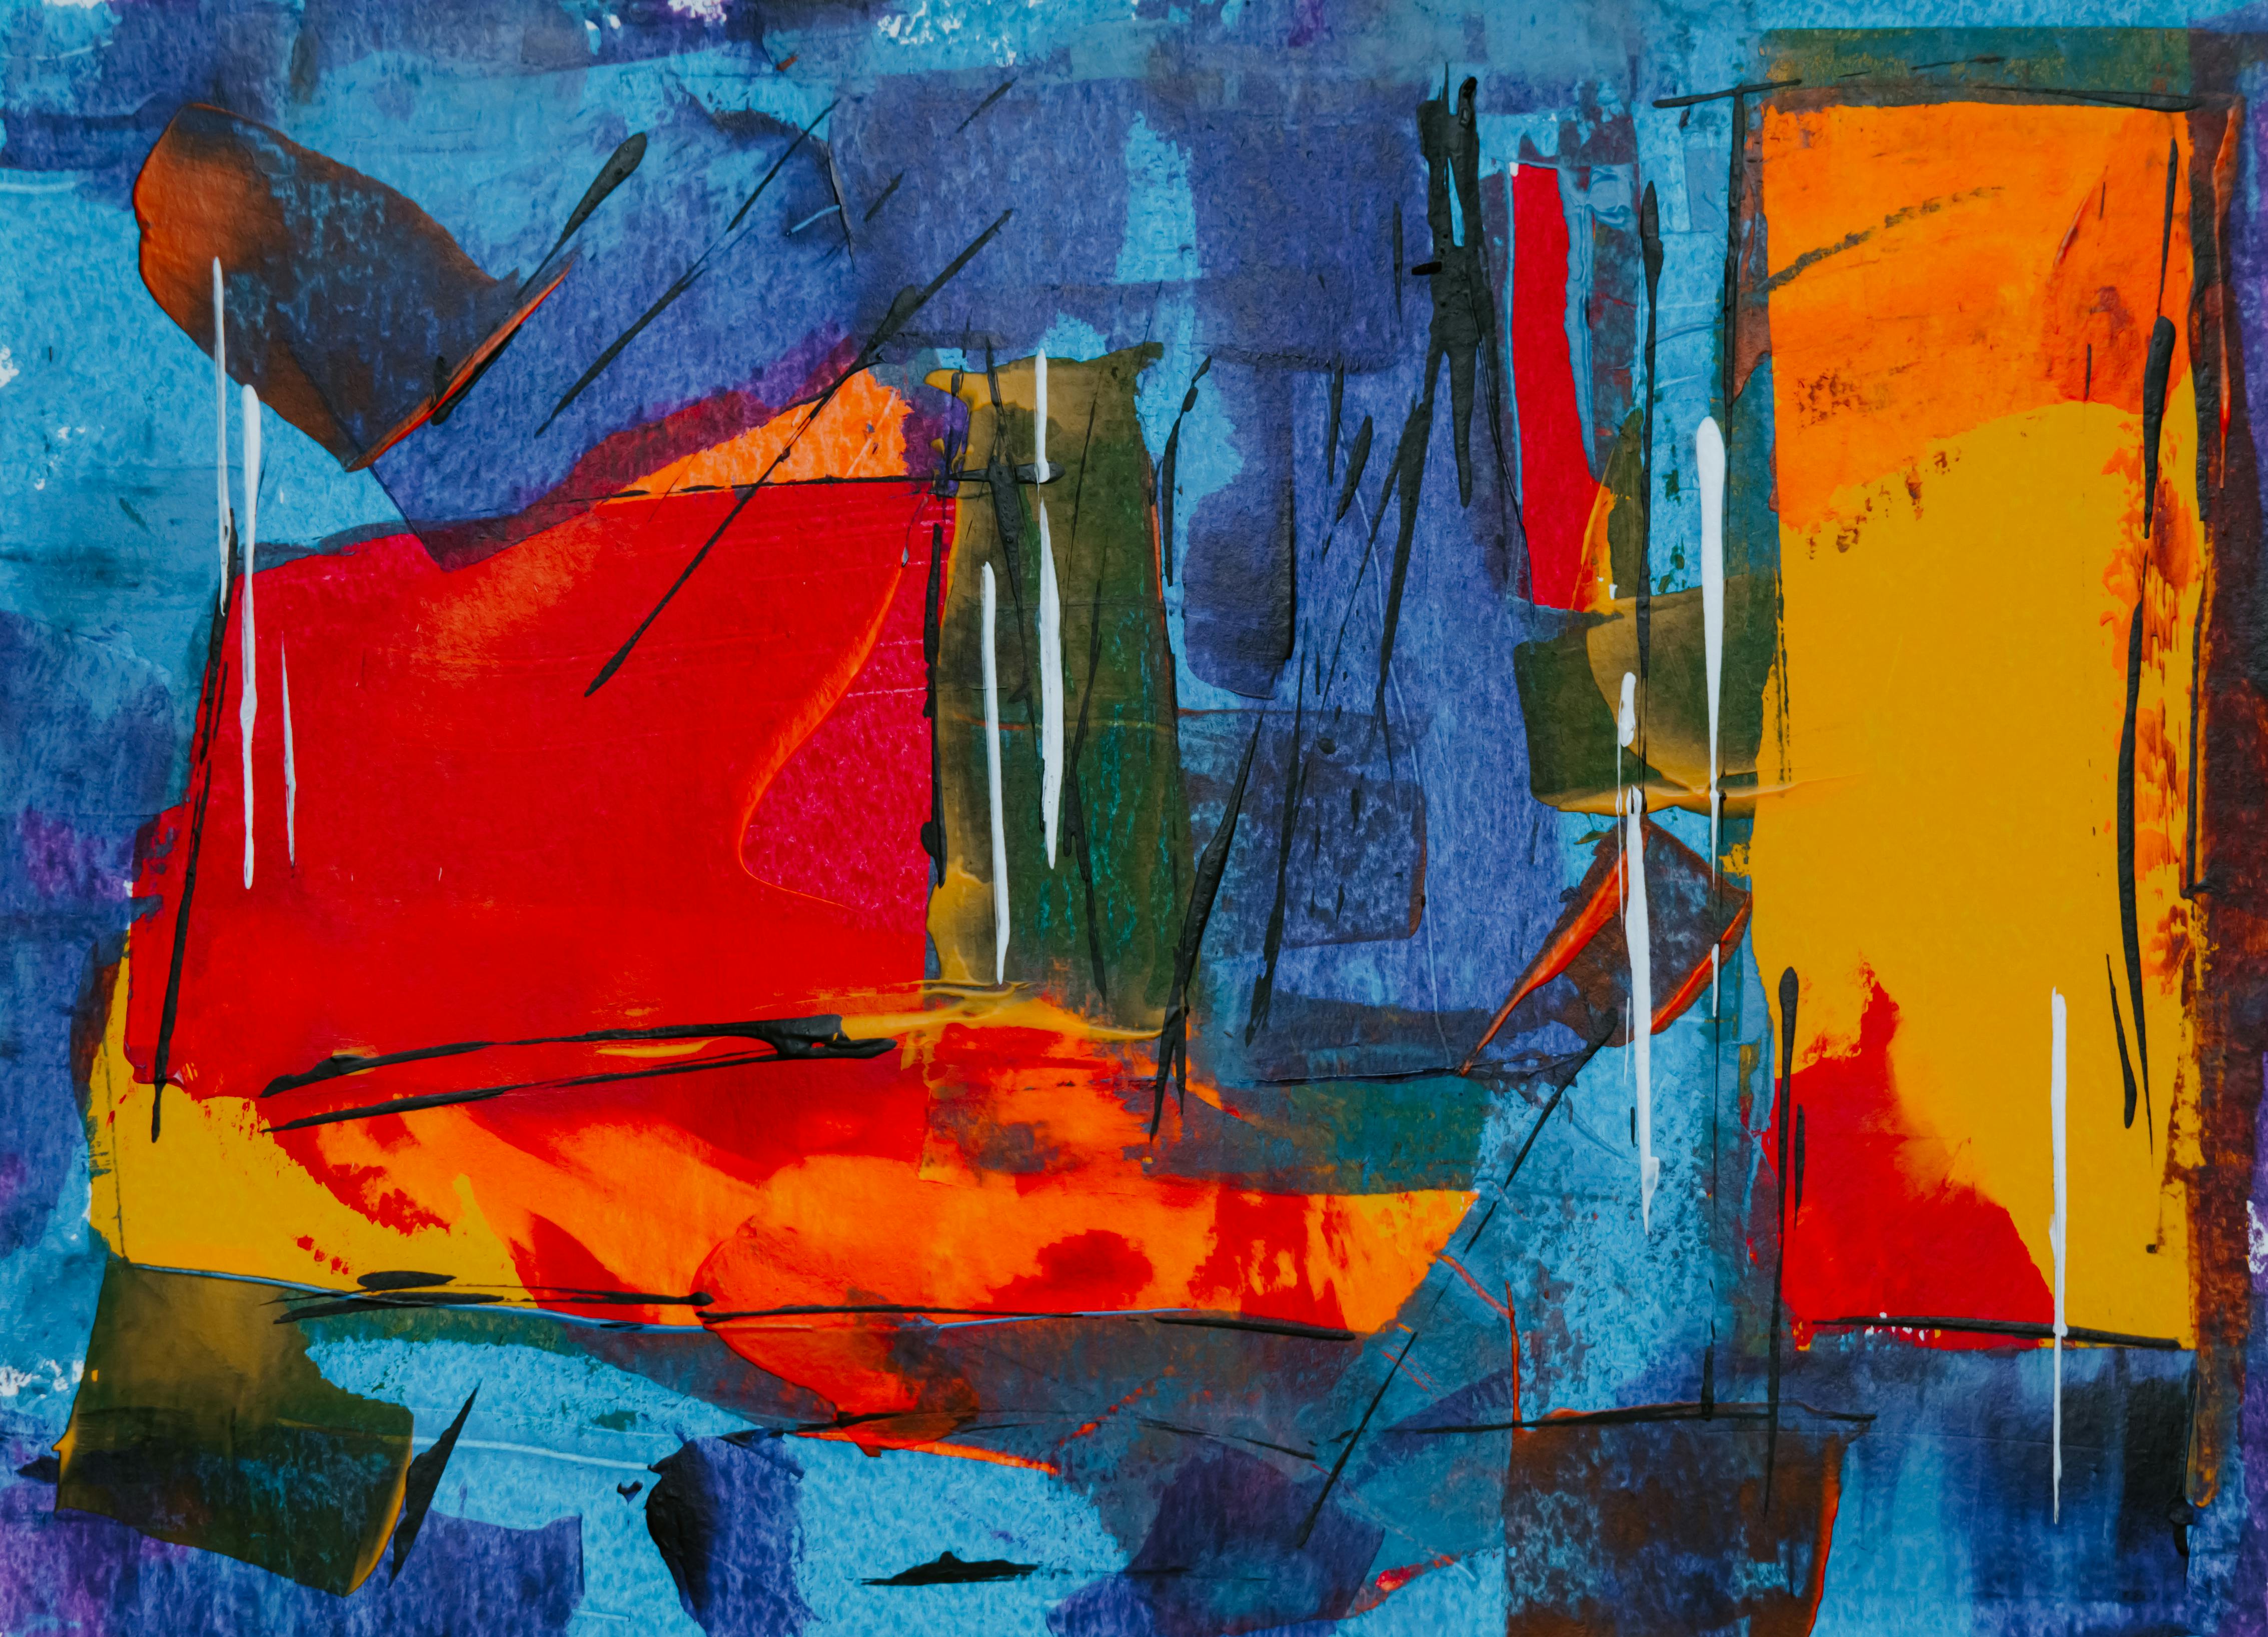