Unleash Expressive Art: My Ultimate Guide to Oil Sticks & Abstract Texture
Unlock the raw power of oil sticks for abstract art. Join my journey through mark-making, impasto, and layering. Learn essential techniques, overcome common mistakes, and master this versatile medium for expressive, textured paintings. Your comprehensive artist's guide.
My Expressive Affair with Oil Sticks: An Artist's Journey to Abstract Mark-Making and Texture
My studio, I confess, is less an organized workspace and more a glorious monument to my magpie tendencies for art supplies. So, when I first stumbled upon oil sticks, my initial reaction was a weary sigh. “Another art supply?” I thought, rolling my eyes at myself. My brain was already quite full, thank you very much, attempting to master basic brushstrokes for acrylic painting and perpetually trying to decipher how artists use color. Yet, as it always does in the delightfully messy world of abstract art, curiosity, that ever-present itch, won out. And boy, am I thrilled it did. To truly 'wrestle' with their unique properties – the way they demand direct engagement, their luxurious texture, their surprising permanence, and the unexpected challenges they brought – I first had to understand what they actually were.
Oil sticks, for me, haven't just been 'another art supply'; they've been a total game-changer for the raw, intuitive heart of my art of mark-making: expressive lines and gestures in abstract painting. It’s been a tangled, beautiful, and sometimes infuriating affair, full of unexpected challenges and exhilarating discoveries, and I’m ready to tell you all about it – even the messy parts.

So, What Exactly Are Oil Sticks? (And Why My Brain Didn't Get It At First)
Okay, let's cut to the chase, because honestly, I spent too long confused. An oil stick (often interchangeably called an oil bar, with no significant practical difference in composition or application, just a different brand preference or regional term) is, quite simply, oil paint in a solid, crayon-like form. Imagine your richest, creamiest oil paint, but instead of being squished from a tube, it’s molded into a hefty, robust stick. The key difference? Unlike pastels, which typically rely on a gum or resin binder and dry to a chalky, powdery finish that can easily smudge or flake, oil sticks cure just like traditional oil paint. They form a durable, stable film that's considered permanent once fully dry. Think of the difference between drawing with sidewalk chalk (a pastel) and drawing with a rich, vibrant lipstick (more akin to an oil stick in its application and texture).
The first time I picked one up, my internal monologue went something like this: 'Why not just use a brush and tube paint? My hands get messy enough already, thank you very much!' That, my friends, was my initial mistake – trying to force a square peg into a round hole. Oil sticks aren't replacements for brushes; they are an entirely different conversational partner for your canvas. They’re about directness, about immediacy, about a tangible connection that a brush, for all its grace, sometimes buffers. It's like talking directly to the canvas, rather than sending a polite, well-articulated letter.
A bit of history, because I love a good origin story: oil sticks emerged in the mid-20th century, a brilliant innovation for artists seeking a more direct, drawing-like approach to oil painting. They gained popularity among Abstract Expressionists like Joan Mitchell, whose vibrant, gestural abstractions often feature broad, energetic marks perfectly suited to the medium, allowing her to capture raw emotion and movement with unparalleled immediacy. Willem de Kooning also embraced their directness for powerful outlines and vigorous layering in his raw, expressive figures and landscapes, using them to build up sculptural surfaces that held incredible energy. They were also quickly embraced for plein air painting or for creating quick, expressive sketches directly on the canvas, thanks to their wonderful portability. As someone who occasionally likes to drag my supplies out to my garden (and yes, my dog has, on occasion, insisted on contributing an abstract paw-print, much to my initial chagrin and eventual delight), this portability is a huge plus. They truly solved a problem for artists wanting to bridge the gap between drawing and painting. In contemporary abstract art, artists like Cecily Brown continue to explore the sensual, physical qualities of oil sticks, layering them with traditional oils to create dense, vibrant compositions that oscillate between figuration and abstraction.
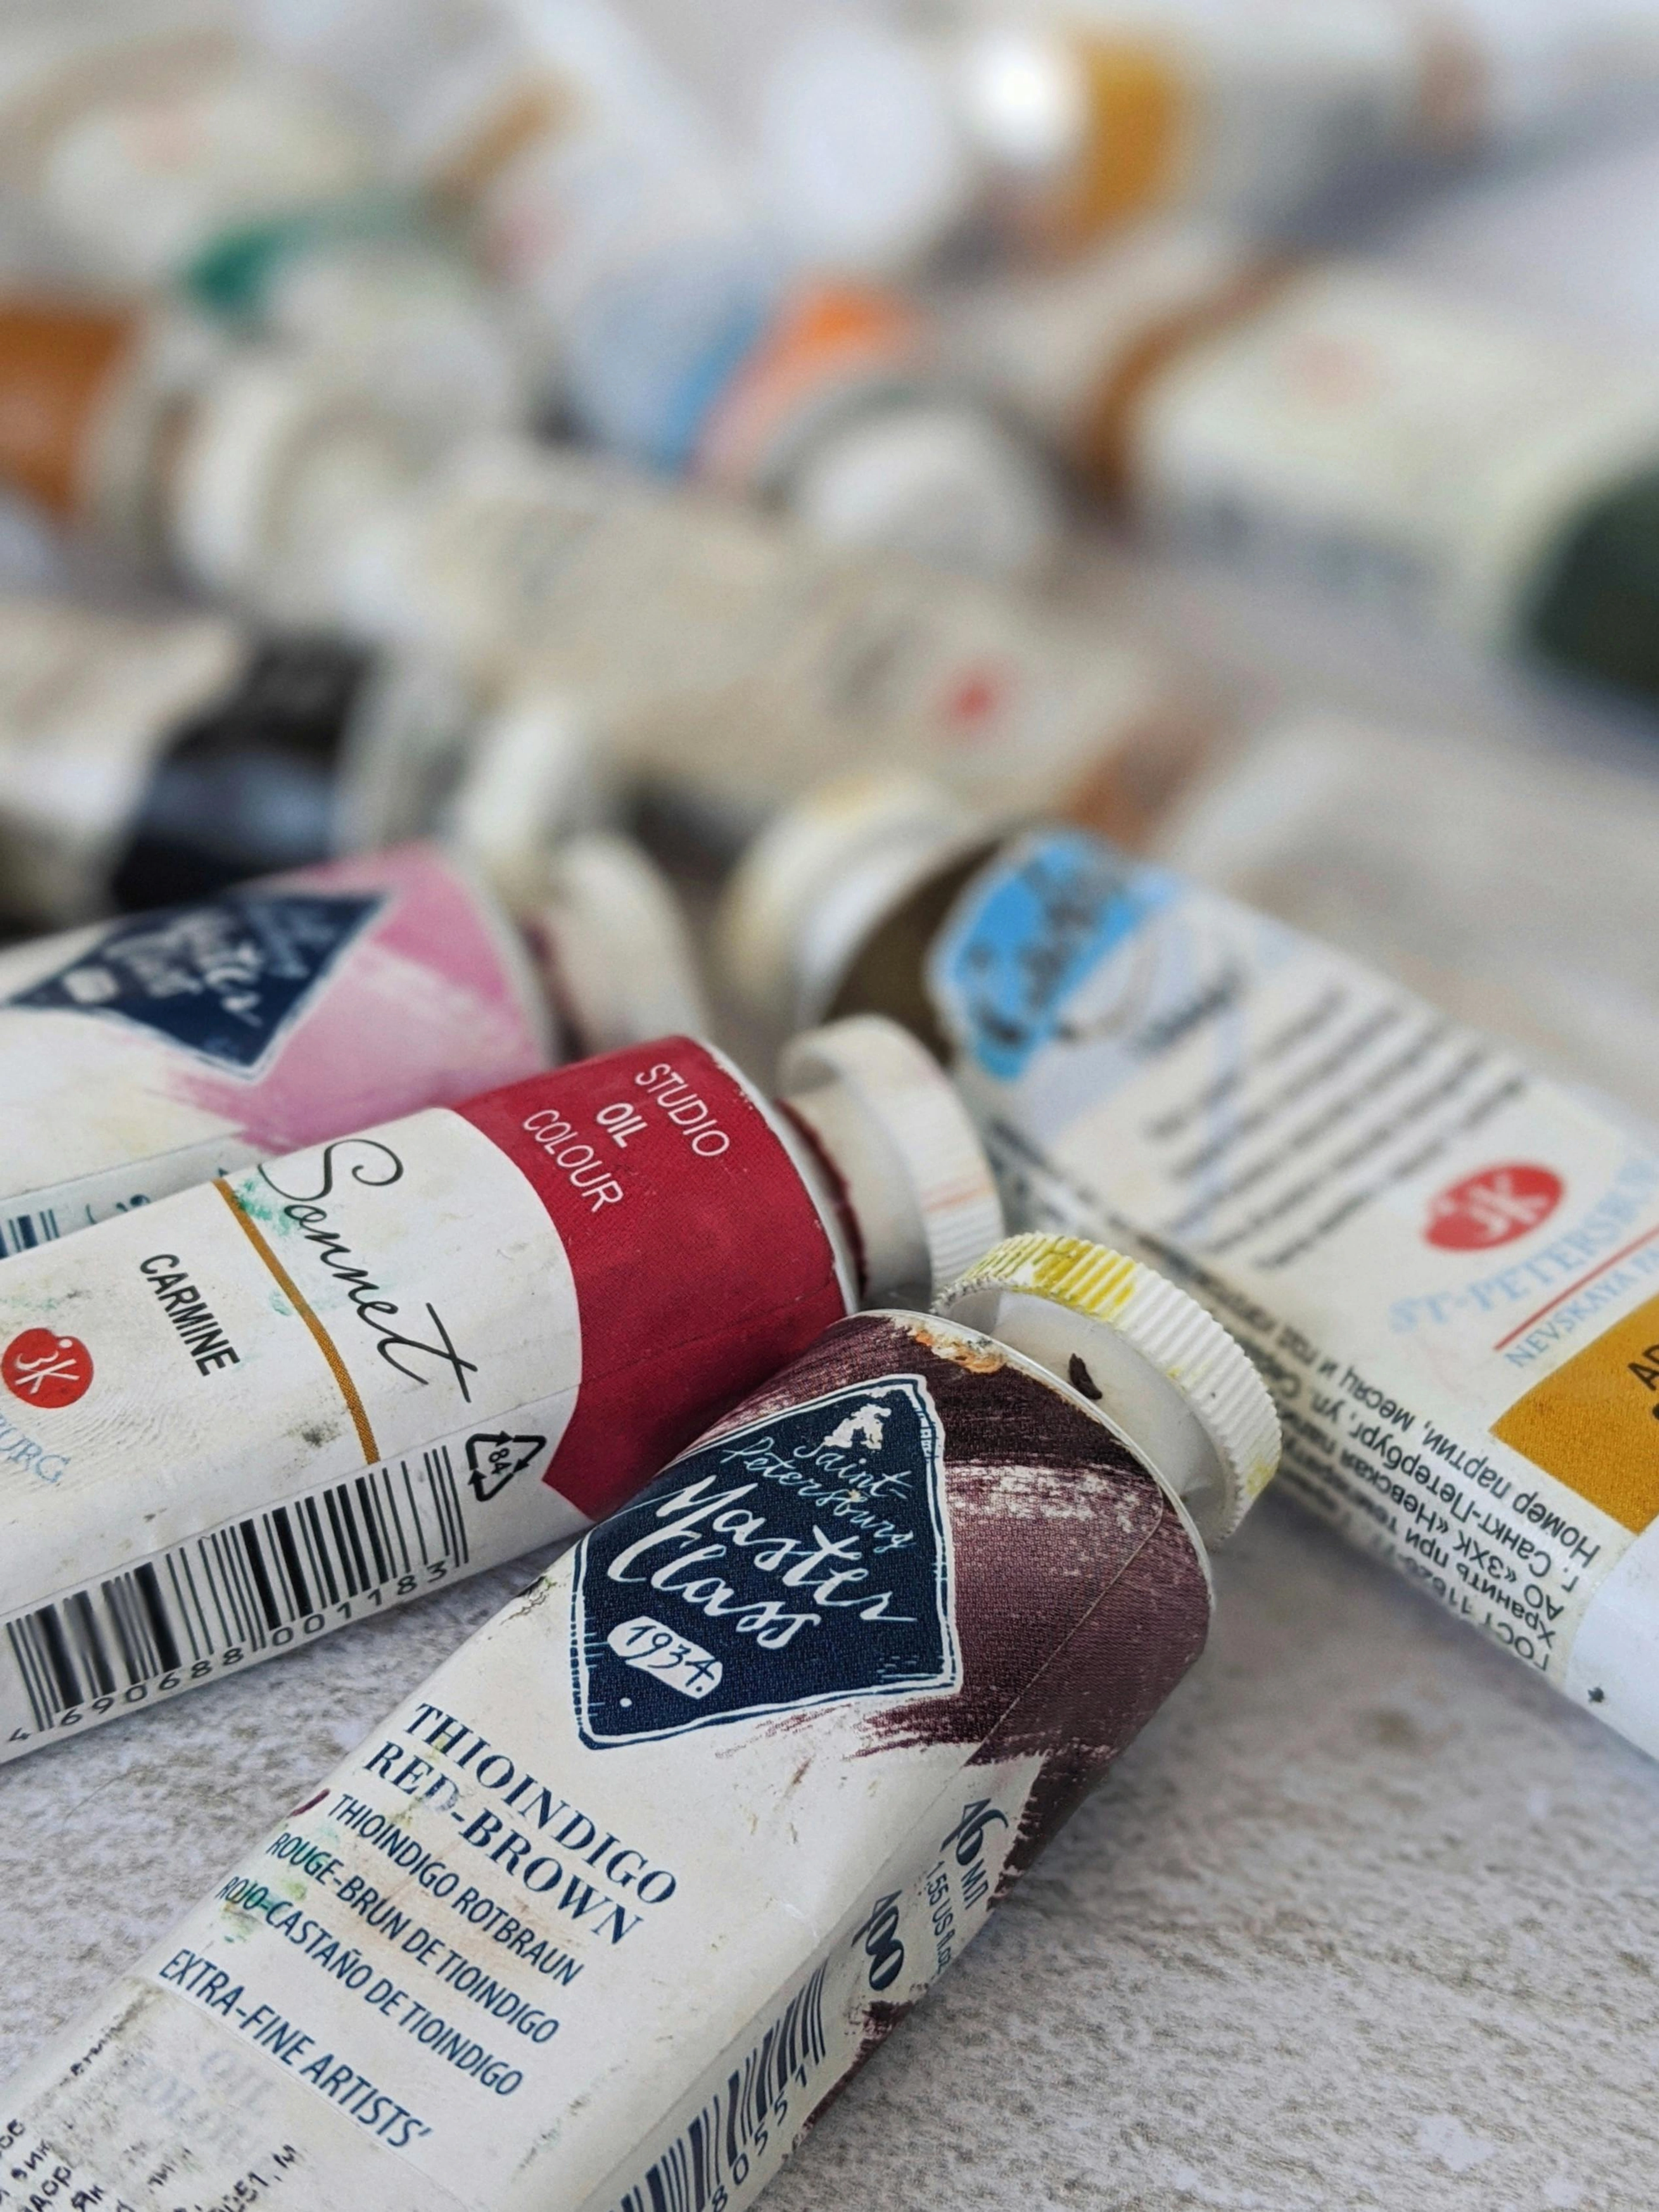
These wonderful tools typically consist of pigment, a careful balance of wax (often beeswax or paraffin, sometimes synthetic waxes), and linseed oil. The wax doesn’t just give them their solid form; its percentage directly influences their firmness and melt point. A higher wax content means a firmer stick, while a lower content results in a softer, more buttery texture. This unique composition contributes to their handling properties, allowing for those thick, sculptural applications and a slower, more deliberate drying process. This means your expressive marks stay put, slowly transforming over weeks or even months, especially with thick impasto layers. A little patience, it turns out, is a virtue in the oil stick world – a virtue I'm still working on, frankly. While they all share this basic composition, I've found that different brands offer varying degrees of firmness and pigment concentration.
Some brands, like Sennelier or R&F Handmade Paints, are famously buttery soft, practically gliding across the surface, making them ideal for delicate blending, seamless color transitions for skies, or broad, painterly strokes. They're like butter on hot toast. Others, such as Winsor & Newton, tend to be firmer, perfect for sharp lines, controlled applications like defining abstract architectural elements, and more robust scratching. Consider them more like a firm crayon. It’s worth exploring a few to find your perfect match, your artistic soulmate, if you will, as the firmness dramatically impacts your mark-making style and preferred techniques.

The drying process for oil sticks is, in a word, slow. This isn't a bug; it's a feature, allowing for extensive manipulation of the paint over days. However, it also demands careful consideration. When we talk about drying, we really mean two distinct stages: touch-dry and fully cured. Thinner applications might be touch-dry (meaning you can gently touch it without smudging) in a few days to a week, but thicker impasto layers can take months, even up to a year or more, to fully cure (meaning the oil has completely oxidized and hardened throughout the layer). The benefit? You have ample open time to blend, scrape, and re-work your layers. The challenge? Patience, my friend, patience. And careful storage of wet works, lest you end up with a sticky mess or accidental smudges.
Key Benefits of Oil Sticks at a Glance
Benefit | Description |
|---|---|
| Directness | Offers an immediate, unfiltered connection between your hand and the surface, perfect for capturing raw energy and intuitive gestures without the mediation of a brush. |
| Texture | Enables building up glorious, thick impasto layers that catch the light, creating tantalizing tactile ridges and a physical presence that demands engagement. |
| Portability | Their solid, self-contained form makes them incredibly easy to transport, ideal for outdoor painting (plein air) or sketching on the go without the need for palettes, solvents, or brushes. |
| Blendability | Can be blended directly on the surface with fingers, brushes, or other sticks, allowing for rich color transitions and luminous, layered effects. |
| Versatility | Compatible with traditional oil paints and dried acrylics, allowing for dynamic mixed-media applications and expanding artistic possibilities. |
| Expressiveness | Facilitates spontaneous, energetic mark-making, from bold declarations to agitated scribbles, making them indispensable for abstract and gestural art. |
| Longevity | Once fully cured, they form a durable, stable, and permanent film, similar to traditional oil paint, ensuring the artwork's endurance (with proper varnishing, of course). |
What You'll Need: Your Essential Oil Stick Toolkit (and Why)
Before we dive into the juicy details of using oil sticks, let’s quickly gather our essentials. You don't need much to get started, which is part of their charm! And trust me, a good setup can save you a lot of future frustration (and mess).
- Oil Sticks: Obviously! Start with a basic set of primary colors plus black and white. Don't be afraid to experiment with different brands to find your preferred firmness – it really makes a difference to your mark-making style. You might even find yourself collecting different textures, much like I do. Remember, some pigments can be toxic (like cadmiums or cobalts), so always check the product's safety information (often on the label or manufacturer's website) and handle with care. Avoid ingestion, use gloves, and ensure good ventilation, especially when sanding or grinding dry paint.
- Suitable Surfaces: Stretched canvas, canvas panels, wood panels, or even heavy-duty paper. Make sure they're properly primed (more on this in a moment). The tooth (texture) of your surface will dramatically impact how the oil stick applies, so experiment! A sturdy easel is also a non-negotiable for the kind of energetic mark-making oil sticks invite, especially for larger pieces. For plein air painting or studio work, consider sturdy panels or small stretched canvases that can be easily transported and protected.
- Palette Knife(s): Invaluable for mixing, applying, scraping, and creating sgraffito effects. Check out my guide on what is a palette knife and how to use it.
- Gloves: Essential for blending with your fingers and keeping your hands clean. Trust me, your inner artist (and outer studio) will thank you. Oil sticks are messy.
- Odorless Mineral Spirits (OMS) or other Oil Solvents: For thinning oil sticks, creating washes, and cleaning brushes (if you use them). A little goes a long way. Always ensure good ventilation when working with solvents. If working in a small space, consider alternatives like oil-based brush cleaners or natural, non-toxic solvents, though their effectiveness can vary. Always dispose of solvent-soaked rags properly by soaking them in water and laying them flat to dry outside to prevent spontaneous combustion.
- Lint-free Cloths or Paper Towels: For wiping sticks, cleaning, and general studio tidiness (or lack thereof, if you're like me). I always have a huge stack of these at arm's reach.
- Varnish (optional, but recommended): For protecting your finished artwork once it's completely dry. We'll talk more about patience here.
- Good Lighting: Essential for accurately seeing your colors and values, and appreciating the textures you're building. Natural light is best, but good artificial daylight-balanced lights are a close second.
- Ventilation: Important, especially when working with solvents or for prolonged painting sessions, to ensure air circulation and minimize exposure to fumes and any potential pigment toxicity.
Unleashing the Power: How I Use Oil Sticks in My Abstract World
My approach with oil sticks is, by and large, a beautifully intuitive dance. I rarely map out their precise placement; it’s far more about responding, in the moment, to the developing personality of the piece. This is where their inherent directness truly captures my artistic heart. It’s a primal, almost visceral, cave-painting kind of feeling, a direct imprint of thought and emotion, a conversation between me and the canvas. This raw immediacy is precisely what makes them indispensable for exploring texture: my favorite techniques for adding depth to abstract paintings and for building line in abstract art.
1. The Initial Spark: Laying Down Expressive Foundations and Mark-Making
I often reach for oil sticks to create that initial surge of expressive energy. Before a brush even enters the scene, I’ll make a series of energetic, almost reckless marks – scribbles, bold lines like a furious whisper, frantic dashes – to establish movement and an underlying structure. This is often where the very 'bones' of a painting, the foundational gestures, begin to whisper into existence. The sheer physicality of pushing the stick directly onto the surface creates a unique dialogue, allowing for a visceral transfer of energy that feels different from a brush. The firmness of the stick and the texture of the canvas dictate the mark – a soft stick dragged firmly will lay down a dense, buttery stroke, while a firmer stick lightly scraped will create a broken, agitated line.
And yes, you absolutely can use oil sticks on canvas! Canvas is a fantastic surface; its inherent tooth (texture) eagerly grabs the pigment, making for wonderfully engaging marks. The tooth is crucial because it gives the pigment something to adhere to, allowing for rich, broken color effects and better pigment loading. A canvas with a more pronounced tooth (like a coarse-grained linen or a surface prepped with a textured gesso) will grab more pigment, creating a bolder, more textural line. Imagine a mountain range of pigment. Conversely, a smoother surface allows for softer, more blended marks, almost like ice skating. I regularly use them on stretched canvas, canvas panels, and even wood panels. Just ensure your surface is properly primed, ideally with gesso, as I detail in my guide on how to apply gesso to canvas a beginners guide. While acrylic gesso is commonly used, an oil-based primer can offer a smoother, less absorbent surface, which might be preferred for certain effects. You can even mix marble dust or other texture mediums into your gesso for an even more tactile foundation. The choice of surface and primer significantly impacts how the oil stick interacts, allowing for different levels of grip and absorbency. It's all about finding what speaks to your process.
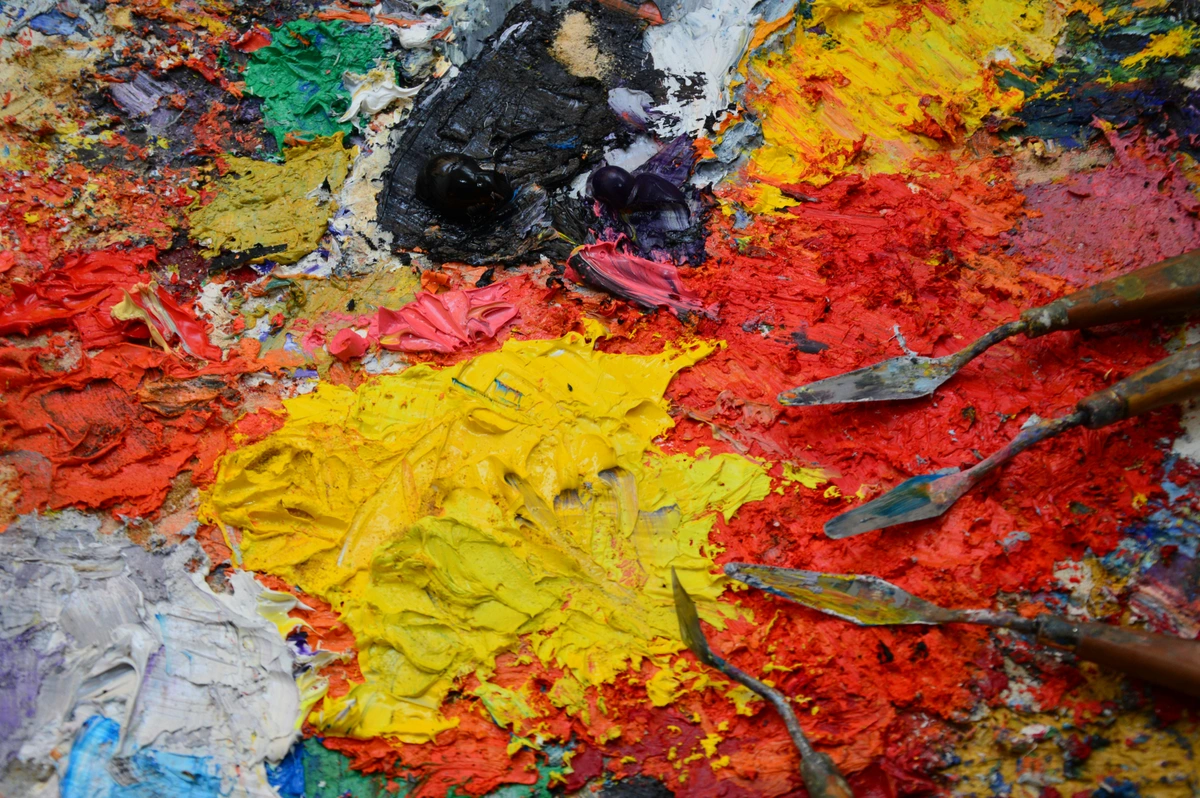
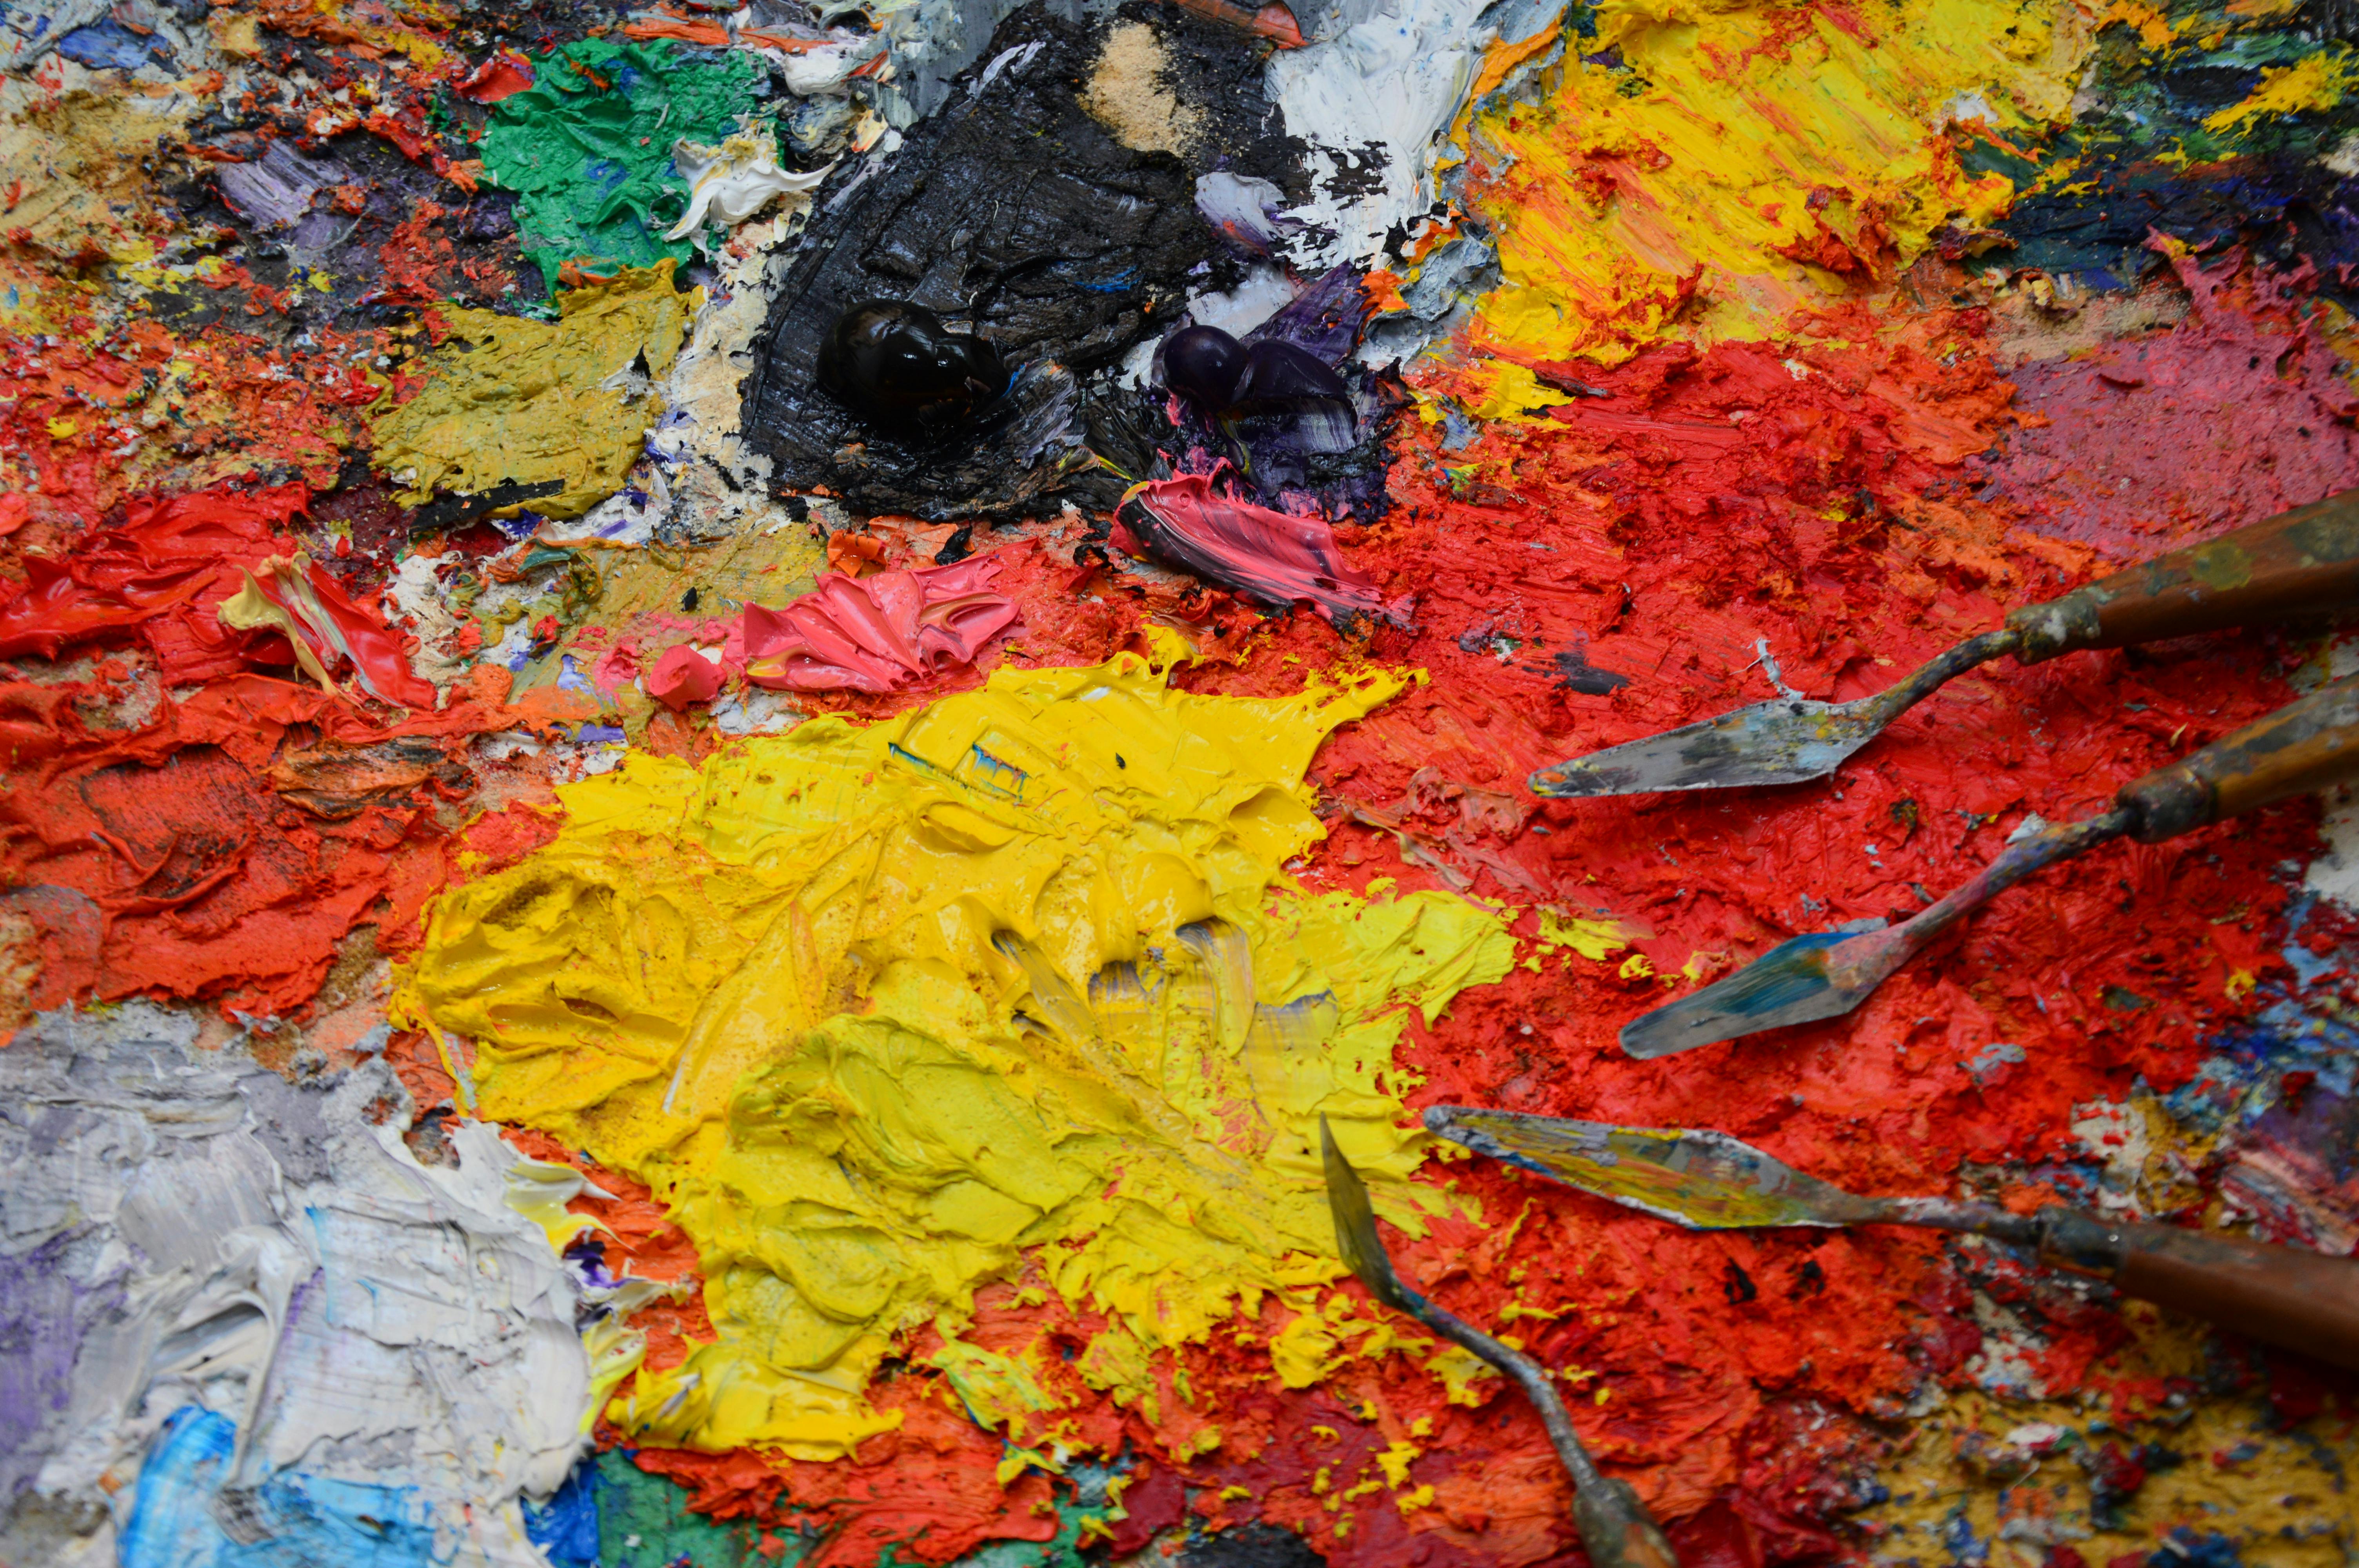
2. Building Depth: Layering and the Art of Subtle Blending
Oh, the texture! If I had to pick one thing, this is it. Oil sticks lay down a substantial, almost sculptural layer of color. You can build up glorious, thick impasto that catches the light like tiny, inviting cliffs, create tantalizing tactile ridges, or even, with a bit of playful destruction, scratch into them for mesmerizing sgraffito effects. This unique capability is why they are indispensable for exploring texture: my favorite techniques for adding depth to abstract paintings.
You can blend oil sticks with your fingers (gloves, people, gloves are your friends!), a brush dampened with a tiny bit of solvent, or even another stick. Layering colors creates the most exquisitely rich, luminous effects. I often lay down a vibrant, almost audacious yellow, then scumble (that’s applying a thin, broken layer of color, by the way – imagine a whisper of color, allowing the layer beneath to peek through like sunbeams through clouds) a deep, moody blue over it, letting glimpses of that initial sunny warmth peek through. It's always a surprise, always an adventure, full of those 'happy accidents' that are the bedrock of my broader journey with mixed media: blending materials for abstract expression. Why are happy accidents so valuable in abstract art? Because they push you beyond your preconceived notions, forcing you to respond in the moment and discover unforeseen beauty. It’s about letting the material lead you sometimes.
Now, here's where I made a common rookie mistake: the over-blending trap. Their rich, tactile texture is their absolute superpower. In my early days, I'd over-blend, trying to make them smooth and uniform like regular tube paint. 'Why isn't this behaving?' I'd grumble. Don't fall into this trap! Embrace the glorious chunkiness, the unevenness, the tangible presence. That's their inherent charm, the very essence of what makes them so compelling for abstract work. Over-blending often leads to muddy, lifeless colors, turning a vibrant conversation into a dull monologue, a grey sludge of lost potential. If you've already ventured into the mud, don't despair! Sometimes, introducing a crisp line of a highly contrasting, pure color or scraping back to reveal an earlier layer; sometimes a new color can cut through the dullness like a beacon.

3. Unearthing Beauty: Scratching, Incising, and Textural Play
Once these glorious layers are down, the real fun—and sometimes the most unexpected beauty—begins. This is where I truly unleash my inner mischievous child. Once I’ve laid down a glorious, thick layer of an oil stick, I love grabbing the blunt end of a tool, a palette knife, a skewer, a sculptor's loop tool, or even my trusty fingernail, to scratch into the surface. This act of sgraffito reveals the hidden colors beneath, adding a raw, almost primitive feel to the piece. It’s like digging for buried treasure, only the treasure is pure, unadulterated texture and a glimpse into the layers of the painting’s history. Different tools create different effects: a fine point for delicate, agitated lines, a broader edge for wider gouges, or even a comb for parallel textures.
Beyond direct application, oil sticks invite even more exploration. Try using a stencil to create crisp, defined shapes with their thick pigment, or experiment with frottage – placing a textured object (think a leaf, sandpaper, or even textured fabric) under your canvas or paper and rubbing the oil stick over it to pick up the pattern. For frottage, hold the stick firmly but apply gentle, even pressure, allowing the texture to emerge subtly. This adds another layer of serendipitous texture and visual interest to your work, embracing the very spirit of embracing spontaneity in abstract creation.
4. Manipulating the Medium: Beyond Direct Application and into Fluidity
But why stop at direct application? The true magic of oil sticks, I’ve found, lies in how they can be coaxed and manipulated beyond their intended form. Sometimes, the most exciting discoveries come from pushing the boundaries of what a tool is supposed to do. While direct application is fantastic, I've found endless joy in manipulating the stick itself to create different textures. Try holding the oil stick at a very shallow angle and dragging its edge lightly across a textured surface for a beautiful dry brush effect, letting the canvas tooth grab only a little pigment. This creates subtle, broken lines and atmospheric veils of color. You can also press textured objects directly into a freshly applied oil stick layer or use tools like spatulas or even the back of a comb to create ridges and patterns, adding another dimension of tactile richness to your abstract work.
While I adore the direct, unadulterated application, sometimes I yearn for softer edges or a more fluid wash. In these moments, I’ll dip a brush into a tiny bit of solvent, like odorless mineral spirits, and gently 'melt' or spread the oil stick pigment on the surface. This creates beautiful, soft transitions and allows for more traditional blending, vastly extending my range of expressive possibilities.
But wait, there's more! You can also mix them with various oil painting mediums to alter their consistency, transparency, or drying times. Adding linseed oil, for example, increases fluidity, gloss, and transparency, making the oil stick behave more like traditional tube paint for glazing (applying thin, transparent layers of color) or subtle effects. Alkyd mediums (like Galkyd or Liquin) are fantastic if you want to speed up the drying time, a godsend when you're impatient (like me!). Other mediums like Stand Oil can increase flow and flexibility while drying to a tough, enamel-like film, perfect for detailed work or creating subtle textures that hold their shape. For a matte finish and even more body, I sometimes mix them with cold wax medium, which also allows for incredible textural build-up. Each medium opens up a new dialogue with the material, allowing you to fine-tune your approach for the exact conversation you’re having with your canvas. It’s all about experimentation and finding what feels right – don't be afraid to break the rules a little! You can find many of these techniques discussed in depth in my definitive guide to oil painting techniques.
Working with Other Mediums & Finishing Strong: Longevity, Layers, and Learning
My journey with oil sticks has always been about pushing boundaries, seeing how they play with other elements in my abstract world. This naturally leads to some practical considerations about finishing and combining mediums.
1. Layering with Other Paints: The "Patience Paradox" and "Fat Over Lean"
This is where things get really interesting! You can mix oil sticks with other mediums, but there's a golden rule I learned the hard way. My rule of thumb: you can put oil sticks over dry acrylics (once the acrylic is fully cured), but generally not under acrylics. Why? Oil paint, and by extension oil sticks, remain flexible as they dry and for years afterward. Acrylics, on the other hand, become much more rigid as they dry. Layering a rigid medium (acrylic) over a flexible one (oil) can, over time, lead to cracking or delamination of the acrylic layer – a heartbreak we can avoid! The acrylic won't be able to flex with the oil layer underneath, eventually leading to separation. I once, in a moment of sheer creative impulsivity (or perhaps delusion), tried to layer acrylics over a still-tacky oil stick layer. Let's just say the result was a sticky, frustrating, unvarnishable mess that earned me a stern talking-to from my inner art critic. Learn from my impatience: let them cure! Seriously. (It's a lesson I'm still applying to many areas of my life, frankly.)
Painting over oil sticks with traditional oil paint is a resounding yes! In fact, it’s a very common and effective practice. You can absolutely paint traditional tube oil paint over dry oil stick layers. But here’s the golden rule of oil painting: 'fat over lean.' What does that mean? Think of it like a sponge that slowly releases its moisture. A 'lean' layer has less oil, so it's less flexible and dries faster, like a relatively dry sponge. Think of oil paint thinned with mineral spirits or alkyd mediums. A 'fat' layer has more oil, making it more flexible and slower drying, like a fully saturated sponge. This includes unthinned tube paint or paint mixed with linseed oil or other oil-rich mediums. To prevent cracking over time, you always want to apply more flexible (fat) layers over less flexible (lean) ones. Oil sticks, due to their inherent oil and wax content, are generally considered 'fat.' So, applying traditional oil paint (which can be adjusted from lean to fat) over them is perfectly fine, as long as the underlying oil stick layer is dry. Just be mindful of applying leaner oil paint on top of a fat oil stick layer – always ensure your subsequent layers are at least as 'fat' as (or fatter than) the one underneath. This rule is crucial for the longevity of your artwork – a lesson I’ve learned (and re-learned!) over my own artist's journey.
Now, what about other wax-based friends? Using oil sticks alongside other oil pastels or wax pastels is an interesting area. Oil pastels, while similar in application, often have a softer, waxier binder (typically a non-drying oil or wax) and don't typically cure into a permanent, hardened film in the same way oil sticks do. This means they remain vulnerable to smudging and are not generally considered archival in the long term, offering less stability and permanence. You can layer oil sticks over oil pastels for added texture, but be aware that the underlying pastel layer may always retain some malleability and will not offer the same permanence. For archival quality, integrating them requires careful consideration of the permanence of the underlying pastel. Consider them more for mixed-media experimentation where longevity isn't the primary concern, or as an underpainting for areas you intend to fully cover with oil sticks and traditional oils.
2. Varnishing Your Oil Stick Paintings: The Final Protective Hug
Do you need to varnish oil stick paintings? Generally, yes, it's a good idea! Oil sticks, especially those from reputable brands, are formulated with high-quality pigments and binders, making them archaically sound and comparable to traditional oil paints in terms of permanence. Once your painting is completely dry – and this is where patience truly comes in – varnishing provides a vital protective layer. Thick applications of oil stick can take 6-12 months or even longer to fully cure (meaning the oil has completely oxidized and hardened throughout, becoming stable). This curing process isn't just about being dry to the touch; it's about the paint being stable enough to accept a varnish without compromising its integrity. If you varnish too early, you risk the varnish cracking, yellowing, or even bonding permanently with the still-curing paint, making future conservation incredibly difficult and potentially damaging the artwork upon attempted removal. The varnish might even appear cloudy or uneven. Once cured, varnish shields your artwork from dust, dirt, and harmful UV light, and can also beautifully unify the sheen across the painting, making those textures sing. You can choose a gloss varnish to enhance color saturation and give a vibrant, polished look, a satin varnish for a subtle, even sheen, or a matte varnish to reduce glare and provide a raw, understated finish. While I often opt for a satin finish to preserve the tactile quality without excessive shine, some abstract artists choose not to varnish if they prefer a raw, unadulterated matte appearance, accepting the inherent vulnerabilities this entails. Always, always use a varnish specifically formulated for oil paintings. Your artwork (and future generations of admirers) will thank you. Remember, good things come to those who wait, especially in the world of oil paints! You can also find more of my thoughts on these types of finishes by exploring my abstract art for sale.
The Quirks and My Mistakes (So You Don't Make Them!)
Of course, my 'love affair' with oil sticks wasn't all immediate bliss and painterly rainbows. Like any good relationship, it came with its share of frustrating learning curves and rookie mistakes. Beyond the over-blending trap, here are a few other 'gotchas' I stumbled into, hoping to save you some heartache, and some inherent challenges of the medium:
1. The Muddy Color Quandary
I quickly learned that while blending is glorious, mixing too many colors directly on the canvas, especially with a heavy hand, can lead to a dull, muddy mess faster than you can say 'abstract expressionism.' My early attempts at subtle gradients often resulted in a murky brown abyss, a conversation that lost its voice. The trick, I've found, is to work with fewer colors per layer or to blend them before applying them to the canvas (e.g., scraping them onto a palette and then applying). Embrace the layering for luminosity, rather than vigorous mixing on the surface. If you've found yourself in a muddy predicament, don't despair! Sometimes, introducing a crisp line of a highly contrasting, pure color or scraping back to a clean layer can rescue a passage.
2. Impatience is a Virtue's Nemesis (Especially with Drying Times)
Yes, I mentioned it before, but it bears repeating: oil sticks take time to dry. Like, a lot of time. In my early, impatient days, I'd get excited, add a new layer, and then wonder why my beautiful, fresh texture was smudging or why the whole piece felt sticky weeks later. Once, I even tried to move a still-tacky painting while it was drying, resulting in a glorious abstract impression of my fingerprint permanently embedded in a prominent red impasto layer. Or, worse, trying to varnish a painting that was merely 'dry to the touch' instead of fully cured. The result? A cloudy, uneven mess that needed to be painstakingly removed (and trust me, removing varnish from uncured oil paint is a delicate, risky, and often damaging process that should be avoided at all costs). Resist the urge! Let your layers breathe and cure fully. Think of it as a forced meditation – a test of artistic discipline I’m still acing… sometimes.
3. The Overworking Temptation
There's a fine line between adding depth and detail, and simply overworking a piece into oblivion. With oil sticks, their immediacy and tactile nature can make it incredibly tempting to just keep adding, keep pushing pigment around. I've ruined many a promising passage by thinking, 'just one more stroke will perfect it,' only to realize I've smothered the spontaneous energy that made it compelling in the first place. Knowing when to stop is an art in itself. Look for the point where the painting feels balanced, vibrant, and alive, even if it's not 'perfect.' Sometimes, the most powerful abstract works retain a raw, unfinished quality. Step back, take a break, and come back with fresh eyes. Often, less is truly more.
Storage and Maintenance of Your Oil Sticks
Just like any cherished art supply, a little care goes a long way in ensuring your oil sticks remain in prime condition for years to come. I learned this the hard way after finding a few of my favorite sticks had decided to melt into their wrappers on a particularly hot studio day.
- Temperature Control: Store your oil sticks in a cool, dry place, away from direct sunlight or extreme temperatures. High heat can soften them significantly, making them difficult to handle and prone to breakage, while extreme cold can make them brittle. A consistent room temperature is ideal.
- Protection: Keep them wrapped in their original paper or plastic sleeves, or individually wrap them in wax paper or parchment. This prevents them from drying out unevenly (which can lead to cracking) and, more importantly, stops them from transferring pigment onto other sticks or surfaces in your toolkit – a quick way to create a muddy palette before you even begin!
- Cleaning: If a stick gets dirty or contaminated with another color, simply wipe it gently with a lint-free cloth or paper towel. For tougher grime, you can carefully scrape off the outer layer with a palette knife. Avoid using solvents directly on the sticks for cleaning, as this can alter their composition.
- Reshaping: If a stick becomes too blunt or develops an awkward shape, you can gently reshape it with a palette knife, or even mold it slightly with your fingers if it's a softer brand, to create a new edge for specific marks.
By giving your oil sticks a little TLC, you're not just preserving the tools; you're preserving the vibrant potential they hold for your next abstract masterpiece. And trust me, a well-cared-for stick is a happy stick, ready to make its mark!
My Final Thoughts: Embrace the Mess, Embrace the Magic
My journey with oil sticks has been a profound lesson in embracing spontaneity, accepting imperfection, and finding joy in the raw, tactile process of creation. They’ve forced me to slow down, to observe, and to truly feel the paint as it moves across the canvas. They’re not always easy, sometimes they’re frustratingly slow, and yes, they’re definitely messy. But in that mess, in that direct conversation between my hand and the surface, lies an undeniable magic.
So, if you’re an artist looking to break free from the brush, to add incredible texture, or simply to find a new voice in your abstract work, I urge you: pick up an oil stick. Get messy. Experiment. Let curiosity be your guide. Your artistic journey, like mine, will be all the richer for it. And who knows, maybe you’ll even find a little piece of yourself reflected in the vibrant, tactile landscape you create. Happy mark-making!
If you want to dive deeper into other techniques or explore abstract art further, don't hesitate to check out my art for sale or learn more about my artist's journey and my museum in 's-Hertogenbosch.


