
Master Oil Painting Brushes: Guide to Bristles, Shapes & Care
Unlock brushstroke mastery! This definitive guide explores natural vs. synthetic bristles, essential shapes, sizes, expert care rituals, and personal recommendations for oil painters. Elevate your art.
The Ultimate Guide to Choosing Oil Painting Brushes: From Bristles to Brushstroke Mastery
Alright, let's talk brushes. For me, they're not just tools; they're an extension of my hand, my voice, my very intent when I'm wrestling with a new canvas. I still remember the sheer frustration of a commission many years ago, trying to capture the delicate folds of fabric with a splayed, lifeless brush – the bristles fanned out uncontrollably, leaving muddy streaks instead of clean lines. The paint dragged, the lines wobbled, and I genuinely thought my skills had abandoned me. It was only after a moment of frustrated clarity that I swapped out the culprit for a proper filbert with good snap – that lovely spring back to shape – and suddenly, the paint flowed, the fabric shimmered. It was like magic, a true revelation, and a hard-won lesson in the profound difference the right tool makes.

That experience taught me a profound lesson: the right brush can feel like an extension of your soul, while the wrong one can feel like wrestling a broom made of cobwebs. You know the feeling, don't you? This isn't just a list of brushes; it's a deep dive into the craft, a conversation about what truly makes a difference, born from years of getting it right, and definitely getting it wrong. I want to save you some of that headache and share the hard-won insights that can help you find your brush-magic. Let's peel back the layers and discover the companions that will truly bring your oil paintings to life, covering everything from bristle types and shapes to sizes and essential care. We'll explore why a good set of hog bristle brushes might be your first love, but modern synthetics could become your lifelong partner, enhancing techniques from classic glazing to expressive impasto painting.

The Heart of the Matter: Natural vs. Synthetic – A Philosophical Tug-of-War
Before we dive into the specific bristles, let's get a handle on the brush itself. Every brush, from the humblest to the most luxurious, is essentially made of three critical parts that work in concert to deliver your artistic vision. Their quality and construction fundamentally dictate the brush's performance, longevity, and ultimately, your painting experience. It's truly a testament to generations of craftsmanship and innovation.
Understanding the Anatomy of a Brush
- The Bristles (or Hair): This is the working end, the part that actually touches the canvas and holds the paint. Bristles vary wildly in material (natural animal hair vs. synthetic filaments), stiffness, shape, and how much paint they can hold and release. Their interaction with the paint and canvas is what creates your mark. For oil painting, bristles need to be robust enough to handle the paint's viscosity and the solvents used for cleaning, while still providing the desired control and feel.
- The Ferrule: This is the metal band (often nickel-plated brass or aluminum) that crimps the bristles securely to the handle and gives the brush its distinctive shape. A high-quality, seamless ferrule prevents water or solvent from seeping in, protecting the crucial glue that holds the bristles and preventing dreaded splaying (where the bristles lose their original shape). A poorly constructed ferrule can lead to wobbling, bristle loss, and endless frustration – I've had more than one brush head detach mid-stroke, which is a true nightmare. It's an unsung hero of brush integrity, often overlooked but absolutely vital.
- The Handle: Typically made of wood (though sometimes plastic or bamboo), the handle provides grip and balance. Handles can be long (traditional for easel painting, encouraging distance and broader strokes) or short (favored for close-up, detailed work, offering more precise finger and wrist control). Its ergonomics – how it feels in your hand – significantly impact comfort and control during long painting sessions. A well-balanced handle can make even a large brush feel surprisingly nimble, reducing fatigue and allowing you to focus on the art.
When I first started, everyone told me: "Oil painting? You must use natural hog bristle brushes!" And for a long time, I blindly followed that advice. They are fantastic, don't get me wrong. But the art world, much like life, keeps evolving, and with it, our options expand. For centuries, natural bristles were the only game in town, shaping many traditional painting techniques I still admire. The Old Masters, with their incredible depth and texture, often relied on the unique properties of natural hair for everything from precise glazing techniques to rich impasto, understanding that the tool was an extension of their artistic will.
Natural Bristles: The Traditionalist's Choice with Timeless Appeal
Natural bristles primarily come from hogs or sables, each offering a distinct feel and effect, a legacy stretching back through art history. The inherent organic structure of these animal hairs has characteristics that modern synthetics strive to replicate.

- Hog Bristle: These are the legendary workhorses, and for good reason. They're stiff, incredibly springy, and have naturally flagged tips – tiny, split ends that look like miniature flags. These flagged tips, with their porous, irregular surface, act like micro-hooks or sponges, holding a surprising amount of thick oil paint and ensuring a controlled, even release onto the canvas. Many high-quality hog bristle brushes are also "interlocked," meaning the bristles are set into the ferrule curving inward, which helps them maintain their shape and crucial spring (snap) over time, even with heavy use. Hog bristles truly excel at moving thick, buttery paint, creating beautiful texture for impasto painting, and are brilliant for working wet-into-wet (blending fresh paint into existing wet paint on the canvas). Their inherent drag or satisfying resistance against the canvas is a key characteristic that many artists, myself included, cherish for expressive, sculptural marks and techniques like sgraffito (scratching into wet paint). Their firm resilience is often rated as 'stiff' or 'firm' by manufacturers, offering incredible tactile feedback. My first set of 'serious' brushes were hog bristles, and they truly taught me the joy of pushing paint around, building up those foundational layers with confidence.
- Sable (and Sable Blends): If you're chasing that elusive, incredibly smooth application, delicate blending, or precise, finer details, sable is the gold standard. These brushes, often made from Siberian weasel hair, are renowned for their softness, incredible responsiveness, and ability to hold a perfect point or edge with remarkable fidelity. Their natural taper and smooth cuticle allow for exceptional paint-holding capacity without dripping, facilitating long, consistent strokes ideal for intricate work and delicate glazing techniques. The almost complete absence of drag makes them glide across the canvas with effortless grace. They are significantly more expensive than hog bristle due to the rarity of the hair and the meticulous hand-assembly required. And, let's be honest, cleaning them properly after a session with gooey oil paint can feel like a sacred, slightly intimidating ritual. That pang of regret when you've damaged a good sable is real!
- Other Natural Hairs: While hog and sable dominate oil painting, you might encounter brushes made from badger (offering a unique stiffness with soft tips, good for scumbling and softening edges), ox (very springy, good for heavy-bodied paint but often coarser), or even squirrel (extremely soft, holds lots of thinned paint, but generally too floppy for thick oils, more common in watercolors). Knowing these exist simply broadens your understanding of the incredible range of options out there, even if they aren't your primary choice for oils. Each has unique properties that a discerning artist might leverage for specific effects, much like a chef choosing a very particular knife for a very particular cut.
Synthetic Bristles: The Modern Contender, Forging a New Path
Then came synthetics. Oh, how I resisted at first! I considered myself a purist, clinging to tradition, worrying they lacked the soul of natural hair. I recall scoffing at them in art stores, convinced they were inferior. But, much to my surprise and eventual delight, I've been completely won over by the innovations in synthetic brushes, especially high-quality ones designed specifically for oil painting. It turns out, giving up some old ideas can open up a world of possibilities – who knew?
- Durability & Cleaning: This is where synthetics often shine. They are generally far more durable than natural bristles, especially when subjected to the harsh solvents and vigorous cleaning oil painting demands. Their non-porous filaments mean they absorb less paint into the ferrule, making them significantly easier to clean thoroughly. They're less prone to splaying (losing their original shape and spreading out) and maintain their integrity longer. This alone has saved me many moments of frustration (and probably extended the life of my brushes considerably). I've ruined enough natural brushes by accidentally leaving them in solvent overnight to appreciate this resilience!
- Versatility & Innovation: The technology behind synthetic bristles has exploded. Many modern synthetics are ingeniously engineered to mimic the best qualities of both hog bristle (stiff, good for texture, excellent snap – meaning how well they spring back to shape) and sable (soft, smooth application). You can now find brushes with crimped or textured filaments, varying diameters, and even electrostatic charges designed to replicate the flagged tips of natural hair, enhancing their paint-holding capacity and controlled release. This means brushes that are stiff enough to push heavy paint but still soft enough to blend seamlessly, offering incredible control for a variety of oil painting techniques. They're often rated as 'soft,' 'medium,' or 'firm' based on their intended mimicry, providing options for every conceivable effect and style, from photorealism to gestural abstraction.
- Price & Ethics: Generally, synthetics are more affordable, making quality tools accessible to more artists. And for those of us who are conscious about animal products, they offer a fantastic, high-quality, and compassionate cruelty-free alternative without compromising on performance. I've found some synthetic sable brushes that honestly give genuine sable a serious run for its money, delivering that buttery smooth application without the guilt or the hefty price tag. It's a win-win in my book.
Here's how I typically weigh them, a quick mental checklist I go through:
Feature | Natural Bristle (Hog/Sable) | Synthetic Bristle | My Take |
|---|---|---|---|
| Stiffness/Snap | High (hog) – excellent for heavy paint & texture; Medium to Low (sable) – for soft flexibility, excellent point retention. Good structural integrity (especially "interlocked" bristles) | Adjustable – can mimic hog (stiff, good snap) or sable (soft, flexible), constantly improving, with advanced filament engineering for specific resistance. | Both are absolutely essential; it entirely depends on the desired effect. For bold, textured work, hog is still king, but synthetics are catching up rapidly for precision and controlled resistance. For delicate blends, both sable and high-quality synthetics are brilliant. |
| Paint Load | Very Good – flagged tips excel at holding paint due to their micro-structures (hog); Excellent – natural taper and cuticle hold a large, controlled amount of paint (sable). | Good to Very Good (improving constantly due to advanced filament design and textures, including hollow or crimped filaments that mimic flagged tips). | Natural often slightly edges it out for sheer volume in the stiffest applications, but modern synthetics are incredibly close and offer excellent, controlled paint release with less absorption into the ferrule, meaning less waste and easier cleaning. |
| Drag/Resistance | High (hog) – creates a satisfying, controlled friction against the canvas, ideal for expressive, sculptural marks; Very Low (sable) – glides effortlessly for smooth, seamless strokes. | Adjustable – can mimic both high (hog-like texture and resistance) and low (sable-like glide) drag, offering unparalleled versatility for diverse techniques. | This is a subtle but crucial factor in the feel of painting. I love the visceral feedback natural hog gives, but synthetics are getting remarkably good at replicating that satisfying pull and push, allowing for a broader range of expressive marks. |
| Durability | Good, but can splay/wear with heavy use, susceptible to harsh solvents, prone to damage if left uncleaned or neglected (especially sable, which is delicate). | Excellent – less prone to damage, withstands solvents better, often holds shape longer, and resists splaying due to engineered filaments. | Synthetics often win for sheer longevity and resilience, especially for artists who are tough on their brushes (like me, sometimes!). They forgive accidental neglect more readily, which is a blessing in a busy studio. |
| Cleaning | Can be challenging to get truly clean, especially near the ferrule, requires meticulous care and specific brush soaps (especially delicate sable). | Easier to clean thoroughly, paint releases more readily due to non-porous fibers, meaning less paint gets trapped and less time spent scrubbing. | Synthetics are a dream for cleanup; natural bristles, particularly sable, demand a bit more TLC and a proper, slightly ritualistic cleaning. It's a trade-off for their unique performance, but one that synthetics are rapidly closing. |
| Cost | Moderate to High (especially sable, due to rarity and processing, can last generations with care, offering long-term value and investment). | Low to Moderate (excellent value for performance and durability, making high-quality tools accessible without breaking the bank). | Synthetics are fantastic value, offering professional-grade performance without the hefty price tag. Natural bristles, especially quality sable, remain an investment that requires careful consideration but can be incredibly long-lasting. |
| Best For | Impasto, heavy texture, bold expressive strokes, traditional techniques (e.g., scumbling, dry brushing, sgraffito) with hog; delicate blending, smooth glazes, fine details, precise lines with sable. | Blending, smooth application, fine detail, versatility across techniques, modern approaches (layering, crisp marks, photorealism), and for artists seeking cruelty-free options. | A versatile mix is usually the sweet spot for me – leveraging the strengths of both. Don't limit yourself to one camp; always match the tool to the effect you're after and the consistency of paint you're using! The beauty is in the choice. |
Decoding Brush Shapes: Your Artistic Arsenal – The Forms That Make the Mark
Okay, so you've got your bristles and their composition sorted – the very material that touches the canvas. Now, let's talk shapes. This is where the magic really happens, where a specific tool unlocks a specific gesture or effect, truly shaping your artistic vision. It's not about having all the brushes, believe me, I've gone through that phase with an overflowing brush pot, only to find myself reaching for the same essential few every single time. My past hoarding can inform your strategic selection! Remember, the ferrule – that metal band – isn't just holding the bristles; its quality and how it crimps the bristles fundamentally define the brush's shape and integrity, impacting its feel and balance in your hand. The choice of shape is as personal as your signature (which you can learn more about how I sign my art here).

- Flats & Brights: These are my absolute go-to for blocking in large areas, creating sharp, clean edges, or applying thick, impactful strokes of paint. A flat brush has longer, often more flexible bristles, offering a bit more flow and a longer, smoother stroke, creating a clean, rectangular mark. It's excellent for broad, sweeping applications and even for creating delicate lines when used on its thin edge. A bright brush, on the other hand, has shorter, stiffer bristles, making it perfect for controlled, robust application, especially for alla prima painting where you're working quickly and directly. This shorter, firmer head excels at sculpting defined forms, pushing heavy paint with immediate impact, and is fantastic for techniques like sgraffito (where you scratch into wet paint) or creating bold, choppy textures. The key difference? Flat offers more 'give' and flow; bright offers more 'punch' and control.
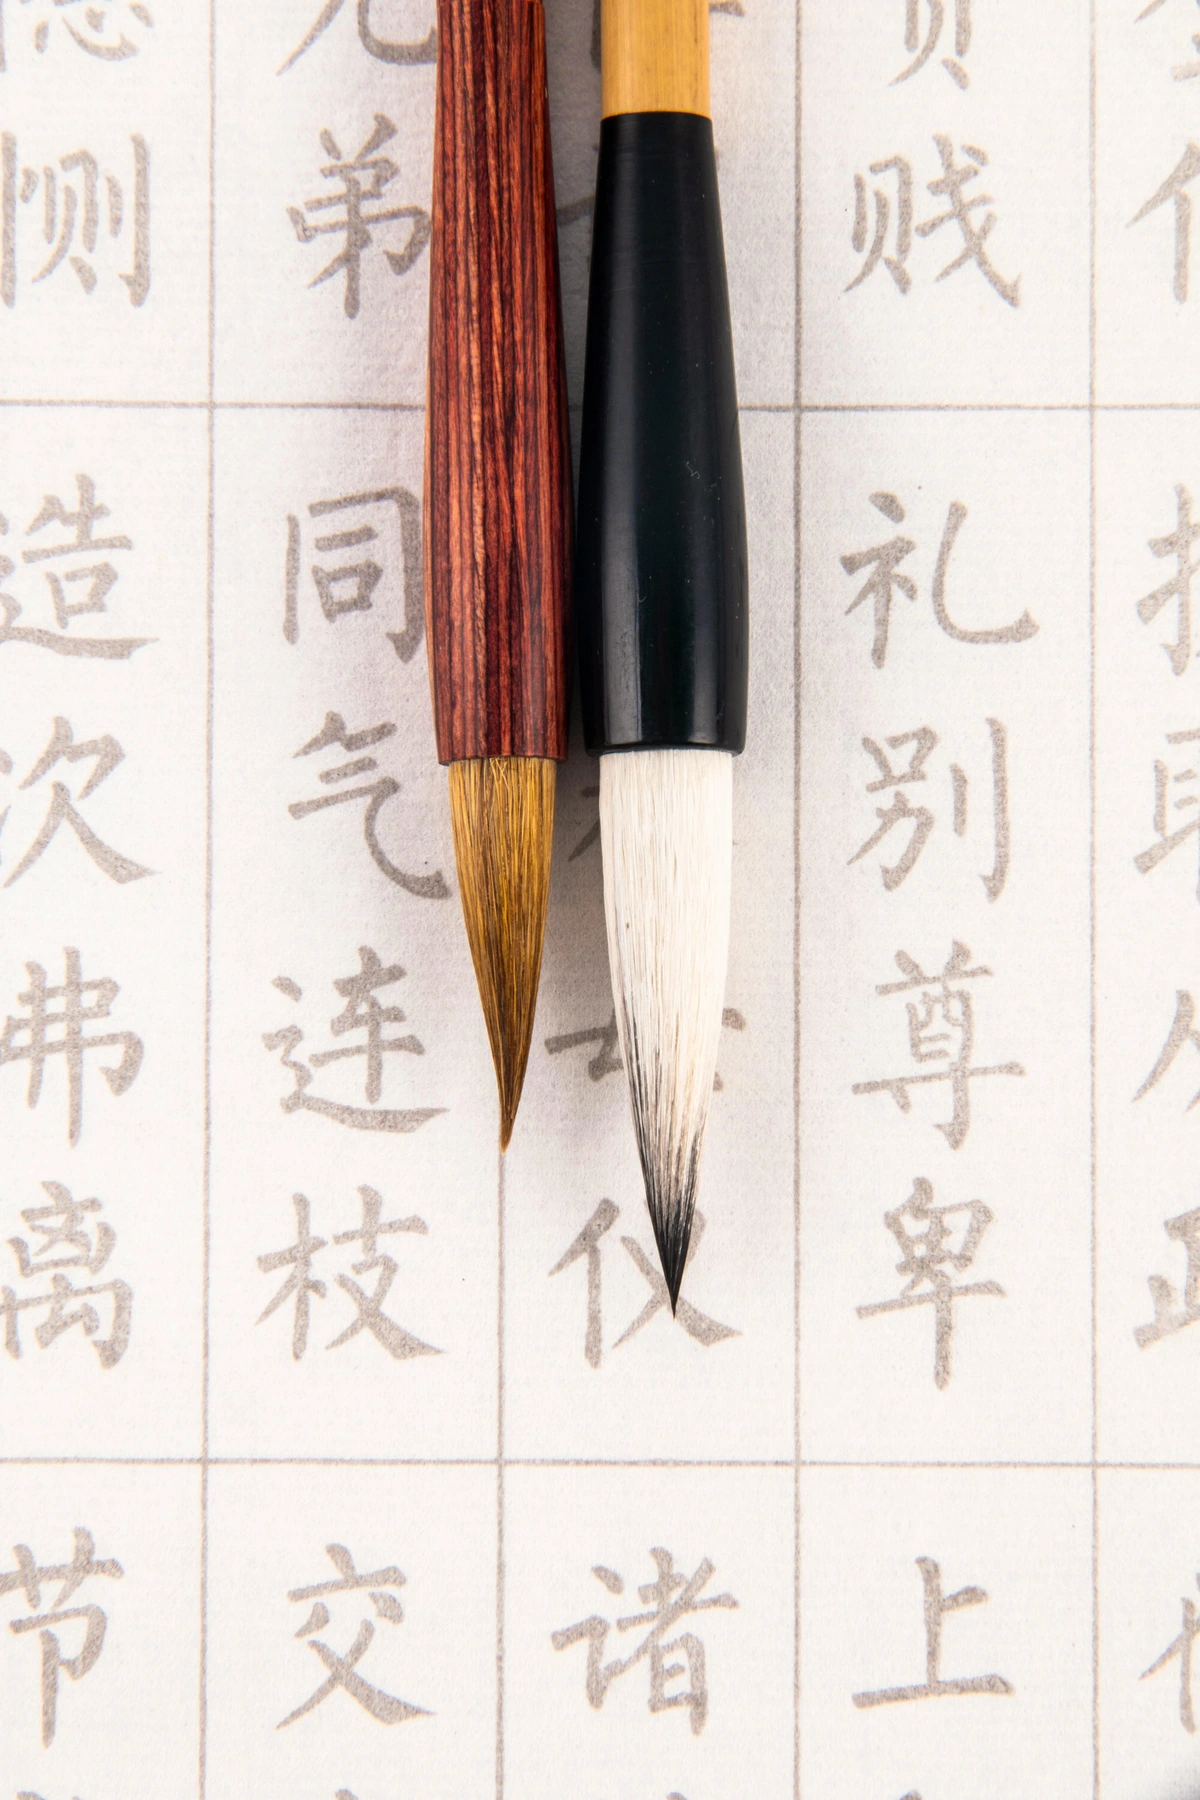
- Rounds: When I need to draw, outline, or add fine details, a good round brush is utterly indispensable. They taper to a beautiful point, allowing for expressive lines (like a precise calligraphic stroke), intricate work, and even applying thin washes of paint or blending small, precise areas. They can also create soft, broken marks for texture if used lightly, making them versatile for everything from detailed portraits to delicate landscape elements. They're like the pen of the painting world, offering immense versatility from drawing to subtle shading.
- Filberts: Ah, the filbert! If I had to pick just one brush shape to have with me on a deserted island (assuming I had paint, canvas, and an easel, of course), it would probably be a filbert. With its flat base and gently rounded tip, it truly offers the best of both worlds. It can apply broad strokes much like a flat, but its rounded edge prevents harsh lines, making it perfect for creating softer, blended transitions and sculpting organic forms seamlessly. It's my everyday hero for blending and shaping, especially for figurative work, softening edges in landscapes, or creating nuanced curves – it allows for painterly strokes without the hard edges a flat might leave, making it incredibly adaptable to the creamy consistency of oil paint.
- Fans: These unique brushes, with their splayed bristles, are fantastic for softening edges, subtly blending colours (think gentle gradients), or creating ethereal textures like wisps of smoke, grass, hair, or even stippled foliage. They don't hold much paint, but their shape makes them ideal for delicate manipulation of wet paint on the surface, offering a gentle, almost atmospheric touch. They are the whisper of your brush arsenal, perfect for delicate scumbling techniques or creating misty effects.
- Riggers / Liners: When you need those super long, consistent, delicate lines – think tiny branches, intricate patterns, or perhaps a confident signature (like you might see on my own art) – a rigger or liner brush is your absolute best friend. They have exceptionally long, thin bristles that hold a surprising amount of thinned paint, allowing for uninterrupted lines akin to a fine ink pen stroke. They are also excellent for creating subtle gradations in line weight for organic forms like fine roots or veins, where a slight pressure change can add a nuanced taper. They demand a steady hand but offer unparalleled precision for linear detail.
- Angle Shaders (or Angled Flats): These are like a secret weapon for precise control. With their angled tip, they're fantastic for sharp edges, crisp lines, and for reaching into tight corners. They're also brilliant for blending in a controlled way, allowing you to feather paint with precision and create clean, diagonal marks. For architectural elements, geometric abstraction, or cutting in specific areas, they are indispensable. Their unique shape offers both broad coverage and fine-line capability, depending on the angle.
- Dagger Strippers: A less common but incredibly versatile brush for expressive mark-making, distinct from the angle shader due to its longer, more dramatic taper. Their long, tapered, and angled shape allows for a huge range of marks, from fine, hair-like lines to broad, organic, leaf-like or petal-like shapes, all depending on the pressure and angle of the wrist. Great for creating gestural, calligraphic marks that vary in thickness, or for feathering effects and soft transitions where precision is still key. They can feel like drawing with paint, but with a surprising breadth of control, allowing for unique linear textures and dynamic, sweeping strokes that might be harder to achieve with a regular angle shader.
Here's a quick rundown of their primary uses, the shapes I find myself reaching for most often:
Brush Shape | Characteristics | Primary Uses for Oil Painting | When I Reach for It |
|---|---|---|---|
| Flat | Long, square-ended bristles, can be stiff or soft | Blocking in large areas, creating strong lines and sharp edges, impasto building, broad washes. Offers more flow and a longer stroke. | Early stages of a painting, bold geometric shapes, crisp architectural elements, pushing heavy paint, covering canvas quickly. |
| Bright | Shorter, square-ended, typically stiffer than a flat | Controlled impasto, short and punchy strokes, precise blending, working alla prima painting, sgraffito. Ideal for sculpting defined forms. | Sculpting defined forms with heavy paint, robust application, controlled blending of thick paint, scratching into wet layers, creating energetic textures. |
| Round | Tapered bristles to a fine point | Details, outlining, expressive lines, washes, sketching with paint. Excellent for intricate work and fine control. | Fine details (eyes, small elements), calligraphic marks, drawing with thinned paint, small blending, precise hatching, creating delicate forms. |
| Filbert | Flat base with a rounded tip, offering versatility. Prevents harsh lines. | Blending, softening edges, sculpting forms, seamless transitions, creating curved strokes. My ultimate all-rounder. | Almost always! My everyday hero for subtle blends, sculpting organic forms, softening hard edges, creating painterly forms, and adapting to various paint consistencies. |
| Fan | Flat, splayed bristles, delicate, does not hold much paint | Softening edges, subtle blending, creating textures (grass, hair, clouds), scumbling. Adds atmospheric touch. | Delicate transitions, atmospheric effects, light textural details, softening harsh lines, creating misty or wispy effects, especially for foliage. |
| Rigger / Liner | Very long, thin bristles, comes to a fine point, holds thinned paint well | Very fine, long, consistent lines, intricate details, signatures (/buy), subtle line gradations, tiny details. Unparalleled precision for linear work. | Adding final delicate touches like hair strands, fine branches, signing my finished work, creating delicate organic lines, fine lettering, spiderwebs. |
| Angle Shader | Flat, angled tip | Precise edges, sharp lines, controlled blending, working into corners. Versatile for both linear and blending tasks. | Architectural details, sharp transitions, feathering effects, reaching into tight areas, controlled linear blending, defining specific planes. |
| Dagger Stripper | Long, tapered, angled shape, allows for varied line thickness and sweeping gestures. | Expressive lines, organic shapes, calligraphic strokes, varying line thickness, feathering, unique textural marks. Offers great dynamic range from a single brush. | Unique textural marks (grass, foliage, flowing fabrics), gestural lines, creating soft, graduated transitions, drawing with paint with varied pressure for dynamic effects. |
Brush Sizes: It's Not Just About Detail – Mastering Scale in Your Painting
One thing I learned early on, often the hard way, is that artists – especially beginners – tend to instinctively gravitate towards small brushes. And while fine detail is undoubtedly important, please, please, don't shy away from larger brushes! They are transformative. They force you to think about broader strokes, larger masses, and the overall composition of your piece before you get lost in the tiny details. As I've heard it said, and I completely agree, you should try to paint your entire piece with a brush that feels "too big" for as long as possible, and only then reach for the smaller ones. It’s counter-intuitive, but it works wonders. This approach prevents you from getting bogged down in minutiae too early, which can quickly make a painting feel tight and overworked. It forces a bolder, more confident approach from the outset.

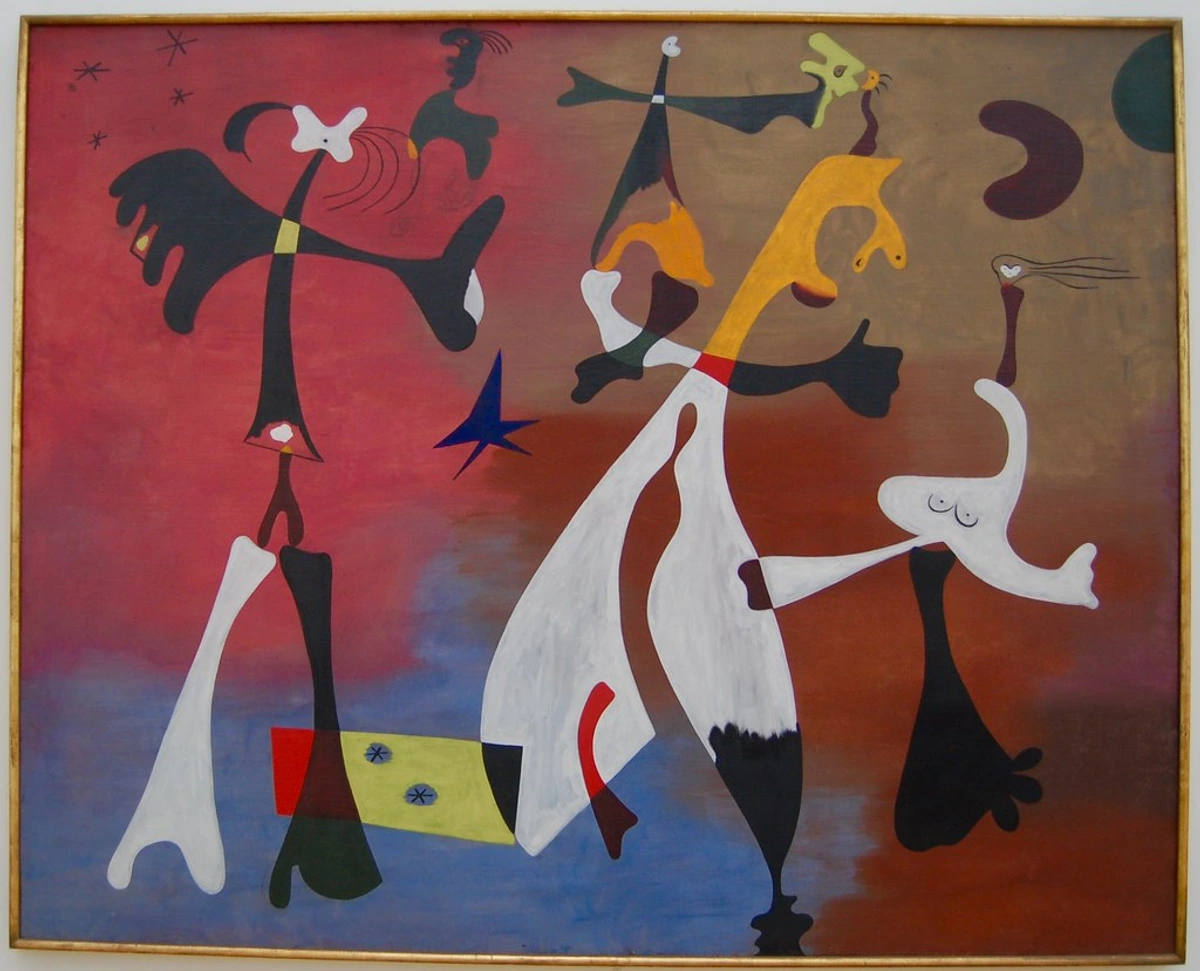
For my abstract art, starting big is absolutely crucial for laying down those foundational layers and vibrant colours – it's about establishing the bones of the painting. Remember too, that a brush's shape also dictates its effective size; a large round will make a very different mark than a large flat, even if they have the same numerical size. And don't forget the weight and balance of a larger brush; a well-balanced, albeit large, brush can feel surprisingly nimble in your hand, offering control that belies its size and reducing fatigue during long sessions. It becomes an extension of your arm, not just your wrist.
Brush sizes are typically indicated by numbers stamped on the handle, usually ranging from 000 (or even smaller) up to 12, 20, or even higher for very large brushes. It's important to remember that these numbers aren't universally standardized across brands, so a "size 8" from one manufacturer might be significantly different from another's "size 8." Always check a brand's specific size chart or, even better, feel the brush in person if you can. However, the general principle remains: higher numbers mean larger brushes. Don't limit yourself; a good range of sizes, from a chunky size 12 flat for blocking in to a delicate size 0 round for intricate work, will give you incredible freedom and control over your canvas. After all, you can learn more about different paint types and essential oil painting supplies to truly complement your brush choices.
My Go-To Recommendations: Starting Your Collection and Expanding Your Arsenal
If you're just starting out, or looking to refresh your kit, I cannot stress this enough: invest in a small, curated collection of quality brushes rather than a huge set of mediocre ones. A few quality pieces will serve you infinitely better in the long run, feeling more responsive and lasting longer with proper care. Look for brushes from reputable art supply manufacturers; often, a solid ferrule (the metal part) that doesn't wiggle or rust, bristles with excellent snap (that lovely spring back), and a balanced handle are indicators of better craftsmanship. The history of brush making, from early natural hair bundles to today's engineered synthetics, is a testament to the continuous pursuit of better tools – so trust in good craftsmanship. A good brush is truly an investment in your artistic journey, much like a quality canvas is. It's about empowering your hand with tools that respond to your artistic will.
For Beginners: Your Essential Starter Kit for Oil Painting
When you're taking your first steps into oil painting, keeping it simple and effective is key. I'd recommend a foundational trio that offers maximum versatility without overwhelming you. These are often labelled "for oil/acrylic" for their durability and versatility – perfect for learning the ropes and exploring various oil painting techniques:
- A medium-sized synthetic flat (around size 8-10): Excellent for blocking in shapes, applying color broadly, and creating crisp edges. This will be your workhorse for initial layers and bold statements, allowing for confident, expansive strokes. Its versatility is unmatched for foundational work.
- A medium synthetic filbert (size 6-8): Your blending hero, perfect for softening edges, sculpting forms, and achieving smooth transitions. This brush truly excels at making paint feel alive and handling the creamy consistency of oil paint, making it a dream for organic forms and seamless painterly effects. If you're only going to have one brush, this is often it for me.
- A small synthetic round (size 2-4): Indispensable for details, fine lines, and expressive marks. For those intricate touches and controlled drawing with paint, or signing your work. It's like a finely tuned pencil for your canvas, offering precision when it matters most.
This trinity of quality synthetic brushes will get you through most initial tasks and help you discover what you enjoy painting without breaking the bank. It's a fantastic, cruelty-free way to build confidence and explore your early style, serving as an excellent foundation for your artistic journey.
My Personal Must-Haves: Expanding Beyond the Basics
Once you've found your rhythm and are ready to expand, these are the brushes I simply can't do without. They cover the full spectrum of my artistic needs and feel like true extensions of my vision – the ones I'd grab first in a studio fire, probably:

- A large (size 12+) hog bristle flat or bright: For powerful blocking in, establishing bold texture, textural underpaintings, and moving serious amounts of paint. It's the brute force you sometimes need, especially for big canvases or initial underpaintings. The sheer joy of pushing thick paint around with one of these for scumbling techniques is unmatched. It truly feels like sculpting with paint, laying down substantial foundations.
- A high-quality synthetic filbert (size 8-10): My ultimate workhorse for almost everything. It’s the perfect all-around brush for versatility, seamless blending, and general paint application. I probably own several of these in varying sizes because I simply rely on them that much! Its ability to adapt to different paint consistencies and create those soft, organic edges is key to my style and allows for endless expressive possibilities.
- A fine rigger or liner (size 00-1): For those crucial delicate details, intricate fine lines, subtle line gradations in organic forms, and of course, adding my distinctive signature (come see my latest art to spot it!). It allows for a level of control and precision that no other brush can match for fine linear work, bringing tiny elements to life.
- A soft synthetic fan brush: Invaluable for subtle blending, softening transitions, and creating atmospheric effects or delicate textures like foliage or soft clouds. It offers a wonderfully light touch and is fantastic for gentle scumbling or softening harsh edges without removing too much paint. It's the brush that brings an ethereal, almost poetic quality to a painting.
- A small angle shader (size 4-6): For incredibly precise edges, crisp lines, and for getting into tight spots with absolute control. It's fantastic for architectural elements or sharp shifts in form, allowing you to feather paint with remarkable accuracy, making it a secret weapon for precision and controlled linear work.
Remember, this journey is deeply personal. What feels absolutely right for me might not be your perfect fit, and that's the beauty of it. It's all about experimentation, listening to how the tools respond in your hand, and ultimately finding your companions for the canvas. Don't be afraid to try new combinations and break conventions; that's where true brush-magic often happens.
Caring for Your Creative Companions: Longevity is Key to Happy Brushes
Your oil painting brushes are an investment, and with proper care, they can last for years, even decades. Seriously! But by "proper care," I mean a consistent, respectful routine. The biggest cardinal sin, which I admit I've committed more times than I care to count in my early, impatient days, is leaving brushes soaking in solvent overnight. Please, don't do this! It's a guaranteed way to ruin the bristles, making them splay and lose their spring, and it can also weaken the glue holding the bristles in the ferrule, causing them to eventually fall out. This ferrule-glue compromise is insidious, leading to wobbly heads and stray bristles – a true nightmare that once ruined a crucial detail on a commission. Another crucial tip: consider investing in a brush case or roll for storage to protect bristles and maintain their shape when not in use. You wouldn't leave a valuable tool lying around, would you?

My cleaning ritual, refined over many years, goes something like this:
Step 1: Wipe Excess Paint
Immediately after painting, use an old rag or paper towel to wipe off as much paint as possible from the bristles. This reduces the amount of solvent you'll need and makes subsequent steps much easier. Don't underestimate this simple step; it's your first line of defense against stubborn, dried paint and prevents pigment from working its way too deep into the ferrule, where it can cause lasting damage.
Step 2: Solvent Wash
Swish the brush in a jar of odourless mineral spirits (OMS) or turpentine. I usually have two jars: one for the initial, dirtier wash (to get the bulk of the paint off) and a second for a cleaner rinse. Remember to gently press the bristles against the bottom of the jar to work the solvent into the base of the ferrule. While both OMS and turpentine are effective, I generally prefer OMS as it's less harsh on natural bristles and the glue within the ferrule. Turpentine can be more aggressive and, in my experience, can dry out natural hairs more quickly if not followed by a good soap wash. If you encounter dried paint near the ferrule, a specialized brush cleaner fluid can sometimes help, but prevention is always best! Just remember: never leave brushes soaking in solvent, especially bristles-down, as this can bend them and weaken the ferrule glue over time. Consider a brush cleaning jar with a coil or screen to aid this process.
Step 3: Soap & Water: The Crucial Deep Clean
This is the step many skip, but it's vital. Even if the brush looks clean after solvent, tiny paint particles remain. Use a good artist's brush soap (there are many excellent ones out there, or even a gentle hand soap will do in a pinch) and lather the bristles thoroughly in your palm. Work the soap into the brush until all traces of paint are gone. Rinse thoroughly under lukewarm water, shaping the bristles back to their original form as you go. Repeat until absolutely no colour comes out of the brush. You want the water running clear. This is where you truly remove the pigment that can stiffen and damage bristles over time, and it helps condition natural hairs. For sable brushes, this step is non-negotiable for maintaining their suppleness.
Step 4: Dry & Store
Gently squeeze out any excess water, reshape the bristles to their original point or flat edge, and then lay them flat on a clean, absorbent surface or store them bristles-up in a container that allows air circulation. Crucially, never store them bristles-down (as this will bend and splay them), and don't let them dry standing bristles-up in a jar with water still in the ferrule, as that water can seep into the ferrule and loosen the glue due to swelling and contracting of the wood handle. For natural brushes, especially sable, I sometimes work a tiny amount of brush conditioning oil (like linseed oil, wiped almost dry) into the bristles after washing. This helps maintain their suppleness and prevents them from becoming brittle over time. The satisfaction of a perfectly clean, reshaped brush awaiting its next session is truly unmatched; it's a testament to good stewardship of your tools and an investment in your future art.
This simple, yet consistent, routine has saved countless brushes from an early demise. It's a small investment of time at the end of a painting session that pays off hugely in brush longevity and performance, allowing your favorite tools to be with you for years to come. I've even had brushes last for decades – true companions on my artistic journey, bearing the marks of countless creative battles.

Frequently Asked Questions About Oil Painting Brushes
I get a lot of questions about brushes, and it's understandable – there's a lot to navigate! Here are some of the common ones I hear, aiming to give you practical, authoritative answers rooted in my own experiences:

How many oil painting brushes do I really need to start?
Ah, the classic beginner's dilemma! I remember feeling overwhelmed by choice. You honestly don't need many to begin! My strong recommendation would be a good quality set of 3-5 versatile synthetic brushes: a medium flat (size 8-10), a medium filbert (size 6-8), a small round (size 2-4), and perhaps a small bright (size 4-6) if you want a bit more stiffness for direct application. This selection gives you enough range to explore different techniques without overwhelming you or breaking the bank. Remember, quality over quantity! You can always expand later once you discover your personal preferences and find your artistic voice. Focus on learning to manipulate paint with a few good tools, rather than collecting many mediocre ones.
Can I use my acrylic brushes for oil painting (and vice versa)?
In short: I strongly advise against it. It's generally not recommended for several critical reasons. Acrylics dry quickly and are water-based, so brushes designed for them tend to be softer and less resilient than what you need for the thicker, often stickier, oil-based paints and their solvents. Using acrylic brushes for oil painting can quickly ruin them due to the solvents (which can degrade the bristles and weaken the ferrule glue) and the heavier paint, leading to splaying and loss of snap. Conversely, using oil brushes for acrylics isn't ideal either; cleaning them with water alone won't remove all the oil residue, potentially affecting your acrylic work by introducing oily contaminants and even causing your acrylics to lift or appear patchy. It's best to have separate, dedicated sets for each medium to preserve their integrity and performance, saving you frustration and money in the long run. My advice: keep them strictly segregated! Your art (and your wallet) will thank you.

When should I replace an oil painting brush?
That's a good question, and it's a balance between usability and sentimentality! You'll know it's time to retire or repurpose a brush when the bristles permanently lose their spring and "snap" (meaning they stay bent and don't return to shape), become excessively splayed (even after proper cleaning and reshaping), or when the ferrule becomes loose and wobbly, allowing water or solvent to seep in and compromise its integrity. A good brush should always return to its original shape when wet and respond precisely to your hand. If it's just a little worn, I often repurpose it for textural effects, mixing mediums, or for rougher applications rather than completely throwing it out. There's always a use for an old friend, even if it's not for a pristine stroke! Sometimes, a worn-out brush can create unexpected, beautiful textures that a new one can't.
What's the main difference between a "bright" and a "flat" brush?
Both are flat, square-ended brushes, and can look quite similar at first glance. The key difference lies in bristle length and, consequently, their stiffness and drag. A flat brush has longer bristles, which gives it more flexibility and allows for a longer, smoother stroke with a slightly softer touch. It's like a long, flexible paddle, excellent for broad, even coverage. A bright brush, conversely, has shorter bristles, making it stiffer and more robust. This stiffness makes it super effective for controlled, punchy strokes, especially with thick paint, or for precise, sculptural applications like those you might find in alla prima painting or for creating sgraffito effects. Think of the bright as the workhorse for heavier, more direct application, and the flat for smoother, broader coverage. It's all about how much give you want in your stroke and the kind of tactile feedback you're seeking from the canvas.

Are expensive brushes always better for oil painting?
Not always, but there's definitely a strong correlation between price and quality, especially up to a certain point. More expensive brushes often utilize higher-grade bristles (whether natural hair or advanced synthetic filaments), feature better-constructed ferrules (less likely to rust or loosen over time), and are built with well-balanced handles for ergonomic comfort. They tend to hold their shape better, last significantly longer with proper care, and feel more responsive and precise in your hand. Ultimately, superior materials and craftsmanship directly translate to better long-term performance and a more satisfying painting experience. However, a mid-range quality brush from a reputable art supply brand can be perfectly excellent for most artists. It's about finding the best value for your needs, your budget, and your desired feel – don't feel pressured to buy the most expensive ones right away; focus on quality within your budget. Sometimes a humble workhorse is all you need, and sometimes a splurge is absolutely worth it for that special tool.
Should I choose natural or synthetic brushes as a beginner?
I generally recommend beginners start with good quality synthetic brushes. They are more durable, significantly easier to clean (a huge bonus when you're still getting the hang of things and solvents!), more affordable, and incredibly versatile, often mimicking the best qualities of both hog bristle and sable without the demanding care. This allows you to experiment with different effects without the higher investment or specific care demands of natural hair, particularly sable. Once you understand your style and preferences, and you're ready for that extra layer of specific feel, you can then selectively add natural brushes to your collection. Think of synthetics as your incredibly forgiving training partners, allowing you to focus on technique without worrying too much about your tools.
What's the deal with long vs. short handles on oil painting brushes?
This is all about control and distance! Long-handled brushes are traditionally used for easel painting, encouraging you to step back from the canvas and paint with broader, more gestural strokes from the shoulder, allowing you to see the overall composition. It's about maintaining perspective and letting your arm, not just your wrist, do the work. Short-handled brushes are typically preferred for closer work, like tabletop painting or detailed studies, giving you more precise control from the wrist or fingers for intricate work. Ultimately, it comes down to your working style and what feels most comfortable for the type of painting you're doing, and even the size of your canvas. I find a mix is always useful; sometimes you need to get up close and personal, other times you need to step back and survey the battlefield of your canvas. It's about matching the tool's ergonomics to the scale of your artistic ambition.
How do I break in new oil painting brushes?
Good question! While natural brushes (especially hog bristle) might need a little conditioning to soften and improve paint-holding, high-quality synthetic brushes are generally ready to go. For any new brush, I recommend giving it a quick wash with mild soap and lukewarm water, then rinsing and reshaping it before its first use. This helps remove any manufacturing residue or stray bristles that might have been left over. For natural brushes, gently working a tiny amount of brush conditioning oil (like linseed oil, wiped almost dry) into the bristles after washing and rinsing can help them become more supple and ready to hold paint beautifully. Just be sure to remove almost all the oil before it touches your actual painting, or it could affect your paint adhesion! A clean, well-conditioned brush is a happy brush.
Are there truly "vegan" or "animal-free" brush options for oil painting?
Yes, absolutely! This is an area where modern synthetic brushes truly shine. High-quality synthetic brushes are specifically designed to replicate the performance of natural hair without using any animal products, making them the primary and excellent cruelty-free alternative. Many brands now offer comprehensive ranges of synthetic brushes engineered for various paint consistencies and effects, so you can easily build an entire arsenal of brushes that align with ethical considerations without compromising on your artistic performance. As I mentioned, some synthetic sable brushes are virtually indistinguishable in performance from genuine sable, delivering that buttery smooth application without compromise. You don't have to choose between your values and your art anymore – it's a wonderful evolution in art supplies.
Conclusion: Your Brushes, Your Voice, Your Uncharted Artistic Journey
Choosing the "best" brushes for oil painting isn't a destination; it's a deeply personal journey, full of experimentation, delightful discoveries, and sometimes, a few happy accidents. I remember one time a splayed old fan brush, which I almost threw out, ended up creating the most unexpected, ethereal cloud texture in an abstract landscape – a true breakthrough that taught me to never fully discard an "imperfect" tool! It's about finding those extensions of your hand that truly resonate with your style, your intentions, and the unique marks you want to make on the canvas. Don't be afraid to try new things, to deviate from convention, and most importantly, to listen to what your brushes tell you through their feel and response. They are the conduits through which your internal vision becomes an external reality, shaping not just your artwork, but your artistic identity itself.

Remember, every stroke, every decision, every brush you pick up is a part of your unique artistic voice. Equip yourself wisely, care for your tools, and then let go. Go forth, experiment without fear, and make some truly beautiful, expressive art. And when you're done creating, if you're ever looking for a different kind of inspiration or perhaps even a piece that speaks to your soul, feel free to explore my own contemporary and abstract art here on the site. Happy painting – may your brushes always sing! They are, after all, the silent partners in your creative dance.


