Alla Prima Painting: Master Wet-on-Wet Techniques for Vibrant Art
Unlock the secrets of alla prima painting through a personal journey. Master wet-on-wet techniques, conquer mud, explore historical insights, and create vibrant, expressive art with confidence and speed.
Alla Prima: My Journey into the Heart of Wet-on-Wet Painting Techniques
I remember the exact moment alla prima truly clicked for me. It wasn’t a lightning bolt in a grand gallery, but a quiet, almost stubborn wrestle with a canvas in my own studio. Suddenly, the resistance I felt towards waiting for paint to dry—the endless days between layers—melted away. Instead, I found myself drawn into the exhilarating immediacy of alla prima. It’s an Italian phrase, literally meaning "at first attempt," but honestly, it’s so much more than just a quick try. Alla prima is this incredible painting method where you keep laying wet paint directly onto previous wet layers. We often call it "wet-on-wet painting," and it’s defined by its absolute directness and urgency. The aim, often, is to complete a significant portion, or even the entirety, of the painting in a single session, before the paint has a chance to dry. Think of it as a creative sprint, rather than a marathon.
This is a wild contrast to the traditional layered approaches I grew up with, which demand what feels like an eternity of waiting for each layer to dry—days, even weeks, sometimes. Alla prima? It's about being present, observing acutely, and then having the guts to just go for it. You've got to make quick, confident decisions about color, value, and the direction and force of your brushstrokes, because once that wet paint is down, the flexibility for endless tweaking pretty much vanishes, making the paint behave like stubborn, uncooperative clay if you try to force it. What you get from this approach, though, is often this unbelievably fresh, vibrant look, full of visible brushstrokes that just sing with the artist's spontaneous dance with the paint. It’s messy, it’s immediate, and frankly, I love it. The inherent directness of the technique means you're building form and color simultaneously, rather than in stages, and the speed it often demands is a thrilling consequence of this directness.
A Stroll Through History: The Roots of Direct Painting
To truly appreciate alla prima, it helps to see its echoes in the past, even in the work of artists known for more traditional methods. If we’re tracing this thread back through time, we can’t skip over some of the unsung heroes of direct application from the Dutch Golden Age. While artists like Rembrandt van Rijn and Peter Paul Rubens might be known for their masterful layering and glazing, they often employed direct, wet-on-wet passages for specific, impactful effects. Back then, pigments were often ground by hand, and mediums like linseed oil were carefully chosen to control drying times. This meticulous approach allowed masters like Rembrandt to incorporate wet-on-wet passages with stunning control, knowing exactly how their carefully prepared paints would behave. For Rembrandt, a confident, fresh stroke could capture the shimmer of light on velvet or the fleeting emotion in a sitter's eyes, conveying a tactile quality that patient glazes might soften. Rubens, too, would use direct applications to suggest the texture of flesh or fabric with an almost sculptural immediacy, often visible in details of his grand compositions. It wasn't about completing the whole piece alla prima, but rather harnessing its power for intense moments.
When I look at portraits by Frans Hals or Diego Velázquez, I see these early masters practically wringing character and form out of their canvases with dynamic, fluid brushwork, almost as if they couldn't wait for the paint to dry. Hals's energetic, almost improvised strokes, particularly in his famous Laughing Cavalier or Regents of the Old Men's Almshouse, are a masterclass in controlled spontaneity. He wasn’t just painting; he was capturing a moment, an essence, with a fearless directness. And Velázquez? His masterful way of capturing light and shadow, often through the dramatic use of chiaroscuro – that interplay of strong light and dark – with fresh paint applications, really set the stage for what we now understand as alla prima. He wasn't just putting paint down; he was sculpting light directly onto the canvas, achieving luminous depths and striking contrasts that are difficult to replicate with multiple dried layers, especially on his carefully prepared canvases that often had a slightly absorbent ground to aid paint manipulation. It feels impossibly immediate when you examine his canvases, like in Las Meninas where individual brushstrokes coalesce into stunning realism from a distance.
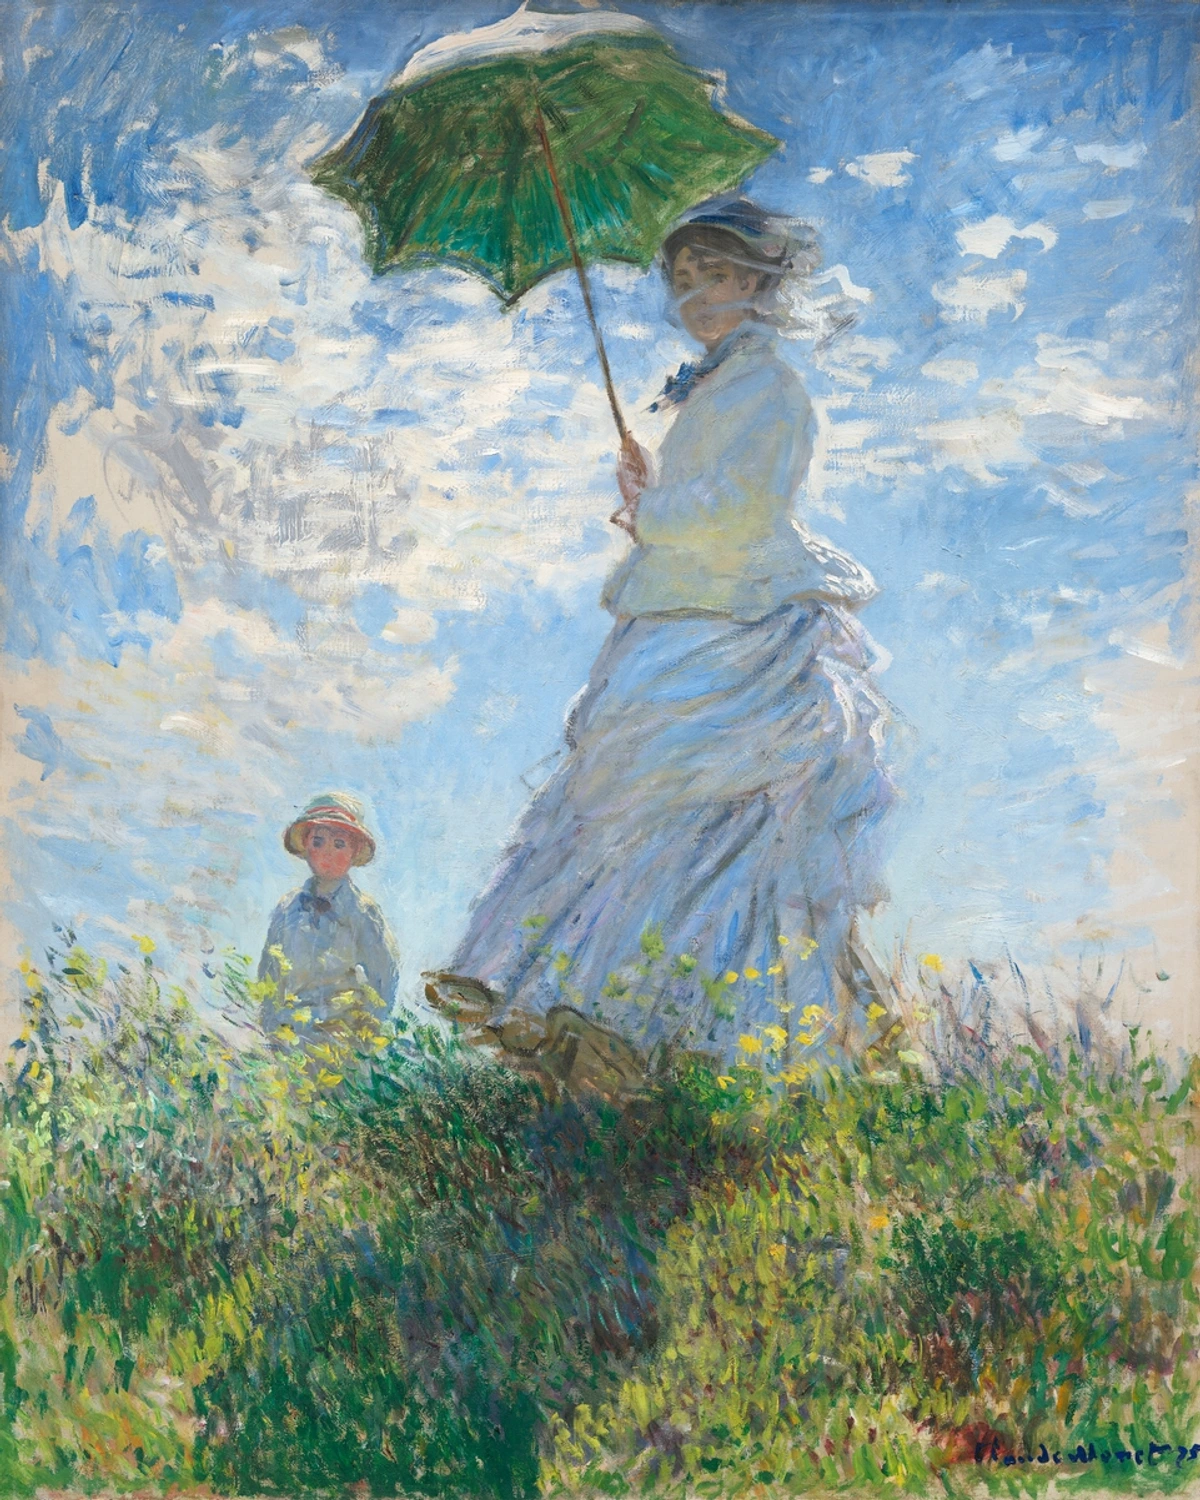
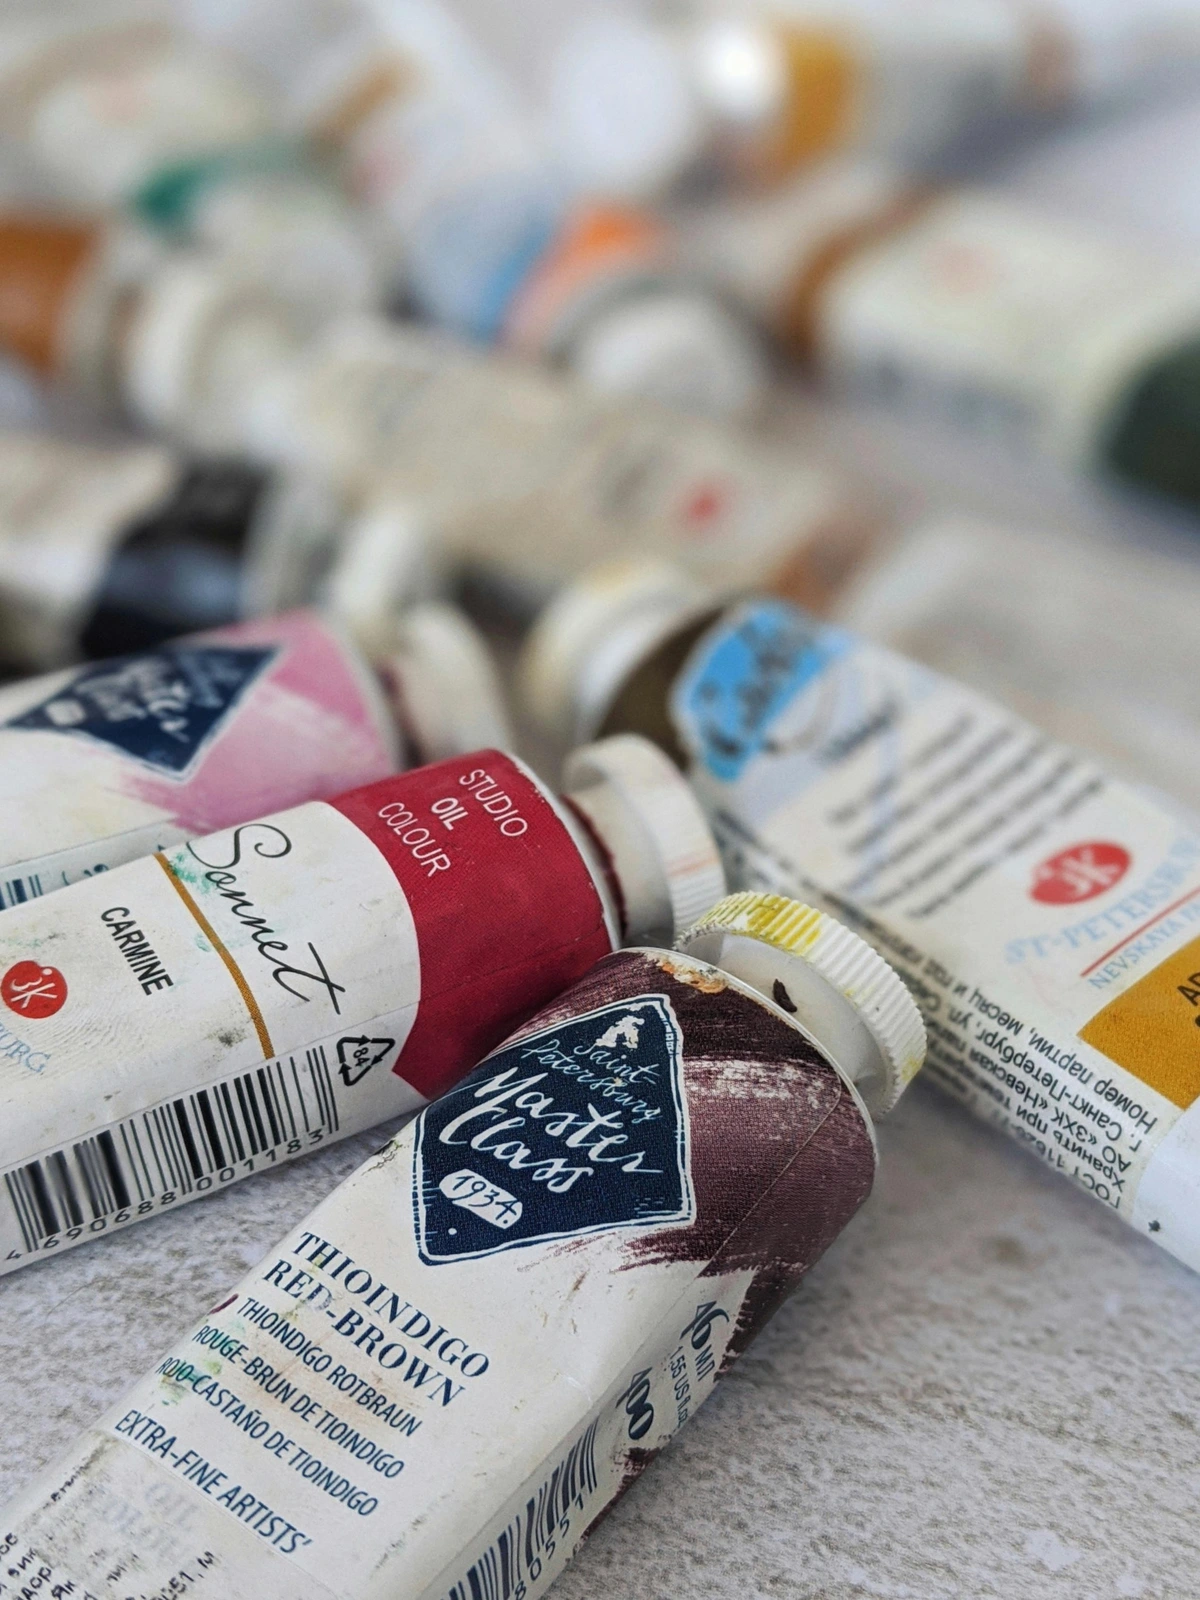
But if we're talking about true champions of the rapid, direct method, we've got to point to the Impressionists of the 19th century. Their big idea—to really nail down the fleeting qualities of light and atmosphere—demanded speed and an almost instant reaction to whatever they were seeing. Artists like Claude Monet, Pierre-Auguste Renoir, and Camille Pissarro famously worked en plein air (that’s painting outdoors, in case you were wondering), often wrapping up entire canvases in a single session to catch those constantly shifting light conditions. Can you imagine trying to capture that momentary sparkle with the patience of a saint and the drying times of molasses? This focus on the momentary, rather than some painstakingly polished finish, perfectly embodies the alla prima spirit. And honestly, it wouldn't have been quite so practical without the advent of portable paint tubes and, crucially, the development of new, more stable pigments that dried at a reasonable pace. Think of the revolutionary impact of pre-packaged tubes and advanced pigment chemistries like vibrant cobalt blues or luminous cadmium yellows; these innovations freed artists from the tedious task of grinding and mixing colors on site, allowing them to truly chase the light and experiment with direct applications and impasto that older, less stable pigments often couldn't support. This period marked a real turning point, making alla prima a truly viable and widespread approach.
Then there's John Singer Sargent, a giant in the world of direct painting. His portraits are just dazzling, and his landscapes practically glow. Sargent was a true virtuoso of alla prima; he built form and infused his subjects with light using these incredibly confident, expressive brushstrokes, often leaving his initial marks right there for all to see. He wasn't afraid to let the paint be paint, letting visible strokes convey texture and movement. The energy and presence he brought to his sitters and scenes using this technique are just remarkable, as seen in works like Madame X or The Daughters of Edward Darley Boit, where every stroke feels both deliberate and utterly spontaneous, an orchestration of marks that somehow come alive, capturing the very essence of the moment. This rich tapestry of history, woven with bold brushstrokes and daring decisions, provides the perfect context for understanding how I, and perhaps you too, can harness the power of alla prima in our own studios today.
Let's Get Our Hands Dirty: My Alla Prima Process and What I've Learned
While these masters demonstrated the sheer power of alla prima, understanding how to implement it in your own studio requires a deep dive into the practicalities – and believe me, I've had my share of practical (and messy) lessons. Mastering alla prima, at least in my experience, isn't just about throwing paint around. It's a nuanced dance of technical skill, quick decisions, and a real understanding of your materials. Let me walk you through how I approach it, and some of the things I've picked up along the way, often through trial-and-error (mostly error, if I'm being honest).
Preparation and Foundational Steps: The Quiet Before the Storm
Despite how spontaneous alla prima seems, my most successful attempts almost always start with some careful prep. I mean, who shows up to a dance without knowing at least the first few steps? I generally like to have a super clear idea in my head, a mental blueprint if you will. This isn't about rigid adherence, but about having a roadmap to confidently veer from.
- Conceptualization & Underdrawing: Sometimes it’s just a simplified underdrawing or a toned canvas to give me some compositional anchors and initial value relationships. This helps me avoid the dreaded "blank canvas paralysis" and serves as a silent conversation starter with my subject. I'm essentially sketching out the main players before the paint party begins.
- Value Studies: The Scaffolding: I often do quick value studies in charcoal or monochromatic paint to really understand the light and shadow patterns before even thinking about color. It's like a mental warm-up, getting my mind ready for the decisive strokes ahead. This also helps me protect those crucial light areas later, knowing precisely where the darkest darks and lightest lights will live, providing the necessary scaffolding for the entire piece.
- Fresh Perspective: My Secret Reset Button: And here’s a little trick: I often keep a small mirror nearby. Flipping my canvas into a mirror gives me a fresh perspective, making it easier to spot compositional errors or areas where values are off—something crucial when you’re working against the clock. It’s like hitting a mental reset button, allowing me to see the painting with fresh eyes before I'm too deep to easily course-correct.
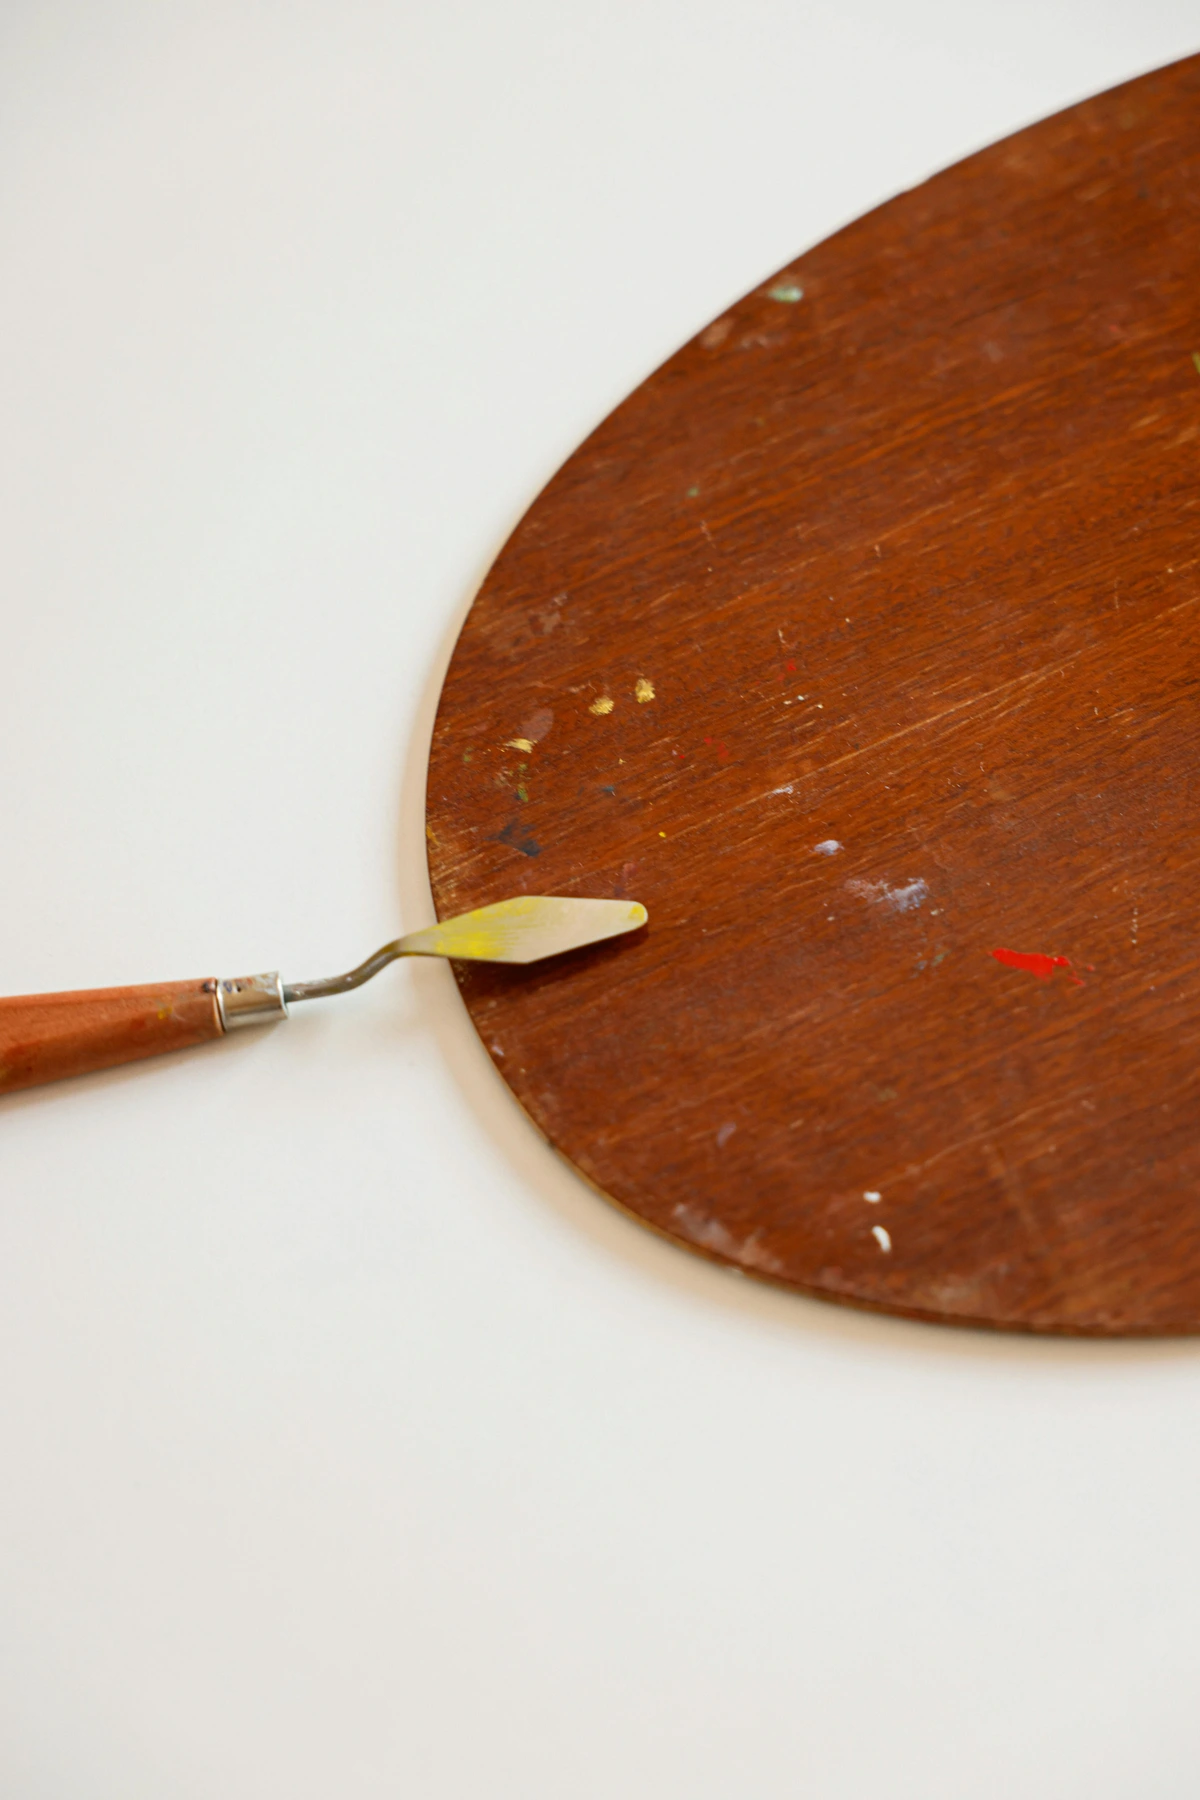
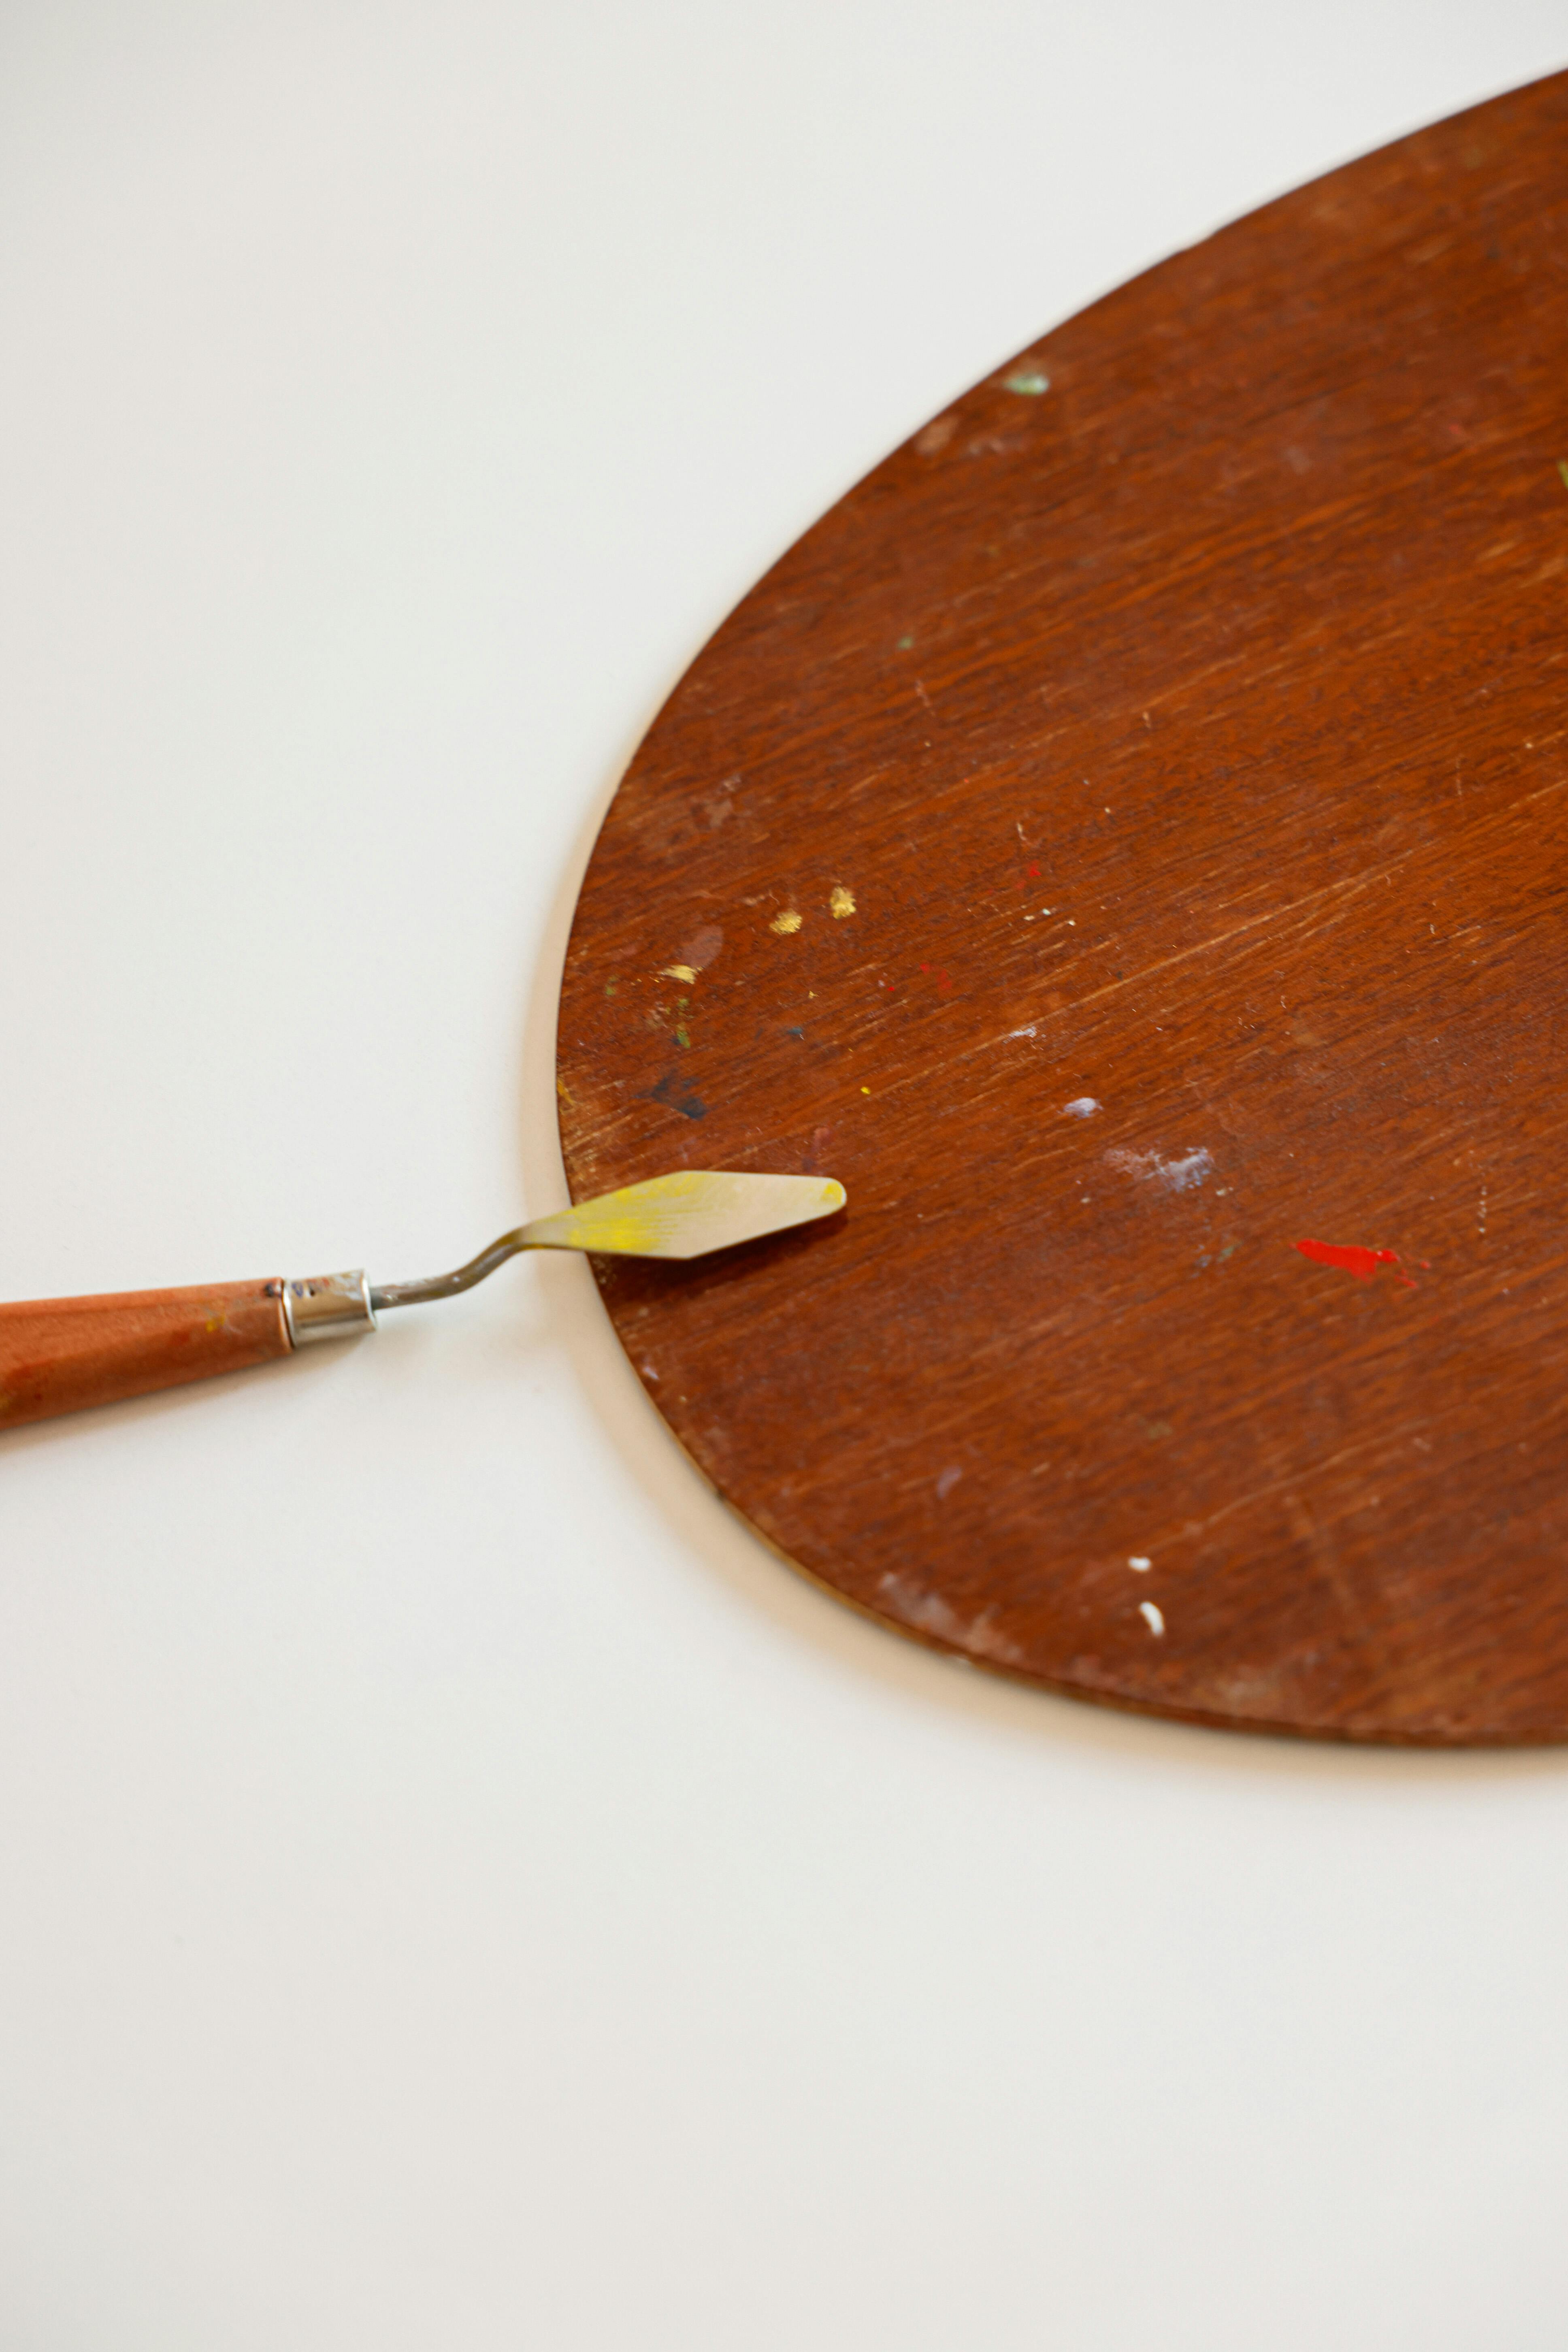
- Organized Palette: My Battle Station: And an organized palette? Absolutely paramount. I usually pre-mix a few key colors or at least arrange them intuitively (lights to darks, warm to cool) so I can grab what I need quickly and avoid accidentally muddling them when I’m in the thick of it. My palette isn't always pretty, but it's always ready—a true battle station for color. I often spend a good 10-15 minutes just setting up my colors, knowing it will save me far more time (and frustration!) down the line.
Surface Tooth and Texture: Your First Partner in Crime
I've learned that your choice of painting surface is almost like choosing a dance partner for alla prima; each one responds differently to your touch. For instance, a canvas or panel with a smoother gessoed surface will let your paint glide and blend more effortlessly, which is fantastic for subtle gradations or delicate passages. But if you're aiming for bold, thick impasto and want that paint to truly 'stand up' and grab, a surface with a more pronounced tooth or texture will provide that necessary grip. It's a subtle but significant choice, directly influencing how much wet-on-wet manipulation you can achieve and the final textural outcome of your piece. I've had moments where I tried to push thick paint on a too-smooth panel, and it just slid around like butter on glass – a frustrating lesson in material compatibility!
Paint Consistency and Mediums: Finding Your Flow and Avoiding the Mud
The very lifeblood of an alla prima painting lies in the way the paint behaves – its flow and pliability are your primary tools. I find myself constantly playing with paint thickness, from thin, almost diluted washes for those first layers, to rich, thick impasto (that's where the paint is applied so thickly it literally stands off the canvas, creating amazing texture) for highlights or really pronounced details. The big goal here is to build up form and apply color without letting those wet layers just mush together into some desaturated, muddy mess.
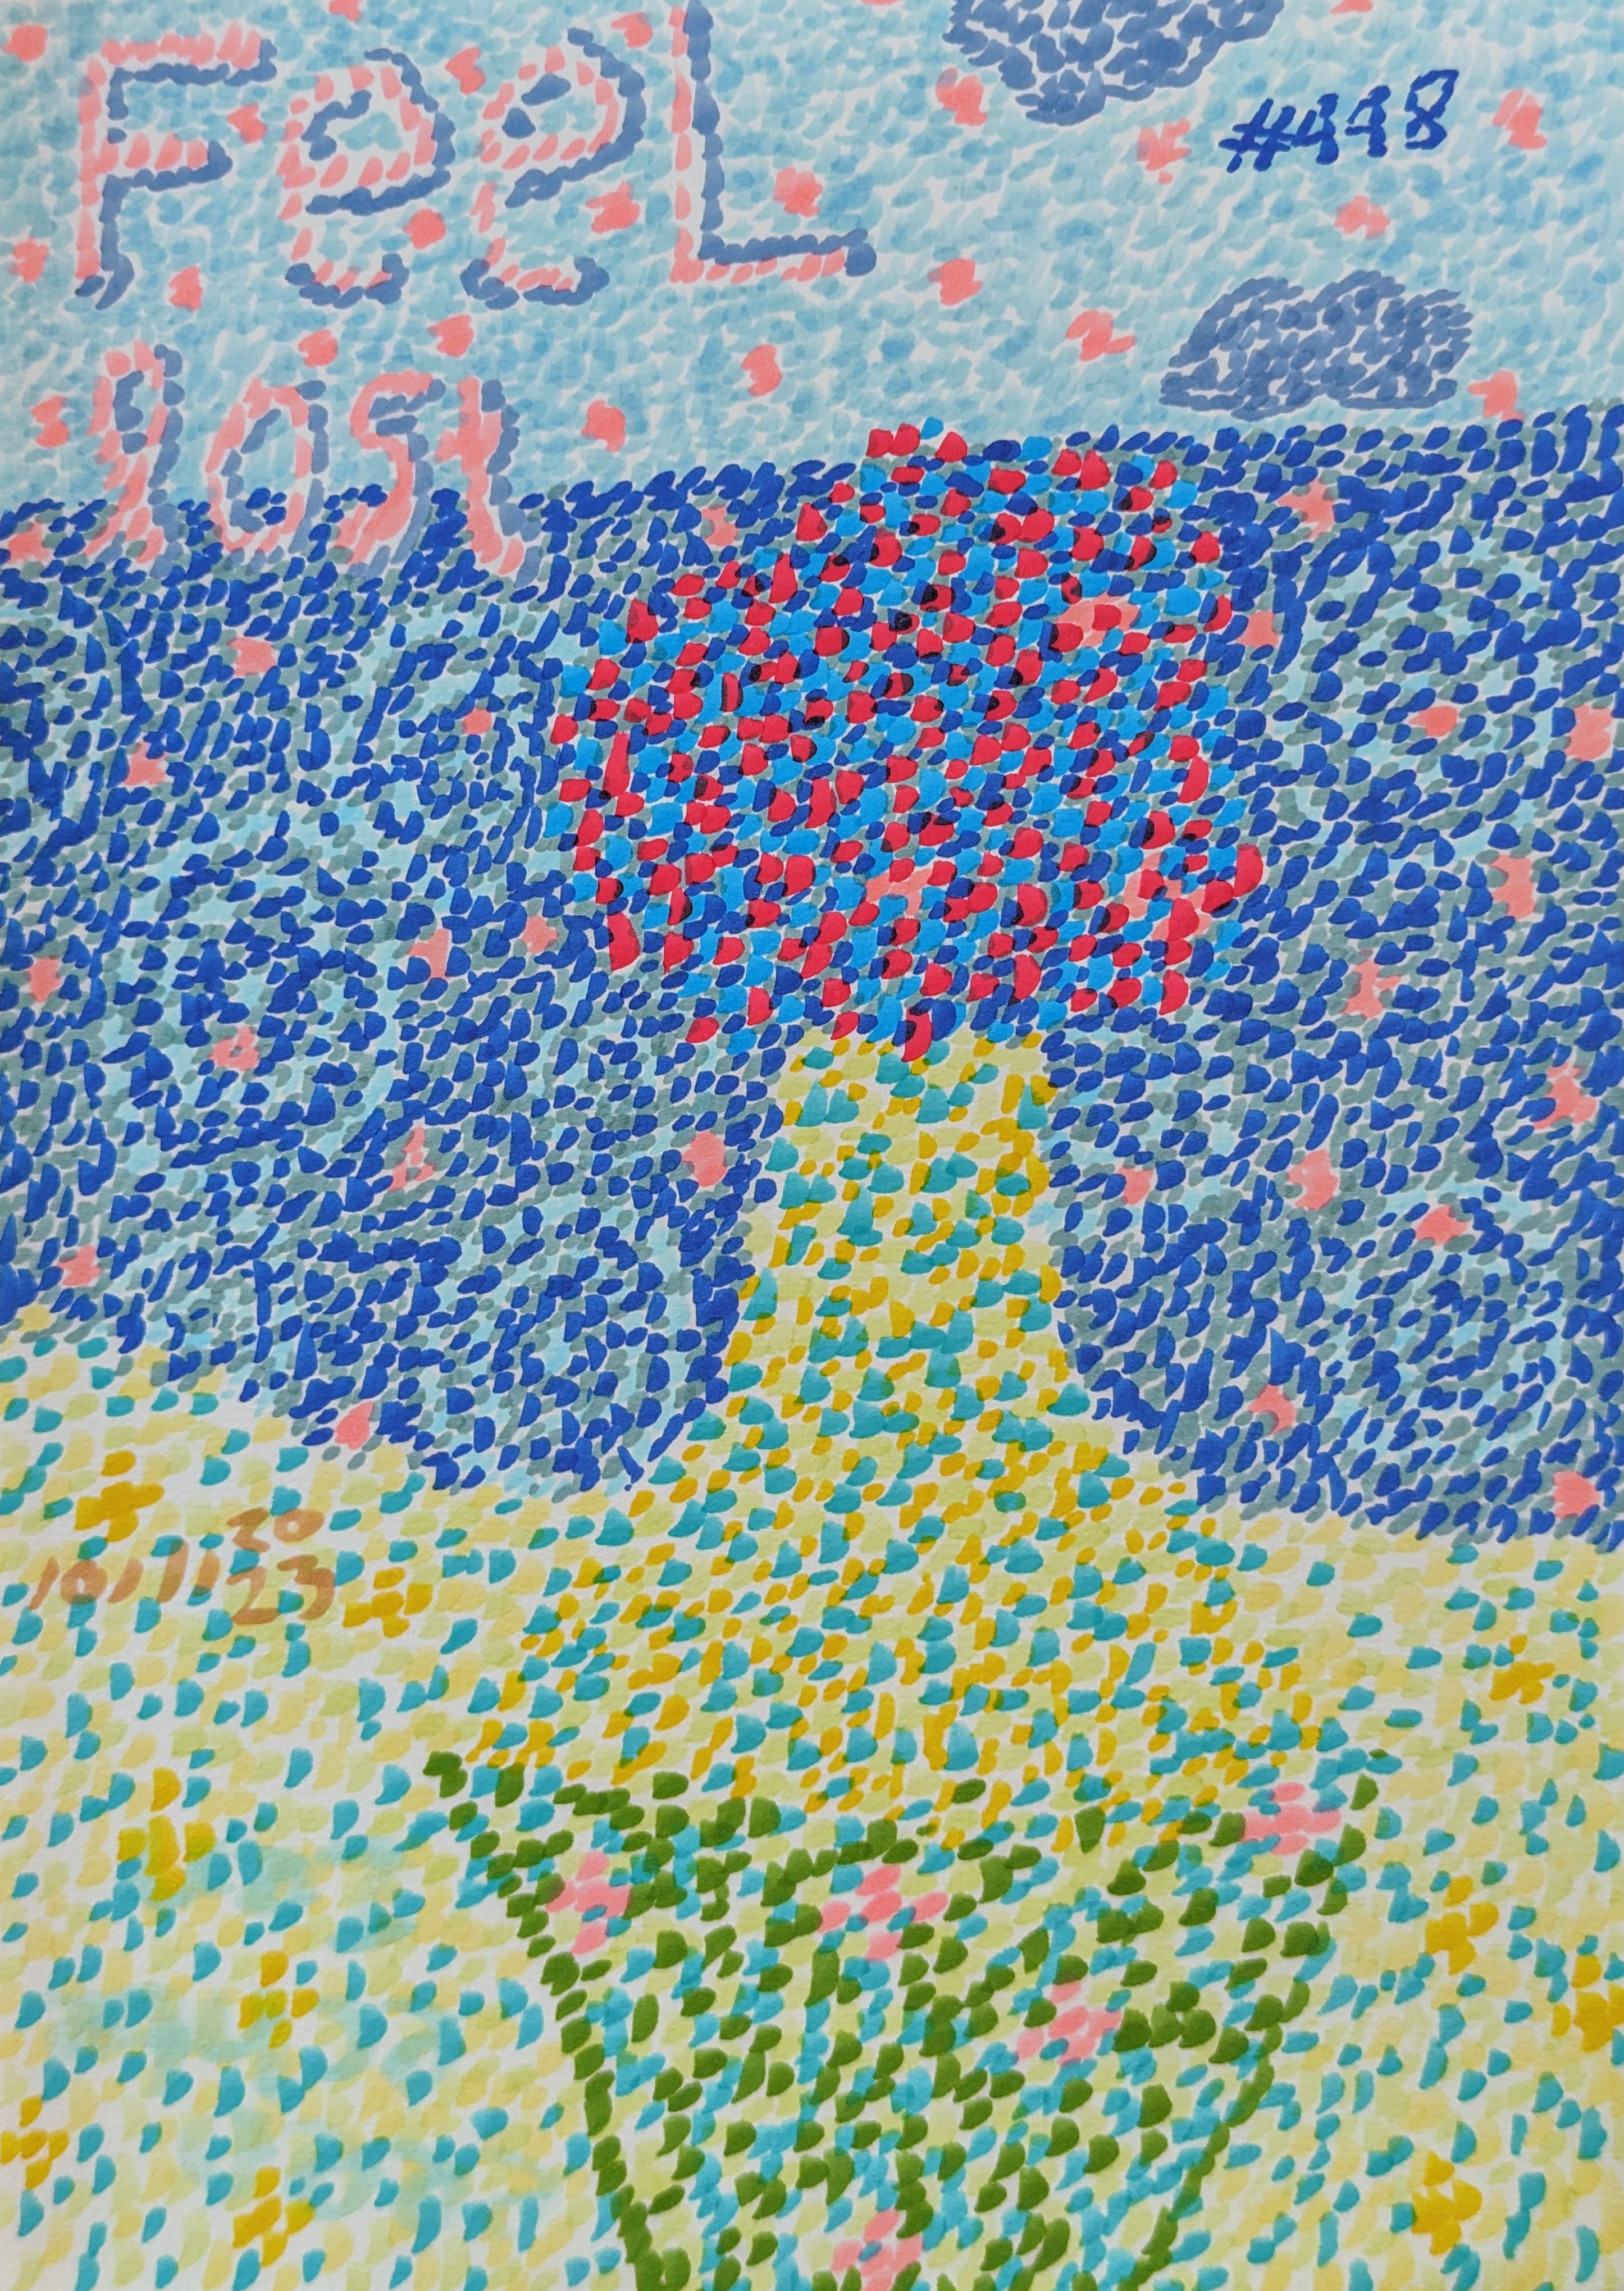
And speaking of mud, that's the lurking villain of alla prima. It often happens when complementary colors (like red and green, or blue and orange) are mixed excessively on the canvas, or when too many distinct hues are blended together indiscriminately, turning vibrant colors into a dull, brownish gray – colors that should sing with life instead whisper in drab, muddy tones. My personal battle cry against mud involves meticulous palette preparation (as I mentioned), sticking to a carefully chosen limited color palette, and religiously cleaning my brushes between color changes, especially for lighter tones. Instead of endlessly blending, I focus on confident, deliberate strokes that sit next to each other, allowing the viewer's eye to do the blending from a distance – what artists call optical mixing. It’s like magic, really, where two distinct colors next to each other create a third color in the viewer's mind. For example, trying to blend a vibrant cadmium red and a viridian green directly on the canvas without extreme care almost always results in a lifeless, brownish grey. Instead, I might place flecks of each color next to each other, letting the eye do the work, or keep them slightly separated. Less fussing, more feeling!
This control over consistency demands serious precision over how much paint is on your brush and how much pressure you're applying. It's a delicate balance, and trust me, I've had my fair share of muddy disasters that made me question my life choices – or at least my choice of medium!
Choosing Your Dance Partner: Painting Mediums
The choice of medium, especially with oil paints, is also super critical. It's like choosing your dance partner; each one brings something different to the floor and directly impacts the paint's flow and drying time:
Medium | Effect on Paint | Drying Time Impact | Common Use in Alla Prima |
|---|---|---|---|
| Linseed Oil | Increases flow and transparency, adds gloss. | Slows drying time | Ideal for extended wet-on-wet manipulation and subtle blends. |
| Alkyd Mediums | Increases flow, transparency, and often gloss. | Significantly speeds drying | Essential for tighter deadlines or multi-session alla prima. |
| Siccatives | Chemical drying agents. | Accelerates oxidation | Used sparingly for targeted acceleration of specific layers (caution: can cause brittleness if overused). |
Understanding different paint types and their associated mediums is non-negotiable for controlling drying times, how cooperative the paint is, and ultimately, whether your alla prima session is a success. And here’s a foundational principle, even in this wet-on-wet world: "fat over lean." Think of it like building a house: you start with a solid, stable foundation (the "leaner" paint, meaning less oil or more solvent) before you start adding the more flexible, decorative layers (the "fatter" paint, with more oil). Trust me, nobody wants cracks – especially not the kind that look like ancient hieroglyphs on your fresh painting, or worse, like a roadmap of artistic despair! The reason this happens is simple: leaner paint with less oil dries faster and shrinks more. If you put a faster-drying, shrinking layer over a slower-drying, more flexible one, the top layer will stress and crack as the bottom layer continues to dry and move beneath it. It’s a foundational principle, even in this wet-on-wet world, and one that has saved me countless heartbreaks since I actually started listening to it.
Beyond mediums, even the pigments themselves have different properties. Some, like the earthy Ochres and Siennas, tend to dry faster and are more opaque, making them great for initial, leaner layers. Others, like Alizarin Crimson or Ultramarine Blue, are slower drying and more transparent, perfect for those final, fatter, luminous glazes or subtle color shifts in the top layers of an alla prima piece. It's all part of the dance, anticipating how each color will behave.
Deliberate Brushwork and Selective Blending: The Art of Knowing When to Touch
My brushwork in alla prima is always about directness and, let's be honest, often pure expression. But it’s not just about getting paint on the canvas; it’s about how it gets there. The direction and weight of your brushstrokes are deliberate choices. A consistent directional stroke can imply form and movement – think of how Sargent suggested the drape of fabric with sweeping, confident lines. A lighter touch might feather edges, while a heavier hand can create bold, tactile impasto. Blending? That usually happens right there on the canvas, often by simply nudging wet colors together. It requires a really sensitive hand; sometimes I'll use a clean brush to gently merge adjacent colors, other times I'll lay down distinct, unblended strokes to keep the color pure and create visual texture. For example, a gentle nudge of a warmer tone into a cooler one can create a shimmering transition of light on skin, while distinct strokes can capture the roughness of a tree bark. And for the love of art, keep those brushes clean! There’s nothing worse than unintentionally contaminating a beautiful clean color with a smudge of something else—it’s like a tiny artistic crime. I also find a limited palette simplifies color mixing, helps keep my colors harmonious, and drastically cuts down on the risk of turning everything into a drab, muddy soup. For example, if I need a very specific green, I'll mix just the right touch of blue and yellow on my palette first, rather than trying to blend both colors directly on the canvas and risking an accidental brown mess. It’s all about intentional application, even amidst the spontaneity.
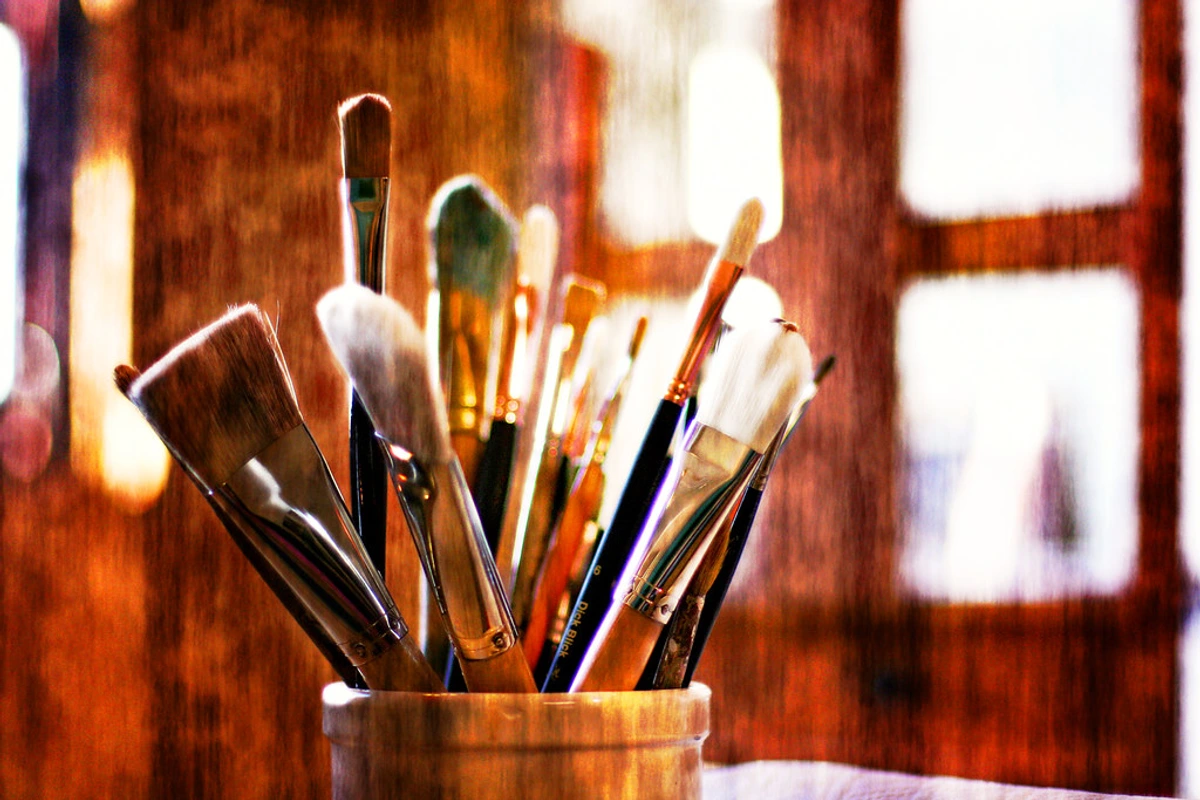
Choosing Your Voice: Types of Brushes for Alla Prima
The brushes you choose are truly an extension of your artistic hand in alla prima. They dictate how the paint moves, blends, and ultimately, how much texture you achieve. I keep a variety ready, because each offers a different kind of 'voice':
Brush Type | Key Characteristic | Ideal Use in Alla Prima |
|---|---|---|
| Hog Bristle | Stiff, resilient hairs | Pushing thick paint, bold visible strokes, impasto. |
| Stiff Synthetic | Mimics hog, slightly smoother | Cleaner edges, controlled blending without losing shape. |
| Soft Synthetic/Sable | Delicate, flexible tips | Fine details, gentle blending in specific areas, thin washes. |
| Filbert | Oval shape, rounded edge | Versatile for sharp and soft edges, feathered strokes. |
| Flat | Square, broad edge | Broad, confident strokes, large color areas, crisp edges. |
| Round | Pointed tip | Lines, small details, precise control with thinner paint. |
Experimentation is key here; what feels right for one artist might not for another. The important thing is to understand how each brush interacts with the wet paint to achieve your desired effect. Think of your brushes as your conversational partners with the canvas; each one has something unique to say.
The Impact of Temperature and Humidity
Here's a little something many artists overlook, especially when working alla prima: the ambient conditions of your studio or outdoor environment. Temperature and humidity play a surprisingly big role in how quickly your paint dries and how it behaves. On a warm, dry day, your oils might start to set up much faster, demanding even swifter decision-making. Conversely, a cool, humid environment can extend your working time considerably, giving you more wiggle room for blending and layering. This is particularly crucial for plein air painting, where conditions can shift dramatically with the weather. I've had days where I thought I had hours, only to find my paint tacky within minutes, and other days where it felt like the paint would never dry. Paying attention to these subtle environmental cues helps you anticipate and adjust your pace and medium choices accordingly. Always have a backup plan for accelerating or slowing drying times, especially when painting a critical area like a sky.
Speed, Decisiveness, and Knowing When to Conclude: The Clock is Ticking
The biggest, most exhilarating challenge of alla prima is that clock ticking. The paint will start to set. This means you’ve got to make rapid decisions and execute with confident, assured strokes. Hesitation? Oh, I know that feeling. It's like trying to dance with a ghost – you end up looking a bit silly, and worse, overworking an area can quickly kill the vibrancy or create those dull, muddy colors we all dread, turning what should be a luminous sunset into a bruised, muddled mess. This decisiveness, crucially, stems not from blind confidence, but from a solid understanding of composition, color theory, and value. It’s about knowing why you’re putting a color where you are, and trusting that fundamental knowledge. The real beauty of alla prima often lives in its fresh, sometimes wonderfully 'unfinished' quality; it's a direct reflection of the energy and immediacy with which it was created.
For me, a huge part of mastering this is knowing precisely when to put the brush down—when the artwork has said what it needs to say. It requires constantly stepping back, critically observing, and asking: "Am I adding anything, or just fiddling?" Often, the answer is the latter. My inner perfectionist sometimes needs a good, firm shove out the door. I once spent an extra half hour trying to 'perfect' a sky, only to end up with a dull, bruised-looking mess instead of the luminous light I started with. Lesson learned: the point of no return is real, and it sneaks up on you.
When it comes to corrections, remember that extensive errors are significantly harder to fix or paint over once that wet paint is down. This is why those accurate initial placements and decisive executions are so darn important. It teaches you to trust your first instinct, which, surprisingly, is often the best one anyway. Overcoming the fear of making a permanent mistake in alla prima can actually translate to greater confidence and decisiveness in other aspects of your art-making, and even life itself. It's a journey of learning to commit. For critical highlights or areas I want to absolutely sing with light, I might even use a lighter or more opaque paint only for those last touches, keeping them as the very last areas I handle. Sometimes, for super delicate areas, I’ll even consider very lightly blotting with a tissue to lift excess dark paint – a soft reset, though that's a move for the truly brave (or desperate!). This isn't a technique for endless second-guessing; it's for learning to commit.

Alla Prima on Different Surfaces
This intimate understanding of materials extends to the very ground you paint on. While canvas is a classic, alla prima can really sing on other surfaces too. Each has its own distinct vibe, and the paint behaves slightly differently on each, which is something I love to explore and can significantly impact your wet-on-wet experience:
- Stretched Canvas: The go-to. It has a bit of give, which can be lovely for expressive strokes, almost absorbing some of the impact. A smooth gessoed surface will allow paint to glide and blend more easily, while a more textured one provides tooth for thicker paint to grab, giving very different results. The subtle springiness can also add a unique bounce to your brushwork, giving a certain liveliness to your marks.
- Wood Panels: These offer a really rigid, smooth surface. I find they're great for fine detail and often make the paint feel a bit more 'slippery' initially due to less absorbency, which can be fantastic for extended blending times. However, if not properly prepared, this slickness can also make it harder for subsequent wet layers to truly 'grip' if you're not careful, leading to paint beading up. And speaking of wood, remember it's organic; it can expand and contract slightly with humidity changes, which, if not properly sealed and primed, can potentially stress the paint layers over time. The lack of flex also means less risk of cracking for heavy impasto work, making them a sturdy choice for bold texture.
- Paper (oil paper or acrylic-prepared paper): A fantastic, affordable option for studies and practice. Just make sure it’s specifically designed for oils or heavily gessoed for acrylics, otherwise, the oils will eventually degrade the paper, turning it brittle and transparent. On paper, paint can sometimes dry a little faster due to capillary action drawing oil into the fibers, so be extra swift! It also offers a very different textural interaction compared to canvas or wood, often giving a more immediate, dry-brush feel.
On a related note, choosing the right surface often goes hand-in-hand with choosing the right subject matter for your alla prima session. Some subjects, like a fleeting cloudscape, a quick portrait sketch, or a vibrant still life where capturing immediate light is key, lend themselves beautifully to the speed and spontaneity of alla prima. Highly detailed architectural renderings, intricate patterns, or hyper-realistic portraits requiring days of meticulous layering might, however, work against the inherent strengths of this direct method. It’s about matching your technique to your intention, not forcing a square peg into a round hole.
Alla Prima Beyond Oils: A Quick Look at Other Media
While oil paints are, without a doubt, the undisputed champions of traditional alla prima due to their extended drying times and forgiving nature, the spirit of wet-on-wet can be explored with other mediums, albeit with their own unique challenges and adaptations. It’s a testament to the versatility of the core principle.
- Acrylics: Can be used for alla prima, but you have to be lightning fast! Their rapid drying time means you have a much smaller window for blending and manipulating wet layers. Why this challenge? Because acrylics dry by evaporation to a plastic film. Once that film forms, it’s much harder to blend or rework wet-into-wet without disturbing the already set layer beneath, creating muddy patches or lifting the underlying paint. You effectively lose that open working time that oils so generously provide. To mitigate this, consider using fluid acrylics for better flow, and definitely explore slow-drying mediums or retarders. You might also want to look into "open acrylics," which are formulated specifically to stay wet longer. It’s a different beast from oils, demanding intense focus and quicker decisions, but the vibrancy can be incredible.
- Gouache: This opaque watercolor is naturally suited to wet-on-wet effects, particularly for atmospheric blends or soft transitions, as you can re-activate dried layers with water to some extent. The beauty here is in its matte finish and the ability to layer lights over darks opaquely, almost like oils, but with water as your medium. It's fantastic for studies and vibrant, illustrative works.
- Watercolor: While often associated with translucent washes, watercolor can also be used wet-on-wet. By keeping areas of the paper moist or applying wet paint to a wet surface, colors bloom and blend in beautiful, unpredictable ways. The control is very different from oils, relying more on water flow and pigment dispersion, but the immediacy and accidental magic it creates are deeply satisfying. It's about letting the water and pigment do their dance together.
The Dance: Alla Prima's Joys and Jitters
These dynamics of medium and surface are part of what makes the alla prima dance so thrilling – a dance with its share of both joys and jitters. So, why do I keep coming back to this whirlwind of a technique? Because despite its challenges—and oh, there are challenges—the payoffs are just too good to ignore. It’s like a thrilling, slightly dangerous dance; you might stumble, but when you nail a step, it’s pure magic.
One of the most obvious rewards is the sheer vibrancy of the colors. By not letting paint dry between layers, alla prima ensures hues retain their initial brilliance and purity. You avoid that dulling effect that can happen with multiple dried layers, and your work just pops. It’s almost a direct transference of emotion and light from your eye to the canvas, and that directness often lends an unbelievably fresh, luminous quality to the finished piece.
Then there's the feeling of pure spontaneity. This method inherently captures your immediate, raw response to the subject. There’s a dynamic, lively quality that’s just tough to fake with more methodical, layered approaches. It feels less like an assembly line and more like a direct, spirited conversation with the canvas, where every brushstroke is a word. This also means you get texture you can almost touch. Laying wet paint on wet paint naturally invites thick, luscious brushstrokes and delicious impasto, adding a palpable dimension to your work that begs to be seen up close.
And let’s not forget speed, glorious speed! For quick studies, sketches, or just grabbing a fleeting impression—say, a changing sky or a quick portrait—alla prima lets you work with remarkable pace, cutting out those long, often frustrating, drying intervals. It’s perfect for capturing the essence before the moment passes, or before your model gets bored and leaves.
But let's be real, it's not all sunshine and spontaneous brushstrokes. This dance has its tricky steps. The demand for decisive execution is high. This technique demands a significant degree of confidence and a solid understanding of fundamental art principles. That window for extensive adjustments? It’s tiny. It really forces you to know your stuff before you even start, almost like performing without a net, and this decisiveness stems from a strong understanding of composition, color theory, and value. And speaking of adjustments: corrections? Good luck! As I mentioned, once you’ve slapped that wet paint on, extensive errors are significantly harder to fix or paint over. This is why those accurate initial placements and decisive executions are so darn important. It teaches you to trust your first instinct, which, surprisingly, is often the best one anyway. The fear of making a permanent mistake can be paralyzing, but overcoming it is part of the growth.
Alla Prima Today: Keeping it Fresh and Relevant
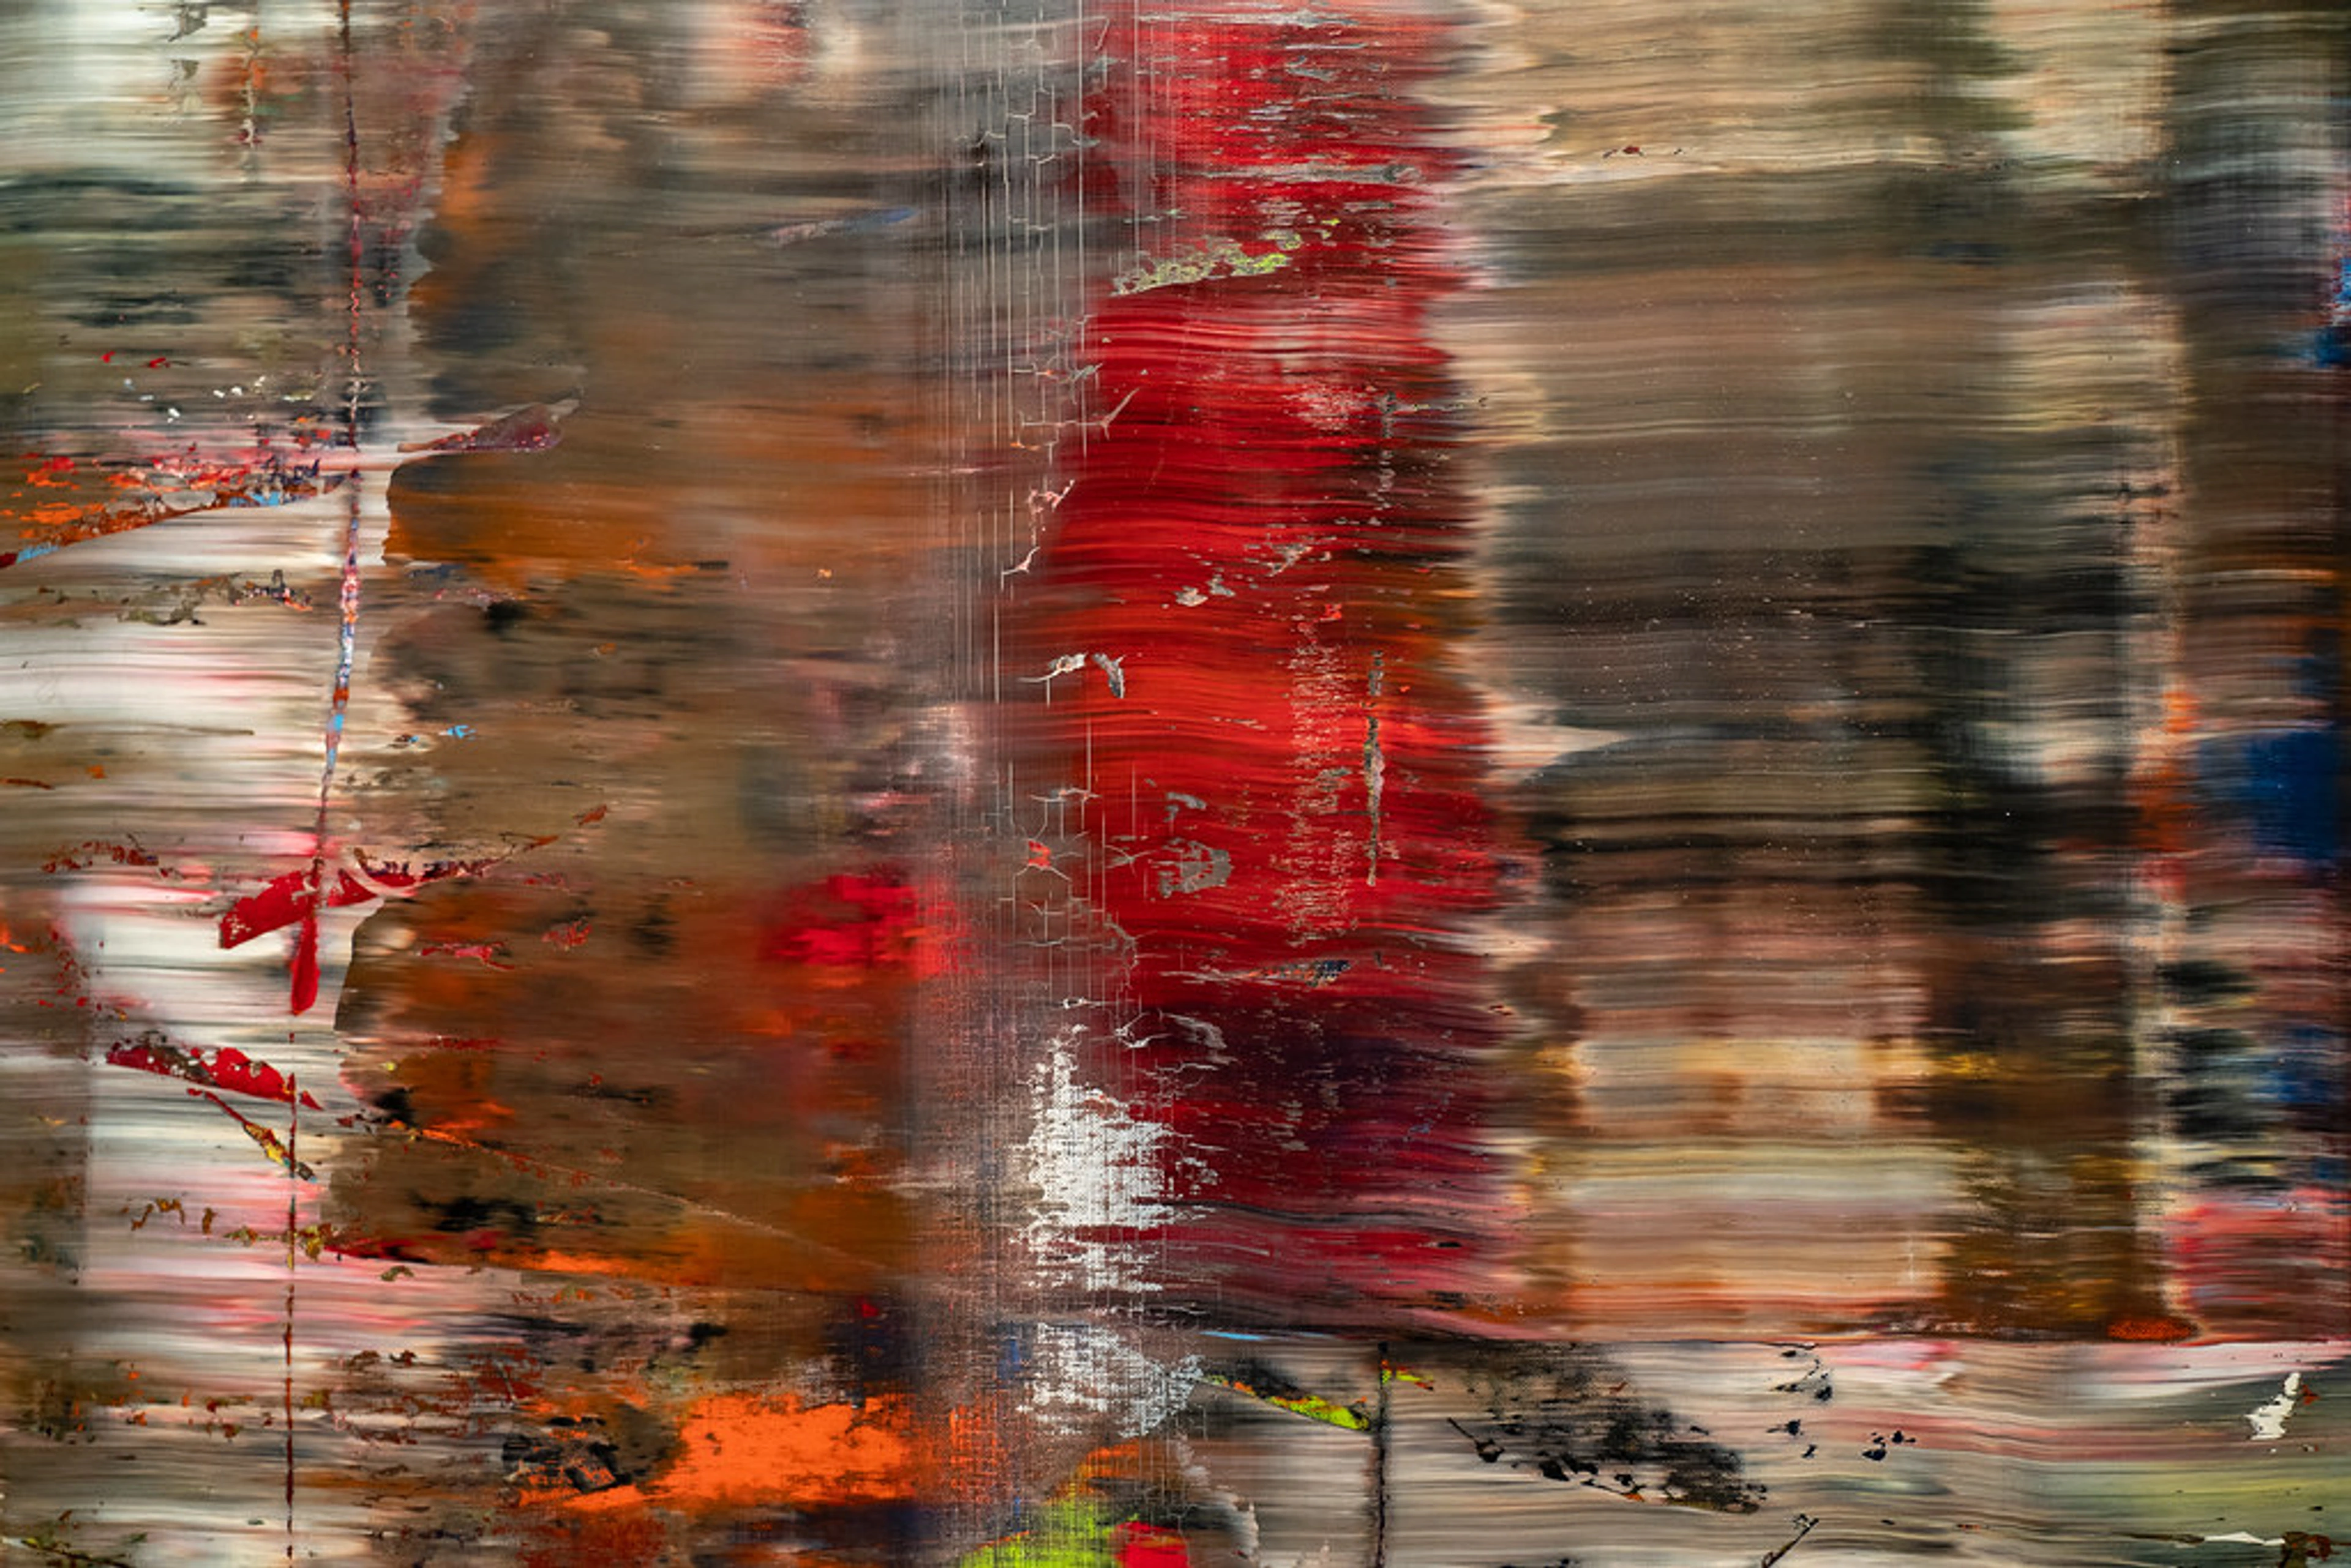
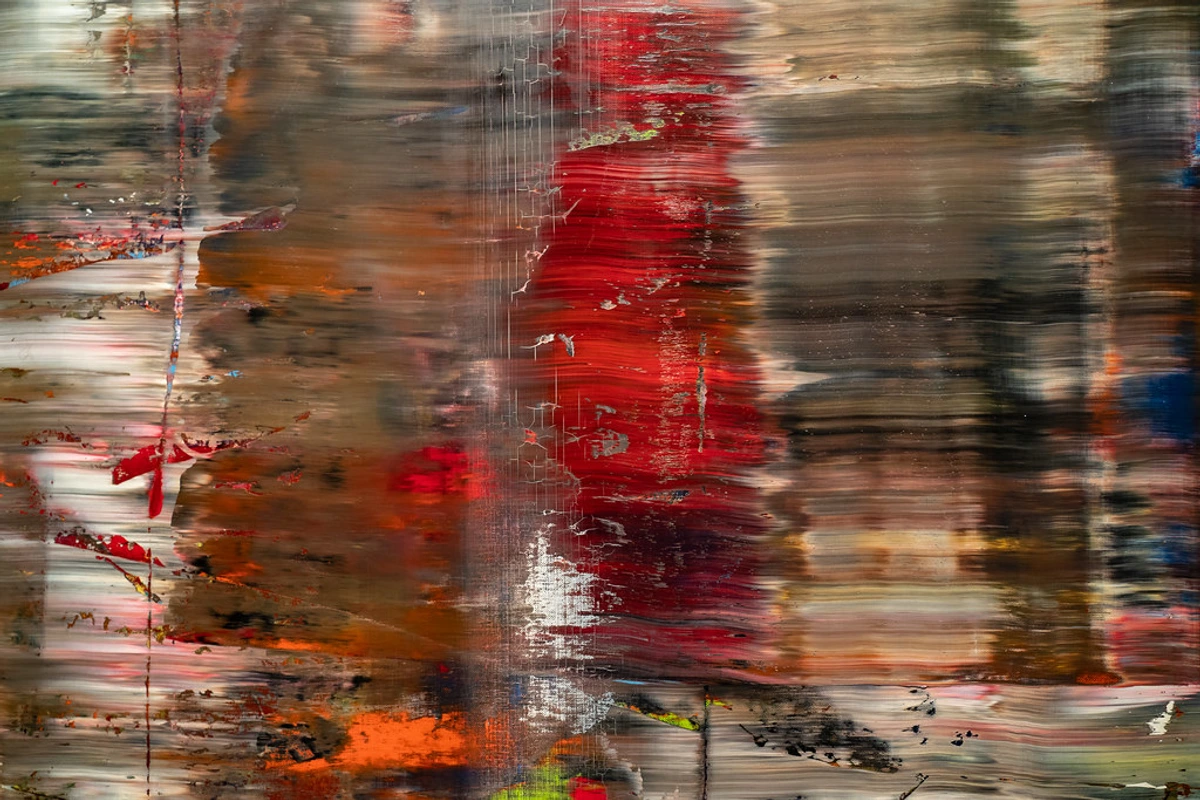
Today, alla prima is still a hugely respected technique, showing up in everything from traditional portraiture and landscape painting to bold, expressive abstract pieces. Contemporary artists, myself included, often lean into its inherent immediacy to inject raw emotion, vibrant energy, and a direct visual statement into their creations. Think of artists like Cecily Brown, whose gestural, abstract figures often feel like they’ve burst onto the canvas in a single, frenetic burst of color and form. Her work, such as The Nude Descending a Staircase, is a prime example of this painterly freedom, where masses of wet paint are pushed and pulled across the surface with incredible vigor, directly conveying raw emotion and dynamism through the speed and interaction of wet pigments. Or Jenny Saville, whose powerful, large-scale figurative works retain a raw, painterly quality from direct application, with the thick, visceral strokes in pieces like Propped conveying immense emotional depth and the materiality of flesh through immediate, unblended applications. Even abstract artists like Gerhard Richter, while not strictly wet-on-wet in every phase, employ techniques that capture that same sense of immediacy and dynamic material interaction, as seen in his large-scale Abstract Paintings (like the 726 series), where layers of wet paint are often scraped, smeared, and blended directly on the surface using large squeegees, creating a mesmerizing interplay of color and texture.
That unfiltered quality of alla prima really speaks to the modern desire for authentic, unmediated expression, allowing the artist's initial vision to just happen directly on the canvas. It's a testament to the fact that sometimes, the simplest, most direct path is the most powerful. If you’re curious about how modern artists interpret this directness, I encourage you to visit the artist's museum in 's-Hertogenbosch for insights into contemporary art forms that showcase visible brushwork, vibrant color, and that undeniable sense of immediacy, or perhaps browse some art for sale online. You'll often find diverse approaches to color and form that clearly owe a nod to the immediacy inherent in alla prima.
Let's Talk About Those Burning Questions!
Okay, I know you've got some thoughts bubbling up, so let's tackle a few common questions I get about alla prima. Consider this our little coffee-shop chat about the nitty-gritty.
Q: What types of paint do you find work best for alla prima?
A: For me, oil paints are the absolute champions here, mainly because their longer drying time gives me more flexibility for that wet-on-wet manipulation. But hey, faster-drying mediums like acrylics can totally be used! You just have to be even swifter with your strokes, or, if you're like me and need a bit more time, judiciously add some slow-drying mediums or opt for "open acrylics." I've also had some interesting wet-on-wet experiments with gouache, but that's a whole different conversation about re-activating layers! The key is understanding your chosen medium's unique properties and adapting to them.
Q: Is it true an alla prima painting must be finished in one day?
A: You know, that's a common misconception. While the ideal often involves a single session, "alla prima" really just refers to the wet-on-wet application method itself. For larger or more intricate pieces, I might do several alla prima sessions, where I complete each distinct section wet-on-wet before letting it dry. Or, sometimes, I'll even return to a partially dried area and reactivate it with new wet paint to continue the wet-on-wet process. My studio floor has certainly borne witness to many 'partially-alla-primaed' pieces that later got a second life, often thanks to careful storage! Don't let the "one session" rule intimidate you; it's a guideline, not a law.
Q: Is alla prima a good technique for beginners? I'm a bit intimidated!
A: Intimidated? Totally understandable! It does present challenges, no doubt. But honestly, I think alla prima is an excellent way for beginners to really hone their observational skills, get a feel for color mixing, and embrace spontaneity without getting bogged down in super intricate multi-layered approaches. To ease into it, try starting small with simple studies like painting a single apple, focusing on light and shadow with minimal color mixing, or practicing layering colors on a separate surface. You could even try exercises like painting a simple sphere with graded values to understand form, or copying a passage from a master’s alla prima work to learn about brush economy. You'll learn so much about paint and light, and crucially, you'll learn to trust your instincts. And don't worry about perfection; just enjoy the process. It's truly one of the best ways to understand how paint works, without overthinking, and to build that muscle for decisive brushwork.
Q: When would you not recommend alla prima?
A: Good question! While I love it, alla prima isn't always the right tool for the job. If you need super precise, highly rendered detail, or if you're aiming for a very smooth, luminous finish built up through many translucent glazes (think old master techniques like those used for photographic realism), then alla prima might actually work against you. It's also less ideal if you constantly second-guess yourself and need a lot of time for meticulous adjustments over days. For me, it's about matching the technique to the intention. Don't force a square peg into a round hole, right? Sometimes a more patient, layered approach is exactly what the painting calls for.
Q: How do you store a painting that is still wet?
A: Ah, the classic conundrum! If I'm working on a piece that needs to stay wet overnight or for a few days, I typically use 'wet painting carriers' or just rig up some spacers to keep another canvas from touching its surface. You can use large clips, blocks of wood, or even pushpins on the corners of the wet painting to elevate it slightly above a flat surface, or place it on an easel in a secure, undisturbed spot. The key is to prevent anything from touching the delicate wet surface, especially if it has texture or impasto. Sometimes, for smaller pieces, an old pizza box with holes poked in it for airflow can even do the trick! Sometimes, for super delicate areas or to extend working time slightly, I’ll even consider very lightly blotting with a tissue to lift excess dark paint – a soft reset, though that's a move for the truly brave (or desperate!). And for those truly ambitious pieces you want to keep wet for longer, some artists even mist the surface of their oil painting with a fine spray of water (yes, water!) or a special slow-drying medium, though this requires extreme caution to avoid blooming or affecting the paint film's integrity over the long term. Whatever method you use, just ensure good ventilation to aid in the eventual drying process, and keep it away from curious pets or clumsy studio-mates!

In Conclusion: My Love Affair with Alla Prima
For me, alla prima painting is so much more than just a technique; it’s a whole philosophical approach to creating art. It's about celebrating immediacy, spontaneity, and that direct, unfiltered conversation between me and my canvas. I remember that initial click when the method first truly resonated, and it felt like unlocking a new language for my art. From those expressive, bold strokes of the old masters to the vibrant, light-drenched canvases of the Impressionists, and now to the dynamic works of contemporary artists (like, perhaps, myself on a good day!), alla prima has consistently proven to be this incredibly potent way to capture a transient moment and channel raw artistic energy. It pushes me to be decisive, to sharpen my observational eye, and to really, truly trust my creative gut—even when my gut is saying, 'Please don't make more mud!' And honestly, the artworks that come out of it, imbued with that unique freshness and compelling vitality, are always worth the effort, the mud, and the occasional dance with a ghost. The profound lesson of overcoming the fear of 'mistakes' and embracing imperfection is, in itself, a liberating artistic revelation. So go on, give it a try! Start with a simple still life, a single fruit perhaps, or a quick outdoor sketch of something fleeting. You might just fall in love too, and find a whole new way to express your artistic self on the canvas. Perhaps you'll even be inspired to document and share your own artistic journey with the world, who knows? It's a journey of continuous learning, and that's the real joy.


