Gesso: The Unsung Hero – My Candid Guide to Vibrant, Lasting Art
Ever wondered why your paint falls flat? Dive into gesso! An artist's candid guide covering types, dual magic, application secrets, when to use (or skip!), and how this essential primer transforms your art from my messy studio perspective.
What in the World is Gesso? My Honest Take on This Painting Essential: A Deep Dive into Vibrant, Lasting Art
Alright, let's talk gesso. I know, I know, it sounds a bit… technical, maybe even a little boring. But trust me, as an artist who's spent countless hours wrestling with paint – and even more hours wrestling with my own impatience – I can tell you this seemingly simple white (or sometimes not-so-white) stuff is an absolute game-changer. It's like the unsung hero hiding behind the scenes, making all the vibrant chaos and beautiful textures possible. I still cringe remembering the early days: a large abstract piece, filled with what I thought were luminous blues and fiery reds, drying to a dull, paint-sucking mess. The culprit? My impatient younger self, who just wanted to get straight to the color and skipped gesso. It looked faded, lifeless, and honestly, a bit sad. It's one of those hard lessons, like trying to bake a soufflé without prepping your ingredients – it just doesn't quite work, no matter how much effort you pour into the presentation. That early frustration truly cemented gesso's place in my process, making it an indispensable step for achieving those vibrant, lasting results we all crave.
In this article, I'll unpack what gesso truly is, explore its diverse forms, delve into why it's indispensable, share my personal (and sometimes messy) approach to using it, and even consider when it's best to step aside – all from my messy studio perspective. We'll dive into both the practicalities of modern acrylic gesso and take a peek at its fascinating historical roots.
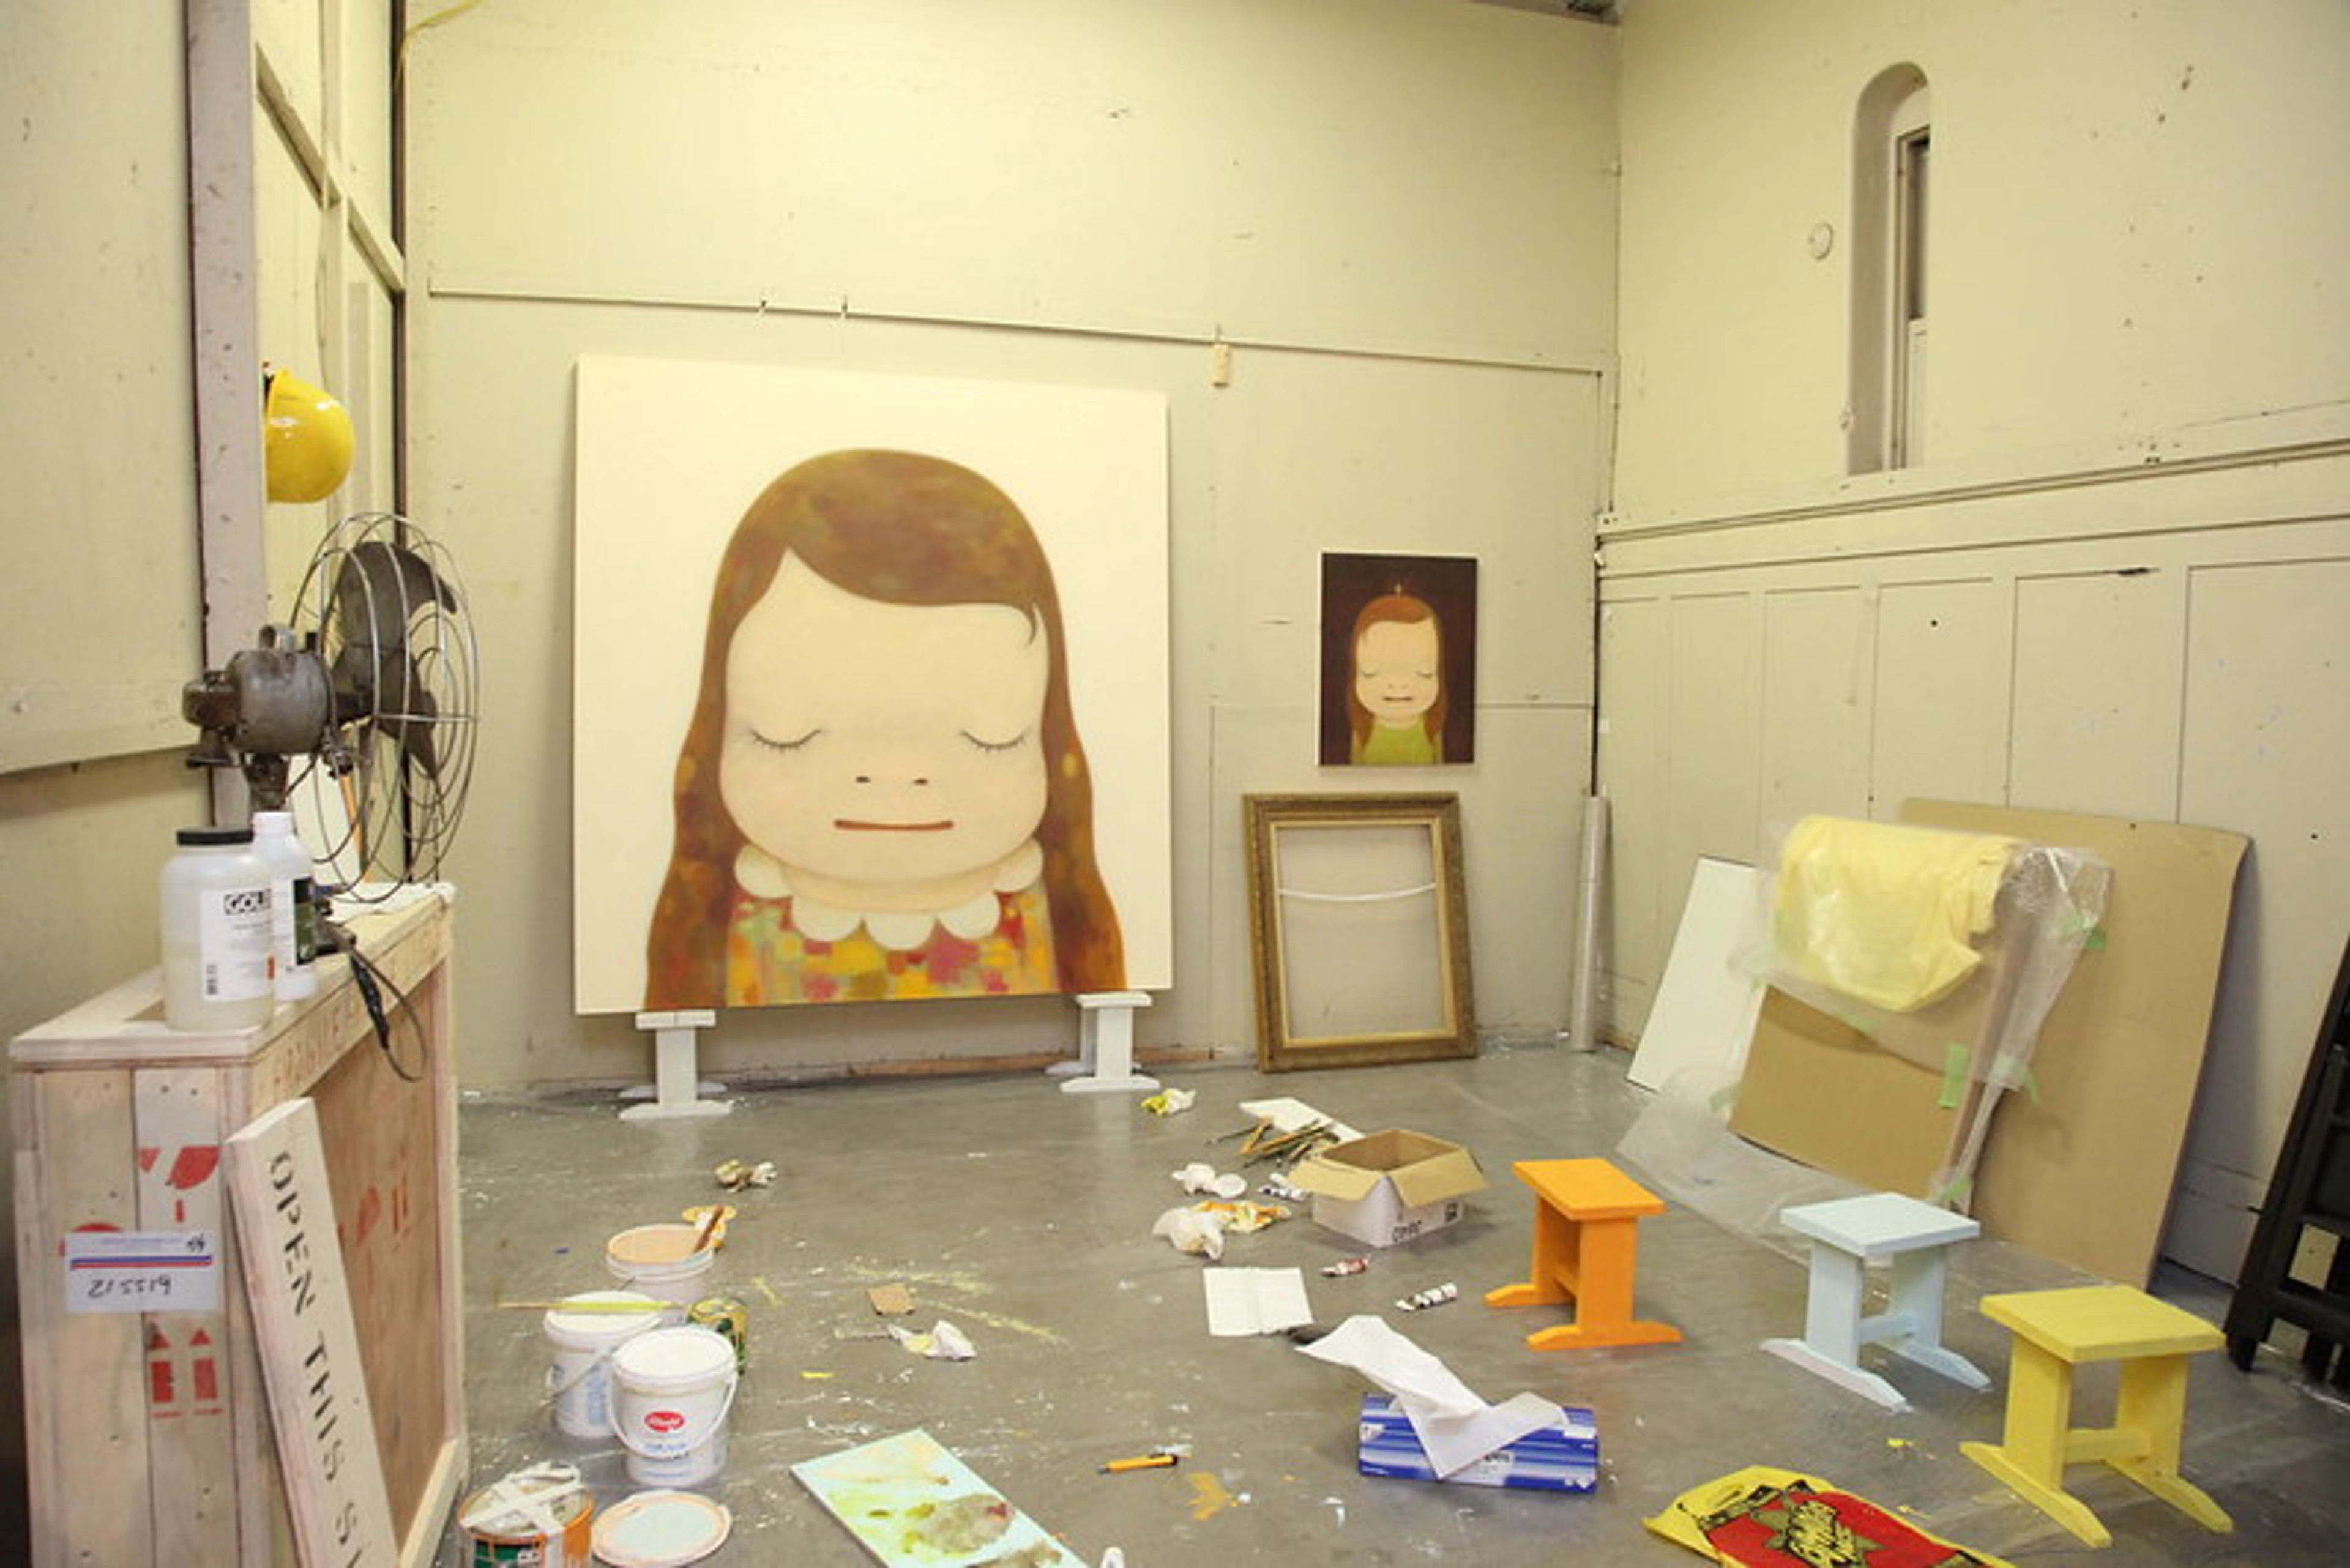
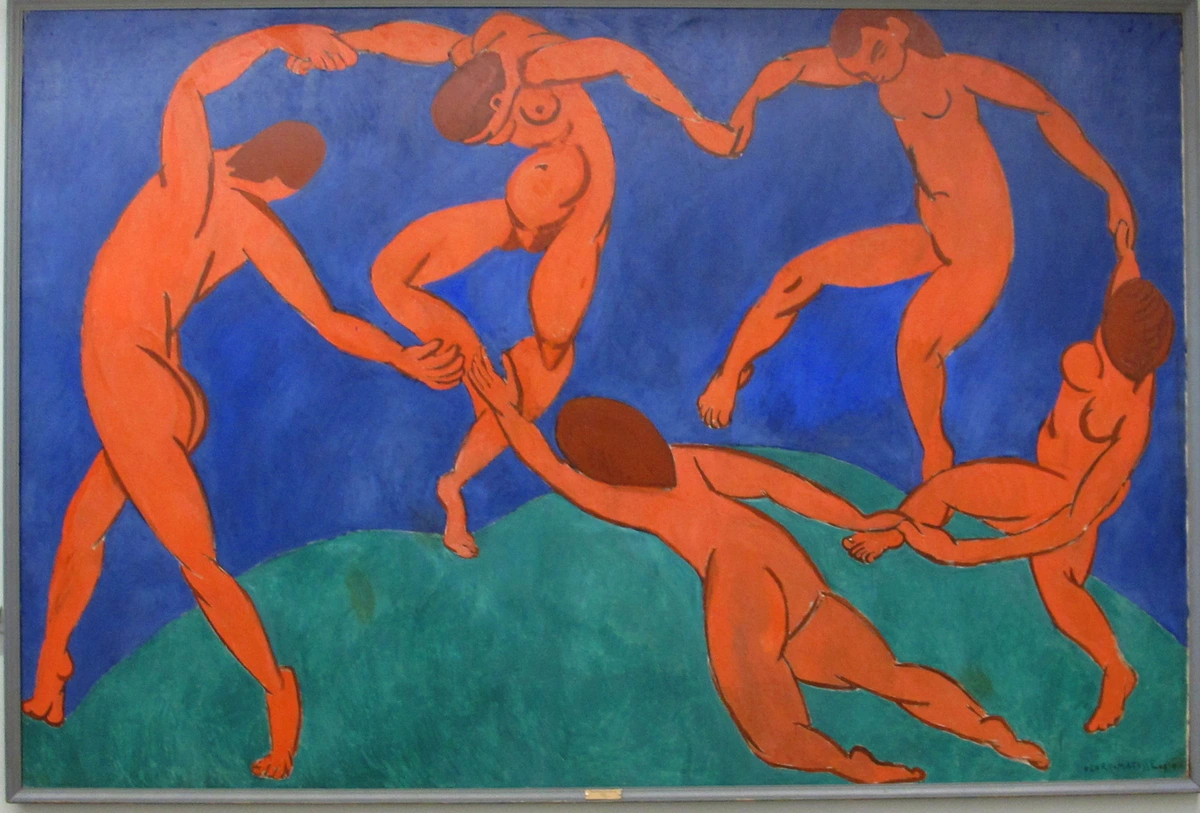
Even for abstract pieces, like the one above, with all its vibrant colors and layered moods, a solid foundation built with gesso makes all the difference. It's the secret handshake between your surface and your paint. All of this to say, gesso isn't just a primer; it's the bridge between your intention and your masterpiece.
The Humble Beginnings: What Is This Gesso Stuff, Anyway?
But before we get to the magic, let's get down to the nitty-gritty: what is this stuff, anyway? At its core, gesso (pronounced "JES-oh," from the Italian word for "chalk" or "gypsum") is a white paint-like substance used to prepare a surface (like canvas, wood, or paper) for painting. Think of it as a super-powered primer, but with a lot more intention behind it. Its main job is to create a consistent, slightly absorbent surface, often called "tooth," that your paint can really grab onto. Without it, your paint might just… disappear into the canvas, leaving your colors looking sad and flat, or worse, start to crack like a parched desert. Nobody wants that, especially when you're putting your heart and soul into a piece.
The Dual Magic: Sealing & Priming Your Surface for Success
So, what are gesso's superpowers? For me, it boils down to two key jobs that work together to transform your surface:
- Sealing (The Protector): This is where gesso acts as a crucial barrier. It protects your surface (especially canvas) from the acids found in oil paint. These acids, primarily free fatty acids within the linseed oil (and other drying oils) themselves, can slowly break down the natural fibers of cotton or linen. Upon contact, these acids cause the fibers to become brittle, weaken, and eventually disintegrate, leading to a loss of tensile strength. Essentially, the canvas slowly "rots." Think of it like this: without a gesso barrier, the oil in your paint is slowly 'eating away' at your canvas, much like an unchecked chemical reaction. We've seen historical works where, over centuries, areas with thin paint application directly on unsized canvas have literally disintegrated. This is due to the catalytic effect of heavy metal pigments (like lead white, which can accelerate degradation) and the inherent acidity of linseed oil, which over time can hydrolyze the cellulose fibers. For acrylics, gesso prevents the paint from soaking too deeply into the fibers, which not only makes your colors less vibrant but can also lead to paint adhesion issues over time and significantly increase the amount of paint you need to achieve solid coverage.
- Priming (The Gripper & The Even-er): This function gives the surface a subtle texture, a bit like very fine sandpaper. This "tooth" is essential because it allows the paint to adhere better, preventing it from sliding off or flaking. Imagine trying to get a car tire to grip on a perfectly smooth, icy road – it would just slide. Gesso provides that invisible grip, much like how the textured surface of a well-worn path or the tiny hooks of Velcro connect to their counterparts, giving your paint something substantial to hold onto. Different gesso formulations, with varying amounts of fillers like calcium carbonate or silica, will offer different levels of tooth, allowing you to tailor your surface to your painting style – a finer tooth for detailed work, a coarser one for expressive impasto.
These two core functions are why, for me, gesso isn’t just an optional extra – it's the foundation upon which almost all my artistic endeavors are built. What surface are you preparing for your next artistic adventure?

Modern Acrylic Gesso: Your Flexible Friend in the Studio
Most modern gessos are acrylic-based, a development that revolutionized painting in the mid-20th century. At its heart, this formulation uses an acrylic polymer emulsion as its binder. Think of this emulsion as tiny plastic particles suspended in water. When dry, these particles fuse together, forming a flexible, clear film that holds everything together and binds tenaciously to your surface. This, along with fine powders like calcium carbonate to give the surface 'tooth' and titanium dioxide for brightness and coverage, is often enhanced with specific components:
- Plasticizers: Added for enhanced flexibility, crucial for preventing cracks on moving canvas supports.
- Dispersants: Ensure smooth, even application by preventing pigment clumps.
- Rheology modifiers: Control the flow and consistency, giving gesso its characteristic smooth yet viscous texture.
But that’s not all; artist-grade gessos also commonly include defoamers to prevent unsightly bubbles during application and biocides to inhibit mold and mildew growth, ensuring your artwork endures. This acrylic innovation was a game-changer, freeing artists from the rigid demands of historical grounds and opening vast new possibilities for experimentation, especially on flexible canvas supports. These additions make modern gesso flexible, non-toxic, and quick-drying. This flexibility is incredibly crucial for modern canvases, by the way. Unlike rigid wood panels, canvases expand and contract with changes in temperature and humidity, and a flexible ground is essential to prevent cracking over time. Without this pliability, the rigid paint film would inevitably fracture as the canvas fibers move, ruining your artwork over the long term. These modern gessos offer incredible versatility compared to their historical counterparts.

Traditional Gesso: A Glimpse into Art History's Foundations
Historically, however, gesso was a very different beast. Made with animal glue (often rabbit skin glue) and chalk or gypsum – typically around 1 part glue to 8-10 parts chalk/gypsum by weight – this traditional gesso was a staple for Renaissance masters like Leonardo da Vinci and Michelangelo. This specific ratio was vital to achieve a highly rigid, yet still workable and absorbent ground. Rabbit skin glue, for instance, is a protein-based adhesive derived from animal hides, prized for its strong adhesion and its ability to become highly flexible when warm and wet, yet dry to an extremely hard, brittle, and absorbent film. This peculiar property, while perfect for rigid wood panels, made it utterly unsuitable for canvases that might stretch or move, as it would simply crack. They valued its incredible absorbency and rigid, smooth finish, which allowed for precise detail and luminous oil glazes that truly glowed from within. This traditional gesso, often prepared with a colored underpainting called imprimatura, truly set the stage for the luminous, layered effects seen in Renaissance art. This particular ground was essential for the multi-layered, thin applications of oil paint, enabling artists to build up profound depth and light through dozens of transparent layers. Its rigidity also made it an ideal surface for highly detailed tempera painting and the intricate application of gold leaf for gilding on rigid wood panels. Its laborious preparation (involving heating animal glue, typically rabbit skin glue, often in a double boiler, carefully mixing it with fine chalk or gypsum to avoid lumps, and applying many thin, warm layers, often sanding meticulously between each to achieve an ultra-smooth finish) and susceptibility to humidity made it challenging, requiring careful handling to prevent cracking. Honestly, my impatient self shudders at the thought of all that prep work! It's a fascinating rabbit hole, by the way! If you're into the history of materials, you'll find it quite intriguing how the history of acrylic painting from industrial innovation to artistic medium evolved, largely moving away from these older, more complex grounds.
My Unwavering Loyalty: Why Gesso is My Studio's MVP (Most Valuable Primer)
Why do I, someone who often struggles with meticulous preparation in other areas of life (my desk is a perpetual disaster zone, and don't even ask about my tax receipts), insist on gesso? Because it makes my art better, plain and simple. Before I even begin to dream about color, the act of gessoing my surface has become a quiet ritual, a moment of preparation that, I've learned, brings its own sense of calm before the creative storm. Honestly, it's one of the few areas where my inner perfectionist truly shines, probably because I know the consequences of cutting corners! And because I want my work, like the art for sale here, to truly endure for generations.
Artist-Grade vs. Student-Grade: A Non-Negotiable Investment
And a quick note on quality: while student-grade gesso might seem like a bargain, artist-grade options are a whole different beast. They pack in higher pigment concentration and finer solids like titanium dioxide and calcium carbonate. This translates to superior coverage, better tooth (that subtle roughness your paint craves), and ultimately, a more durable and vibrant finished painting. You'll find artist-grade gesso often requires fewer coats for full opacity, saving you time and material, whereas student-grade might be more translucent, necessitating more layers for a truly bright white base. Trust me, it’s worth the small investment. I learned this the hard way on a large commission. I thought I could save a few bucks on a big tub of student-grade gesso. The result? I ended up applying five thin coats just to get decent coverage, and even then, some areas felt 'thirsty.' The final painting, a vibrant abstract landscape, just didn't have the same punch as my usual work; the blues felt flatter, and the yellows less luminous. Never again! Generally, gesso is most beneficial for porous surfaces like raw canvas, unprimed wood panels, and some rigid art boards. For pre-primed canvases or surfaces designed for specific dry media, its necessity might vary, but it rarely hurts. Oh, and one more thing I often forget to mention until it's too late: always ensure good ventilation when working with gesso, especially if you're using solvents or traditional gesso. And on a more technical note, artist-grade gesso also helps maintain a neutral pH level for your painting surface, providing a stable, acid-free foundation that is crucial for the long-term archival quality of your artwork. A healthy start for your art, right?
- Color Vibrancy & Even Application: Making Your Pigments Sing! This is a big one for me, especially in my abstract art. When paint soaks directly into an unprepared canvas, it can lose its punch, literally sinking in and becoming duller even after it dries. Gesso creates a barrier, pushing the pigment forward. By creating a non-absorbent, light-reflective barrier, gesso prevents paint pigments from disappearing into the canvas fibers. Instead, the color sits on the surface, allowing light to interact directly with the pigment, making it appear more saturated and luminous. It's like painting on a pristine white wall versus an old, stained one, making your colors pop and sing! I've had many moments where I've layered vibrant hues, only to find them dull on an unprimed surface – a truly frustrating experience. I vividly remember a client once asking me how I got such vibrant, almost glowing blues in an abstract piece. My secret? A carefully gessoed surface. Without it, those same blues would have muted into something far less captivating. In fact, a few years back, I rushed an abstract landscape and skipped gesso on a small section, thinking 'no one will notice.' The sky in that section turned out noticeably flatter, almost 'thirsty' for color, a constant, subtle reminder of my impatience. For example, a transparent pigment like Phthalo Blue will appear dramatically richer and more jewel-like on a gessoed surface, allowing its inherent luminosity to shine, whereas on raw canvas, it might just look stained and muted. Similarly, a warm, semi-transparent earth tone like Burnt Sienna, which might appear muted and almost muddy on raw canvas as its binders soak in, will retain its rich, reddish-brown depth and subtle translucency on a gessoed surface, allowing for beautiful glazes. Gesso also evens out the playing field, giving you a consistent surface to work on, which is vital for everything from basic brushstrokes for acrylic painting to complex layering. Ever tried painting on a surface where some spots are more absorbent than others? It's a nightmare.
- Better Adhesion & Durability: A Hug for Your Paint. My art needs to last. Gesso provides that crucial layer for the paint to grip. This means fewer accidental scrapes revealing the canvas underneath, and a more robust final product with true archival quality, meaning it's built to endure for generations. It's like giving your paint a really good hug, so it doesn't want to let go.
- Build-up & Texture: My Playground. And this is where gesso truly becomes my playground. You can apply gesso thickly, even sculpt with it using various tools like palette knives, spatulas, trowels, sponges, or even your fingers, to create incredible textures and depth before you even touch your colors. Imagine applying gesso with a trowel to create a rough, stucco-like base for a cityscape, or using a comb to create parallel ridges for a wood-grain effect. For instance, to create a subtle stucco texture, I'd apply a medium-thick layer of gesso with a palette knife, then gently drag the flat edge of the knife in random, overlapping motions, allowing the gesso to build up slightly in peaks and valleys. This quickly creates an organic, weathered surface perfect for adding subsequent layers of paint that catch the light. You can even dab it on with a sponge for a subtle, dappled effect, or use stencils to create raised patterns. A spray bottle with diluted gesso can create unique drippy, ethereal textures, too! It's a fantastic way to begin building texture right from the foundation. While many artists use gel mediums for texture, starting with a gesso base provides a consistent, absorbent foundation that mediums alone might not offer on raw canvas, especially if you're layering with paint later. You can even combine gesso with inert fillers like fine sand, pumice, or marble dust mixed into the gesso for even more diverse textural effects. For instance, mixing in fine sand creates a subtle, gritty texture perfect for weathered landscapes, providing a matte finish that diffuses light. Pumice yields a coarser, more robust surface ideal for heavily textured abstract work, almost like a stone surface that catches light in dramatic ways. Marble dust, on the other hand, provides a smoother, almost plaster-like feel, excellent for highly detailed glazes and offering a luminous quality under subsequent layers. This foundational texture is where I often begin to build the complex layers and tactile qualities that define my abstract pieces.
- Cost-Effectiveness: Stretching Those Precious Pigments. Good quality paint can be expensive. Gesso acts as a buffer, preventing your precious paint from being absorbed excessively by the raw canvas. I've found that a properly gessoed canvas can reduce paint absorption by 20-30%. This means if a tube of expensive cadmium red typically covers 10 square feet on raw canvas, on a properly gessoed surface, it might cover 12-13 square feet, making your paint go significantly further and saving you money in the long run.
So, what artistic goals drive you to reach for the gesso, or perhaps explore other ways to prep your surfaces?
The Gesso Spectrum: Finding Your Perfect Match
Just when you thought gesso was just "white stuff," trust me, there's a whole rainbow (or lack thereof) of options out there! My personal preference often leans towards a good quality acrylic gesso, but let's quickly touch on a few types. It's also worth noting the difference between student-grade and artist-grade gesso, which we discussed earlier; artist-grade often has higher pigment concentration and finer solids, providing superior coverage and tooth.
Type of Gesso | Key Characteristics | Best For | Pros | Cons |
|---|---|---|---|---|
| Acrylic Gesso | Flexible, water-soluble when wet, dries waterproof. Forms a non-porous film. | Most versatile, acrylics & oils (modern approach) | Easy to use, quick-drying, flexible, non-toxic | Less absorbent than traditional gesso, which can require more layers for heavy oil impasto or delicate glazes if a specific historical effect is desired. For oil painters, paint tends to 'sit' more on the surface, which some find less suitable for deep, luminous glazes or the unique 'tooth' interaction of traditional oil painting techniques. |
| Traditional Gesso | Rigid, very absorbent, not flexible. Made from animal glue (e.g., rabbit skin glue), chalk, and white pigment. Highly porous. | Oil painters seeking a historical, rigid ground for fine detail, tempera, gilding on panels. | Creates a luminous, smooth, highly absorbent surface ideal for oil glazes, tempera, and provides significant tooth. | Laborious preparation, unsuitable for flexible surfaces, prone to cracking if mishandled, susceptible to humidity. |
| Clear Gesso | Transparent but provides tooth (contains fine clear solids like silica or marble dust). | When natural surface appearance is desired (e.g., wood grain, printed canvas), mixed media. | Retains substrate's natural look, provides excellent adhesion without obscuring. | Less opacity for covering blemishes, can be harder to see where applied. |
| Black Gesso | Opaque black ground. | Dramatic effects, vibrant colors on dark ground, unique underpainting. | Makes colors pop, allows for striking light-on-dark compositions. | Influences color perception significantly, may require more layers of light paint to achieve full opacity. |
- Acrylic Gesso: This is the most common and versatile. It's water-soluble when wet, but dries waterproof and flexible. You can use it for acrylics and oils. I always have a big tub of this in my studio.
- Traditional Gesso (Animal Glue Gesso): As mentioned, this is a historical formulation made from rabbit skin glue, chalk, and white pigment. It creates a very rigid, highly absorbent surface, primarily for oil painters who want a specific, non-flexible ground that was common in Renaissance art, or for tempera and gilding. It's a distinct material, and honestly, a bit too involved for my usual process (I'm more of a "grab and paint" kind of person).
- Clear Gesso: This is fantastic if you want to keep the natural look of your canvas or wood while still getting all the benefits of gesso. It still provides tooth because it contains fine, clear solids (often silica or marble dust) that create that subtle grip, but is transparent. I use this when I want the raw canvas to peek through in my work, or for mixed media pieces where I want to collage paper elements onto a canvas while still allowing the canvas weave to show through for textural interest. It’s a great way to marry preparation with natural aesthetics.
- Black Gesso: Offers a dramatic, dark ground that can make colors truly glow. Painting light colors on a dark background creates a completely different mood and intensity. It's a fun way to shake things up and challenge your usual color palette. Which type of gesso do you find yourself reaching for most often?
My Not-So-Secret Gesso Application Method (It's Easier Than I Used to Think)
So you've chosen your gesso. Now what? Applying gesso isn't rocket science, and honestly, I've learned it's easier than I used to think, but there are a few things I've picked up that make a huge difference. And full disclosure, I've definitely rushed this step more times than I care to admit, only to pay for it later when my paint absorbed unevenly or didn't quite stick. Learn from my impatience!
- Stir Well: Gesso can settle, so give it a good stir. Think of it like stirring yogurt; you want a consistent texture throughout.
- Thin If Needed: If it's too thick, you can add a tiny bit of water to acrylic gesso. But don't go overboard; you don't want to lose the tooth!
- Apply in Thin Layers: I usually go for 2-3 thin, even coats rather than one thick glob. This helps prevent cracking, ensures an even surface, and allows each layer to cure properly. I use a wide brush or a foam roller for this.
- Direction Matters: Apply the first coat in one direction (e.g., horizontally), let it dry, then apply the next coat perpendicular to the first (vertically). This helps build an even texture without visible brushstrokes.
- Sand (Optional, But Recommended!): Once dry, I often give it a light sanding with fine-grit sandpaper (around 220-grit) between coats, or after the final coat, especially if I want a smoother surface. Just remember to wipe off the dust with a damp cloth before applying the next coat or starting to paint!

When Gesso Might Not Be Your Best Friend (And What to Do Instead)
While I'm a gesso evangelist, it's not always the right choice for every project. There are definitely moments when I pause and think, "Maybe not gesso this time," often when preserving a specific underlying texture or absorbency is key. I vividly recall starting a series of subtle mixed media collages on delicate Japanese papers, instinctively reaching for gesso, then catching myself. Gesso would have completely ruined the ethereal quality of the paper. It's a constant lesson in mindfulness!
- Raw Canvas Aesthetic: Sometimes, you want the raw, untreated look and feel of the canvas to be part of your artwork. In that case, you might skip gesso entirely to preserve that direct connection, or use clear gesso on specific areas to maintain that natural appearance while still protecting the fibers.
- Specific Paper Types: If you're working on highly absorbent watercolor paper, delicate printmaking paper, or specialty papers like illustration board or Bristol board designed for specific ink, charcoal, or pastel work, gesso might alter its properties in a way you don't want. For example, on delicate Japanese papers, gesso can cause buckling, tear the fibers, or make them overly stiff. On heavily sized watercolor paper, it typically reduces the paper's natural absorbency by creating a less porous, more sealed surface. This causes washes to bead up, dry inconsistently, or even resist lifting techniques, fundamentally changing how watercolor pigments behave on the surface, often in an undesirable way. Or on papers designed for dry media like pastels or charcoal, gesso can create a slick, non-porous surface that prevents pigments from adhering effectively, making them simply slide off. For these, it's often better to consider specific specialty grounds (like watercolor ground or pastel ground) that are formulated to enhance rather than hinder the medium's unique properties. Always test first on a scrap piece!
Gesso on Other Surfaces: Paper, Metal, and More
While canvas and wood are classic pairings, artists sometimes wonder about gesso's role on other grounds. For example, using gesso on certain metal surfaces like aluminum or copper can provide a valuable key for acrylics or oils to adhere, as these smooth, non-porous materials otherwise offer very little grip. However, metal surfaces often require specialized metal primers first to ensure long-term adhesion and prevent corrosion, with gesso acting as a secondary, textural layer. Think of prepping a discarded aluminum baking sheet for a mixed media collage – a metal primer first, then gesso for texture. For paper, as mentioned, it's a delicate balance; while a thin layer can add stiffness and tooth to heavier art papers, it can also dramatically change their absorbency and feel, making them unsuitable for media like watercolor unless specifically formulated watercolor ground is used.
So, when do you choose to embrace the raw canvas, and when do you reach for the gesso?

Beyond Gesso: Other Surface Preparations
While gesso is my go-to, it’s worth acknowledging that artists have other ways to prepare a surface. For specific effects or media, you might encounter:
- Sizing (e.g., Rabbit Skin Glue): Often applied before gesso for traditional oil painting, sizing seals the canvas, protecting it from oil penetration, but doesn't provide tooth. The sizing acts as a crucial initial barrier, preventing the linseed oil in the paint from directly touching and eventually rotting the canvas fibers. Traditional gesso is then applied over the sizing to provide the absorbent, rigid ground with the desired tooth. Modern acrylic gesso, however, often incorporates these sealing properties directly into its formulation, making a separate sizing layer less critical for many contemporary applications. It's a nice convenience, frankly.
- Acrylic Mediums: Sometimes, specific acrylic mediums can be applied as a base, especially if you want a very specific texture or transparency that gesso doesn't offer. For example, gel mediums can be used to build significant texture directly, though they generally don't offer the same universal absorbency or foundational protection as gesso. Other textured acrylic mediums, like pumice gels or molding pastes, can also be fantastic for creating extreme textures or sculptural effects before painting, offering alternatives or complements to gesso.
- Specialty Grounds: There are also various specialty grounds available for specific media. Pastel grounds, for instance, are designed with a very gritty surface (often containing pumice or finely ground marble) to provide countless microscopic peaks and valleys for pastel pigments to cling to, essentially mimicking the texture of sanded paper. Watercolor grounds are specifically formulated to control water absorption, creating a surface that allows for luminous washes and layering on surfaces not typically suited for watercolor, such as canvas or wood, enabling the unique flow and transparency characteristic of the medium.
But honestly, for the vast majority of my mixed media and acrylic work, and for preparing canvases for oil paint, gesso remains the undisputed champion. It’s reliable, versatile, and does exactly what it needs to do without overcomplicating things. Oh, and remember to always store your gesso in a cool, dry place with the lid tightly sealed to ensure its optimal shelf life and prevent it from drying out or degrading over time. A little care goes a long way in the studio!
FAQs: Quick Answers to Your Gesso Queries
Before we wrap up, let's address some common questions I hear about gesso...
Q: Can I use house primer instead of gesso?
A: Please don't! House primer isn't formulated for artistic archival quality. It might yellow, crack, or react poorly with your paints over time. This is because house primers typically use different binders and pigments not designed for the flexibility required for canvas or the long-term stability needed for fine art. They often lack the specific inert solids that provide gesso's unique tooth, and their chemical composition can leach into paint layers, causing discoloration or degradation. Stick to art-specific gesso for longevity. Professional artist-grade gessos are rigorously tested for archival quality, flexibility, and chemical compatibility with paints, which DIY versions and house primers simply cannot guarantee. Your future self (and any potential collectors of your work at the museum in 's-Hertogenbosch) will thank you.
Q: How long does gesso take to dry?
A: Acrylic gesso usually dries to the touch in 15-30 minutes, but I always recommend waiting at least an hour, or even a few hours, between coats, and preferably 24 hours before you start painting seriously. Patience is a virtue, even for impatient artists like me!
Q: Do I need gesso for oil painting?
A: Absolutely! Especially on canvas. Oil paints contain linseed oil, which is an "oxidizing oil." Over time, this oil undergoes a chemical reaction that can cause the natural fibers (like cotton or linen canvas) to slowly rot and degrade. Gesso creates a protective barrier, preventing direct contact and also regulating oil absorption. This prevents your oil paint from soaking too deeply into the canvas fibers, which can make colors appear dull and flat, and preserving the integrity of your canvas for generations. While modern acrylic gesso is an excellent, more versatile choice for oil painting, providing essential barrier and tooth, some traditional oil painters still prefer traditional gesso for its unique historical properties, highly absorbent surface, and ability to create luminous glazes that are difficult to achieve otherwise. The choice depends on your desired effect and historical adherence.
Q: Can gesso be tinted?
A: Yes! You can mix a small amount of acrylic paint into your gesso to create a tinted ground. This can be a fantastic way to influence the overall mood and light of your painting from the very beginning. I often tint my gesso grey or a muted earth tone for a warmer underpainting, or even a soft blue or green to influence the cool tones in a landscape. For abstract work, a vibrant red or deep purple ground can add incredible depth and unexpected luminosity to the final layers, while a deep blue can intensify the mood of a marine scene, making the final ocean colors resonate more profoundly. For a delicate floral piece, a pale lavender or peach tinted gesso can provide a wonderfully soft, ethereal start, making the delicate hues sing. This idea of a colored ground, sometimes called imprimatura in historical painting, truly sets the stage for the artwork. It allows the artist to establish an overall tone or mood from the very first layer.
Q: Can gesso be used with other media like pastels or watercolors?
A: While gesso can technically be applied to various surfaces, it's generally not ideal for all media without careful consideration. For watercolors, gesso typically reduces the absorbency of the paper, creating a less porous, more sealed surface. This causes washes to bead up, dry in unpredictable ways, or even resist lifting techniques. Fundamentally, it changes how watercolor behaves. For pastels, chalk, or charcoal, traditional gesso can create a surface that is too smooth, preventing the dry pigments from adhering effectively. As I mentioned earlier, specialty grounds are often a much better choice for these media (e.g., pastel grounds with added grit, or watercolor grounds designed to control absorption), which are usually a better choice for achieving optimal results and preserving the medium's unique qualities. Always test on a scrap piece before committing to your final artwork.
Q: What about DIY Gesso recipes?
A: While a quick online search might reveal recipes for homemade gesso using things like PVA glue, chalk, or even flour, I strongly caution against using these for any artwork you intend to last. Professional artist-grade gessos are rigorously tested for archival quality, flexibility, and chemical compatibility with paints, which DIY versions lack. They can yellow, crack, or degrade over time, and might react unexpectedly with your chosen pigments, undermining all your hard work. For serious art, investing in a quality commercial gesso is always the safer, more reliable choice. It's like baking a cake – you could try to grind your own flour, but sometimes it's just better to use the reliable store-bought kind to ensure your masterpiece doesn't crumble!
My Final Brushstroke on Gesso
So, there you have it: my (perhaps overly enthusiastic, but hopefully helpful) take on gesso. It's not the glamorous part of painting, for sure. You won't see it in the final art for sale, glistening in the spotlight. But it's the quiet, foundational hero that supports everything else. It allows your colors to truly sing, your textures to truly speak, and your art to endure – a journey I've charted throughout my own artistic timeline.
Next time you're preparing a canvas, don't rush past the gesso. Take a moment, apply it thoughtfully, and appreciate the silent work it's doing. Your canvas will thank you, your paint will thank you, and frankly, your future art will definitely thank you. And who knows, maybe you'll even find a little meditative joy in the process, like I eventually did – discovering that sometimes, the most profound artistic statements begin with the humblest of preparations. Perhaps, like me, you'll discover that true artistic freedom often begins with a solid, well-prepared foundation. So go on, embrace the gesso, and let your art truly flourish! Happy prepping, and even happier painting! So, tell me, after diving into the world of gesso, what's one technique you're eager to try, or a past gesso 'oops' moment that taught you a valuable lesson?