
Gesso Unfiltered: The Artist's Definitive Guide to Choosing & Applying Your Best Art Foundation
Demystify gesso with this artist's comprehensive guide! Explore its science, historical evolution, types, application techniques, and creative uses. Build the ultimate archival foundation for your acrylic, oil, or mixed media masterpieces.
Gesso Unfiltered: The Artist's Definitive Guide to Choosing & Applying Your Best Art Foundation
Ever feel like your vibrant paint colors just… sink into the canvas, losing their magic before they’ve even had a chance to truly sing? Or perhaps you’ve stared at a centuries-old masterpiece, utterly captivated by its brilliant luminosity, and wondered how on earth it still glows? For the longest time, I was that artist who eyed my pristine, pre-primed canvases with a 'Why mess with perfection?' kind of attitude. I mean, the canvas is already white, right? Why bother with an extra, seemingly redundant, step? Oh, past self, you had so much to learn, so much to unlearn, even. This isn't just about making your canvas white; it's about unlocking the true potential of your colors, ensuring your paint adheres beautifully, and creating art that stands the test of time. Let's dive into the foundational magic of gesso.
My past, lazier self would have argued until the cows came home – and probably brought snacks – but my present, slightly-wiser self insists: this isn't just about making your canvas white. It's about giving your art a proper fighting chance, a true foundation to truly shine and, frankly, to last – not just for a season, but for generations. When I say 'fighting chance,' I mean ensuring your colors pop with an almost impossible vibrancy, your paint adheres like a long-lost friend, and your masterpiece doesn't degrade over time like that forgotten sandwich lurking in the back of the fridge. So, what exactly is this foundational magic, and why do you really need it in your artistic life?
Let's Get Real About Gesso: A Legacy of Luminosity
I remember one frustrating afternoon, painting on an unprepped canvas (because I was certain I knew better – a classic blunder of my younger, more impulsive self). The paint just… sucked in. It lost its vibrancy, the texture was all wrong, and it felt like I was battling the canvas itself, not creating with it. That's when I finally humbled myself and started looking into what gesso actually is in painting and why every serious artist seemed to swear by it. Turns out, it's not just hype – it's a foundational legacy that has evolved through centuries of artistic endeavor. Understanding this historical evolution helps us appreciate the sophisticated science behind the modern gesso we use today.
A Brief History of Ground Preparation: From Hides to Polymers
Historically, before modern acrylic formulations, masters like Jan van Eyck meticulously prepared surfaces with traditional gesso. This wasn't the gesso we squeeze from a tube today, but a laborious mix of animal glue (like rabbit skin glue) and chalk or gypsum. This wasn't just about priming; it was about creating a luminous, stable ground that influenced the entire painting's structure and brilliance. Imagine the dedication required during the Renaissance and Baroque periods: boiling down rabbit hides, carefully grinding chalk, and applying layer after layer, all while worrying about humidity causing mold or pests finding a tasty snack in your canvas. This was essential for creating the incredibly stable and luminous surfaces we admire in classical art, allowing for the deep glazes and rich colors characteristic of those eras. While our focus here is largely on Western traditions, it's worth noting that diverse cultures across the globe have historically developed their own ingenious methods for preparing painting surfaces, from early Egyptian gesso made of gypsum to various Asian grounds incorporating rice paste or clay.
The tactile experience of traditional gesso, often referred to as 'gesso grosso' (coarse gesso) or 'gesso sottile' (fine gesso), was distinct. It could be sanded to an incredible smoothness for intricate details, yet still offered a unique, subtle absorbency that allowed oil paints to be manipulated with a certain richness. This contrasts with the continuous flexibility and sometimes slicker feel of modern acrylic gessos, a distinction many traditionalists still cherish.
The shift towards modern, acrylic-based grounds began gaining traction in the mid-20th century. Pioneers in art materials saw the need for a more stable, flexible, and user-friendly alternative to the sometimes temperamental traditional grounds. These early modern acrylic gessos, often referred to as universal acrylic ground, carried that essential spirit but with modern, archival binders, thankfully saving us from boiling rabbit bones and the headaches of historical material instability (and the potential for some truly pungent studio smells, trust me). This evolution represents a significant leap, making high-quality, archival preparation accessible to every artist, not just those with apprenticeships and a strong stomach.
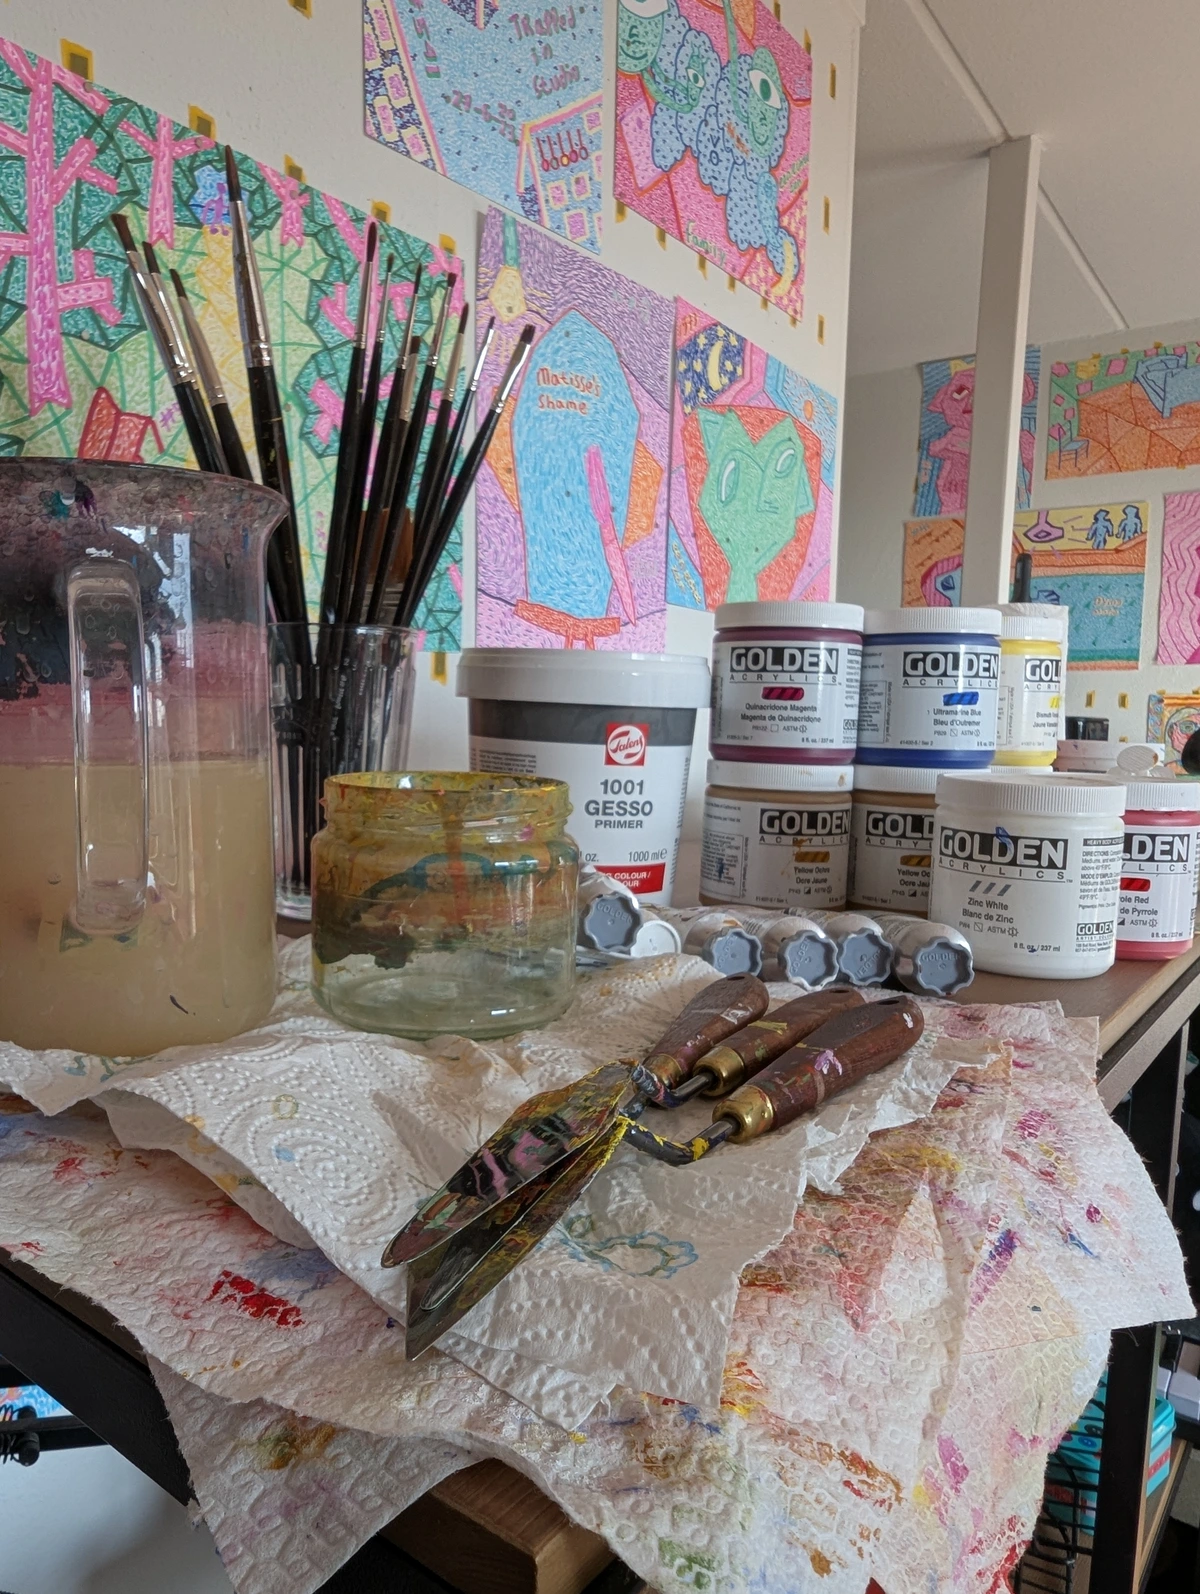
For me, gesso is that silent, indispensable partner in the studio. It's the unsung hero that ensures your paint adheres properly, maintains its true color, and extends the life of your artwork. One time, it quite literally saved a large abstract piece when I spilled coffee on a raw canvas section – the gessoed part repelled it, the raw part absorbed it like a sponge, leaving an ugly, permanent stain. I learned that day that gesso works by creating a slightly absorbent, yet uniform surface that grabs the paint beautifully. It reduces the absorbency of the raw canvas, preventing your paint from sinking in and losing its brilliance, and preventing colors from appearing muddy or dull. It also provides a stable, archival barrier between your precious materials and the canvas. (And by "archival," I mean specifically formulated to resist degradation for generations, designed to protect your artistic legacy, and ideally meeting standards like those from the International Organization for Standardization – ISO – for permanence!) If you're going to pour your heart and soul onto a canvas, shouldn't it have the best possible surface to live on? I certainly think so now.

https://www.pexels.com/photo/creative-art-studio-with-brushes-and-paints-29589096/, https://creativecommons.org/public-domain/
The Science Behind the Surface: What is Gesso, Really?
So, what exactly is this magical potion we brush onto our canvases? Modern gesso, often referred to as acrylic gesso or universal acrylic ground, is typically a mix of three key components, working in harmony to give your artwork the best possible foundation – it’s like a secret formula for creative success:
- Acrylic Polymer Emulsion (the binder): Think of this as the super-strong, yet flexible glue, the firm handshake holding everything together – or even the invisible scaffolding that supports your vibrant world. This is essentially liquid plastic that gives gesso its flexibility and adhesion properties. A high-quality binder ensures that your paint will stick to the surface and move with the canvas as it expands and contracts (like your skin breathing), preventing cracking over time and making your artwork more durable and archival. It’s the strong, yet flexible backbone of your painting surface, preventing a phenomenon called binder migration, where the paint binder could otherwise be absorbed into an unprepared surface, leaving your pigments poorly adhered, vulnerable to flaking, and ultimately leading to duller, less stable colors. This is crucial because pigments without sufficient binder are unprotected and won't hold their vibrancy or structure over time.
- Titanium Dioxide (the pigment): For white gesso, this is the powerhouse pigment that provides opacity and that brilliant white backdrop. The finer the particle size, the greater the opacity, light reflection, and better UV resistance – meaning your colors stay true and vibrant under gallery lights. This finely ground white pigment makes your colors pop by reflecting light, ensuring their true vibrancy isn't absorbed by the canvas fibers, which could otherwise lead to dull, less impactful hues. It also contributes to the overall luminosity and sheen of the primed surface, making colors appear brighter and more vivid. Imagine your colors wearing their brightest, most dazzling outfit against a pristine white wall, ready for their close-up.
- Calcium Carbonate or Chalk (the filler/extender): This is where the crucial 'tooth' comes from. And what is tooth? It's the subtle surface texture that gives your paint something to grip onto, preventing it from sliding off a slick surface. These finely ground particles, typically calcium carbonate, create a slightly abrasive, porous surface – think of it like microscopic Velcro hooks or tiny hills and valleys that grab onto your paint, allowing it to adhere beautifully. The grade of calcium carbonate matters here; a coarser grade provides more tooth for impasto, while a finer grade results in a smoother surface for detailed brushwork or delicate glazes. It adds body, controls absorbency, and is truly the texture that lets your brush dance or dig in with confidence.
In essence, gesso transforms a raw, often overly absorbent, and potentially acidic substrate into a stable, slightly porous, and archivally sound painting surface. It's the essential bridge between your raw canvas and your vibrant art, ensuring longevity and optimal performance for your paints. This carefully balanced combination ensures that gesso doesn't just sit on the surface, but genuinely interacts with and prepares the substrate for its artistic destiny. And when we talk about archival quality, we're referring to materials that meet specific industry standards (like ISO standards for permanence) designed to last for centuries without significant degradation, preserving your artistic voice for future generations.
My Gesso Journey: From Beginner's Bluff to Prepping Pro
My initial reluctance stemmed from pure laziness, I won't lie. It felt like an extra, tedious step that stood between me and the glorious, messy act of putting paint down. "Just get to the good stuff!" my impatient inner artist would scream, often with a dramatic flair worthy of a stage performance. But the difference a properly gessoed canvas makes is, truly, night and day. It creates a surface that's just absorbent enough to grip the paint beautifully, allowing for smoother application and effortless blending. It's completely transformed how I approach preparing a canvas for acrylic painting and even how I think about the canvas itself.
My early attempts at gesso application were… well, let's just say they involved more guesswork than technique. I vividly remember one disastrous experiment where I applied gesso far too thinly on a cheap, porous canvas. My vibrant reds and blues, usually so bold, bled right through the canvas fibers, leaving a ghostly, dull stain on the back and muted, lifeless colors on the front. It was a disheartening mess, teaching me the hard way about opacity and proper coverage. It felt like my passion was literally draining away with the pigment. On the flip side, learning to apply thin, even coats and allowing proper drying time led to a breakthrough with a large-scale abstract, where the colors finally sang with the vibrancy I'd always envisioned, directly thanks to a perfectly prepped ground. It wasn't until I understood these seemingly small details that I truly grasped the magic. This personal journey of trial, error, and eventual triumph is all part of what makes creating my colorful abstract art so rewarding; every lesson learned on the surface translates to better art, deeper understanding, and fewer creative headaches.
Over the years, I've dabbled with quite a few different types and brands, each offering a slightly different experience. It’s like trying on different shoes – some are adequate, and then there’s that one pair that just fits and makes you want to run a marathon. Or, in my case, paint for hours without battling the surface. So, what have I learned from all that experimenting? Let's dive into the lineup.
The Gesso Lineup: What I've Tried and What I Think
When it comes to gesso, it’s not a one-size-fits-all situation. Your choice can subtly, or not so subtly, influence your painting process and the final outcome. Here’s a quick overview of the main types, followed by a deeper dive into my experiences, complete with my personal takes and hard-earned lessons.
Gesso Type | Primary Use | Key Benefit / Characteristic | Best For | Considerations | Artist's Take (My Experience) |
|---|---|---|---|---|---|
| Universal (Acrylic) | Versatile for most paint types | Dependable, good tooth, bright white, flexible | Acrylics, oils, gouache, mixed media; general purpose priming when you want a bright, uniform white surface. | Most pre-primed canvases benefit from additional coats. | My absolute workhorse. It makes my colors sing and provides a reliable base for almost anything. Essential for vibrant abstracts! |
| Clear (Acrylic) | Retain surface texture/color | Transparent barrier, shows substrate, subtle darkening | Mixed media, wood panels, when you want the natural material's texture/color to show. | Can slightly darken raw canvas (makes fibers translucent); less absorbent than white gesso. | Great for wood grain or mixed media. I once underestimated the darkening effect, so always test first if the exact raw color matters. |
| Black (Acrylic) | Dramatic, high-contrast works | Enhances vibrancy, moody, unique lighting | Abstract works, still life, portraiture where a dark ground is desired; pushing color vibrancy and contrast. | Requires building up light; some transparent colors may need more layers. | A game-changer for dramatic contrast. It forces you to rethink light, which can lead to incredible breakthroughs in color relationships. Be patient with transparent layers! |
| Oil Painting Ground | Traditional oil painting | Less flexible, specific absorbency, archival for oils | Oil painting only, especially traditional techniques. Creates a smoother, slightly 'slippery' surface that allows for easy manipulation and blending of oil paints. | Not suitable for acrylics; less flexible, so careful with flexible substrates (stretched canvas). | If you're serious about oils, this is non-negotiable. I learned that using acrylic gesso for oils eventually leads to cracking – a costly lesson! Ensures proper archival longevity for oil works. |
| Absorbent Gesso | Watercolor, washes, thin glazes | Highly absorbent, matte finish, takes washes/stains well | Watercolor effects on canvas/panels, highly diluted acrylic washes, ink drawings, thin glazes where you want paint to sink in quickly and create soft edges. | Can be too absorbent for thick paint; can consume a lot of paint if not managed. | Fantastic for watercolor effects on canvas. It's a thirsty beast, so be prepared for it to absorb more paint than you expect, but the soft edges are beautiful. |
| Colored Gessos | Specific palettes, moods | Influences overall color temperature, unique starting point | Any medium where you want to start with a specific non-white base color (e.g., grey for mid-tones, red for warm underpainting). | Changes how colors interact; requires thoughtful color choices. | Fun for experimentation, but definitely requires pre-planning. A grey ground once helped me nail the subtle values in a monochrome piece I was struggling with. |
| Sanding Gesso | Ultra-smooth surfaces | Extremely fine grit, easy to sand, glass-like finish | Fine detail, portraiture, highly realistic work, glazes where absolute smoothness is paramount. | Requires multiple very thin coats and meticulous sanding. | My secret weapon for hyper-smooth grounds. It's more work, but the results for fine detail are unparalleled. |
| Textured Gesso | Adding surface relief | Contains coarse particles, creates tangible texture | Impasto effects without thick paint, mixed media, adding sculptural elements before painting, creating specific tactile surfaces. | Can be difficult to apply evenly, may consume more paint due to irregular surface. | When I want to add oomph to an abstract without piling on paint. It's messy, but the sculptural quality it brings is fantastic. |
Universal Gesso: The Reliable Workhorse
This is probably where most of us start, and for good reason. Universal gesso is almost always acrylic-based, making it incredibly versatile for acrylics, oils, gouache, and more. It typically consists of an acrylic polymer emulsion (the binder), titanium dioxide (the white pigment), and calcium carbonate or chalk (to add tooth and body). My go-to brands here have often been Golden Gesso and Liquitex Professional Gesso. They offer a good balance between having enough 'tooth' for the paint to grab onto and a pleasing smoothness, drying quickly to a matte, opaque finish.
- My take: It’s dependable. If you’re not sure what you need, this is your safest bet. It creates a lovely, bright white surface that makes colors pop, especially important in my colorful abstract art. It’s also generally pretty affordable, which is a bonus for those of us who go through a lot of canvases (like me, check my artist timeline for evidence of my painting addiction).
When it comes to student-grade vs. professional-grade universal gesso, the main differences lie in pigment load and binder quality. Professional grades tend to have significantly more titanium dioxide for better opacity, meaning you need fewer coats for a truly opaque white. They also use a higher quality acrylic binder for superior adhesion, flexibility, and longevity, leading to more durable, archival results. This higher binder content provides increased elasticity, reducing the risk of cracking on flexible substrates like stretched canvas as they expand and contract with environmental changes. A student-grade gesso might, for example, require 4-5 coats to achieve the opacity and archival strength of just 2 coats of a professional-grade product, meaning significantly more time, material, and ultimately, less protection for your serious work. For a true workhorse that won't let you down and will protect your art for decades, professional grade is absolutely worth the investment.
Clear Gesso: For When You Love the Canvas Texture
This one was a game-changer for me when I wanted to incorporate the natural texture or color of the raw canvas or wood into my work. Instead of covering it up with white, clear gesso provides that necessary barrier and tooth without obscuring the material underneath. I’ve mostly used Winsor & Newton Clear Gesso for this. While Golden and Liquitex are my primary loves, Winsor & Newton also produces excellent gessos across the board, as do brands like Gamblin and Blick, each with their own subtle nuances.
- My take: It’s fantastic for allowing the underlying surface to show through. Think mixed media, or when you’re working on wood panels and want that grain to be part of the composition. Just be mindful that it can slightly darken the raw canvas, as the binder fills the microscopic air pockets in the canvas fibers, making them more translucent and thus darker – similar to how a wet paper towel looks darker than a dry one. This subtle darkening effect is less pronounced on less porous surfaces like sealed wood panels, but it's something I always test first if the exact raw color matters. It can also be less absorbent than white gesso due to a higher binder-to-filler ratio, which means your paint might sit on the surface more, rather than sinking in – great for specific glazing techniques but challenging for washes where you want quick absorption. It's less common for my highly pigmented abstracts, but great for specific textural explorations.
Black Gesso: Diving into Dramatic Depths
Oh, the drama! Painting on a black surface is a completely different experience. It forces you to think about light and color in a new way, pushing you to build up brightness rather than starting with it. I’ve experimented with Liquitex Black Gesso quite a bit.
- My take: Using black gesso can make colors appear incredibly vibrant and intense, as they contrast so strongly with the dark background. For my abstract work, this really makes those intense saturated hues pop with an almost electric energy. Some highly opaque pigments will cover easily, while transparent colors might need more layers or specific underpainting to achieve vibrancy. It’s not for every piece, but for certain abstract works where I want a really moody or high-contrast feel, it’s invaluable. It's a great way to challenge yourself, honestly, and can lead to some unexpected breakthroughs in how artists use color.
Other Colored Gessos & Creative Applications: Expanding Your Palette's Foundation
Beyond black, there's a whole spectrum of colored gessos available. While not as common as white or black, a neutral grey gesso, for instance, can provide a fantastic mid-tone base, making it easier to judge values and color temperatures without the stark contrast of white or black. Other colors can be chosen to unify a particular palette, create a warm or cool glow from beneath, or simply add another layer of complexity to your work. Experimentation is key here – a red gesso under a green painting can create unexpected, earthy undertones, while a blue gesso under warm yellows might lead to a vibrant, almost electric contrast. It's like having a secret underpainting pre-applied!
And let's not forget using gesso creatively within a painting. It's not just a ground; it can be a textural element! I've used gesso for impasto effects, building up subtle raised surfaces for a sculptural feel before painting, or even mixing it with a tiny bit of pigment before applying it to create a uniquely textured, tinted base. This versatility extends beyond just preparing a ground; gesso can also act as a fantastic primer for other mediums. I’ve found great success using a thin coat of clear gesso on paper to prepare it for pastels or charcoal, giving the surface just enough grip without overwhelming the delicate medium. It can even be used on woodblock or linocut printing plates to create a smooth, ink-receptive surface, or on rigid panels for highly detailed ink drawings. It's a versatile medium in its own right if you dare to play with it.

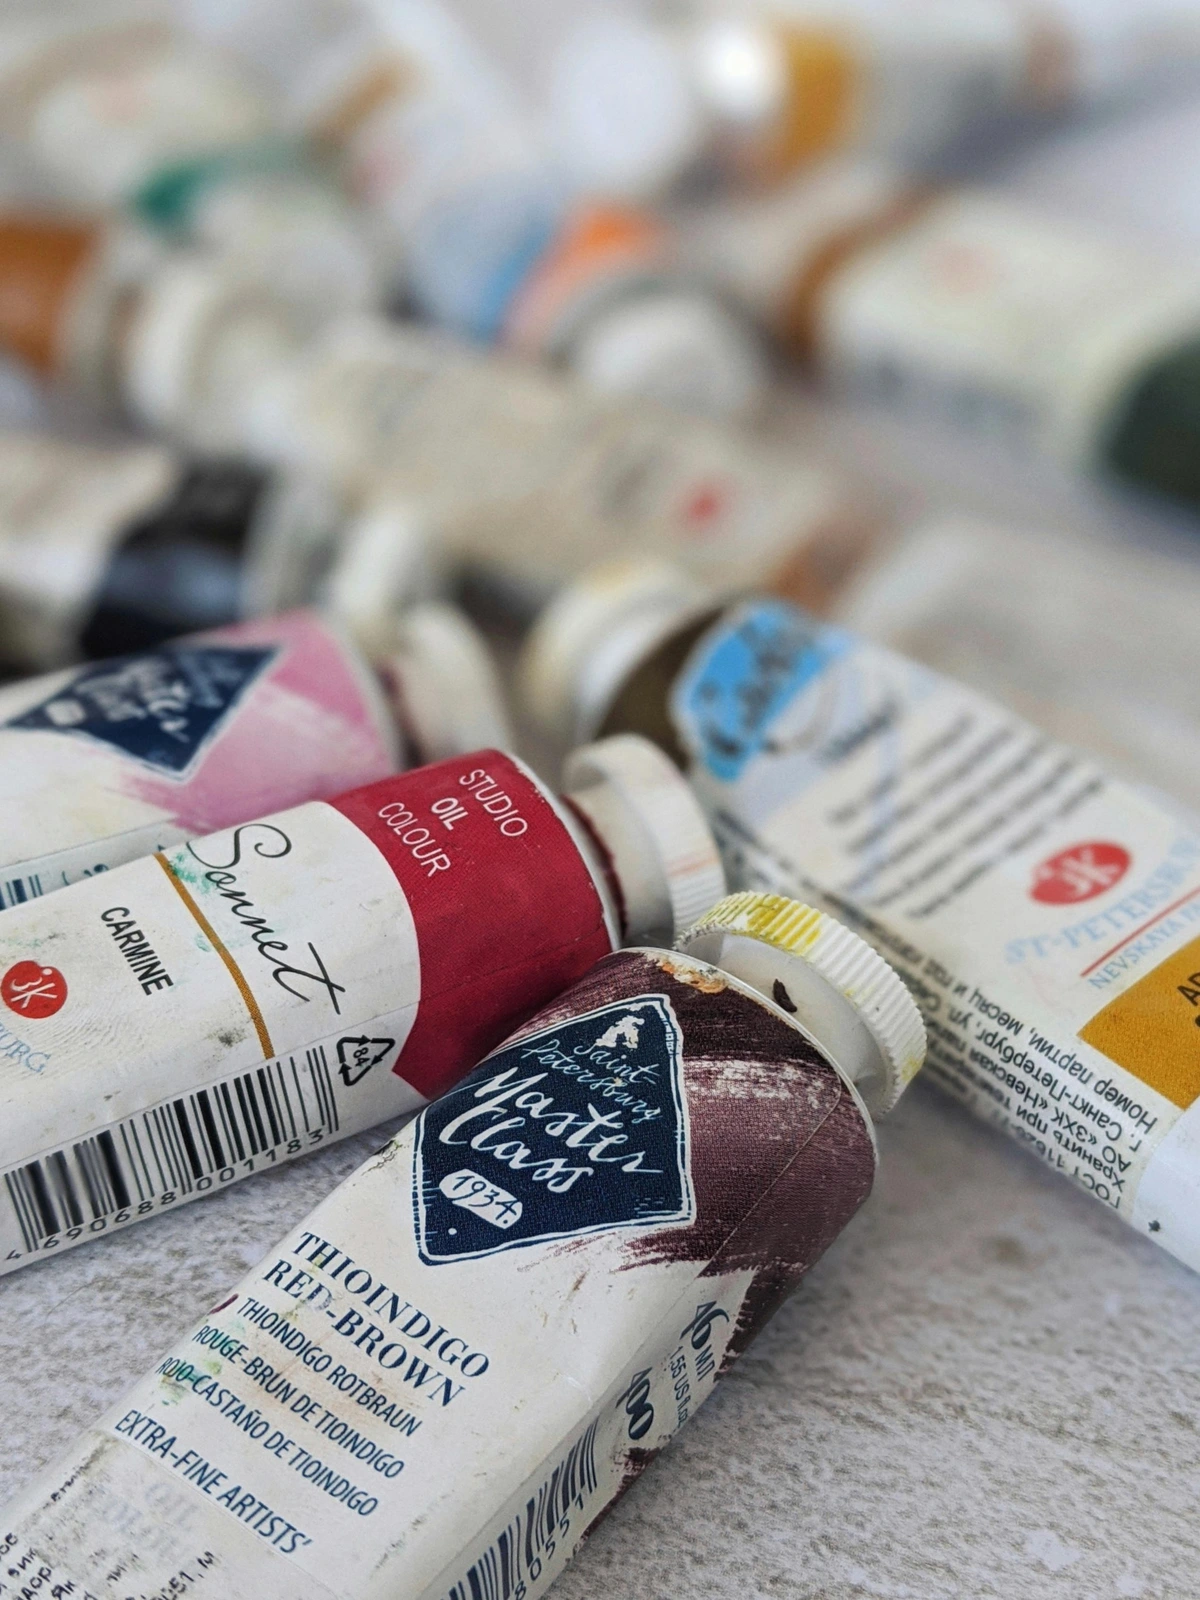
https://www.publicdomainpictures.net/pictures/250000/nahled/messy-colorful-artists-palette.jpg, https://creativecommons.org/publicdomain/zero/1.0/
Specialized Gessos: Oil Painting Ground & Absorbent Gesso
While I primarily work in acrylics these days, I’ve had my phases with oils. For oil painting, some artists prefer a dedicated oil painting ground (like Gamblin Oil Painting Ground), which is often alkyd-based and formulated to be less flexible than acrylic gesso. This is crucial because oil paint stiffens and becomes less flexible as it cures over time, and a flexible ground on a flexible substrate could lead to cracking. Alkyd resins, like phthalic anhydride and fatty acids, cure into a harder, more brittle film over time compared to the continuously flexible acrylic polymer emulsions. This makes them ideal for oil paint, which undergoes a similar hardening process. Traditional oil grounds also tend to have a different drying time and 'feel' under the brush, often slower and with a particular richness that many oil painters seek. They create a smoother, slightly 'slippery' surface that allows oil paints to move and blend beautifully, facilitating classic sfumato or glazing techniques. It’s a very different tactile experience from acrylic gesso's grip.
Then there's absorbent gesso (sometimes called watercolor ground), which is designed for maximum absorbency, creating a matte finish ideal for thin washes, watercolor, or highly diluted acrylics/oils where you want the paint to sink in rapidly. It truly mimics the behavior of paper when working with water-based mediums on canvas. This can be fantastic for creating soft edges and allowing colors to bleed and bloom in unexpected ways.
- My take: If you're serious about oil painting techniques, especially with traditional approaches, don't skimp here. The wrong gesso for oils can lead to cracking or poor adhesion over time. Always check the label to ensure compatibility. It behaves differently than the acrylic-based universal gessos, and understanding this is crucial when deciding the right canvas for acrylic vs. oil. Absorbent gesso is also fantastic for creating a watercolor-like effect on canvas or panels, allowing beautiful blooms and subtle staining that typical acrylic gesso won't. It's a game-changer for artists who want to bridge wet-on-wet techniques from watercolor onto a canvas surface. However, be warned: its high absorbency means it can 'eat' a lot of paint if you're not careful, so plan your paint quantity accordingly!
Beyond the Basics: Sanding Gessos & Textured Grounds
And then we venture into the world of truly specialized grounds, designed for very specific effects. Sanding gesso, for example, is formulated with extremely fine particles that allow it to be sanded to an incredibly smooth, almost porcelain-like finish. This is ideal for artists who demand a glass-like surface for hyper-realistic detail, delicate glazes, or fine brushwork where every brushstroke should disappear. It requires patience and meticulous sanding between thin coats, but the result is a surface that truly lets your paint glide.
On the opposite end, textured gesso (sometimes called impasto gesso or modeling paste for specific applications) contains coarser particles or additives that create a tangible, raised surface. This is fantastic for adding sculptural elements to your work, creating deep impasto effects without using massive amounts of paint, or building up a unique tactile quality that interacts with light in fascinating ways. I’ve used it to create subtle relief maps in my abstract pieces, adding another dimension of interaction for the viewer. It's a powerful tool for artists who want to explore beyond the flat plane of the canvas.
https://images.pexels.com/photos/4139739/pexels-photo-4139739.jpeg, https://creativecommons.org/public-domain/
Beyond the Brush: Mastering Gesso Application Techniques
Now that we've demystified the various types of gesso and their science, let's roll up our sleeves and explore the practical art of applying it for the best possible results. Applying gesso might seem straightforward, but a few refined techniques, learned through plenty of trial-and-error (and yes, my share of gloopy, streaky, cracking mistakes), can make a world of difference in your final surface quality and overall painting experience. Isn't it empowering to know that the materials you choose today can safeguard your artistic voice for generations to come?
1. Preparation is Key (Don't Skip This!)
Before you even think about grabbing your brush, ensure your chosen surface (canvas, wood panel, paper, hardboard, even metal or plastic) is impeccably clean, dust-free, and thoroughly dry. For wood, I often give it a light sanding first to remove any splinters or imperfections, then wipe it down with a tack cloth or a slightly damp, lint-free cloth. And here's a crucial tip for wood: sometimes, especially with certain woods like oak, pine, or birch, I'll seal it with a clear acrylic medium before gesso. Why? To prevent 'support induced discoloration' (SID), which is when natural tannins or acids from the wood can leach into your gesso and paint layers, causing yellowish-brown stains to appear over time – like a stubborn, unsightly tea stain seeping through a crisp white tablecloth, or a persistent shadow that mysteriously appears from within the material. This can be especially frustrating and utterly soul-crushing in my bright, colorful abstract work! Gesso on illustration board or hardboard also seals these porous materials, preventing warping and providing a stable, uniform painting surface. For unusual surfaces like metal, rigid plastic, or even glass, you might need specialized preparation beyond just cleaning. This often involves degreasing the surface, light sanding (for mechanical tooth), and sometimes specific adhesion promoters or primers designed for non-porous materials to ensure proper, lasting adhesion. Think of it as tailoring your prep to the material, ensuring the gesso is genuinely happy where it lands.
2. Thinning Your Gesso (Sparingly, My Friend!)
My first coat almost always gets a tiny bit of water – maybe 5-10% max. This helps it soak into the fibers of the canvas better, creating a strong, deep bond. Think of it as opening up the pores of the canvas to really embrace that first layer. But here's a serious warning: don't overdo it! Too much water dramatically dilutes the acrylic binder, significantly reducing adhesion, flexibility, and archival effectiveness. It can weaken the polymer chains, leading to a brittle, powdery surface, reduced paint adhesion, and even eventual cracking or flaking. You just want it thin enough to flow smoothly, not like watery skim milk. If you find your gesso too thick, start with a teaspoon of water for a small pot and mix thoroughly, testing the consistency as you go.
3. Tools of the Trade: Your Gesso Application Arsenal
Choosing the right tool can make the difference between a smooth, even ground and a surface you’ll spend hours trying to fix (or worse, just give up on). My philosophy? Invest in good tools where it counts, but sometimes the simplest solution is best.
- Brushes: A wide, flat synthetic brush is my go-to. Look for one with soft, even bristles that won't leave too many brush marks. For an ultra-smooth finish, I might use a stiffer bristle brush for the first, more aggressive coat to really work the gesso into the weave, and then switch to a softer synthetic for subsequent, lighter coats. Make sure your brush is spotlessly clean! Old, dried gesso is the enemy of smooth application, leaving annoying, gritty streaks. My past self would have considered brush cleaning a personal affront to my creative flow, but my present, slightly more patient self knows it’s the absolute key to smooth sailing… and smoother, more vibrant paintings.
- Rollers: For large canvases, a high-density foam roller can give a super smooth, even application with minimal texture. Just be mindful of bubbles! Roll evenly and lift the roller gently at the end of each stroke. A high-density foam roller will give the smoothest finish, while a coarser nap roller can impart a subtle texture if that's what you're after.
- Squeegees/Palette Knives: For thin, perfectly flat coats, especially on rigid panels like wood or illustration board, a flexible squeegee or even a palette knife can work wonders. These tools push the gesso into the surface rather than laying it on top, minimizing texture and air bubbles, and providing a beautifully uniform base for detailed work that feels almost factory-made.
https://images.pexels.com/photos/7302087/pexels-photo-7302087.jpeg, https://creativecommons.org/public-domain/
4. Multiple Thin Coats > One Thick Coat (The Golden Rule, Seriously)
Seriously, if you take one thing from this section, make it this: two or three thin, even coats, with proper drying time in between, will give you a much, much better, smoother, and more durable surface than one gloopy, inconsistent mess. A thick single coat can dry unevenly, leading to cracking, poor adhesion, and inconsistent absorbency, which can absolutely ruin your painting down the line. Each coat should be dry to the touch before applying the next. If you're painting on an unprepared canvas, I recommend at least two coats; for pre-primed, one or two more of your preferred gesso will elevate it significantly. Patience is not my strongest virtue, so quick-drying acrylic gesso is always a win for me! Waiting 15-30 minutes between coats usually does the trick.
5. Sanding for Smoothness (or Deliberate Texture!)
If you're aiming for a porcelain-smooth surface for fine detail work or delicate glazes, I usually sand lightly with fine-grit sandpaper (220-400 grit) between coats. Use a light hand and wipe off all dust before the next layer. This smooth surface encourages finer details and smoother blending, allowing paint to glide with effortless grace. It reduces the visibility of brushstrokes and the weave of the canvas, giving you a pristine foundation. Conversely, if I want to maximize the effect of texture and encourage a more expressive abstract, one or two coats without sanding might be absolutely perfect. The underlying texture can become a subtle part of the composition, influencing how light plays on the surface and adding tactile interest to your brushwork. It's a deliberate choice, not a mistake! My lazy past self thought sanding was a tedious chore; my present, slightly-wiser self knows it's an opportunity to truly tailor the surface to my specific artistic vision.
6. Brush Strokes Matter (Unless You're Going Rogue)
Unless you explicitly want texture from your gesso application, try to apply it with smooth, even, deliberate strokes. To minimize visible brush marks, alternate direction for each coat (e.g., horizontal for the first, vertical for the second, then horizontal again for the third). This helps fill in any grooves from the previous application and creates a more uniform, harmonious base.
7. Environmental Factors: Don't Let Your Studio Work Against You
Ah, the joys of studio life! Sometimes things don't go as planned, and gesso is no exception. While I'll dive deeper into specific troubleshooting in the next section, understanding your environment can prevent many headaches.
- Ventilation: Gesso can have a smell, especially some oil-based grounds or brands. Always work in a well-ventilated area, and wear a mask if you're particularly sensitive. Your lungs and brain will thank you for the fresh air.
- Humidity/Temperature: This is a silent killer of good gesso application. High humidity can significantly extend drying times, making your gesso tacky for longer and prone to collecting dust (the ultimate enemy!). Conversely, very dry conditions or excessive heat can cause gesso to dry too quickly, leading to brush marks, uneven layers, or even cracking if applied too thickly. Aim for moderate conditions (around 65-75°F or 18-24°C and 50-60% humidity) for optimal drying and application. Your gesso, and your sanity, will thank you.
Troubleshooting Common Gesso Application Issues: When Things Go Sideways
Ah, the joys of studio life! Sometimes, despite our best efforts, things just don't go as planned, and gesso is no exception. Knowing how to spot and fix common issues can save you a lot of heartache (and potentially, a perfectly good canvas!). Here are some of the sticky situations I've run into, and how I've learned to navigate them:
- Bubbles, Bubbles Everywhere: If you find yourself facing a canvas covered in tiny gesso bubbles, it's often from over-working the gesso with your brush or roller, or applying it too quickly in a rush of artistic zeal. Gentle, even strokes and not over-thinning usually solves this. Using a high-density foam roller can also help minimize bubbles by providing a smoother, less agitated application. If you see a few stubborn ones before they dry, gently pop them with the edge of your brush or a pin. It’s like playing whack-a-mole, but for your art! Remember, trying to gently coax gesso into an even layer is like trying to gently coax a toddler to sleep – requires patience and the right technique, lest you end up with a messy, screaming canvas!
- Streaky, Uneven Application: If you end up with thick spots, visible brushstrokes, or frustrating streaks after drying, don't despair! A light sanding with fine-grit sandpaper (220-400 grit) can often level the surface beautifully. If it's severe, you might need to scrape it down and reapply (a painful but sometimes necessary step), but usually, a gentle sanding followed by another thin coat works wonders. This is where patience truly pays off.
- Cracking (The Heartbreaker): This is one of the most disheartening issues. Cracking usually stems from applying gesso too thickly in one go, or painting on a too-flexible canvas with an incompatible gesso (especially oil-based grounds on flexible canvases). It looks like spiderweb cracks on the surface and can compromise the longevity of your artwork. Prevention is key here: multiple thin coats, appropriate gesso for your substrate, and respecting drying times. For clear gesso, improper layering can exacerbate cracking as it lacks the bulk of opaque fillers.
- Peeling/Flaking (The Betrayal): Often indicates poor adhesion. This can be due to an unclean surface (grease, dust, oils), gesso that was over-thinned (weakening the binder), or gesso incompatible with the substrate (e.g., using acrylic gesso on an overly slick, unprepared metal surface without proper adhesion promoters). The gesso literally lifts off the surface, taking your precious paint with it. Make sure your surface is pristine and your gesso is not overly diluted! If you're having issues with absorbent gesso peeling, it might be due to too many layers applied too quickly, trapping moisture, or an incompatible initial surface.
- Chalkiness/Powdery Surface (The Disappointment): If your dried gesso feels dusty, chalky, or comes off on your hand, it's usually a sign of too much water used to thin the gesso, or a low-quality binder in a student-grade gesso. The surface feels dusty, paint won't adhere properly, and your colors will appear dull. Unfortunately, the best fix here is often to seal it with a clear acrylic medium to stabilize the surface, or, if severe, to scrape it off and start fresh with better gesso or proper thinning ratios.
- Poor Paint Grab (The Frustration): If your paint still feels like it's sliding around or not adhering properly after gessoing, the gesso might lack sufficient tooth or be too slick. This can also be a sign of a very low-quality gesso with insufficient filler. Testing a small patch is always wise before committing to a whole piece! A light sanding can sometimes help, or adding another thin coat of a higher-quality gesso.
- Dried-on Gesso (The Inevitable Scourge): For brushes, clean immediately after use! Seriously, your future self will thank you. If gesso dries on them, try soaking in warm water with a little dish soap, but it's often a losing battle. For surfaces, if you applied it too thickly and it's cracking, sometimes you can wet the area to reactivate it and carefully scrape it off, but prevention is always best. A few minutes of cleaning now saves hours of frustration later.
Choosing Your Gesso: My Personal Criteria & Brand Favorites
After all my experimenting, my studio has accumulated a surprising number of gesso tubs, and I've developed a pretty clear idea of what I look for. Your personal preferences, painting style, and the medium you use will, of course, guide your ultimate choice. It's truly a foundational element, not just literally, but creatively too. For example, a smoother gesso might encourage finer details and smoother blending, while a gesso with more texture could lend itself to bolder brushstrokes and a more expressive, tactile style. Here are my specific criteria, and how they impact my artistic flow, especially in creating large, vibrant abstract pieces destined for places like my colorful abstract art collection:
- Consistency: Not too thick that it’s a battle to spread, not too thin that it runs like water or requires endless coats. I like a creamy, almost yogurt-like consistency that flows beautifully but still holds its shape. A too-thick gesso can lead to more visible brush strokes and uneven drying, while a too-thin one demands endless layers and offers less protection – and who has time for endless layers when inspiration strikes? If you crave smooth, even application, look for a creamy, self-leveling consistency that behaves itself.
- Grit/Tooth: This is highly personal. I like a subtle tooth – it helps the paint grab onto the surface like a friendly handshake, but I don't want it feeling like sandpaper unless I'm going for a very specific texture. Too smooth, and paint can feel slippery, like it's skating on ice; too rough, and it can eat up your brushes and paint quickly. For my layered abstracts, a moderate tooth is perfect, providing just enough grip for subsequent layers without overwhelming the delicate blending. For impasto and bold texture, opt for more tooth; for fine detail and delicate glazes, less tooth is generally better. (Remember that analogy of "cradles for paint"? That's exactly what you're looking for – a cozy spot for your pigments!)
- Drying Time: Patience is not my strongest virtue, I admit it. So, quicker drying times (15-30 minutes) are an absolute win for my layered abstract work, allowing me to build up my paintings without agonizing waits. While fast-drying is great for efficiency, some artists prefer a slightly longer open time for specific blending techniques that require more leisurely manipulation. If you're impatient like me, choose fast-drying acrylic gesso; if you're a master blender, a slightly slower dry might be preferable.
- Opacity: For white gesso, I demand good coverage. I don’t want the canvas weave showing through after two coats – that just screams "amateur hour." Good opacity reduces the number of layers needed, saving precious time and material, and ensures the true vibrancy of your colors can truly sing. This is often where student-grade gessos fall short, requiring many more applications to achieve a truly bright white. Always aim for high opacity in white gesso for vibrant colors and efficient coverage – your pigments will thank you.
- Flexibility (for canvases): Especially important for paintings that might be rolled for shipping or displayed in environments with fluctuating humidity, good flexibility prevents cracking over time. This is where professional-grade binders truly shine, maintaining elasticity as the canvas expands and contracts with environmental changes. It’s the unsung hero that keeps your masterpiece together. Prioritize high flexibility for stretched canvases and larger, more ambitious works.
- Price: Let's be real, this matters to all of us. While I relentlessly advocate for quality, there's a point of diminishing returns. I look for the best value that still delivers professional, archival results. For large works, a good quality gesso that's not prohibitively expensive is a definite plus. Sometimes, investing a little more upfront saves you immeasurable time and frustration (and, let's be honest, potentially ruined artwork!) down the line. Balance quality with your budget, but never compromise on archival properties for serious work. For me, the cost of replacing a ruined canvas or the time lost to fixing issues far outweighs the negligible savings on cheap, unreliable gesso.
My Brand Favorites (for Acrylic-Based Needs)
After years of sampling, I tend to gravitate towards Golden Gesso and Liquitex Professional Gesso. Their universal gessos consistently hit that sweet spot of creamy consistency, good coverage, and just enough tooth. These are the ones that have reliably stood by me through countless canvases, not that I'm not open to new discoveries (but my artistic heart, for now, belongs to these two!). They are widely available, trusted by professionals, and offer consistent, archival quality that truly allows my abstract visions to come to life.
Gesso Quandaries Answered (My Way): Your Burning Questions, Sorted
Now, let's tackle some of the burning questions I often get, or ones I've wrestled with myself over the years. Think of this as my personal hotline for gesso-related woes and curiosities!
Do I really need gesso for pre-primed canvases?
This is a common one! Short answer: maybe, but probably yes. Longer answer: Most commercially pre-primed canvases do have a layer of primer, but it's often a very thin, inexpensive, student-grade acrylic emulsion. It's rarely a true, robust gesso layer designed for archival quality. From my experience, it's like a factory paint job on a new car – adequate to get by, but not custom. I always add at least one or two more coats of my preferred professional-grade gesso, especially if I'm doing a larger piece or one I plan to sell or exhibit. It gives me ultimate control over the surface, ensures consistent quality and absorbency, and provides a much better archival foundation for my work. Think of it as upgrading a basic rental car to something a bit more robust and comfortable for a long, important road trip.
Can I use house primer instead of gesso?
Oh, the temptation! I've heard stories, and my inner rebel once seriously considered it, but I’ve since learned better. While some house primers can technically work for adhesion in the short term, they are absolutely not formulated for archival quality art. They're often highly acidic, meaning they can chemically degrade the canvas and paint over time, leading to embrittlement, yellowing, or cracking – a slow, sad death for your masterpiece. House primers are designed for architecture, not for fine art materials; their binders and pigments might be incompatible with artist paints, leading to poor adhesion or unexpected chemical reactions (like discoloration) down the line. They might also contain industrial additives (like mildewcides or strong VOCs) that can interact negatively with artist pigments or binders, compromising the integrity and longevity of your precious artwork. For an art primer to be considered truly archival, it should ideally be pH-neutral, utilize stable and non-reactive binders (like artist-grade acrylic polymers), and contain inert pigments and fillers that won't degrade or react over centuries. Gesso is designed specifically for artists' materials and their longevity, with carefully chosen archival components. Save the house primer for your walls, not your masterpieces. Trust the art-specific formulations for your cherished work; your future self (and any collectors!) will thank you.
How many coats of gesso should I apply?
For most acrylic and oil painting, two to three thin, even coats are usually perfect. If you want a super smooth surface for fine detail work or glazing, go for three or even four, sanding lightly between each. For a more absorbent, textured surface (like for washes, or if you want the canvas weave to show through more), maybe just one or two. It really depends on your desired outcome, the absorbency of your initial surface, and how much protection you need. Remember, thin coats are always better than one thick, gloopy one – that’s a recipe for disaster!
Can I gesso over an existing painting?
Yes, you absolutely can! It's a fantastic way to salvage a painting you're not happy with, or to prepare a canvas for a completely new artwork. Think of it as hitting the reset button on your creative process! Just make sure the existing paint layers are fully dry and well-adhered. If there are very thick impasto areas, you might want to gently sand them down first for a smoother new surface and to ensure even coverage. Then, apply your gesso as usual – two or three thin coats should completely obscure the previous work and give you a fresh, vibrant start.
Sustainability in Gesso: A Modern Concern
In today's art world, many of us are increasingly mindful of the environmental impact of our materials. While traditional gesso ingredients like animal glue have their own ethical considerations, modern acrylic gessos are often water-based and contain fewer VOCs (volatile organic compounds) than some older formulations. However, they are still plastic-based. Some brands are beginning to offer eco-friendlier options, such as gessos made with recycled materials, plant-based binders (though often still experimental), or those with lower environmental footprints. Always check product labels for certifications, ingredient transparency, and disposal recommendations. It's a conversation worth having, and a choice worth making, where possible, to align our art with our values.
Creative Surfaces: Gesso for Beyond the Canvas
While we often talk about gesso for canvas and wood, its utility extends far beyond! I've experimented with priming heavy watercolor paper with a thin coat of clear gesso to give it more body and tooth for mixed media, allowing me to combine watercolors with acrylics or pastels. It can also be used on illustration board, hardboard, and even carefully prepared metal or rigid plastic surfaces. The key is understanding that gesso provides an adhesive, slightly absorbent, and often archival layer. So, if you're feeling adventurous, don't limit yourself – consider how gesso can transform an unexpected surface into a suitable ground for your artistic expression!
Storing Gesso: Keeping Your Foundation Fresh
Just a quick tip from my studio: always make sure your gesso container is tightly sealed after use! Exposure to air can cause gesso to dry out and form a thick skin on top, rendering it lumpy and difficult to apply smoothly. If you do get a skin, gently remove it, but try not to stir it back into the gesso. Store your gesso in a cool, dark place, away from extreme temperatures, to maximize its shelf life. A little care goes a long way in ensuring your gesso is always ready when inspiration strikes.

https://freerangestock.com/photos/177284/artists-workspace-filled-with-paint-brushes-and-supplies.html, https://creativecommons.org/public-domain/cc0/
Final Thoughts: The Silent Guardian of Your Canvas, and a Creative Secret Weapon
If you take one thing away from my admittedly extensive rambling, it's this: don't skip gesso. Your future self, the longevity of your art, and the vibrancy of your colors will absolutely thank you. Even if it feels like an extra step, a small delay before the "real" painting begins, it's an invaluable investment in your artwork's future, preventing countless heartaches and ensuring your vision endures, perhaps for centuries – maybe even making it to a place like my museum in 's-Hertogenbosch someday. It truly is the silent guardian of your canvas, patiently waiting for your masterpiece to unfold.
And before I sign off, a final creative tip from my studio, an extra layer of magic I often employ: after gessoing, sometimes I'll apply a thin, transparent wash of color over the entire surface – what artists call an imprimatura. This subtle colored ground can profoundly influence the mood and color temperature of the entire painting, especially for abstract work, giving a warm or cool glow from beneath. It's a fantastic way to break free from the stark, sometimes intimidating, white canvas and can subtly unify your palette from the very first layer. It's an opportunity to infuse even more intention and depth into your work from the very beginning. So, embrace the gesso. See it not as a chore, but as the first, fundamental brushstroke of your next great creation. Go forth, gesso fearlessly, and let your art truly shine!


