
My Essential Guide: The Best Oil Paints for Beginners to Start Your Luscious Artistic Journey
Master oil painting basics! Discover my top beginner oil paint brands, essential tools, and pro tips. Learn how to choose, mix, and paint with confidence and joy.
My Essential Guide: The Best Oil Paints for Beginners to Start Your Luscious Artistic Journey
I know, I know. "Oil painting? For me?" It sounds incredibly intimidating, doesn't it? Like something reserved only for serious, beret-wearing artists cloistered away in hushed, solvent-fumed studios. For the longest time, I felt exactly the same way. The sheer mystique of oil paints – their slow drying times, the perceived complexity of mediums and solvents, the daunting price tags – it all just seemed like a mountain far too steep to climb. I even distinctly remember a period where I meticulously avoided the oil aisle in art stores, almost out of a sense of artistic imposter syndrome.
But here's the thing I've learned, and trust me on this one: diving into oil painting as a beginner doesn't have to be overwhelming. In fact, with the right mindset and, crucially, the right set of paints, it can be an incredibly rewarding, forgiving, and utterly luscious experience. My first tentative foray into oils involved a slightly dusty, forgotten tube of crimson red I found lurking in a box of old art supplies. I was so used to the immediate gratification of acrylics, which are fantastic in their own right (and if you're curious, you can find my thoughts on the definitive-guide-to-paint-types-for-artists). But oils? They demanded a different kind of dance, a slower rhythm. And that, I've come to understand, is their secret superpower. They literally allow you to push paint around on the canvas for hours, blending colors seamlessly, correcting "mistakes" (which are really just opportunities for revision!), and exploring without the panic of a fast-drying medium. This extended working time is pure magic for learning color mixing, brushwork, and even subtle techniques like glazing. By the end of this guide, you'll be ready to confidently pick up your first oil brushes and discover why this medium is actually your new best friend. We'll delve into the surprising benefits of oil paint for beginners, explore the essential qualities of student-grade paints, and then I'll share my top recommendations along with essential tools and tips to overcome any initial hurdles.

So, if you're ready to dip your toe (or, more appropriately, your brush!) into this vibrant, tactile world, let's talk about the best oil paints to get you started without breaking the bank or your artistic spirit. My goal is to demystify the process and equip you with the knowledge to make confident choices.
A Brief History: From Ancient Pigments to Modern Palettes
While we often associate oil painting with the grand masters of the Renaissance, its roots stretch back much further than you might imagine. Imagine ancient artists in Afghanistan, nearly 1,500 years ago, already experimenting with oil-based paints for cave murals. Fast forward to the European Renaissance, and we see the Flemish masters, like Jan van Eyck, truly revolutionizing the medium, developing sophisticated layering and glazing techniques that gave their portraits and altarpieces an unparalleled luminosity and depth. The journey didn't stop there; the Baroque period, for instance, saw artists like Rembrandt and Velázquez pushing the boundaries with dramatic chiaroscuro and masterful brushwork, proving the medium's incredible versatility. This slow, deliberate evolution is part of oil painting's charm; it's a medium built for patience and enduring beauty. Understanding this lineage helps us appreciate the craft and the materials we use today.

Why Oil Paints Are Actually a Beginner's Best Friend (Seriously!)
When I first started, I genuinely thought oils were too advanced. Boy, was I wrong. What often gets touted as a 'con' – the slow drying time – is, for a beginner, actually a monumental 'pro.' Think about it:
- Endless Blending: You can take your time mixing colors directly on the canvas or on your palette, achieving smooth, nuanced transitions that are incredibly difficult with faster-drying paints. This sustained workability is a dream for understanding how colors interact, how to create gradients, and even for mastering techniques like mastering-glazing-techniques-in-oil-painting or what-is-alla-prima-painting. No more struggling to blend before the paint sets! I remember trying to blend a sky with acrylics, and it was a frantic race against time. With oils, that same sky became a calm, meditative process.
- Forgiving Corrections: Made a wrong stroke? No problem! You can scrape it off, wipe it away, or simply paint over it hours later without creating muddy layers. This freedom to rework is invaluable for learning, allowing you to experiment boldly without fear of permanent "mistakes." It truly reduces the pressure and lets you focus on the creative process. I've often turned what felt like a disaster into an exciting new direction, all thanks to oils' generous drying window.
- Layering with Ease: While some layers take longer, the slow drying allows for techniques like wet-on-wet (painting fresh paint into wet paint), scumbling (applying a thin, broken layer of opaque paint over a dry layer), and glazing (applying thin, transparent layers of color to build depth and luminosity). These are fundamental techniques that oils make incredibly accessible, helping you build a rich visual language.
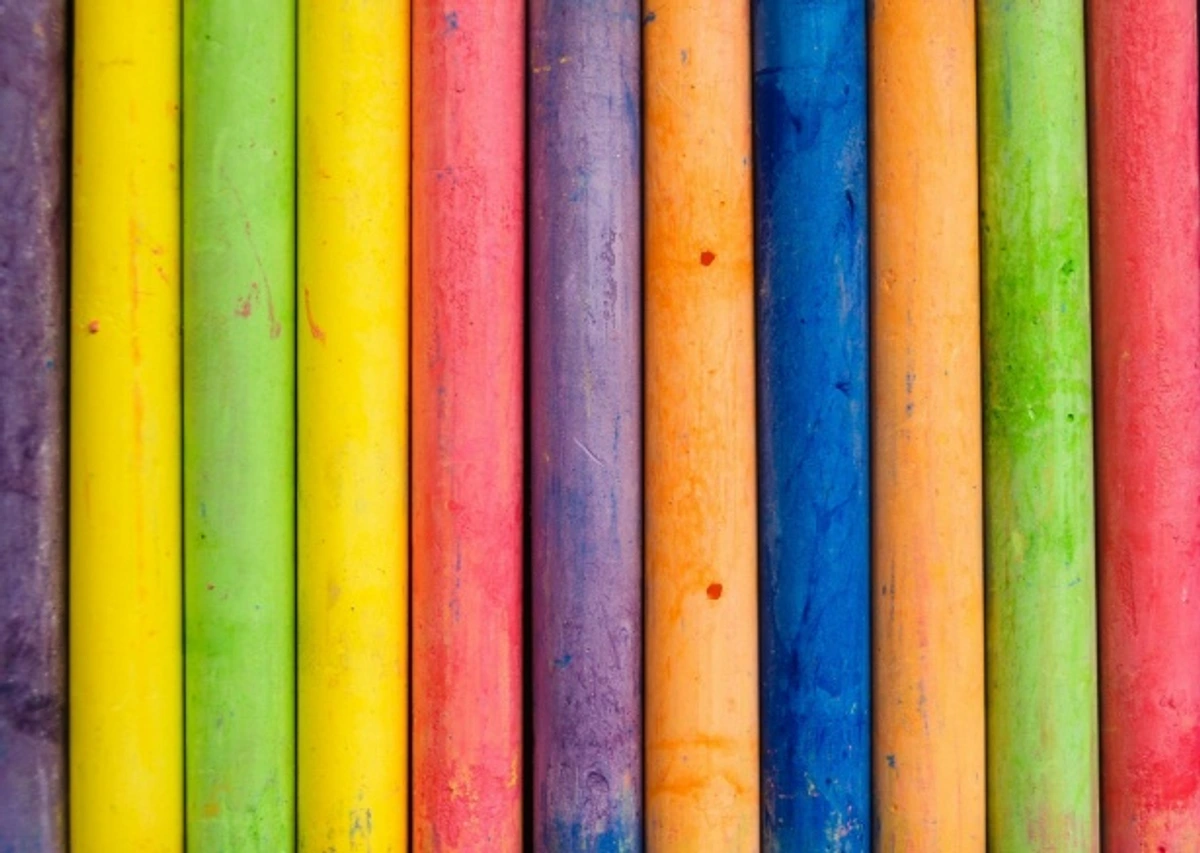
Beyond the drying time, the richness and depth of color you can achieve with oils are just breathtaking. There's a luminous quality, a tangible presence, that truly elevates your work. It's a feeling you simply have to experience to truly understand, and I promise, it's worth the initial leap.

Key Qualities of Beginner-Friendly Oil Paints: Your Smart Choices
Before we dive into specific brands, let's quickly chat about what I, as an artist who’s been through the beginner phase and back, look for when recommending oil paints for someone just starting. It's a careful balancing act between quality, ease of use, and, of course, that ever-important budget. Understanding these qualities will empower you to make informed decisions.
Quick Reference: What to Look For in Beginner Oil Paints
Quality | What it Means | Why it Matters for Beginners |
|---|---|---|
| Pigment Load | Amount of actual color pigment vs. fillers; often uses "hues" for student grade. | Good vibrancy without chalkiness; allows for learning my-approach-to-color-mixing-creating-vibrant-palettes-in-abstract-painting. |
| Binder | The oil (e.g., linseed, poppy) that holds pigment particles together. | Affects drying time, consistency, and paint film flexibility. Understanding it helps with mediums. |
| Consistency | How stiff or fluid the paint is. | A medium, "buttery" consistency is easy to mix, apply, and holds brushstrokes for texture. |
| Drying Time | How quickly paint becomes touch-dry and fully cures (oxidizes). | Oils dry by oxidation, not evaporation. Slow drying is a benefit, allowing ample rework. Some student paints dry faster. |
| Safety/Toxicity | Presence of toxic pigments or need for harsh solvents. | Essential for a healthy studio. Look for non-toxic labels and water-miscible options to avoid strong solvents. |
| Price Point | Cost per tube or set. | Student-grade is affordable, encouraging experimentation without financial pressure. |
Understanding the Qualities in Detail

1. Pigment Load (The Heart of the Color!)
This refers to how much actual color pigment is in the paint versus fillers or extenders. For beginners, you don't necessarily need artist-grade intensity just yet, but you absolutely want enough pigment to ensure your colors are vibrant, mix well, and maintain their integrity without looking chalky or washed out. Student-grade paints often achieve their lower price point by using a slightly lower pigment concentration or substituting expensive pigments (like Cadmium or Cobalt, which are natural minerals known for their opacity and lightfastness) with "hues" – synthetic alternatives that mimic the color but are more affordable and often non-toxic. Think of "hue" as a stand-in, designed to look like the real thing without the cost or toxicity. We're looking for a good 'student grade' here – decent color without the hefty artist-grade price tag, offering plenty of punch for practice and learning. A good pigment load means your blues look truly blue, not faded, and your mixtures remain clean and vibrant, teaching you proper my-approach-to-color-mixing-creating-vibrant-palettes-in-abstract-painting.

2. The Binder (What Holds it All Together)
At its core, oil paint is pigment suspended in an oil binder. This is typically linseed oil, but sometimes poppy oil or safflower oil are used, especially for whites and blues (as they yellow less over time). The binder doesn't just hold the pigment; it's what cures and hardens to form the paint film. Understanding the binder helps you choose appropriate mediums to alter your paint's properties and ensures you follow important rules like "fat over lean" for archival quality. The binder is literally the glue of your painting!
3. Consistency and Texture
Some oils can be super stiff, almost like cold butter, making them hard to push around without a lot of medium. Others can be quite runny, offering less control. For a beginner, a medium, buttery consistency is ideal. What does "buttery" mean? Imagine a soft, spreadable butter straight from the fridge – it moves easily across the canvas, holds its shape somewhat for impasto strokes, yet blends effortlessly. It's easy to handle, mix, and apply directly from the tube without too much fussing with additional painting mediums (at least not in the beginning!). Stiff paints can be frustrating as they require more effort to get off the brush, and runny paints can feel out of control, making fine details tricky.

4. Drying Time & Mechanism
Yes, oils are known for slow drying, and we just discussed why that's great. However, some brands formulate their student-grade paints to be a bit quicker to the touch, often by adjusting the oil binder (e.g., using alkyd oils which speed drying). This can be a boon for impatient beginners, allowing for layers to become touch-dry (the surface is dry enough to touch without smudging) a bit faster. A truly traditional slower dry time, however, is excellent for extended blending and wet-on-wet work. It's truly a preference thing, but either way, embrace the pace. Learning patience is part of the oily journey!
How Oils Dry: Oxidation, Not Evaporation
Unlike acrylics or watercolors that dry by water evaporation, oil paints dry through a process called oxidation. The oil binder reacts with oxygen in the air, polymerizing and hardening to form a solid, durable film. This chemical process is inherently slower, which is why even thin layers can take days to become touch-dry, and thick layers can take weeks or months to fully cure internally. This oxidative drying is also why oils retain their flexibility over time, unlike some faster-drying mediums that can become brittle.
5. Safety & Non-Toxic Options
Gone are the days when oil painting had to involve harsh, headache-inducing solvents. This is a big one for me, as a healthy studio environment is paramount. Many modern beginner paints and mediums are now non-toxic and, even better, water-miscible. Water-miscible oils can be thinned and cleaned up with water, eliminating the need for traditional solvents like mineral spirits or turpentine. Even with traditional oils, many brands offer non-toxic pigment alternatives. Always check the labels! Look for ASTM D-4236 certification, which means the product has been evaluated by a toxicologist and deemed non-toxic when used as intended. Pigments like Cadmium and Cobalt can be toxic, so student-grade 'hues' are a safer alternative for beginners.

6. Price Point: Student Grade vs. Artist Grade
Let's be real: art supplies add up quickly. For your first set of oils, you want something affordable enough that you feel comfortable experimenting, exploring, and making "mistakes" without feeling precious about every drop. Think of a budget around $50-100 for a decent starter set of 6-12 tubes. You're looking for value for money – paint that performs well for its cost, not just the absolute lowest price you can find (which can often lead to frustration).
This leads us to a crucial distinction: student grade vs. artist grade paints. For now, stick with student grade. It offers incredible learning opportunities without the financial pressure. Once you're comfortable, have developed your style, and perhaps even started thinking about selling your work (my journey from my-journey-from-studio-to-sale:-navigating-the-business-of-abstract-art-as-an-artist might be inspiring!), then you can absolutely consider investing in artist-grade paints for those key pieces. The goal is to build confidence, not debt!
Quick Breakdown: Student Grade vs. Artist Grade
Feature | Student Grade Oil Paints | Artist Grade Oil Paints |
|---|---|---|
| Pigment Load | Moderate, often using "hues" for expensive colors | High, often single pigments for ultimate purity |
| Purity of Pigment | Often mixes of pigments to achieve desired color | Usually single, pure pigments for clean mixing |
| Fillers | More fillers (extenders) like alumina hydrate | Fewer to no fillers, maximizing color intensity |
| Color Intensity | Good, but can be less vibrant or opaque | Intense, rich, brilliant, and often more opaque |
| Consistency | Generally smooth, consistent across colors | Varies by pigment, often richer and more buttery |
| Lightfastness | Good, but can vary more significantly by color | Excellent, designed for archival longevity |
| Price | Affordable, making experimentation accessible | Significantly more expensive, an investment |
| Best For | Beginners, practice, studies, learning techniques | Professionals, exhibitions, archival work, selling art |
My Top Picks: Oil Paints for Your First Strokes
Okay, deep breath! With those qualities in mind, let's dive into the specific brands that consistently deliver for budding oil painters. Based on my own experience and what I often recommend to emerging artists, here are my go-to oil paint brands for beginners. These strike a great balance and will set you up for success on your oily journey.

1. Winsor & Newton Winton Oil Colour
When I think 'beginner oil paints,' Winton is almost always the first name that pops into my head. It's a classic for a reason, a true workhorse in the student-grade category. These paints are student-grade, meaning they offer a superb balance of quality and affordability.
They boast a decent pigment load, providing rich, vibrant colors that are surprisingly easy to mix. I distinctly remember an "aha!" moment early on, realizing how effortlessly I could blend a Winton Ultramarine Blue into a Permanent Rose to create a myriad of purples, something that felt like a struggle with my previous, lower-quality paints. The consistency is generally smooth and buttery, making them very pleasant to work with straight from the tube or with a little linseed oil as a medium. They're widely available, so you can easily pick up individual tubes as you figure out your favorite colors. For a more in-depth look at this brand's professional line, you might enjoy my holbein-vs-winsor-newton-oil-paints comparison.
Essential Starter Colors:
- Titanium White (for its opacity and mixing capabilities)
- Lemon Yellow Hue
- Ultramarine Blue
- Permanent Rose
With these, you can mix a surprising array of colors!
Why Winton is great for beginners:
- Reliable Quality: Consistent results without being overly expensive.
- Great Color Range: A good spectrum of colors to explore and learn mixing.
- Accessible: Easy to find in most art stores and online.
- Forgiving: The standard drying time allows for ample blending and rework.
2. Gamblin 1980 Oil Colors
Gamblin is a brand I genuinely admire for its commitment to quality and safety, even in its student lines. Their 1980 series is a fantastic step up from absolute budget options without making the full jump into the professional price bracket. It feels like a subtle nudge towards more serious painting without the financial sting.
What sets Gamblin 1980 apart for beginners? Their pigment load is excellent for a student-grade paint, meaning you get really vibrant, strong colors that retain their intensity even when thinned. I've found their blues, in particular, to have a beautiful depth – a true experience compared to flatter student blues. They also offer a wonderfully stiff, yet buttery consistency that holds brushstrokes exceptionally well, which is great for learning different textures, impasto techniques, and expressive marks. It's like the paint almost sculpts itself under your brush! And importantly, Gamblin champions non-toxic painting practices, which aligns perfectly with my own preference for a healthier, more pleasant studio environment. This focus on safety is a huge bonus for anyone new to oils.

Essential Starter Colors:
- Cadmium Yellow Light (Hue)
- Alizarin Permanent
- Ultramarine Blue
- Burnt Umber
This quartet will give you strong primaries and a versatile earth tone for creating shadows and muted mixtures.
Why Gamblin 1980 is great for beginners:
- Superior Pigment: You'll immediately notice the difference in color vibrancy and strength.
- Consistent Quality: Reliable performance tube after tube, fostering confidence.
- Safety Conscious: Gamblin’s focus on non-toxic options is a huge bonus for a healthy studio.
- Sculptural Texture: Holds brushstrokes beautifully for texture work and impasto.
3. Lukas Studio Oil Paints
Lukas Studio oils are a bit of a hidden gem that I've stumbled upon over the years and truly grown to appreciate. They offer an incredible value proposition, often coming in larger tubes (sometimes 200ml!) for a very competitive price point. For beginners, this means you can afford to be more generous with your paint – a crucial factor for uninhibited experimenting and not feeling precious about every single drop. This freedom to be messy and explore without financial guilt is, in my book, priceless for learning. I remember discovering their generous tubes and finally feeling permission to really slather the paint on, which was incredibly liberating.
The consistency is smooth and creamy, making them exceptionally easy to mix and apply. They dry at a reasonable pace – not too fast to hinder blending, but not so slow that you're waiting weeks between thin layers. Plus, many of their colors are formulated to be highly lightfast, which means your beautiful creations won't fade or shift over time, a comforting thought even for practice pieces.
Essential Starter Colors:
- Primary Yellow
- Magenta
- Cyan
- Burnt Sienna
This offers a modern primary triad and a classic earth tone for robust mixing.

Why Lukas Studio is great for beginners:
- Excellent Value: Generous tubes for the price, encouraging liberal use.
- Smooth Consistency: Very easy to work with and blend, reducing frustration.
- Good Lightfastness: Your art will retain its colors over time.
- Solid Pigmentation: Decent color strength for the cost, providing vibrant results.
4. Reeves Oil Paints (For the Ultra-Budget Explorer)
Look, sometimes you just need to try something out with the absolute minimum financial investment, and that's where Reeves oil paints shine. Often found in starter kits at craft stores, these are truly entry-level oils.
The pigment load isn't as high as Winton or Gamblin, and the consistency can be a bit more erratic between colors (sometimes a touch oily, sometimes a little thinner), but for someone who literally just wants to see what it feels like to push oil paint around, they're a completely valid starting point. Think of them as your 'disposable' practice paints. If you find you love the medium, you'll naturally want to upgrade to one of the brands above. Don't expect masterpieces with these – their archival qualities are not their strong suit – but do expect fun, exploration, and a low-stakes way to answer the question, "Is oil painting for me?" I often recommend these to students who are genuinely on the fence and just need to get their hands dirty. I remember a friend, completely new to art, picked up a Reeves set and just started making colorful swatches, giggling at the unexpected textures. That's exactly what these paints are for.
Essential Starter Colors: A basic set will usually provide a good range to begin with, but focus on the primaries (Red, Blue, Yellow) plus White and Black, as these will allow for fundamental color mixing experiments.
Why Reeves is great for beginners:
- Unbeatable Price: The cheapest way to try oil painting without a significant commitment.
- Low Commitment: Perfect for absolute beginners unsure about the medium.
- Widely Available: Easy to find in most craft and hobby stores.
- Pure Experimentation: Ideal for just getting a feel for the medium without pressure.
Quick Comparison: Top Beginner Oil Paints
Brand | Key Strengths | Ideal For | Price Point |
|---|---|---|---|
| Winsor & Newton Winton | Balanced quality & affordability | Reliable learning, consistent results | Mid-range student |
| Gamblin 1980 | Superior pigment, great texture | Developing brushwork, healthy studio practices | Higher-end student |
| Lukas Studio | Excellent value (large tubes), smooth | Uninhibited experimentation, frequent painting | Value student |
| Reeves Oil Paints | Ultra-affordable, low commitment | "Just trying it out" phase, zero pressure exploration | Entry-level |
Beyond the Paints: Essential Tools (Keep it Simple!)
Choosing your paints is a big step, but you absolutely don't need a massive studio full of gadgets to start. Seriously, keep it simple. Here are the absolute essentials that will get you painting without overwhelming you, plus a few crucial additions for a complete understanding of the medium.

- Brushes: A basic set of synthetic or hog bristle brushes in various shapes (flats, rounds, filberts) will do wonders. Don't buy dozens; a few good ones will teach you more than many cheap ones. For more guidance, check out my thoughts on best-oil-painting-brushes-for-artists.
- Palette: A simple wooden palette, a sheet of glass (with taped edges for safety!), or even a tear-off paper palette is perfect for mixing your colors. My personal preference is always glass; it's so easy to clean!
- Canvas/Surface: Don't splurge on expensive linen for your first attempts. Primed canvas panels or pre-stretched cotton canvases are perfect and readily available. Other great options include prepared wood panels or heavy, gessoed paper. Cotton canvas is generally more affordable and readily available, while linen is finer and more durable (but pricier). You can also explore preparing your own surfaces; learning how-to-apply-gesso-to-canvas-a-beginners-guide is a game-changer for preparing your own surfaces if you're feeling adventurous. For more on choosing the right support, check out how-to-choose-the-right-canvas-for-acrylic-vs-oil.
- Palette Knife: Not just for mixing paint, but a fantastic tool for applying paint directly to the canvas for luscious texture and expressive marks! Check out what-is-a-palette-knife-and-how-to-use-it for tips.
- Solvent/Mediums: This is where beginners often get confused, but it's simpler than it sounds. It's crucial to understand the difference and purpose of each. For a deeper dive into these, explore what-are-painting-mediums-a-beginners-guide.
- Solvents: Used primarily for thinning paint for initial washes or for cleaning brushes. If you're using traditional oils, a small amount of odorless mineral spirits (OMS) is commonly used. Always use in a well-ventilated area. Avoid turpentine, which has strong fumes. If you chose water-miscible oils, you can largely skip solvents for thinning!
- Painting Mediums: These are substances you add to your paint to alter its properties – like increasing flow, gloss, transparency, or speeding up/slowing down drying time. A basic linseed oil is a great all-around medium for beginners to enhance flow and gloss. Other useful mediums include Stand Oil (a thicker linseed oil that creates smooth, enamel-like surfaces and increases durability), Alkyd Mediums (synthetic resins like Gamblin Galkyd or Winsor & Newton Liquin that significantly speed up drying time), and Glazing Liquids (designed for thin, transparent layers). If you're using water-miscible oils, just water! No need for solvents or complex traditional mediums initially.
- The Golden Rule: "Fat Over Lean" This rule is fundamental for preventing cracking and ensuring the longevity of your oil painting. It means each successive layer of paint should contain more oil (or medium) than the layer beneath it. Layers with less oil (lean) dry faster and are less flexible. Layers with more oil (fat) dry slower and are more flexible. Painting a fast-drying, less flexible layer over a slower-drying, more flexible one will cause the top layer to crack as the bottom layer continues to cure. Here's a simple progression:
- Layer 1 (Leanest): Paint thinned with only odorless mineral spirits (OMS) or water (for water-miscible oils).
- Layer 2 (Lean): Paint mixed with a small amount of oil medium (e.g., linseed oil) or paint straight from the tube.
- Layer 3 (Fatter): Paint mixed with more oil medium, or a specific glazing medium. Always ensure underlying layers are dry to the touch before adding a fatter layer. This isn't just a rule, it's a structural necessity for your art.
- Varnish: Once your oil painting is completely dry (which can take months for thicker layers!), you'll want to protect it. Varnishing provides a protective layer against dirt and UV damage, and can unify the sheen of your painting. Look for a removable artist's varnish, either spray or brush-on, that is specifically designed for oil paints. Do not apply varnish until your painting is fully cured. (A thin painting can take 6-12 months, thick impasto can take years). Applying varnish too early can trap solvents and prevent proper curing, leading to cracking or haziness.
Getting Started: Overcoming the Blank Canvas Fear & Common Beginner Mistakes
Fear of the blank canvas is incredibly real, I get it. It's almost as if the canvas is silently judging your every move! My advice? Don't aim for a masterpiece on your first try. Seriously. Just play. Approach it like a scientific experiment or a delightful mess.
Common Misconceptions About Oil Painting (Busted!)
Before you even pick up a brush, let's tackle some common myths that might be holding you back:
- Myth 1: Oils are too hard for beginners. Reality: As we've discussed, their slow drying time is actually a huge advantage for learning! It makes blending and corrections incredibly forgiving.
- Myth 2: You need a fancy, expensive studio. Reality: While a dedicated space is nice, you can absolutely start with a small corner of a room, a good easel, and basic supplies. Ventilation is key, not grandeur.
- Myth 3: Oil painting is toxic and smelly. Reality: Modern advancements offer non-toxic pigments and water-miscible oils that eliminate the need for harsh solvents. A well-ventilated area and proper cleanup are always smart, but it doesn't have to be a health hazard.
- Myth 4: Oils take forever to dry. Reality: Yes, they dry slower than acrylics, but this is a feature, not a bug! Thin layers dry to the touch in days, and the longer working time is fantastic for learning. Embrace the pace, and your patience will be rewarded.
Embracing Play & Exploration:
Experiment with mixing colors directly on your palette and then on the canvas. See how thick or thin you can make the paint. Try different brushstrokes – soft, hard, impasto, smooth, scratchy. Explore basic techniques like impasto (applying thick paint for texture, which these buttery student oils handle beautifully, like frosting a cake!), alla prima (painting wet-into-wet in one sitting, perfect for slow-drying oils), or simple glazing (thin, transparent layers over dry paint to shift color or add luminosity). You can even try a bit of plein air painting (painting outdoors) to embrace the light and atmosphere, though managing your setup is an extra step. The goal is to get comfortable with the medium, to learn its language, not to create a gallery-worthy piece right away. Think of it as a low-stakes experiment. The more you play, the more you learn. For more detailed guidance on techniques, check out the-definitive-guide-to-oil-painting-techniques.
Common Beginner Mistakes (and How to Sidestep Them):
Having made most of these myself, I can confidently tell you they're part of the learning curve! It's okay, we've all been there.
- Over-Reliance on Solvents: While solvents are useful for thinning, using too much, especially in upper layers, can 'wash out' your paint, making it dull, brittle, and prone to cracking. Start with minimal solvent, and move to oil mediums like linseed oil for thinning once you're comfortable. Remember: "fat over lean"!
- Not Understanding Drying Times: Expecting oils to dry like acrylics will lead to frustration. Embrace the slow dry! It's a feature, not a bug. Plan your layers accordingly. Thin layers dry faster. Be patient, young grasshopper.
- Overworking a Passage: Because oils stay wet, it's tempting to keep blending and blending. This can lead to muddy colors and a dull, lifeless look. Learn when to step away from a section and let it rest. Sometimes the freshest strokes are the best ones.
- Using Too Many Colors at Once: This often leads to muddy palettes and confusing compositions. Start with a limited palette (e.g., your essential starter colors) and learn to mix everything from those. It's a fantastic way to understand the-definitive-guide-to-color-theory-in-art-from-pigments-to-psychology and create harmonious paintings.
- Improper Brush Cleaning: Leaving paint in your brushes will ruin them. Clean them immediately after painting with odorless mineral spirits (for traditional oils) or soap and water (for water-miscible), then finish with warm water and soap to remove all traces. Don't let paint dry in the bristles! Your brushes are your friends, treat them well.

Common Pitfalls Beyond the Basics (Troubleshooting):
Even after avoiding the initial mistakes, artists can encounter common issues. Awareness is key!
- Cracking: Often caused by painting "lean over fat" (a fast-drying layer over a slower-drying, more flexible layer), or by using too much solvent in upper layers. Always ensure underlying layers are drier and contain less oil or medium than subsequent layers. Patience, again, is your ally.
- Yellowing: Typically occurs over long periods with certain oils, especially linseed oil in the dark. It's less common with modern paints, but can be minimized by exposing paintings to indirect light. Poppy oil or safflower oil (often used in whites and blues) are less prone to yellowing.
- Dulling/Sinking In: When paint loses its sheen and appears dull or matte in areas. This happens when the canvas absorbs too much oil from the paint. It can be rectified after drying by "oiling out" (applying a thin layer of medium to the dull areas) or through varnishing.
- Paint Not Adhering: If your paint beads up or doesn't stick to the surface, your canvas might be too oily, under-gessoed, or have residual contaminants. Ensure your surface is properly primed and clean.
- Colors Not Mixing as Expected: This often comes down to pigment load (student grades may have more fillers) or simply needing more practice with color theory. Stick to a limited palette to master mixing before adding more hues.
Frequently Asked Questions (FAQ)
Q: How do I clean my oil paint brushes effectively?
A: For traditional oils, start by wiping off excess paint with a rag. Then, rinse them in odorless mineral spirits. Finally, wash them thoroughly with warm water and soap (like an art brush cleaner or even dish soap). For water-miscible oils, soap and water are often all you need! Always reshape your brushes before storing them flat or bristle-up.
Q: How long do oil paints typically take to dry?
A: This is the classic oil painting question, and the answer is: it varies wildly! Thin layers can be touch-dry in a day or two, especially with student-grade paints formulated for quicker drying. Thicker impasto layers, however, might take weeks or even months to become touch-dry, and much longer to fully cure (harden all the way through). Pigment type and environmental conditions (humidity, temperature) also play a role. Remember, 'touch dry' doesn't mean fully cured.
Q: Can I mix different brands of oil paints together?
A: Generally, yes! Most artist-quality and student-quality oil paints are compatible with each other, regardless of brand, as long as they are all traditional oil paints (or all water-miscible if that's your chosen type). The key is to stick within the same type of oil paint (e.g., traditional with traditional, water-miscible with water-miscible).
Q: Are oil paints considered toxic, and how can I paint safely?
A: Some pigments (e.g., cadmium, cobalt, lead whites) can be toxic, but most student-grade paints use non-toxic alternatives (often labeled as 'hues'). The main concern for beginners is usually the solvents. To paint safely, use odorless mineral spirits in a well-ventilated area, or choose water-miscible oil paints to eliminate solvent use entirely. Always check the labels on your paints and mediums, and avoid eating, drinking, or smoking while painting. Wash your hands thoroughly afterwards.
Q: What's the best way to store oil paints to prevent them from drying out?
A: Keep the caps on tightly to prevent air exposure. Store tubes upright in a cool, dark place away from direct sunlight or extreme temperatures. If a tube is almost empty, you can roll it up from the bottom to push out excess air and extend its life. Avoid freezing or excessive heat.
Q: What is the "fat over lean" rule, and why is it important?
A: The "fat over lean" rule states that each successive layer of paint should contain more oil (or medium) than the layer beneath it. This ensures that the upper layers remain more flexible and dry slower than the lower layers, preventing cracking as the painting cures. Simply put, don't paint a lean, solvent-thinned layer over a fat, oil-rich layer. It's a fundamental principle for archival oil painting.
Q: When should I varnish my oil painting?
A: Varnish should only be applied once the oil painting is completely dry and fully cured, which can take a significant amount of time. For thin paintings, this might be 6-12 months; for thick, impasto works, it could be several years. Applying varnish too early can trap solvents and prevent proper curing, leading to cracking or haziness.

Ready to Get Oily? Your Next Steps!
Stepping into the world of oil painting can feel like a big, perhaps even scary, leap, but I truly believe it's one of the most rewarding journeys an artist can take. The depth, the blendability, the sheer luxuriousness of the medium—it's an experience unlike any other. Don't let perceived difficulty or cost hold you back. Start with a good set of beginner-friendly paints, embrace the process of playful experimentation, and allow yourself the freedom to explore. Who knows what beautiful things you'll create?
Here’s how you can take your first confident steps:
- Choose Your Starter Set: Based on your budget and aspirations, pick one of the beginner-friendly brands I've recommended (Winton, Gamblin 1980, Lukas Studio, or Reeves).
- Gather Basic Tools: Grab a few brushes, a palette, some pre-primed canvases or panels, and your chosen solvent/medium.
- Start Simple: Don't aim for a masterpiece. Try a simple still life, an abstract color study, or even just practice mixing colors and making different brushstrokes on your surface. The goal is to get comfortable!
I truly hope this guide has demystified oil painting for you and ignited a spark of curiosity. The journey is messy, exhilarating, and endlessly rewarding. Go forth and make some luscious art!
And remember, if you ever fall in love with a piece and feel like adding some of that oily magic to your own walls, you can always explore my original work or buy a print to inspire your own journey. Or if you want to see my work and the inspirations for my colors in person, visit my personal gallery space, the den-bosch-museum, for a look at my work and others!


