How to Blend Acrylic Paint on Canvas for Beginners: My Secrets to Seamless Transitions
Struggling with blending acrylics? Join me as I share my personal journey and practical tips for beginners to achieve smooth, vibrant transitions on canvas, covering essential tools, techniques like wet-on-wet, and common pitfalls. Unlock the magic of seamless blending!
Mastering Acrylic Blending on Canvas: My Secrets to Seamless Transitions for Beginners and Beyond
I remember a time when blending acrylics felt like trying to catch smoke with my bare hands. One moment, I'd have two beautiful colors on my brush, full of promise; the next, a harsh, jagged line or, worse, a muddy mess. "Why won't you just blend?" I'd silently plead with my canvas. If you've ever felt that frustration, you're absolutely not alone. But here's the thing: mastering those silky-smooth transitions in acrylics isn't some ancient, forbidden art. It's a skill, and like any skill, it comes with a few tricks, a lot of patience, and a dash of playful experimentation. So, let's dive into my world of blending – the good, the bad, and the surprisingly simple techniques that changed everything for me. We'll explore everything from essential tools to advanced tips, ensuring you can create those dreamy, soft gradients that truly make your art sing.I remember a time when blending acrylics felt like trying to catch smoke with my bare hands. One moment, I'd have two beautiful colors on my brush, full of promise; the next, a harsh, jagged line or, worse, a muddy mess. "Why won't you just blend?" I'd silently plead with my canvas. If you've ever felt that frustration, you're absolutely not alone. But here's the thing: mastering those silky-smooth transitions in acrylics isn't some ancient, forbidden art. It's a skill, and like any skill, it comes with a few tricks, a lot of patience, and a dash of playful experimentation. So, let's dive into my world of blending – the good, the bad, and the surprisingly simple techniques that changed everything for me.## Why Blending Acrylics Can Feel Like a Mystery (and Why It's Worth Solving)Acrylic paint, bless its vibrant heart, has one glorious superpower and one notorious Achilles' heel: it dries fast. Like, blink-and-you-miss-it fast. This rapid drying time is fantastic for layering without smudging (hello, [/finder/page/how-to-layer-colors-in-acrylic-painting]!), but it can be a real headache when you're trying to coax two colors into a graceful gradient. In my early days, I'd watch in despair as the edge between my blues and greens solidified into a stark line, mocking my attempts at a serene sky or a flowing abstract passage.
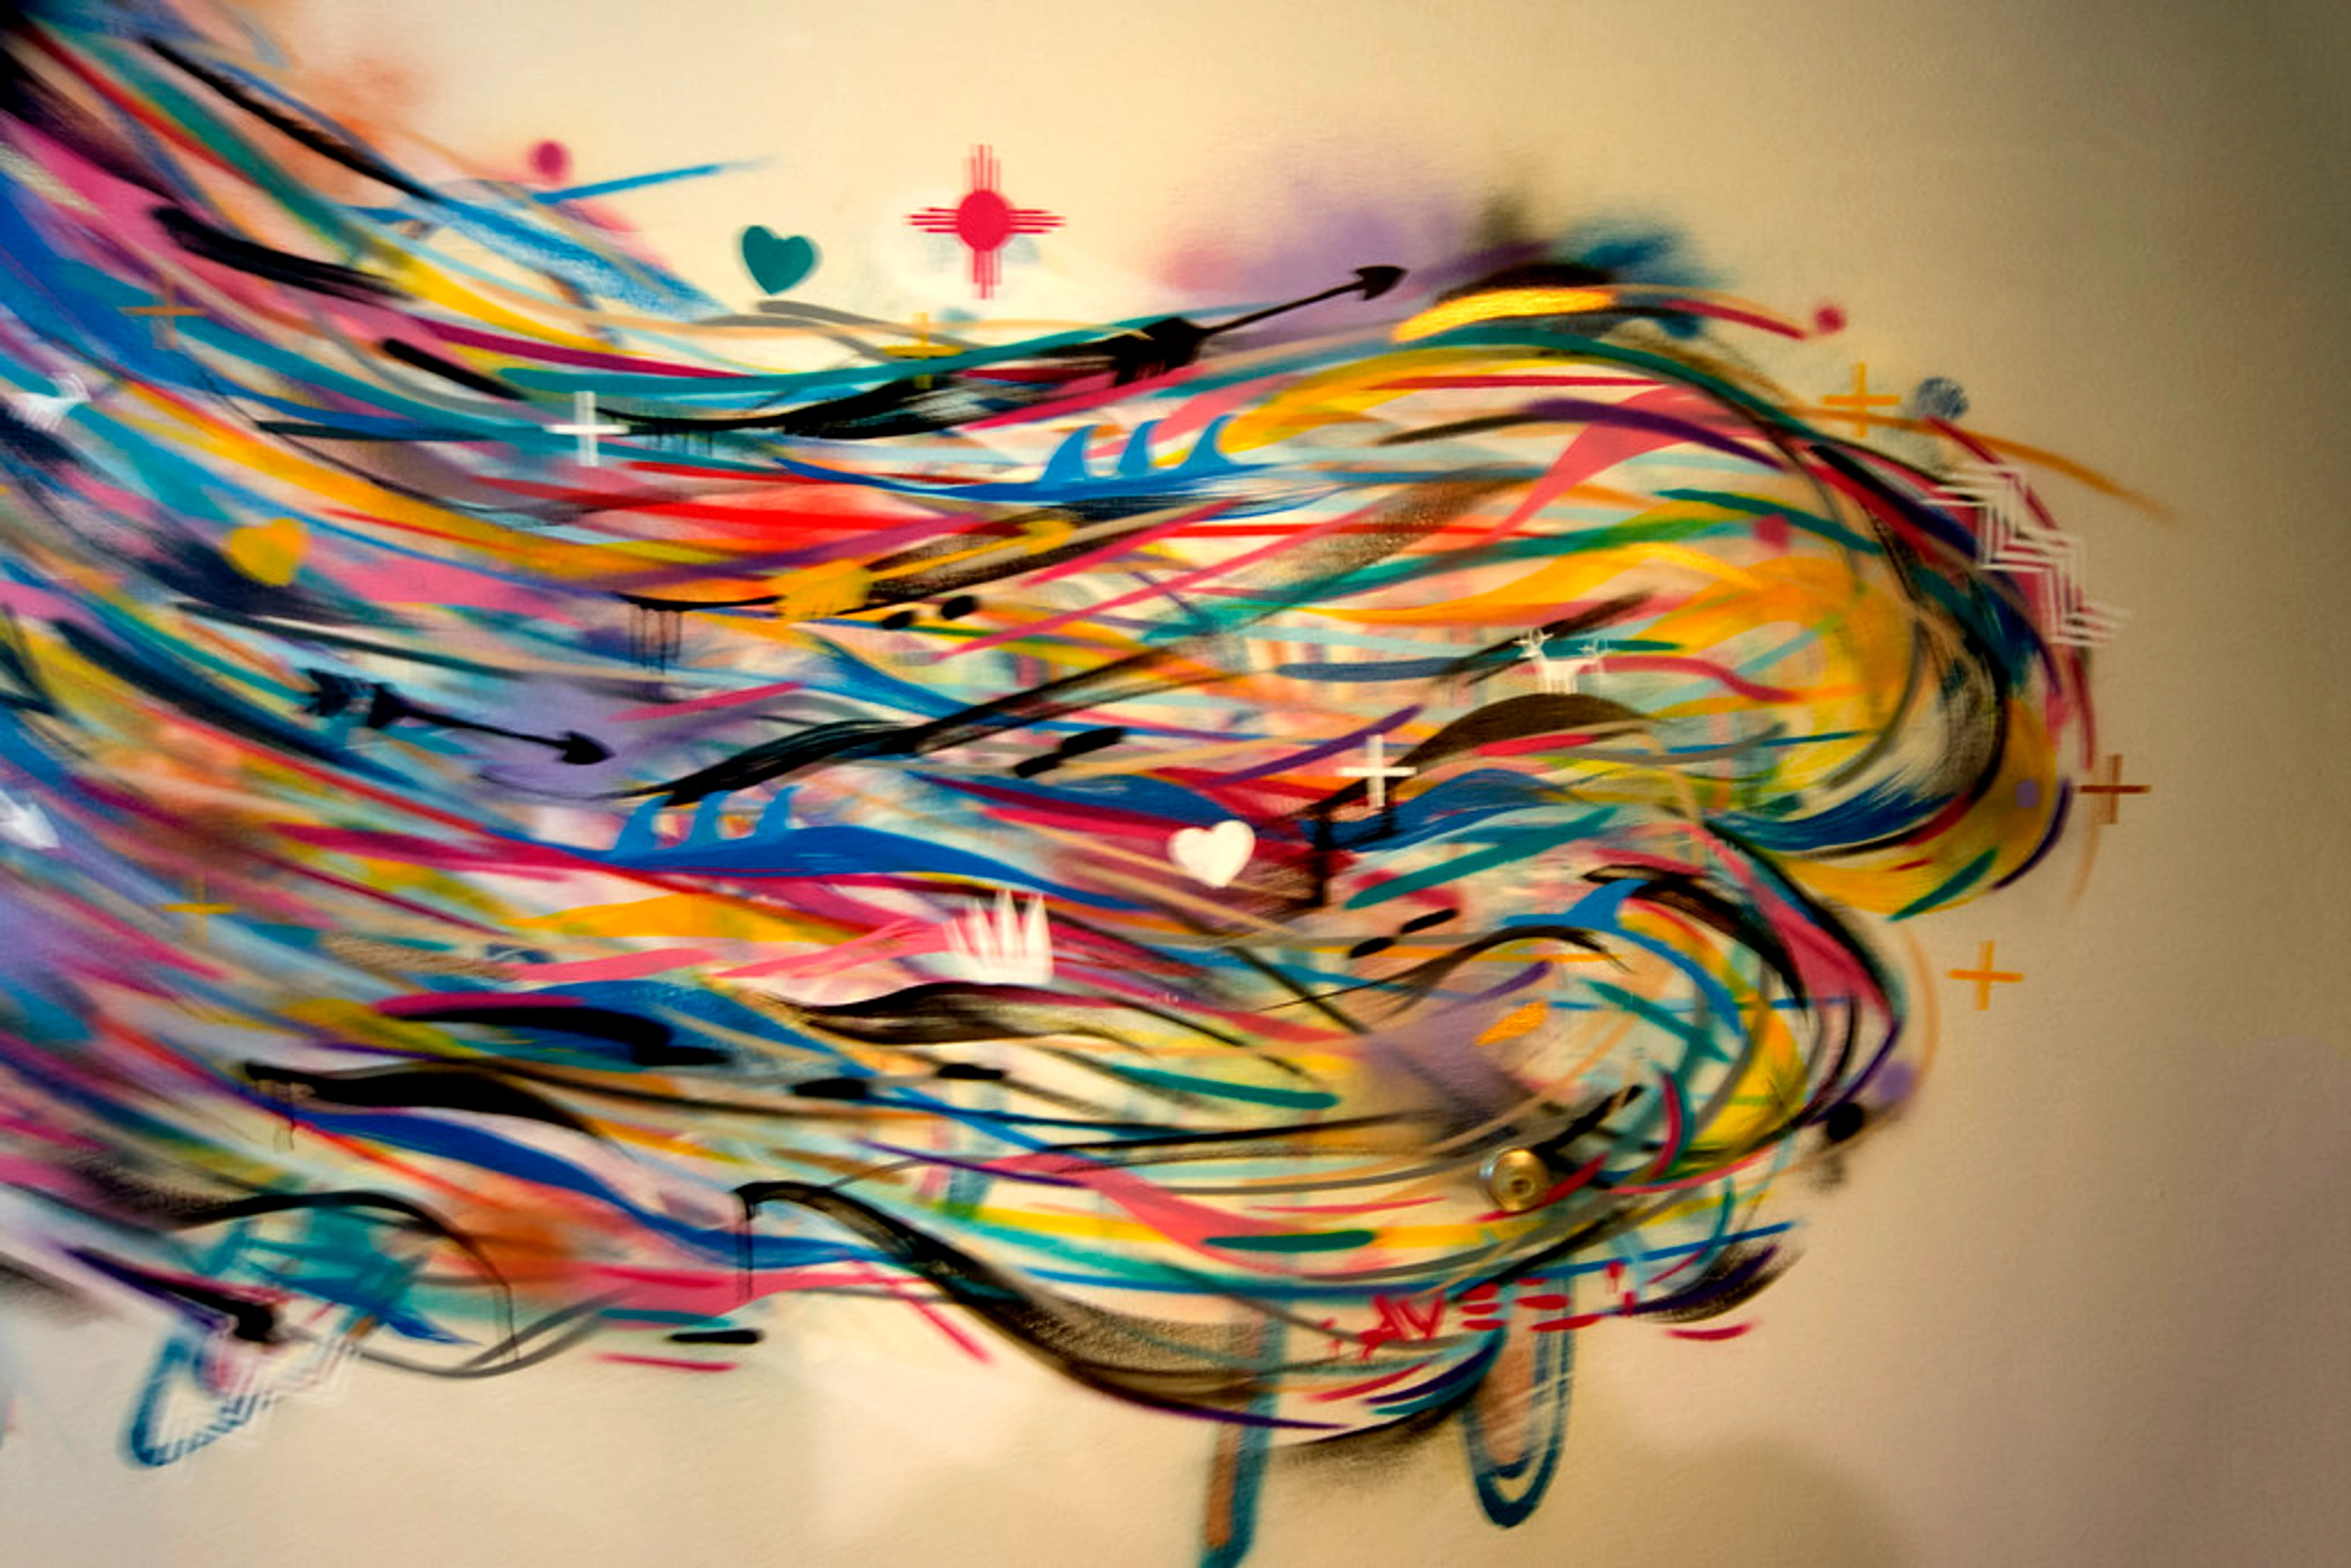
But the fast-drying nature isn't the only hurdle. The unique polymer emulsion of acrylics means that once the water evaporates, the paint film is set. Unlike oils, which allow for days of open working time, acrylics demand a dance with speed and precision. This often leads to frustrating 'muddy' areas where colors overmix, or stark 'hard edges' where you desperately wanted a gentle fade. It's a learning curve, for sure, but one that's incredibly rewarding to master.But here's why you shouldn't give up: those seamless blends are the bedrock of so many stunning effects. They give life to form, add depth to landscapes, and create the kind of luminous backgrounds in abstract pieces that just sing. It’s about creating an illusion of effortless flow, and trust me, the reward of seeing those colors melt into each other is profoundly satisfying. Beyond aesthetics, the act of blending, of guiding colors into each other, is a deeply meditative process. It's where you truly connect with your medium and learn its language, pushing past frustration to discover the magic within the paint.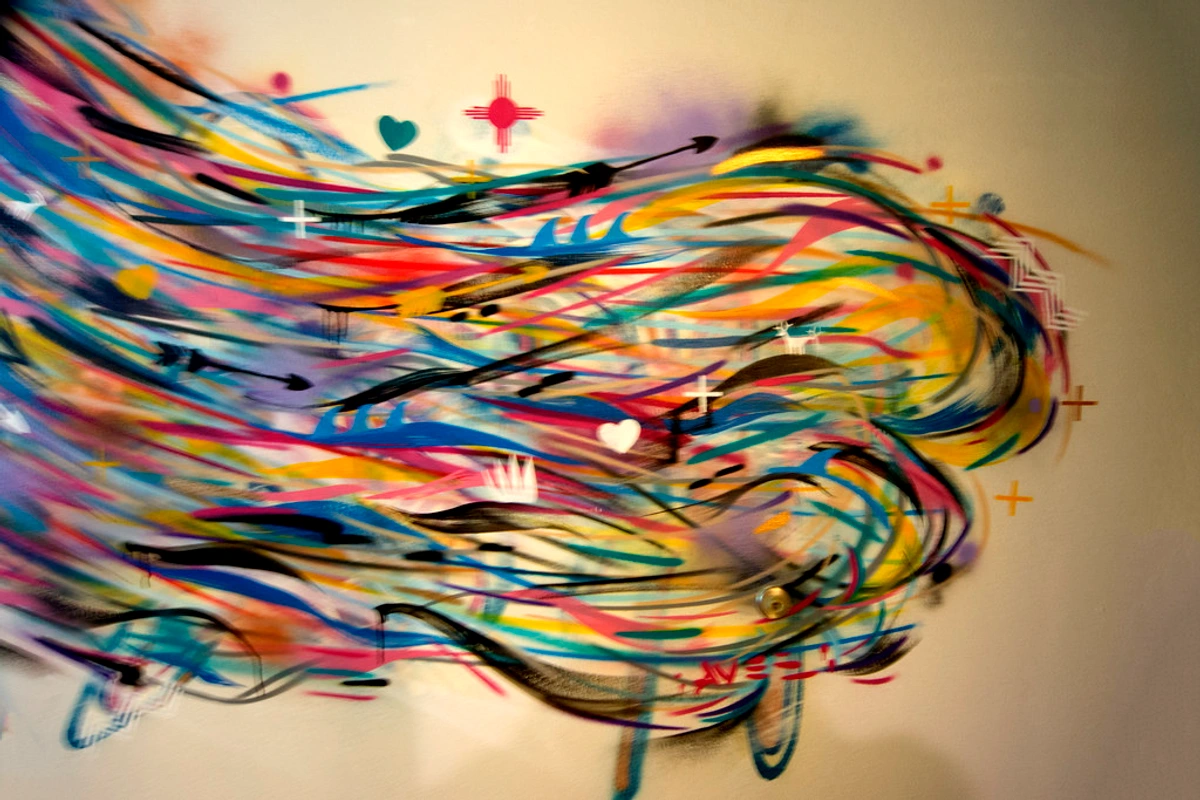 credit: https://live.staticflickr.com/2940/33246926773_4d63fe20de_b.jpg, licence: https://creativecommons.org/licenses/by-sa/2.0/ ## Essential Tools for the Blending AdventureBefore we even think about touching brush to canvas, let's gather our blending arsenal. You don't need a million fancy gadgets, just the right basics to set yourself up for success.### Paint: Think ConsistencyThe consistency of your acrylic paint is actually quite important. Too thick, and it's hard to move around; too thin, and it loses its opacity. I usually go for a creamy, toothpaste-like consistency. If it's too thick straight from the tube, a tiny drop of water or, better yet, a blending medium (we'll get to that!) will do the trick. If you're curious about different types, I've got a whole spiel on the [/finder/page/definitive-guide-to-paint-types-for-artists].### Brushes: Your Best Friends for SmoothnessThis is where a lot of the magic happens. While you can blend with almost any brush, some are definitely more forgiving for beginners. I always recommend: * Soft, Flat Brushes: Think synthetic filbert or bright brushes. They hold a good amount of paint and can create those broad, smooth strokes needed for gradients. * Soft, Round Brushes: Great for smaller areas or softening edges with a gentle touch. * Blending Brushes: These often have very soft, densely packed bristles, almost like makeup brushes. They're designed specifically for softening transitions.Want to dive deeper into brush types? Check out my thoughts on the [/finder/page/best-acrylic-paint-brushes-for-artists].### Water and Mediums: Your Time-Stretching AlliesBecause acrylics dry so quickly, we absolutely need to slow them down a bit. Think of these as your personal time-travel devices for paint.
- Water: Your simplest, most accessible friend. A clean brush lightly dampened with water can help soften edges and increase flow. But be careful! Too much water (more than 30%) and your paint film can weaken, get thin, transparent, and lose its vibrancy – not to mention potentially reactivating lower layers. Use sparingly, like a whisper.
- Slow-Drying Mediums / Retarders: These are lifesavers! They literally extend the drying time of your acrylics, giving you more time to work with your blends, sometimes by minutes or even hours depending on the product and amount used. I often mix a small amount directly into my paint on the palette, usually no more than 10-15% of the paint volume to maintain the integrity of the paint film.
- Blending Mediums: These are like retarders' slightly more sophisticated cousins. They not only extend drying time but also improve the paint's flow and workability, making it feel more like oil paint without losing the acrylic benefits. They're formulated to integrate seamlessly with your paint, maintaining pigment intensity and adhesion.
- Glazing Mediums: While not strictly for blending two wet colors, these are fantastic for the layering and feathering technique. They thin the paint to a translucent, jewel-like quality without compromising its adhesive properties, allowing you to build up color and blend subtly over dried layers.
- Flow Improvers: These reduce the surface tension of water in the paint, making it flow more easily and smoothly without significantly extending drying time. They can be helpful for very thin washes or when you need the paint to spread quickly across a surface.
If you're wondering which mediums are truly essential for abstract artists, I've got a detailed guide on [/finder/page/best-acrylic-mediums-for-abstract-artists], and a broader look at [/finder/page/what-are-painting-mediums-a-beginners-guide].### Surface: Prep is KeyA well-prepared canvas makes a huge difference. I always prime my canvas with gesso (you can learn [/finder/page/how-to-apply-gesso-to-canvas-a-beginners-guide] if you haven't already!). A smooth, non-absorbent surface gives you more working time than a raw canvas that sucks up paint immediately.### Palette: Keep it WetI can't stress this enough: a stay-wet palette is a game-changer for blending acrylics. It keeps your paint workable for much longer, preventing those frustrating dry bits mid-blend. If you don't have one, a regular palette with a damp paper towel underneath a sheet of parchment paper works wonders.### Table: Blending Tools & Their Purpose for Optimal Results| Tool | Purpose | My Personal Tip | Recommended For ||----------------------|------------------------------------------------------------------------|---------------------------------------------------------------------------------|-------------------------|| Acrylic Paints | The medium itself; choose good quality for better pigment load and blending properties (e.g., fluid vs. heavy body). | Keep them creamy for heavy body, or use fluid for easier washes. | All blending || Soft Flat/Filbert Brushes | Applying broad strokes and creating smooth gradients, especially in wet-on-wet. | Use synthetic brushes; clean often during blending to prevent dried paint buildup and muddying. | Large area blending, gradients || Soft Round Brushes | Softening edges and blending in smaller, more detailed areas, or for subtle transitions. | Gentle pressure is key for delicate blends; synthetic bristles are best. | Detail blending, edge softening, subtle transitions || Slow-Drying Medium/Retarder | Extends paint's open working time, crucial for achieving smooth transitions. | Mix sparingly (10-15%) into paint on your palette; don't overdo it. | All blending techniques, especially wet-on-wet || Blending Medium | Improves paint flow and workability, extending open time, for truly seamless transitions. | Experiment with ratios; a little goes a long way to find your perfect consistency. | Smooth gradients, complex color mixing || Stay-Wet Palette | Keeps paints wet and workable for extended periods, preventing premature drying. | Absolutely essential for complex blends, large pieces, or when you work slowly. | Extended blending sessions, preventing paint waste || Water | Dampening brushes for softening edges, and thinning paint very slightly (less than 30%). | Use sparingly; too much water dilutes color, weakens paint film, and can cause streaks. | Brush cleaning, very light thinning, edge softening |## My Go-To Blending Techniques for Beginners (and How I Actually Use Them)Now for the fun part! These are the techniques I rely on to achieve beautiful blends, and they're all perfectly doable for anyone just starting out. I'll walk you through how I approach each one, sharing the little nuances that make a big difference.### 1. The "Wet-on-Wet" Method (My Absolute Favorite for Smoothness)This is the holy grail for seamless gradients in acrylics, especially for things like skies, water, or soft backgrounds in my abstract pieces. The idea is to apply wet paint directly onto another wet layer of paint, allowing them to mix on the canvas.1. Prep Your Area: Mentally (or physically, if it's a huge canvas) divide your blending area into manageable sections. You're racing the clock here!2. Lay Down Your First Color: Quickly apply your lighter or dominant color to one side of the area you want to blend. Don't let it dry!3. Introduce Your Second Color: Immediately apply your second color right next to (or slightly overlapping) the first color.4. Blend with a Clean Brush: Grab a clean, slightly damp brush (a soft flat or filbert works wonders). With gentle, even strokes, move your brush back and forth across the meeting point of the two colors. The key here is light pressure and consistent movement, allowing the colors to gradually merge. I find it helpful to wipe my brush occasionally on a paper towel to remove excess paint and keep the blend clean.5. Add a Blending Medium (Optional but Recommended!): If your paint is drying too fast, try adding a tiny bit of slow-drying or blending medium to both colors on your palette before applying them to the canvas. This buys you precious extra seconds. credit: https://images.zenmuseum.com/art/184/scan.jpeg, licence: [] ### 2. The "Layering and Feathering" Approach (When Wet-on-Wet Isn't an Option)Sometimes, wet-on-wet isn't practical, especially for larger areas or if you're working slowly. This technique builds up thin, transparent layers to create a soft transition. It takes a bit more patience but offers more control.1. Apply Your Base Color: Lay down your first color and let it dry completely. Yes, completely! This is crucial.2. Thin Your Blending Color: Take a small amount of your second color and thin it down with water or, ideally, a glazing medium. You want it to be translucent, like a watercolor wash. (Speaking of layers, I talk a lot about them in my article on [/finder/page/how-to-layer-colors-in-acrylic-painting]).3. Feather and Build: Apply a thin, even layer of your thinned second color over the edge of your first color. Use a soft, clean brush and gentle, circular, or back-and-forth motions to "feather" the edge, making it almost invisible. Let this layer dry.4. Repeat: Continue applying thin, transparent layers, gradually extending the feathered edge and building up the color intensity until you achieve your desired blend. This method is fantastic for subtle shifts and adding luminous depth.### 3. "Dry Blending" or "Scumbling" (For Texture and Soft Edges)This technique is fantastic for creating soft, diffused effects, like clouds, distant mist, or a subtle textured background. It's not about a perfectly smooth gradient but rather a soft, broken color transition. I also touched on this briefly in my [/finder/page/dry-brush-technique-acrylic-painting] article.1. Load a Dry Brush: Take a clean, dry, soft brush (a fluffy round brush works well here) and pick up a tiny amount of paint. Then, offload almost all of it onto a paper towel. You want barely any paint on the brush.2. Apply with Light Pressure: Gently scumble (small, circular, or scrubbing motions) the brush over the area where you want the colors to blend. The dry brush will deposit tiny flecks of color, gradually building up and softening the edges between existing colors. This is more about building up a soft haze than a seamless melt.3. Layer if Needed: If you want more intensity, let the layer dry and repeat with another tiny bit of paint.The beauty of this method is the subtle texture it creates, adding another dimension to your work.### Table: Quick Blending Technique Comparison & When to Use Them & When to Use Them| Technique | Best For | Key Characteristic | My Personal Take ||---------------------|----------------------------------------------------|------------------------------------|--------------------------------------------------------------------------|| Wet-on-Wet | Seamless gradients, smooth skies, water, large abstract color fields. | Colors mix on the canvas while both layers are wet. | Fast-paced, requires good timing and planning, but yields incredibly satisfying, fluid results. Best with mediums. || Layering & Feathering | Subtle transitions, luminous depth, large areas. | Builds translucent color in thin layers. | More controlled, patient approach, great for beginners who feel rushed. || Dry Blending / Scumbling | Soft, diffused effects, textured backgrounds, clouds. | Minimal paint on a dry brush. | Adds beautiful texture, excellent for atmospheric effects, less about 'smooth'.|## Troubleshooting Blending Blunders (Because We All Make Them – Yes, Even Me!)
Even with the right tools and techniques, things can go awry. Don't fret! I've been there, painted that, and figured out a few ways around the most common blending issues. Learning to troubleshoot is part of the artistic journey, and honestly, sometimes the 'blunders' lead to happy accidents!## Troubleshooting Blending Blunders (Because We All Make Them – Yes, Even Me!)
Even with the right tools and techniques, things can go awry. Don't fret! I've been there, painted that, and figured out a few ways around the most common blending issues. Learning to troubleshoot is part of the artistic journey, and honestly, sometimes the 'blunders' lead to happy accidents!### Paint Drying Too FastThis is the classic acrylic conundrum. * Solution 1: Work Faster (Duh, I know!): Seriously, try to tackle smaller sections at a time. * Solution 2: Use Mediums: Incorporate a slow-drying or blending medium into your paint. It makes a world of difference. * Solution 3: Mist Your Canvas: A fine mist of water from a spray bottle can give you a few extra moments, especially on a large canvas. Just don't drench it!### Muddy ColorsAh, the dreaded mud. This usually happens when you over-blend or mix too many complementary colors on the canvas. * Solution 1: Clean Your Brush: Regularly wipe or rinse your brush when blending, especially when transitioning between very different hues. My mantra: clean brush, clean blend. * Solution 2: Understand Color Theory: A basic grasp of [/finder/page/my-approach-to-color-mixing-creating-vibrant-palettes-in-abstract-painting] or [/finder/page/the-definitive-guide-to-color-theory-in-abstract-art-principles-psychology-and-application] will help you choose colors that play well together without creating swamp water. * Solution 3: Less is More: Sometimes, a subtle blend is better than trying to perfectly merge two highly contrasting colors.### Harsh Lines or StreaksThis often comes from too much pressure or not enough paint. * Solution 1: Gentle Pressure: Lighten your hand. You're coaxing colors, not scrubbing them. * Solution 2: Sufficient Paint: Make sure you have enough paint on the canvas for the colors to actually merge. If it's too dry, you'll just be dragging your brush across dry pigment. * Solution 3: Softer Brushes: If your brush is too stiff, it might not be spreading the paint smoothly. Switch to a softer, more flexible brush.## Common Mistakes I Made (So You Don't Have To)## Common Mistakes I Made (So You Don't Have To - My Hard-Earned Lessons)
I'm going to save you some heartache. These are the blending missteps I made countless times before I finally got the hang of it. Consider this my confession, and hopefully, your shortcut to smoother sailing:1. Using Too Much Water: Early on, I thought more water equaled more blending time. Nope! It just diluted my colors, made them streaky, and sometimes lifted the gesso right off the canvas if I scrubbed too hard. Use mediums for time, water for cleaning.2. Not Cleaning Brushes Enough: I'd try to blend from a dark blue into a light yellow without properly cleaning my brush first. Instant green mud. Every. Single. Time. Clean brushes are your secret weapon.3. Trying to Blend a Huge Area All at Once: My ambition often outstripped my paint's drying time. Start small, master the technique, then gradually increase the size of your blending areas. Or, embrace the layering method for larger canvases.## FAQs about Blending Acrylics (Your Burning Questions, Answered!) (Your Burning Questions, Answered!)### Can I blend acrylics with just water? (And Should You?) You absolutely can, especially for softening edges, creating quick washes, or doing small, localized blends. However, there's a significant caveat: too much water (typically more than 30% of the paint volume) can dilute your pigments significantly, make your paint streaky, and even weaken the paint film over time, potentially leading to cracking or poor adhesion. For more extensive, smooth, and durable blends, I highly recommend using a proper slow-drying or blending medium. Water is a tool, but mediums are specifically formulated for enhancing blending without compromising the paint's integrity.You absolutely can, especially for softening edges or doing quick, small blends. However, be cautious: too much water can dilute your pigments, make your paint streaky, and even weaken the paint film over time. For more extensive or smooth blends, I highly recommend using a proper slow-drying or blending medium.### How do slow-drying mediums work? (The Science Behind Your Extra Time) Slow-drying mediums (also called retarders) contain ingredients that specifically slow down the evaporation of water from the acrylic paint, extending its open working time. This chemical intervention means your paint stays wet and workable on the canvas for much longer – minutes, or even hours, depending on the product and how much you use. You typically mix a small amount directly into your paint on the palette, usually no more than 10-15% of the paint volume. Exceeding this ratio can cause your paint to become overly fluid, lose its opacity, or even remain permanently tacky after drying, which isn't what we want! It's about a delicate balance.Slow-drying mediums (also called retarders) contain ingredients that slow down the evaporation of water from the acrylic paint, extending its open working time. You typically mix a small amount directly into your paint on the palette, usually no more than 10-15% of the paint volume, otherwise, your paint might never fully cure or become tacky.### What's the best brush for blending? (Hint: Soft and Synthetic!) For beginners, I usually recommend soft, synthetic flat brushes like filberts (which have a rounded edge, great for smooth curves) or brights (flat, square edge, good for broad strokes). A dedicated blending brush (often a large, fluffy, dome-shaped brush, much like a soft makeup brush) is also fantastic for diffusing edges and creating a soft haze. The absolute key is soft, synthetic bristles that move the paint gently and smoothly without leaving harsh brushstrokes. Natural hair brushes can absorb too much water and paint, making them less ideal for acrylic blending. More important than the exact type of brush, however, is that it's clean and lightly damp.For beginners, I usually recommend soft, synthetic flat brushes like filberts or brights, or even a dedicated blending brush (often a fluffy, dome-shaped brush). The key is soft bristles that move the paint gently and smoothly without leaving harsh brushstrokes. A clean, damp brush is more important than the exact type!### How do I avoid muddy colors when blending? (The Golden Rules) Muddy colors are typically the result of three main culprits: over-blending (you've simply mixed too much), using too much water (which dilutes pigment and makes colors less vibrant), or attempting to blend too many complementary colors directly without proper understanding. The best defenses are: rigorously keeping your brushes clean between color changes, working efficiently and knowing when to stop (don't overwork the blend), using appropriate mediums instead of excessive water, and having a foundational understanding of basic color theory – knowing which colors neutralize each other into dull browns or grays versus those that create harmonious transitions. Patience and a clean palette are your allies!Muddy colors usually stem from over-blending, using too much water, or mixing too many complementary colors without proper control. The best defenses are: keeping your brushes clean, working efficiently (don't overwork the blend), and understanding basic color theory (which colors create gray when mixed).### Can I blend acrylics after they've dried? (The Illusion of Blending) Once acrylics are dry, they're dry! That's the nature of the beast. You can't truly re-activate them and blend them in the same wet-on-wet way you would with, say, oils or watercolors. However, you can absolutely create the illusion of blending over dried layers. This is precisely what the layering and feathering technique is all about: applying thin, translucent glazes over dried paint to gradually shift color and soften transitions. The dry brush (scumbling) method also works beautifully over dry paint to create soft, textured, optical blends. So, while direct wet-on-wet blending is out, your blending journey isn't over just because a layer dried – it just means you shift gears to a different technique.Once acrylics are dry, they're dry! You can't truly blend them in the same wet-on-wet way. However, you can create the illusion of blending using layering techniques (as discussed above with feathering) or a dry brush method. These involve applying thin, translucent layers or scumbling dry paint over the dried surface to create a soft, gradual transition.## My Final Thoughts on the Art of Blending: It's a Dance, Not a Race
If there's one thing I want you to take away from this, it's that blending acrylics is a journey, not a destination. It's about getting comfortable with the unique nature of the medium, learning to dance with its fast-drying tendencies, and finding what works for you. Don't be afraid to make mistakes – I still do! They're just opportunities to learn, to adjust, and to discover new happy accidents. I mean, who hasn't accidentally created a stunning new color while trying to fix a 'blunder'?
I find that beautiful blends, whether perfectly smooth or subtly textured, add such a richness and depth to my abstract work. They create the quiet whispers or the grand crescendo in a composition, guiding the eye and evoking emotion. It's truly a magical transformation to witness, seeing two distinct colors melt into a seamless, unified expression. It’s a testament to the artist's hand, patience, and understanding of the medium.
So, grab your brushes, embrace the learning curve, and start playing with color. You might surprise yourself with the beautiful transitions you can create. And hey, if you want to see how I incorporate some of these fluid techniques into my own abstract art, feel free to explore my collection here or learn more about my artistic journey here. Happy blending, and remember, the canvas is your playground for endless color exploration! Happy blending, and remember, the canvas is your playground!If there's one thing I want you to take away from this, it's that blending acrylics is a journey, not a destination. It's about getting comfortable with the unique nature of the medium, learning to dance with its fast-drying tendencies, and finding what works for you. Don't be afraid to make mistakes – I still do! They're just opportunities to learn.I find that beautiful blends, whether perfectly smooth or subtly textured, add such a richness and depth to my abstract work. They create the quiet whispers or the grand crescendo in a composition, guiding the eye and evoking emotion. It's truly a magical transformation to witness.So, grab your brushes, embrace the learning curve, and start playing with color. You might surprise yourself with the beautiful transitions you can create. And hey, if you want to see how I incorporate some of these fluid techniques into my own art, feel free to explore my collection here or learn more about my artistic journey here.


