The Definitive Guide to Varnishing Acrylic Paintings
Learn how to properly varnish your acrylic paintings with this comprehensive, step-by-step guide. Protect your artwork and enhance its vibrancy.
How to Varnish an Acrylic Painting: A Definitive Guide
The moment an acrylic painting is "done" is often a strange mix, isn't it? A huge sigh of relief, a burst of pride, and then, for me, a little tremor of fear – "Oh no, what if I mess up the final step?" I've been there, trust me. I've rushed, I've skipped, and I've learned the hard way that the final act of varnishing isn't just a formality; it's the invisible superhero cape your painting desperately needs. It's the difference between a fleeting moment and a lasting legacy, dramatically enhancing its visual magic and shielding it from the world's harsh realities. This isn't just a technical guide; it's my personal walkthrough, packed with all the wisdom (and mistakes!) I've gathered, to help you varnish your acrylic masterpieces professionally. Because you've poured your soul into this; now let's make sure that soul-work lasts, beautifully, for generations. I once forgot to varnish a small, experimental piece, thinking it wasn't "important" enough, just a quick study. Years later, sitting dusty and dull in a corner of my studio, it looked so tired, so unprotected, almost... neglected. The colors had lost their pop, the surface felt vulnerable to every speck of dust. That's when the metaphor of the "superhero cape" really cemented itself in my mind – every painting, every brushstroke, deserves that final, invisible layer of strength and shimmer, a silent guardian that keeps its vibrancy alive for years, not just a fleeting moment. It’s a little investment of time and effort that pays off in enduring beauty, allowing your art to truly last and tell its story across time.
I still remember the first painting I ever varnished. Oh, the excitement! I was so proud of the piece, so impatient to see it 'finished,' and so utterly clueless about the final step. I slapped on a thick coat, saw bubbles appearing like tiny, mocking eyes, and in my panic, just kept brushing, hoping they'd disappear. Instead, I ended up with a perpetually tacky, cloudy mess that felt sticky even months later. It was heartbreaking! All that effort, ruined by a hasty final step. That's when I realized varnishing wasn't just a chore; it was a skill, an art in itself, demanding as much respect as mixing a perfect color. And that's why I'm here, to share all those hard-won lessons so you don't have to learn them the messy, frustrating way like I did, wiping away tears over a ruined masterpiece.
What This Guide Covers: A Structured Overview
This guide is structured to provide you with a thorough understanding of the acrylic varnishing process. Think of it as sitting down with a seasoned artist (me!) who's seen it all, made all the mistakes, and is now here to share the shortcuts to success. We'll address the fundamental reasons why varnishing is essential (it's more than just shine, trust me, it's about eternal life for your hues!), clarify when an acrylic painting is optimally prepared for varnish application (patience is a virtue, especially here!), detail the various types of varnishes available (from the everyday hero to the conservation champion), and offer practical tips and techniques for achieving a professional and flawless finish (because nobody wants a streaky masterpiece!). Additionally, it includes vital sections dedicated to ensuring your safety during the process, understanding proper storage and display techniques, troubleshooting common issues, dissecting classic mistakes to avoid, and answering frequently asked questions. Think of it as your complete art preservation playbook – because sometimes, you just need someone to tell you exactly what to do (and what not to do!), and maybe offer a few "oops" stories to lighten the mood. By the end, you'll be able to confidently protect your art for the ages.
Why Varnish an Acrylic Painting?
Varnish serves multiple essential functions:
- Protection: Varnish creates a robust, sacrificial barrier, a kind of invisible bodyguard for your precious artwork. I've always imagined it as a superhero cape for my paintings, silently fending off the villains of the art world. This barrier works on a micro-level, forming a distinct, often surprisingly tough film over your paint. This film acts as a buffer, a kind of invisible bouncer, taking the brunt of environmental assault – those sneaky airborne pollutants (like cigarette smoke or industrial fumes), everyday dirt, accidental scuffs (oh, I've almost leaned a rogue canvas against a finished piece, only to be saved by the varnish!), minor scratches, and the inevitable grime that accumulates over time, even in seemingly clean environments. Because it's a separate, often removable, layer, it's invaluable for the longevity of the artwork. Conservators, decades down the line, can safely clean or even remove and replace this 'sacrificial' layer without ever touching your original paint, thereby preserving the artwork's integrity. It's like having a replaceable shield; the varnish takes the hit, keeping your precious pigments safe underneath, unmarred by the passage of time or unexpected mishaps. This foresight in art preservation truly makes a world of difference for the lifespan of a piece, transforming it from a fleeting creation into a potential heirloom, ensuring its story continues for generations. For more on protecting your art, consider how to clean and care for acrylic paintings.
Non-Removable Varnishes: A Cautionary Tale (and Why I Don't Use Them)
Before we dive into the good stuff, let's talk about the varnishes I, and most professional conservators, generally steer clear of for acrylic paintings: non-removable varnishes. These are often older formulations or industrial sealants that, once applied, become a permanent part of your artwork. Sounds protective, right? Well, not exactly.
- The Problem with Permanence: The biggest issue is that they cannot be safely removed without damaging the underlying paint layers. Imagine your painting collecting dirt, dust, and pollutants over decades. With a removable varnish, a conservator can gently lift off that dirty top layer and replace it, leaving your original paint untouched and vibrant. With a non-removable varnish? That dirt is now part of your art's destiny.
- Irreversible Damage: If a non-removable varnish yellows, cracks, or discolors over time (and many do!), there's little to nothing that can be done to rectify it without risking irreversible damage to your actual painting. It’s like sealing a time capsule with the wrong kind of glue – you might get it open, but at what cost?
- Chemical Incompatibility: Some non-removable sealants might also react negatively with acrylics over the long term, leading to unexpected chemical changes, cloudiness, or even a perpetually tacky surface.
So, while they might seem like a quick, cheap solution in the short term, trust me when I say that the long-term headaches and potential for irreversible damage make non-removable varnishes a risk I'm simply not willing to take with my art. Always, always, always choose a varnish that is explicitly stated as removable for archival purposes. Your future self (and any conservator who might encounter your work!) will thank you profusely.
Types of Removable Varnishes
- Solvent-based (e.g., MSA Varnish): Mineral Spirit Acrylic (MSA) varnishes are highly regarded in professional art conservation for their exceptional durability, optical clarity, and robust UV protection. These varnishes utilize strong yet gentle solvents like mineral spirits (specifically, odorless mineral spirits are my go-to for less fume drama!) or other specified solvents as their primary vehicle, forming a strong yet flexible acrylic resin film upon drying. This formulation renders them highly resistant to dirt accumulation and yellowing over time. A key advantage is their complete removability with mineral spirits, simplifying future conservation efforts where the varnish layer can be safely replaced without affecting the underlying paint. However, due to their solvent base, adequate ventilation is crucial during application, and they typically possess a stronger odor.
- Water-based (e.g., Polymer Varnish): Polymer varnishes are widely favored for their ease of use, lower odor, and water-based cleanup. They consist of a liquid acrylic polymer emulsion that dries to form a clear, flexible, and protective film. While generally durable and protective, they typically incorporate fewer UV stabilizers compared to MSA varnishes, potentially offering slightly less UV protection. A critical consideration is that while they can be removed with ammonia-based cleaners (look for clear, dye-free formulas like diluted window cleaner, or even plain ammonia diluted with water – but be careful!), their removal process is often more delicate and challenging for conservators, as their chemical composition closely resembles that of the underlying acrylic paint. For this reason, the application of an isolation coat is strongly recommended when using polymer varnishes.
- UV Resistance: One of the most insidious threats to an artwork's vibrancy is ultraviolet (UV) radiation from sunlight and even some artificial light sources. Think of it like leaving your favorite shirt out in the sun – eventually, the colors just aren't the same. I once saw an unvarnished painting that had hung near a window for years, and the difference between the sun-exposed areas and the protected edges was heartbreakingly stark. Many quality varnishes incorporate advanced UV stabilizers and absorbers which essentially act as a high-SPF sunscreen for your painting. Think of UV absorbers (like benzophenones or benzotriazoles, if you're curious about the science!) as tiny, proactive sponges that soak up those harmful UV rays, preventing them from ever reaching your precious pigments. UV stabilizers, on the other hand (often Hindered Amine Light Stabilizers, or HALS), work differently; they step in after UV exposure has already begun, actively preventing the chemical degradation of the paint and varnish film itself, essentially cleaning up the damage before it can take a firm hold. Together, these remarkable agents form a formidable defense, filtering out harmful UV rays and significantly retarding the fading and discoloration of pigments over decades, thereby preserving the artwork's original, intended colors and integrity over time. It's peace of mind for your precious hues, ensuring they stay vibrant and true, not just for a few years, but for a lifetime – a small investment for eternal vibrancy, wouldn't you say? It’s truly about giving your colors the longest, brightest life possible.
- Even Sheen: Acrylic paints, by their very nature, often dry with inconsistent sheens, which, I’ll admit, used to drive me absolutely batty. I once had a painting of a moonlit scene, and half the moon was glaringly shiny, while the other half was dull, completely destroying the ethereal mood I was going for. It was so frustrating! This variability can stem from using different brands (oh, the horror of mismatched finishes!), mixing paints with various mediums (like gloss or matte mediums, which all dry differently), or even subtle differences in paint thickness across the canvas. Varnish acts as a masterful equalizer, a true hero, creating a single, uniform surface finish – whether you desire a brilliant gloss, a subtle satin, or a sophisticated matte. This consistency not only presents a more professional aesthetic but also ensures that the viewer's eye is drawn to the art itself, not to distracting patchy reflections or uneven glares. Imagine a portrait where one eye gleams and the other is dull – your focus would instantly go to the inconsistency, wouldn't it? Varnish prevents this, creating a unified optical plane that allows the narrative of your painting to unfold without visual interruptions. It’s like magic, I tell you, pulling the whole piece together into one harmonious vision, making a series of paintings feel cohesive even if they use different techniques.
- Color Enhancement: It's almost magical, truly, how a final coat of varnish can dramatically transform and invigorate your painting. Beyond just unifying the sheen, varnish also works to saturate and deepen the colors, often making them appear richer, more intense, and more vibrant than they did in their unvarnished state. I remember the first time I varnished a particularly moody landscape, and the greens and blues suddenly gained a depth I hadn't seen before – it was like someone turned on the lights! This is particularly true for matte or semi-matte acrylics, which, let's be honest, can sometimes look a bit "flat" or sleepy before varnishing. The varnish creates a smooth, refractive surface that allows light to penetrate the paint layers more uniformly, reducing microscopic scattering that can make unvarnished colors appear dull. Essentially, the varnish fills in the microscopic texture of the dried acrylic paint, creating a more uniform surface with a consistent refractive index. This reduces the amount of light scattered at the surface, allowing more light to pass through to the pigments and reflect back to the viewer, intensifying their perceived color. This enhanced light penetration and reduced surface texture means colors appear more saturated, vibrant, and deep, as if waking them up from a long nap – truly, it’s like seeing the painting in its 'wet' state again, full of life and brilliance. It's a revelation every time I see it happen, a moment where the painting truly comes alive, transforming a sometimes-dull dry surface into something rich and luminous.
- Surface Integrity and Adhesion: Beyond protection and aesthetics, varnish contributes to the overall structural integrity of the paint film. It creates a unified, stable surface that can prevent minor abrasions or flaking of dry, fragile paint layers over time. Think of it as adding a final, invisible embrace that holds everything together securely. For mixed media pieces, it can also help to seal and consolidate various elements, like those delicate bits of paper or fabric, improving their long-term adhesion to the canvas and providing a cohesive finish. This is especially vital for ensuring that all those wonderful collage bits or textured elements stay exactly where you put them, safeguarding your artistic choices for years to come. Beyond protecting from casual scuffs, this enhanced surface integrity also makes the artwork more resilient during handling, framing, and transportation – crucial considerations if your pieces are destined for exhibition or sale. I’ve seen countless pieces damaged during transit, and a good varnish provides that critical extra physical layer of strength, preventing small chips, abrasions, or cracks from even starting. It's like putting a sturdy frame around a delicate photograph, providing an extra layer of structural confidence that ensures your artwork arrives safely and holds up beautifully wherever it goes.
When is an Acrylic Painting Ready for Varnish?
This is perhaps the most critical question, and here’s where my own impatience has taught me some hard lessons: patience is key. I'm naturally someone who wants to see the finished result now, and this desire has, on more than one occasion, led to a varnishing disaster. Acrylic paintings must be completely dry and cured before varnishing. While acrylics are touch-dry quickly (sometimes annoyingly so when you're trying to blend!), the curing process – where all residual water fully evaporates from the paint film and the polymer chains completely coalesce and cross-link – takes considerably longer. Think of "touch dry" as the surface being firm and non-transferable, but "cured" as the entire paint film being stable, cohesive, and completely inert, a truly robust and finished entity. Rushing this stage is a common pitfall that can lead to irreversible problems, like a cloudy finish (often from trapped moisture causing the varnish to emulsify and bloom) or a perpetually tacky surface that just won’t go away, stubbornly attracting every bit of lint. Trust me, I've had to carefully remove varnish from pieces that never fully cured, and it's a painstaking, often heartbreaking process! And if you're working with thick impasto, oh boy, get ready for the long haul – that's when patience truly becomes a virtue! It's like baking a cake – you can't frost it until it's completely cooled and set, no matter how tempting it looks! I once got a commission with some seriously thick impasto, and the client wanted it yesterday. I varnished it after a week, thinking "it feels dry enough." Big mistake. The varnish went on beautifully, but two months later, the entire surface was still subtly tacky, attracting every speck of dust and eventually developing a faint, milky haze in the thickest areas. A truly agonizing lesson in patience! (More on that, and other best acrylic paint brushes for artists, later). Before you even think about varnish, make a quick mental (or actual!) checklist: Is it cured? Is it clean? Are my tools ready? This little ritual saves so much stress and prevents so many tears.
- Thin applications: For those delicate, wispy layers, I usually tell myself (and now I'm telling you!), patience is indeed crucial. Paintings featuring thin layers of acrylic paint generally necessitate a curing period of at least 24-72 hours. Rushing this stage can lead to undesirable outcomes such as a cloudy or tacky finish, as residual moisture may become trapped beneath the varnish layer, creating a persistent haze you definitely don't want. Adhering to these recommended drying times is essential for ensuring the stability and longevity of the artwork, and frankly, your peace of mind.
- Thick impasto applications: For paintings incorporating thick impasto applications (for further information, refer to what is impasto painting), an extended curing period is required. These artworks can demand 1-2 weeks or considerably longer to fully cure, with the exact duration influenced by factors such as environmental conditions and the overall thickness of the paint layers. Premature varnishing of heavily textured pieces risks trapping moisture, which can lead to persistent tackiness, cloudiness, or even the development of mold, thereby compromising the artwork's integrity. Imagine those beautiful impasto peaks becoming little reservoirs for uncured paint! Attempting to varnish a painting that is not fully cured is like putting a lid on a pot before the food is cooked – you trap unwanted elements inside, creating a little ecosystem of potential problems. Trust me, I once varnished a piece prematurely and ended up with a perpetually sticky surface that felt like a magnet for every speck of dust in my studio, and the finish remained stubbornly hazy, like my art was permanently shrouded in a fog. This can lead to a host of issues, most notably a cloudy or tacky finish that may never fully resolve, as moisture remains trapped beneath the varnish. Beyond that, trapped moisture can compromise the long-term adhesion of the varnish, potentially causing it to peel, crack, or delaminate over time. It can also create an environment conducive to mold or mildew growth, causing irreparable, unsightly damage to your paint layers. Patience here truly is a virtue that pays dividends in longevity – a lesson I've learned, sometimes the hard way, but always a rewarding one, because the alternative is a real heartbreak and a lot of wasted effort.
Pre-Varnish Surface Preparation: More Than Just Dusting (My "Obsessive Cleaner" Routine)
Before we even think about applying varnish, there's a crucial, often overlooked, step that can make or break your final finish: meticulous surface preparation. I call it my "obsessive cleaner" routine because, frankly, you need to be a little obsessive here! Even the tiniest speck of dust, a stray cat hair (my studio's perennial challenge!), or an invisible fingerprint can become permanently embedded in your pristine varnish, mocking you for eternity. Trust me, I've seen it happen.
- The Meticulous Dust Patrol: Beyond a soft, lint-free cloth, consider a dedicated art-specific lint roller (the gentle, sticky kind, not the aggressive clothing type!). These are fantastic for picking up microscopic fibers and dust without leaving any residue. For more stubborn, statically charged dust, a soft anti-static brush (often used for electronics, but perfect for art!) can be invaluable, especially for textured surfaces where dust loves to hide. Think of it as giving those tiny particles a gentle, but firm, eviction notice!
- Degreasing and Fingerprint Foes: Our skin naturally produces oils, and even a faint fingerprint can interfere with varnish adhesion or create a subtle sheen anomaly. This is why I religiously wear clean, white cotton gloves (or nitrile gloves) whenever I handle a painting that's nearing the varnishing stage. If you suspect any greasy residue or fingerprints, a cloth very lightly dampened with distilled water (and I mean very lightly!) can be used to gently wipe the surface, ensuring it's completely dry before proceeding. For exceptionally stubborn, non-water-soluble grime (like lingering greasy smudges from handling, or even some faint pencil marks that slipped past your initial cleaning), a tiny amount of artist-grade, pH-neutral mild soap diluted in distilled water can be used. But please, always test on an inconspicuous area first and rinse meticulously and thoroughly with a clean, damp (distilled water only!) cloth. The goal is to remove the grime, not leave a soap residue! Remember: absolute dryness is key before varnish touches the surface! Any remaining moisture or soap will absolutely wreak havoc on your varnish adhesion and clarity, creating a cloudy, uneven mess.
- Why the Obsession? Because the varnish, once applied, magnifies everything underneath it. A flawlessly clean surface allows the varnish to do its job: enhance, protect, and make your colors sing, not highlight a speck of dust you missed! This step is your last chance to get things perfect, so embrace your inner meticulous cleaner!
Recognizing a Cured Painting: More Than Just Dry to the Touch
So, how do you really know it’s cured? It’s more than just a quick poke. Over the years, I've developed a few informal tests (use with caution, of course!):
- The Smell Test (Gentle, Please!): This is one of my go-to informal tests, but be subtle! Artists can perform a gentle smell test by bringing their nose close (but not touching!) to the painting. If a faint acrylic odor is still detectable, it indicates that the paint is likely still off-gassing those residual volatile organic compounds (VOCs) and has not fully cured. Cured paint should be largely odorless, or at most, have a very, very faint, inert scent. If you're still catching that distinct acrylic 'tang,' it's your painting telling you, "Not yet, friend!" – walk away and wait longer.
- The Coolness Test: A coolness test can be conducted by gently placing the back of one's hand against a thicker, inconspicuous area of the paint. If the area feels noticeably cooler than the surrounding canvas, it suggests that moisture continues to evaporate. This evaporative cooling is a clear sign that the internal drying process is still active, and further curing time is needed.
- The Flex Test (Small Canvases Only):
- The Gentle Tap Test (For Thick Areas): For paintings with significant texture or impasto, I sometimes do a very gentle, almost imperceptible tap with the back of a clean knuckle in an inconspicuous, thick area. If it feels solid, like tapping a hard surface (think a dry piece of wood versus something slightly damp), that's a good sign. If there's any perceived 'give' or softness, even subtle, or if the sound is a bit 'dull' rather than a crisp tap, that indicates residual moisture and uncured paint. This one requires a light touch, though – don't go knocking on your masterpiece like it's a door! It's more about sensing the subtle resonance and firmness. For smaller, unstretched canvases or panels (where flexing is less risky), a very gentle flex test can be performed. This is primarily useful for thinner substrates where you can observe subtle shifts. If any hairline cracks or a subtle 'give' indicative of internal movement are observed, the painting is not yet fully cured. For stretched canvases, especially larger ones, this test is generally not recommended as it could stretch the canvas or even damage the paint film. Caution is advised when performing this test to avoid damaging the artwork – remember, we're testing for readiness, not for breakage!
- The Visual Sheen Test: While not always foolproof, a painting that is still actively curing can sometimes exhibit slight, localized differences in sheen that seem to shift over time, particularly in thicker areas. Once fully cured, the entire surface, ignoring intended variations from mediums, should present a stable, consistent sheen that doesn't 'sweat' or change in subtle ways over a day. For example, if you notice a faint, slightly damper-looking area that seems to shift or disappear under different light as the day progresses, that’s your paint still working things out. It's a very subtle cue, but one I've learned to observe in pieces I'm particularly anxious to varnish, a kind of optical 'tell' that patience is still required.
Ultimately, it is prudent for artists to err on the side of caution. If uncertainty regarding the painting's cured state persists, allowing additional drying time is always recommended to ensure optimal results.
The Science of Curing: What's Really Happening?
So, we talk a lot about "drying" and "curing," but what's actually going on in your paint? For me, understanding the 'why' behind the 'what' makes the waiting game a little easier. When acrylic paint "dries," the water evaporates, and the tiny polymer particles in the paint start to stick together, forming a solid film. That's why it's touch-dry. But "curing" is a deeper, more profound process, a true transformation. It's when those polymer chains fully interlock and cross-link – a fascinating chemical process where individual polymer strands form bonds with each other, creating a much stronger, more stable, and cohesive network. This is what truly makes the paint film incredibly strong, creating a durable and flexible layer that can withstand the test of time, resisting cracking or brittleness. Think of it like a freshly poured concrete slab versus a fully set, load-bearing one – both might look dry on the surface, but only the cured one has achieved its full structural integrity, ready to handle the demands of its existence. Rushing to varnish before this full curing process is complete is like trying to frost a hot cake (a mistake I've learned from many times!); you trap moisture and un-evaporated chemicals, leading to potential cloudiness, stickiness, or even adhesion issues down the line. It's a slow, beautiful chemical dance, and we want to let it finish its performance before we add the final spotlight.
Factors Influencing Drying and Curing
Beyond paint thickness, several other factors significantly influence how quickly an acrylic painting dries and fully cures. For me, understanding these variables is like being a weather forecaster for my art – it helps me predict the best varnishing days and avoid unpleasant surprises!
- Substrate Absorbency: The surface you paint on plays a surprisingly big role. Highly absorbent surfaces like unprimed wood or raw canvas can actually wick moisture away from thinner paint layers more quickly, potentially leading to faster surface drying. However, for thicker applications, a less absorbent, well-primed canvas might allow for a more even and thorough evaporation from within the paint film, preventing a 'skin' from forming too soon. It's a delicate balance, and I've learned to adjust my waiting times based on whether I'm working on a gessoed panel or a heavily textured canvas. For instance, a very absorbent gesso (like a traditional chalk gesso) might pull moisture from thin acrylic washes quickly, but for thick applications, a denser, less absorbent acrylic gesso will allow for more even, internal evaporation. Think about painting on raw canvas versus a smooth, well-primed panel – the raw canvas will absorb things differently, potentially leading to faster surface drying but slower deep curing. Understanding these subtle differences can assist artists in better planning their varnishing schedule and avoiding common pitfalls, helping you make smarter choices about your drying environment.
- Humidity Levels: Elevated ambient humidity directly impedes the evaporation of water from the acrylic paint film, leading to a substantial increase in drying times. I've definitely made the mistake of trying to varnish on a muggy summer day, only to have my painting feel perpetually tacky – a real patience-tester! Artists should aim for a controlled environment with a relative humidity between 40-60% to facilitate efficient and consistent curing. If you live in a perpetually humid climate (like I sometimes do!), a small dehumidifier in your studio can be a game-changer. Conversely, in very dry environments, a humidifier can prevent the paint surface from drying too quickly and cracking. High ambient humidity (say, above 70-80%) directly impedes the evaporation of water from the acrylic paint film, leading to a substantial increase in drying times. I've definitely made the mistake of trying to varnish on a muggy summer day, only to have my painting feel perpetually tacky – a real patience-tester! Artists should aim for a controlled environment with a relative humidity between 40-60% to facilitate efficient and consistent curing. If you live in a perpetually humid climate (like I sometimes do!), a small dehumidifier in your studio can be a game-changer. Conversely, in very dry environments, a humidifier can prevent the paint surface from drying too quickly and cracking. Elevated humidity can also contribute to issues like "blushing" or cloudiness if varnish is applied prematurely, essentially trapping that moisture in the varnish film and giving your art a hazy, permanent fog you definitely didn't intend.
- Temperature: While higher temperatures generally accelerate the drying process, a careful balance is essential. Excessively high temperatures can cause the paint's surface to dry too quickly, forming a skin that traps moisture within the deeper layers, exactly like a cake that is cooked on the outside but frustratingly raw inside. I've learned that a quick surface dry doesn't mean a fully cured painting! Conversely, low temperatures significantly extend drying periods, making the waiting game even longer. While higher temperatures generally accelerate the drying process, a careful balance is essential. Excessively high temperatures (e.g., above 80°F or 27°C) can cause the paint's surface to dry too quickly, forming a rigid skin that traps moisture and uncured polymers within the deeper layers – exactly like a cake that is cooked on the outside but frustratingly raw inside. I've learned that a quick surface dry doesn't mean a fully cured painting! Conversely, low temperatures (e.g., below 60°F or 15°C) significantly extend drying periods, making the waiting game even longer and potentially hindering proper film formation. Maintaining a stable, moderate room temperature (e.g., 65-75°F or 18-24°C) is recommended to promote uniform drying and curing, ensuring your painting truly sets from the inside out. This ideal range allows the polymer particles to coalesce and form a strong, continuous film without external stresses like rapid surface drying or sluggish internal evaporation. Think of it as the 'Goldilocks zone' for your paint – not too hot, not too cold, but just right for optimal film formation and longevity, minimizing risks like cracking or a tacky finish.
- Air Circulation: Sufficient air circulation is critical as it aids in the efficient removal of evaporated moisture from the paint film, thereby promoting quicker and more even drying. However, artists must exercise extreme caution to avoid strong, direct drafts, which can introduce dust and airborne contaminants onto the drying painting or wet varnish – a surefire way to embed unwelcome particles permanently! Gentle, consistent air movement, perhaps from a distant oscillating fan on a low setting (aiming away from the painting, to gently move air around the room rather than directly at the surface), is ideal for maintaining a clean and optimal curing environment. Avoid direct, powerful blasts from fans, which can introduce dust and create uneven drying. Sufficient air circulation is critical as it aids in the efficient removal of evaporated moisture from the paint film, thereby promoting quicker and more even drying. However, artists must exercise extreme caution to avoid strong, direct drafts, which can introduce dust and airborne contaminants onto the drying painting or wet varnish – a surefire way to embed unwelcome particles permanently! Gentle, consistent air movement, perhaps from a distant oscillating fan on a low setting (aiming away from the painting, to gently move air around the room rather than directly at the surface), is ideal for maintaining a clean and optimal curing environment. Avoid direct, powerful blasts from fans, which can introduce dust and create uneven drying. A good air purifier running in the background also helps filter out airborne particulates (especially those with HEPA and activated carbon filters), making the air that circulates even cleaner and reducing exposure to VOCs.
- Paint Composition and Mediums: The specific composition of acrylic paints and the integration of various acrylic mediums, such as gels, pastes, or flow improvers, will directly influence drying and curing times. I've noticed a huge difference between my quick-drying fluid acrylic pours and a heavily textured impasto piece, where the wait can feel almost endless! For example, heavy body acrylics and impasto mediums will require significantly longer to dry than fluid acrylics due to their greater material volume and moisture content. The specific composition of acrylic paints and the integration of various acrylic mediums, such as gels, pastes, or flow improvers, will directly influence drying and curing times. I've noticed a huge difference between my quick-drying fluid acrylic pours and a heavily textured impasto piece, where the wait can feel almost endless! For example, heavy body acrylics and impasto mediums will require significantly longer to dry than fluid acrylics due to their greater material volume and moisture content. Even different brands of paint, with varying binder-to-pigment ratios, can have subtly different drying times. Similarly, the addition of flow improvers will extend drying, while some texture gels might seem dry but hold moisture deep within for ages. Artists should consider these inherent differences when scheduling the varnishing process, especially when combining diverse products, and err on the side of patience when in doubt – when it comes to drying, always assume it needs more time than you think, especially with those thick, juicy layers!
Environmental Conditions: The Unsung Heroes of Drying
The ambient environment significantly impacts the drying and curing efficacy of acrylic paintings. High humidity in the workspace will substantially retard drying times by saturating the air with moisture, making your painting feel perpetually sticky and increasing the risk of a cloudy varnish. Conversely, exceedingly dry conditions can sometimes result in premature surface drying, potentially leading to cracking if underlying paint layers remain wet – a frustrating paradox! Optimal conditions involve maintaining a moderate, consistent room temperature with gentle air circulation, while strictly avoiding direct drafts that could introduce airborne contaminants. I've come to see my studio as a mini-laboratory during the varnishing process, where maintaining this controlled environment is paramount for successful curing and a flawless finish.## Understanding Varnish Types for Acrylics
Alright, let's talk varnish types, because this is where things can get a little confusing, but also where you get to make some important choices for your art – choices that will impact its longevity and how it "feels" visually. Varnishes for acrylics generally fall into two main categories, each with its own quirks and benefits, plus you'll have a choice in finish. These are:
1. Removable Varnishes
These are, in my humble opinion, the most recommended types for serious artists, as they truly allow for future conservation – a critical consideration for any piece you hope will last for generations.
Isolation Coats: Your Painting's Invisible Shield (and My Hard-Learned Lesson)
Before exploring the various types of varnishes, it is essential to understand the function of an isolation coat. This layer, and trust me, this is where my "hard-learned lesson" comes in handy, is a permanent, non-removable application. It's typically composed of a clear acrylic gloss medium, often diluted with water (I usually aim for a 1:1 or 2:1 medium to water ratio, but always test!). This mix is applied directly onto the cured paint surface, preceding the final removable varnish. It's the unsung hero of archival art! For standard gloss mediums, a common dilution is a 1:1 ratio with distilled water, but some artists prefer a 2:1 medium to water for a slightly thicker barrier. The key is to keep it thin, so it doesn't build up too much gloss if you're aiming for a matte finish later – remember, the isolation coat is permanent! It's crucial to allow each isolation coat to dry completely – typically 6-24 hours depending on thickness, humidity, and ventilation – before applying the next, just like with varnish. Rushing this can lead to cloudiness or a tacky surface, defeating its purpose. My rule of thumb: when in doubt, wait longer!
The Importance of an Isolation Coat:
- The Ultimate Protector: An isolation coat establishes an impermeable barrier between the paint layers and the subsequent removable varnish. This layer is crucial for future conservation efforts; should the removable varnish need to be cleaned or removed decades later, the isolation coat protects the original paint from solvents or cleaning agents, preventing potential damage to the artwork. Think of it as a transparent, impenetrable force field that stands guard over your original brushstrokes, allowing conservators to work safely without ever touching your masterpiece.
- A Perfect Canvas for Varnish: Acrylic paints often exhibit varying porosity and inconsistent absorption. An isolation coat creates a smooth, non-absorbent, and uniform surface, optimizing it for varnish application. This uniformity ensures the varnish applies more evenly, reducing the likelihood of streaking or patchy absorption, and contributing to a professional, consistent finish.
Applying an isolation coat is a straightforward yet significant step towards achieving truly archival standards. And just like varnish, aim for multiple thin coats of isolation medium, allowing each to dry completely before the next. This builds a strong, even barrier without risking drips or unevenness. It is imperative that the painting is fully cured before the isolation coat is applied, and subsequently, the isolation coat itself must be completely dry prior to the application of the final varnish. This sequence ensures long-term protection and simplifies future conservation efforts. For additional guidance on artwork maintenance, consider how to clean and care for acrylic paintings.
Choosing Your Varnish: It's All About Your Art (and Your Comfort!)
Selecting the appropriate varnish involves a careful consideration of the artwork's longevity, aesthetic requirements, and the artist's working environment. For me, it's often a balance between chasing that perfect archival dream and the practical realities of my studio. The choice typically balances archival quality with practical application considerations – and sometimes, my desire for a specific look wins out, but always with an understanding of the trade-offs.
- If Archival Quality and Future Conservation are Your North Star: When archival quality and future conservation are paramount, particularly for artworks intended for exhibition or sale, MSA (Mineral Spirit Acrylic) varnish is frequently recommended by professionals. Its exceptional durability and solvent-based removability offer significant advantages for conservators, facilitating future cleaning or restoration without compromising the original artwork.
- For Ease of Use and Low Odor: For artists working in environments with limited ventilation or who prefer a less intense experience, water-based Polymer Varnish presents a viable alternative due to its user-friendliness and lower odor. However, its removal process is more delicate, making the prior application of an isolation coat strongly advisable when utilizing this type of varnish.
- For That Perfect Artistic Vibe (Gloss, Satin, or Matte): The choice of finish (gloss, satin, or matte) is primarily an aesthetic decision, and this is where you get to truly personalize the final presentation of your art. It's capable of significantly altering the artwork's overall mood and visual impact, so choose wisely – or, like me, experiment endlessly on test swatches! Do you want drama and intensity? Gloss. A soft, elegant whisper? Matte. Or a balanced, sophisticated conversation? Satin. Each finish can totally shift the personality of your piece.
- Gloss: Gloss varnish provides the highest reflectivity, intensifying colors and creating a vibrant, "wet" appearance. While it enhances color saturation and depth, artists should be aware that excessive reflections can occasionally distract from the artwork itself, especially under certain lighting conditions, turning a focal point into a mirror. However, gloss is often ideal for abstract works, photography-inspired pieces, artworks with bold, graphic colors, or those with metallic accents where maximum vibrancy and depth are desired. It’s also fantastic for pieces intended to be viewed in well-controlled lighting, where reflections can be minimized. It's like turning up the volume to eleven on your colors, making them truly sing and giving them an undeniable presence!
- Matte: Matte varnish delivers a soft, non-reflective, and often velvety aesthetic, effectively minimizing glare. This finish can lend a sophisticated, subdued, or even historical feel to an artwork. However, it is advisable to test matte varnishes, as they can sometimes subtly mute or flatten colors, impacting their vibrancy – something I've learned to anticipate and, sometimes, embrace. Another consideration with matte finishes is their slightly more porous nature, which can make them more susceptible to scuffing, fingerprints, and collecting dust in their microscopic texture. It’s like their beautiful, velvety surface has tiny, open pores that can trap things! To mitigate this, some artists apply a base layer of gloss or satin varnish, letting it cure completely, then follow with a final thin coat of matte varnish – a clever technique that offers the aesthetic benefits of a matte finish (that sophisticated, subdued look!) without all the potential drawbacks, giving you a more robust and easier-to-clean surface overall.
- Satin: Satin varnish offers a semi-gloss finish, striking a balance between gloss and matte. It provides a subtle sheen that enhances colors without the intense reflectivity of a high-gloss finish, presenting a polished and sophisticated appearance that minimizes distracting glare. For many of my pieces, satin is the 'just right' choice, offering the best of both worlds – the color depth and protection of a gloss, but with a refined, understated elegance that minimizes distracting glare. It's the sophisticated middle ground, allowing the artwork to shine without overwhelming the viewer with reflections. It's a fantastic option for almost any subject matter, from landscapes to portraits, still lifes to abstracts, where you want a polished look that remains approachable and minimizes distracting glare. For me, it often provides the perfect middle ground, allowing the artwork's details and colors to shine without the intensity of a full gloss or the potential muting of a full matte.
- Gloss: Gloss varnish provides the highest reflectivity, intensifying colors and creating a vibrant, "wet" appearance. While it enhances color saturation and depth, artists should be aware that excessive reflections can occasionally distract from the artwork itself, especially under certain lighting conditions.
- Matte: Matte varnish delivers a soft, non-reflective, and often velvety aesthetic, effectively minimizing glare. This finish can lend a sophisticated or subdued feel to an artwork. However, it is advisable to test matte varnishes, as they can sometimes subtly mute or flatten colors, impacting their vibrancy.
- Satin: Satin varnish offers a semi-gloss finish, striking a balance between gloss and matte. It provides a subtle sheen that enhances colors without the intense reflectivity of a high-gloss finish, presenting a polished and sophisticated appearance that minimizes distracting glare.
It is always recommended that artists perform a test application on a scrap piece of canvas or an inconspicuous edge of the painting. This allows for observation of how the chosen finish interacts with specific colors and textures. Ultimately, the most appropriate varnish is one that an artist is proficient in applying, provides the requisite level of protection, and enhances the artwork's final presentation.
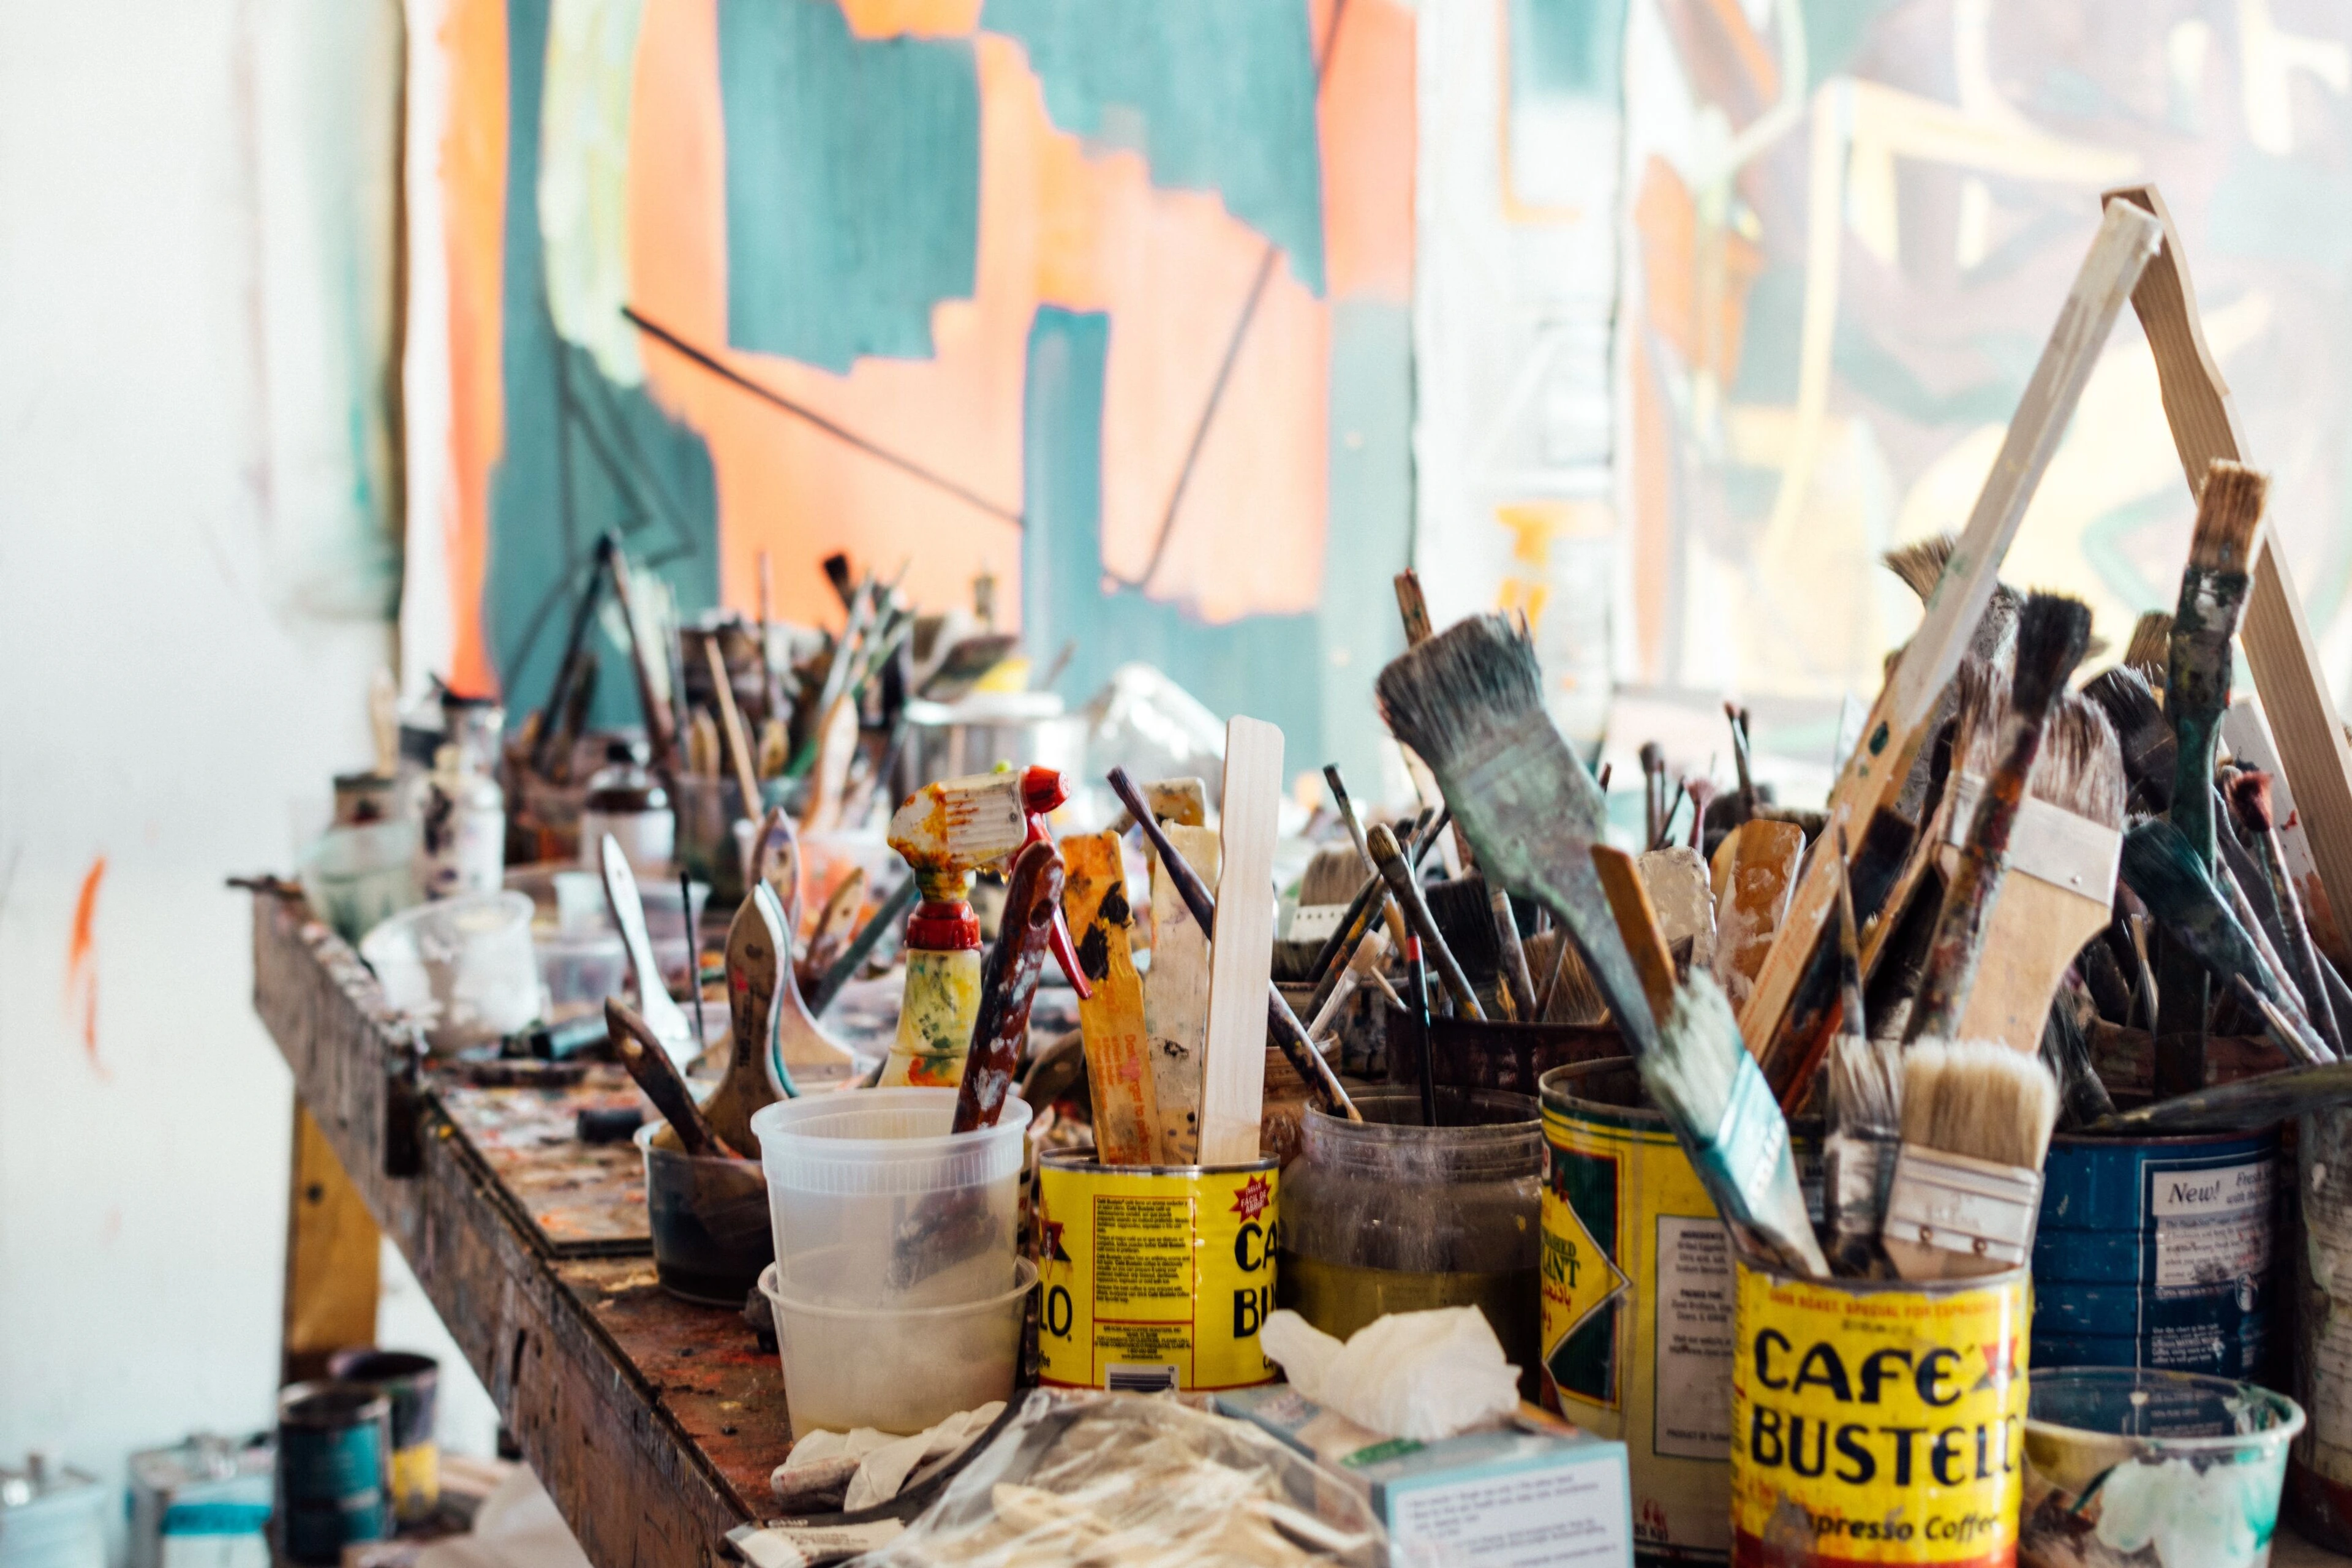
Materials You Will NeedBefore you begin, gather all your supplies. Preparation is key to a smooth varnishing process. https://freerangestock.com/photos/177284/artists-workspace-filled-with-paint-brushes-and-supplies.html, https://creativecommons.org/public-domain/cc0/* Dust Removal Tools: Essential dust removal tools include a super soft, lint-free microfiber cloth, a dedicated hake brush, or a soft, clean cosmetic brush (the fluffier, the better!). For stubborn, tiny fibers, a gentle art-specific lint roller (the kind designed for delicate surfaces, not your aggressive clothing type!) can be a lifesaver, as can a soft anti-static brush designed for electronics or art. These tools work wonders for lifting those almost invisible particles that always seem to be drawn to your masterpiece! The objective is to meticulously remove all dust particles prior to varnish application, preventing them from becoming permanently embedded within the film. This critical step ensures a pristine finish, as any dust you miss, no matter how tiny, will be magnified by the varnish and become a permanent, frustrating imperfection!
- Varnish: Your chosen type (e.g., MSA Varnish, Polymer Varnish) and finish (gloss, satin, matte).* Soft, Wide Brush or Foam Applicator: The selection of a soft, wide brush or foam applicator is paramount. A high-quality, dedicated synthetic brush, at least 2 inches wide (or wider for larger artworks), specifically designed for varnishing and guaranteed not to shed bristles, is essential. The selection of a soft, wide brush or foam applicator is paramount. A high-quality, dedicated synthetic brush, at least 2 inches wide (or wider for larger artworks), specifically designed for varnishing and guaranteed not to shed bristles, is essential. Brushes with very soft, fine synthetic bristles (which tend to shed less than natural hair and are ideal for water-based acrylic varnishes), often labeled as "varnishing brushes" or "hake brushes," are highly recommended. Natural hair hake brushes, with their incredibly soft yet resilient bristles, are fantastic for solvent-based varnishes. For larger, flatter surfaces, a high-density, fine-celled foam roller or applicator (like those used for cabinet painting) can provide an exceptionally smooth, even finish, minimizing air bubbles – just ensure it’s not too porous! Whatever you choose, ensure it's dedicated to varnishing and meticulously clean; even a single stray bristle from an old painting brush can ruin your perfect finish. Selecting appropriate tools is as crucial as choosing the best acrylic paint brushes for artists – after all, a good brush for painting might not be the best for varnishing!* Clean, Lint-Free Cloths: For cleaning and wiping.* Distilled Water or Mineral Spirits: Depending on your varnish type, for thinning or cleanup. Always check the manufacturer's instructions.* Measuring Cups/Syringes: Precise measurement tools, such as measuring cups or syringes, are invaluable for achieving consistent results. They are particularly useful when diluting varnish (always adhering to manufacturer's instructions) or when blending different finishes to create custom sheens (e.g., mixing gloss and matte varnishes). Accurate measurement ensures a repeatable and consistent finish across multiple artworks.
- Palette or Container: For pouring varnish (a non-porous surface like a glass palette or a clean plastic container works best for mixing).
- Timer/Clock: Essential for keeping track of drying times between coats. Don't just guess; set a timer and walk away! Your patience will be rewarded.
- Magnifying Glass or Strong Flashlight: For those of us who obsess over details (guilty as charged!), a magnifying glass or a strong flashlight can be invaluable for doing a final sweep for dust or tiny imperfections before the varnish dries, or between coats. After that first coat, I always do a little dance around my painting, observing it from multiple angles under varying light conditions. This is how I spot those sneaky areas of uneven sheen – little puddles, dull spots, or streaks. Minor irregularities can be very lightly and swiftly addressed while the varnish is still wet (but resist the urge to overwork it!); otherwise, they can be corrected during subsequent coats. Raking light (holding a flashlight at a low angle, almost parallel to the surface) is particularly effective for spotting texture, dust, or subtle irregularities in the varnish application. This angle casts shadows that make even the slightest imperfection stand out like a sore thumb – your secret weapon for a flawless finish! It’s a good moment to play detective and ensure your artwork is uniformly gleaming (or perfectly matte!), because any inconsistencies will be amplified once dry.
- Test Swatches/Scrap Canvas: I can't stress this enough – always have a scrap piece of canvas or an inconspicuous area on your painting to test your varnish. It's your safety net against unexpected sheens or reactions, and it has saved me from so many potential heartbreaks!
- Good Music or Podcast: Okay, this isn't a tool in the traditional sense, but for me, a calming playlist or an engaging podcast is absolutely essential. Varnishing demands focus and patience, and having something to keep your mind gently occupied (without distracting your hands!) can make the process much more enjoyable and less stressful. It helps with that all-important patience during drying times too!* Personal Protective Equipment (PPE): This isn't optional, friends, it's essential! This isn't optional, friends, it's essential! This includes disposable gloves (nitrile are my favorite – they’re tough, save your hands from sticky situations and chemical exposure, and let you feel what you’re doing!), and for solvent-based or spray varnishes, a good quality organic vapor respirator mask. Make sure your respirator is properly fitted and has the correct cartridges for organic vapors. You might even consider thin cotton gloves when handling the dry painting to prevent fingerprints before you even open the varnish bottle. Your health is worth it, trust me, I've learned this the hard way with one too many post-varnishing headaches, feeling lightheaded and foggy. Protect those lungs and your skin at all costs!* Air Blower or Canned Air: A gentle blast of dust-free air (not from an oily compressor!) can dislodge stubborn dust particles right before you apply varnish – a handy last-minute trick. Just be sure it's dust-free air and not from a compressor that might spray oil!
- Drop Cloth or Newspaper: To protect your workspace.* Air Blower or Canned Air: A gentle blast of air can dislodge stubborn dust particles right before you apply varnish. Just be sure it's dust-free air and not from a compressor that might spray oil!
- Humidity Gauge/Thermometer: Knowing the precise temperature and humidity of your workspace can help you make informed decisions about drying times and whether it's an optimal day for varnishing. I keep one right next to my drying rack.
- Dust Cover: A box or cover to protect the varnished painting while drying.
Setting Up Your Workspace: Getting in the Zone
Prior to varnish application, establishing an optimal workspace is essential. For me, this is almost as meditative as the painting process itself – it's about "getting in the zone." This involves creating a meticulously clean and organized environment to minimize potential imperfections. A serene and prepared workspace directly contributes to a more controlled and effective varnish application, ultimately enhancing the final artwork. Thorough preparation is not merely about efficiency but also about mitigating unforeseen issues, such as airborne dust or unexpected drips, on a nearly completed piece – because there's nothing worse than a stray cat hair embedded in your final varnish!
Proactive Dust Management: Establishing a Pristine Environment
Dust represents a significant challenge to achieving an immaculate varnish finish. Even within seemingly clean surroundings, particulate matter can unexpectedly manifest. The following strategies are recommended for dust control:
- Damp Dusting: Prior to varnishing, the entire workspace should be damp-dusted at least one hour in advance. This action effectively settles airborne particles, allowing any disturbed dust to fall before you introduce the wet varnish. Sweeping or vacuuming immediately before varnishing should be avoided, as these activities can aerosolize dust and kick it up into the air, creating a truly terrible environment for varnishing. Think of it as giving the dust a chance to settle down and behave before you start your delicate work.
- Air Purifier & Humidity Control: Operating an air purifier in the workspace for several hours before and during the varnishing process can substantially reduce airborne particulates. I run mine religiously! Operating an air purifier in the workspace for several hours before and during the varnishing process can substantially reduce airborne particulates. I run mine religiously! Look for models with a HEPA filter for capturing fine particulates (the tiny ones that cause havoc!), and an activated carbon filter if you're concerned about VOCs from solvent-based products (though a respirator is still paramount for those, please!). Beyond just dust, adequate airflow is crucial for the varnish to dry and cure properly. Stagnant air can prolong drying times and, in some cases, contribute to issues like cloudiness, especially with water-based varnishes. Consider a small humidifier or dehumidifier to maintain that ideal 40-60% relative humidity. Aim for gentle, consistent air movement, not strong drafts that could kick up dust – we're looking for a controlled breeze, not a hurricane! Think of it as creating a mini, perfectly controlled microclimate for your artwork, where the air works with you, not against you.
- Dedicated Varnishing Area: Where feasible, designating a specific area exclusively for varnishing can contribute to maintaining a consistently cleaner environment. This minimizes the risk of cross-contamination from other art projects (glitter, pastels, or charcoal dust, for instance) and allows you to optimize that space for dust control, ventilation, and ideal lighting. It's like having a dedicated "operating room" for the final, delicate stage of your artwork.
- Static Electricity Mitigation: Arid conditions can generate static electricity, which attracts dust. A modest increase in ambient humidity can be beneficial, or surfaces can be gently wiped with an anti-static cloth.
- Appropriate Attire: Artists should wear clean, lint-free clothing, and avoid fabrics known to shed fibers easily, such as wool. This is where good lighting saves your sanity! Raking light (holding a flashlight at a low angle, almost parallel to the surface) is particularly effective for spotting texture, dust, or subtle irregularities in the varnish application. This angle casts shadows that make even the slightest imperfection stand out like a sore thumb – your secret weapon for a flawless finish!
Establishing optimal environmental conditions is paramount for protecting the artwork during this critical stage.
Controlling the Chaos: Pets, Kids, and Uninvited Guests
Controlling the Chaos: Pets, Kids, and Uninvited Guests (Aka, My Daily Challenge)
Managing the presence of pets, children, and other household members is crucial during the varnishing process to maintain a pristine environment and ensure safety. The varnishing area should be considered a restricted zone during application and initial drying – I once had my beloved (but mischievous) cat decide the wet varnish was a new, interesting surface to investigate, leaving a paw print 'signature' I had to painstakingly remove! Another time, a small human decided a wet painting was the perfect place to leave their sticky handprint, leaving behind a permanent, glossy reminder of youthful curiosity. These anecdotes, while amusing in retrospect, were pure panic in the moment! It's better to be overly cautious than to find unexpected, and often irreversible, additions to your masterpiece. Clear communication with family (and a stern, but loving, "Stay Away!") along with physical barriers like closed doors or temporary screens are your best defense.
- Pet Management: It is advisable to confine pets to a separate area of the residence during the varnishing process and the initial drying period, as pet fur can easily adhere to wet varnish.
- Child Safety: All varnishing materials, particularly solvent-based products, must be kept out of the reach of children. Clear communication regarding the restricted nature of the workspace and the drying artwork is essential, and physical barriers are often the most effective preventative measure.
- Communication: Informing other household members about the varnishing activity and the need for the area to remain undisturbed can prevent accidental interference and potential damage to the artwork. A simple 'Wet Paint! Do Not Touch!' sign often goes a long way, especially if you have curious children or partners. Setting clear boundaries is key to protecting your work and your sanity!
1. Prepare Your Painting
Ensure your artwork is completely dry and cured as discussed.
- Clean the Surface & Wear Gloves: The meticulous cleaning of the painting's surface is an indispensable preparatory step. The artwork should be thoroughly cleaned with a soft, lint-free cloth or a dedicated soft brush (e.g., a hake brush or cosmetic brush) to eliminate all dust, hairs, and debris. And here's a pro-tip I swear by: wear clean, white cotton gloves while handling your painting during this stage. They prevent fingerprints and transfer of skin oils, which can sometimes interfere with varnish adhesion. Even microscopic particles can become permanently embedded in the varnish, becoming permanent, tiny annoyances! For persistent dirt or greasy residues, a cloth lightly dampened with distilled water can be used, ensuring the painting is completely dry before varnish application. In instances of exceptionally stubborn contaminants (like faint pencil marks or crayon that might have been overlooked, or even insect residue), a highly diluted, pH-neutral soap solution may be applied sparingly with a soft brush, followed by a rinse with a clean damp cloth – but proceed with extreme caution, test a small, inconspicuous area first, and ensure all soap residue is removed! Absolute dryness of the artwork is a non-negotiable prerequisite for varnishing; a wet surface is a recipe for disaster. Even microscopic particles can become permanently embedded in the varnish, becoming permanent, tiny annoyances! For persistent dirt or greasy residues, a cloth lightly dampened with distilled water can be used, ensuring the painting is completely dry before varnish application. In instances of exceptionally stubborn contaminants (like faint pencil marks or crayon that might have been overlooked, or even insect residue), a highly diluted, artist-grade, pH-neutral mild soap solution may be applied sparingly with a soft brush, followed by a rinse with a clean damp cloth – but proceed with extreme caution, test a small, inconspicuous area first, and ensure all soap residue is removed! Absolute dryness of the artwork is a non-negotiable prerequisite for varnishing; a wet surface is a recipe for disaster, potentially leading to cloudiness, tackiness, or poor adhesion.
2. Prepare Your Workspace
Choose a clean, dust-free area with good ventilation.
- Flat Surface: Place your painting flat on a clean, level surface, protected by a drop cloth. This prevents drips and allows for an even application. Don't forget the edges! If your canvas is gallery-wrapped, varnish the sides too for a consistent finish and added protection against edge damage.
- Optimal Conditions: Avoid varnishing in overly humid or cold conditions, as this can affect drying time and finish.### 3. Apply the Varnish: The Moment of Truth The application phase demands precise technique to achieve a smooth, even finish. This is where all that preparation pays off, and your steady hand becomes your best friend!
- Pour Varnish: Pour a small, manageable amount of varnish into a clean, dedicated container.
- Load the Brush: Dip the brush into the varnish, ensuring it is loaded sparingly. The aim is to have sufficient varnish to cover the surface without drips or excessive pooling.
First Coat: Thin and Even Application
- The Golden Rule: Less is More. Varnish should always be applied in thin, uniform strokes across the painting, ensuring thorough yet light coverage. Over-application is one of the quickest ways to invite drips, streaks, and bubbles – trust me, I’ve been there with a painting looking like it had a bad facial peel, and trying to fix it while wet only makes it worse!
- Work Methodically: Artists should work methodically in a consistent direction (e.g., horizontally) from one edge of the painting to the other. For larger canvases, dividing the surface into manageable sections can ensure comprehensive coverage and prevent missed areas.
- Overlap Like a Pro: Each varnish stroke should slightly overlap the preceding one, typically by one-third to one-half of the brush width. Think of it like mowing a lawn or painting a wall; you overlap your passes slightly to ensure no strips are missed and you get full, even coverage. This technique ensures continuous coverage, preventing unvarnished gaps and promoting a seamless finish, making the final coat appear as one unified, unbroken layer of protection.
- Impasto's Special Treatment: For artworks featuring significant texture, such as impasto (those wonderful thick dollops of paint!), a direct brushing application is not ideal; it can trap air and flatten your beautiful texture. Instead, a gentle dabbing motion should be employed, almost like stippling, to ensure the varnish penetrates all textural crevices without flattening them. After the dabbing, a very light, almost "feather-light" brushing can be used to gently smooth the surface, ensuring the varnish is evenly distributed without pooling or creating a flat look. Aggressive brushing in these areas significantly increases the risk of air bubble formation, which, trust me, you do not want to see fossilized in your varnish – they look like tiny, frustrating pimples on your beautiful texture, mocking your efforts! The key is gentle persistence, ensuring every crevice gets its protective layer without disturbing the precious texture you’ve worked so hard to create.
- Hands Off! Avoid Overworking: It is critical to avoid overworking the varnish once it has been applied. I once had a small bug, a tiny, unwitting intruder, land on a freshly varnished piece. In my panic to brush it off, I ended up with a massive streak and a whole new set of bubbles, creating more damage than the bug ever would have! Excessive brushing, especially after the varnish has started to set, can re-emulsify partially dried areas, introduce air bubbles, or potentially disturb underlying paint layers (though this is uncommon with fully cured acrylics). The recommended approach is to use efficient and deliberate strokes, then allow the varnish to set undisturbed – step away and resist the urge to 'fix' it while wet. That bug would have been easier to remove when dry than trying to fix a streaky mess!
- Foam Applicator Flow: If using a foam applicator or roller, remember it's about rolling lightly and evenly across the surface, applying consistent, gentle pressure. No need to press hard.* How to Check for Evenness: After that first coat, I always do a little dance around my painting, observing it from multiple angles under varying light conditions. This is how I spot those sneaky areas of uneven sheen – little puddles, dull spots, or streaks. Minor irregularities can be very lightly and swiftly addressed while the varnish is still wet (but resist the urge to overwork it!); otherwise, they can be corrected during subsequent coats. It’s a good moment to play detective and ensure your artwork is uniformly gleaming (or perfectly matte!), because any inconsistencies will be amplified once dry.
- Drying Time: The first coat must be allowed to dry completely. This period can range from 2 to 24 hours, influenced by varnish type, application thickness, and environmental factors. The surface should be tack-free before proceeding. It is often prudent to extend drying times beyond manufacturer recommendations to ensure full tack-free status.* Subsequent Coats (Optional, But I Say Essential!): To truly enhance protection, deepen color vibrancy, and achieve that professional, gallery-worthy finish, applying a second, and potentially a third, thin coat is something I highly recommend. Think of it like building up layers of magic! To truly enhance protection, deepen color vibrancy, and achieve that professional, gallery-worthy finish, applying a second, and potentially a third, thin coat is something I highly recommend. Think of it like building up layers of magic! My go-to technique is to rotate the application direction with each coat (e.g., horizontal for the first coat, vertical for the second, diagonal for the third if you're feeling ambitious and doing three coats!). I once skipped this, thinking "it'll be fine," and found a thin, unvarnished strip running down the side of a large canvas months later, a real forehead-slapper, and a testament to my own impatience! This is a critical method because it ensures comprehensive, even coverage across the entire painting from multiple angles, addressing any areas potentially missed in previous applications and constructing a robust, uniform protective layer, almost like weaving a protective basket around your art. Each coat, and I can't stress this enough, must be allowed to dry fully to a tack-free state prior to the next application. Typically, 2-3 thin coats are sufficient for optimal protection and aesthetic outcomes – it's worth the extra time, I promise! Your patience will ensure a resilient, beautiful, and consistent finish.### 4. Curing the VarnishOnce the final coat is dry to the touch, protect the painting while the varnish fully cures.
- Dust Protection: Place a dust cover (like a clean cardboard box) over the painting to shield it from airborne particles during the curing process.
- Curing Period: The Final Test of Patience (and Why I Learned to Walk Away) This represents the terminal and critical phase during which the varnish attains its complete hardness and protective efficacy. The varnish undergoes a chemical curing and hardening process that extends over several days to weeks, potentially up to a month, contingent on environmental conditions and product specifications. Throughout this duration, extremely gentle handling of the painting is absolutely imperative, and ideally, no handling at all. This represents the terminal and critical phase during which the varnish attains its complete hardness and protective efficacy. The varnish undergoes a chemical curing and hardening process that extends over several days to weeks, potentially up to a month, contingent on environmental conditions and product specifications. Throughout this duration, extremely gentle handling of the painting is absolutely imperative, and ideally, no handling at all. I once got impatient and tried to move a 'touch-dry' painting too soon, and ended up with a small, permanent smudge – a constant reminder of my haste and a tiny scar on a beautiful piece! It taught me that 'touch-dry' is not 'ready for anything' – it's still chemically vulnerable. Objects should not be placed on the varnished surface, nor should the painting be leaned against other items or exposed to abrupt temperature fluctuations. Although touch-dry, the varnish remains comparatively delicate and susceptible to imprints, scratches, or subtle surface alterations (like a subtle dulling of the sheen) until fully cured. My advice? Cover it, walk away, and distract yourself with a new project for a few weeks. Think of it like a freshly baked cake versus one that's cooled and set – you wouldn't frost a hot cake, right? Similarly, 'touch-dry' varnish is still chemically active and vulnerable. It’s hard, but necessary – and your future self (and your artwork) will thank you!
When NOT to Varnish: Important Considerations
While varnishing is generally advisable for the majority of acrylic paintings, trust me, there are certain circumstances where its application may be unsuitable or even detrimental. This is where I’ve gathered some hard-earned lessons, often through trial and error (mostly error, in my early days!). Knowing when not to varnish is just as crucial as knowing how, and it'll save you a lot of heartache (and ruined art, speaking from experience!) – because sometimes, the best protection is no varnish at all.
- Artworks with Fragile or Unstable Media: This is a big one, and a personal nightmare scenario! If your acrylic painting integrates any fragile or water-soluble media that haven't been adequately fixed or sealed (think pastels, watercolors, charcoal, some inks, encaustic, or even certain delicate collage elements), applying a liquid varnish is like playing Russian roulette. If your acrylic painting integrates any fragile or water-soluble media that haven't been adequately fixed or sealed (think pastels, watercolors, charcoal, some inks, encaustic, or even certain delicate collage elements), applying a liquid varnish is like playing Russian roulette. I once tried to varnish a piece with some charcoal details that I thought were 'fixed' enough, and watched in horror as the charcoal smeared into a muddy mess, irreversibly ruining hours of delicate work. Absolute disaster! Learn from my pain, and be incredibly cautious here, because this kind of damage is often permanent and heartbreaking.
- Specifically, Mixed Media Incorporating Water-Soluble Elements: Should an acrylic painting integrate water-soluble media such as pastels, watercolors, charcoal, or specific inks (that have not been adequately fixed or sealed), the application of a liquid varnish (particularly water-based variants) poses a risk of smudging, bleeding, or lifting these elements – turning your careful details into a blurred nightmare. Should an acrylic painting integrate water-soluble media such as pastels, watercolors, charcoal, or specific inks (that have not been adequately fixed or sealed), the application of a liquid varnish (particularly water-based variants) poses a risk of smudging, bleeding, or lifting these elements – turning your careful details into a blurred nightmare. In such instances, the use of a spray fixative followed by a spray varnish (always an aerosol, never a liquid varnish with a brush!) may be considered, but exhaustive testing and extreme caution are strongly advised. Even with a fixative, there’s no guarantee that it will fully protect the underlying media, and different brands of fixative work differently, so compatibility is a huge unknown. Always test on a scrap first, or better yet, avoid liquid varnishes entirely on these pieces unless you are 100% confident in your fixative and its compatibility with all your media; sometimes, the best approach is to simply enjoy the raw beauty of the mixed media elements, acknowledging the trade-off in long-term protection.
- Unconventional or Sensitive Substrates: Certain experimental or unconventional painting surfaces may exhibit adverse reactions to varnish. Think about highly absorbent fabrics (like raw silk or very thin, untreated cotton), certain highly porous papers, or even some metallic surfaces that might react chemically. Certain experimental or unconventional painting surfaces may exhibit adverse reactions to varnish. Think about highly absorbent fabrics (like raw silk or very thin, untreated cotton), certain highly porous papers, or even some metallic surfaces that might react chemically or reject the varnish entirely. I once tried varnishing a piece on a highly absorbent, untreated wood panel, and the varnish sank in unevenly, leaving a patchy, unappealing finish that no amount of additional coats could fix – a truly frustrating experience! Another time, a piece on a highly flexible synthetic sheet seemed to reject the varnish entirely, causing it to bead up like water on a freshly waxed car. Your unique artistic choices sometimes require unique varnishing considerations, and a little test swatch can save you a lot of grief (and wasted effort!) – it is always recommended to perform a test application on an inconspicuous area or a representative scrap of the material to avoid these unpleasant surprises. A little foresight goes a long way!
- Intentional Matte or Unfinished Aesthetic: If the artist's specific intent dictates an unvarnished, raw, or profoundly matte aesthetic that varnish would compromise, then its omission is warranted. However, it must be acknowledged that this decision foregoes the archival protective benefits.
- Digital Prints or Photography on Canvas: While these often mimic the look of paintings, they require specialized protective coatings designed for photographic emulsions or inkjet prints, not traditional acrylic varnishes. Using the wrong varnish can cause discoloration, cracking, or damage to the print itself. Always use products specifically formulated for fine art prints.
- Oil Paintings (and Acrylic Varnish Incompatibility): As previously noted, oil paintings necessitate specialized oil varnishes. The application of an acrylic varnish to an oil painting can result in compromised adhesion, cracking, and damage, attributable to the disparate drying and curing characteristics of oil paint.
- Intentional Imperfection or Temporary Artworks: Sometimes, you want your art to be raw, ephemeral, or designed for a temporary installation. If your artistic vision specifically calls for an unvarnished look, or if the piece isn't intended for long-term preservation, then by all means, skip the varnish! Just be aware you're foregoing all those lovely protective benefits.
Understanding these caveats is as important as understanding the application process. My personal golden rule? When in doubt, don't varnish (or test, test, test!). It's far easier to leave a piece unvarnished than to try and reverse a varnishing disaster.
Spray Varnishing: An Alternative Method
Spray Varnishing: The Smooth Operator's Choice (and My Occasional Go-To)
While brushing is a common method, spray varnishing offers a super smooth, brushstroke-free finish, which I sometimes prefer for certain pieces where a perfectly uniform sheen is paramount. It can be a bit trickier to get right, a real exercise in technique, but with a little practice, it's totally achievable and incredibly rewarding.
Choosing Your Spray Varnish: Aerosol vs. HVLP Gun
When we talk about spray varnishing, we're generally looking at two main options, each with its own set of pros and cons. I’ve fiddled with both, starting with aerosols out of convenience and eventually investing in an HVLP system as my work grew in scale, and my preference really depends on the scale and frequency of my work.
- Aerosol Cans: These are the most accessible for most artists, offering convenience and a relatively low entry cost. They’re great for occasional use or smaller pieces. Think of them as the grab-and-go option for a quick, even coat.
- HVLP (High Volume Low Pressure) Spray Guns: These are a more significant investment, often used by professional artists or those working on large-scale projects. They offer superior control over the spray pattern and material flow, and can be more economical in the long run if you’re varnishing frequently, as you buy varnish in bulk and dilute it. But be warned, they also come with a steeper learning curve and a much more involved cleaning and maintenance process – if you don't clean them meticulously after every single use, they'll clog, and you'll have a very expensive paperweight on your hands! (Guess how I learned that agonizing lesson – it involved hours of scrubbing and a lot of cursing!). So, while they offer amazing results, they demand dedication to maintenance.
Ultimately, the choice comes down to your budget, your frequency of varnishing, and your comfort level with the equipment. I started with aerosols and gradually moved to an HVLP system for larger commissions.
When to Consider Spray Varnish: The Reasons I Reach for the Can (or Gun)
- Smooth Finish: If you absolutely despise brushstrokes, this is your jam.
- Delicate Surfaces: For paintings with very delicate textures or dry pastel elements (though this guide is acrylic-focused, the principle holds).
- Large Paintings: It can be faster for really big canvases.
Tips for Spray Application:
- Read the Can! Seriously, every brand is a bit different, so follow the manufacturer's instructions for distance, drying times, and recoating.
- Ventilation is NON-NEGOTIABLE (I Learned This the Hard Way, with a Crushing Headache): You must, absolutely must, work in a very well-ventilated area, ideally outdoors or in a dedicated spray booth, and wear a proper organic vapor respirator. You must, absolutely must, work in a very well-ventilated area, ideally outdoors or in a dedicated spray booth, and wear a proper organic vapor respirator. I’ve made the mistake of not ventilating enough in my early days, thinking a cracked window was fine for a quick spray, and trust me, the pounding headache, dizziness, and general 'fume-brain' that followed were a miserable lesson that took days to shake off. My lungs ached, and my brain felt foggy – it was absolutely not worth the risk. Your lungs are precious; protect them at all costs, and never, ever compromise on ventilation or proper PPE when spray varnishing!
- Test Spray: Always do a test spray on a scrap piece of paper or cardboard to get a feel for the spray pattern and flow.
- Thin, Even Coats: The Zen of Spraying: This principle is paramount for successful spray varnishing. I like to think of it as a meditative process. The aerosol can should be held upright at a consistent distance of approximately 10-12 inches (25-30 cm) from the artwork. Maintain a steady, even speed as you traverse the surface, almost like you're conducting an orchestra with the can. Apply multiple very thin, light, and overlapping coats using a smooth, consistent, sweeping motion, akin to a fine mist. Crucially, spraying should commence off the edge of the painting, traverse the entire width or length, and the nozzle should only be released after passing the opposite edge. This technique prevents the formation of heavy spots and drips. Your objective is uniform coverage, not saturation. You’re building up a protective layer, not drowning your painting!
- Rotate Your Painting: For even coverage, rotate your painting 90 degrees between coats.
- Patience Between Coats: Each coat must be allowed to dry to the touch in accordance with the manufacturer's instructions prior to subsequent applications. This practice prevents drips and unevenness and facilitates the proper flash-off of solvents.
- Environmental Conditions: Spray varnishing should be avoided during periods of high humidity or strong wind. Elevated humidity can lead to phenomena such as blushing or cloudiness in the varnish film, while wind not only disrupts spray trajectory but also carries airborne dust. Optimal conditions include low humidity and minimal air movement.
Whether brushing or spraying, the objective remains consistent: to provide beautiful, lasting protection for the artwork.
Troubleshooting Common Spray Varnish Issues
Spray varnishing, while convenient, can sometimes throw a few curveballs. Here are some common problems and how to tackle them:
- "Orange Peel" Texture: If your spray varnish dries with a bumpy, dimpled texture resembling an orange peel, you've likely encountered this frustrating issue. It's often due to applying the coats too heavily, holding the can too far away (causing the varnish to dry mid-air before hitting the surface), or spraying in conditions that are too hot or windy. The solution? Lighter, more controlled coats, maintaining the recommended distance, and ensuring optimal environmental conditions. If your spray varnish dries with a bumpy, dimpled texture resembling an orange peel, you've likely encountered this frustrating issue. It's often due to applying the coats too heavily, holding the can too far away (causing the varnish to dry mid-air before hitting the surface), or spraying in conditions that are too hot or windy. The solution? Lighter, more controlled coats, maintaining the recommended distance, and ensuring optimal environmental conditions. If it's already dried, for minor orange peel, you might be able to very gently buff it with an extremely fine polishing cloth or a very high-grit sandpaper (3000+ grit, or even finer micro-mesh) and then apply another very thin, perfect coat. But proceed with extreme caution, as it’s incredibly easy to do more harm than good, creating visible scratches or dull patches! It's all about finding that sweet spot, and sometimes, less is truly more.
- Sputtering or Uneven Spray: This can happen if the nozzle is partially clogged, the can isn't warm enough, or you're holding it at an inconsistent angle. This can happen if the nozzle is partially clogged, the can isn't warm enough, or you're holding it at an inconsistent angle. Clean the nozzle immediately after use (some can be removed and soaked in mineral spirits or water, depending on varnish type – check instructions!). For stubborn clogs, a fine needle or compressed air can sometimes clear it, but be gentle; you don't want to damage the spray mechanism! Pre-warm the can by submerging it in warm (not hot!) water for 10-15 minutes to improve flow, and always practice smooth, consistent strokes on a test surface before hitting your masterpiece. A consistent, rhythmic motion is key to preventing sputtering and ensuring an even mist.
- Drips or Runs: Too much varnish in one spot! You're either moving too slowly, holding the can too close, or applying too heavily. Go back to thin, sweeping motions. Too much varnish in one spot! You're either moving too slowly, holding the can too close, or applying too heavily. Go back to thin, sweeping motions. If a drip happens while wet, you might be able to gently absorb it with the edge of a paper towel, or lightly wick it away with the tip of a clean brush, but often, it's best to let it dry completely and then very, very lightly sand the area with extremely fine sandpaper (think 3000+ grit) before applying another very light coat. Trying to fix a wet drip by brushing over it usually just spreads the problem and creates a bigger mess. Patience and precision are your allies here!
Practice is truly the key with spray varnishing. Don't be discouraged by initial imperfections; they're part of the learning curve!
Comparison: Brush vs. Spray Varnish - A Methodological Analysis
The selection between brush application and spray application for varnish extends beyond mere preference; it's a strategic decision that, for me, often feels like choosing the right tool for the job in my messy studio. Each method presents distinct advantages and disadvantages that may influence an artist's decision for a specific artwork or studio practice, and I've certainly leaned on both depending on the project.
- Brush Varnishing:
- Advantages: For me, brushing affords enhanced control for precise application, which is particularly beneficial for my smaller or intricately textured pieces where I want to get into every nook and cranny. I also find it generally results in less material waste, and the initial equipment costs (just a good brush!) are delightfully low.
- Disadvantages: Potential for visible brushstrokes if application is not meticulous. Necessitates a high-quality, non-shedding brush. Can be time-consuming for very large-scale works.
- Spray Varnishing (Aerosol Can):
- Advantages: Yields an exceptionally smooth, uniform, and brushstroke-free finish. Expedites the process for larger paintings. Optimal for delicate surfaces where brush contact may be disruptive.
- Disadvantages: Oh, the disadvantages! It requires stringent ventilation and respiratory protection – I've had more than one close call with fumes. It's also incredibly susceptible to environmental factors; humidity can turn your perfect spray into a cloudy nightmare, and a slight breeze means dust everywhere. It may offer reduced precision for fine details, incurs higher material costs over time due to overspray, and there's definitely a learning curve to achieve consistent outcomes without drips or uneven patches. My early attempts often looked like a streaky mess until I got the hang of it!
- Spray Varnishing (HVLP Spray Gun): For the serious professional with a dedicated studio, an HVLP (High Volume Low Pressure) spray gun is often considered the ultimate tool. This isn't just a bigger version of an aerosol can; it's a precision instrument.
- Advantages: This method offers unparalleled control over atomization and spray pattern, delivering an exquisitely smooth, factory-finish quality. It's incredibly efficient for very large canvases or multiple pieces, reducing overspray compared to aerosol cans. The ability to mix and control your own varnish viscosity also provides immense flexibility, and while the upfront cost is higher, using bulk varnish can be more economical in the long run. It truly elevates the finish to an exhibition-ready standard.
- Disadvantages: This is a significant commitment! It represents a substantial initial investment in equipment (gun, compressor, respirator, spray booth) – a leap I only took after much deliberation. It demands comprehensive cleanup and maintenance, and there's a steep learning curve to master the technique; my first few attempts were, shall we say, 'textured.' Not typically practical for most avocational or emerging artists, but a dream tool for those who reach a certain scale.
- Advantages: This method offers unparalleled control over atomization and spray pattern, delivering an exquisitely smooth, factory-finish quality. It's incredibly efficient for very large canvases or multiple pieces, reducing overspray compared to aerosol cans. The ability to mix and control your own varnish viscosity also provides immense flexibility. It truly elevates the finish to an exhibition-ready standard.
- Disadvantages: This is a significant commitment! It represents a substantial initial investment in equipment (gun, compressor, respirator, spray booth) – a leap I only took after much deliberation. It demands comprehensive cleanup and maintenance, and there's a steep learning curve to master the technique; my first few attempts were, shall we say, 'textured.' Not typically practical for most avocational or emerging artists, but a dream tool for those who reach a certain scale.
Artists should evaluate the painting's dimensions, surface texture, studio environment, and individual comfort level with each method to make an informed choice. The availability of both options often provides the greatest versatility.
Advanced Varnishing Techniques: Beyond the Basics (Playing with the Magic)
Once you've mastered the fundamentals, there are a few "next-level" techniques you might want to explore to achieve specific artistic effects or address unique challenges. This is where varnishing moves from a chore to another creative opportunity!
Spot Varnishing: Highlighting with Sheen (Make Those Details POP!)
Sometimes, you don't want to varnish the entire painting. Perhaps you have a mixed-media piece with unvarnishable elements, or you want to highlight certain areas with a different sheen. That's where spot varnishing comes in. It's like putting a literal spotlight on the areas you want to emphasize, directing the viewer's eye exactly where you want it to go.
- Purpose: To apply varnish only to specific areas of a painting, creating localized protection or altering the sheen to draw attention to details or create visual depth. Sometimes, you don't want to varnish the entire painting. Perhaps you have a mixed-media piece with unvarnishable elements, or you want to highlight certain areas with a different sheen. That's where spot varnishing comes in. It's like putting a literal spotlight on the areas you want to emphasize, directing the viewer's eye exactly where you want it to go. For example, I might gloss varnish a focal point while leaving the background matte – it creates an incredible optical illusion that pulls the glossy element forward, almost off the canvas, making it feel more prominent, more "real." This psychological effect of varying sheens is a fantastic way to add another dimension to your composition, subtly guiding the viewer's eye and enhancing the narrative of your piece. It’s a wonderful way to play with perception and add a sophisticated layer to your artwork.
Custom Varnish Mixtures: Your Perfect Sheen (Become Your Own Alchemist!)
Can't find the exact satin finish you're dreaming of? Mix your own! Many professional artists (and I've definitely done this when I just couldn't find the 'perfect' subtle glow) blend gloss and matte varnishes from the same brand and type to create a custom satin or semi-gloss sheen. It's like being a color mixer, but for shine!
- How-to: Start with gloss varnish and slowly add small amounts of matte varnish, mixing thoroughly, until you achieve your desired level of reflectivity. This isn't a race; go slow, add tiny amounts, and test often! Can't find the exact satin finish you're dreaming of? Mix your own! Many professional artists (and I've definitely done this when I just couldn't find the 'perfect' subtle glow) blend gloss and matte varnishes from the same brand and type to create a custom satin or semi-gloss sheen. It's like being a color mixer, but for shine! Start with gloss varnish and slowly add small amounts of matte varnish, mixing thoroughly, until you achieve your desired level of reflectivity. This isn't a race; go slow, add tiny amounts, and test often! Always mix more than you think you'll need for consistency across coats, and for the love of all that is creative, write down your precise ratios! (I once forgot and spent hours trying to replicate a perfect sheen, thinking "I'll remember that!" – never again, it was pure agony!). I highly recommend mixing in very small batches until you've found your ideal ratio, then scaling up. And rigorous testing on scrap pieces is paramount to ensure the custom blend performs as expected, ensuring you can replicate that perfect, unique sheen every time.
- Why it works: You have ultimate control over the final look, tailoring it precisely to your artwork. This is fantastic for achieving a truly unique aesthetic that factory-standard finishes might not provide.
- Caution: Never mix varnishes from different brands or different chemical types (e.g., MSA with Polymer) unless explicitly stated by the manufacturer. Stick to like with like!
- Technique: Use a smaller, fine-tipped brush and carefully apply varnish only to the desired areas. For truly crisp edges, you can use low-tack artist's masking tape or even a liquid frisket/masking fluid (always test for compatibility first!) to protect the areas you don't want varnished. Just be mindful of its adhesion to your paint, especially if the paint layers are delicate. You'll need an incredibly steady hand and a clear vision of your desired outcome.
- Considerations: This requires careful planning and execution to avoid visible varnish lines. Test on a scrap first to see how the different sheens interact.
Layering Different Sheens: Creating Visual Depth (Playing with Perception)
Beyond just mixing, you can strategically layer different sheens to create optical illusions of depth and focus. This is where you really start to manipulate how a viewer perceives your artwork, adding a subtle but powerful layer of sophistication.
- Technique: Apply a full coat of one sheen (e.g., matte) over your entire painting and let it cure fully. Then, apply a second, different sheen (e.g., gloss or satin) to specific areas you want to pop forward or emphasize. The key here is patience – allow each layer to fully cure before the next, or you risk some muddy, uneven results.
- Effect: A glossy element over a matte background will appear to advance, drawing the eye and adding a sculptural quality. Conversely, a matte area over a glossy background can create a subtle, almost ethereal recession. It’s a powerful tool for manipulating perception!
- My Experience: I've used this to great effect on abstract pieces where I wanted certain forms to feel like they were coming off the canvas, while others receded into the background. For instance, a matte background with a glossy central figure creates a striking focal point, or a semi-gloss over a matte landscape can make specific elements like water or distant mountains subtly shimmer, giving them a more lifelike quality. Beyond just mixing, you can strategically layer different sheens to create optical illusions of depth and focus. This is where you really start to manipulate how a viewer perceives your artwork, adding a subtle but powerful layer of sophistication. Apply a full coat of one sheen (e.g., matte) over your entire painting and let it cure fully. Then, apply a second, different sheen (e.g., gloss or satin) to specific areas you want to pop forward or emphasize. The key here is patience – allow each layer to fully cure before the next, or you risk some muddy, uneven results. A glossy element over a matte background will appear to advance, drawing the eye and adding a sculptural quality. Conversely, a matte area over a glossy background can create a subtle, almost ethereal recession. On an abstract piece, I might use a satin base and then spot gloss key areas to create a push-pull effect, making some forms appear to recede and others to advance, adding a dynamic, sculptural depth. It truly adds another dimension to the viewing experience, making the painting come alive with subtle shifts in perception.
Tips for a Flawless Finish: My Golden Rules
- Always Test First: If varnishing for the first time or using a new varnish (and trust me, I'm always trying new ones!), always, always, always test it on a scrap piece of canvas or an inconspicuous area of your painting. This step is non-negotiable and has saved me from countless potential heartbreaks, and a lot of tears! Don't skip it, even if you're eager.
- Environmental Monitoring: Invest in a simple hygrometer and thermometer for your studio. Knowing your temperature and humidity levels is crucial for optimal drying and curing. Invest in a simple hygrometer and thermometer for your studio. Knowing your temperature and humidity levels is crucial for optimal drying and curing – it's like being a weather forecaster for your art! I used to eyeball it, but now I know exactly what my "Goldilocks zone" is for varnishing – and it saves so much guesswork and potential issues! If humidity is too high (above 60-70%), I'll postpone varnishing or run a dehumidifier. If it's too cold (below 65°F), I'll gently warm the room. Knowing these numbers allows me to make informed decisions rather than just crossing my fingers and hoping for the best. A small investment for big peace of mind, and vastly improved results in clarity and durability!
Safety First: Protecting Yourself While You Protect Your Art (Because Your Health Matters!)
Okay, so we're talking about chemicals here, and while most acrylic varnishes are pretty benign, especially the water-based ones, some solvent-based options and spray varnishes definitely require a bit more respect. I've gotten a little complacent before, and my head paid the price, so learn from my mistakes! Your art is important, but your health is paramount. It’s also a good idea to have a small first aid kit handy, especially if you're working with solvent-based varnishes – just in case of any accidental splashes!
- Wear Gloves: Disposable gloves (nitrile are great, and what I always reach for) aren't just for keeping your hands clean; they protect your skin from potential irritants, and prevent annoying sticky fingers! Trust me, nobody wants a varnish-induced rash or a surprise chemical burn.
- Consider a Respirator: If you're using solvent-based varnishes regularly, or especially spray varnishes, investing in an organic vapor respirator mask is a really smart move. If you're using solvent-based varnishes regularly, or especially spray varnishes, investing in an organic vapor respirator mask is a really smart move. My lungs have thanked me profusely after I learned this lesson the hard way – that post-varnishing headache, feeling of lightheadedness, and general 'fume-brain' that lingers for days is absolutely not worth it! Protection is key, and a good respirator is like a superhero mask for your airways, filtering out those harmful volatile organic compounds (VOCs) that can really mess with your health. Don't compromise; your long-term health is far more important than a quick finish.
- Read the Labels: Always, always, always read the safety instructions and warnings on your varnish product. They're there for a reason!
It's all about making art safely, so you can enjoy the process and the finished piece without any unexpected side effects.
- Ventilation is Key: Adequate ventilation is paramount. Operating in a well-ventilated environment is crucial not only for comfort but primarily for health protection. For solvent-based varnishes and all spray varnishes, effective air exchange is essential to disperse fumes and prevent the inhalation of potentially harmful Volatile Organic Compounds (VOCs). This entails utilizing open windows, fans for cross-ventilation, or, ideally, a dedicated exhaust system. Varnishing in enclosed spaces with these products is strongly discouraged – I've learned that a 'fume hangover' is a very real, and very unpleasant, consequence of poor ventilation.
- Work in Sections for Larger Pieces: For really big canvases, don't try to varnish the whole thing at once. Mentally (or lightly with a pencil, if you dare!) divide your painting into manageable sections and work methodically. This prevents the varnish from drying too much on one side while you're still working on the other, which can lead to streaks and unevenness.
- Cleanliness: The Dust Battle: A single speck of dust can become permanently trapped, a tiny monument to your oversight, mocking you for eternity! Ensure your workspace, brush, and painting are meticulously clean. I'm talking wiping down surfaces an hour before, using an air purifier, and dressing in lint-free clothes. A single speck of dust can become permanently trapped, a tiny monument to your oversight, mocking you for eternity! Ensure your workspace, brush, and painting are meticulously clean. I'm talking wiping down surfaces an hour before, using an air purifier, and dressing in lint-free clothes. I once found a tiny, sparkly piece of glitter embedded in a final varnish coat – a relic from a previous art session that seemed to materialize out of thin air and became a permanent, shimmering imperfection! It's a constant battle against the invisible, but a necessary one, and winning it means a crystal-clear, truly pristine finish for your art.
- Thin Coats are Better: Always. Multiple thin coats are always superior to one thick coat. Thick coats are prone to unevenness, drips, and significantly longer drying times, increasing the chance of dust adhesion. Think of it like a delicate, transparent veil, not a thick, gloopy blanket – the goal is protection, not an impenetrable, lumpy shield. Each thin layer dries uniformly and builds strength, like constructing a beautiful, invisible fortress for your art.* Thin Coats are Better: Multiple thin coats are always superior to one thick coat. Thick coats are prone to unevenness, drips, and longer drying times, increasing the chance of dust adhesion.* Don't Rush: Patience is Not Just a Virtue, It's a Lifesaver! I'm an impatient person by nature. I want things done now. But varnishing has taught me more about patience than almost anything else in my artistic journey. Every single time I've rushed a drying period, or tried to squeeze in an extra coat before the previous one was truly tack-free, I've regretted it. Cloudy finishes, tacky surfaces, trapped dust – you name it, I've seen it, and it's almost always because I didn't wait. So, step away, set a timer, go make a cup of tea (or a whole meal!), and let your painting do its thing. I'm an impatient person by nature. I want things done now. But varnishing has taught me more about patience than almost anything else in my artistic journey. Every single time I've rushed a drying period, or tried to squeeze in an extra coat before the previous one was truly tack-free, I've regretted it. Cloudy finishes, tacky surfaces, trapped dust, irreparable smudges – you name it, I've seen it, and it's almost always because I didn't wait. I've ruined enough pieces by rushing to tell you, from the depths of my own impatience, that the payoff for waiting is immense. Your patience throughout the drying and curing process is paramount, and it pays dividends in a truly flawless, long-lasting finish that you (and future generations!) will be proud of.
Troubleshooting Common Varnishing Issues: Because Things Sometimes Go Sideways (My Own Mishaps Included)
- Bubbles: Often caused by overworking the varnish with the brush or applying it too thickly. Use lighter strokes and thinner layers, and resist the urge to 'fix' them by brushing repeatedly once the varnish starts to set – you'll only make it worse! Often caused by overworking the varnish with the brush, applying it too thickly, or brushing too aggressively. Use lighter strokes and thinner layers, and resist the urge to 'fix' them by brushing repeatedly once the varnish starts to set – you'll only make it worse! If you spot a stubborn bubble while the varnish is still wet, you can sometimes gently exhale on it (your warm, moist breath helps break surface tension), lightly touch it with the very tip of a clean brush, or even carefully use the tip of a very fine needle to pop it. But be incredibly careful not to disturb the surrounding varnish, as overworking can lead to more bubbles! I've had many a bubble-riddled piece in my early days, and it's a frustrating sight, almost like tiny imperfections mocking your efforts.* Streaks: Can result from uneven application, using too little varnish, or a brush that is too stiff or shedding. Ensure even loading of the brush and consistent strokes. Can result from uneven application, using too little varnish, applying too quickly, or a brush that is too stiff, shedding, or not loaded correctly. Ensure even loading of the brush and consistent, overlapping strokes. I’ve cursed at many a streak, only to realize I was either too stingy with the varnish, applying uneven pressure, or, most commonly, trying to use a brush that had seen better days (or was just too cheap!), leaving behind tiny, frustrating lines or shed bristles that become permanently embedded. Investing in a high-quality, dedicated varnishing brush and ensuring consistent, steady movements are your best defense against streaks – remember, the tool matters just as much as your technique!
- Orange Peel Texture: This looks exactly as it sounds – a bumpy, uneven surface, like the skin of an orange. It's often caused by applying varnish too thickly, using too much pressure, or varnishing in overly humid or cold conditions. Thin coats and proper environmental control are your best friends here. This looks exactly as it sounds – a bumpy, dimpled texture, like the skin of an orange. It's often caused by applying varnish too thickly (which prevents it from leveling properly), using too much pressure, or varnishing in overly humid or cold conditions, or if the spray nozzle is too far from the surface causing the varnish to dry mid-air. Thin coats and proper environmental control are your best friends here. I once thought more varnish meant more protection, only to create a miniature moonscape on my painting – a frustrating sight that taught me a valuable lesson about moderation and the importance of thin, even layers!* Cloudiness/Tackiness: This issue almost invariably results from varnishing an inadequately cured painting or applying varnish in conditions of high humidity or low temperature. This issue almost invariably results from varnishing an inadequately cured painting or applying varnish in conditions of high humidity or low temperature. I once varnished on a particularly muggy day, and my painting looked like it was trapped in a permanent fog – a disheartening sight, to say the least, like my artwork was forever shrouded in a mysterious mist! Ensuring appropriate drying times and effective ventilation is critical. Seriously, varnishing on excessively humid days should be avoided at all costs, as the trapped moisture causes the varnish to 'blush' or cloud. Sometimes, the only fix is to remove the varnish (if it's removable!) using the appropriate solvent (mineral spirits for MSA, ammonia solution for Polymer) and start over, which is a pain I wouldn't wish on anyone. This delicate removal requires immense patience and a very gentle hand, and ideally, guidance from a conservator if it's a valuable piece, as incorrect removal can damage the paint layers underneath.
- Yellowing: This is a fear many artists share! While modern acrylic varnishes are specifically formulated to resist yellowing, older or inferior-quality varnishes can sometimes exhibit yellowing over prolonged periods, especially when exposed to a lot of UV light. This is a fear many artists share! While modern artist-grade acrylic varnishes are specifically formulated to resist yellowing, older or inferior-quality varnishes can sometimes exhibit yellowing over prolonged periods, especially when exposed to a lot of UV light. I've also seen incomplete curing of the underlying paint, or improper use of certain oil-based materials in mixed-media artworks, contribute to discoloration. The good news? If yellowing occurs with a removable varnish, a professional conservator can often safely remove and replace that aged layer, bringing your art back to life with its original vibrancy. For permanent varnishes, though, remediation is considerably more complex and risky for the artwork, which is another reason I champion removable options and isolation coats! (Trust me, I've had moments of panic seeing a beloved old piece start to dull and yellow, only to be relieved it had a removable varnish and could be restored!)
Frequently Asked Questions (FAQ): Your Burning Questions, Answered (with a Smile and a Hint of Hard-Earned Wisdom)
- Can I varnish with a roller? Absolutely, and for larger, flatter paintings, a high-density foam roller (fine-celled, like those for cabinetry) can be an excellent choice. I've used them for big abstracts, and when done correctly, they can give an impeccably smooth finish that rivals spray application.
- Pros: Can achieve an incredibly smooth, brushstroke-free finish quickly. Great for even application over large areas.
- Cons: Less control for detailed or highly textured areas. Can introduce tiny air bubbles if overworked or if the foam is not fine enough. Requires practice to avoid ridges at the start/stop points. Absolutely, and for larger, flatter paintings, a high-density foam roller (fine-celled, like those for cabinetry) can be an excellent choice. I've used them for big abstracts, and when done correctly, they can give an impeccably smooth finish that rivals spray application. Pros: Can achieve an incredibly smooth, brushstroke-free finish quickly. Great for even application over large areas. Cons: Less control for detailed or highly textured areas. Can introduce tiny air bubbles if overworked or if the foam is not fine enough. Requires practice to avoid ridges at the start/stop points. Just ensure your roller is clean, shed-free, and designed for fine finishes.
- Can I varnish oil paintings with acrylic varnish? No. And I mean a firm, resounding NO! Acrylic varnish is specifically formulated for acrylic paints. Oil paintings require specialized oil varnishes. Mixing them is a recipe for disaster, potentially leading to cracking, delamination, and irreversible damage due to their vastly different chemical compositions and drying processes. For more on oil painting techniques, consult relevant guides – but know that acrylic varnish is never the answer for oils.
- Can I use hairspray as a temporary varnish? Oh, please, for the love of your art, NO! I've heard this myth floating around, and it sends shivers down my spine. Oh, please, for the love of your art, NO! I've heard this myth floating around, and it sends shivers down my spine. Hairspray contains all sorts of ingredients (like lacquers, silicones, and perfumes) that are absolutely not archival, will yellow, crack, and potentially damage your paint in the long run. It's a quick fix that leads to permanent heartache and irreversible damage to your artwork. It will degrade over time, yellow horribly, and trying to remove it will likely damage the paint underneath. Stick to artist-grade varnishes; your future self (and any conservator who might encounter your work!) will thank you profusely, because there’s simply no good reason to risk your art with a non-archival product.* What if my varnish is too thick or has drips? Ah, the dreaded drip! It's happened to the best of us (and certainly to me!). If the varnish is still wet, very gently try to absorb the excess with the corner of a clean, lint-free cloth or the tip of a dry brush. If it has dried and hardened, it's a bit trickier. For minor issues, you might be able to extremely lightly sand the area with very fine-grit sandpaper (e.g., 2000 grit or higher), then apply another thin coat of varnish. For larger drips or very thick areas, you might need to use the appropriate solvent (mineral spirits for MSA, ammonia-based cleaner for Polymer) to carefully remove the affected area, let it dry, and reapply. This is delicate work, so test first and proceed with caution. Ah, the dreaded drip! It's happened to the best of us (and certainly to me!). If the varnish is still wet, very gently try to absorb the excess with the corner of a clean, lint-free cloth or the tip of a dry brush. If it has dried and hardened, it's a bit trickier. For minor issues, you might be able to extremely lightly sand the area with very fine-grit sandpaper (e.g., 2000 grit or higher), then apply another thin coat of varnish. For larger drips or very thick areas, you might need to use the appropriate solvent (mineral spirits for MSA, ammonia-based cleaner for Polymer) to carefully remove the affected area, let it dry, and reapply. This is delicate work, so test first and proceed with caution. Prevention (thin coats!) is definitely better than cure here, because trying to fix a dried drip can be a real headache and often leads to more complications!
- What if I don't want a shiny finish? A satin or matte varnish should be selected. It is advisable to test the varnish, as matte finishes can subtly alter color perception.
- What about humidity and temperature during varnishing? Oh, these are huge factors! Varnishing in very high humidity (say, above 70-80%) can lead to a cloudy, hazy, or 'blush' finish because moisture gets trapped in the drying varnish film, essentially creating a permanent fog over your artwork. Conversely, extreme cold can make the varnish dry unevenly or too slowly. Oh, these are huge factors! Varnishing in very high humidity (say, above 70-80%) can lead to a cloudy, hazy, or 'blush' finish because moisture gets trapped in the drying varnish film, essentially creating a permanent fog over your artwork. Conversely, extreme cold can make the varnish dry unevenly or too slowly, hindering proper film formation. I always aim for moderate room temperature (around 65-75°F or 18-24°C) with moderate humidity (40-60%). If it's a super humid day, I'll often just postpone varnishing, even if it means waiting an extra day or two. It's truly better safe than sorry, and your patience will be rewarded with a clearer, more consistent finish! These environmental conditions are crucial for a successful outcome.
- How does one varnish a highly textured (impasto) painting? This application requires particular attention, especially for those beautiful, thick textures! For impasto work, a very soft, high-quality brush or a sponge applicator should be utilized to gently dab the varnish into all textural crevices, ensuring comprehensive coverage. Aggressive brushing, which can induce bubble formation, should be avoided. The application of multiple, very thin coats is especially critical in this context. This application requires particular attention, especially for those beautiful, thick textures! For impasto work, a very soft, high-quality brush or a sponge applicator should be utilized to gently dab the varnish into all textural crevices, ensuring comprehensive coverage without flattening or filling in your precious peaks. Aggressive brushing, which can induce bubble formation, should be avoided at all costs. The application of multiple, very thin coats is especially critical in this context to build up protection without obscuring detail. Spray varnish can also be an excellent method for impasto, as it provides uniform coverage without disturbing the existing texture – something I often lean on for my most textured pieces, as it’s often the safest and most efficient way to get into all those nooks and crannies without a brush.
- Can I mix different varnish finishes to create a custom sheen? Oh, absolutely, and I often do! This is one of those fun experimental things you can do to dial in the exact finish you want. For example, if you want something that's not quite satin but not quite matte, you can mix gloss and matte varnishes together. Just be sure to mix thoroughly in a separate container, use accurate measurements if you want to replicate the effect later, and, as always, test on a scrap piece first. Oh, absolutely, and I often do! This is one of those fun experimental things you can do to dial in the exact finish you want. For example, if you want something that's not quite satin but not quite matte, you can mix gloss and matte varnishes together from the same brand and type. Just be sure to mix thoroughly in a separate container, use accurate measurements if you want to replicate the effect later, and, as always, test on a scrap piece first. I've found some truly unique sheens this way that perfectly complement certain artworks – it's like having a secret recipe for shine that only you know, giving your art a truly bespoke finish!
- How do different varnish finishes affect the overall artistic impression? Oh, this is a fun one! I used to think gloss was always best, but I've learned that the finish can totally change the mood of a piece.
- Gloss: This one is a showstopper for me when I want my deepest blacks to be deep and my vibrant colors to sing, giving the painting that "wet" or "freshly painted" look. It's fantastic for making details pop, but, and this is a big but, be aware of reflections – sometimes they can distract from the art itself, especially under certain lighting conditions.
- Satin: This, for me, is often the Goldilocks finish – just right. It offers a subtle, soft sheen that's less reflective than gloss but still beautifully enhances colors. It strikes a lovely balance, giving a polished look without being overly distracting. It's my personal go-to for so many pieces.
- Matte: This finish creates a soft, non-reflective surface, which can be wonderful for pieces where you want a very subtle, perhaps more historical, or subdued feel. It almost gives the colors a quiet elegance. Just a heads-up: it can slightly mute colors, sometimes giving them a chalkier appearance, so always test it first! Oh, this is a fun one! I used to think gloss was always best, but I've learned that the finish can totally change the mood of a piece. Gloss: This one is a showstopper for me when I want my deepest blacks to be deep and my vibrant colors to sing, giving the painting that "wet" or "freshly painted" look. It's fantastic for making details pop, but, and this is a big but, be aware of reflections – sometimes they can distract from the art itself, especially under certain lighting conditions, turning a focal point into a mirror. Satin: This, for me, is often the Goldilocks finish – just right. It offers a subtle, soft sheen that's less reflective than gloss but still beautifully enhances colors. It strikes a lovely balance, giving a polished look without being overly distracting. It's my personal go-to for so many pieces, providing a sophisticated, approachable elegance. Matte: This finish creates a soft, non-reflective surface, which can be wonderful for pieces where you want a very subtle, perhaps more historical, or subdued feel. It almost gives the colors a quiet elegance. Just a heads-up: it can slightly mute colors, sometimes giving them a chalkier appearance, so always test it first! I've definitely had some surprises there when I didn't test. Choosing a finish is another artistic decision, so play around with samples – your art deserves its perfect presentation!
- What about varnishing paintings destined for outdoor display? This is a niche but important question! If your painting is truly intended for outdoors, you'll need specialized outdoor acrylic varnishes that offer even more robust UV protection and weather resistance. Standard artist varnishes, even those with UV inhibitors, are generally not formulated for prolonged exposure to direct sunlight, rain, and extreme temperature fluctuations. Always check the manufacturer's specifications for outdoor suitability, and be prepared for more frequent re-varnishing than an indoor piece. I've only done one outdoor piece, and it required a lot of research and a very specific product! (It's a whole different ballgame!)
- What about varnishing paintings destined for outdoor display? This is a niche but important question! If your painting is truly intended for outdoors, you'll need specialized outdoor acrylic varnishes that offer even more robust UV protection and weather resistance against the elements. Standard artist varnishes, even those with UV inhibitors, are generally not formulated for prolonged exposure to direct sunlight, rain, and extreme temperature fluctuations. Always check the manufacturer's specifications for outdoor suitability, and be prepared for more frequent re-varnishing than an indoor piece. I've only done one outdoor piece, and it required a lot of research and a very specific product – it's a whole different ballgame!
- Can I use household products to clean my varnished painting? Generally, no! And when I say no, I mean a resounding, unequivocal NO! Stick to what's recommended: a soft, dry, lint-free cloth or a very slightly dampened (with distilled water only) cloth for light cleaning. Household cleaners, even "gentle" ones, often contain chemicals, ammonia, or abrasives that can damage, dull, or even strip your varnish over time, leaving you with a compromised and dull surface. It's just not worth the risk to your precious artwork. If you have particularly stubborn grime, consult a professional art conservator – don't gamble with your art, it's simply not worth the risk!
- How do I clean a varnished acrylic painting? For light dust, a soft, dry brush or lint-free cloth. For anything beyond light surface dust or very minor grime, I recommend consulting a professional art conservator. They have the expertise and specialized solvents to deep clean a varnished painting safely without damaging the artwork, something I would never attempt myself with household products.* How long does varnish last? That's a fantastic question, and one I get asked a lot! With proper application and good environmental conditions, a quality artist-grade acrylic varnish can protect your painting for many, many decades – easily 50 to 100 years or more, especially with UV protection. That's a fantastic question, and one I get asked a lot! With proper application and good environmental conditions, a quality artist-grade acrylic varnish can protect your painting for many, many decades – easily 50 to 100 years or more, especially with robust UV protection. However, like all things, it's not truly 'forever.' Over prolonged periods, it may naturally accumulate dirt, pollutants, or show subtle signs of aging. This is where the beauty of removable varnishes shines, as they can be professionally cleaned or replaced by a conservator to give your artwork a fresh lease on life without touching the original paint. So, while it lasts a very long time, it's not a 'set it and forget it' situation for eternity, especially if you want your art to always look its absolute best!
- Is an isolation coat necessary? This is a question I get a lot! While not strictly mandatory in every single case, I'll be blunt: for artists who intend for their work to be conserved in the future, or for any piece you truly cherish, an isolation coat is highly recommended. It's that permanent, non-removable layer of gloss medium applied before the final removable varnish. This is a question I get a lot! While not strictly mandatory in every single case, I'll be blunt: for artists who intend for their work to be conserved in the future, or for any piece you truly cherish, an isolation coat is highly recommended, almost essential. It's that permanent, non-removable layer of gloss medium applied before the final removable varnish. It acts as a sacrificial barrier, protecting your precious paint layers during any future varnish removal by a conservator. Think of it as putting on a base coat before your main nail polish – it protects the nail and makes the polish look better. I consider it a critical step for archival quality, offering peace of mind and preserving the integrity of your original artwork for generations!
Maintaining Your Varnished Painting: The Long Haul (Because Your Art Deserves Ongoing Love)
So, you've done the hard work, your painting is varnished and looking glorious. Now what? Just like any cherished possession, a varnished painting benefits from a little ongoing care to ensure its beauty lasts. I've seen some artists just put their work away and forget about it, only to find it dusty and dull years later – a sad fate for a beautiful creation! Let's not be those artists!
- Annual Inspection Routine: Make it a habit to gently inspect your varnished paintings once a year. Make it a habit to gently inspect your varnished paintings once a year. Look for any signs of surface damage, excessive dust buildup, or subtle changes in the varnish film (e.g., cloudiness, yellowing, micro-cracks that might appear with age – though rare with modern varnishes, it's good to be vigilant). Also, check for any subtle dulling of the sheen, which could indicate environmental pollutants settling on the surface. Catching small issues early can prevent them from becoming bigger problems down the line, saving you potential heartache and costly repairs. It's like a yearly health check for your art – proactive care is always best, ensuring its longevity and vibrancy!
- Gentle Cleaning: For everyday dust, a soft, dry, lint-free cloth or a very soft brush (like a makeup brush) is usually all you need. Resist the urge to use harsh chemicals or abrasive materials – those varnishes are tough, but not invincible! For everyday dust, a soft, dry, lint-free cloth or a very soft brush (like a makeup brush) is usually all you need. Resist the urge to use harsh chemicals or abrasive materials – those varnishes are tough, but not invincible! I once, in a moment of madness, thought a kitchen cleaner would be 'fine' for a stubborn spot, and almost ruined the finish, creating a dull, irreversible patch that I still regret. Stick to the basics, and you'll be golden, keeping your varnish pristine and avoiding unnecessary damage.
- Handling with Care: When moving or storing your artwork, always handle it by the edges. Even cured varnish can be susceptible to fingerprints and scratches.
- Avoid Extreme Conditions: Varnished artworks should be protected from direct sunlight exposure, which, notwithstanding UV-resistant varnishes, can contribute to gradual fading over extended periods. Furthermore, extreme temperature fluctuations and elevated humidity levels should be avoided, as these conditions can induce stress within the varnish film, potentially resulting in issues such as clouding or cracking. Varnished artworks should be protected from direct sunlight exposure, which, notwithstanding UV-resistant varnishes, can contribute to gradual fading over extended periods. Furthermore, extreme temperature fluctuations and elevated humidity levels should be avoided, as these conditions can induce stress within the varnish film, potentially resulting in issues such as clouding, cracking, or delamination. Maintaining a stable environmental setting (think a consistent room temperature, not an attic or a damp basement, which are notorious for wild swings!) is crucial for the long-term preservation of the artwork, ensuring the varnish (and the paint beneath) remains stable.
- Long-Term Storage: A Cozy Home for Your Art: If you're storing varnished paintings, treat them with care. Store them upright (never stack them face-to-face, as they can stick!) in a stable, temperate environment, ideally covered with a clean sheet or archival paper to protect against dust and accidental bumps. I use old, clean bedsheets for mine – a simple, effective solution. If you're storing varnished paintings, treat them with care. Store them upright (never stack them face-to-face without protection, as they can stick!) in a stable, temperate environment, ideally covered with a clean sheet or archival paper to protect against dust and accidental bumps. Avoid attics, basements, or garages where temperatures and humidity can fluctuate wildly – those are recipes for disaster for any artwork, accelerating degradation and potential damage. Think of it as creating a cozy, consistent home for your art when it's not on display.
- Documentation of Varnish Type and Date: This might seem overly meticulous, but for archival purposes, it's gold. On the back of your painting (or in a separate record), make a small note detailing the specific varnish brand, type (MSA, Polymer, Gloss, Matte), and the date it was applied. This information is incredibly valuable for future conservators or collectors, and trust me, they will thank you for it! This might seem overly meticulous, but for archival purposes, it's gold. On the back of your painting (or in a separate record book), make a small note detailing the specific varnish brand, type (MSA, Polymer, Gloss, Matte), and the date it was applied. This information is incredibly valuable for future conservators or collectors who might need to clean or remove the varnish, and trust me, they will thank you for it! I've had to guess what varnish was on an old piece, and it's always a challenge that could have been easily avoided with a simple note.
- Re-varnishing (When Needed): Over several decades, a removable varnish may naturally exhibit slight yellowing or accumulate environmental particulates and pollutants that resist superficial cleaning. In such cases, the advantage of a removable varnish becomes evident: a professional conservator can meticulously and safely remove the aged, compromised layer and apply a fresh one, thereby revitalizing the artwork without affecting the original paint. This procedure represents the pinnacle of long-term artwork maintenance, essentially giving your painting a 'fresh start' without compromising its integrity. Over several decades, a removable varnish may naturally exhibit slight yellowing or accumulate environmental particulates and pollutants that resist superficial cleaning. In such cases, the advantage of a removable varnish becomes evident: a professional conservator can meticulously and safely remove the aged, compromised layer and apply a fresh one, thereby revitalizing the artwork without affecting the original paint. This procedure represents the pinnacle of long-term artwork maintenance, essentially giving your painting a 'fresh start' without compromising its integrity. While there's no hard and fast rule, generally, a well-applied, quality removable varnish might be considered for cleaning or replacement every 20-50 years, depending on environmental exposure. It's not a frequent chore, but a long-term commitment to preservation and ensuring your art looks its best for generations.
- Long-Term Storage Best Practices: If you're storing paintings, especially for extended periods, proper practices are crucial. Avoid stacking paintings directly on top of each other without protection. Use glassine paper or archival board between varnished surfaces. Store paintings vertically in a climate-controlled environment, away from extreme temperature swings, humidity, and pests. Think of it as creating a mini archive for your body of work!
- Framing and Display Considerations: When enclosing a varnished painting within a frame, it is imperative to ensure a minimal air gap between the painting's surface and any glass or acrylic glazing. This precaution prevents the varnish from adhering to the glazing, particularly in humid environments. When enclosing a varnished painting within a frame, it is imperative to ensure a minimal air gap between the painting's surface and any glass or acrylic glazing, especially if the artwork is highly textured. This precaution prevents the varnish from adhering to the glazing over time, particularly in humid environments. Ideal display lighting should eschew direct, intense spotlights, which can generate distracting reflections on gloss varnishes or induce uneven thermal expansion of the canvas, which can be detrimental to both the paint and varnish film. Aim for soft, diffused, and even illumination to showcase your art without risking damage or visual distractions.
Think of it as a commitment to your art, ensuring it looks its best for as long as possible.
Conclusion: Your Art, Preserved and Cherished (A Legacy in Every Brushstroke)
So, there you have it. Varnishing an acrylic painting isn’t just some tedious final step; it’s a professional finishing touch, a declaration of love for your hard work, and a powerful way to elevate its visual impact. By understanding the different types of varnishes, preparing meticulously (and patiently, oh so patiently!), and applying with care, you, dear artist, can ensure your creations endure for generations. Every single step in your artistic journey, from the first brushstroke to that final, shimmering coat of varnish, contributes to the lasting legacy of your art.
Whether your masterpiece finds its home in a gallery, hangs proudly in your living room, or embarks on a journey for sale at a place like the artist's museum or through the website, embracing these practices is a profound testament to your dedication to your craft and the lasting quality of your artistic timeline. I truly believe that taking this final, careful step transforms your painting from a temporary expression into a lasting legacy. It's an act of deep respect – for your art, for your effort, and for all those who will view it, admire it, and connect with it for years and even centuries to come. Go forth and varnish with confidence, knowing you've given your art the best possible chance to shine for eternity!


