What is Oil Painting? Your Ultimate Guide from an Artist
Dive deep into oil painting with a personal, comprehensive guide. Explore its history, techniques, and why artists love this timeless medium, from an artist's unique perspective.
What Even Is Oil Painting? Let's Unpack It Together.
You know, it's always struck me as fascinating. We encounter these masterpieces in museums, we hear the term oil painting, and it just... exists as this undeniable force, a pillar of art history. But what truly is it? Beyond the technical definitions, what grants it such an enduring, almost mystical allure? For me, stepping into the world of oil painting was like discovering a secret language, one spoken by artists across centuries and cultures, a rich dialogue spanning countless canvases. It's profound, it's intricate, and let's be honest, sometimes it's a gloriously messy, utterly captivating challenge. If you've ever felt that inexplicable pull standing before a Rembrandt, a Van Gogh, or even one of Picasso's more introspective works, that's the raw power of oil at play. It's the medium I consistently return to in my own abstract explorations, a wellspring of inspiration and a constant test, enabling me to conjure textures and depths that simply sing with life.
I've spent countless hours, probably too many, with my hands covered in this stuff, trying to coax out a particular shade or blend a transition just so. And let me tell you, it's more than just applying paint; it's an experience, a conversation. It's a dance between patience and immediate gratification, a negotiation with a medium that truly has a mind of its own. It whispers secrets of light and shadow, of emotion and form, becoming a tangible extension of the artist's soul.
In a world increasingly dominated by fleeting digital images, the tangible, luminous quality of oil paint stands in stark contrast. It offers a connection to a slower, more deliberate artistic process, a kind of meditation that allows for profound depth, not just in the finished piece, but in the creative journey itself. And perhaps that's why, despite all the innovations in art materials, oil painting endures. It’s a testament to human ingenuity and our endless desire to capture and express the beauty and complexity of the world around us. It's about building a connection – both with the medium and with artistic tradition itself.
So, if you're curious, if you're wondering what makes oil painting such an enduring and beloved art form, come along. We're going to pull back the curtain, get a little messy (metaphorically, mostly), and truly understand what we're dealing with here. From the basic ingredients to the grand techniques, and even the quirks and challenges, we'll cover it all. Trust me, it's a journey worth taking, a way to see the world—and art—with new eyes, and perhaps even inspire your own artistic endeavors. What you're about to read isn't just a foundational piece; it's a comprehensive dive, a personal journey into a medium that has shaped the very fabric of art history and continues to ignite the imaginations of millions, myself included. Consider this your invitation to truly see, to grasp the 'what,' 'how,' and 'why' of oil painting, and perhaps even to begin your own creative adventure.
So, What Exactly Are We Talking About Here? The Core Definition: A Deep Dive into the Medium's Anatomy
At its heart, oil painting is simply the process of painting with finely ground pigments suspended in a drying oil. Sounds pretty straightforward, right? Well, yes and no. The true magic, and what gives oil paint its distinctive characteristics, lies in that "drying oil." The oil doesn't just hold the pigment; it surrounds each tiny particle, forming a protective, refractive layer. This encapsulation is what creates that unique optical depth and luminosity we cherish in oil paintings. The way light penetrates the transparent oil film, interacts with the pigment particles, and then reflects back, creates a sense of internal glow and richness that's truly unparalleled. Unlike water-based paints that dry through evaporation (where water simply leaves the paint film), oil paints dry through a complex chemical process called oxidation. This is where the oil chemically reacts with oxygen in the air, polymerizing and hardening into a durable, flexible, and often luminous film. This isn't a quick process – it's a molecular transformation, a slow, deliberate conversation with your canvas, where the paint's gradual transformation allows for profound changes and careful consideration. This unique drying mechanism contributes significantly to the medium's distinct characteristics: its extended working time, its rich color saturation, and its remarkable archival quality. It's this property, this slow chemical dance, that sets oil painting apart from almost every other artistic medium.
The most common oil binder is linseed oil, pressed from flax seeds. However, other oils like walnut, poppy, or safflower oil are also used, each imparting slightly different working properties, drying times, and tendencies toward yellowing. This oil binder is what gives oil paint its signature qualities: a rich, luminous quality that seems to glow from within, incredible depth of color that can't quite be replicated by other mediums, and that wonderfully long drying time. This extended open time means the paint remains workable on the palette and canvas for hours, even days, enabling seamless blending and extended manipulation. It's this characteristic 'openness' that allows for subtle gradations and the intricate layering that oil painting is famous for, truly inviting you to sculpt with color. When choosing a binder, it's a bit like selecting a wine for a meal: linseed is your robust, all-purpose red, excellent for strong, flexible films and building up layers. Walnut oil, with its lower yellowing tendency and silky feel, is often preferred for more delicate colors and portraits. Poppy seed oil, the slowest drying and palest, is typically reserved for those pure whites and blues in final layers where any warmth is to be avoided, though its film is less durable for impasto. Understanding these nuances allows for incredibly precise control over your paint's behavior and the longevity of your masterpiece.

Unlike, say, acrylic paints, which dry quickly to a plastic-like finish, or watercolor, which relies on water as its vehicle, oil paint is all about the slow, deliberate build-up. It's a medium that encourages contemplation and allows for almost endless manipulation on the canvas. It allows you to really work the paint, blending colors seamlessly or layering them to create a profound sense of light and shadow. It's a conversation, as I like to think, between you, the canvas, and centuries of artistic tradition – a dialogue where you have ample time to consider your next word, to refine, to rethink, and to truly let the artwork evolve.
The Science Behind the Sheen: More on Oxidation
Let's get a little deeper into that oxidation process. When a drying oil is exposed to air, the polyunsaturated fatty acids in the oil absorb oxygen. This absorption initiates a series of complex chemical reactions, primarily polymerization, where the oil molecules link together to form a larger, more intricate network of interlocking molecular chains. Imagine countless tiny threads not just weaving, but chemically fusing themselves into a remarkably durable, flexible fabric. This molecular cross-linking is what causes the paint film to solidify, not through simple evaporation like water-based paints. This is precisely why oil paintings don't just 'dry out' like a puddle; they 'cure,' forming a stable, inert, and immensely durable film over time. The rate of this curing is a fascinating interplay of various factors, including temperature, humidity, light exposure, and even the specific pigments used – some pigments naturally accelerate the process, acting as tiny internal catalysts. It's a slow, deliberate magic that underpins oil paint's unique longevity and workability, setting it apart as a truly transformative medium.
A Little Trip Through Time: The (Surprisingly Long) and Global History of Oil Paint
You might think oil painting is a Renaissance invention, and honestly, for a long time, I did too. My mind would immediately jump to the glorious works of the 15th century, with its iconic masterpieces. But here's a little secret that genuinely blew my mind when I first learned it: evidence suggests that artists were using oil-based paints as far back as the 7th century in the Bamiyan Valley of Afghanistan, for intricate Buddhist cave murals! This wasn't the sophisticated, layered oil painting we know today, but a clear and innovative use of oils as a binder, proving the medium's deep roots are far older and more global than often assumed. Mind-blowing, right?
Even in Europe, before the Renaissance, medieval artists and craftsmen were experimenting with oil-based paints, particularly for decorative arts, gilding, and manuscript illumination, seeking greater luminosity and durability than tempera could offer. Figures like Theophilus Presbyter, in the 12th century, documented recipes for oil paints, demonstrating a growing, if still nascent, understanding of the medium's potential.
However, it truly gained prominence and evolved into the refined form we recognize today during the Northern Renaissance in 15th-century Europe. Artists like Jan van Eyck are often credited with popularizing its use and developing advanced techniques, though it was a gradual evolution with many contributing innovators across the continent. The meticulous detail and luminous surfaces achieved by Van Eyck, Robert Campin, and others transformed portraiture and religious art. This also coincided with the flourishing of the Venetian School in Italy, where artists like Giovanni Bellini and Titian embraced oil for its ability to render rich colors and atmospheric effects, moving away from the linear precision of Florentine art towards a more painterly approach.
Then came the 19th century, and with it, the Industrial Revolution fundamentally changed how artists worked. The invention of the collapsible metal paint tube, attributed to American portrait painter John Goffe Rand in 1841, was a game-changer. Suddenly, artists weren't tied to their studios, painstakingly grinding pigments and mixing paints. They could easily transport their colors, which, quite literally, paved the way for movements like Impressionism and plein-air painting. Imagine Monet or Renoir dragging heavy pigment stones to paint a field of poppies! The tube democratized the medium, making it more accessible and freeing artists to capture fleeting light and atmospheric effects directly from nature, forever altering the artistic landscape.
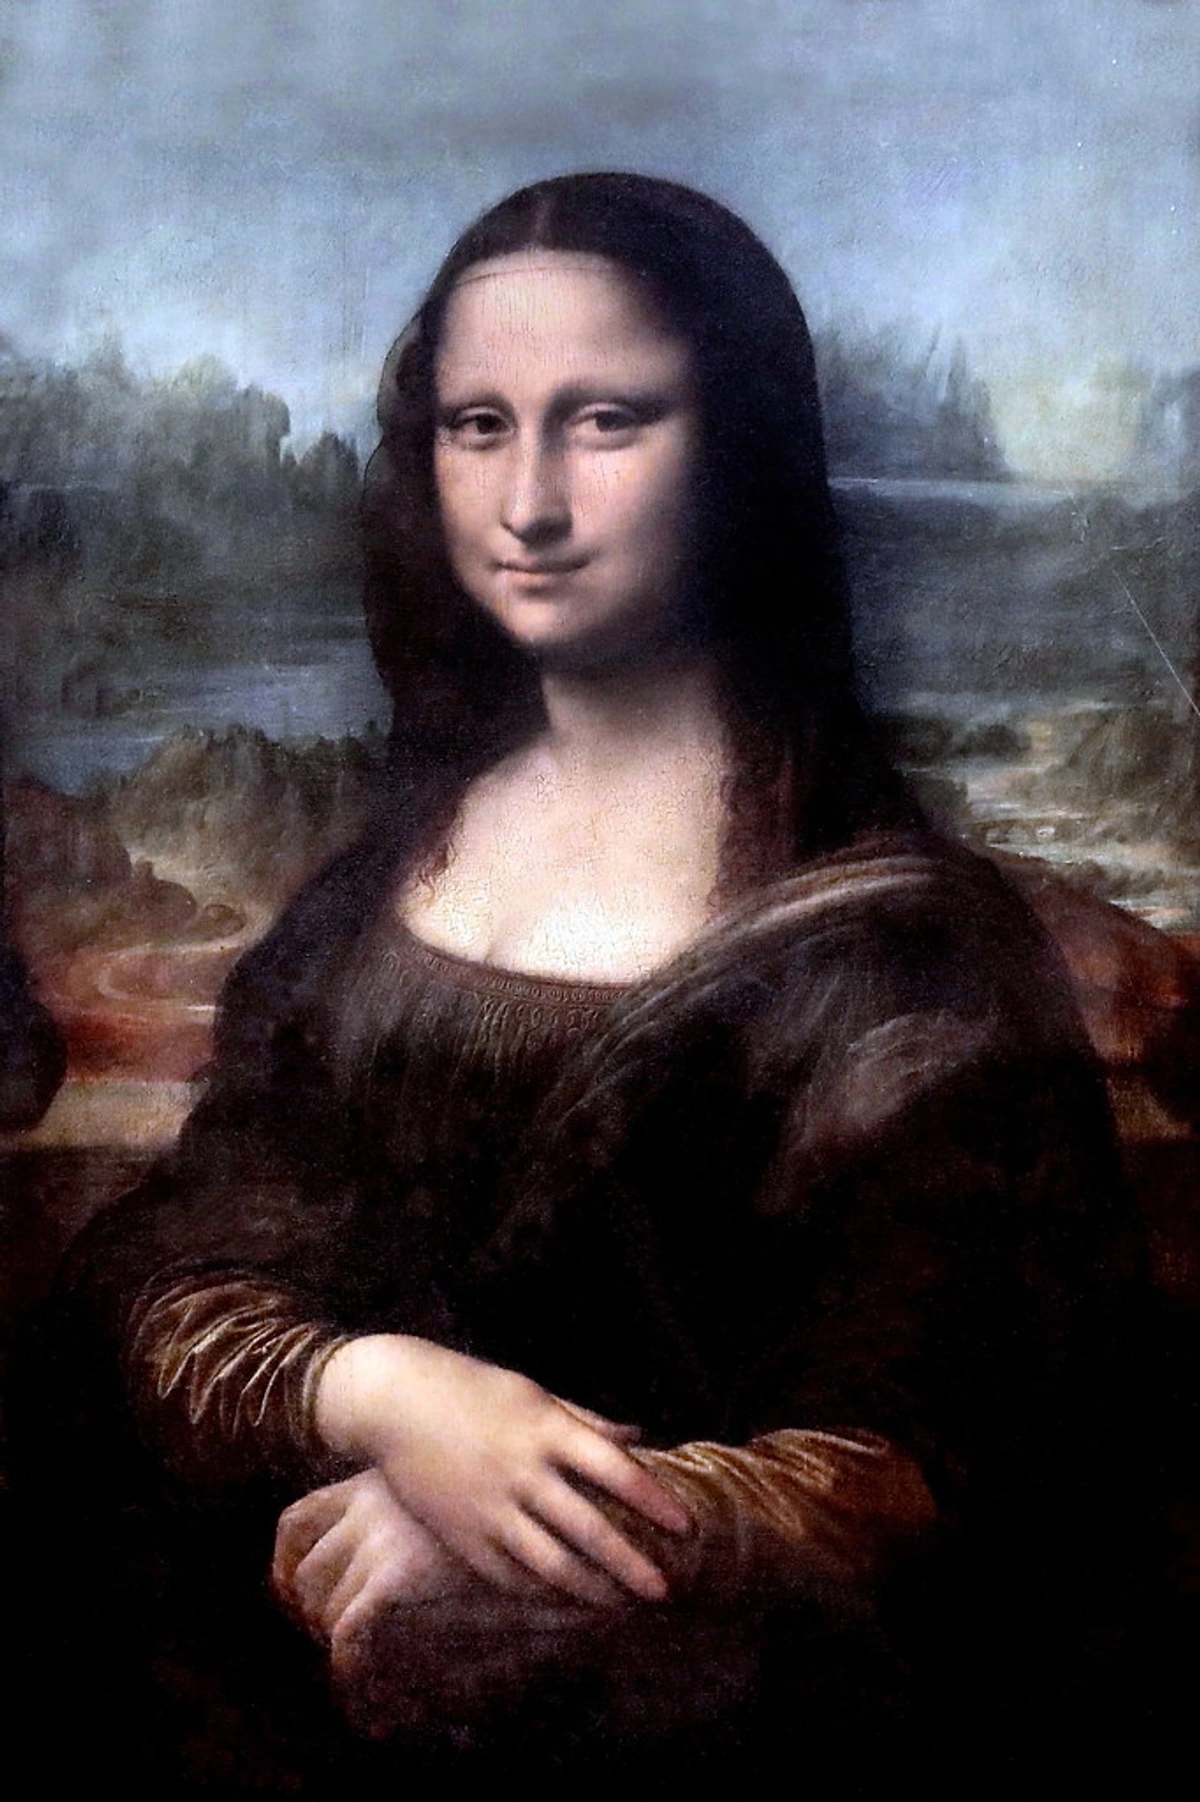
They discovered that by suspending pigments in oil, they could achieve an unprecedented depth of color, a luminous transparency, and a level of realism that was simply impossible with earlier mediums like fast-drying, less malleable egg tempera. Tempera, while capable of exquisite detail, dried almost instantly, making seamless blending a monumental challenge and limiting the rich, glowing effects that artists craved. This marked a profound shift in artistic capability and ambition. The slow-drying nature of oil paint meant artists could blend colors directly on the canvas for extended periods, create incredibly smooth, seamless transitions, and achieve a level of nuanced detail previously unattainable. This was revolutionary! Imagine the artistic leap, going from fast-drying, rigid tempera to this luscious, malleable substance. It genuinely opened up a whole new world of artistic expression and ambition, allowing for ground-breaking techniques like sfumato – that ethereal, hazy quality you see in the iconic Mona Lisa (we'll definitely talk about that more later, or you can jump ahead to what is sfumato or what is sfumato in Renaissance art). Or glazing, that exquisite method of building up transparent layers of color to create unparalleled luminosity and profound depth, a technique I personally adore and have written about extensively in mastering glazing techniques in oil painting.
This shift wasn't merely technical; it profoundly impacted the subjects and narratives artists could explore. With the ability to render fabric textures, intricate jewelry, and human skin with unprecedented realism, portraiture and genre scenes flourished. The very nature of artistic patronage began to change, moving beyond solely religious commissions to include wealthy merchants and aristocracy eager to capture their likeness and status in these new, vibrant, and enduring works of art.
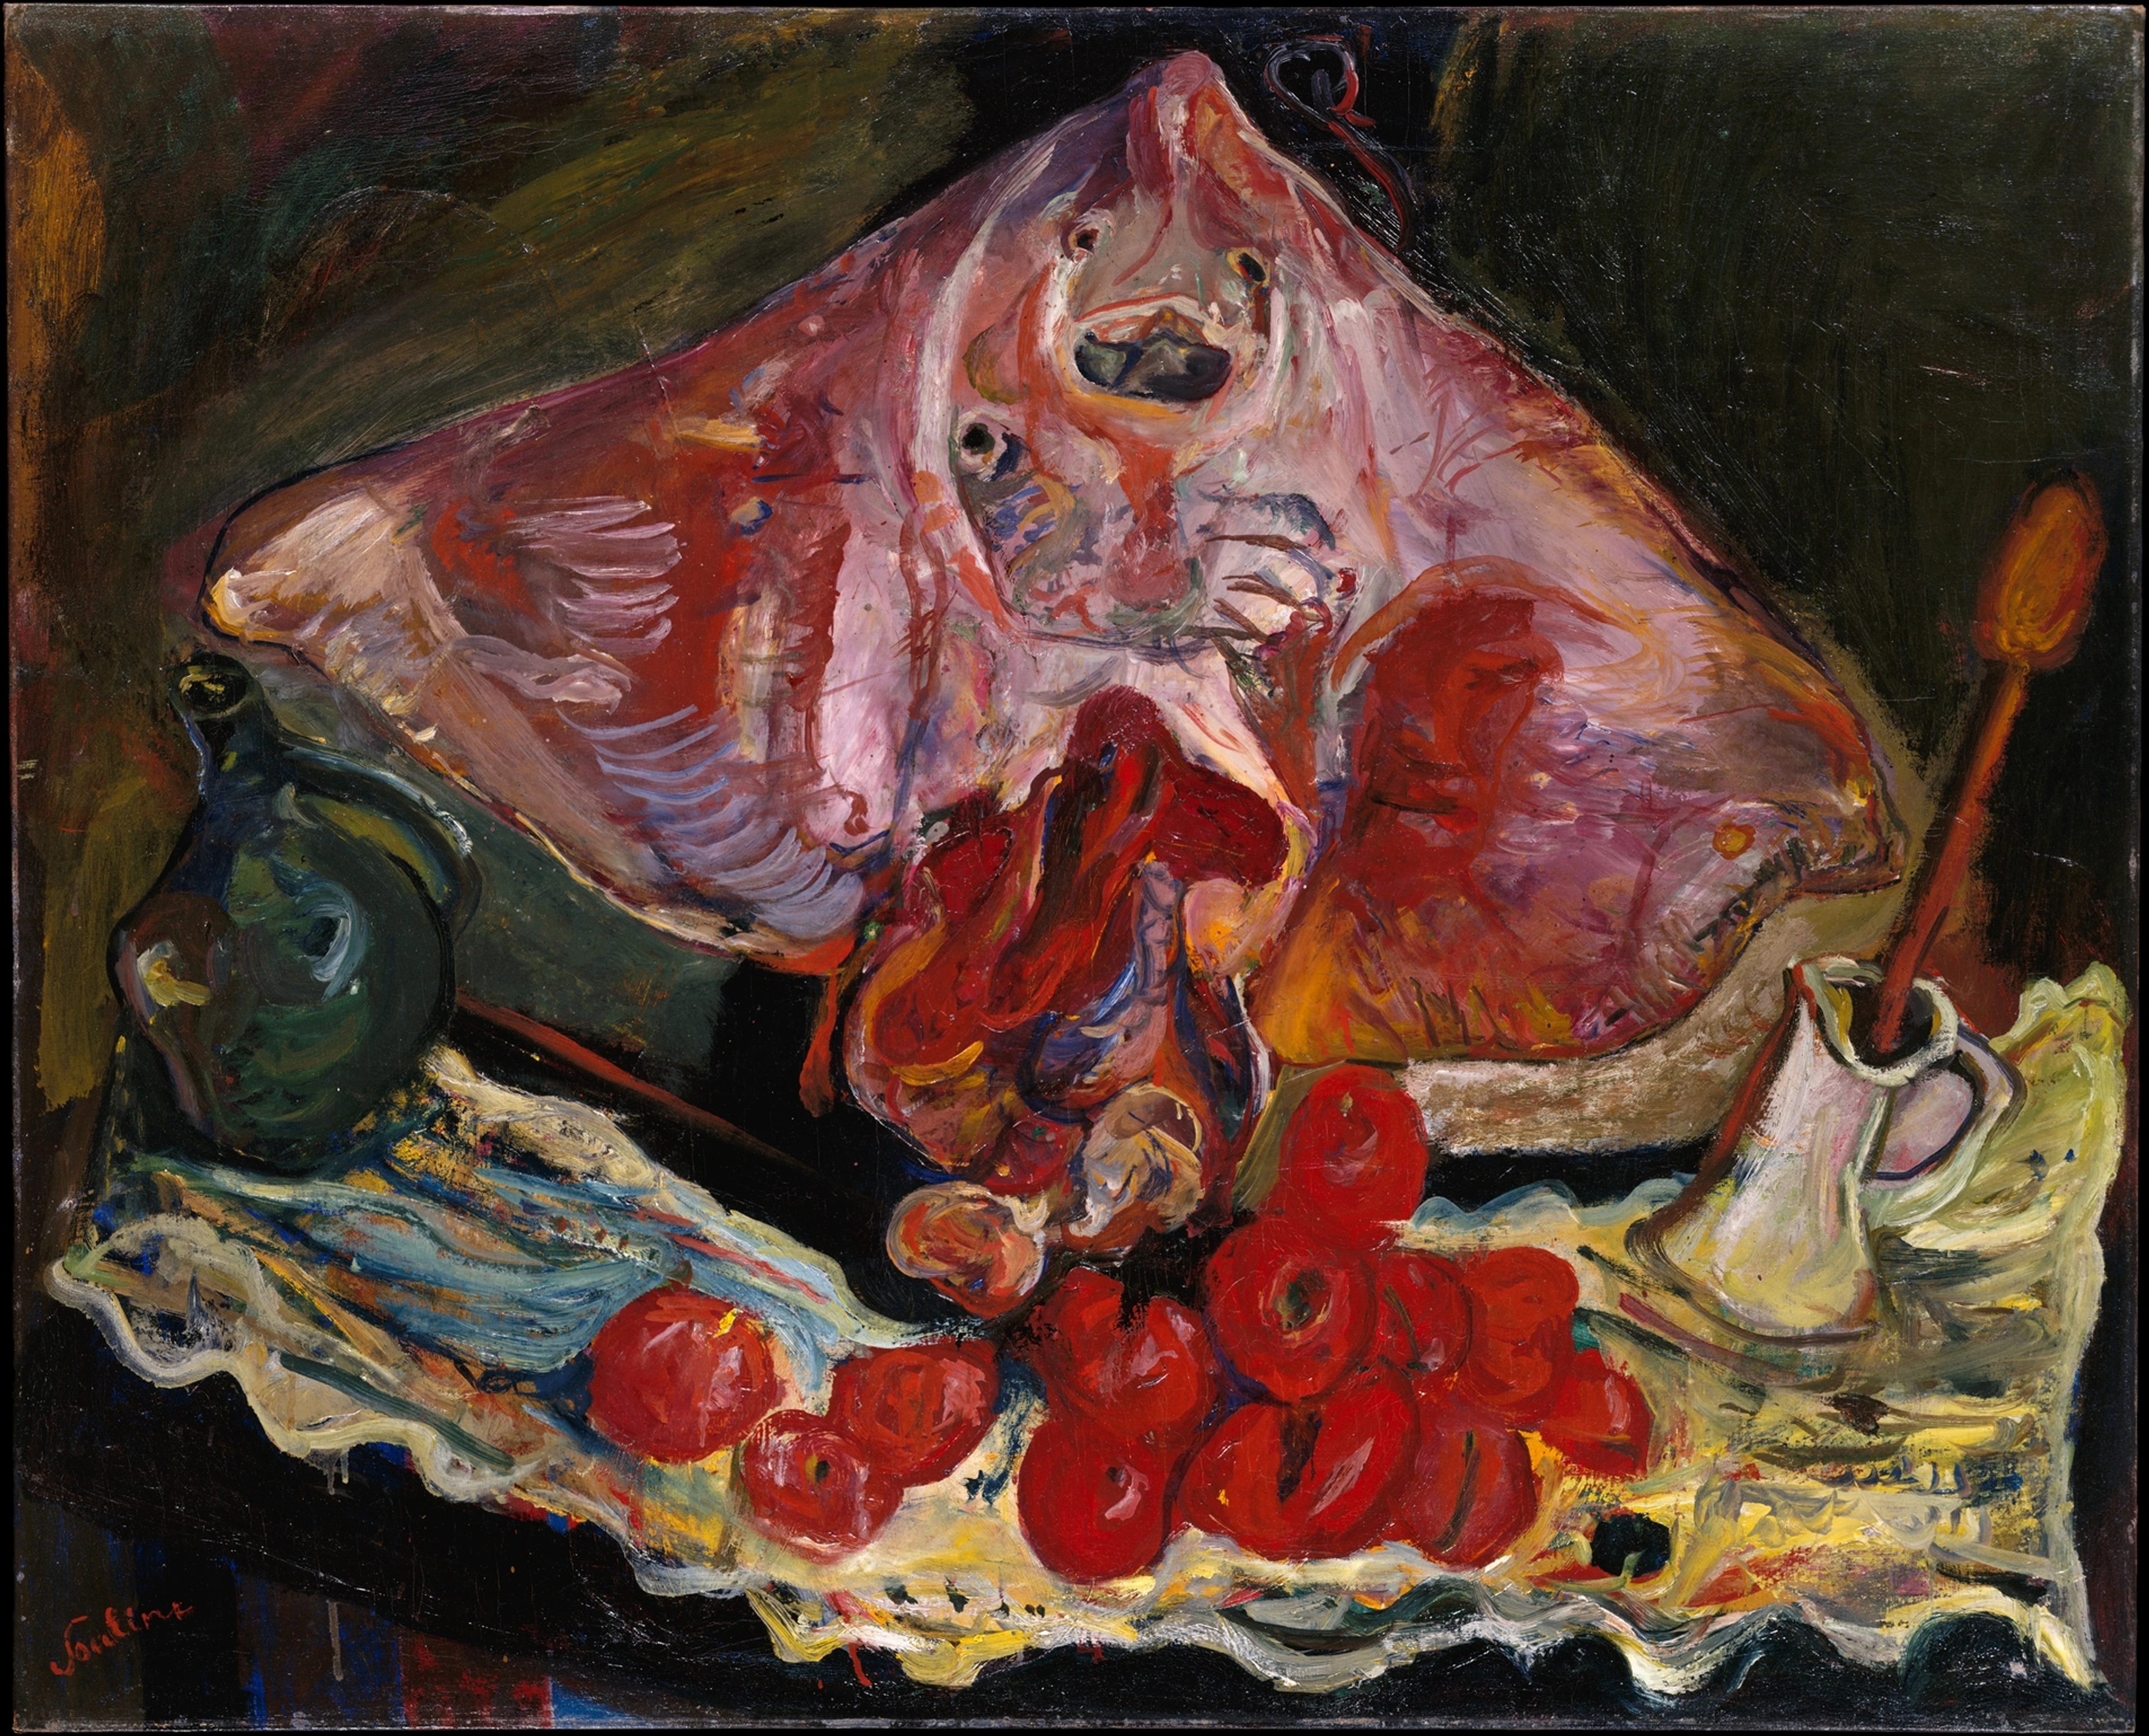
Oil painting quickly spread across Europe, becoming the dominant medium for centuries. From the dramatic chiaroscuro of the Baroque era, where intense contrasts of light and shadow created powerful emotional impact, to the vibrant, broken brushstrokes of Impressionistic landscapes and the bold, abstract forms I explore in my own work, oil paint has been at the forefront of artistic innovation. It really has a fascinating story, which you can dive into more deeply in the-history-of-oil-painting-from-ancient-pigments-to-modern-masterpieces, or explore the wider context of artistic developments on the timeline.
A Timeline of Oil Painting Milestones
Era/Century | Key Development/Artists | Impact on Art | Notable Works/Movements | |
|---|---|---|---|---|
| 7th Century CE | Early oil-based paints in Bamiyan Valley, Afghanistan | Demonstrated global, ancient origins of oil as a binder | Buddhist cave murals | |
| Medieval Era (e.g., 12th Century) | European monastic traditions incorporate oils | Used in manuscript illumination and decorative elements for increased luminosity and detail | Manuscript illuminations, altarpieces | |
| 12th-13th Century | Theophilus Presbyter documents oil paint recipes | Spread of knowledge, foundational for later European development | Manuscript illumination, decorative arts | |
| 15th Century (Northern Renaissance) | Jan van Eyck, Robert Campin | Revolutionized realism, luminosity, and depth; precise detail, smoother transitions | Arnolfini Portrait (van Eyck), Mérode Altarpiece (Campin) | |
| 15th-16th Century (Italian Renaissance) | Leonardo da Vinci, Titian, Giorgione | Mastered sfumato and chiaroscuro; emphasized color and atmosphere | Mona Lisa (Da Vinci), Assumption of the Virgin (Titian) | |
| 17th Century (Baroque) | Rembrandt, Caravaggio, Rubens | Dramatic lighting (chiaroscuro), intense emotion, dynamic compositions | The Night Watch (Rembrandt), The Calling of St Matthew (Caravaggio) | |
| 18th-19th Century (Romanticism/Realism) | Delacroix, Courbet, Manet | Expressive brushwork, focus on emotion, social commentary, everyday life | Liberty Leading the People (Delacroix), The Stone Breakers (Courbet) | |
| Late 19th Century (Impressionism/Post-Impressionism) | Monet, Renoir, Van Gogh, Cézanne | Captured fleeting light and atmosphere, visible brushstrokes, subjective perception | Water Lilies (Monet), Starry Night (Van Gogh) | |
| 20th Century & Beyond | Picasso, Pollock, Rothko, Contemporary Artists | Explored abstraction, expressionism (Abstract Expressionism, Pop Art, Color Field), and conceptual uses; continues to evolve in new media and contexts | Guernica (Picasso), Number 1A, 1948 (Pollock), Campbell's Soup Cans (Warhol), works by Jenny Saville, Anselm Kiefer, Cecily Brown | 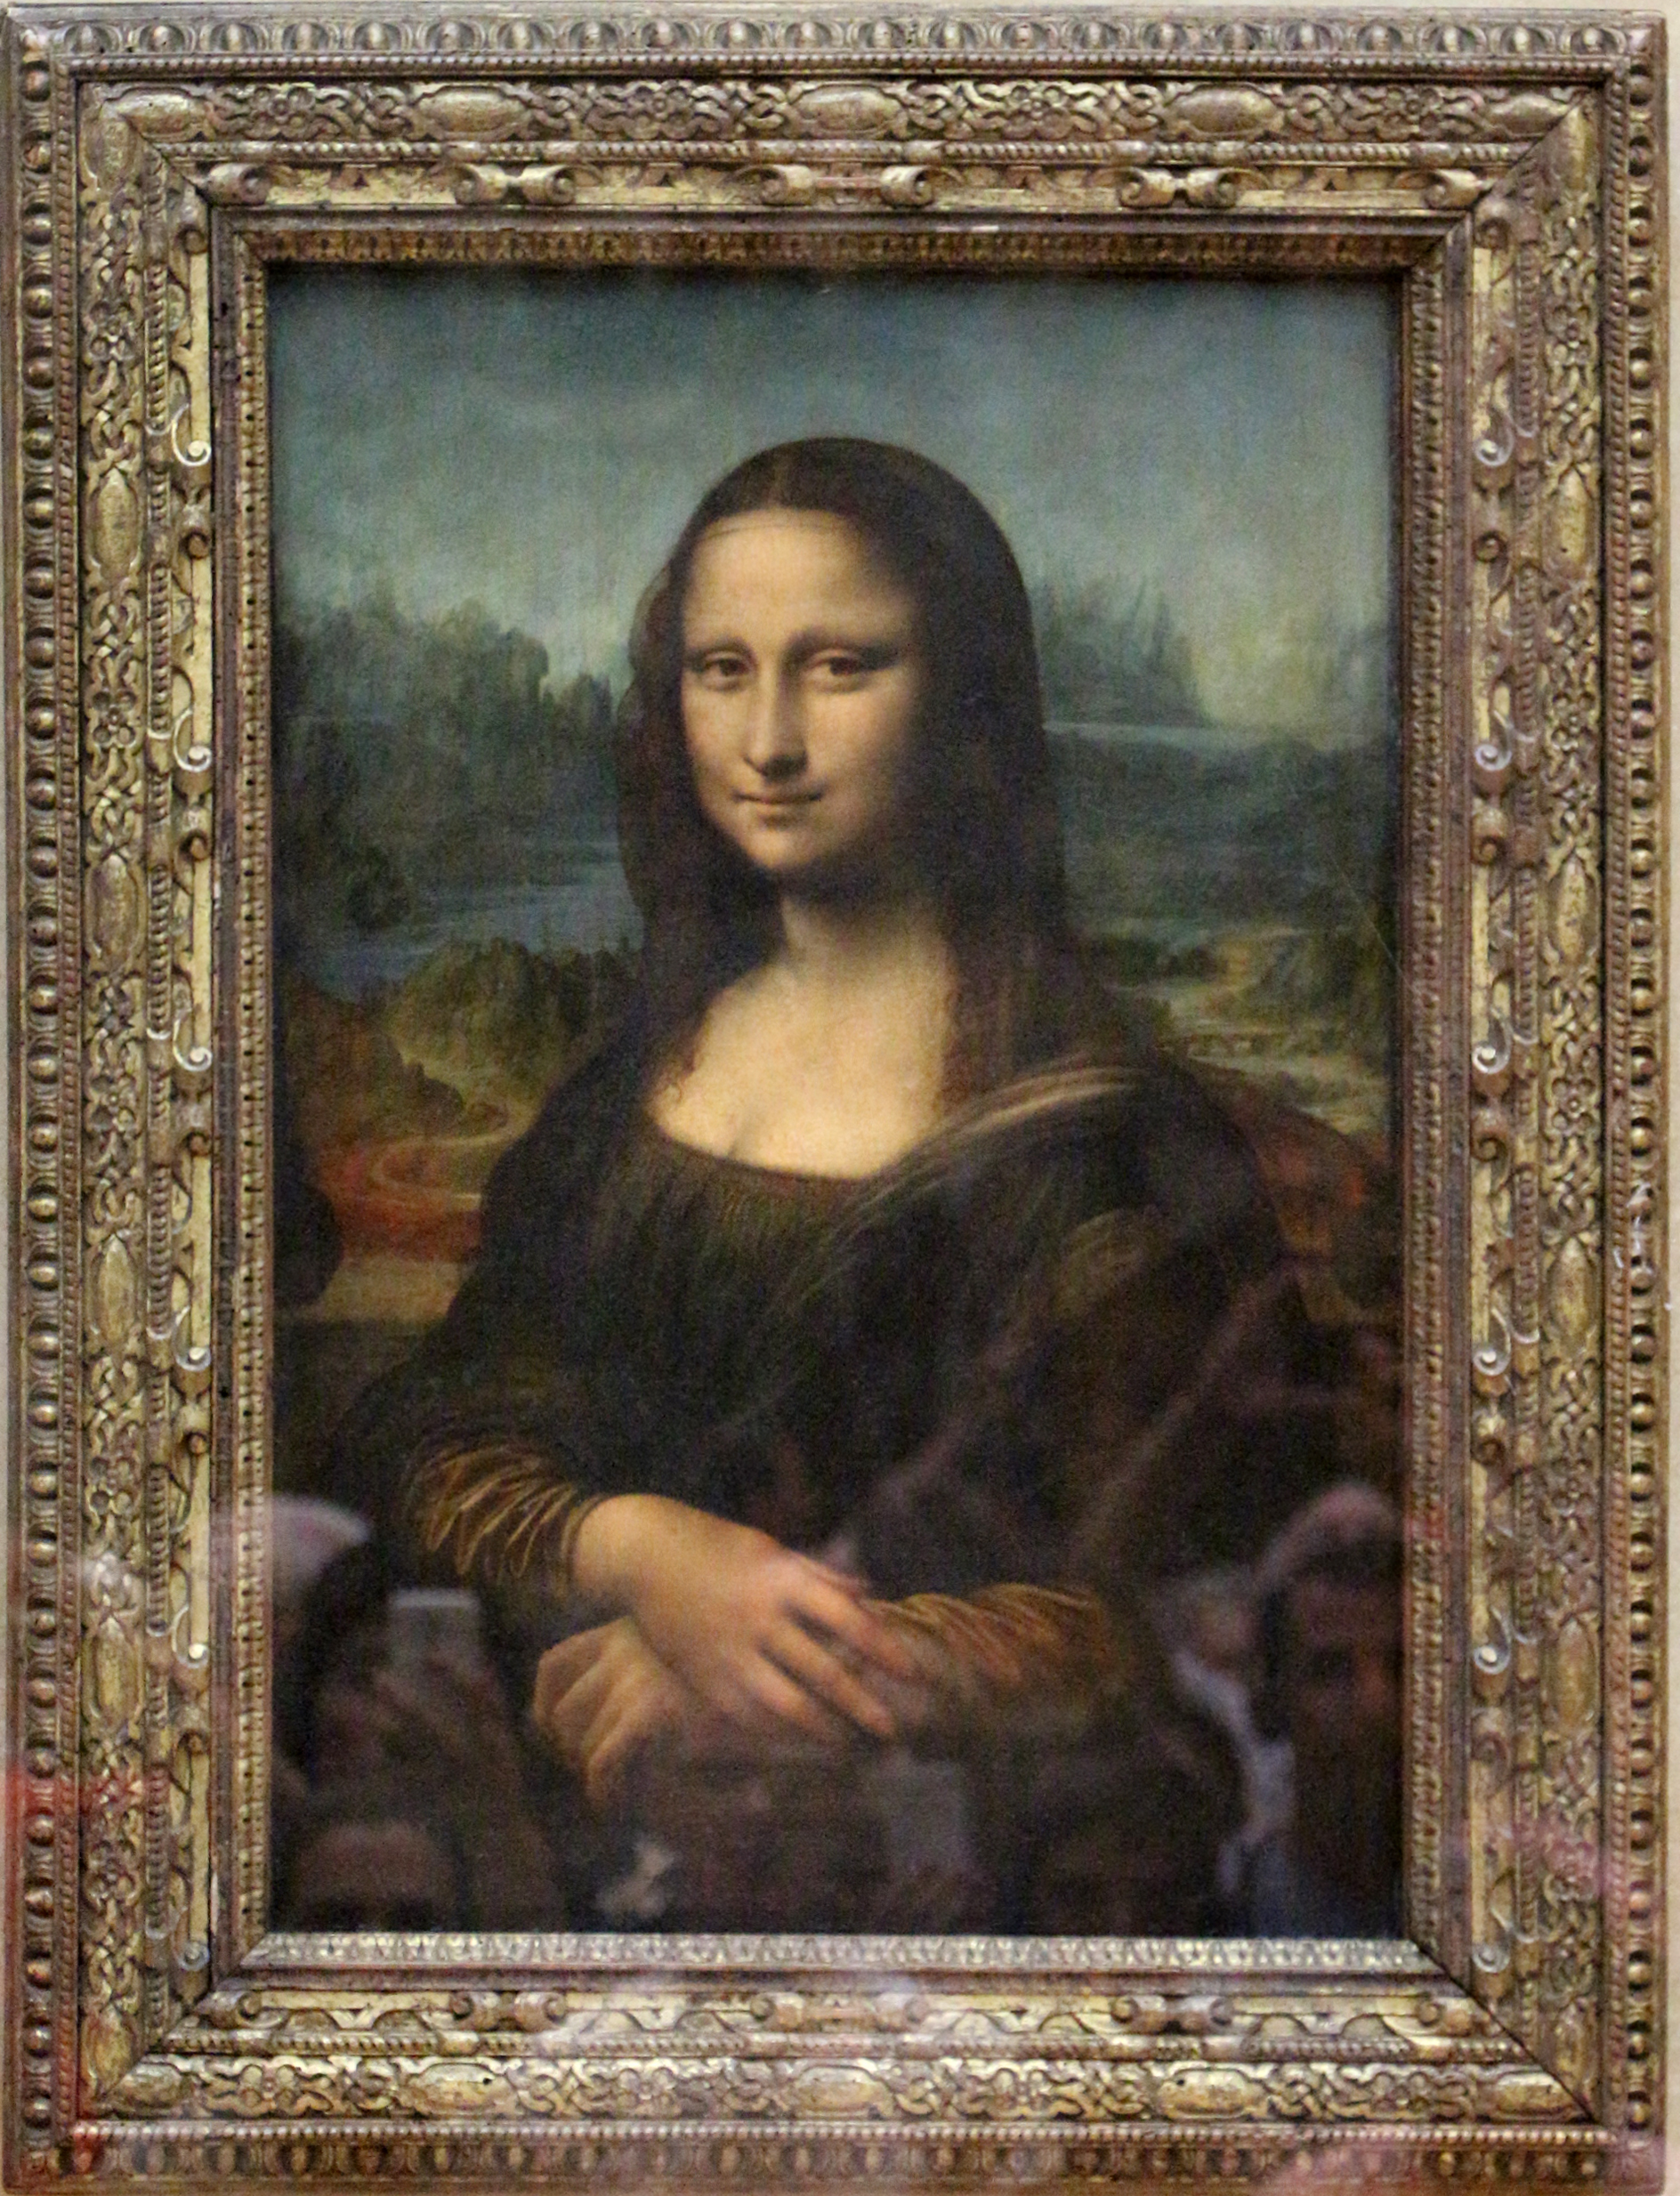 credit, licence## The Science of Color in Oil Painting: Beyond the Tube credit, licence## The Science of Color in Oil Painting: Beyond the Tube |
Before we dive into the ingredients, let's talk about what makes colors sing in oil paint. It’s not just the pigment; it’s how that pigment interacts with the oil, light, and other colors. I often think of it as a complex dance where every element plays a crucial role. Understanding these nuances is key to truly mastering the medium and achieving those rich, vibrant effects we all chase.
Optical Mixing and Transparency
One of the magical aspects of oil painting, especially with techniques like glazing, is optical mixing. Unlike physical mixing on a palette, where pigments combine to form a new color, optical mixing occurs when thin, transparent layers of color are applied over each other. Light passes through the top transparent layer, reflects off the underlying layers, and then passes back through, causing your eye to blend the colors together. This creates a far more luminous and complex color than could be achieved by mixing paints directly. It's why a glazed red over a yellow will often glow with a warmth and depth that a pre-mixed orange simply can't match. This interplay of light and transparent layers is what gives oil paintings their characteristic internal glow.
Color Temperature and Harmony
Color isn't just about hue; it's also about temperature. Every color has a relative warmth or coolness, which can dramatically affect the mood and perception of your painting. Reds, oranges, and yellows are generally considered warm, evoking feelings of energy, passion, or proximity. Blues, greens, and purples are typically cool, suggesting calm, distance, or introspection. Understanding how to balance and juxtapose warm and cool colors is a fundamental skill in oil painting, allowing you to create depth, guide the viewer's eye, and evoke specific emotions. I often use subtle shifts in temperature to create atmosphere in my abstract pieces, making a section feel like it's advancing or receding from the viewer. Harmonizing these temperatures throughout your composition is one of those subtle touches that elevates a good painting to a truly captivating one.
Value and Chroma
Beyond hue and temperature, value (how light or dark a color is) and chroma (the intensity or purity of a color) are critical in oil painting. Because oil paint allows for such fine control over blending and layering, artists can achieve incredibly subtle gradations of value and precise control over chroma. This control is what enables the rendering of realistic forms through light and shadow, and the creation of vibrant focal points or subdued backgrounds. High chroma colors tend to advance, while desaturated colors recede. Mastering these elements allows for profound control over the visual impact of your work, transforming a flat canvas into a dynamic, three-dimensional space. It's truly about orchestrating these elements to tell your visual story.
The Magic Ingredients: What Makes Oil Paint Tick?
Understanding what goes into a tube of oil paint is like peeking behind the curtain of a magic show. It demystifies the process just enough to make you feel empowered, but leaves plenty of room for wonder.
Pigments: The Soul of Color
At its most basic, paint is pigment. These are finely ground colored powders, derived from a fascinating array of sources: minerals (like vibrant blues from lapis lazuli or earthy reds from iron oxides), plants (though less common today for permanence), and increasingly, advanced synthetic sources developed through modern chemistry. It's truly a journey from the earth, or the lab, to your palette. Historically, the sourcing of pigments was often dangerous and labor-intensive, with certain colors, like genuine ultramarine (crushed lapis lazuli, once more precious than gold), lead white, or vermilion, posing significant health risks and logistical challenges to artists. Imagine the dedication required to grind these raw, often toxic, materials by hand, sometimes in poorly ventilated spaces! This is why certain hues were historically reserved for the most important figures or sections of a painting – they were simply too precious or difficult to obtain.
But thankfully, modern chemistry has revolutionized our palette, offering a broader, safer, and remarkably consistent range of pigments. We now have lightfast, non-toxic alternatives to many traditional hues. For instance, that deep, rich ultramarine we adore is now often a synthetic version, equally vibrant but far more accessible and less damaging to both pocket and health. Pigments are generally categorized as inorganic (minerals, earth pigments, metal oxides), which tend to be opaque, very stable, and incredibly lightfast, or organic (derived from natural or synthetic carbon compounds), which are often more vibrant, transparent, and can sometimes be less lightfast, though modern synthetics have vastly improved this. Each category and individual pigment comes with its own unique characteristics, affecting how it handles and appears on the canvas, including its particle size. Finer pigments tend to create smoother paints and can offer greater tinting strength, while coarser pigments might lend themselves to more textured applications. This often means that even within the same color, different brands or grades can behave quite differently, affecting not just the color, but the very feel and application of the paint.

The quality of the pigment is paramount; it's the very soul of your color. It determines the richness, the tinting strength (how much it can influence other colors when mixed), its opacity or transparency, and crucially, its lightfastness – how well it resists fading or discoloration when exposed to light over time. This last point is vital for creating archival works; you want your colors to sing for centuries, not just a few years! Understanding these properties helps you make informed choices, ensuring your artwork endures. For example, some pigments, like phthalocyanine blues and greens, are incredibly transparent and powerful, making them ideal for glazing. Others, like titanium white, are extremely opaque and perfect for covering or creating bright highlights. Knowing the nuances of each pigment is a journey in itself, but a rewarding one for any artist.
Additives and Extenders: The Supporting Cast
Beyond pure pigment, some paints, especially student-grade varieties, may contain additives and extenders. These are often inert fillers like chalk or barytes, used to bulk up the paint, modify its consistency, or reduce cost. While artist-grade paints minimize these to maximize pigment load, some carefully chosen additives can serve useful purposes, such as improving stability or preventing oil separation. It’s worth noting that while not inherently "bad," a higher pigment load generally equates to higher quality, richer color, and greater tinting strength – something I always look for. It determines the richness, the tinting strength (how much it can influence other colors when mixed), its opacity or transparency, and crucially, its lightfastness – how well it resists fading or discoloration when exposed to light over time. This last point is vital for creating archival works; you want your colors to sing for centuries, not just a few years! Understanding these properties helps you make informed choices, ensuring your artwork endures. For example, some pigments, like phthalocyanine blues and greens, are incredibly transparent and powerful, making them ideal for glazing. Others, like titanium white, are extremely opaque and perfect for covering or creating bright highlights. Knowing the nuances of each pigment is a journey in itself, but a rewarding one for any artist.
Binders: The Oil that Holds it All Together
Then there's the binder, which is the oil itself. This is what suspends the pigment particles, allows them to spread, and, most importantly, dries through oxidation to form a durable film. Different oils have different properties, affecting drying time, flexibility, and tendency to yellow. It's not just about drying; it's about forming a lasting, protective matrix around each pigment particle. The choice of binder profoundly influences not only how the paint handles on your brush but also its long-term archival stability and visual characteristics. Here’s a quick rundown of common oil binders and their characteristics:| Oil Type | Characteristics | Drying Time (Thin Layer) | Yellowing Tendency | Usage Notes | |--- |--- |--- |--- |--- | |Linseed Oil | Forms a strong, flexible, robust film; can feel 'sticky' and holds brushstrokes. | 3-5 days | Moderate | The traditional workhorse. All-purpose, good for building layers. Its slight yellowing can create a warm patina over time, which can be desirable for some classical effects but avoided for cool colors. | |Refined Linseed Oil | Purified linseed, lighter in color, less impurities. | 3-5 days | Moderate | Similar to cold-pressed but cleaner, sometimes slightly faster drying. Good general-purpose, a staple for many artists. | |Cold-Pressed Linseed Oil | Less refined, retains more mucilage, stronger film, slightly faster drying. | 2-4 days | Moderate | Valued by traditionalists for its strength and working properties, often producing a slightly more textured film. | |Stand Oil (Polymerized Linseed) | Thick, honey-like; creates smooth, enamel-like film without visible brushstrokes. | 5-7 days | Very Low | Excellent for fine detail, glazing. Increases paint flow and gloss. Its low yellowing is ideal for lighter colors and can create wonderfully transparent effects. | |Walnut Oil | Dries to a less brittle film, silky smooth brushwork. | 5-7 days | Low | Prized for minimal yellowing, excellent for lighter colors, blues, whites. Gives paint beautiful flow and a soft sheen. Historically significant, used by many Old Masters. | |Poppy Seed Oil | Extremely slow drying; very pale, 'slippery' film. | 7-10+ days | Very Low | Ideal for whites, pale colors, glazes where absolute minimal yellowing is key. Creates a weaker, more brittle film; avoid for impasto or underlayers, as it can crack more easily. | |Safflower Oil | Similar to poppy oil, slightly faster drying, less brittle film. | 5-7 days | Low | Good alternative for pale colors/whites; less prone to yellowing than linseed. Not recommended for underlayers due to weaker film strength, better for final, thinner applications. |

I usually stick to linseed for the foundational layers and most of my work due to its strength and versatility. However, I often reserve walnut, safflower, or stand oil for those delicate whites, pale blues, and final glazing layers where I really don't want any yellowing or added warmth. Poppy seed oil, for instance, creates a particularly brittle film and should generally be avoided for robust underlayers or impasto, whereas linseed is incredibly durable. It's all about choosing the right tool for the job, or in this case, the right binder for the desired effect and the layer you're working on. It’s a subtle but significant choice that can impact the longevity and aesthetic of your finished piece, pushing it from merely good to truly great. For those diving deeper, comparing specific brands like Holbein vs Winsor & Newton oil paints or reading a Winsor & Newton Artists' Oil Colour review can offer even more nuanced insights into binder variations. You can also learn more about various binders and their properties in my definitive guide to paint types for artists.
Fillers and Additives: Beyond Pigment and Binder
Beyond pigments and binders, paint manufacturers sometimes include fillers or additives to modify the paint's consistency, opacity, or cost. These can range from inert powders like chalk (calcium carbonate) or barytes (barium sulfate) to waxes or even stabilizers. While artist-grade paints typically minimize fillers to maximize pigment load and intensity, student-grade paints often contain more, which can sometimes result in less vibrant color or a 'thinner' feel. It's worth noting that not all additives are bad; some are vital for pigment stability or to prevent oil separation. But generally, a higher pigment load (and thus, fewer fillers) usually correlates with higher quality, richer color, and greater tinting strength. It's another subtle but important factor in understanding what makes your paint, well, your paint.
Solvents and Mediums: Your Paint's Best Friends (and Sometimes Foes)
This is where things get really interesting, and where you start to feel like an alchemist. Solvents are used to thin the paint, increase its fluidity, and clean brushes. The classic is turpentine, derived from pine resin, known for its strong, distinct odor and excellent solvent power. But for those sensitive to fumes (like me, after years of studio work!), odorless mineral spirits (OMS) are a godsend. Seriously, my studio air quality improved dramatically once I made that switch! OMS are highly refined petroleum distillates, stripping away the aromatic hydrocarbons that cause the strong smell. Beyond these, there are also natural alternatives like spike lavender oil (which has a lovely, if strong, floral scent and excellent solvent power) or various citrus-based solvents, all offering less toxic alternatives to traditional turpentine. The key is always, always good ventilation, regardless of the solvent, and always use them in well-ventilated areas or, even better, outdoors if weather permits.
Then there are mediums, which are a whole universe unto themselves. They're essentially mixtures of oils, resins, and solvents that you add to the paint to modify its working properties. You can make paint more fluid, add gloss, increase transparency for glazing, speed up or slow down drying time, or even build texture. These aren't just additives; they are collaborators in your creative process, allowing for nuanced control over your paint's behavior. Natural resins, like Dammar Varnish (a classic, providing a brilliant, jewel-like quality to glazes) or the harder Copal Medium (known for its durability), are often cooked with oils to create traditional mediums. Beyond these, modern chemistry has also provided us with synthetic resin mediums. You might also encounter drying siccatives (like cobalt driers), which are chemical agents used very sparingly to accelerate the oxidation process, but caution is key as overuse can make the paint film brittle over time. Common oil painting mediums include:
- Linseed Oil (or other drying oils): Increases fluidity, gloss, and slows drying time. Great for a classic, rich feel. It enhances the paint's richness and elasticity, and can be used on its own or as part of a more complex medium.
- Stand Oil: Thick, honey-like consistency. Creates a smooth, enamel-like film without visible brushstrokes, making it perfect for refined finishes. Excellent for fine detail and glazes, imparting a beautiful, self-leveling flow to the paint, and is particularly resistant to yellowing.
- Alkyd Mediums (e.g., Liquin, Galkyd): Oh, these are absolute game-changers when patience wears thin and you need layers to dry faster! Alkyd mediums significantly speed up drying time (often allowing layers to be touch-dry in a day or two), increase flow, and transparency. These are typically made from synthetic resins, offering excellent consistency and reliability. For multi-layered paintings, working to a deadline, or just getting a foundational layer down quickly, they are simply invaluable, a true lifesaver.
- Resin Mediums (e.g., Dammar Varnish, Copal Medium): Add gloss and depth, can be mixed with oils and solvents to create custom mediums. Dammar, in particular, offers a brilliant, jewel-like quality to glazes and adds a beautiful, subtle warmth. Copal mediums are known for their hardness and durability and are historically revered for their resilience.
- Cold Wax Medium: A paste-like medium that adds body and matte finish to paint, extending it and creating unique textural effects. Fantastic for abstract work or building up impasto without excessive oil, giving a lovely translucent quality. It also imparts a unique velvety feel and can be used to create a more sculptural surface.
It's a rabbit hole, but a fun one! I talk about this a lot in what-are-painting-mediums-a-beginners-guide.
A modern innovation worth mentioning here are water-miscible oil paints. These are real oil paints with an emulsifier added, allowing them to be thinned and cleaned up with water, eliminating the need for traditional solvents. While they have slightly different working properties, they offer a fantastic, less toxic entry point into oil painting for many artists. They're a great option for those with sensitivities or limited studio ventilation.
You'll often hear about the "fat over lean" rule. This simply means applying layers of paint with more oil (fat) over layers with less oil (lean). If you put a lean layer over a fat one, the top layer will dry faster and likely crack. It's a crucial principle to learn early to avoid heartbreak down the line, ensuring the longevity and structural integrity of your painting. Think of it like a stack of pancakes: you want the top ones to be lighter and more flexible, not harder and more rigid than the ones beneath, or the whole stack will crumble.
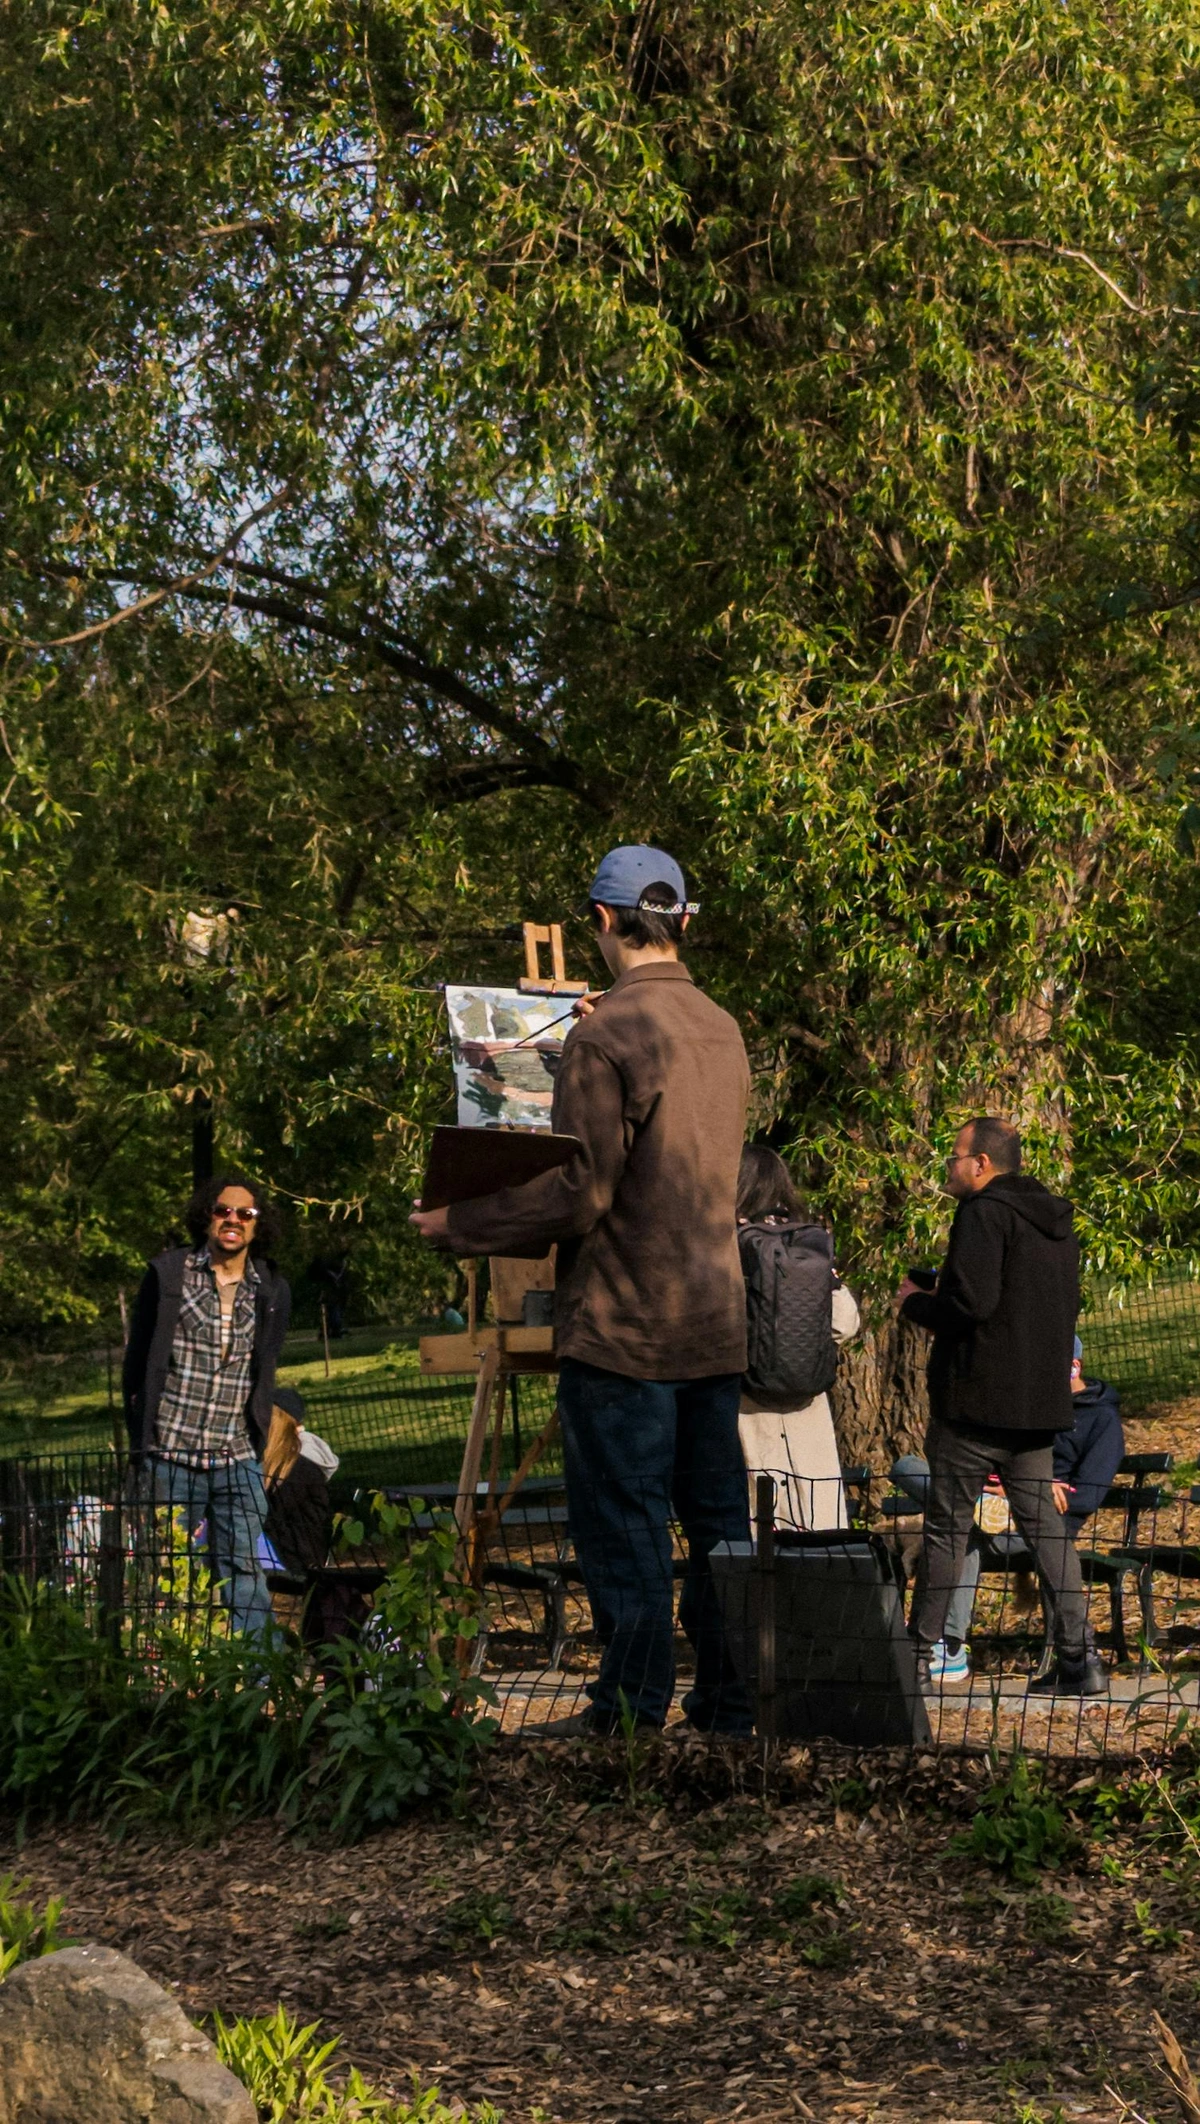
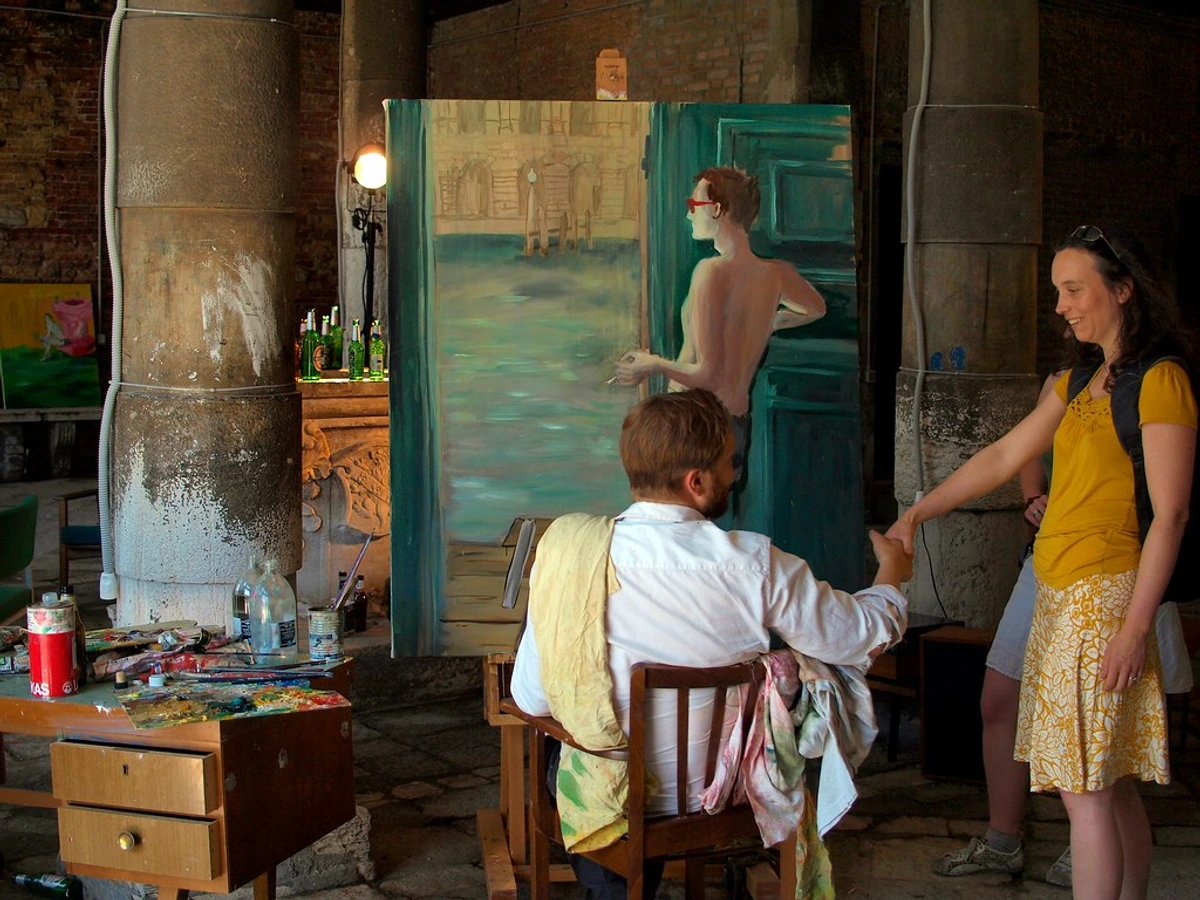
The Playground of Techniques: How Artists Actually Use Oil Paint
Toning / Imprimatura (Setting the Stage)
Before you even touch a brush loaded with color, many artists, myself included, will often start with a toning or imprimatura layer. This involves applying a very thin, transparent wash of a neutral color (like a diluted earth tone, a warm sienna, or a cool gray) over the entire canvas or specific areas of the gesso primed surface. Why bother? Well, it eliminates the stark, intimidating white of the canvas, which can be surprisingly difficult to work against – that blank white can really skew your color perception! It helps unify your initial palette, allows for easier judgment of subsequent colors by providing a middle value to work from, and can even contribute a subtle underlying glow to your finished piece, peeking through later layers. It's like setting the mood lighting before the main actors come on stage; it establishes a foundational atmosphere that can greatly influence the entire painting and provide immediate harmony.
This is where the real fun begins, where the theory of pigments and oils truly come alive on the canvas. Oil paint is incredibly versatile, allowing for a huge range of expressive possibilities. From the rapid, direct stroke to the patiently built-up glaze, these techniques truly highlight its unique properties and offer artists a rich vocabulary for expression. Here are a few foundational, and some more experimental, approaches:
Direct Painting (Immediate & Deliberate)
Direct painting is a broad approach where colors are applied more or less as they will appear in the final work, often without extensive underpainting or glazing layers. While it can include techniques like alla prima, it’s more about the philosophical approach of laying down color with intention, aiming for a finished look in fewer layers. This doesn't mean it's simple; it requires confidence in color mixing and brushwork, and a keen eye for value and hue. It's about building the form and color simultaneously, rather than in separate stages. This approach values immediacy and can result in a powerful, spontaneous feel, where the artist's hand is clearly visible in the brushstrokes. It's the kind of painting that makes you feel the artist's energy, a direct conduit from their vision to your eye.
Alla Prima (Wet-on-Wet)
This is my jam for capturing quick, energetic moments. Alla prima means "at first attempt" in Italian, and it's all about finishing a painting in one session while the paint is still wet. No waiting for layers to dry! It’s spontaneous, bold, and can create wonderfully textured, fresh-looking pieces. Think of the vibrant, direct brushwork of an Impressionist painting, or a quick landscape study painted directly from nature. This technique is fantastic for capturing fleeting light or a raw emotional response. The challenge and thrill of alla prima is the need for decisive action and confident brushwork, allowing colors to blend and fuse on the canvas itself, creating a lively, immediate feel. It demands a certain audacity, a willingness to commit, but the rewards are often incredibly fresh, vibrant, and immediate results. It’s a technique that truly celebrates the luscious, malleable nature of oil paint, allowing for that glorious wet-into-wet blending that feels so alive. If you're into that immediate expressive kick, you'll love what-is-alla-prima-painting.
Glazing (Transparent Layers)On the flip side, we have glazing. This is a slower, more methodical approach where you apply thin, transparent layers of paint (often diluted with a medium that increases transparency and flow, like stand oil or a resin medium) over meticulously dried underlayers. Each glaze adds depth, luminosity, and subtle shifts in color, creating an incredible glow that seems to emanate from within the painting. This is how the Old Masters achieved such luminous effects, building complexity and richness that seems to vibrate with life. It’s like looking through stained glass, each color enriching the last. The magic lies in the optical phenomenon: light travels through the transparent glaze, bounces off the dried opaque layers beneath, and then travels back through the glaze, creating a profound optical mixing effect and an unmatched inner luminosity. It's truly magical and something I explore in depth in mastering glazing techniques in oil painting. The patience required is amply rewarded by the breathtaking results.
Impasto (Thick and Textured)Sometimes, you just want to glob it on! Impasto involves applying paint thickly, often with a palette knife or a heavily loaded, stiff-bristled brush, so that it stands out from the surface and retains visible tool marks. This creates a tactile texture that catches the light and adds a dynamic, sculptural quality to the painting, literally giving it dimension. Van Gogh was a master of impasto, giving his skies and fields a swirling, almost living presence. Think also of the powerful, textured portraits by Frank Auerbach, the expressive landscapes of Nicolas de Staël, or the abstract expressions of Joan Mitchell. Different palette knife shapes – from diamond to trowel – offer varied expressive possibilities, allowing for anything from broad, flat planes to delicate ridges, and the type of knife you choose can truly influence the final mark. It’s a great way to add energy and dimension, and if you want to get truly sculptural with your paint, check out what-is-impasto-painting and mastering-the-palette-knife:-advanced-techniques-for-abstract-texture. It's a bold way to emphasize form and movement, inviting the viewer to engage with the surface on a visceral level, and can create incredible depth even in seemingly simple forms.
Sfumato (Soft Blending)
Remember that mysterious smile of the Mona Lisa? That's sfumato at work, a technique famously perfected by Leonardo da Vinci. This technique involves incredibly subtle gradations of light and shadow, without any sharp lines or borders, creating a soft, hazy, and often dreamlike effect. It requires immense control and patience, building up those delicate transitions over time, making forms appear to emerge from a mist, as if veiled by smoke. While related to chiaroscuro (which focuses on dramatic contrasts between light and dark), sfumato is all about those seamless transitions, a feather-soft blurring of edges, rather than the stark juxtaposition of tones. It's a masterclass in subtlety, allowing for a profound sense of atmosphere and form, making figures feel incredibly lifelike and present, blurring the edges between them and their environment. If you want to dive deeper into how this beautiful atmospheric effect is achieved, take a look at what is sfumato and what is sfumato in Renaissance art.
Underpainting / Grisaille
This foundational technique, often associated with the Old Masters, involves creating a monochromatic underpainting (usually in grays, browns, or greens) to establish the values and forms of the composition before applying color. It's like building the skeletal structure before adding the flesh, mapping out the light and shadow first. A grisaille is a specific type of underpainting done entirely in shades of gray, often used to create a sculptural, realistic form. Beyond grisaille, you'll also encounter verdaccio (a greenish-gray underpainting, historically popular in the Italian Renaissance for flesh tones, as it neutralized the pinks of subsequent layers) and bistre (warm brown tones, excellent for atmospheric landscapes). This methodical approach ensures a strong underlying structure for your painting and helps achieve incredible luminosity and depth in subsequent color layers. I've found it invaluable for complex compositions where precision in light and shadow is key, giving the painting a solidity that pure color alone sometimes misses. It’s an exercise in pure value, abstracting form from color, which can be incredibly liberating.

Scumbling (Broken Color Effect)
Scumbling is all about applying a thin, opaque or semi-opaque layer of paint over a dried layer using a stiff, often relatively dry brush. The goal isn't to create a smooth, even coat, but rather to allow the underlying color to show through in bits and pieces, creating a shimmering, broken color effect. It's fantastic for generating atmospheric effects, softening edges, or adding highlights that seem to glow from within, like diffused light through clouds, the subtle texture of old stone, or the complex weave of fabric. I often use it for clouds, distant foliage, or to create a subtle texture that catches the light in my abstract pieces, adding a delicate veil of color and enhancing visual vibration and luminosity.
Dry Brush (Textural Strokes)
While related to scumbling, dry brush is a distinct technique where a brush with minimal paint and very little medium (hence, "dry") is dragged across a textured surface. This results in broken, skip-like strokes that leave a coarse, granular texture, allowing the tooth of the canvas or underlying colors to show through. It’s excellent for creating specific textures like hair, weathered wood, rough fabric, or to add a sense of ruggedness to a landscape. It's a powerful way to add visual interest and tactile quality to your painting, providing a stark contrast to smooth, blended areas. You can see how this can create truly unique effects and is something I explore in my guide to dry-brush-technique-acrylic-painting, many principles of which apply to oils.
Washing / Staining
While often associated with watercolors, thin washes or stains can also be achieved with oil paint, especially when highly diluted with solvent or a very fluid medium. This technique involves applying a very transparent, liquid layer of color, allowing it to soak into an absorbent ground or simply tint a dried underlying layer. It's a quick way to establish broad areas of color or to create atmospheric effects, particularly useful for toning a canvas or laying down an initial color field. This initial, often unifying, layer not only helps harmonize your palette but also profoundly reduces the intimidating stark white of the canvas. It provides a warm or cool foundation upon which all subsequent colors will interact. I find it invaluable for initial toning of a canvas or for creating subtle color transitions in backgrounds that don't require heavy impasto, truly setting the stage for the colors to come and creating a foundational luminosity that can be built upon later.
Sgraffito (Scratching Away)
Sgraffito comes from the Italian word "to scratch," and that's exactly what it is! This technique involves scratching into a wet layer of paint to reveal an underlying dried layer of a different color or even the canvas itself. Tools can range from the blunt end of a paintbrush, a palette knife, a stylus, a comb, or even specialized sgraffito tools designed for various line widths and textures. It's fantastic for creating fine lines, intricate details, textures like hair or grass, or adding a sense of spontaneity and raw energy. I often use it to carve lines or create patterns in wet impasto, adding another dimension to the surface, bringing forth a hidden history within the layers of paint. It's a wonderfully direct and tactile way to introduce line and contrast, and it can add a surprising depth to abstract marks, creating a dynamic interplay between surface and subsurface.
Grattage (Scraping and Texturing)
Similar in spirit to sgraffito, grattage involves laying a canvas over a textured object (like a coin, mesh, leaves, or even crumpled paper) and then scraping paint over it, often with a squeegee or palette knife. The paint picks up the texture of the object underneath, creating fascinating patterns and unforeseen visual effects. Max Ernst famously pioneered this for surreal effects, but it's a wonderfully abstract and experimental technique, a delightful way to introduce chance and tactile surfaces into your work, which I find particularly engaging in my abstract pieces. It's a playful invitation for the unexpected to inform the composition, a surrender to the material's own voice, yielding truly unique and organic textures.
Frottage (Rubbing Textures)
Derived from the French word 'frotter' (to rub), frottage involves placing a canvas or paper over a textured surface (like wood grain, lace, or coins) and then rubbing a thin layer of paint or a drawing tool over it to pick up the texture. While often done with graphite or charcoal, it can also be used with very thin oil washes to transfer subtle patterns and ghostly impressions onto your ground. It's a fantastic way to introduce organic or repeating patterns and a sense of history or decay into a piece, letting the environment subtly contribute to the artwork's surface, and can create some truly unexpected and beautiful effects.

These are just a few of the foundational techniques, but honestly, the possibilities are endless. Oil painting really invites you to experiment, to push the boundaries, and to find your own voice within its rich tradition. For a broader look at techniques, my guide the definitive guide to oil painting techniques is a great place to start.
Color Blocking (Simplified Forms, Bold Hues)
Color blocking is a technique where an artist applies large, flat, distinct areas of color, often without much blending or detail, to establish the foundational composition and form of a painting. It's like sketching with blocks of color. This approach is excellent for quickly establishing the overall value structure and color relationships in a piece, before refining details or introducing subtle shifts. I often use this in the initial stages of my abstract work to lay down broad areas of color, setting up a dynamic interplay of hues and values before diving into texture or detailed brushwork. It's a robust way to ensure a strong underlying composition.
Indirect Painting (Layered & Methodical)
In contrast to direct painting, indirect painting is a layered, methodical approach that builds up the image in stages. This can involve meticulous underpaintings (like grisaille or verdaccio), followed by tonal layers, glazes, and scumbles, all applied over carefully dried layers. It's a process of gradual refinement, allowing for incredible depth, luminosity, and subtle optical effects that are difficult to achieve in a single pass. Many Old Masters employed indirect methods to achieve their breathtaking realism and glowing effects. It requires patience and a systematic approach, but the rewards are often a profound sense of atmosphere, complex color interactions, and an enduring archival quality. It's a patient dialogue with the medium, where each layer contributes to the overall richness.
Other Expressive Techniques to Explore
Beyond the foundational approaches, the world of oil painting offers even more avenues for creative expression. Don't be afraid to combine and adapt these to develop your unique artistic voice:
- Vellatura: This is a technique similar to glazing but with slightly more opaque paint, still allowing underlying layers to show through but with a softer, veiled effect. It's excellent for subtly modifying colors, harmonizing diverse hues, or creating atmospheric haze without full transparency, providing a delicate bridge between layers.
- Decalcomania: This technique involves applying paint to a surface, then pressing another surface (like paper or canvas) onto it, and pulling it away to create a textured, often organic pattern. It's a fantastic method for generating spontaneous, Rorschach-like forms and textures, injecting an element of controlled chance into your compositions.
- Wet-on-Wet (Alla Prima): This is where you apply fresh paint onto wet paint, allowing the colors to blend and mix directly on the canvas. It's a spontaneous and direct way to work, often used to capture fleeting moments or to create bold, energetic brushwork. It’s what gives many Impressionist works their vibrant, immediate feel. You can explore this more in my guide to what-is-alla-prima-painting.
- Blending: While implicit in many techniques, intentional, seamless color blending is a core skill in oil painting, facilitated by the long drying time. It involves carefully merging adjacent colors directly on the canvas to create smooth transitions in hue or value, crucial for rendering subtle light and shadow, creating a sense of natural flow and continuity.
- Layering: The strategic application of successive paint layers, each serving a specific purpose (e.g., underpainting, tonal layers, color glazes, impasto accents). This build-up creates optical depth and luminosity that single-layer painting cannot achieve. Understanding the 'fat over lean' rule is paramount here, ensuring the structural integrity of your multi-layered masterpiece.
Caring for Your Oil Paintings: Ensuring Longevity
Beyond the painting process itself, understanding how to care for your finished oil paintings is paramount. After all, you’ve poured your heart and soul (and quite a bit of time!) into creating something beautiful and enduring. Proper care ensures that your work, and the work of masters before you, can be enjoyed for generations to come. It’s a bit like taking care of a cherished heirloom; a little proactive attention goes a long way.
Environmental Considerations
The environment where a painting is displayed or stored can significantly impact its longevity. Extreme fluctuations in temperature and humidity are oil paint's greatest enemies, causing the canvas and paint layers to expand and contract at different rates, leading to cracking or delamination. Ideally, maintain a stable environment: moderate temperature (around 68-72°F or 20-22°C) and relative humidity (around 45-55%). Avoid hanging paintings in direct sunlight, over radiators, or near air conditioning vents. UV radiation from direct sunlight can fade pigments and degrade the oil film over time, so consider UV-protective glass for framed works or display in areas with indirect light.
Cleaning and Handling
Dust is a common enemy, accumulating on surfaces and dulling colors. Regularly dust your paintings gently with a soft, clean, dry brush or a lint-free cloth. For more stubborn dirt or grime, it's always best to consult a professional art conservator. Never use water, chemical cleaners, or household products on an oil painting, as these can cause irreversible damage. When handling paintings, always hold them by the edges of the frame or stretcher bars, and ideally wear cotton gloves to avoid transferring oils from your skin to the surface. Avoid touching the painted surface, even if it feels completely dry.
Framing and Storage
Proper framing provides both aesthetic enhancement and crucial physical protection. A frame with a sturdy backing board and, for delicate or smaller works, archival-quality glazing (glass or acrylic) can shield the painting from dust and physical damage. Ensure the painting is securely fitted within the frame without excessive pressure. For storage, especially for unframed pieces, protect the painted surface with glassine paper or archival cardboard. Store paintings upright in a stable environment, away from potential pests, moisture, or extreme temperatures. If stacking, use spacers to prevent surfaces from touching. Think of framing as both a presentation and a bodyguard for your artistic expression.
The Final Touch: Varnishing Your Oil Painting
Once your oil painting is completely dry – and this is where that patience I mentioned earlier truly comes into play, as it can take anywhere from six months to a year, or even longer for thick impasto – you'll want to consider varnishing. Varnishing isn't just about making your painting shiny; it's a crucial protective layer that guards against environmental damage like dust, dirt, and UV radiation, and it unifies the painting's finish, bringing out the depth and richness of the colors. Before the final varnish, many artists apply an isolation coat, a non-removable barrier between the painting and the removable final varnish. This protects the paint layer during future varnish removal. It’s like putting a clear, protective shield on your hard work, a final seal of protection that will preserve your creation for generations to come.
There are different types of varnishes to choose from, each offering a distinct finish:
- Gloss Varnish: Enhances color saturation and creates a shiny, reflective surface.
- Satin Varnish: Offers a subtle sheen, a middle ground between gloss and matte.
- Matte Varnish: Reduces glare and provides a non-reflective, subtle finish, often preferred for contemporary or abstract works where glare can distract.
You can explore the ins and outs of this vital final step in how-to-varnish-an-oil-painting-a-step-by-step-guide.
Why Bother? The Pros and Cons of Oil Painting
Every medium has its quirks, its charms, and its challenges. Oil painting is no exception. While I absolutely adore working with oils, I'm also pragmatic. It's not always sunshine and roses, but for me, the rewards far outweigh the hurdles. Let's look at a balanced view.

The Good Stuff (Pros)
Aspect | Description | Curator's Insight |
|---|---|---|
| Unparalleled Blendability | The famously slow drying time is a gift for artists, allowing for seamless transitions between colors, creating incredibly smooth gradients and soft edges. | This is often the biggest draw. I've spent hours blending skies, achieving subtle shifts of blue and purple that are almost impossible with faster-drying paints. It’s a meditative process. |
| Rich, Vibrant Colors & Depth | Oils produce colors that are intensely saturated and luminous. Light penetrates and reflects off the oil film, giving a unique depth and an 'alive' glow. | The optical effects of layered glazes are unmatched, creating an inner luminosity. It's a visual feast that feels truly timeless. |
| Exceptional Archival Quality | When properly executed and cared for, oil paintings are incredibly durable and long-lasting. Many masterpieces from centuries ago are still vibrant, a testament to their inherent stability and the efforts of countless conservators. | This permanence is a huge draw. As an artist, knowing your work can endure for generations adds a profound layer of meaning, a conversation with the future. Conservation efforts ensure these works remain vibrant, bridging time and space. |
| Versatility in Technique | From thin washes and luminous glazes to thick, sculptural impasto and expressive palette knife work, oils handle a vast array of techniques. | It's like having a whole orchestra of tools at your fingertips, allowing for a truly personal and expressive artistic vocabulary. |
| Forgiveness & Manipulability | The slow drying time means ample time to correct mistakes, scrape off paint, rework entire areas, or adjust a composition. | This is a huge relief for beginners and experienced artists. I've often rescued paintings from what I thought was utter disaster, simply by having the time to rethink and rework. It's like having a forgiving editor for your visual thoughts, allowing for endless refinement until it feels just right. |
| Optical Depth & Luminosity | The way light interacts with the layered, translucent oil film creates an extraordinary sense of depth and an internal glow unmatched by other mediums. | This is, for me, the true magic. My abstract pieces thrive on this deep luminosity, where colors seem to vibrate and layers invite the eye to journey beneath the surface. It's a profound visual experience that makes an artwork feel alive. |
| Artistic Legacy & Connection | Engaging with oil paint connects you to centuries of artistic tradition, from the Old Masters to contemporary innovators. It's a shared language across time. | There's something profoundly satisfying about working with a medium that has touched so many hands and visions throughout history. It feels like joining a grand, ongoing conversation. |
The Not-So-Good Stuff (Cons)
Aspect | Description | Curator's Insight |
|---|---|---|
| Slow Drying Time | While a blessing for blending, it also means you often have to wait days, weeks, or even months between layers, which can significantly test your patience and lengthen the overall painting process. This requires careful planning and a shift in mindset. | This isn't a medium for the impatient, and honestly, sometimes it really tests mine! But embracing this slow rhythm is part of the art itself, a kind of forced meditation. If you're really pressed, alkyd mediums can significantly speed up touch-dry times, giving you the best of both worlds, allowing for quicker layering. |
| Cost | Quality artist-grade oil paints, brushes, and mediums can be more expensive upfront than comparable supplies for other paint types, though their longevity and the richness of their results often balances this out over time. | Yes, an initial investment is often higher. But consider the longevity and richness of the results – for me, it balances out over time. And remember, student grades are a perfectly valid and excellent start; you don't need top-tier gear on day one. |
| Use of Solvents & Fumes | Traditional oil painting often requires solvents like turpentine, which can have strong odors and necessitate excellent ventilation. Many pigments also contain heavy metals, posing toxicity concerns, though modern alternatives and safety practices can mitigate this. | My studio air quality improved dramatically once I switched to odorless mineral spirits and prioritized ventilation. Safety is non-negotiable, and modern alternatives help a lot. |
| Lingering Odor | Even with low-odor solvents, some residual smell can linger in the studio or on drying paintings, which might be an issue for those with sensitivities or limited space. | While vastly reduced with OMS, a subtle, earthy smell often remains. For some, this is part of the charm; for others, it's a factor to consider for home studios or shared living spaces. Good airflow remains your friend. |
| Cleanup | Cleaning brushes, palettes, and other tools requires dedicated solvents and more effort than water-based paints. It can be a messy and sometimes tedious part of the process, but good habits (like cleaning as you go) make it much easier and extend the life of your precious brushes. |
|"Fat Over Lean" Rule | This essential rule about layering is non-negotiable and can be a stumbling block for beginners. Ignoring it leads to cracking, delamination, and other structural failures in the painting, which is truly heartbreaking. | This rule caused me some early heartbreak! But once you understand why it's important (differential drying), it becomes second nature and crucial for archival integrity. |

For me, the ability to blend, the sheer luminosity, and the archival quality make all the waiting, the cleaning, and the occasional battle with fumes totally worth it. But I completely understand that for others, these challenges can be a real buzzkill. It really boils down to your personal workflow and what you value in a medium. It's a deeply personal choice, but for those willing to commit, the rewards are immense.
Safety Considerations in Oil Painting
It's paramount to approach oil painting with a mindful awareness of safety. Many traditional oil paints contain pigments with heavy metals (like cadmium, cobalt, lead) which can be toxic if ingested, inhaled, or absorbed through the skin. This isn't to scare you, but to inform you; it's about being responsible. Always ensure your studio or workspace has excellent ventilation, especially when using solvents like traditional turpentine. Consider switching to odorless mineral spirits (OMS) or even water-miscible oil paints if fumes are a concern, as these options significantly reduce or eliminate the need for harsh solvents. Wear nitrile gloves to protect your skin from both pigments and solvents, avoid eating or drinking while painting, and always clean your tools and hands thoroughly after each session. Properly dispose of solvent-soaked rags in a sealed, fire-safe metal container to prevent spontaneous combustion, a rare but serious risk – these rags can generate heat as the oil oxidizes. Environmentally responsible disposal of solvents and paint waste is also a crucial consideration, so research local hazardous waste guidelines. A safe studio is a happy, healthy studio, and good habits protect both you and your art, ensuring you can enjoy the medium for years to come. Remember, your health is more important than any masterpiece.
Getting Started: What You'll Need to Dive In
If you're feeling that itch to try oil painting, I say go for it! Don't let the perceived complexity scare you off. Like learning any new skill, it's about taking that first step, and the right tools make all the difference. While the world of art supplies can be overwhelming, you truly only need a few essentials to begin creating. Here's a basic list to get you started on your colorful journey – think of these as your artist's toolkit, the essentials for beginning your conversation with oil paint without breaking the bank:
Essential Oil Painting Supplies: A Beginner's Checklist
Item | Description & Tips |
|---|---|
| Item | Description & Tips |
| --- | --- |
| 1. Oil Paints | Start with a basic set of primary colors (warm/cool red, yellow, blue), plus white (Titanium White is versatile) and maybe a Burnt Umber or Ivory Black. Student-grade paints are perfectly fine initially for learning, but understand they contain more fillers and less pigment. As you progress, consider artist-grade whites and blues for their superior pigment load, lightfastness, and vibrancy – they really do make a difference! Refer to best oil paints for beginners and best oil paint brands for artists for guidance. |
| 2. Brushes | A few good quality hog bristle brushes (flats, rounds, filberts in small, medium, large) are excellent for oils due to their stiffness and ability to hold paint, making them perfect for impasto and bold strokes. Add a soft synthetic for blending, glazes, or fine details, especially for smoother passages where you don't want visible brush marks. Consider a fan brush for delicate blending or atmospheric effects. Explore best oil painting brushes for artists for more details. |
| 3. Palette | A simple non-absorbent surface is key. Tempered glass (super easy to clean!), ceramic, or even disposable palette paper pads work well. Avoid raw wood unless properly sealed, as it will absorb your precious oils. I personally find glass palettes a joy to clean, a small luxury that makes a big difference! |
| 4. Painting Surfaces | Canvas boards or stretched canvases (cotton is common, linen is prized for its strength and fine weave) are ideal. You can also use rigid wood panels (birch, MDF), and even metal surfaces like aluminum or copper, provided they are always properly primed. Heavy paper or cardboard specifically designed for oils, or simply well-gessoed, can also work. Learn more in how to prepare a canvas for oil painting and how to choose the right canvas for acrylic vs oil. |
| 5. Gesso / Primer | A crucial step, really the foundation of your painting! Apply gesso (typically an acrylic polymer emulsion with titanium dioxide) to your chosen surface (canvas, wood panel, heavy paper) to create a barrier that prevents the oil from soaking in and eventually degrading the support (known as 'oil rot'). It also provides a stable, slightly absorbent ground with 'tooth' for your paints to adhere to. Learn more in what is gesso in painting and check out my recommendations for the best gesso for canvas preparation review. |
| 6. Easel | Not strictly essential to start, but a tabletop, studio standing easel, or a portable plein-air easel significantly improves comfort, posture, and your vantage point for viewing the work, allowing you to step back and assess. Choosing the right one depends on your space and whether you prefer to work indoors or outdoors. It's an investment in your physical comfort and artistic process. |
| 7. Solvents & Brush Cleaning System | Odorless Mineral Spirits (OMS) for thinning paint and initial brush cleaning. Ensure good ventilation. Invest in two small, sturdy, well-sealed containers for solvent (one for initial dirty rinse, one for cleaner rinse). I always recommend a proper brush cleaning system to protect your brushes and your health! |
| 8. Linseed Oil/Medium | A small bottle of basic linseed oil or a simple painting medium (like an alkyd medium for faster drying, such as Liquin) to increase fluidity, add gloss, or modify drying time. Refer to what are painting mediums: a beginner's guide for more options and to truly unlock the versatility of your paints. |
| 9. Palette Knives / Painting Knives | Invaluable for mixing paint (saves brushes and cleans thoroughly!) and for scraping off mistakes on the canvas. Painting knives, with their flexible blades and various shapes (diamond, trowel, straight), are also great for impasto, expressive textures, and even applying smooth, thin layers, offering a different mark-making quality than a brush. Check out what is a palette knife and how to use it. |
| 10. Rags/Paper Towels | Essential for wiping brushes, cleaning up spills, and general tidiness. Old cotton rags are environmentally friendly and effective, and absorb paint well. I always have a huge stack within reach; mess is part of the fun, but controlled mess is better! |
| 11. Wet Painting Carrier/Storage | Since paintings take time to dry, a way to transport or store wet pieces without smudging is vital. Pizza boxes work wonders for small pieces; dedicated drying racks or carriers for larger ones are a worthy investment, preventing heartbreak. |
| 12. Sketchbook & Drawing Materials | For planning compositions, value studies, and practicing drawing skills that underpin strong painting. The better your drawing, the stronger your painting – it's the foundation of all visual art. |
| 13. Brush Cleaning Soap | Beyond solvent, a dedicated artist's brush soap (like Master's Brush Cleaner) will remove paint residue, condition bristles, and extend brush life significantly. Treat your tools well, and they'll treat you well, saving you money in the long run. |
| 14. Nitrile Gloves | Protect your hands from pigments and solvents, especially when working with traditional heavy metal pigments. A simple, yet crucial, safety measure that I never skip! |
| 15. Reference Materials/Inspiration | Keep a collection of images, books, or even objects that inspire you. A wellspring of ideas is as vital as any physical tool! My studio is filled with inspiring objects, from found leaves to abstract sculptures. |

 credit, licence## My Personal Takeaway: Is Oil Painting for You? A Reflection
Oil painting, for me, is far more than just a medium; it's a philosophy, a way of engaging with the world. It relentlessly teaches patience, profoundly rewards careful observation, and yet, paradoxically, also wholeheartedly embraces spontaneity and bold, energetic strokes. It feels like a direct, tangible connection to centuries of artistic dialogue, a privileged way to join the conversation started by the masters who came before us.
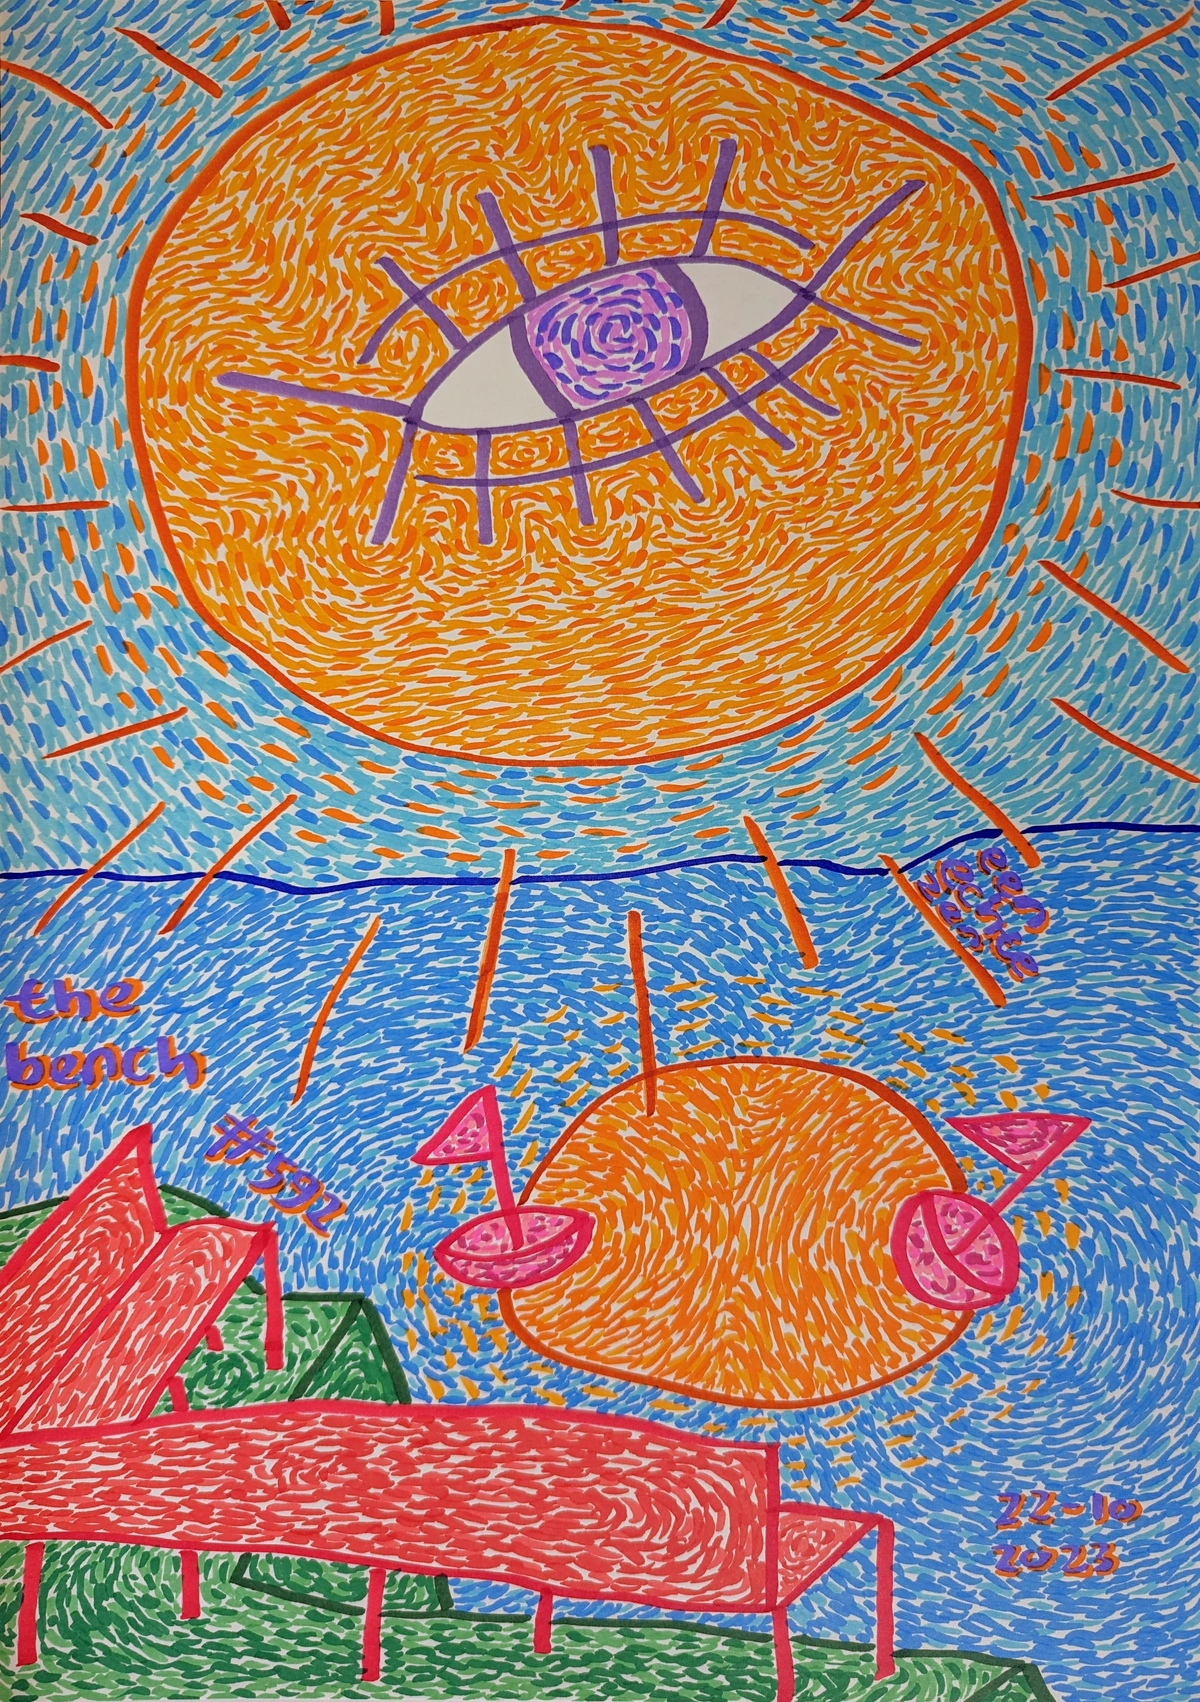
When I'm immersed in my studio, absorbed in a new piece, there's a certain meditative, almost rhythmic quality to the process. The distinct, subtle smell of the oils (the good, non-toxic kind, naturally!), the way the vibrant colors push and pull on the canvas, the slow, deliberate reveal of something entirely new emerging from the chaos – it's truly captivating, a dance between intention and happy accident. It's a continuous dialogue with the material itself, a continuous unfolding of ideas and emotions. Even in my journey through abstract art, where I often deliberately explore the interplay of texture, light, and composition, the inherent qualities of oil paint – its richness, its ability to hold a gesture, its capacity for deep, layered colors – allow me to build the vibrant, complex surfaces that truly define my style, creating a palpable sense of history and profound emotion within the work itself. This is why you'll see oil paint as a dominant medium in much of my collection available on the site; it simply offers the depth and expressiveness I crave.
If you find yourself drawn to rich, luminous colors that seem to glow from within, to smooth, almost invisible blends that whisper of subtlety, and to a medium that generously lets you take your time, to truly think and feel with your hands, then yes, oil painting might just be your calling. It’s an immersive journey of discovery, of learning to perceive the most subtle shifts in light and shadow, and of expressing something uniquely yours, a personal vision rooted deeply in centuries of tradition yet utterly, vibrantly contemporary.
And who knows, maybe one day you'll even visit my work at den-bosch-museum and see what these oils can do! Or perhaps you'll be inspired to start your own artistic adventure. If you're interested in the kinds of contemporary art that can be made with such a rich history, feel free to explore my collection and perhaps even buy a piece that speaks to you. The path of an artist is a long and winding timeline, but always, always rewarding. The truth is, the world of art is vast and welcoming, and oil painting is just one incredibly beautiful path within it. It's a path worth exploring, even if it's just to understand the magic behind those masterpieces in the museum. What's holding you back from starting your own journey?

What's the best way to mix colors with oil paint?
Ah, color mixing – it's an art in itself! The slow drying time of oil paints is a huge advantage here, allowing for extensive manipulation on the palette. Start by placing your primary colors and white/black around the edge of your palette, leaving the center clear for mixing. Use a palette knife (it's much better than a brush for mixing large quantities and prevents brush wear) to thoroughly blend your colors. Begin with smaller amounts, gradually adding one color to another until you achieve your desired hue, value, and saturation. Don't be afraid to experiment! The beauty of oils is you can scrape off and rework mixtures if you don't get it right the first time.

How can I make my own oil paint?
You know, the idea of making your own paint can sound a bit daunting, like something only Old Masters did in dusty studios, but it's actually a fascinating process that gives you incredible control over your materials. Essentially, you take finely ground pigment (the dry color powder) and mix it with a drying oil (like linseed or walnut oil) until you achieve a smooth, consistent paste. This usually involves grinding the pigment into the oil with a glass muller on a slab, a slow, meditative process that ensures every particle is thoroughly coated. The advantages are immense: you get to control the pigment load, the specific oil binder, and avoid any unwanted fillers or additives found in commercial paints. It's a deep dive into the essence of the medium and can be incredibly rewarding, offering a direct connection to the historical practices of painting. If you're really curious, there are many resources out there, but it's a step up in commitment!
How can I speed up the drying time of my oil paintings?
While the slow drying time is a hallmark of oil paint, there are certainly ways to accelerate the process if you need to. The most common method is to incorporate alkyd mediums into your paint. These synthetic resin-based mediums significantly reduce drying time, often allowing thin layers to be touch-dry in a day or two. You can also add a small amount of a drying siccative (like Liquin or cobalt drier) to your paint, but use these sparingly as too much can make the paint film brittle and yellow over time. Painting in thinner layers, on an absorbent gesso ground, and ensuring good air circulation in your studio can also help. Remember, while you can speed up 'touch-dry' time, the full 'curing' process through oxidation still takes months, so plan accordingly for varnishing.

What is oil painting best for?
Oil painting is best for achieving rich, luminous colors, seamless blending, and creating durable, archival artworks with incredible depth and texture. Its slow drying time allows for extensive manipulation and fine detail, making it ideal for portraits, landscapes, still lifes, and any subject requiring subtle color transitions or dramatic light effects. Many artists also find it unparalleled for capturing the nuances of light and shadow, and its ability to build complex, glowing surfaces has made it a favorite for centuries. For me, it's also the go-to medium for exploring abstract concepts where layers and texture are paramount, allowing for a profound sense of history and presence in the artwork.### Is oil painting hard for beginners?
While oil painting certainly has a reputation for being complex and intimidating, I firmly believe it's not inherently difficult for beginners. It simply requires a different approach and a healthy dose of patience. In fact, its slow drying time, often seen as a drawback, can be a huge advantage for novices. It allows for extensive blending, corrections, and thoughtful manipulation without the pressure of quick drying, giving you ample time to refine your vision. The key is to start with basic, good-quality supplies (you don't need the most expensive!), understand foundational principles like "fat over lean," and embrace the learning process without judgment. Don't aim for masterpieces on day one; aim for experimentation, enjoyment, and consistent practice. Just like any art form, consistency, curiosity, and a willingness to get a little messy are your best teachers, guiding you on a rewarding journey.
How long does oil paint take to dry?
The million-dollar question for many beginners! The drying time for oil paint varies significantly, and it's less about "drying" and more about "curing" through oxidation. Several factors influence this: the type of oil used (linseed typically dries faster than poppy or safflower), the pigments themselves (some, like earth tones, contain natural driers, while others, like cadmium, are slower), the thickness of the paint layer (thin washes can be touch-dry in a day or two, but thick impasto layers can take weeks, months, or even a year to fully cure), and environmental conditions (humidity and temperature play a big role). It's a game of patience, truly, and embracing this slow rhythm is part of the medium's unique charm.
What is the best way to store oil paints?
Proper storage of your oil paints is crucial for their longevity and to prevent them from drying out in the tube prematurely. Always recap your tubes tightly immediately after use to prevent air exposure, which initiates the oxidation process. Store them in a cool, dark place, away from direct sunlight or extreme temperature fluctuations. I like to keep mine in an airtight container or a dedicated art box to further protect them from air and dust. If a tube becomes stiff, you can sometimes work a tiny bit of fresh oil into it to revive it, but prevention is always better than cure. Keeping your palette knife clean and using it to gently press any separated oil back into the pigment before recapping can also help maintain consistency. It’s a small habit, but it makes a huge difference!

What's the difference between oil and acrylics?
Ah, the classic rivalry! The core difference lies in their binders and how they dry. Oil paints use a drying oil (like linseed) that cures through oxidation, leading to a long drying time and a rich, luminous, often transparent finish when layered. Acrylics, on the other hand, use an acrylic polymer emulsion that dries rapidly through water evaporation, resulting in a plastic-like, flexible, and often opaque film. Oils offer unparalleled blending time, depth of color, and luminosity, making them ideal for traditional realism, portraiture, and subtle transitions. Acrylics are known for their speed, versatility (they can be used very thinly like watercolor or thickly like oils), and easy water cleanup. Both are incredible mediums, but they demand different approaches and offer distinct aesthetic qualities. You can dive deeper into the nuances in my definitive guide to paint types for artists.
Feature | Oil Paints | Acrylic Paints |
|---|---|---|
| Binder | Drying oils (e.g., linseed, walnut) | Acrylic polymer emulsion |
| Drying Mechanism | Oxidation (chemical curing) | Evaporation of water (physical drying) |
| Drying Time | Slow (hours to days for touch-dry, months to years for full cure) | Fast (minutes to hours for touch-dry, days for full cure) |
| Cleanup | Requires solvents (mineral spirits, turpentine) | Water and soap |
| Finish | Rich, luminous, often transparent with deep color saturation | Matte, satin, or gloss; often opaque; can be plastic-like |
| Flexibility (Dried) | Less flexible, becomes more rigid over time | Highly flexible |
| Blending | Excellent, extended working time | Limited, dries quickly |
| Layering | Best with "fat over lean" principle; allows for optical depth | Can layer quickly, but can become muddy if overworked while wet |
| Odour | Can have strong odours, especially with traditional solvents | Low odour (water-based) |
| Archival Quality | Excellent, proven over centuries | Excellent, modern; long-term studies ongoing |
| Ideal For | Seamless blending, realism, subtle gradations, luminosity, traditional techniques | Fast-paced work, impasto, mixed media, bold color, quick studies |
How do you clean oil paint brushes?
Properly cleaning your oil paint brushes is crucial for their longevity and performance – a well-cared-for brush is a happy brush! First, wipe off as much excess paint as possible with a rag or paper towel. Then, swirl the brush in a container of solvent (like odorless mineral spirits) to break down the paint. Wipe again, and repeat in a fresh container of solvent until most paint is removed. Finally, wash the brush thoroughly with warm water and a good brush soap (saddle soap or artist's brush cleaner works wonders), working a lather into the bristles. Rinse, gently reshape the bristles, and lay the brush flat or hang it brush-side down to dry to prevent water from seeping into the ferrule. Trust me, establishing this ritual will save you money and frustration in the long run!
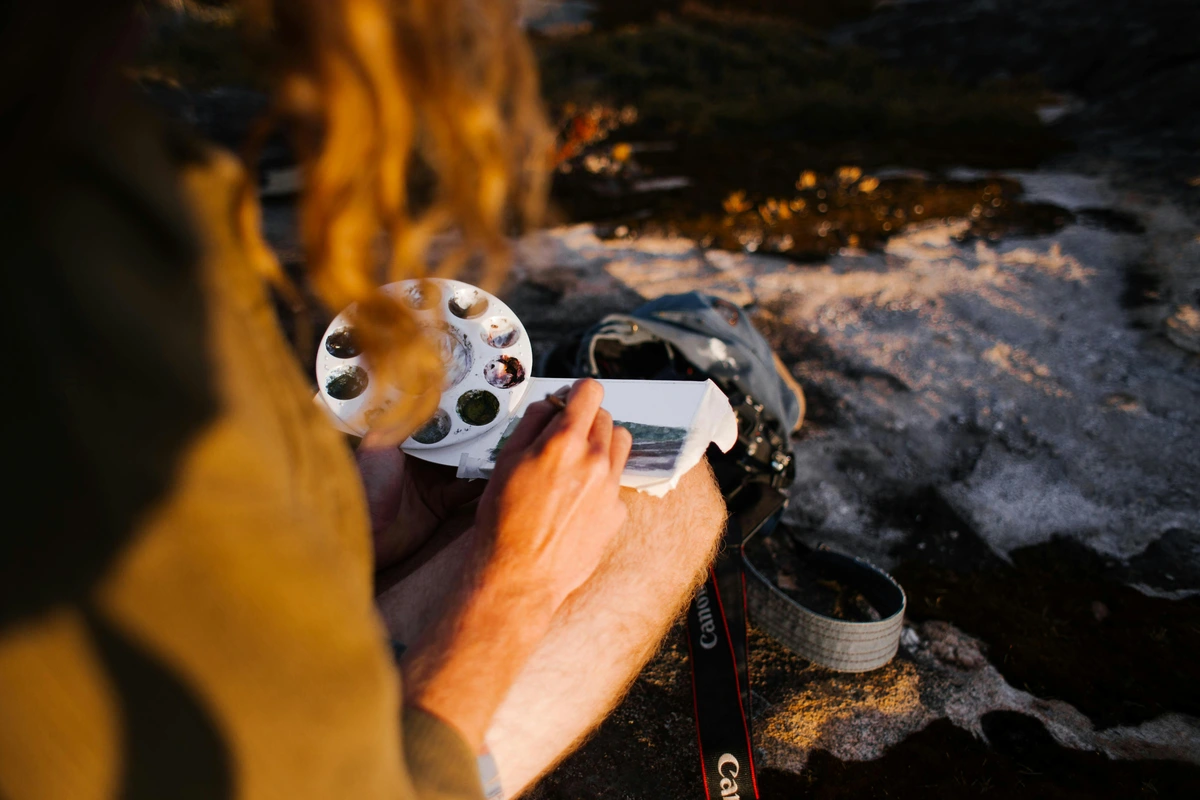
Can you paint oil over acrylic?
Yes, you absolutely can! Painting oil over acrylic is a common and perfectly acceptable practice, forming a stable and durable bond. The key is that the acrylic layer must be completely dry first – and since acrylics dry quickly, this is usually not an issue. Acrylics provide an excellent stable, non-absorbent ground for oils, and their fast drying time makes them ideal for creating quick underpaintings or initial compositional blocks. However, the reverse is generally not recommended: you should never paint acrylic over oil. The flexible acrylic film would likely crack and delaminate over the slower-drying, more brittle oil layer beneath. Always remember the principle of "flexible over less flexible" for archival integrity, which means the top layer should always be more flexible than the layer beneath it. This prevents cracking and ensures your artwork's longevity.
What is "fat over lean" and why is it important?
The "fat over lean" rule is one of the most fundamental and critical principles in traditional oil painting, essential for the longevity of your artwork. "Fat" refers to paint layers with a higher oil content (either from pure paint or paint mixed with an oily medium), and "lean" refers to paint layers with less oil, typically thinned with solvent. The rule dictates that you must always apply layers of paint with more oil over layers with less oil. If a faster-drying, leaner layer is applied over a slower-drying, fatter layer, the top layer will dry and become rigid before the bottom layer is fully cured. This differential drying can lead to cracking, delamination, and instability in your painting over time. It's about ensuring structural integrity, allowing the painting to dry from the inside out, and preventing future heartbreak. Ignore it at your peril!
What surfaces can you paint on with oil?
Oil paints are incredibly versatile when it comes to compatible surfaces, but proper preparation is absolutely key. Common and recommended surfaces include stretched canvas (both cotton and linen are popular), canvas panels, and rigid wood panels (like birch, MDF, or hardboard). You can also paint on heavy paper or cardboard, provided they are correctly treated. The most crucial preliminary step, regardless of your chosen support, is to prime the surface with gesso (acrylic gesso is widely used and perfectly suitable for oil paints). Gesso creates a protective barrier that prevents the oil from degrading the support over time (known as "oil rot") and provides a stable, slightly absorbent surface for the paint to adhere to. You can find more on preparing various surfaces in how to prepare a canvas for oil painting.
Surface Type | Description | Preparation Notes | Pros & Cons |
|---|---|---|---|
| Stretched Canvas | Cotton or linen fabric stretched over a wooden frame. | Must be primed with 2-3 coats of gesso. | Pros: Traditional, lightweight, portable. Cons: Can sag over time, susceptible to punctures. |
| Canvas Panels/Boards | Canvas glued to rigid cardboard or hardboard. | Pre-primed versions are common; can add more gesso for texture. | Pros: Economical, rigid, great for studies or beginners. Cons: Less archival than stretched canvas, heavier. |
| Wood Panels | Birch, MDF, hardboard, or plywood. | Needs thorough priming (at least 3-4 coats of gesso) on all sides to prevent warping and oil absorption. | Pros: Very rigid, smooth surface for fine detail, no sagging. Cons: Can be heavy, requires more prep. |
| Heavy Paper/Cardboard | Specialized oil painting paper or heavy watercolor paper. | Requires multiple coats of gesso or a barrier layer to prevent oil penetration. | Pros: Economical, good for studies, easy storage. Cons: Can warp, less archival. Perfect for quick studies or if you’re traveling light. |
| Metal (Copper/Aluminum) | Smooth, non-absorbent surfaces. | Degrease thoroughly, then apply a specialized primer designed for metal. | Pros: Extremely smooth, durable, unique luminous effects, historically used by some Old Masters. Cons: Expensive, requires specific priming, can be heavy, less common. |
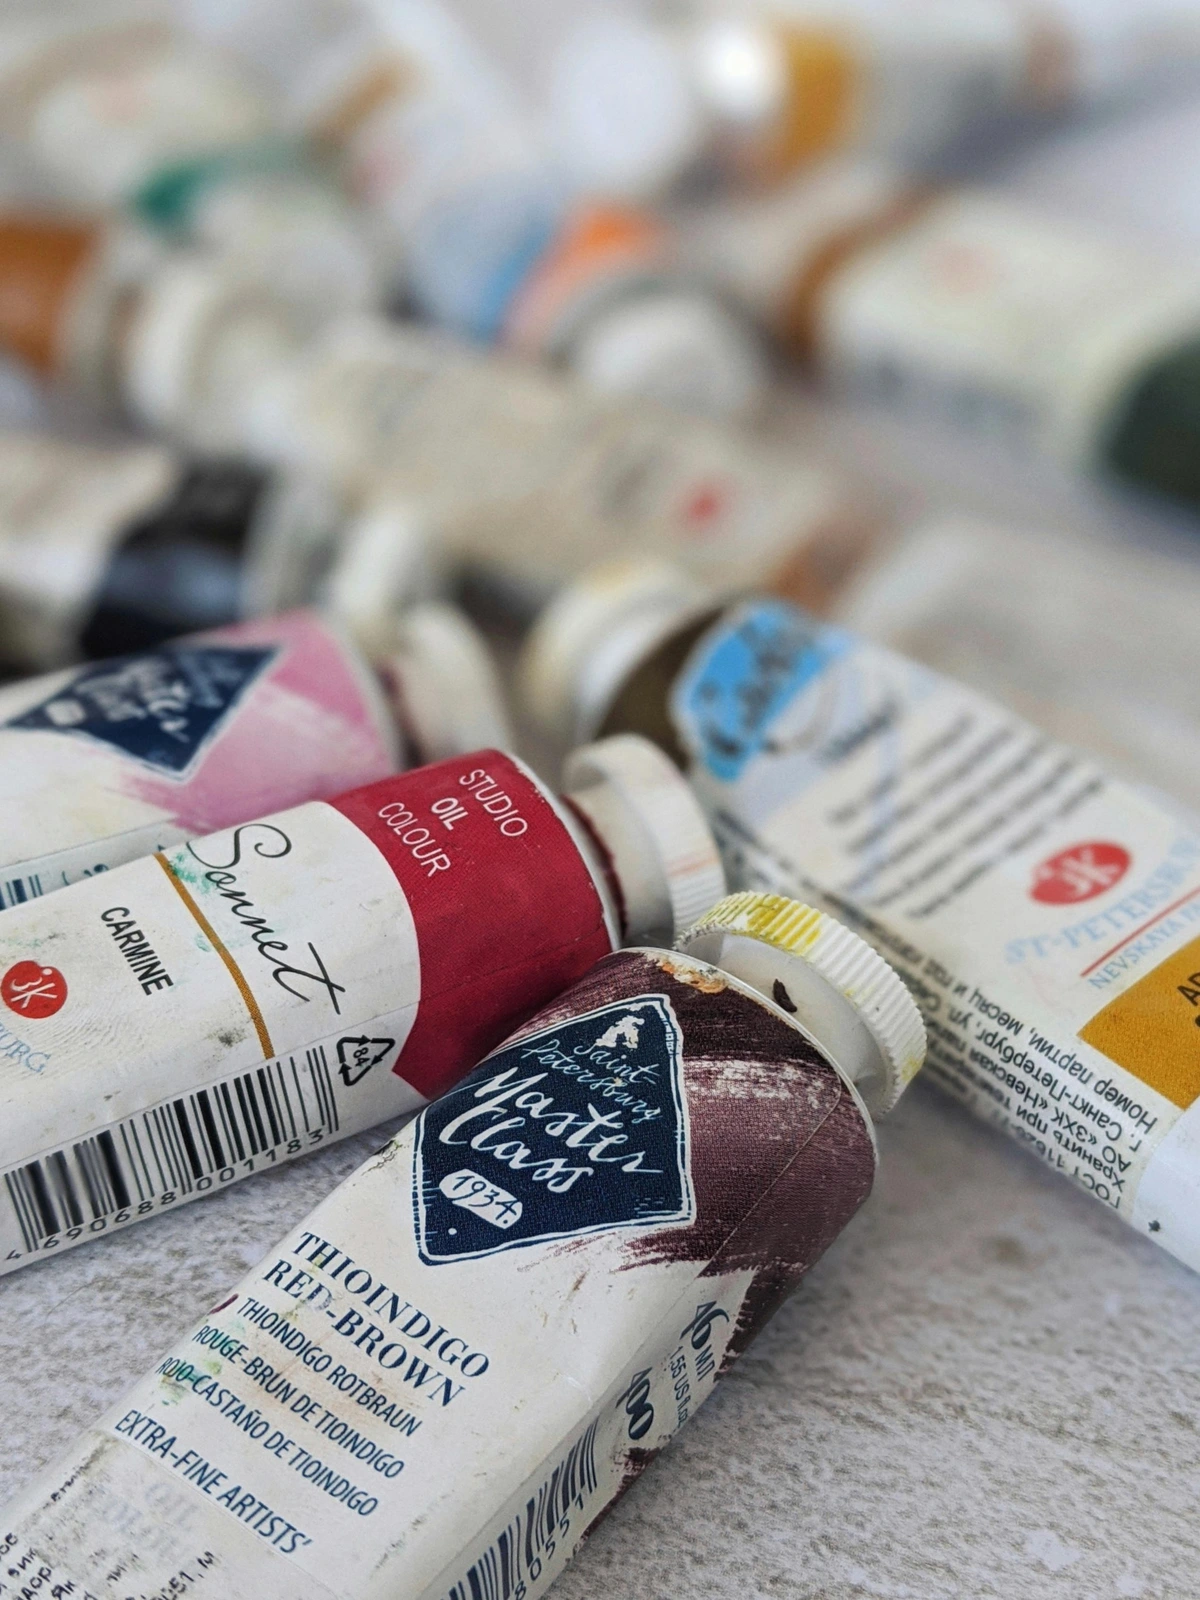
How to varnish an oil painting?
Varnishing an oil painting is a crucial final step that protects your artwork and enhances its visual qualities. It's incredibly important to wait until your oil painting is completely dry – and I mean thoroughly cured, not just touch-dry. This can take anywhere from six months to a year, or even longer for paintings with thick impasto (I've waited two years for some of my really thick pieces!). Applying varnish too soon can trap solvents and inhibit proper curing, leading to cracking, clouding, or even mold growth. There are typically two types of varnish: a temporary retouch varnish (applied sooner for interim protection, allowing some oxygen exchange) and a final picture varnish. Always apply varnish in thin, even coats in a dust-free environment, preferably horizontally to avoid drips, and ensure good ventilation. Varnish protects against UV damage, dirt, and pollution, while also unifying the sheen and saturating the colors, bringing them back to their "wet" look. For a detailed guide on this essential final step, check out how-to-varnish-an-oil-painting-a-step-by-step-guide.
Common Misconceptions About Oil Painting
Before we dive into a glossary and then some frequently asked questions, I wanted to address a few common myths and misunderstandings that often swirl around oil painting. Sometimes, these misconceptions can deter budding artists, and I'd hate for you to miss out on this incredible medium because of outdated ideas! It's important to separate fact from fiction so you can approach this rich art form with confidence.
Myth 1: Oil Painting is Too Toxic
Reality: While historically, and even today, some pigments and solvents can be toxic, modern oil painting can be incredibly safe. The key is awareness and good practice. By opting for cadmium-free or cobalt-free pigments (many brands offer excellent alternatives), using odorless mineral spirits instead of traditional turpentine, ensuring proper ventilation, and wearing gloves, you can paint very safely. It's about being informed and mindful, not scared off. Many manufacturers are also creating non-toxic alternatives for all aspects of the medium, making it more accessible and safer for everyone. Always prioritize good ventilation, wear gloves, and avoid direct contact with paint and solvents, and you’ll be fine.
Myth 2: Oil Painting is Only for Old Masters
Reality: Absolutely not! While oil painting has a rich history, it's a vibrant and evolving medium used by countless contemporary artists, myself included. From photorealism to bold abstraction, from intricate portraits to expansive landscapes, oil paint continues to be chosen for its unique qualities that no other medium can quite replicate. Just because it's old doesn't mean it's outdated – it's timeless, constantly being reinvented and pushed into new expressive territories! Look at artists like Jenny Saville, Anselm Kiefer, or Cecily Brown – their work is profoundly contemporary, yet deeply rooted in the power of oil. It’s a medium that truly transcends eras.
Myth 3: Oil Painting is Only for Traditional/Realistic Art
Reality: This goes hand-in-hand with Myth 2, but it's worth a specific mention. While oils are undeniably excellent for rendering realistic detail and traditional subjects, they are equally potent for abstract, expressionistic, and experimental art. The versatility of oil paint, its capacity for thick impasto, transparent glazes, and bold color blocking, makes it a powerhouse for artists exploring non-representational forms. My own work, often abstract and color-driven, relies heavily on these properties to create texture, depth, and emotional resonance. It's about how you use the medium, not what the medium dictates.
Myth 4: It's Too Expensive to Start Oil Painting
Reality: Like any hobby, you can certainly invest a lot, but you don't have to break the bank to start. Many brands offer excellent student-grade paints, and you only need a few basic colors and brushes to begin. You can even start on inexpensive canvas boards or gesso-primed paper. The initial outlay is often comparable to getting started with other art forms. Focus on learning, not on having the most professional setup right away; you can always upgrade later as your passion grows. Remember, the most important tools are your eyes, your hands, and your curiosity – everything else is just an aid to that creative fire.
Myth 5: Oil Paintings Take Forever to Dry, So It's Too Slow
Reality: Yes, they take time to cure, but this "slowness" is a feature, not a bug! It allows for unparalleled blending, reworking, and layering that fast-drying mediums simply can't offer. You learn patience, and you learn to plan. And for those who prefer a quicker pace, alkyd oil mediums can significantly speed up drying times without sacrificing the core benefits of oil. Embrace the pace, and you'll find it liberating, a chance to truly reflect on your marks. I often tell people it's like slow cooking versus fast food; both have their place, but one offers a depth of flavor and richness that the other simply can't match.
Myth 6: You Can't Paint Oil Over Acrylic
Reality: This is a very common misconception! You absolutely can paint oil over acrylic, and it's a stable, archival practice. Acrylics make an excellent, non-absorbent ground or underpainting for oils, especially useful for artists who want a quick-drying base. The rule to remember is "fat over lean," but also "flexible over less flexible." Since acrylics are flexible once dry, and oils form a more rigid film as they cure, painting oil over acrylic works perfectly. The reverse, however (acrylic over oil), is generally not recommended, as the flexible acrylic film applied over a rigid oil layer can lead to cracking.
Glossary of Oil Painting Terms
Sometimes, the world of oil painting comes with its own vocabulary. To help you navigate, here are some common terms you'll encounter, each opening up a new facet of this rich medium:

- Alla Prima: Italian for "at first attempt," refers to a painting completed in a single session while the paint is still wet; also known as "wet-on-wet." It's about immediacy, bold strokes, and capturing the moment, allowing colors to blend on the canvas itself.
- Binder: The medium (in oil paint, a drying oil) that holds the pigment particles together and allows them to adhere to a surface. The binder is what makes the paint, well, paint, curing through oxidation to form a durable film.
- Chiaroscuro: An artistic technique using strong contrasts between light and dark, usually bold contrasts affecting a whole composition, to create dramatic effects, emphasizing volume and drama and often conveying a sense of theatricality. Think Caravaggio or Rembrandt!
- Direct Painting: An approach to painting where colors are applied directly to the canvas, often wet-on-wet, aiming to achieve the final color and value in a single application, without extensive layering. It prioritizes spontaneity and immediacy over methodical build-up.
- Drying Oil: A type of oil (like linseed, walnut, poppy) that hardens through oxidation when exposed to air, forming a durable, flexible paint film. This is the magic ingredient in oil paint, giving it its unique working properties and archival quality.
- Fat Over Lean: A crucial rule in oil painting: apply layers with more oil (fat) over layers with less oil (lean) to prevent cracking and ensure the longevity and structural integrity of the paint film. Essential for archival quality!
- Gesso: A primer, usually white (though tinted versions exist), applied to a canvas or other surface to prepare it for painting, providing a stable, slightly absorbent ground for the paint to adhere to and protecting the support from the oils.
- Glazing: Applying thin, transparent layers of paint (often thinned with a suitable medium) over dried underlayers to build luminosity, depth, and subtle color shifts, creating an incredible glow from within the painting. It's like stained glass for your canvas, each layer enriching the last.
- Grattage: A technique involving scraping paint from a surface that has a textured object underneath (e.g., mesh, leaves), creating patterns and textures as the paint picks up the relief. An experimental way to introduce serendipity and tactile surfaces.
- Grisaille: A monochromatic underpainting, typically in shades of gray or sepia, used to establish values and forms of the composition before applying color layers, providing a strong structural foundation for the painting. It builds the bones of the painting, ensuring accurate light and shadow.
- Impasto: Applying paint thickly (with a brush or palette knife) so that it stands out from the surface, retaining visible brushstrokes or knife marks, creating tactile texture and sculptural quality. Think Van Gogh's swirling skies or Rembrandt's expressive surfaces!
- Indirect Painting: A layered, methodical approach to painting, building up the image in stages with underpaintings, tonal layers, glazes, and scumbles over dried layers, allowing for incredible depth, luminosity, and refinement. It's a patient dialogue with the medium.
- Lightfastness: A measure of how resistant a pigment is to fading or discoloration when exposed to light over time, crucial for archival quality and the longevity of your artwork. You want your colors to last for centuries, not just a few years!
- Medium: Substances (mixtures of oils, resins, solvents, or waxes) added to paint to modify its working properties, such as consistency, drying time, flow, or transparency. Your alchemist's toolkit for achieving specific effects!
- Odorless Mineral Spirits (OMS): A refined petroleum distillate with fewer aromatic hydrocarbons, making it less odorous and generally safer than traditional turpentine for thinning paints and cleaning brushes. Still requires good ventilation!
- Oxidation: The chemical process by which drying oils react with oxygen in the air, causing the oil molecules to polymerize and harden (cure). This isn't evaporation; it's a fundamental chemical transformation that forms a durable paint film.
- Pigment: Finely ground colored powders, derived from various natural or synthetic sources, that give paint its color and properties like opacity, transparency, and tinting strength. The very soul of color and the core of artistic expression.
- Sgraffito: A technique where a tool (like a palette knife tip or the blunt end of a brush) is used to scratch through a wet layer of paint to reveal an underlying dried layer, a different color, or even the canvas beneath. Great for adding fine lines, expressive marks, and texture.
- Siccative: An additive that accelerates the drying time of oil paints, usually containing metallic salts (like cobalt drier). Use sparingly and cautiously, as overuse can lead to brittle paint films over time.
- Sfumato: A painting technique for softening the transition between colors and tones, without sharp lines or borders, creating a hazy or smoky, almost dreamlike effect, making forms appear to emerge from a mist. Leonardo da Vinci's secret weapon for achieving profound realism and atmosphere.
- Solvent: A liquid (like turpentine or odorless mineral spirits) used to thin oil paint, increase its fluidity, clean brushes, or dissolve natural resins. Necessary for traditional oil painting practices and cleanup.
- Tempera: An early paint medium, typically egg tempera (using egg yolk as a binder), known for its fast drying time, crisp lines, and rigid, matte finish. A significant precursor to oil paint, but offering very different handling and aesthetic qualities.
- Underpainting: An initial layer of paint (often monochromatic in grays, browns, or earth tones) used to establish the values, forms, and composition of a painting before applying final color layers. It's the blueprint, providing a solid foundation for the subsequent layers.
- Varnish: A protective, often transparent, removable coating applied to a completely dry oil painting to shield it from environmental factors (dust, dirt, UV) and unify its final sheen and color saturation. The crucial final touch for preservation.
- Vehicle: Often used interchangeably with 'binder,' it refers to the liquid component of the paint that carries the pigment and allows it to spread, drying to form the paint film.
- Support: The physical surface upon which a painting is made, such as canvas, wood panel, or paper. It's the foundation that holds your artistic vision.
- Ground: The preparatory layer applied to the support (like gesso) to create a stable, receptive surface for the paint, preventing oil absorption and providing tooth.
- Pigment Load: The concentration of pigment particles within a paint. High pigment load typically means richer, more vibrant color and better tinting strength, characteristic of artist-grade paints.
- Tinting Strength: A pigment's ability to retain its color and impact when mixed with another color, especially white. A high tinting strength means a small amount can significantly alter a mixture.
- Fugitive Pigment: A pigment that is not lightfast and is prone to fading, darkening, or changing color over time when exposed to light, compromising the longevity of an artwork. Avoid these for archival work!
- Sfumato vs. Chiaroscuro: While both involve light and shadow, sfumato emphasizes soft, subtle, blurred transitions without harsh lines (think Mona Lisa's smile), creating atmospheric depth. Chiaroscuro focuses on dramatic, strong contrasts between light and dark, often for heightened emotional impact and to emphasize volume (think Caravaggio's dramatic lighting). They are complementary but distinct approaches, each offering a unique way to sculpt with light.
- Impasto vs. Alla Prima: While both can involve thick paint, impasto is specifically about the texture created by thick paint application, often with visible brush or knife marks, and can be applied in layers over time. Alla prima (wet-on-wet) refers to completing a painting in a single session while the paint is still wet, which often results in impasto-like effects due to the direct application, but the focus is on speed and immediacy rather than just texture.
- Glaze vs. Wash: A glaze is a thin, transparent layer of paint applied over a dried underpainting to create luminosity and subtle color shifts through optical mixing. A wash is also a thin, transparent layer, but it's typically applied as an initial toning layer or broad area of color, often soaking into an absorbent ground, and isn't necessarily built up for optical depth in the same way a glaze is. They are both about transparency but serve different purposes.
- Support vs. Ground: The support is the physical material the painting is created on (e.g., canvas, wood panel). The ground is the preparatory layer applied to the support (like gesso) to prepare it for paint, creating a stable and receptive surface and preventing oil absorption. They are distinct but equally vital components of a durable painting.


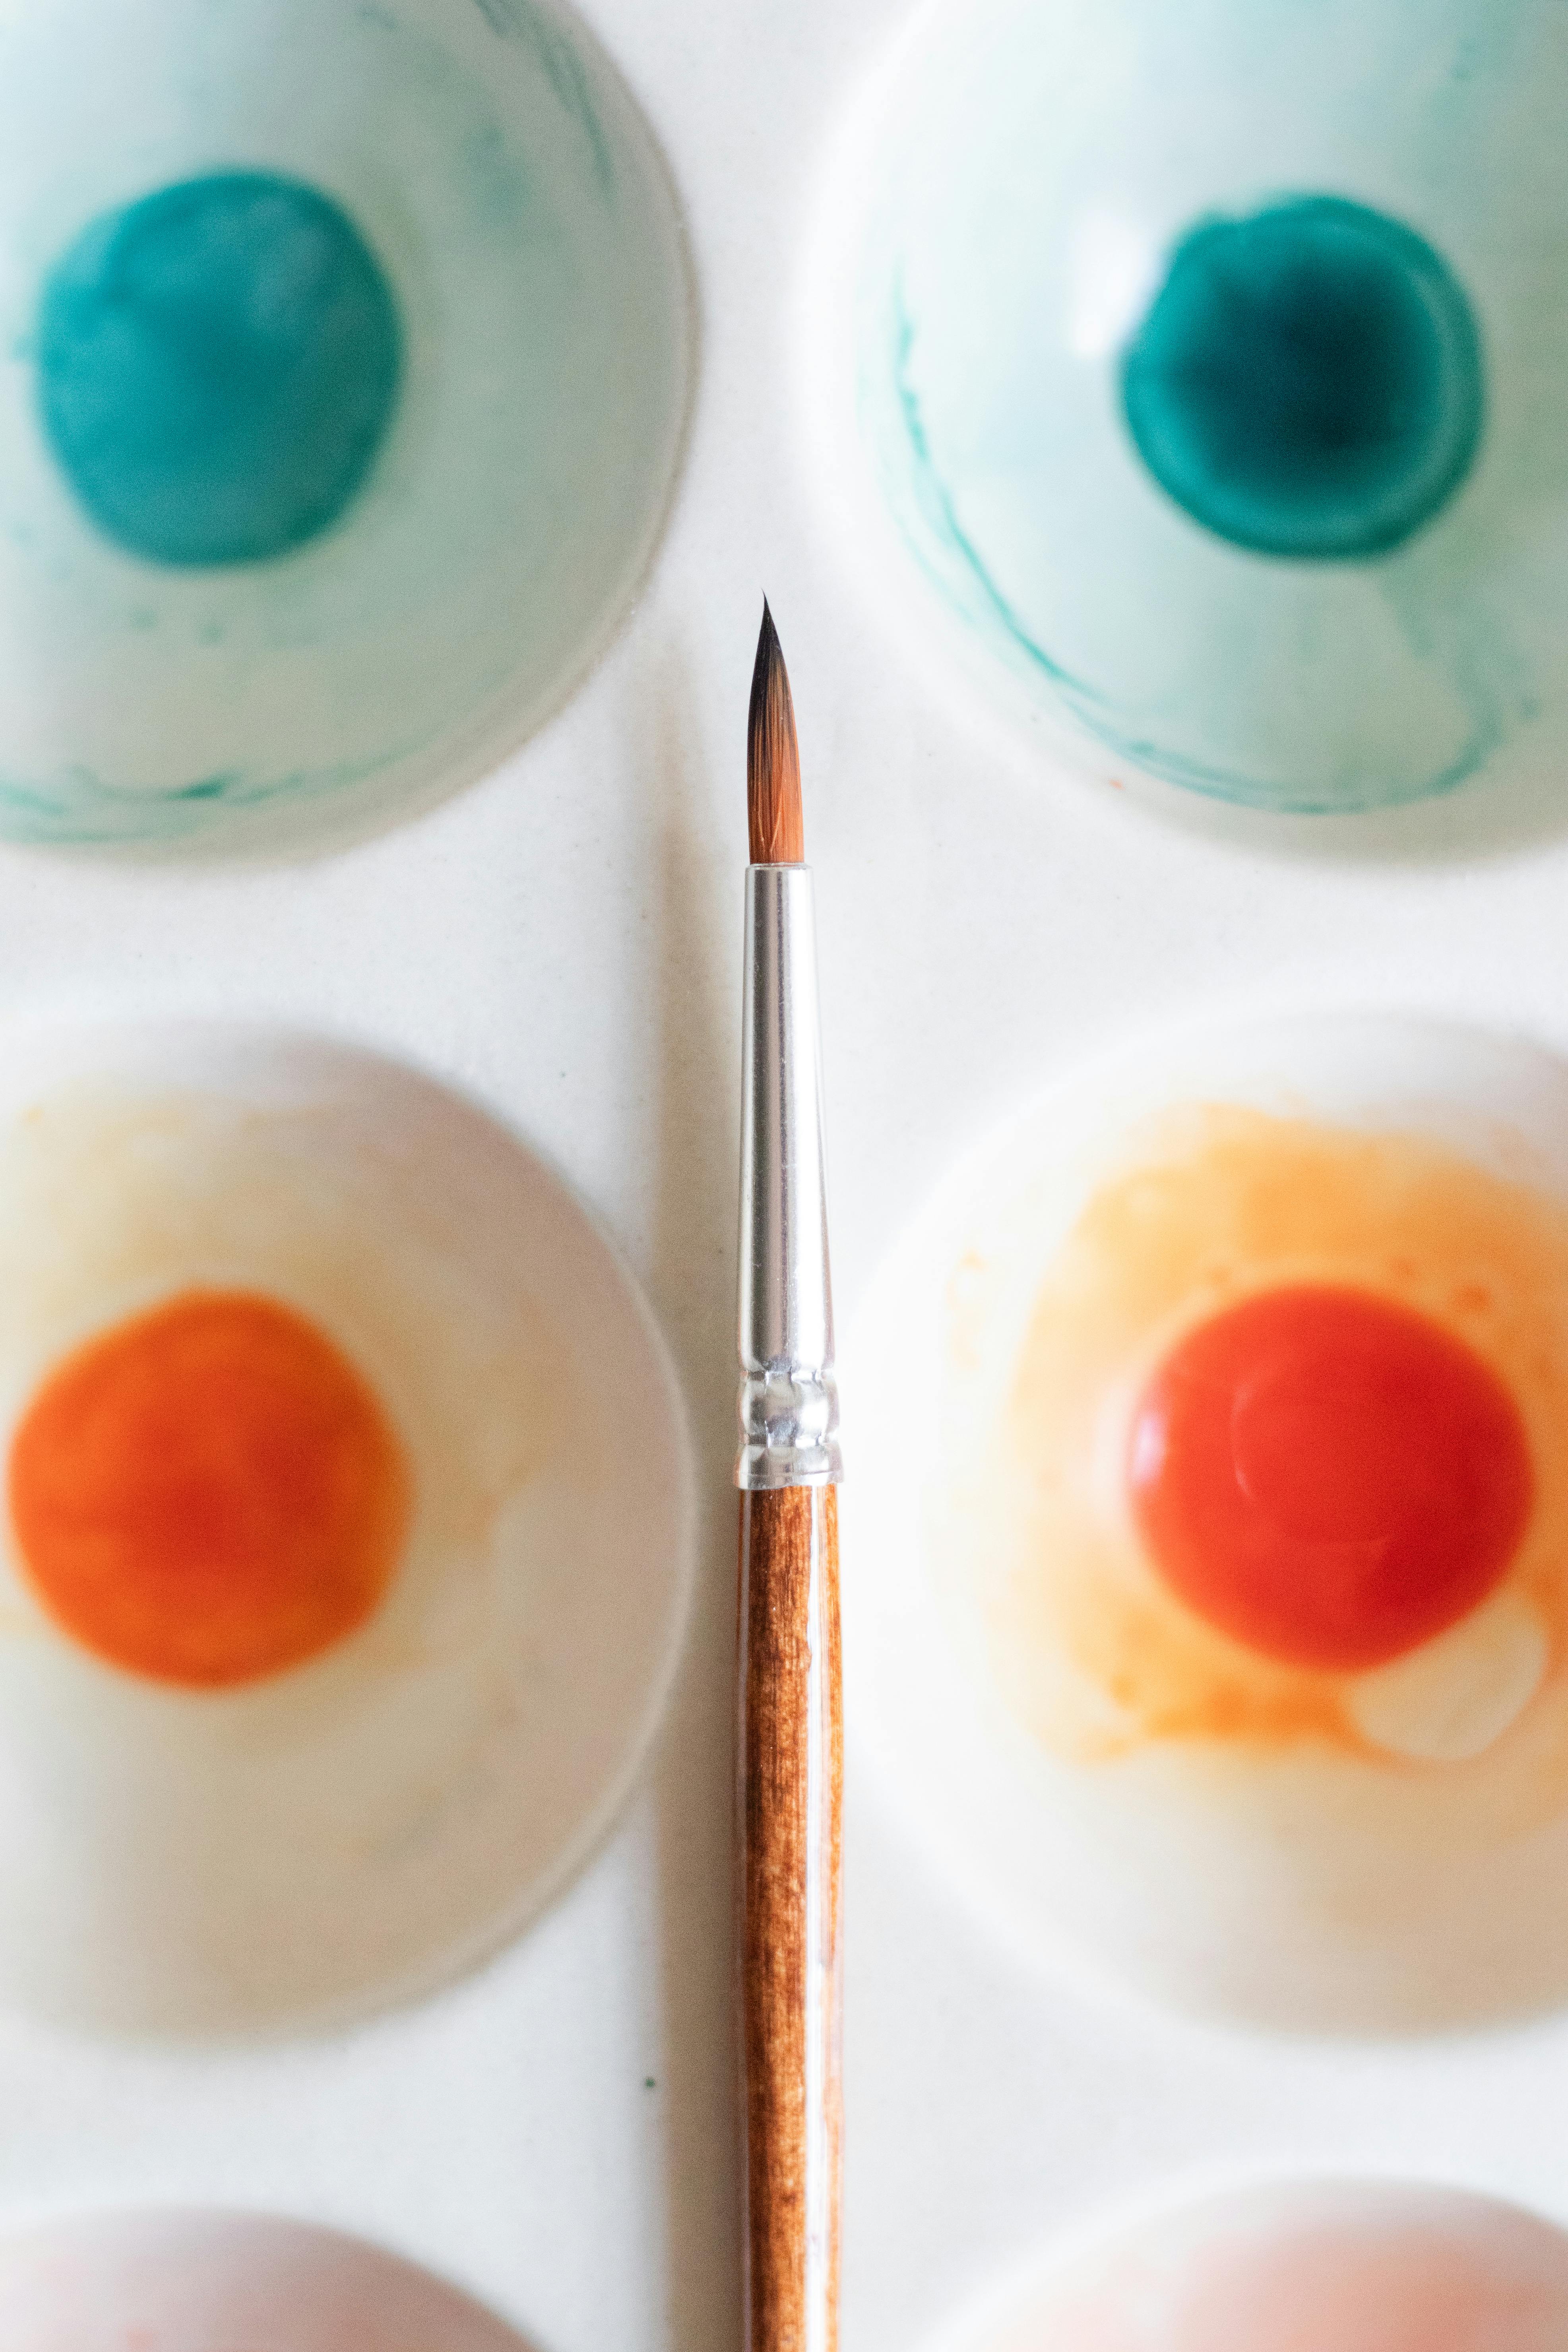