DIY Gesso Guide for Artists: Make Your Own Canvas Primer
Learn how to make your own gesso at home! This comprehensive DIY guide shares my personal recipe, tips for customizing, and why homemade gesso can transform your art practice.
The Ultimate DIY Gesso Guide: Crafting Your Perfect Canvas (And Why It's a Game-Changer!)
It's a connection to centuries of artists who've prepared their own grounds, a profound act of taking control from the very first layer. And honestly, it's a quiet rebellion in a world of mass-produced art supplies, a reclaiming of the craft. Before you even think of dipping a brush into that beautiful acrylic or oil, there's this quiet hero working behind the scenes: gesso. We all use it, most of us buy it, and honestly, for years, I did too. It felt like one of those things you just… acquire. But then, a few years back, I found myself in a pinch—running low, on a tight budget, and with a looming deadline. What started as a desperate scramble turned into a delightful journey into the world of DIY gesso, and let me tell you, it's been a game-changer for my art practice, particularly in bringing my abstract art visions to life. This journey isn't just about saving money; it's about connecting deeply with your materials, understanding their essence, and customizing your art from the very first layer. It’s about taking true control, a feeling I absolutely love when creating my unique pieces.
What is Gesso, Anyway?
Historically, the term "gesso" (from the Italian for "gypsum" or "chalk") referred to traditional grounds made with animal glue and gypsum or chalk, primarily used for tempera and oil painting on rigid supports. These grounds were hard, brittle, and highly absorbent, perfect for fine detail. But today, when most artists talk about gesso, we're usually referring to acrylic gesso – a flexible, modern version that's much more versatile. It's the unsung hero, the invisible scaffolding that gives your artwork its enduring strength and character. If you've ever wondered what gesso really is and why it's so important, I've got a whole other piece on what is gesso in painting that dives deep.
Before we dive into the 'how-to,' let's quickly clarify: gesso (pronounced 'jess-oh') is essentially a primer, a preparatory coating applied to a surface before painting. It creates a slightly absorbent, uniformly textured ground that allows paint to adhere beautifully, enhances its vibrancy, and protects your support. Think of it as the unsung hero, the invisible scaffolding that gives your artwork its enduring strength and character. If you've ever wondered what gesso really is and why it's so important, I've got a whole other piece on what is gesso in painting that dives deep.
Why DIY Gesso? My Journey from Store-Bought to Homemade
I remember standing in the art supply store, staring at rows of gesso containers, feeling a slight pang in my wallet. Especially when I was working on larger abstract art pieces that demanded multiple layers of primer and texture. It felt like a necessary expense, but also… a bit generic. Every canvas started with the same factory-produced base. It lacked a certain... personal touch. It felt like a small disconnect, a silent compromise in the very first layer. I remember working on a series of large, textured pieces, and feeling like the uniform smoothness of store-bought gesso was fighting against the raw, expressive quality I was aiming for. I craved a ground that felt as authentic and personal as the paint I was about to apply, something that whispered my artistic intent from the very start. This subtle friction, this feeling of something being 'off', was what truly pushed me to explore alternatives. It wasn't just about saving money; it was about injecting more of myself into every single artwork, right from the foundational layer. This deep craving for unique tactile experiences led me to explore exploring texture: my favorite techniques for adding depth to abstract paintings in a whole new way. It was a subtle friction, but noticeable. This made me crave something more tailored, something that resonated with the unique spirit I wanted to infuse into every artwork. It's not just about the paint you apply; it's about the entire journey, starting from the very foundation.

One day, after reading an old artist's journal (yes, I'm a bit of a history nerd, as you might gather from my visits to the den-bosch-museum and my fascination with art timeline), I stumbled upon a recipe for homemade gesso. The idea was immediately appealing. Could I really make something comparable, or even better, with simple, readily available ingredients? The thought of crafting my own foundation felt incredibly liberating.
The answer, I quickly discovered, was a resounding yes. In fact, it often surpassed my expectations, offering advantages that store-bought versions couldn't.
The Philosophy of Self-Sufficiency: Reclaiming the Craft
For me, making my own gesso taps into a deeper philosophical current within art. It's a return to the roots, to a time when artists were artisans, intimately involved in every stage of their craft, from grinding pigments to preparing canvases. There's a profound satisfaction, almost a spiritual connection, in knowing you've built your surface from the ground up. It fosters a sense of self-reliance and deep understanding of your materials that can be incredibly empowering. This isn't just about utility; it's about embedding intention, care, and a little bit of your own soul into the very foundation of your work. It's a quiet act of rebellion against the consumer-driven art world, a personal investment that resonates throughout your entire creative process. This philosophy extends beyond gesso; it's why I'm fascinated by the stories of artists who prepared their own paints, like the Old Masters, and how their connection to materials influenced their unique definitive guide to paint types for artists.
The biggest revelation was the control it gave me. Store-bought gesso is usually quite smooth and consistent, which is great for some applications. But for my abstract work, I often crave texture, a certain tooth, a specific level of absorbency – elements that profoundly influence the final aesthetic. With homemade gesso, I could tweak the recipe to get exactly what I wanted. It felt like I was truly building my surface from the ground up, not just buying a pre-made foundation. This control over the very first layer of my painting, its texture and feel, has been instrumental in my exploring texture: my favorite techniques for adding depth to abstract paintings.
And the cost? Oh, the cost savings were substantial, especially when preparing large batches for multiple panels or canvases. It freed up a bit of my art budget for more exotic pigments or that fancy new palette knife I'd been eyeing. It's truly empowering to know you can create your own high-quality materials. Beyond that, there's a profound satisfaction in understanding every component of your artwork, from the first layer to the final brushstroke. For me, it's about feeling a direct connection to the lineage of artists who, for centuries, ground their own pigments and prepared their own surfaces. This DIY approach echoes the innovative spirit of those who've always pushed the boundaries of their materials, a return to the roots, if you will, understanding the fundamental building blocks of art. Moreover, it's often a more environmentally conscious choice, significantly reducing the plastic waste associated with commercially packaged art supplies. Think about all those empty tubs! It's a small step, perhaps, but one that aligns with a broader commitment to sustainable art practices, lessening your art's footprint on the planet. I find a real satisfaction in knowing I'm doing my bit, even if it's just one less plastic tub in the bin. Plus, sourcing individual ingredients often means less overall processing and transportation compared to ready-made products, further reducing the environmental burden. It's a conscious choice that extends beyond the canvas, reflecting a holistic approach to my art and its impact on the world around me. And honestly, there's something incredibly meditative about the process itself, a mindful act that grounds me before I even make the first stroke of paint. It's almost a quiet ritual, connecting me to the physicality of creation, much like how I approach my abstract art with deliberate, mindful movements. This journey isn't just about saving money; it's about connecting deeply with your materials, understanding their essence, and customizing your art from the very first layer. It’s about taking true control, a feeling I absolutely love when creating my unique pieces.
Understanding the Ingredients: What Goes Into a Good Gesso?
Before we start mixing, let's chat about the stars of our gesso show. Think of it like cooking: you need to know your ingredients to make a truly great meal. And trust me, understanding these basics will make you a much more confident gesso-maker.
The Binder: PVA Glue is Your Friend

Every good gesso needs a binder—something to hold everything together and adhere it to your painting surface. For traditional gesso (which uses rabbit skin glue), it's animal-based. But for modern, flexible, and wonderfully simple acrylic gesso, we turn to PVA glue. This choice is not just about convenience; it's about creating a surface that works beautifully with contemporary paints, especially acrylics, and even oils, as we’ll discuss later in the definitive guide to paint types for artists.
PVA stands for Polyvinyl Acetate. It's essentially what white craft glue, like Elmer's, is made of. The beauty of PVA is that it's archival, flexible once dry (meaning it won't crack on your canvas), and readily available. When I first heard this, I was skeptical. Craft glue for fine art? It sounded too good to be true, but after trying it, I was totally convinced. It works beautifully, creating a stable, durable surface that holds paint remarkably well.
Make sure you get a good quality, acid-free PVA glue. The sort you'd use for bookbinding or general craft projects is usually perfect. Stay away from anything labeled 'washable' or 'school glue' as these often contain additives like plasticizers or emollients that can compromise the archival quality of your gesso, potentially leading to yellowing, brittleness, or cracking over time. These glues are designed for temporary adhesion and easy removal, which is the opposite of what we want for fine art that should last generations. Look for a strong, flexible PVA that dries clear and is explicitly stated as archival or permanent. Brands like Lineco or Golden offer professional-grade PVA emulsions specifically for art and conservation. This ensures your gesso creates a stable, long-lasting surface for your artwork. I've found that spending a little extra on a good PVA pays off in the long run, giving me peace of mind that my efforts won't yellow or crack down the line. Believe me, you don't want to see your hard work compromised years later because of a shortcut on the binder; I once had a small test piece yellow on me from a cheap, non-archival glue, and it was a harsh lesson! Professional art conservators, in fact, frequently use high-quality PVA in their restoration work, a testament to its long-term stability and archival properties. These glues are designed for temporary adhesion and easy removal, which is the opposite of what we want for fine art. Make sure you get a good quality, acid-free PVA glue. The sort you'd use for bookbinding or general craft projects is usually perfect. Stay away from anything labeled 'washable' or 'school glue' as these often contain additives like plasticizers or emollients that can compromise the archival quality of your gesso, potentially leading to yellowing, brittleness, or cracking over time. These glues are designed for temporary adhesion and easy removal, which is the opposite of what we want for fine art that should last generations. Look for a strong, flexible PVA that dries clear and is explicitly stated as archival or permanent. Brands like Lineco or Golden offer professional-grade PVA emulsions specifically for art and conservation. This ensures your gesso creates a stable, long-lasting surface for your artwork. I've found that spending a little extra on a good PVA pays off in the long run, giving me peace of mind that my efforts won't yellow or crack down the line. Believe me, you don't want to see your hard work compromised years later because of a shortcut on the binder; I once had a small test piece yellow on me from a cheap, non-archival glue, and it was a harsh lesson! Professional art conservators, in fact, frequently use high-quality PVA in their restoration work, a testament to its long-term stability and archival properties. These glues are designed for temporary adhesion and easy removal, which is the opposite of what we want for fine art. Look for a strong, flexible PVA that dries clear and is explicitly stated as archival or permanent. This ensures your gesso creates a stable, long-lasting surface for your artwork. I've found that spending a little extra on a good PVA pays off in the long run, giving me peace of mind that my efforts won't yellow or crack down the line. Think of it as an investment in the longevity of your art. Believe me, you don't want to see your hard work compromised years later because of a shortcut on the binder; I once had a small test piece yellow on me from a cheap, non-archival glue, and it was a harsh lesson! Professional art conservators, in fact, frequently use high-quality PVA in their restoration work, a testament to its long-term stability and archival properties.
The Pigment/Filler: Calcium Carbonate is Your Tooth Fairy
Next up, we need some bulk and a bit of 'tooth' – that subtle texture that helps your paint adhere. This is where calcium carbonate comes in, often sold as whiting, marble dust, or even powdered chalk. It's essentially a fine, white powder that provides opacity and creates a receptive surface for your paint. Think of it like a microscopic landscape with tiny peaks and valleys that grip your brushstrokes, much like the way a good textured canvas interacts with your basic brushstrokes for acrylic painting.
I remember the first time I used real marble dust; the difference in the feel of the canvas was immediate. It wasn't just smooth; it had this lovely, almost velvety resistance. You can adjust the fineness of the powder to control the texture of your gesso. Finer powders create smoother surfaces, while coarser ones give you more pronounced texture. It’s all about what your art demands, right? For my abstract pieces, I often gravitate towards a medium-to-coarse grind, as it enhances the tactile quality of the finished work and allows me to build up rich impasto effects. And for those of us who love to explore exploring texture: my favorite techniques for adding depth to abstract paintings, this is where the magic really happens. Different grades of calcium carbonate, from fine chalk to coarser marble dust, offer a spectrum of textural possibilities. You might even find ground quartz, pumice, talc, or even a small amount of fine sand for an even more abrasive surface, though always test these for compatibility and archival safety. The fineness of these particles is what really dictates the tooth; a very fine grind feels almost like velvet, while a coarser one offers a satisfying drag to the brush. Historically, artists used chalk, gypsum, or even toxic lead white as fillers, so you're continuing a very long tradition of surface preparation, just with safer, more modern materials! Beyond calcium carbonate, other artist-grade fillers you might encounter or experiment with include gypsum (Plaster of Paris, though needs careful handling and not always recommended for flexible supports due to its hardness), talc (often used for smoother, silkier surfaces), kaolin clay (adds a silky feel and absorbency), or even a small amount of fine-grade silica for a very aggressive tooth. You could also try fine pumice powder for a subtle abrasive quality, or a tiny amount of very fine quartz sand for a more pronounced gritty texture. Each imparts a slightly different tactile experience and absorbency, allowing for truly bespoke surfaces. This tactile control is truly a game-changer for me, especially as I explore the definitive guide to texture in abstract art in my work.
The Diluent: Water, the Great Unifier
Finally, we need something to bring it all together and achieve the right consistency: water. Simple, right? But it's crucial. Distilled water is often recommended to avoid any impurities like chlorine, minerals, or bacteria that might react with your ingredients over time, potentially causing discolorations, mold growth, or even subtle chemical degradation of the binder. Though for most purposes, good quality filtered tap water is often acceptable, I tend to err on the side of caution with distilled water, especially if I'm making a large batch or if my local tap water is particularly hard. The mineral content in hard tap water can sometimes lead to subtle discolorations over many years, or even slight chemical reactions with your binder, potentially impacting the archival quality. Water allows the PVA glue to be spreadable and helps the calcium carbonate mix evenly, preventing lumps, and facilitating the crucial curing process of the PVA binder. It's the silent partner, ensuring everything flows beautifully and maintains its integrity over time, allowing the polymer chains in the glue to properly cross-link and harden. In a subtle way, the pH of your water also plays a role. Slightly acidic or alkaline tap water might interact with certain pigments or binders over decades, though this is a very fine point for the most diligent archivists among us! For the absolute highest archival standards, some conservators even opt for deionized water to eliminate all mineral content, ensuring a truly inert mixing environment. But understanding the chemistry just a little bit empowers you, doesn't it?
Getting the water ratio right is often a matter of feel, almost an intuitive process. Too little, and your gesso is thick and clumpy, making it hard to apply evenly. Too much, and it's watery, losing its opacity and tooth, essentially diluting its priming power. It's a dance, a gentle addition and stirring until you hit that sweet spot. I often start with less, knowing I can always add more, but taking it away? That’s a trickier proposition! Think of it like baking; you can always add more flour, but taking it out once mixed is a whole different challenge.
Optional Additives: Customizing Your Craft
While PVA, calcium carbonate, and water form the core, there are a few optional additives you might consider, depending on your specific needs or artistic preferences. Think of these as the spices in your gesso recipe, enhancing certain qualities:
- Acrylic Medium: Adding a small amount of best acrylic mediums for abstract artists can significantly increase the flexibility of your gesso once dry. This is particularly useful if you're working on highly flexible supports like canvas that might be rolled, stretched, unstretched, or subjected to environmental fluctuations. The polymers in the acrylic medium intertwine with the PVA, creating a more elastic film that is less prone to cracking and brittleness over time. It can also enhance adhesion and create a slightly smoother, more refined finish, which can be desirable for certain styles of painting where a very delicate, seamless surface is required. You can experiment with different types too: a fluid matte medium can maintain absorbency while adding flexibility and a subtle matte finish, while a gloss medium might create a slightly less absorbent, smoother, and more luminous finish, altering the way your paint sits on the surface. You could also consider a tiny drop of flow improver (an additive used in acrylics to reduce surface tension) to help the gesso self-level even more smoothly, though use sparingly to avoid compromising adhesion. Each type of medium brings a nuanced change to the final surface, inviting further experimentation.
- Fungicide/Mold Inhibitor: If you live in a humid environment or plan to store large batches of gesso for extended periods, a small amount of artist-grade fungicide (available at most art supply stores or preservation suppliers) can prevent unsightly and damaging mold growth. This is a practical consideration, especially for artists who prepare large quantities in advance and want to ensure the longevity of their homemade supplies. I once had a batch go fuzzy – a truly disheartening sight and a complete waste of materials and effort! A tiny drop, following the manufacturer's instructions carefully, can save you a lot of grief and protect your artistic investments. While commercial fungicides are highly effective, some artists have experimented with very small amounts of natural anti-microbial agents like clove oil, thyme oil, or even a tiny amount of natural grain alcohol (isopropyl alcohol can also work, but check compatibility) to deter mold. However, their long-term archival safety and interaction with PVA is less established and requires careful testing and proper dilution. Personally, I stick to artist-grade formulations for peace of mind and proven longevity.
- Tinting: While not strictly an additive for function, adding a tiny bit of artist-grade acrylic paint to your gesso allows you to create a tinted ground. This can be fantastic for establishing a mood and influencing the entire color theory of your painting from the very first layer, or if you simply prefer to work on a colored surface rather than stark white. Think about how a warm ochre base could infuse a landscape with an autumnal glow, or a deep blue could set a moody, contemplative tone for an abstract piece. A subtle grey can be invaluable for portraiture, helping you judge skin tones more accurately, while a vibrant red or orange can create a dynamic, energetic background for an expressive abstract, allowing underlying hues to peek through. Just be sure to use artist-grade acrylics to maintain archival quality and avoid compromising the gesso's structural integrity. A little goes a long way; remember that white gesso will lighten any color you add, creating more muted, pastel versions of the original pigment! For my own work, I often lean into a subtle Payne's Grey or Raw Umber as a base – it's amazing how a foundational color can inform all your subsequent color mixing decisions. For instance, a warm sienna ground can add a luminous glow to cool blues and greens, while a cool grey can intensify the vibrancy of warm reds and yellows. A subtle Payne's Grey or Raw Umber can serve as a sophisticated neutral base, allowing your colors to pop without the starkness of pure white. Understanding these subtle interactions is a powerful tool for controlling the overall mood and light of your finished piece.
Ingredients at a Glance: Your Homemade Gesso Shopping List
To make things easier, here's a quick summary of what you'll typically need. Think of it as your grocery list for a perfectly primed canvas:
Ingredient | Purpose | Notes | Approx. Ratio (by volume, initial) | Where to Find It | Typical Cost | Safety Notes |
|---|---|---|---|---|---|---|
| PVA Glue | Binder; adheres gesso to surface | Acid-free, good quality craft or bookbinding glue | 2 parts | Art supply stores, craft stores, hardware stores, bookbinding suppliers | Medium to High | Generally non-toxic; wash hands |
| Calcium Carbonate | Filler; provides opacity and tooth (texture) | Whiting, marble dust, powdered chalk (various grinds) | 1 part (adjust for texture) | Art supply stores, pottery suppliers, sculpture suppliers, online specialty stores | Low to Medium | Wear a dust mask/respirator |
| Water | Diluent; achieves desired consistency | Distilled water recommended, tap water often fine | 1-2 parts (adjust for consistency) | Your tap! (or grocery store for distilled) | Very Low | N/A |
| Acrylic Medium | (Optional) Increases flexibility and adhesion | Use artist-grade | Small amount (e.g., 10%) | Art supply stores | Medium to High | Generally non-toxic; wash hands |
| Fungicide | (Optional) Prevents mold growth | Especially for humid climates or long storage | Tiny drop (follow instructions) | Art supply stores, preservation suppliers, chemical suppliers | Medium | Follow manufacturer's instructions |
| Acrylic Paint | (Optional) For tinting the gesso | Use artist-grade; small amounts only | Tiny amount (to desired hue) | Art supply stores, general craft stores | Low to Medium | Generally non-toxic; wash hands |
Getting Started: What You'll Need to Mix Your Masterpiece
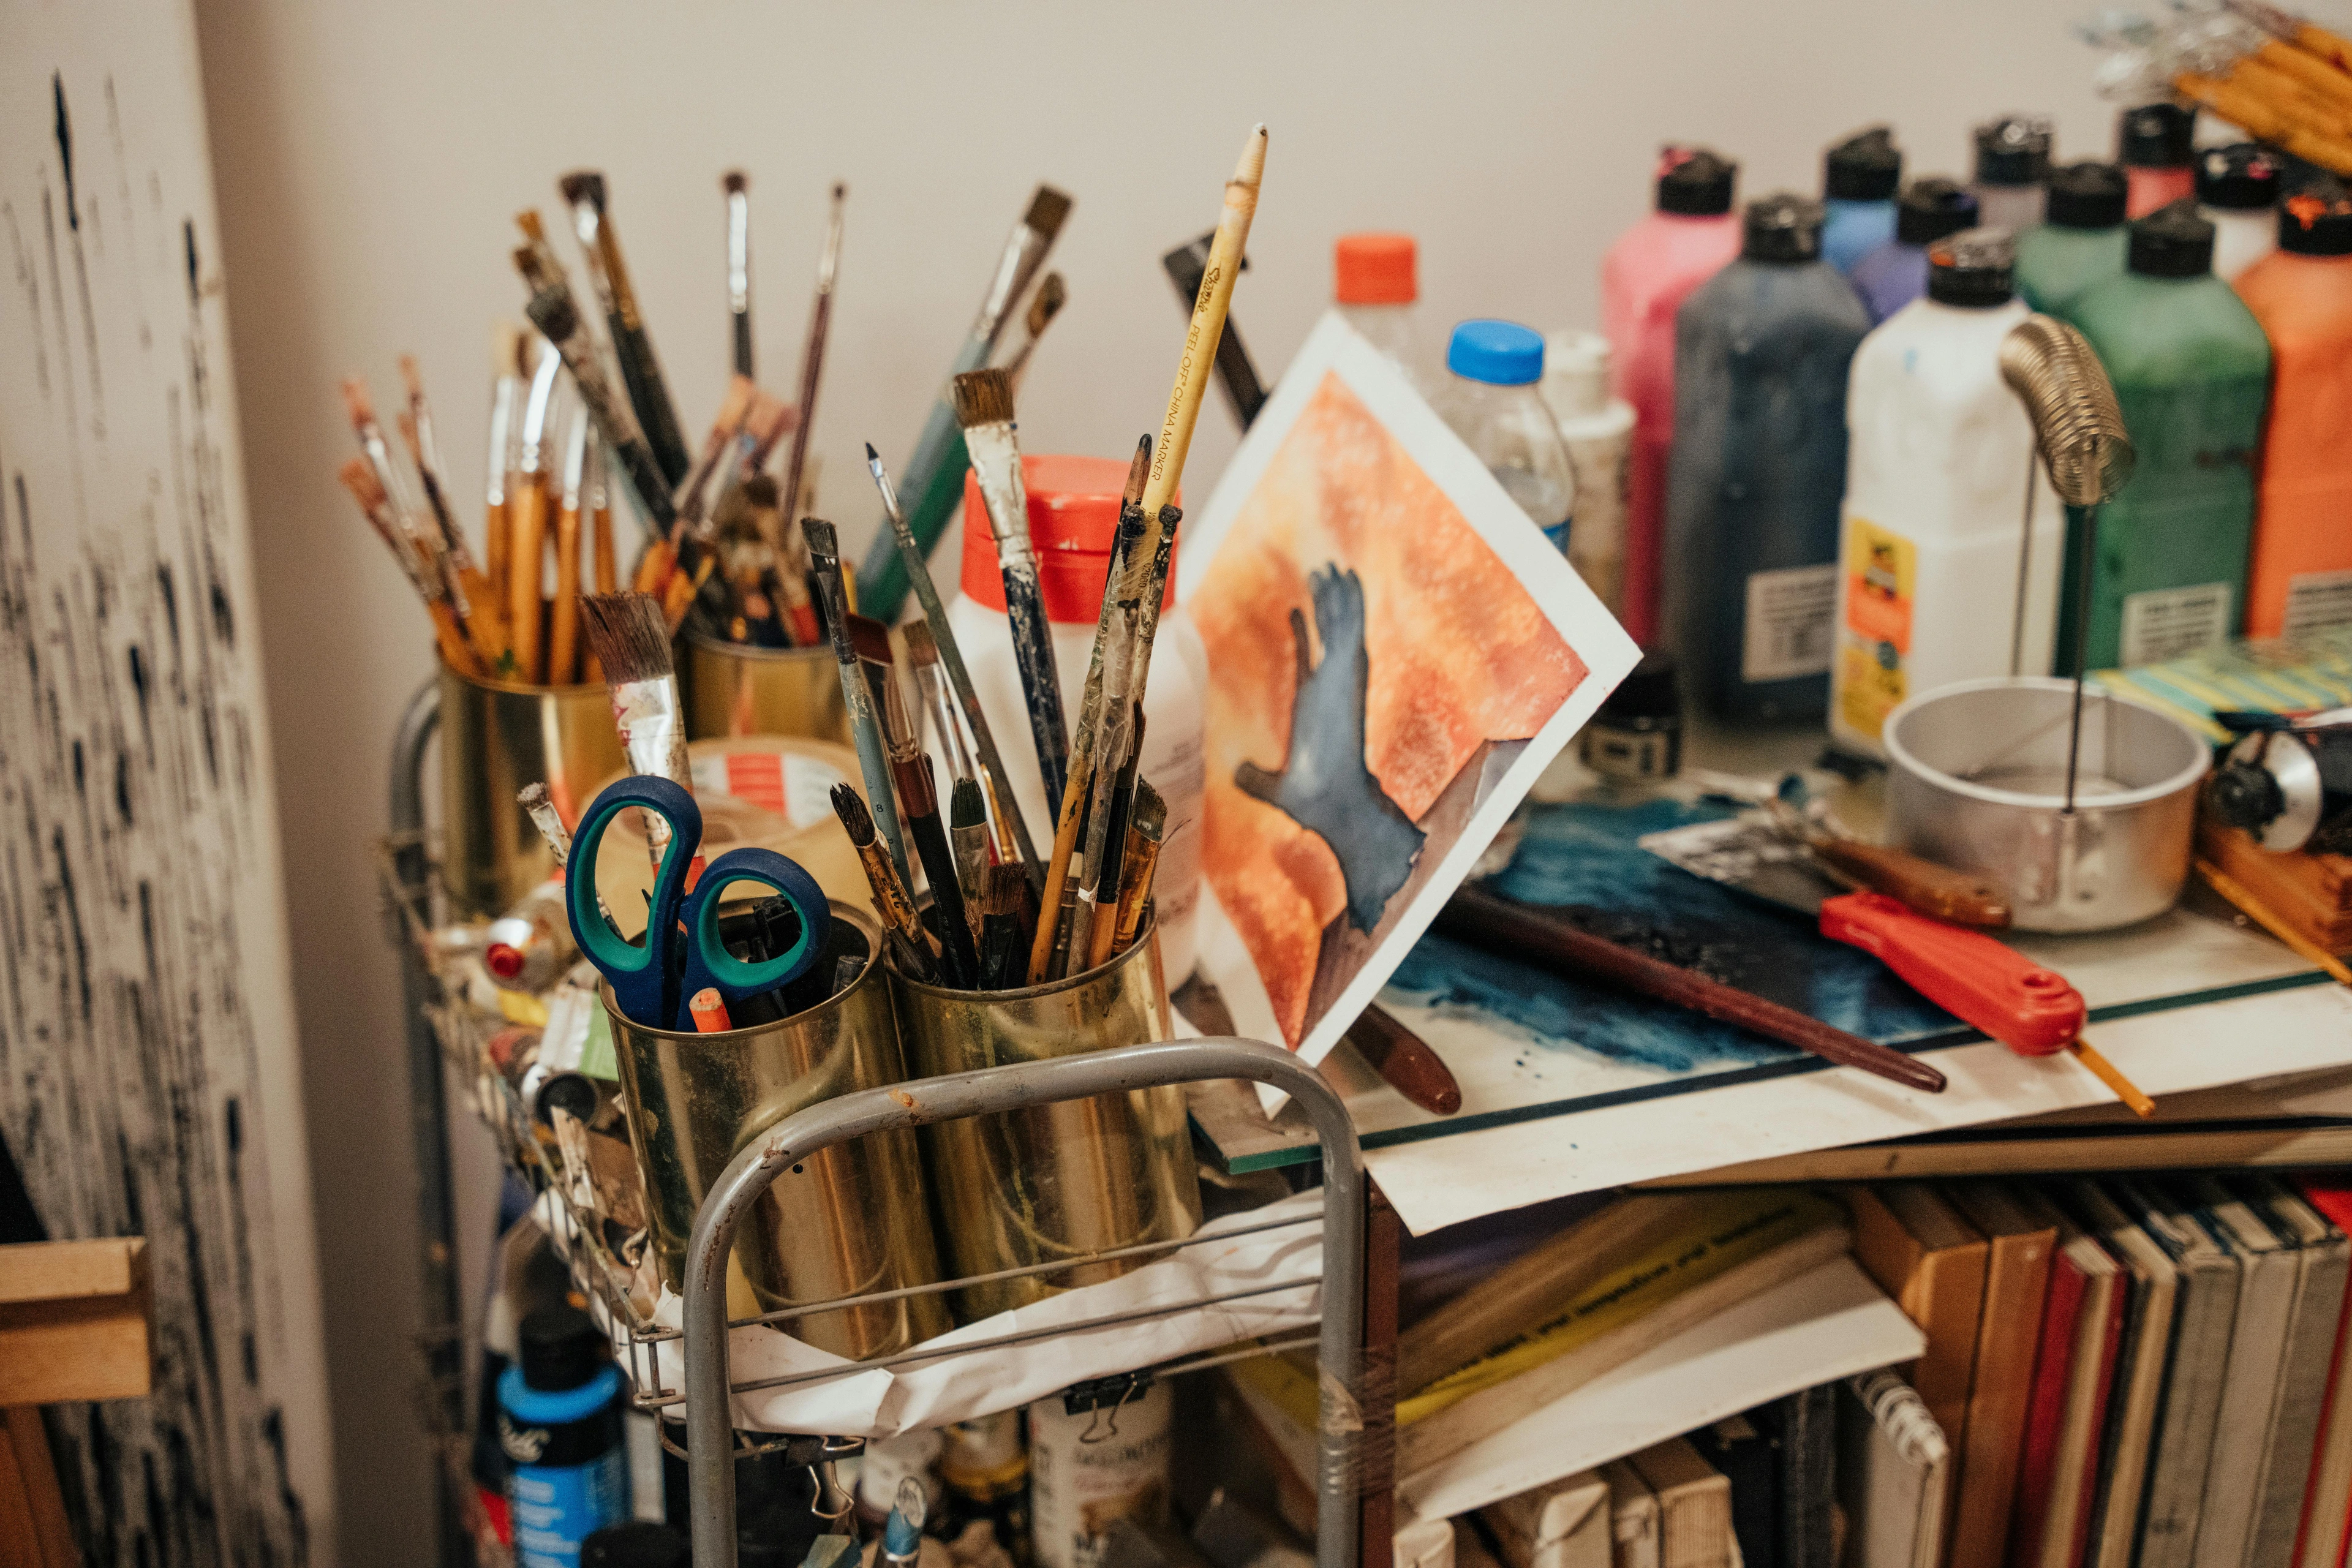
Before we dive into the delightful mess of mixing, let's make sure you have all your tools ready. This isn't brain surgery, but having everything at hand makes the process smooth and enjoyable. Trust me, rummaging for a spoon with wet gesso on your hands is not ideal – I’ve been there, covered in white goo, desperately trying to find a clean cloth!
Here's your essential toolkit, the items that will transform you into a gesso alchemist:
- Large mixing container: An old plastic container, a sturdy bowl, or even a clean bucket works perfectly. Just make sure it's big enough to hold your mixture and allow for vigorous stirring without splashing. I often use a dedicated 1-gallon plastic paint bucket for larger batches. And a quick tip: even if you think you'll clean them later, try to designate specific 'gesso tools.' This isn't just about preserving your kitchenware; it's also about preventing cross-contamination with food items or other art materials that might not be compatible. There's nothing worse than ruining a good kitchen whisk with dried gesso, or worse, inadvertently introducing a non-archival substance into your art supplies! Having dedicated tools ensures consistency and prevents headaches down the line.
- Measuring cups and spoons / Digital Scale: For accurate ratios, especially if you're starting out or trying a new recipe. I tend to eyeball it these days, after years of practice, but precision is your friend for repeatable results and consistent batches. A kitchen scale or digital scale can be incredibly useful for measuring powders and liquids by weight, which is often more accurate, especially when trying to replicate a perfect batch. I started with cups and spoons, but for true consistency, weighing ingredients is the way to go, offering a level of precision that is hard to beat with volume measurements. This helps ensure your gesso batches are consistently perfect, time after time.
- Stirring sticks or a whisk: A sturdy paint stirring stick, an old kitchen whisk, or even a strong spatula. Avoid anything precious, as it will get gesso-y! I have a set of cheap plastic whisks specifically for art projects.
- Gloves: While gesso is generally non-toxic, it can be a bit sticky and messy, and prolonged skin contact with raw ingredients isn't ideal. Gloves save your hands from a thorough scrubbing and protect any delicate skin.
- Respirator or dust mask: Crucial when working with powdered calcium carbonate. You do not want to inhale fine dust particles, as they can irritate your lungs. Your lungs will thank you for this simple safety precaution.
- A well-ventilated area: Mixing powders can create dust, so work outdoors or in a space with good airflow, perhaps near an open window. Good ventilation also helps the gesso cure properly.
- A fine-mesh sieve (optional but highly recommended): To ensure a super smooth gesso, straining can catch any stubborn lumps that resisted your stirring efforts. It’s like a secret weapon for creamy consistency.
- Airtight storage containers: If you plan to make more than you'll use immediately, having clean, airtight containers ready is key for extending shelf life. Old plastic food containers work great. And a pro tip: consider designating specific containers and tools only for gesso. It saves a lot of hassle trying to get thoroughly dried gesso off your good kitchenware!
The Mixing Process: Your Step-by-Step Guide to Gesso Glory
Alright, hands on! This is where the magic happens. Don't be afraid to get a little messy; that's part of the fun, right? My first batch looked a bit like lumpy oatmeal, I'm not going to lie! I think I added all the water too fast. But with a little patience, you'll get a beautifully smooth consistency.
Step 1: Combine the Dry Ingredients (Carefully!)
In your large mixing container, slowly add your calcium carbonate. This is where your respirator or dust mask becomes absolutely non-negotiable! You do not want to inhale these fine particles, which can irritate your lungs and cause long-term health issues. Gradually add any powdered optional additives (like powdered fungicide or even a fine pigment for a pre-tinted base) and stir them together thoroughly until they're completely combined and uniform. This crucial step prevents stubborn lumps later on when you introduce liquids. For an extra smooth finish, I sometimes even sift the calcium carbonate through a very fine mesh sieve before combining it with other dry ingredients, just to break up any tiny aggregates that might have formed in storage. This makes the initial dry mixing even more effective. I usually use an old, dedicated spoon or a small trowel for this part, making sure there are no hidden pockets of dry powder, especially at the bottom of the container. If you're using a very coarse filler or experimenting with grinding your own pigments for tinting, a mortar and pestle can be surprisingly useful in this initial stage, ensuring a truly homogenous dry blend before liquids are introduced.
Step 2: Introduce the Wet Elements
Now, pour in your PVA glue. If you're adding any liquid acrylic medium (which I often do for extra flexibility, especially on canvas), you can add it here too. Give it a gentle but firm preliminary stir to start incorporating the glue with the dry mixture. It might look a bit thick and uncooperative at this stage, almost like very stiff dough or thick paste. Don't fret; this is perfectly normal. The binder needs time to start absorbing those dry particles, so don't rush it and try to force it into a smooth consistency right away; that comes next!
Step 3: The Great Stir-Fest: Achieving Smoothness
This is where the elbow grease comes in! Slowly, gradually, begin to add water, a little bit at a time, while continuously stirring. Your goal is to break down any lumps and create a smooth, creamy consistency, similar to heavy cream or a thin yogurt. It takes patience, almost a meditative rhythm. I often switch between a sturdy stirring stick and an old kitchen whisk to really get in there and break up any stubborn bits. If you're finding lumps persist, run the mixture through your fine-mesh sieve; it's a lifesaver for truly silky gesso. Don't be shy about pressing any stubborn clumps through the mesh with a spoon or spatula to ensure everything is incorporated! Don't be shy about pressing any stubborn clumps through the mesh! If you're making a very large batch and find that lumps are still incredibly stubborn despite your best stirring and sieving efforts, a very brief pulse with an immersion blender (again, dedicated to art supplies, and never for food again!) can work wonders. Just be careful not to incorporate too much air, which can lead to bubbles, and pulse rather than blend continuously.
Step 4: Adjusting Consistency: The Artist's Touch
The perfect gesso consistency is largely a matter of personal preference and how you plan to use it. Do you want a thick, textural base, or a smooth, almost invisible primer, perhaps for fine detail work or glazing? This is where you fine-tune the mixture. Continue adding tiny amounts of water, stirring well after each addition, until you reach your desired viscosity. Remember, you want it to be brushable, but not so thin that it loses its opacity and body, as that would defeat its priming purpose. This consistency directly impacts the flow and drag of your brush on the surface. A thicker gesso will offer more resistance and build texture more quickly, which can be fantastic for impasto or expressive techniques. Conversely, a thinner consistency will glide more easily, creating a smoother, more subtle film. A good visual cue is to dip a stirring stick into the gesso: it should coat the stick completely but drip off slowly, like warm honey or heavy cream, not run off like water. Achieving this 'just right' consistency is a hallmark of a skilled gesso-maker. When I'm working on large, expressive pieces, I might keep it a little thicker to build texture, almost like a thin paste, which complements my what is impasto painting techniques or if I'm planning to work with exploring oil sticks for expressive mark-making. For finer work, such as delicate glazing or detailed realism, I'll thin it out more, sometimes to the consistency of melted ice cream, aiming for a porcelain-smooth finish. It's truly your creative control coming into play, shaping the very foundation for your artistic vision.
Ratio Guidelines (A Starting Point, Not a Strict Rule!)
While consistency is an intuitive dance, having a starting point can be helpful, especially when you're first dabbling in DIY gesso. I often begin with a ratio that gives me a medium-bodied gesso, then adjust from there. Think of these as suggestions, not commandments:
- PVA Glue: 2 parts
- Calcium Carbonate: 1 to 1.5 parts (start with 1, add more for extra tooth)
- Water: 1 to 1.5 parts (add gradually until desired consistency)
For example, if I'm using measuring cups, I might start with two cups of PVA, one cup of calcium carbonate, and then slowly add water. The goal is a pourable, brushable liquid that isn't too thin to provide good coverage, nor so thick that it drags or clumps. It should coat a stir stick thoroughly but drip off slowly. Remember, it's easier to add more dry ingredients or water than to take them away!

The Mixing Process: Your Step-by-Step Guide to Gesso Glory
Alright, hands on! This is where the magic happens. Don't be afraid to get a little messy; that's part of the fun, right? My first batch looked a bit like lumpy oatmeal, but with a little patience, you'll get a beautifully smooth consistency.
Step 1: Combine the Dry Ingredients (Carefully!)
In your large mixing container, slowly add your calcium carbonate. This is where your respirator or dust mask becomes absolutely non-negotiable! You do not want to inhale these fine particles. Gradually add any powdered optional additives (like powdered fungicide or even a fine pigment for a pre-tinted base) and stir them together thoroughly until they're completely combined and uniform. This crucial step prevents stubborn lumps later on when you introduce liquids. I usually use an old, dedicated spoon or a small trowel for this part, making sure there are no hidden pockets of dry powder, especially at the bottom of the container. If you're using a very coarse filler or experimenting with grinding your own pigments for tinting, a mortar and pestle can be surprisingly useful in this initial stage, ensuring a truly homogenous dry blend before liquids are introduced.
Step 2: Introduce the Wet Elements
Now, pour in your PVA glue. If you're adding any liquid acrylic medium (which I often do for extra flexibility, especially on canvas), you can add it here too. Give it a gentle but firm preliminary stir to start incorporating the glue with the dry mixture. It might look a bit thick and uncooperative at this stage, almost like very stiff dough or thick paste. Don't fret; this is perfectly normal. The binder needs time to start absorbing those dry particles, so don't rush it.
Step 3: The Great Stir-Fest: Achieving Smoothness
This is where the elbow grease comes in! Slowly, gradually, begin to add water, a little bit at a time, while continuously stirring. Your goal is to break down any lumps and create a smooth, creamy consistency, similar to heavy cream or a thin yogurt. It takes patience, almost a meditative rhythm. I often switch between a sturdy stirring stick and an old kitchen whisk to really get in there and break up any stubborn bits. If you're finding lumps persist, run the mixture through your fine-mesh sieve; it's a lifesaver for truly silky gesso. Don't be shy about pressing any stubborn clumps through the mesh!
Step 4: Adjusting Consistency: The Artist's Touch
The perfect gesso consistency is largely a matter of personal preference and how you plan to use it. Do you want a thick, textural base, or a smooth, almost invisible primer, perhaps for fine detail work or glazing? This is where you fine-tune the mixture. Continue adding tiny amounts of water, stirring well after each addition, until you reach your desired viscosity. Remember, you want it to be brushable, but not so thin that it loses its opacity and body, as that would defeat its priming purpose. When I'm working on large, expressive pieces, I might keep it a little thicker to build texture, almost like a thin paste, which complements my what is impasto painting techniques or if I'm planning to work with exploring oil sticks for expressive mark-making. For finer work, such as delicate glazing or detailed realism, I'll thin it out more, sometimes to the consistency of melted ice cream, aiming for a porcelain-smooth finish. It's truly your creative control coming into play, shaping the very foundation for your artistic vision.
Customizing Your Gesso: Tailoring Your Surface
One of the greatest joys of making your own gesso is the ability to customize it. You're not just creating a primer; you're designing the very foundation of your painting, perfectly suited to your artistic vision. This level of control, for me, is truly empowering. It's about making your materials work for you, rather than the other way around.
Adjusting the Tooth and Texture
Want a rougher surface that grabs your paint and allows for rich textures, perhaps for a bolder exploring oil sticks for expressive mark-making approach? Add a bit more calcium carbonate, or opt for a coarser grind of marble dust or even a small amount of fine sand (always test first for archival quality!). Prefer a smoother, almost polished feel for fine detail work or delicate glazing techniques? Use a finer powder and perhaps strain your gesso through a fine-mesh sieve multiple times. You can even experiment with very fine sand, ground quartz, or pumice for specific, more abrasive textural effects, though always test a small batch first to ensure compatibility and archival quality! I've even heard of artists using sawdust or finely ground nutshells for extremely rough textures, but these are definitely experimental and require careful research to ensure they won't compromise the artwork over time by degrading or leaching acids. This tactile control is something you simply don't get with most store-bought options, and it can profoundly influence how your paint behaves and how your finished piece looks and feels. It's like having a bespoke canvas for every artwork. For instance, a fine, velvety tooth, often achieved with very fine calcium carbonate or talc, works beautifully for subtle washes and blending, allowing for smooth transitions in color, ideal for delicate portraits or atmospheric landscapes. Conversely, a more aggressive texture, perhaps incorporating marble dust or a tiny amount of silica, can energize your brushstrokes, making colors 'skip' and creating broken color effects, perfect for expressive abstract work or the art of mark-making:-expressive-lines-and-gestures-in-abstract-painting. You can even experiment with adding very fine pumice powder for a subtle abrasive quality, or a small amount of fine sand for a more pronounced, almost gritty, texture, though always test for archival stability.
Controlling Absorbency
The absorbency of your gessoed surface profoundly affects how quickly your paint dries, how much it sinks into the surface, and ultimately, how vibrant and luminous your colors appear. A more absorbent gesso will 'drink' up paint more quickly, leading to faster drying times and often a more matte, fresco-like finish. This can be great for building up layers quickly, creating subtle washes, or if you prefer a less luminous quality. To increase absorbency, you can use a slightly higher ratio of calcium carbonate to PVA, or simply apply fewer, thinner coats. Conversely, a less absorbent surface (achieved with more PVA or more coats, or by using a specific acrylic sizing layer underneath) will allow paint to sit on top longer, giving you more blending time and often resulting in brighter, more saturated colors with a more luminous quality, especially with acrylics. It’s a delicate balance, and something I often adjust based on the paint types I plan to use. For instance, highly absorbent gesso is often preferred for watercolor, gouache, or tempera, speeding up drying times and creating a beautiful, velvety matte finish. Conversely, a less absorbent ground, with more PVA or an additional layer of acrylic medium, might be chosen for oil painting, allowing for longer open times and easier blending. For acrylics, a less absorbent surface ensures the paint sits on top, yielding brighter, more saturated colors with a more luminous quality, as the paint doesn't soak in as much. This control over absorbency is paramount, particularly when exploring delicate glazing techniques where you want layers of transparent color to build luminosity on the surface rather than disappear into it.
Tinting and Color Ground
Why settle for stark white? As an artist who loves the emotional language of color in abstract art, creating a tinted ground from the start can radically alter the mood, underlying harmonies, and even the luminosity of your painting. By adding a small amount of artist-grade acrylic paint to your gesso, you can create a subtle, middle-value ground – a warm grey, a soft blue, an earthy ochre, or even a deep muted green. This eliminates the intimidating starkness of a white canvas and provides an immediate atmospheric base. It can make subsequent layers of paint feel richer, help unify your entire palette, and even subtly influence your compositional choices from the very first stroke. Think of it as a pre-meditation on your final artwork's mood and a way to quickly establish a cohesive visual language. Just remember to add paint sparingly to avoid compromising the gesso's archival qualities; too much paint can dilute the gesso's binding properties and reduce its ability to act as a proper primer. I particularly love using a tinted ground when I'm working on the emotional language of color in abstract art pieces, as it sets the tone from the very beginning. A warm, reddish-brown ground, for example, can infuse an entire painting with a sense of earthy intimacy or raw passion, while a cool, blue-grey can evoke calm, distance, or mystery. It's a powerful psychological anchor for your art, a silent collaborator that guides your creative decisions. For instance, a subtle Payne's Grey ground can enhance the luminosity of subsequent cool colors, while a Raw Umber base can provide a beautiful warmth for portraits or landscapes. It's all about how you want your color harmonies to play out from the very beginning. Historically, artists like Rembrandt often worked on warm, reddish-brown grounds, which unified his palette and lent a deep, rich glow to his portraits. The Impressionists, on the other hand, sometimes used a light, neutral grey to better judge their subtle color shifts in natural light. For abstract artists like myself, a tinted ground can act as a psychological anchor, influencing not just color choices but also the emotional tenor of the entire piece from the first stroke.
Enhancing Flexibility and Durability
If you frequently work on flexible supports like canvas that might be rolled or transported, enhancing the flexibility of your gesso is a smart move. Adding a quality acrylic medium, as mentioned in our ingredients, can significantly improve the elasticity of the dried gesso, making it less prone to cracking. This is particularly important for larger works or pieces that might experience environmental fluctuations, or if you plan to ship your artwork frequently. Think of it as giving your canvas a bit of extra resilience at a molecular level, as the long polymer chains in the acrylic medium intertwine and cross-link with the PVA binder, forming a more elastic, cohesive film that can withstand movement without becoming brittle. Similarly, ensuring a good ratio of PVA to calcium carbonate contributes to overall durability, creating a robust, long-lasting surface that will protect your artwork for years to come. This also plays into controlling the sheen of your surface; more PVA and less calcium carbonate can result in a slightly smoother, sometimes subtly more satin finish, while a higher calcium carbonate ratio tends towards a matte finish. For works intended for outdoor display or pieces that will be exposed to significant light, you can even explore adding a tiny amount of artist-grade UV inhibitor to your gesso, offering an extra layer of protection against pigment fading and prolonging the life of your artwork, though this requires careful research into compatibility and application methods. It's a subtle but impactful customization for truly durable art.
Applying Your Homemade Gesso: Preparing for Brilliance
Once your gesso is perfectly mixed, the next step is to apply it to your chosen surface. This is where you transform a blank canvas or board into a receptive ground for your art. I've spent countless hours priming canvases, and there's something incredibly meditative about this preparation phase.
First, ensure your surface is clean and dust-free. Whether it’s a stretched canvas, a wooden panel, or heavy paper, a clean foundation is key to good adhesion. Even if you're starting with a commercially pre-primed canvas, a light sanding (220-grit) and then applying a layer or two of your homemade gesso can provide a more consistent, personalized, and often superior ground tailored to your preferences, especially if the store-bought primer feels too slick or too absorbent.
Applying to Canvas or Wood Panels
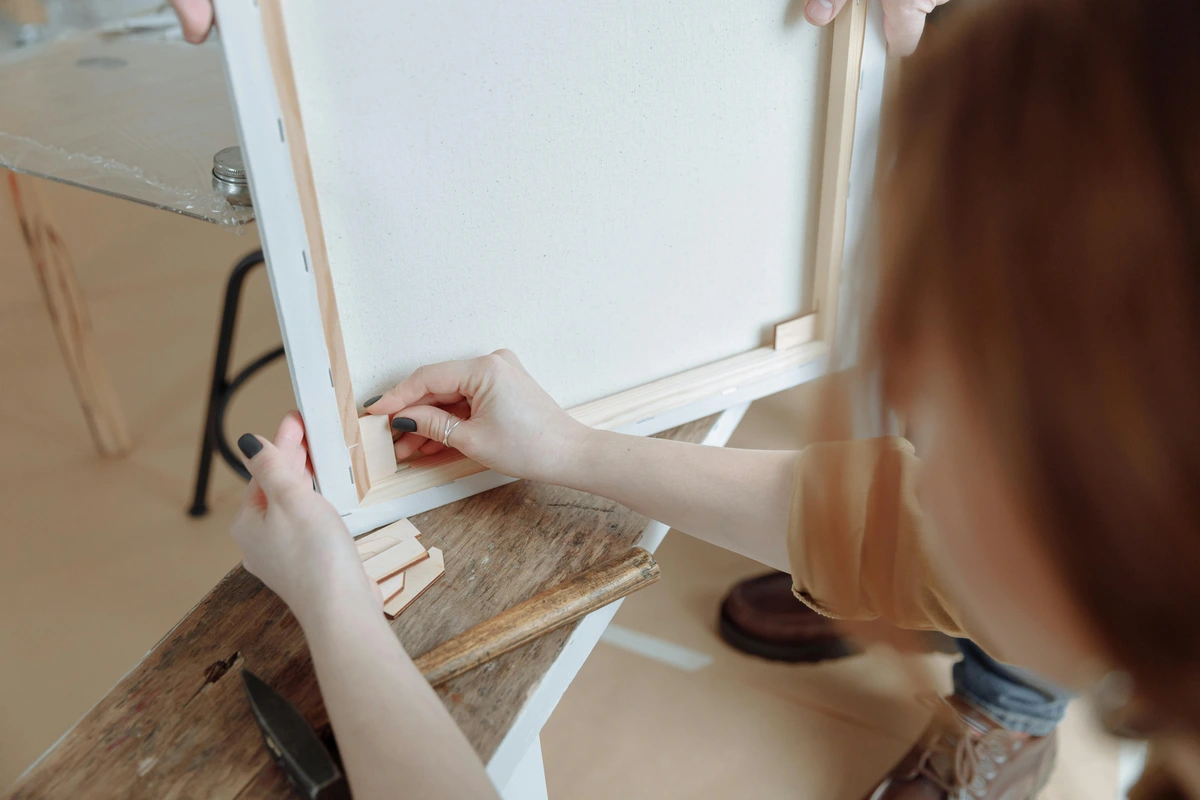
For canvases and wood panels, I like to use a wide, flat brush or a roller. This ensures even coverage and helps to eliminate brushstrokes if you're aiming for a smoother finish. Look for a good quality synthetic brush with soft, flexible bristles for the smoothest application, or a dense foam roller for very uniform results with minimal texture. Avoid cheap natural bristle brushes, as they can shed hairs into your gesso. Look for a synthetic brush with soft bristles for the smoothest application, or a foam roller for very uniform results. Apply your gesso in thin, even coats. The first coat can often be quite translucent, but don't worry, subsequent layers will build opacity. I always try to apply the first coat in one direction (say, horizontal) and the second coat perpendicular to it (vertical) to get maximum coverage and minimize visible lines. Let each coat dry completely before applying the next. This is crucial for preventing cracking and ensuring a strong, uniform surface. For a more in-depth guide, check out my article on how to apply gesso to canvas: a beginner's guide. You can also get more specific guidance on how to prepare a canvas for acrylic painting or how to prepare a canvas for oil painting. A common question I get is whether to gesso before or after stretching a raw canvas. My advice? It depends. If you're buying pre-stretched canvas, it's usually already sized and primed. If you're stretching raw canvas yourself, I often apply a couple of gesso coats before stretching, especially if I want a super smooth finish that's easier to achieve on a flat, unstretched surface without the resistance of tension. This initial application prevents the gesso from cracking when the canvas is later stretched taut, and allows for thorough, even coverage. Then I'll stretch it and apply the final one or two coats once it's taut, which helps ensure even tension and prevents potential cracking later if the gesso is applied too thickly on an already stretched, flexible surface. Check out my guide on how to stretch a canvas for painting for more insights into this fundamental process. Also, don't forget to prime the wooden stretcher bars themselves with a simple coat of PVA or an acrylic sealer; this protects the wood from environmental moisture and helps prevent acidic components from leaching into your canvas over time, ensuring the longevity of your entire artwork assembly. And don't overlook the edges of your canvas or panel! A well-primed edge creates a professional, finished look, whether you plan to paint on the sides or frame your artwork. For unstretched canvases, applying a coat to the back can also help prevent warping.

When working on different surfaces, a little preparation goes a long way. For wood panels, a light sanding beforehand (start with 150-grit, then move to 220-grit for a smoother finish) can help with adhesion, creating a 'key' for the gesso to grip. For raw wood like birch or cradled panels, I sometimes apply a thin coat of diluted PVA glue (or an artist-grade acrylic wood sealer) first to seal the grain and prevent warp, especially if it's a thinner panel, before applying gesso. This crucial initial sealing step helps to stabilize the wood and create a uniform surface. For very porous papers, an initial coat of just PVA glue (diluted with a little water) can seal the surface before gesso application. When working with paper or illustration board, I always recommend taping it down securely to a rigid, non-absorbent surface with artist's tape before applying gesso, and often apply a coat to both sides to minimize warping as it dries. This pre-sealing prevents your gesso from soaking in too much and gives you a more consistent finish. For raw canvas, especially natural fibers like linen or cotton, an initial sizing with traditional rabbit skin glue or an acrylic polymer medium (applied before gesso) is often recommended to seal the fibers, protect them from the acidity and oils in paints, and prevent eventual degradation or "oil halos." While the PVA in your gesso provides a barrier, an additional sizing step can offer extra protection and a more historically accurate, archival ground, particularly for oil painting, preventing the binder from being absorbed excessively into the fabric.
Drying and Curing
Homemade gesso generally dries to the touch within an hour or two, but it's absolutely vital to allow it to cure properly before painting. This means letting it dry for at least 24 hours, preferably longer (up to 72 hours if you've applied multiple thick layers or if you're in a very humid environment). Curing allows the residual water to fully evaporate from the deep layers and, crucially, allows the PVA binder's polymer chains to fully harden and cross-link, forming a cohesive, flexible, and archival film. This chemical process is essential for giving you the most stable, flexible, and archival surface possible. During curing, the tiny polymer spheres within the PVA emulsion fuse together, creating a continuous, tough film that locks in the calcium carbonate particles. This process, known as coalescence, is what gives the gesso its durability and prevents it from re-dissolving in water once fully dry. Patience is a virtue here; rushing this step can lead to issues like cracking, poor paint adhesion, a subtly softer surface that doesn't quite have the 'tooth' you worked so hard to achieve, or even a tendency for paint to sink in unevenly. Think of it as setting concrete – it may feel dry to the touch quickly, but it takes time to reach its full structural strength, and a premature load can compromise its long-term integrity. If you're in a hurry (and who isn't sometimes?), gentle air circulation from a fan can help speed up drying, but avoid direct heat or strong drafts, which can cause uneven drying and increase the risk of cracking.
Layering and Sanding
Most artists apply two to three coats of gesso for a good, opaque, and absorbent surface. For my work, two coats are usually sufficient, but sometimes I go for three if I want an incredibly rich, deep ground. If you desire a very smooth, almost porcelain-like finish, you can lightly sand between coats with a fine-grit sandpaper (around 220-grit or higher). For an even smoother finish, try wetsanding with very fine grit sandpaper (400-600 grit) after the final coat has fully cured, but be gentle! The grit you choose is key: 220-320 grit will effectively knock down minor imperfections and provide a good 'key' for the next layer, significantly improving inter-coat adhesion and ensuring your subsequent paint layers have something substantial to grip onto, rather than just sliding across. For a truly luxurious, satin-smooth finish, I might even use 400-600 grit sandpaper for the final pass, or even wet-sand with a very fine grit for an almost porcelain-like feel. Alternatively, for a perfectly flat, almost glass-like surface, some artists carefully scrape the wet gesso with a wide, flexible palette knife or a straight edge, a technique that can eliminate brushstrokes entirely and create an incredibly smooth, even layer. While a highly polished surface can be beautiful, remember that some tooth is often desirable for optimal paint adhesion and vibrancy, preventing a slick, non-receptive surface where paint might struggle to grip. It's about finding your perfect balance. I often find this step unnecessary for my abstract work, as I appreciate a bit of tooth for exploring texture and expressive brushwork, but for detailed realism or portraiture, a silky smooth surface can be paramount. Just remember to meticulously wipe away all sanding dust (a tack cloth works wonders for grabbing fine particles, or a slightly damp, lint-free cloth can also work, followed by complete drying) before applying the next layer, otherwise, you'll be sealing tiny imperfections into your pristine surface, which can be frustrating later on! This seemingly small step is critical for a smooth, flawless finish.
Troubleshooting Common Homemade Gesso Issues
Even with the best intentions, sometimes homemade gesso can present a few quirks. Don't let these deter you! They're usually easy to fix, and understanding them will make you an even more confident gesso-maker. Think of it as part of the learning curve, a little wrinkle in the otherwise smooth journey of creativity.
Issue 5: Graininess or Grit (After Drying)
Sometimes, even after careful mixing, your dried gesso might feel unpleasantly grainy or gritty in areas you didn't intend to be textured. This usually points to undissolved calcium carbonate particles or tiny clumps that weren't fully broken down during the stirring process. It can also be caused by dust or debris falling into the gesso as it dries.
Solution: Prevention is key here. Ensure you thoroughly mix your dry ingredients first, then gradually add liquids, stirring vigorously. Using a fine-mesh sieve (or even a few layers of cheesecloth) to strain your gesso before application is a lifesaver for achieving a silky-smooth consistency. After applying each coat, keep your drying surface in a clean, dust-free environment. If you do end up with some unwanted graininess, a light sanding with fine-grit sandpaper after the gesso is fully cured can often smooth out the surface enough for painting. Just remember to wipe away all sanding dust meticulously before applying more gesso or paint!
Even with the best intentions, sometimes homemade gesso can present a few quirks. Don't let these deter you! They're usually easy to fix, and understanding them will make you an even more confident gesso-maker. Think of it as part of the learning curve, a little wrinkle in the otherwise smooth journey of creativity.
Issue 1: Cracking
Cracking is often caused by applying gesso too thickly in one go, or by not allowing each layer to dry completely before applying the next. It’s also more common on flexible surfaces like canvas if the gesso isn’t flexible enough (a good, artist-grade PVA helps here!). Another culprit can be extreme temperature fluctuations during the drying process, forcing the gesso to dry too quickly on the surface while the deeper layers are still wet. This rapid surface drying can also lead to a phenomenon known as 'skinning,' where a dry layer forms on top, trapping wet gesso underneath, leading to potential future problems.
Solution: Apply gesso in thin, even layers. Think of it like painting; multiple thin coats are always better than one thick one. Allow ample drying time between coats—I'm talking a full 24 hours, especially in humid conditions, or even up to 48-72 hours if you've applied thicker layers. Ensure your drying environment is stable, avoiding direct heat sources or drafts that can cause rapid, uneven drying. If you're working on canvas, ensure your PVA glue is specifically rated for flexibility, and consider adding a small amount of acrylic medium. If cracking occurs, don't despair! You can often mitigate it by carefully sanding down the affected area with a medium-grit sandpaper (around 180-220 grit) to remove the loose gesso and smooth the edges of the cracks. Wipe the surface meticulously clean with a tack cloth to remove all dust, then reapply thinner, more flexible coats of gesso, ensuring each layer dries completely before the next. Think of it as patching a wall – you need a smooth, stable base before reapplying, and patience is your best tool for a lasting repair. For minor hairline cracks, sometimes a very thin, diluted coat of gesso (almost a wash) can seep into the cracks and help stabilize them once dry. In severe cases, where the cracking is extensive and deep, it might be necessary to remove all the gesso from the affected section and start again with a proper preparation process, paying extra attention to thin layers and extended drying times, possibly even reinforcing the support if it's contributing to the issue.
Issue 2: Gesso is Too Thin or Too Thick
This is all about the water-to-solids ratio. If your gesso is too thin, it won't offer good coverage, opacity, or the desired 'tooth.' It might also sink too much into the canvas fibers. If it's too thick, it can be difficult to apply evenly, lead to visible brushstrokes, and is more prone to cracking and bubbling. It's a Goldilocks problem!
Solution: If too thin, add more calcium carbonate, a little at a time, mixing thoroughly until you reach your desired consistency. Remember to wear your dust mask! If too thick, gradually add small amounts of water, stirring well after each addition, until it's brushable and smooth. This is where the 'artist's touch' really comes in; trust your instincts and adjust slowly, always aiming for that heavy cream or thin yogurt consistency. A good trick is to dip a brush or stirring stick in and see how it flows and coats the bristles or stick. It should coat completely but drip slowly and evenly, without running off too quickly or clinging in unmanageable clumps.
Issue 3: Bubbles in the Gesso
Bubbles usually occur from over-mixing or mixing too vigorously, especially with a whisk. Air gets trapped in the mixture, and these bubbles can create tiny craters on your surface once dry, which are an absolute pain to sand out later. It breaks the smooth, consistent surface we're striving for.
Solution: Mix your gesso gently but thoroughly. Avoid whipping it as if you're making meringue. If you do notice bubbles, let the gesso sit for 10-15 minutes after mixing to allow them to rise and pop on their own. You can also gently tap your container on the table a few times, use a palette knife to skim the surface, or even lightly spray the surface with a fine mist of water or denatured alcohol (if working in a very well-ventilated area and away from open flames) to encourage bubbles to dissipate before application. When applying, use a steady hand and don't overwork the brush strokes, as this can introduce new air into the freshly applied gesso. For stubborn bubbles, a very light misting of water from a fine spray bottle, a quick pass with a heat gun (from a safe distance to avoid drying the gesso too quickly and causing cracks!), or even a quick spritz of denatured alcohol (if you're careful and working in a very well-ventilated area, away from open flames) can help pop surface bubbles and achieve that pristine finish.
Issue 4: Poor Adhesion
If your gesso isn't sticking well, it's usually due to an improperly prepared surface (dust, grease, oils, or even residue from sizing agents on canvas) or using a poor quality, non-archival PVA glue. It's frustrating to see your beautiful primer peel away! Another less common but equally frustrating issue can be yellowing over time, usually a sign of using non-archival PVA glue with additives that degrade or discolor as they age. Always ensure your PVA is art-grade and acid-free to prevent this. Another less common but equally frustrating issue can be yellowing over time, usually a sign of using non-archival PVA glue with additives that degrade or discolor as they age. Always ensure your PVA is art-grade and acid-free to prevent this. This yellowing often comes from plasticizers or other non-archival additives that break down and discolor over decades, something you absolutely want to avoid in fine art. A slight off-white color is natural for some high-quality PVAs, but a distinct yellowing is a warning sign.
Solution: Always ensure your surface is meticulously clean, dry, and free of any contaminants like dust, grease, natural oils from your hands, or residues from commercial sizings before applying gesso. For raw fabric canvases, a proper sizing layer with diluted PVA or an acrylic polymer medium is highly beneficial before gesso, especially if the canvas is particularly absorbent, as this creates a stable barrier. For wood panels, a thorough light sanding (180-220 grit) followed by a tack cloth wipe is ideal to create a 'key' for the gesso. For very oily or stubborn surfaces (like certain plastics or metals), a thorough wipe-down with a mild degreaser, acetone (with extreme caution and ventilation), or isopropyl alcohol (and allowing it to dry completely) can make a huge difference in promoting adhesion. For challenging non-porous surfaces, specialized primers designed for plastics or metals might be necessary before gesso application, creating a crucial 'key' for adhesion. Double-check that your PVA glue is artist-grade, acid-free, and explicitly suitable for permanent applications. Some 'school glues' or 'washable glues' might not have the necessary adhesive strength for long-term artwork and are best avoided, as they can lead to poor adhesion, yellowing, or cracking.
Maintenance of Tools: Post-Gesso Cleanup
You’ve put in the effort to make and apply your gesso, now let’s make sure your tools are ready for your next session! Proper cleaning isn’t just about tidiness; it’s about preserving your brushes and containers, and preventing dried gesso from interfering with future batches or other art projects. Trust me, dried gesso is notoriously difficult to remove once it’s fully cured, so immediate cleanup is your best friend.
Brushes and Rollers
Immediately after applying gesso, rinse your brushes and rollers thoroughly with warm water. Don't let the gesso dry on them, even for a few minutes!
- For brushes: Work the gesso out of the bristles using warm, soapy water. Gently massage the bristles against the palm of your hand or a brush cleaning pad to ensure all gesso is removed from deep within the ferrule (the metal part). Rinse until the water runs clear. Reshape the bristles and allow the brush to air dry flat or hanging bristles-down to prevent water from seeping into the ferrule and loosening the glue.
- For rollers: Remove excess gesso with a palette knife, then rinse under warm water, squeezing repeatedly until the foam or nap is clean. Store them upright to dry.
Mixing Containers and Stirring Tools
- Mixing bowls and buckets: Scrape out any remaining wet gesso with a spatula or old credit card. Rinse thoroughly with warm water and a scrub brush. If there's a thin film of dried gesso, hot water and a bit of soaking can help loosen it, but ideally, clean before it dries.
- Whisks and stirring sticks: These can be the trickiest! Immediately rinse under warm water, scrubbing with a stiff brush or even an old toothbrush to get into all the nooks and crannies.
Dealing with Dried Gesso (The Last Resort!)
If some gesso does manage to dry on your tools (it happens to the best of us!), don't panic, but know it will require more effort.
- Soaking: For brushes and small tools, try soaking them in warm water for several hours or overnight. This can soften the gesso enough to scrape or scrub it off.
- Scraping: For stubborn patches on containers or hard tools, a plastic scraper or old palette knife can be effective. Avoid metal scrapers on plastic containers, as they can scratch and create rough surfaces where gesso might adhere more easily next time.
- Chemical removers: In very tough cases, some artists have had success with commercial acrylic paint removers, but use these sparingly, test in an inconspicuous area, and always ensure excellent ventilation. These can be harsh and may damage certain plastics or natural bristles.
Remember, a clean tool is a happy tool, and it makes your next gesso session much more enjoyable!
Storing Your Homemade Gesso: Keep it Fresh!
So you've made a glorious batch of gesso, and now you have some leftover. What's the best way to keep it fresh for your next creative burst? Proper storage is key to maximizing its shelf life and preventing waste. I've learned this the hard way with a few batches that, shall we say, went 'off' prematurely!
Airtight is Right
The most important thing is to store your gesso in an airtight container. This prevents evaporation, which can cause the gesso to thicken and dry out, essentially making it unusable. It also minimizes exposure to airborne contaminants like dust and spores that could encourage mold growth. Old plastic paint containers with tight-fitting lids, or even clean jam jars, work wonderfully. I often repurpose old yogurt containers for smaller batches. The key is truly airtight – if air can get in, your gesso is at risk. Don't forget to label your containers clearly with the date you made the gesso and any specific notes about the recipe, especially if you're experimenting with different ratios or additives. This small step saves a lot of guesswork later on and ensures consistency! Don't forget to label your containers with the date you made the gesso and any specific notes about the recipe, especially if you're experimenting with different ratios or additives. This small step saves a lot of guesswork later on!
Cool and Dark is Best
Store your container in a cool, dark place. A closet, a cupboard, or even a pantry shelf away from direct sunlight and extreme temperature fluctuations is ideal. Think of it like storing food, but for art! Heat and light can accelerate the degradation of the PVA binder, leading to a loss of flexibility and adhesion, and also significantly encourage spoilage and mold growth. Avoid garages or attics that experience wide temperature swings, as these environments are the enemy of homemade gesso.
Shelf Life Expectations
While store-bought gesso can last for years, homemade gesso typically has a shorter shelf life, often ranging from a few weeks to a few months, depending on the ingredients and storage conditions. If you added a fungicide, it might last a bit longer. Always give it a good sniff test before use – any funky, sour, or ammonia-like odors mean it's time to make a fresh batch. If you see obvious mold (fuzzy spots, discoloration), discard it immediately. Trust me, you don't want to introduce mold spores onto your canvas, as they can later compromise your artwork! Beyond obvious mold, also look for significant changes in color (beyond what you tinted it), extreme thickening that doesn't resolve with vigorous stirring, or a distinct, unmixable separation of ingredients. These are all signs it's past its prime. If it's just a little thick, sometimes adding a tiny bit of distilled water and stirring vigorously can bring it back to life, but if it's severely clumpy, smells off, or looks suspect, it's really best to start fresh. Better safe than sorry when it comes to the foundation of your artwork!
Homemade vs. Commercial Gesso: A Quick Comparison
Why go through all this effort when you can just grab a tub off the shelf? That's a valid question, and one I've asked myself countless times, usually when I'm short on time! Here's how the two options stack up, from my perspective, emphasizing the practicalities and philosophies behind each choice:
Feature | Homemade Gesso | Commercial Gesso |
|---|---|---|
| Cost | Significantly lower, especially for large quantities | Higher, can be a major expense for large works |
| Customization | Full control over texture, absorbency, tinting, flexibility | Limited options; specific formulas for specific needs |
| Ingredients | You know exactly what's in it; full transparency | Proprietary blends; less transparency, often contains undisclosed additives |
| Archival Quality | Can be excellent if quality, artist-grade ingredients are used with proper technique | Generally high; formulated for longevity, but can vary by brand and product line |
| Control over Potency/Strength | You dictate the ratio for specific needs (e.g., more absorbent for watercolors, less for oils, thicker for texture) | Fixed formulation, less adaptable; you're reliant on the manufacturer's specific blend for a particular effect |
| Convenience | Requires time for mixing and occasional troubleshooting | Ready to use out of the tub, minimal preparation |
| Time Investment | Initial setup and mixing time required; ongoing maintenance | Minimal time investment, simply open and use |
| Shelf Life | Shorter (weeks to a few months) | Longer (years), due to preservatives |
| Health & Safety Concerns | Requires precautions (dust mask for powder); generally non-toxic with proper handling | Generally safe, but some brands may contain undisclosed chemicals; always check labels |
| Environmental Impact | Potentially lower (less packaging, local sourcing, reduced plastic waste from tubs) | Varies; often more industrial processes, significant plastic packaging waste |
| Control over Potency/Strength | You dictate the ratio for specific needs (e.g., more absorbent for watercolors, less for oils, thicker for texture) | Fixed formulation, less adaptable; you're reliant on the manufacturer's specific blend for a particular effect |
| Connection to Materials | Deep understanding and personal connection; part of the artistic process | Detached; simply a purchased supply |
As you can see, each has its merits. For me, the creative control and cost savings of homemade gesso often outweigh the convenience of store-bought, particularly for larger projects or when I'm experimenting with different surfaces. It becomes part of the artistic ritual, you know? It's akin to a chef making their own stock versus buying it – both work, but one offers a deeper satisfaction and control over the final flavor. If you're looking for more guidance on choosing commercial options, I've also put together a reviewing the best gesso for canvas preparation that might be helpful.
Expanding Your Horizons: Beyond Basic Gesso
Making your own gesso opens up a world of creative possibilities. It's not just about preparing a canvas; it's about actively participating in the creation of your artistic tools. I've found that this connection to my materials often pushes me to new places in my artwork.
Surfaces, Surfaces, Everywhere!
While we often think of canvas, homemade gesso can be applied to a vast array of surfaces. Think beyond! Wood panels, masonite, cardboard, heavy paper, even metal (with proper preparation, of course), glass, or rigid plastics can all become suitable painting grounds. This flexibility means you're no longer limited by what's available commercially. You can repurpose materials, experiment with found objects (think old vinyl records, flattened aluminum cans, sturdy packaging cardboard, textured fabric scraps, or even old book covers), and truly personalize your art from the very first layer. Preparing my own panels has been a game-changer for my abstract art for small spaces: maximizing impact in compact areas series, allowing me to tailor each support perfectly. I've even seen artists gessoing textured fabric scraps and old book covers – the possibilities are truly endless, limited only by your imagination and a little bit of experimentation. Just remember that non-porous surfaces like glass or metal will require special preparation, often a thorough cleaning, a light sanding (using fine grit like 320-400), or a specific adhesion promoter (like a specialized primer for challenging surfaces, e.g., an automotive primer for metals, or a glass prep solution) to ensure the gesso adheres properly and permanently. For metals, specifically, ensure they are free of rust and oils, and a good degreaser is essential. For glass, a thorough cleaning with alcohol and potentially etching the surface lightly (using an etching cream or abrasive paste) can significantly improve mechanical adhesion. I've even experimented with preparing old ceramic tiles for painting, transforming discarded objects into unique canvases, further pushing the boundaries of what a painting support can be. You can also explore rigid architectural materials like concrete or plaster (after proper sealing and curing) as fascinating, sculptural painting surfaces, offering a completely different textural and visual experience for your artwork. The key is always to create a 'key' – a slightly roughened or chemically prepared surface – for the gesso to grip onto.
Gesso and Different Paint Types
Your homemade acrylic gesso will work beautifully with both acrylics and oils. The flexible acrylic binder makes it a stable ground for both. For oils, the gesso provides an essential barrier that protects the canvas fibers from the oil's acidity and potential deterioration, ensuring longevity – a crucial aspect discussed in our the definitive guide to oil painting techniques. For acrylics, it creates an ideal absorbent surface that helps the paint adhere strongly and show its true color and vibrancy. You can also use it as a primer for a wide range of mixed media work, providing a consistent, unifying base for everything from graphite, charcoal (as I do in my expressive power of charcoal in abstract art pieces), pastels, inks, and collage elements. It also works beautifully with gouache and tempera, giving them a lovely, matte, and receptive ground that truly enhances their unique qualities. For traditional egg tempera, a highly absorbent ground is key, and while acrylic gesso works, some tempera artists prefer a more traditional, rigid chalk ground for historical accuracy. Similarly, casein paints, with their natural matte finish, thrive on absorbent surfaces that allow for beautiful layering and scumbling effects. It’s truly versatile, a fundamental tool in any artist's arsenal, no matter their preferred definitive guide to paint types for artists.
Mixed Media Applications
Beyond traditional painting, homemade gesso is a fantastic foundation for a myriad of mixed media explorations. Its absorbent, toothy surface takes exceptionally well to graphite, charcoal (I love using it for my expressive power of charcoal in abstract art pieces), pastels, inks, and even a variety of collage elements. It effectively unifies disparate surfaces, allowing you to layer different materials and media without adhesion issues. Imagine gessoing an old newspaper clipping, then seamlessly painting over it, or using it to prepare found objects for sculptural work, creating a consistent base. You can even use gesso to create specific textural effects before painting, for instance, by applying it thickly with a palette knife or a stiff brush for pronounced what is impasto painting effects, adding immediate dimension to your surface. You can press textured objects (like leaves, lace, coarse fabrics, or even crumpled paper) into wet gesso to create unique impressions, or even scratch into it (known as sgraffito) for linear designs and etched patterns once it's partially dry. You can also use stencils to build up raised patterns with gesso, creating intricate dimensional designs before you ever touch a brush with paint. I've personally experimented with mixing fine sand, marble dust, or other aggregates directly into a thicker gesso mixture and applying it with a trowel to build up incredibly rich, gritty, and sculptural surfaces that scream for the art of mark-making:-expressive-lines-and-gestures-in-abstract-painting and bold brushwork. This opens up entirely new creative avenues and allows for incredible textural depth in your artwork, transforming your ground from a passive support into an active, integral participant in the visual conversation. For collage work, gesso can act as a unifying primer, allowing you to seamlessly integrate disparate materials like paper, fabric, or even found objects onto your surface, creating a cohesive base for further painting or drawing. For even more inspiration, dive into the definitive guide to mixed media in abstract art.

Frequently Asked Questions (FAQ) About Homemade Gesso
Q: Can I use homemade gesso as a final varnish or sealer?
A: No, absolutely not! Gesso is a primer, designed to create an absorbent, receptive surface for paint. A varnish or sealer, on the other hand, is a final protective layer that creates a non-absorbent, often glossy or satin, barrier over your finished artwork. Applying gesso as a varnish would make your painting dull, potentially flake, and certainly wouldn't offer the protection it needs. Always use appropriate artist-grade varnishes for finished artwork to ensure longevity and proper aesthetic results.
Q: Can I apply homemade gesso over an existing painting?
A: Generally, I'd advise against it for finished work. If you're working on an unfinished piece and want to restart or rework an area, a thin layer of gesso can sometimes be applied, but it will significantly change the underlying texture and absorbency. For oil paintings, applying acrylic gesso over existing oil paint is a definite no-no due to flexibility and adhesion issues between the different mediums. For acrylic paintings, it might be possible to gesso over an old piece if you plan to completely obscure the original work, but remember that gesso will act as a new primer, requiring you to essentially start from scratch on that surface. Always consider the long-term archival implications of layering different materials in this way.
I get a lot of questions about making gesso, so I thought I'd tackle some of the most common ones here. It's totally normal to have queries when you're venturing into DIY art supplies!
Q: Is homemade gesso archival?
A: Absolutely, if you use high-quality, artist-grade, acid-free ingredients like a good PVA glue and pure calcium carbonate, your homemade gesso can be just as archival as many commercial options. The key is in the quality of your materials and proper application (thin, even layers, full drying and curing, and using appropriate sizing). I wouldn't risk using questionable craft store glues or un-tested fillers for pieces I intend to last for generations, but with the right components and careful technique, you're golden. Think of it this way: professional conservators often use artist-grade PVA in their work for repairs and coatings, a testament to its stability and long-term archival properties when used correctly. To ensure maximum archival quality, always document your gesso recipe and materials used for future reference – it's like keeping a lab notebook for your art!
Q: Can I use any white paint instead of gesso?
A: This is a common question, and my answer is generally no. While white acrylic paint might look similar, it fundamentally lacks the 'tooth' and absorbency that gesso provides. Paint is designed to sit on a surface and show its own color and texture, while gesso is specifically designed to prepare a surface for paint, giving it something robust to grip onto. Using just white paint can lead to adhesion issues, a slick non-receptive surface that causes subsequent paint layers to slide rather than adhere, cracking (especially on flexible supports), and a less vibrant final painting over time as the paint may not properly adhere or absorb pigments as intended. It's simply not formulated for the same purpose, a distinction crucial for the longevity and integrity of your artwork. The chemical composition of gesso with its higher pigment-to-binder ratio and specific fillers creates a micro-porous surface that regular paint can't replicate. For a deeper dive into the differences, you might find my article on gesso vs. primer: what's the difference for artists enlightening. While many artists use the terms interchangeably, gesso specifically refers to the white preparatory ground formulated for artists, whereas 'primer' is a broader term for any preparatory coating, including those with different chemical compositions and purposes for various industries.
Q: How long does homemade gesso last?
A: As mentioned above, homemade gesso typically lasts anywhere from a few weeks to a few months when stored properly in an airtight container in a cool, dark place. It generally doesn't have the same extensive shelf life as commercial gesso, which is formulated with stronger industrial preservatives. Some artists even experiment with freezing small batches of homemade gesso for longer storage, though this requires careful thawing and vigorous stirring to re-emulsify the binder and pigments before use, as freezing can sometimes cause slight changes in consistency or separation. Always ensure it's completely thawed to room temperature and thoroughly re-mixed before use. Always check for consistency (no hard lumps or unmixable separation), and any funky, sour, or moldy odors before using an older batch. If in doubt, it's always safer to discard and make a fresh batch than to risk the foundation of your artwork.
Q: Can I tint my homemade gesso?
A: Yes, definitely! This is one of my favorite ways to customize it, transforming a blank white canvas into a warm, cool, or even vibrantly colored ground. Just add a small amount of artist-grade acrylic paint (fluid acrylics or heavy body thinned slightly work best) to your gesso mixture and stir thoroughly. Start with a tiny drop and gradually add more until you achieve your desired hue. Remember that the gesso itself is opaque white, so any color you add will inherently appear lighter and more pastel than it would if mixed with a clear medium or applied directly. Be mindful that too much paint can dilute the gesso's binding properties and compromise its ability to properly prime your surface, so use it sparingly – the goal is a tinted ground, not a painted ground.
Q: How many coats of gesso should I apply?
Q: What about traditional gesso made with rabbit skin glue?
A: Traditional gesso, often made with rabbit skin glue (a protein adhesive) and chalk (calcium carbonate) or gypsum, is a distinct material primarily used for oil painting on rigid supports like wooden panels. It creates a very hard, brittle, and highly absorbent surface that is famously receptive to fine details and subtle brushwork in oil paint. It's a beautiful, time-honored technique, but it requires different preparation and application methods, often involving careful heating of the glue, multiple very thin layers, and specific timing for application. My focus here is on modern, flexible acrylic gesso, which is much more versatile and user-friendly for both acrylic and oil paints on various supports, including flexible canvas. Traditional gesso is a different beast entirely and requires a deeper dive into historical materials and processes; honestly, it's a bit more effort than I usually want to put in for a primer, though it yields beautiful, historically accurate results for specific techniques and aesthetics, and is deeply rooted in art history.
Q: Is homemade gesso toxic?
A: Generally, no, homemade acrylic gesso made with standard artist-grade ingredients is considered non-toxic. The main components—PVA glue (which is essentially white craft glue, albeit a higher quality version), calcium carbonate (a common mineral), and water—are typically safe for studio use. However, always use common sense and good studio practices: absolutely avoid inhaling the fine calcium carbonate dust (wear a mask or respirator!), don't ingest the materials, and wash your hands thoroughly after use. If you add fungicides, pigments, or other specialized additives, always read their specific safety warnings and follow instructions carefully. Always work in a well-ventilated area to dissipate any fumes from glue or additives and to prevent dust buildup.
Q: Can I use homemade gesso on paper or illustration board?
A: Absolutely! Homemade gesso works wonderfully on paper and illustration board, transforming ordinary paper into a robust, professional painting surface. It stiffens the paper, significantly reduces or prevents buckling from wet media (which is a common frustration when painting on untreated paper), and creates a fantastic painting surface with excellent tooth. Just be mindful not to apply it too thickly in one go on thinner papers, as excessive moisture can still cause some curling. For best results and to minimize warping, always tape your paper down securely to a rigid surface with artist's tape while applying and drying, or consider applying a coat of gesso to both sides to equalize tension and counteract potential warping. It's a great way to elevate simple, inexpensive paper into a serious, archival art surface for drawing, painting, and mixed media.
Q: Should I gesso both sides of a board or paper?
A: Yes, if you're working on a non-stretched, rigid support like wood panel, MDF, or heavy paper/illustration board, it's a very good idea to apply a coat of gesso to the back as well as the front. This helps to equalize the tension on both sides as the gesso dries and shrinks, significantly reducing the likelihood of warping, which can be a real headache! For paper, especially, gessoing both sides is almost a necessity if you want to keep it flat.
Q: Should I gesso a stretched or unstretched canvas first?
A: If you're buying a pre-stretched canvas, it's usually already sized and primed, so you're good to go. However, if you're working with raw canvas that you plan to stretch yourself, I often recommend applying a couple of gesso coats before stretching. This allows you to work on a flat surface, making it easier to achieve an even coat and avoid potential pooling in stretched areas. Once it's dry, stretch the canvas, and then apply any final coats, sanding lightly in between if you desire a very smooth finish. This approach can help prevent cracking that might occur if gesso is applied too thickly to an already flexible, stretched surface and then subjected to tension changes.
Q: Can I use homemade gesso for encaustic painting?
A: While homemade acrylic gesso offers flexibility, traditional encaustic painting usually requires a rigid, absorbent ground like wood panel. While some artists experiment, acrylic gesso might not always provide the ideal absorbency or rigid support that encaustic wax requires for proper adhesion and preventing cracking, especially on flexible surfaces like canvas. If you're exploring definitive guide encaustic painting, you'll often find recommendations for traditional, highly absorbent gessoed panels or even unprimed wood for the best results. Always test thoroughly if you plan to combine new materials!
A: This is largely a matter of personal preference and the specific surface you're working on, but generally, two to three thin, even coats are recommended for a good, opaque, and receptive surface. The first coat can often be quite translucent and may appear streaky, but don't worry, subsequent layers will build opacity and establish the desired tooth. For a very smooth, almost porcelain-like finish (ideal for fine detail or glazing), you might opt for three to four layers with very light sanding in between with a fine-grit sandpaper (220-400 grit). For general use and expressive work, two to three coats typically provide an excellent, robust ground that accepts paint beautifully. For very smooth, detailed work, I might apply three to four coats, sanding lightly between each. Conversely, for highly textural abstract pieces where I want the gesso to be a part of the expressive surface, I might only apply one or two thicker coats, or even apply it with a palette knife for dramatic impasto effects. It's all about matching the gesso application to your artistic intent. Always remember to let each coat dry thoroughly before applying the next, which is crucial for preventing cracking and ensuring optimal adhesion!
Q: Can I use gesso to create texture before painting?
A: Absolutely! This is one of the most exciting and creatively liberating aspects of making your own gesso. You can apply it thickly with a palette knife or a stiff brush to create pronounced impasto effects, adding immediate dimension and expression to your surface. You can press textured objects (like leaves, lace, or even crumpled paper) into wet gesso to create unique impressions, or even scratch into it (known as sgraffito) for linear designs and etched patterns once it's partially dry. Some artists even mix fine sand, marble dust, or other aggregates directly into a thicker gesso mixture to build up incredibly tactile, sculptural surfaces that invite dynamic mark-making and rich paint application. It truly transforms the primer from a mere base into an active, integral textural element of your artwork, setting a unique stage for your creative vision.
Q: What about traditional gesso made with rabbit skin glue?
A: Traditional gesso, often made with rabbit skin glue (a protein adhesive) and chalk (calcium carbonate) or gypsum, is a distinct material primarily used for oil painting on rigid supports like wooden panels. It creates a very hard, brittle, and highly absorbent surface that is famously receptive to fine details and subtle brushwork in oil paint. It's a beautiful, time-honored technique, but it requires different preparation and application methods, often involving careful heating of the glue, multiple very thin layers, and specific timing for application. My focus here is on modern, flexible acrylic gesso, which is much more versatile and user-friendly for both acrylic and oil paints on various supports, including flexible canvas. Traditional gesso is a different beast entirely and requires a deeper dive into historical materials and processes; honestly, it's a bit more effort than I usually want to put in for a primer, though it yields beautiful, historically accurate results for specific techniques and aesthetics, and is deeply rooted in art history.
Q: Is homemade gesso toxic?
A: Generally, no, homemade acrylic gesso made with standard artist-grade ingredients is considered non-toxic. The main components—PVA glue (which is essentially white craft glue, albeit a higher quality version), calcium carbonate (a common mineral), and water—are typically safe for studio use. However, always use common sense and good studio practices: absolutely avoid inhaling the fine calcium carbonate dust (wear a mask or respirator!), don't ingest the materials, and wash your hands thoroughly after use. If you add fungicides, pigments, or other specialized additives, always read their specific safety warnings and follow instructions carefully. Always work in a well-ventilated area to dissipate any fumes from glue or additives and to prevent dust buildup.
Q: Can I use homemade gesso on paper or illustration board?
A: Absolutely! Homemade gesso works wonderfully on paper and illustration board, transforming ordinary paper into a robust, professional painting surface. It stiffens the paper, significantly reduces or prevents buckling from wet media (which is a common frustration when painting on untreated paper), and creates a fantastic painting surface with excellent tooth. Just be mindful not to apply it too thickly in one go on thinner papers, as excessive moisture can still cause some curling. For best results and to minimize warping, always tape your paper down securely to a rigid surface with artist's tape while applying and drying, or consider applying a coat of gesso to both sides to equalize tension and counteract potential warping. It's a great way to elevate simple, inexpensive paper into a serious, archival art surface for drawing, painting, and mixed media.
Q: Should I gesso both sides of a board or paper?
A: Yes, if you're working on a non-stretched, rigid support like wood panel, MDF, or heavy paper/illustration board, it's a very good idea to apply a coat of gesso to the back as well as the front. This helps to equalize the tension on both sides as the gesso dries and shrinks, significantly reducing the likelihood of warping, which can be a real headache! For paper, especially, gessoing both sides is almost a necessity if you want to keep it flat.
Q: Should I gesso a stretched or unstretched canvas first?
A: If you're buying a pre-stretched canvas, it's usually already sized and primed, so you're good to go. However, if you're working with raw canvas that you plan to stretch yourself, I often recommend applying a couple of gesso coats before stretching. This allows you to work on a flat surface, making it easier to achieve an even coat and avoid potential pooling in stretched areas. Once it's dry, stretch the canvas, and then apply any final coats, sanding lightly in between if you desire a very smooth finish. This approach can help prevent cracking that might occur if gesso is applied too thickly to an already flexible, stretched surface and then subjected to tension changes.
Q: Can I use homemade gesso for encaustic painting?
A: While homemade acrylic gesso offers flexibility, traditional encaustic painting usually requires a rigid, absorbent ground like wood panel. While some artists experiment, acrylic gesso might not always provide the ideal absorbency or rigid support that encaustic wax requires for proper adhesion and preventing cracking, especially on flexible surfaces like canvas. If you're exploring definitive guide encaustic painting, you'll often find recommendations for traditional, highly absorbent gessoed panels or even unprimed wood for the best results. Always test thoroughly if you plan to combine new materials!
Q: What's the ideal room temperature for mixing and applying gesso?
A: Aim for a comfortable room temperature, generally between 65-75°F (18-24°C). Extreme cold can make the PVA glue too thick and difficult to mix, while excessive heat can cause the gesso to dry too quickly, leading to uneven application or even cracking. Good ventilation is always a must, especially when dealing with powdered ingredients.
Q: How do I clean my tools after using homemade gesso?
A: The good news is that homemade acrylic gesso cleans up easily with water while it's still wet! Wash your mixing container, brushes, and whisk immediately after use with warm soapy water. Don't let the gesso dry on your tools, as it becomes much harder to remove once cured. A dedicated 'gesso brush' or 'gesso whisk' can also save your good art supplies.
Q: Can I re-use gesso that has separated?
A: If your gesso has simply separated into layers (where the liquid and solid components have settled) but still smells fresh and has no mold, you can often vigorously stir or whisk it back to a usable, creamy consistency. However, if it's very lumpy (with hard, unmixable clumps), has a strange, sour, or ammonia-like odor, or shows any signs of mold or unusual discoloration, it's absolutely best to discard it immediately. Separation can sometimes indicate that the binder has begun to break down or that the ingredients are no longer stable, which might compromise its archival quality or adhesion to your artwork. If the separation is extreme or accompanied by other signs of spoilage, it's a clear indicator to discard. When in doubt, always err on the side of caution and prioritize the longevity of your artwork over a small batch of gesso.
My Final Brushstroke: Embrace the DIY Spirit!
Making your own gesso might seem like an extra step, an unnecessary detour from the act of painting itself. But I truly believe it's one of the most rewarding parts of my art practice. It fosters a deeper connection to your materials, allows for unparalleled customization, and yes, it saves a pretty penny too! It’s a foundational step that infuses your art with intention from the very beginning. So, next time you're about to buy that tub of gesso, consider whipping up your own batch. You might just discover a new layer of joy and intention in your artistic journey, shaping the very canvas for your unique vision. This hands-on approach, this deliberate act of creation, is what makes your art uniquely ours from the very first layer. It's a journey into the heart of your materials, a conversation that begins long before the first stroke of paint. And if you're looking for art that embodies this spirit of connection and unique creation, where every layer tells a story, please do explore my own work available for purchase here. Happy creating, and may your surfaces be perfectly primed, ready for your next masterpiece!
Making your own gesso might seem like an extra step, an unnecessary detour from the act of painting itself. But I truly believe it's one of the most rewarding parts of my art practice. It fosters a deeper connection to your materials, allows for unparalleled customization, and yes, it saves a pretty penny too! It’s a foundational step that infuses your art with intention from the very beginning. So, next time you're about to buy that tub of gesso, consider whipping up your own batch. You might just discover a new layer of joy and intention in your artistic journey, shaping the very canvas for your unique vision. This hands-on approach, this deliberate act of creation, is what makes your art uniquely yours from the very first layer. It's a journey into the heart of your materials, a conversation that begins long before the first stroke of paint. And if you're looking for art that embodies this spirit of connection and unique creation, where every layer tells a story, please do explore my own work available for purchase here. Happy creating, and may your surfaces be perfectly primed, ready for your next masterpiece!


