
What is Raw Canvas? A Guide for the Fearless Artist
Ever wondered about raw canvas? Dive into this personal guide on what unprimed canvas is, why artists use it, how to prepare it, and the beautiful, messy results.
What is Raw Canvas? The Ultimate Guide to Unprimed Canvas for Artists
I remember the first time I bought a roll of raw canvas. It sat in the corner of my studio for weeks, looking... intimidating. It wasn't the pristine, welcoming white of a pre-stretched, primed canvas. It was rustic, beige, and felt like a blank page with a lot more opinions. You know that feeling? That quiet hum of potential, mixed with the terrifying thought of a much, much bigger mess than usual? It’s the kind of material that challenges you, makes you question your process, and ultimately, can push your art in entirely new directions, revealing something uniquely you in the process. And let’s be honest, for those of us who embrace a bit of creative chaos, raw canvas (also often searched as 'raw canva' – yes, you're in the right place, we'll cover that common typo!) is an irresistible invitation to explore deeper, more visceral forms of expression. This guide will unravel everything you need to know about working with unprimed canvas, from its fascinating history and unique properties to essential preparation techniques and advanced artistic applications. It’s a material that whispers to the experimentalist, promises untold textures, and demands a deeper conversation. It connects you to centuries of artistic tradition while forging entirely new paths, becoming an active collaborator in your artistic journey.
Here’s the secret, and it’s one I had to discover for myself: that raw, unprimed surface is one of the most exciting, even revolutionary, materials you can work with. It's not just a passive background; it's an active collaborator, almost a co-conspirator in your artistic journey. It demands attention, respects certain preparations, and in return, offers a depth, an authenticity, and an organic quality that's simply hard to achieve otherwise. If you've ever felt that familiar mix of intense curiosity and a tiny bit of terror when eyeing a roll of raw canvas, this guide is for you. We're going to demystify this beautiful, versatile textile together, unrolling its secrets and showing you exactly why it might just become your new favorite, most beloved, and perhaps most challenging art material. Consider this your definitive resource for understanding, preparing, and creating with raw canvas. My aim is to equip you with the knowledge and confidence to truly unlock its boundless potential, connecting you to centuries of artistic tradition while forging entirely new paths.
The Unveiling of Raw Canvas: History, Core Properties, and Enduring Legacy
Before we dive into the 'raw' part, it's worth a quick moment to appreciate the fascinating history of canvas itself. For centuries, artists painted on sturdy but often heavy and rigid wood panels, or directly onto walls – a practice that limited scale and portability. Imagine trying to move a massive fresco across Europe! It was in the Italian Renaissance, particularly around Venice in the 15th and 16th centuries, that painting on stretched fabric emerged as a significant, game-changing alternative to wood panels. Why the shift? Largely due to its lighter weight, incredible portability, and far greater capabilities for larger formats that allowed for grander narratives and more expansive visions, from monumental altarpieces to panoramic battle scenes. Initially made from robust linen, a highly durable natural fiber, and later the more affordable and readily available cotton, canvas quickly became the support of choice for countless masterpieces across Europe. From the luminous works of the Venetian masters like Titian and Tintoretto to the dramatic narratives of the Baroque period by artists such as Rubens and Rembrandt, canvas offered artists a new freedom. The very term 'canvas' is believed to derive from the Latin word cannabis, referring to hemp, highlighting its ancient textile roots.
Historical Pedigree: From Old Masters to Modern Mavericks
Historically, raw canvas, or rather, fabric that would become canvas, has been the default for centuries. Before the advent of modern primers and mass-produced art supplies, artists weren't just painters; they were alchemists and artisans, preparing their own surfaces with various sizes and grounds, meticulously tailored to their chosen medium and the specific demands of a commission. This tradition, dating back to the Renaissance, saw masters like Titian and Tintoretto experimenting with various textile supports. They'd often prepare them with layers of animal glue (like rabbit skin glue) and gypsum (calcium sulfate dihydrate) or lead white to create a smooth, luminous ground, sometimes even tinting it to influence the final palette. It was a hands-on, deeply intimate process that allowed for incredible control over the final surface. Think of the meticulous preparation involved in creating a truly bespoke surface, a dialogue between artist and material that began long before the first brushstroke.
Working with raw canvas, in a way, connects you to this long lineage of artistic tradition, from these Renaissance masters who meticulously crafted their supports to the mid-20th-century Abstract Expressionists, like Jackson Pollock and Helen Frankenthaler, who famously embraced its raw materiality and gestural potential. They saw the canvas not just as a support, but as an active participant, letting paint soak directly into its fibers to create revolutionary new forms of expression. More recently, artists like Sam Gilliam have pushed the boundaries further, using unstretched, raw canvas in monumental drape paintings, challenging the very notion of a flat picture plane. It’s a tactile link to the past, reminding us that art-making has always involved a certain amount of hands-on preparation and a deep understanding of one's materials—a philosophy that resonates deeply in contemporary art today. It’s a journey from the Venetian ateliers to the New York studios, all united by a profound respect for the material's inherent qualities, constantly reinventing the dialogue between fiber and artistic intent.
Core Properties of Unprimed Canvas
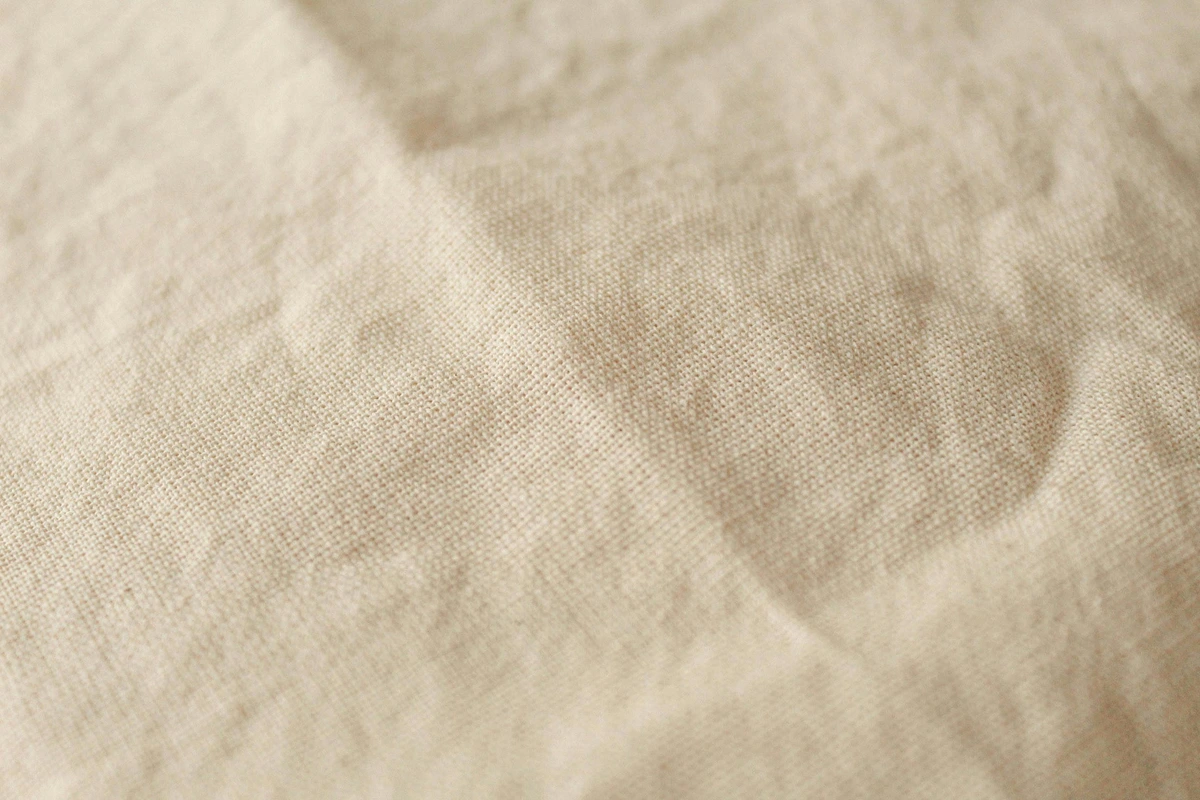
At its simplest, raw canvas (also widely known as unprimed canvas) is precisely what it sounds like: a woven fabric—most commonly cotton or linen, though you'll also find varieties made from hemp or jute, each with its own character and weave—that hasn't been pre-coated with any layers of primer. That protective, foundational layer is typically gesso, a crucial preparation we'll get into later. Think of it as the naked, honest-to-goodness textile, straight from the loom or the mill. It’s the canvas in its most natural, most absorbent state, utterly ready to soak up your artistic intentions (and, without proper sizing, your paint). This inherent absorbency is its defining characteristic and what gives it both its unique charm and its preparatory challenges. It’s a direct link to the historical roots of painting, inviting you to engage with your materials in a profound way. For me, it's about peeling back the layers of modernity and rediscovering the essential dialogue between fiber and pigment. This unadulterated surface is an open invitation for a unique dialogue between your medium and the support, offering a direct, tactile connection that a pre-primed surface simply cannot replicate.### The Anatomy of Raw Canvas: Weave, Thread Count, and Selvedge
Before we delve into the artistic possibilities, it's worth understanding the basic anatomy of this versatile material. Raw canvas isn't just one thing; it varies significantly in its construction, which directly impacts its performance and aesthetic. Think of it like choosing a fabric for a bespoke suit – every detail matters. The way the fibers interlace, their density, and their inherent qualities all contribute to the final surface. Understanding these characteristics helps you make an informed choice, tailoring your canvas to your specific artistic needs and vision.
- Weave: This refers to the pattern in which the threads are interlaced. Common weaves include plain weave (a simple over-under pattern, often leading to a uniform surface ideal for detailed work or smoother applications), twill weave (creates diagonal lines, offering increased durability and a slightly different, often more tactile texture, great for a visible brushstroke), and duck weave (a heavy, plain-weave cotton known for its tight, smooth surface, often graded by numbers like #10 or #12 – lower numbers mean heavier, coarser fabric). The tighter the weave, the less absorbent the canvas will be naturally, and the finer the detail you can achieve, while a looser weave offers a more pronounced texture that can become an integral part of the artwork, almost a signature.
- Thread Count: Similar to bed sheets, thread count indicates the number of threads per square inch. A higher thread count generally means a finer, smoother, and often more expensive canvas, ideal for detailed work, delicate glazes, or portraiture. A lower thread count suggests a coarser, more textured surface, excellent for expressive or heavily impastoed paintings where you want the canvas to assert its presence, providing a tactile richness.
- Weight (or Mass): Expressed in ounces per square yard (oz/sq yd or g/m²), the weight tells you how dense and thick the canvas is. Heavier canvases (e.g., 12oz or more) are typically more robust, less prone to tearing, and suitable for large, ambitious works with substantial paint application, providing a sturdy foundation. Lighter canvases (e.g., 7oz-10oz) are more delicate, often chosen for subtle staining, ethereal washes, or where the drape and movement of the fabric is part of the artwork (as in unstretched pieces), offering a sense of lightness and fluidity.
- Selvedge: This is the factory-finished edge of the fabric, designed to prevent fraying. While often trimmed away for traditional stretching, some artists deliberately incorporate the selvedge into their work, especially in textile art, mixed media, or when working with unstretched canvas, as a subtle nod to the material's origins and a unique textural element, a quiet statement of raw authenticity.
- Finish: Raw canvas can come with various natural finishes, from a soft, almost fuzzy surface to a crisper, smoother hand. These subtle variations, often a result of the weaving process or minimal processing, can influence initial absorbency and the way paint interacts with the fibers. It's worth touching a sample if you can, to feel the difference.
Now, think of the pre-stretched canvases you buy at the art store. They're almost always coated with a bright white, slightly toothy layer. That's the primer. It creates a barrier, making the surface less absorbent and providing a uniform background. Raw canvas skips that step, which opens up a whole new world of possibilities and problems (the fun kind, mostly!). It means you, the artist, get to decide exactly how that surface will behave and what dialogue it will have with your paint, truly becoming the alchemist of your own artistic ground.
If you're still on the fence, or just trying to wrap your head around the fundamental differences, or perhaps convince a skeptic (or yourself!) why all this extra effort is worth it, here’s a quick breakdown of how raw and primed canvas stack up, feature by feature. This comparison should help clarify why one might be chosen over the other for a specific project, guiding your decision towards a surface that truly resonates with your artistic intentions:
Feature | Raw Canvas | Primed Canvas | |
|---|---|---|---|
| Surface | Natural, textured weave. Color is beige/off-white, offering an organic, earthy ground. | Smooth, uniform white surface (unless tinted), providing a consistent, often stark white base. | |
| Absorbency | Extremely high. Drinks up paint like a sponge, allowing for deep staining, unique bleeding effects, and a matte finish. | Low. Paint sits on top, offering more control for blending, layering, crisp lines, and vibrant opacity. | |
| Best For | Staining, soaking, drawing directly onto fabric, expressive work where texture and the raw material are key, abstract expressionism, textile art. | Traditional oil/acrylic painting, detailed work, glazing, achieving vibrant color opacity, smooth gradients, representational art. | |
| Prep Time | Requires sizing (and often priming) which adds significant steps to the process, but offers customization. | Ready to use right out of the wrapper, saving time and effort for immediate painting, ideal for quick studies or commissions. | |
| Vibe | Organic, rustic, deeply integrated with the artwork, a co-creator in the piece, offering a direct tactile connection to historical traditions. | Classic, clean, a neutral stage for the paint to perform, providing clear separation between medium and support, a predictable surface. | |
| Longevity/Archivability | Excellent, if properly sized. Vulnerable to oil rot, brittleness, and SID if not, which can cause severe degradation over time. | Generally very good and stable due to protective primer layer, offering reliable archival qualities and long-term stability. | |
| Surface Sensitivity | Prone to Support Induced Discoloration (SID) without proper barrier, which can lead to unwanted yellowing or staining from the support or environment. | Less susceptible to SID due to barrier, ensuring color integrity and preventing discoloration from the support. | |
| Texture Variation | Exhibits natural variations, slubs, and the inherent character of the weave, contributing unique visual interest and a handmade feel. | Generally uniform, obscuring the natural weave and providing a consistent, predictable surface without inherent variations. | |
| Color Interaction | The natural beige/off-white tone influences overlaid colors, often adding warmth and unifying the palette. | Provides a neutral (usually white) base, allowing colors to be perceived without underlying tonal influence, making them pop. | |
| Environmental Impact | Can be lower if using natural fibers (like organic cotton or linen) and eco-friendly sizes (such as pH-neutral PVA or natural starches), reducing the overall carbon footprint. | Varies depending on primer type; often involves synthetic acrylic polymers and industrial processes that can have a larger environmental impact. | |
| Price Point | Often more economical per square foot, but factor in the additional cost of prep materials and your time. | Higher initial cost, but the convenience and ready-to-use factor are major considerations, especially for smaller works. | |
| Flexibility/Drape | Retains inherent flexibility and drape, which can be part of the artwork, especially when unstretched. | Stiffer due to primer layers, less flexible, typically intended for a taut, stretched presentation. | |
| Archival Considerations | Demands thorough understanding of sizing to prevent deterioration (oil rot, SID). Your diligence ensures longevity. | Generally pre-treated for archival stability, requiring less artist intervention in terms of long-term preservation. |

It's a bit like choosing between baking from scratch with raw ingredients or using a pre-made mix. Both get you cake, but the process and the subtle nuances of the final product are entirely different, and frankly, the "from scratch" version often feels more personal, more you. The canvas itself becomes a part of the narrative, not just a stage.
The Allure of the Unprimed: Why Bother? Unlocking New Artistic Dimensions
If primed canvas is so convenient, readily available, and seemingly fuss-free, why would anyone go through the trouble of sourcing, preparing, and working with raw canvas? I've asked myself that question many times, especially after a particularly challenging stretching session or a messy sizing application. But the answer always comes back to this, resounding clear: the results can be breathtakingly unique, profoundly authentic, and a direct reflection of a more engaged, hands-on artistic process. It’s an invitation to lean into imperfection, to collaborate with your materials, and to find beauty in the raw, unpolished state of things – a philosophy that resonates deeply with my own approach to art. It's about stepping beyond the conventional and discovering new possibilities that only raw canvas can offer, pushing the boundaries of what a painting can be and how it interacts with its support.
Authenticity and Texture: A Dialogue with the Material
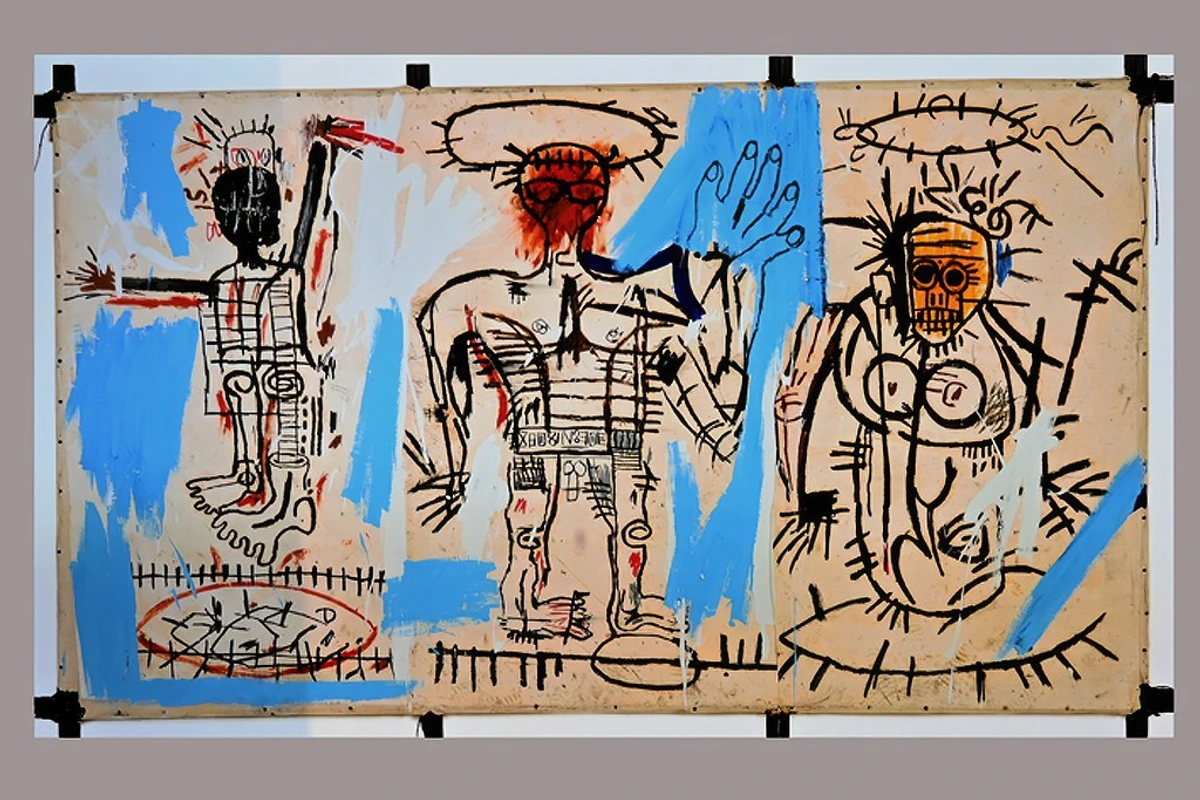
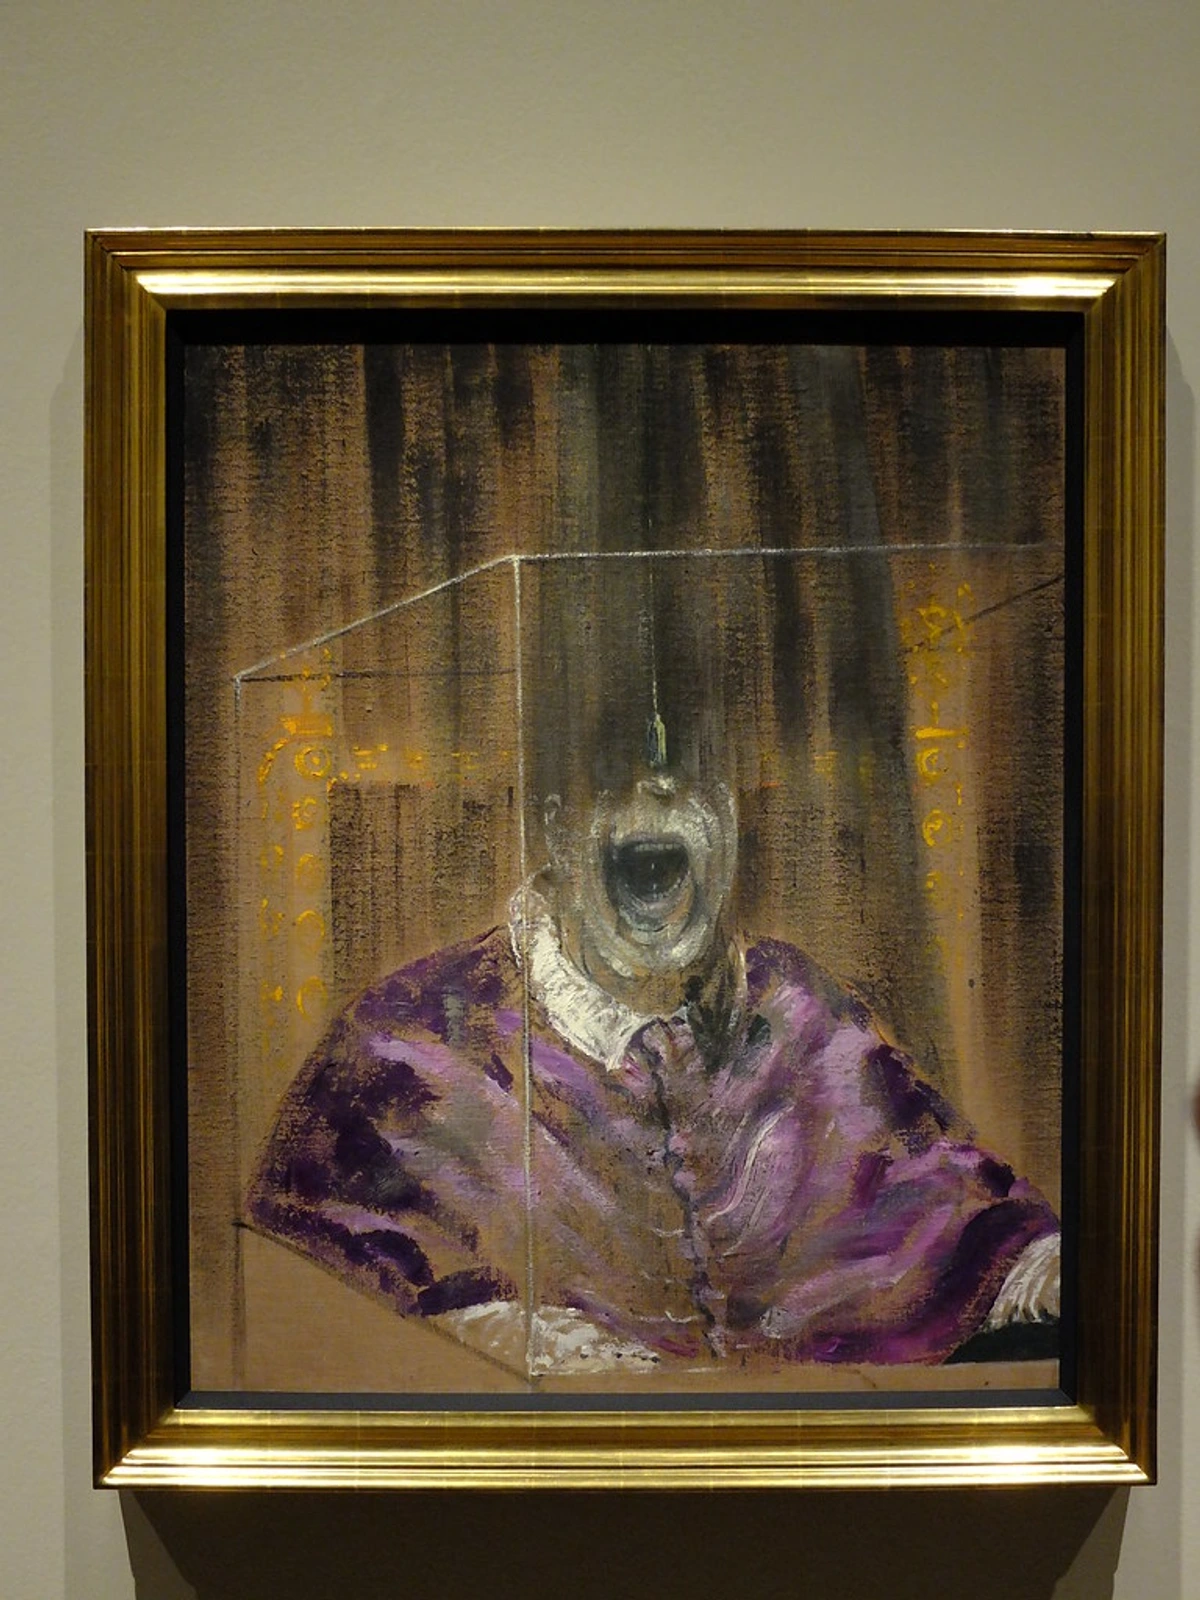
There's a raw power to it, a philosophical concept known as "truth to materials" – the idea that a material's inherent qualities should be respected and celebrated rather than disguised. When you let the natural color and texture of the canvas show through, it stops being just a just a passive support and becomes an active, undeniable element in the visual vocabulary, influencing the very elements of art: line, shape, form, texture as well as the overall composition in art explained. It's not just an aesthetic choice; it’s a profound dialogue between your medium and your surface, a conversation that adds unparalleled depth and authenticity to the final piece. Think of artists like Jackson Pollock, who famously used raw, unstretched canvas, laying it on the floor and letting his signature drips and pours soak right into the fibers, making the fabric an inseparable part of the work—almost a topographic map of his artistic process, an enduring legacy of Abstract Expressionism.
But it’s not just about dramatic drips. Consider artists like Sam Gilliam, who in his drape paintings, allowed the unstretched, painted canvas to hang freely, emphasizing its materiality, gravitational interaction, and sculptural potential. Or look at the minimalist works of Robert Ryman or Agnes Martin, where the texture and subtle variations of the white-primed canvas surface become the subject itself, inviting close contemplation of surface quality. This deep integration of material, especially prominent in many abstract art styles and contemporary sculpture, offers a unique visual and tactile experience, inviting the viewer to engage with the very fabric—the literal DNA—of the artwork itself. It's about letting the material speak, rather than trying to force it into submission, fostering a more honest and direct artistic statement. This approach also deeply connects to understanding form and space in abstract art and the deeper meaning of what is abstract art. Beyond these giants, many contemporary artists are also rediscovering the power of raw canvas, using it to challenge traditional notions of painting and sculpture, inviting viewers to question what art is and can be.
More recently, artists like El Anatsui have transformed discarded materials, including bottle caps and other found objects, into monumental, tapestry-like sculptures, often incorporating textiles that blur the lines between traditional craft and contemporary art. While not strictly raw canvas, his work embodies the spirit of truth to materials and the recontextualization of everyday objects into profound artistic statements, a philosophy that deeply resonates with the raw canvas movement. It’s about challenging the hierarchy of materials and celebrating the inherent qualities of the humble. This also ties into discussions around what is design in art and how materials dictate both form and function.
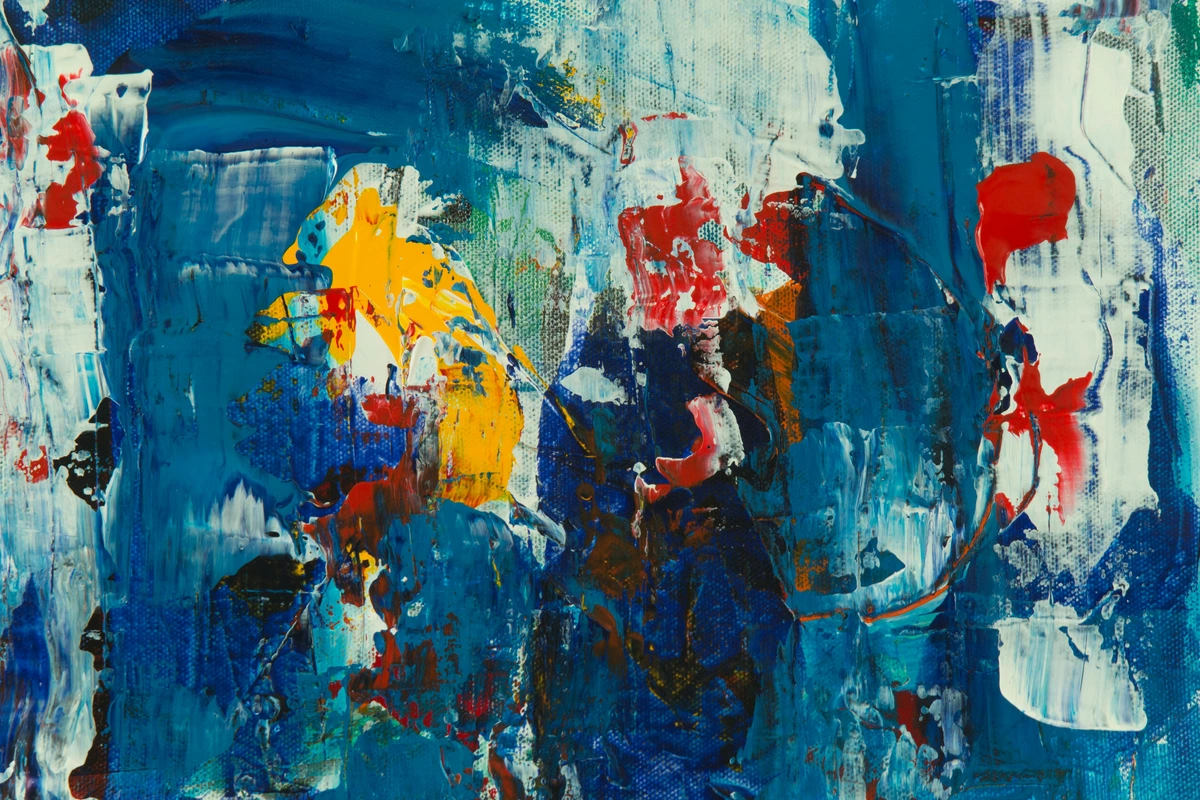
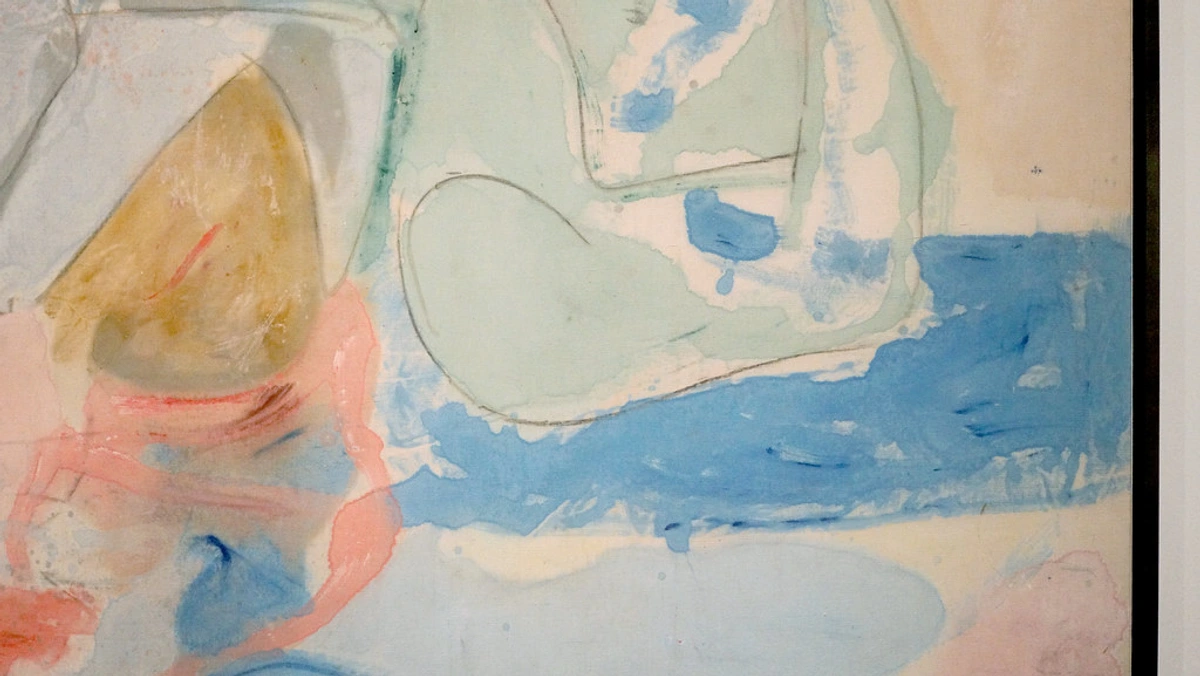
Staining and Soaking: The Magic of Absorption
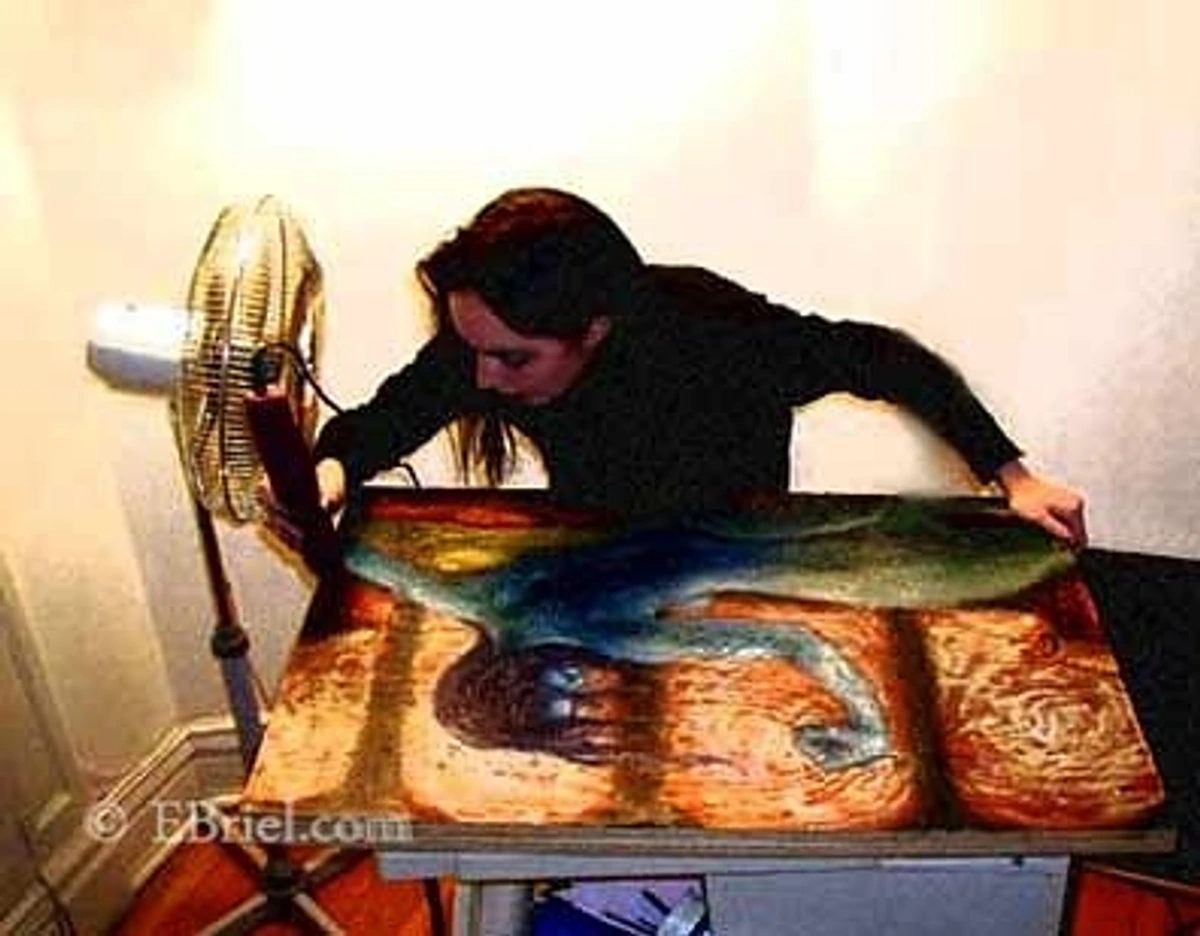
This is often the big draw for artists experimenting with raw canvas. Because raw canvas is so incredibly absorbent, you can thin your paint way down—with water for acrylics (or even acrylic inks) or turpentine/mineral spirits for oils (always in a well-ventilated space, please, and consider personal protective equipment!)—and pour, brush, or even spray it directly onto the surface. The paint doesn't just sit on top as it would on a primed surface; it soaks into the fibers, becoming one with the fabric, creating soft, ethereal, watercolor-like effects with the richness and permanence of acrylic or oil. This technique, famously pioneered by artists like Helen Frankenthaler and Morris Louis in the mid-20th century, is called soak-stain or stain painting. Their innovative approach allowed for direct engagement with the canvas, often by laying it on the floor, eliminating the traditional brushstroke and focusing instead on vast expanses of color that seemed to emerge from the canvas rather than rest on it. It's a beautiful way to create luminous fields of color, subtle gradients, and unexpected bleeds, where the paint and canvas are almost indistinguishable, a hallmark of Color Field painting, a significant movement in abstract art. I've found that this process can feel incredibly meditative, a dance between control and surrender, a true collaboration where the material plays a powerful, almost mystical, role. This direct interaction allows for unique textures and atmospheric qualities that are impossible to achieve on a sealed surface, making it a favorite technique for many abstract art styles. For even more pronounced effects, experiment with different viscosities and application methods – a spray bottle for misty transitions, a sponge for diffused areas, or a direct pour for intense, concentrated blooms of color. The key is to embrace the liquid nature of the paint and allow the canvas to guide its journey. Beyond traditional paints, many artists find immense success using textile dyes or highly diluted fabric paints on raw canvas. These mediums, by their very nature, are designed to penetrate and become one with the fibers, producing incredibly vibrant, permanent, and deeply integrated color fields that highlight the canvas's texture and natural qualities.
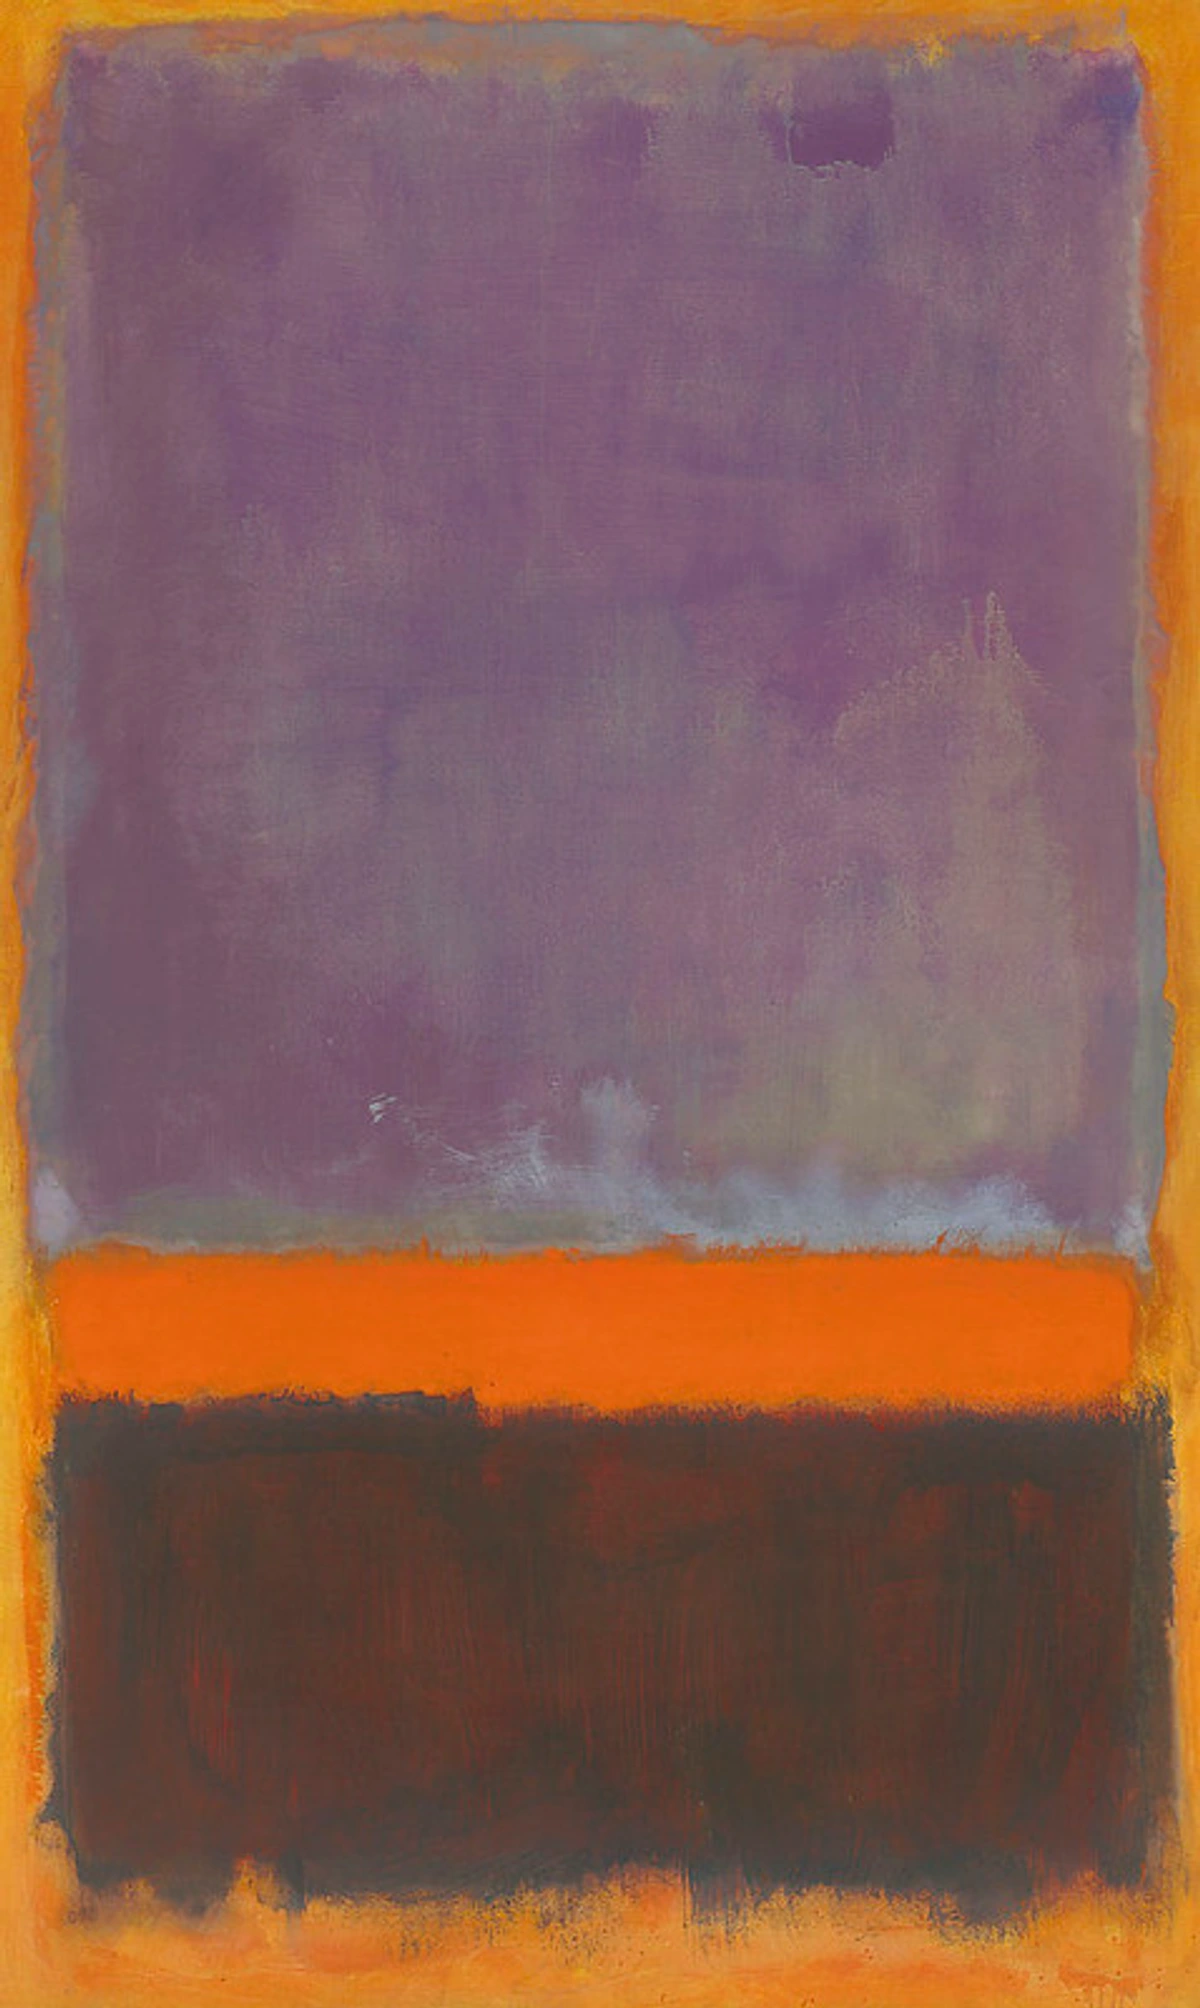
A Different Color Ground: Building from Earth's Palette
The warm, earthy, often oatmeal-like tone of natural cotton or linen can be a stunning starting point for a painting, a far cry from the stark white of a typical primed canvas. Instead of starting with a blank white slate that sometimes feels like it demands to be completely covered, this natural ground can unify a palette, adding an inherent warmth, depth, and organic quality that a white ground just can't replicate. It subtly influences every color you lay down, often pushing towards richer, more harmonious hues and creating unexpected color interactions. I find that this natural ground encourages a fundamentally different way of thinking about color relationships, about light, and crucially, about negative space. It can often lead to a more minimalist approach in art or a minimalist art style, where the untouched, unpainted canvas areas become as potent and important as the painted areas. It's almost like the canvas itself is gently whispering suggestions for your entire palette, guiding your choices towards an organic unity, creating a nuanced conversation between the untouched and the applied. This allows you to think of your compositions in terms of positive and negative space in a truly integrated way, deeply connected to the elements of art and design and how artists use color. The natural hue can act as a built-in mid-tone, simplifying value judgments and allowing you to focus on the interplay of light and shadow, resulting in works that feel deeply connected to their foundational material. This is where understanding the psychology of color in abstract art becomes particularly potent, as the inherent warmth of the canvas can subtly shift the emotional resonance of your entire piece, profoundly influencing the viewer's experience. It's a testament to the power of a foundational tone, as explored in depth in The Definitive Guide to Color Theory in Art.

Environmental Considerations: Painting with a Conscience
In today's world, many artists are also thinking deeply about the environmental impact of their materials and practices. Working with raw canvas can offer a more sustainable and eco-conscious option, especially if you choose organic cotton or linen that's sustainably sourced and opt for eco-friendly sizing alternatives like pH-neutral PVA or even natural starch-based sizes. This approach often reduces the reliance on pre-primed canvases that, while convenient, frequently involve synthetic polymers, petro-chemical derivatives, and industrial processes (including packaging and transportation) which can have a larger carbon footprint and contribute to waste. It's a small but meaningful way to connect your art practice with a broader ecological awareness, aligning your creative choices with your values. For me, creating beauty shouldn't come at the cost of the planet, and consciously selecting materials is an integral part of that philosophy. Furthermore, opting for reusable stretcher bars, repurposing materials, and minimizing single-use plastics in your studio can amplify these positive environmental efforts, fostering a more holistic approach to sustainable art-making. Even the choice of natural dyes or earth pigments can further reduce your ecological footprint, creating art that truly embodies a connection to nature. Consider exploring local suppliers for canvas and stretcher bars to reduce transportation emissions, and always research the lifecycle of your chosen materials, from production to disposal. Every small choice contributes to a larger, more conscious creative ecosystem. And honestly, it feels pretty good to create something beautiful while also being kind to the planet.
Cost-Effectiveness and Customization: Beyond Standard Dimensions
For many artists, especially those working on a larger scale or frequently producing new works, buying raw canvas in rolls can be significantly more cost-effective than purchasing pre-primed, pre-stretched canvases. While there’s an upfront investment in stretcher bars, canvas pliers, and sizing materials, the long-term savings can be substantial, especially when you consider the sheer volume of material you might use over time. Beyond just the economics, a crucial advantage is the complete creative control you gain over the size and aspect ratio of your canvas, freeing you from the limitations of standard store dimensions. Need an irregularly shaped canvas for that new conceptual piece, or a massive triptych that spans an entire wall? Or perhaps you're working on a series of truly monumental scale that would be prohibitively expensive with pre-made options? Raw canvas is unequivocally your answer. It offers unparalleled freedom to tailor your surface to your exact artistic vision, allowing for truly unique presentations and pushing the boundaries of traditional formats. This liberation from the tyranny of standard dimensions is something I absolutely love and constantly seek in my own creative practice, enabling me to realize visions that would otherwise be impossible or financially prohibitive. It's about empowering your vision, not limiting it to what's available off the shelf, and truly making the canvas an extension of your creative will, whether you're crafting a subtle narrative or a monumental statement in abstract art.
To give you a rough idea, a typical roll of raw linen might cost, say, $300 for 10 yards. To buy that same amount in pre-primed, pre-stretched canvases of various standard sizes, you could easily be looking at upwards of $600 to $1000, not accounting for specialty sizes or bespoke dimensions. The initial outlay for tools and materials (staple gun, pliers, sizing, stretcher bars) is a one-time investment that quickly pays for itself if you're a prolific artist or work on larger scales.
Expressive Freedom and Experimentation: Embracing the Unpredictable
Working with raw canvas inherently encourages a different, often more intuitive, kind of artistic thinking. It's less about dominating or covering a pristine surface and more about collaborating with a living, breathing textile. The high absorbency, the visible weave, the natural color—all these factors invite experimentation and push you beyond conventional painting methods. You might find yourself exploring new techniques like sophisticated staining, expressive drawing directly on the canvas (perhaps with charcoal or pastels that truly grab the tooth), or incorporating the natural fibers themselves into your marks and textures. This material challenges you to break free from old habits and truly explore how to abstract art in novel ways. It's a journey of discovery, every single time, often revealing surprises and new artistic pathways that a pre-primed surface wouldn't allow. Perhaps you'll explore mark-making directly on the raw fibers, or integrate collage elements that interact directly with its natural texture and color. This can lead to rich mixed media works that celebrate layered textures and unexpected juxtapositions. In essence, raw canvas challenges you to adapt, to innovate, and to let the material guide a part of the creative process, making the final artwork a more honest and profound reflection of that collaborative effort. It’s an invitation to embrace the unpredictable and find beauty in the spontaneous, deeply connecting with the art of intuitive painting. You might even find yourself engaging with its fibers through embroidery, stitching, or weaving, further blurring the lines between painting and textile art.
The Practical Part: Preparing Raw Canvas
Okay, so you can't just slap oil paint directly onto raw canvas and call it a day. Well, you can, but you'll probably regret it later – and your artwork will likely regret it even more. Trust me on this. There are a couple of crucial prep steps, especially for oil painters, that are non-negotiable for archival longevity and often highly beneficial for aesthetic control, no matter your medium. This isn't about stifling your creativity; it's about building a robust foundation that allows your artistic vision to flourish for decades, even centuries.
Essential Tools and Materials for Preparation
Getting started with raw canvas requires a few basic supplies beyond the canvas itself – consider this your preparatory toolkit, carefully curated for both efficiency and archival quality. Here’s a quick checklist of what you'll likely need to get started:
- Raw Canvas: Of course! Rolls are generally more economical than pre-cut pieces, allowing for custom sizes and reducing waste. I often buy a large roll of linen or cotton duck canvas, knowing I'll always have material on hand, ready for inspiration. Consider the specific weave and weight you'll need for your project, as discussed in detail later.
- Stretcher Bars: These wooden frames come in various lengths and are assembled to create the underlying support for your canvas. Always look for kiln-dried wood to minimize warping and twisting, especially for larger works that need to stay true over time. Consider "keyed" bars for re-tensioning – they come with small wedges that can be tapped to tighten the canvas later, which is invaluable if your canvas sags due to humidity or heavy paint application. You'll want to choose bars with a slight bevel to prevent the canvas from touching the inner edge of the frame, avoiding unsightly lines on your finished painting. Investing in good quality bars is an investment in your artwork's longevity.
- Canvas Pliers: This specialized tool is an absolute lifesaver. It gives you the leverage needed to pull the canvas taut over the stretcher bars, essential for achieving that satisfying, drum-tight surface. Trust me, your hands will thank you, especially on larger canvases, making the stretching process far more efficient and less strenuous than trying to do it by hand. It ensures a stable, responsive surface for your paint.
- Staple Gun & Staples: For securely attaching the canvas to the stretcher bars. While a manual one works, an electric staple gun makes the job significantly easier on your hands and offers more consistent results, preventing frustrating half-driven staples that can snag or tear. Ensure you use stainless steel staples for archival purposes, especially if working in humid environments, as they resist rust and degradation, preserving the integrity of your attachment points.
- Measuring Tape, Ruler & Utility Knife/Scissors: For accurately cutting your canvas from the roll and ensuring precise dimensions for stretching. A sharp, heavy-duty utility knife (with plenty of fresh blades) is key for clean, straight edges and preventing fraying, especially if you're cutting a lot. A self-healing cutting mat is also invaluable for protecting your work surface and providing a clean, flat area for cuts. Precision here will save you headaches later.
- Sizing Agent: As discussed, your choice will likely be between pH-neutral PVA size or Golden GAC 100. This is non-negotiable for oil painters – it’s the archival bodyguard for your canvas! I often recommend a large, soft hake brush or a foam roller for even application, ensuring complete coverage and a uniform barrier. This step is the silent hero of archival longevity.
- Gesso/Primer (Optional): This could be a standard acrylic gesso (available in white, clear, or black), or a tintable variety if you want a custom-colored ground. Always check if it's suitable for your chosen medium and provides the desired absorbency and tooth. For applying gesso, I recommend consulting a guide like how to apply gesso to canvas. The choice here is deeply personal, impacting the initial interaction of your paint with the surface.
- Brushes/Rollers: For applying sizing and gesso evenly. I always recommend dedicating specific, inexpensive brushes or foam rollers for these prep steps, as they can be tough on bristles and you don't want primer gunking up your good painting brushes. Rollers can be particularly effective for achieving smooth, even layers over large areas with minimal brushstrokes, ensuring a consistent application.
- Sandpaper (Fine-grit, 220-400): For smoothing gesso layers if you desire a very slick, refined surface. This helps eliminate brushstrokes and create an ultra-smooth ground, perfect for detailed work, delicate glazing, or portraiture. Always sand gently and in a well-ventilated area, and wear a dust mask to protect your lungs from fine particulate matter.
- Mixing Containers & Stir Sticks: For diluting sizing agents, mixing tinted gesso, or preparing glues. Old yogurt containers, plastic cups, or repurposed food containers work perfectly, saving you from cleaning your nice studio bowls and keeping your workflow efficient and less messy. Organization, even for mixing, contributes to a smoother process.
- Gloves: Essential for protecting your hands from sticky sizes, gesso, and any solvents you might use. Nitrile gloves are often preferred for their chemical resistance and durability. A little prevention goes a long way in the studio, protecting both you and your materials, and allowing you to focus on the creative act without worry.
- Dust Mask/Respirator: Especially important when sanding gesso or working with solvent-based materials. Protecting your respiratory health is paramount, and a good quality mask is a non-negotiable investment for a safe studio practice. A little prevention goes a long way in the studio, protecting both you and your materials.
Workspace and Safety Considerations: Creating a Conducive Environment
Preparing raw canvas can, I admit, be a bit messy, and occasionally involves fumes – it's definitely not always a pristine process! Therefore, it's incredibly wise to set up a dedicated workspace that prioritizes both efficiency and safety. Lay down plenty of drop cloths, old tarpaulins, or thick newspapers to thoroughly protect your floors and work surfaces from spills and drips – better safe than sorry, I always say! Ensure you have excellent ventilation, especially when working with solvents for oil paints (like turpentine or mineral spirits) or any sizing agents that might emit fumes. A window fan or an open door can make a huge difference, but consider a dedicated exhaust fan for serious solvent use. If you're using sprays, strong chemicals, or if ventilation is limited, a respirator mask (designed for organic vapors) and appropriate chemical-resistant gloves are not just recommended, they're an absolute must for your health and safety. Remember, a safe and organized workspace not only makes the entire process more enjoyable and less stressful, but, more importantly, it allows you to focus completely on the art itself, not on the cleanup or potential health hazards. Keep your tools within easy reach, designate a separate, airtight, fire-safe bin for messy rags (especially those soaked in solvents, which can be a fire hazard – always check local disposal guidelines!), and always read the safety instructions on all your art materials. A well-organized studio is a safe studio, allowing creativity to flow without unnecessary distractions, letting you explore new abstract art styles or traditional methods with peace of mind. Investing in good lighting is also key, reducing eye strain and allowing for accurate color mixing and application.
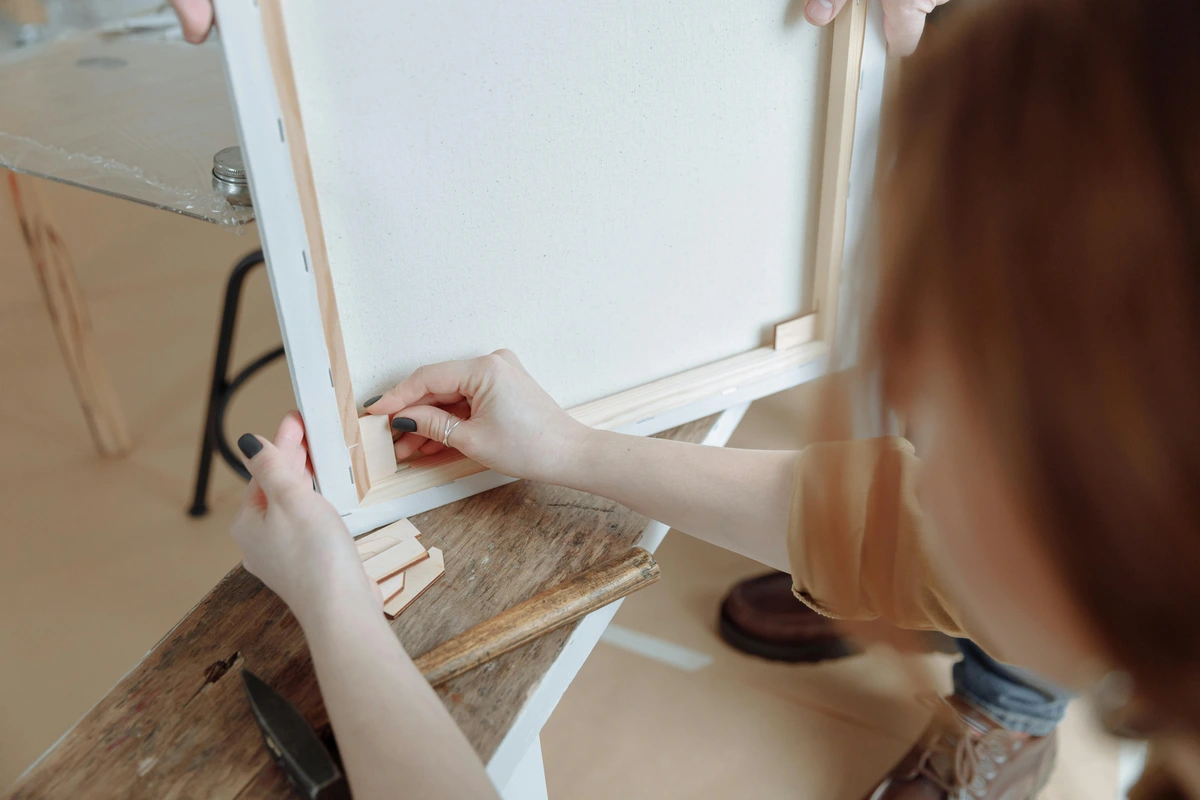
First, you'll want to master the art of how to stretch your canvas onto a frame. While some artists prefer to work with unstretched canvas (more on that later), it's generally much easier to achieve predictable results on a taut surface. A well-stretched canvas provides a stable, resilient foundation for your brushstrokes, your staining techniques, or any mark-making. Crucially, a drum-tight canvas prevents sagging and ensures your composition remains true and undistorted as the paint dries and the fabric settles. It’s an investment of time that pays dividends in the final integrity of your artwork, preventing frustration down the line. You can find a detailed guide on how to stretch a canvas to walk you through the process step-by-step.
Stretcher Bar Options
Choosing the right stretcher bars is more important than you might think. They are the skeleton of your artwork, the silent structural support that dictates its stability and longevity. Just as a good foundation is essential for a building, a quality stretcher frame is paramount for your canvas, especially for larger pieces or those intended for a long life.
Type of Stretcher Bar | Description | Pros | Cons |
|---|---|---|---|
| Standard Pine | Common, affordable, usually finger-jointed (multiple small pieces joined together). Often made from softer, fast-growth woods. | Economical, widely available at most art supply stores. Good for studies, practice pieces, or less archival works where longevity isn't the primary concern. | Can warp, twist, or bow over time, especially in larger sizes or fluctuating humidity, potentially distorting your artwork. Joints can be less stable and may shift, leading to a less taut surface. |
| Heavy Duty/Gallery Wrap | Thicker, wider bars (e.g., 1.5" or deeper profile), often made from more stable woods (like fir or poplar) or laminated to resist warping. | Significantly less prone to warping and bowing, offering superior stability for large, ambitious works. The deeper profile is ideal for contemporary gallery-wrap presentation, where the painting extends around the sides of the frame, eliminating the need for external framing. | More expensive and heavier than standard bars, which can add to shipping costs for larger works. The deeper profile might also impact framing options if you later decide to frame traditionally. |
| Keyable Bars | Feature small wooden wedges (keys) that can be tapped into the corners of the assembled frame. These subtly expand the frame from within. | Allows for future re-tensioning of the canvas if it loosens due to environmental changes, stretching from paint layers, or the drying process, extending the life and presentation of your artwork significantly. This is a crucial feature for archival work. | Slightly more complex assembly initially due to the need to fit the keys correctly. The keys themselves can sometimes get lost or be difficult to tap if the canvas is overly tight. |
| Aluminum Stretcher Bars | Lightweight, extremely stable metal frames, often used for very large archival works or in environments with extreme humidity fluctuations. | Will not warp, twist, corrode, or be affected by humidity changes. Provide ultimate stability and are ideal for monumental scale artworks where wood might fail, or for international shipping. | Significantly more expensive than wood, require specialized assembly (often with proprietary corner brackets), and are less common to find in standard art supply stores. Can also be colder to the touch, which might be a minor aesthetic consideration. |
| Ponderosa Pine/Hardwood | Made from higher quality, more stable wood than standard pine, often with solid, not finger-jointed, construction. | Offers a good balance of affordability and stability, less prone to warping than standard pine. A step up for artists looking for better quality without the jump to aluminum. | Still susceptible to some environmental movement, though less so than standard pine. May not be readily available in all areas. |
Investing in good quality stretcher bars is investing in the longevity of your artwork. For larger pieces, consider cross-braces for added stability and to prevent bowing. Always assemble them on a flat, even surface to ensure your frame is perfectly square – a warped frame means a warped canvas, and nobody wants that. When assembling, use a carpenter's square to check all corners for true 90-degree angles, and gently tap the joints with a mallet to ensure a snug fit. This meticulous attention to detail at the outset can prevent a lot of frustration down the line.
Next, and I cannot stress this enough, this is probably the single most important part for the longevity and archival quality of your artwork: you need to size it. Sizing is the process of applying a sealant that creates an impermeable barrier between the raw canvas fibers and your subsequent paint layers. For oil painters, this is absolutely non-negotiable. The oils in oil paint (like linseed oil, walnut oil, or poppy seed oil) contain fatty acids that, over time, will penetrate the unprotected canvas fibers. This acid literally eats away at the cellulose (the primary component of cotton and linen fibers), causing the fabric to become brittle, weak, and eventually disintegrate. This irreversible process is grimly known as oil rot, and trust me, you absolutely do not want your masterpiece, your hours of dedication, your artistic legacy, to turn into dust a few decades down the line. A properly applied size prevents this destructive chemical interaction, ensuring your artwork remains structurally sound and vibrant for centuries, maintaining its aesthetic and material integrity. Think of it as putting on an archival-grade raincoat, a protective shield, for your canvas. It's the silent hero of art conservation, quietly ensuring your creative efforts endure. Even if you're not planning to use oil paints, sizing can still be highly beneficial for controlling absorbency and preventing 'Support Induced Discoloration' (SID) which can occur with certain acrylic applications as well.
Here’s a quick guide to your options, keeping in mind that the goal is always a stable, archival surface:
Method | Description | Pros | Cons | Application Tips | Drying Time | Compatibility |
|---|---|---|---|---|---|---|
| Rabbit Skin Glue (RSG) | The traditional, historical method of sizing, a protein-based animal glue prepared by soaking and gently heating granules. | Creates a very taut, drum-like surface, a favorite among old masters for its firmness and responsiveness to brushwork. | Can be highly hygroscopic (absorbs and releases moisture with humidity changes), leading to brittleness and cracking over time, especially in fluctuating environments. It also has a distinct odor, requires careful preparation (heating, not boiling), and is not vegan. | Apply warm in thin, even coats with a wide brush. Avoid bubbles and ensure complete, uniform coverage. | Several hours per coat; multiple coats (typically 2-3) may be needed for full sealing, with thorough drying between applications. | Primarily for oil painting under traditional gesso. Not recommended for acrylics due to incompatibility and potential for adhesion issues. |
| PVA Size (Polyvinyl Acetate) | A modern, pH-neutral synthetic glue specifically designed for art conservation. It's a common and highly recommended archival alternative to RSG. | Flexible, archival, easy to use (often ready-mixed or easily diluted with water), non-toxic when dry, and doesn't emit strong odors. It's significantly less prone to brittleness and cracking than RSG, offering a stable barrier. | Doesn't tighten the canvas as much as RSG, though it still provides good tension. Can be considered less "traditional" for purists, but its archival benefits are undeniable. | Apply thinly and evenly with a brush or roller. Can be diluted slightly with water for easier spreading and to achieve desired penetration. | Quick drying, usually within 1-2 hours per coat, making the process relatively efficient. | Excellent for both oil and acrylic paints, providing a stable, protective barrier. Ideal for achieving a matte to satin surface that retains some of the canvas's natural absorbency. |
| Acrylic Polymer (e.g., Golden GAC 100) | A clear, liquid acrylic medium formulated as a universal protector. It effectively seals porous surfaces and is particularly renowned for blocking Support Induced Discoloration (SID) from the canvas or wooden stretcher bars. | Considered the modern gold standard for archival sizing. It's highly flexible, remains clear and non-yellowing over time, and provides excellent protection against oil penetration and SID. It's also highly effective for preventing colors from 'sinking' unevenly into absorbent canvases, thus maintaining color vibrancy and consistency. | Can look a bit glossy if applied too thick, which might need to be accounted for if you're not priming over it. Its thin consistency requires careful, even application to avoid unevenness, drips, or streaks that could alter the final surface texture. | Apply 2-3 very thin, even coats with a soft brush or foam roller, allowing each to dry thoroughly according to manufacturer instructions (typically an hour or two). Avoid pooling, especially in the weave, to maintain a consistent surface and prevent an overly glossy finish. | Dries fairly quickly, often within an hour or two, depending on humidity and coat thickness. Ensure complete curing before applying oil paints. | Ideal for both oil and acrylics, especially if you want to retain the raw canvas look but need maximum protection and color integrity. Creates a slightly more luminous and less absorbent ground than raw canvas or even PVA, due to its inherent clarity and film-forming properties. |
| Acrylic Gel Medium (Clear) | A thicker, transparent acrylic medium used not only for sizing but also to add texture and build layers in mixed media. | Provides a good, flexible, and archival seal; effectively controls absorbency; and can add subtle texture to the surface while preserving the raw canvas look. Can be useful for embedding collage elements. | Can be more expensive than liquid sizes; its thicker consistency requires careful, even application to avoid streaks, uneven drying, or bubbles. May not penetrate fine weaves as deeply as liquid sizes. | Apply 1-2 coats, allowing thorough drying between each. Can be thinned slightly with water for easier spreading, but avoid over-thinning, which can compromise its sealing properties. | 1-3 hours per coat, depending on thickness and environmental conditions. Requires complete curing before oil painting. | Excellent for acrylics, mixed media, and collage. Can be used under oils if fully cured, providing a robust, flexible barrier. |
For acrylic painters, sizing is less about preventing the destructive chemical interaction of oil rot (as acrylics are water-based and don't harm the canvas fibers in the same way) and more about controlling absorbency and achieving desired aesthetic effects. If you want your acrylic paint to flow a bit more smoothly, blend easily, and not sink in immediately, becoming dull or splotchy, a couple of coats of clear acrylic medium (like a gloss or matte medium) or a dedicated clear gesso will do the trick. This not only provides a more predictable painting surface but also helps to preserve the vibrancy of your colors and reduce paint consumption, all while preserving that desirable raw canvas look. For controlled staining effects, a single thin coat of GAC 100 might be perfect, while for more brushable, opaque layers, a clear acrylic gesso with a bit more tooth could be ideal. It's about tailoring the surface to your specific acrylic technique.
Priming (Optional, but Often Recommended): Tailoring Your Surface with Gesso
After the crucial sizing step, you might choose to apply a primer, commonly referred to as gesso. This isn't strictly necessary if you're aiming for a raw, unadulterated canvas look with a clear sizing agent, but it serves several crucial, often overlooked, purposes that can significantly impact your painting process and the final artwork. The decision to gesso or not often comes down to your desired surface texture, the specific medium you're using, and the overall aesthetic you're chasing for the piece. I've found that sometimes the raw canvas whispers to me to leave it naked and celebrate its natural qualities, while other times, a bright, uniform ground feels absolutely essential to my vision, especially for vibrant color work, precise detailing, or achieving luminous transparency. It's a balance between embracing the inherent qualities of the canvas and exerting control over the final surface – a truly personal choice that often evolves with your artistic journey. Here's why you might consider it – and why many professional artists do, viewing it as another layer of deliberate artistic choice:
Common Problems and Troubleshooting with Raw Canvas: Navigating the Obstacles
Working with raw canvas, while immensely rewarding and creatively liberating, isn't without its quirks and challenges. It's a material that demands a little extra understanding and patience. As with any artistic material, encountering potential pitfalls is part of the learning process, but knowing how to troubleshoot them can save you a lot of frustration, wasted effort, and even salvage an artwork. Here are some common issues I've encountered in my own practice, along with my hard-won advice on how to navigate them effectively:
Problem | Description | Solution(s) |
|---|---|---|
| Sagging After Painting | Canvas loses tautness after paint application or due to environmental changes. | Re-tension with corner keys (if available). For non-keyable bars, a fine mist of water on the back (use caution and test first). Extreme cases may require re-stretching. |
| Paint Bleed-Through | Thin paints penetrate to the back of the canvas, visually distracting but usually not archival issue if properly sized. | Apply an extra coat of sizing (especially GAC 100) or clear gesso before painting. Use a less absorbent canvas or slightly thicker paint layers. |
| Uneven Drying & Texture | Patches of varying absorbency or texture due to inconsistent application of sizing/gesso. | Apply sizing/gesso in thin, even coats with ample drying time between layers. Light sanding (220-400 grit) between gesso layers can create a uniform surface. |
| Support Induced Discoloration (SID) | Acidic components from stretcher bars or canvas migrate, causing yellowing/staining in paint layers. | Use a robust sizing layer (GAC 100 is highly effective) thoroughly applied, even on the back edges contacting stretcher bars. Use archival-quality stretcher bars. |
| Fraying Edges | Cut edges of raw canvas unravel, making stretching difficult and messy. | Cut with a very sharp utility knife or heavy-duty scissors. Apply a thin bead of PVA glue or GAC 100 to cut edges immediately after cutting. |
| Warping Stretcher Bars | Stretcher bars twist or bow due to poor wood quality or humidity changes. | Invest in kiln-dried, good quality stretcher bars. Use cross-braces for larger canvases. Store artwork in a stable environment. |
| Wrinkling or Puckering | Canvas develops wrinkles or puckers as sizing/gesso dries due to thick application or insufficient tautness. | Apply thin, even layers of sizing/gesso to a drum-tight canvas, allowing full drying between coats. Patience is crucial here. |
| Paint Lifting or Poor Adhesion | Paint layers peel or don't stick well to the surface. | Ensure sizing is fully cured before priming. Use gesso appropriate for your medium. Lightly sand overly smooth gesso to create 'tooth' for better adhesion. |
- Sagging After Painting: This is a common issue, especially if the canvas wasn't stretched drum-tight or if heavy paint layers are applied. If your canvas sags after painting, you can try re-tensioning it with corner keys (if your stretcher bars are keyable). For non-keyable bars, a fine mist of water on the back of the canvas, allowed to dry slowly, can sometimes help tighten it, but proceed with caution and test a small area first, as over-wetting can cause other issues. Extreme sagging on unkeyed bars might necessitate re-stretching.
- Paint Bleed-Through: Even with proper sizing, extremely thin or fluid paints, especially with aggressive staining techniques, can sometimes bleed through the back of the canvas. This is usually an aesthetic issue rather than an archival one (if properly sized), but if you find it distracting, consider adding an extra coat of sizing or a clear gesso before painting. Using a less absorbent canvas from the outset, or applying paint in slightly thicker layers, can also help. If the bleeding is severe, it might indicate an insufficient sizing layer.
- Uneven Drying and Texture: Raw canvas is inherently irregular. If sizing or gesso is applied unevenly, you might end up with patches of different absorbency or texture. The best prevention is careful, thin, and even application, allowing ample drying time between coats. Sanding lightly between gesso layers (with fine-grit sandpaper, 220-400) can also help create a more uniform surface if desired, providing a smoother ground for your paint. Consistency is key here.
- Support Induced Discoloration (SID): As mentioned, this is when acidic components migrate from the support (like unsealed wood stretcher bars or even the canvas itself) into the paint layers, causing yellowing or staining. The best prevention is a robust sizing layer (especially GAC 100) applied thoroughly, even on the back of the canvas if you're worried about interaction with stretcher bars. Using archival-quality stretcher bars also helps. Don't skimp on this step, especially for important works.
- Fraying Edges: When cutting raw canvas from a roll, the edges can fray, making stretching difficult and messy. Cut with a very sharp utility knife or heavy-duty scissors, and if possible, apply a thin bead of PVA glue or GAC 100 along the cut edges immediately after cutting to seal them and prevent further fraying before you begin stretching. A serger or sewing machine can also be used for a more permanent edge finish if you plan to incorporate the edges.
- Warping Stretcher Bars: This is often due to poor quality wood or significant humidity fluctuations. Invest in kiln-dried, good quality stretcher bars, and consider using cross-braces for larger canvases. Storing your finished artwork in a stable environment is also key. Once a stretcher bar has warped significantly, it's very difficult to correct, so prevention is paramount.
- Wrinkling or Puckering During Drying: This happens when sizing or gesso is applied too thickly or unevenly, or to a canvas that isn't taut enough. As the layers dry and contract, they pull at the canvas, causing wrinkles. The solution is consistent, thin layers of sizing/gesso applied to a drum-tight canvas, allowing full drying between each coat. Patience really is a virtue here; rushing this step almost always leads to irreversible textural issues.
- Paint Lifting or Poor Adhesion: If your paint layers don't adhere well and begin to lift or peel, it often indicates an incompatible surface or insufficient preparation. Ensure your sizing is fully cured before priming, and that your primer (gesso) is appropriate for your chosen paint medium. Sometimes, overly smooth gesso without enough 'tooth' can also cause adhesion issues, especially for thicker paint applications. Light sanding between gesso layers can improve adhesion by providing a micro-texture.

Types of Primer: Tailoring Your Ground
- Traditional Gesso: Historically, this was made from rabbit skin glue, chalk (calcium carbonate), and white pigment (like titanium white). It creates a highly rigid, absorbent, and bright white ground, favored by old masters for its unique surface quality. Modern "acrylic gesso" (which isn't true gesso in the traditional sense, but an acrylic polymer primer with titanium dioxide and calcium carbonate) is far more common, flexible, and easy to use, and is typically what you'll find in art stores today. When applying, use wide, soft brushes or foam rollers, allowing each thin coat to dry completely before sanding lightly for a smoother finish. For a truly professional finish, multiple thin coats (3-5) with sanding between them can create a surface as smooth as glass.
- Clear Gesso: For those who want the benefits of gesso (tooth, absorbency control, and a slight barrier) but still want the raw canvas color and texture to show through. It offers a subtle texture without altering the natural aesthetic, ideal for artists who love the look of raw linen but need a prepared surface. This is particularly good for maintaining the organic feel while adding a layer of protection and control. Apply in thin, even coats to avoid an overly glossy or uneven surface, which can be distracting.
- Tinted Gesso: You can easily mix acrylic gesso with acrylic paints (or even a small amount of universal pigment paste) to create a custom-colored ground. This can be a fantastic way to set the mood for your painting, creating an underpainting that subtly influences your entire palette, similar to how the natural raw canvas tone works, but with greater intentional control. It's an opportunity to intentionally shift the temperature, value, or overall atmospheric quality of your starting point, and can be particularly useful for establishing a foundational tone for your entire composition or for color studies.
- Oil-Primed Linen/Canvas: While not a gesso you apply yourself to raw canvas, it's worth noting as a distinct type of ground. Some high-quality art suppliers sell raw canvas that is already prepared with an oil-based primer. This provides a traditional, smooth, non-absorbent ground, often a blend of linseed oil and lead white or titanium white, ideal for oil painting. It eliminates the need for you to apply sizing and gesso yourself. It's often more expensive but offers a premium surface, cherished by those who value a traditional, slick oil painting surface that allows for seamless blending and rich glazes, a truly luxurious ground for the discerning oil painter.
Finally, understanding what is gesso in painting and mastering how to apply gesso to canvas are essential skills that will significantly elevate your raw canvas experience. Don't skip these resources!
My Mistakes, So You Don't Have To Make Them: Lessons from the Studio
I once got so excited about a new roll of linen that I skipped sizing for an acrylic painting. I was going for that deep-stain effect. The result? The paint soaked in so unevenly it looked like a sad, splotchy mess, and it used about three times as much paint as I expected. I learned my lesson: even for acrylics, a little bit of prep to manage absorbency can save you a lot of paint and heartache. It's like baking without measuring; you can do it, but the results are rarely what you hoped for.
Another time, I didn't stretch the canvas tight enough before staining. As it dried, it sagged in weird places, pulling at the corners. Always get that canvas drum-tight! A loose canvas will not only look unprofessional but can also lead to uneven paint application and even tears over time. It's like trying to draw on a bouncy castle – just not ideal, and it can contribute to a serious case of the fear of the blank canvas when your surface isn't cooperating! I learned that the physical integrity of the support is as crucial as the artistic execution.

Another one that sneaks up on you: I didn't adequately seal the back of a particularly absorbent linen canvas, planning to leave the front entirely raw. After a few years, I noticed some subtle discoloration bleeding through from the stretcher bars – what's known as Support Induced Discoloration (SID). This happens when acidic components migrate from the support (like unsealed wood stretcher bars) into the canvas, causing yellowing or staining. Even if you're leaving the front raw, a thin coat of GAC 100 on the back can be a lifesaver for longevity, especially with certain woods and unprimed fabrics. I learned that even when going 'raw,' an archival mindset is always a good idea, and a little barrier on the back can save a lot of heartache – and a lot of beautiful artworks from an untimely demise. It’s like discovering a slow leak in a beautiful vintage car; a little preventative maintenance goes a long way.
And here’s a subtle one: I didn't test a small swatch of my raw canvas first. Different batches, even from the same supplier, can have slightly varying absorbencies and textures, and even color. That one time, I jumped straight into a large painting, only to find the new roll was far thirstier than the last, completely throwing off my intended staining technique and leaving me scrambling to adjust my paint consistency and approach. Always, always do a small test swatch to understand your material before committing to a large piece. It's like a quick conversation with your canvas, getting to know its personality and quirks before you embark on a serious relationship. A few minutes of testing can save you hours of frustration and wasted materials. This is akin to a chef tasting ingredients before cooking a meal; knowing your materials profoundly influences the final outcome.
Another frustrating lesson I learned early on was related to wrinkling or puckering during drying. I’d often apply sizing or gesso too thickly, or unevenly, to a canvas that wasn't stretched quite tight enough. As the layers dried and contracted, the canvas would pucker or develop unsightly wrinkles. The solution? Always stretch your canvas as taut as a drum before applying any liquids, and apply sizing and gesso in multiple thin, even coats, allowing each to dry completely. Patience is a virtue here, and rushing can lead to irreversible textural issues. This is one of those times where slowing down truly speeds things up in the long run.
Troubleshooting Incompatible Materials: The Unseen Battle
I also once made the mistake of trying to apply an oil-based primer over an acrylic size that hadn't fully cured. What happened? A greasy, patchy mess that refused to dry properly, leading to poor adhesion and an entirely compromised surface. This taught me the hard way about the importance of understanding the chemical compatibility of your materials. Always ensure your sizing layer is fully cured before applying any subsequent primers, especially when switching between oil-based and acrylic-based products. And if in doubt, stick to a single material family (all acrylic or all oil) for your prep layers to minimize the risk of a disastrous chemical reaction. It's like trying to mix oil and water, literally, and your canvas will let you know about it in no uncertain terms.## Choosing the Right Raw Canvas for Your Project: A Deep Dive into Materials and Their Impact
Now that we've covered the 'why' and the 'how' of preparing raw canvas, let's talk about the 'what'. Selecting the perfect raw canvas isn't just about grabbing the cheapest roll you can find; it's a critical decision about understanding how different fibers, weaves, and weights will profoundly interact with your artistic vision, your chosen medium, and your desired final effect. This is where the canvas truly becomes a proactive, even collaborative, element in your work, influencing everything from texture to luminosity. Making an informed choice at this stage can significantly impact the success and longevity of your artwork. It's about finding the right partner for your creative journey. Here's a detailed breakdown to help you decide and make an informed choice:
Beyond Cotton and Linen: Exploring Other Natural Fibers for Unique Textures
While cotton and linen currently dominate the raw canvas market, the broader world of natural fibers offers even more exciting options for the adventurous artist. Exploring these can unlock completely new textures, varying absorbencies, and distinct aesthetic qualities for your work, truly pushing the boundaries of what a canvas can be and fostering unique creative dialogues, inviting you to connect with the material on a deeper level:
- Hemp: A highly durable and environmentally friendly fiber, hemp canvas is known for its exceptional strength, resistance to mildew and UV degradation, and excellent longevity. It often has a slightly coarser, more rustic texture than linen, offering a unique, pronounced tooth that can be wonderfully receptive to pastels, charcoal, heavy impasto, or dry brush techniques. Its inherent strength and archival qualities are excellent, making it a sustainable and enduring choice for serious artists looking for a robust and characterful support, especially for pieces intended for public display or long-term collection. I find its slightly irregular texture adds an authentic, earthy feel.
- Jute: More coarse, open-weave, and rustic than hemp or linen, jute canvas offers a very pronounced, almost burlap-like texture. While it's less traditionally used for fine art due to its prominent weave and slightly lower archival stability (can be prone to yellowing over time if not properly sealed, so thorough sizing is crucial!), it can be fantastic for highly textural, expressive, or mixed-media works where the raw, earthy, and sometimes dramatic quality is celebrated as an integral part of the piece. Its dramatic texture makes it less suitable for fine detail but absolutely perfect for bold, gestural marks and works that embrace the raw materiality of the support, making it popular for experimental abstract art. It's also typically very affordable, making it accessible for large-scale experimental projects, allowing for grand explorations without breaking the bank.
- Silk: A less common but luxurious option, raw silk provides an incredibly smooth, fine, and luminous surface. It's highly absorbent and ideal for delicate staining, dyes, and thinned paints where you want extreme fluidity and subtle color transitions. Its delicate nature requires careful handling and meticulous sizing (often with specialized silk-specific mediums), but the results can be breathtakingly ethereal and jewel-like, perfect for works demanding a refined, elegant touch. Imagine the subtle glows and soft transitions achievable on such a ground.
- Bamboo: An emerging sustainable fiber, bamboo canvas offers a smooth yet subtly textured surface. It's known for its impressive strength, natural antimicrobial properties, and often a beautiful sheen. While still relatively new to the art world, it presents an interesting, eco-friendly alternative for artists looking to experiment with innovative materials and create works with a subtle, modern appeal. Like other natural fibers, proper sizing is key to achieving predictable results. Its slightly silken hand can offer unexpected delights for paint application.
Cotton vs. Linen: A Timeless Debate in the Artist's Studio
The choice between cotton and linen raw canvas is a foundational one for many artists, sparking a timeless debate that often comes down to budget, desired aesthetic, and archival considerations. Each fiber offers distinct advantages and characteristics that will influence your painting experience, shaping the final outcome in subtle yet profound ways:
- Cotton (Duck Canvas): Generally more affordable and widely available, cotton canvas is a fantastic starting point for beginners or for artists working on a budget or on a very large scale where cost is a significant factor. It typically has a more uniform, often tighter weave than linen, which can make it a bit less prone to texture variations unless you choose a very coarse duck. This smoother, more even surface can be excellent for more detailed work, portraiture, or when you want the canvas texture to be minimal, allowing the paint to be the primary focus. It's highly absorbent and takes sizing and gesso well, providing a versatile ground. However, cotton is generally considered less durable and more susceptible to environmental changes (like stretching and loosening with humidity fluctuations) than linen over very long periods, which can sometimes lead to sagging. Cotton canvas is often graded by 'duck' numbers (e.g., #10 duck, #12 duck), with lower numbers indicating a heavier, coarser weave and thus a more pronounced texture, while higher numbers (e.g., #12, #15) denote a finer, tighter weave, suitable for different levels of detail and paint application. It's the workhorse of the art world, reliable and adaptable, a solid choice for exploring the material's potential without a prohibitive investment. For my own work, when I need a consistent, smooth surface for intricate designs without the higher cost of linen, cotton duck is often my go-to.
- Linen: Ah, linen, the traditional choice of the Old Masters and a favorite among professional artists and conservators. Linen is revered for its exceptional strength, unparalleled durability, and remarkable resistance to degradation over time. Its fibers are naturally longer and stronger than cotton, making it significantly less prone to sagging, warping, or stretching over decades and centuries, making it a superior choice for archival work that you intend to last and perhaps pass down through generations. Linen also often boasts a more pronounced, inherently beautiful natural texture and subtle slubs (small, irregular thickenings in the yarn) in its weave, which many artists find highly desirable to incorporate into their work as a visual element, allowing the material itself to contribute actively to the aesthetic. The primary downside? It's significantly more expensive than cotton, but for archival quality, superior strength, and sheer aesthetic appeal, many consider it a worthwhile, long-term investment. Different linen weaves (e.g., plain, twill, reverse twill, or even coarser weaves like 'rough' or 'heavy duty') also offer varying textures and strength characteristics, each inviting a unique interaction with your artistic medium, whether you're working with delicate glazes or thick impasto. Belgian linen, in particular, is often considered the gold standard for its uniformity and strength, though French and Irish linens also offer excellent quality. When I'm creating a piece I know will endure, especially something with a focus on texture and the inherent beauty of the material, I always reach for linen.
Weave and Weight Considerations: The Fabric of Your Artistic Expression
Beyond the fundamental fiber type, the weave and weight (often expressed as ounces per square yard, or "duck" number for cotton) of your canvas dramatically affect its appearance, performance, and interaction with your chosen medium. These factors dictate the tooth, absorbency, and overall character of your painting surface:
Feature | Fine Weave (e.g., lightweight linen, fine cotton duck) | Medium Weave (e.g., standard cotton duck, mid-weight linen) | Coarse Weave (e.g., heavy jute, loose linen, #10 cotton duck) |
|---|---|---|---|
| Texture | Very smooth, subtle texture. Ideal for delicate details, smooth washes, and portraiture where the canvas should be unobtrusive. | Noticeable but not overly dominant weave pattern. Versatile for a wide range of styles, from abstract to representational. | Pronounced, rustic, and often irregular texture. Becomes a strong visual element, adding character and depth to the artwork. |
| Absorbency | Moderate to high, depending on sizing. Will still drink paint but offers more control than very coarse weaves. | High. Can be a noticeable paint sponge, especially for initial layers or staining techniques. | Extremely high, can be a real paint sponge, leading to rapid drying and deep saturation, perfect for true soak-stain effects. |
| Best For | Portraiture, fine detail, smooth washes, delicate glazes, subtle staining, academic painting, detailed abstract art. | General painting, expressive abstract work, moderate staining, works where some canvas texture is desired but not dominant, mixed media. | Expressive, highly textural painting, thick impasto, bold gestural statements, textile art, works where the raw materiality is celebrated, mark-making. |
| Paint Consumption | Lower, as surface is less porous. Fine weaves allow paint to spread further. | Moderate. Expect some paint to be absorbed into the fibers, especially with thinner applications. | Higher, as more paint sinks into the valleys of the weave and fibers. May require more paint for opaque coverage. |
| Cost | Typically higher for fine linen or specialty cottons due to the intricate weaving process. | Mid-range, offering a good balance of quality and cost-effectiveness for everyday use. | Varies; can be high for specialty weaves like heavy Belgian linen, but very affordable for common jute. |
| Archival Stability | Excellent if properly prepared with sizing and priming. Less prone to physical damage due to tight weave. | Good if properly prepared. A robust choice for longevity across many styles. | Good if properly prepared, but coarser weaves can sometimes be more vulnerable to tear if subjected to sharp impacts. |
| Durability/Stability | Good strength, but delicate for very heavy impasto. More prone to environmental movement (stretching/loosening) than heavier weaves. | Very good strength, consistent performance, less prone to sagging than lighter cottons. A reliable choice. | Excellent strength and tear resistance, holds up to aggressive techniques, but may still show some inherent movement or slubs that are part of its character. |
Ultimately, the choice of canvas is deeply personal and depends on your specific project and artistic goals. Don't be afraid to experiment with different types to find what truly resonates with your creative process.
FAQ: Your Raw Canvas Questions, Answered (And Then Some)
Navigating the world of raw canvas can bring up a lot of questions, especially if you're new to the material. Here, I've gathered some of the most common inquiries and my best, most honest answers, drawing on both practical experience and archival considerations. Hopefully, these insights will clarify any lingering doubts and empower you to approach raw canvas with confidence, transforming uncertainty into inspired action.
How do I choose between cotton and linen raw canvas?
As discussed in depth in the "Choosing the Right Raw Canvas for Your Project" section, cotton is generally more affordable and has a more uniform weave, making it great for beginners, large-scale works where cost is a factor, or when a smooth surface is desired. Linen, while more expensive, offers superior strength, archival qualities, and a beautiful natural texture that many professional artists prefer for its longevity and aesthetic character. If you're aiming for crisp details and a smoother surface for portraiture, cotton might be a good start. If you want the subtle slubs and enduring quality for abstract or expressive work, or for pieces intended to last for generations, linen is often worth the investment. Ultimately, your choice often comes down to budget, desired texture, the longevity you expect from your artwork, and the specific demands of your artistic vision. I often tell artists to consider the story they want the canvas to tell, and then choose the fiber that best tells that story.
What's the difference between raw canvas and unprimed canvas?
Honestly, in everyday artist-speak, they mean the exact same thing. Both terms refer to canvas fabric that has not been prepared with any layers of gesso or primer. They are interchangeable and point to the natural, untreated textile.
Can I use watercolors or gouache on raw canvas?
While technically possible, watercolors and gouache are generally not recommended for raw canvas without significant, specialized preparation. The extreme absorbency of raw canvas will cause the pigments to soak in unevenly, spread uncontrollably, and lose their vibrancy, becoming dull, muddy, and extremely difficult to control. You'll likely end up with a splotchy, unsatisfying result that lacks the luminosity and crispness associated with these mediums. If you desire a watercolor effect on canvas, it's far better to use highly thinned acrylics on a properly sized and lightly primed surface (perhaps with clear gesso), or to seek out specially prepared watercolor canvas designed to mimic paper's absorbency. For those determined to try, applying a heavily gessoed surface and then sanding it to an ultra-smooth finish, possibly with a layer of watercolor ground specifically designed for canvas, is the only way to achieve anything close to a predictable result. It's a challenging path, for sure, and often not worth the effort when more suitable materials exist for these delicate mediums.
Can I use acrylics on raw canvas?
Absolutely! Acrylics are much safer for the canvas fibers than using oils without a size, as acrylics are water-based and don't cause the destructive 'oil rot'. You can paint directly on it without a sizing agent, but be prepared for extremely high absorbency and a very matte, stained appearance where colors may appear duller due to sinking into the fibers. This can be a desirable effect for expressive, muted pieces, particularly if you're aiming for a soft, diffused aesthetic similar to historical fresco painting. However, for more control over paint flow, better color vibrancy, and to significantly reduce paint consumption, I strongly recommend applying a coat or two of clear gesso or acrylic medium (like Golden GAC 100) first. This gives you the best of both worlds – the raw aesthetic with much more manageable performance. Experiment with different dilutions of acrylics and application methods (brush, spray, pour) to discover the myriad effects possible. Acrylic inks, in particular, can achieve stunning, luminous stain effects on properly sized raw canvas, allowing for incredible fluidity and vibrant, transparent layers.
What is the shelf life of raw canvas?
Raw canvas, particularly linen and cotton, can last for many years if stored correctly. The key is a cool, dry, dark environment, away from direct sunlight, humidity, and pests. Rolls should ideally be stored horizontally or on a wide tube to prevent creasing. Over very long periods (decades), natural fibers can degrade or become brittle if exposed to adverse conditions, but for typical artistic use, a well-stored roll of canvas will serve you for years, often holding its integrity for decades if kept in optimal conditions. Think of it as a quality textile; it's designed to last, but requires a little consideration.
How should I store raw canvas rolls or cut pieces?
Proper storage is crucial for preserving your raw canvas. Rolls should ideally be stored horizontally on a wide, sturdy cardboard or plastic tube to prevent creasing and flat spots, which can be difficult to remove later. Avoid storing them vertically for long periods, as gravity can cause distortion. Keep them in a cool, dry, dark place, away from direct sunlight, extreme temperature fluctuations, and sources of humidity (like damp basements or outside walls). Pests (like moths or silverfish) can also be an issue, so ensure your storage area is clean and sealed. Consider adding cedar blocks or natural deterrents for long-term storage, but ensure they don't directly contact the fabric. For cut pieces, store them flat between acid-free archival paper or rolled loosely around a tube. Always protect them from dust and physical damage, perhaps in an archival box or sealed container. Think of it like storing a valuable textile; the more care you take, the longer it will remain pristine and ready for your artistic vision, preserving its subtle character until you're ready to work with it.
Should I wash raw canvas before stretching or sizing?
Generally, you don't need to "clean" raw canvas in the traditional sense, and in fact, washing it can be detrimental. The key is to handle it with clean, dry hands or wear gloves to avoid transferring natural skin oils or dirt, which can create resist areas or discoloration. If your canvas has picked up dust from storage or handling, a gentle brushing with a soft, clean cloth, a soft bristled brush, or a lint roller can help remove loose particles. Avoid washing it, as this can affect the weave, cause unpredictable shrinkage, introduce unwanted chemicals from detergents that could react with your art materials, and make the crucial stretching process much more difficult and less predictable. The sizing process itself will often encapsulate any minor surface dust or impurities, effectively sealing them. Trust the sizing to do its job, and focus your efforts on a clean handling technique.
Can I paint with other mediums besides oil or acrylic on raw canvas?
Absolutely! While oils and acrylics are the most common, raw canvas is incredibly versatile. Textile dyes and fabric paints can be used directly for results that truly integrate with the fabric's identity, creating vibrant, permanent colors that become part of the weave itself. Charcoal, soft pastels, oil pastels, and even chalks can be applied directly to the textured surface, allowing the natural tooth of the canvas to become an integral part of the mark-making, though I'd recommend a good fixative for stability. You can also explore various mixed media applications, incorporating collage elements, embroidery, or even small found objects. The key is understanding how the raw canvas's absorbency and texture will interact with your chosen medium and applying appropriate sizing or fixatives for archival longevity when necessary. Experimentation is highly encouraged here; the raw surface is an open invitation to push boundaries.
What kind of paints are best for raw canvas?
Acrylics are generally the most forgiving and versatile paints for raw canvas, especially for soak-stain techniques where their fluid nature and water-based composition are ideal. Thinned acrylic inks can also produce stunning, luminous effects, allowing for incredible depth and transparency. Oils can also be used beautifully, but they absolutely require proper sizing to protect the canvas from oil rot; without it, you're risking the long-term integrity of your artwork. Experimentation is key to finding what resonates with you, but always prioritize sizing for oils. Some adventurous artists also use textile dyes or fabric paints directly on raw canvas for unique, fabric-integrated results that truly make the canvas part of the artwork's identity. Beyond paints, charcoal, pastels (with a good fixative), and various drawing media can also be used directly on the textured surface, allowing the natural tooth of the canvas to become an integral part of the mark-making. I often find that less is more with raw canvas; allowing the material to show through can be more impactful than heavy, opaque layers.
What is 'raw canva'?
This is a very common typo for 'raw canvas'! If you've been searching for 'raw canva', you're in exactly the right place! We're talking about the unprimed, natural fabric that artists use as a painting support. It's a simple spelling difference, but the artistic potential and creative opportunities it unlocks are profound!
Is raw canvas cheaper than primed canvas?
Generally, yes. A roll of raw canvas is often significantly more economical per square foot than buying the equivalent amount of pre-primed and pre-stretched canvases. However, you absolutely have to factor in the additional costs of stretcher bars (if stretching), canvas pliers, staple guns, sizing agents, priming materials (if using gesso), and, crucially, your time for preparation. For very large works, the cost savings on raw material can be substantial, making the preparation effort worthwhile. For smaller pieces, the convenience of pre-primed might sometimes outweigh the cost savings. For example, a 10-yard roll of raw linen might cost $300, while 10 equivalent pre-primed canvases could cost upwards of $600, not accounting for specialty sizes or bespoke dimensions. The initial outlay is higher, but the long-term value, creative freedom, and archival quality are undeniable. For me, the investment in time and materials is a small price to pay for such profound artistic control.
Do I need to stretch raw canvas before painting?
Not necessarily! This is a common question, and the answer often depends entirely on your artistic approach and desired outcome. Many artists, especially those working with large-scale staining or gestural techniques (like those seen in many abstract art styles or in the work of Color Field painters), prefer to work with the canvas unstretched. You can lay it out on the floor, tack it to a wall, or even drape it, allowing for greater freedom of movement, unconventional formats, and gravity-driven effects. Helen Frankenthaler famously painted on unstretched canvas laid on the floor to achieve her signature soak-stain effects, embracing the unpredictable flow of paint and the organic nature of the material. However, if you're planning more precise brushwork, detailed compositions, or desire a truly taut, stable surface from the outset (which is often preferred for traditional representational painting), stretching it first is highly advisable. Just be aware that if you paint unstretched, be prepared for potential stretching challenges later, as the canvas can shrink, warp, or develop creases as paint dries and the fibers react. The key is to understand your artistic intention and choose the method that best serves your creative vision and the final presentation of your artwork. For me, embracing the unstretched canvas often feels like a pure dialogue with the material, allowing its inherent qualities to shape the work in unexpected ways.
Can I use mixed media on raw canvas?
Absolutely! Raw canvas is a fantastic and versatile ground for mixed media work precisely because of its inherent absorbency, tooth, and natural texture. You can securely layer papers, various fabrics, found objects, and a wide range of drawing materials (like charcoal, pastels, or pencils) directly onto its surface, allowing the canvas's own character and weave to emerge through, around, or beneath the layers. This creates rich, multi-dimensional surfaces and dialogues between disparate materials, opening up a world of experimental possibilities for layering and surface building. Its inherent rustic quality can ground disparate materials, creating a cohesive and compelling visual narrative. Consider incorporating elements like fabric scraps, natural fibers, or even small found objects, adhering them with archival acrylic mediums, to create truly unique, tactile works that blur the lines between painting, sculpture, and collage. I personally love exploring the unseen layers in my mixed media pieces, using the raw canvas as a foundational element to build depth and narrative, as you can see in my work. It’s an invitation to build a complex visual tapestry, where every element contributes to the overall story of the piece.
Is raw canvas suitable for digital printing or photography transfers?
Yes, but with caveats! Raw canvas can be used for digital printing (like giclée prints) or various photography transfer techniques, but it generally requires specific preparation. For digital printing, the canvas usually needs to be specially coated or pre-treated by the manufacturer to ensure ink adhesion, sharpness, and archival quality. Printing directly onto completely raw, untreated canvas would result in muddy, undefined images due to its high absorbency. For photography transfers (like gel medium transfers or solvent transfers), the raw canvas's texture can add a unique quality, but a thin, even layer of acrylic medium as a base is often necessary to provide a stable surface for the image to adhere to or transfer onto. Always do small tests first to ensure compatibility and achieve your desired effect. It's a fascinating way to merge different artistic disciplines, creating hybrid works that speak to both digital and tactile aesthetics.
Where can I buy good quality raw canvas?
Art supply stores, both local and online, are your primary sources for good quality raw canvas. Look for reputable brands that clearly specify the fiber content (cotton, linen, hemp, jute) and weave (e.g., plain weave, duck canvas, Belgian linen). Companies specializing in artist materials will often provide detailed specifications regarding weight, weave, and suitability for different mediums. Fabric stores may also carry raw canvas, but exercise caution: ensure it's artist-grade and suitable for painting, meaning it's free of optical brighteners, synthetic finishes, or sizing meant for upholstery or apparel, which could compromise its archival qualities or interaction with paint. Don't hesitate to ask for small samples if you're unsure about the feel or absorbency, or read reviews from other artists to gauge product quality and consistency! Also, consider seeking out suppliers that emphasize fair trade or sustainably sourced materials, aligning your artistic practice with ethical consumerism. A quick search online for 'artist raw canvas supplier' will yield many results, but always prioritize reputation and detailed product descriptions.

Beyond the Stretch: Unconventional Uses of Raw Canvas
Before we wrap up, it's worth a moment to consider that raw canvas isn't just for stretching onto a frame in the traditional sense. Its inherent flexibility, tactile nature, and raw honesty open up a whole realm of unconventional possibilities, inviting artists to redefine the very notion of a painting support:
- Unstretched and Drape Paintings: As mentioned, artists like Helen Frankenthaler famously worked on unstretched canvas laid on the floor, allowing gravity and the material's absorbency to become active collaborators in the painting process. This approach allows the material to behave more like a textile, responding to gravity and the flow of liquid paints in unique ways, often creating organic forms and fluid color fields that are impossible to achieve on a taut, stretched surface. The final piece can then be hung freely, draped over armatures, or even folded and re-stitched, blurring the lines between painting and sculpture and becoming a dynamic, three-dimensional object in itself. These works emphasize the materiality of the canvas, often speaking to themes of fragility, movement, and the ephemeral nature of art. When displaying such works, consider the environment and how light and air might interact with the fabric, further enhancing its dynamic qualities and influencing the viewer's perception of form and space in abstract art. The subtle interplay of light and shadow on the folds can create a constantly shifting visual experience, making the artwork feel alive.
- Soft Sculpture and Textile Art: The raw, untreated quality of canvas, particularly its inherent flexibility, durability, and receptiveness to manipulation, makes it an excellent material for soft sculpture and contemporary textile art. It can be sewn, cut, stuffed, gathered, painted, embroidered, woven, and shaped into three-dimensional forms, blurring the lines between painting, sculpture, and textile art. Think of artists who create large, immersive installations where the canvas literally surrounds the viewer, creating an environment rather than just a flat surface. This approach invites a tactile engagement with the artwork, celebrating its fabric nature. Techniques like appliqué, reverse appliqué, quilting, knotting, or even manipulating the canvas with heat or stiffeners can open up entirely new sculptural possibilities, allowing the fabric to take on unexpected forms and textures, creating works that are truly hybrid and innovative. I've seen incredible pieces where the canvas is treated almost like clay, molded and manipulated to convey powerful conceptual ideas.
- Collage and Mixed Media Substrates: The natural texture, inherent absorbency, and robust nature of raw canvas make it an ideal base for collage and other diverse mixed-media applications. You can securely layer papers, various fabrics, found objects, and a wide range of drawing materials (like charcoal, pastels, or pencils) directly onto its surface, allowing the canvas's own character and weave to emerge through, around, or beneath the layers. This creates rich, multi-dimensional surfaces and dialogues between disparate materials, opening up a world of experimental possibilities for layering and surface building. It's a fantastic way to create intricate compositions that celebrate both the applied and the underlying textures, where the very history of the materials can become part of the artwork's narrative.
- Dyeing and Printing: Because it's so incredibly absorbent and often made of natural fibers, raw canvas is highly receptive to textile dyes, natural pigments, and various printing techniques (like silkscreen, block printing, or even eco-printing). This allows you to integrate patterns, imagery, and color directly into the fabric itself, creating truly unique surfaces that feel both painterly and textile-based. It's an excellent way to explore surface design, texturing, and to create art that blurs the boundaries between fine art and craft, celebrating the material's textile heritage and connecting with its industrial origins. Consider experimenting with natural dyes derived from plants or minerals for an even deeper connection to sustainable practices and organic aesthetics, creating works that are truly rooted in nature, perhaps even referencing historical textile patterns or techniques. The possibilities for surface manipulation are truly endless here, transforming the canvas from a mere support into a vibrant, expressive medium in itself.
These methods challenge the traditional rectangular format of painting, inviting you to think of the canvas not just as a flat picture plane, but as a dynamic, adaptable material with its own expressive potential, a partner in pushing artistic boundaries.
Beyond the Studio: Raw Canvas in Public Art and Installations
Raw canvas also finds its way beyond the confines of the traditional studio, making powerful statements in public art and large-scale installations. Its natural texture, ability to be dyed or printed, and sheer scale make it ideal for monumental works that interact directly with architectural spaces or outdoor environments. Artists have used vast expanses of raw canvas to create immersive environments, temporary architectural interventions, or even as surfaces for projected imagery, transforming public spaces and engaging viewers on a grand, often visceral, scale. Its unpretentious nature can also lend a powerful sense of accessibility and raw honesty to public art projects, inviting a broader dialogue with the community. Think of Christo and Jeanne-Claude's monumental fabric installations, which, while often using specialized textiles, embody the spirit of transforming landscapes and architectural forms through the tactile presence of fabric. Or even the striking urban interventions of street artists like Banksy, whose impactful works often appear on raw, untreated walls, embracing the authenticity of the urban canvas.
A Final Thought: Embracing the Journey with Raw Canvas
Care and Maintenance for Raw Canvas Artwork: Ensuring Lasting Beauty
Once your raw canvas masterpiece is complete, after all that dedication and creative energy, proper care is absolutely essential to ensure its longevity and preserve its unique aesthetic. Because raw canvas, even when meticulously sized and prepared, can sometimes be more sensitive to environmental factors and certain types of physical damage than a heavily primed surface, a thoughtful approach to its care is crucial. Here are a few vital tips to safeguard your artwork for generations:
- Varnish: Applying a high-quality, archival varnish is a crucial final step for almost all finished paintings, especially those on raw canvas. This not only protects the delicate paint layers from harmful UV damage (which can cause fading), airborne pollutants, and dust, but it can also provide an additional protective barrier to the canvas itself, particularly if you opted for a clear size and no gesso, keeping the raw canvas look intact while adding protection. Varnish also unifies the sheen of your painting, eliminating patchy matte or glossy areas, and can dramatically bring out the depth and vibrancy of colors, much like a good paint type can make a difference. Choose a varnish that complements your desired sheen (matte, satin, or gloss) and consider whether you want a removable (for long-term conservation purposes) or permanent type. Removable varnishes (like those based on synthetic resins that can be safely dissolved by conservators) are generally recommended for their flexibility in future restoration. Always apply varnish in thin, even coats in a dust-free environment, ensuring complete, uniform coverage, and allow it to cure fully.
- Framing: Thoughtful framing is more than just aesthetics; it's a critical component of protection. Consider framing your work, especially if it's a delicate stain, an ink drawing, a heavily textured piece on canvas, or an unstretched work. For works on paper or unmounted canvas, framing behind glass (ideally with UV-protective glazing to prevent light damage) offers robust physical protection from dust, airborne particles, and incidental contact, while also buffering against minor environmental fluctuations. For larger, stretched canvases, a sturdy float frame can protect the exposed edges of the canvas and stretcher bars, while providing a professional, finished presentation that visually 'floats' the artwork within the frame, emphasizing the artwork's materiality. You might also opt for a traditional frame, but always ensure it allows for proper air circulation behind the canvas to prevent moisture buildup and potential mold growth. Choosing acid-free backing materials and spacers for framed works is also essential to prevent long-term damage to the canvas itself. For more ideas, explore articles like how to choose art for a dining room.
- Environmental Control: Environmental stability is paramount for the long-term preservation of any artwork, and particularly so for raw canvas. Avoid hanging raw canvas art in areas with extreme temperature or humidity fluctuations, such as bathrooms, kitchens, near radiators, fireplaces, or in direct, unfiltered sunlight. These conditions can cause the canvas fibers to expand and contract excessively, leading to sagging, cracking of paint layers, or even warping of stretcher bars. Direct sunlight can also cause irreversible fading of pigments. Aim for a consistent, moderate temperature (ideally around 68-72°F or 20-22°C) and a stable humidity level (around 45-55% RH) to minimize stress on the canvas fibers and paint layers, significantly extending the life of your piece. Investing in a simple hygrometer to monitor humidity levels in your display or storage areas can be a small but effective step in proactive conservation.
- Handling & Storage: Always handle your finished artwork with the utmost care. Use clean, dry hands or, ideally, wear clean cotton gloves to prevent transferring oils, dirt, or acid from your skin. When moving or lifting a stretched canvas, always hold it by the stretcher bars, not the canvas surface itself, to avoid putting pressure on the paint surface. When storing, ensure pieces are well-padded and separated (using acid-free tissue or glassine paper between stacked works) to prevent rubbing, abrasion, or pressure damage. Store stretched canvases vertically, ideally in custom-built racks or in an archival storage box, in a stable environment, away from direct light, pests, and dampness, which can cause mold or mildew. For unstretched works, roll them (paint-side out) around a wide, acid-free tube, interleafing with protective paper, and store them in a sturdy, archival box. For very large unstretched canvases, consider professional art storage solutions, much like museums utilize art storage solutions for collectors.
Taking these steps helps preserve the unique character of your raw canvas artwork for generations to come.
Working with raw canvas is, for me, an invitation to let go of a little control, to embrace the unexpected, and to engage in a deeper, more profound dialogue with my materials. It's a genuine partnership. You bring the paint, your vision, and your intention, and the canvas brings its inherent texture, its nuanced color, its eager thirst, and its own subtle voice. It might not be the right choice for every single project you undertake – sometimes a pristine, primed surface is exactly what's needed – but for those times when you yearn for your work to feel more organic, more integrated, more tactile, and a little more wild and uninhibited, it's an absolutely incredible and transformative choice. It pushes you to think differently, to respond actively to the material's unique characteristics, and that dialogue can be profoundly rewarding, leading to unforeseen creative breakthroughs.
So go on, I encourage you. Grab that intimidating roll of fabric. Don't be afraid to make a mess, to experiment, or to deviate from the plan; some of the best art, I've found, often comes from glorious accidents, unexpected discoveries, and the courage to depart from conventional methods. See what happens when you truly let the canvas have a say in the final piece, when you engage in that genuine dialogue with your materials. You might just create something beautifully, authentically you—a piece that couldn't have come into being on any other surface, a testament to the power of working with the raw and the real, and a reflection of your unique artistic journey. And if you're ever curious about the kinds of textures, layers, and raw honesty this approach can inspire, feel free to browse some of the works I have available to buy. You might find that the direct, unmediated connection to the material is visible, alive, and breathing in every brushstroke, inviting you to see the canvas anew. Embrace the challenges, celebrate the imperfections, and let the raw beauty of the canvas guide your creative hand. Happy painting, and perhaps, happy discovering your own abstract art style!

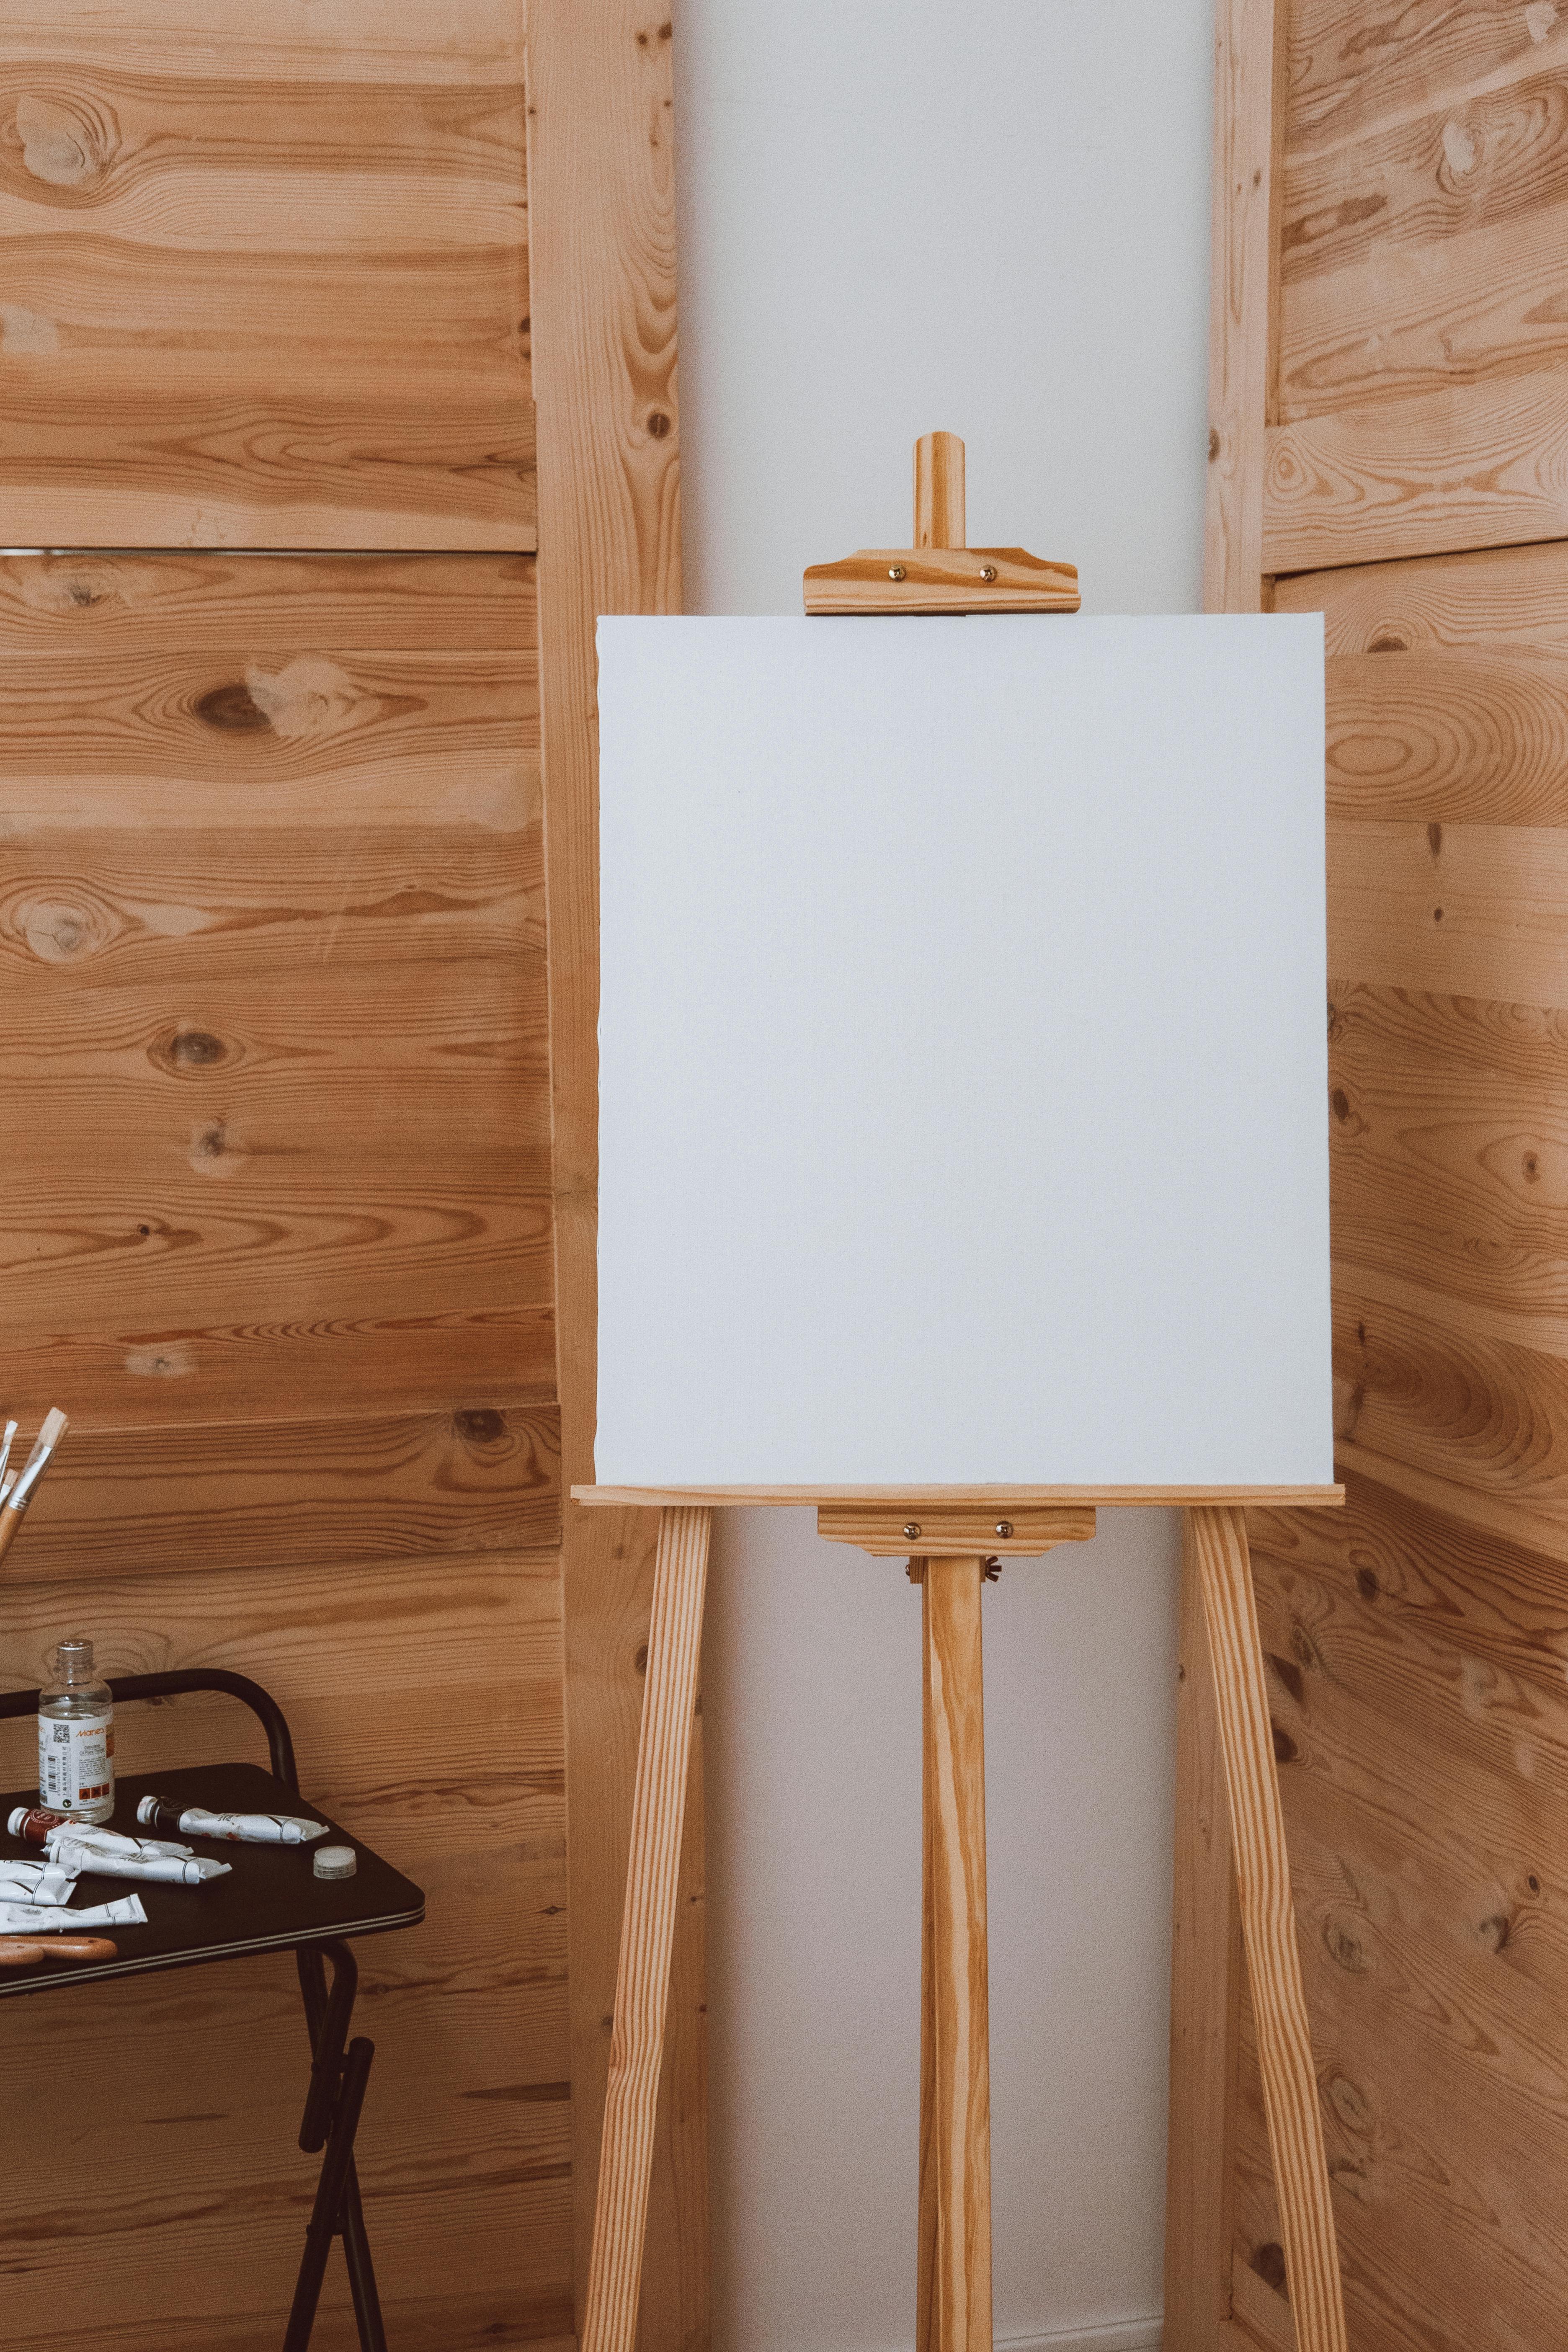
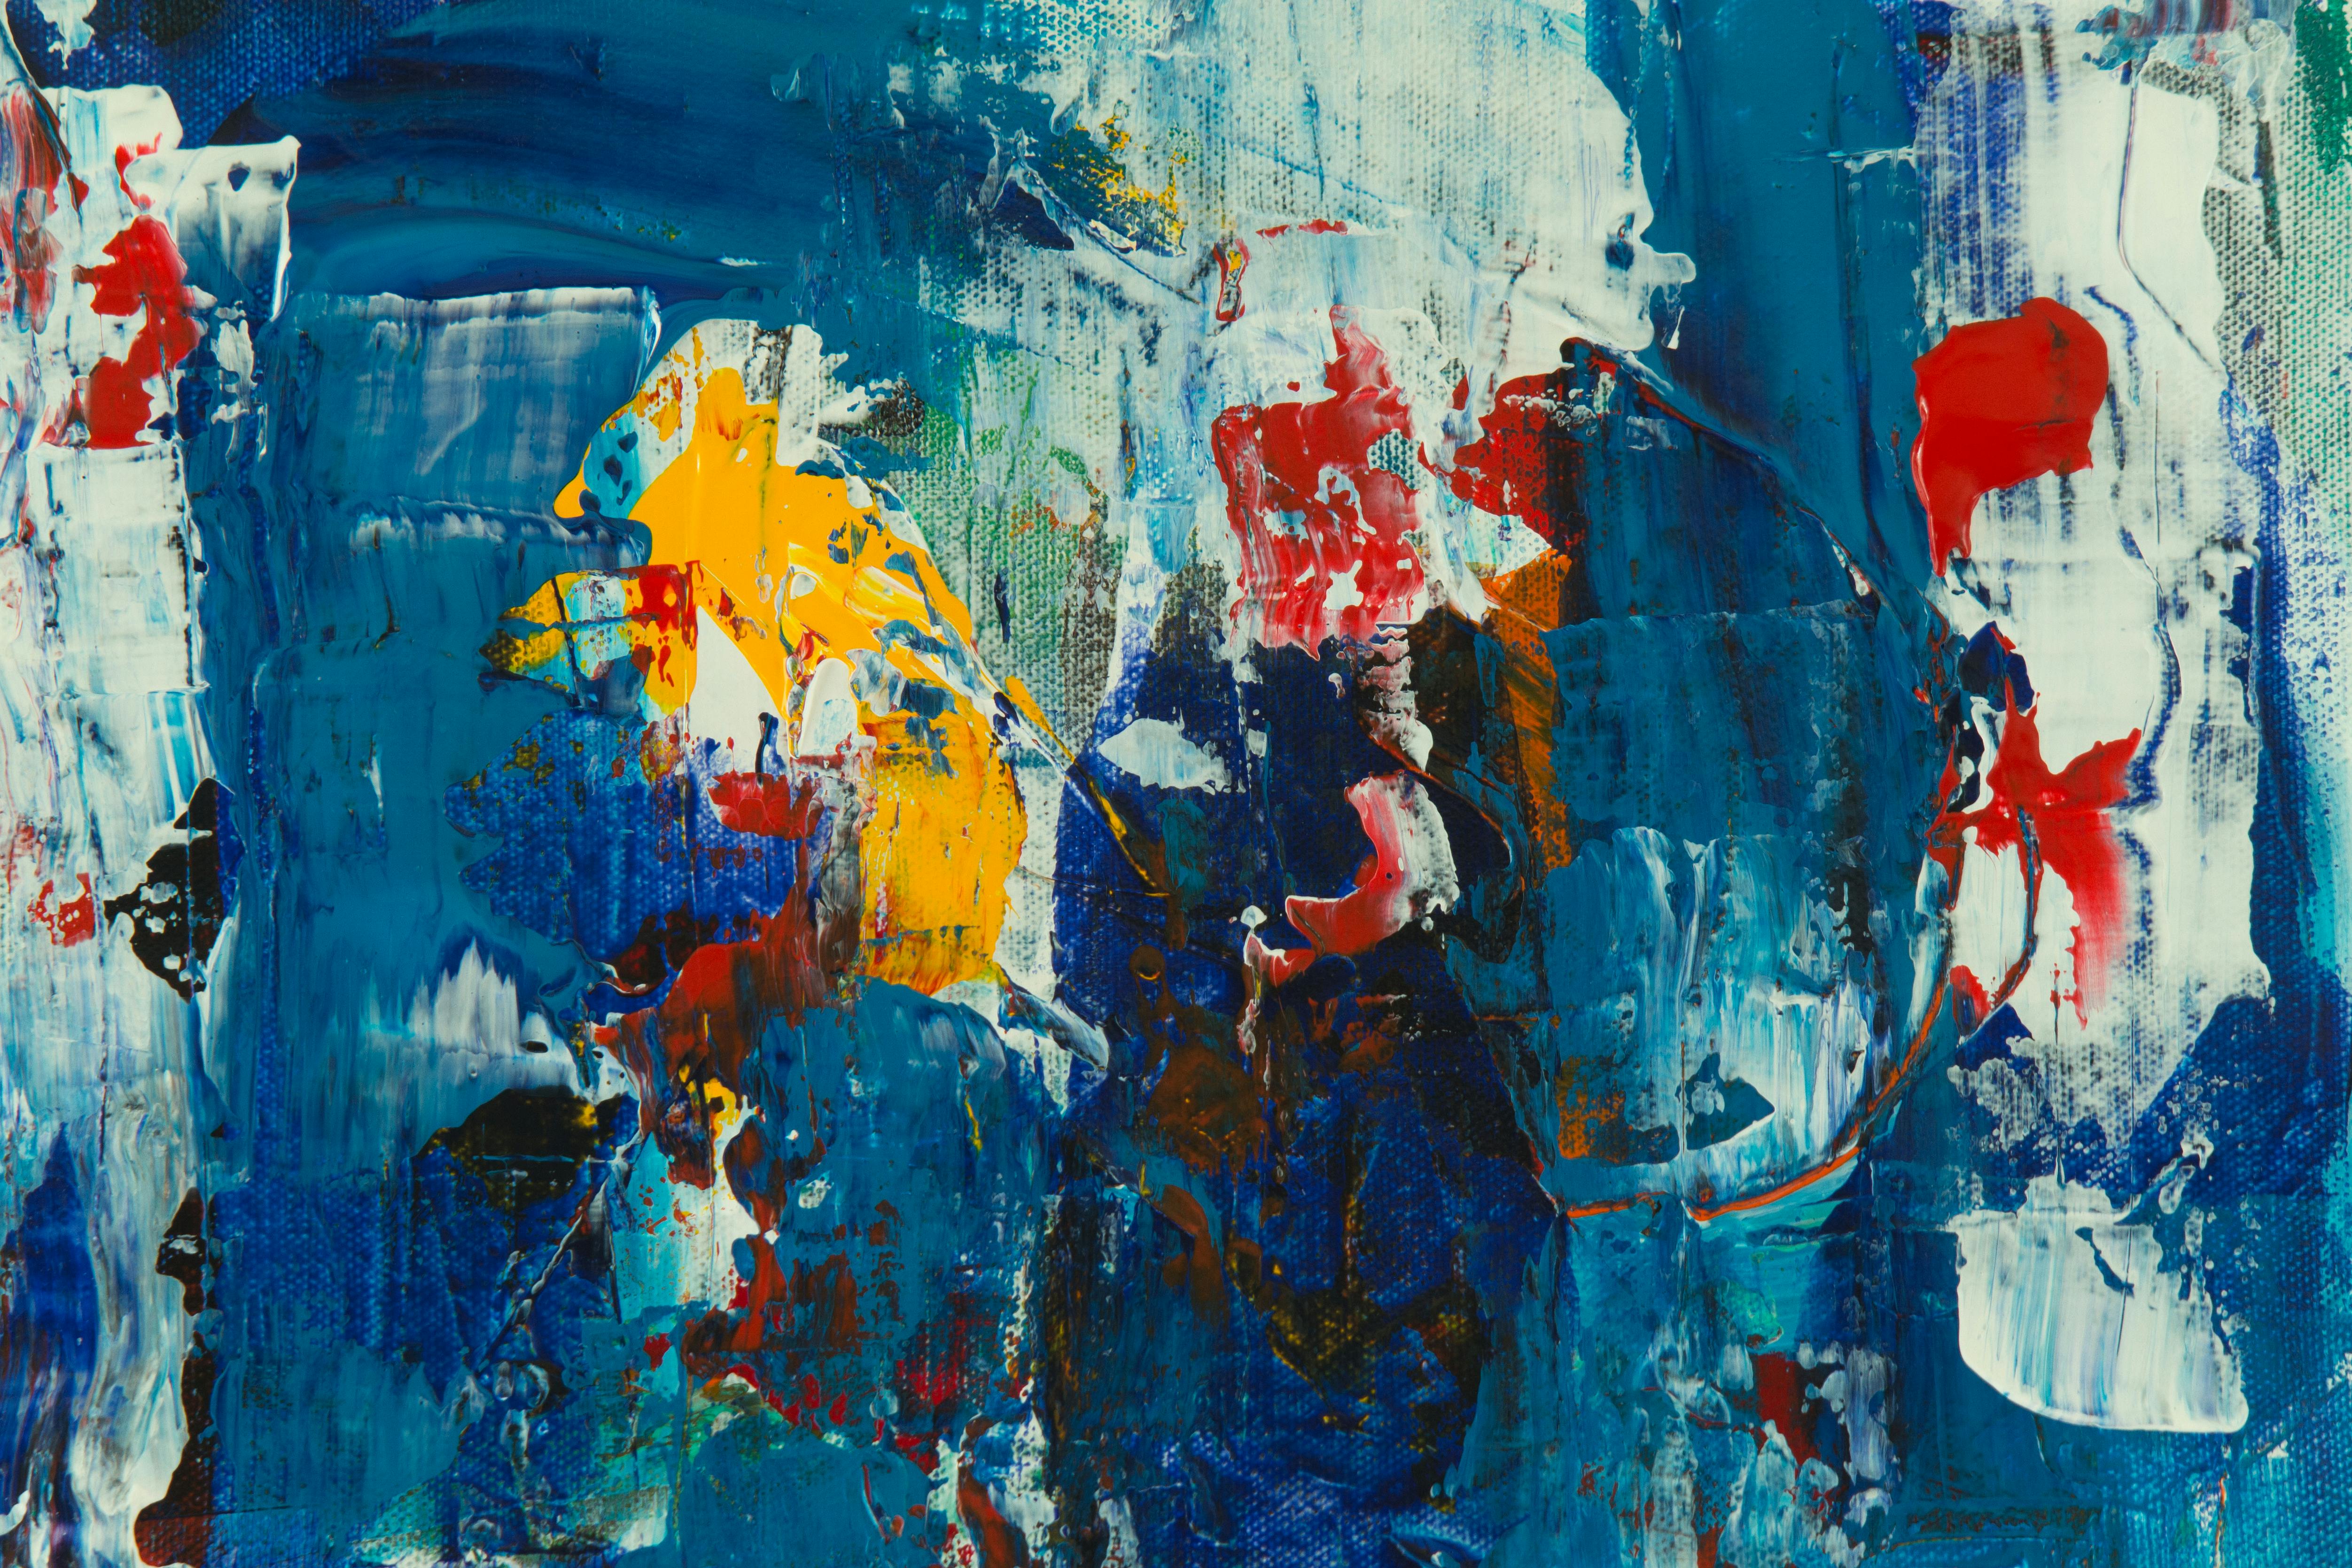