Essential Art Supplies for Beginners: Your Ultimate Guide to Kickstart Your Creative Journey
Zen Dageraad Visser's ultimate guide for beginner artists. Discover essential drawing and painting tools, understand material quality, avoid common pitfalls, and confidently kickstart your vibrant, intuitive artistic journey. Quality over quantity for joyful creation!
Essential Art Supplies for Beginners: Your Ultimate Guide to Kickstart Your Creative Journey
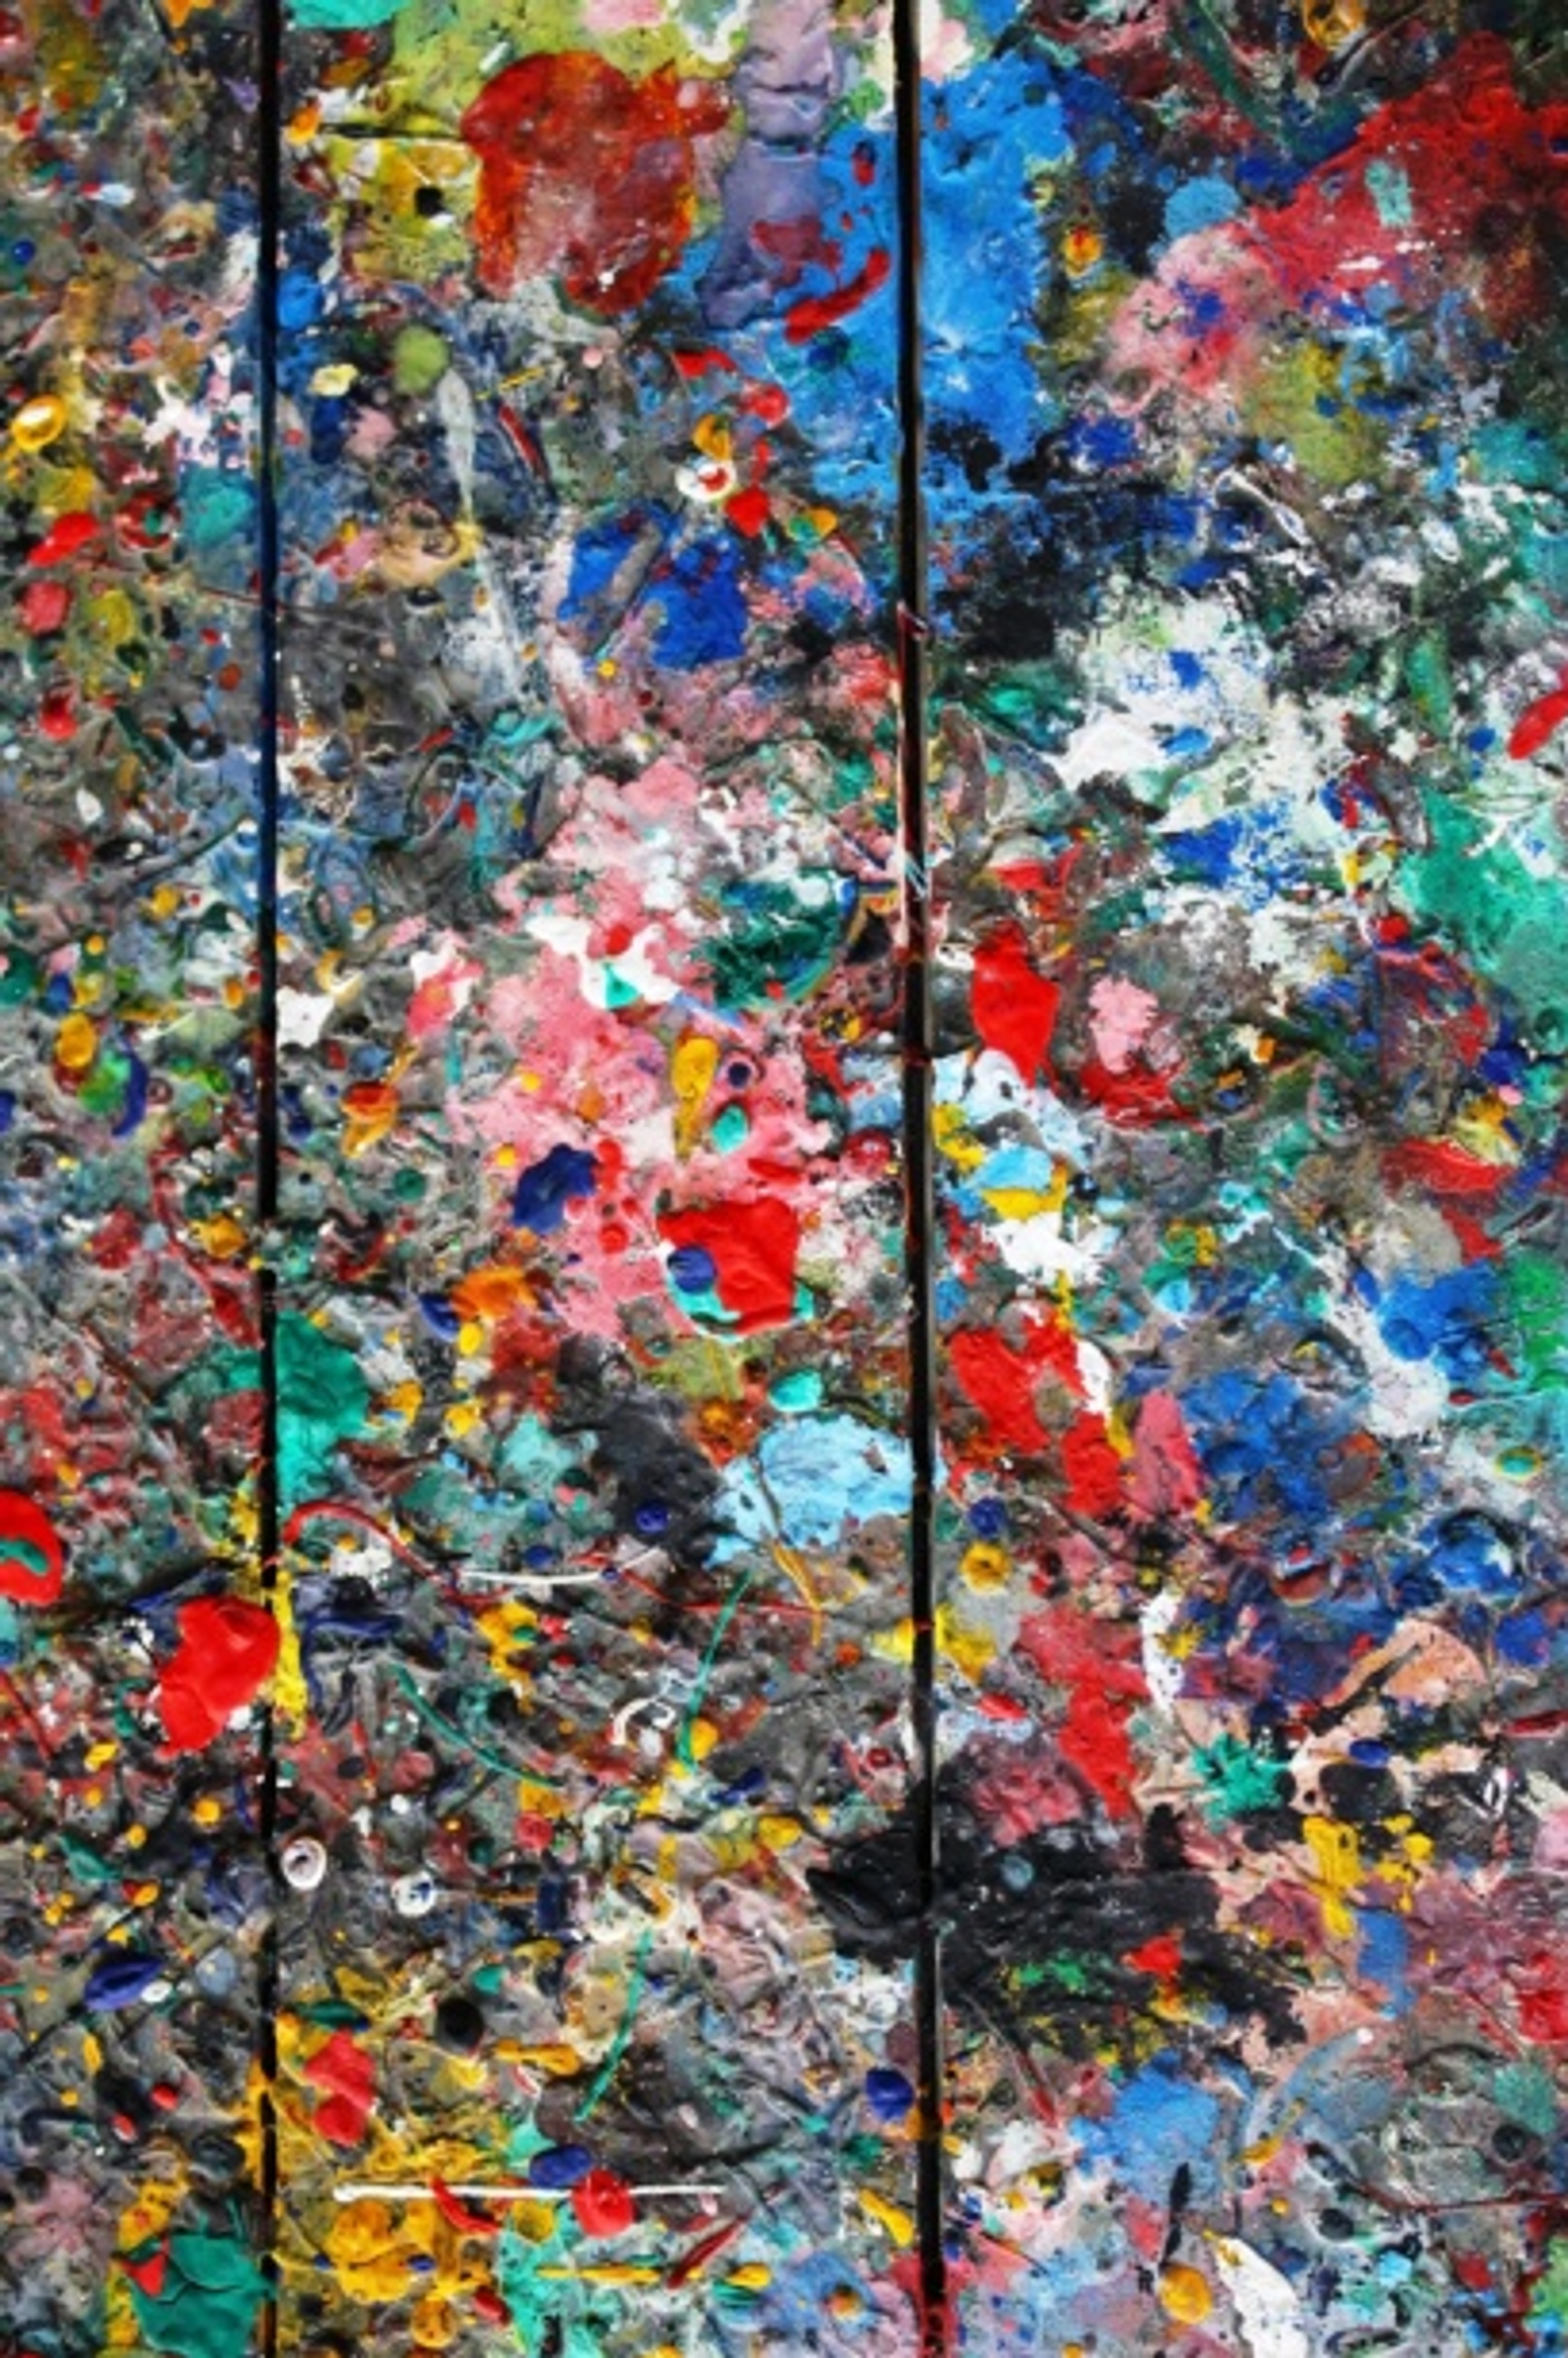
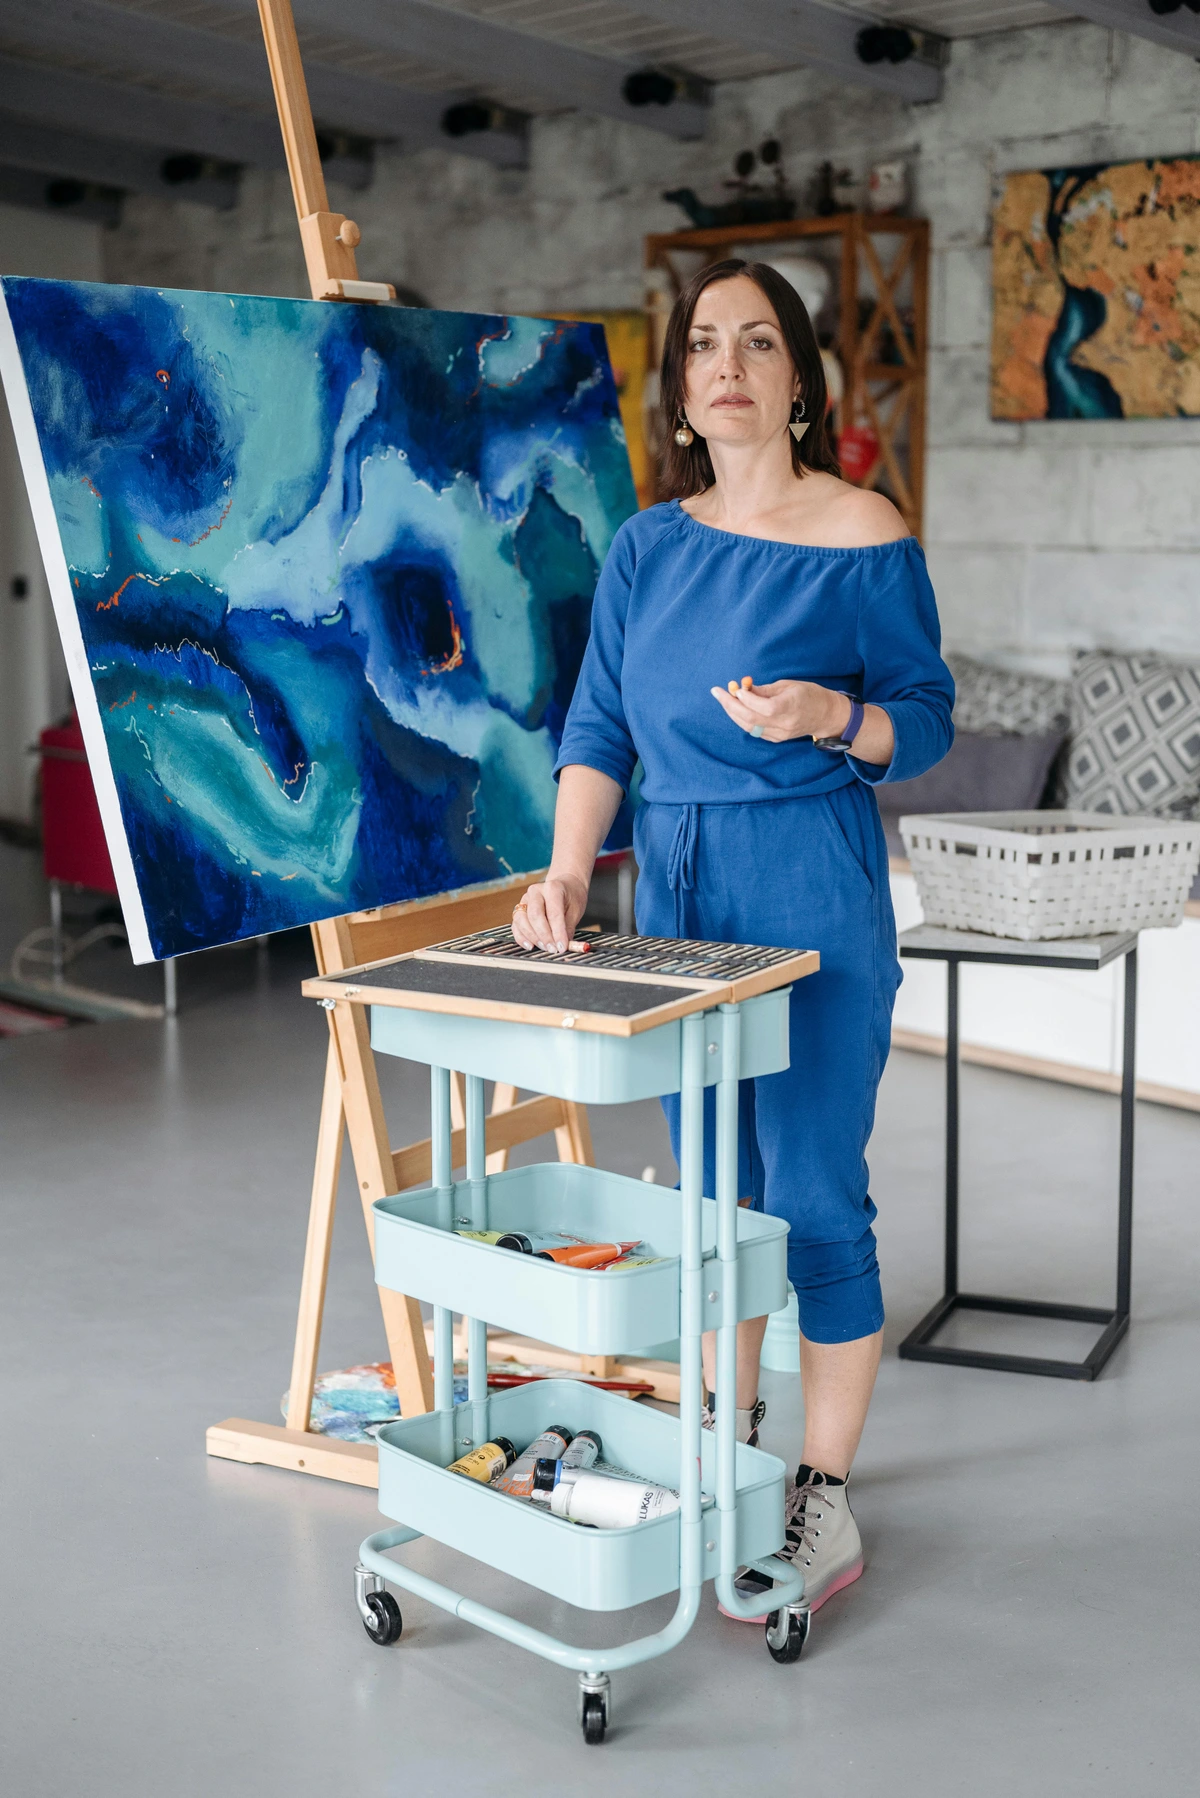
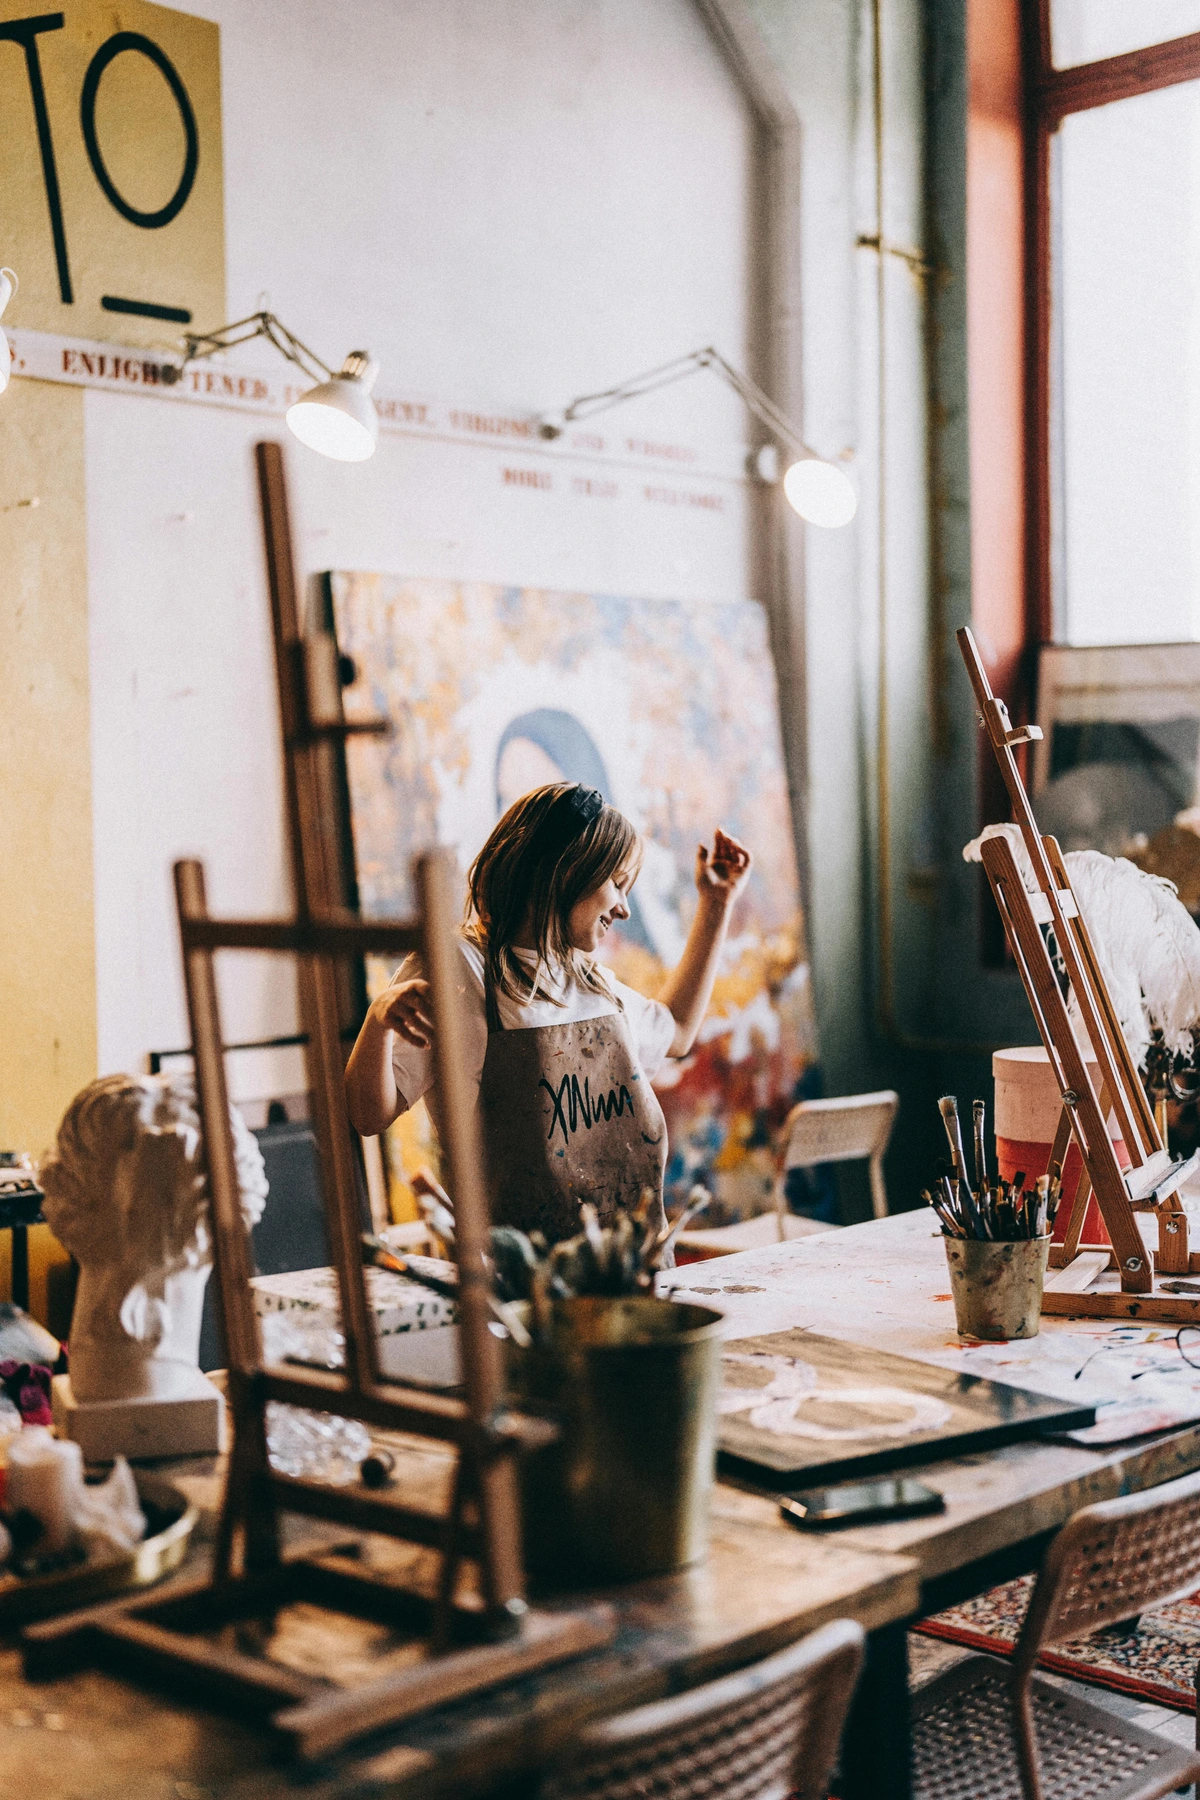
I remember standing in the art supply store for the very first time, a total newbie, feeling like I'd just walked into a secret society's initiation ritual. So many options, so many brands, all those unfamiliar terms… it was a beautiful, overwhelming mess. I even remember one time, early on, picking up what I thought was a fantastic deal – a 100-piece 'art set' for next to nothing, only to find the paint cracked off the canvas almost immediately and the pencil leads snapped at every turn! Honestly, my discipline is a mess on most days, but the one thing that works is knowing I have the right tools. The truth is, starting any creative pursuit can feel a bit like that, can't it? My own journey, creating the vibrant, abstract pieces you see on my Den Bosch Museum page, pieces like 'Geometric Harmony' or 'Abstract Flow,' started with that same blank stare. You want to dive in, but you're not sure where to begin, and suddenly you're picturing yourself buying every single tube of paint or pencil set available. I've been there, more times than I care to admit, even after years of painting my abstract, vibrant pieces. This guide aims to be the curated, no-nonsense, and truly ultimate resource I desperately wished I'd had when I was first starting out, covering the absolute essentials for both drawing and painting.
But let me tell you a little secret, something I learned the hard way and which forms the core of my artistic philosophy: you don't need all of it. Not even close. My journey as an artist, and really, my whole approach, is about finding the essential, the core, and then letting your intuition guide you. This article? It's my attempt to be the friendly guide I wish I'd had, helping you cut through the noise and find the best art supplies for beginners – the ones that will truly kickstart your creative flow without sending you into an existential crisis (or bankruptcy). We'll explore foundational drawing tools, dive into the vibrant world of paint, and even peek at future artistic horizons, always emphasizing quality over sheer quantity. After all, a few high-quality tools that feel good in your hand often unlock a deeper exploration of form, light, and color, which is then beautifully reflected in the energy of my own abstract work.
What You'll Learn in This Guide:
- How to choose essential, quality drawing and painting supplies without feeling overwhelmed.
- The fundamental differences between student-grade and artist-grade materials.
- Practical tips for using and caring for your tools to enhance your artistic journey.
- A comprehensive glossary of beginner art terms to demystify the art world.
- Inspiration for expanding your artistic horizons beyond the basics, including digital art and printmaking.
The Beginner's Paradox: Why Quality Over Quantity is Your Creative Superpower
Honestly, when I first started, I bought everything. My early art supply purchases resembled a small, very confused art-apocalypse. I had every color imaginable, brushes of every conceivable shape, papers for every medium. And you know what happened? I was paralyzed. Too many choices can be just as limiting as too few; it’s a classic case of decision fatigue in the studio, a common culprit behind beginner anxiety. Psychologically, our brains struggle when presented with an overwhelming array of options, leading to indecision and, often, inaction. It becomes a distraction, an excuse to not start because you're still organizing, still deciding. It’s not just about the money; it’s the mental load, the pressure to choose 'the right' thing, and the fear of making a 'wrong' investment. My advice? Start small, but start with quality.
Yes, even for beginners. I'm not saying go for the most expensive artist-grade items right off the bat, but please, please, please avoid the cheapest, flimsiest stuff. After years of pushing paint around and filling sketchbooks, I've learned that a slightly better quality pigment or paper will give you a much more satisfying experience, make your efforts feel more rewarding, and ultimately encourage you to keep going. Think of it like cooking: you can make a meal with mediocre ingredients, but a few good, fresh ones (like a perfectly ripe tomato or a high-quality olive oil) can make all the difference, even for a beginner chef. Similarly, good quality graphite that glides smoothly across paper or a watercolor paper that doesn't buckle under a wash makes the learning process itself easier and more enjoyable. Crucially, quality tools also allow you to better understand the material's properties – how paint mixes, how a pencil blends – which is vital for artistic development. This philosophy is deeply embedded in my own abstract work; the quality of my initial materials often dictates the joy of the process itself, as you can see reflected in my pieces on the Den Bosch Museum page.

So, let's simplify. We're going to focus on two main areas to begin: drawing and painting. These are the foundations for so much artistic expression, and they’re incredibly rewarding to explore, laying the groundwork for more complex mediums like those explored in The Definitive Guide to Paint Types for Artists.
Drawing Your First Lines: The Foundational Conversation
Before paint, before sculpture, before elaborate digital compositions, there was the line. Drawing is, for me, the most direct conversation between your hand and your idea. It’s where everything begins, a true training ground for observation and expression. It teaches you to see, to compose, and to translate the world around you onto paper. Historically, drawing has been the bedrock of artistic practice, with early artists sketching on cave walls with burnt sticks, Medieval scribes meticulously illustrating manuscripts with quill pens, and Renaissance masters like Leonardo da Vinci refining their understanding of form and anatomy using silverpoint or red chalk. Before mass-produced pencils and paper, artists relied on charcoals, ink, and even sharpened reeds on surfaces like parchment, papyrus, or prepared wood panels. The widespread availability of mass-produced pencils and paper in the 19th century further democratized this fundamental art form, making it accessible to many more aspiring creators. Beyond pure art, drawing has been indispensable in fields like scientific illustration, architectural drafting, and technical design, highlighting its foundational importance across disciplines. As you refine your lines, you'll uncover a silent language – one that can speak volumes.
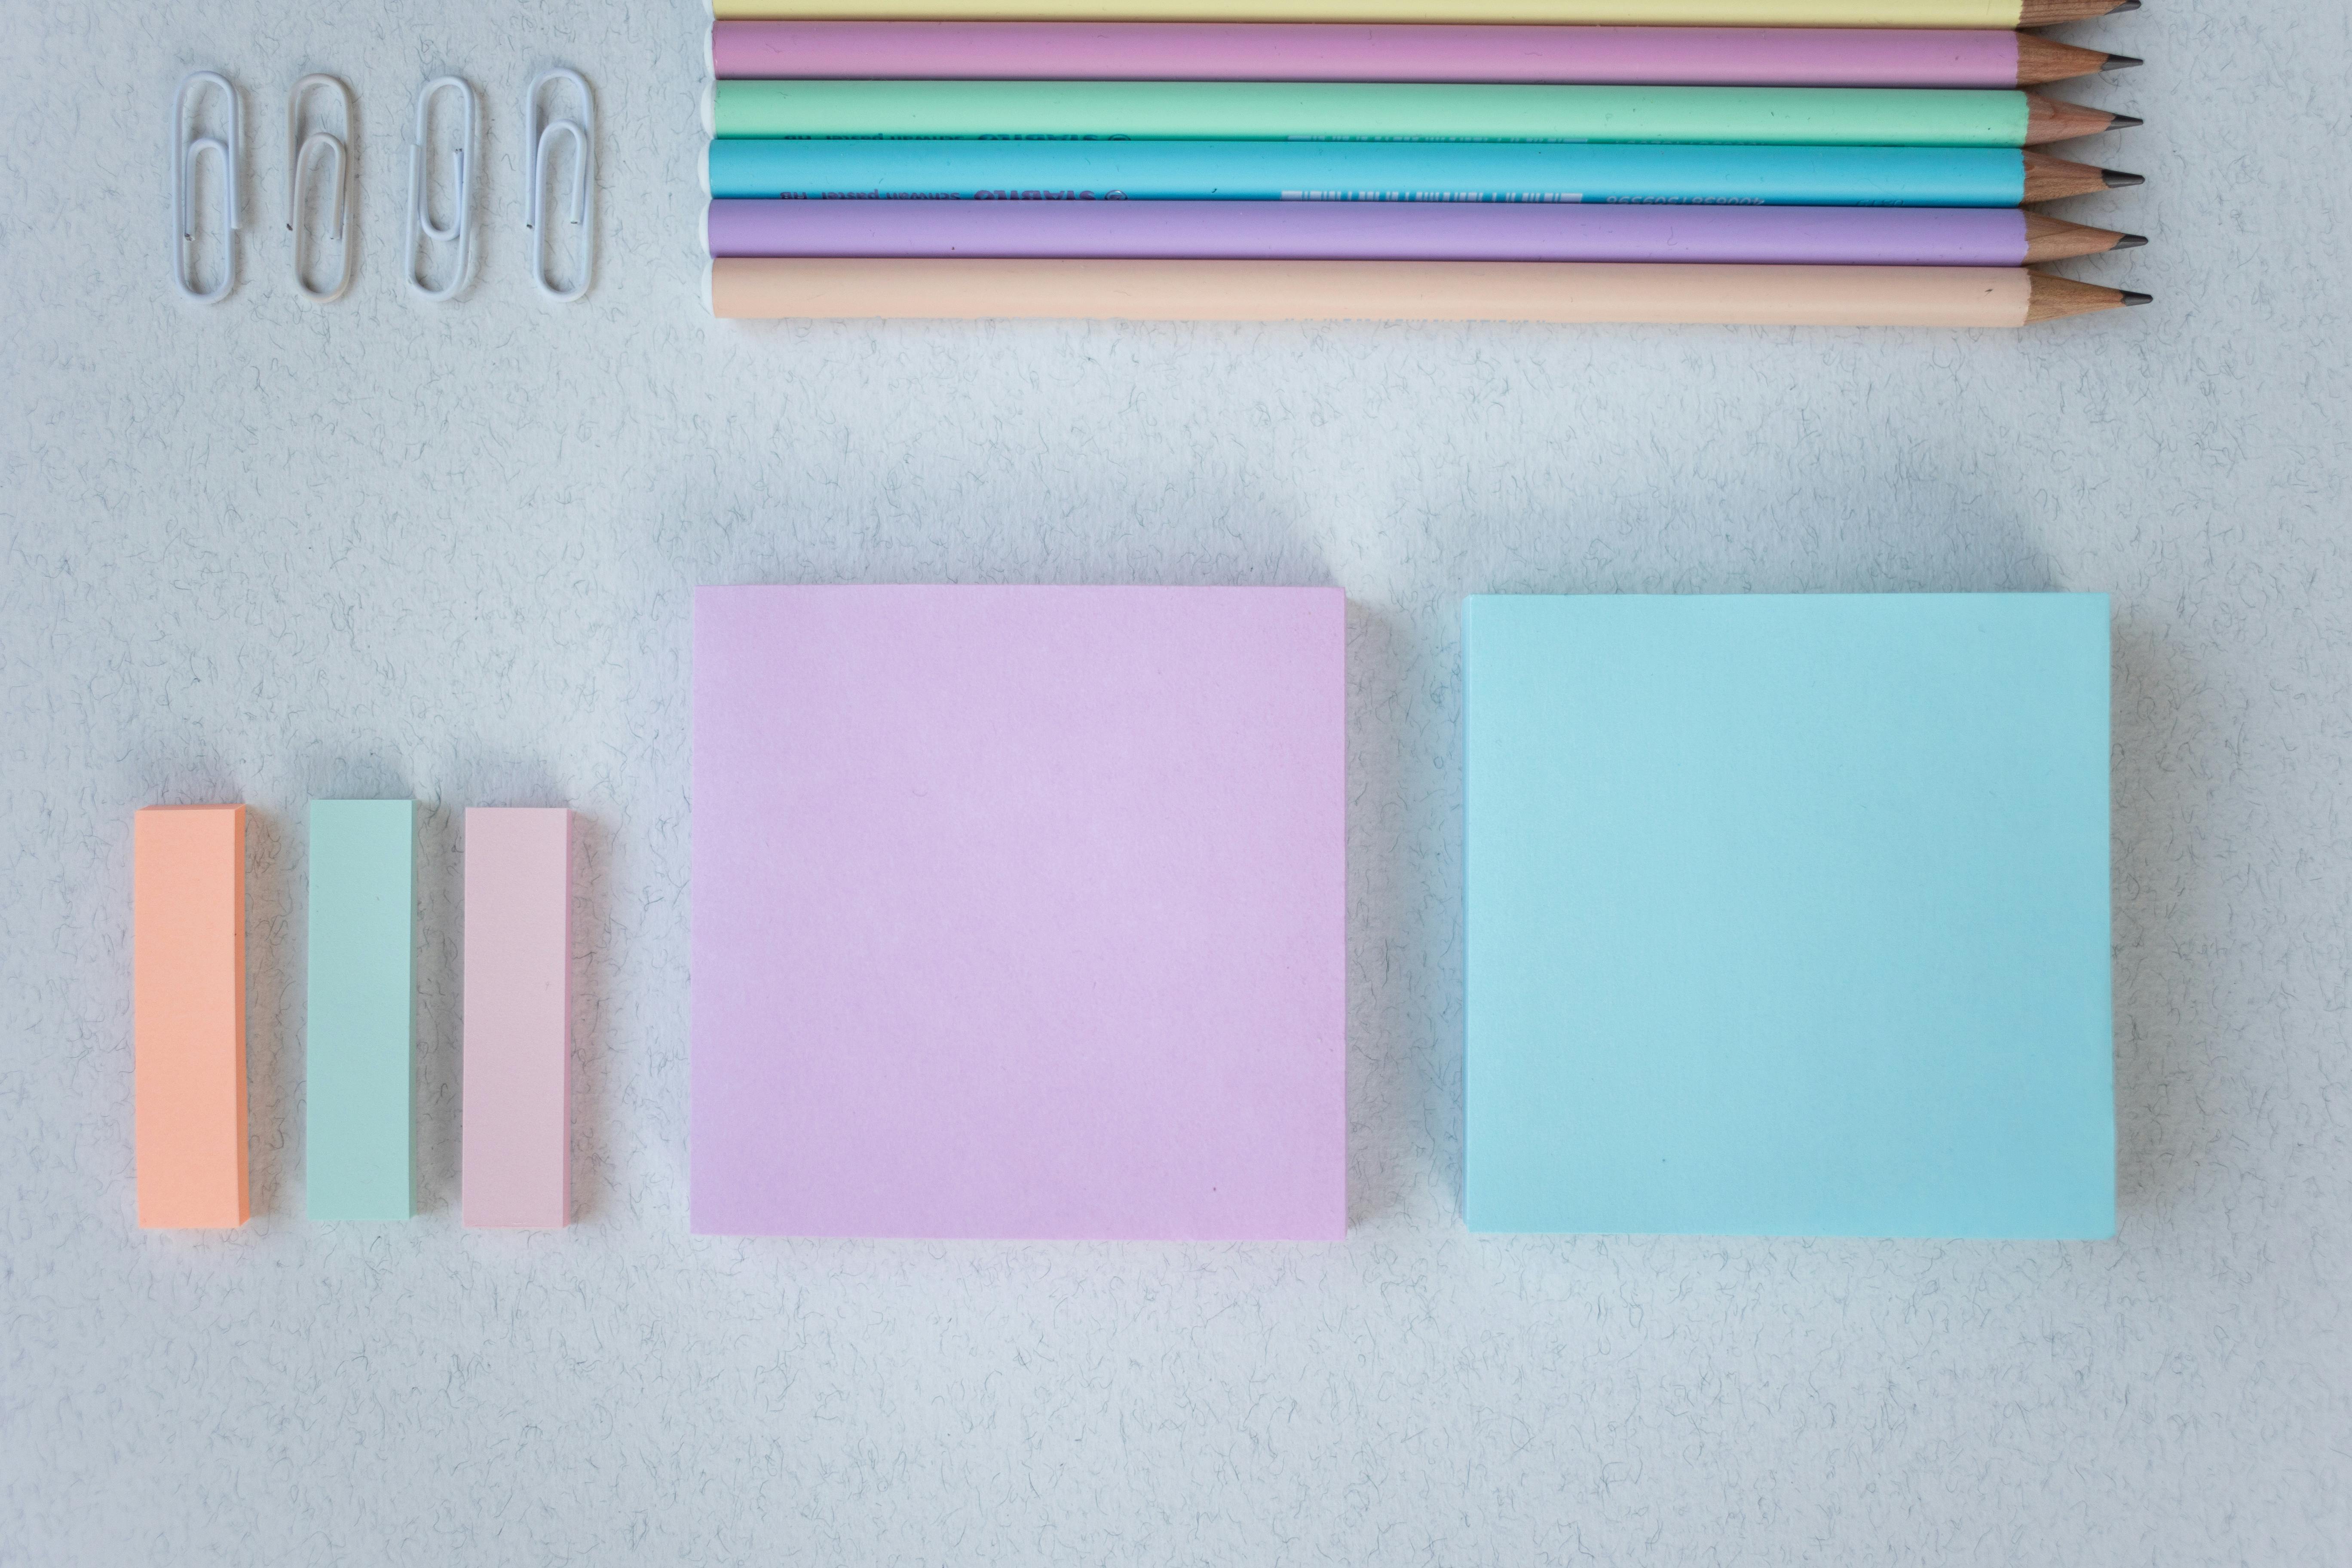
Sketchbooks & Paper: Your First Creative Sanctuary
This is where the magic happens, where ideas take shape. Don't underestimate the power of good paper. While printer paper (typically 80 gsm) is okay for quick doodles, investing in a decent sketchbook makes your work feel more substantial and, importantly, helps preserve it. Your sketchbook isn't just paper; it's a visual diary, a practice ground, and a space to develop your unique artistic voice, without the pressure of a 'finished piece.' Look for something with a paper weight of at least 90-150 gsm (grams per square meter); this weight prevents your marks from bleeding through or ghosting (showing faintly on the other side), and simply feels more substantial – think cardstock versus tissue paper. For light sketching and quick studies, a lighter 80-90 gsm paper is fine, but for anything involving ink or heavier applications, aim for 120 gsm and up. If you plan to use ink or light washes, go a bit heavier, say 120-150 gsm. Even better, look for acid-free paper; this is crucial because it means your drawings won't yellow, embrittle, or degrade over time. The acids naturally present in wood pulp break down cellulose fibers, causing discoloration and weakening – a process neutralized in acid-free paper. I still wince remembering a stunning charcoal sketch I did on cheap paper that yellowed and flaked within months. Never again! Investing in quality paper, even for practice, tells your subconscious that your efforts are valuable.
Paper also often has sizing – an internal or external additive (like gelatin or synthetic polymers) that reduces the paper's absorbency. This is super important because it controls how much ink or water the paper soaks up, preventing your medium from bleeding too much or creating fuzzy lines (feathering), especially for ink or watercolor. The texture also matters – some papers are smoother (great for fine detail and ink, like a light Bristol board), while others have a 'tooth' that grabs graphite better for shading, creating a richer texture. A smooth surface, like hot-press paper, is fantastic for crisp ink lines and detailed pencil work, but less absorbent for washes. Hot-press paper is made by pressing damp paper sheets between heated metal rollers, resulting in a very smooth, dense surface. Conversely, cold-press paper offers a slight texture, created by pressing paper between cold felts, making it versatile for most dry media and light washes, and is excellent for both wet-on-wet and wet-on-dry watercolor techniques. Other textures you might encounter include eggshell (a subtle, finely pebbled surface) or laid paper (featuring fine, parallel lines from the papermaking screen, adding a traditional, classic feel). For general drawing, a good all-purpose cartridge paper sketchbook is perfect, often available in spiral-bound (great for laying flat) or perfect-bound (more durable). For specific mediums like charcoal or pastels, a paper with a heavier 'tooth' or even a sandpaper-like texture (especially for pastels) can be ideal for building up layers of pigment. If you're using watercolor paper that isn't heavy enough (under 300 gsm), a pro tip to prevent buckling (when paper warps from water saturation) is to tape it down securely to a rigid board using artist's tape before you start. Oh, and keep an eye out for paper grain; some papers have a noticeable direction to their fibers, which can subtly affect how your strokes appear, how dry media blends, and how the paper tears or folds, especially with dry media.
For specific mediums like watercolor? That's a whole different beast, as I've explored in Best Watercolor Paper for Artists Review and Best Sketchbooks for Artists.
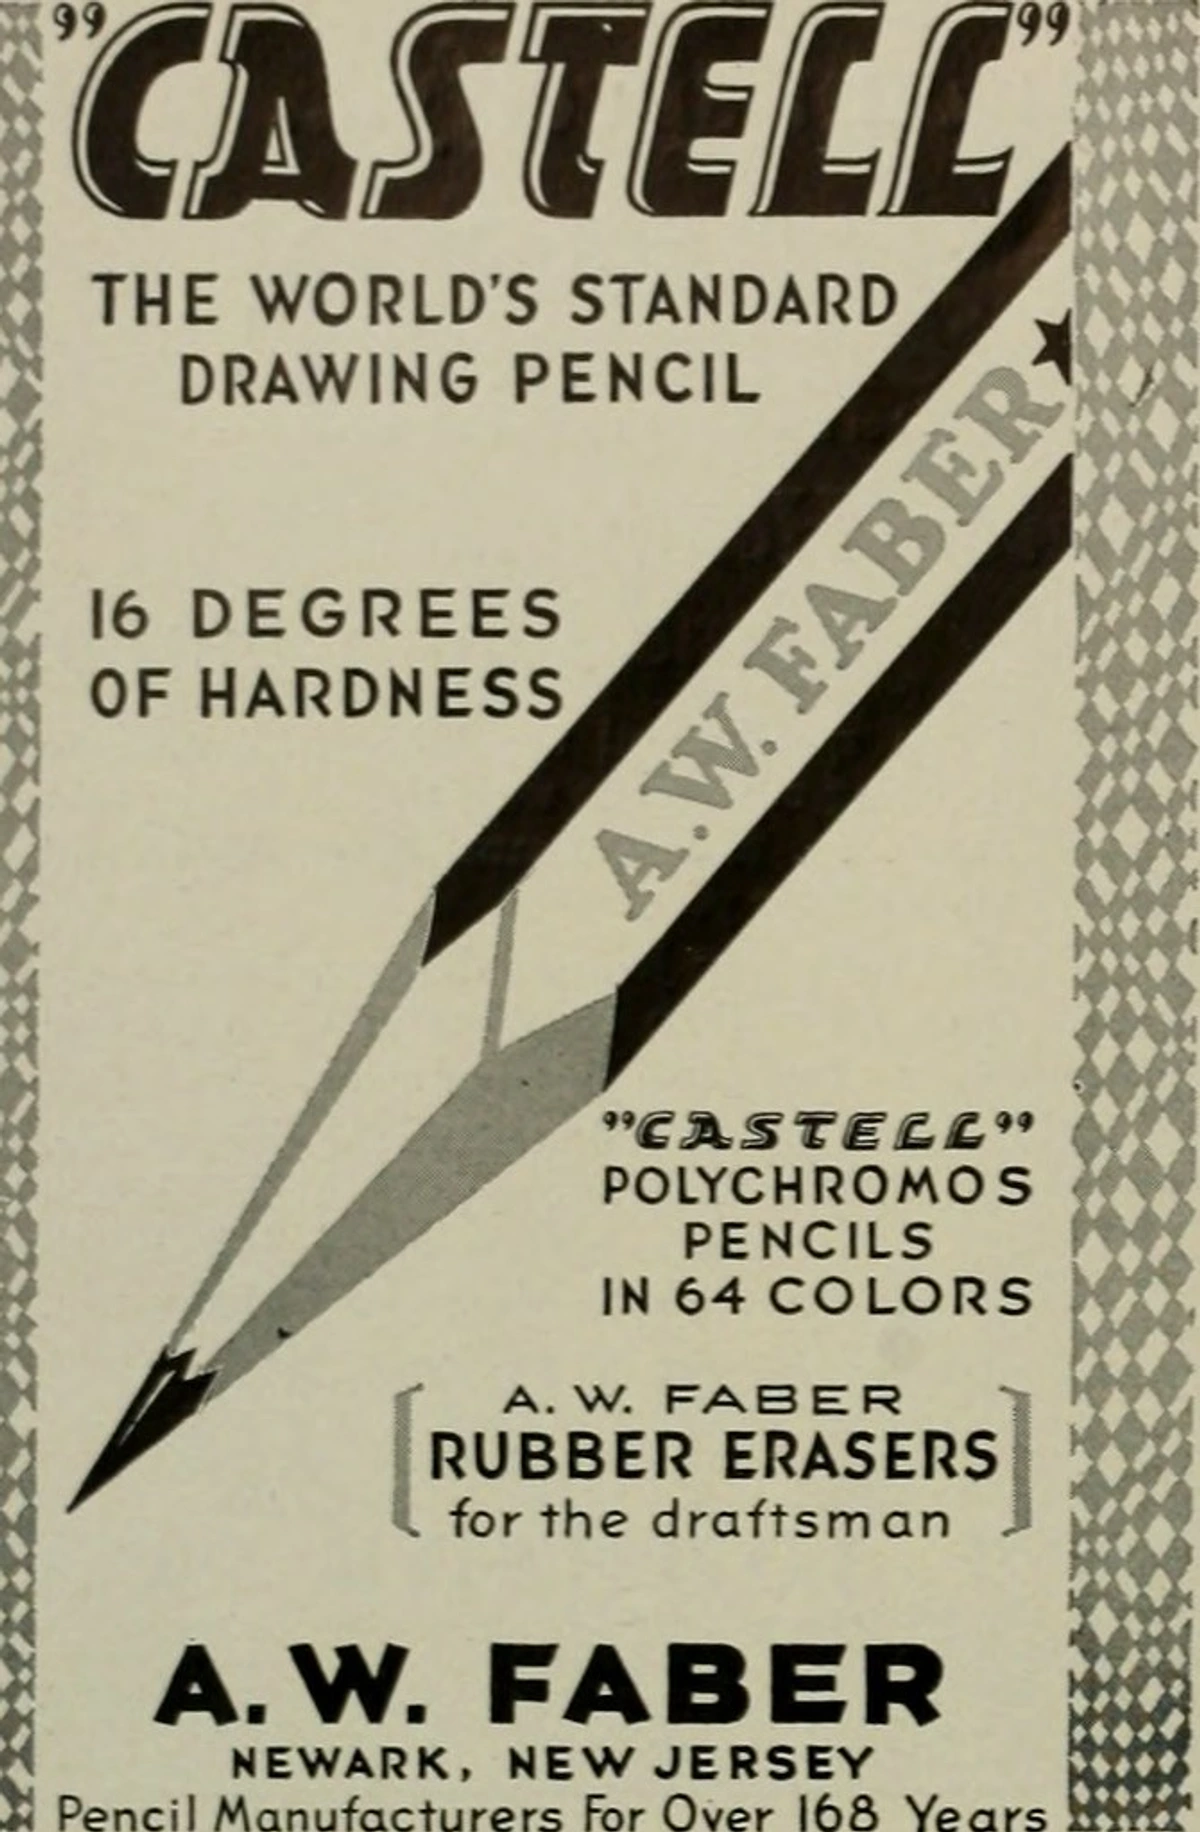
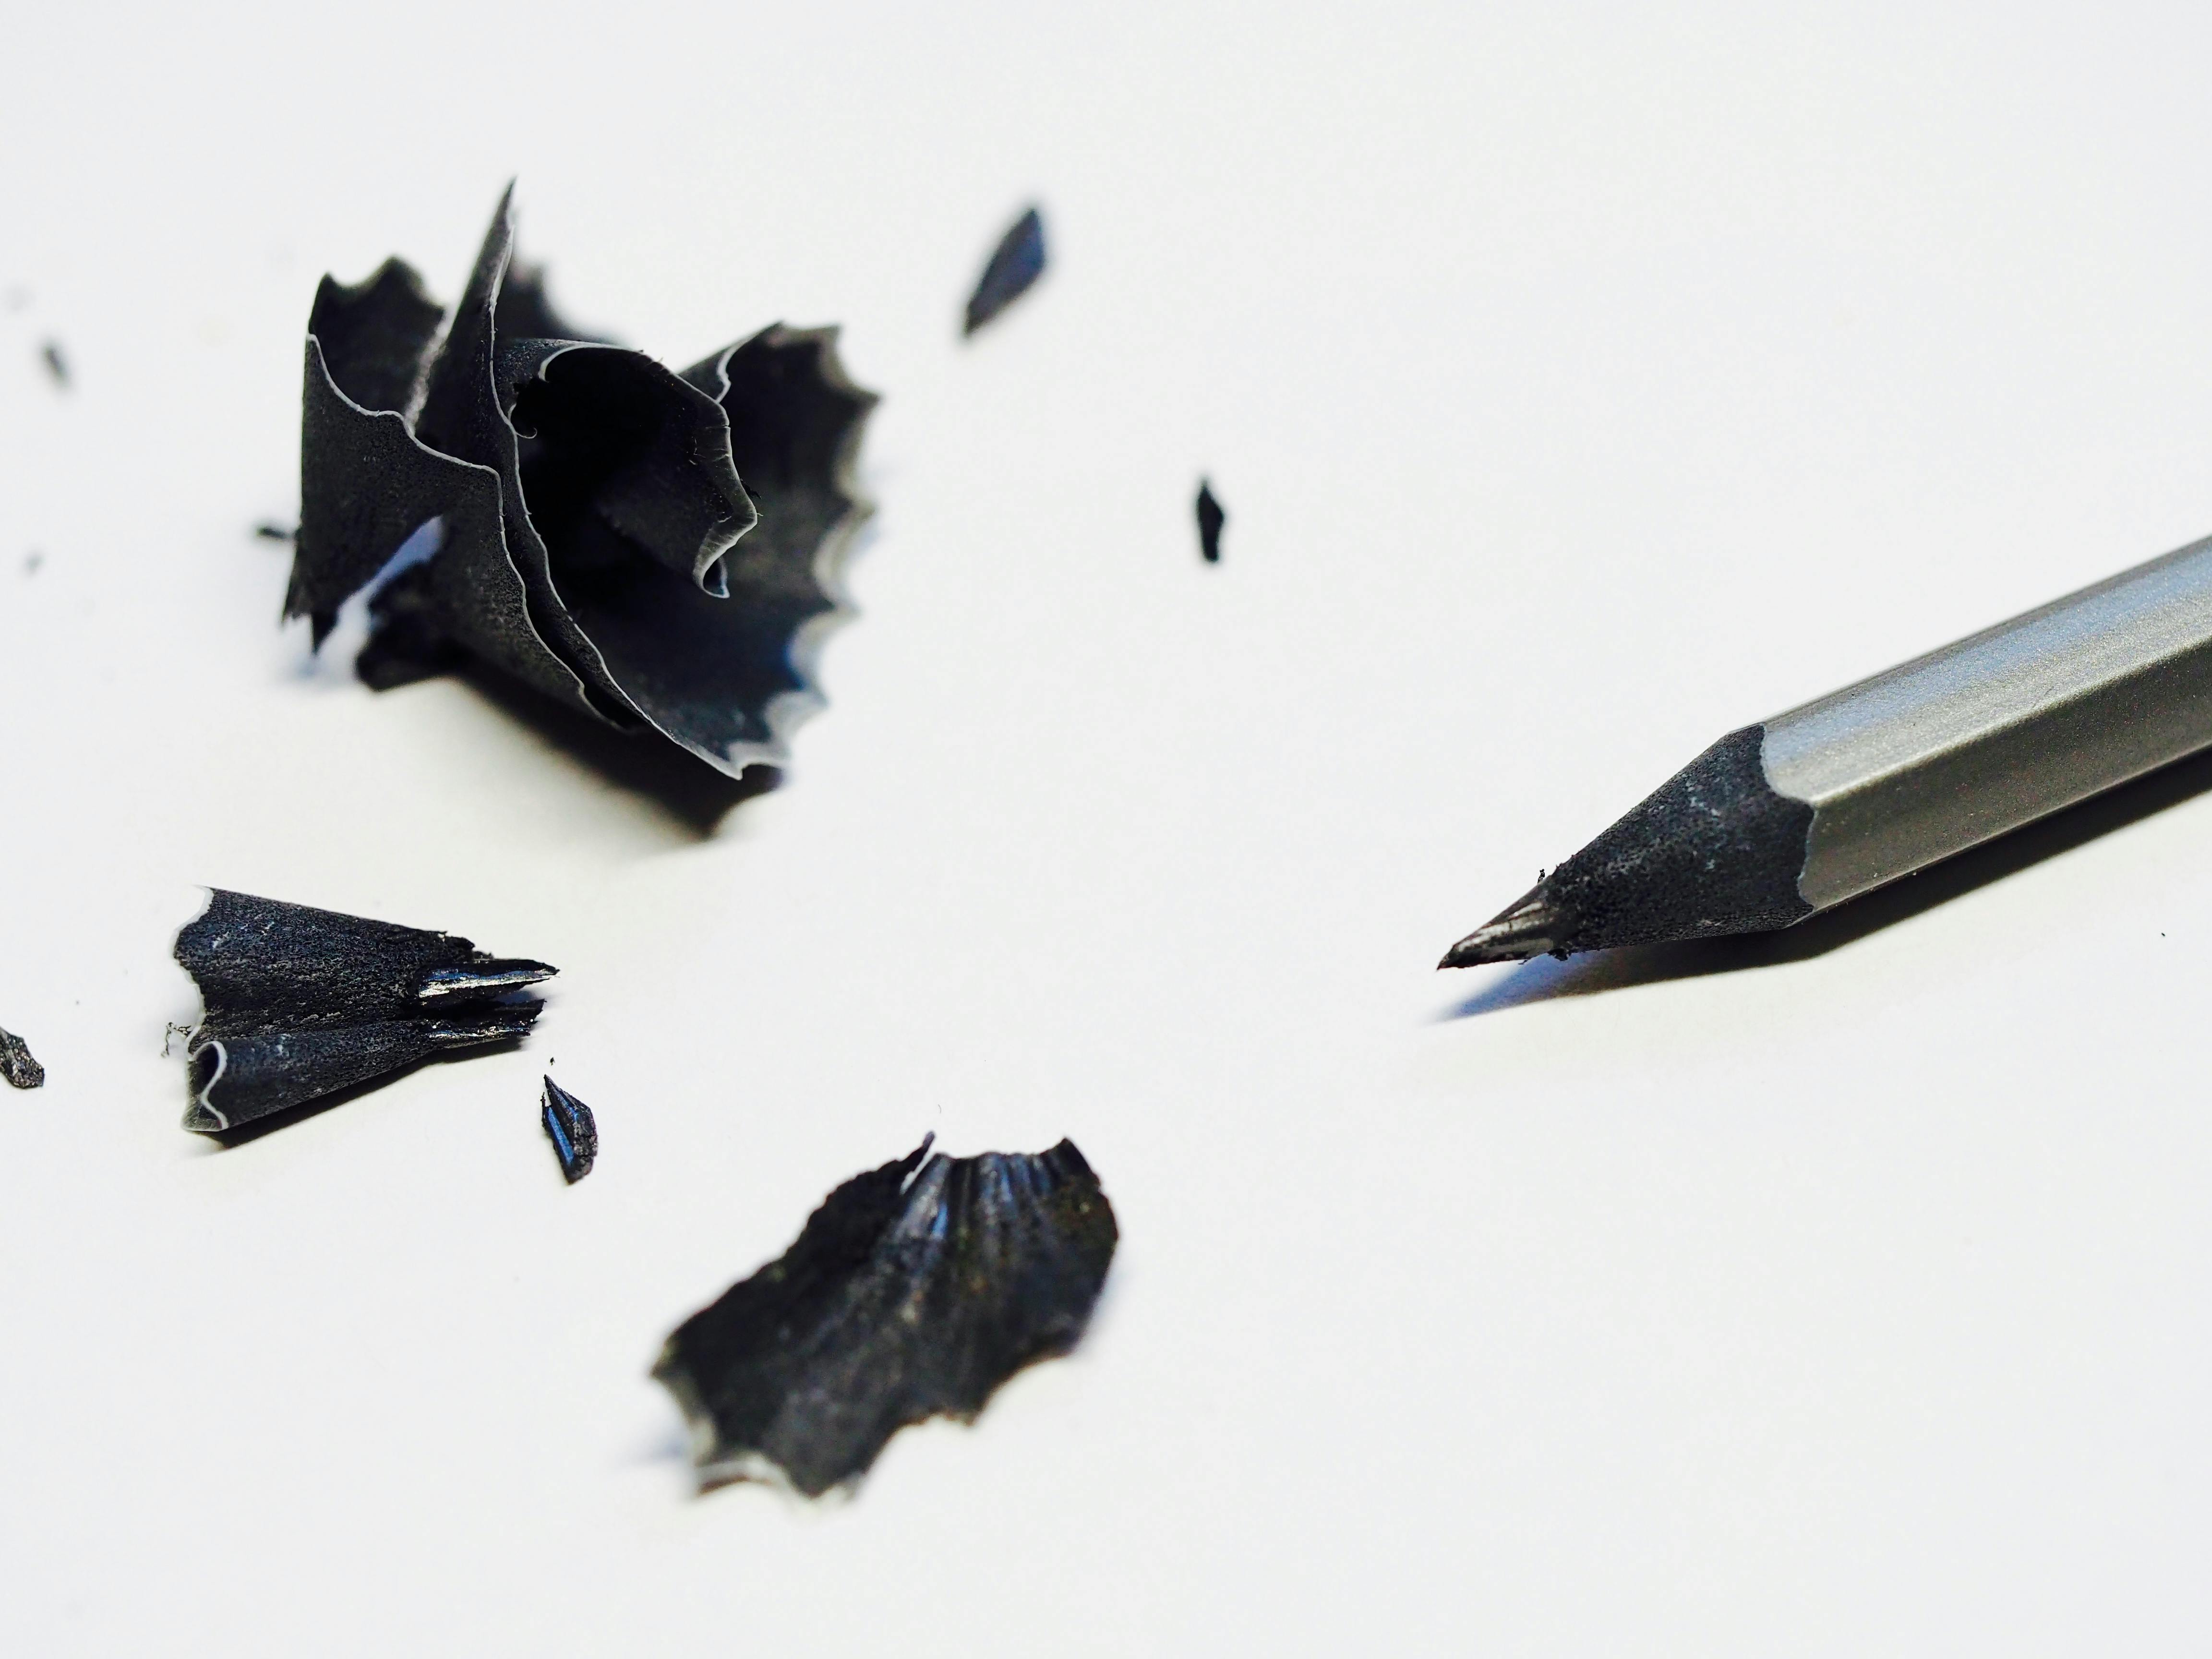
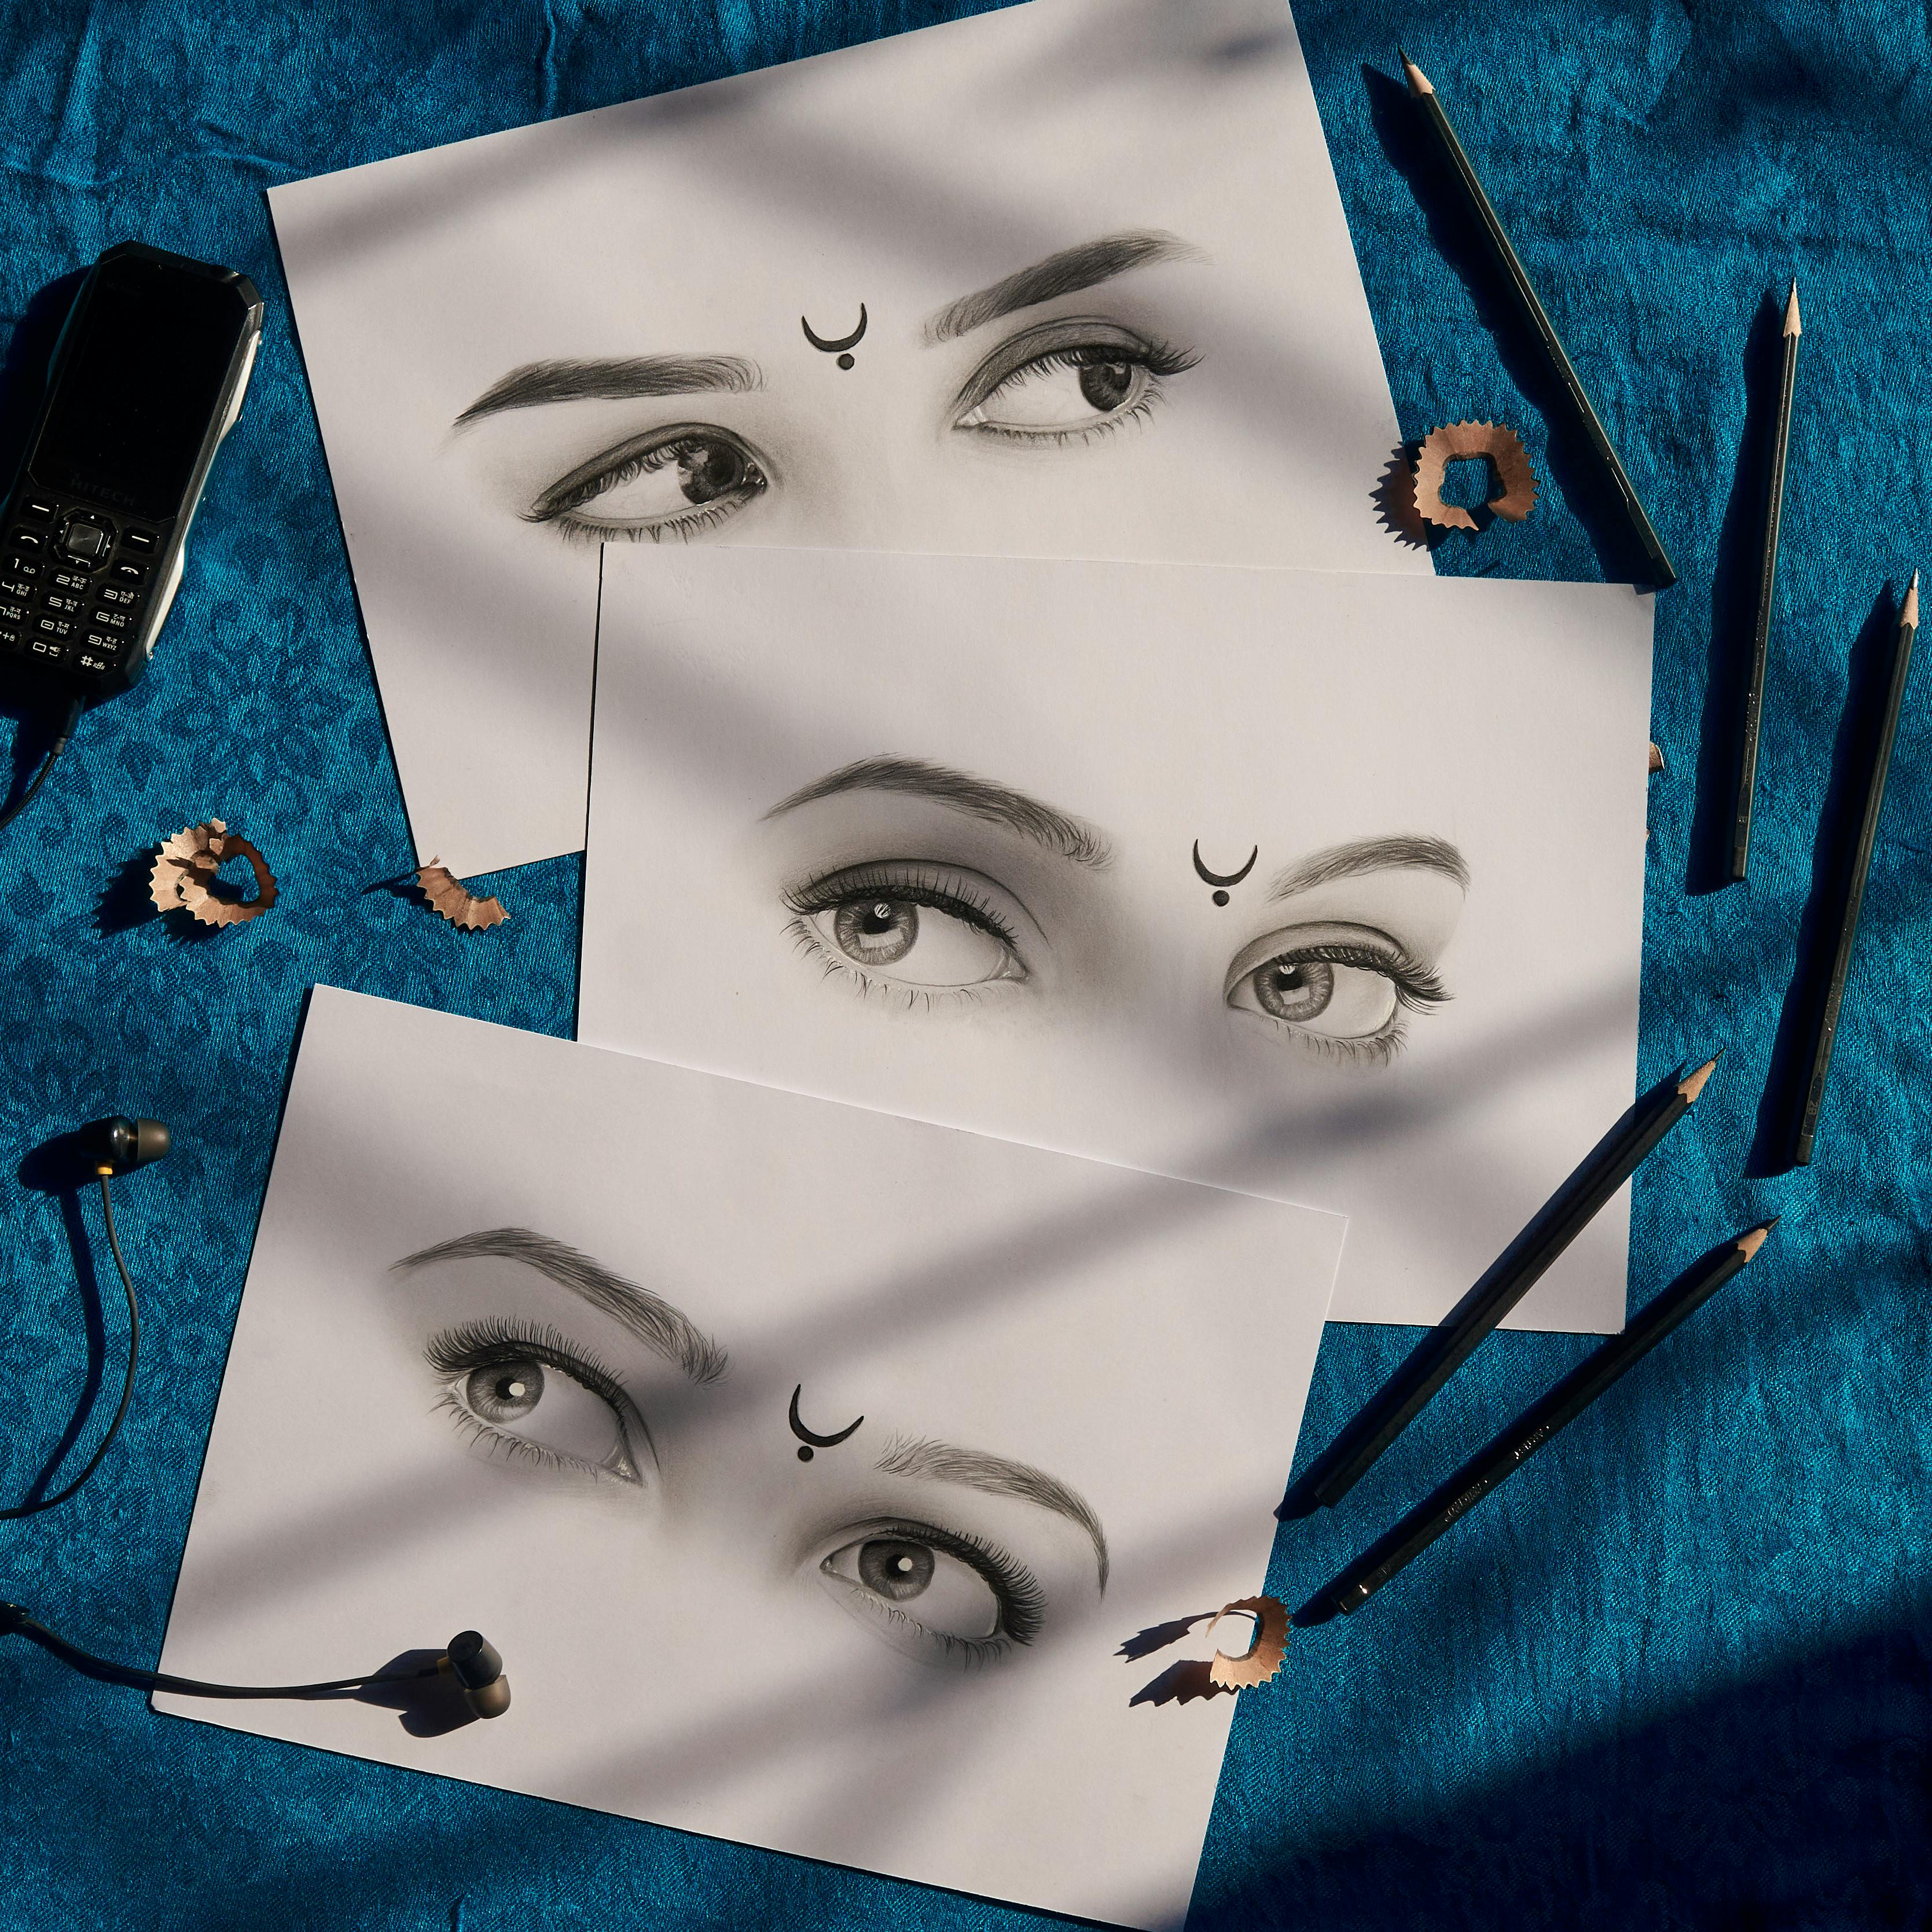
Pencils: Not Just for School Notes
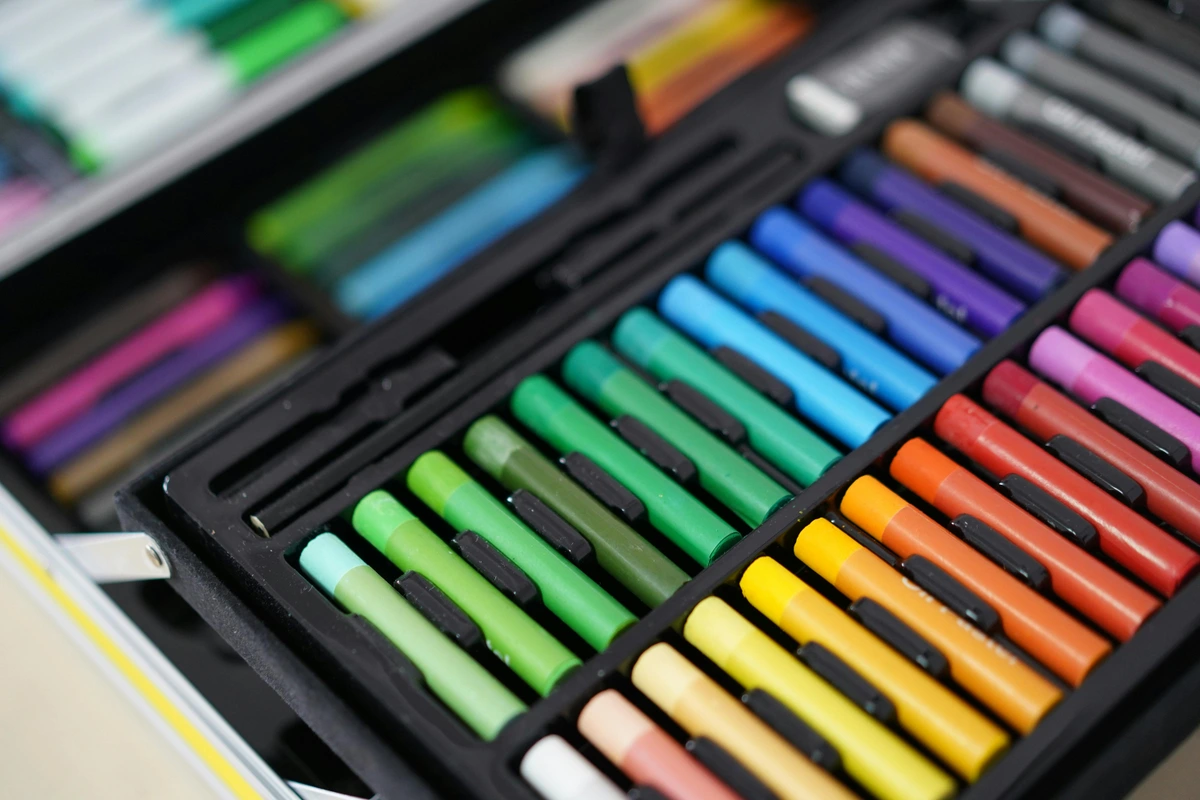
Forget those single HB pencils from school. While they’re fine, a small, good quality set of drawing pencils will open up a whole new world of shading and texture. Unlike standard school pencils, drawing pencils are crafted with a higher quality graphite and binder, ensuring smoother application and superior blending. You'll find pencils come in a grading system ranging from H (for Hard) to B (for Black, or soft), with F (Fine point) sometimes in between. This system helps you select the perfect tool for your desired mark. Graphite quality refers to the purity and fineness of the graphite particles, while the binder (typically clay) determines the hardness or softness of the lead. A lower binder-to-graphite ratio means a softer pencil, while a higher ratio makes it harder. This also affects lightfastness, a crucial property referring to how well a pigment or dye resists fading when exposed to light, ensuring your artwork lasts. I typically recommend a basic set ranging from 2H (hardest, lightest) to 6B (softest, darkest). The 2H is your ghost, perfect for those barely-there preliminary sketches that won't leave deep indentations, while 6B is your storyteller, building dramatic shadows and deep tones crucial for learning form and value. An HB pencil (right in the middle) is great for general sketching and line work. As you explore, a 4B can offer a nice balance for mid-tones and darker lines without being overly soft. A common pitfall for beginners is pressing too hard with H pencils, which can emboss the paper, creating shiny areas that are hard to erase. Use a light touch! While a full spectrum from 9H to 9B exists, for a beginner, a curated set focusing on these core grades is more than enough to get started. You'll quickly find your favorites, perhaps even venturing into an 8B or 9B for truly deep blacks, or an H or 2H for very light under-sketches. Brands like Faber-Castell Castell 9000 or Staedtler Mars Lumograph offer excellent student-grade options, known for their consistent quality and smooth application. A common pitfall for beginners is over-blending with pencils, which can make your drawing look muddy. Focus on layering and subtle changes in pressure, and experiment with drawing with the side of your pencil lead for broader, softer strokes and faster shading. If you're curious about a deeper dive, check out my thoughts on The Best Drawing Pencils for Beginners and Essential Drawing Supplies for Beginners.
Beyond traditional wood-cased graphite pencils, you might encounter mechanical pencils, which offer consistent line width without sharpening, great for precise details, technical drawing, or simply convenience. However, they lack the broad stroke and blending capabilities of wood-cased pencils. Consider carbon pencils too; they are a mix of charcoal and graphite, offering an incredibly deep, matte black that graphite alone can't achieve, perfect for dramatic darks. Beyond graphite, consider colored pencils for adding vibrant hues or pastel pencils for a painterly, blendable feel, offering new dimensions to your drawing practice.
Ink Pens: Adding Precision and Pop to Your Drawings
Once you've got a feel for pencil, introducing ink can add a whole new dimension to your drawing practice. It forces a certain decisiveness, as ink lines are typically permanent! Historically, ink has been a primary medium for document creation, technical drawings, and enduring artworks, underscoring its inherent permanence. For beginners, I recommend a set of fine liner pens (like those from Pigma Micron or Staedtler Pigment Liner) in various nib sizes (e.g., 0.1mm, 0.3mm, 0.5mm). These pens offer consistent, clean lines, are usually waterproof, and don't bleed much. They're fantastic for outlining, cross-hatching, and adding crisp details. Pro Tip: Always test your ink pens on a scrap piece of your chosen paper first to check for bleed-through and feathering (ink spreading along the paper fibers), which can be mitigated by using heavier, sized, or smoother papers. A brush pen (like a Pentel Pocket Brush or Faber-Castell Pitt Artist Pen Brush) is another excellent addition, allowing for incredible line variation from thin wisps to bold strokes, perfect for expressive ink washes or dynamic gestural drawings. Just remember that ink dries quickly, so practice a light touch and embrace the permanence! For a deeper dive, check out Best Drawing Inks Review. For those interested in decorative lettering or a unique artistic challenge, exploring calligraphy pens with specialized nibs or even traditional dip pens and quills with liquid inks can offer elegant line variations and a different, often more flowing, tactile experience. If you intend for your ink artwork to last, always choose archival or permanent inks, which are formulated to resist fading and degradation over time.

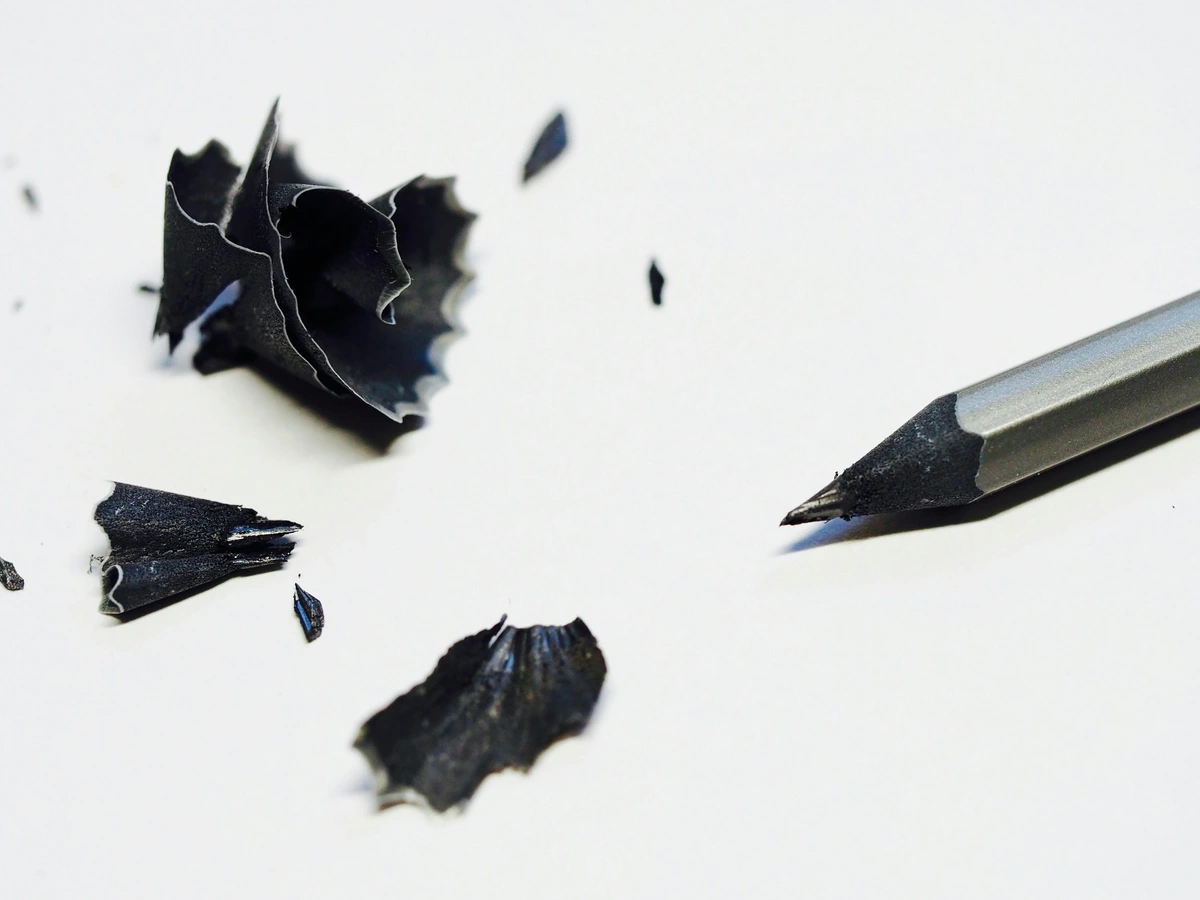
Erasers & Sharpeners: The Silent Saviors
Two humble tools that make a huge difference. A good quality vinyl eraser (the white block ones) will lift graphite cleanly without smudging, tearing your paper, or leaving behind greasy residues like some pink rubber erasers do. There are soft vinyl erasers for delicate work and harder ones for more stubborn marks. I'm also a huge fan of a kneaded eraser. It's like a pliable putty that you can shape to lift small areas of graphite, lighten tones, or even clean up smudges without any residue. You can dab it to lift graphite, knead it into a point for fine highlights, or gently roll it for blending large areas. It's truly a versatile tool for shading and highlights. For sharpeners, a simple metal manual one is often better than a fancy electric one for preserving your pencil lead. Trust me on this, I've broken more leads than I care to admit trying to get that perfect point! The controlled angle of a good manual sharpener (like a Staedtler or Faber-Castell single-hole sharpener) often uses a helical blade design, which provides a cleaner, more precise cut and ensures less breakage compared to a standard straight blade because it shaves the wood evenly without undue stress on the graphite. A quality sharpener creates a consistently sharp point, which is crucial for detailed drawing and extends the life of your pencils by minimizing lead waste. Oh, and a simple metal or clear plastic ruler, say 30cm, is invaluable for perspective, composition grids, or just getting those perfectly straight lines. And if you're serious about drawing comfort and stability, even for a beginner, a simple drawing board can be a game-changer. It provides a firm, consistent surface for your paper and can be propped at an angle for better ergonomics and viewing perspective.
Your Essential Drawing Toolkit: A Quick Recap
Here’s a quick rundown of the essential drawing tools I recommend to get your lines flowing:
Tool | Recommendation for Beginners | Why It Matters |
|---|---|---|
| Sketchbook & Paper | Acid-free, 90-150 gsm cartridge paper (Bristol board also great); spiral-bound is ideal. Consider hot-press (smooth) or cold-press (slight texture) for different effects. For wet media, 300 gsm+ paper with good sizing is best. | Durable, prevents yellowing and bleed-through, providing a satisfying foundation for practice and a lasting record of your progress. Different textures and sizing suit various media, enhancing results and preventing issues like buckling and feathering. |
| Pencils | Basic set (2H-6B, plus HB), e.g., Faber-Castell 9000. Consider colored pencils, pastel pencils, or carbon pencils for broader exploration. Learn about the H/B grading system and how binder ratios affect lead hardness and lightfastness. | Versatile for sketching, shading, and detail; higher quality graphite for smoother results and richer tones. Offers a range of hardness/softness. Avoid pressing too hard with H pencils. Drawing with the side of the lead offers broader strokes. |
| Fine Liner Pens | Set of various nib sizes (e.g., 0.1, 0.3, 0.5mm), e.g., Pigma Micron. Choose archival/permanent inks. Always test on scrap paper first. | For crisp, permanent lines, outlining, and precise detail, adding a professional finish. Waterproof options are versatile, and archival quality ensures longevity. Testing prevents feathering and bleed-through. |
| Brush Pen | One versatile brush pen (e.g., Pitt Artist Pen Brush). For decorative work, consider calligraphy pens (nibs/dip pens). | Allows for dynamic line variation, expressive strokes, and creating ink washes, bridging drawing and painting. Calligraphy tools offer unique artistic challenges and elegant lines and are often archival. |
| Vinyl Eraser | White block eraser (various hardnesses). | Cleanly lifts graphite without smudging or damaging paper, crucial for clean lines and preventing greasy residues. |
| Kneaded Eraser | Pliable putty eraser. | Excellent for blending, lifting highlights, and subtle corrections without leaving residue. Highly versatile for shading and creating soft transitions. |
| Manual Sharpener | Metal single-hole with helical blade, e.g., Staedtler. | Precise sharpening, reduces lead breakage, extending the life of your pencils and ensuring a clean, sharp point by evenly shaving the wood without undue stress on the graphite. |
| Ruler | 30cm metal or clear plastic. | Essential for straight lines, accurate measuring, and composition grids, bringing structure and precision to your art. |
| Drawing Board | Simple, rigid board, potentially with an easel stand. | Provides a stable, consistent surface for drawing, which can be angled for ergonomic comfort and improved perspective, aiding your composition. |
Pro Tip for Drawing: While you're drawing, focus on seeing negative space – the shapes around your subject. It's a game-changer for improving accuracy and composition, and it's a skill that translates beautifully to all forms of art.
With these simple, quality tools, you're more than equipped to fill your sketchbook with observations, ideas, and pure creative joy. Once you've mastered the dance of light and shadow with your pencils, you'll be ready to explore the vibrant world of color through paint.
Dipping Your Toes in Color: The Vibrant Symphony
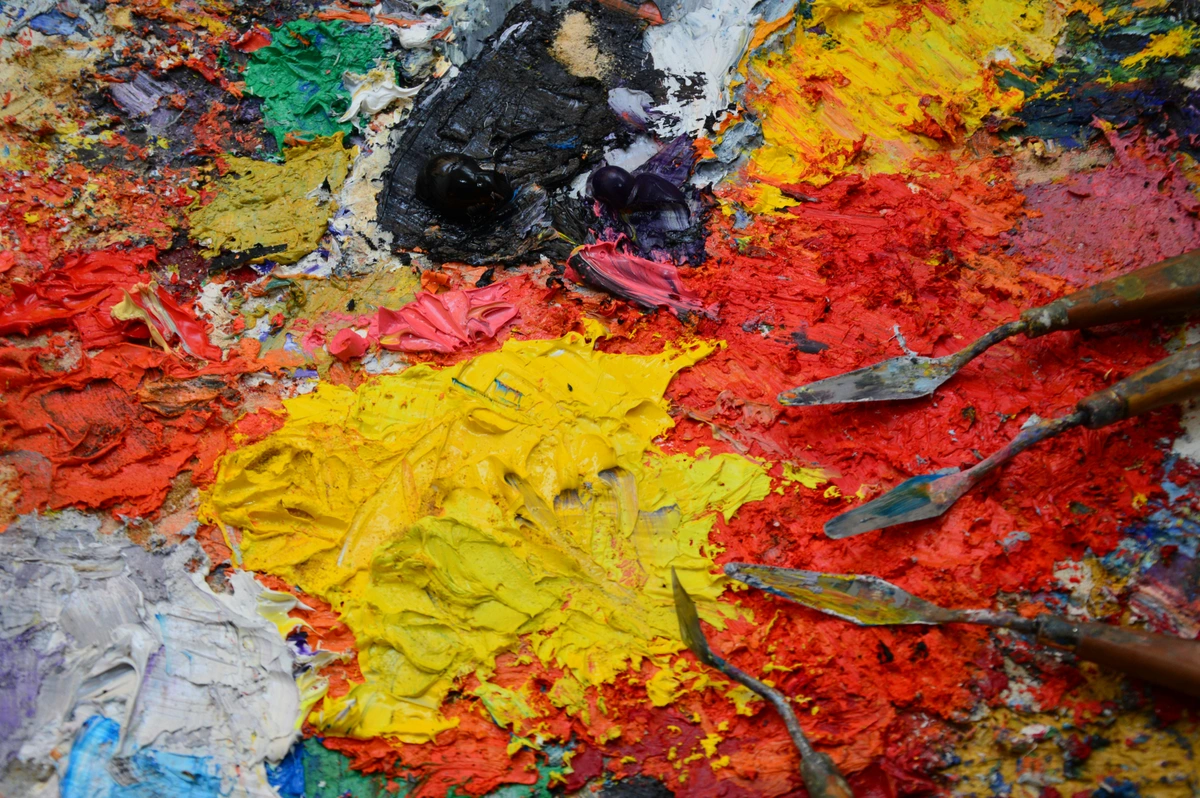
Once you've found your rhythm with lines and shading, you've unlocked a silent language. Now, are you ready to add the thunder, the whispers, the vibrant symphonies of color to your artistic conversation? The world of paint is vast and wonderful, but for beginners, three mediums stand out for their accessibility and versatility: acrylics, watercolors, and gouache. Gouache, in particular, offers opaque, matte color with water-soluble convenience, bridging the gap between watercolor's fluidity and acrylics' opacity. We can talk about oils later – perhaps after you've mastered What is a Palette Knife and How to Use It, as oils especially demand more specific handling and drying times. Art history shows how mediums shaped movements: from the Renaissance painters who moved from quick-drying fresco to slow-drying oils for their luminous depth, to the Impressionists who embraced portable tube paints for plein air, and Abstract Expressionists who found freedom in the quick-drying nature of early acrylics.
The Essentials of Color Theory: Painting with Understanding
Before we dive into specific paints, let me share a little about color theory – it's like learning the grammar of painting, and it will truly transform your work, as I touch upon often in my own vibrant abstracts (definitive guide to color theory in art). At its core, color theory helps you understand how colors interact and influence each other. Think of the color wheel: red, yellow, and blue are your primary colors – the foundational colors from which all others can theoretically be mixed. Mix two primaries, and you get secondary colors (orange, green, purple). Mix a primary and a secondary, and you get tertiary colors. Understanding complementary colors (colors directly opposite each other on the color wheel, like red and green) is key; they create strong contrast when placed side-by-side, making each other pop, and interestingly, they can be used to desaturate each other when mixed, creating a wider range of nuanced, earthy tones. For example, adding a touch of green to red will subtly dull it down, making it less vibrant and more of an earthy rust color. Then there are analogous colors, which are next to each other on the color wheel, creating harmonious and often calm palettes. Also consider hue (the pure color itself, like 'red'), value (how light or dark it is), and saturation or chroma (the intensity or purity of the color). This basic understanding will empower you to mix colors more intentionally and create the moods and focal points you desire in your art.

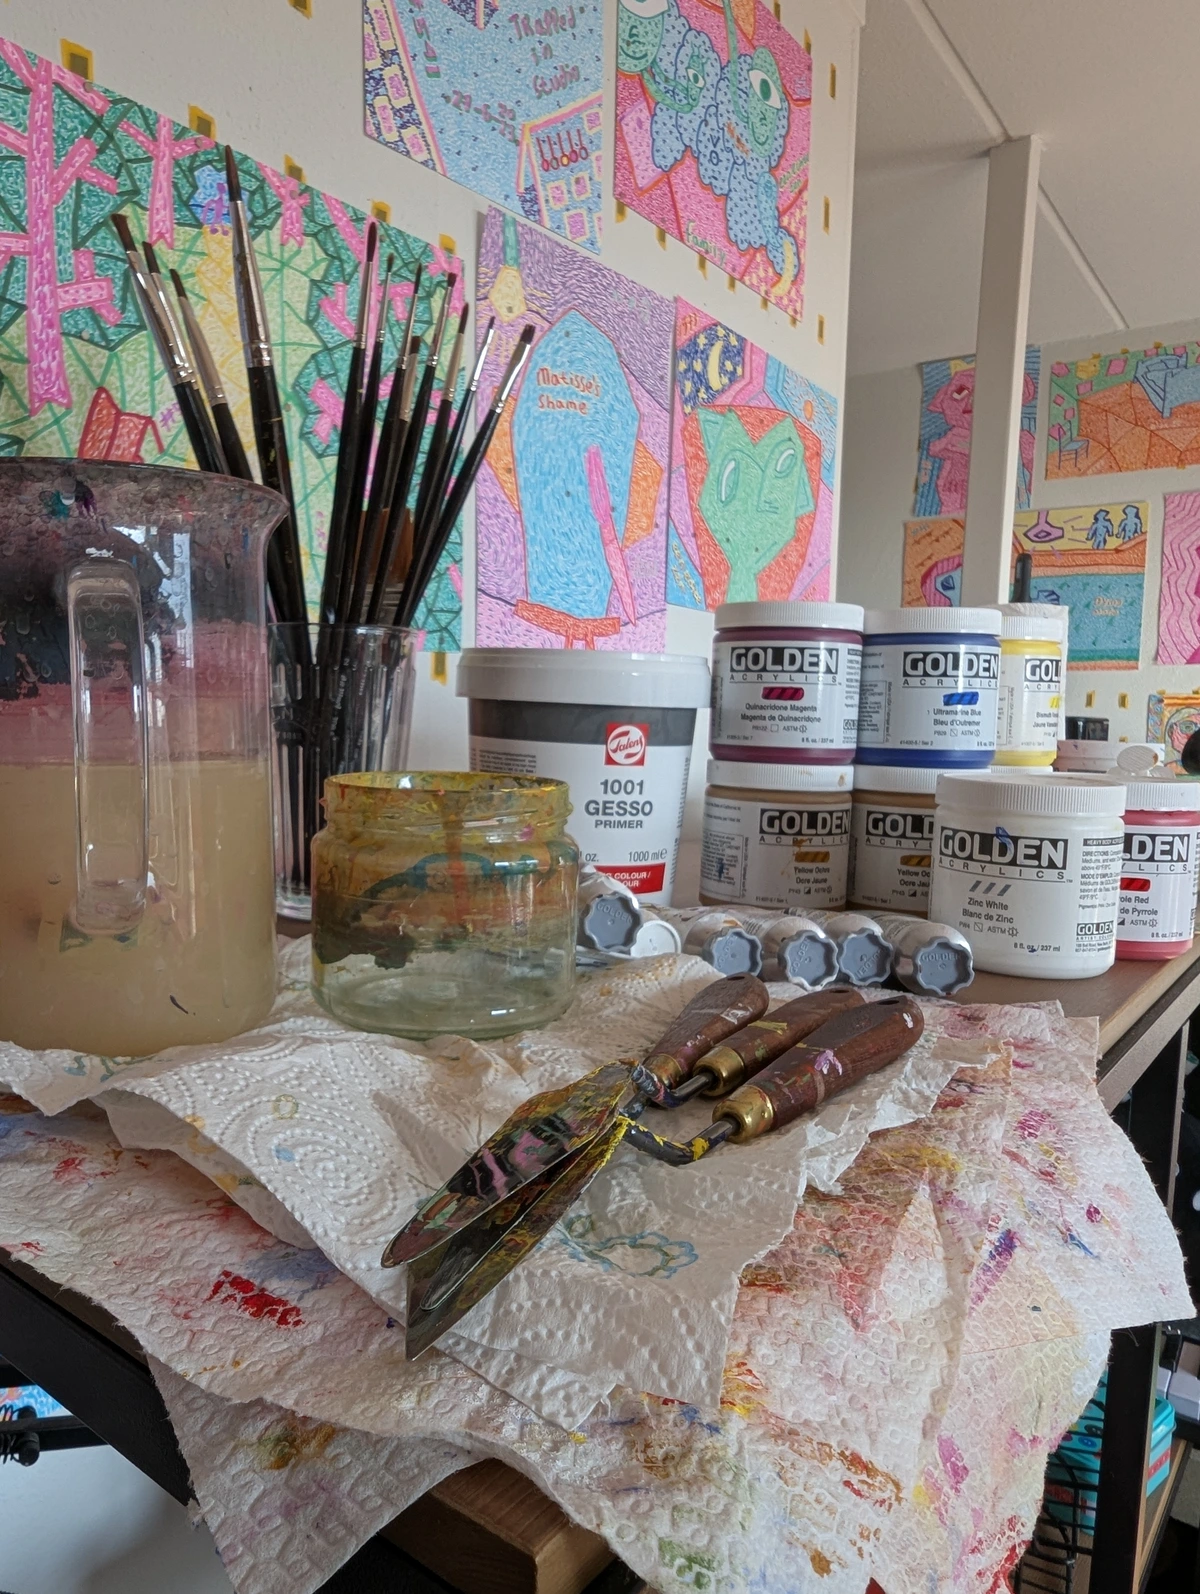
Acrylics: The Versatile & Forgiving Friend
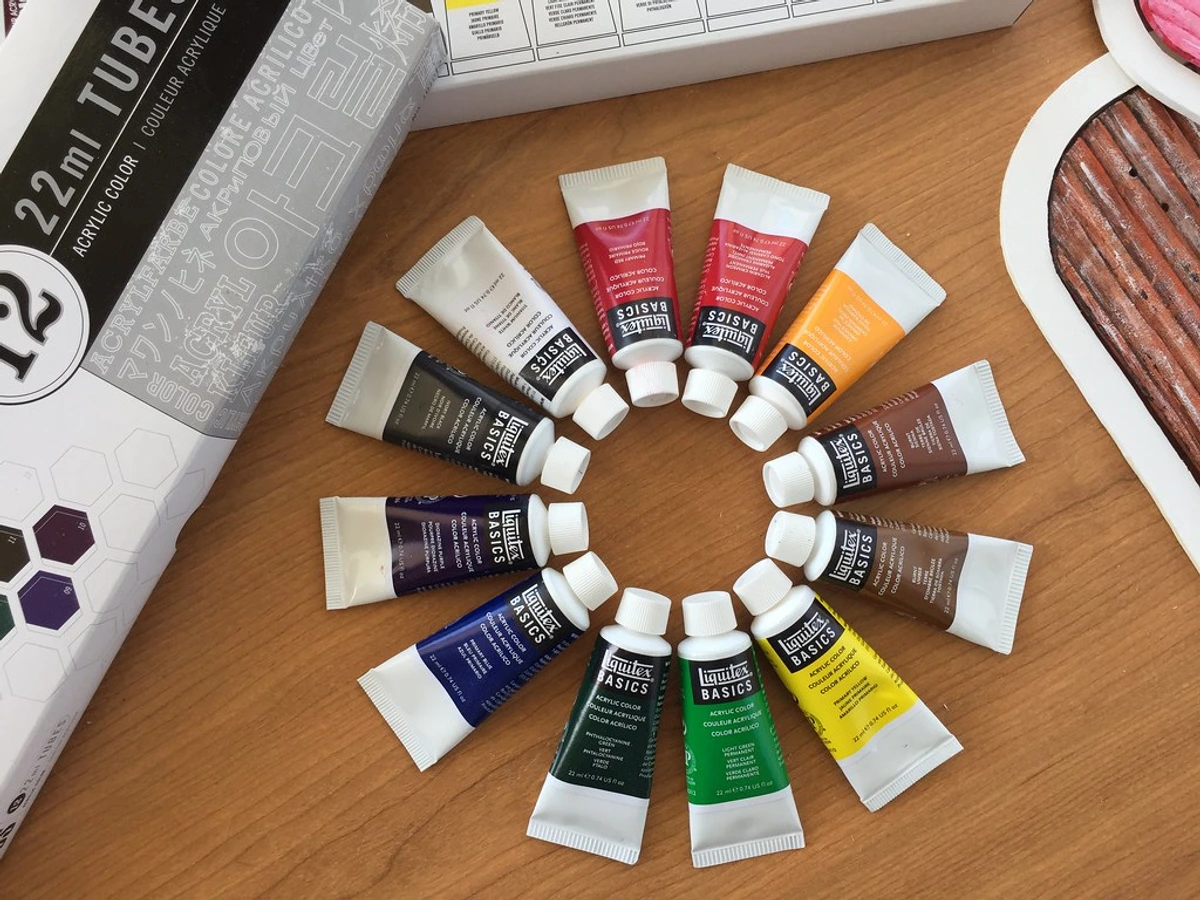
If you're unsure where to start with paint, I always point people towards acrylics. They're water-soluble (easy cleanup!), dry relatively quickly (no waiting around for days!), and are incredibly versatile. You can use them thick like oils for impasto textures or thin them down to look like watercolors. Seriously, they're like the Swiss Army knife of paints; you can achieve everything from opaque, bold strokes, to delicate washes that mimic watercolors, or even textured, sculptural effects like scumbling (applying thin, opaque coats for a broken, textured look) or stippling (creating texture with small dots or dabs). The history of acrylics is fascinating too; developed in the mid-20th century, they quickly became a favorite of artists like Andy Warhol and David Hockney for their fast-drying nature and vibrant colors, liberating artists from the long drying times of oils. A good starter set should include a basic palette of colors:
- Red
- Blue
- Yellow (your primaries – the foundational colors from which all others can theoretically be mixed)
- Black
- White
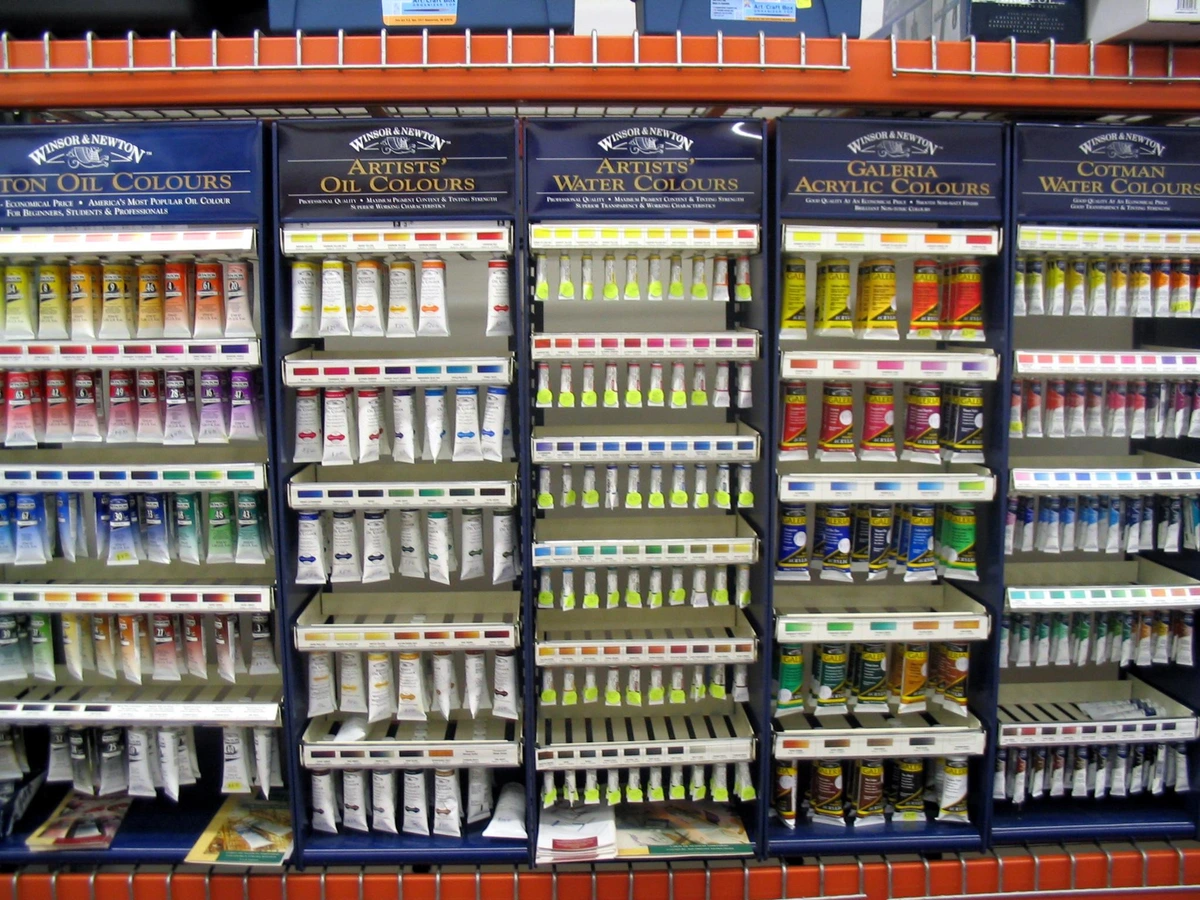
With these, you can mix an astonishing array of other colors. While black and white are essential for adjusting lightness and darkness (value), they are also crucial for desaturating colors, creating a wider range of nuanced, earthy tones. Consider adding a burnt sienna or raw umber for earthy tones and rich neutrals, and perhaps a cerulean blue or viridian green for more nuanced hues. Look for 'student grade' ranges like Liquitex Basics or Winsor & Newton Galeria; these offer excellent pigment load without the professional price tag. 'Student grade' paints, like these, have good quality binders and pigments, but typically less pure pigment concentration than 'artist grade' or professional paints. This difference in pigment load affects vibrancy, coverage, and color permanence, but student grades are more affordable and ideal for learning without sacrificing performance. Artist-grade paints, conversely, offer maximum pigment concentration, often ground more finely, and boast superior lightfastness, giving brighter, purer, and longer-lasting colors – something to consider when you're ready to create archival masterpieces.
A common pitfall for acrylic beginners is painting too thinly without using appropriate mediums, which can result in dull, uneven color. Acrylic mediums (like gloss medium for sheen or slow-drying medium to extend working time) can dramatically alter paint properties, allowing for thicker impasto effects with modeling paste or increased transparency with glazing medium. They can also be used effectively for underpainting – laying down a thin, foundational layer of color beneath subsequent layers in other mediums, even oils. If you're curious about their journey, check out The History of Acrylic Painting from Industrial Innovation to Artistic Medium. You can dive deeper into these with best acrylic mediums for abstract artists.
Pro Tip for Acrylics: Clean your acrylic brushes immediately after use! Dried acrylic is a brush's nemesis, hardening bristles and ruining their shape. Use a dedicated brush soap or cleaner along with warm water, and rinse thoroughly until no color comes off. If you accidentally let some dry, a dedicated brush cleaner (like those from Winsor & Newton or Masters Brush Cleaner) can sometimes salvage them, but prevention is always best. I learned this the hard way more times than I care to admit, seeing favorite brushes go stiff!
For surfaces, a multi-pack of small stretched canvases or even some heavy-weight acrylic paper (around 200-300 gsm) will work perfectly. Papers like smooth Bristol board or slightly textured canvas paper are excellent for acrylics, offering a durable surface that can handle the paint's wet-to-dry application. When choosing canvas, consider canvas textures – fine for smooth details (great for portraits), medium for versatile application (the most common), and coarse for pronounced texture (ideal for abstract backgrounds or impasto). Canvas weave, whether cotton or linen, also affects durability and texture, with linen being traditionally favored for its strength and fine weave. If you want to get fancy, you can learn How to Apply Gesso to Canvas: A Beginner's Guide to prep your surfaces with gesso, which creates an ideal, slightly absorbent surface for paint adhesion and increases its archival quality, but it's not strictly necessary for your first experiments. For brushes, look for a basic set of stiffer, synthetic bristles, ideal for pushing acrylic paint around.
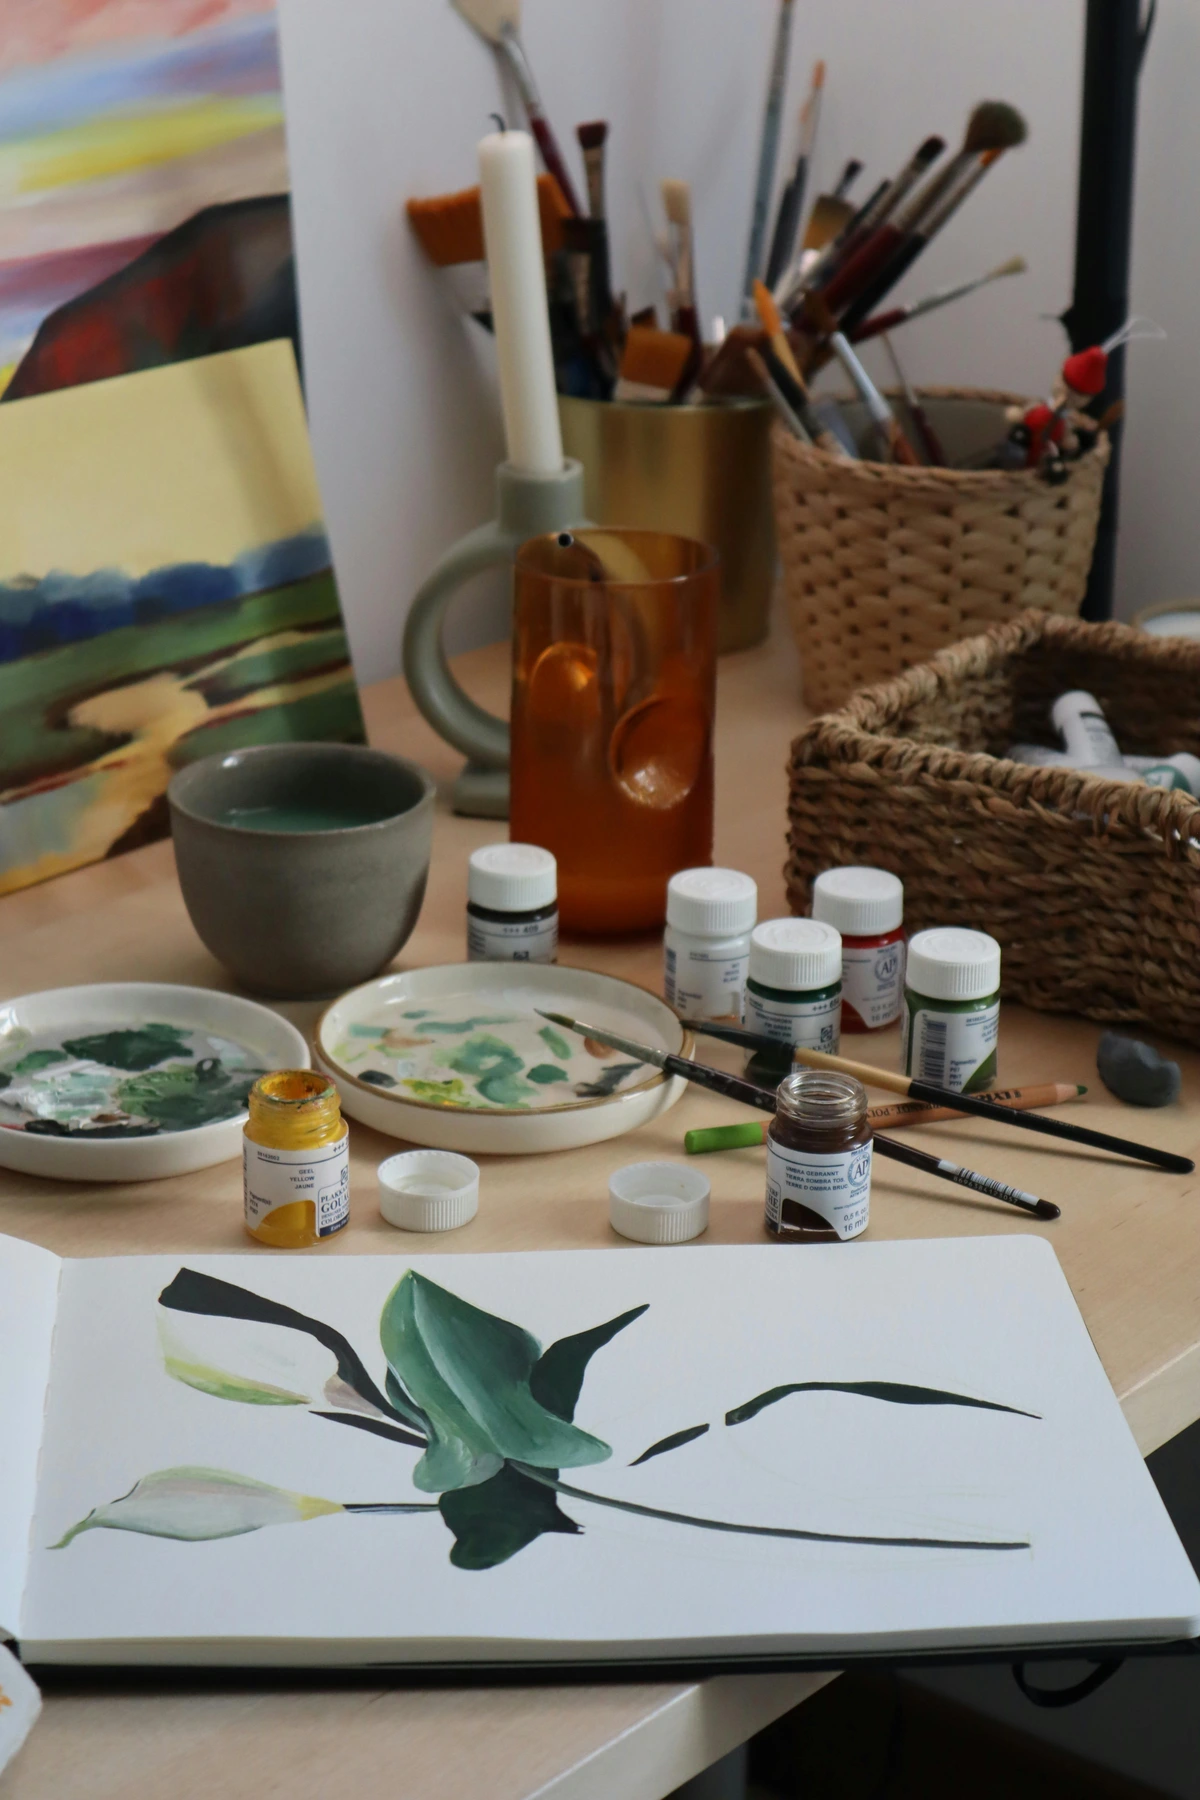
Watercolors: Lightness and Luster
Watercolors have a delicate beauty all their own. They can be a bit trickier to master than acrylics due to their inherent transparency and how they react with water, but they're incredibly rewarding. It's this transparency that allows light to reflect off the white paper, shining through the layers of pigment, creating a unique luminosity and glow that other paints can't quite replicate. Historically, watercolors gained significant popularity in the 18th and 19th centuries, especially in England, with artists like J.M.W. Turner pushing the boundaries of the medium for luminous landscapes. For beginners, a pan set (where the paint is solid and you activate it with water) is often easier to manage than tubes. Pan sets offer convenience and control over the amount of paint picked up, making them ideal for learning. Tubes, conversely, offer more concentrated pigment and are better for larger, saturated washes or when you need a lot of a specific color. Again, a simple set with a few core colors is all you need – focus on student-grade sets from brands like Winsor & Newton Cotman or Schmincke Akademie. Remember, good watercolor paper is non-negotiable here; it needs to be absorbent and durable enough to handle washes without buckling (when the paper warps from water saturation) or pilling (when the paper surface roughens up from overworking with water). This absorbency prevents paint from soaking through too quickly or the paper from disintegrating with multiple layers. To mitigate buckling, consider using heavier paper (300 gsm and up, preferably 100% cotton) or taping your paper down before you start. There are different textures: hot-press for a smooth surface ideal for fine detail and even washes, cold-press for a slight texture that's versatile and excellent for both wet-on-wet and wet-on-dry techniques, and rough for a pronounced texture that adds character. A common pitfall is overworking the paper with too many layers or scrubbing.
Watercolors also offer a unique technique called 'lifting,' where you can re-wet dried paint and dab it with a clean brush or sponge to lighten areas or create textures – a beautiful way to control the flow. You could even aspire to master the wet-on-wet technique, where you apply wet paint to a wet surface for soft, dreamy, blended effects, or wet-on-dry for crisp, defined edges and more control. For preserving white areas or creating sharp edges, masking fluid can be a game-changer; it's a liquid latex product applied to areas you want to protect from paint, then gently peeled off once dry. Even within watercolors, some pigments are more naturally transparent (like many yellows) while others are more opaque (like cadmium reds or some earth tones), allowing for different layering effects. For a successful watercolor journey, brush control is key; learning to load your brush with just the right amount of water and pigment is a fundamental skill. A water brush pen can be a handy tool for on-the-go watercolor painting, as it has a built-in reservoir for water. You can also use watercolor mediums like gum arabic to increase gloss and transparency, or ox gall as a wetting agent to improve paint flow. I've covered this in more depth in Essential Watercolor Supplies for Beginners and Best Watercolor Paper for Artists Review.
Gouache: The Best of Both Worlds
Gouache is a fantastic medium that often flies under the radar for beginners, but it's truly the best of both worlds. Like watercolors, it's water-soluble and dries quickly, and can even be reactivated with water once dry. But unlike the transparent nature of watercolor, gouache is opaque, meaning it's highly pigmented and can cover underlying colors completely, much like acrylics. This offers incredible versatility: you can use it in thin washes for a watercolor-like effect, or apply it thickly for bold, matte, vibrant blocks of color. Its opacity also means you can paint light colors over dark colors, making corrections easier and allowing for a broader range of techniques than pure watercolor. Historically, gouache has been used for centuries, from ancient Egyptian tomb paintings to medieval manuscript illumination, and later by commercial artists for its strong, flat colors and smooth finish. It's an excellent bridge between the fluidity of watercolor and the covering power of acrylics. A basic set of primary colors, black, and white is a great starting point, allowing you to explore its unique characteristics. While traditionally used without additional mediums, a clear acrylic medium can be added for increased durability once dry. You can explore more in ultimate guide to gouache painting or reviewing the best gouache sets for beginners.
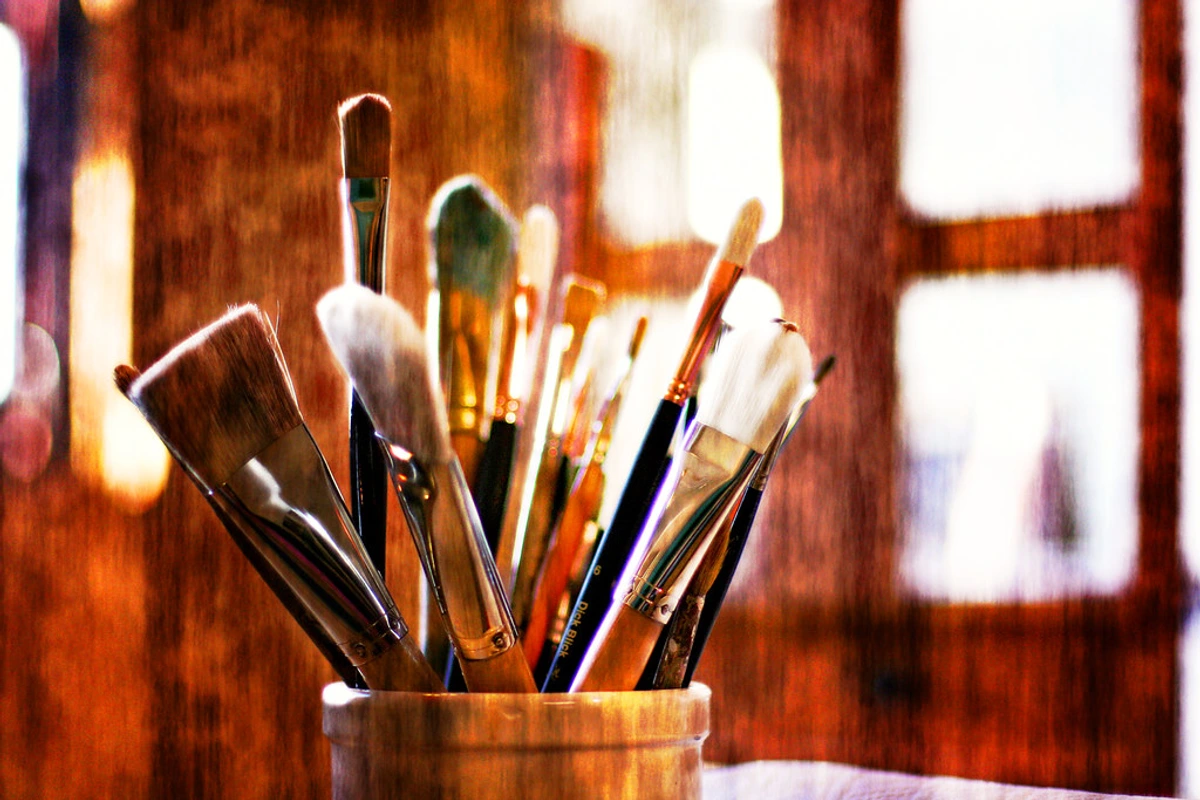
Brushes: Your Artistic Extensions
Ah, brushes! These are like your magical wands. You don't need dozens. For painting beginners, I recommend a set of 3-5 versatile brushes. Think of a small round brush (e.g., a #2 or #4) for fine lines and details, a medium round brush (e.g., a #6 or #8) for general work and expressive strokes, and a medium flat brush (e.g., 1/2 inch or 3/4 inch) for broader washes and sharp edges. Round brushes are great for controlled lines, dots, and varied strokes depending on pressure, while flat brushes excel at bold strokes, sharp edges, and filling larger areas. You'll also encounter other brush shapes like filbert (oval-shaped for soft edges) or fan brushes (for blending and textural effects), but they aren't essential for starting out. Understanding a brush's stiffness and flexibility is key; a stiff brush will push thick paint well, while a flexible brush allows for more fluid marks.
When it comes to materials, synthetic brushes are often a good starting point as they work well with both acrylics and watercolors; their durable, resilient nylon or polyester fibers stand up well to the heavier body of acrylics and are resistant to cleaning solvents. They're also generally more cost-effective than natural hair brushes. Natural hair brushes (like sable or squirrel) absorb more water and are often preferred for watercolor's fluid washes due to their excellent water retention and ability to form a fine tip. Stiffer hog bristles are common for oils or thick acrylic impasto due to their springy nature and ability to hold heavy paint. If you're looking to upgrade later, check out Best Acrylic Paint Brushes for Artists or The Definitive Guide to Essential Paint Brush Types for Artists.
Don't forget to clean your brushes thoroughly after each use! A little soap and water (or brush cleaner for acrylics) and reshaping them will keep them happy and extend their life. Pro Tip: Store your brushes upright in a container with the bristles facing up, or lay them flat, to prevent the bristles from bending or deforming. Lazy cleaning is a brush's worst enemy, I've learned from painful experience. There's a special kind of dread that sets in when you see dried acrylic hardening in your favorite brush. Lesson learned the hard way!
Your Essential Painting Toolkit: A Quick Recap
Ready to add some color? Here’s your go-to list for dipping your toes into painting:
Tool | Recommendation for Beginners | Why It Matters |
|---|---|---|
| Acrylic Paints | Basic set (primaries R,B,Y, Black, White) + Burnt Sienna, Raw Umber. Student grade (e.g., Liquitex Basics, Winsor & Newton Galeria). | Versatile, fast-drying, easy cleanup. Great for bold impasto or thin washes; primaries for mixing; black/white for value and desaturation. Allows for diverse techniques like scumbling or stippling. Student grade is affordable for learning. |
| Watercolor Paints | Basic pan set. Student grade (e.g., Winsor & Newton Cotman, Schmincke Akademie). Consider mediums like gum arabic or ox gall for varied effects. | Portable, delicate, great for translucent washes and layered effects, offering unique luminosity and easy activation. Excellent for building depth, transparency, and experimenting with wet-on-wet/wet-on-dry techniques. Includes opaque pigment options. |
| Gouache Paints | Small basic set (primaries R,B,Y, Black, White). Student grade. | Opaque, matte finish, water-soluble, and reactivatable. A powerful bridge between watercolor and acrylic, offering bold color with easy cleanup and excellent covering power. Allows for painting light over dark. |
| Brushes | 1 small round (#2/4), 1 medium round (#6/8), 1 medium flat (1/2"-3/4") synthetic. | Covers details, general work, and broader strokes for both mediums; synthetic is durable and easy to clean, suitable for acrylics and watercolors. Understanding stiffness/flexibility is key. Proper storage prevents damage. |
| Surfaces | Small stretched canvases or heavy acrylic/watercolor paper (200-300 gsm). Consider specialized canvas paper for acrylics and 100% cotton cold-press for watercolors. | Ready-to-use surfaces that can handle paint without buckling or bleeding, providing a satisfying working area. Canvas textures (fine, medium, coarse) and weaves (cotton/linen) offer varied effects, from smooth portraits to textured abstracts. |
| Palette | Simple plastic palette, ceramic plate, or even a disposable paper palette. | Essential for mixing and diluting your paints, allowing you to create your desired hues and tones without staining your workspace. |
| Water Jars/Containers | 2-3 sturdy containers (one for clean water, one for rinsing). | For cleaning brushes and diluting paint (keep clean water separate for washes), ensuring proper brush care and clean color application. |
| Surface Preparation & Mediums | If using canvas, gesso (especially for acrylics); also consider masking fluid for watercolors and acrylic mediums (gloss, slow-drying, texture) or underpainting techniques. | Creates an ideal, archival surface for paint adhesion, increasing opacity, and ensuring longevity, making your art last. Masking fluid helps preserve white areas, and mediums alter paint properties and textures. |
These tools will be your allies as you explore the incredible world of color and expressive strokes. Don't be afraid to make a vibrant mess!
Beyond the Basics: Expanding Your Artistic Horizon
As my own artistic journey unfolded, pushing the boundaries of what I could achieve with a brush and palette, I naturally found myself drawn to other textures and techniques. As your confidence grows and your artistic curiosity expands, you'll naturally begin to explore these other exciting mediums. Here's a glimpse into what lies beyond the drawing pad and canvas, offering new textures, techniques, and ways to express your unique vision.

Dry Media Explorations
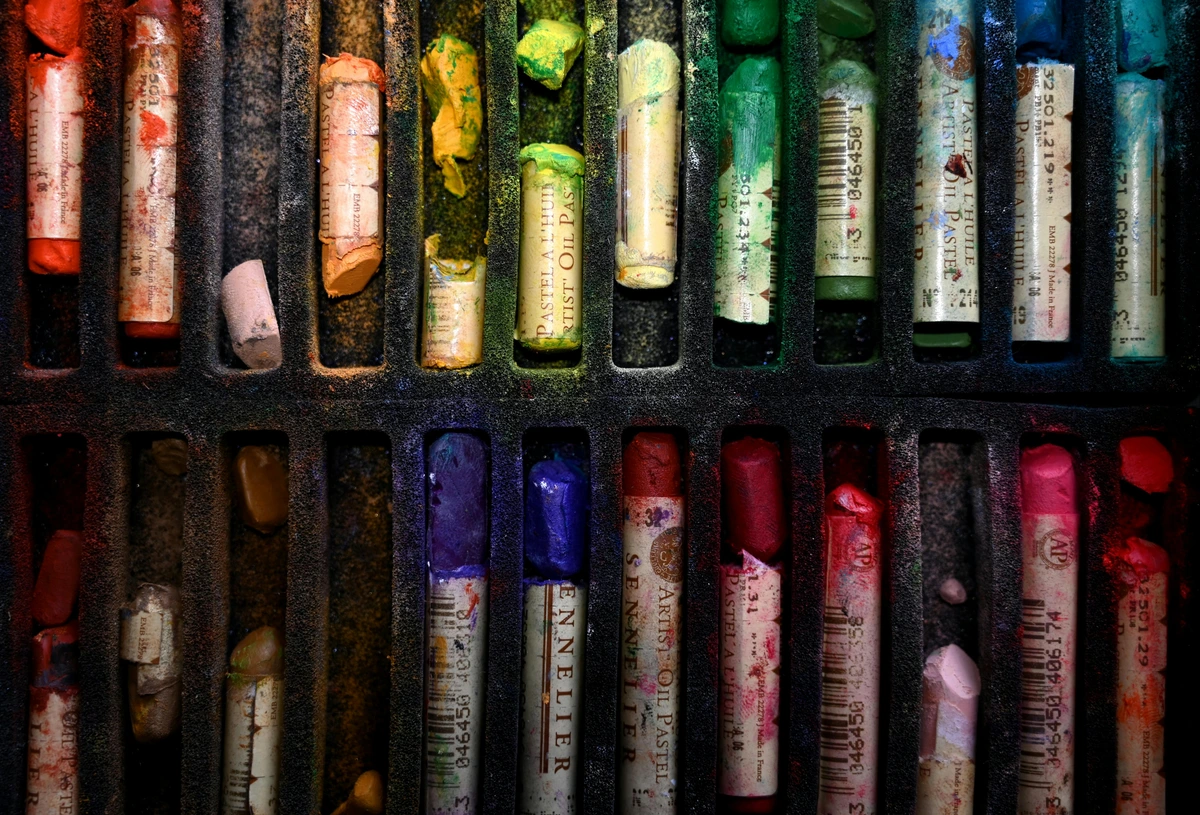
Once you've got a feel for drawing and painting, a whole universe of other mediums awaits! You might find yourself drawn to the rich, blendable textures of pastels, which come in soft and oil varieties. Soft pastels are almost pure pigment held together by a minimal binder, creating a velvety, painterly effect, but they can be quite dusty and require a fixative to prevent smudging (and good ventilation, perhaps even a mask, is a must!). Oil pastels, on the other hand, have an oil and wax binder, giving them a creamy, crayon-like consistency. They can be blended directly on the surface without fixative and are less dusty. Both offer a wonderfully direct way to apply pure color with unique, velvety textures. They're fantastic for vibrant landscapes or expressive portraits, and a motivated beginner could even aim to master layering and blending for atmospheric effects. I discuss soft pastels a bit in What is Pastel Painting, and you can find more in best oil pastels for artists review and a beginners guide to using oil pastels.
Or perhaps the vibrant precision of colored pencils, with wax-based options like Prismacolor Premier offering creamy blending, while oil-based pencils provide harder leads and sharper details. Colored pencils provide incredible control for detail and layering, allowing you to build up rich colors slowly through techniques like burnishing (applying heavy pressure to fuse layers and create a smooth, enamel-like finish). Look for lightfastness ratings if you want your work to last. You can explore those in In-Depth Review of Prismacolor Premier Colored Pencils.
Or perhaps the raw, expressive power of charcoal, perfect for dramatic tonal studies and bold gestures. Charcoal forces you to think about light and shadow in its purest form, and learning to smudge and lift can create incredible depth, even allowing for atmospheric effects with charcoal dust. There are generally two types: vine charcoal (made from burnt grapevines, soft and easily erasable) and compressed charcoal (pigment mixed with a binder, harder and darker, producing rich, deep blacks). Remember, charcoal can be messy, so dedicate a workspace and consider using a fixative spray during the drawing process, not just at the end, to prevent smudging while you work on different areas and to ensure archival longevity. To clean up charcoal dust, use a kneaded eraser to dab up excess, or a soft, dry cloth. Avoid wiping vigorously, which can embed the charcoal further into the paper. If charcoal sparks your interest, delve deeper with Essential Charcoal Drawing Supplies for Beginners, learn How to Use Charcoal for Drawing Basics, and discover the Best Paper for Charcoal Drawing.
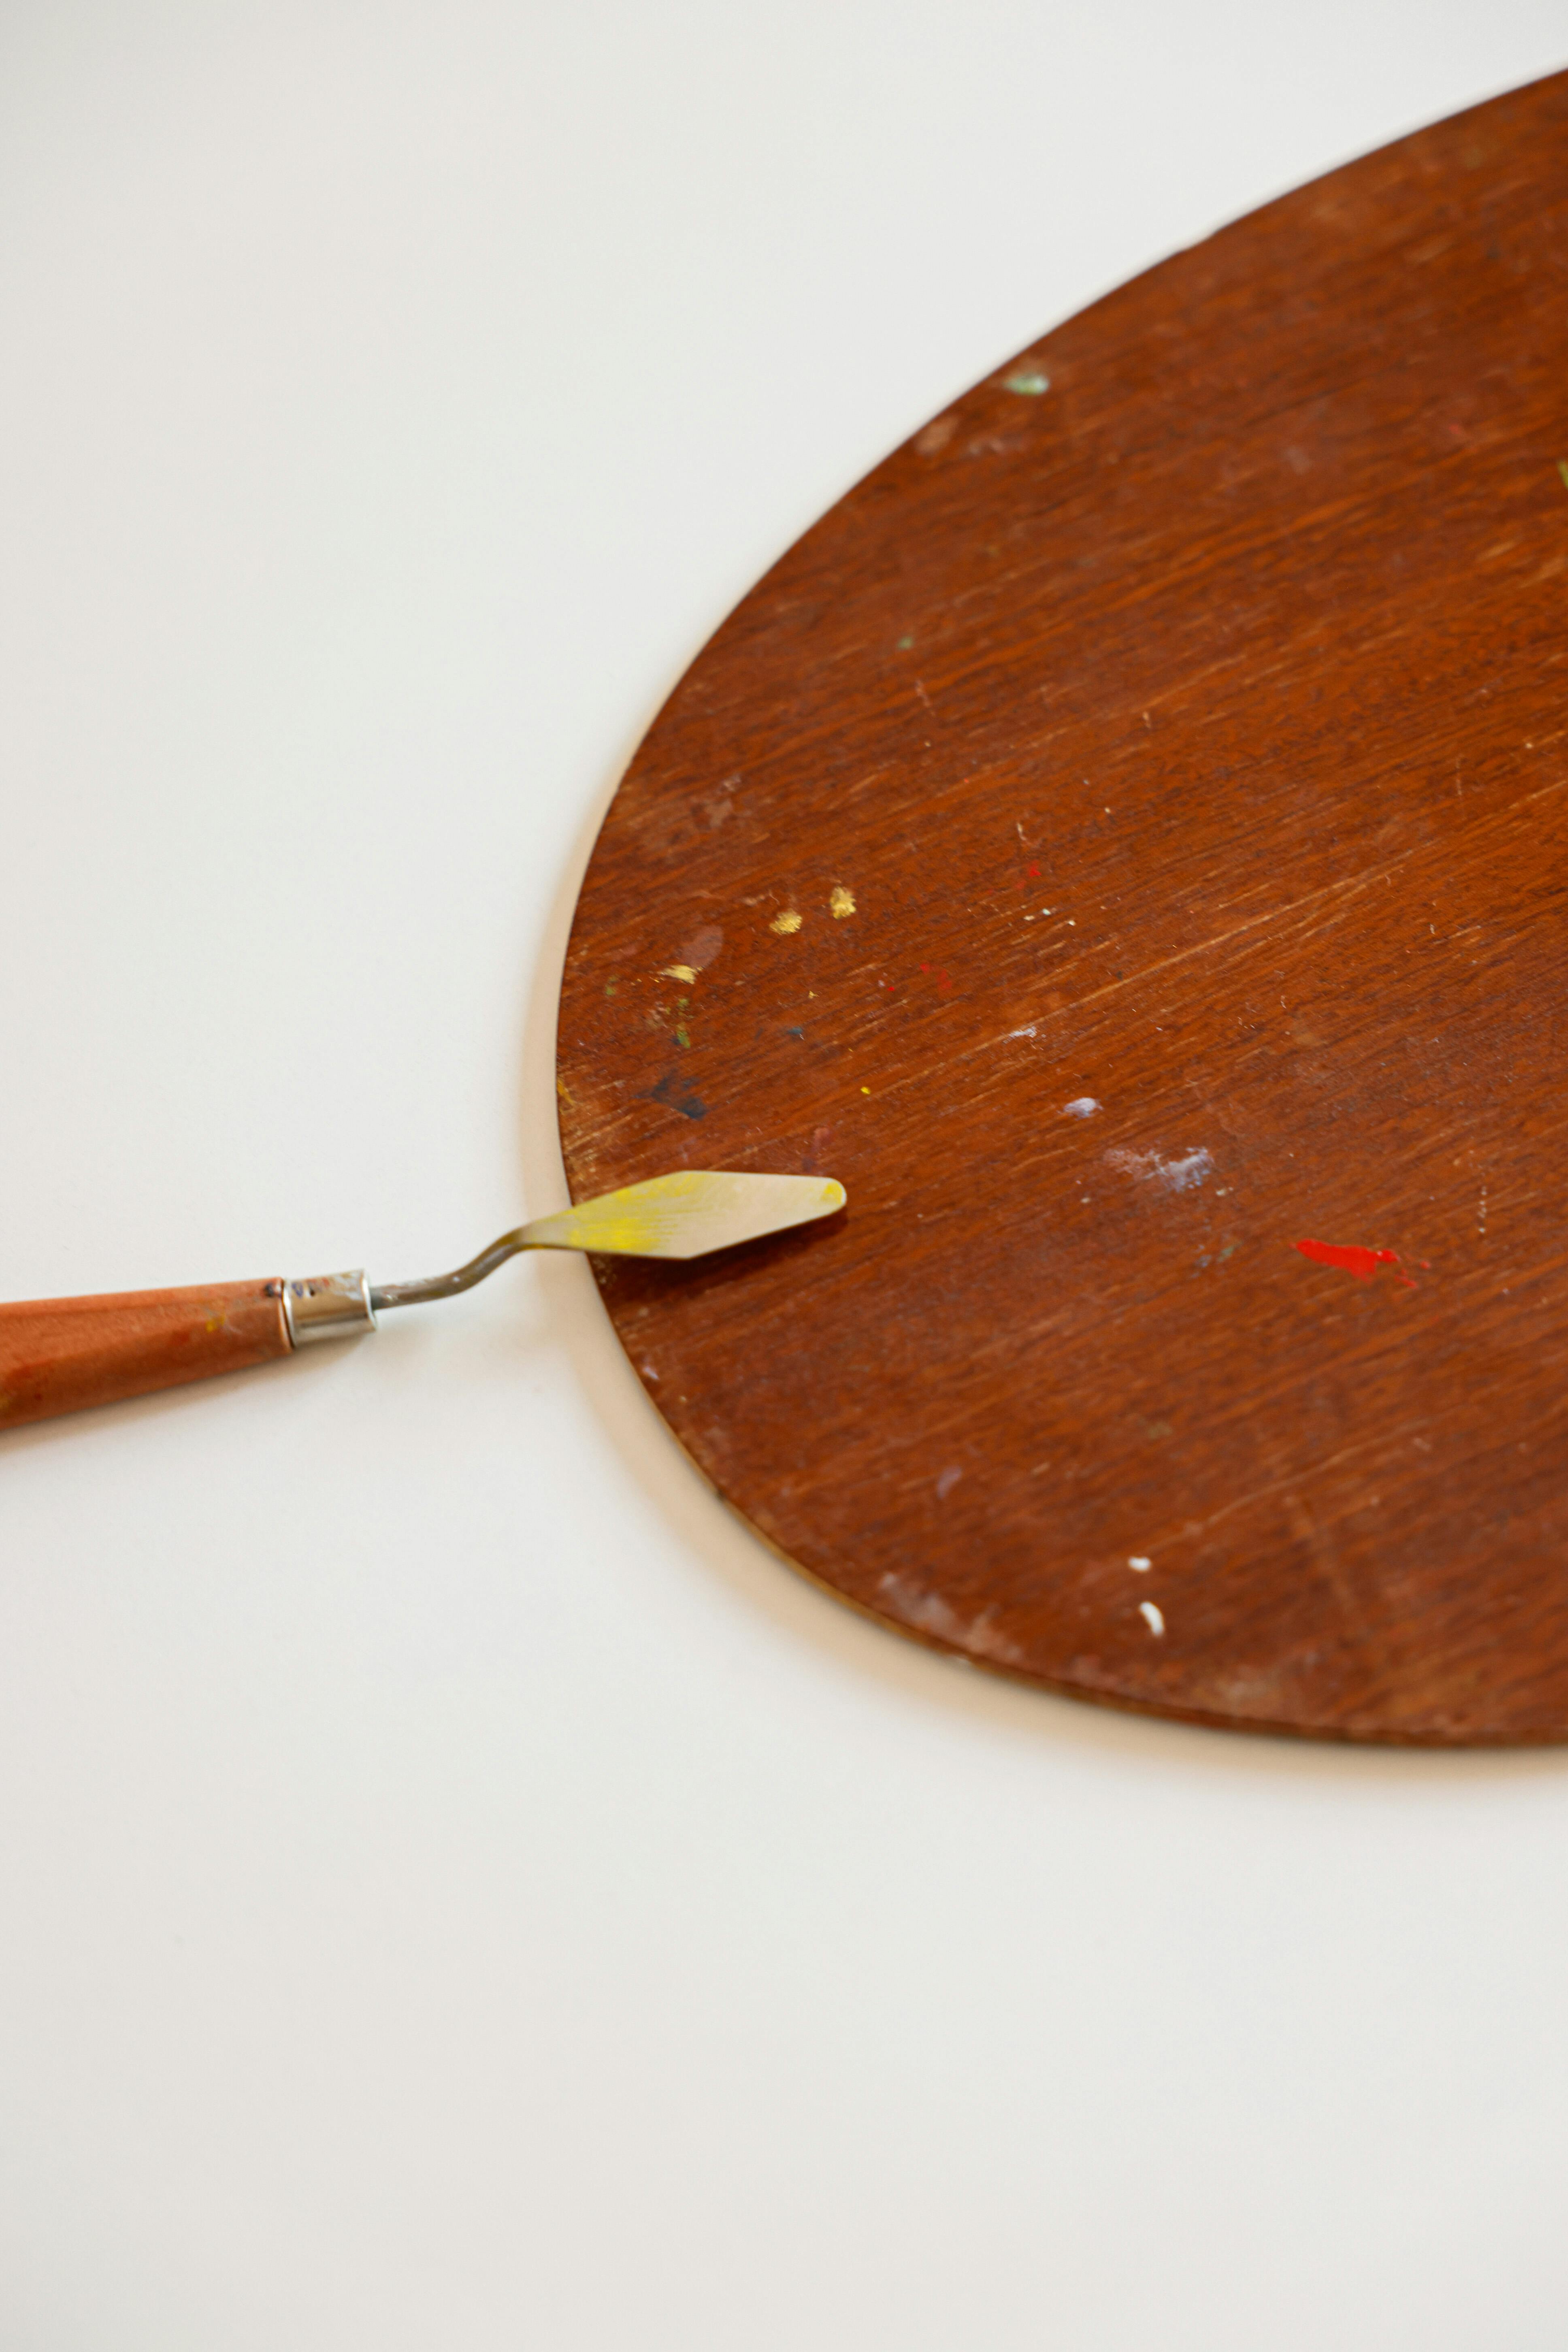
Other Traditional Tools & Three-Dimensional Forms
Even more obscure tools like the palette knife, which I've used extensively for creating bold textures in my abstract work (you can learn What is a Palette Knife and How to Use It), can open up new avenues beyond just applying paint thickly – think scraping, sgraffito, or even mixing. And don't forget actual inks! Beyond the fine liners, traditional drawing inks like India ink or acrylic inks can be used with dip pens, quills, brushes, or even eyedroppers for vibrant, fluid, and often permanent effects. If that sounds interesting, you might enjoy Best Drawing Inks Review.
If you're looking to explore three-dimensional art, simple, beginner-friendly mediums like air-dry clay (easy to use, no kiln needed, but less durable) or polymer clay (requires baking, offers more durability and fine detail) offer fantastic ways to sculpt without needing a kiln. A few basic sculpting tools, a rolling pin, and your hands are all you need to start bringing forms to life.
Printmaking & Multiples
For those interested in printmaking, techniques like linocut (carving into a linoleum block with carving tools and rolling ink with a brayer – a roller used to apply ink) or screen printing (using a stencil with mesh to push ink through) can be surprisingly accessible. Additionally, monotyping (creating a unique print from an uncarved surface) or reduction linocut (carving and printing from the same block in stages) offer unique ways to create multiple copies of your artwork, exploring texture and repetition. The basic principle of screen printing involves creating an image on a mesh screen, then pushing ink through the unblocked areas onto a substrate, perfect for producing multiples of designs.

This broad category of mixed media art, where various traditional and modern art supplies are combined, is also an exciting avenue for creative exploration. But for now, just keep them in mind as future explorations. No rush, no pressure – your artistic journey is a marathon, not a sprint. Consider checking out my article The Definitive Guide to Mixed Media in Abstract Art: Techniques, Materials, and Contemporary Masters for more inspiration.
Digital Art: A Mess-Free Canvas
Don't overlook the world of digital art! A simple drawing tablet and software can be an incredibly accessible way to experiment with color, composition, and effects without the physical mess. Many foundational principles of drawing and painting translate beautifully to the digital realm, offering endless undo buttons and a vast palette at your fingertips. This ability to easily undo mistakes is a huge advantage, encouraging boundless experimentation without the fear of 'ruining' a piece. For beginners, free software like Krita (for PC/Mac) or accessible apps like Procreate (for iPad) are excellent starting points. You'll quickly learn about layers (functioning like transparent sheets stacked on top of each other, allowing independent manipulation of elements), brush settings (opacity, flow, texture), and selection tools (isolating areas). You'll also delve into concepts like brush dynamics (how pressure, tilt, or speed affect the stroke). These tools mimic traditional media while offering unique digital capabilities. Understanding basic file formats like JPG (good for sharing online, with some compression) or PNG (supports transparency and lossless compression) and resolution settings (DPI/PPI – important for both web display and quality prints) is crucial. You'll also encounter raster graphics (pixel-based images that can pixelate when enlarged, good for painting and photo manipulation) versus vector graphics (mathematically defined shapes that scale to any size without losing quality or becoming pixelated, ideal for logos and illustrations) – a fundamental distinction in digital art. Plus, being aware of color spaces (like sRGB for web or CMYK for print) ensures your digital art looks as intended across different outputs. It's an excellent entry point for those intimidated by traditional materials or seeking a different kind of freedom. While professional tools like Adobe Photoshop or Illustrator are industry standards, the learning curve is steeper. The choice between traditional and digital often comes down to personal preference, tolerance for mess, and desired output, but both are valid and rewarding paths. My own work sometimes begins with a digital sketch before translating to canvas, a testament to the fluid boundary between the two.

Glossary of Essential Art Terms for Beginners
Navigating the world of art supplies can introduce you to a new vocabulary. Here are a few key terms explained simply:
- Acid-Free: Paper or materials treated to neutralize acid, preventing yellowing, embrittlement, and degradation over time. This is crucial as natural acids in wood pulp would otherwise break down cellulose fibers, causing artwork to deteriorate. Ensures archival quality.
- Analogous Colors: Colors that are next to each other on the color wheel (e.g., yellow, yellow-green, green). They create harmonious and often calming color palettes when used together.
- Archival/Permanent: Art materials (like inks, paints, paper) that are designed to resist fading, discoloration, and deterioration over a long period, ensuring the longevity of your artwork. For paints, this refers to stable pigment compositions and binders that do not degrade over time.
- Artist Grade (Professional Grade): Art supplies with the highest concentration of pure, high-quality pigments, superior lightfastness, and binders, offering optimal vibrancy, coverage, and longevity. Designed for professional artists.
- Binder: The substance in paint (e.g., acrylic polymer emulsion for acrylics, gum arabic for watercolors/gouache, linseed oil for oils) that holds pigment particles together and allows them to adhere to a surface. The binder significantly affects the paint's texture, drying time, and flexibility.
- Brayer: A hand-held roller, typically made of rubber or hard brayer, used in printmaking to evenly apply ink to a printing plate or block.
- Bristol Board: A type of strong, smooth, often very white paper, excellent for fine detail work with pen, ink, or colored pencils due to its low "tooth." Hot-press watercolor paper has a similar smooth quality.
- Brush Dynamics (Digital Art): Refers to how the characteristics of a digital brush (e.g., size, opacity, flow, texture, rotation) can be controlled by factors like pen pressure, tilt, or speed, mimicking traditional brush effects.
- Brush Pen: A pen with a flexible, brush-like tip (often made of nylon or synthetic fibers) that delivers ink, allowing for varied line widths and expressive strokes, bridging drawing and painting.
- Buckling: When paper warps or ripples due to excessive moisture, particularly common with lighter weight papers (under 300 gsm) used for wet media like watercolor. Using heavier, 100% cotton paper or taping the paper down can prevent this.
- Burnishing: A colored pencil technique where heavy pressure is applied to layer and fuse colors, creating a smooth, enamel-like, solid finish with no paper tooth showing through.
- Calligraphy Pens: Specialized pens with unique nibs designed for decorative lettering and elegant, precise lines, often used with liquid inks.
- Canvas Textures: Refers to the weave and surface quality of canvas (fine, medium, coarse), which impacts how paint is applied and how the final artwork appears. Canvas weaves also vary (e.g., cotton, linen), affecting durability and surface quality.
- Carbon Pencils: Drawing pencils that are a mix of charcoal and graphite, offering an incredibly deep, matte black that pure graphite alone cannot achieve.
- Cold-Press Paper: Paper that has a slight surface texture or "tooth," created by pressing damp paper sheets between cold felts. This makes it versatile for most drawing and painting mediums, including watercolor and acrylics. It's the most common type for watercolor, excellent for both wet-on-wet and wet-on-dry techniques.
- Color Spaces (Digital Art): Standardized systems for defining and reproducing colors (e.g., sRGB for web, CMYK for print). Choosing the correct color space is crucial for consistent color appearance across different devices and outputs.
- Color Theory: The principles and guidelines surrounding the use of color in art, including the color wheel, primary, secondary, and tertiary colors, complementary colors, and how colors interact to create mood and harmony.
- Colored Pencils: Pencils with wax or oil-based pigment cores, used for drawing and coloring. They offer control for detail and layering, and vary in softness, blendability, and lightfastness.
- Complementary Colors: Colors directly opposite each other on the color wheel (e.g., red and green, blue and orange, yellow and purple). They create strong contrast when placed side-by-side and can be used to desaturate each other when mixed.
- Composition: The arrangement of visual elements in a work of art, including the placement of subjects, lines, shapes, and colors, to create a harmonious and aesthetically pleasing whole with a clear focal point.
- Compressed Charcoal: Charcoal where powdered pigment is mixed with a binder and compressed into sticks. It's harder and produces darker, richer blacks than vine charcoal.
- Decision Fatigue: The psychological phenomenon where making too many choices or decisions leads to mental exhaustion, reduced willpower, and often, inaction or poor decision-making. Common for beginners faced with overwhelming art supply options.
- Desaturation: Reducing the intensity or purity (chroma) of a color, making it more muted or grayish. This can be achieved by adding black, white, gray, or a complementary color (e.g., adding a touch of green to red makes it an earthy rust color).
- Dip Pens: Traditional drawing tools consisting of a handle and a removable metal nib, used with liquid ink. They offer expressive line variation depending on the nib and pressure.
- DPI/PPI (Digital Art): DPI (dots per inch) is a measure of print resolution, while PPI (pixels per inch) is for screen resolution. Higher values mean more detail and a clearer image, crucial for printing large, crisp images or displaying on high-density screens.
- Drawing Board: A rigid, flat surface used to support paper while drawing, often portable and sometimes designed to be propped at an angle for ergonomic comfort.
- Drawing Tablet (Digital Art): A hardware input device used with a stylus to create digital art directly on a computer or tablet screen, mimicking the feel of traditional drawing.
- Eggshell Texture: A subtle, finely pebbled surface texture often found on paper, providing a slight "tooth" that is good for many dry drawing mediums.
- Feathering: When ink or paint spreads uncontrollably along the fibers of the paper, creating fuzzy or uneven lines, often due to porous paper or thin consistency of the medium. Sizing helps prevent this.
- Filbert Brush: A flat brush with an oval-shaped tip, used to create soft, rounded edges and blend colors smoothly.
- Fine Liner Pens: Pens with very thin, precise nibs, typically waterproof and consistent, used for outlining, cross-hatching, and adding crisp details.
- Fixative: A spray applied to drawings (especially charcoal and pastel) to prevent smudging and increase permanence. Can be workable (allows more layers) or final.
- Flat Brush: A brush with a square-ended, flat ferrule (the metal part holding the bristles), excellent for bold strokes, sharp edges, and filling larger areas.
- Gesso: A primer, typically white, applied to a surface (like canvas or wood) to prepare it for painting. It provides a stable, slightly absorbent base for paint adhesion and helps seal the surface, increasing paint opacity and helping with archival quality.
- Ghosting: When marks (e.g., pencil lines) made on one side of a paper are faintly visible on the other side, often due to thin or translucent paper.
- Glazing Medium: An acrylic medium used to thin paints and increase their transparency, allowing for thin, luminous layers of color (glazes) over existing paint.
- Gouache: An opaque watercolor paint. It's water-soluble and dries to a matte, solid finish, offering strong, vibrant colors that can be layered to cover underlying tones. Unlike traditional watercolor, it can also be reactivated once dry.
- Grading System (Pencils): A standardized system using letters (H for Hard, B for Black/Soft, F for Fine) and numbers (e.g., 2H, 6B) to denote the hardness and darkness of a pencil lead. Higher numbers next to H mean harder/lighter, higher numbers next to B mean softer/darker.
- GSM (Grams per Square Meter): A measure of paper's weight and thickness. Higher gsm means heavier, more durable paper that can withstand more media without buckling or bleeding through. For reference, typical printer paper is 80 gsm, while watercolor paper is often 300 gsm or higher.
- Gum Arabic: A natural binder used in watercolors and gouache that also functions as a medium to increase gloss and transparency of watercolor paints.
- Helical Blade Design: A type of sharpener blade that rotates around a central axis, providing a precise, clean cut to pencils and reducing lead breakage by evenly shaving the wood without undue stress on the graphite, often superior to standard straight blades.
- Hog Bristles: Stiff, coarse natural hair bristles often used in brushes for oil and thick acrylic paints, known for their spring and ability to hold heavy impasto paint.
- Hot-Press Paper: Paper with a very smooth, often almost slick surface, achieved by pressing it between heated rollers. Ideal for fine detail work, pen and ink, and crisp lines, but generally less absorbent for washes.
- Hue: Simply another word for color (e.g., red, blue, yellow) – it refers to the pure spectrum color.
- Impasto: A painting technique where paint is applied thickly, often with a brush or palette knife, creating visible texture and dimension.
- Kneaded Eraser: A pliable, putty-like eraser that can be shaped to lift graphite, lighten tones, and clean up smudges without leaving residue, highly versatile for shading and highlights.
- Laid Paper: Paper featuring fine, parallel lines from the papermaking screen, adding a traditional, classic feel and subtle texture.
- Layers (Digital Art): In digital art software, layers function like transparent sheets stacked on top of each other, allowing artists to create and manipulate individual elements (e.g., lines, colors, textures) independently without affecting others.
- Lightfastness: The ability of a pigment or dye to resist fading or changing color when exposed to light over time. High lightfastness ensures the longevity of artwork. Archival materials have high lightfastness.
- Linocut: A printmaking technique where a design is carved into a sheet of linoleum (a type of block), which is then inked and printed onto paper, creating a relief print.
- Lifting (Watercolor): A technique where you re-wet dried watercolor paint on the paper and then dab it with a clean brush or sponge to remove some pigment, lightening the area or creating soft textures.
- Masking Fluid: A liquid latex-based product applied to paper to protect specific areas from watercolor washes. Once the paint is dry, the masking fluid is gently removed, revealing the unpainted paper or desired light areas.
- Medium (Art): 1. The material or substance used by an artist (e.g., paint, charcoal, clay). 2. An additive mixed with paint to change its properties (e.g., working time, transparency, texture, sheen).
- Mixed Media: An art term referring to an artwork in which more than one medium or material has been used (e.g., combining collage, paint, and drawing elements).
- Modeling Paste: A thick, opaque acrylic medium used to create pronounced texture and dimension in paintings. It dries hard and can be sculpted, carved, or sanded.
- Monotyping: A printmaking technique where a unique image is created on a non-absorbent surface (like glass or metal), then transferred to paper, producing a single, one-of-a-kind print (a monoprint).
- Negative Space: The space around and between the subjects of an image. Focusing on negative space can improve accuracy and composition by making you observe shapes more abstractly.
- Opacity: The quality of a paint that allows it to cover underlying layers completely, blocking light from passing through. Gouache and acrylics are generally opaque, while watercolors are transparent.
- Ox Gall: A watercolor medium (traditionally derived from ox bile, now often synthetic) used as a wetting agent to improve the flow and spread of watercolor paints on paper.
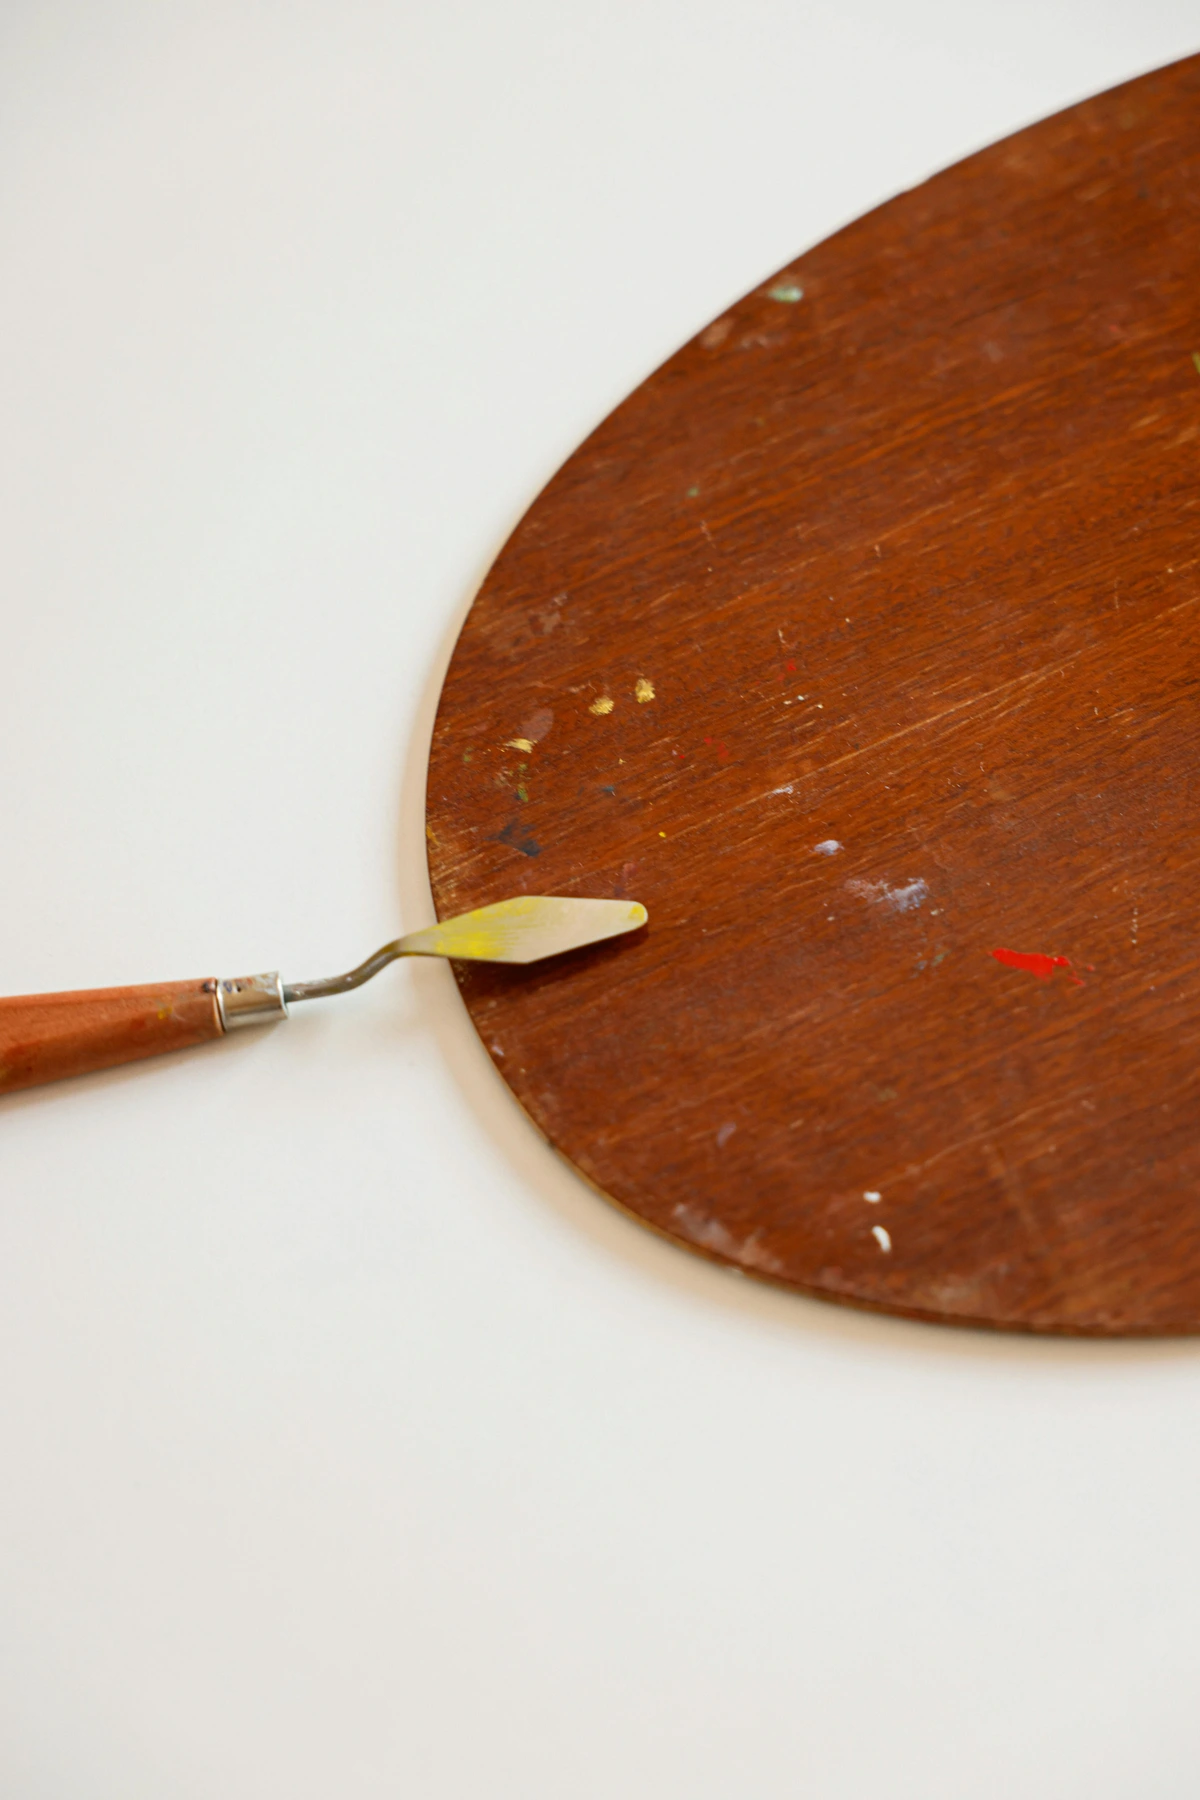
- Palette Knife: A blunt, flexible tool, often metal with a wooden handle, used for mixing paints, applying thick layers (impasto), and creating textured effects on a painting surface.
- Pan Set (Watercolor): A set of solid watercolor cakes (pans) that are activated by adding water with a wet brush, offering convenience and control, especially for beginners.
- Paper Grain: The direction in which the fibers in a sheet of paper are aligned. This can subtly affect how paper folds, tears, and how strokes from dry media appear on its surface, influencing blending and texture.
- Pastel Pencils: Pencils with a pastel core, offering the blendable, painterly qualities of pastels with the precision and control of a pencil.
- Pastels: Art media made from pure powdered pigment and a binder. Soft pastels are dusty and vibrant; oil pastels are creamy and less dusty, offering unique blendable textures.
- Pigment: The raw colored powder that, when mixed with a binder, creates paint, ink, or other coloring materials. The quality and lightfastness of pigments are crucial for the longevity of artwork.
- Pigment Load: The concentration of pure pigment in a paint. A higher pigment load generally means more vibrant, 'true' colors, better coverage, and less need for multiple layers, common in artist-grade paints.
- Pilling: When the surface of paper roughens up or forms small fibers ("pills") due to excessive working with water or scrubbing, common with lower quality papers or overworking watercolor.
- Polymer Clay: A type of modeling clay that hardens permanently when baked in a conventional oven, offering fine detail and durability for sculptural forms.
- Primary Colors: Red, yellow, and blue – the foundational hues from which all other colors can theoretically be mixed.
- Printmaking: Artistic processes of creating images by transferring ink from a matrix (like a carved block, plate, or screen) onto another surface, most often paper. This allows for creating multiple copies (multiples) of an artwork.
- Quills: Traditional writing and drawing implements made from bird feathers, used with liquid ink to create expressive and varied lines.
- Raster Graphics (Digital Art): Digital images composed of a grid of individual pixels (picture elements). They are resolution-dependent; enlarging them too much can cause pixelation. Common formats include JPG and PNG. Ideal for painting and photo editing.
- Reduction Linocut: A linocut printmaking technique where the artist progressively carves away from the same block and prints multiple layers of color, one after another, from lightest to darkest, destroying the previous stage of the block with each carving.
- Resolution (DPI/PPI): In digital art, DPI (dots per inch) for print or PPI (pixels per inch) for screens refers to the density of pixels or dots. Higher resolution means more detail, crucial for printing large, crisp images or ensuring clarity on high-density screens.
- Round Brush: A paintbrush with a round ferrule and bristles that come to a point, excellent for fine lines, details, and varied strokes depending on pressure.
- Sable Bristles: Fine, soft, natural hair bristles (often from the Kolinsky sable) highly prized for watercolor brushes due to their excellent water retention, fine point, and spring.
- Saturation (Chroma): The intensity, purity, or vividness of a color. A highly saturated color is vibrant; a desaturated color is muted or grayish.
- Scumbling: A painting technique where a thin, opaque or semi-opaque layer of paint is applied over another color, allowing parts of the underlying color to show through, creating a broken, textured effect.
- Screen Printing: A printmaking technique where ink is forced through a mesh screen (onto a substrate like paper or fabric) using a squeegee, with a stencil blocking areas where ink is not desired.
- Sgraffito: A technique in painting where a layer of paint is scratched through to reveal an underlying layer or the canvas itself, creating lines and textures.
- Sizing: An internal or external additive applied to paper during manufacturing to reduce its absorbency, controlling how liquids like ink and watercolor penetrate the fibers and preventing feathering and excessive bleeding. Typically gelatin or synthetic polymers.
- Squirrel Bristles: Soft, natural hair bristles used in watercolor brushes, known for holding a large amount of water and creating broad, even washes, though less springy than sable.
- Stiffness/Flexibility (Brushes): Refers to how resistant a brush's bristles are to bending. Stiff brushes are good for thick paint and impasto; flexible brushes allow for fluid, expressive marks.
- Stippling: A drawing or painting technique that uses small dots or dabs to create areas of shading, texture, or an optical mixing of colors.
- Student Grade: Art supplies (paints, pencils) designed for beginners and students. They offer good quality and performance at a more affordable price point, typically with a lower pigment-to-binder ratio than professional or artist-grade materials. They are still excellent for learning and practice, and often have good archival qualities for practice pieces.
- Synthetic Brushes: Brushes made with man-made fibers (like nylon or polyester), known for their durability, versatility with various media (especially acrylics), and ease of cleaning.
- Tertiary Colors: Colors created by mixing a primary color with a secondary color (e.g., red-orange, blue-green, yellow-green).
- Texture: The perceived surface quality of a work of art, which can be actual (e.g., thick paint, collage) or implied (e.g., through shading or rendering).
- Tooth: The slight texture or 'grab' of a paper's surface, which helps dry mediums like graphite, charcoal, or pastels adhere. Smooth papers have less tooth (good for fine pen work), while rougher papers have more (ideal for pastels or charcoal).
- Transparency: The quality of a paint that allows light to pass through it, revealing underlying layers or the paper beneath. Watercolors are known for their transparency, allowing for luminous effects.
- Underpainting: A preliminary layer of color or tone applied to a canvas or surface before the main painting layers. It helps establish values, overall composition, and provides a base for subsequent colors, especially useful for acrylics or oils.
- Value: The lightness or darkness of a color, independent of its hue. Essential for creating contrast and form in a drawing or painting (e.g., a dark value of blue is navy, a light value is sky blue).
- Vector Graphics (Digital Art): Digital images that use mathematical equations to define lines, curves, and shapes. They are resolution-independent, meaning they can be scaled to any size without losing quality or becoming pixelated. Common for logos, typography, and illustrations.
- Vinyl Eraser: A white, plastic-based eraser known for cleanly lifting graphite marks without smudging or damaging paper, often preferred over rubber erasers.
- Vine Charcoal: A soft, easily erasable form of charcoal made from burnt grapevines or willow, typically used for light sketches and preliminary drawings.
- Water Brush Pen: A brush with a hollow barrel that holds water, allowing for a continuous supply of water to the brush tip, ideal for portable watercolor painting or ink washes.
- Wet-on-Dry: A watercolor technique where wet paint is applied to a dry paper surface or a dry wash. This results in crisp edges and more defined shapes, offering greater control.
- Wet-on-Wet: A watercolor technique where wet paint is applied to a pre-wetted paper surface or an existing wet wash. This results in soft, blended, and diffused effects as the colors spread and mingle organically.
FAQ: Clearing Up Those Creative Queries
Let's tackle some common questions I hear from aspiring artists. Remember, there are no 'stupid questions' when you're starting a creative journey!

Question | Answer |
|---|---|
| How much should I spend on beginner art supplies? | That's a fantastic question! For beginner art supplies, aim for quality student-grade sets. You can often get a good basic drawing kit (pencils, sketchbook, erasers, sharpener) for around €20-€40, and a basic painting kit (a few acrylics or watercolors, brushes, paper/small canvas) for €30-€60. Remember, the goal isn't to spend a fortune, but to invest in a few key items that won't frustrate you. Focus on a few key, quality items rather than many cheap ones. The real magic happens when you start creating, not just acquiring! |
| Where should I buy my art supplies as a beginner? | Great question! Local art stores are fantastic for advice and seeing items in person – plus you're supporting local businesses! Online retailers like Jackson's Art Supplies (EU/UK), Blick Art Materials (US), or even larger marketplaces offer wider selections and often good deals. Look for reputable brands like Winsor & Newton (student grade series), Liquitex Basics, Faber-Castell, or Staedtler. While I've mentioned some reliable brands, availability can vary by region. Always check local art stores for their recommendations and stock. |
| What if I'm not good enough to use quality art supplies? | Oh, I hear this one all the time, and it's a huge misconception! Quality supplies actually make the learning process easier and more enjoyable, providing better results and encouraging you to keep going. More importantly, they allow you to better understand how materials behave, revealing nuances in your technique that cheaper supplies might obscure. They can even help you identify your own stylistic preferences more clearly because the tools behave predictably. Many professional artists still use student-grade materials for practice or specific applications. Think of them as tools to help you learn, not just for finished masterpieces. Trust me, you are good enough to learn with good tools! |
| How do I store and care for my art supplies? | This is super important for extending the life of your tools! Keep pencils organized in a case to prevent breakage and smudging. Store brushes clean, reshaped, and upright with bristles facing up (or lay flat for long-term storage) to maintain their form. Keep paints sealed tightly to prevent drying out. Store paper flat to prevent curling or warping. Good storage protects your investment and keeps your workspace tidy and inspiring. A clean workspace is a clear mind! You can learn more about cleaning different types of art supplies. |
| Should I get a drawing board or easel for beginners? | For drawing, a simple, flat drawing board is beneficial for stability and consistent surface, or even just a sturdy table. For painting, a basic tabletop easel (compact and portable) or a field easel (collapsible for outdoor use) can be very helpful for comfortable working angles and standing to gain perspective, but isn't strictly necessary for your very first steps. Studio easels are larger and more permanent. For digital art, a comfortable desk setup or even a lap desk can suffice. |
| What are the biggest mistakes beginners make with art supplies? | One of the biggest? Buying too much, too cheap. This leads to decision fatigue and frustration with poor results. Another is not cleaning brushes properly – a quick way to ruin your tools! And don't forget storing supplies haphazardly, which can damage them. Also, not understanding the properties of different materials (e.g., using watercolor paper with acrylics without proper prep, or vice versa) can lead to unexpected frustration. Finally, neglecting proper lighting and an ergonomic setup can lead to discomfort and less enjoyment, hindering your progress. I've made all these mistakes, trust me! |
| Can I use household items as art supplies for experimentation? | Absolutely! Things like coffee, tea, cardboard, or even diluted food coloring can be fantastic for experimentation, especially for abstract or mixed-media work. Just be aware that they're often not archival, meaning your creations might fade or change over time. It's a fun way to play and explore, but for lasting pieces, stick to dedicated art supplies. Always research archival qualities if permanence is a goal. |
| What about an ergonomic workspace and proper lighting for artists? | While not a 'supply,' your workspace comfort and lighting significantly impact your artistic journey. Ensure good, consistent lighting (natural light is ideal but can fluctuate; consider balanced artificial lighting like a daylight lamp) to accurately perceive colors and details. A comfortable chair, proper posture, and regular breaks will prevent discomfort and allow you to create for longer periods. Your body (and your eyes!) will thank you. This is one of those things I wish I'd focused on earlier in my career. |
| What are the best art supplies for kids or young beginners? | For kids, focus on non-toxic, washable, and easy-to-handle materials. Chunky crayons, large washable markers, finger paints, large sheets of paper (80-120 gsm), and student-grade watercolor pan sets are excellent. Tempera paints are also a great, opaque, and washable option. The key is safety and allowing for joyful, mess-making experimentation without frustration. |
| How do I choose art supplies for a specific artistic style (e.g., realism vs. abstract)? | For realism, you'll generally want tools that allow for fine detail, smooth blending, and a wide color range (like fine-point pencils, oil-based colored pencils, or artist-grade oils/acrylics). For abstract work, versatility is often key: choose mediums that allow for bold strokes, texture, and spontaneous expression (like student-grade acrylics, large brushes, palette knives, or mixed media supplies). Remember, a good basic beginner set will still let you experiment with both, so don't feel limited. My own abstract journey began with simple acrylics and a few brushes! |
| What is the difference between workable and final fixatives? | That's a great question about preserving your dry media! A workable fixative creates a light, transparent coating that allows you to continue drawing or layering on top of it. It prevents smudging while you're still working. A final fixative, on the other hand, provides a more durable, permanent protective layer meant to be applied once the artwork is complete, offering maximum protection against smudging and environmental damage. Always spray both in a well-ventilated area, and test on a scrap piece first, as some can slightly darken or yellow your artwork. |
| Are there specific art supplies for different artistic movements (e.g., Impressionism vs. Cubism)? | While certain movements favored particular media (Impressionists loved portable tube oils for plein air, Cubists often used muted palettes and collage with paper and charcoal), the spirit of the movement is more about how you use the tools rather than specific exclusive sets. For a beginner, mastering the basics discussed here will give you the foundational skills to explore any movement. Don't feel pressured to buy specific historical tools – focus on developing your artistic eye and technique with accessible student-grade supplies, and the movements will become lenses through which you see your own work. |
My Personal Take: Less is More, Joy is Everything
I truly believe that the best art supplies for beginners aren't necessarily the most comprehensive or the most expensive. They're the ones that get you excited to create, that don't intimidate you, and that allow you to experiment freely. My own art, often abstract and filled with vibrant color, comes from a place of pure play and intuition. It's in that space of pure play and intuition that my signature vibrant abstracts truly come alive. For beginners, abstract art can be wonderfully freeing because it removes the pressure of realistic representation, allowing you to focus on the fundamental elements of color, line, and form without judgment. My journey into vibrant abstracts, as you can see in my work on the Den Bosch Museum page or even on my timeline, was fueled by the simple joy of mixing primaries and seeing what happens on the canvas. I remember one day, using a slightly higher pigment load acrylic, and suddenly, the colors just sang in a way I hadn't experienced before – that small upgrade unlocked a new level of vibrancy and freedom in my work, leading directly to pieces like 'Geometric Harmony.'
I often find that the tactile richness of my materials—the way a pigment blends, how paper responds to a stroke—directly influences the joy of the process and, ultimately, the energy in the final piece. That's why I champion starting with a basic, quality set – it liberates you to explore rather than getting bogged down by choices. It allows you to develop your unique style without battling your tools. So, remember these key takeaways: prioritize quality over quantity, embrace experimentation, and focus on the joy of the creative process. It's this blend of intention and spontaneity that connects all forms of artistic expression.
So, my friend, don't get caught in the trap of needing more to start. Get a few good basics, set aside some time, and just begin. Make messes, make mistakes, make masterpieces – whatever emerges, it will be uniquely yours. The journey itself is the reward, and your first sketch, your first brushstroke – they are the beginning of your unique artistic story. Embrace the process, trust your intuition, and most importantly, have fun with it. What's the first thing you'll create with your new essential art supplies? Share your biggest challenges, or your first joyful splashes of color with me! I can't wait to see what you create! If you find yourself inspired by the idea of pure play and intuition, you might even find a piece from my own collection on the Buy page that resonates with your creative journey.