
How I Tame Creative Chaos: My Real-Life Guide to Organizing an Art Studio
Ditch the perfect, sterile studio ideal. I'm sharing my personal, battle-tested system for organizing an art space that actually fuels creativity, not stifles it.
Orchestrating the Mess: My Real-Life Guide to Organizing an Art Studio for Uninhibited Flow
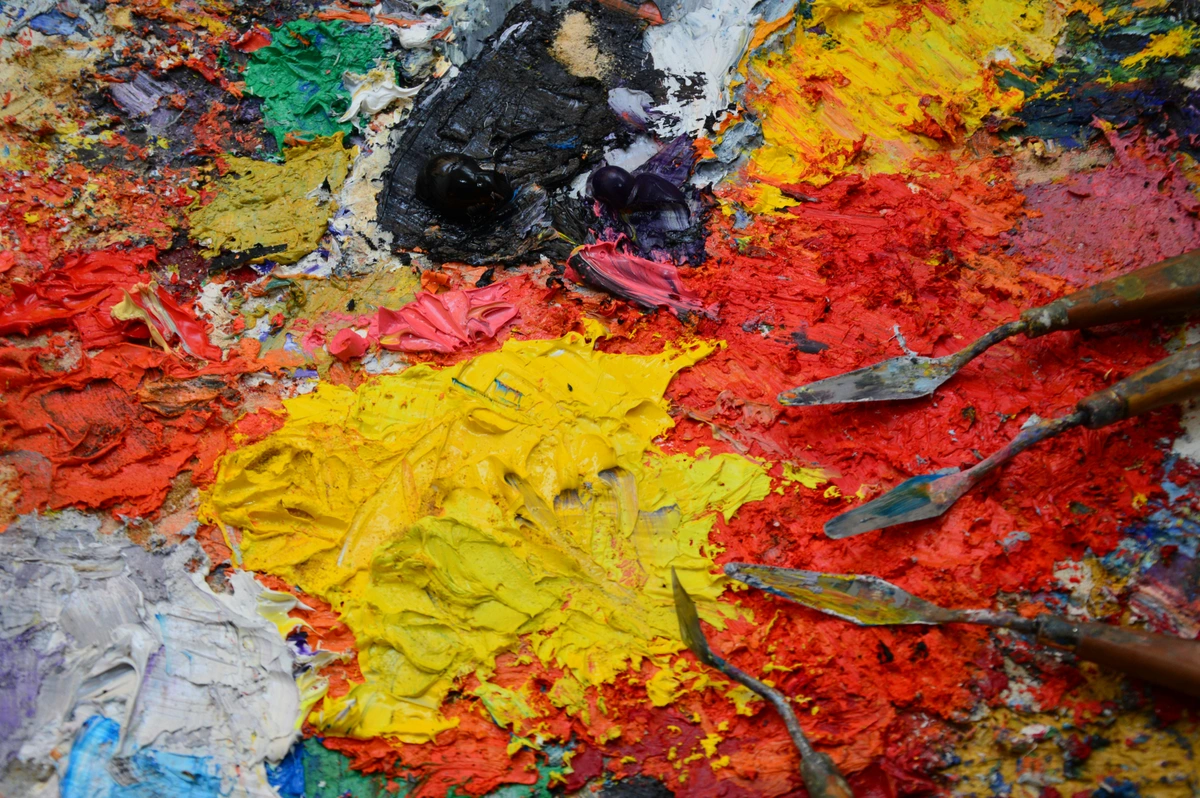
Let's be honest. The idea of a perfectly organized, minimalist art studio is often a beautiful, unattainable fantasy for most of us working artists. I used to chase that pristine, 'Instagram-ready' image, only to find it stifled my actual making. My first thought seeing those spotless spaces is always, 'Does anyone actually make art here?' And my second thought is, 'Where's the grit? Where's the glorious, messy evidence of creation, the paint splatters that tell a story?' I've seen the photos—pristine white walls, a single easel, three tubes of paint arranged just so. My own space? It's often a beautiful, controlled mess, a testament to the fact that creativity thrives not in pristine conditions, but in an environment that understands and supports its glorious chaos.
My studio, on any given day, is a controlled explosion. It's a living, breathing space that has seen its fair share of paint spills, abandoned projects, and moments of pure, unadulterated chaos. For years, I believed that messiness was just a non-negotiable part of the creative journey. But I slowly realized something crucial: there's a world of difference between a creative mess and a chaotic barrier. One fuels ideas; the other just makes you want to go watch TV because you can't find your favorite brush. It's about finding that sweet spot where your environment supports your artistic practice rather than stifling it. A creative mess is a sign of work in progress, a vibrant testament to ideas taking shape. A chaotic barrier, however, is a suffocating force, blocking access to tools, disrupting thought, and draining energy. This insidious distinction, I've come to believe, is at the heart of an artist's relationship with their space. This realization was a turning point, making me think deeply about how my physical space impacts my creative process itself. It's not about being neat, it's about being effective, about creating an ecosystem where inspiration can flow unimpeded.
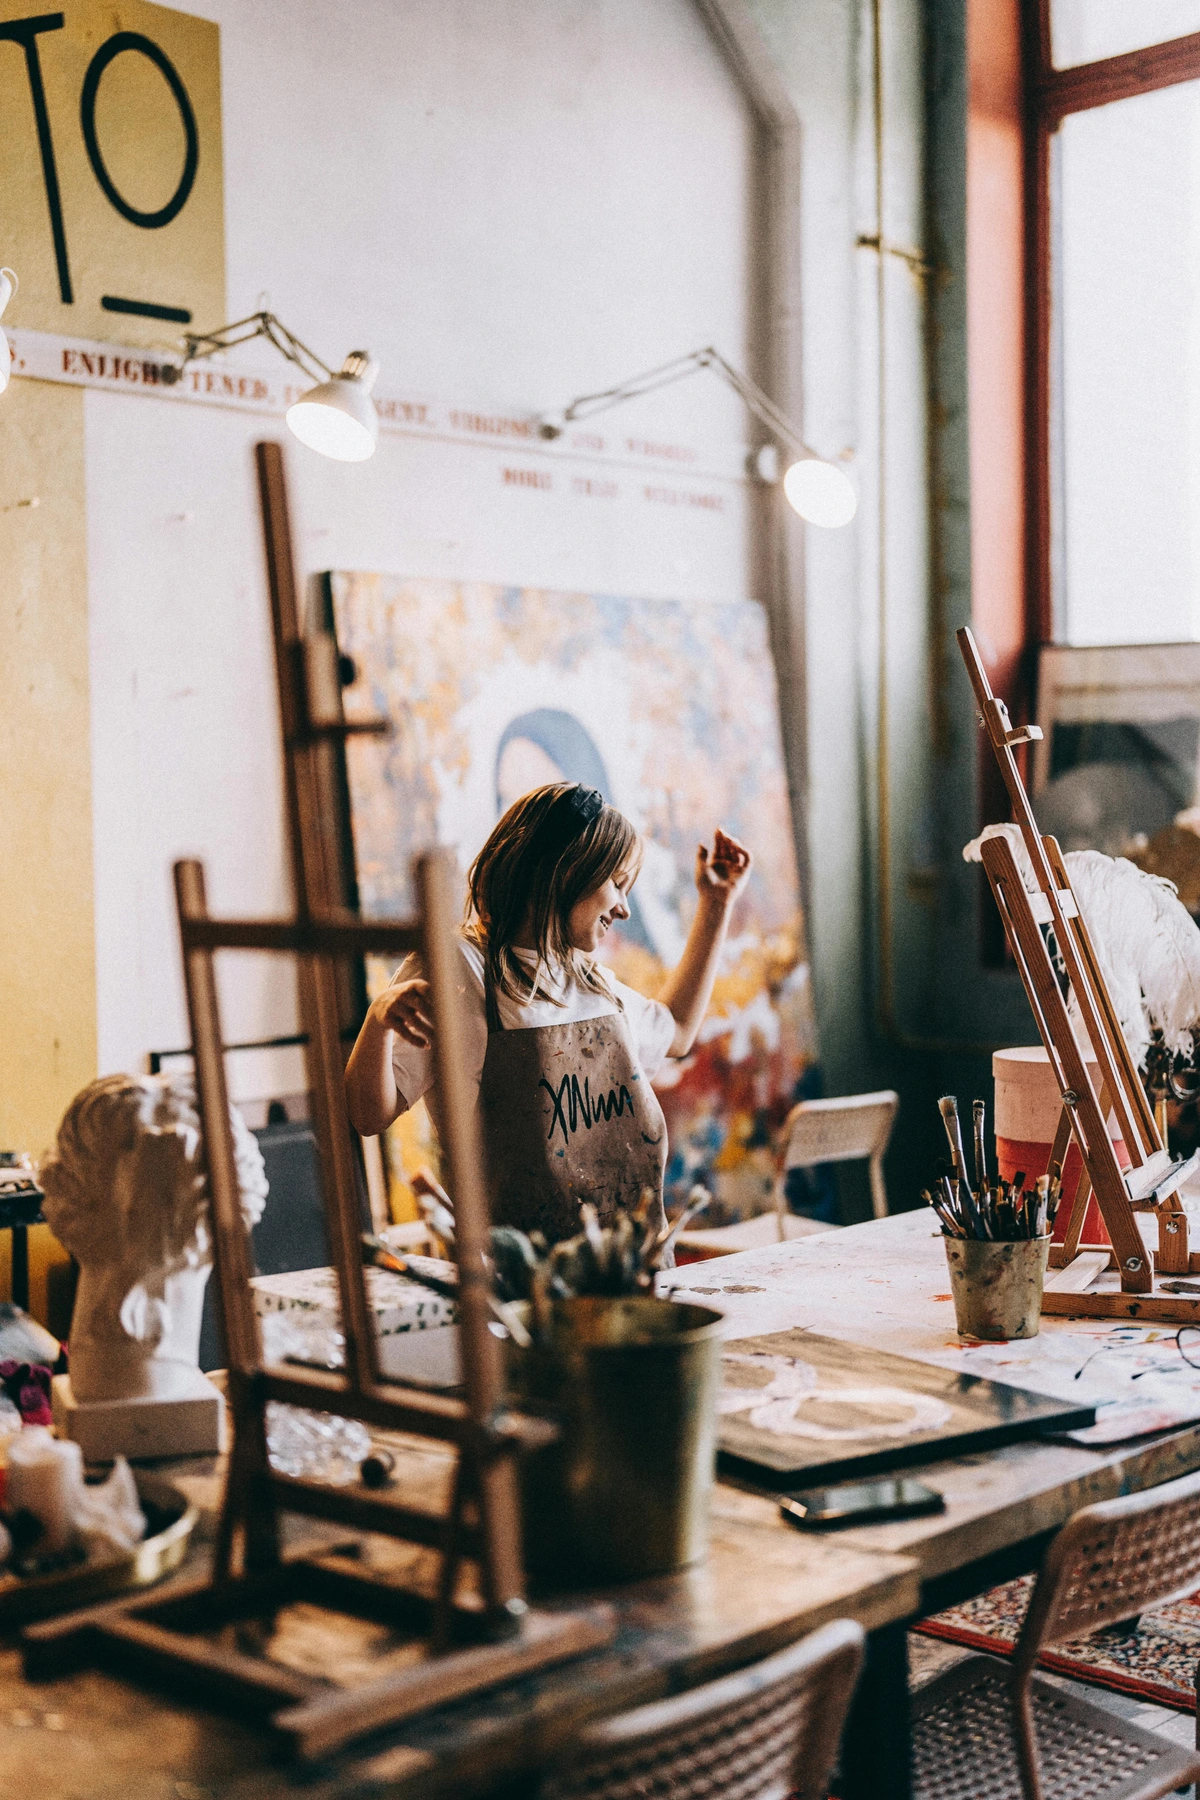
So, this isn't a guide to creating a showroom. This is how I, a real, working artist, organize my space to minimize friction and maximize flow. It’s about creating a partnership with your studio, not a battleground, where the space itself becomes an active collaborator in your creative process. It's about crafting a functional ecosystem where every tool, every canvas, every swatch of inspiration is ready to serve your next impulse, anticipating your needs before you even fully articulate them. This isn't just about my studio; it's a deep dive into principles that can transform any creative space, from a sprawling warehouse to a cozy corner of your living room, into a sanctuary of focused creation. This approach embraces the reality of making art – the glorious mess, the intense focus, the occasional frustration – and builds a system around it. Think of this as your ultimate guide to turning chaos into creative flow. I often think of it as orchestrating a jazz improvisation – there's a structure, a framework, but within that, there's boundless freedom to explore and experiment without hitting a sour note (or, more literally, tripping over a rogue tube of cadmium yellow). And remember, your perfect system will likely look different from mine, and that’s not just okay, it’s essential. Organization, like art itself, is a deeply personal journey of discovery and refinement.
My Core Philosophy: It's About Flow, Not Tidiness
Before we get into carts and containers, we have to talk about mindset. My entire organization system is built on one single principle: reduce the time and effort between thought and action.
When an idea strikes, I want to be able to grab a canvas, the right colors, and a palette knife within seconds. If I have to spend 15 minutes digging through a pile of dried-up tubes to find my phthalo blue, there's a good chance that initial spark of inspiration will have fizzled out. It's like telling a great joke but forgetting the punchline, or having a brilliant dream that vanishes the moment you wake up. That moment of pure, unadulterated creative flow is precious, and I've learned that clutter is its natural enemy. Beyond just the lost time, there's a subtle psychological toll, a draining of vital creative energy. Each moment spent searching is a mental micro-aggression against your creative self, a small whisper of 'this isn't important enough to be ready for you.' This insidious internal dialogue erodes confidence, fosters frustration, and can even lead to self-sabotage, making you less likely to even start your next masterpiece, let alone finish it. Organization, then, becomes an act of profound self-care for the artist, a foundational practice that clears the mental and physical decks for true, uninhibited creation.
So, for me, organization isn't about looking tidy for visitors or adhering to some aesthetic ideal. It's a selfish, practical act designed to protect my creative energy, to build a bridge between the spark of an idea and its execution. Every organizational choice I make is measured against this one question: 'Does this make it easier for me to start making something, right now, without losing momentum?' If the answer is no, then that system isn't working for me.

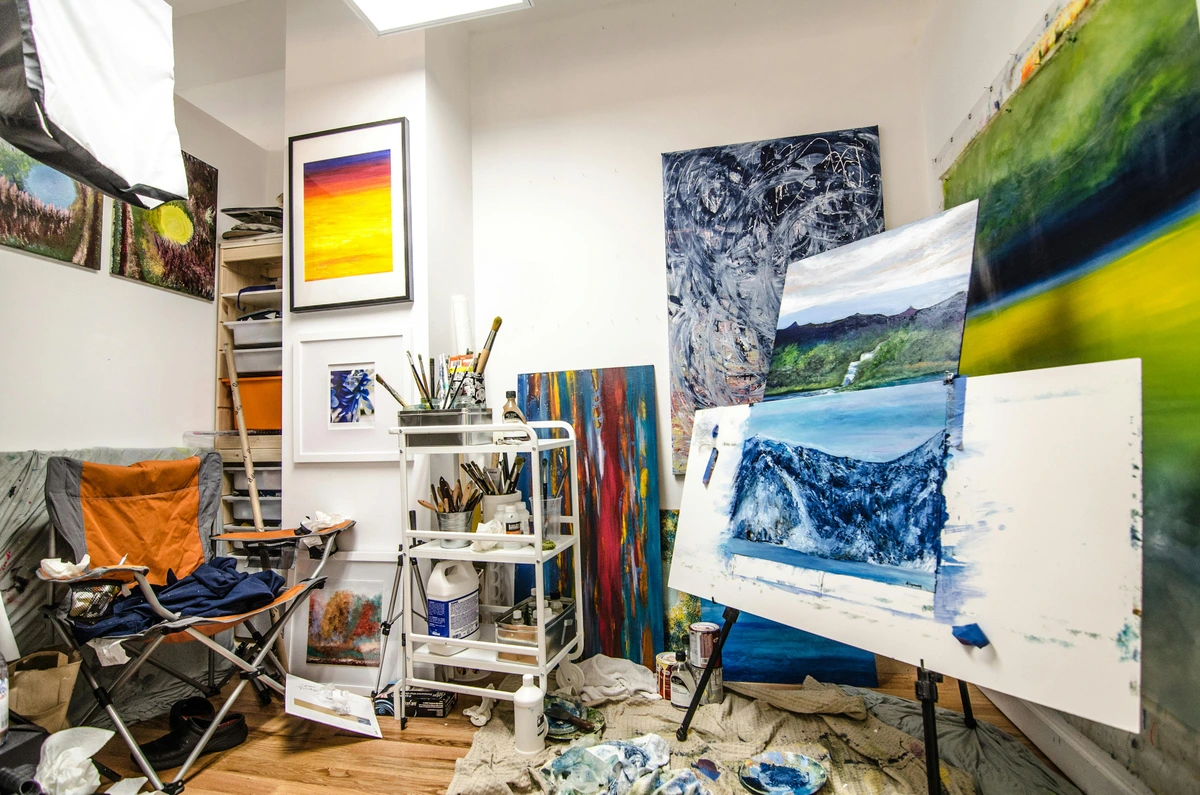
Zoning: The Only System That Actually Works for Me
I’ve tried a million complex systems, and the only thing that has ever stuck is zoning. It’s like creating mini-studios within your main studio, each dedicated to a specific function. I divide my space into distinct areas based on the type of activity, and the magic really happens when your brain automatically switches gears as you physically move from one zone to another. It also has the added benefit of containing the mess to predictable locations, which is a lifesaver (and sometimes a floor-saver).
Why Zoning Works: More Than Just Tidiness
For me, zoning is less about strict boundaries and more about creating mental cues. When I step into my 'wet zone', my brain automatically shifts into a more experimental, less precious mode. The permission to make a mess is baked into the space itself. Conversely, moving to the 'clean zone' signals a need for precision, focus, and a different kind of creative energy. It's a subtle but powerful way to trick your brain into productivity, minimizing decision fatigue and maximizing your creative output. It’s also incredibly practical; containing specific types of mess to specific areas simplifies cleanup dramatically. This means less accidental cross-contamination (no charcoal dust on your wet watercolors!), easier waste management, and a clearer mental division for different stages of a project – from the initial, explosive idea to the meticulous final touches. Think of it as a spatial trigger, helping you transition mentally without conscious effort, a true hack for your creative flow.
Here’s how I think about my zones, and what generally goes into them:
Zone Name | Primary Purpose | Essential Items & Considerations |
|---|---|---|
| The Wet Zone (Messy Zone) | Painting, glazing, mixing, solvent use, even initial canvas preparation or working with thick acrylic mediums that might splash. | Easel, primary paint palettes, solvents, rags, paper towels, water buckets, drop cloths, good ventilation. |
| The Dry Zone (Clean Zone) | Sketching, digital art, writing, planning, detailed drawing, pastel work, or even calligraphy where dust or spills would be detrimental. | Desk, computer, tablet, drawing board, sketchbooks, pencils, pens, erasers, clean paper. |
| The Library/Thinking Zone | Research, inspiration, contemplation, journaling, conceptual development, or quiet reading. This is also where I might display small studies or art storage solutions for inspiration. | Comfortable seating, art books, magazines, journals, cork board or mood board, perhaps a small light for reading. |
| The Workshop/Construction Zone | Framing, canvas stretching, sculptural work, repairs. | Work bench, saws, drills, staple guns, measuring tools, raw materials (wood, canvas rolls, wire for armatures), framing tools, and perhaps a dedicated space for sculptural work or even ceramics if you have the space and equipment. Dust extraction, proper ventilation, and safety gear are absolutely critical here! |
| The Archive/Storage Zone | Finished art, works-in-progress, raw materials in bulk. | Vertical racks for canvases, flat files for paper, archival boxes, shelving for overflow supplies. Good climate control is important for long-term storage. |
| The Shipping/Photography Zone | Documenting and preparing art for sale/exhibition. | Dedicated backdrop, good lighting, packaging materials, shipping labels, scale, clean flat surface. |
| The Framing/Finishing Zone | Preparing canvases, matting, framing, varnishing, final touches. | Workbench, miter saw, frame clamps, mat cutter, glass cleaner, non-shedding cloths, dedicated drying racks for varnished pieces. Ventilation for aerosols. |
| The Display/Viewing Zone | Evaluating finished work, client presentations, final critique. | Good natural and artificial lighting, neutral wall space, comfortable seating for viewers, a clear path for art movement. |

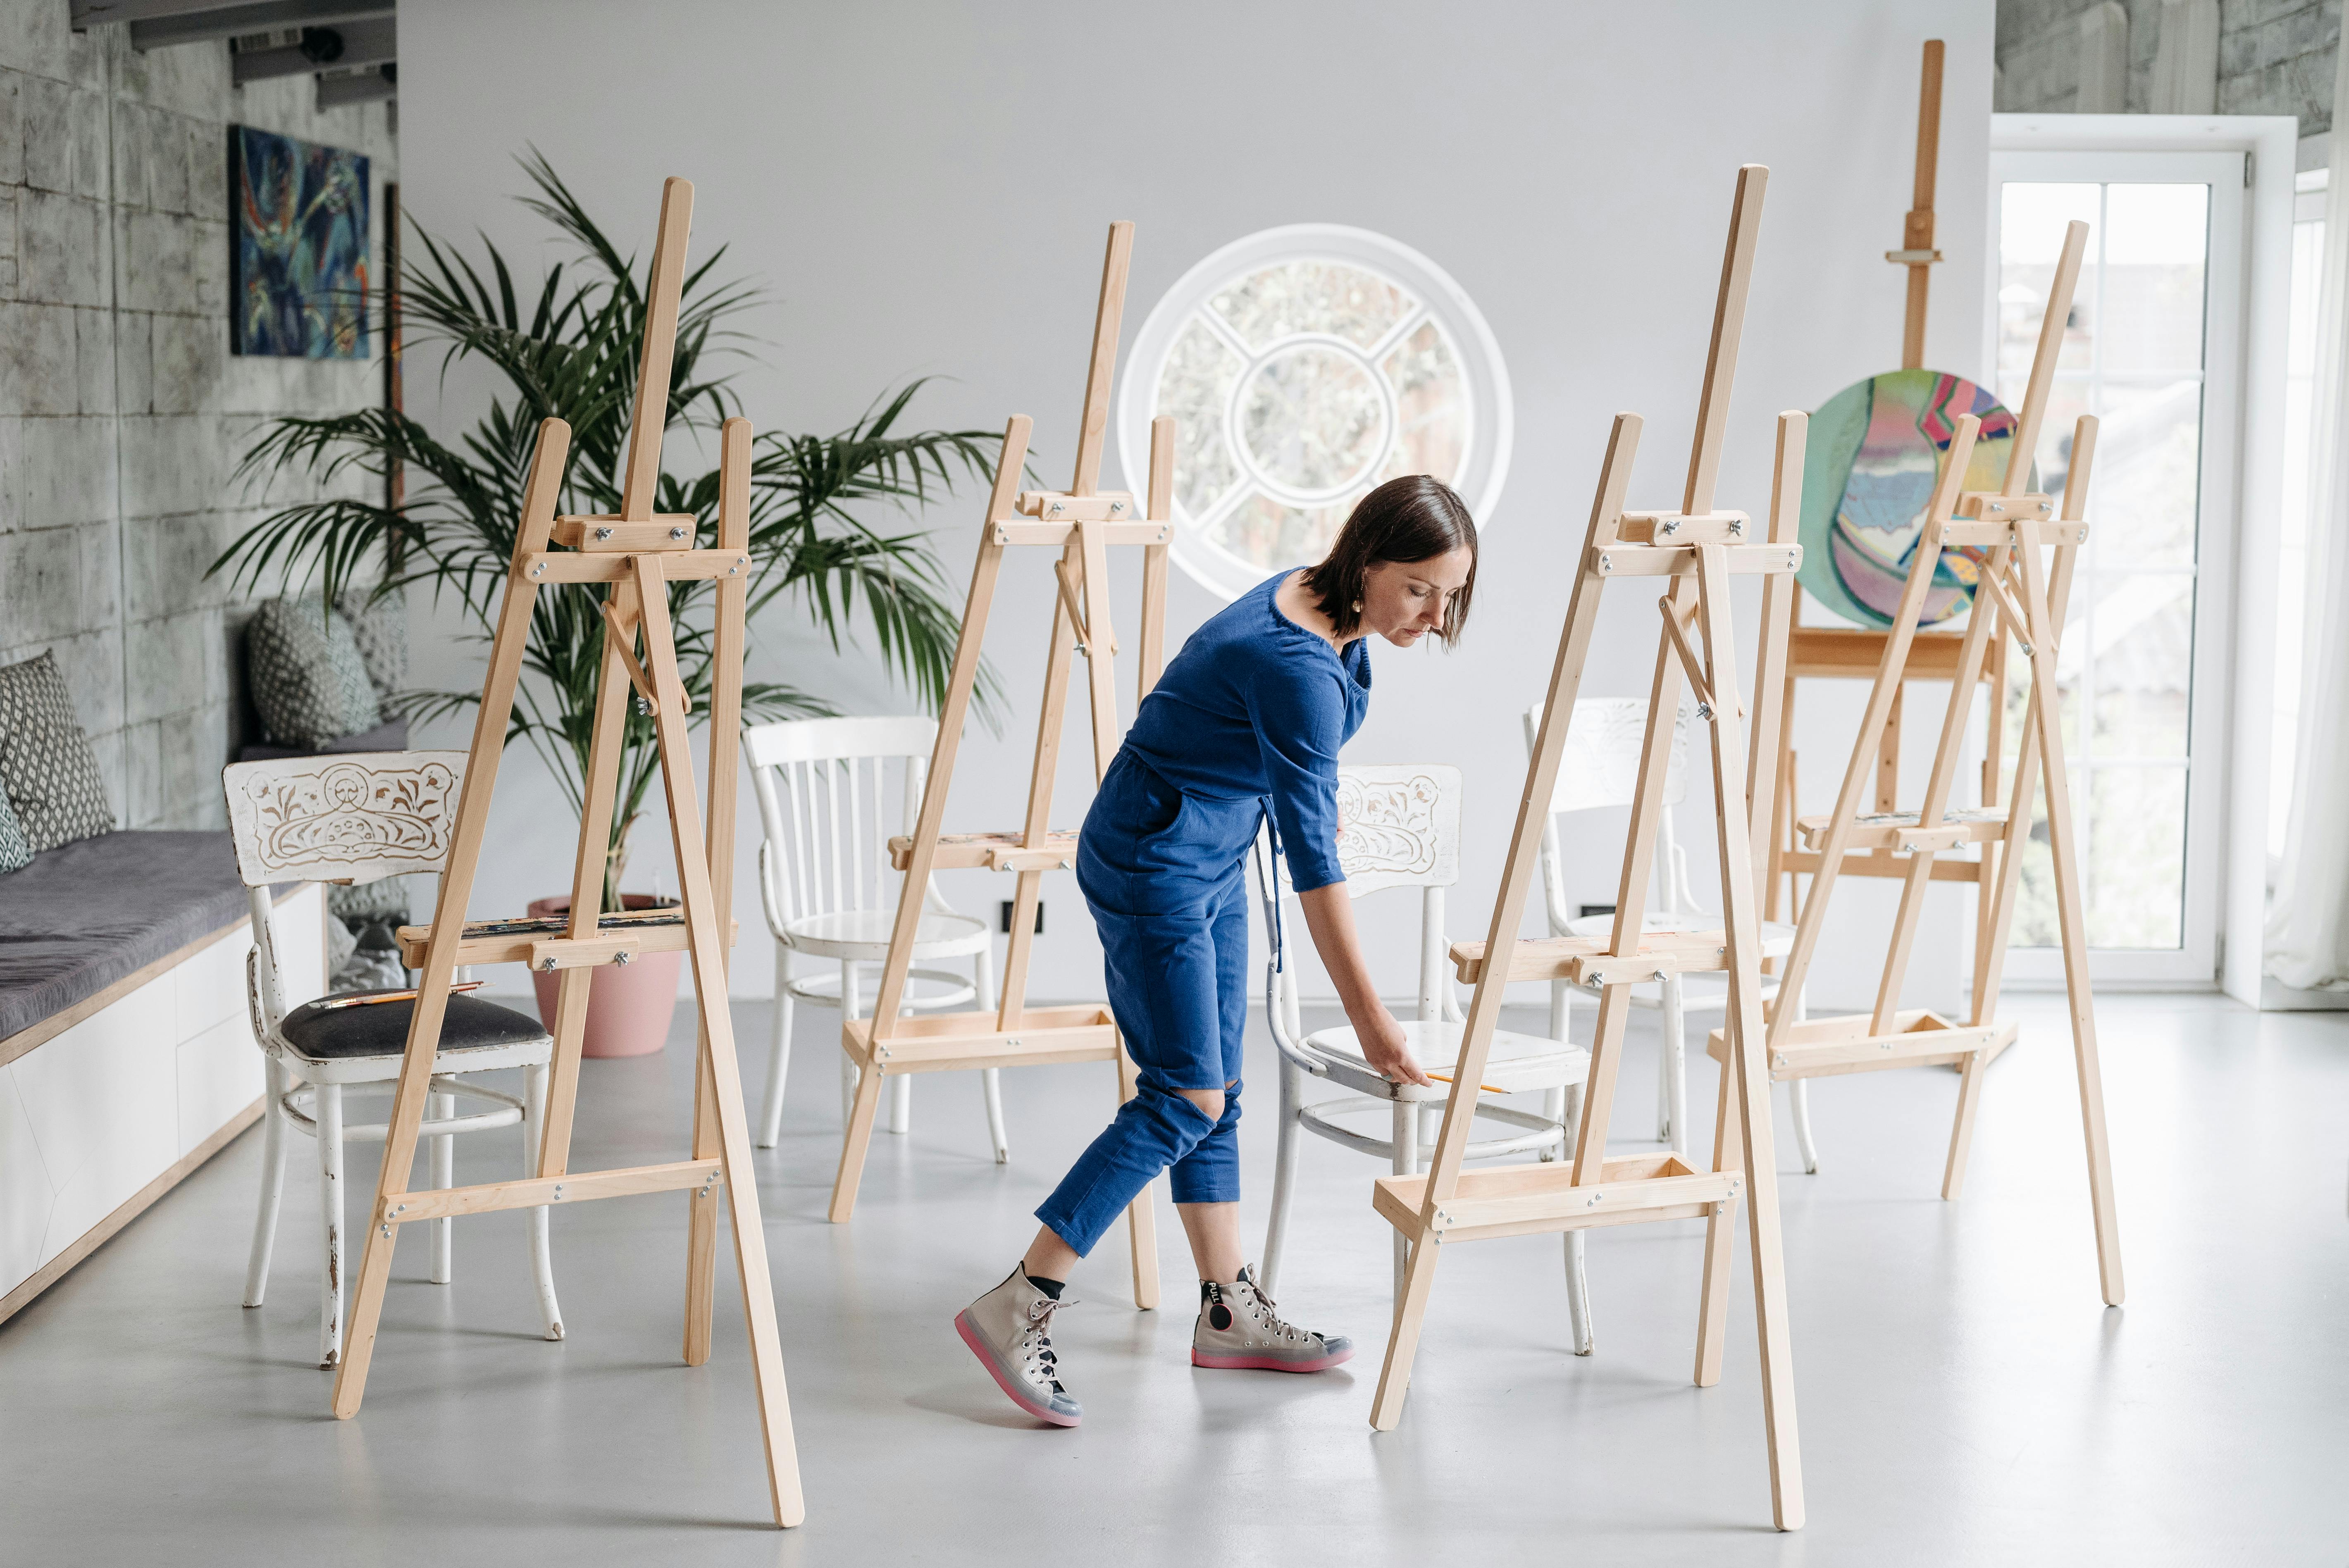
Now, I know what you’re thinking: 'Zen, I don't have a giant warehouse!' And you absolutely don't need one. My first studio was a tiny corner of a shared apartment, and it had a 'messy corner' and a 'clean corner' of the same desk. The principle is the same: separate your tasks in space to create clarity in your mind. Even if it's just a protective mat you roll out for painting and then put away for drawing, you're still creating a mental and physical boundary. It’s about being intentional with your space, no matter its size. In a truly small space, your zones might be layers on a single surface, or even a 'pop-up' zone that only exists when you pull out a specific rolling cart or folding table. Think vertically: wall-mounted shelves, pegboards, and stackable containers are your best friends. Every inch counts, so consider multi-functional furniture that can serve different purposes depending on your current activity. Think folding tables that collapse when not in use, storage ottomans that double as seating, or wall-mounted desks that free up floor space. Verticality is truly your greatest ally in a compact studio. Look into hanging solutions, stackable modules, and even tension rod systems to utilize every available surface without permanent installation.
Taming the Supplies: My Arsenal of Organization
Okay, let's get into the nitty-gritty. Your art supplies are your army, and a disorganized army is just a mob. Here’s how I keep my troops in line.
Mobility is Everything: The Glorious Rolling Cart
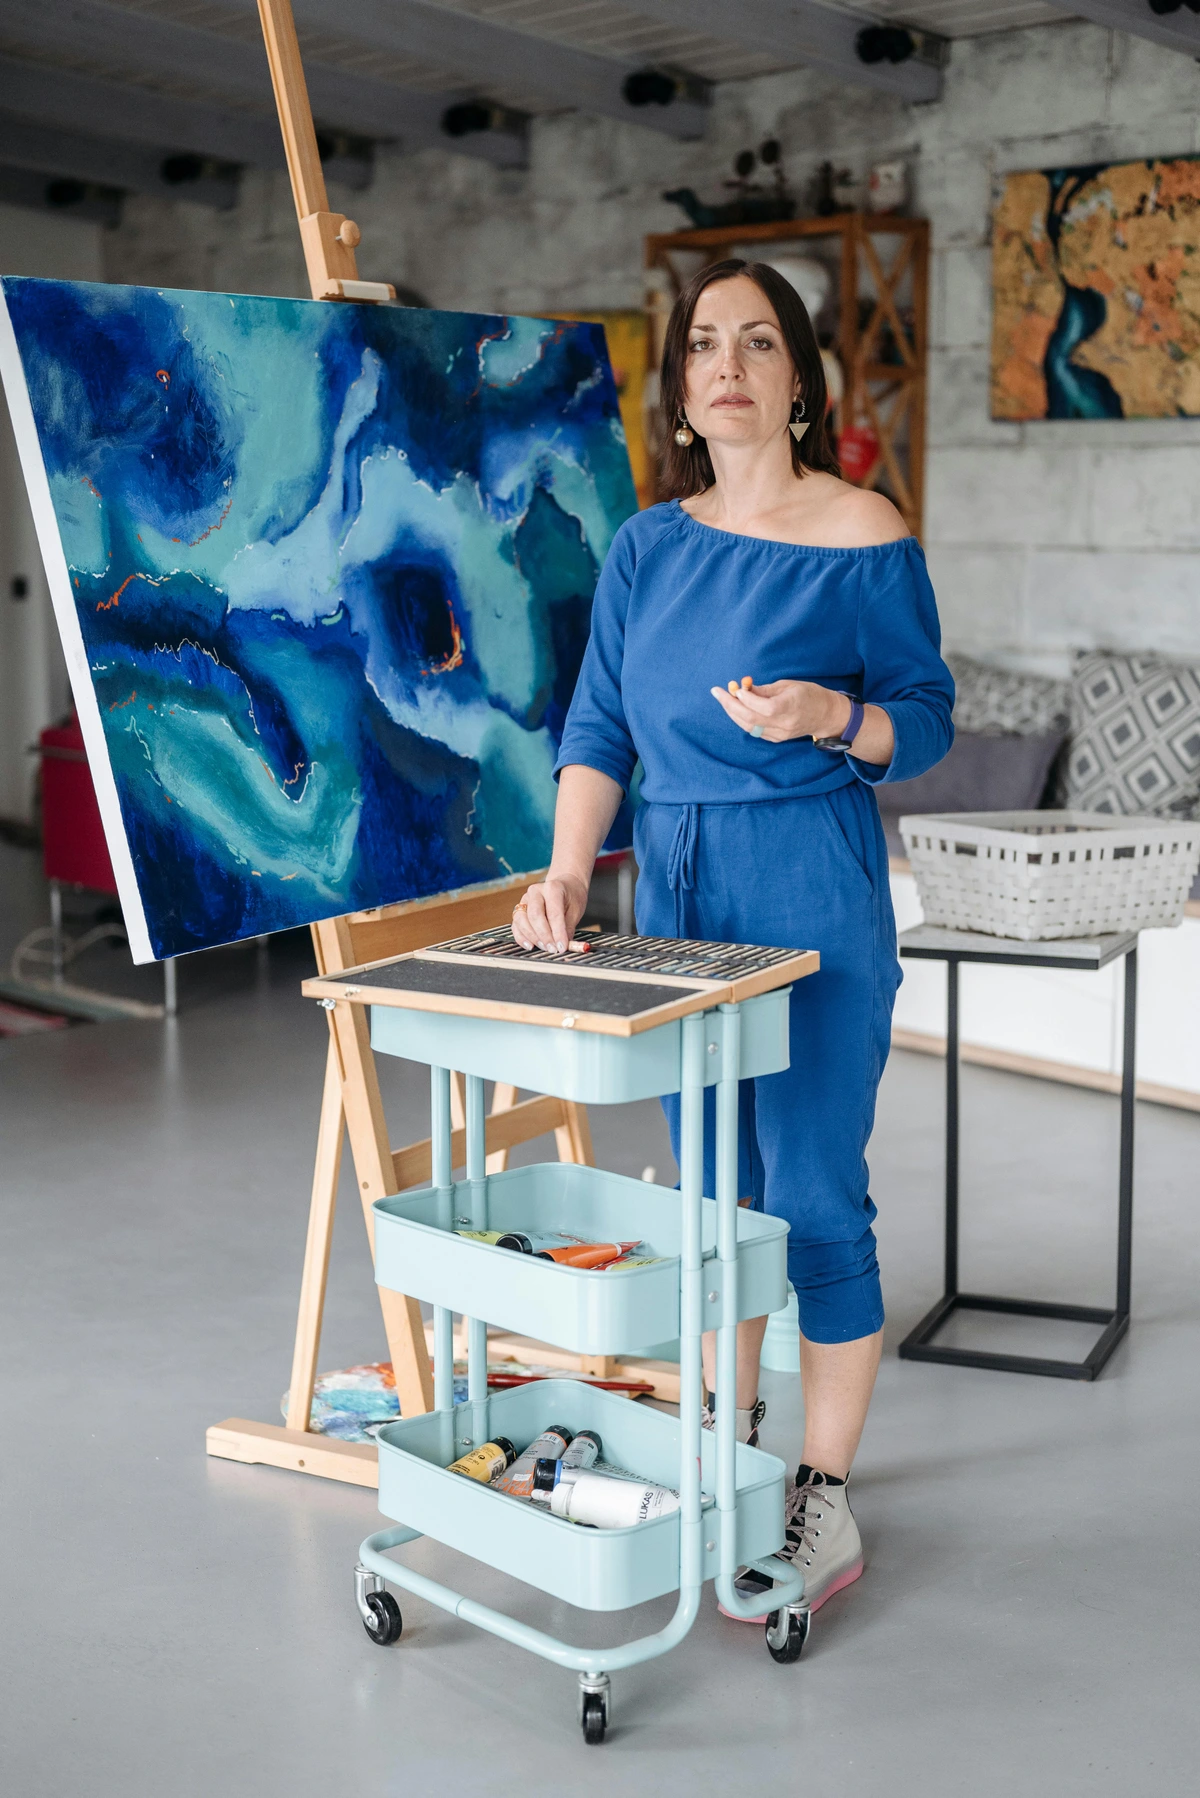
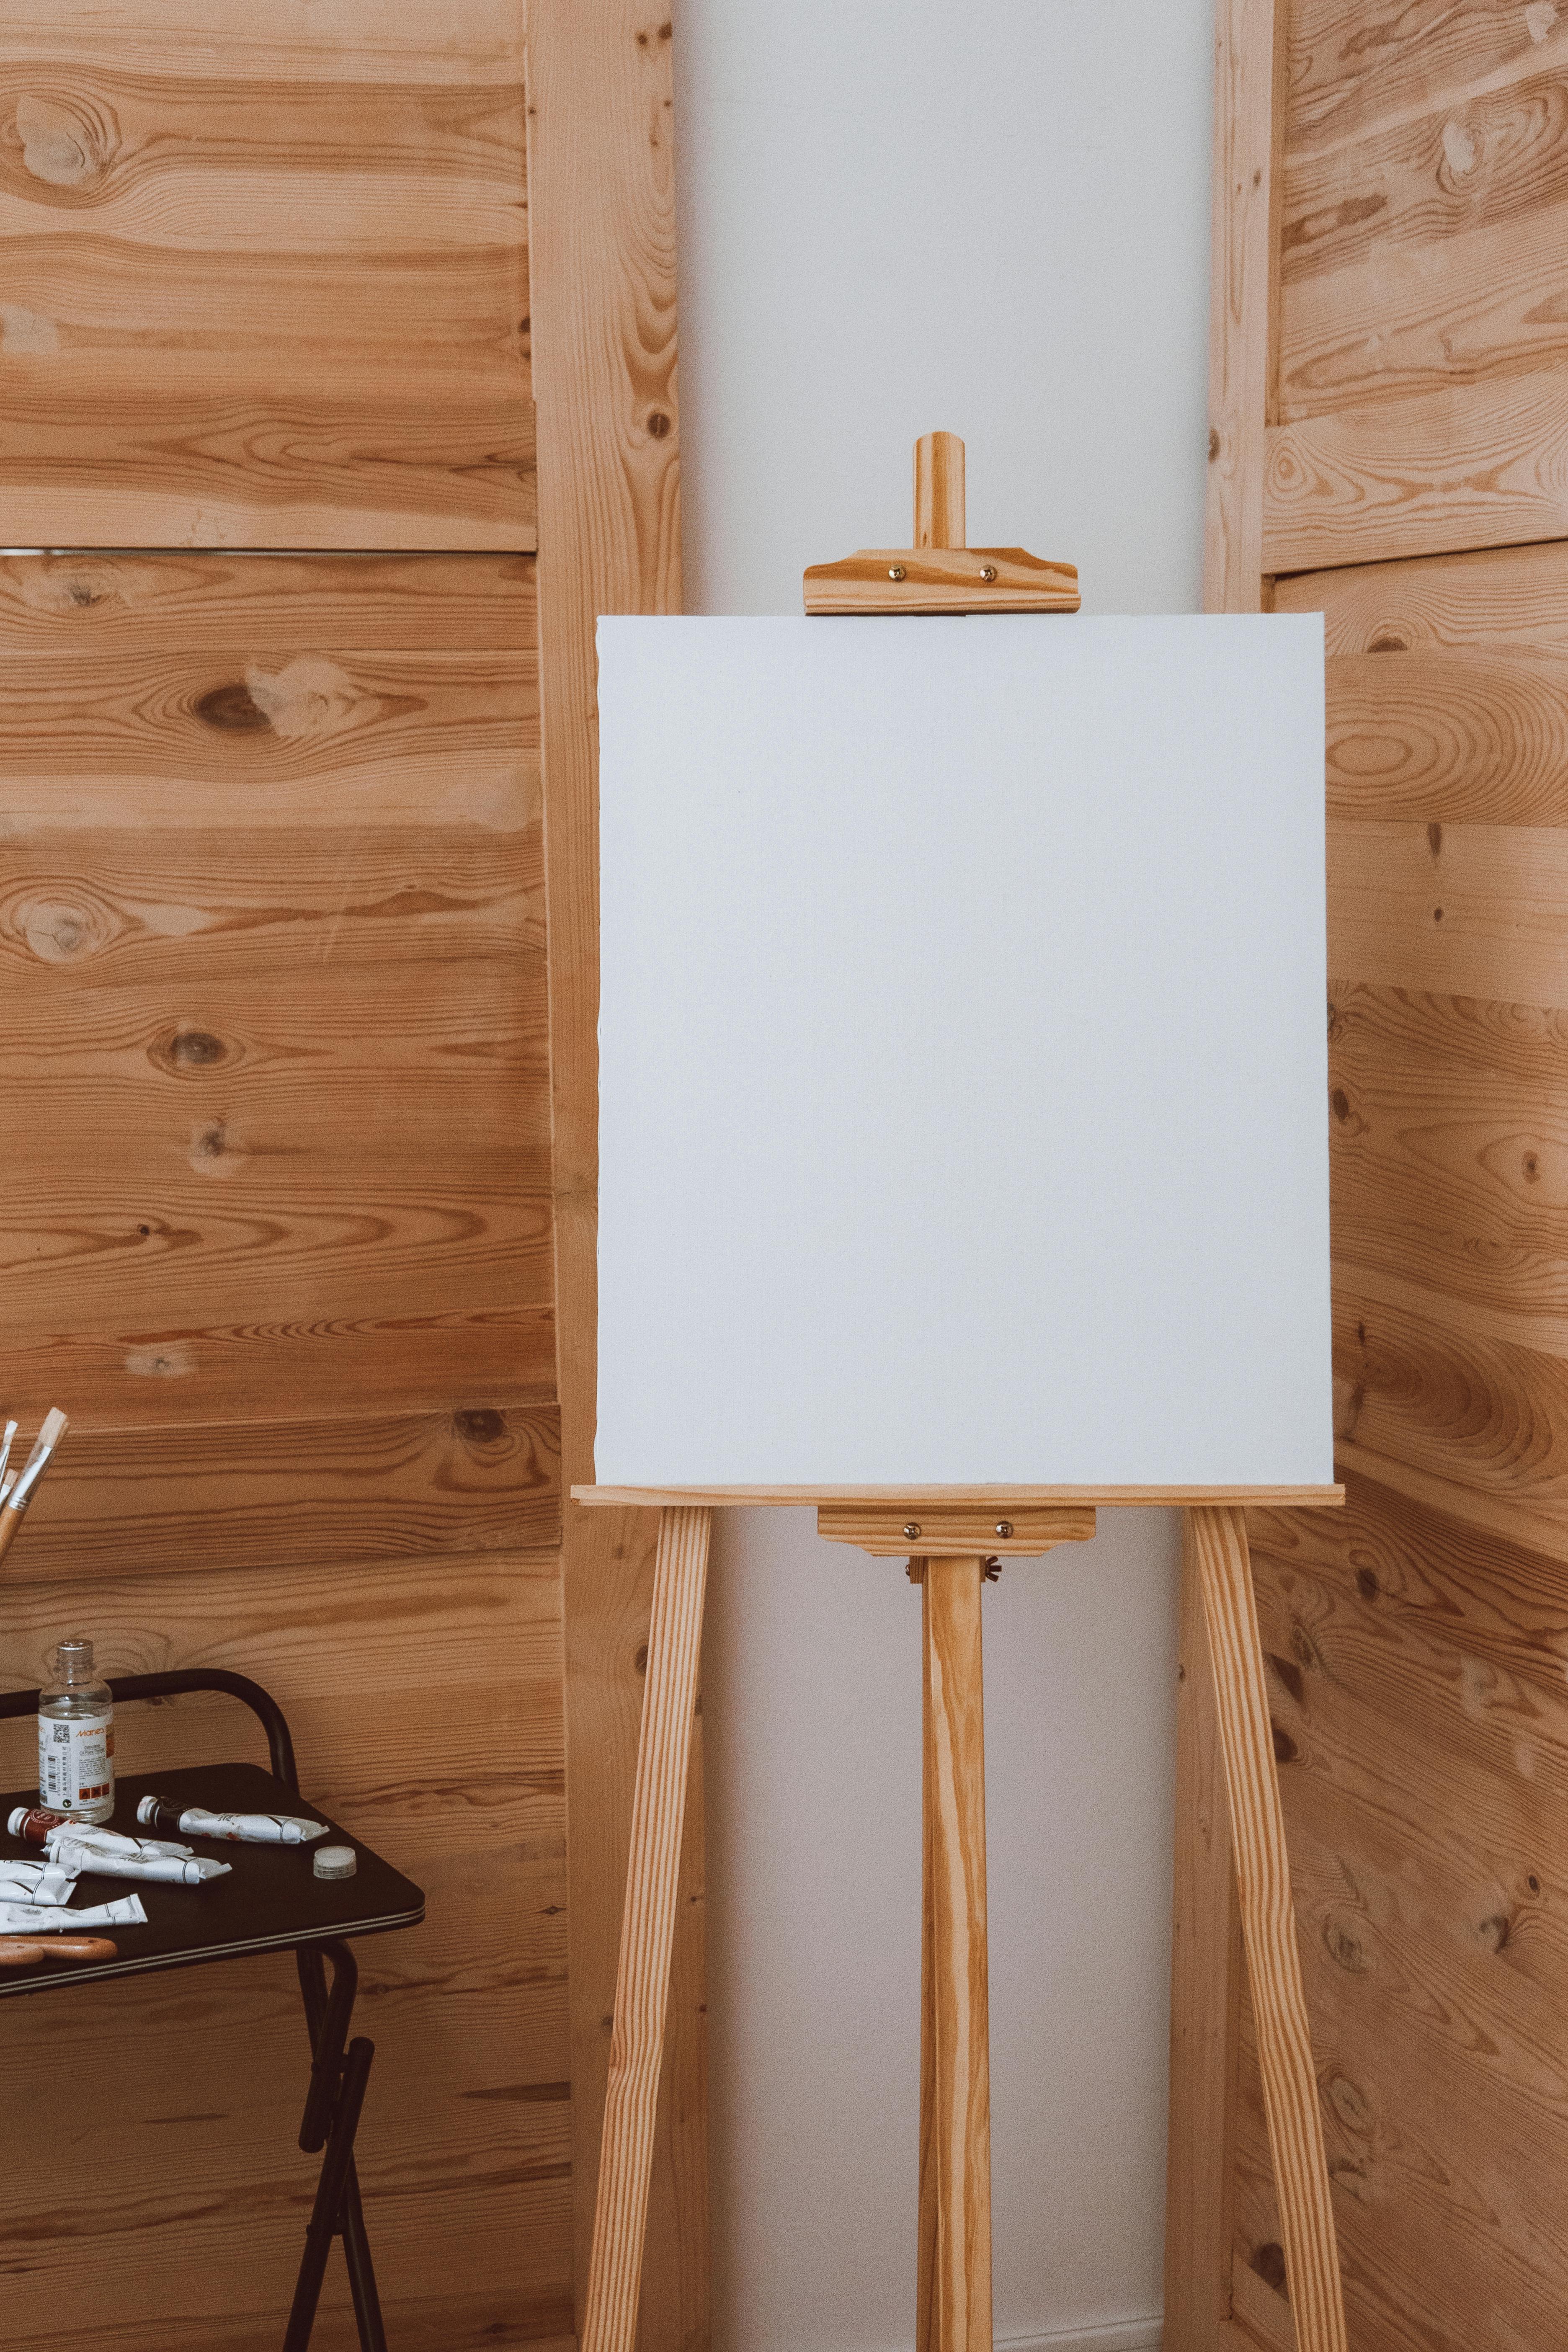
If I could only recommend one thing for studio organization, it would be a multi-tiered rolling cart. Seriously, it's the unsung hero, the loyal sidekick, the single most valuable piece of furniture in my studio. I vividly remember trying to juggle a palette, half a dozen tubes of paint, and a wet brush while moving from my easel to a smaller table for detail work. It was a disaster waiting to happen (and often did). The rolling cart changed everything.

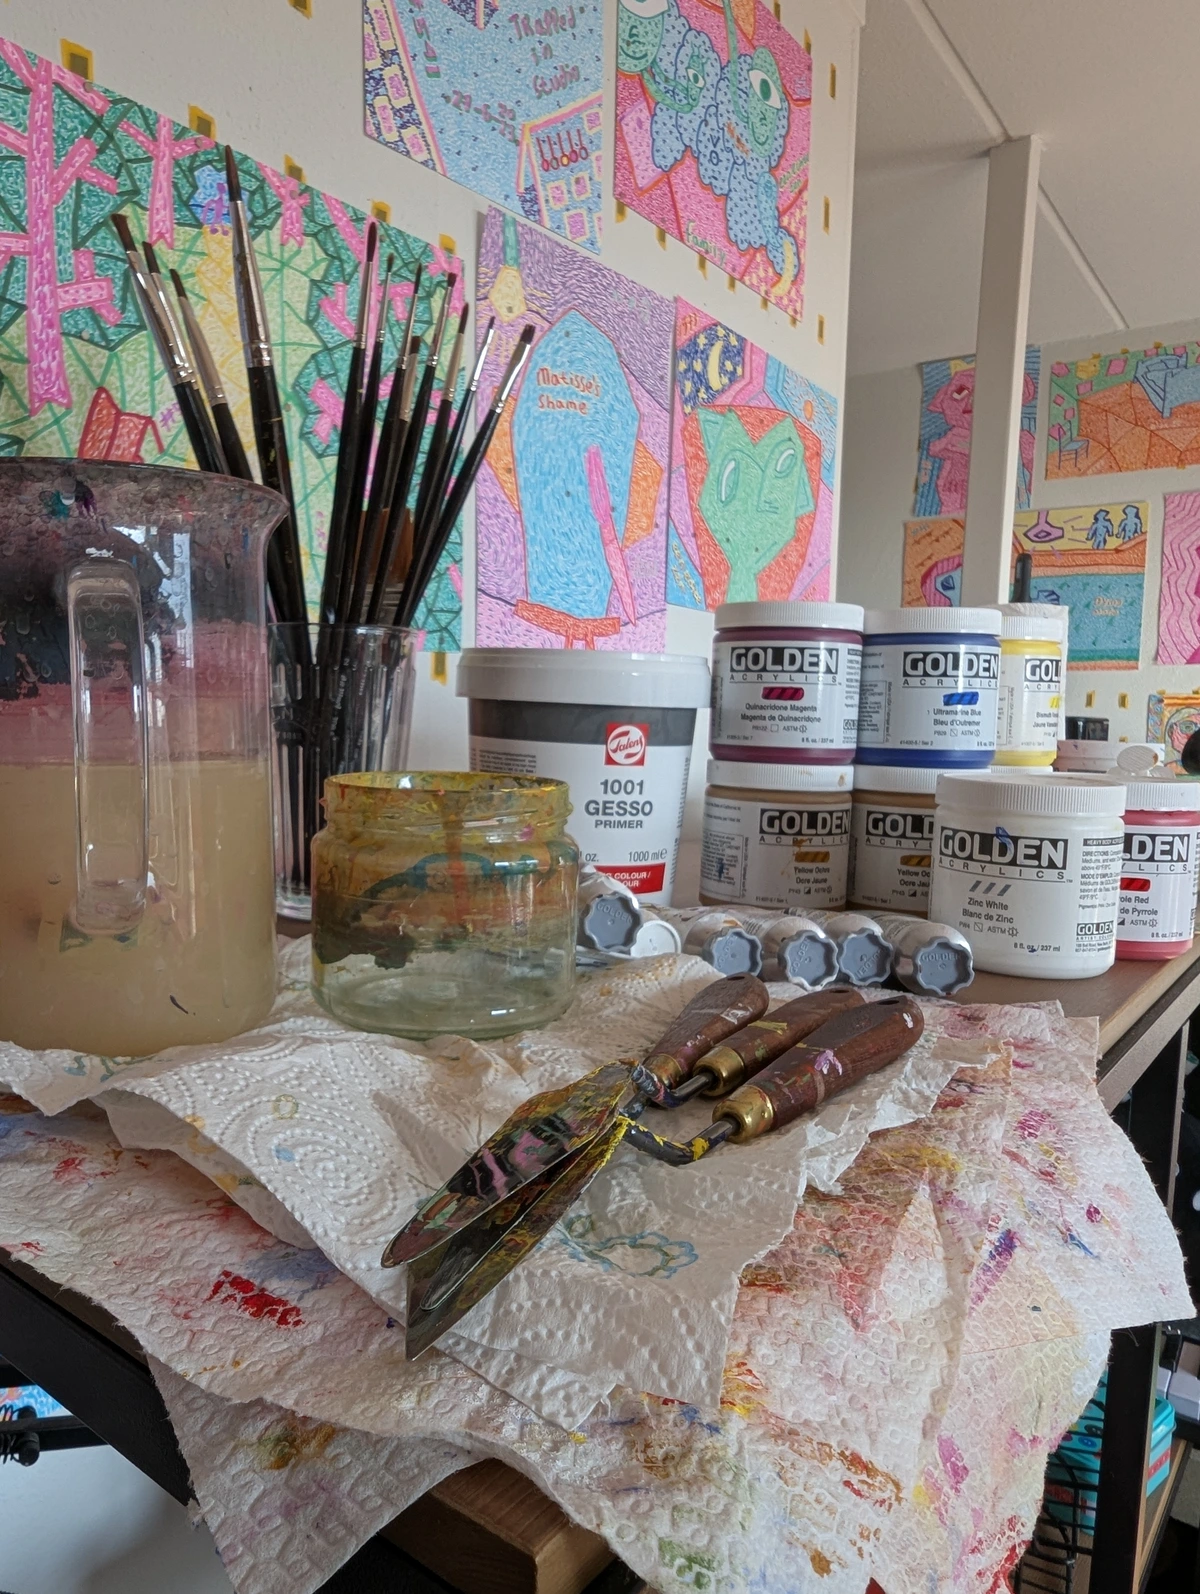
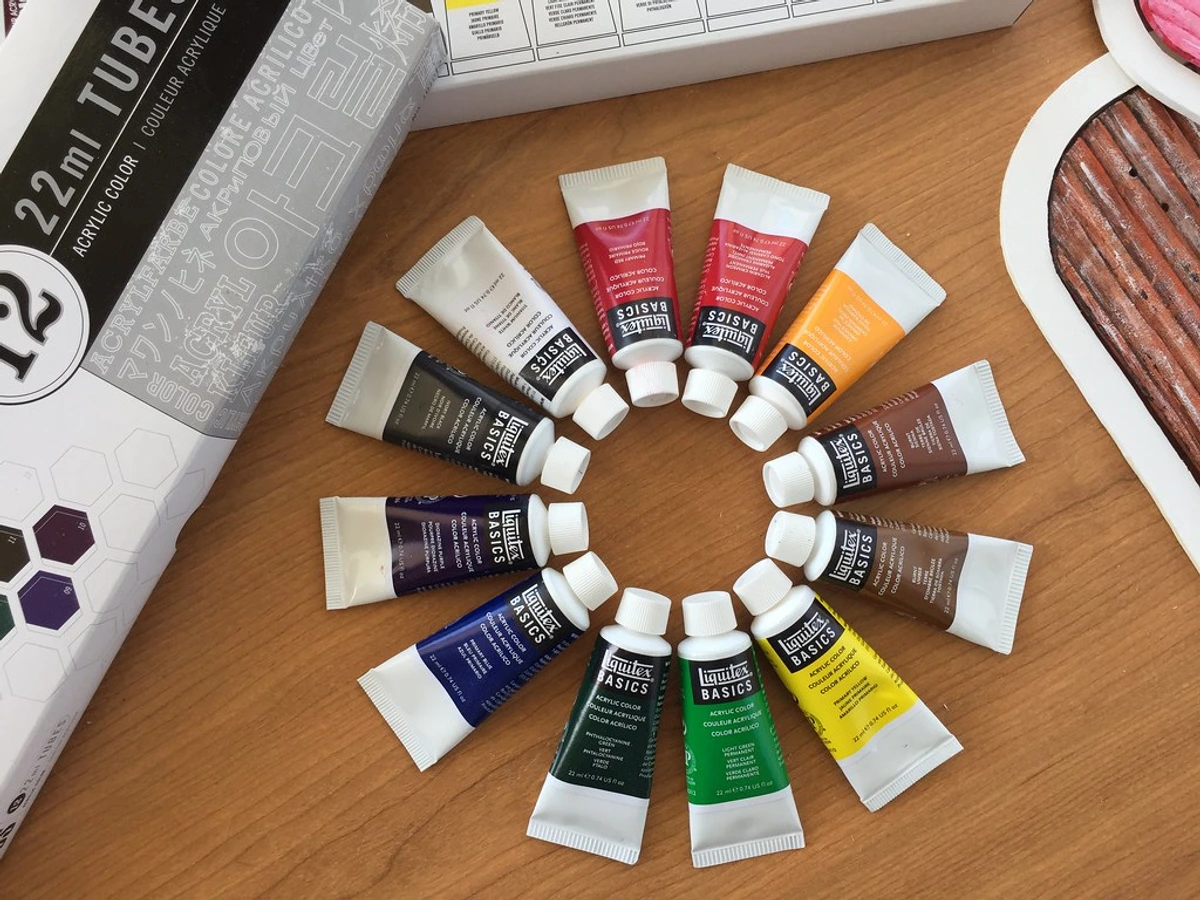
My main painting cart now holds all my go-to acrylics, mediums, frequently used brushes, and palette knives. I can roll it from my main easel to a smaller setup for detail work, or even over to a drying rack without missing a beat. It’s my painting butler, my mobile command center, my everything. I even have three of them for different purposes now: one for wet painting supplies, one for drawing and paper-based mixed media, and a third for framing and light assembly tools. When choosing a rolling cart, look for sturdy, industrial-grade wheels (the cheap plastic ones will fail you, trust me), a durable frame (metal is usually best), and consider models with optional attachments like cup holders for water or solvents, or magnetic strips for small metal tools. Prioritize carts with lockable wheels for stability, especially on uneven floors, and multiple shelves with high edges to prevent items from rolling off. Trust me, you'll be loading it up with all sorts of treasures, and a flimsy cart is a recipe for creative disaster and spilled paint, not to mention physical strain. Consider models with integrated drawers, hooks for small tools, or even magnetic strips for holding stray palette knives and scissors. The right cart isn't just storage; it's a mobile workstation that brings your supplies to your point of creation, wherever that may be in your studio, allowing for seamless transitions between tasks.

See-Through is Better
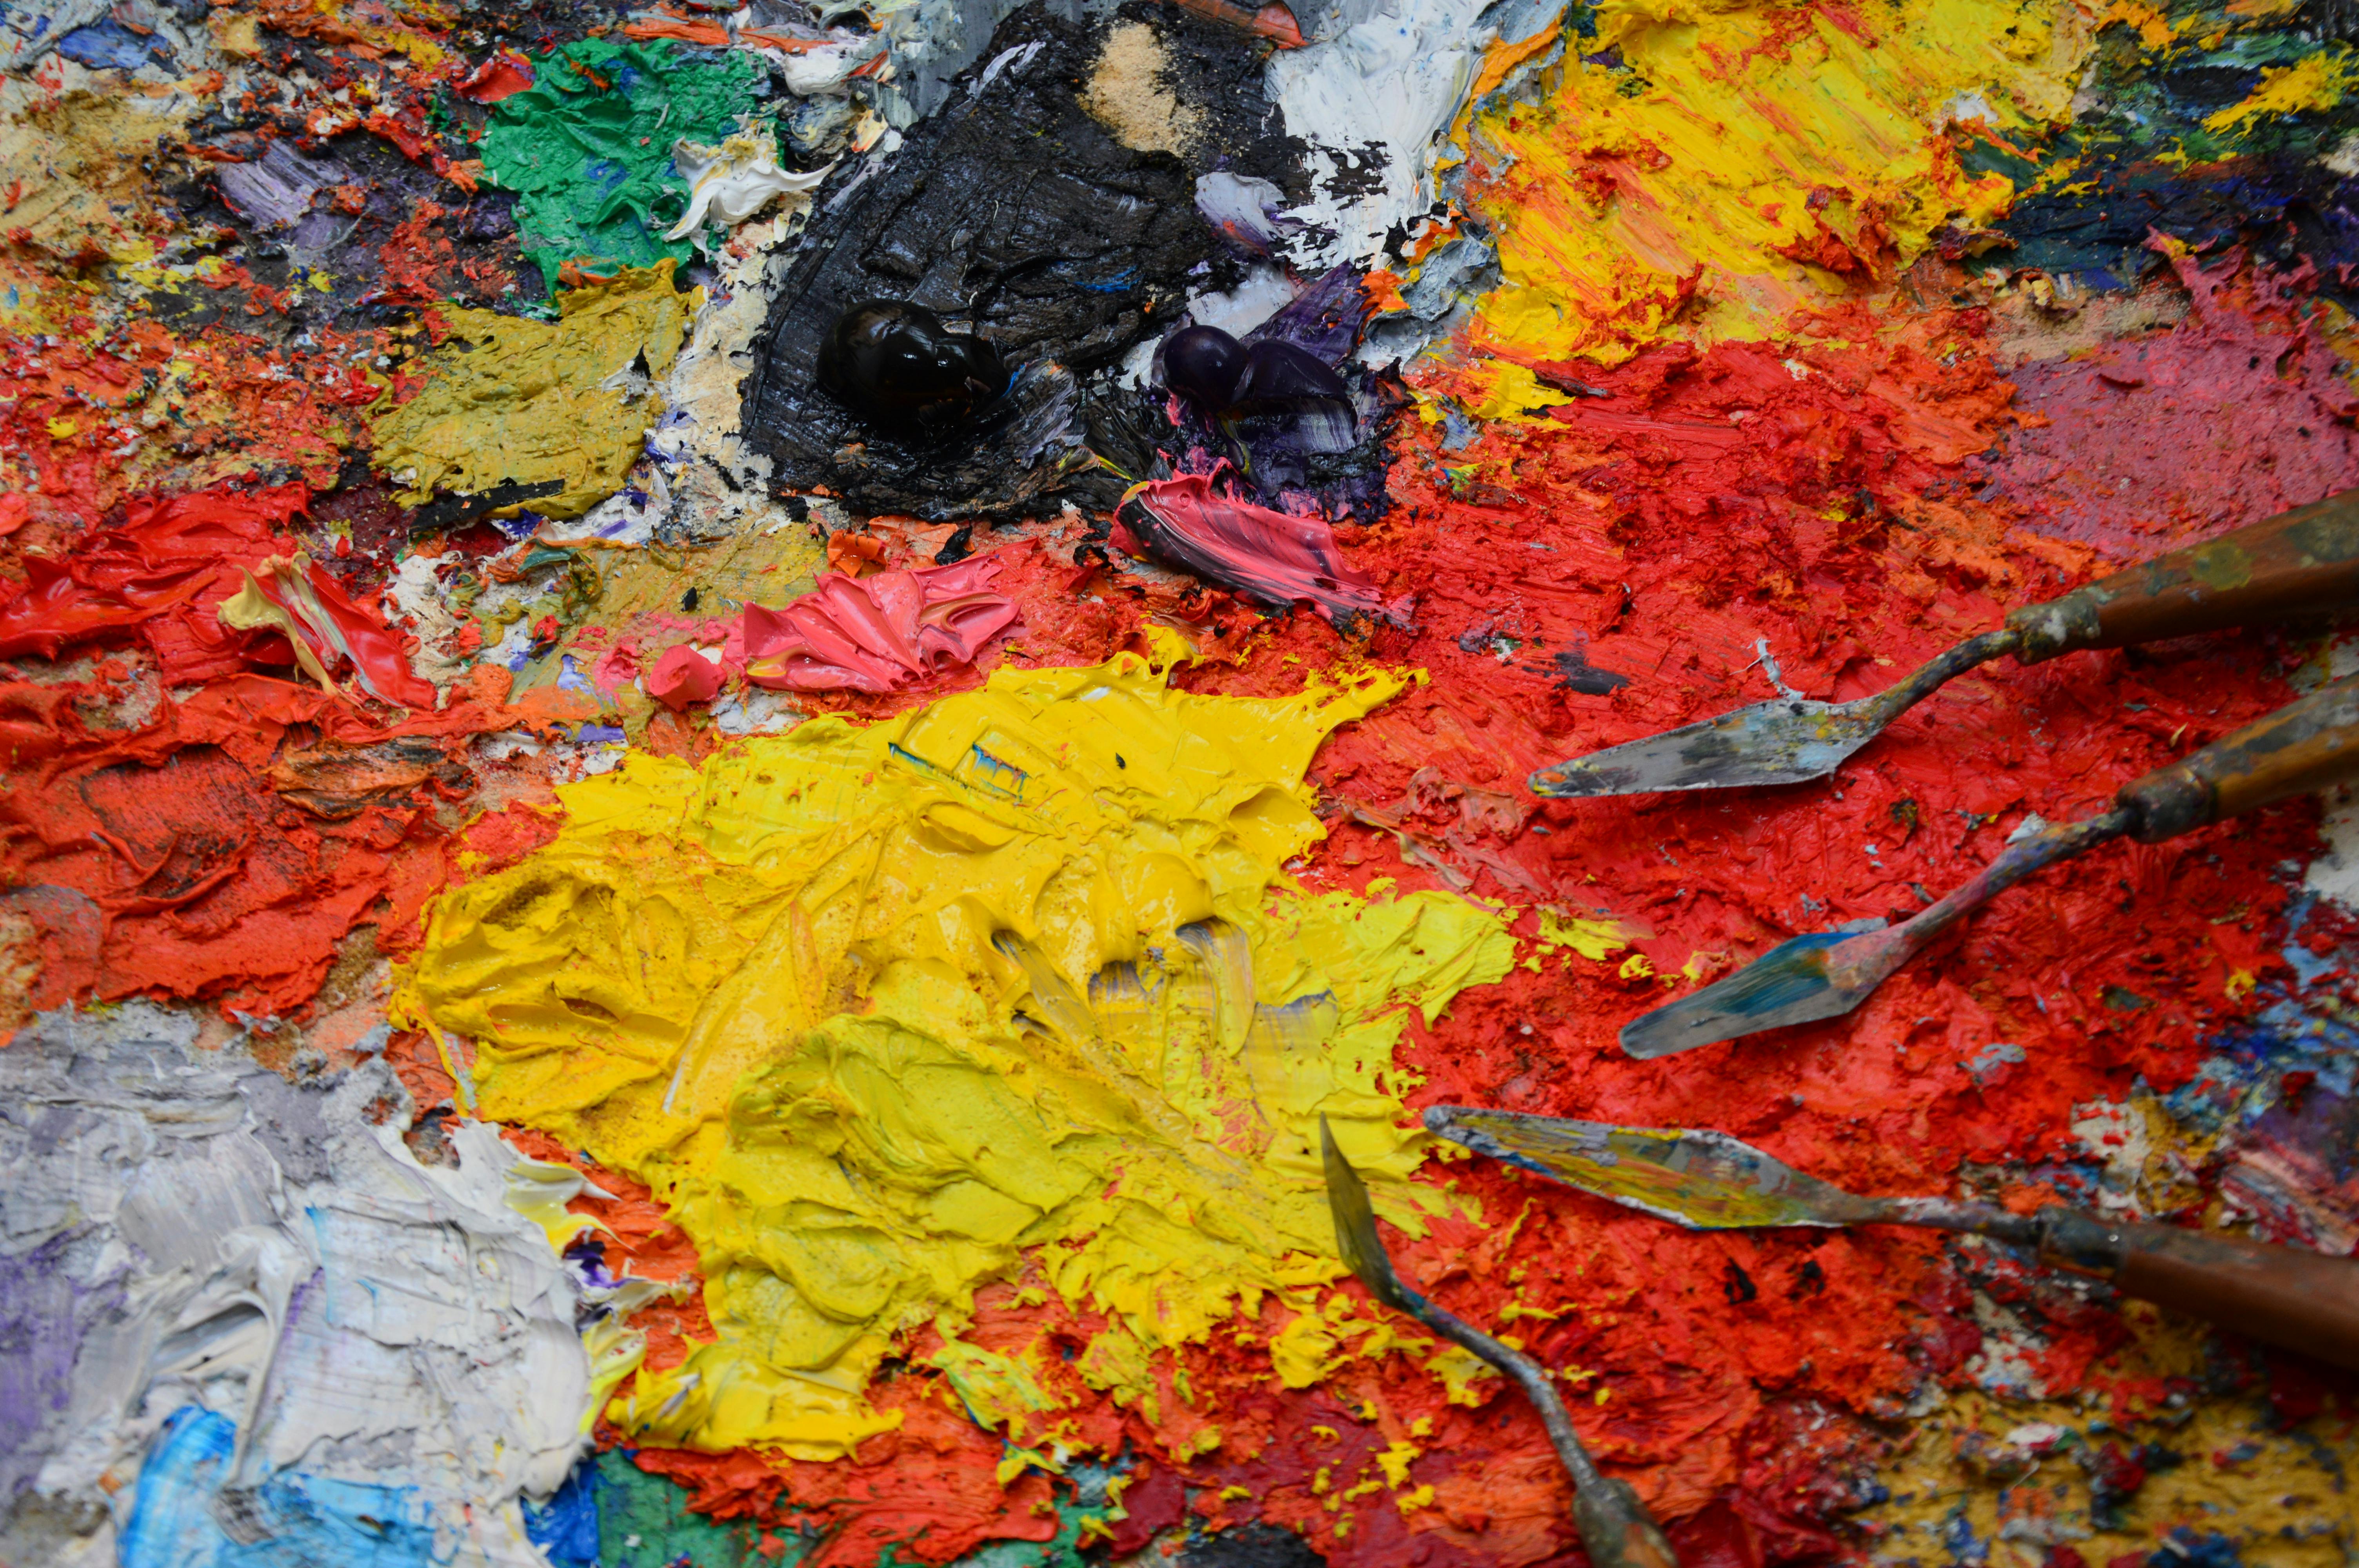
I have a profound love-hate relationship with beautiful, opaque storage boxes. You know the ones—those perfectly matched, matte black or linen-covered beauties that promise serene organization. They look amazing in styled photos, I'll give them that. But in my real-life studio, they're where ideas go to die a slow, dusty death. If I can't immediately see what's inside a container, I will, without fail, forget it exists.
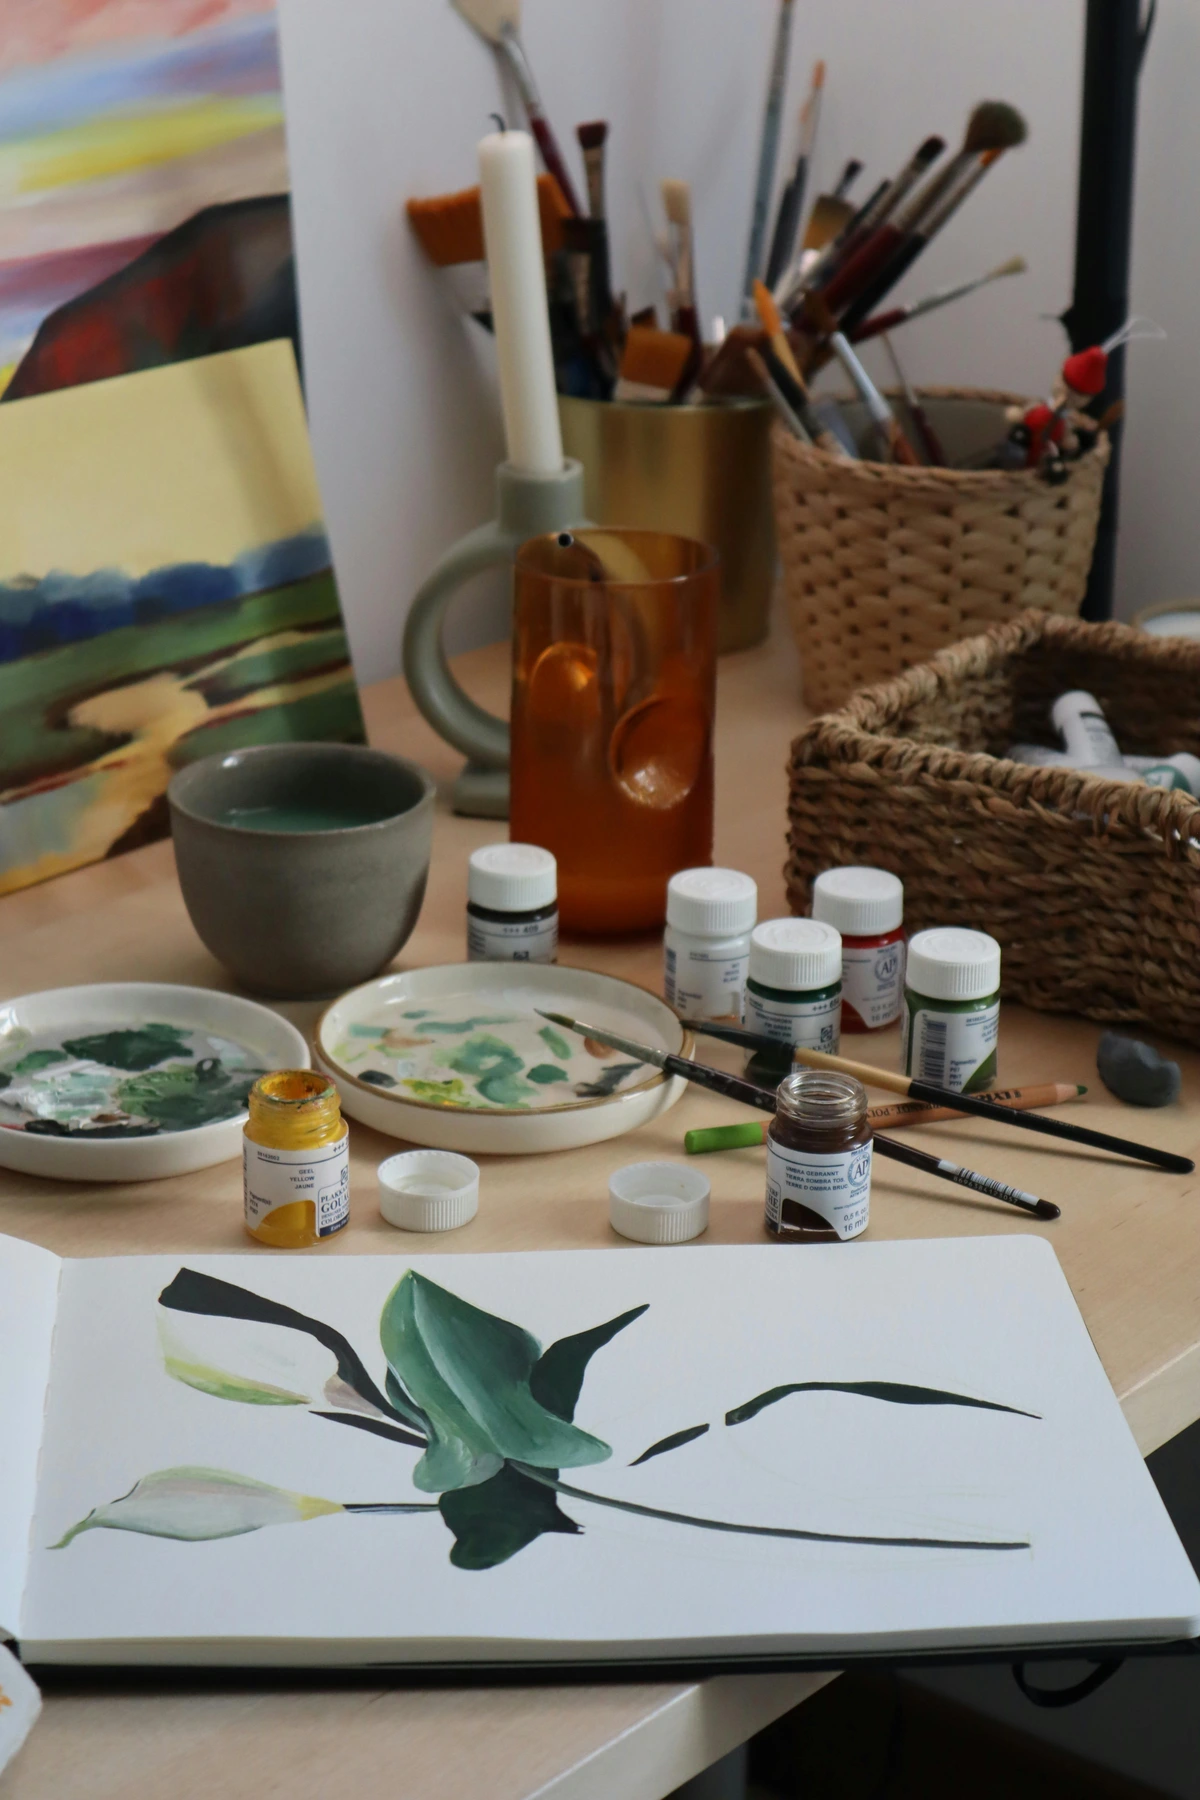
I learned this the hard way after finding three unopened sets of oil sticks I'd been 'saving' for a special project, only to realize I'd bought them three times over. Talk about a facepalm moment. Now, I use clear plastic bins, transparent drawers, and glass jars for almost everything. From tubes of paint to small bits of mixed media supplies, if it's visible, it's usable. It might not be as aesthetically pleasing as a Pinterest board, but it's brutally, beautifully effective at keeping my supplies in rotation and my budget intact. For even quicker retrieval, especially with smaller items or similar-looking materials, I use a simple label maker. Beyond just the item name, I sometimes add the purchase date (especially for mediums with a shelf life) or a color swatch for paints – a tiny dab of the actual color on the label itself is a game-changer for identifying that subtle tint of ochre. For custom mixes, I'll even add a small note about the ratio or primary colors used, along with the date of mixing, as some custom colors have a limited lifespan. This level of detail might seem obsessive, but a quick glance at 'Acrylic Glazing Medium, Opened 03/24' rather than trying to distinguish between three identical clear bottles saves precious mental energy and keeps my focus on the art, not the search. It's about front-loading the organization so your creative brain can run wild. It's about respecting your future self, ensuring that when inspiration strikes, you're not held back by the inability to find or identify a crucial tool or color.
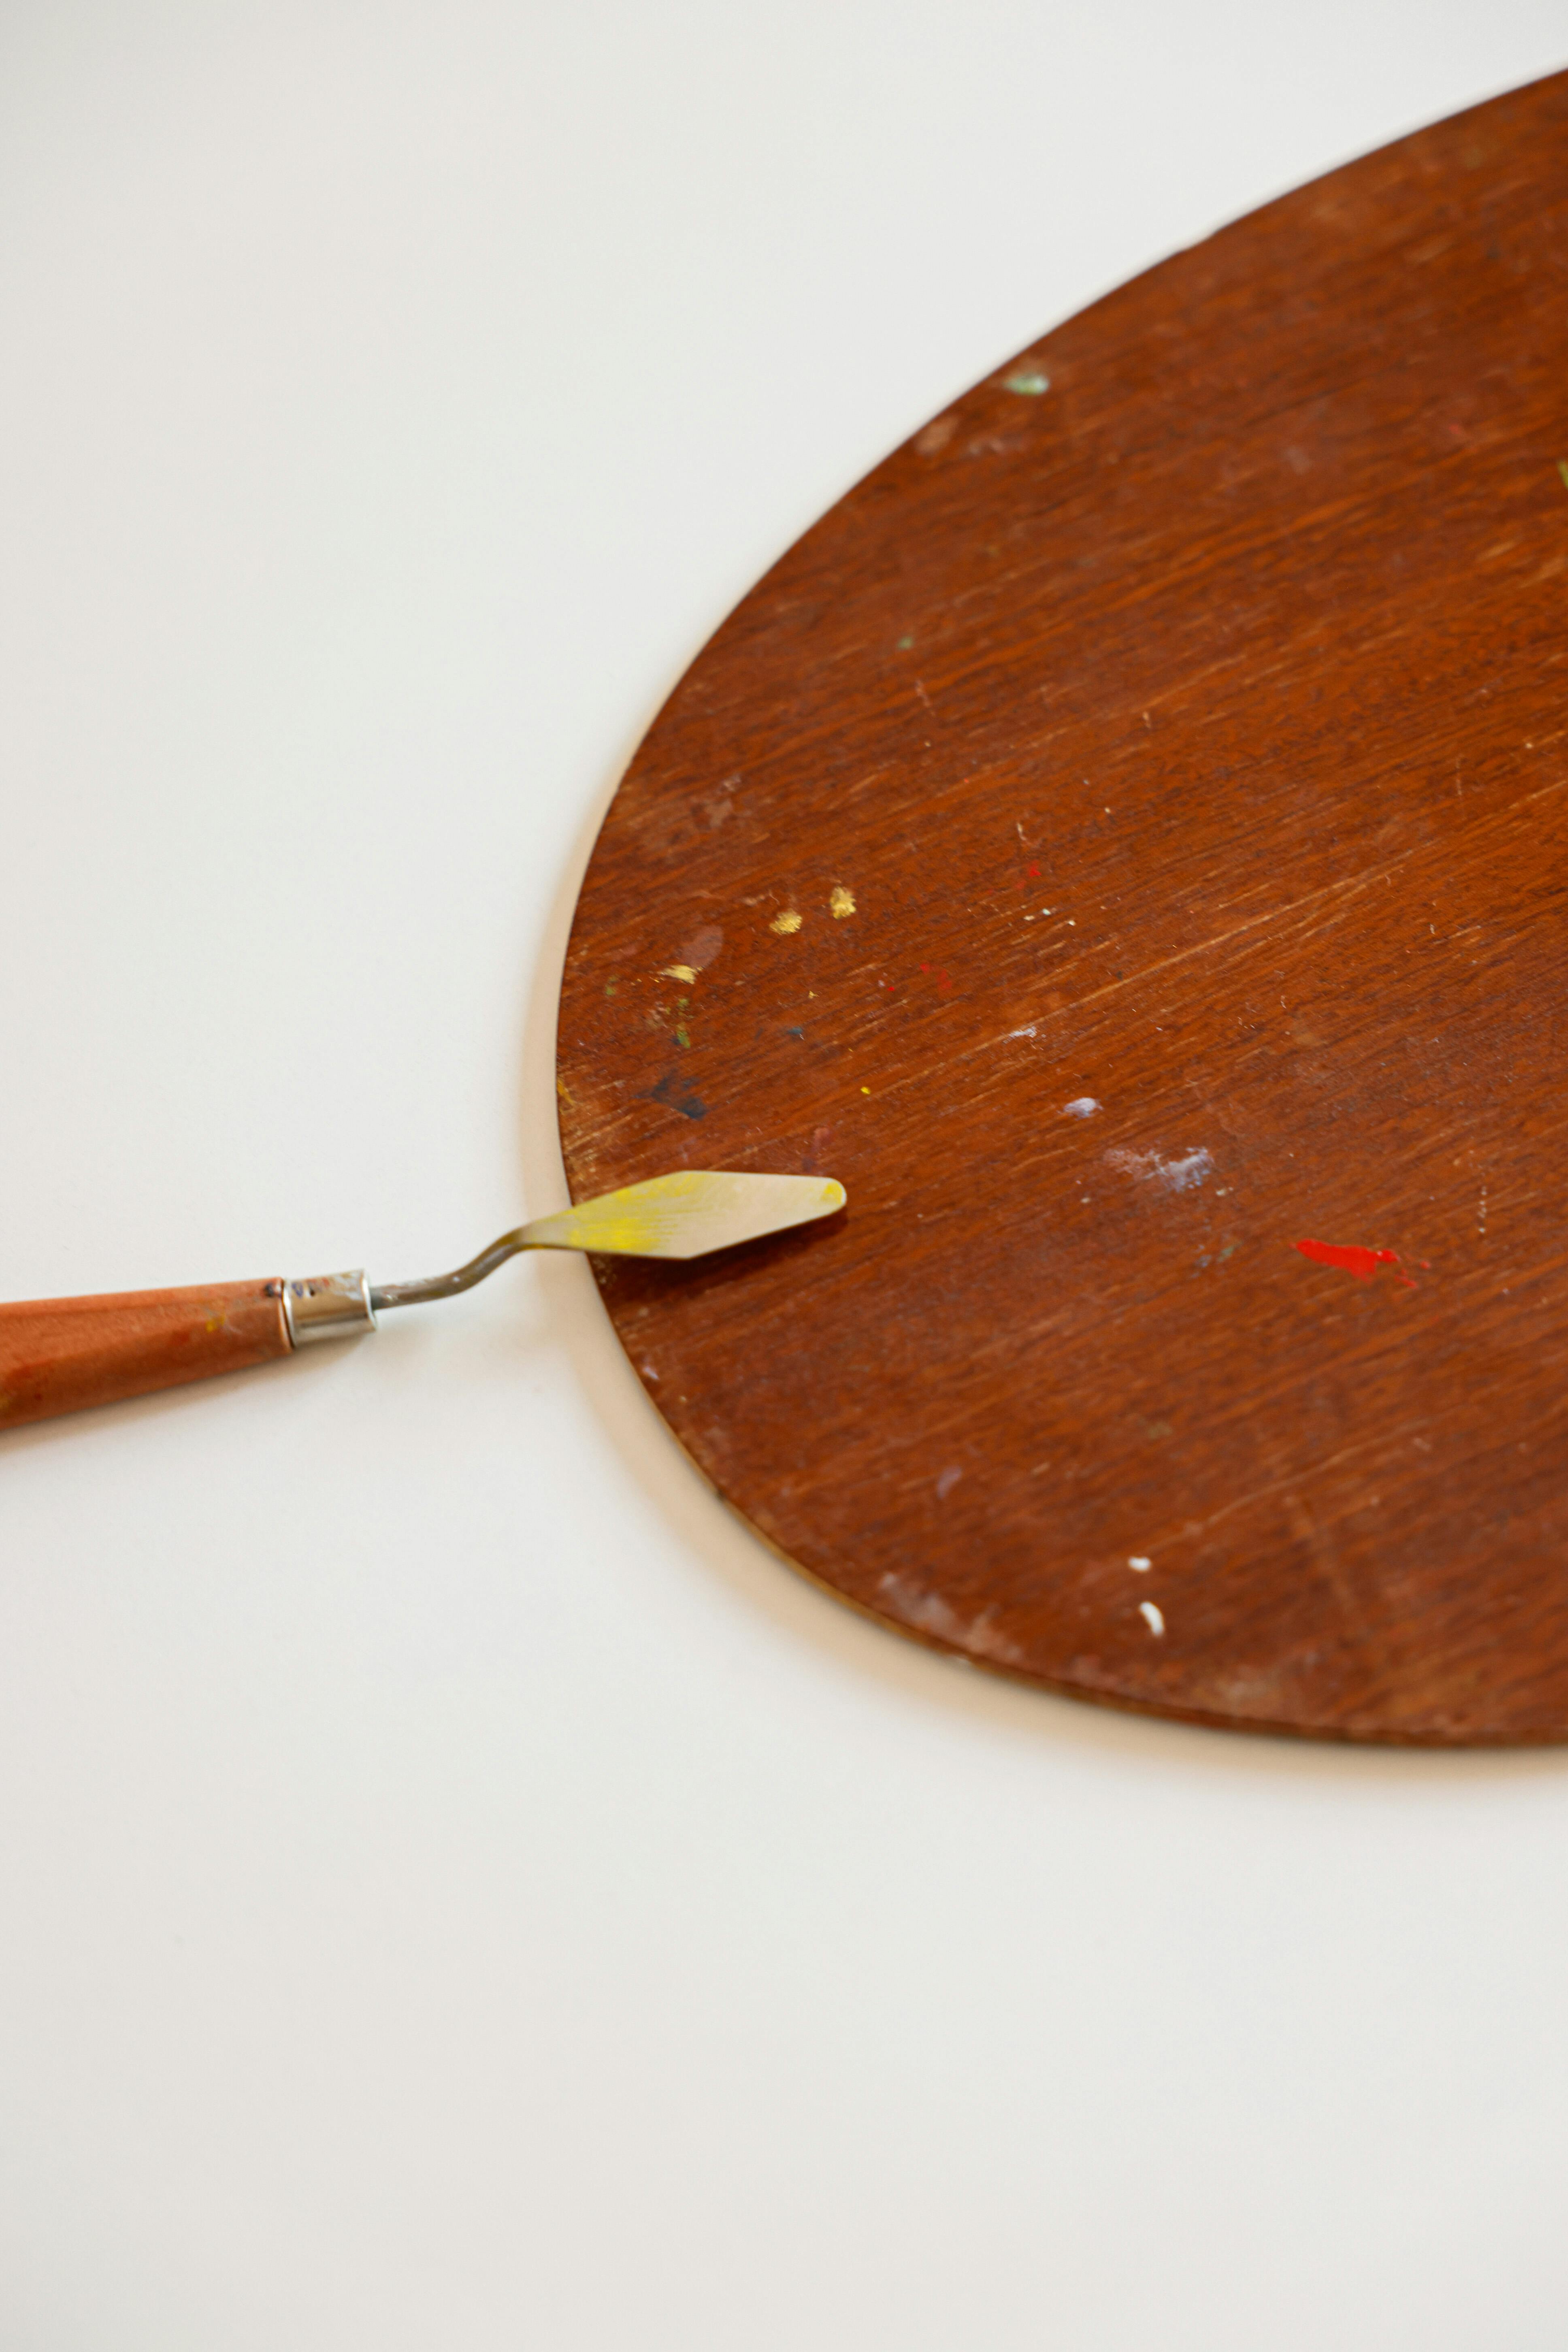
Ritualize Your Brush Cleaning
A jar full of pristine brushes, standing at attention, ready for their next creative mission, is a truly beautiful sight. A sink full of stiff, pigment-caked casualties, however, is a cry for help—and a sign of wasted money. I’ve found that the absolute best way to keep brushes clean and extend their lifespan is to make it a non-negotiable ritual at the end of every painting session.
For me, it's my 'closing ceremony'. I put on some music, maybe a podcast, and the act of carefully washing each brush signals to my brain that the active creative work is done for the day. It transforms what could be a chore into a meditative practice, a quiet winding down. This isn't just about cleanliness; it's about respecting your tools and preparing for tomorrow's inspiration. Different paints require different cleaning methods, and understanding these nuances is crucial. Acrylics might just need warm water and a gentle brush soap, ensuring no pigment remains near the ferrule. Oils often benefit from specific solvents and conditioners like odorless mineral spirits or a natural oil-based brush cleaner, followed by a thorough wash with soap and water. Watercolors, being water-soluble, usually clean up easily with water alone, but a gentle soap can help remove staining pigments. For particularly stubborn oil paint or dried acrylics, a dedicated brush cleaner or rejuvenator can work wonders, often saving seemingly ruined brushes. Knowing how to properly care for your best brushes for acrylic painting (or oils, or watercolors) is an investment in your artistic future, extending their lifespan and preserving their shape and spring. Consider specialized brush soaps like "The Master's Brush Cleaner and Preserver" for deep cleaning and conditioning, or an eco-friendly citrus-based brush cleaner as an alternative to harsher solvents.
To make it easier, here's a quick guide to brush cleaning by paint type:
Paint Type | Cleaning Method | Specific Tips & Products |
|---|---|---|
| Acrylics | Warm water & gentle brush soap (or dish soap). | Clean immediately before paint dries. Ensure pigment is completely removed from ferrule. Use a brush cleaner for dried paint. |
| Oils | Odorless mineral spirits or natural oil-based brush cleaner, then warm water & brush soap. | Gently squeeze out excess paint with a rag. Rinse thoroughly in solvent, then wash with soap until water runs clear. |
| Watercolors | Water alone (usually sufficient), gentle brush soap for staining pigments. | Rinse until water runs clear. Be gentle with delicate hairs. Avoid harsh scrubbing. |
| Gouache | Water alone, gentle brush soap for dried areas. | Similar to watercolor, but can dry faster. Don't let it dry completely on brushes. |
| Inks | Water for water-based inks; specific solvent for waterproof/acrylic inks. | Clean immediately after use to prevent clogging, especially for fine-liners and dip pens. |
Storing Your Clean Brushes
Once your brushes are sparkling clean, how you store them is equally important. I let them air dry completely, preferably bristles down (using a brush holder that allows this, or lying them flat on an absorbent cloth) to prevent water from seeping into the ferrule and loosening the glue. Gravity is your friend here! Once thoroughly dry, I stand them upright in jars, organized by type (e.g., flats, rounds, detail brushes), or store them flat in drawers or brush rolls. This keeps the bristles from getting bent, protects their delicate shape and ferrules, and allows for easy selection when the next wave of inspiration hits. For brushes used for travel or stored long-term, specialized brush cases or wraps offer extra protection against dust and accidental damage. For very fine detail brushes, consider storing them with brush guards to maintain their delicate points. And for those antique or cherished brushes, acid-free archival sleeves or boxes can ensure their longevity.
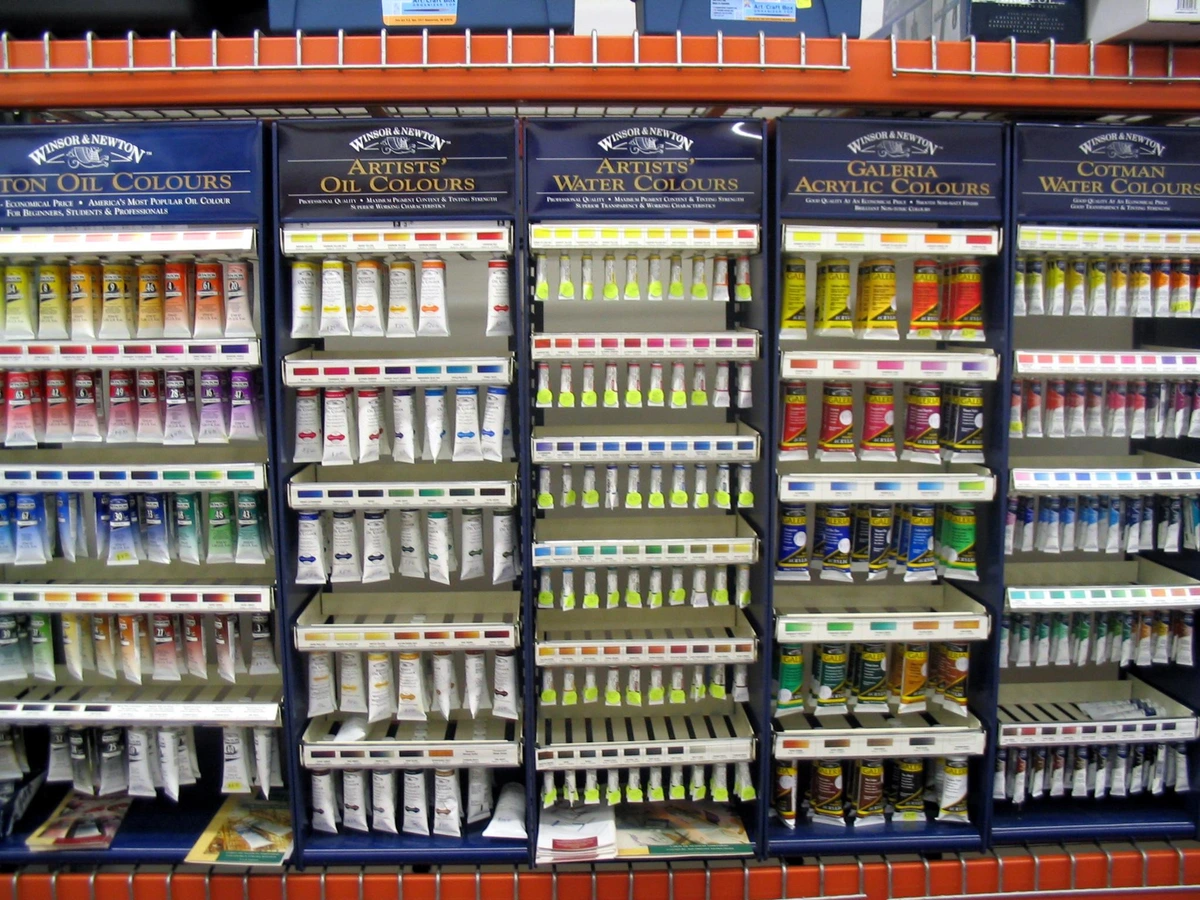
Paints and Mediums: Strategic Storage
Let's talk about the heart of many studios: paint. Whether you're a devotee of acrylics, oils, or watercolors, how you store them directly impacts their usability and longevity. I keep my most-used tubes of acrylics in a rolling cart (naturally!), organized by color family. This makes grabbing a specific shade incredibly efficient. For larger bottles of mediums or pigments, I use clear, stackable bins on shelves.

- Tubes: Store them horizontally or upside down (cap facing up) to prevent air from drying out the paint near the opening.
- Jars/Bottles: Keep lids tightly sealed. Consider airtight containers for opened mediums or pre-mixed custom colors.
- Palettes: For oil painters, covering your palette with plastic wrap can keep paint workable for days. Acrylic palettes are best cleaned immediately. For some deep dive, check out this guide on paint types.
Paint Type | Ideal Storage Conditions | Specific Tips |
|---|---|---|
| Acrylics | Cool, dry, dark place. Avoid freezing. | Keep tubes/jars tightly sealed to prevent drying. Store tubes horizontally to prevent pigment separation. |
| Oils | Cool, dark place, consistent temperature. | Tightly cap tubes to prevent air exposure and oxidation. Consider glass jars for opened, custom-mixed colors, covering with plastic wrap and an inert gas (like argon) if storing for extended periods. Protect from light to prevent yellowing of certain pigments. |
| Watercolors | Dry environment, protect from humidity. | Pans should be allowed to dry completely before closing kits to prevent mold. Tubes should be tightly capped. |
| Gouache | Cool, dry place. Protect from air exposure. | Keep tubes tightly capped. For pans, re-wetting is possible, but extreme drying can affect consistency and opacity. |
| Inks | Cool, dark place. Tightly sealed. | Prevent evaporation and contamination. Store bottles upright and avoid direct sunlight. For dip pen inks, ensure nibs are clean before storing to prevent clogging. |
| Pastels | Flat, in covered trays or drawers, with glassine paper or foam inserts between layers. | Avoid humidity, which can make them sticky, and protect from breakage and excessive smudging. Store by color family for easy access, ensuring no direct pressure on delicate sticks. |
For artists working with specific mediums, such as exploring oil sticks for expressive mark-making, understanding how to preserve these unique tools is just as vital as organizing your traditional tubes. Each type of paint and medium comes with its own quirks and requirements, and a little forethought in storage can save you a lot of heartache (and money!) in the long run.

Drawing & Dry Media: Keeping Your Mark-Making Tools Ready
Beyond paints, our pencils, pastels, charcoals, and markers are the bedrock of countless ideas. Keeping them organized is about protecting delicate tips, preventing smudges, and ensuring every shade is at your fingertips when inspiration strikes, like a well-stocked mental library. It’s about cultivating immediate access to your entire expressive vocabulary.
- Pencils (Colored & Graphite): I store mine in dedicated pencil cases or desk organizers, often separated by hardness or color family. This prevents tips from breaking and makes finding that perfect 6B graphite or forest green colored pencil a breeze. For my favorite Prismacolor pencils, I even keep the original tins as they're great for organized, flat storage, and protect against breakage. Consider magnetic strips on your desk for frequently used pencils or small tools.
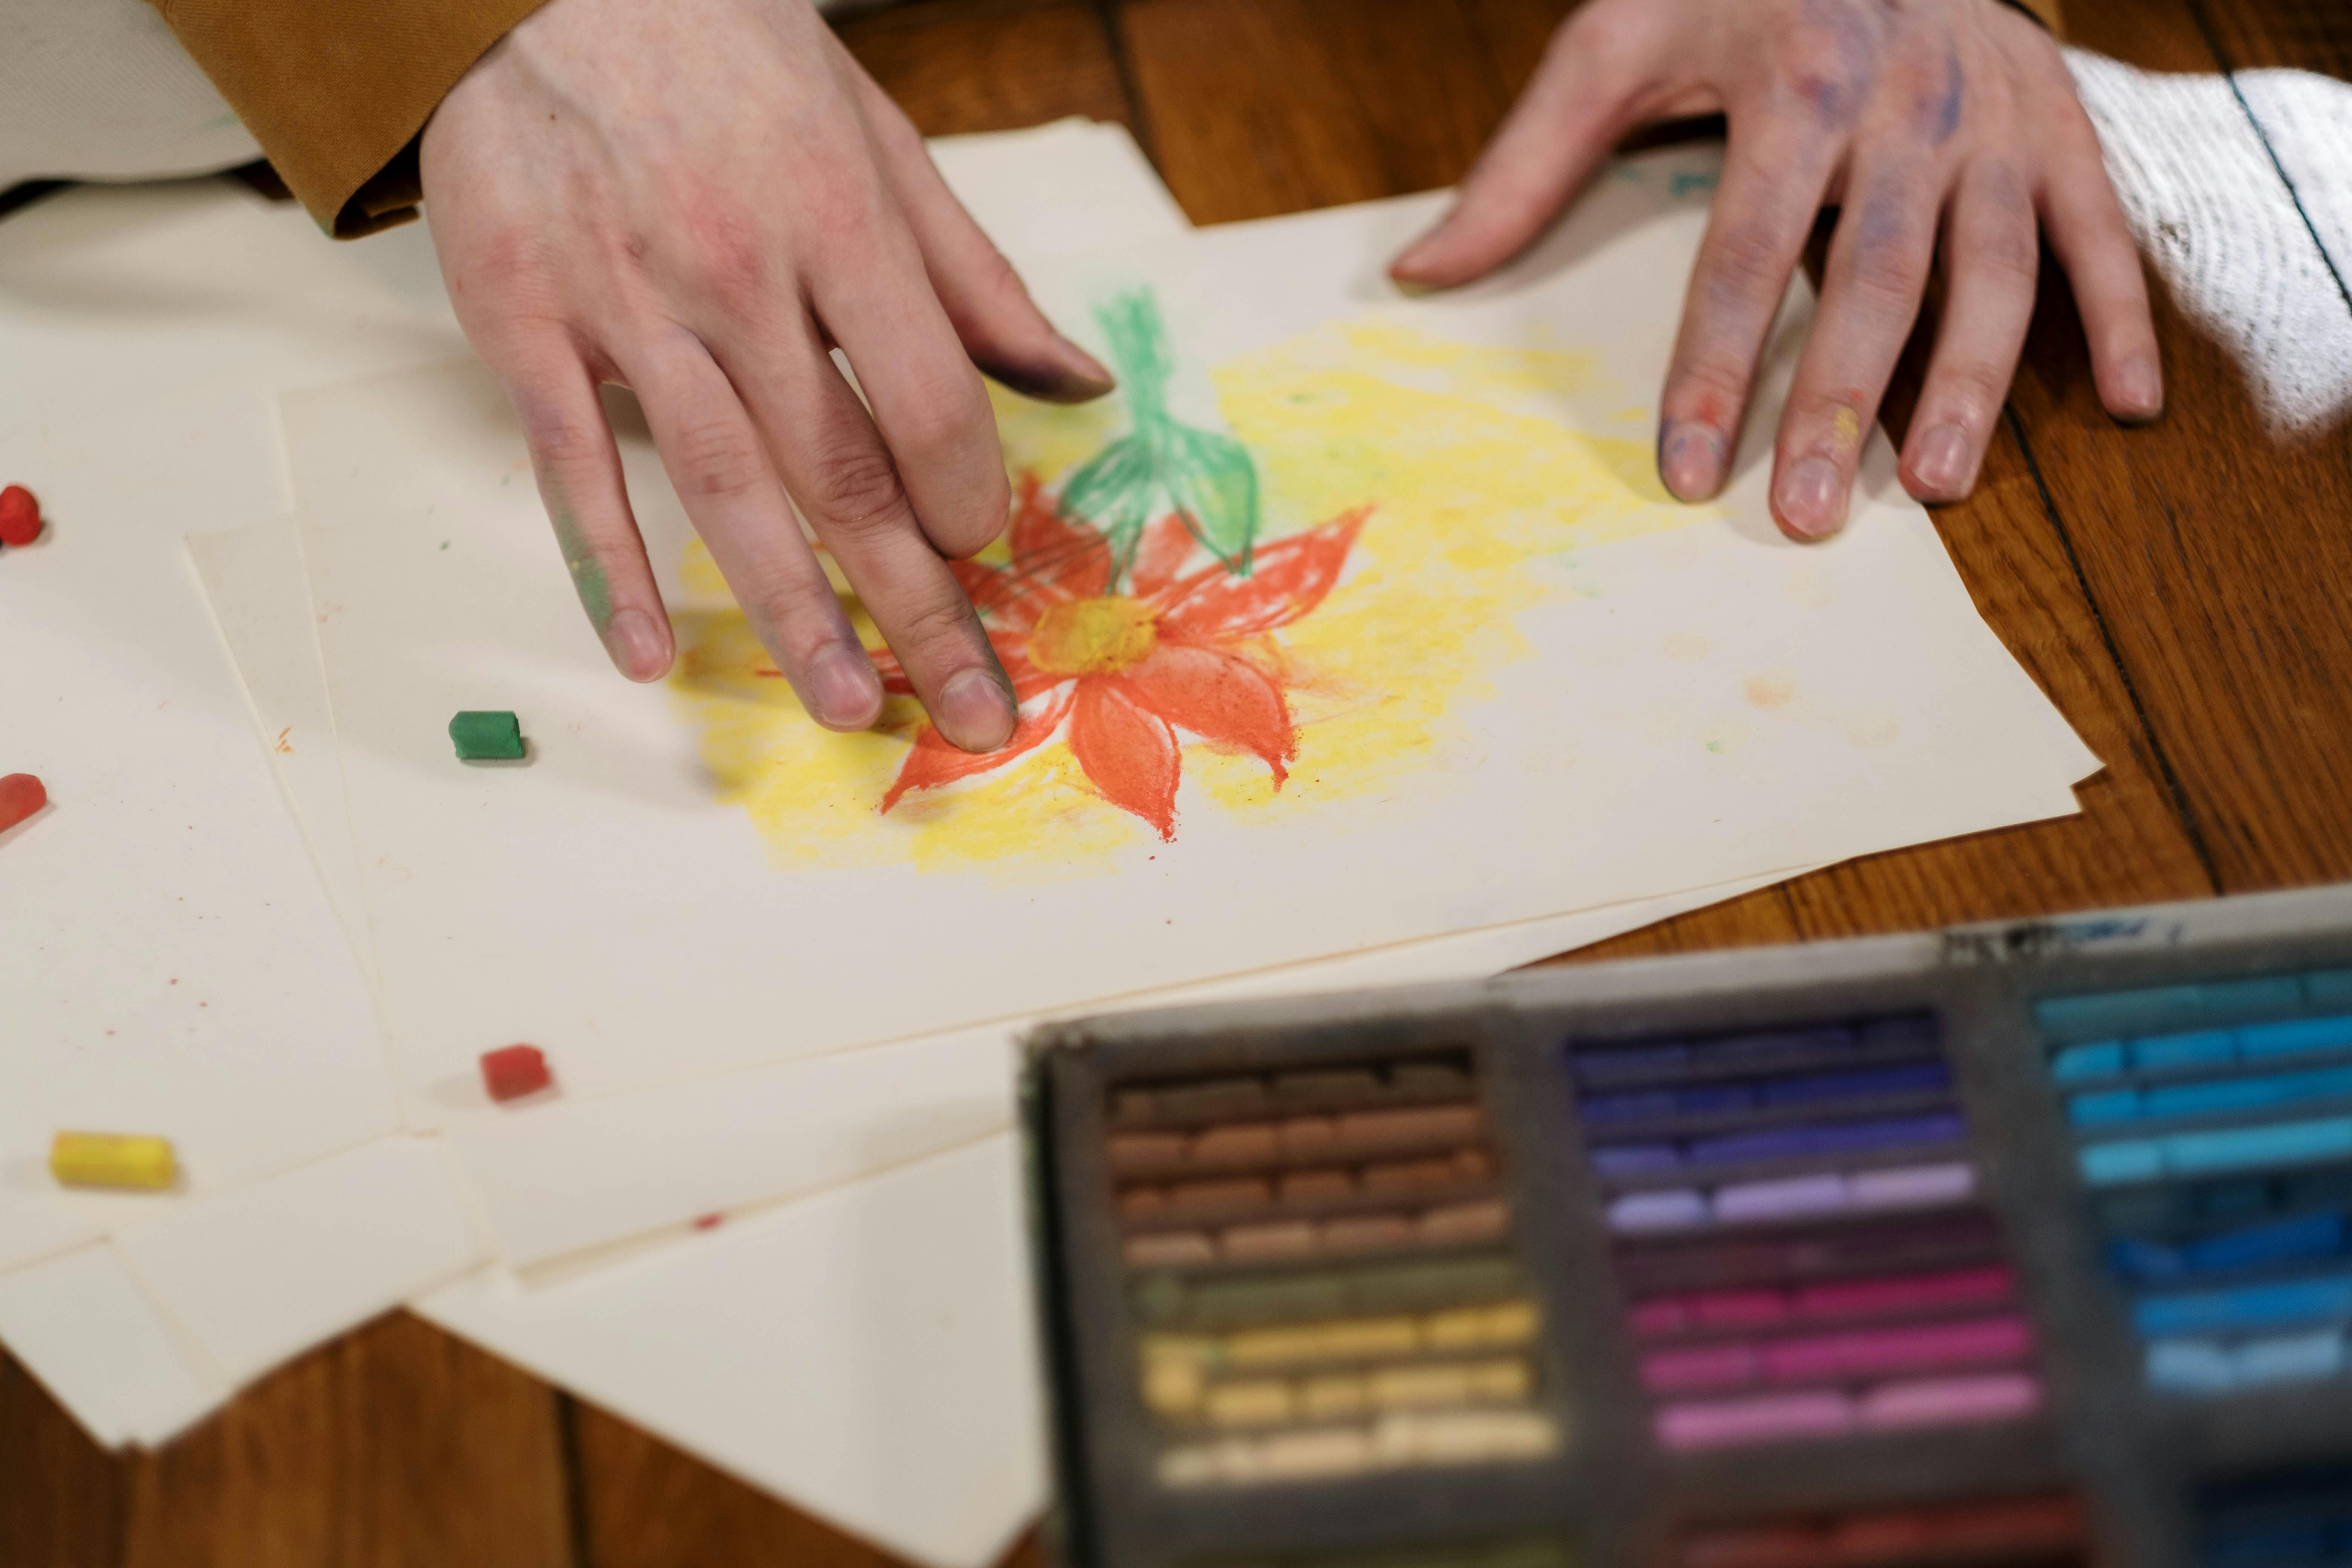
- Charcoals & Pastels: These are notoriously messy, but their expressive power is unmatched. I store mine flat in shallow drawers or lidded boxes, often with glassine paper between layers to prevent smudging and breakage, and to contain the dust. Specialized pastel boxes with foam inserts are fantastic for protecting delicate sticks, ensuring they don't crumble into a rainbow of unusable dust. Organizing them by color (for pastels) or hardness (for charcoal) saves so much time when you're in the zone. Remember to protect completed charcoal or pastel drawings with a fixative before storing or stacking! For detailed insights, check out my guide on best paper for charcoal drawing and what is pastel painting.
- Markers & Pens: I keep mine upright, tip down for alcohol-based markers (to keep the ink flowing and prevent drying), in clear containers. Organizing by color makes selection instant. For archival pens, ensure they are stored horizontally to prevent ink from pooling at one end. For essential calligraphy pens, specialized cases protect delicate nibs.


Paper & Canvas: Flat, Vertical, and Protected
Paper and canvas, the very foundations of so much art, are surprisingly vulnerable to damage if not stored correctly. Wrinkles, creases, and warping are the enemy.
- Paper: For larger sheets, flat files are a godsend. If that's not an option, store them rolled in sturdy tubes, but ideally flat. Smaller pads and individual sheets go into clear plastic sleeves or archival boxes, organized by weight, texture, or intended use. For delicate papers or best watercolor paper for artists, always use acid-free archival storage to prevent yellowing or degradation over time.
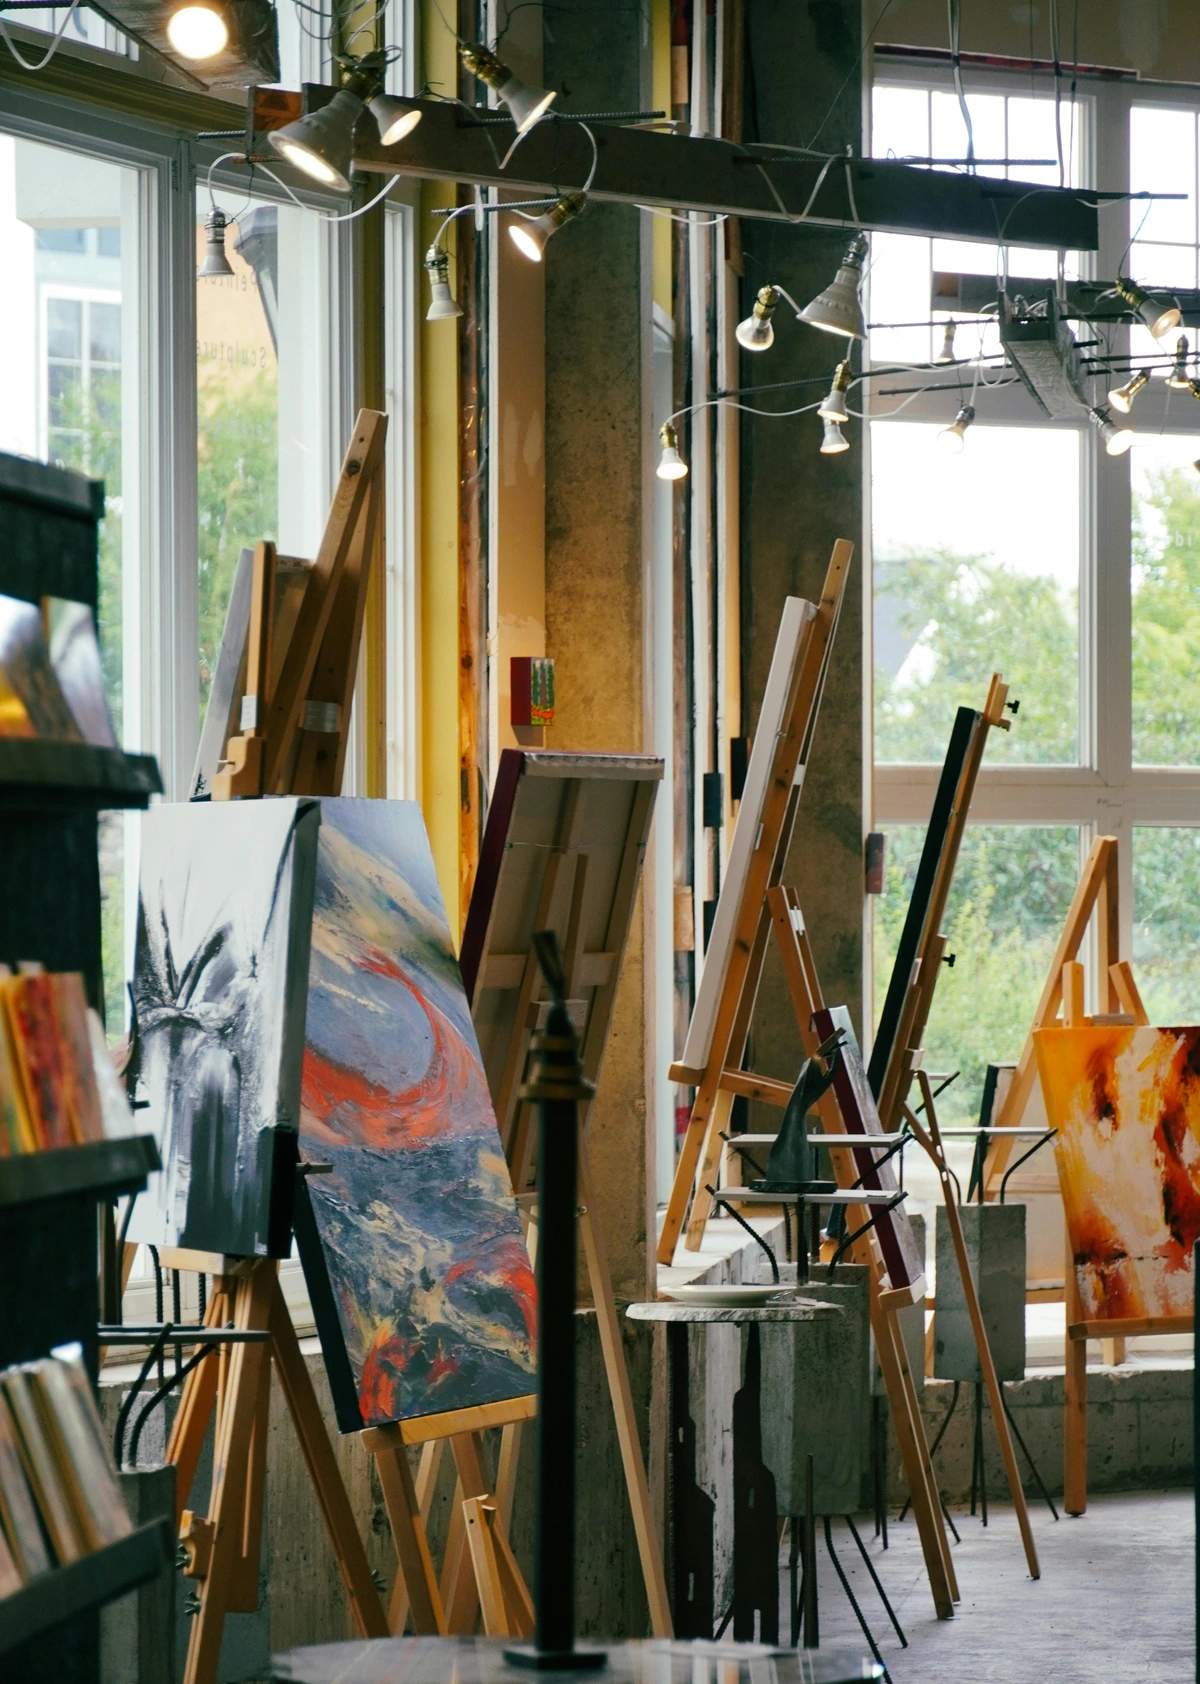
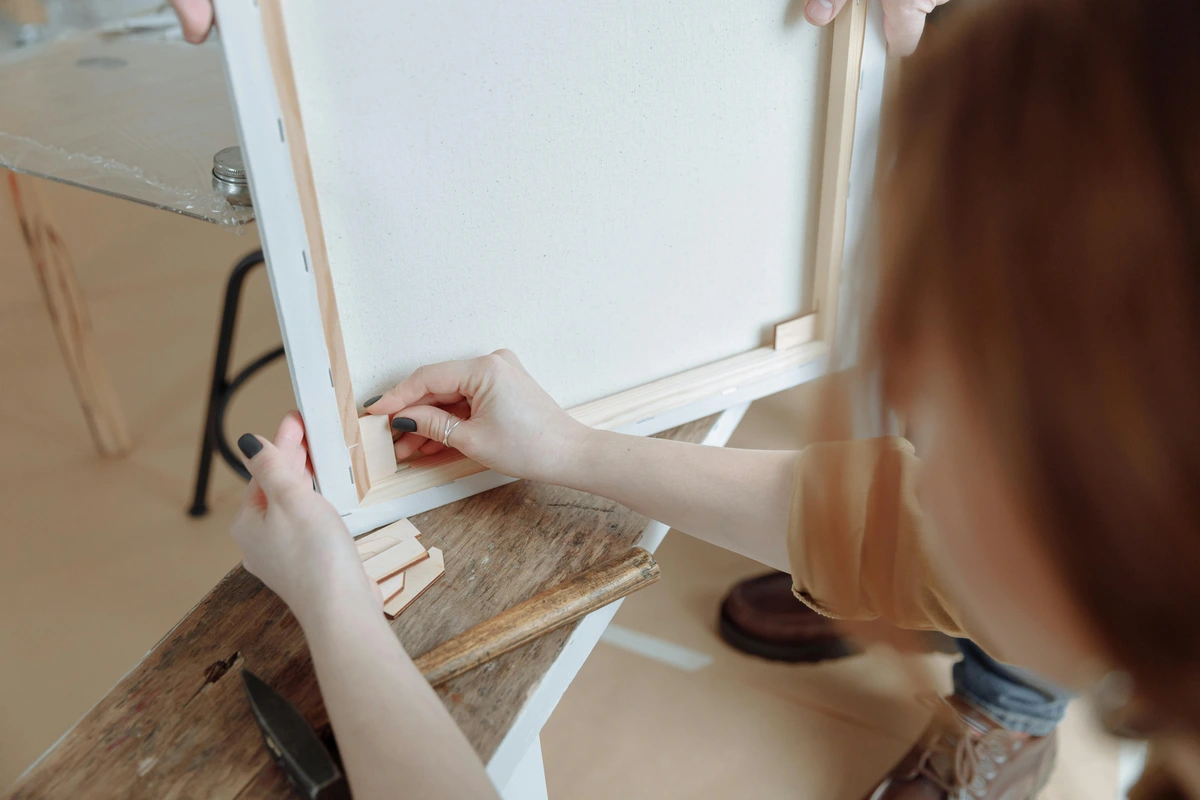
- Canvases (Blank & Stretched): Unstretched canvas rolls need to be kept from creasing and stored in their original packaging or covered to prevent dust accumulation. Stretched canvases, especially finished works, thrive in vertical slotted racks. Think of it like a library for your paintings. This protects the surface from accidental damage and uses vertical space efficiently. For works-in-progress, ensure they are stored where they won't get bumped or gather dust, ideally with temporary protective covers. Beyond canvases, remember mat boards, framing materials, and finished prints. I use flat archival boxes for smaller prints and acid-free portfolios for larger ones, ensuring they're protected from light, dust, and physical damage. Look for acid-free tissue paper or glassine sheets to separate individual prints. Having a dedicated, clean, and easily accessible space for these preparatory and finished components simplifies the entire process, especially when preparing for an exhibition or shipping to a client, saving you frantic last-minute searches and potential damage. For guidance on creating frames, a guide to building a floating frame for canvas art can be incredibly useful.
The Wall of Ideas (and Other Lies I Tell Myself)
Every studio needs a brain—a place to pin up inspiration, color swatches, scribbled notes, and half-baked ideas. For me, that's a massive cork board in my 'Library/Thinking Zone'. It's a living document of my current obsessions, a visual symphony of textures, colors, and concepts that I'm wrestling with. Sometimes, I even create mini gallery walls of small studies or reference photos. For me, the 'wall of ideas' isn't just passive viewing; I physically interact with it. I'll move pieces around, layer new bits of ephemera, or even add a splash of paint to a corner, treating it as a dynamic, evolving canvas in itself. It's a dialogue, not a monologue.
But let's be real: it's also a wall of procrastination. I've caught myself spending an hour meticulously rearranging torn magazine pages when I should be painting. It feels like work, but it's really just avoiding the terror of the blank canvas. I've learned to accept this human quirk. Now, I give myself a strict 10-minute timer to fiddle with the board, and then it's time to actually paint. Giving the procrastination a name and a time limit takes away its power. It’s a part of the artistic process, not a failing. It’s simply a warm-up.
This "wall of ideas" isn't just physical anymore, either. I maintain digital mood boards and folders for online inspiration, categorizing images, articles, and even sounds that spark something. Tools like Pinterest are invaluable here, allowing for visual curation and easy access to a vast ocean of ideas. But the key is to not let digital accumulation become another form of clutter; regularly curate these resources, deleting anything that no longer resonates, ensuring they remain an active wellspring of inspiration, not a stagnant swamp. Think of it as pruning a garden; you remove the dead leaves so the vibrant flowers can truly bloom, making space for new ideas to take root. The goal is to have these resources organized in a way that allows for quick retrieval and sparks genuine creative action when that elusive muse finally calls. It's all part of cultivating creativity, nurturing both the tangible and intangible aspects of your artistic journey. I often find myself creating different digital boards for various series or themes I'm exploring, almost like a separate 'Library/Thinking Zone' in the cloud.
The 'Reset' Ritual: Why I Don't Tidy Up Daily
Forcing myself to do a full studio clean-up every single day was a recipe for burnout. I would end a great session, full of creative energy, and then kill the vibe by spending an hour scrubbing and sorting. It felt like a punishment for being productive, a tax on my inspiration. That kind of self-imposed pressure is a sure-fire way to dampen your creative process.
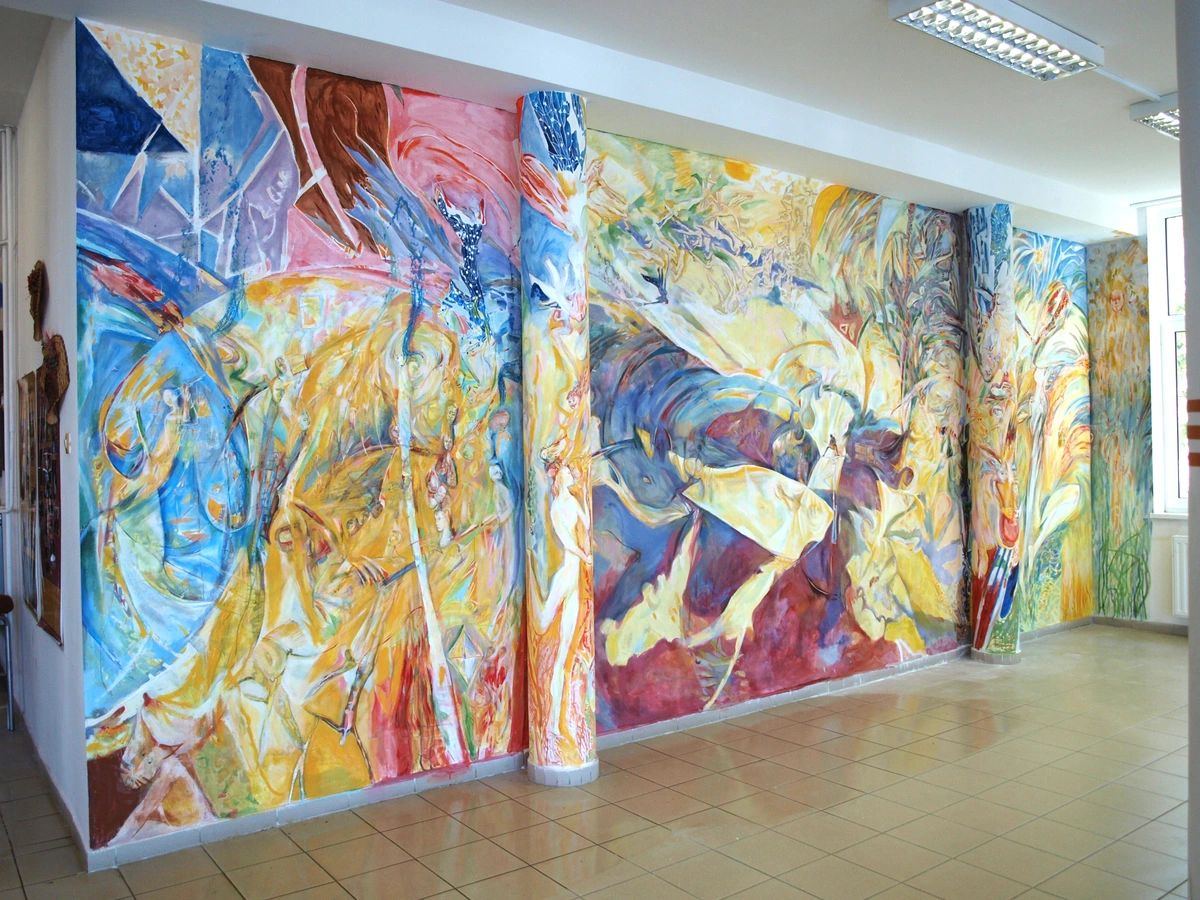
Now, I do a proper 'reset' at the end of each week, or at the natural conclusion of a large project. This isn't just a tidy-up; it's a deeper clean. I wipe down surfaces, sweep the floor, put away supplies that have inevitably migrated between zones, and organize my finished pieces. Some of these eventually make their way to shows, like the one I had at the Den Bosch Museum, or become available for you to /buy.
This weekly reset means I can tolerate a certain level of 'working mess' during the week without letting it slide into true chaos. It gives me permission to be messy while I'm in the thick of it, knowing there's a dedicated time to bring order back. It’s a sustainable rhythm that respects both the need for creative freedom and the absolute necessity of a functional, inspiring space. I've found that breaking down the "reset" into different levels helps maintain this balance without feeling overwhelmed:
- The Mini-Reset (15-Minute Flow-Saver): This happens mid-week, or whenever I feel things are getting just a bit too unruly. It's a quick tidy-up: putting away the most glaring offenders, clearing a crucial work surface, sweeping up the most egregious paint flakes. It's about clearing mental space to keep the momentum going.
- The Weekly Reset (Focused Re-calibration): At the end of each week, or the natural conclusion of a large project, this is a more thorough clean. Wiping down main surfaces, reorganizing current projects, taking out the trash, and returning misplaced items to their zones. It's a focused session to bring order back to the 'working mess' and prep for the next week's creative adventures.
- The Seasonal Deep Clean (The Grand Overhaul): This is a true studio overhaul that feels like hitting the refresh button on your entire creative environment. It involves wiping down shelves, vacuuming thoroughly, rotating supplies, checking expiration dates on mediums, taking inventory of materials, and perhaps even minor repairs. Some of these eventually make their way to shows, like the one I had at the Den Bosch Museum, or become available for you to /buy.
This layered approach ensures that my studio is always ready for creation, without becoming another source of stress or an overwhelming chore. It allows for intentional periods of productive mess, followed by intentional periods of restorative order.
Beyond Physical Organization: Digital & Mental Space
We often focus on the tangible—the paints, the brushes, the canvases. But in today's world, our creative space extends beyond the physical walls of the studio. It encompasses our digital files, our online inspiration, and, most crucially, our mental landscape. Neglecting these areas can create just as much creative friction as a pile of unwashed brushes.
Digital Decluttering: Taming the Tangent Tabs and Files
Hands up if you have 50 tabs open and a desktop wallpapered with screenshots of "inspiration." (My hand is definitely up.) Digital clutter can be as paralyzing as physical clutter. I've learned that a clean digital workspace is vital for maintaining focus and finding reference material quickly.
- Organized Folders: Create clear folder structures for projects, reference images, experiments, and finished work. And crucially, adopt consistent naming conventions for your files. This is a big one. 'IMG_0023.jpg' tells you nothing. 'Abstract_Series_Eclipse_Sketch_01.jpg' tells everything. Think about keywords you'd use to search for it later – include project names, dates, and key descriptors. It's a small habit, but it saves hours of frustration down the line when you're searching for that one specific sketch from two years ago. This mindful approach to digital naming is as vital as labeling your physical paint tubes and can even feed into your visual storytelling techniques in narrative art if you organize your concepts.
- Cloud Storage: Back up everything! Seriously, this is non-negotiable. I use a multi-tiered approach: local external hard drives for immediate backups, and cloud services (like Google Drive or Dropbox) for off-site redundancy and easy access from any device. Imagine losing years of sketches or finished scans—it's a nightmare scenario that proper backup can prevent. Cloud storage also allows for seamless access to files from anywhere, fostering flexibility in your creative environment, whether you're working from your studio or on the go. Regularly test your backups to ensure data integrity – there’s nothing worse than thinking you’re backed up only to find corrupted files when you need them most.
- Digital Mood Boards: Tools like Pinterest or even simple image folders can be powerful, but curate them regularly. Delete anything that no longer resonates or clutters your vision. Embrace the fact that your digital art practice also needs organization, just like your physical space. Think of it as a living, evolving visual library, not a digital dumping ground.

Cultivating a Creative Mindset: The Inner Studio
Ultimately, the most important space to organize is inside your head. No amount of perfectly aligned paint tubes will help if your mind is a whirlwind of self-doubt or procrastination. This is where ritual and intention come into play, echoing my 'Reset' philosophy.
- Morning Rituals: A consistent start to the day can set a powerful tone. For me, it's often coffee, a short walk, and 15 minutes of journaling before stepping into the studio. This is how I cultivate my creative journey.
- Scheduled Breaks: It sounds counter-intuitive, but stepping away from your work is as important as stepping into it. These breaks allow for mental percolation and prevent burnout. I often incorporate simple mindfulness exercises, like a few minutes of focused breathing, or a short walk to shift my perspective. It's like pressing the 'reset' button on your brain. The goal isn't just to rest your body, but to allow your subconscious to process ideas, often leading to breakthroughs when you least expect them. Consider short guided meditations, progressive muscle relaxation, or simply stepping outside to observe nature for five minutes. These mini-breaks are powerful tools for preventing creative fatigue and fostering mental clarity, ensuring your creative wellspring never runs dry.
- Protect Your Time: Treat your creative time as sacred. Minimize distractions. Silence notifications. Close irrelevant tabs. It's about building boundaries to nurture your inner world, creating a mental sanctuary for your artistic endeavors.
- Cultivating a Sense of Play and Experimentation: One of the greatest dangers of an overly rigid organizational system is that it can stifle spontaneity and play. My studio might be organized for efficiency, but it's also a laboratory for joyful experimentation. I always keep a 'play zone' (even if it's just a corner of my wet zone) dedicated to low-stakes messing around. This is where I test new mediums, try out wild color combinations, or simply make marks without any pressure of a 'finished' piece. It's permission to fail, to explore, and to rediscover the sheer delight of creating without a goal. This concept is crucial for keeping the creative spark alive, reminding you why you started making art in the first place. It allows for the freedom that is vital for finding my voice: the evolution of my abstract artistic style. Sometimes, the biggest breakthroughs come from the least planned moments, from simply allowing yourself to be curious.
The Unseen Hand: Music & Sound in the Studio
It might not be a physical object to organize, but the soundscape of your studio is a critical component of your creative environment. For me, music is often the unseen hand that guides my brush, a rhythmic anchor that helps me find and sustain my flow.
- Curated Playlists: I have different playlists for different moods or stages of my work. Upbeat electronic music for initial energetic mark-making, ambient soundscapes for focused detail work, or instrumental jazz when I need improvisation and fluidity.
- Podcasts & Audiobooks: Sometimes, when the work is more repetitive or physical (like stretching canvases), I'll dive into an interesting podcast or audiobook. This keeps my mind engaged without demanding visual attention.
- Silence: Don't underestimate the power of pure silence. Occasionally, turning off all external sound allows for deep internal listening, helping me connect with the nascent ideas swirling within. It's a space for introspection, crucial for truly original thought.
A mindful approach to your studio's auditory environment can significantly enhance your creative output and overall well-being.
Safety First: A Non-Negotiable Aspect of Organization
This isn't the most glamorous part of studio talk, but it's arguably the most important. A truly functional studio is a safe studio. I've had my share of close calls with solvents and sharp objects, and I'm here to tell you that prevention is far better than a trip to the emergency room. Always keep a well-stocked first-aid kit readily accessible, and ensure you know where the nearest fire extinguisher is and how to use it. Knowing basic emergency procedures can make all the difference. Beyond immediate first aid, ensure you know how to contact emergency services and have a clear exit strategy from your studio.

- Ventilation: If you work with oil paints, aerosols, or strong mediums, proper ventilation is non-negotiable. Open windows, use fans, or invest in an air purifier specifically designed for VOCs. A fume extractor directly over your workspace can be a game-changer for localized ventilation.
- Material Storage: Store flammable liquids in approved safety containers, away from heat sources or direct sunlight. Keep sharp tools like palette knives and carving tools in designated holders or sheaths to prevent accidental cuts. Label all containers clearly, especially if you decant chemicals, to avoid dangerous mix-ups.
- Waste Disposal: Dispose of rags soaked in solvents or oil paints properly according to local regulations, usually by placing them in a sealed, metal, fire-proof container filled with water, or drying them flat outdoors away from ignition sources before disposal. Never just toss them in the trash, as spontaneous combustion is a real and terrifying fire hazard. Contact your local waste management facility for guidelines on disposing of paints, solvents, and other hazardous art materials. Embracing responsible waste disposal is a key part of an eco-conscious and sustainable art practice.
To make this even clearer, here’s a quick overview of common studio hazards and how I mitigate them:
Hazard Type | Examples | Prevention / Best Practice |
|---|---|---|
| Chemical Exposure | Solvents (turpentine, mineral spirits), aerosols, certain pigments, epoxy resins, thick acrylic mediums. | Ensure proper ventilation (open windows, dedicated exhaust fans, or a high-quality air purifier specifically for VOCs). Wear appropriate PPE (gloves, respirators when necessary, especially with spray paints, solvents, or fine dust from pastel painting). Read all product labels and safety data sheets (SDS) carefully and understand the risks. Always work in a well-ventilated area, and consider a local exhaust system for tasks involving strong fumes. |
| Fire Hazards | Flammable liquids, solvent-soaked rags, sawdust, electrical equipment, oily rags. | Store flammables in approved safety containers (metal, explosion-proof cans) away from heat sources. Dispose of solvent-soaked rags in metal, airtight, fire-proof containers filled with water, or dry them flat outdoors away from ignition sources before disposal. Keep electrical cords in good condition, avoid overloading outlets, and never run cords under rugs. Regularly check for frayed wires and ensure circuit breakers are properly rated. Have a fire extinguisher readily accessible and know how to use it. |
| Physical Injury | Sharp tools (knives, chisels, palette knives), heavy objects, power tools, unstable easels, slippery floors. | Store sharp tools in designated holders/sheaths or magnetic strips. Ensure easels are stable and appropriate for the canvas size. Use proper lifting techniques for heavy canvases or materials. Always use safety guards on power tools and wear eye/ear protection. Clean spills immediately to prevent slips, and ensure clear pathways throughout the studio. |
| Dust & Particulates | Sawdust (from framing), sanding dust, pastel dust, ceramic dust, fine pigment powders. | Use dust masks/respirators (N95 or better) when generating dust. Wet mop rather than dry sweep to prevent dust resuspension. Use dust extraction systems for power tools (e.g., when stretching canvases or cutting wood). Consider an air purifier with a HEPA filter. Perform dusty tasks outdoors or in a designated, easily cleaned area whenever possible. |
| Ergonomic Strain | Repetitive motions, poor posture, prolonged standing/sitting. | Invest in an adjustable, ergonomic chair and easel. Take regular stretch and movement breaks. Position tools and materials within easy reach to minimize reaching and bending. Use anti-fatigue mats if standing for long periods. Regularly assess your posture and workstation setup, making adjustments to minimize strain and prevent long-term injury. |
Inventory Management: Knowing What You Have (and What You Need)
It's a common artist's dilemma: you find a forgotten tube of paint you just bought, or worse, you run out of a crucial medium mid-project because you thought you had more. This is where a simple inventory management system comes into play. It doesn't have to be fancy; even a handwritten list or a basic spreadsheet can save you time, money, and creative momentum.
- Regular Check-ins: Before a big project or a supply run, take 10 minutes to quickly assess what you have.
- "One In, One Out": For frequently used items, when you buy a new one, make a mental note to dispose of the old, empty one.
- Digital Lists: Keep a running digital list of consumables (paints, canvases, paper) and note when you're running low. This makes ordering supplies much more efficient.
- Digital Lists: Whether it's a simple notes app, a spreadsheet, or a dedicated inventory tool (there are even some great apps designed specifically for artists!), keeping a running digital list of your consumables (paints, canvases, paper, best sketching pencils for artists) and noting when you're running low is a superpower. This makes ordering supplies much more efficient and prevents those frustrating mid-project supply emergencies. I often add a column for "reorder date" or "quantity remaining" to keep things truly dialed in. Consider using a barcode scanner app for bulk items to quickly log new inventory.
- "Wish List": Have a separate list for aspirational tools or materials – the fancy new pigment set (perhaps from review of Schmincke Horadam watercolors you've been eyeing), a larger easel, a specific palette knife, or even a new studio lighting setup. This helps distinguish between immediate needs and future wants, preventing impulsive, unnecessary purchases and allowing for planned, strategic investments in your studio. It's also a great way to track your growth and what inspires you next. I categorize my wish list by "Immediate Need," "Next Investment," and "Dream Studio Upgrade."
- "Just In Case" Stash: I also tend to keep a small 'just in case' stash of absolute essentials (a few tubes of primary colors, a blank canvas or two) separate from my main working inventory, so I'm never truly stuck if inspiration strikes unexpectedly and local stores are closed. Think of it as your creative emergency kit.
This isn't about rigid accounting; it's about being aware. It allows you to anticipate needs, avoid impulse purchases of duplicates, and ensures you're never unexpectedly stranded without that perfect shade of ultramarine. I also tend to keep a small 'just in case' stash of absolute essentials (a few tubes of primary colors, a blank canvas or two) separate from my main working inventory, so I'm never truly stuck.
FAQ: Your Art Studio Organization Questions Answered
Q: How do you deal with creative blocks in an organized studio?
A: Ah, the dreaded creative block! Ironically, an organized studio can sometimes prevent blocks by removing friction, but when they do strike, I find the organization helps. My initial approach is to step away from the current project and engage with a different zone – perhaps sketching in the 'Dry Zone' or researching in the 'Library/Thinking Zone.' Sometimes, simply tidying a small area of the studio can be a meditative act that clears mental space. If it persists, I'll turn to my 'play zone' for some low-pressure experimentation, reminding myself that not everything has to be a masterpiece. The key is to shift your focus and environment, letting your subconscious work on the problem while you engage in a different, less demanding activity. It’s a form of active recovery for your creative mind, and sometimes, a little creative block is just your brain telling you it's time to gather new input or try a new approach, perhaps even considering new perspectives like understanding balance in art composition. I've found that sometimes a change of medium, exploring the art of mark-making:-expressive-lines-and-gestures-in-abstract-painting with a new tool, or even revisiting old sketchbooks can be enough to kickstart new ideas.
Q: I have a limited budget. How can I organize my studio without breaking the bank?
A: Oh, I've been there! Creativity thrives under constraints, and organization is no different. Start with what you have: repurpose old jars for brushes, shoe boxes for small supplies, or even sturdy cardboard boxes for paper storage. Look for second-hand furniture like old dressers or filing cabinets for storage – a quick coat of paint can transform them! DIY solutions like pegboards (just a sheet of pegboard and some hooks) are incredibly cost-effective for maximizing vertical space. The key is to be resourceful and prioritize functionality over aesthetics. You don't need fancy containers; you need a system that works for your budget and your needs. Don't underestimate the power of thrift stores, dollar stores, and even repurposing packaging materials like sturdy product boxes or even old luggage for bulk storage. And remember, organization is an ongoing process, not a one-time purchase, so you can build your system incrementally.
Q: What’s the one organization tool you absolutely can't live without?
A: Hands down, the rolling cart. Its flexibility is unmatched. I have three of them for different purposes: painting, drawing supplies, and framing tools. It's truly a mobile command center that adapts to my ever-shifting creative focus, making it easier to grab what I need when an idea strikes. If you're serious about creating, this is where I'd put my first investment. It’s like having a dedicated assistant for all your creative whims, always bringing the right tools to hand.
Q: How do you deal with dust and fumes beyond basic ventilation?
A: Dust is the enemy of paintings, and fumes are the enemy of your lungs! For dust, I swear by a dedicated shop vac with a HEPA filter for regular cleanups, especially after sanding or working with dry media like pastels or best paper for charcoal drawing. Wet wiping surfaces regularly also helps, as does using specialized dust cloths that trap particles rather than just moving them around. For fumes from solvents or sprays, targeted exhaust fans (like a bathroom fan or a dedicated studio exhaust system) are crucial. If a full ventilation system isn't an option, consider a high-quality air purifier specifically designed for VOCs (Volatile Organic Compounds) and particulate matter, and always, always wear a proper respirator (not just a dust mask!) when working with strong chemicals, aerosols, or creating a lot of airborne particulates. Your health is your most valuable tool, so invest in it wisely.
Q: How do you organize large canvases and finished work?
A: For finished or in-progress canvases, I use vertical slotted racks. It's like a library for paintings, allowing me to easily browse and select. It keeps them safe, visible, and uses vertical space efficiently. Proper art storage solutions for collectors are a good source of inspiration here, even on a smaller scale. Ensure canvases are stored with their surfaces protected from dust and damage, perhaps by placing glassine paper or a clean sheet between them. If stacking, use spacers to prevent pressure on the painted surface, such as foam core or custom-cut wooden blocks. Regularly rotate your displayed works to keep inspiration fresh and to allow new perspectives on older pieces – it’s a great way to re-engage with your own work. For very large or fragile pieces, consider custom-built crates or professional art handlers for transport and long-term storage, especially if you're shipping artwork internationally.
Q: I have a tiny space. How can I apply these principles?
A: It's all about going vertical and using multi-functional furniture. A desk with shelves above it, a rolling cart that can be tucked under the desk, and wall-mounted storage like pegboards are your best friends. The zoning principle is even more critical in a small space—a single table can be your 'clean zone' in the morning and your 'messy zone' in the afternoon with the help of a protective mat or a dedicated surface cover. Look for furniture that can be easily moved or reconfigured, like folding easels or stackable storage modules. Wall-mounted shelves, pegboards, and magnetic strips are invaluable for utilizing vertical space, freeing up precious tabletop real estate. Think of it as a cleverly designed ship's galley – every item has a place, and every space serves multiple functions, maximizing every inch without feeling cramped. You can even use the back of a door for hanging storage! Consider even your under-bed space for flat storage of large papers or finished works.
Q: How do you evaluate your finished work or works-in-progress before showing them to others?
A: This is a vital part of the creative process, a sort of self-critique that hones your artistic eye! I use my 'Display/Viewing Zone' for this, but even in a small space, a clear wall with good lighting can suffice. I make sure to step away from the piece for a while—sometimes a day, sometimes a week—and then come back to it with fresh eyes. I'll often hang it up in different orientations or even in different rooms of my home to see it in new contexts, looking for shifts in definitive guide to perspective in art. I look for compositional strengths, color harmony (especially relevant for understanding the psychology of color in abstract art), emotional impact, and areas that might need further refinement. It’s a moment of objective distance before deciding if a piece is truly 'finished' or if it needs to go back to the easel. I also find immense value in soliciting feedback from trusted artist friends or mentors at this stage. A fresh pair of eyes can spot something you've become blind to, offering constructive criticism that refines the work without undermining your vision. It's a balance between trusting your intuition and being open to external perspectives, ultimately serving the artistic process. Sometimes, photographing the work and reviewing it digitally can reveal new insights, as the screen presents it with a different kind of objectivity.
Q: How do I maintain inspiration and novelty in an organized space? Won't it become sterile?
A: This is a fantastic question and a valid concern! While organization reduces friction, it shouldn't lead to sterility. I combat this by regularly rotating elements on my 'Wall of Ideas,' bringing in new natural objects or curiosities, and consciously introducing new art supplies to experiment with – perhaps even exploring different types of paint from a definitive guide to paint types for artists. The 'play zone' also prevents things from getting too serious, offering a pressure-free space for exploration. Remember, an organized space isn't meant to be static; it's a dynamic framework that supports your evolving inspiration, not dictates it. Embrace the tension between order and serendipity, and always leave room for the unexpected magic to happen. Sometimes, a simple rearrangement of your tools or a new art book can spark an entirely fresh perspective.
Q: What’s more important in a studio: aesthetics or function?
A: Function, 100%. A beautiful studio that you’re afraid to get messy in is a prison; it actively stifles your creativity. A functional, slightly chaotic studio that invites you to create is a paradise. You can always make it look nice later, or even incorporate the "beautiful mess" into the aesthetic, but if it doesn't work for you, it's not a true studio. Prioritize creating an environment where art happens.
Q: What are your tips for traveling with art supplies and maintaining organization on the go?
A: Traveling with art supplies requires a specialized approach to organization! For plein air painting or workshops, I recommend dedicated travel kits—compact watercolor sets (like those from review of Schmincke Horadam watercolors if you want to invest in quality on the go), pencil cases, or small, well-sealed containers for paints and mediums. Prioritize lightweight, durable, and leak-proof solutions. A dedicated art backpack or roll-up case with compartments is a game-changer. The key is to only bring what's essential for your specific project, minimizing bulk and potential mess, and ensuring everything has a secure spot to prevent damage during transit. Think about portability, protection, and quick access, especially if you're working outdoors in varied conditions. I also always pack a small, quick-drying towel and a plastic bag for wet brushes or trash.
Q: I have children/students whose art I want to keep organized without it overwhelming my studio. Any tips?
A: What a wonderful problem to have, the joyful explosion of creativity from younger artists! For children's art, I have a dedicated 'archive box' for each child. At the end of the year, we go through it together and select a few favorites to keep, photograph the rest (a great way to preserve memories without physical clutter!), and then respectfully let go of what we can't store. It's a great way to teach them about curation and the value of their own creations. For students' work, especially if you're teaching, having a clear system for collecting, critiquing, and returning assignments is key. Flat files or large portfolios work well for in-progress work, and digital documentation (photographing final pieces) can reduce the need for extensive physical storage of every single artwork. Consider a rotating display system for student work, celebrating their efforts without permanent storage demands, perhaps even a digital gallery for their best pieces.
Q: How do you decide what to throw away?
A: This is tough, truly, and it's a battle I wage regularly! I have a 'probation box'. If a tool, paint, or piece of reference material hasn't been used in six months, it goes into the box. If I don't reach for it in the next six months, it gets donated, gifted to another artist, or responsibly tossed. It’s a way to emotionally detach before making the final decision, a little cooling-off period for sentimental hoarding tendencies. This also applies to half-finished sketches or experimental pieces that just aren't going anywhere. Sometimes, letting go of what isn't serving you clears space for something new and exciting, both physically and mentally. It’s an act of editing, a crucial part of the creative process that extends beyond the canvas. The 'probation box' creates a necessary buffer, allowing you to detach without immediate regret, making the final decision less emotionally charged and more strategically sound for your evolving artistic journey and fostering new directions, perhaps even influencing your artistic process. Remember, every item you keep has a "cost" in terms of space, time, and mental energy, so be ruthless in your generosity to yourself.
Q: How do you build a community around your studio practice?
A: Building a creative community is as important as organizing your physical space! While my studio is a sanctuary for individual work, I actively seek connections. This might involve participating in local art shows, joining online artist forums, attending workshops (both as a student and sometimes as an instructor), or simply having regular coffee chats with fellow artists to share ideas and challenges. Consider inviting trusted artist friends for studio visits or informal critiques, which can also help you hone your eye for understanding art appraisals: what every collector needs to know. These interactions offer fresh perspectives, accountability, and a sense of shared journey, combating the isolation that can sometimes accompany the artistic life. Your studio isn't just for making; it's a hub for connection, even if those connections extend digitally. Don't forget the power of social media to connect with a wider global community, but also remember the power of in-person connections and local art events.
Q: What about studio lighting? How important is it?
A: Critically important! Good, consistent lighting is often overlooked until you realize your colors look completely different outside the studio. I aim for natural daylight whenever possible, supplementing with full-spectrum, daylight-balanced LED lights that mimic natural light. Avoid harsh, cool-toned fluorescents, which can distort colors and create eye strain. It makes a huge difference not just to your work, allowing for accurate color mixing and evaluation, but also to your eyes and overall well-being. Good lighting prevents fatigue and keeps your creative energy flowing, especially important when translating emotion into abstract art where color is key. Investing in good quality lighting is an investment in the accuracy and longevity of your artwork.
Q: How can I make my studio more eco-conscious and sustainable?
A: That's a fantastic and increasingly important question, one that deeply resonates with my own values! There are many ways to go green, and it's a journey, not a destination. Start with materials: research non-toxic paints and mediums, look for recycled paper, and consider eco-friendly solvents. Minimize waste by using palette scraps in collage, turning old canvases into test pieces, or properly disposing of hazardous materials at designated facilities. Repurpose and reuse as much as possible—those old jars make great brush holders! Conserve energy with LED lighting and optimize natural light. It's an ongoing journey, but every small step towards sustainability makes a difference, reducing your environmental footprint and often saving you money in the long run. For example, cleaning brushes with less water or using specialized cleaning tools can extend the life of your brushes and reduce water waste. Opt for reusable palettes instead of disposable ones, and explore pigments made from ethically sourced or recycled materials. Even small choices, like choosing energy-efficient lighting or repurposing old materials for mixed media collages, contribute to a more mindful and sustainable artistic practice, aligning with the principles of best eco-friendly art supplies for conscious artists. Consider also donating unused or gently used art supplies to schools or community art programs rather than discarding them.
Q: My studio is in my home. How do I maintain boundaries between my art space and my living space?
A: This is a common challenge, and it goes back to the zoning principle. Even if it’s a corner of a room, establish clear physical boundaries—a screen, a large rug, or even just rearranging furniture to denote the 'studio' area. Mentally, it's important to have a 'start' and 'stop' time for your studio work, even if you don't leave the house. This helps prevent your art from completely taking over your home, and vice-versa. I even have a specific 'studio uniform' – an old apron and comfortable clothes – that I change into. It's a small but effective ritual that signals to my brain, and to anyone else in the house, that 'artist mode' is engaged. Setting these boundaries is crucial for maintaining both your creative sanity and domestic harmony, allowing you to fully immerse yourself in art without guilt, and then fully relax when you step away. It's about respecting both your artistic and personal lives, giving each the space it needs to thrive.

Q: How do you deal with visitors or clients in your studio?
A: Great question! My studio is a working space, but it's also where I host clients occasionally. Before a visit, I perform a rapid 'presentation tidy'—it’s not a full reset, but a quick sweep to ensure paths are clear, surfaces are wiped down, and any particularly messy or dangerous materials are out of sight. I also have a dedicated area, often near my 'Library/Thinking Zone', with a clean surface to display finished pieces. It’s about being professional while still showing the authentic, creative energy of the space. I've found that clients appreciate seeing a working studio, not a sterile showroom. It adds to the story of the art itself, showing the viewer a glimpse behind the curtain of creation, especially when discussing concepts like the evolution of abstract art: key movements and their collectible value. It makes the connection more personal and genuine. I might even have a small portfolio or sketchbook on display to give them a deeper insight into my my creative journey-from-concept-to-canvas-in-abstract-art.
Q: What about ergonomic considerations in the studio?
A: This is so important for longevity as an artist! I wish I'd thought about it sooner, as years of hunching over a canvas can take their toll. Invest in a good, adjustable chair if you spend a lot of time at a desk or easel. Ensure your easel height is comfortable for your arm and shoulder movements, and that your drawing table allows for a natural posture. Take regular stretch breaks, set timers to remind yourself to stand and move. The physical act of making art can be demanding, so protecting your body is part of a sustainable creative practice. Don't be a hero; listen to your body. Consider anti-fatigue mats if you stand for long periods, or adjustable tables that allow you to switch between sitting and standing. Proper posture, frequent stretching, and regular movement breaks are not optional—they're essential for a long and healthy artistic career, allowing you to keep creating well into the future. Think of your body as your primary instrument, and treat it with the care it deserves.

Ultimately, your studio should feel like an extension of your brain and your hands, a perfectly imperfect ecosystem that hums with your creative energy. It doesn't need to be pristine; it just needs to work for you, supporting your unique impulses and minimizing the obstacles between an idea and its manifestation. Stop chasing an idealized image of what an art studio 'should' look like, and instead, start building a space that genuinely serves your authentic creative impulse. Create a sanctuary for your art, a place where mess is a byproduct of passion, not a barrier to entry. Now, if you'll excuse me, I can't find my favorite palette knife and I think my cat, mischief-maker extraordinaire, might be sleeping on it again. There's always a new puzzle in the studio, isn't there? A stray cat sleeping on a palette knife, a forgotten tube of cadmium yellow rolling under the easel... sometimes, that unexpected discovery is the catalyst for the next abstract expression. And that's really the beauty of it: a creative space is never truly 'finished,' just perpetually evolving alongside your artistic journey. It's a testament to the fact that creativity is a dynamic force, and its environment must adapt to its ebb and flow. By embracing these principles, you're not just organizing a room; you're building a resilient, inspiring sanctuary that will support your art for years to come, and bring a little more joy to the daily grind of making. Go forth and create, beautifully and functionally, and remember that even the tidiest studio needs a little bit of glorious, controlled chaos. Your studio, much like your art, should be a reflection of your evolving self, always ready for the next improvisation.