Calligraphy for Beginners: The Ultimate Guide to Pens, Inks & Mastering Mindful Art
My comprehensive guide to starting calligraphy. Discover essential pens, inks, paper, and techniques, explore different scripts, and embrace the mindful art form with my personal insights.
Calligraphy Pens for Beginners: My Personal Guide to Essential Tools and Techniques
You know, I always thought calligraphy was just fancy handwriting. Something for incredibly disciplined folks, perhaps monks in old monasteries, meticulously illuminating manuscripts. And while that's certainly part of its rich tapestry, I’ve found it’s so much more personal, so much more of a journey. It’s an art form that can genuinely transform your artistic perspective, revealing a deep, almost meditative connection between focused creation and mindfulness. For me, it became a visual language, and the right tools? Oh, they absolutely unlock its full potential. It’s about finding your rhythm, connecting with the ink, and letting your hand dance across the paper. Honestly, it’s a revelation, and I’m excited to share my adventure with you.
A Nod to Calligraphy's Rich History: More Than Just Pretty Letters
Before we dive into the fun stuff – the pens – I think it’s really important to take a moment to appreciate calligraphy’s rich past. This isn't just about making pretty letters; it’s an art form that literally shaped communication, preserved knowledge, and expressed devotion for thousands of years. From those undeniably elegant Roman Capitals that etched empires into history to the incredibly intricate, shimmering illuminated manuscripts of the Medieval age (I mean, have you ever seen the Book of Kells or the Lindisfarne Gospels? They're breathtaking – visual sermons, really) and then the exuberant, flourishing scripts of the Renaissance – each era just left this indelible mark.
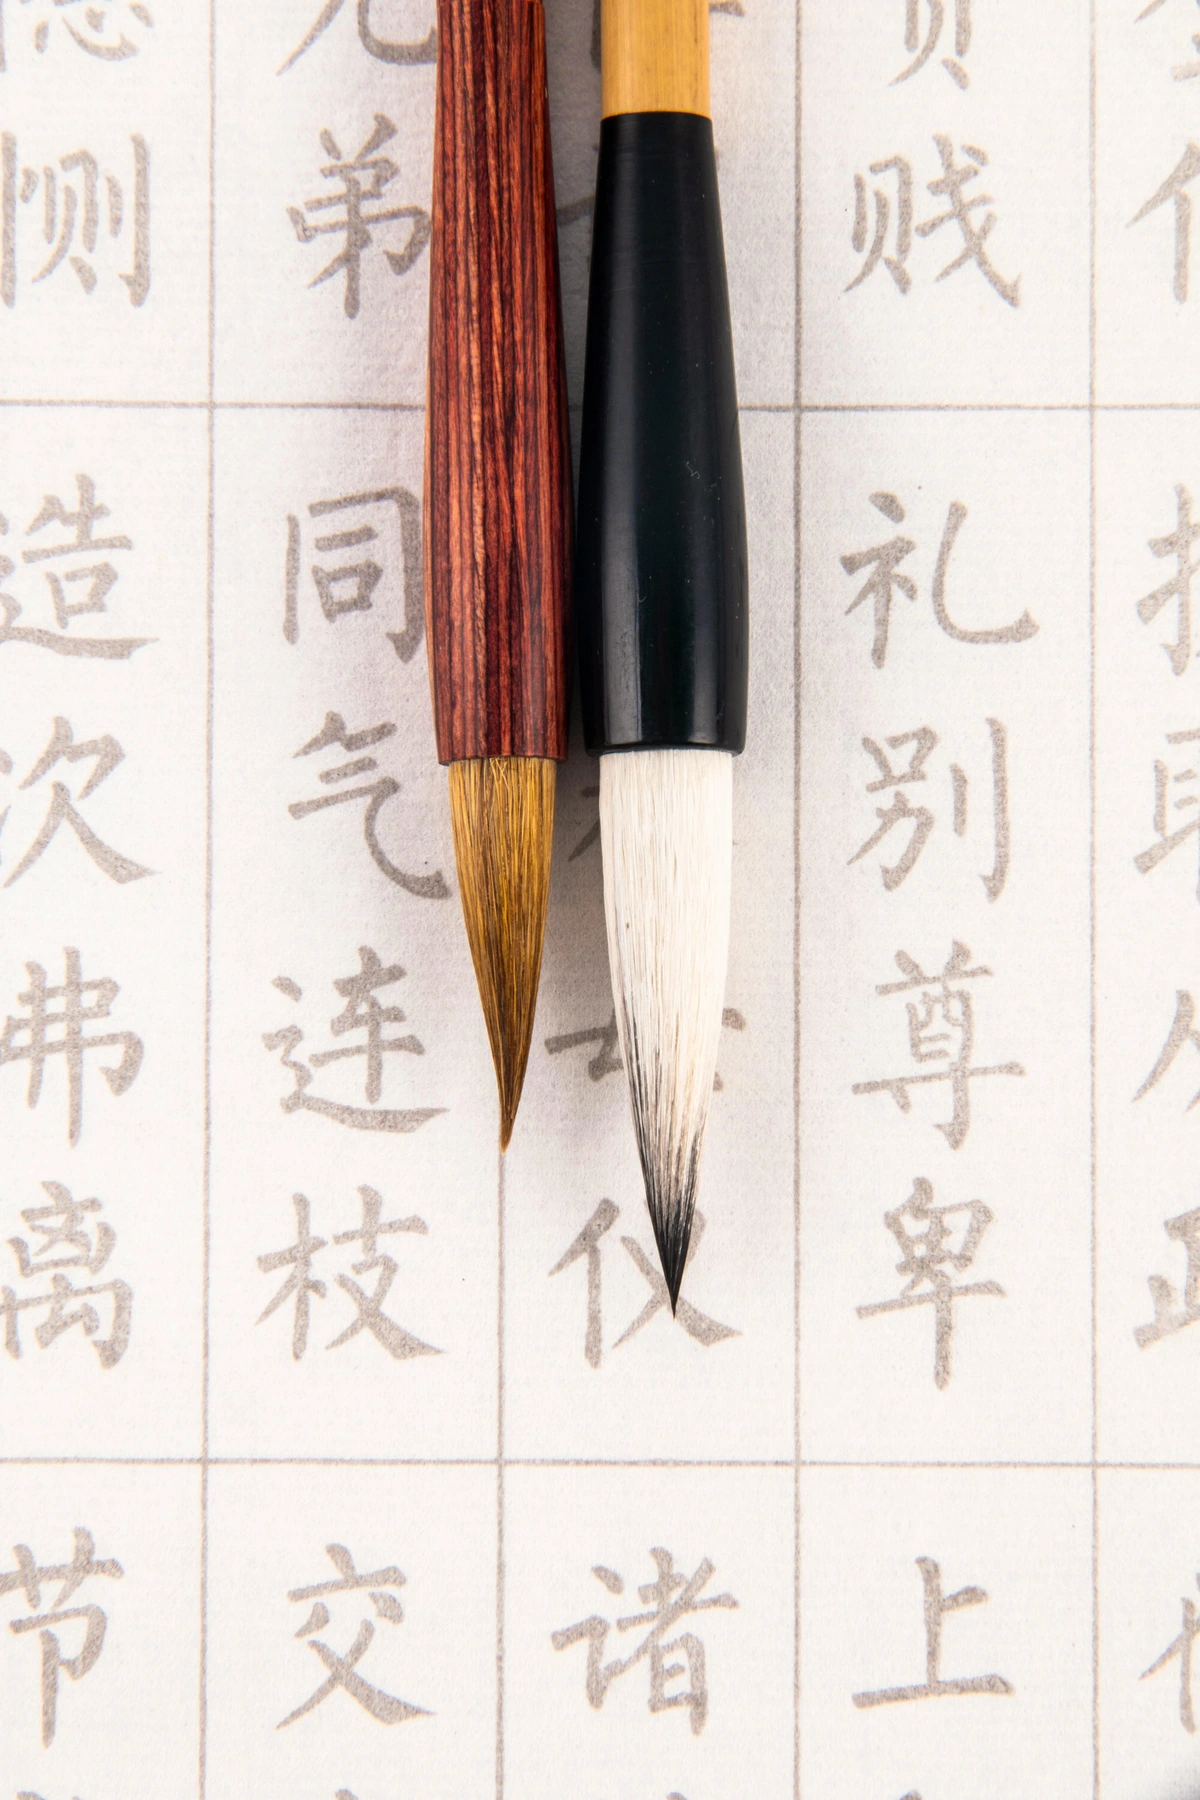
But the story of calligraphy isn't confined to the West. Across the globe, diverse cultures developed their own profound calligraphic traditions. Think of the intricate geometric patterns and flowing, rhythmic scripts of Arabic calligraphy, where writing became a supreme art form often used to adorn religious texts and architecture. Or the profound emphasis on brushwork, balance, and spiritual connection in East Asian calligraphy, where each stroke is a deliberate act of mindfulness, often linked to painting and poetry.
What I find fascinating is how these historical forms often dictated the very tools and styles that emerged. Take Gothic scripts, for instance; those broad, consistent lines pretty much begged for the development and refinement of broad-edge nibs. Even the invention of the printing press, which you might think would kill calligraphy, just shifted how it evolved, pushing it more purely into the realm of art. Edward Johnston, who revived and popularized broad-edge scripts in the early 20th century, drew so much inspiration from these historical forms. Understanding this heritage allows us to connect with a timeless human endeavor, placing our own little creative adventures within a grander my artistic timeline. It reminds me that we’re not just making marks; we’re joining a conversation that’s been going on for centuries. And this conversation, believe it or not, starts with the very instruments we choose.
Foundational Instruments: My Take on the Tools
Alright, let’s get down to the brass tacks: the actual pens. If you’re anything like me when I started, the sheer variety can feel a bit overwhelming. But trust me, once you understand the primary types, you’ll find your way. Each instrument has its own quirks and charms, suited for different styles and, honestly, different moods. Having a discerning eye for these differences really will guide you toward a confident beginning. So, let’s explore them, starting with what I’ve found to be the easiest entry points.
Marker-Style Calligraphy Pens: Uncap and Go (Seriously)
For the absolute beginner, the "just-want-to-try-it" crowd, or frankly, for those of us who just crave instant gratification, marker-style calligraphy pens are a godsend. These are typically sturdy, felt-tip pens (either chisel-edged or sometimes a bit brush-like) that come pre-filled with ink. No assembly, no dipping, no fuss – just uncap and start writing. It’s a completely mess-free experience, which, let’s be honest, is highly appealing when you’re just exploring. I remember thinking, "Finally, I can just write without feeling like I'm performing a delicate scientific experiment!" These are perfect for getting a feel for fundamental broad-edge strokes, like consistent downstrokes and basic letterform construction, without the complexities of ink management.
Now, they might not offer the subtle nuances of a dip pen or the delicate fluidity of a high-quality brush pen, but their affordability and sheer ease of use make them brilliant for practicing basic strokes and letterforms without any significant upfront investment. They’re really about understanding the core principles of broad-edge lettering before you commit to more complex tools. Think of them as your training wheels. Brands like Speedball, Zig Calligraphy, or Pilot Lettering Pens offer reliable and accessible options for that initial exploration. If you crave instant results and a mess-free experience, the marker-style pen is absolutely your starting point!
Advantages for Beginners: Inexpensive, incredibly easy to use, completely mess-free, and perfect for understanding fundamental letter shapes without distraction.
Considerations: Limited control over line variation, tips can wear out relatively quickly, and the results are generally less refined than with other pen types. But hey, it’s a start!
Brush Pens: My Go-To for Expressive, Modern Calligraphy
Brush pens have absolutely exploded in popularity, especially if you’re into modern calligraphy and hand-lettering. These pens feature a flexible, fiber tip that truly mimics a traditional brush. Some, often called 'fude' pens, even incorporate angled tips for enhanced control over line width; they’re generally stiffer than a fully flexible brush tip, which I found surprisingly helpful for more precise work, especially when I was just getting my muscle memory sorted. The real magic here is the significant variation in line weight you can achieve just by altering pressure and angle. If you've got any background in drawing or painting, these will feel incredibly intuitive, offering immediate gratification with wonderfully fluid, expressive strokes. It's almost like painting, but with words!
I love brush pens for developing muscle memory for letterforms, and honestly, the sheer dazzling spectrum of colors they come in is just... inspiring. Their flexibility really encourages a dynamic, contemporary aesthetic, pushing you towards a freer, less rigid approach to letter construction. They’re invaluable for exploring expressive lettering, especially for those popular "bouncy" modern scripts or the striking thick-and-thin lettering achieved through pressure variation. Brands like Kuretake Fudegokochi or Tombow Fudenosuke are fantastic, alongside the widely known Tombow Dual Brush Pens or Pentel Fude Touch Sign Pens. And for an even wider range of color exploration, water brushes (pens with a refillable water barrel and a brush tip) can be loaded with water and used with traditional watercolor pans or inks, offering a similar flexible brush experience with endless color possibilities. If expressive, fluid lettering and a burst of color excite you, brush pens are a fantastic choice for your creative journey!
Advantages for Beginners: Highly versatile, perfect for modern calligraphy, provides instant expressive results, and offers a wide color range for creative exploration.
Considerations: Flexible tips can fray with heavy pressure (I’ve ruined a few, trust me!), the ink is typically fixed (though some models are refillable, which is a bonus), and consistent line control, especially for those delicate upstrokes, definitely requires practice.
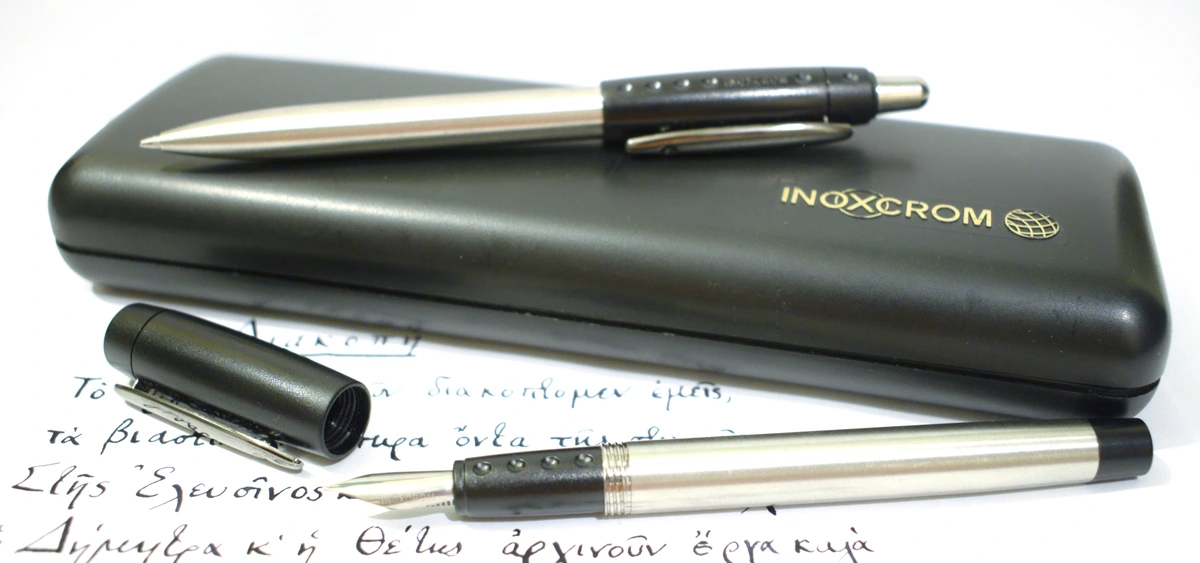
Calligraphy Fountain Pens: Modern Convenience, Consistent Practice
Okay, so after dabbling with markers and brush pens, you might be looking for something a bit more... refined, but still super convenient. That’s where calligraphy fountain pens step in. These are wonderfully modern, self-contained instruments with an internal ink reservoir (usually a cartridge or a converter). This design totally eliminates constant dipping, which makes them highly portable and significantly less prone to those dreaded ink spills. For sustained practice, they’re just brilliant.
Many come with interchangeable broad-edge nibs of various widths, which is fantastic for experimenting with different styles without needing a dozen different pens. They’re excellent for fostering consistent lettering and ideal for those longer projects where you just want an uninterrupted flow. While they’re generally less flexible than pointed dip nibs (because their nibs are stiffer), they provide such a wonderfully smooth experience for broad-edge scripts. The pen's intricate feed system – that clever capillary mechanism – ensures a consistent and controlled ink flow from the reservoir to the nib, allowing you to just write, and write, and write.
A crucial point here, and one I learned the hard way: you must use inks specifically designed for fountain pens. These are typically dye-based, less viscous, and pH neutral. They’re formulated to flow smoothly through the pen's intricate feed system without clogging or, worse, corroding the delicate metal parts. Thicker, pigment-based inks contain tiny particles or shellac that will, I promise you, settle and completely jam that intricate feed system, leading to frustrating blockages and possibly a ruined pen. It's like putting sand in a delicate clockwork mechanism – it just won't work, and you'll regret it! Acidity (low pH) can quite literally eat away at the delicate metal of the nib and feed over time. So, please, please, please stick to fountain pen-specific inks! It’s not worth the heartache. If consistent, clean practice with elegant broad-edge scripts is your aim, a calligraphy fountain pen will be your steadfast companion.
Advantages for Beginners: Highly portable, generally less messy, consistent ink supply minimizes interruptions, and excellent for developing consistent letterforms, especially broad-edge.
Considerations: Ink choices are somewhat limited to fountain pen inks (though converters open up bottled options), they’re generally less adept at pointed pen scripts than dip pens, and the initial cost can be a bit higher.
Dip Pens: The Classic Ritual and Unparalleled Control
Ah, the dip pen. This is where it gets truly traditional, and for many, myself included, it’s where the real magic (and sometimes the real mess) of calligraphy lives. Dip pens are your classic entry point into traditional calligraphy, offering unparalleled control over ink flow and line variation – but, and this is a big "but," it takes practice. These instruments are essentially two parts: a separate nib and a holder. You literally have to physically dip the nib into an inkwell for a few strokes. This deliberate, almost ritualistic pace? It really cultivates a mindful rhythm, fostering a deep connection to the writing process. It’s a meditative practice with ink, I tell you.
Let’s talk nibs. Broad-edge nibs, with their chisel-like tips, are fundamental for those foundational hands like Uncial (think rounded, majestic early scripts), Gothic (dramatic, angular blackletter forms – very impactful!), and Italic (elegant, sloping scripts that always look sophisticated). Their chisel edge naturally creates those characteristic thick downstrokes and thin horizontal strokes, defining the geometric precision of these scripts. The pen angle – that consistent angle at which you hold the broad-edge nib relative to the writing line – is absolutely crucial here. It determines the width and shape of your strokes, much like how the angle of a chisel affects a wood carving.
Conversely, pointed nibs are exceptionally flexible and indispensable for elegant scripts like Copperplate (renowned for its dramatic swells and delicate hairlines – pure elegance!) and Spencerian (a more flowing, airy American script, very graceful). The flexibility of their tines – those two prongs that spread apart with pressure – is what allows for dramatic thick and thin strokes through varying pressure. This technique, I won’t lie, requires significant practice, but oh, the potential is thrilling! It enables the delicate contrast vital to these scripts. Good pointed nibs also feature a vent (a small hole) and a shoulder (the widest part before the tines split), which are vital for controlling ink flow and preventing blotting; the vent acts as a tiny air hole to facilitate smooth ink delivery, while the shoulder provides structural integrity and keeps things from getting too wobbly. Historically, earlier flex nibs in fountain pens aimed to replicate this pressure-sensitive line variation, though modern pointed dip nibs offer the greatest control and range.
Now, ink for dip pens. For beginners, a good quality, non-waterproof, pigment-based calligraphy ink is highly recommended. Pigment-based inks offer superior opacity and lightfastness compared to dye-based inks, providing consistent results and proving significantly easier to clean from nibs during initial practice. Brands like Dr. Ph. Martin's Bombay India Ink (despite its name, it’s often more beginner-friendly than traditional shellac-based India ink) or Sumi ink are excellent choices. Beyond composition, consider ink properties like viscosity (how thick or thin it is, affecting flow) and drying time; thinner inks flow faster but might feather more, while quick-drying inks are great for left-handers but can clog nibs quicker. Also, consider ink permanence: do you need a waterproof ink for archival quality or something water-soluble for easy corrections? A word of strong caution from someone who learned the hard way: traditional shellac-based India ink should absolutely be avoided by beginners. Its tendency to dry and cement onto tiny nib grooves can permanently damage your tools. Some specialized inks, like metallics or iridescent varieties, can also be challenging to use even with dip pens and will require extra diligent cleaning. My advice? Start simple, get comfortable, then experiment! If you seek the authentic, tactile experience of traditional calligraphy and maximum control, dip pens are your path to profound artistic expression.

credit, licence
Advantages for Beginners: Offers exceptional control with practice, compatible with a wide array of inks (unlike fountain pens!), and truly demands precision and patience. The ritual of dipping provides an authentic, deeply satisfying experience.
Considerations: Can be gloriously messy (embrace the splatters, I say!), requires frequent re-inking which can interrupt your flow, and definitely presents a steeper learning curve for consistent ink distribution and pressure.
Finding Your Flow: Choosing Your First Script
So you've picked your pen – or maybe you're still weighing the options. Now, what do you actually write? Calligraphy isn't just one style; it's a whole world of them! For a beginner, picking a script can feel as daunting as picking a pen. But don't worry, I've got a few suggestions based on pen type that I've found work well for easing into the craft.
- For Marker-Style Pens & Calligraphy Fountain Pens (Broad-Edge Focus):
- Foundational Hand: This is truly what it sounds like – a foundational script. It's an upright, simple, and clear script that's perfect for learning basic letterforms and understanding the broad-edge principles without too much complexity. It's like learning to walk before you run, and it's where I recommend most people start with these pens.
- Carolingian Minuscule: Another excellent foundational broad-edge script, Carolingian Minuscule is known for its clarity, legibility, and rounded letterforms. It's historically significant and offers a slightly different feel than Foundational Hand, making it a great alternative for learning consistent strokes.
- Italic: Once you're comfortable with Foundational or Carolingian, Italic is a natural next step. It's a slightly slanted, elegant script that still emphasizes those broad-edge principles. It feels a bit more dynamic but uses many of the same foundational strokes.
- Why these? All three are structured, making it easier to achieve consistency, and they really teach you to control that broad-edge nib.
- For Brush Pens (Modern Calligraphy Focus):
- Modern Calligraphy (Simplified): This is less about strict historical rules and more about expressive freedom. It focuses on pressure-sensitive strokes – thick downstrokes, thin upstrokes – and can be very forgiving in terms of exact letterform replication. Start with simple letter shapes and focus on the thick-thin contrast. There are tons of beginner worksheets for "bouncy" or free-flowing modern scripts, which are incredibly rewarding for getting those expressive lines quickly.
- Why this? Brush pens are designed for this kind of fluidity. It allows you to explore personal style and immediate visual impact.
- For Dip Pens (Traditional & Pointed Pen Focus):
- Foundational Hand, Carolingian Minuscule, or Italic (Broad-Edge Nibs): If you're using a broad-edge dip nib, these are still excellent choices for the same reasons mentioned above. You'll get the added experience of ink management.
- Copperplate (Beginner-Friendly Pointed Nibs): For those eager to dive into pointed pen, Copperplate is the go-to. It's famous for its elegant flourishing and dramatic thick-and-thin lines. Start with a medium-flexible pointed nib like a Nikko G or Zebra G; they offer enough flexibility to see the dramatic line variation without being so flexible they're impossible to control.
- Why these? Dip pens give you the most control for these traditional, highly structured scripts. The tactile feedback of the nib on paper is invaluable for learning.
Remember, the "best" script is always the one that excites you the most. But sometimes, starting with a simpler one lets you build confidence before tackling your dream script.
Navigating the Selection: Key Considerations for Your Calligraphy Journey
Choosing the 'right' calligraphy pen is such a personal endeavor. It’s truly influenced by the style you're aiming for, how comfortable it feels in your hand, and what you’re hoping to get out of the practice. Beyond just the pen type, I've found a few factors really warrant some thought.
The Heart of the Line: What to Look for in a Nib
- Broad-Edge Nibs: These are your go-to for traditional scripts like Gothic, Italic, and Uncial. For beginners, I always suggest starting with a medium width (around 2-3mm). It’s forgiving enough for basic strokes but wide enough to really show off those script characteristics. Many calligraphy fountain pen sets actually come with multiple broad-edge nibs, which is a big bonus. The consistent pen angle is absolutely paramount here for nailing those classic thick-and-thin lines.
- Pointed Nibs: If you’re dreaming of flourishing scripts like Copperplate and Spencerian, pointed nibs are crucial. The flexibility of the nib is what it’s all about; it dictates how much variation you can get between your thick and thin strokes. For beginners, a medium-flexible nib is a great starting point – those super-flexible ones can be a real challenge to control, believe me. It’s all about the ability of the nib’s two tines to spread apart with pressure. And don't forget the vent and shoulder; they play a significant role in getting that ink flowing smoothly and keeping the nib stable.
- Brush Tips: The bread and butter of modern calligraphy. They come in all sorts of sizes and stiffnesses. Softer tips will give you more dramatic line variation (think bold downstrokes and delicate upstrokes!), while stiffer tips offer greater control, which is incredibly helpful when you’re still building that crucial muscle memory.
- Nib Material: While perhaps less critical for beginners than flexibility, the material of the nib can influence its feel and durability. Most modern nibs are stainless steel, which is affordable and robust. Higher-end nibs might feature gold plating or even solid gold, which can offer a slightly softer, smoother feel and greater flexibility over time due to gold's malleability. It's a subtle difference, but one to be aware of as you advance.
Keeping Lines Smooth: The Dance of Pen and Ink
Oh, the ink! Getting this right is absolutely vital for smooth calligraphy. Fountain pens, as I mentioned, are meticulously engineered for specific fountain pen inks, which are typically less viscous and pH neutral. These properties are what keep them from clogging and corroding the delicate feed system and metal bits. I cannot stress this enough: thicker, pigment-based inks will not flow through the tiny capillaries of a fountain pen, and acidic inks will absolutely corrode metal over time. Using an incompatible ink is, I promise you, a swift path to clogging, skipping, and pure frustration. It's like putting sand in a delicate clockwork mechanism – it just won't work, and you'll regret it!
Dip pens, on the other hand, are remarkably versatile. They’ll happily accept thicker, pigmented inks like Sumi ink, gouache, or those specialized calligraphy inks that would quickly ruin a fountain pen. That said, certain specialized inks, like metallics or those with suspended particles, can still be more challenging for dip pens and demand diligent cleaning. Brush pens usually come with their own proprietary inks, though some refillable models do offer a bit more freedom. A little tip from me: store your ink bottles upright and away from direct sunlight to keep them happy and long-lasting.
Ergonomics and Comfort: Your Hand's Best Friend (and Mine!)
This might sound like a minor point, but for extended practice sessions, a comfortable pen isn't just a luxury – it's an absolute necessity. Factors like the pen's weight, balance, and grip genuinely impact your endurance. I know I’ve had sessions cut short because my hand just gave out! I remember one particularly frustrating evening trying to master a challenging script, and after only an hour, my hand was cramping so badly I had to stop. It wasn't the script; it was the tiny, thin pen I was using! Calligraphy pens with ergonomic designs or wider barrels can really reduce hand fatigue. A pen that feels natural in your hand doesn’t just make the learning experience more enjoyable; it encourages you to practice longer and more consistently. And hey, while we’re talking comfort, careful attention to hand posture and grip – keeping a relaxed grip and an open hand – can prevent cramping and improve control, both of which are absolutely essential for those wonderfully consistent lines we all strive for.
Maintenance and Durability: A Little Care Goes a Long Way (and Saves Your Wallet)
Look, I’m probably as lazy as the next person, but when it comes to my tools, I’ve learned that proper maintenance is key to keeping them performing beautifully and lasting forever (or at least, a very long time!). Dip pen nibs? Wipe them clean with a lint-free cloth or rinse thoroughly under water immediately after each use. You want to prevent ink from drying and cementing onto those tiny grooves. Fountain pens need periodic flushing, especially when you’re changing ink colors or before you stash them away for a while. For stubborn clogs – and believe me, they happen – a bulb syringe or a dedicated pen flush solution can be invaluable. My general rule for fountain pens and brush pens is to store them horizontally or nib-up (depending on the specific model) and always capped when not in use. This prevents ink evaporation and those dreaded dry clogs. Marker-style pens are usually pretty low-maintenance until their ink runs dry or the tips fray. Trust me, adhering to these simple care requirements ensures your instruments keep working beautifully, and it saves you money in the long run. Nobody likes buying a new nib because they forgot to rinse!
Calligraphy Pen Comparison: My Quick Overview
To consolidate these points and give you a clearer picture, here’s how I see the different pen types stacking up:
Feature | Dip Pen | Calligraphy Fountain Pen | Brush Pen | Marker-Style Calligraphy Pen |
|---|---|---|---|---|
| Control | High (with practice) | Moderate to High | High (pressure sensitive) | Low to Moderate |
| Ink Versatility | Very High (most non-fountain pen inks) | Limited (fountain pen inks only) | Low (proprietary ink, some refillable) | Low (pre-filled, non-refillable) |
| Messiness | High (but fun!) | Low | Low | Very Low |
| Learning Curve | Steeper | Moderate | Moderate | Very Low |
| Portability | Low (separate ink) | High | High | High |
| Cost (Initial) | Low | Moderate to High | Low to Moderate | Very Low |
| Best For | Traditional scripts (Copperplate, Italic), artistic exploration, unique inks, the ritual | Consistent broad-edge scripts, sustained practice, convenience, everyday use | Modern calligraphy, hand-lettering, expressive strokes, color exploration | Absolute beginners, basic practice, quick projects, fuss-free starts |
Curated Recommendations for the Budding Calligrapher: My "Adventure Kit" Ideas
So, what should you actually buy? For those of you just embarking on this captivating calligraphic journey, I’ve found that a balanced approach often yields the best results and minimizes early frustration. My ideal beginner's 'calligraphy adventure kit' might include a few things:
- A good quality calligraphy fountain pen set: These often come with interchangeable broad-edge nibs and a converter, offering such a clean and versatile entry point for traditional scripts. Brands like Pilot Parallel (they give incredibly crisp, consistent broad-edge lines), Lamy Joy (comfortable and stylish, a personal favorite), or Speedball (reliable and accessible) offer excellent beginner sets.
- A set of diverse brush pens: You absolutely need these to explore the fluid, expressive world of modern calligraphy and hand-lettering. Tombow Dual Brush Pens (those versatile dual tips are great) or Pentel Fude Touch Sign Pens (smaller, precise fude tips for more control) are fantastic for initial exploration and come in a dazzling array of colors.
- A basic dip pen set with both a broad-edge and a pointed nib: For those eager to really delve into traditional methods and experiment with a wider array of inks. This gives you that authentic experience and maximum control over ink consistency. For broad-edge, I'd suggest Brause Bandzug or Speedball C-series nibs. For pointed nibs, Nikko G or Zebra G are often recommended because of their beginner-friendly flexibility. And remember that good quality Sumi ink or a beginner-friendly pigment-based calligraphy ink to go with them is a must! This whole journey of artistic exploration and skill development? I see it as part of a broader my artistic timeline, a continuous evolution of how we express ourselves. Beyond personal practice, many calligraphers find inspiration and community through calligraphy competitions or exhibitions, offering exciting avenues to showcase their evolving skills and discover new artistic directions.
Beyond the Pen: My Essential Supporting Tools for Calligraphy
While pens are, without a doubt, the stars of the show, I’ve discovered that several other tools are truly indispensable for a successful calligraphic practice. These are the unsung heroes that quietly support optimal pen performance, and honestly, they make a world of difference.
- Paper: Oh, paper. I used to think paper was just paper, but the choice of paper is critical. You need smooth, bleed-proof paper, often 90gsm or heavier with a smooth finish, specifically designed to prevent feathering (where ink spreads unpleasantly along paper fibers) and show-through (where ink is visible from the other side of the page). Rhodia pads are fantastic, or honestly, even HP Premium Laserjet paper (typically 28lb/100gsm) is surprisingly effective for practice. For traditional broad-edge work or delicate flourishes, a slightly smoother, more coated paper works wonders. For brush pens, a Bristol board or other smooth, durable paper can offer a nice surface with good durability and help prevent fraying those precious tips. When you’re selecting paper, look for labels like "bleed-proof" or "calligraphy paper." Also, consider the paper grain – the direction in which the paper fibers are aligned. While often subtle, writing against the grain can sometimes cause nibs to catch or ink to flow less smoothly, especially with pointed dip pens. Practice pads with guidelines—including x-height (the height of your lowercase 'x'), ascender (the part of letters like 'b' or 'h' that rises above the x-height), and descender (the part of letters like 'p' or 'g' that drops below the baseline) lines—are invaluable for achieving consistent letterforms. Alternatively, using grid or dot paper can greatly assist in achieving consistent letter spacing and alignment for those who prefer to draw their own specific guidelines. And a little secret of mine: a ruler and a light pad are truly invaluable for drawing custom guidelines or tracing, saving you from repetitive pencil work. Seriously, get a light pad if you can.
- Inks: As I harped on about earlier, for dip pens, non-waterproof, pigment-based calligraphy inks are an excellent starting point. And yes, traditional India ink should be avoided initially due to its shellac content, which can permanently stain or clog nibs. But I must repeat: fountain pen inks must be specifically formulated for fountain pens. This is not optional; it’s to prevent clogging and damage to that intricate feed system. This cannot be overstated. Mixing ink types is a guaranteed way to severely damage your tools, and trust me, I’ve seen it happen.
- Practice Guides and Worksheets: These resources are your best friends. They provide structured exercises for mastering basic strokes, letterforms, and spacing, and they will significantly accelerate your learning process. There are so many options available online, or you can invest in a comprehensive beginner's workbook. I’ve found that consistent guidance is absolutely key to developing any craft, and calligraphy is no exception.
Cultivating the Craft: Embracing My Learning Process
Look, calligraphy isn’t about instant perfection. It genuinely demands patience and consistency. Embracing those early challenges, those wobbly lines, those frustrating splatters? That’s a crucial aspect of growth. My advice? Focus intently on fundamental strokes—the basic upstroke, downstroke, ovals, and loops—before you even think about attempting complete letters. Prioritize consistency over speed in every single session. I’ve found that regular, short practice sessions (like 15-20 minutes daily) are often far more effective than infrequent, marathon ones that just lead to hand cramps and frustration. Before each session, I always recommend doing some light hand and wrist warm-up exercises; things like gentle finger stretches, wrist rotations, and even drawing large, free-flowing shapes in the air or on scrap paper without ink can really help prevent strain and improve flexibility. It’s a process, really, akin to nurturing a garden, where those small, consistent efforts yield the most beautiful, enduring results. And the power of observation is absolutely crucial – I spend so much time just studying examples of beautiful calligraphy, analyzing stroke order, and really trying to understand how each letter is constructed. It truly aids development.
This meditative practice, for me, genuinely enhances mindfulness and refines motor skills. It contributes to a broader artistic perspective, deeply informing various approaches, whether I’m aiming for precise lines or bold abstract strokes. It's a wonderful example of how disciplined craft can fuel boundless creativity. For individuals who find joy in creating, exploring the possibility of transforming newfound skills into tangible art pieces available for purchase my art can feel like such a natural progression. These principles, this dedication to craft and expression, echo in the collections at the Den Bosch museum, where various artistic disciplines, including the definitive guide to understanding abstract art, are celebrated. It's all connected, you see.
Frequently Asked Questions (FAQ)
Okay, let's tackle some of those burning questions I hear all the time from folks just starting out.
Q: What is the absolute best calligraphy pen for an absolute beginner? A: You know, there’s no single "best" answer, but I usually recommend starting with either a good quality calligraphy fountain pen set (they often come with interchangeable broad-edge nibs and are wonderfully clean to use) or a quality brush pen if you're drawn to modern styles. Both offer ease of use and generally provide more immediate, satisfying results. If you're feeling adventurous and want to dive straight into traditional methods, a basic dip pen set will offer that foundational experience, though be prepared for a slightly steeper learning curve and a bit more mess! The ideal choice really depends on the style you're leaning towards and your learning inclination. Don't be afraid to try a few!
Q: What's the difference between calligraphy and hand-lettering? I get them mixed up. A: Oh, it’s a common confusion, and I totally get it! I like to think of it this way: calligraphy is the art of writing letters. It's very disciplined, emphasizing proper stroke order and consistent letterforms, often replicating established historical styles with specific tools like dip pens or fountain pens. Its purpose is the beautiful, disciplined creation of writing. Hand-lettering, on the other hand, is the art of drawing letters. Here, there’s much greater freedom and artistic interpretation; each letter is almost a unique illustration, often executed with brush pens or even regular pens, then embellished. Its purpose is more about visual design and illustration. Both are amazing, just different approaches!
Q: Can I use regular drawing ink or India ink with my calligraphy pens? A: For fountain pens, absolutely not. Please, please, please only use inks specifically designed for fountain pens. Using anything else is a sure path to clogging and permanent damage to that delicate feed system. Now, dip pens are much more forgiving; they can accommodate a wider range of inks, including Sumi ink, gouache, or specialized calligraphy inks. However, and this is a big however, I strongly advise beginners to avoid traditional India ink initially. Its shellac base makes it notoriously difficult to clean and it can, believe me, permanently adhere to your nibs. Stick to pigment-based calligraphy inks for dip pens to start.
Q: How do I clean dip pens and fountain pens? I'm worried about ruining them. A: Great question, and it’s actually simpler than you think! For dip pen nibs, just wipe them clean with a lint-free cloth or rinse thoroughly under running water immediately after each use. Don’t let the ink dry on them! Fountain pens need periodic flushing with clean water, especially when you’re changing ink colors or if you’re storing them for a long time. This usually involves repeatedly filling and emptying the converter or cartridge with water until it runs completely clear. If you get a stubborn clog (it happens!), a small bulb syringe or a dedicated pen flush solution can be a lifesaver. And always, always consult the manufacturer's instructions for specific care recommendations. A little care goes a long way!
Q: What type of paper is truly best for calligraphy? I'm getting feathering. A: Ah, feathering – the bane of every calligrapher's existence when they start! The key is smooth, non-absorbent paper. I often recommend trying laser printer paper (typically 28lb/100gsm) for practice; it can work surprisingly well. But for a superior experience, specialty calligraphy paper or Bristol board is your best bet. The goal is to pick paper that absolutely prevents feathering (that annoying spreading of ink along paper fibers) and ensures those lovely crisp lines. Generally, a smoother surface will always yield better results. For consistent spacing and alignment, I can't recommend grid paper or dot paper enough. Or, get yourself a ruler and a light pad and draw your own guidelines – it’s a game-changer!
Q: What are common mistakes beginners make, and how can I avoid them? A: Oh, I've made them all! Common errors include applying excessive pressure (especially with brush pens, which can fray tips faster than you can say "oops"), using incompatible ink for your pen type (we talked about that, right?), inconsistent pressure (leading to wobbly, uneven lines), neglecting to clean tools (a cardinal sin!), and not understanding the appropriate pressure needed for broad-edge versus pointed nibs or brush pens. My personal avoidance strategy? Start with light pressure, always use the correct ink, diligently practice those basic strokes until they're second nature, and commit to immediate tool cleaning after every use. And honestly? Patience and consistent effort are paramount. Embrace the learning, embrace the mistakes; they're all part of the journey.
Q: What are some of the most common beginner scripts to learn? Where should I start? A: Okay, so if you're using broad-edge pens, popular beginner scripts include Italic (it's elegant, slightly slanted, and great for learning those broad-edge principles) and Foundational Hand (an upright, clear script that's just fantastic for basic letterforms). For pointed pens, Copperplate is widely studied, known for its elegant flourishing and those dramatic thick-and-thin lines achieved through pressure. And for brush pens, Modern Calligraphy offers a super versatile and expressive starting point, focusing on pressure-sensitive strokes and stylistic freedom. Each script provides a unique pathway into the art form, so pick one that truly calls to you, and just dive in!
Q: Why are rulers and guide sheets so important in calligraphy? I feel like I should just 'freehand' it. A: I get the temptation to just go for it, trust me! But rulers and guide sheets (or even grid/dot paper) are absolutely essential for achieving consistency in calligraphy. They provide that necessary structure for uniform letter heights (your x-heights), consistent ascender and descender lines, and perfectly even spacing between letters and words. Without these guides, maintaining precision and visual harmony is incredibly challenging, especially for beginners. It's like trying to build a house without a blueprint – possible, maybe, but much harder and less stable! Utilizing guides is crucial for developing consistent and visually harmonious calligraphic work. They’re not crutches; they’re foundations.
Embarking on Your Calligraphic Journey
So, there you have it. Selecting the right tools is truly just the initial step into this captivating world of calligraphy. With these essential pens in hand and a commitment to consistent practice, you, too, can unlock a profound sense of creativity and connect with a truly timeless art form.
The beauty of calligraphy, I’ve found, lies not just in the elegant strokes you produce, but deeply in the meditative, mindful process of creation itself. It’s a testament to enduring human artistry, offering a unique avenue for expression. The skills developed through calligraphy can inform and expand your understanding of other visual arts, like those showcased at the Den Bosch museum, where various artistic disciplines, including the definitive guide to understanding abstract art, are celebrated.
And as you progress, remember that you're not alone. Many calligraphers find immense support and inspiration by exploring online communities, forums, or even local calligraphy guilds. These spaces offer opportunities to share your work, learn from others, and find encouragement. It's all part of the grand, messy, beautiful creative journey.


