Beyond the Brush: 5 Unique Art Materials for Creative Breakthroughs
Break artistic blocks! Explore 5 unconventional art materials like expressive oil sticks, re-workable gouache, and evolving silverpoint. This curator's guide provides history, techniques, safety tips, and practical projects to revolutionize your creative process and discover new artistic dimensions.
Beyond the Brush: 5 Unique Art Materials for Creative Breakthroughs
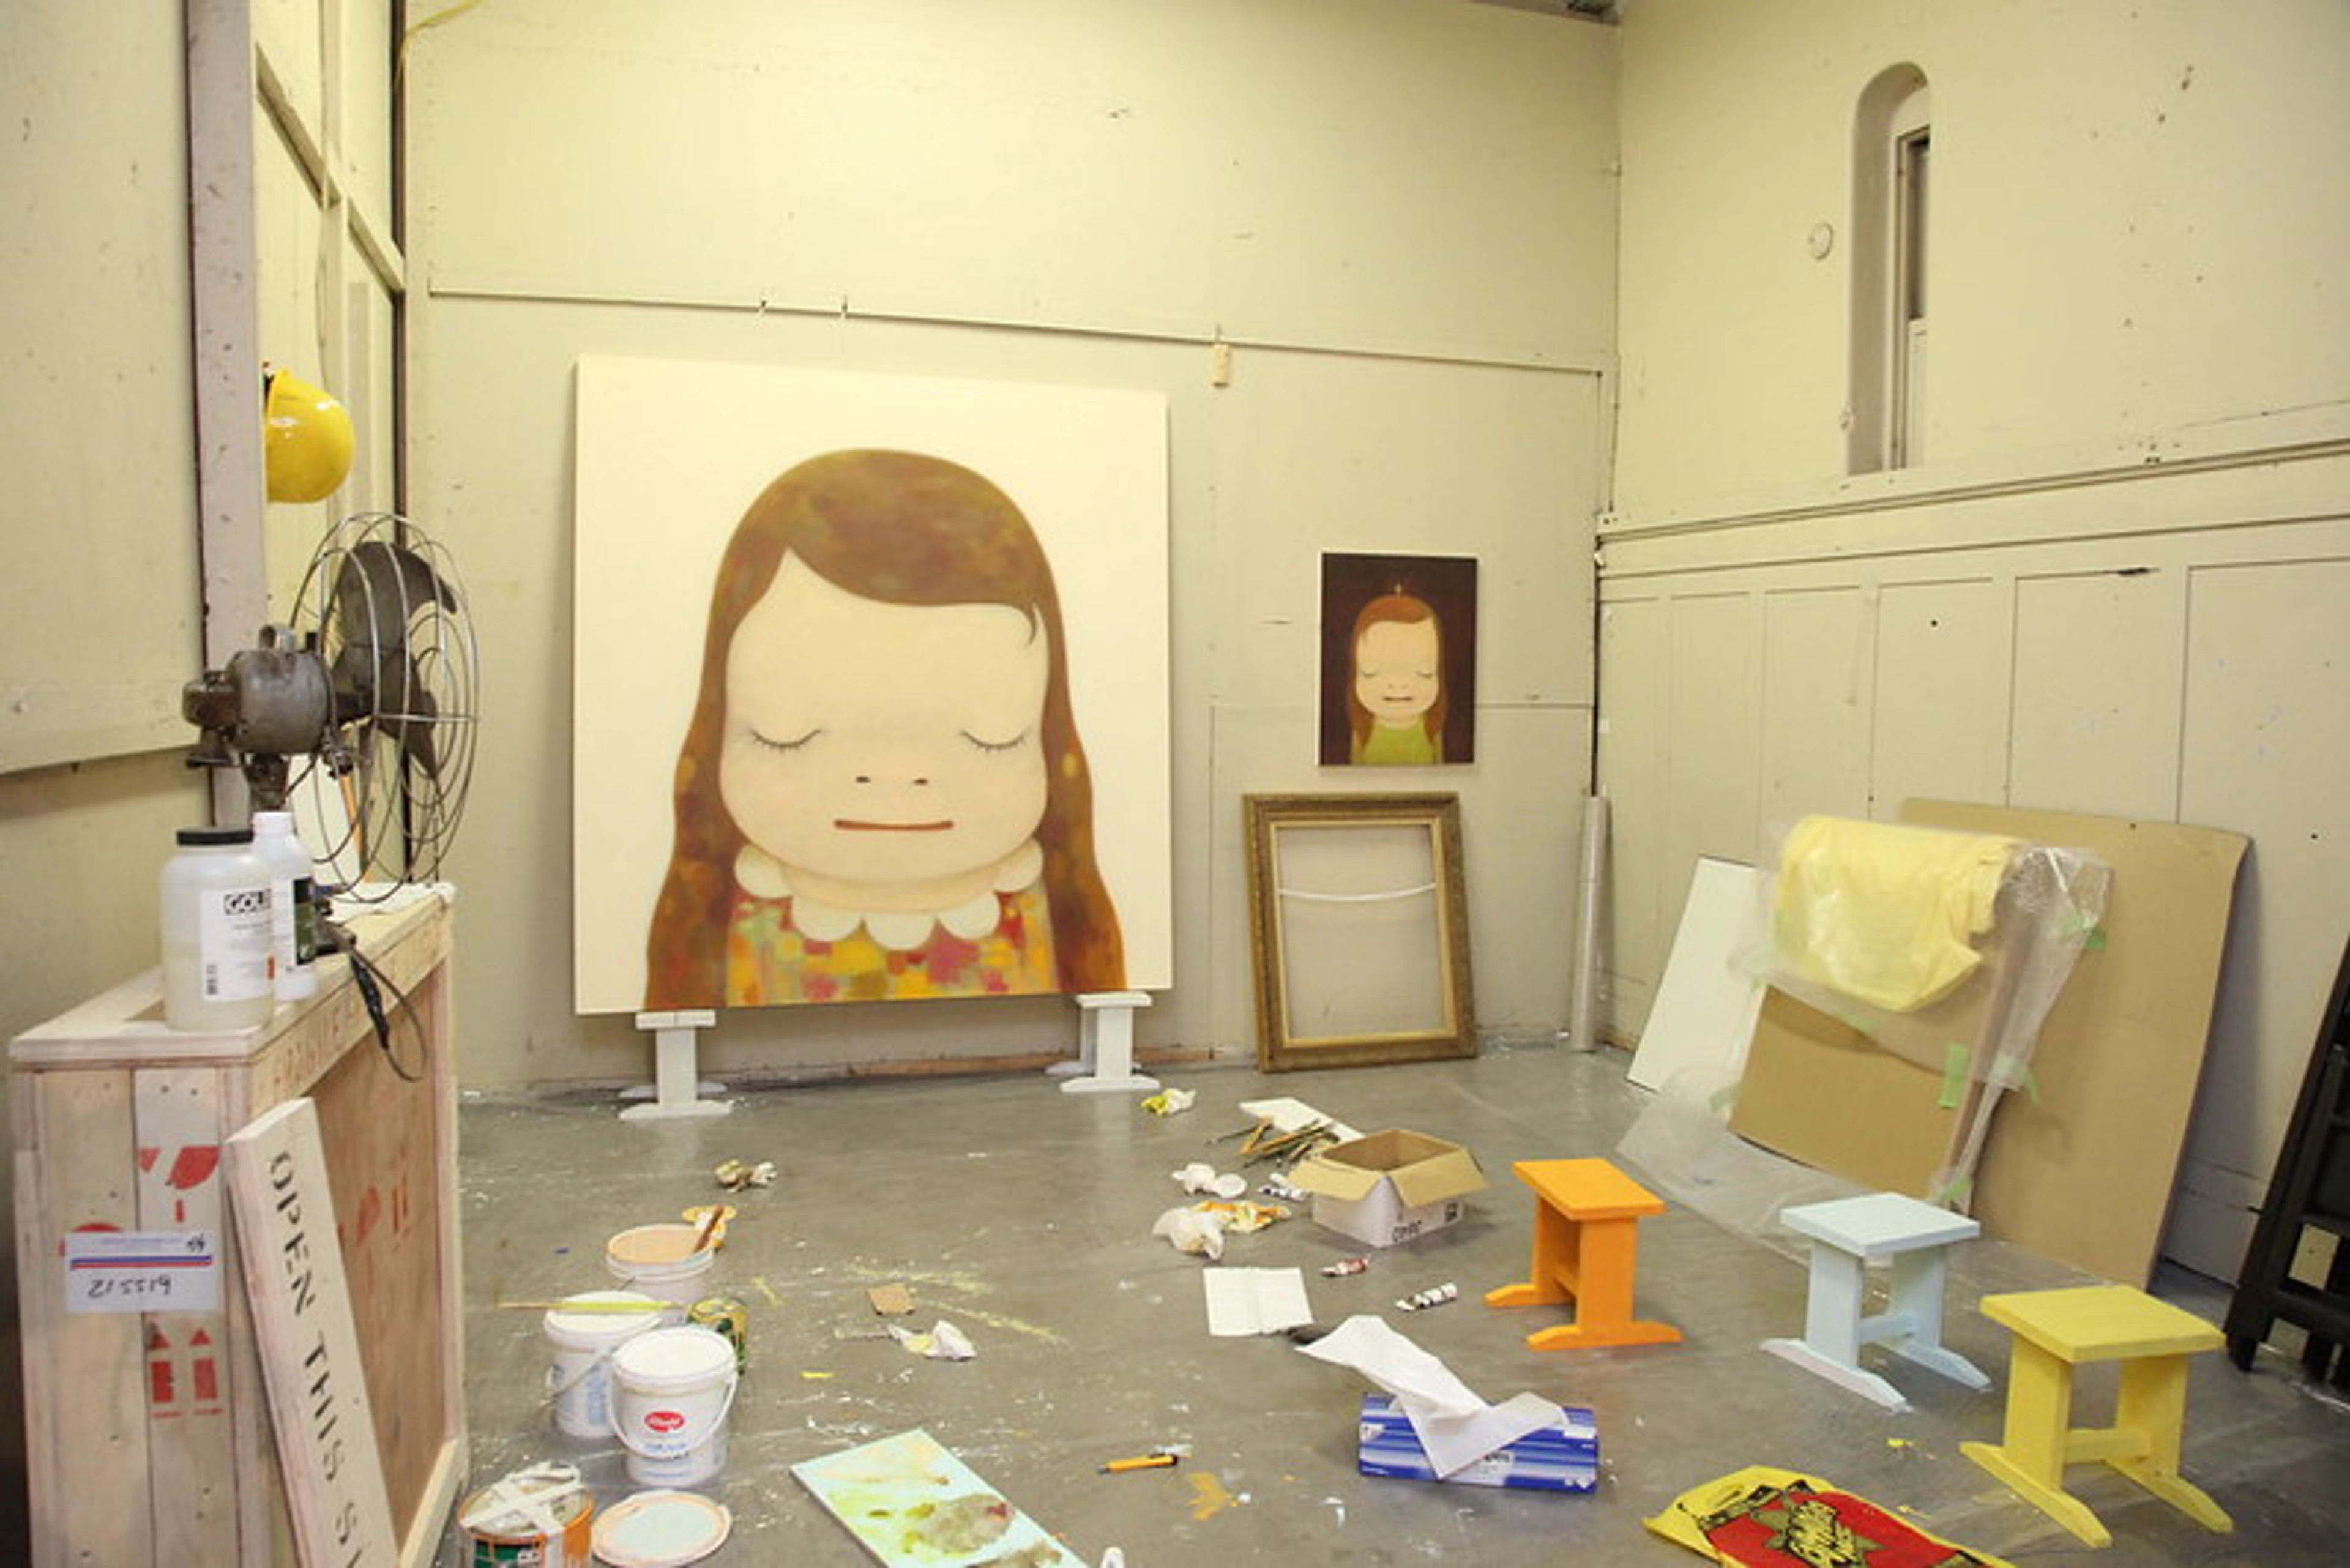
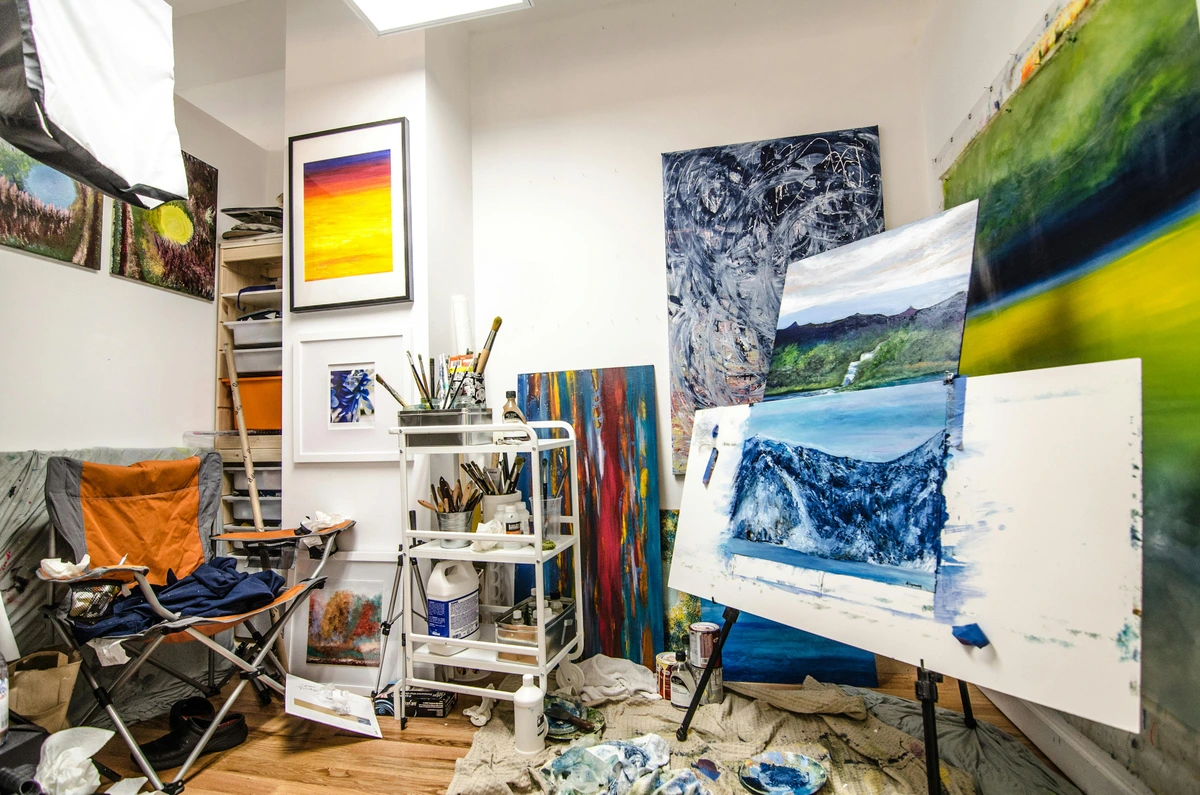
I’ve been a curator for years, and while the finished artwork always captures the eye, my real fascination lies in the genesis—the chaotic, messy, exhilarating decisions made in the studio. I know what you’re probably thinking: "Another article telling me to break out of my comfort zone?" And yes, that’s exactly what this is, but with a twist! We all gravitate towards our familiar tools, don't we? That dependable squeeze of acrylic, the reliable graphite pencil. They're good, really good, but sometimes that very reliability feels less like a trusted friend and more like a gilded cage for creativity, subtly nudging us away from true breakthroughs. It's like only ever listening to your favorite song when there's an entire universe of music waiting to be heard, or endlessly revisiting the same gallery room when a whole museum of unexpected works awaits.
I remember vividly hitting a wall with my own abstract art a few years back. Every painting felt the same, a comfortable rut of color and brushstroke. I was technically proficient, yes, but the soul was missing, the unexpected spark that makes art feel alive. That's when I dared myself to literally put down the brush and pick up something utterly foreign. It was uncomfortable, messy, and initially frustrating, but it forced my brain to rewire, to think differently about texture, line, and form. The most profound sparks of magic often happen when you dare to step beyond what feels safe. To help you embark on your own creative revolution, I've curated five extraordinary art materials that offer a departure from the norm. Today, I want to take you on a journey through some of the unsung heroes of the art supply world: Oil Sticks, Gouache, Cold Wax Medium, Silverpoint, and Unconventional Pigments. These aren't the materials dominating every gallery or art school curriculum, but they possess an incredible power to shake up your studio habits, reveal fresh ways of seeing and creating, and frankly, some of them are just plain fun to experiment with. I’ve found that truly engaging with new mediums is a continuous process of discovery, a kind of dialogue that fundamentally transforms my own approach to art. It's how I keep my own abstract art evolving, always asking, "What else is possible?" If you're looking to redefine your artistic boundaries and inject a new sense of adventure into your work, this guide is for you. What if a simple change in material could unlock a whole new dimension in your art?

The Unexpected Collaborators in Your Studio: Beyond the Familiar Palette
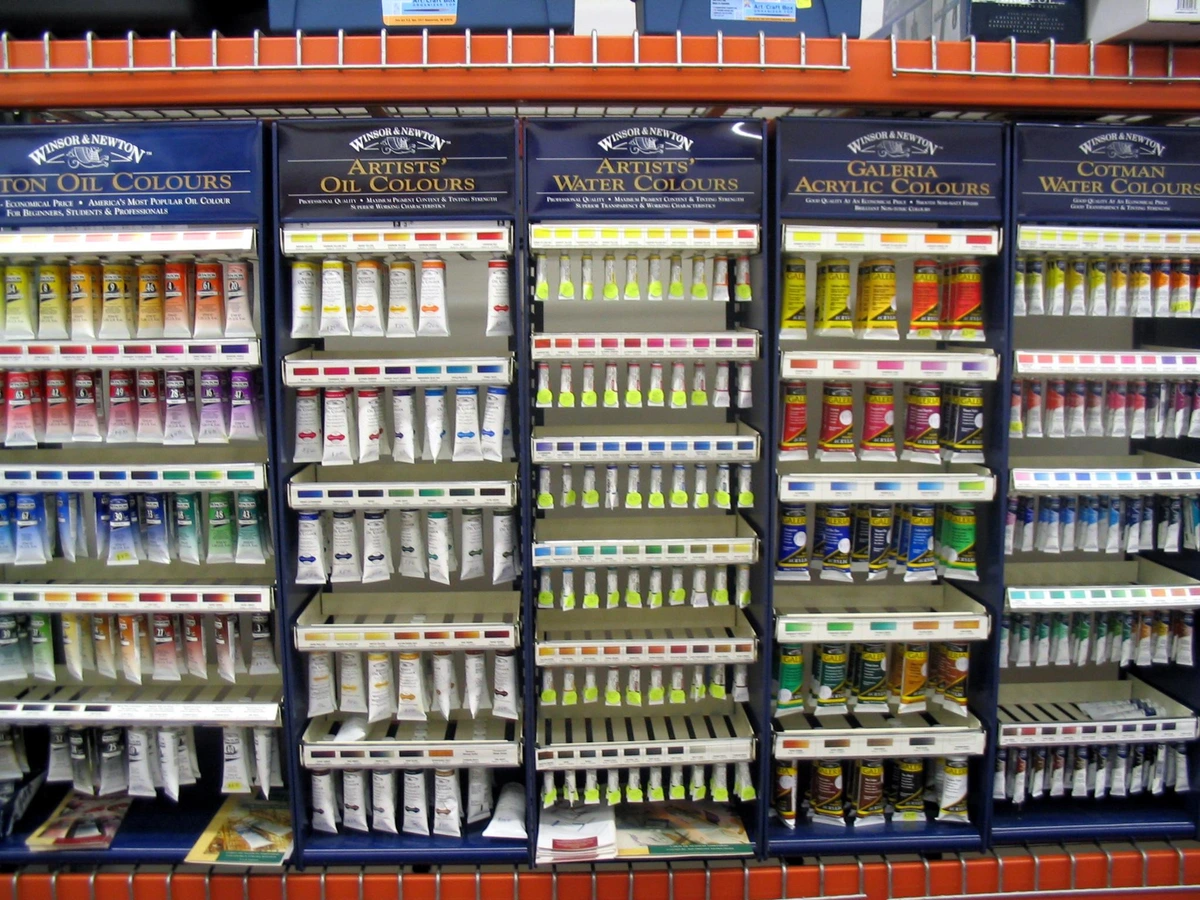
Walk into any art store, and the sheer volume of options can be dizzying. So many promises of brighter colors and smoother applications. But tucked away, often overshadowed by the best-sellers, are materials with truly unique personalities. Think of them not just as tools, but as collaborators, ready to push back, surprise you, and lead you down paths you never intended to travel. This isn't about discarding your tried-and-true favorites, but about expanding your artistic vocabulary. Let's explore five that I believe deserve far more attention, challenging you to rethink what's possible with alternative art supplies. It’s all part of what makes the creative process so endlessly fascinating—that search for new visual languages, new ways to express the unseen layers of thought and emotion. If you're curious about how art can truly evolve beyond routine, this is where you start.
1. Oil Sticks & Pigment Bars: Sculpting with Color, Free from the Brush
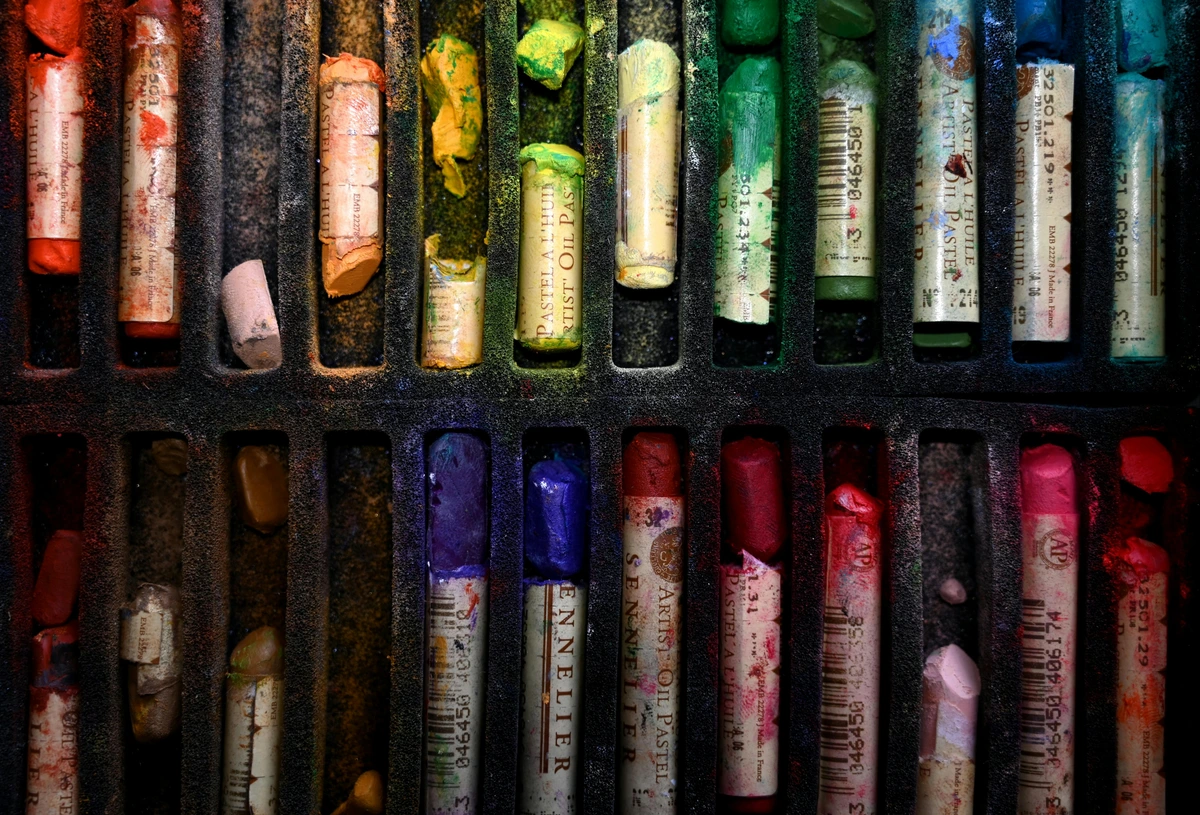
Imagine the rich, buttery pigment of oil paint, but freed from the brush. That's the immediate, almost primal appeal of an oil stick or pigment bar. It’s a substantial crayon, a robust bar of pigment, wax, and drying oil, designed for direct application. This isn't just a modern innovation; early forms of wax-based drawing and painting go back centuries. Techniques like encaustic, used by ancient Egyptians for mummy portraits and Romans for frescoes, harnessed the power of wax as a binder. Later, in the 20th century, artists seeking raw energy and directness, like the Abstract Expressionists Jean-Michel Basquiat and Willem de Kooning, embraced oil sticks to create iconic works with expressive gestures and bold mark-making that traditional brushes often mediated. More recently, artists like Anselm Kiefer have used their sculptural quality to build monumental, textured surfaces, adding a physical gravitas to their work. For them, it was a way to strip away formality and pour pure emotion onto the surface. Basquiat's Untitled (Skull), for instance, powerfully showcases the raw, immediate impact achievable with these tools. I remember the first time I really drew a large-scale figure with an oil stick; the immediacy and physicality were a revelation, pulling me into the process in a completely new way. It felt like I was sculpting with color, truly feeling the pigment on the canvas, almost like playing in mud, but with glorious, vibrant hues. If you're used to the precision of a brush, the glorious messiness and tactile feedback of an oil stick is pure liberation.
With an oil stick, you can draw directly onto your surface, scumble it (lightly drag color over another layer), smudge it with your fingers, or even thin it slightly with solvent and spread it like traditional paint. This effortlessly collapses the boundary between drawing and painting, giving you an expressive freedom a brush often can't match. They excel at creating impasto effects, where paint is applied thickly, creating a textured surface that truly jumps off the canvas. You can feel the pigment, almost smell the linseed oil, and enjoy the resistance as you push it across the canvas—it’s a truly embodied artistic experience.
Why are they so often overlooked? I suspect they're frequently mistaken for glorified oil pastels, which, let's be honest, can sometimes have a reputation for being a student-grade material. But professional-quality oil sticks are an entirely different beast. While both use pigment and a binder, oil pastels typically have a higher wax content and a non-drying oil, making them more like a robust crayon that never truly hardens or forms a permanent film, often remaining smudgeable indefinitely. Artist-grade oil sticks, on the other hand, use drying oils (like linseed or poppy oil) and have a significantly lower wax ratio, making them fully compatible with traditional oil paints and drying to a permanent, stable film. They boast superior lightfastness (resistance to fading over time) and permanence (long-term stability), along with a higher pigment load, meaning more vibrant, lasting color. When choosing, always look for artist-grade brands like Sennelier, R&F, or Winsor & Newton; their lower wax ratio allows for a creamier application and better interaction with other oil paints and mediums. My personal preference for surfaces is a primed canvas or wood panel, as their rigidity really stands up to the physical pressure of direct application. But don't stop there! Sanded gessoed paper or even Yupo paper can offer unique resistances, allowing for different textural outcomes. You want a surface that can take a beating!
Pros | Cons |
|---|---|
| Direct, expressive, physical mark-making | Can be messy, requires proper ventilation for solvents (if thinning) |
| Rich, buttery texture (impasto effects) | Higher initial cost for artist-grade quality |
| Effortlessly blurs line between drawing and painting | Can be slow to dry (to touch: days, fully cure: months), similar to traditional oils |
| Fully compatible with traditional oil paints & mediums | Not ideal for very fine, delicate detail work |
| Excellent permanence and lightfastness | Softens in extreme heat, needs careful storage |
| Ideal for raw, energetic expression | Some pigment staining possible (protect work surfaces!) |
| Good shelf-life when stored correctly | Hardening in cold conditions (can be warmed gently) |

Getting Started: Oil Sticks For anyone interested in powerful, expressive mark-making and wanting to truly feel the pigment on their surface, this is an absolute must-try. As a first project, try drawing directly onto a prepared canvas or panel with bold strokes, then experiment with blending just one area with your finger or a little odorless mineral spirit. For a slightly more challenging exploration, try working on a textured ground to see how the oil stick picks up the surface nuances. You can dive deeper into specific techniques and unlock the full potential of these vibrant tools in my guide to exploring oil sticks for expressive mark making. They’re a fantastic way to introduce dynamic texture and raw energy into your paintings, especially for those who love bold gestures in abstract art or expressive portraiture. When it comes to cleanup, wipe off excess pigment from sticks with a rag, and clean brushes used with solvents (like odorless mineral spirits) before washing with soap and water. Always dispose of solvent-soaked rags properly according to local regulations, often by letting them air-dry flat and then sealing them in a non-combustible container.
2. Gouache: The Opaque, Velvety Powerhouse with Remarkable Re-workability
Gouache is often, somewhat dismissively, called "opaque watercolor." And while, yes, it is water-soluble and opaque, that description barely scratches the surface of this incredible medium. Where traditional watercolor thrives on transparency and luminosity, gouache offers a dense, velvety, intensely pigmented matte finish. For decades, it was the gold standard for commercial illustrators, animation artists, and graphic designers—think iconic posters, book covers, and even early animated cell painting for Disney and other studios during the Art Nouveau and Art Deco periods. Classics like Disney's Snow White or the vibrant backgrounds of Fantasia often utilized gouache for its crisp, flat areas of color that reproduced beautifully in print. Its smooth, non-reflective finish was indispensable in a pre-digital era. It even found a home in scientific illustration, comic book art, and illuminated manuscripts for its precision and vibrant opaque qualities. Many concept artists and editorial illustrators still choose it today for its unique aesthetic and fast-drying nature.
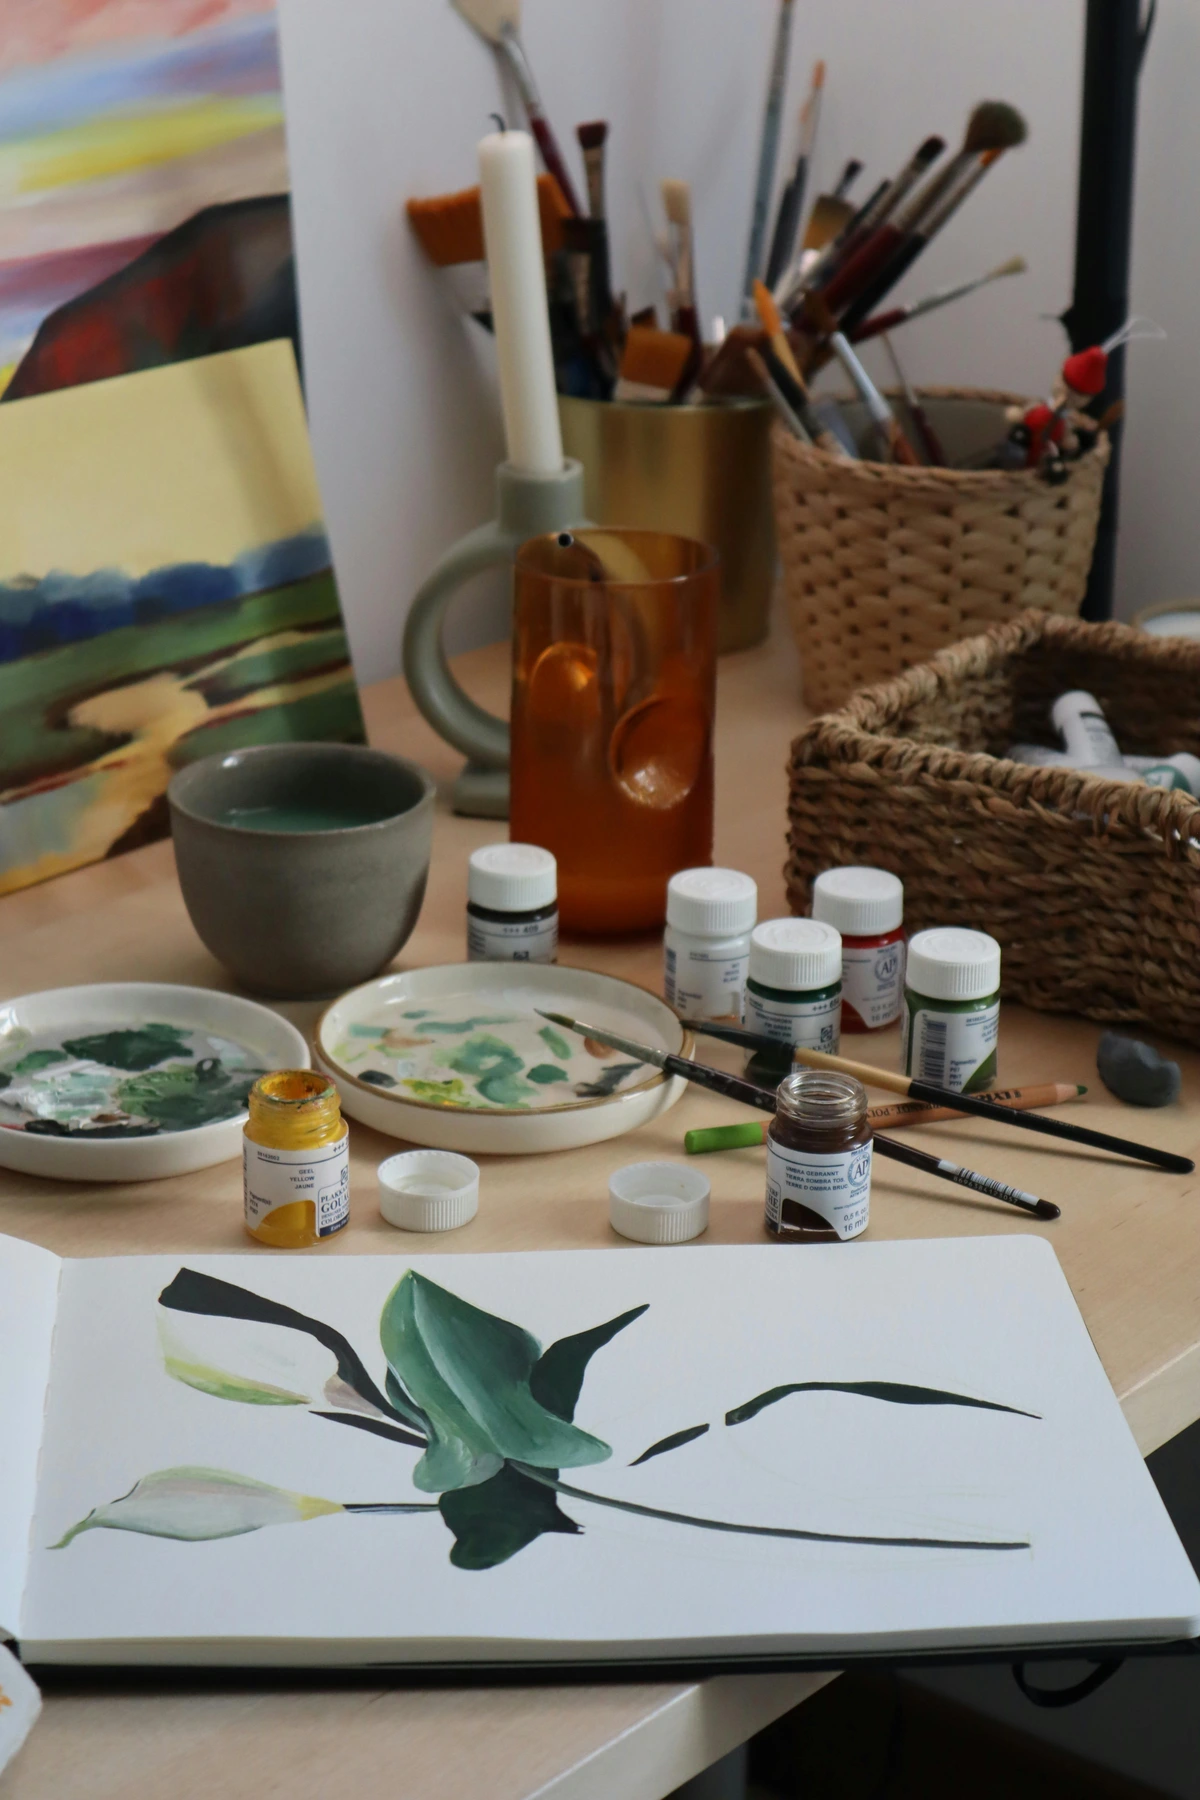
In the realm of fine art, however, it's sometimes relegated to a 'stepping stone' on the way to oils or acrylics. What a tragic oversight! Its unique matte quality offers a chalky depth and an understated elegance that other paints simply can't replicate. And here’s a beautiful secret that truly sets it apart: because it's re-wettable, you can lift, layer, and blend colors even after they've dried. This offers a level of forgiveness and flexibility that acrylics, once dry, simply cannot provide. You can create delicate glazes or build up surprisingly thick, textural impasto effects, offering a versatility many don't expect. The tactile feel is smooth and creamy when wet, drying to a wonderfully soft, velvety finish that absorbs light beautifully. When getting started with gouache, a good quality synthetic or natural hair brush (like a sable blend) and a non-absorbent mixing surface are key. I typically use a ceramic plate or a plastic palette. Try painting simple botanical illustrations or abstract color blocks to truly appreciate its unique opacity and matte finish. It’s perfect for achieving that graphic, bold look or for detailed, flat illustrations where precision is paramount, allowing for crisp edges and smooth color fields.
However, be aware that applying gouache too thickly can sometimes lead to cracking, especially on flexible surfaces like paper; the binder (gum arabic) can become brittle when overextended. To mitigate this, some artists add a tiny drop of flexible acrylic medium to their water when mixing, or work on a rigid support like illustration board. A common beginner's mistake is overworking an area with too much water, which can cause previous layers to lift (where pigment particles loosen and redeposit) or create a patchy finish, often called 'blooming.' Blooming occurs because too much water can reactivate underlying layers, causing pigment to migrate unevenly. Patience and controlled, thinner layers are your friends here; think of it like gently feathering the paint rather than scrubbing it. Another trick? Use opaque white gouache to adjust values and opacity without losing vibrancy. When dried, it's best framed under glass without varnish, as varnishing can alter its distinct matte quality and re-wet the paint.
To truly grasp its unique position among paint types, let’s compare it to its closest relatives:
| Feature | Watercolor | Gouache | Acrylic | Oil Paint | | :--- | :--- | :--- | :--- | | Opacity | Transparent | Opaque | Opaque (can be thinned to transparent) | Opaque (can be thinned to transparent) | | Finish | Luminous, glossy | Matte, velvety | Satin or Gloss (can be matte with medium) | Varies (from matte to high gloss depending on medium) | | Re-wettable? | Yes | Yes | No (permanent when dry) | No (permanent when dry) | | Drying Time | Fast | Moderate (a few minutes to an hour) | Fast | Slow (hours to days, depending on thickness and mediums) | | Permanence (when dry) | Yes | No (water soluble, needs protection) | Yes | Yes | | Lightfastness | Good (artist-grade) | Good (artist-grade) | Excellent | Excellent | | Ease of Blending (Wet-into-wet) | High | Moderate-High | Moderate | High | | Adhesion to Surfaces | Good on absorbent paper | Good on paper, illustration board | Excellent on most surfaces | Excellent on canvas, wood | | Best For | Glazing, washes, luminosity, delicate effects | Flat color blocks, illustration, matte effects, graphic art, precise details, re-working | Layering, texture, versatility, permanence, impasto | Rich color, blending, traditional techniques, subtle transitions | | Best Surfaces | Paper (rough, cold press) | Paper (smooth, hot press, watercolor paper, illustration board) | Canvas, wood, paper, fabric | Canvas, wood panel |
Pros | Cons |
|---|---|
| Matte, velvety finish | Can crack if applied too thickly (use flex medium/rigid support) |
| Highly re-wettable (forgiveness & re-workability!) | Not permanent when dry, requires framing under glass |
| Vibrant, opaque colors | Varnish can change its unique matte finish |
| Fast drying time | Can lift previous layers or create 'blooming' if over-worked with too much water |
| Excellent for crisp edges & flat washes | Colors can shift slightly when drying (lighter hues often appear slightly darker, deeper tones may lighten) |
| Great for mixed media with dry materials | Achieving perfectly smooth blends can be challenging due to fast drying |
| Can create subtle textural variations | Susceptible to moisture even after drying |
Getting Started: Gouache If you're curious about venturing into this lush world, starting with a good set is key. My review of the best gouache sets for beginners is a great place to start, with brands like Holbein or Winsor & Newton offering excellent artist-grade options. For a broader understanding of different paint characteristics, you might find my definitive guide to paint types for artists insightful. It's a fantastic choice for those who appreciate a unique matte aesthetic and the flexibility of re-working areas long after they've dried, making it ideal for experimental abstract work or precise illustrative pieces. Its graphic punch and surprising re-workability can truly revolutionize how you approach color and form. Cleanup is a breeze: warm water and soap are usually sufficient for brushes and palettes, just don't let the paint dry on your brushes. Simply rinse any leftover paint down the drain, as it's water-soluble and generally non-toxic.
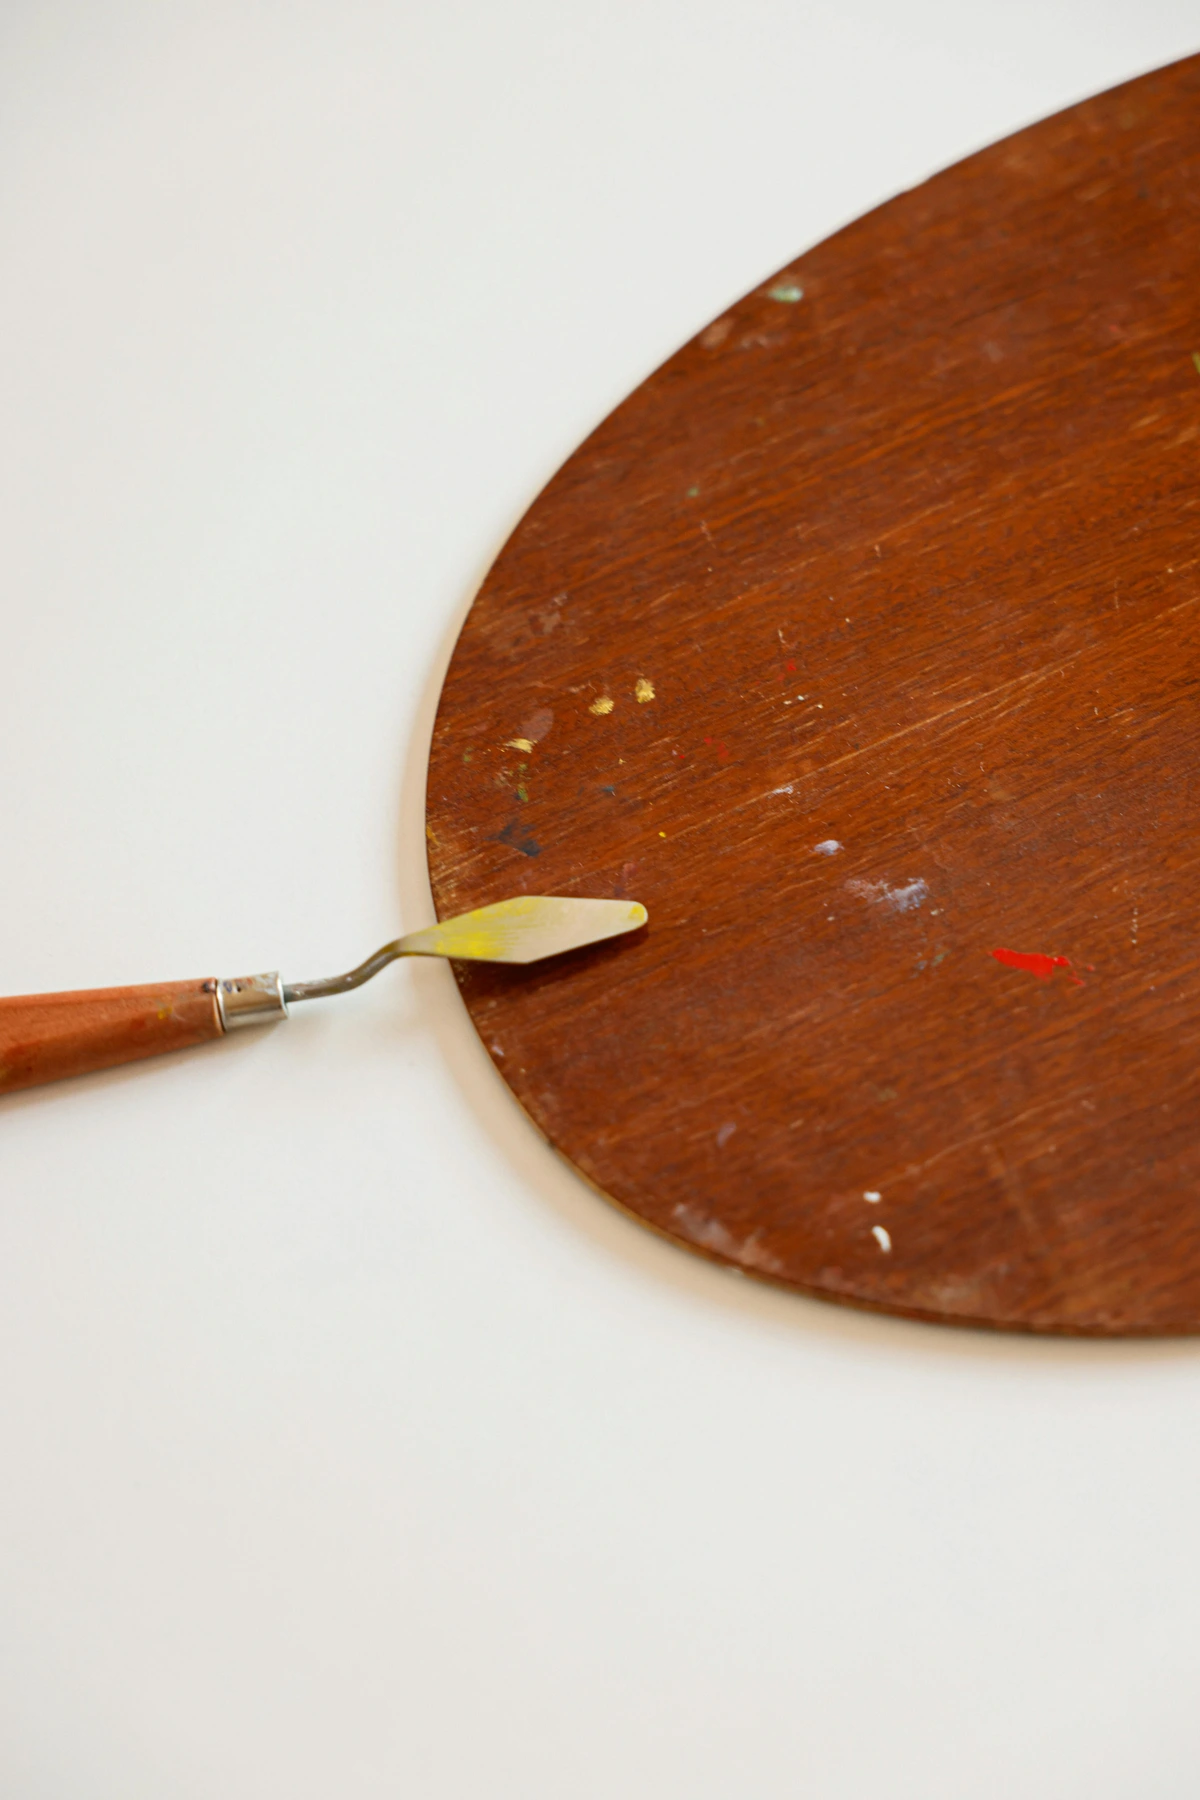
3. Cold Wax Medium: For Textural Narratives You Can Feel
For those of us who adore texture, who want to build up surfaces that beg to be touched, cold wax medium is nothing short of a revelation. This soft, sculptural paste, primarily composed of beeswax, a solvent (like odorless mineral spirits), and a hint of resin, is mixed directly with oil paints. It instantly thickens their body, making them luscious and sculptural. But it does so much more: it accelerates drying time by increasing surface area and creating a more permeable film, adds a beautiful translucent quality, and imparts a rich, satin-to-matte finish. Working with it feels like frosting a cake, but for your canvas—you can really push the paint around with palette knives, clay tools, humble kitchen scrapers, or even just your hands. It excels at creating those satisfying, chunky, and weathered textures and impasto effects that jump off the surface. I’ve found it invaluable for abstract work, especially when I want to convey a sense of history or the passage of time, a bit like the earth's own geological layers being exposed. It's about building and revealing stories through the surface itself. The subtle scent of beeswax and solvent mingling with oil paint becomes part of the studio atmosphere, a sensory cue that something truly textural is being created.
Its real magic lies in the ability to build up translucent layers and then, with various tools like a brayer, silicone shaper, or even just a credit card, excavate back through them. This process of scraping, incising, and revealing creates a rich history of your marks, turning your canvas into an archaeological dig. It’s a medium that forces you to engage with the surface on a deeper, more physical level, and the results are truly unique. I've found it particularly effective for abstract landscapes or textured studies, where I want to convey a sense of geological time and weathered surfaces. Be warned: the temptation to keep adding and scraping is strong! A common beginner's mistake is using too much wax, which can make the paint brittle and prone to cracking; a good starting ratio is about 1 part wax to 4 parts oil paint, though this can be adjusted with experience. Always ensure good ventilation due to the solvents involved (e.g., odorless mineral spirits like Gamsol, or even citrus-based solvents), and take breaks if you feel lightheaded. Compared to traditional encaustic, cold wax eliminates the need for heat, making it safer and more accessible for home studios, though proper ventilation for solvents remains crucial. When properly combined with oil paints, cold wax creates a durable, non-yellowing film, and with sufficient layers, it can be as archivally sound as traditional oil paintings. Like all oil works, it benefits from a final varnish once fully cured (which can take many months to a year, depending on thickness) to protect the surface and unify the sheen. Occasionally, a wax bloom (a slight haziness) can appear, which is easily buffed away with a soft cloth. This medium has been a key part of my journey with mixed media and building depth in abstract paintings.
Pros | Cons |
|---|---|
| Creates incredible texture and impasto effects | Requires good ventilation due to solvents (e.g., mineral spirits) |
| Accelerates oil paint drying time (to touch) | Too much wax can make paint brittle and prone to cracking |
| Adds translucency and a unique matte/satin finish | Can add to the overall cost of oil painting |
| Allows for excavation and expressive layering techniques | Final varnish only after full cure (can take many months) |
| Fully compatible with traditional oil paints and mediums | Working with it can be quite messy |
| Enhances depth and luminosity in layers | Initial learning curve for wax-to-paint ratios and layering timing |
| Safer than heated encaustic for home studios | Fine detail work can be challenging due to its thick consistency |
| Easily buffed to remove wax bloom | Not suitable for flexible stretched canvas if applied very thickly |
| Good archival stability when used correctly | Some artists prefer the gloss of pure oil paint |
Getting Started: Cold Wax Medium For a first project, try applying a thick layer of paint mixed with cold wax, letting it set for a bit (around 30-60 minutes, depending on the environment), then scraping back into it with a palette knife or a simple kitchen scraper to reveal layers underneath. Don't be afraid to make a mess; that's where the best discoveries often lie! Other common mistakes include working too quickly, not allowing thin layers to set enough before adding new ones, or not varying your tools, which can lead to a monotonous surface. For cleanup, tools should be cleaned with mineral spirits or a citrus-based solvent before the wax hardens, as it can be stubborn once dry. Always dispose of solvent-soaked rags and used solvents responsibly according to local hazardous waste guidelines.
4. Silverpoint: Drawing with Patience, Precision, and the Passage of Time
Now for something truly out of left field, an ancient technique favored by masters long before graphite became commonplace. Silverpoint is about drawing with a stylus made of actual silver (or sometimes gold, copper, or lead) on a specially prepared, lightly abrasive ground. This ground, crucial for the technique, is essentially a prepared surface (often paper, vellum, or panel) that contains a fine abrasive, such as bone ash, marble dust, titanium white pigment, or gesso powder, usually bound in a traditional gesso (like rabbit skin glue gesso) or a modern acrylic-based binder. The abrasive quality is vital, as it's what allows the tiny metallic particles from the stylus to be physically abraded onto the surface, forming the line. You can purchase commercially prepared silverpoint grounds, or even experiment with DIY solutions. Historically, it was a fundamental drawing method during the late Gothic and early Renaissance periods, used by artists like Jan van Eyck (Man in a Turban prep studies), Albrecht Dürer (Self-Portrait at 13, numerous animal and botanical studies), and of course, Leonardo da Vinci (Portrait of a Warrior, anatomical studies) for their incredibly detailed preparatory studies and intricate natural observations. Its subtle, luminous quality was perfect for capturing light and shadow with extraordinary precision, offering a delicate, almost ethereal line quality quite distinct from the softer, darker marks of charcoal or the more variable graphite pencil. It demanded a focused hand, a slow breath, and an unwavering eye, creating lines so fine they feel almost etched onto the surface. The faint whisper of the silver stylus on the slightly abrasive ground is a meditative sound, grounding you in the precision of each mark.

credit, licence
Here's where the magic truly unfolds: over weeks and months, the silver slowly tarnishes through oxidation, and that faint, cool grey line warms into a beautiful, subtle golden-brown patina. It's a living medium, evolving with time, literally capturing the passage of days and seasons within your artwork. This transformation from a cool, almost scientific line to a rich, warm, historical tone is deeply satisfying. The rate and exact hue of this tarnishing can be influenced by environmental factors like humidity, air pollution, and even the pH of the ground itself. This technique demands exquisite precision and mindfulness, primarily because it's virtually impossible to erase. Unlike graphite, which sheds particles that can be lifted, silverpoint marks are indelible once made. Every single mark counts. In our fast-paced, instant-gratification world, engaging with a slow, evolving medium like silverpoint feels like a quiet act of rebellion, a meditation. It forces a deliberate hand, fostering an incredible connection between eye, hand, and mind. I find it particularly suited for delicate portraits, detailed botanical studies, or intricate architectural drawings where its subtle elegance and luminous sheen can truly shine. The challenge of achieving strong darks can be overcome by building up many fine cross-hatched layers, using a toned ground to provide inherent mid-tones, or by sparingly combining it with light washes of ink or watercolor for deeper accents. The reward? Drawings with an unparalleled, almost ethereal, living quality, imbued with a sense of history and quiet dedication. Can you imagine the patience and focus required to create such intricate works with a tool that offered no room for error? You can buy styli made from pure silver wire or with a silver tip, often set into a wooden handle, making it a tool that truly lasts a lifetime. Brands like Apico, Edward R. Wade, or even modern calligraphy suppliers offer excellent silverpoint tools and grounds. Don't be intimidated; start small, embrace the challenge of permanence, and marvel at the beautiful evolution of your marks. While its popularity waned with the advent of graphite, contemporary artists still cherish it for its unique aesthetic and meditative process.
Pros | Cons |
|---|---|
| Produces extremely delicate, precise, luminous lines | Virtually impossible to erase, demands exquisite precision |
| Develops a beautiful, warm patina over time (a living medium) | Requires a specially prepared, lightly abrasive ground (not regular paper) |
| Excellent permanence and archival quality | Cannot achieve very dark, dense values easily; requires layered cross-hatching or toned grounds |
| Stylus lasts a lifetime (one-time purchase) | Requires patience and a slow, deliberate hand to build tone |
| Forces mindfulness, observation, and deliberate execution | Initial cost for stylus and prepared grounds (or time to make your own) |
| Unique, subtle metallic sheen with historical gravitas | Primarily suited for linear drawing, less for broad tonal washes |
| Odorless and non-toxic | Delicate surface requires careful handling and framing |

Getting Started: Silverpoint As a first project, try drawing a simple still life or an object you can observe carefully, focusing on developing a light, consistent touch to build up tones gradually. It teaches you to see in a completely new way, to appreciate every single stroke. For cleanup, silverpoint styli usually just need a gentle wipe to remove any residue, or occasionally a soft polishing cloth to restore shine. The ground itself, if used in liquid form, can be rinsed with water before it dries.
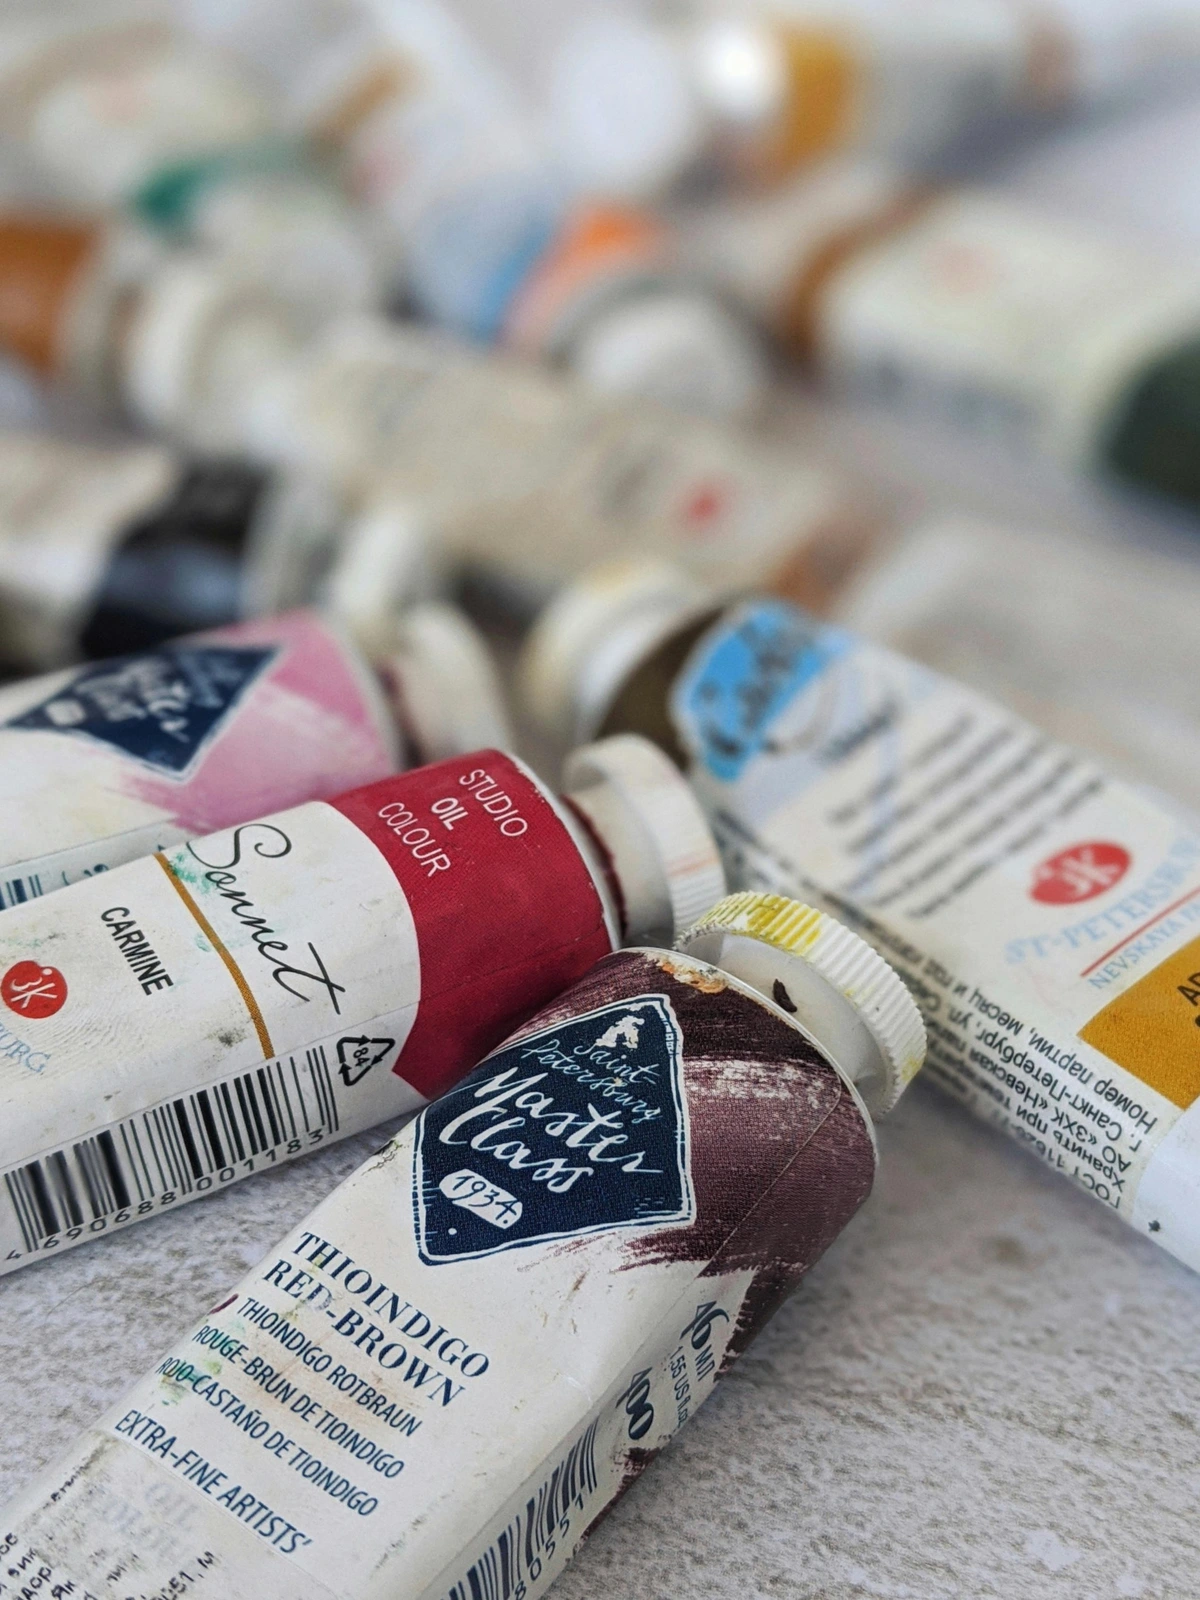
5. Unconventional Pigments: From Earth to Art, Connecting to the Source
The most profoundly underrated art material might just be the one lying right beneath your feet, or growing in your garden. For centuries, artists didn’t buy tubes of paint; they made them, grinding up earth, minerals, and plant matter to create their own vibrant palettes. Rediscovering this ancient practice isn't just about making paint; it's a powerful, grounding way to connect with your immediate environment and craft a truly unique, personal artistic language. This exploration of non-traditional painting mediums takes us back to the roots of color. Indigenous cultures worldwide have rich histories of using locally sourced pigments for everything from ancient rock art (like the ochre paintings of Aboriginal Australians) to elaborate body painting, showing a deep, spiritual connection between land, identity, and artistry. Think also of the vibrant mineral pigments used in ancient Mesoamerican frescoes, or the historical dyes extracted from plants and insects across Asia and Europe. The very origin of color can become part of your artwork's story. The earthy scent of raw materials, the satisfying grit as you grind, the rich, often muted tones that emerge—it's an utterly sensory experience that connects you deeply to your material.

You can literally unearth rich browns, umbers, and ochres from local soils and clays, deep oranges and reds from rust (yes, rust!), and a surprisingly delicate array of hues from foraged flowers, berries, or even fallen leaves. But the palette expands far beyond that: consider charcoal from burned wood, rich black soot collected from candles, vibrant greens from naturally occurring malachite, deep blues from azurite, rich reds from hematite, or even subtle yellows from turmeric and intense crimsons from cochineal insects (historically, a major source of crimson dye!). The world is your pigment pot, you just need to know how to look and, crucially, how to safely process. The inherent texture and character of handmade paints will be unique to your process, a direct result of the particle size and composition of your chosen raw materials, giving each stroke a subtle, narrative quality.
Gathering and Processing Your Own Pigments: A Step-by-Step Guide
The process of transforming raw materials into usable pigment can be incredibly rewarding—a true alchemical journey. Here’s a general approach:

- Collect Raw Material: Gather your chosen earth, mineral, or plant matter. For earth pigments, look for rich, distinct colors in soil or clay beds. For plant materials, consider strong dyes like berries (elderberry, but exercise extreme caution for toxicity with many berries like pokeberry, which is both toxic and fugitive), onion skins, red cabbage, or certain flower petals (e.g., marigolds, coreopsis, indigo plants). For minerals, ensure they are safe to handle and grind (more on safety below). Always collect responsibly and sustainably, taking only what you need and leaving plenty behind. Respect private property and avoid protected natural areas. The tactile experience of sourcing these materials offers a unique connection to your art, almost a meditative act.
- Clean & Prepare: Remove any debris, leaves, or stones. For earth, let it dry completely in the sun, then break it into smaller pieces. For plant matter, you might need to steep it in water to extract color, then reduce the liquid by slow evaporation to get a concentrated dye, or dry and grind the plant matter itself. Some materials, like avocado pits and skins, can yield surprising pinks and browns after a soaking and drying process.
- Grind into Fine Powder: This is crucial for smooth paint. A ceramic mortar and pestle works well for small batches of dry earth or soft minerals. For larger quantities, or if you want a finer powder, a dedicated coffee grinder (used only for art materials!) can be effective for dry earth pigments. For harder materials (like some rocks), a specialized pigment mill (or even a rock tumbler with abrasives) might be necessary. For wet dyes, this step involves evaporating the liquid to get a concentrated pigment paste or powder. The finer the powder, the smoother your paint will be, the better it will mix with binders, and the more consistent your color will be. This is often the most time-consuming and rewarding part of the process, transforming your raw finds into a velvety dust.
- Sieve (Optional but Recommended): Pass your dry pigment powder through a fine sieve, mesh, or even a silk stocking to ensure consistent particle size and remove any remaining impurities. This step drastically improves paint quality and reduces grit.
- Test for Color: Mix a tiny amount with water or your chosen binder to see the true color and intensity. Remember that the color often deepens and changes once wet. This is also where you'll start to notice the unique, often earthy undertones of natural pigments, distinct from synthetic colors.
Bind Your Pigment
Once you have your fine pigment powder, the next crucial step is mixing it with a binder – the substance that holds the pigment particles together and adheres them to your chosen surface. The choice of binder depends on the type of paint you want to create. The binder's role is not just to hold, but to influence the paint's texture, drying time, and eventual archival stability, fundamentally shaping the final character of your homemade paint.
Medium | Traditional Binder | Notes | Preparation & Shelf-life |
|---|---|---|---|
| Oil Paints | Linseed oil, walnut oil, poppy oil | Creates a slow-drying, rich, and durable paint. Ideal for many earth and mineral pigments due to their inherent stability. | Pigment is ground into oil; paint is very stable. |
| Watercolors/Gouache | Gum arabic (with glycerine and honey) | Water-soluble, allowing for transparent (watercolor) or opaque (gouache) washes. Excellent for many plant dyes, though lightfastness is a key concern. | Gum arabic solution needs periodic preparation; short shelf-life for plant-based watercolors. |
| Acrylics | Acrylic polymer emulsion (e.g., acrylic medium, gloss/matte medium) | Creates a fast-drying, permanent, and flexible paint. A versatile choice for most pigments, offering good adhesion. | Easy to mix directly; highly stable. |
| Egg Tempera | Egg yolk emulsion (historically common) | Dries quickly to a durable, luminous matte finish. Requires fresh eggs and is less flexible. Traditionally used with mineral and earth pigments. | Binder must be made fresh daily; limited working time. |
| Casein Paint | Casein (milk protein) | A durable, matte, quick-drying paint, re-wettable initially but becoming water-resistant. Good for a variety of pigments. | Casein binder can be made or bought; good shelf-life for powder, shorter for liquid. |

Safety and Archival Considerations: Crafting with Care
Is it more work than squeezing a tube? Absolutely. Are the results always archival in the traditional sense? Not inherently; lightfastness (resistance to fading over time) and permanence (long-term stability) depend entirely on the source material and your processing. However, steps can be taken to significantly improve longevity, and prioritizing safety is non-negotiable:
- Careful Sourcing: Prioritize known stable natural pigments (e.g., earth pigments like ochres, umbers, siennas, iron oxides are often very stable and lightfast, having survived millennia in cave paintings!). Avoid fugitive pigments (colors that fade quickly, often found in certain bright berries or flowers like pokeberry, which is both toxic and fades rapidly). Research is key here; a quick search for a plant's dye properties will often indicate its lightfastness. Look for information on traditional dye plants known for color stability (e.g., madder for reds, indigo for blues, weld for yellows).
- Pre-testing: Create a sample swatch of your homemade paint and expose it to direct sunlight for a few months, comparing it to a kept-away sample. This is your personal lightfastness test and a crucial step for understanding your materials. I've been surprised by what lasts and what doesn't!
- Stable Binders: Use binders known for their stability, like artist-grade oils or gum arabic. Avoid household glues or unstable plant-based binders if longevity is your goal. For plant-based pigments, consider using a mordant (a substance that fixes the dye to the material) if creating dyes, which can improve lightfastness.
Always practice good safety: Wear gloves and a dust mask (N95 or better) when grinding any dry pigments, regardless of their source, to avoid inhaling fine particles, which can irritate lungs or, with certain materials, be toxic. Even seemingly innocuous materials like coffee grounds, if inhaled as fine dust, can be problematic. Some natural materials (like certain minerals or plant extracts) can be highly toxic or irritants; always research thoroughly before handling unknown substances and consult authoritative safety guides. If you're unsure about a material's safety, research its Material Safety Data Sheet (MSDS) online – it's like a safety manual for pigments. For example, minerals containing heavy metals like lead (e.g., minium red), mercury (e.g., vermilion), or arsenic (e.g., realgar) are highly toxic and should be avoided entirely by hobbyists and beginners due to severe health risks. Even seemingly harmless plant pigments can cause skin irritation or allergic reactions; perform a patch test if you're sensitive. Consult resources on long-term preservation of artwork if you're concerned about your work's longevity. For cleanup, ensure all pigment residue is collected and disposed of according to local environmental regulations, particularly for any pigments that might be toxic. Never wash mineral pigments down the drain.
Pros | Cons |
|---|---|
| Deep personal connection to nature and history | Requires significant time, effort, and research to process |
| Unique, environmentally sustainable palette | Lightfastness/permanence can be variable or unknown (requires rigorous testing) |
| Cost-effective (often free raw materials) | Some raw materials can be toxic or irritants, requires strict safety gear & knowledge |
| Empowering, teaches about color origin & chemistry | Inconsistent results possible for beginners (particle size, binder ratio) |
| Promotes experimentation and discovery | Limited range of vibrant, saturated hues compared to commercial options |
| Contributes to a sustainable art practice | Reproducing exact colors can be challenging, potential for allergens from plants |
| Unique tactile and aesthetic qualities | Batch consistency can be difficult to achieve |
Getting Started: Unconventional Pigments A simple first project might be collecting local earth samples, grinding them, and making small watercolor cakes to explore your environment's hidden colors. For a slightly advanced project, try binding a processed earth pigment into linseed oil to create a small batch of oil paint. The inherent texture and character of handmade paints will be unique to your process. The true value isn't just in the finished product; it's in the transformative process itself. It deepens your understanding of color, connects you to the earth, and offers a profoundly sustainable approach to art-making. For those of us concerned with our ecological footprint, exploring these options is not just an artistic choice, but a conscious lifestyle step, as part of a larger conversation about the best eco-friendly art supplies for conscious artists. It's a journey back to the very origins of art.
FAQ: Stepping Beyond the Standard Palette
Let’s tackle some common questions you might have about integrating these fascinating, often experimental art techniques into your practice. After all, the best way to demystify a new material is to ask the practical questions!

Q: Are these unique materials expensive?
A: It really varies quite a bit, much like traditional art supplies. Professional artist-grade oil sticks can be a significant investment, often comparable to high-quality oil paints from brands like Sennelier, typically ranging from $10-$40 per stick. A starter set might cost $50-$100. However, a single stick can go a long way. Gouache, especially student-grade sets, is generally quite affordable, often on par with mid-range watercolors ($20-$50 for a starter set of tubes or pans), though artist-grade options from Holbein or Winsor & Newton will cost more. Cold wax medium can appear pricey upfront for a tub ($30-$60), but a little goes an incredibly long way when mixed with oils, making it surprisingly cost-effective over time. Silverpoint styli are a fantastic one-time purchase that lasts indefinitely, with high-quality silver tips ranging from $30-$100+; however, you'll need to account for specially prepared grounds (which can be DIY or bought for $10-30 per sheet/bottle of ground), adding to the cost. Starter kits combining a stylus and some prepared paper are often available for around $50-$80. And of course, making your own earth pigments from foraged materials can be virtually free for the raw materials, requiring only time, effort, and careful research, though safety gear (mask, gloves) and binders are an investment. I usually think of it as an investment in a new skill and a deeper connection to materials, rather than just a material purchase.
Q: Can I combine these with my existing supplies?
A: Mostly, yes, and that’s part of their appeal! Think of them as new companions for your existing toolkit. Oil sticks and cold wax medium are specifically designed to be used seamlessly with traditional oil paints, allowing for incredible mixed media possibilities and the creation of rich, layered textures. You can even combine them! You might apply an oil stick over a dry acrylic underpainting, for instance. Gouache plays very well alongside watercolors, offering opaque accents or foundational layers, and can even be used with ink, colored pencils, or pastels for mixed media drawings. Unconventional pigments, once properly processed, can be bound into almost any medium—acrylic (using an acrylic polymer emulsion), oil (using linseed or walnut oil), or watercolor (using gum arabic with glycerine and honey)—to expand your palette. Silverpoint is more of a standalone drawing technique due as it requires a specific type of prepared, abrasive surface, making direct combination on regular paper challenging. However, a silverpoint drawing can certainly be integrated into a larger mixed-media piece or serve as a delicate underdrawing for other mediums before adding layers of transparent paint or ink. The beauty is in the experimentation, so don't be afraid to try unique combinations and see what emerges. That's where the real revolution happens.
Q: What about safety considerations for these materials?
A: This is a crucial point, and it varies greatly by material, so always prioritize your health and research thoroughly! For oil sticks, cold wax medium, and binding natural pigments into oil, good ventilation is always key, as solvents (like odorless mineral spirits) are often involved. Always check the manufacturer's safety data sheets (SDS) for commercial products. When foraging for unconventional pigments, ensure you know your materials; some natural substances can be highly toxic or irritants if inhaled, ingested, or even touched. Examples of highly toxic pigments to avoid include those containing heavy metals like lead (e.g., minium red), mercury (e.g., vermilion), or arsenic (e.g., realgar). Certain common plant materials like pokeberry can be irritating or toxic. Always wear gloves and a dust mask (N95 or better) when grinding any dry pigments, regardless of their source, to avoid inhaling fine particles. Gouache and silverpoint are generally considered non-toxic and low-hazard, but basic studio hygiene (washing hands, not eating while working) is always recommended. Better safe than sorry, especially when you're exploring the unknown. If in doubt about a natural material, stick to commercially prepared, non-toxic alternatives or consult an expert.
Q: How do I clean my tools after using them?
A: For oil sticks, you can simply wipe off the excess pigment with a rag or paper towel. If you've blended with solvents, clean your brushes or tools with the appropriate solvent (like odorless mineral spirits or turpentine), then wash thoroughly with soap and water. For gouache and any tools used with water-based unconventional pigments (e.g., watercolors from plant dyes), warm water and soap are usually sufficient—just don't let the paint dry on your brushes! For cold wax medium, tools should be cleaned with mineral spirits or a citrus-based solvent before the wax hardens, as it can be stubborn once dry. Silverpoint styli usually just need a gentle wipe to remove any residue, or occasionally a soft polishing cloth to restore shine. Proper cleaning extends the life of your tools and keeps your studio tidy and ready for your next adventure.
Q: Where can I buy them?
A: Most well-stocked art supply stores, particularly larger ones or specialist retailers, will carry professional-grade oil sticks (e.g., Sennelier, R&F), gouache (Holbein, Winsor & Newton, Schmincke), and cold wax medium (Gamblin, Dorland's). For silverpoint styli and prepared grounds, you'll often need to look at specialty online art suppliers (e.g., Apico, Edward R. Wade, or even some calligraphy suppliers like John Neal Bookseller) or direct from manufacturers, as they are niche. As for unconventional pigments, well, a mindful walk in nature and a bit of research is your best starting point! Many online suppliers also offer raw pigment powders if you prefer to skip the foraging and grinding; a local rock shop or even a well-stocked garden center can be a surprising source for certain minerals or plant seeds. Don't underestimate the power of exploration, even in your shopping habits.
Q: Are they difficult for beginners to use?
A: Not at all, in fact, sometimes they can be more intuitive than traditional mediums, precisely because they bypass some of the established rules! Their perceived 'difficulty' often stems from unfamiliarity, not from inherent technical complexity. Oil sticks are incredibly direct, offering a tactile drawing experience that feels primal. Gouache's re-wettability offers a forgiving learning curve, allowing you to correct mistakes and experiment without fear of permanence. While silverpoint demands precision and patience to build tone, the actual application of the silver stylus is straightforward once you have a properly prepared surface. For unconventional pigments, the challenge lies more in the processing and testing of the raw materials than in the final mixing of pigment and binder to make paint. The key, as with any art material, is to approach them with a playful, experimental mindset and without fear of making a 'mistake.' The most exciting discoveries happen when you let the material lead the way, like a dance partner with its own rhythm. I often tell people to treat it like a game: what happens if I try this? What if I try that? Embrace the unexpected! Perhaps try a small, low-stakes project with just one of these materials this week and see what unfolds. You might surprise yourself.
Q: What are the limitations of these materials compared to traditional ones?
A: Good question! Each material has its unique 'personality' and therefore, its own set of characteristics that might be seen as limitations, depending on your artistic goals. For example, the non-erasable nature of silverpoint demands a different kind of precision than a graphite pencil, and achieving truly dark, dense values is a challenge without layered cross-hatching or complementary mediums. The matte finish of gouache means you won't achieve the same intense luminosity as transparent watercolor, or the deep gloss of certain oils or acrylics, and its tendency for colors to shift slightly when drying (lighter hues often appear slightly darker, deeper tones may lighten) can take some getting used to. Oil sticks, while wonderful for expressive marks, can be less precise than a finely tipped brush for intricate details or hyper-realistic rendering. Cold wax adds bulk and texture, but pure oil paint can be thinned to achieve very flat, smooth glazes, and excessive wax can make the paint brittle. And while making unconventional pigments connects you to nature, ensuring their lightfastness and archival stability requires more research and care than simply buying a tube of artist-grade paint. Often, what appears to be a 'limitation' simply translates into a unique characteristic that, once understood, can be leveraged for distinct artistic effects rather than being a true drawback. It's about understanding what each material wants to do, and working with its inherent qualities rather than against them. It’s a dialogue, not a monologue.
Q: How do I store artworks created with these materials?
A: Proper storage is key to preserving any artwork, and these unique materials have specific needs. For oil stick paintings, treat them like traditional oil paintings: allow ample time to cure completely (this can be months to a year, depending on thickness), then a light, non-yellowing varnish can offer protection. Store them upright, ideally in a stable environment away from extreme temperature fluctuations. Gouache paintings, being water-soluble even when dry, should always be framed under UV-protective glass to protect against moisture and physical damage; avoid varnishing as it alters their unique matte finish and can re-wet the paint. Cold wax medium works, once fully cured and varnished (if desired), are also best stored upright, away from significant temperature changes that could affect the wax's stability. For silverpoint drawings, framing under UV-protective glass is essential to protect the delicate surface and slow the natural tarnishing process, which contributes to its beauty but can also make the marks more fragile. For artworks made with unconventional pigments, particularly those with unverified lightfastness (especially plant-based dyes), storing them away from direct sunlight and harsh artificial light is paramount. If the pigments are not thoroughly bound, there's a slight risk of dusting or pigment migration, so a protective frame is even more crucial. UV-protective framing is highly recommended for all works created with these pigments if longevity is a concern. Always handle all artworks by the edges and use archival-quality materials for backing and mounting. A little care goes a long way in ensuring your unique creations last.

Q: What is the typical shelf-life of artworks made with these materials?
A: This is where it gets interesting, as it varies widely! Well-executed oil stick and cold wax medium paintings, when combined properly with artist-grade oil paints and eventually varnished after full curing, can have a shelf-life comparable to traditional oil paintings—meaning centuries, if cared for properly. Gouache paintings, while permanent in terms of pigment, remain water-soluble. Their longevity relies heavily on protection from moisture and physical abrasion, making framing under glass essential. With proper care, they can last for many decades. Silverpoint drawings are incredibly archival due to the inert nature of silver and the prepared ground, evolving beautifully as the silver tarnishes. They can last for hundreds of years. The biggest variable is with unconventional pigments. Earth pigments often have excellent lightfastness and permanence, but plant-based dyes can be notoriously fugitive (fade quickly), while others are incredibly stable. Longevity for these works hinges entirely on rigorous testing of your specific pigments and binding them with stable, archival mediums. Think of it this way: some cave paintings are millennia old, made with earth pigments, proving their potential! It really is about informed choices and careful preservation for each unique piece.
A Final Word from the Curator: Embrace the Unfamiliar and Revolutionize Your Practice
The materials you choose aren't just inanimate tools; they are, in a very real sense, your creative collaborators. They push back, they surprise you, they lead you down artistic paths you might never have conceived of on your own. Breaking free from the comfortable, trusted favorites, even for just a single project, can introduce an entirely new vocabulary into your artistic language and fundamentally transform your artistic process. This "revolution" isn't about discarding old techniques, but expanding your expressive range, fostering greater spontaneity, and uncovering unique visual outcomes. It's about allowing your artistic voice to find new ways to sing. I've found that these materials offer not just new techniques, but new ways of thinking about art, challenging my assumptions and pushing me into uncharted creative territory. It's exhilarating!
It's a journey of continuous discovery, where every new material offers a fresh lens through which to view your artistic practice. It's how I keep my own abstract art evolving, always searching for that next unexpected texture or color combination, that deeper dialogue with the medium, that moment of delightful surprise. After all, isn't that what art is truly about: constantly exploring the edge of what's known, pushing boundaries, and finding new ways to express the human experience? To simply follow the path already trodden is to miss the magic of charting your own course.
So, I encourage you to embrace that curiosity. Pick up that weird-looking stick of paint you’ve always walked past. Try the medium you can barely pronounce. You might just discover your next great artistic partner, a material that unlocks a new dimension of your creative voice and helps you forge truly unique works. Why not challenge yourself to try one of these materials this month? Explore these possibilities, share your discoveries with other artists online, and if you find something that truly speaks to you, consider bringing a new piece of art into your life by browsing what's for sale. I'm always fascinated to see how artists transform their practice, and perhaps one day, your work will inspire others to step beyond the brush. What material will you explore first? I can't wait to hear about your discoveries!