Cracking the Code: The 'Fat Over Lean' Rule in Oil Painting I Never Ignore
A deep dive into the 'fat over lean' principle in oil painting. Learn why it's crucial for preventing cracks, how to apply it with mediums and solvents, and when you can even break the rule.

The Unbreakable Law: Mastering 'Fat Over Lean' in Oil Painting for Archival Quality and Enduring Art
I've seen it countless times – the heartbreak of an oil painting, meticulously crafted, slowly succumbing to the insidious creep of cracks, dullness, or even delamination. It's a betrayal of artistic intent, a structural failure that can erase months, or even years, of dedication. And almost invariably, the silent culprit is a misunderstanding, or worse, a disregard, for the single most fundamental principle of oil painting: fat over lean. This isn't just a dusty rule from an old master's studio; it's the bedrock science of how oil paint behaves, dries, and endures. Neglect it, and your beautiful work risks becoming a fragile memory. Embrace it, and you unlock the secret to creating art that truly stands the test of time, glowing with an inner luminescence for centuries. I've been painting with oils for decades, and still, nothing quite sends a chill down my spine like the thought of a cracking canvas. That visceral memory of seeing a hairline fracture emerge – sometimes weeks, even months, after pouring my soul into a piece – it feels like a profound betrayal. A structural failure in the very DNA of the artwork. The silent, insidious culprit, more often than not? My early ignorance of the fundamental, almost sacred, law of oil painting physics: fat over lean. What if I told you that neglecting this single principle is the most common reason why beautiful paintings lose their luster, crack, and even delaminate over time, effectively erasing artistic intention? It's a sobering thought, isn't it? A structural vulnerability lurking beneath the surface, waiting to betray the very permanence we artists strive for. This isn't just about avoiding a technical flaw; it's about respecting the medium's inherent properties to achieve true archival quality, ensuring your artistic voice can speak clearly for generations to come. This commitment to archival practice is what ensures your artistic voice can speak clearly, not just across the room, but across generations to come. It’s about building a legacy, not just a painting.
So, let’s demystify this essential principle, because frankly, it's easier to implement than it sounds once you understand the why. I want to talk you through what 'fat over lean' actually means, why ignoring it is a recipe for disaster (and trust me, I've had my share of those early disasters – the kind that makes you want to hide a painting in the back of the closet forever), and how you can integrate it into your own studio practice in a simple, non-intimidating, and ultimately liberating way. Beyond mere technicality, understanding your materials is truly the first step to artistic freedom, whether you're working with oils, acrylics, or other mediums. For a broader perspective on the various tools of the trade, and to understand how oils stack up, check out this definitive guide to paint types for artists. Learning the language of your materials is an art form in itself.
A Brief History of 'Fat Over Lean': Wisdom from the Old Masters
It might seem like a modern technicality, but the 'fat over lean' principle isn't a recent invention. Its roots stretch back centuries, born from the empirical observations and meticulous practices of Old Masters who were keenly invested in the longevity of their creations. Before the advent of standardized art materials and comprehensive chemical understanding, artists experimented, learned, and refined their techniques through trial and error. They noticed that paintings created with thinner, faster-drying layers at the bottom and progressively richer, slower-drying layers on top simply endured better, resisting the ravages of time and structural failure. Think of the luminous, multi-layered works of the Flemish Primitives, the Renaissance masters, or the Dutch Golden Age painters – their techniques, often involving numerous glazes, naturally adhered to the spirit of 'fat over lean' even if the precise scientific terminology wasn't yet established. They instinctively understood the delicate balance required to build a painting that would not only capture their vision but also speak to generations across time. This principle, passed down through ateliers and apprenticeships, became a cornerstone of archival painting, proving that sometimes, the oldest wisdom is the most enduringly valuable. It’s a testament to the patient craft that has shaped art history, and understanding it connects you directly to that rich lineage of artistic excellence. To truly appreciate this historical journey, you might want to explore the history of oil painting: from ancient pigments to modern masterpieces.
What Does 'Fat Over Lean' Actually Mean?
At its core, the concept is beautifully simple, rooted in the fundamental chemistry of oil paint. It’s all about meticulously managing the oil-to-solvent ratio in your successive paint layers, influencing not just drying time but also the final flexibility, transparency, and optical qualities of the film. Oil paints, at their heart, are wonderfully simple yet deceptively complex. They consist of finely ground pigments suspended in a binder, which, for oil paint, is typically a drying oil.
This isn't just any oil you'd find in your kitchen; these are special oils, each with unique properties that subtly influence your painting process. Understanding them is key to truly mastering 'fat over lean' and, dare I say, even making your own paints (how to make your own oil paint) if you're feeling adventurous!
Drying Oil  | Characteristics & Uses | Yellowing Tendency | Drying Time (Relative) | Ideal Application (Lean/Fat) |
|---|---|---|---|---|
| Linseed Oil | The most common and versatile. Creates a strong, flexible, durable film with excellent adhesion. A robust choice for general use and initial layers. Cold-pressed linseed oil offers superior purity and a slightly purer color. | Moderate | Moderate-Fast | Lean to Fat (Versatile) |
| Walnut Oil | Valued by Old Masters like Leonardo da Vinci for its buttery consistency and archival stability. Yellows significantly less than linseed. Allows for extended blending. Produces a supple paint film. | Low | Moderate-Slow | Middle to Fat (Especially for lighter colors) |
| Poppy Oil | Very pale, minimal yellowing, making it ideal for whites, blues, and pale colors. Forms a softer, less durable film than linseed; best for upper, delicate layers and glazes where purity of color is paramount. | Very Low | Slow | Fat (Upper layers, glazes) |
| Safflower Oil | Similar to poppy oil in its non-yellowing and slow-drying properties. Often found in pre-made whites and pale colors. Also forms a softer film, suitable for upper, delicate layers. | Very Low | Slow | Fat (Upper layers, glazes) |
| Stand Oil | Polymerized (heat-treated) linseed oil. High viscosity, flexibility, and reduced yellowing. Creates an enamel-like, highly durable film. Exceptionally slow-drying, used in fat glazes for smooth blending and luminous depth. | Very Low | Very Slow | Fat (Glazes, final layers) |
| Alkyd Mediums | Synthetic resin-based oils (e.g., Liquin, Galkyd). Dramatically accelerate drying while maintaining excellent flexibility and durability. Invaluable for building layers quickly. Still adhere to 'fat over lean' by progressively increasing relative oil content. | Very Low | Very Fast | Lean to Fat (Versatile, for quicker layering) |
Each offers its own nuanced drying characteristics and impact on the final paint film, influencing everything from sheen to flexibility. Understanding these subtleties is the first step to truly mastering your palette and predicting your results, whether you're aiming for luminous glazes or sturdy impasto.
And this is where the magic (and the potential for disaster) truly happens. Unlike water-based paints, where the paint dries as water simply evaporates, drying oils undergo a profound, irreversible chemical transformation. They don't just 'dry' in the traditional sense; they cure through a complex process called oxidation. This is where the oil molecules absorb oxygen from the air, triggering a reaction that causes them to link together, forming long, intricate chains in a process called polymerization. Imagine millions of tiny molecular hands reaching out, grasping each other, and forming an incredibly robust, interwoven net. This gradually transforms the paint from a liquid or paste into a stable, solid, and incredibly durable film. Think of it like a slow-motion plasticization – the liquid paint literally turns into a kind of flexible, resilient plastic that can withstand the test of time. This chemical reaction is exothermic, meaning it releases a tiny amount of heat, which, over large quantities of oil-soaked rags, can even lead to spontaneous combustion – a potent reminder of the power within your materials! This slow but powerful chemical ballet is why we call them 'drying oils' rather than simply 'evaporating oils'.
This intricate chemical dance is absolutely crucial to understanding why the 'fat over lean' rule exists and why it’s non-negotiable for longevity and archival integrity. It’s also where the refractive index of these oils comes into play. The refractive index is a fancy term for how much light bends when passing through a substance. Think of it like a prism, splitting white light into a rainbow, or how a straw in a glass of water appears bent. Different oils and pigments have different refractive indices, and as light penetrates and refracts through progressively more oily layers, it bends and reflects in a way that creates the mesmerizing sense of luminous depth and internal glow that we associate with the enduring beauty of Old Master paintings. This interplay of light within the layers makes colors truly sing, offering a visual feast that draws the viewer deeper into the artwork. It’s the secret sauce behind that incredible, glowing quality of historical oils, creating an illusion of light coming from within the canvas.
- Lean paint, in my mind, is like that person who’s always a little restless, eager to get things done. It has less oil, or a higher proportion of solvent to oil, sometimes even none if you're using tube paint thinly. Think of it as a 'hungry' or 'thirsty' layer, designed to grab onto the canvas or the layer beneath. Its 'thinness' refers specifically to its oil content, which is often reduced by diluting your tube paint with a small amount of a solvent. Common solvents include:
- Pure Gum Turpentine: A traditional, natural solvent derived from pine trees, with a strong, distinctive, often pungent odor that many traditionalists swear by. Renowned for its strong solvent power and resinous feel, it creates a matte finish and is excellent for initial washes, staining, and underpaintings. Be mindful of ventilation when using this powerful solvent.
- Odorless Mineral Spirits (OMS): A refined petroleum distillate with minimal odor, making it a popular choice for health reasons due to reduced VOCs (Volatile Organic Compounds). It's a versatile, less aggressive solvent suitable for thinning paint, creating initial lean layers, and cleaning brushes. While 'odorless,' good ventilation is still advised.
- Citrus-based Thinners & Oil of Spike Lavender: Newer, natural alternatives that offer pleasant aromas and reduced toxicity compared to turpentine. Oil of Spike Lavender, in particular, has a historical pedigree, used by Old Masters as both a solvent and a medium. They function similarly to traditional solvents in thinning paint but typically evaporate at different rates, sometimes slower than OMS. They can be a great option for artists seeking a more natural or less pungent studio environment.
Because there's less oil to undergo that slow, deliberate oxidation, lean layers dry significantly faster and cure into a more rigid, brittle, almost glass-like film. They are the strong, unyielding foundation upon which everything else must be built, providing a stable, non-flexible base for subsequent layers. For beginners wondering about these crucial materials, our essential oil painting supplies for beginners offers a great overview. - Fat paint, on the other hand, is the relaxed, flexible character, happy to take its time. It has more oil, or a higher proportion of an oil-based medium, and often also contains resins. This is your 'oily,' pliable, and wonderfully flexible layer. It’s typically achieved by mixing your paint with additional drying oils like Linseed Oil (the most common and versatile, offering a robust film and strong adhesion, forming a durable, slightly yellowish film), Poppy Oil (excellent for whites and pale colors due to less yellowing, but dries slower and forms a softer film), Walnut Oil (a personal favorite for its buttery consistency and moderate drying time, often used by historical artists and valued for its low yellowing and excellent film strength), or specialized, ready-made oil-based mediums. These mediums can range from thick Stand Oil (a polymerized linseed oil that creates an enamel-like, highly flexible surface, ideal for glazes and smooth finishes, and remarkably resistant to yellowing over time) to modern Alkyd mediums such as Galkyd, Liquin, or Winsor & Newton's Alkyd Drying Medium, which notably accelerate drying while maintaining excellent flexibility and durability, making them an incredible tool for impatient artists. Some 'fat' mediums also incorporate natural resins like Dammar or synthetic resins, which can enhance gloss, depth, and adhesion, though care must be taken with their specific properties and application. Resins add a jewel-like quality to glazes, increasing transparency and luminosity. With a higher oil content, fat layers dry slower – sometimes much slower – and remain significantly more flexible, even after they have fully cured and become touch-dry. This inherent flexibility is their superpower, allowing them to gently move and expand with the ever-so-slight shifts of the layers beneath them, preventing internal stress and subsequent cracking. This is crucial for long-term stability and vibrancy.
The core rule, therefore, is to always apply a fatter (more oil/medium, slower drying, more flexible) layer of paint over a leaner (less oil/medium/more solvent, faster drying, more rigid/brittle) layer. This gradient of flexibility is the ultimate safeguard for your artwork.
I often think of it like dressing for extreme weather – specifically, winter in a place that has actual, bone-chilling cold. Your lean layer is a thin, crisp cotton undershirt; it dries fast and holds its shape rigidly. Your fat layer is a big, wonderfully flexible wool sweater or a puffy down jacket. Now, you wouldn't put that thick, stiff jacket on first and then try to stretch a tight cotton t-shirt over it, would you? It would constrict everything, feel horribly uncomfortable, and probably tear at the seams as you tried to move. It's the exact same principle with paint layers. The inflexible lean layer must be on the bottom, allowing the more flexible fat layers to comfortably expand and contract over it without strain. Beyond mere structural integrity, though, mastering fat over lean also unlocks some of the most cherished optical effects in traditional oil painting: a mesmerizing sense of depth, subtle translucency that hints at what lies beneath, and a richer, almost internal luminosity as light penetrates and refracts through progressively more oily layers. This layering of increasing refractive indices (a fancy term for how light bends when passing through different materials – think of a straw in a glass of water appearing bent, or a prism splitting light) creates a visual richness that is uniquely characteristic of traditional oil painting. It allows your colors to truly sing, not just sit on the surface, offering a visual feast that draws the viewer deeper into the artwork and creates a vibrant, almost living, surface. It’s this deep, almost glowing quality that makes oil paintings so enduringly captivating.
Here’s a simple breakdown:

Term | Meaning | Key Additive/Ingredient | Drying Time | Flexibility | Structural Role |
|---|---|---|---|---|---|
| Lean | Less oil, more 'thirsty' | Solvent (e.g., OMS, Turpentine, Spike Lavender) | Faster | Less (Rigid/Brittle) | Foundation layer, initial washes, quick sketches, underpainting, staining the canvas. |
| Fat | More oil, more 'oily' | Oil-based Medium (e.g., Linseed Oil, Alkyd, Stand Oil, Resins) | Slower | More (Flexible) | Upper layers, glazes, impasto, detailed work, achieving optical depth. |
The Science of Cracking: Why This Rule Exists – The Unseen Battle for Longevity
It’s a tale as old as oil painting itself: the silent battle waged beneath the surface of a seemingly finished artwork. Understanding the 'fat over lean' rule isn't just about mixing paint; it's about respecting the fundamental physics and chemistry that dictate whether your masterpiece will endure for centuries or betray your efforts with an unfortunate spiderweb of cracks. Let's peel back the layers and understand the scientific drama unfolding in your studio, and how you can ensure your legacy endures.
The Importance of a Stable Support: The First Layer of Lean
Before we dive deeper into the paint layers themselves – and that's where the real fun is, right? – it's worth a quick, absolutely vital detour. The structural stability, the very backbone, of your entire painting begins not with the first brushstroke of paint, but with its foundation: the support. Whether you choose a stretched canvas, a rigid wooden panel, or a robust linen board, a properly prepared surface, primed with a quality gesso, is non-negotiable. This prepared ground provides a stable, slightly absorbent surface that allows your initial lean layers to properly adhere, bond, and dry. Without this crucial foundation, even the most meticulous 'fat over lean' application can be completely undermined by a shifting, acidic, or unstable ground. It's like building a magnificent house on a sandy foundation – doomed to fail. If you're looking to start strong, truly strong, learning how to prepare a canvas for oil painting is an absolute must, as is exploring what is gesso in painting to understand its pivotal role, and mastering how to stretch canvas for painting to ensure a truly stable support. Choosing a quality support, such as properly primed linen canvas (which offers superior archival quality, less elasticity than cotton, and resists expansion and contraction better, providing a remarkably stable substrate), or rigid, sealed wood panels (like marine-grade birch plywood or MDF, properly prepared with multiple layers of primer on all sides to prevent warping and acid migration), is an investment in the long-term health of your artwork. Don't underestimate this first, crucial step, as a painting's longevity often hinges on its unseen foundations. For more on preparing your surface, you might also find our guides on how to apply gesso to canvas a beginner's guide and gesso vs primer: what's the difference for artists invaluable. And for those truly dedicated, even how to make your own gesso: a DIY guide for artists exists.
This isn't just an artistic preference; it's pure chemistry, a principle observed and refined by master painters over centuries as they sought permanence in their work. Oil paint doesn't 'dry' in the way water-based paint does through simple evaporation. Instead, it cures through a complex chemical process called oxidation, where the oil reacts with oxygen in the air and hardens. This chemical reaction is accompanied by a phenomenon called molecular tension. As the oil cures and its molecules link together (polymerize), it undergoes a slight but significant volumetric shrinkage, essentially becoming denser and more compact. This internal contraction creates stress within the paint film, which must be carefully managed to prevent structural failure. Think of it like a shrinking sponge; if the outer layers shrink too quickly and rigidly while the inner layers are still expanding or moving, something has to give. This shrinkage is microscopic, but cumulative across layers, it creates powerful forces. If those forces are not harmonized, the painting literally tears itself apart from within.
This process takes time. A lot of time. A thin layer might be touch-dry in a day, but it could be shifting, polymerizing, and curing on a microscopic level for months or even years. Imagine the intricate internal dance happening within your layers long after the surface feels firm to the touch. This microscopic activity is precisely what the 'fat over lean' rule seeks to harmonize, by ensuring each layer can gracefully accommodate the subtle, ongoing movements of the layers beneath it. It's a delicate balance, a testament to the patient craft of oil painting, and one that separates the fleeting from the enduring. This ongoing process of curing is why the distinction between touch-dry and fully cured is so important in oil painting. A layer can feel dry to the touch, meaning you can safely paint over it, but it may still be undergoing significant chemical changes internally.
Now, picture this all-too-common scenario: you've lovingly applied a 'fat' layer to your canvas, perhaps rich with slow-drying linseed oil or a generous dollop of alkyd medium. It looks beautiful, but it's still internally active, slowly polymerizing and shrinking. Then, impatience strikes – and believe me, impatience is the absolute nemesis of oil painters, leading to more heartache than almost any other mistake. You get eager, and without letting that fat layer properly set up, you brush on a 'lean' layer, perhaps heavily thinned with solvent. The lean top layer, with its minimal oil, oxidizes quickly, forming a hard, rigid, unyielding skin. But underneath, the fat layer is still slowly curing, still subtly shrinking, still doing its internal chemical dance, attempting to contract. The rigid top layer simply can't flex, can't accommodate the movement and subtle volume changes of the still-active layer beneath it. The tension builds, a silent battle is waged, a molecular tug-of-war, and then... crack. The paint film fractures, often with a heartbreaking sound (or at least, it feels like it). This is precisely how you end up with various types of structural damage, from fine, delicate hairline cracks (often called craquelure or "drying cracks") that betray the surface tension, appearing like a spiderweb across the surface; to more severe, visually disruptive patterns like alligatoring (where the surface resembles dried mud or, indeed, thick, leathery alligator skin, often due to a fast-drying, rigid top layer over a vastly slower-drying, thick, still-moving one, creating a powerful shear force that tears the surface); or even outright delamination (where paint layers literally peel away from each other like old wallpaper, a catastrophic adhesion failure due to insufficient adhesion and internal stress, often starting at edges or points of impact). Another common flaw is crazing, a type of wrinkling or cracking where the top layer shrinks unevenly, causing the surface to pucker. It's a tragedy that's entirely preventable, a silent scream from your canvas. The progressive increase in flexibility from bottom to top is the antidote, allowing each layer to gracefully accommodate the subtle movements of the one beneath without succumbing to stress, maintaining a harmonious, flexible whole. This careful gradient creates a cohesive, single film that behaves as one, rather than a stack of conflicting tensions. It’s the difference between a symphony and a cacophony of molecular forces.
The Chemistry of Pigments and Binders: A Deeper Look at Stability
Beyond just the oil content, the specific chemical properties of your pigments and how they interact with the binder (the oil) also play a crucial role in the long-term stability of your paint film. Some pigments, for instance, are naturally more reactive with oils, forming stronger chemical bonds that contribute to a more robust and flexible film. Others might be more inert, relying primarily on mechanical encapsulation by the oil. The particle size and shape of pigments also influence how much oil they absorb and how they contribute to the overall film structure. Fine pigments, for example, often require more oil to bind them effectively, which can contribute to a naturally 'fatter' consistency. Coarser pigments, on the other hand, might require less. Understanding these subtle interactions, while not requiring a degree in chemistry, helps you appreciate the inherent qualities of your materials and make more informed choices about which pigments might be better suited for specific layers or techniques, further ensuring the archival integrity of your artwork.
Following 'fat over lean' ensures that your layers get progressively more flexible as you build up your painting. Think of it as a carefully choreographed dance of flexibility. The rigid, lean bottom layers do their thing, hardening up and creating an unmoving anchor. Each subsequent layer, being progressively more flexible, can then gracefully move and adapt with any subtle shifts from the layers below it without tearing. This progressive flexibility isn't just about preventing cracks; it's also why we patiently wait a considerable amount of time – often six months to a year, sometimes even longer depending on paint thickness, pigment choice, and atmospheric conditions – before applying a final varnish to an oil painting. Varnishing too early can seal in any remaining solvents or uncured oil, effectively trapping them and inhibiting the full, crucial curing process of the deeper oil layers. This can lead to a host of further issues, including continued cracking, a dulling of colors (as the oil cannot fully oxidize), or even a permanently sticky surface that attracts dust and grime. The varnish is not just for aesthetic appeal; it's the artwork's final protective embrace, a sacrificial layer that shields the paint film from environmental pollutants, UV radiation, and physical damage. While this article doesn't delve into varnishing specifics, always remember it's the final act of preservation for your oil painting; timing is paramount for its effectiveness and the painting's long-term health. For a definitive guide to this crucial final step, delve into how to varnish an oil painting: a step-by-step guide.
Interlayer Adhesion: The Unseen Bonds – How Layers Hold Together
Beyond just flexibility, another crucial aspect of 'fat over lean' is ensuring optimal interlayer adhesion. This refers to the strength of the chemical and mechanical bond between successive paint layers. When you apply a lean, solvent-thinned layer, it creates a porous, slightly 'hungry' surface that's highly receptive to the next, slightly fatter layer. The oil in the subsequent layer can penetrate and interlock with the underlying lean film, creating a strong mechanical and chemical bond. This interlocking prevents layers from delaminating or peeling apart over time. If a lean layer is applied over a very glossy, fully cured fat layer without proper surface preparation (like gently scuffing to create a 'tooth' or applying a thin 'couch' layer), the adhesion can be compromised, leading to a weaker bond and eventual structural failure. Think of it like preparing a wall for new paint – you wouldn't paint over a slick, dirty surface without sanding and cleaning, right? Your canvas layers deserve the same thoughtful preparation to ensure maximum bond strength. A well-adhered painting is a stable painting, resisting the insidious pull of time and gravity. This bond is not just physical; it's a subtle chemical embrace between the curing oil molecules of each layer, creating a truly unified artwork.
Environmental Factors: Beyond the Brushstroke – Creating the Optimal Curing Conditions
It's easy to obsess over what's on your palette (and believe me, I do!), but it's vital to remember that it's not just about the paint and mediums you mix. The silent partner in your studio, the environment itself, plays a surprisingly significant, often overlooked, role in how your paint dries and cures. Temperature and humidity, in particular, can drastically affect drying times and, consequently, the successful, stable application of the fat over lean rule. Think of your studio as a delicate ecosystem for your art, a carefully controlled environment where chemistry can do its patient, beautiful work.

- Temperature: Warmer temperatures (ideally between 18-24°C or 65-75°F) generally accelerate oxidation and drying, ensuring a more consistent and predictable curing process. Painting in a cold studio can slow drying dramatically, increasing the risk of subsequent, potentially faster-drying layers cracking over still-wet, fatter layers. Conversely, excessively hot conditions can cause some paints to dry too fast on the surface, forming a brittle 'skin' that may wrinkle or crack as the underlying layer continues to cure and contract. Extreme heat can also make paint less workable, affecting brushability and potentially degrading pigments over time.
- Humidity: High humidity (ideally between 40-60%) can also significantly slow drying, as it can hinder the evaporation of solvent and the crucial interaction of oil with oxygen. Think of trying to dry clothes on a muggy day – it's a similar principle. Conversely, extremely dry conditions might make lean layers cure too rapidly, potentially making them overly brittle and susceptible to cracking later, especially if the subsequent layers aren't flexible enough. Rapid and extreme fluctuations in temperature and humidity are particularly detrimental, as they put undue stress on the paint film as it tries to cure and stabilize, causing expansion and contraction that can lead to tears, delamination, or even warping of the support.
To counteract these variables, I always strive for a consistent, moderate environment in my studio. This isn't just about my comfort; it's about creating the optimal conditions for the oil paint to breathe, polymerize, and cure at a natural, predictable pace. Good ventilation is also paramount, both for your health when using solvents and for ensuring adequate oxygen exchange for the paint's oxidation process – a gentle airflow is key, not a harsh blast. Consider a humidifier or dehumidifier if your climate swings wildly, and try to keep your studio within a comfortable, consistent temperature range year-round. It's an investment in the longevity of your work.
The Critical Role of Ventilation and Air Quality
I mentioned ventilation, but it bears repeating with emphasis. Adequate airflow isn't just a nicety; it's a critical component for both your personal health and the proper curing of your oil paintings. Solvents, even 'odorless' ones, release Volatile Organic Compounds (VOCs) that can be harmful if inhaled in poorly ventilated spaces. More subtly, a stagnant environment can hinder the very oxidation process that allows oil paint to cure. Oil paint needs oxygen! A gentle, consistent movement of air ensures a fresh supply of oxygen to the paint surface, promoting even and thorough drying throughout the layers. Think of it like a subtle breeze aiding the curing process, rather than a harsh wind that might cause rapid surface drying. I always ensure a window is slightly ajar or a quiet fan is circulating air (not directly blowing on the painting) to maintain this crucial balance. It’s an easy, yet often overlooked, way to safeguard both your well-being and the future of your artwork.
The Subtle Impact of Light and the Menace of Dust
Beyond temperature and humidity, light exposure also plays a role. While direct, intense sunlight can accelerate drying (and some artists will cautiously use it for specific effects), it can also potentially cause long-term harm by fading or degrading certain pigments, particularly organic ones, and can exacerbate cracking by causing uneven drying. A balanced, consistent light source (e.g., indirect natural light or studio lighting that mimics it, such as full-spectrum daylight bulbs) is usually best for consistent curing and color retention. Avoid placing paintings in direct window sunlight during drying. And let’s not forget the humble enemy: dust. A dust-free environment, especially during the tacky drying stages, is essential to prevent unsightly particles from becoming permanently embedded in your paint film, compromising both aesthetics and archival quality. Investing in a clean studio and using a drying box or rack can go a long way. I know, it sounds like we're coddling our canvases, but it's an investment in their future, ensuring they remain pristine and vibrant for generations. Think of it as creating a mini museum-quality environment right in your studio.
Long-Term Archival Storage and Display
Ensuring your painting endures isn't just about how you apply the paint; it's also about how you treat it once it's finished and cured. Proper archival storage and display conditions are the final, crucial acts of preservation. Aim for a stable environment with consistent temperature and humidity, mirroring your ideal studio conditions (ideally 18-24°C or 65-75°F and 40-60% humidity). Avoid attics, basements, or areas with significant temperature swings or dampness. When storing, interleave paintings with archival glassine paper and protect them from dust and physical damage. For display, shield your artwork from direct sunlight and harsh spotlights, which can cause fading and accelerate degradation. Framing with UV-protective glass or acrylic can offer an additional layer of defense against harmful light. Remember, a painting's life doesn't end when your brush leaves the canvas; it's an ongoing journey of care and preservation. For detailed guidance on caring for your finished works, explore how to clean and care for oil paintings.
Common Mistakes and How to Avoid Them – Don't Learn the Hard Way!
I've made my share of mistakes, believe me, and they often boiled down to impatience or a misunderstanding of the materials. So, let's explore the most common pitfalls when it comes to the 'fat over lean' rule, so you don't have to learn these tough lessons the hard way.
- Over-thinning Initial Layers (Underbound Paint): Yes, you want your first layers lean – that's the whole point, right? But there's a critical difference between 'lean' and 'anemic,' or what's known as underbound paint. Going too lean with an excessive amount of solvent (think a watery wash of color that barely holds pigment, almost like watercolor) can make the paint film incredibly weak, brittle, and poorly adherent. This is because the pigment particles lose sufficient binder (oil) to form a cohesive film, leaving them essentially loose on the surface. It might look fine initially, but it can lead to chalkiness, dullness, poor color saturation, a rough or 'sinking in' appearance (where the oil from subsequent layers is absorbed too rapidly, leaving a matte, lusterless patch), flaking, or a compromised bond with the canvas over time, making it utterly un-archival. A little solvent is good for a lean start; a flood is a recipe for a fragile foundation, similar to trying to build a wall with too much water and not enough cement. The goal is a stained, not soaked, canvas that allows the paint to bond securely and form a durable film, maintaining an adequate pigment-to-binder ratio. Think of a thin, strong stain, not a dilute puddle. This is particularly problematic for pigments with low oil absorption, as they can become even more starved for binder.
- Using Non-Drying Oils: This might seem obvious to some, but it’s a mistake I've seen happen (and had to learn the hard way about in my youth!). It's absolutely crucial to understand that not all oils are created equal in the context of oil painting. Some oils, like everyday mineral oil, baby oil, cooking oils (olive, sunflower, canola), or even some cosmetic oils, are non-drying oils – they simply don't oxidize and cure to form a solid film. Introducing these into your oil paint, even accidentally, will leave a permanently greasy, unstable, and tacky film that will never truly harden. This leads to catastrophic issues: relentless dust attraction (your painting will become a magnet for every speck, becoming a fuzzy, unappealing surface!), unsightly mold growth (as the oil provides a food source, particularly in humid environments), premature cracking as proper curing is inhibited, and eventual complete paint film failure. Always, always stick to artist-grade drying oils (linseed, walnut, poppy, safflower, and their variants like stand oil) and mediums specifically formulated for oil painting; your artwork's longevity depends on it. A ruined painting from a simple mistake is a tough lesson to learn, and frankly, completely avoidable. If you're unsure, check the label – if it doesn't explicitly say
- Impatience: Oh, impatience! If there’s a patron saint of oil painting failures, it’s got to be the demon of impatience. Trying to rush drying times, perhaps by applying heat (a definite no-no, as we’ll discuss), or adding a new layer before the previous one is truly, properly touch-dry, is a direct invitation for structural disaster. I confess, in my early days, I was guilty of this far too often, eager to see the painting finished. But in oil painting, patience isn't just a virtue; it's a foundational requirement, an act of faith in the medium itself. Every layer needs its time to become sufficiently stable, to establish its structural integrity, before the next is applied. Think of it as letting cement cure; you wouldn't rush to build the next story on a wet foundation, would you? The analogy holds true: haste makes waste, and in art, waste means heartache. To cultivate patience, try working on multiple paintings simultaneously, or dedicate specific studio days to different stages of drying. You might even use a drying rack to manage multiple works effectively, perhaps even dating the back of your canvas or a studio notebook to keep track of drying times for different layers or works in progress.
- Ignoring the Support: I've said it before, and I'll say it again: a painting is only as strong as its foundation. A poorly prepared, acidic, or unstable canvas (think cheap, unprimed cotton that buckles and flexes under tension) can cause catastrophic cracks and delamination regardless of how perfectly you apply the 'fat over lean' rule. The support is the first "lean" layer, if you will, and it needs to be absolutely rock-solid. Investing in quality surfaces – properly primed linen or artist-grade cotton canvas (which offer superior archival quality and less elasticity than cheaper alternatives, providing a much more stable substrate), or rigid wood panels (like gesso-primed birch plywood or sealed MDF, preferably cradled for extra stability) – is not an extravagance; it's an investment in the longevity and stability of your artwork. Always ensure panels are sealed on all sides to prevent warping, moisture absorption, and acid migration from the wood into your paint layers. This includes painting or sealing the back and edges of a panel to prevent uneven moisture absorption, which can lead to warping over time. Don't skimp here; your future self (and the future owners of your art) will thank you for taking the time to build a solid start. For more on this, check out how to prepare a canvas for oil painting and even how to stretch canvas for painting yourself for ultimate control. Remember, a good ground is not just about adhesion; it's also about preventing "sinking-in" of oil, which can dull colors.
- Mixing Incompatible Mediums: This is a less obvious but equally insidious mistake. The vast majority of artist-grade oil paints and traditional oil mediums are compatible. However, introducing specialty mediums (like certain water-miscible oil mediums into traditional oils, or vice-versa), or using unverified substances, can lead to unpredictable and often detrimental results. Always read labels carefully and, when in doubt, perform a small test on a scrap surface. The chemical properties of different binders and additives can clash, preventing proper curing and leading to cracking, dullness, or even complete paint film failure.
- Overworking Wet Layers: While alla prima painting involves working wet-on-wet, there's a difference between intentional blending and aggressive, excessive overworking. Repeatedly disturbing a wet layer, especially as it starts to 'set up,' can break down the paint film's integrity, leading to muddy colors and a weakened, potentially fragile surface. It can also introduce too much solvent or oil into areas where it's not intended, disrupting the fat over lean balance. Learn to apply your strokes with confidence and decisiveness, knowing when to leave a passage alone to dry. This is especially true for layers that are starting to become 'tacky' as the initial solvent evaporates; disturbing them at this stage can disrupt the delicate polymerization process and create a weak point in the film.
- Applying Excessive Layers Too Quickly: This is closely related to impatience. Building too many layers, one after another, without adequate drying time in between, creates a cumulative internal stress within the painting. Even if each individual layer adheres to 'fat over lean' in terms of composition, the sheer volume of still-curing paint can lead to overall structural instability, increasing the likelihood of cracking, wrinkling, or a permanently soft paint film. Give your painting time to breathe and cure at each stage, especially when building up significant thickness or complex glazes.
- Not Cleaning Brushes and Palette Properly: Okay, this might seem tangential, but hear me out. Residual, uncured oil or solvent from poorly cleaned brushes can subtly (or not so subtly!) disrupt the fat over lean balance in your next layers. Imagine going from a fat glaze to a lean underpainting with the same brush that still has a glob of stand oil in its ferrule – you're accidentally making your lean layer fatter! Similarly, a dirty palette can introduce unintended mediums. A clean studio practice is an extension of the fat over lean principle, ensuring you're intentionally controlling your materials. For tips on keeping your tools pristine, check out how to clean an oil painting palette and best oil painting brushes for artists.
How to Apply 'Fat Over Lean' in Practice: From Theory to the Studio
Okay, so the theory sounds solid, right? But how does this abstract concept of 'fat' and 'lean' translate to the glorious, messy reality when you've got a palette knife glistening with paint and a brush poised to strike? It really boils down to what you consciously choose to mix into your paint at each successive stage of your painting. Think of mediums as your artistic allies, allowing you to manipulate the properties of your paint far beyond its straight-from-the-tube consistency. For a detailed overview of the vast array of options available, and to demystify some of those intimidating bottle labels, check out this comprehensive guide to painting mediums. The secret, really, is control and intention. It's about being an alchemist in your own studio, guiding the material toward its optimal, enduring state.
## The Role of Solvents in Oil Painting: Your Essential Lean Allies
Before we dive into applying the layers, it's worth a dedicated moment to talk about solvents. Often misunderstood, these liquids are your crucial allies in creating lean layers and managing the consistency of your paint, but they demand respect. They are not paint mediums in themselves; they are diluents. Their primary function is to temporarily reduce the viscosity of oil paint and make it 'leaner' by effectively displacing some of the binder (oil) and creating a thinner, faster-drying film. Crucially, they evaporate almost completely from the paint film, leaving behind primarily the pigment and a reduced amount of oil, thus making the layer more brittle and rigid – perfect for the bottom layers. Understanding their individual evaporation rates and solvent strengths is key to choosing the right one for your process and ensuring proper curing. I always opt for artist-grade, highly refined solvents to minimize impurities that could affect the paint film. Cheap, industrial solvents might save you a few pennies, but they can introduce unwanted chemicals that compromise the archival quality of your work – a false economy in the long run, believe me.
Common solvents include:
- Pure Gum Turpentine: A traditional, natural solvent derived from pine trees, with a strong, distinctive, often pungent aroma. It evaporates quickly, thins paint effectively, and creates a matte, 'hungry' surface that is receptive to subsequent layers. It also has a resinous quality that can subtly contribute to the film, enhancing adhesion and sometimes contributing to a slightly glossier finish than OMS. Be mindful of proper ventilation when using this powerful solvent.
- Odorless Mineral Spirits (OMS): A refined petroleum distillate with minimal odor, making it a popular choice for artists sensitive to fumes. It works similarly to turpentine in thinning paint but may not provide the same 'tooth' or subtle resinous feel. It's generally less aggressive than turpentine. It's a versatile, less aggressive solvent suitable for thinning paint, creating initial lean layers, and cleaning brushes. While 'odorless,' good ventilation is still advised for health and optimal paint curing. It evaporates slower than turpentine.
- Oil of Spike Lavender: A natural solvent derived from lavender plants, offering a pleasant aroma and slightly slower evaporation rate than turpentine. It's often favored for its traditional use and less harsh fumes. Some artists find it enhances the flow of paint and provides a subtly richer surface. It's generally considered less toxic than turpentine.
- Citrus-based Thinners: Another category of natural solvents derived from citrus peels, offering a distinct (and usually pleasant, if sometimes overpowering) aroma. They function similarly to OMS in their thinning capabilities but can sometimes leave a slight residue if used excessively. They also tend to have a slower evaporation rate.
However, it's vital to remember that overuse can significantly weaken the paint film, leading to a chalky, underbound layer that lacks adhesion and can crack or flake prematurely. This is because excessive solvent dilutes the essential binder to a point where it can no longer adequately encapsulate the pigment particles, essentially leaving them loose. Always use solvents in moderation for your initial lean layers, aiming for a consistent, brushable stain rather than a watery wash. Proper ventilation, regardless of the solvent type, is non-negotiable for your health and for ensuring adequate oxygen exchange for the paint's oxidation process – a gentle airflow is key, not a harsh blast. A well-ventilated studio protects both you and your artwork from trapped fumes that can inhibit proper curing. Always use minimal amounts for initial layers – a damp brush, not a dripping one.

The First Layer: Keep it Lean – Building a Solid Foundation
A quick but important aside: When working with solvents, always ensure your studio is well-ventilated. Fresh air is crucial for your health and helps with the proper drying of your paints.
Your very first layer, what we affectionately call the underpainting or initial block-in, is your structural cornerstone. It must always be your leanest, as it sets the adhesion and drying rate for everything that follows. This foundational layer doesn't just establish the tone and structure; it's the anchor for everything that follows, essentially staining the canvas rather than building up a thick film. You have a few main options here, and my choice often depends on the subject, my mood, and the complexity I envision for the final piece, but the goal is always a stable, receptive surface, ready to accept subsequent layers:
- Paint straight from the tube, applied thinly: Surprisingly, for many professional-grade brands, the paint itself, when applied thinly and scrubbed into the canvas, is lean enough to serve as a perfectly good starting point. No added solvents required if you’re mindful of your application, using a stiff bristle brush to create a minimal, even layer that stains the canvas rather than sitting thickly on top. This is perhaps the simplest 'lean' start, and one I often use for quick sketches or initial color blocks.
- Add a solvent for a super-lean start: This is the classic, time-honored approach for a truly fast-drying, very lean start. Thin your paint with a small amount of Odorless Mineral Spirits (OMS) or pure gum turpentine. This speeds up drying considerably, creates a wonderfully stable, absorbent, and non-tacky foundation, and allows you to quickly establish your composition and values without waiting days for the first layer to dry. Think of it as a tonal map or a foundational drawing, where the pigment is thinly suspended in the minimal oil binder. This technique also promotes good adhesion by 'etching' slightly into the absorbent primer, creating a micro-texture that subsequent layers can grip onto.
- Monochromatic Underpainting (Grisaille/Bistre/Verdaccio): Many artists, myself included, love to establish values and forms in a single, lean color. This could be a grisaille (using a range of greys to define light and shadow, excellent for sculpting form and volume), a bistre (using earthy browns for a warm, aged feel, providing a rich glow), or even a verdaccio (greens for cool shadows and an optical effect popular in Renaissance portraiture, particularly for flesh tones). This method is fantastic because it separates the challenge of value from the challenge of color, allowing you to build a strong structural drawing and form without worrying about your final palette until later, fatter layers. To truly master this foundational stage, explore what is underpainting in painting and particularly what is grisaille: understanding the monochromatic painting technique.
- Imprimatura: This is a thin, transparent, and uniform wash of color applied over the entire primed canvas. It serves to tone the canvas, kill the stark white (which can be visually overwhelming and throw off color judgment), and establish a mid-tone value from which to build, often helping to unify the subsequent color palette. It's a classic lean starting point, acting as a unifying base color for the entire painting and helping to judge colors more accurately. My personal preference is often a warm earth tone, setting a beautiful glow for the layers to come, almost like a subtle internal light source that shines through the upper glazes. It's essentially the thinnest, most universal 'lean' layer you can apply, providing an immediate atmosphere to your canvas.
- Staining or Toning with Acrylics (for the brave!): While this article focuses on oils, some contemporary artists choose to lay down their initial lean, fast-drying underpainting using acrylics. Since acrylics dry by water evaporation and form a stable, non-oil-based film, a thin acrylic underpainting can serve as an excellent, completely dry, and non-reactive 'lean' foundation for oil layers. You must ensure the acrylic layer is very thin and completely dry before applying any oils, as oils cannot be painted over thick or wet acrylics. This method is a conscious blending of mediums, but it must be done with an understanding of both materials. For more on acrylics, see how to mix acrylic paint and how to prepare a canvas for acrylic painting.
Understanding Oil Painting Mediums: Your Alchemical Toolkit
Beyond solvents, the world of oil painting mediums is vast and wonderfully diverse, designed to modify nearly every characteristic of your paint: its consistency, flow, drying time, sheen, and flexibility. From traditional stand oils to contemporary alkyd gels, each medium plays a specific role in achieving particular artistic effects while simultaneously helping you adhere to the fat over lean rule. It's a bit like having a chef's pantry filled with exotic ingredients, each capable of transforming your basic paint into something extraordinary.
Choosing the right medium for each layer is critical. For instance, fast-drying alkyd mediums can be incredibly useful for painters who prefer a quicker workflow (a lifesaver for the impatient artist!), while thicker, slower-drying oils like linseed or stand oil are perfect for rich, flexible glazes in upper layers, imparting that coveted jewel-like depth. Many artists, myself included, opt for high-quality pre-made mediums from reputable brands; they offer consistency and take the guesswork out of the chemistry, ensuring a balanced 'fatness' for gradual build-up. However, understanding the basic components (drying oils, resins, solvents) will empower you to make informed choices and even create your own custom blends, perfectly tailored to your painting process and unique artistic vision. For a comprehensive overview of your options, check out our what are painting mediums: a beginners guide.
Let’s briefly look at the main categories of mediums you'll encounter and how they fit into the 'fat over lean' puzzle:
- Drying Oils (e.g., Linseed, Walnut, Poppy): These are the core 'fat' components. Adding them directly to your paint increases its oil content, flexibility, and drying time. They can be used on their own for very fat layers (often straight, undiluted oil in final glazes) or as a component in mixed mediums. Remember, the more oil, the fatter the layer and the slower it will dry, but the more flexible it remains. They typically offer a beautiful, rich sheen.
- Resin Mediums (e.g., Dammar, Copal, Alkyd Resins): Resins, whether natural (like Dammar or Copal, often dissolved in solvent) or synthetic (alkyds), add gloss, depth, and contribute to a harder, more durable film. They can also influence drying time – alkyds accelerate, while natural resins can be slower. Dammar, for example, is typically mixed with turpentine and a drying oil to create a traditional painting medium for glazing. Alkyd resins are the basis of many modern fast-drying mediums, offering excellent film strength and flexibility. They often enhance the transparency of glazes and create a jewel-like quality.
- Gel & Impasto Mediums: These are designed to build texture and body, allowing for thick applications without adding excessive oil. Many are alkyd-based, offering structural stability and flexibility for thick applications, and often accelerate drying. They're excellent for creating a tactile surface and are perfect for what is impasto painting. They are typically used in the middle to upper layers, as their inherent 'fatness' can vary.
- Wax Mediums: Incorporating beeswax or other art-grade waxes can create a beautiful matte finish, add body, and make paint more thixotropic (meaning it thickens when at rest and thins when stirred, offering unique handling properties). Wax mediums are considered 'fat' and should be used in upper layers, typically with an oil component to maintain flexibility and adhesion. They create a distinct, rich, almost luminous surface quality that many artists cherish, offering a lovely velvety texture.
- Traditional Varnishes (as mediums): While primarily used as a final protective coating, some traditional varnishes like Dammar, when mixed with drying oils and solvents, can also be used as painting mediums, particularly for glazing. They contribute to gloss, depth, and sometimes accelerate drying. However, they need to be used with caution and an understanding of their specific properties, as not all varnishes are suitable as painting mediums. Always ensure you're using artist-grade materials.
Each of these categories plays a distinct role, allowing you to fine-tune your paint's behavior for any technique you can imagine.
Building the Middle Layers: Getting a Little Fatter – The Heart of Your Painting
Once your initial, lean layer is bone-dry to the touch – and by bone-dry, I mean absolutely no tackiness, no paint lifting, no sticky resistance – you can confidently start introducing a little more 'fat' into your paint. This is precisely where painting mediums stop being a mystery and become your absolute best friend. A good, standard all-purpose medium is typically a thoughtful, balanced mix of a drying oil (like Linseed Oil or Walnut Oil) and a solvent (like OMS). It's designed to offer a moderate increase in flexibility and slow the drying process just enough for comfortable working, without going overboard.
You can, and I often do, buy excellent pre-made mediums from reputable brands; they offer consistency and take the guesswork out of the chemistry, ensuring a balanced 'fatness' for gradual build-up. Or, you can mix your own, tailoring the 'fatness' precisely to your specific needs and current layer – think of it as fine-tuning your paint's personality, a custom blend for each passage. Modern options like alkyd mediums (such as Galkyd, Liquin, or Winsor & Newton's Alkyd Drying Medium) are particularly fantastic. They not only accelerate drying times (a huge bonus for impatient painters like my former self!) but also maintain excellent flexibility, allowing you to build layers without excessive waiting, often enabling multiple layers within a single day. Then there's Stand Oil, a polymerized (heat-treated) linseed oil, which offers a beautiful, self-leveling, enamel-like finish and an incredibly flexible film, albeit with a slower drying time. It’s like liquid glass when properly applied, especially beautiful for smooth, layered passages and creating rich depth and transparency. Remember, the goal isn't to make every layer super fat, but to gradually increase the fatness as you move upwards, maintaining that crucial flexibility gradient that keeps your painting stable and happy. This measured approach is the secret to enduring, vibrant artwork.

My approach is to gradually increase the oil-to-solvent ratio in my medium as I add layers. You don't have to be a chemist about it, just think in general steps. It's an intuitive progression, much like seasoning a dish – a little more here, a little less there, until it's just right. The key is mindful addition, not wild experimentation.
Working with Glazes: Mastering Transparency and Optical Depth
Glazing is where the 'fat over lean' rule truly shines in creating optical magic. A glaze is a thin, transparent layer of paint, heavily diluted with an oil-rich medium (often pure drying oil like Stand Oil, or a highly flexible alkyd medium), applied over a thoroughly dry, underlying layer. Because glazes are inherently fat and slow-drying, they must always be applied over a dry, preferably leaner, foundation. This ensures that the transparent film cures on top without trapping wet paint or causing cracking. Glazes allow light to penetrate through multiple layers, reflecting off the opaque underpainting and creating a luminous, jewel-like depth that is the hallmark of traditional oil painting. Think of building up color and form like a stained-glass window, each layer adding a new hue and intensity without obscuring what came before. For a deep dive into this transformative technique, learn more in our guide to mastering glazing techniques in oil painting.
Working with Impasto: Building Texture Safely
For those of us who love to build texture and create a sculptural surface, impasto is a glorious technique. However, it requires a careful application of 'fat over lean.' Thick impasto layers are, by their nature, very slow to cure, and if they're too lean or applied incorrectly, they are highly prone to cracking. When building impasto, you'll generally want to use a fat medium specifically designed for texture, such as a robust impasto gel (many are alkyd-based for faster drying and flexibility) or even a wax medium mixed with oil. These mediums ensure the thick paint remains flexible as it cures. Crucially, impasto layers should be applied either alla prima (wet-on-wet, where the entire thick passage cures as one cohesive unit) or over a thoroughly dry, stable, and lean underlayer. The goal is to avoid trapping a fast-drying, rigid 'skin' over a still-wet, slow-drying core. Patience is truly a virtue with impasto; allow ample time for these substantial layers to cure fully. For a closer look at this expressive technique, explore what is impasto painting and also mastering the palette knife: advanced techniques for abstract texture.
Couching and Oiling Out: Reviving Dull Layers
Sometimes, as your lean underlayers dry, they can become quite matte and dull, almost as if the color has "sunk in." This happens when the oil from the paint is absorbed by the porous ground beneath, leaving the pigment particles less thoroughly coated and losing their richness. This isn't just an aesthetic issue; it can also affect subsequent adhesion by creating a less receptive surface for the next paint layer. This is where the techniques of couching and oiling out come to the rescue, working with the fat over lean principle.
- Couching: This involves applying a very thin, almost imperceptible film of painting medium (often a lean oil medium or retouch varnish) over a dry, dull area just before you paint on it. It revives the colors, brings back their vibrancy, and provides a fresh, slightly "wet" surface that allows your new paint layer to glide smoothly and adhere beautifully. It's like re-wetting the surface without making it truly wet. You apply it sparingly and wipe off any excess before painting. This is not making the layer fat, but rather providing a slightly oily, receptive film on top of the dry, lean layer.
- Oiling Out: Similar in principle but often used for larger areas or for paintings that have been sitting for a while and have become significantly dull, oiling out involves applying a very thin layer of drying oil (like linseed or walnut oil, often diluted with a touch of solvent) over the entire dry painting or a large section. It saturates the dull areas, restoring color depth and luminosity. Crucially, any excess oil must be wiped off meticulously to avoid creating a thick, sticky film that would violate the fat over lean rule for subsequent applications. Oiling out should also be done sparingly and allowed to become touch-dry before applying new paint. It's a way of nourishing the paint film and ensuring optical continuity.
Both techniques are a testament to the nuanced care that oil painting demands, ensuring that each layer contributes to a luminous and structurally sound whole. They help manage the optical effects and surface receptivity of your painting, working in harmony with the fat over lean rule.
Here’s a sample recipe progression to illustrate the idea:
A quick note on choice of mediums: While there are many fantastic oil mediums available, it's generally best to avoid very heavy, slow-drying, or highly resinous mediums (like certain types of Dammar varnish mixed with oil) in your initial, lean layers. These are often best reserved for final, fatter layers or glazes, as their inherent 'fatness' can easily contradict your lean underpainting efforts. It’s about building a harmonious structure, not creating internal conflicts between layers. Understanding the specific properties of each medium is key; for example, a fast-drying alkyd can be a great 'leaner' medium for initial color blocks, even if it feels 'oily' compared to pure solvent, because its rapid cure time prevents it from being trapped under slower-drying layers.
Layer Stage | Medium Mix Example | Medium Components (Approx. Ratio) | Purpose |
|---|---|---|---|
| 1 (Underpainting) | Paint + minimal solvent (or none, thinly applied) | Pure Solvent (e.g., OMS, Turpentine) or none | Block in shapes, establish values, create a receptive 'tooth'. Dries very fast and rigid, providing a stable foundation. |
| 2-3 (Building Form) | Paint + Lean Medium (e.g., Alkyd-based, or solvent-heavy oil mix) | 1 part Drying Oil : 3 parts Solvent | Build form and color with a medium that's still relatively lean and dries fairly quickly. Creates a slightly more flexible, yet firm, layer. |
| 4+ (Details & Refinements) | Paint + Balanced Medium (e.g., pre-made all-purpose medium, or 1:1 oil/solvent mix) | 1 part Drying Oil : 1 part Solvent | Add details, enrich color, and build texture with a more flexible, moderately fat paint. Good for opaque passages and subtle shifts. |
| Final Glazes/Impasto | Paint + Fat Medium (e.g., Stand Oil, high oil content mix, or straight oil) | Mostly Drying Oil : minimal/no Solvent | Apply thin, luminous glazes or thick impasto. This is the fattest, most flexible layer, maximizing depth and luminosity and creating those jewel-like optical effects. Learn more about glazing techniques here. |
A Note on Pigments: Understanding Your Colors' Inner Life
To add a fun layer of complexity (don't worry, it's not critical to memorize every single pigment's oil absorption, but it's good to be aware), different pigments naturally absorb different amounts of oil during their manufacture. This inherent property profoundly affects their natural 'fatness' or 'leanness' straight out of the tube, and consequently, their drying times. It's like each pigment has its own personality when it comes to drying, a subtle characteristic that only reveals itself with observation and experience. For instance, earth colors like Burnt Umber, Raw Sienna, and Yellow Ochre are typically very 'lean' and dry quite fast, often because they contain metallic compounds (like iron oxides) that act as natural siccatives (driers), and their pigment particles absorb less oil and are often coarser, requiring less binder. Conversely, pigments like Ivory Black, rich Cadmium Reds and Yellows, and many Lake pigments (organic pigments, often transparent, like Alizarin Crimson, or Quinacridones) are naturally more 'oily' or 'fat' and are notoriously slow-drying, often requiring more binder to suspend the pigment, which gives them a richer, more buttery feel. This fascinating (and sometimes frustrating) variability explains why some of your colors might dry at wildly different rates on your palette, even without any added mediums. It's a testament to the complex nature of your materials and another reason to observe and understand them deeply! This inherent variability means that a tube of Burnt Umber might be 'leaner' than a tube of Cadmium Yellow straight out of the tube, even before you add any solvents or mediums. Understanding these inherent qualities can help you anticipate drying times and make more informed decisions about mediums. You can even explore the fascinating process of how to make your own oil paint to truly understand the pigment-to-oil relationship.
Here's a quick reference for common pigments and their general drying characteristics:
Pigment Group | Characteristics | Oil Absorption (General) | Drying Time (General) | Notes |
|---|---|---|---|---|
| Fast Driers | Earth colors (Umbers, Siennas, Ochres), Cobalt Blues, Lead Whites, Raw Umber, Burnt Sienna | Low-Medium | 1-2 days | Contain metallic siccatives (driers) or have coarser particles, requiring less oil. Ideal for underpainting and initial layers due to their rapid cure. |
| Medium Driers | Ultramarine Blue, Viridian, most Transparent Earths, Titanium White, Chromium Oxide Green, Cerulean Blue, Manganese Violet | Medium | 3-7 days | Balanced oil absorption and moderate drying action. Reliable for middle layers and building form, offering a good balance of workability and curing time. |
| Slow Driers | Cadmium Reds/Yellows, Ivory Black, Alizarin Crimson, Lakes, Zinc White, Quinacridones, Phthalo Blues/Greens | High | 7+ days (weeks) | Higher oil absorption or specific chemical composition (e.g., organic pigments, some heavy metals). Best for upper, fatter, and flexible layers, glazes, and impasto, where their extended open time is an advantage. |
Pigment Group | Characteristics | Drying Time (General) | Notes |
|---|---|---|---|
| Fast Driers | Earth colors (Umbers, Siennas, Ochres), Cobalt Blues, Lead Whites, Raw Umber, Burnt Sienna | 1-2 days | Contain metallic siccatives (driers) or have coarser particles, requiring less oil. Ideal for underpainting and initial layers due to their rapid cure. |
| Medium Driers | Ultramarine Blue, Viridian, most Transparent Earths, Titanium White, Chromium Oxide Green, Cerulean Blue, Manganese Violet | 3-7 days | Balanced oil absorption and moderate drying action. Reliable for middle layers and building form, offering a good balance of workability and curing time. |
| Slow Driers | Cadmium Reds/Yellows, Ivory Black, Alizarin Crimson, Lakes, Zinc White, Quinacridones, Phthalo Blues/Greens | 7+ days (weeks) | Higher oil absorption or specific chemical composition (e.g., organic pigments, some heavy metals). Best for upper, fatter, and flexible layers, glazes, and impasto, where their extended open time is an advantage. |
Beyond the Rules: Expressive Freedom with Knowledge
I often think of 'fat over lean' not as a restrictive cage, but as a robust skeleton that allows your artistic vision to flourish without structural compromise. Once you understand the why behind the rule, it frees you to make informed decisions, even when deliberately pushing boundaries. It's about having the knowledge to choose when and how to deviate, rather than stumbling blindly into avoidable structural failures. This deep understanding empowers you to wield your materials with confidence, knowing that your expressive freedom is built upon a foundation of archival integrity. It’s the difference between a fleeting experiment and an enduring masterpiece that speaks across time. For a deeper dive into the science behind this, you might explore the various factors affecting oil paint drying time.
When Can You Break the Rules? (Alla Prima & Impasto) – Understanding Direct vs. Indirect Painting
Okay, I know what you're thinking: for every rule, there's an exception, right? And you're absolutely correct! The 'fat over lean' principle is most acutely, most critically, important for layered painting where you consciously let each layer dry (or at least become touch-dry) in between applications – what we refer to as indirect painting. This is where the sequential build-up demands structural foresight, a careful building of foundations.
Scumbling: Another Layering Technique
Related to glazing, scumbling is another fascinating layering technique that often gets lumped into the "fat over lean" conversation. Unlike glazes, which are transparent and oily, scumbles are thin, semi-opaque, or opaque layers of paint applied with a dry brush over a dry underlayer. The goal is to allow the underlying color to show through in tiny flecks, creating a shimmering, broken color effect. Think of a hazy mist or a delicate veil over a landscape. For scumbling, you typically use paint straight from the tube or mixed with a very minimal amount of medium to maintain its stiff, dry-brush consistency. Because it's a thin, often drier application, it should generally still follow the spirit of fat over lean – applied over a dry, stable underlayer. It's a way to modify tones, add light, or create atmospheric effects without the full transparency of a glaze, and it relies on the optical interaction of layers, much like glazing. It allows for incredible subtle variations in light and texture, adding another dimension to your artwork without compromising structural integrity, as long as your underlayer is sound and dry. You might also find the dry-brush technique acrylic painting article useful for understanding the concept of dry-brush application, even though it's for a different medium.### Indirect vs. Direct Painting: The Core Distinction
Understanding the fat over lean rule truly comes into its own, truly shines, when you grasp the fundamental philosophical and practical difference between indirect painting and direct painting. This isn't just a dry technicality; it's about how you approach the very construction, the very being, of your artwork. It dictates not just what you paint, but how you paint it, and how you manage the drying process. Once you understand this distinction, the 'fat over lean' rule snaps into perfect clarity.
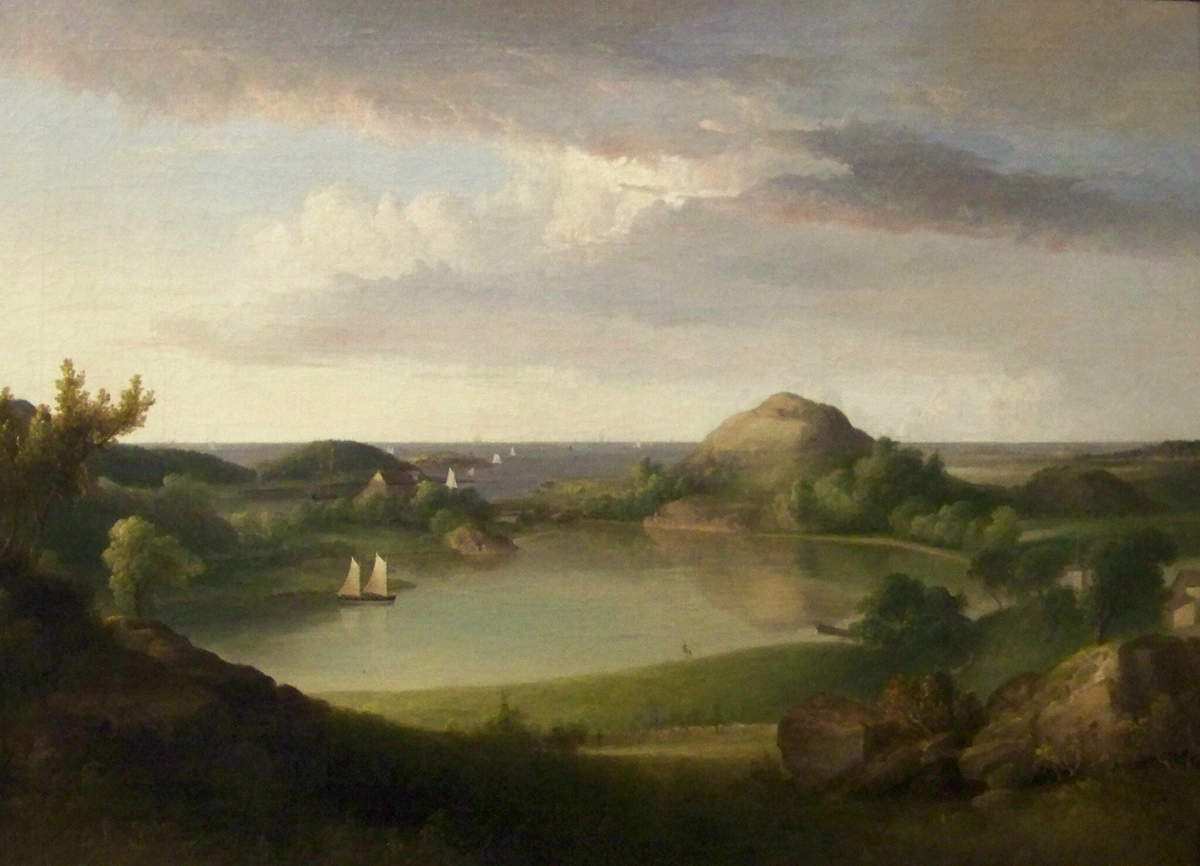
- Indirect Painting: This is the classical approach, characterized by building up multiple layers of paint, often allowing each layer to dry (or at least become touch-dry) before applying the next. Think of glazing, scumbling, and meticulous build-up, slowly building up light, shadow, and color through a series of transparent or semi-transparent veils. This is where the fat over lean rule is absolutely critical, as each successive, more flexible layer needs to sit safely over a more rigid, faster-drying one. Many old masters worked in this fashion, creating the luminous depth and optical effects we admire today, with light appearing to emanate from within the painting itself.
- Direct Painting (Alla Prima/Wet-on-Wet): This approach involves completing a painting, or at least a significant portion of it, in a single session while all the paint remains wet and workable, allowing for continuous blending and spontaneous effects. All the colors and tones are mixed and blended directly on the canvas, often with thick, expressive brushstrokes. Since all the paint is wet simultaneously and will effectively cure together as one cohesive, integrated film, the 'fat over lean' rule doesn't apply in the same rigid, sequential way. It’s more like a single, unified, albeit often thick, layer that dries together, and the internal stresses are distributed differently, curing as one monolithic film. This immediate, often frenetic, approach allows for incredible spontaneity, directness, and often a wonderfully tactile surface, perfect for capturing fleeting moments or raw emotion, or for artists who prefer a more immediate connection to their materials.
To help solidify this distinction, here's a quick table summarizing the core differences and how 'fat over lean' plays a role:

Feature | Indirect Painting | Direct Painting (Alla Prima) |
|---|---|---|
| Process | Built in multiple, often separate, discrete layers. | Completed in one or very few sessions, while paint is still wet. |
| Drying | Each layer typically dries (at least touch-dry) before the next is applied. | All layers cure simultaneously as one cohesive film. |
| Transparency | Often utilizes transparent glazes and semi-opaque scumbles for luminous depth and optical color mixing. | Typically opaque, wet-on-wet blending, direct color application. |
| Appearance | Luminous depth, rich optical effects, nuanced color shifts, archival stability. | Spontaneous, fresh, often textural, immediate impression, vibrant color mixing directly on canvas. |
| Fat Over Lean | Crucial and strictly applied. A foundational principle for layer stability. | Less critical in the sequential sense, as layers cure together as a single unit. Consistency within the wet layer is key. |
| Patience | High degree of patience required between layers. | Less waiting time between layers, more immediate gratification, but still requires overall curing time. |

Okay, I know what you're thinking: for every rule, there's an exception, right? And you're absolutely correct! The 'fat over lean' principle is most acutely, most critically, important for layered painting where you consciously let each layer dry (or at least become touch-dry) in between applications – what we've just discussed as indirect painting. This is where the sequential build-up demands structural foresight, a careful building of foundations.
However, if you're painting alla prima (Italian for "at first attempt"), often gloriously referred to as wet-on-wet, you're essentially completing the painting, or at least a significant portion of it, in a single session while all the paint layers remain wet, workable, and blendable. Since all the paint is wet simultaneously and will effectively cure together as one cohesive, integrated film, the 'fat over lean' rule doesn't apply in the same rigid, sequential way. It’s more like a single, unified, albeit often thick, layer that dries together, and the internal stresses are distributed differently. This immediate, often frenetic, approach allows for incredible spontaneity, directness, and often a wonderfully tactile surface, perfect for capturing fleeting moments or raw emotion. You can learn more about this captivating and liberating approach in this article on what is alla prima painting.
Similarly, with glorious, thick impasto techniques – where you build up substantial, tactile texture with paint, creating a sculptural quality on the canvas – the application of the rule shifts. While you are indeed using a lot of paint (which can and often should be made fatter with robust mediums to ensure flexibility and reduce brittleness), true impasto is often applied either alla prima (wet-on-wet in a single session, where the entire thick passage cures as one cohesive unit) or over an already thoroughly dry, stable, and lean underlayer. The critical factor here is that you are not trapping a very slow-drying, highly flexible layer underneath a rigid, fast-drying one. The entire thick passage is drying together, or it's sitting safely on an already cured foundation, preventing the internal stress that leads to cracking. Artists like Van Gogh, who were unparalleled masters of using thick, expressive paint, created works that have largely held up beautifully for over a century precisely because their dramatic, energetic approach often intuitively avoided the structural conflict of incompatible layers. Their impasto layers cured as cohesive units, solid blocks of paint. For a closer, more hands-on look at creating those rich, sculptural textures that scream "paint!", explore what is impasto painting. You might also find a what is a palette knife and how to use it guide helpful for these techniques.
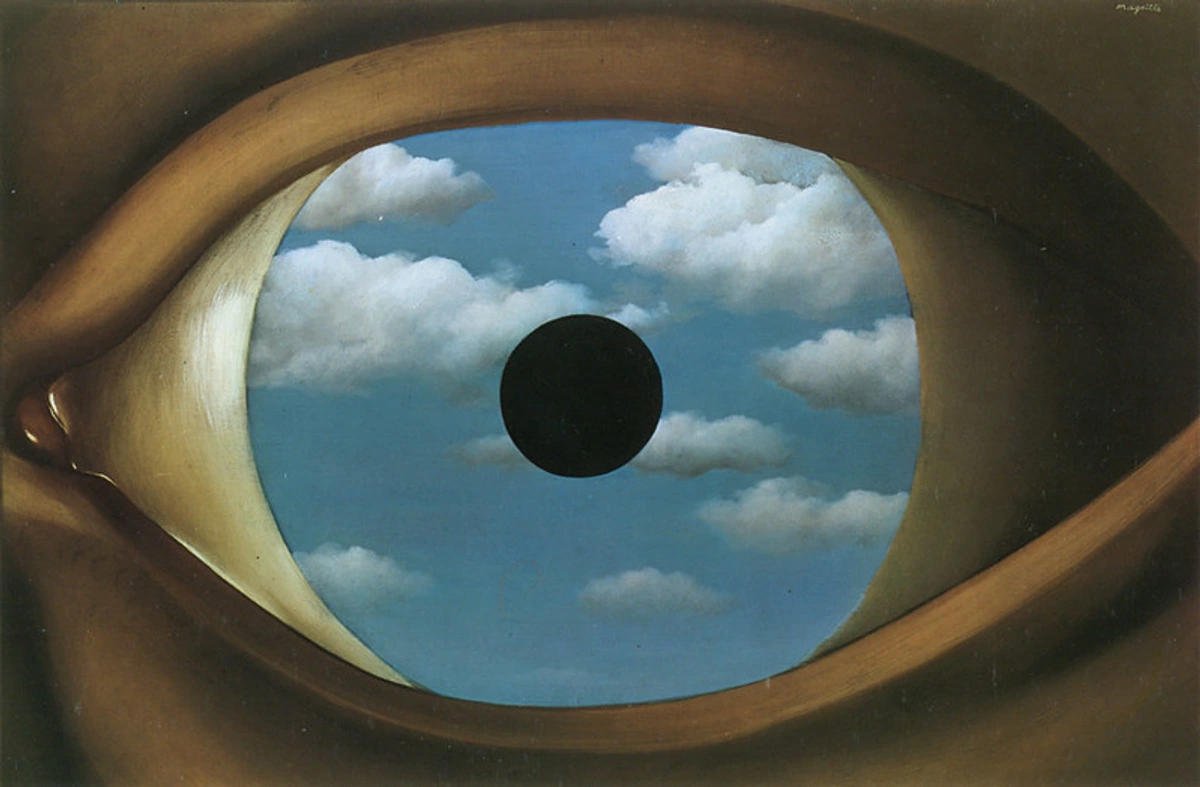
Even in contemporary, abstract work, where the focus might be on texture and expressive mark-making, the underlying principles of material science hold true. Understanding how layers interact ensures that even the most vibrant and spontaneous compositions remain structurally sound and endure for future appreciation. The material science is the silent partner in every bold gesture and subtle nuance.
Frequently Asked Questions (FAQ) – Your Most Pressing Questions Answered!
I know, I know. You've probably got a hundred questions bubbling up by now. The 'fat over lean' rule can feel like a lot to absorb, but remember, every master started somewhere. I've gathered some of the most common questions I get asked, hoping to demystify any lingering doubts and provide practical, actionable answers. Think of this as our ongoing conversation, designed to help you paint with confidence and clarity. There's no such thing as a 'silly' question when it comes to preserving your art and ensuring its archival quality!
Can I use mediums to accelerate or slow down drying times?
Absolutely! This is precisely one of the primary functions of artist-grade oil mediums. Fast-drying mediums, particularly alkyd-based ones (like Liquin, Galkyd, or Winsor & Newton's Alkyd Drying Medium), are formulated to significantly speed up the oxidation process, allowing you to build layers more quickly while maintaining flexibility and adhering to the 'fat over lean' principle. Conversely, slower-drying oils like Stand Oil or Poppy Oil will extend the paint's open time, giving you more opportunity for blending and intricate work, and are ideal for upper, fatter layers and glazes. The key is to understand the specific properties of each medium and how it will influence drying time and flexibility, so you can intentionally manipulate these factors to serve your artistic process without compromising the integrity of your painting. Always read the product descriptions carefully and integrate them thoughtfully into your layering strategy. Remember, it's about control, not simply speed for speed's sake.
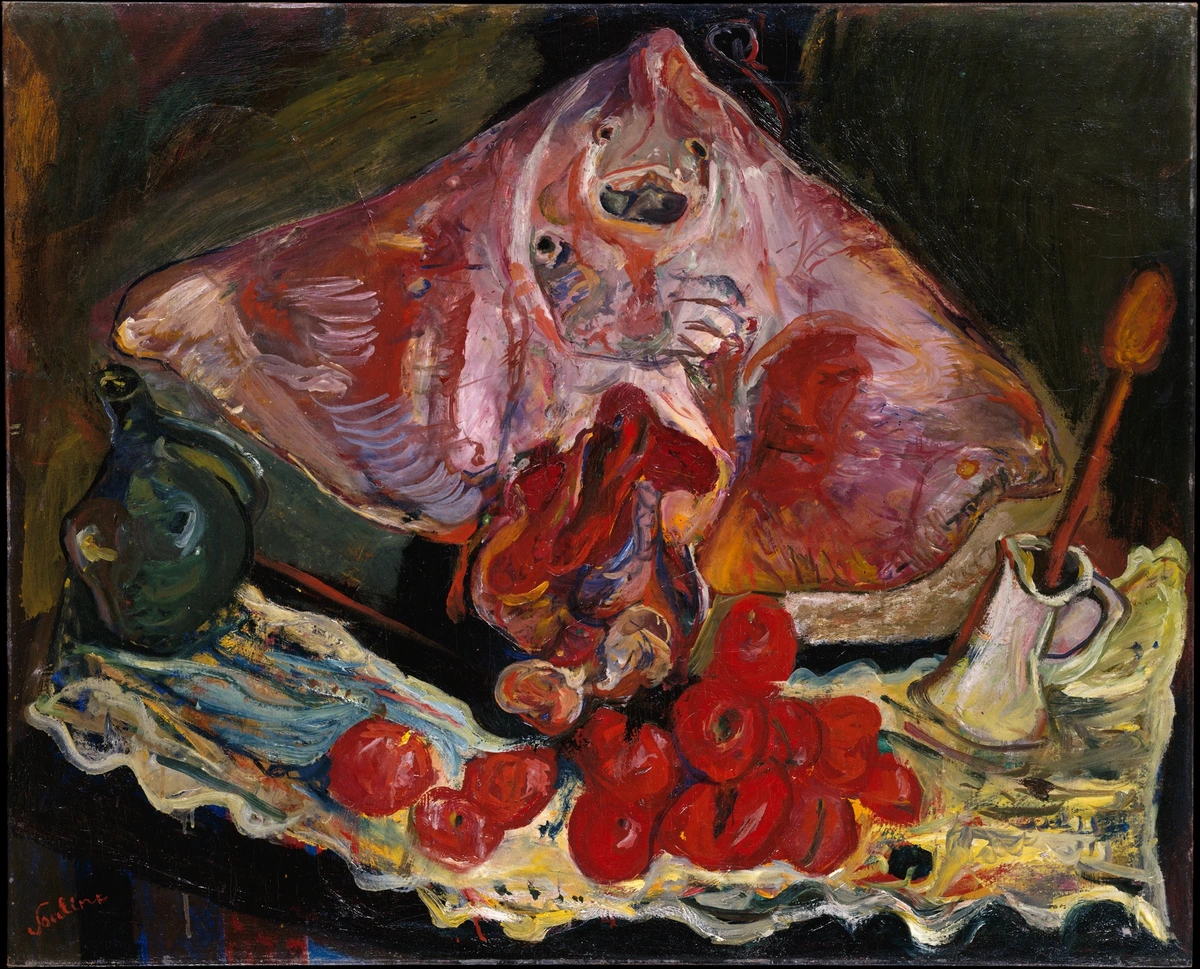
How long should I wait between layers?
Ah, the million-dollar question! And the answer, as frustrating as it is, remains: "It depends!" This isn't a cop-out, but a recognition of the nuanced chemistry involved. Factors like paint thickness (a thick blob will take ages, and I mean ages!), pigment type (some pigments are inherently faster or slower driers, as we discussed in "A Note on Pigments"), the specific amount and type of medium you’ve added, and, of course, your studio's environmental conditions (temperature, humidity, ventilation) all play a significant role. It's a bit like asking how long it takes for a cake to bake; you need to consider the ingredients, the size, and the oven temperature, right?
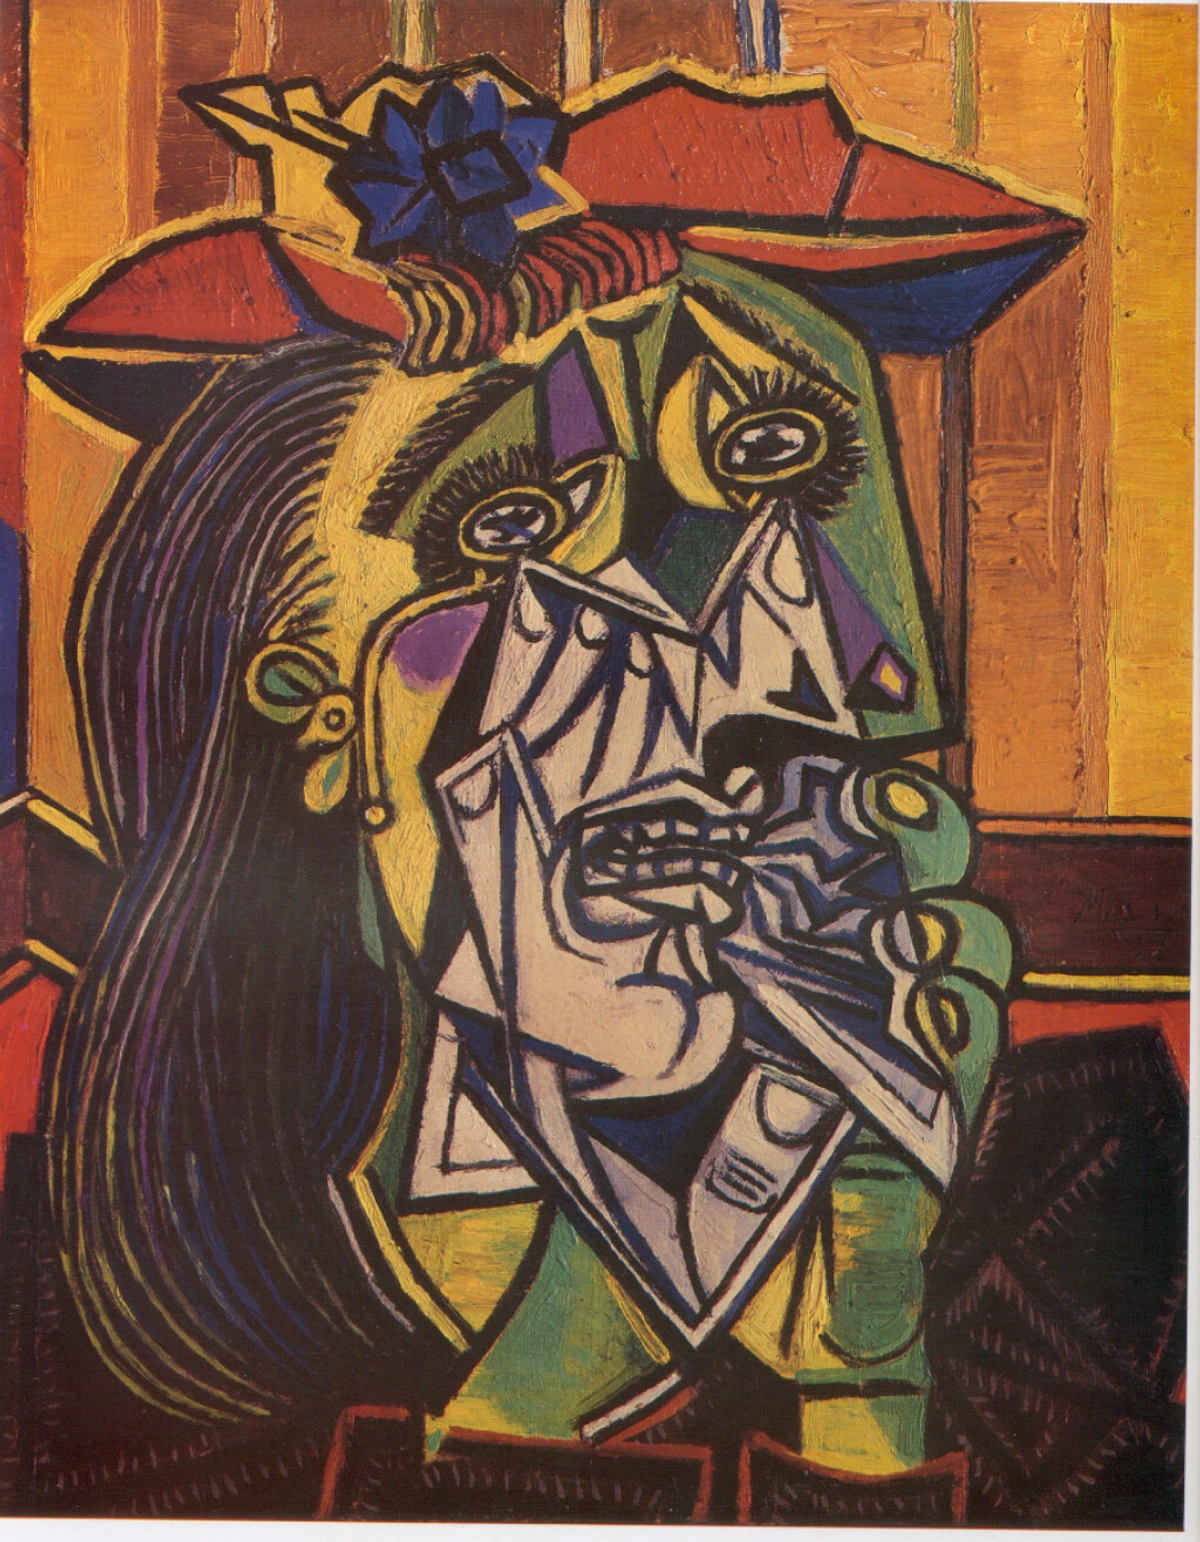
- Very lean, thin underpainting: Might be touch-dry in as little as 12-24 hours, sometimes even less in ideal, warm, dry, well-ventilated conditions.
- Middle layers (with increasing oil/alkyd mediums): Can take anywhere from a few days to a week or even more.
- Thicker impasto layers: Even if applied with fast-drying mediums, these can take weeks or months to become fully cured internally, despite feeling touch-dry on the surface.
The safest, most foolproof bet (and this is where patience truly earns its keep) is to wait until the layer is undeniably touch-dry. This means you can gently press your knuckle into it (your fingertip has natural oils that can affect the surface, so avoid that) without any paint coming off or leaving an indentation, and there's no sticky resistance. If it feels even slightly tacky, it's not ready. If you're ever in doubt, just wait longer. That extra day or two of patience will save you months or years of regret later and protect your investment in your artwork. Trust me on this one – it's the simplest and most effective insurance policy for your artwork's future. It's an act of love for your art.
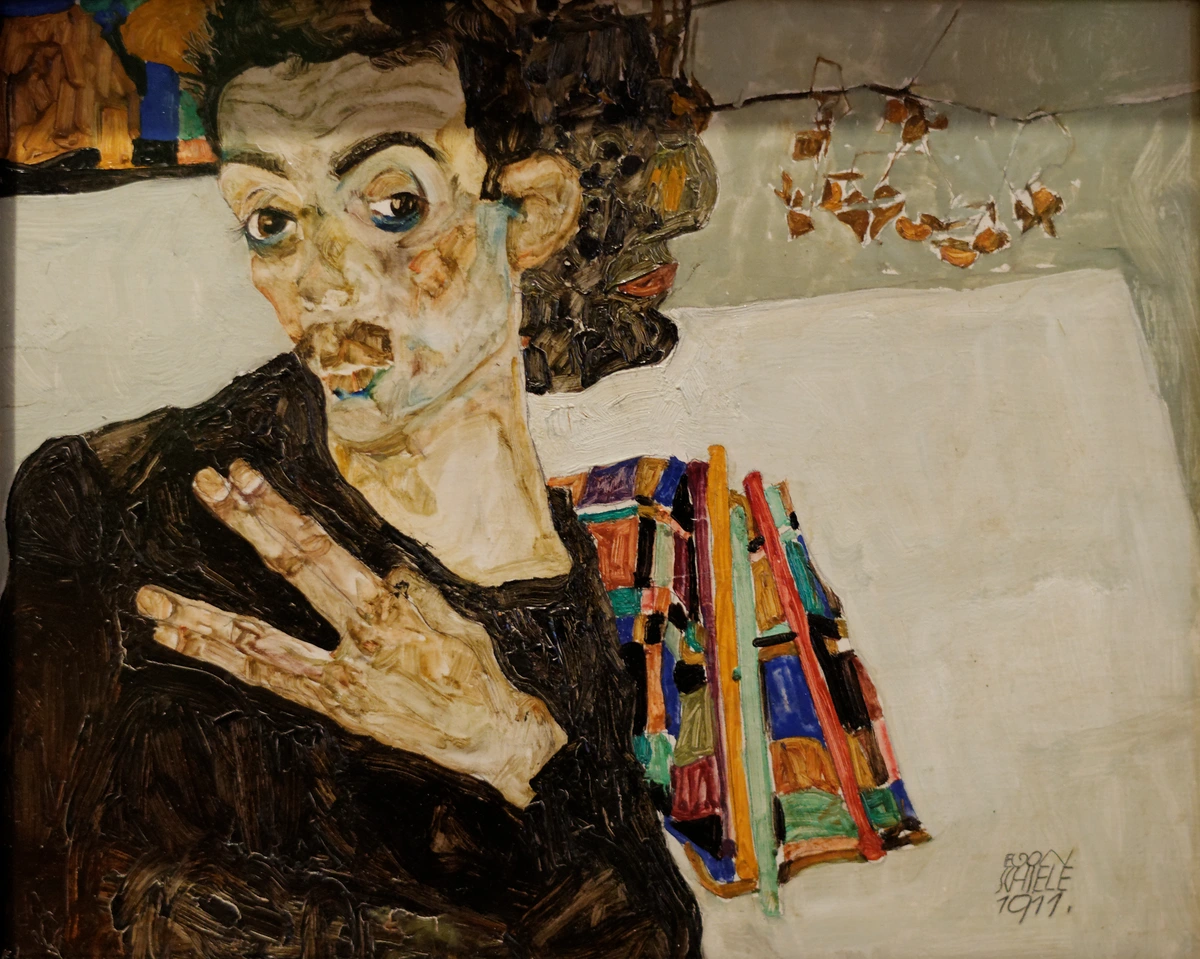
What is the 'working consistency' and why does it matter?
The 'working consistency' refers to how thick, thin, fluid, or stiff your paint is as you apply it. It matters immensely because it's directly tied to the 'fatness' or 'leanness' of your paint, and thus, to the 'fat over lean' rule! A thin, fluid consistency often implies a leaner mixture (more solvent), ideal for underpaintings. A buttery, luscious consistency, on the other hand, might indicate a fatter mixture (more oil or medium), perfect for building rich, flexible upper layers or impasto. Learning to intuitively feel and recognize the right working consistency for each stage of your painting is a huge step toward mastering 'fat over lean' in practice. It's not just about what you add to the paint, but how it behaves on your brush and on the canvas. Your aim is to find that sweet spot where the paint is workable and expressive, yet structurally sound for its intended layer.
How can I tell if a layer is truly dry enough for the next?
This is where your developing intuition, honed through experience, really comes into play. As I mentioned, "touch-dry" means precisely that: you can gently, gently press your knuckle (not your fingertip, which can transfer natural oils and interfere with the surface, potentially leaving a permanent residue or even lifting wet paint) into the paint surface, and absolutely no paint comes off, nor does it feel tacky or leave even the slightest indentation. If it feels even a little "grippy" or leaves a faint mark, it's not ready.
Critically, remember that "touch-dry" is distinct from "fully cured." A paint layer might be touch-dry but still undergoing significant chemical changes internally, including further oxidation and polymerization, a process that can take months or even a year for thicker applications. However, for the purposes of the 'fat over lean' rule, being touch-dry is generally sufficient, as the subsequent, more flexible layers are designed to accommodate those subtle, ongoing internal shifts without fracturing. The true full cure, which can take six months to a year (or more for thick impasto), is primarily relevant for applying a final varnish, not necessarily for subsequent paint layers.
If you're painting thinly with very lean mixtures, it might indeed be a day or two. If you’ve used fatter paints or thicker impasto, it could easily be a week, two weeks, or even more. There's truly no substitute for patient observation and learning the specific drying characteristics of your own unique materials and studio environment. It’s like tending to a garden; you learn the rhythm of growth and when to nurture each plant with care. Pay attention to the subtle cues – the sheen, the texture, and the tactile feel of the surface. A consistent, dull matte finish on a lean layer indicates it's ready for the next layer; a glossy, wet sheen means more patience is required.

What happens if I accidentally paint lean over fat?
In the immediate short term, you might see absolutely no adverse effects, and that's precisely why this mistake is so insidious! The problems tend to manifest later, sometimes months, sometimes years, down the line, much like a hidden structural flaw in a building. But make no mistake, over that extended period, you run a very high risk of structural failure. This can include the dreaded cracking (often craquelure, where fine hairline cracks appear, or alligatoring – a particularly unsightly pattern resembling dried mud or leathery reptile skin), wrinkling (sometimes called 'skinning' or 'beading up' as the top layer shrivels and pulls away from the still-drying layer beneath, or a 'crazing' effect where the top layer shrinks unevenly), or, in the worst-case scenario, outright delamination where paint layers actually peel away from the support or each other. It’s the paint film screaming in protest from internal stress, a silent structural battle being lost. This is the structural equivalent of putting a rigid plaster cast over a still-swelling injury – something has to give.
If you catch yourself applying a lean layer over a still-wet, fat one, and the paint is still workable, it's genuinely best practice to carefully (and completely) scrape off the offending layer with a palette knife and restart that section. Don't try to just paint over it, as the structural flaw will likely remain, a ticking time bomb within your artwork. If it's already set and you realize the mistake later, well, consider it a harsh but valuable lesson, and make a mental note for next time. It's a risk most professional artists simply won't take with their precious work, so better to be safe than sorry. The integrity of your artwork is paramount, and a little extra effort upfront can prevent irreversible damage later. Sometimes, a clean slate is the best path forward.

Can I use a hair dryer or heat gun to speed drying?
Please, for the love of longevity, no! While it might seem like a clever shortcut, attempting to artificially accelerate the drying process of oil paint with heat (like a hair dryer or heat gun) is a recipe for disaster. Oil paint needs to oxidize and polymerize slowly and naturally, absorbing oxygen over time. Rapid, uneven heat can cause the paint to dry too quickly on the surface, forming a rigid skin while the underlying oil remains uncured and still attempting to contract. This traps solvents and uncured oil, leading to severe wrinkling, cracking (especially alligatored cracks), and a weakened, brittle film that will eventually fail. It’s like trying to bake a cake by blasting the outside with a torch – you'll get a burnt crust and a raw, uncooked center. Moreover, excessive heat can cause certain pigments to degrade, altering their color or stability over time, and can even cause the canvas to become brittle or warp. Patience, as we've discussed, is your greatest ally, and mechanical drying is a shortcut to regret, potentially destroying weeks or months of work.
Can I just use paint from the tube for all my layers?
Yes, absolutely, you can primarily use paint straight from the tube for all your layers, especially for simpler paintings, direct painting, or if you're working very thinly. Most artist-grade oil paints, directly from the tube, are formulated with a balanced amount of oil that can be considered a good 'middle-ground' – neither overly fat nor excessively lean. If you apply these layers thinly and, crucially, you allow each layer to dry thoroughly (which, again, can take days or even weeks depending on the pigment and thickness and even the brand's specific formulation), the risk of violating the fat over lean rule is significantly reduced. The rule becomes most critical, most demanding of your attention, precisely when you start actively introducing solvents to make paint leaner or oil-based mediums to make it fatter, thus intentionally altering the paint's inherent properties and drying characteristics. Think of it this way: the tube paint is the baseline; you're modifying it for specific effects or drying control. For a deeper dive into how different brands formulate their paints, explore guides like Winsor & Newton Artists' Oil Colour Review or Holbein vs. Winsor Newton oil paints. Also, for beginners looking for reliable options, consider reviewing the best oil paints for beginners. It's a great way to start, and you can always introduce mediums as you gain confidence and seek more specific effects.
Is 'fat over lean' the same as 'thick over thin'?
Ah, a common point of confusion! While they often overlap in practice, 'fat over lean' and 'thick over thin' are not precisely the same, though they are certainly related. 'Fat over lean' refers specifically to the proportion of drying oil to solvent (or other ingredients) in your paint mixture, directly impacting its flexibility and drying time, and crucially, how it will cure and respond to stress. 'Thick over thin,' on the other hand, refers to the physical volume or build-up of the paint layers, regardless of their oil content. You can have a thin, fat glaze, or a thick, lean scrub of paint.
You can, for instance, have a very thin, transparent glaze that is extremely 'fat' (packed with slow-drying oil medium) applied over a dry, lean underpainting. Conversely, you could have a thick, textural application of paint that is relatively 'lean' if it incorporates a medium like cold wax or a fast-drying alkyd gel that doesn't significantly increase the oil content, but it still has a lot of bulk. That said, it is generally good practice to apply your physically thickest, most textural impasto layers towards the end of your painting process, over thoroughly dry, thinner layers. This ensures that any deep, slow-drying passages are at the top, or that a very thick layer dries uniformly from the surface inwards without a 'skinning' effect that can trap wet paint. The key is managing flexibility, not just bulk, to prevent internal stress and cracking. For more on creating incredible textures, dive into what is impasto painting and mastering tools like the palette knife. Understanding the relationship between these two concepts is crucial for achieving both aesthetic and archival success.
Can I mix different brands of paint and mediums?
Generally, yes, you absolutely can and I often do mix different brands of artist-grade oil paints and mediums. The vast majority are formulated with compatible drying oil binders (linseed oil being the most common universal denominator). This means your Cadmium Red from Brand A will happily mingle with your Ultramarine Blue from Brand B, and they'll get along just fine, creating new, vibrant hues. However, and this is an important 'however,' always, always perform a small test first when you're introducing a new, unfamiliar medium or a brand you haven't used before, especially if it claims unique properties or utilizes proprietary binders. Look for consistency in drying times, film flexibility, and any signs of separation or instability on a scrap surface. While most reputable brands strive for universal compatibility, a quick test swatch on scrap canvas or a spare panel is always a wise idea to avoid unpleasant surprises down the line. Better safe than sorry when it comes to the longevity of your art – a few minutes of testing can save you years of regret! For a broader perspective on different brands, check out best oil paint brands for artists. Mixing brands is often how artists discover new and exciting handling properties and unique color combinations!
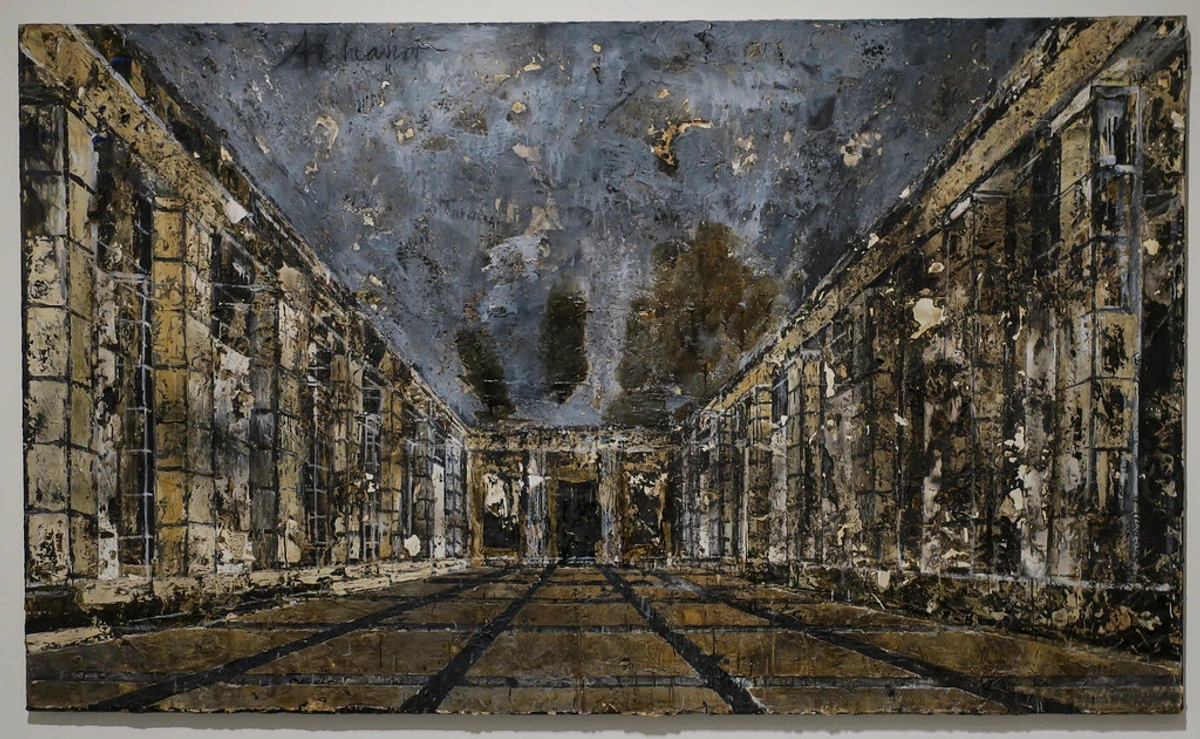
What about solvent-free painting or alternatives to traditional solvents?
The trend towards solvent-free painting is absolutely fantastic, both for artist health and the environment! If you're embracing a solvent-free approach, the 'fat over lean' principle still applies, but its application shifts slightly. Instead of using traditional solvents to thin your initial layers, you'll primarily be thinning them with a minimal amount of a drying oil (like linseed or walnut oil) or a specialized solvent-free gel medium specifically designed for this purpose. In this context, your 'lean' layers will simply contain the least amount of additional oil or medium, and you'll progressively increase that oil/medium content as you build up your layers. Products like oil of spike lavender or citrus-based thinners can also serve as gentler, natural alternatives to traditional petroleum-based solvents, acting as the 'lean' component for thinning while offering different aromatic profiles. The core principle of progressively increasing flexibility from bottom to top remains steadfast, even as your materials and techniques evolve. It's simply a matter of understanding the equivalent 'lean' and 'fat' components within your chosen system, ensuring long-term stability. This demonstrates the universality of the principle, adapting to new material innovations. It's truly a testament to the adaptability of these age-old principles to modern health and environmental consciousness.
What about adding thin glazes over impasto?
This is a fantastic, advanced technique that, when done correctly, can create incredible depth and visual richness! You absolutely can apply thin, fat glazes over thick impasto, but with a critical caveat: the impasto layer must be thoroughly and completely dry/cured first. This is non-negotiable. If you glaze over impasto that is still curing internally, the differential drying and movement between the layers will almost certainly lead to cracking. Once your impasto is rock-solid and stable (which, for very thick applications, can take many months or even a year!), a thin, oil-rich glaze will sit beautifully on top, enhancing its texture, unifying colors, and adding luminous depth without structural issues. The glaze, being a 'fat' layer, will remain flexible over the cured, stable impasto. It's a testament to how layers can interact dynamically when the underlying structural rules are respected.
How does 'fat over lean' apply to glazing?
Glazing is one of the most magical techniques in oil painting – it’s how you build incredible depth, subtle color shifts, and that coveted inner luminosity. It's essentially applying very thin, transparent layers of paint (often tinted, translucent colors) over a thoroughly dry underpainting. And here's the kicker: glazes are, by their very nature, inherently 'fat.' They typically consist of a high proportion of oil-based medium (like linseed oil, stand oil, or alkyd gels) mixed with a small amount of pigment to achieve that transparency and beautiful flow. Therefore, glazes should always be applied over thoroughly dry, usually leaner (or at least less fat) previous layers. This is a classic, textbook application of the fat over lean rule, ensuring those ethereal, luminous layers remain stable, integrated, and glorious for generations. Think of each glaze as a sheer veil of color, enriching what lies beneath without obscuring it, and the 'fat over lean' rule is the underlying framework that allows these veils to stack safely, contributing to the optical depth and vibrancy that only oil painting can achieve. For a deep dive into this transformative technique, learn more in our guide to mastering glazing techniques in oil painting. I often find it's the interplay of these thin, luminous glazes over a solid underpainting that truly brings a subject to life, allowing light to penetrate and bounce back through the layers, creating an almost internal glow.
What is Oil Paint Bloom (Sinking In)?
You might notice that after a paint layer dries, certain areas appear dull, matte, or less vibrant than others, almost as if the color has faded. This phenomenon is commonly known as "sinking in" or, less frequently, "oil paint bloom." It occurs when the oil (binder) from the paint layer is absorbed into a more porous underlying layer or the ground itself, leaving the pigment particles with insufficient oil to maintain their saturation and sheen. The result is a loss of optical depth and luminosity, and often a somewhat chalky appearance. It’s essentially an uneven distribution of the binder, creating a starved, underbound area. While not a direct structural failure, it's an aesthetic one that can compromise the visual integrity of your painting. You can often correct "sinking in" by "oiling out" the affected areas, as discussed earlier, or by applying subsequent glazes or a final varnish, which will re-saturate the pigments and bring back their intended richness. Preventing it starts with a properly prepared, evenly absorbent ground (your gesso!) and maintaining a consistent fat over lean ratio throughout your painting process.
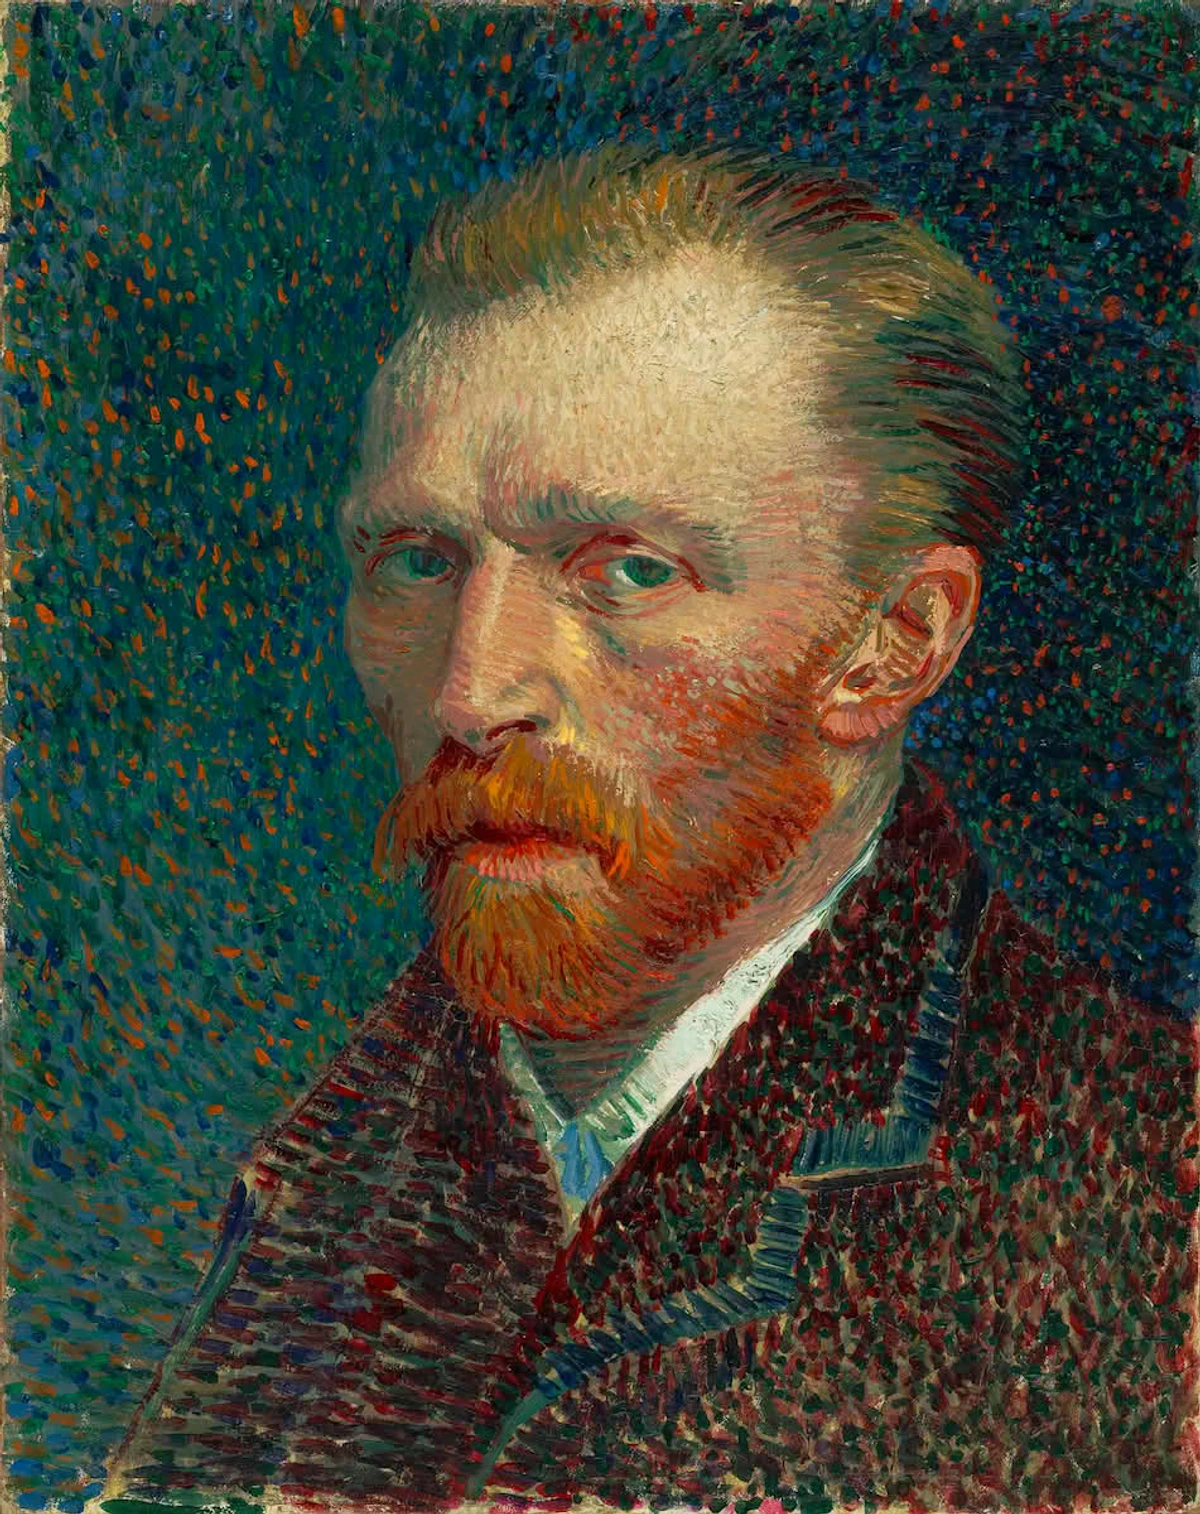
What's the difference between drying oils and non-drying oils?
This distinction, I cannot stress enough, is absolutely, unequivocally vital! Drying oils are the workhorses of artist-grade oil paints and mediums (think linseed, walnut, poppy, safflower oil). They possess the unique chemical property of reacting with oxygen in the air (oxidizing) to undergo polymerization, forming a solid, flexible, and permanent film. This is the entire foundation of oil paint's longevity and archival quality. Non-drying oils, however (like your kitchen olive oil, baby oil, or petroleum-based mineral oil), do not undergo this hardening process. They remain liquid, greasy, and permanently tacky indefinitely. Introducing any non-drying oil into your oil painting process, even in tiny amounts, is a guaranteed path to catastrophic issues: a perpetually sticky surface that will attract and embed every speck of dust and debris, relentless dust attraction, eventual mold growth (as the oil provides a food source), premature cracking as proper curing is inhibited, and ultimately, paint failure where your artwork simply won't cure or remain stable. Please, for the sake of your art, stick exclusively to artist-grade drying oils and mediums – consider it a sacred trust with your materials and your artistic legacy! This is a mistake that can ruin an entire painting, and it's completely avoidable with proper material knowledge.
Should I prime both sides of a wood panel?
Yes, absolutely, and emphatically, yes! This is a critical step often overlooked by artists working on wood panels, and it's essential for the long-term stability of your artwork. Applying primer (gesso) to the painting surface but leaving the back and edges unsealed creates an imbalance in moisture absorption. Wood is a hygroscopic material, meaning it absorbs and releases moisture from the air. If only one side is sealed, the unsealed side will respond to environmental humidity changes differently, causing the panel to expand and contract unevenly. This leads to frustrating and ultimately damaging warping or bowing of the panel over time, which can then put stress on your paint layers and contribute to cracking or delamination. To prevent this, always prime or seal all sides of a wood panel with at least one, and ideally two or more, layers of an appropriate panel sealer or gesso. This creates a balanced barrier against moisture fluctuations, ensuring your support remains flat and stable for centuries. It's a small extra step that makes a monumental difference.
What about water-miscible oils?
Water-miscible (or water-mixable) oil paints are a brilliant innovation, formulated to be thinned and cleaned up with water, offering a less toxic, easier cleanup studio experience, which is a huge bonus for many artists! However, and this is crucial, they are still, at their core, oil paints. This means the fat over lean rule absolutely, unequivocally applies to them, especially if you're building up multiple layers. When you thin them with water, that water acts effectively like a solvent, making your layers leaner and faster-drying. Conversely, if you introduce oil mediums (specifically formulated for water-miscible oils, not traditional oil mediums, as they are not compatible due to their emulsifying agents!), your layers will become fatter, slower-drying, and more flexible. So, the underlying principle of progressively increasing flexibility from bottom to top remains precisely the same, just with water substituting for traditional solvents in your lean stages, or specialized water-mixable mediums replacing traditional oil mediums. It's a fantastic option, but don't forget the underlying chemistry! For a deeper dive into these versatile and increasingly popular paints, check out our comprehensive guide on the best water-soluble oil paints. Always ensure you're using mediums specifically designed for water-miscible oils, as mixing with traditional oils or mediums can cause emulsification issues and compromise the paint film. This is a common trap, so read those labels carefully!
How do I choose the right painting surface (canvas vs. panel)?
Choosing between canvas and panel is a fundamental decision that impacts not just the feel of your painting experience but also the long-term stability and archival quality of your artwork. There's no single 'right' answer; it largely depends on your artistic goals and preferred techniques, but understanding their differences is key to making an informed choice.
Feature | Stretched Canvas (Linen/Cotton) | Rigid Panel (Wood/MDF/Aluminum) |
|---|---|---|
| Flexibility | Inherently flexible; can expand and contract with environmental changes. Quality linen offers more stability than cotton. | Highly rigid and stable; minimal expansion/contraction. Less susceptible to flexing and physical impact damage. |
| Weight | Generally lighter, especially for larger sizes, making them easier to transport and hang. | Heavier, especially for larger sizes or thicker panels. Requires robust hanging hardware. |
| Surface Texture | Variable, from smooth (fine linen) to pronounced weave (coarse cotton). Offers a 'tooth' that paint grips onto. | Can be prepared to be extremely smooth or textured with gesso/additives. Provides a consistent, unyielding surface. |
| Vulnerability | Susceptible to punctures, tears, and environmental damage (humidity fluctuations). Can eventually sag or loosen. | Highly resistant to punctures and tears. Less affected by humidity if properly sealed, but can warp if not sealed on all sides. |
| Best For | Artists who prefer a springy surface, want to work large, or value the traditional feel. Good for alla prima, expressive brushwork, and certain glazing techniques. | Artists seeking maximum stability and durability. Ideal for detailed work, hard edges, precise layering, and impasto where a rigid support is essential. Excellent for mixed media or for achieving a very smooth, enamel-like finish. |
| Archival Notes | Requires proper stretching, sizing, and priming. Linen is generally considered more archival than cotton due to less elasticity and greater strength. | Requires proper sealing on all sides (especially wood) to prevent warping and acid migration. Once sealed and primed, offers superior long-term stability and is considered highly archival. |
Ultimately, a well-prepared surface, regardless of type, is the foundation for a painting's longevity. Don't compromise on quality here – your future self (and the future owners of your art) will thank you. For further guidance on setting up your painting, explore how to prepare a canvas for oil painting and how to stretch canvas for painting.
Does this rule apply to acrylics?
No, absolutely not! This is an oil-painting-specific rule, born from the unique chemistry of drying oils. Acrylics dry by water evaporation (coalescence) and form a stable, flexible plastic film almost immediately upon the water evaporating. You can layer acrylics in any way you please, thick over thin, thin over thick – it's one of their main advantages, offering immense creative freedom and a much faster workflow! This fundamental difference in drying mechanism is why acrylics are often chosen for speed and versatility, allowing for rapid layering and bold impasto without concerns for underlying layers. If you're curious about acrylics, and how their properties differ, you can see a comparison of Golden vs. Liquitex paints here and learn more about what is the difference between acrylic and oil paint. Other mediums like tempera, gouache, or watercolor also have their own specific layering rules, but 'fat over lean' is unique to the oxidative drying of oils. Each medium is a world unto itself! For a broader perspective on different paint types, check out acrylic vs. oil vs. watercolor: choosing paint medium.
How does 'fat over lean' apply to Impasto?
Impasto mediums (like beeswax medium or specific alkyd gels) are designed to build texture and body in your paint, literally making your painting three-dimensional and tactile. While they allow for thick application, the fat over lean rule still subtly (but importantly) applies. If you're building very thick impasto, it's generally best to do so over a fully dry, stable, and ideally slightly leaner underlayer. The medium itself will typically be quite 'fat' in its oil content to ensure it remains flexible and moves cohesively with the layers beneath it. Many modern impasto mediums are alkyd-based, which can speed drying while maintaining excellent flexibility, making them ideal for building thicker layers more quickly without sacrificing structural integrity. The absolute key here is to avoid the cardinal sin: trapping a lean, fast-drying skin over a still-curing, very thick, highly fat impasto layer. This will lead to cracking, wrinkling, and delamination as the slow-drying core shifts beneath a brittle surface. Apply impasto boldly, but apply it wisely, always respecting the underlying principles of flexibility! Think of it as sculpting with paint, where each 'block' needs to be stable and harmonized with its neighbors. A thick impasto layer, even if it dries as a cohesive whole, still takes a considerable amount of time to fully cure, often extending into many months or even years depending on its thickness and the medium used. Patience is, once again, your impasto's best friend. For tips on specific tools, check out what is a palette knife and how to use it and best palette knives for artists.
What about adding texture mediums like marble dust or sand?
When adding textural elements like marble dust, pumice, or sand to your oil paint, you're primarily altering the physical body and surface quality, not necessarily the inherent 'fatness' or 'leanness' in the same way an oil medium does. However, these additions can make the paint film more porous and potentially more brittle if not properly bound. If you're incorporating them, ensure they are mixed with paint that is sufficiently 'fat' (i.e., has enough drying oil or medium) to bind the particles securely, creating a strong, flexible matrix. It's generally safest to introduce these texture-heavy layers in the later, fatter stages of your painting, ensuring they are applied over stable, dry underlayers. The goal is always a cohesive, well-bound film that will not crumble or delaminate. It’s also important to use artist-grade inert fillers to avoid introducing impurities or acidity that could compromise the paint film over time. For tools to manipulate these textures, our guide to what is a palette knife and how to use it might be helpful. If you're really delving into texture, exploring mastering the palette knife: advanced techniques for abstract texture could be an eye-opener.
What role does brush choice play in applying 'fat over lean'?
While brush choice doesn't directly alter the 'fatness' or 'leanness' of your paint mix, it profoundly impacts how those layers are applied and, by extension, how successfully you adhere to the rule. Think of your brushes as extensions of your intention, helping you control the application of each layer with precision.
- For lean, thin underpaintings: Stiff bristle brushes (hog hair) are excellent. Their stiffness allows you to scrub the paint thinly into the canvas weave, creating a minimal, even layer that stains the canvas rather than building up thickness.
- For middle layers and opaque passages: A variety of bristle or synthetic brushes can be used. Flats and brights are good for pushing paint, while filberts offer softer edges, allowing for both precise application and blending.
- For fatter, more fluid layers and delicate glazes: Softer brushes like sables or high-quality synthetics are ideal. Their fine points and soft flags help apply paint smoothly and evenly, allowing for transparent, luminous effects without disturbing underlying layers. These are often used for blending and finishing touches.
Ultimately, the right brush helps you control the thickness and consistency of your application, which is a crucial companion to the fat over lean principle. For instance, you wouldn't use a soft, delicate sable to scrub in a lean, textured underpainting. To find your ideal tools, explore our guide to the best oil painting brushes for artists, and remember that cleaning your brushes properly also plays a role in their longevity and how well they apply paint (how to clean an oil painting palette provides insights into general studio hygiene). A well-maintained brush is a happy brush, and a happy brush helps you paint better!
Can I use oil sticks with the fat over lean rule?
Yes, you absolutely can, and indeed should, apply the fat over lean rule when working with oil sticks in any layered painting. Oil sticks are, at their essence, oil paint in a convenient stick form, often with a higher wax content which contributes to their semi-solid state. Crucially, their binder is still a drying oil, so their curing process is the same as traditional tube oils. Therefore, treat oil sticks like an inherently very 'fat' paint due to their high oil and wax content. If you're incorporating them into a multi-layered oil painting, they are best reserved for later stages, applied sparingly, or as final, flexible layers over thoroughly dry, leaner passages. If you're building layers primarily with oil sticks, you'd still ideally start with a very lean underpainting (perhaps thinly scumbled traditional oil paint or a very thinly dragged application of an oil stick), gradually increasing the thickness and inherent fatness of subsequent oil stick layers. It's about respecting their rich, flexible nature. For more on these wonderfully expressive tools and how to wield them, check out our guide on exploring oil sticks for expressive mark-making. Think of them as concentrated, creamy oil paint, full of luscious 'fatness' that needs to be handled strategically.

Glossary of Key Terms – Your 'Fat Over Lean' Dictionary
To ensure we're all speaking the same language and to demystify any lingering jargon, here's a quick rundown of some key terms you'll encounter in the world of oil painting and the 'fat over lean' rule. Think of this as your personal dictionary for navigating the complexities of archival painting practices:
Term | Definition | Relevance to Fat Over Lean | |
|---|---|---|---|
| Alla Prima | Italian for "at first attempt"; painting wet-on-wet, often in a single session, where layers cure together as one cohesive film. | 'Fat over lean' applies differently here; focus is on consistency within the wet layers rather than sequential rigidity. | |
| Alligatoring | A severe form of cracking where the paint surface resembles dried mud or alligator skin, often due to a fast-drying, rigid top layer over a vastly slower-drying, thick one that is still moving. | A clear visual indicator of violating 'fat over lean', leading to catastrophic structural failure. | |
| Alkyd Medium | A synthetic resin medium that accelerates drying while maintaining flexibility and durability. | Excellent for building layers efficiently, fitting into both 'leaner' (solvent-heavy alkyds) and 'fatter' (more viscous alkyds) stages due to controlled cure times. | |
| Binder | The substance that holds pigment particles together and adheres them to the support, forming a cohesive paint film. | In oil paint, this is the drying oil (e.g., linseed). Its proportion to pigment and solvent is key to 'fat over lean'. | |
| Couch | A thin, transparent layer of painting medium or retouch varnish applied over a dry area to revive dull colors, improve brush-glide, and ensure good adhesion for subsequent layers. | A technique to ensure good interlayer adhesion and optical vibrancy without making the underlying layer too fat, often used between painting sessions. | |
| Craquelure | Fine, delicate hairline cracks that appear on the paint surface. Can be natural aging (stable) or due to improper layering ('drying cracks' – unstable). | A common type of drying crack, exacerbated by ignoring 'fat over lean' or rapid environmental changes. | |
| Crazing | A type of wrinkling or cracking where the top layer shrinks unevenly, often due to a lean, fast-drying layer over a still-curing, fat layer, causing the surface to pucker. | A symptom of violating 'fat over lean' in terms of differential shrinkage and flexibility. | |
| Curing | The complete chemical process by which drying oils harden and stabilize over time, primarily through oxidation and polymerization, resulting in a durable, permanent paint film. | The long-term process that 'fat over lean' meticulously manages to prevent cracking and ensure longevity. | |
| Delamination | The catastrophic failure where paint layers physically separate and peel away from each other or the support, losing adhesion entirely. | A severe consequence of ignoring 'fat over lean' or improper surface preparation, leading to irreversible damage. | |
| Direct Painting | Completing a painting, or a significant portion, in a single session while paint is wet, allowing for continuous blending and spontaneous effects (also known as alla prima). | 'Fat over lean' is less about sequential application and more about consistency within the wet-on-wet layer, as everything cures together. | |
| Driers (Siccatives) | Metallic salts (e.g., cobalt, manganese) added to oil paint or mediums to accelerate the oxidation and hardening of drying oils. | Must be used with extreme caution and in minimal amounts, as overuse can cause brittleness and disrupt the 'fat over lean' principle if misapplied, leading to cracking. | |
| Drying Oil | An oil (like linseed, walnut, poppy, safflower) that polymerizes and hardens upon exposure to air (oxidation), forming a stable paint film. | The 'fat' component of oil paint; its amount determines the flexibility and drying time of a layer. | |
| Fat Paint | Paint with a higher proportion of oil or oil-based medium, resulting in slower drying and greater flexibility and durability. | Always applied over leaner layers to prevent cracking, ensuring a progressive increase in flexibility up through the painting's strata. | |
| Gesso | A primer, typically acrylic-based for modern oil painting, applied to the support to create a stable, slightly absorbent, and non-acidic ground for the paint layers. | A crucial foundation for preventing future cracking and ensuring proper adhesion of lean initial layers. See also: what is gesso in painting. | |
| Glaze | A thin, transparent layer of paint, rich in medium, applied over a thoroughly dry underlayer to modify color, add depth, and create luminous optical effects. | An inherently 'fat' layer, crucial for optical effects, always applied over leaner, dry layers to maintain structural integrity. See also: mastering glazing techniques. | |
| Grisaille | A monochromatic underpainting technique using shades of grey or a single color to establish values, form, and light/shadow, over which color glazes are later applied. | A classic 'lean' underpainting method, providing a solid tonal foundation for subsequent fatter layers. See also: what is grisaille: understanding the monochromatic painting technique. | |
| Imprimatura | A thin, transparent, and uniform wash of color applied over the entire primed support to tone the surface, kill the stark white, and establish a mid-tone value. | A classic 'lean' starting point, unifying the ground beneath initial layers and aiding color judgment. | |
| Impasto | A painting technique where paint is applied thickly, often with visible brushstrokes or palette knife marks, creating a textured, three-dimensional surface. | Can be 'fat' or 'lean' depending on the medium used; often applied in later, more flexible layers over thoroughly dry, leaner foundations. See also: what is impasto painting. | |
| Indirect Painting | Building up multiple layers of paint, often allowing each layer to dry between applications, achieving depth and complexity through successive veils of color. | Where the 'fat over lean' rule is most critically and strictly applied to ensure long-term stability. | |
| Interlayer Adhesion | The strength of the chemical and mechanical bond between successive paint layers, crucial for preventing delamination. | Directly impacted by 'fat over lean,' as proper layering promotes strong chemical and mechanical bonds that fuse the layers together. | |
| Lean Paint | Paint with less oil or a higher proportion of solvent, resulting in faster drying and more rigidity and brittleness. | Forms the foundational layers upon which fatter layers are built, providing a stable, inflexible base. | |
| Medium | A substance added to paint to modify its working properties (e.g., consistency, drying time, sheen, flexibility). | Directly used to control the 'fatness' or 'leanness' of paint layers and ensure adherence to the rule. | |
| Molecular Tension | The internal stress that builds within paint layers as they dry and shrink at different rates. If not managed by 'fat over lean,' this leads to cracking and other structural failures. | The direct physical cause of cracking when 'fat over lean' is ignored, as conflicting tensions pull the film apart. | |
| Non-Drying Oil | An oil (like olive oil, mineral oil) that does not polymerize or harden upon exposure to air, remaining permanently liquid and tacky. | Must be strictly avoided in oil painting, as its inclusion leads to catastrophic paint film failure, dust attraction, and mold growth. | |
| Oil Paint Bloom / Sinking In | A phenomenon where a dried paint layer appears dull, matte, or less vibrant due to the absorption of its oil binder into a more porous underlying layer. | An aesthetic issue caused by uneven oil absorption, often corrected by oiling out or varnishing, and prevented by proper ground preparation and fat over lean application. | |
| Oil Sticks | Oil paint in stick form, often with added wax for consistency. While convenient, they are inherently 'fat' due to their oil and wax content. | Treated as 'fat' paint; applies the 'fat over lean' rule, meaning they are best used in later, flexible layers in a layered painting. | |
| Oiling Out | The technique of applying a very thin layer of drying oil (often diluted) over a dry, dull area of a painting to restore luminosity and color saturation. | Must be done sparingly and wiped thoroughly; helps revive sunk-in areas and prepare surfaces for new layers, working with 'fat over lean'. | |
| Oxidation | The chemical process where drying oils react with oxygen in the air, causing their molecules to cross-link (polymerize) and the paint to cure and harden. | The core process that dictates drying times and flexibility; 'fat over lean' manages this differential rate across layers. | |
| Pigment | The finely ground colored powder that, when mixed with a binder, creates paint. | Different pigments have varying oil absorption rates and inherent driers, affecting their natural fatness/leanness and drying characteristics. | |
| Polymerization | The chemical process where oil molecules link together to form larger, more stable chains, contributing to the hardening and increased flexibility of the paint film over time. | A key part of the curing process; happens faster in leaner layers and continues in fatter layers, creating a gradient of flexibility. | |
| Refractive Index | A measure of how much light bends when passing through a substance. Different oils and pigments have different indices. | Increasing refractive index in fatter, upper layers contributes to the mesmerizing optical depth and luminosity unique to traditional oil paintings. | |
| Retouch Varnish | A very thin, diluted varnish (or painting medium) applied to dry, dull areas of a painting to restore luminosity and provide a receptive surface for new paint. | Used similarly to a 'couch' to aid interlayer adhesion and prevent sinking-in, particularly useful for areas that have lost their luster between sessions. | |
| Scumbling | A dry-brush technique where a thin, semi-opaque layer of paint is lightly dragged over a dry underlayer, allowing the lower color to show through and creating a broken, shimmering effect. | Typically a 'leaner' application, should be applied over thoroughly dry underlayers, respecting the fat over lean principle for stability and optical effect. | |
| Solvent | A liquid (e.g., turpentine, OMS) used to thin oil paint and clean brushes; it evaporates almost completely from the paint film, making the layer leaner. | Crucial for creating lean foundational layers; misuse can lead to underbound paint and cracking. | |
| Support | The physical surface upon which a painting is made (e.g., canvas, wood panel). | The ultimate "lean" foundation; proper preparation is vital for the longevity of the entire artwork. | |
| Touch-Dry | The stage when a paint layer feels dry to the touch, with no tackiness or indentation when gently pressed, but is not yet fully cured internally. | The practical benchmark for when it's safe to apply the next layer in 'fat over lean' painting. | |
| Underpainting | The initial layers of a painting that establish the composition, values, and often tonal relationships, over which subsequent color layers are applied. | Always the leanest layers, forming the rigid, stable foundation for the entire painting. See also: what is underpainting in painting. | |
| Varnish | A removable protective coating applied to a fully cured oil painting to protect it from dirt, UV light, and physical abrasion, and to unify the sheen. | Applied only after the painting is fully cured (6-12+ months); varnishing too early can impede curing and cause issues. See also: how to varnish an oil painting. | |
| Volumetric Shrinkage | The slight but significant reduction in volume that oil paint undergoes as it dries and cures, due to the oxidation and polymerization of the oil molecules. | The internal force that 'fat over lean' manages to prevent cracking, as incompatible rates of shrinkage between layers cause stress. | |
| Wet-on-Wet | See Alla Prima. | Part of direct painting; 'fat over lean' applies differently here as layers cure together as a single unit. | ## It’s a Conversation, Not a Commandment |
Look, I know that for a long time, the phrase 'fat over lean' sounded more like a rigid command than a helpful guide, and honestly, for years I avoided truly engaging with it, which, predictably, led to those dreaded cracks in my own early work. But please, please don't ever see 'fat over lean' as a restrictive rule designed to trip you up, stifle your creative flow, or make painting feel like a chemistry lesson. Instead, I urge you to embrace it as a fundamental, liberating principle. It gives you the profound, almost alchemical knowledge to build paintings not just with incredible depth and lasting luminosity, but with genuine, unassailable structural permanence. It's the exhilarating difference between a fleeting moment of expression and a lasting artistic legacy. It's the silent partner in every enduring masterpiece.




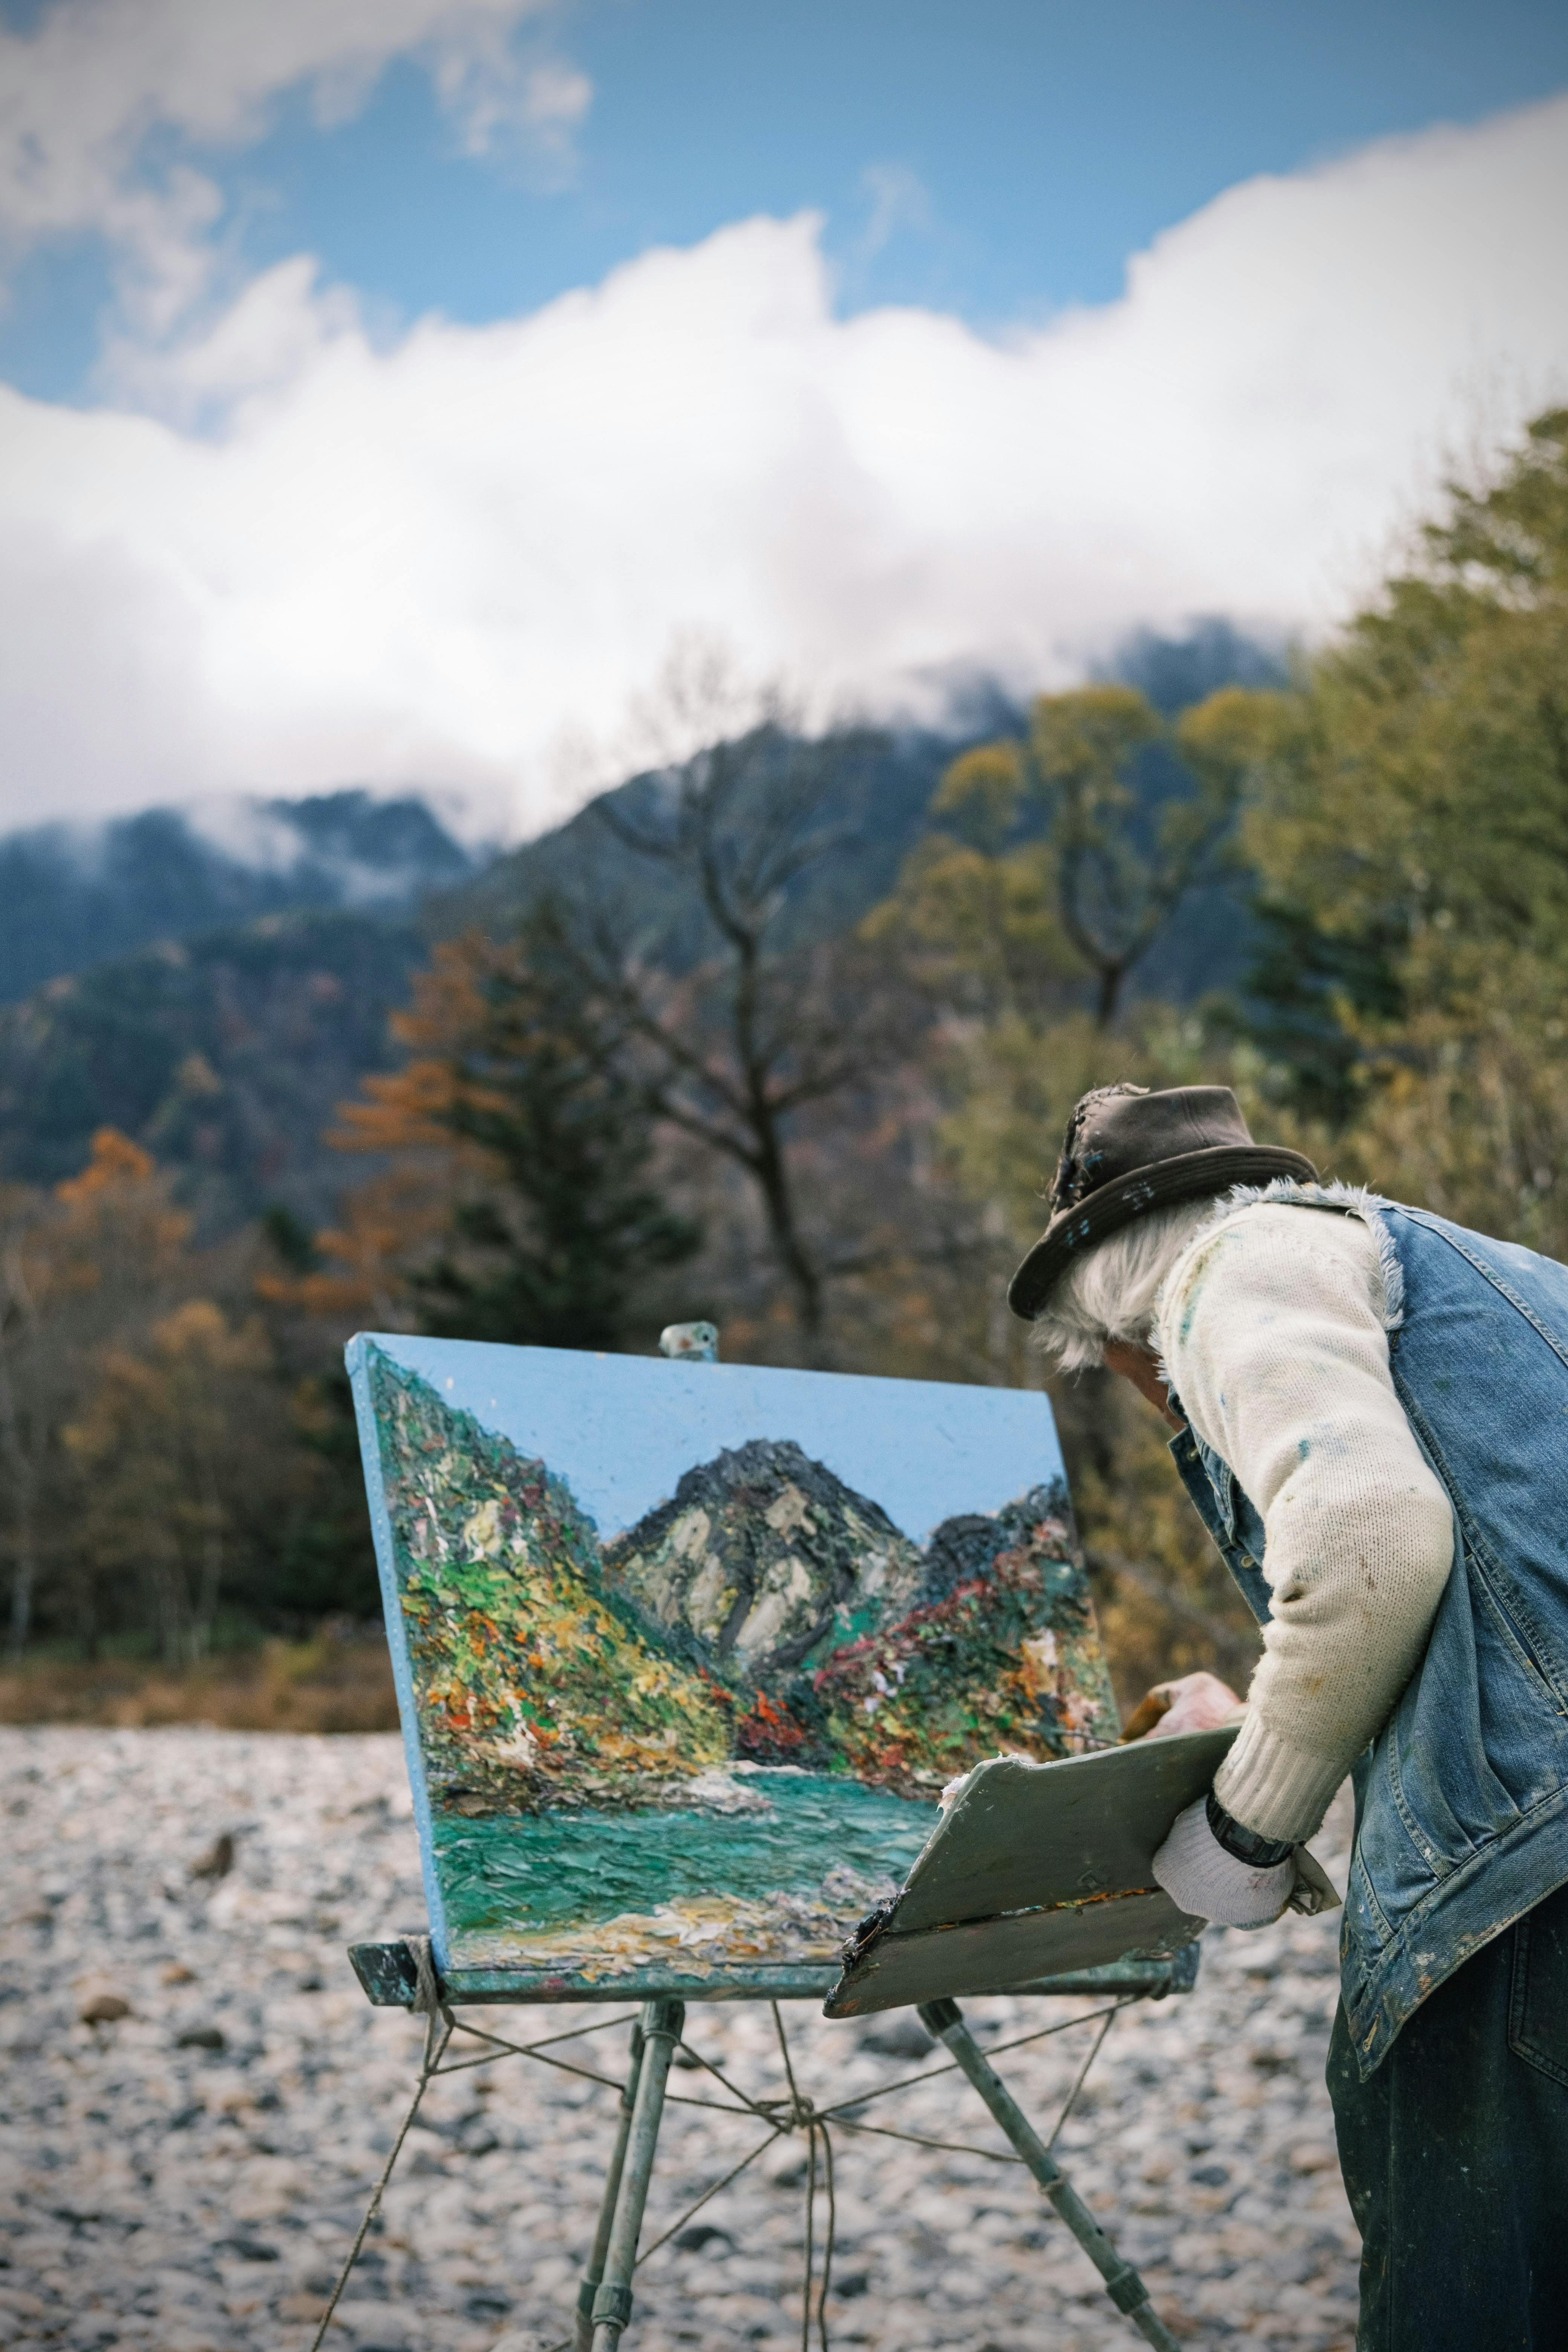






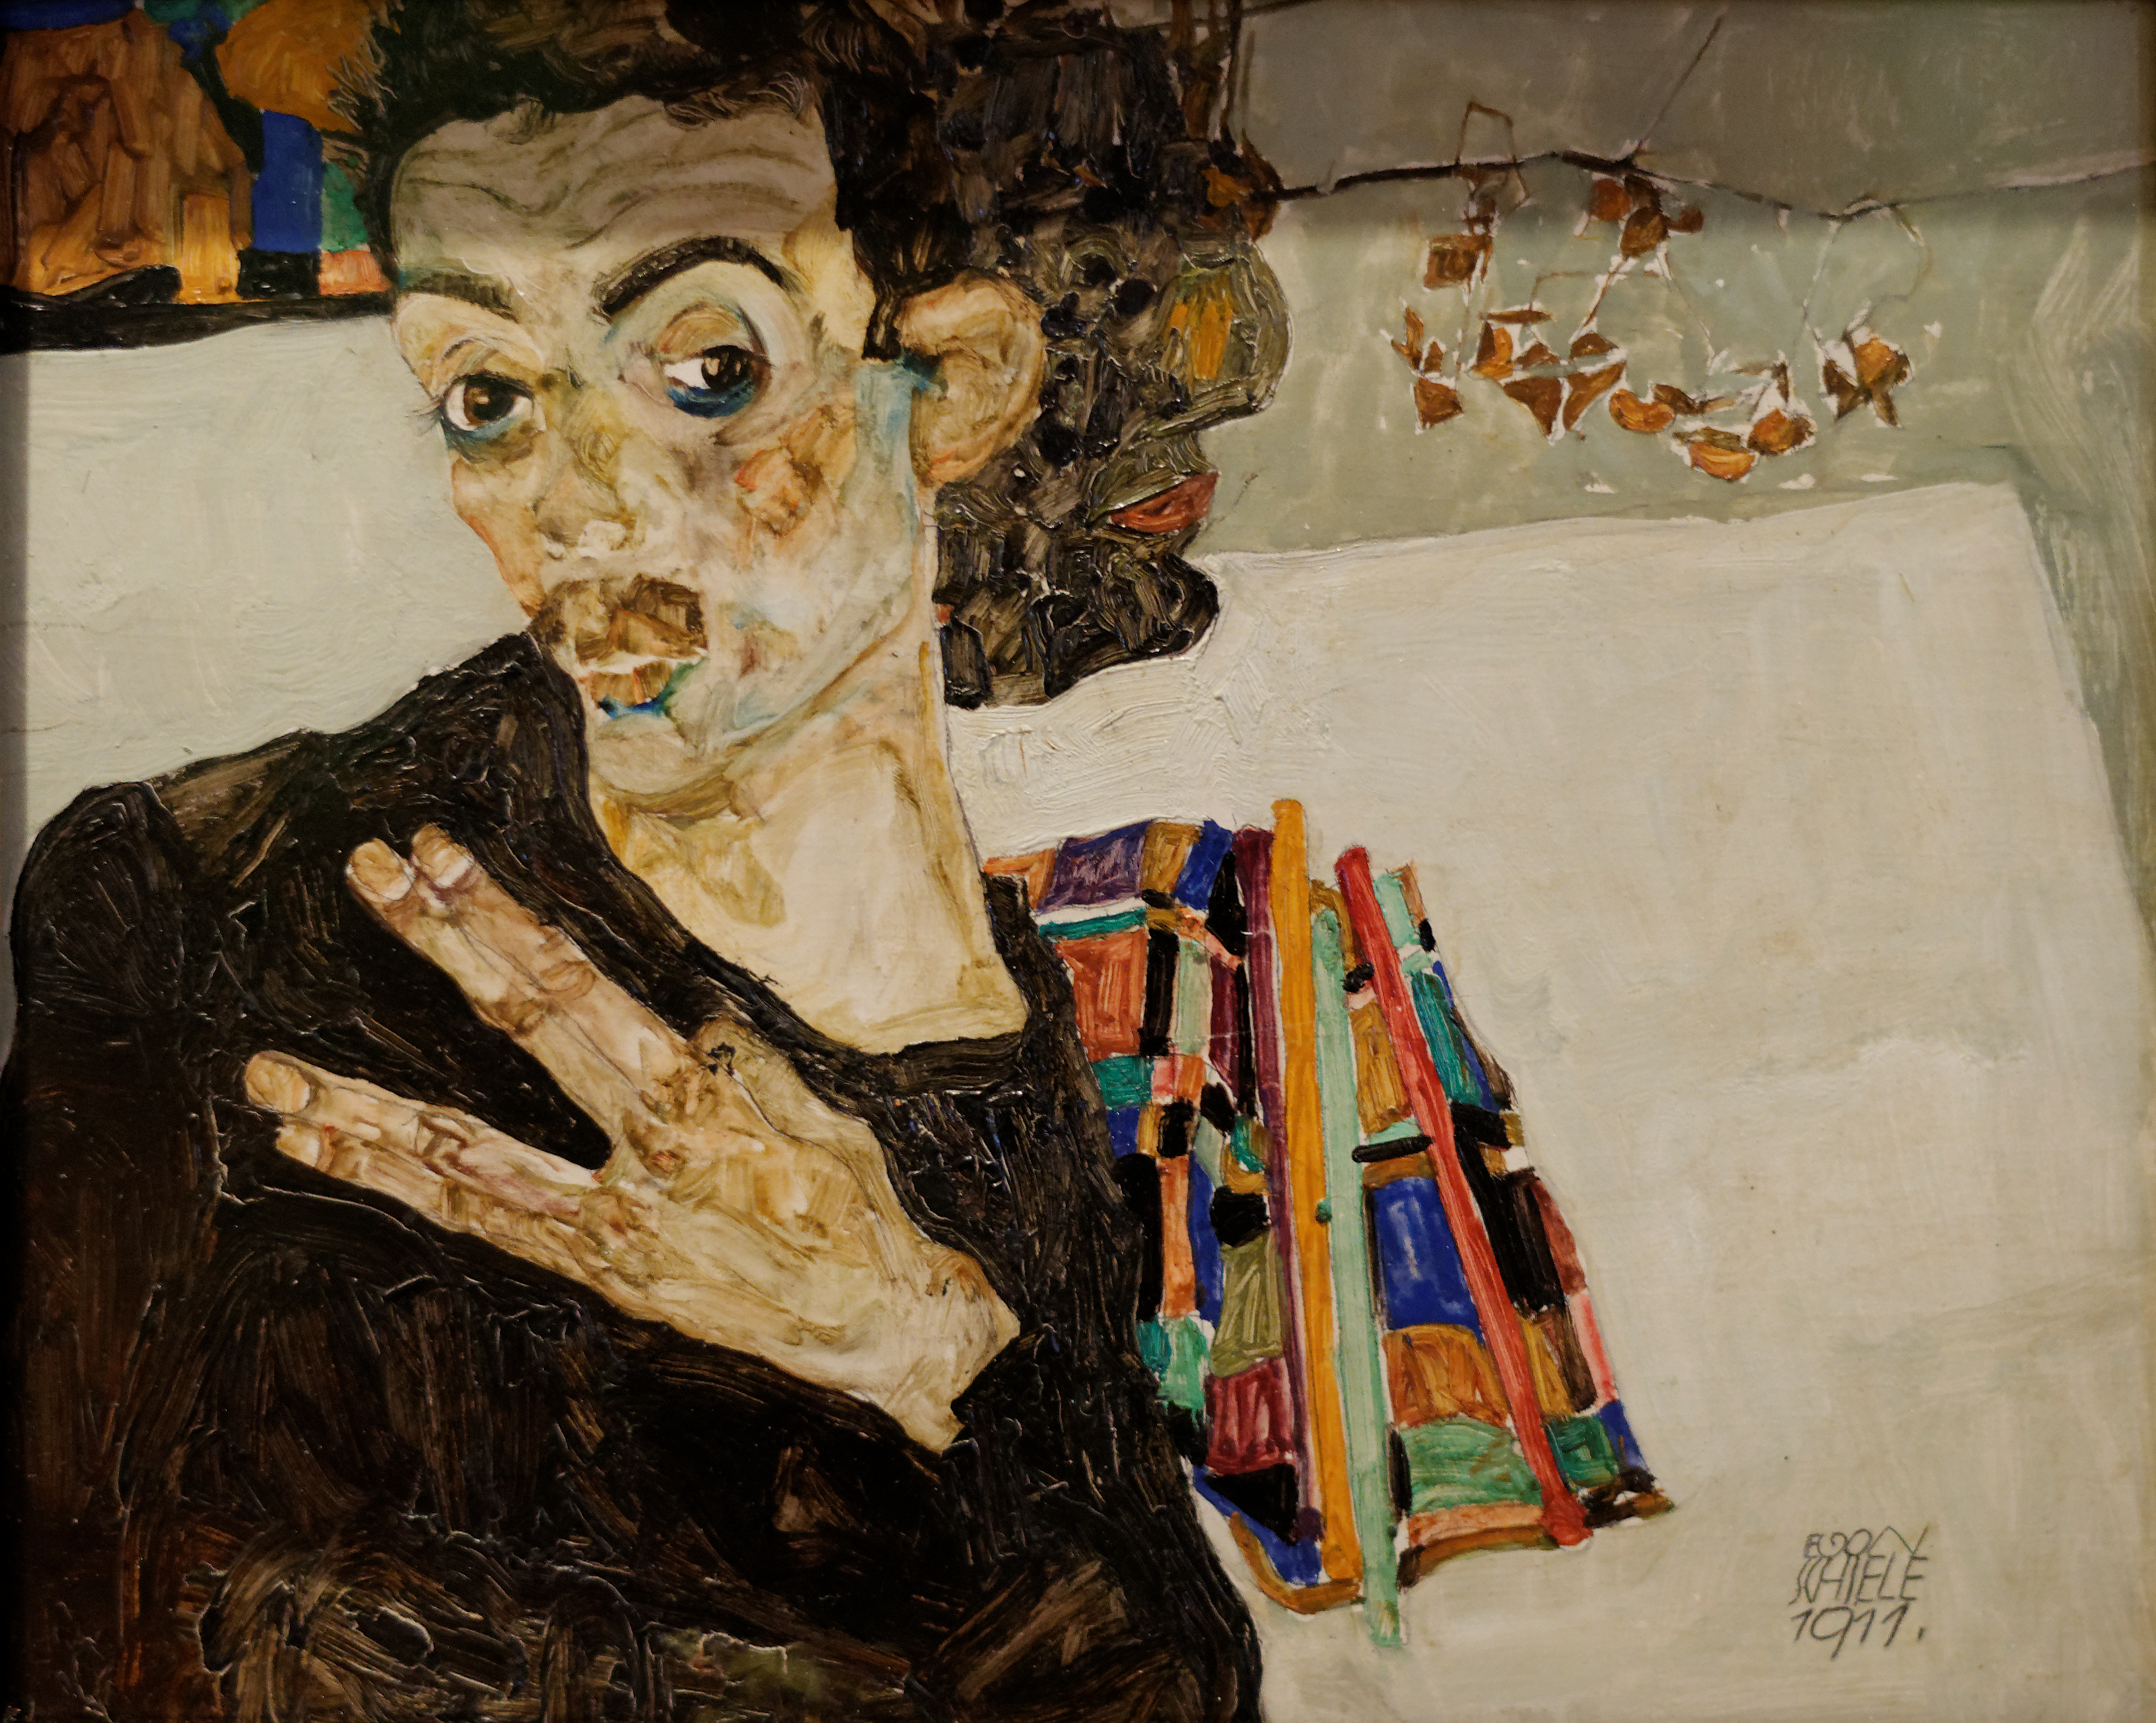


It’s about understanding the inherent nature of your materials and consciously choosing to work with them, not against their fundamental properties. Once you get the hang of starting lean and getting progressively fatter, it really does become second nature – a natural rhythm in your painting process, almost like a dance with your medium. It transforms from a rigid command into a nuanced, intuitive conversation with your paint, a deep understanding that empowers rather than restricts. And trust me, once you learn its subtle language, you can truly make your art sing, creating pieces that will not only capture your vision but will also stand the test of time, enduring and speaking across centuries, just as the old masters intended. So go forth, paint boldly, but paint wisely, for the legacy of your art awaits. Imagine your work being admired hundreds of years from now – that's the power of 'fat over lean'.