How to Clean an Oil Painting Palette: The Artist's Ultimate Guide
Master cleaning your oil painting palette with this comprehensive guide. Learn best methods for wood & glass, tackle dried paint, and keep your studio pristine.

The Artist's Ultimate Guide to a Pristine Workspace: How to Clean Your Oil Painting Palette Like a Pro
Ah, the oil painting palette. For many of us, it starts as a pristine, welcoming canvas for our colors, only to transform into a battleground of dried pigment and vibrant, yet stubborn, residue. I'll be honest, the thought of cleaning my palette after a long painting session often feels like the ultimate buzzkill. You're high on the creative energy, perhaps a little lightheaded from the fumes (don't worry, we'll talk about ventilation!), and then you look down at that glorious, chaotic mess of color that just made your masterpiece… and sigh. It's a rite of passage for every oil painter, isn't it? That moment where the joy of creation gives way to the practical reality of cleanup. But trust me, a clean palette isn't just about tidiness; it’s about respect for your materials, for your future self, and frankly, for your sanity – no matter if you're working with wood, glass, or even a disposable paper palette. But how many of us truly master this essential ritual? My goal here is to make this the single most comprehensive resource on palette cleaning you'll ever need, ensuring your artistic journey is as smooth and colorful as possible. This guide is your definitive answer to all those burning questions: 'How to clean an oil paint palette?', 'What's the best way to clean dried oil paint?', and 'How do I maintain my glass palette?'.
The Unseen Costs of a Dirty Palette: More Than Just a Mess
Before we dive into the nitty-gritty, let's talk about something often overlooked: the hidden price of a perpetually dirty palette. It’s not just an aesthetic issue; a neglected palette quietly erodes your efficiency, compromises your colors, and can even subtly diminish your joy in the creative process. I've been there, thinking 'I'll get to it later,' only to find myself wrestling with rock-hard paint, wasting precious minutes that could have been spent painting. These aren't just minor inconveniences; they're creative roadblocks. A dirty palette acts like a silent saboteur, impacting everything from the purity of your hues to the very flow of your inspiration. It’s a subtle but significant drag on your artistic momentum, often leading to frustrations you might not even attribute directly to your cleaning habits. Think of it as painting with one hand tied behind your back – possible, but far from ideal. And who wants to add unnecessary friction to a process that should be liberating?
If you're just starting out in the world of oils, perhaps you're exploring how to start oil painting or delving into the definitive guide to oil painting techniques for more insights! I've seen palettes so encrusted with years of dried paint they looked more like abstract sculptures than working surfaces. And while there's a certain charm to that, it's not ideal. A well-maintained palette means clearer colors, less waste, and a smoother, more enjoyable painting process. A clean palette quite literally sets the stage for pure color, allowing your cadmium yellows to truly sing without a whisper of residual crimson. So, whether you're a seasoned pro or just starting your journey into the wonderful world of oils, let's dive into the nitty-gritty of keeping that essential tool sparkling. By the end of this guide, you'll not only know how to clean any type of oil painting palette, but why each step is crucial for preserving your materials, enhancing your health, and ultimately, elevating your art.
A Glimpse into Artistic History: Palettes Through Time
It’s fascinating to consider that artists throughout history faced similar challenges with their palettes, though their methods and materials were vastly different. Imagine Rembrandt cleaning his modest wooden board, likely with nothing more than rags, linseed oil, and perhaps a pumice stone for stubborn grime. Before synthetic solvents, natural oils and rudimentary scraping were the order of the day. The evolution of palettes, from simple wooden planks to sophisticated tempered glass, mirrors the advancements in art materials themselves. This historical context reminds us that the act of maintaining our tools is a timeless tradition, connecting us to the countless artists who came before. It’s a quiet ritual that transcends centuries, a testament to the enduring human desire to create and to preserve the instruments of that creation.
Look, I'm not here to preach from an ivory tower. My studio, like many artists' spaces, has seen its fair share of paint-splattered chaos. I've battled dried mounds of phthalocyanine blue, accidentally stained cherished wooden palettes beyond recognition, and yes, even had a regrettable incident involving a stray palette knife and a slippery glass surface (don't worry, everyone was fine, but the palette… not so much!). These weren't just messy accidents; they were hard-won lessons that deepened my understanding of materials, chemistry, and the true value of a clean workspace. This guide is born from those experiences – a distillation of countless hours spent painting, experimenting, cleaning (and procrastinating on cleaning!), and learning. It’s the resource I wish I had when I first started, comprehensive enough for the seasoned professional, yet clear and accessible for the budding artist. Consider this your roadmap to not just a clean palette, but a more mindful, efficient, and enjoyable artistic practice.
Understanding Your Palette: Different Types, Different Needs
Before we even get to the "how" of cleaning, let's acknowledge a crucial truth: not all palettes are created equal. You wouldn't clean a delicate silk blouse the same way you'd clean a rugged pair of jeans, right? The same principle applies here! The material of your palette fundamentally dictates how you'll approach its care and cleaning. I've personally experimented with almost every type imaginable, and each comes with its own set of quirks, advantages, and cleaning considerations. Knowing your palette is the first step to mastering its maintenance. Each material demands a tailored approach, not just for effective cleaning, but for preserving its integrity and extending its lifespan. Understanding these nuances is key to transforming a dreaded chore into a mindful act of artistic stewardship.
Wooden Palettes
Ah, the wooden palette – the undisputed classic, often revered for its warm aesthetic, comfortable grip, and lightweight feel. It's a truly traditional choice for oil painters, and for good reason. I've used countless wooden palettes over the years, and each one develops a unique character, often revealing the artist's unique style through its accumulated history. You'll find them made from various woods like mahogany, walnut, or maple, each offering a slightly different weight, grain, and feel.
- Pros: Offers a traditional, organic feel; comfortable to hold for extended periods; can be seasoned over time to develop a beautiful, non-absorbent patina that actually repels paint; lightweight and often ergonomically designed. Some artists even feel a deeper connection to their craft when using such a classic tool.
- Cons: Naturally porous, meaning raw wood can absorb paint oils and pigments, leading to deep staining and making cleanup harder if not properly seasoned; susceptible to warping, cracking, or mildew if not cared for diligently, especially in fluctuating humidity; dried paint can become deeply embedded in the grain, becoming incredibly difficult to remove without damaging the wood. This porous nature also means certain pigments like phthalocyanine blue, quinacridone magenta, or alizarin crimson can leach deeply into the wood over time, creating unsightly, permanent stains that can subtly influence future color mixes, even affecting the perceived purity of fresh pigments. I've definitely had mixes go unexpectedly dull because of subtle residual stains. Untreated wood can also draw oil from your paint, altering its consistency and potentially leading to premature drying.
- Cleaning Consideration: Requires a gentler hand when scraping to avoid gouging the surface; thorough oil and solvent removal is crucial to prevent absorption and damage. Regular seasoning is paramount to making cleanup easier and extending its life, transforming it into a more durable surface. We'll dive into the specifics of seasoning later, but consider it a vital ritual for your wooden companion! Remember, wiping with the grain is essential to prevent pigments from being pushed deeper into the wood, which is a common mistake I've made in my early days.
Glass Palettes
For many years, a glass palette was my absolute go-to in the studio. Yes, they’re heavy, but there’s something oh-so-satisfyingly slick and efficient about them. They’re a favorite among artists for their pristine mixing surface, offering a completely neutral backdrop for color assessment. I find the transparency also allows me to see the color against the true white of my paper or canvas easily, which is a huge bonus when aiming for precise color matching.

- Pros: Completely non-porous, making them exceptionally easy to clean – dried paint simply sits on the surface, making scraping a breeze; provides true color representation with no underlying tint, which is invaluable for accurate color mixing; highly durable against wear and tear from solvents and scraping (though not impact!). They also tend to stay cooler, which can slightly slow the drying of paint compared to absorbent surfaces.
- Cons: Can be significantly heavy, making them less portable for plein air work; obviously fragile (glass shatters if dropped, so handle with extreme care! And remember, broken glass is a serious hazard, requiring careful cleanup and disposal); can feel cold to the touch, which some artists find less appealing than the warmth of wood; reflective surface can sometimes cause glare, affecting color perception under certain lighting conditions. I've definitely had moments where a stray reflection threw off my color judgment, making studio lighting a key consideration with glass, especially with overhead spotlights or windows directly facing the palette. Positioning your glass palette relative to your light source is a subtle but significant factor in ensuring accurate color mixing and avoiding eye strain during long sessions.
- Cleaning Consideration: Can withstand the most aggressive cleaning methods, including razor blades, without fear of absorption or damage to the surface itself. However, always be mindful of scratching the surface with abrasive materials, which can create tiny imperfections over time, making future scraping less smooth. It's also crucial to protect the edges, as chips can easily occur, which can then lead to further breakage.
Acrylic or Plastic Palettes
These represent a practical middle-ground, often available in clear, white, or various opaque colors. They're a popular choice for their balance of features, offering a modern alternative to traditional materials.
- Pros: Very lightweight and portable, making them excellent for travel or plein air painting; generally non-porous, preventing paint absorption and making cleanup relatively straightforward; more impact-resistant than glass (less likely to shatter, offering a safer alternative in some studios); typically very affordable and widely available in various shapes and sizes.
- Cons: Can scratch quite easily, creating microscopic crevices where paint can hide and dry, making future cleaning more difficult; certain plastics can stain over time, especially with strong, vibrant pigments like alizarin crimson or phthalocyanin blue, which can affect color perception – and once stained, these colors are often there for good! Some artists find them less aesthetically pleasing or lacking the traditional "feel" of wood or glass, sometimes feeling a bit flimsy. I've also found some lower-quality acrylics can develop a slight tackiness over time with repeated solvent exposure, eventually even becoming brittle or hazy. When considering materials, it's worth checking out our definitive guide to paint types for artists for a broader understanding of how different paint formulations interact with various surfaces.
Disposable Paper Palettes
For sheer convenience, especially for quick studies, workshops, or when traveling, disposable paper palettes are the ultimate solution. No fuss, no muss! I've certainly relied on these for fast, focused sessions where cleanup is the last thing I want to think about.
- Pros: Absolutely no cleanup required! Simply tear off a used sheet and discard it, saving valuable time and effort. Extremely lightweight and highly portable, often coming in pad form with a thumbhole, making them ideal for artists on the go. Offers a fresh, clean surface for every session, preventing cross-contamination of colors.
- Cons: Can be perceived as wasteful, especially if you go through many sheets, prompting environmental concerns (though many brands are now offering recycled or biodegradable options, which is a great step!); not always ideal for mixing very large quantities of paint, as the surface area can be limited; the paper can, over extended sessions, absorb some oil from the paint, slightly altering its consistency and potentially dulling colors. This oil absorption can also make paint feel 'draggy' or thick prematurely, particularly frustrating during a delicate glazing technique. The surface can also be prone to tearing if scraped too aggressively, which can be annoying mid-mix. If you're concerned about environmental impact, many brands are now offering recycled or biodegradable options, which is a great step towards a more sustainable art practice.
- Cleaning Consideration: None whatsoever, other than the immediate, responsible disposal of the paint-laden sheet. (Always be mindful of responsible disposal of paint waste, which we'll cover later.) Look for brands that offer recycled or biodegradable options if environmental impact is a concern.
Parchment Paper or Waxed Paper on a Surface (DIY Disposable)
Sometimes the best palette is simply a non-absorbent sheet placed over an existing surface! This DIY approach offers ultimate flexibility and economy, especially if you're experimenting or working on a budget. I've often used this method myself, laying a sheet of baking parchment over a wooden board or even a glass palette to save cleanup time.
- Pros: Extremely affordable and accessible; creates a fresh, non-porous mixing surface for every session; protects your underlying palette or workbench from paint; allows for easy disposal of paint-laden sheets. You can cut it to any size or shape you need, making it incredibly versatile for different painting scales or unique mixing preferences. It's a great way to
Ceramic Palettes
While less common for traditional oil painting, some artists adapt ceramic watercolor palettes or use ceramic tiles for their oil work. They offer a luxurious feel and excellent performance, often becoming a cherished studio item. I've known artists who even dedicate specific ceramic tiles to certain color families to prevent cross-contamination, a truly organized approach! Most ceramic palettes feature a glazed surface, which is what makes them so non-porous and easy to clean. Unglazed ceramic, however, would absorb paint like a sponge, making it unsuitable for oil painting.
- Pros: Highly durable and exceptionally resistant to scratching, maintaining a pristine surface over time; very heavy and stable on the workbench, preventing accidental shifts during intense mixing; completely non-porous, ensuring paint doesn't soak in and true colors are always visible; exceptionally easy to clean, much like glass. The cool surface can also slightly extend the working time of paints.
- Cons: Can be quite expensive, especially for larger sizes or custom designs; their weight makes them less portable, relegating them mostly to studio use; often come in more limited sizes and shapes compared to other materials, which might not suit all artists' preferences; can chip or break if dropped on a hard surface, despite their durability (and a chipped ceramic surface can be surprisingly sharp, so caution is key!). The sheer mass of a ceramic palette can also be a challenge to move around if you frequently rearrange your studio, making them a more permanent fixture.
- Cleaning Consideration: Similar to glass, they can withstand robust cleaning methods, including gentle use of razor blades for dried paint. However, care must always be taken to avoid chipping the edges or surface if using metal scrapers aggressively. The glazed surface is incredibly resistant to staining, ensuring true color representation for years, but regular cleaning helps preserve this smooth, non-staining quality and prevents residue buildup that could affect paint consistency. Special attention should be paid to any unglazed edges or bottoms, which can still absorb paint or moisture if not properly sealed.
Silicone Palettes
Relatively new to the scene, silicone palettes are gaining popularity, especially for those who appreciate convenience and flexibility. They often come in various colors and are surprisingly durable. I’ve experimented with a few, particularly for workshops where I want minimal fuss, and I'm consistently impressed by their non-stick properties.
- Pros: Extremely flexible and virtually indestructible; completely non-porous, making them incredibly easy to clean – dried paint can often be simply peeled right off! Very lightweight and portable; highly resistant to solvents and pigments, so staining is rare and they won't warp or crack. Their pliability also means they can be rolled or folded for compact storage, which is a huge bonus for travel or tight studio spaces. They’re also typically quite affordable.
- Cons: Some artists find the overly flexible surface less stable for intense mixing or scraping; they can sometimes attract dust or lint if not stored carefully; lack the traditional aesthetic appeal of wood or glass, feeling more utilitarian. While durable, their softness means they can be easily cut or punctured by sharp palette knives if not used with a gentle hand, so a delicate touch is needed when scraping. They also tend to be cooler to the touch, similar to glass, which some artists don't prefer.
- Cleaning Consideration: The ultimate low-maintenance option. Wet paint wipes off easily, and dried paint often peels away in a satisfying sheet. For residues, a quick wipe with solvent followed by soap and water is usually all it takes. Be careful with sharp scrapers to avoid cuts, but otherwise, they are incredibly forgiving. They're also dishwasher-safe in many cases, offering another level of effortless cleaning, though I always recommend a hand wash for delicate care.
Metal Palettes
Believe it or not, some artists favor metal palettes, often made of aluminum or stainless steel, particularly for plein air painting or when a super-smooth, non-absorbent surface is desired. I've seen some beautifully designed ones that are surprisingly practical, especially those with integrated wells or magnetic attachments for smaller paint cups – a genius touch for outdoor work or small-scale mixing!
- Pros: Extremely durable and virtually unbreakable, offering incredible longevity; lightweight for excellent portability (especially aluminum palettes); completely non-porous, providing a perfectly slick mixing surface that won't absorb any oils or pigments; very easy to clean wet paint, allowing for quick transitions between colors. Some even feature magnetic properties, allowing for small cups or tools to be attached.
- Cons: Can be cold to the touch, which some artists find less pleasant than warmer materials; some metals can react with certain pigments over time, potentially causing slight discoloration (though less common with artist-grade paints and proper cleaning, it's still something to be aware of); prone to scratching if not careful, which can make subsequent cleaning slightly harder as paint can settle into microscopic crevices; can reflect light quite intensely, potentially affecting color perception under certain lighting conditions, requiring careful studio lighting. I've definitely had to adjust my overhead lights to minimize glare off a metal palette, so thoughtful lighting is a must.
- Cleaning Consideration: Excellent for scraping and wiping due to their hard, slick surface. While incredibly durable, avoid excessively harsh abrasives (like coarse sandpaper) that could mar the surface, as scratches can make subsequent cleaning slightly harder as paint can settle into microscopic crevices. Solvents work wonderfully on metal, but ensure thorough drying to prevent any potential oxidation or water spots (though modern stainless steel and aluminum are usually quite resistant). Some artists even buff their metal palettes periodically with a fine automotive polish to maintain their ultra-smooth, reflective surface and minimize the appearance of minor scratches over time. This extra step helps to keep the surface as pristine as possible, ensuring consistent color mixing without textural interference.
Understanding your palette material is truly the first, foundational step in mastering its cleanup. With this knowledge, you're already halfway there. But how do you choose the right one for you? It's a deeply personal decision, influenced by your painting style, preferred medium consistency, studio setup, and even your aesthetic preferences. This isn't a one-size-fits-all answer, so let's break down the options with a quick comparison to help you find your perfect match – a palette that feels like an extension of your artistic hand.
Choosing Your Ideal Palette: A Quick Comparison
To help you decide which palette is best for your unique painting style and studio setup, I've put together a quick comparison table. This isn't just about functionality; it's about finding a tool that genuinely enhances your creative process and feels right in your hands. Consider each factor carefully through the lens of your own artistic practice, remembering that your needs may evolve as your art does:
Choosing a Palette Shape and Size: Beyond the Material
While the material of your palette is a primary consideration, its shape and size are equally vital for optimizing your workflow and comfort. This isn't just about aesthetics; it's about finding a tool that genuinely supports your painting style and habits.
- Traditional Kidney Shape: The classic, ergonomically designed palette with a thumbhole. Ideal for holding in hand for extended periods, especially for plein air or standing studio work. The curved edge allows for comfortable rest against the body.
- Rectangular or Square: Often preferred for tabletop use, especially glass, ceramic, or larger wooden palettes. They offer maximum mixing surface area and are easy to position stably. Great for mixing large quantities of paint.
- Oval or Round: Can offer a softer aesthetic and a good amount of mixing space, often with a central well or open area for primary colors. Some artists find these shapes more intuitively organized.
- Compact or Travel Palettes: Smaller, often foldable or with integrated wells, designed for portability. Essential for plein air painting or when studio space is limited. They force you to be more economical with your paint.
- Large Studio Palettes: Maximize your mixing real estate. Ideal for artists who work on large canvases, use a broad color range, or prefer to lay out copious amounts of paint without running out of space. These are usually heavy and meant for tabletop or easel tray use.
Consider how you paint, where you paint, and the scale of your work. A large rectangular glass palette might be perfect for your studio, while a small, lightweight kidney-shaped wooden or silicone palette could be your go-to for outdoor sketching. The right shape and size will feel like a natural extension of your hand, enhancing your focus on the art itself.
Factors to Consider When Choosing Your Palette
Choosing a palette goes beyond just material; it's about finding a tool that seamlessly integrates with your personal workflow and aesthetic preferences. Here are some factors I always mull over:
- Ergonomics: How does it feel in your hand? Is it balanced? Does it have a comfortable thumbhole or grip? For long painting sessions, this makes a huge difference to wrist fatigue.
- Weight: Do you paint primarily in the studio, or are you a plein air enthusiast? A heavy glass or ceramic palette is ideal for stability in the studio, but completely impractical for painting on location.
- Color Neutrality: While glass and ceramic are perfectly neutral, some wooden palettes can have a warm tint, and certain plastics might have an inherent color. Consider if this will impact your color judgment.
- Cost vs. Investment: Disposable palettes are cheap per sheet but add up. A high-quality glass or ceramic palette is an upfront investment that can last a lifetime. Balance your budget with your long-term needs.
- Durability: How much rough and tumble will your palette face? If you're prone to accidental drops, glass might not be your best friend, whereas metal or acrylic can take a beating.
- Aesthetic Appeal: Call me vain, but I find myself more drawn to using tools that I genuinely find beautiful. A well-seasoned wooden palette or a sleek glass slab can be an inspiration in itself.
Ultimately, there's no single "best" palette, only the best palette for you. Don't be afraid to experiment! Your preferences may even evolve over time as your painting style develops.
Palette Type  | Portability | Durability (Impact) | Ease of Cleaning (Wet) | Ease of Cleaning (Dried) | Color Purity | Cost | Best For |
|---|---|---|---|---|---|---|---|
| Wooden | High | Moderate | Moderate | Difficult | Moderate | Moderate | Traditionalists, comfortable grip, studio & plein air |
| Glass | Low | Low (shatters) | High | High | Excellent | Moderate-High | Studio use, true color mixing, heavy cleaning |
| Acrylic/Plastic | High | High | High | Moderate | Good | Low | Beginners, travel, workshops, affordability |
| Disposable Paper | Very High | N/A | Very High | N/A (dispose) | Good | Very Low | Quick studies, workshops, travel, no cleanup |
| Ceramic | Low | Moderate (chips) | High | High | Excellent | High | Studio, luxury feel, stable surface |
| Metal | High | Very High | High | High | Good | Moderate | Plein air, super smooth surface, durability |
Now that you're armed with the knowledge of different palettes and their quirks, let's talk about why this seemingly mundane effort of cleaning is truly worth its weight in gold.
Stone or Marble Palettes: The Luxe and Lasting Choice
For those seeking a truly luxurious, stable, and long-lasting mixing surface, stone or marble palettes are an exquisite option. While often heavier and less common for general use, they offer an unparalleled experience, especially in a dedicated studio setting. I've encountered artists who swear by small granite tiles or polished marble slabs, particularly for specific pigment grinding or delicate color mixing where absolute purity and a cool surface are paramount.
- Pros: Exceptionally durable and beautiful, often becoming a statement piece in the studio; completely non-porous, providing an immaculate mixing surface that ensures true color representation; incredibly stable due to their weight, preventing accidental movement during intense painting sessions; naturally cool, which can slightly extend the working time of oil paints by slowing evaporation. Some types of stone can be naturally antimicrobial.
- Cons: Very heavy, making them completely unsuitable for portability or plein air painting work; typically the most expensive palette option, requiring a significant investment; prone to chipping or cracking if dropped or subjected to sharp impacts, despite their overall hardness; limited in shapes and sizes, often requiring custom cutting. The cold surface, while a benefit for paint drying, can be less aesthetically pleasing to some than warmer materials.
- Cleaning Consideration: Similar to glass and ceramic, stone palettes are incredibly easy to clean. Dried paint can be scraped off with a razor blade (with caution, especially on softer stones like marble, to avoid fine scratches) and the surface wiped clean with solvents. A thorough soap and water wash will leave them pristine. Avoid acidic cleaners, which can etch certain natural stones over time. Regular cleaning helps maintain their polished finish and prevents any subtle pigment discoloration that could occur over decades of use.
Why Bother Cleaning Your Palette, Anyway?
"Can't I just let it dry?" I hear you ask. Oh, if only it were that simple! I mean, sure, you could. But here's why I've learned (often the hard way) that a clean palette is a happy palette:
- Pure Colors, Pure Vision: This is perhaps the most fundamental reason. Old, dried paint fragments, leftover smudges, or even invisible residues can subtly but effectively contaminate your fresh mixes. I’ve seen that vibrant cadmium yellow turn into a muted, muddy brown simply because a tiny speck of dried alizarin crimson decided to join the party, or a leftover hint of green subtly grayed a bright orange. It’s like trying to sing a clear note with a frog in your throat – the clarity is lost, and your intended vision gets compromised. A truly clean surface ensures that every color you mix is exactly what you intended, translating directly to the canvas and allowing your true artistic voice to shine through. This clarity is paramount for achieving the luminous, unadulterated hues that oil paints are famous for. It's not just about avoiding mud; it's about allowing your colors to truly sing, to express their full potential without interference, fostering a sense of control and confidence in your palette.
- Extending the Life of Your Tools: Just like cleaning and caring for your paint brushes extends their lifespan, regular palette cleaning prevents oil paint from building up and potentially damaging your palette. For wooden palettes, dried paint can seep deeply into the porous grain, making the surface uneven, difficult to mix on, and eventually leading to warping, cracking, or even mildew growth that can compromise the wood's structure. For glass, ceramic, or metal palettes, while less prone to absorption, abrasive dried paint and improper scraping can lead to microscopic scratches over time, making future cleaning harder and affecting the smooth mixing surface. These micro-scratches can create tiny traps for pigment, making subsequent cleaning an endless battle. Even acrylic palettes are susceptible to scratching and staining, which can become permanent. A little consistent care goes a long, long way in preserving your investment and ensuring your tools remain a joy to use for years to come, truly becoming an extension of your creative hand and saving you from costly replacements.
- Less Waste, More Art: When your palette is clean, you're not just being tidy; you're being incredibly economical and efficient. I've found that a fresh, unblemished surface encourages me to squeeze out only the amount of paint I truly need, rather than trying to navigate around old, dried mounds. This significantly reduces unnecessary waste, and believe me, when you're working with some of the best oil paint brands for artists, every dollop counts! Plus, a clean palette allows for clearer assessment of paint quantities and mixes, helping you manage your valuable supplies more effectively and leading to fewer costly mistakes. It's about being a conscious artist, making intentional choices about your materials. Think of it as a small daily act of fiscal responsibility, directly impacting your art budget, and allowing you to invest more in quality materials or new artistic adventures.
- A Clear Head (and Workspace): Honestly, for me, a clean workspace translates to a clearer mind. It's more than just aesthetics; it's a profound psychological reset. A fresh start, a blank canvas for my thoughts as much as for my colors, allows me to approach each session with renewed focus and a sense of calm. Call me sentimental, but it truly makes a difference to the flow of my creative process and how I engage with my art. A tidy, well-organized environment fosters a tidy mind, ready for pure artistic expression, much like a meditative practice. I've found that struggling with a dirty palette often means struggling with my thoughts, too – it's a subtle but powerful connection that allows for greater freedom and spontaneity in your work.
- Enhancing Your Health & Safety: A regularly cleaned palette significantly reduces your exposure to accumulated pigments and solvents. Dried paint dust can become airborne, and persistent residue means more skin contact. By keeping your palette pristine, you're taking a proactive step in minimizing potential health hazards associated with studio work. We'll dive into this in much greater detail in the Essential Safety Precautions for Palette Cleaning section, but remember: your health is your most valuable asset as an artist, ensuring many more years of creative endeavors.
Your Cleaning Arsenal: What You'll Need
Before you dive into the act of cleaning, let’s make sure you’re properly equipped. Think of this as gathering your trusty cleaning companions – a well-stocked arsenal makes the task far less daunting and much more efficient. I've found that having the right tools makes all the difference, and a well-prepared artist is a happy artist!

Must-Have Cleaning Tools
- Palette Knife: This is truly your best friend for initial scraping, and I cannot stress its indispensability enough. If you’re not fully familiar with this versatile tool, you might want to check out my thoughts on what is a palette knife and how to use it. For cleaning, opt for a sturdy, flexible metal palette knife with a comfortable handle. I personally keep a couple on hand: one with a longer, straighter edge for broad scraping and a wider coverage, and another with a more pointed or angled tip for getting into tight corners, along edges, or coaxing off particularly stubborn dried blobs of paint. A good palette knife makes short work of even thick, wet paint, drastically reducing the amount of solvent you'll need later. Consider a range of shapes and sizes; a small, pointed diamond-shaped knife can be excellent for intricate scraping, while a larger, trowel-shaped one is perfect for clearing large areas. Some artists even prefer a stiff plastic scraper for initial removal on delicate surfaces, reserving metal for harder palettes.
- Paper Towels or Lint-Free Rags: You'll need lots of these – and I mean lots. I maintain a dedicated stash of old cotton T-shirts, microfibre cloths, and sturdy paper towels solely for studio cleanup. The absolute key here is lint-free. The last thing you want is pesky fibers shedding onto your freshly cleaned palette or, even worse, mixing with your precious paints on a fresh canvas. Absorbent paper towels are perfect for the initial heavy-duty wipes to remove the bulk of the paint, especially wet paint, before moving onto finer cleaning. Soft, lint-free rags (like old cotton bedsheets cut into squares or specialized artist's rags) are ideal for the final solvent wipe and buffing, ensuring no streaks or fibers are left behind. Consider reusing rags for solvent application to reduce waste, and always have a separate designated pile for clean versus dirty rags to avoid accidental cross-contamination. Some artists even use a roll of toilet paper for delicate final wipes, as it tends to be very low-lint. You might also consider biodegradable cellulose sponges for absorbing excess liquid.
- Gloves: Protecting your hands from direct contact with solvents and pigments is, for me, absolutely non-negotiable. My hands used to look like a Jackson Pollock masterpiece after every session until I wised up to the potential for skin irritation, allergic reactions, and the absorption of chemicals directly through the skin. Disposable nitrile gloves are my preferred choice; they offer excellent protection against most art chemicals, maintain good dexterity for handling tools, and can be easily disposed of when you’re done. While latex gloves can work, some individuals have allergies, and they can sometimes degrade faster with certain aggressive solvents, compromising their barrier. Always prioritize your skin health – it's an investment in your long-term artistic career! Don't be tempted by thin household gloves; invest in thicker, more robust options for serious studio work. For particularly heavy-duty cleaning or extended exposure, I sometimes even double-glove for an extra layer of peace of mind. Remember, your hands are critical tools; treat them with respect.
- Artist's Soap (or mild dish soap): For the crucial final wash, to effectively cut through any remaining oil residue and leave your palette truly pristine. While a mild, gentle dish soap can certainly work in a pinch (and is a common household alternative), I wholeheartedly recommend investing in a dedicated artist's brush cleaner soap, sometimes labeled as "oil soap" for artists. These specialized soaps are formulated to be gentle on both your skin and your valuable tools, effectively breaking down oil paint without harsh chemicals or abrasive properties. They're designed to remove residual oil without stripping necessary natural oils (especially beneficial for conditioning wooden palettes) or leaving behind any harmful residues. It makes a noticeable difference to the longevity, feel, and overall cleanliness of your palette, helping to maintain its original texture and prevent any sticky buildup. Think of it as a specialized conditioner for your palette, not just a cleaner. My personal favorite also leaves a pleasant scent, which is a nice bonus.
Tool | Primary Use | Best For |
|---|---|---|
| Palette Knife | Scraping wet/dried paint, prying stubborn blobs, paint recovery. | All palette types, initial heavy-duty removal. |
| Paper Towels/Rags | Wiping wet paint, applying/wiping solvents, final drying. | All palette types, especially for bulk removal and solvent application. |
| Nitrile Gloves | Protecting hands from solvents/pigments. | Essential for all cleaning, non-negotiable for safety. |
| Artist's Soap | Final wash to remove oil/solvent residue, conditioning. | All palette types, especially crucial for wooden palettes. |
| Razor Scraper | Removing thin, dried paint films. | Glass, ceramic, metal palettes (use with extreme caution). |
| Plastic Scraper | Gentle scraping of wet/softer dried paint. | Wooden, acrylic/plastic palettes (avoids scratching). |
| Stiff Brush | Getting into textures, grooves, edges. | All palette types for detailed cleaning. |
| Cotton Swabs | Precision cleaning of small areas, corners. | All palette types for intricate spots. |
This arsenal, thoughtfully assembled, empowers you to tackle any palette cleaning challenge with confidence and efficiency, ensuring your tools are always in prime condition for your next creative endeavor.

credit, licence
Other Cleaning Aids (Beyond Solvents)
Sometimes, you need more than just a palette knife and rags. These additional tools can be immensely helpful for specific cleaning challenges or for maintaining the longevity of your palette, offering specialized solutions for stubborn residues or delicate surfaces.
Budgeting for Cleaning Supplies: Investing in Your Workflow
It's easy to overlook the cost of cleaning supplies, but they are a legitimate part of your art budget. Thinking strategically about these expenses can save you money in the long run and ensure you always have what you need on hand.
- Bulk Purchase: Buying paper towels, rags, gloves, and even larger containers of OMS in bulk can often lead to significant savings. Consider joining with other artists to split larger purchases.
- Reusable vs. Disposable: While disposable items like paper towels and gloves offer convenience, investing in high-quality reusable rags or even dedicated brush-cleaning towels can reduce long-term costs and environmental impact. Washable nitrile gloves are also an option for some.
- Reclaim Your Solvents: As we'll discuss, decanting and reusing your dirty solvent is arguably the biggest money-saver when it comes to cleaning supplies. It dramatically extends the life of your fresh spirits.
- DIY Alternatives: For some tools, like scrapers or specific brush cleaners, looking into DIY solutions or multi-purpose household items (with careful consideration for compatibility and safety) can save money, though dedicated art supplies are usually best.
- Consider Longevity: A more expensive, higher-quality artist's soap might seem like an upfront cost, but if it effectively preserves your brushes and palettes, preventing costly replacements, it's a wise investment.
Just as you budget for paints and canvases, allocate a portion of your funds for cleaning and maintenance. It’s an investment in the health of your tools and your studio, preventing future headaches and allowing you to focus on your art without financial anxieties. A well-stocked cleaning arsenal is an essential part of any efficient studio.
Your Solvent Squad
This is where things can get a little… fragrant. Let me reiterate: always, and I mean always, ensure good ventilation. Your health is paramount. Open windows wide, use a powerful fan, or better yet, if you have the option, work in a dedicated, well-ventilated studio space or even outdoors. Your lungs will absolutely thank you. It’s a habit that once formed, you’ll never regret. Before we even delve into the specifics, let's establish a foundational rule: No solvent use without fresh air. This is non-negotiable for your long-term health.
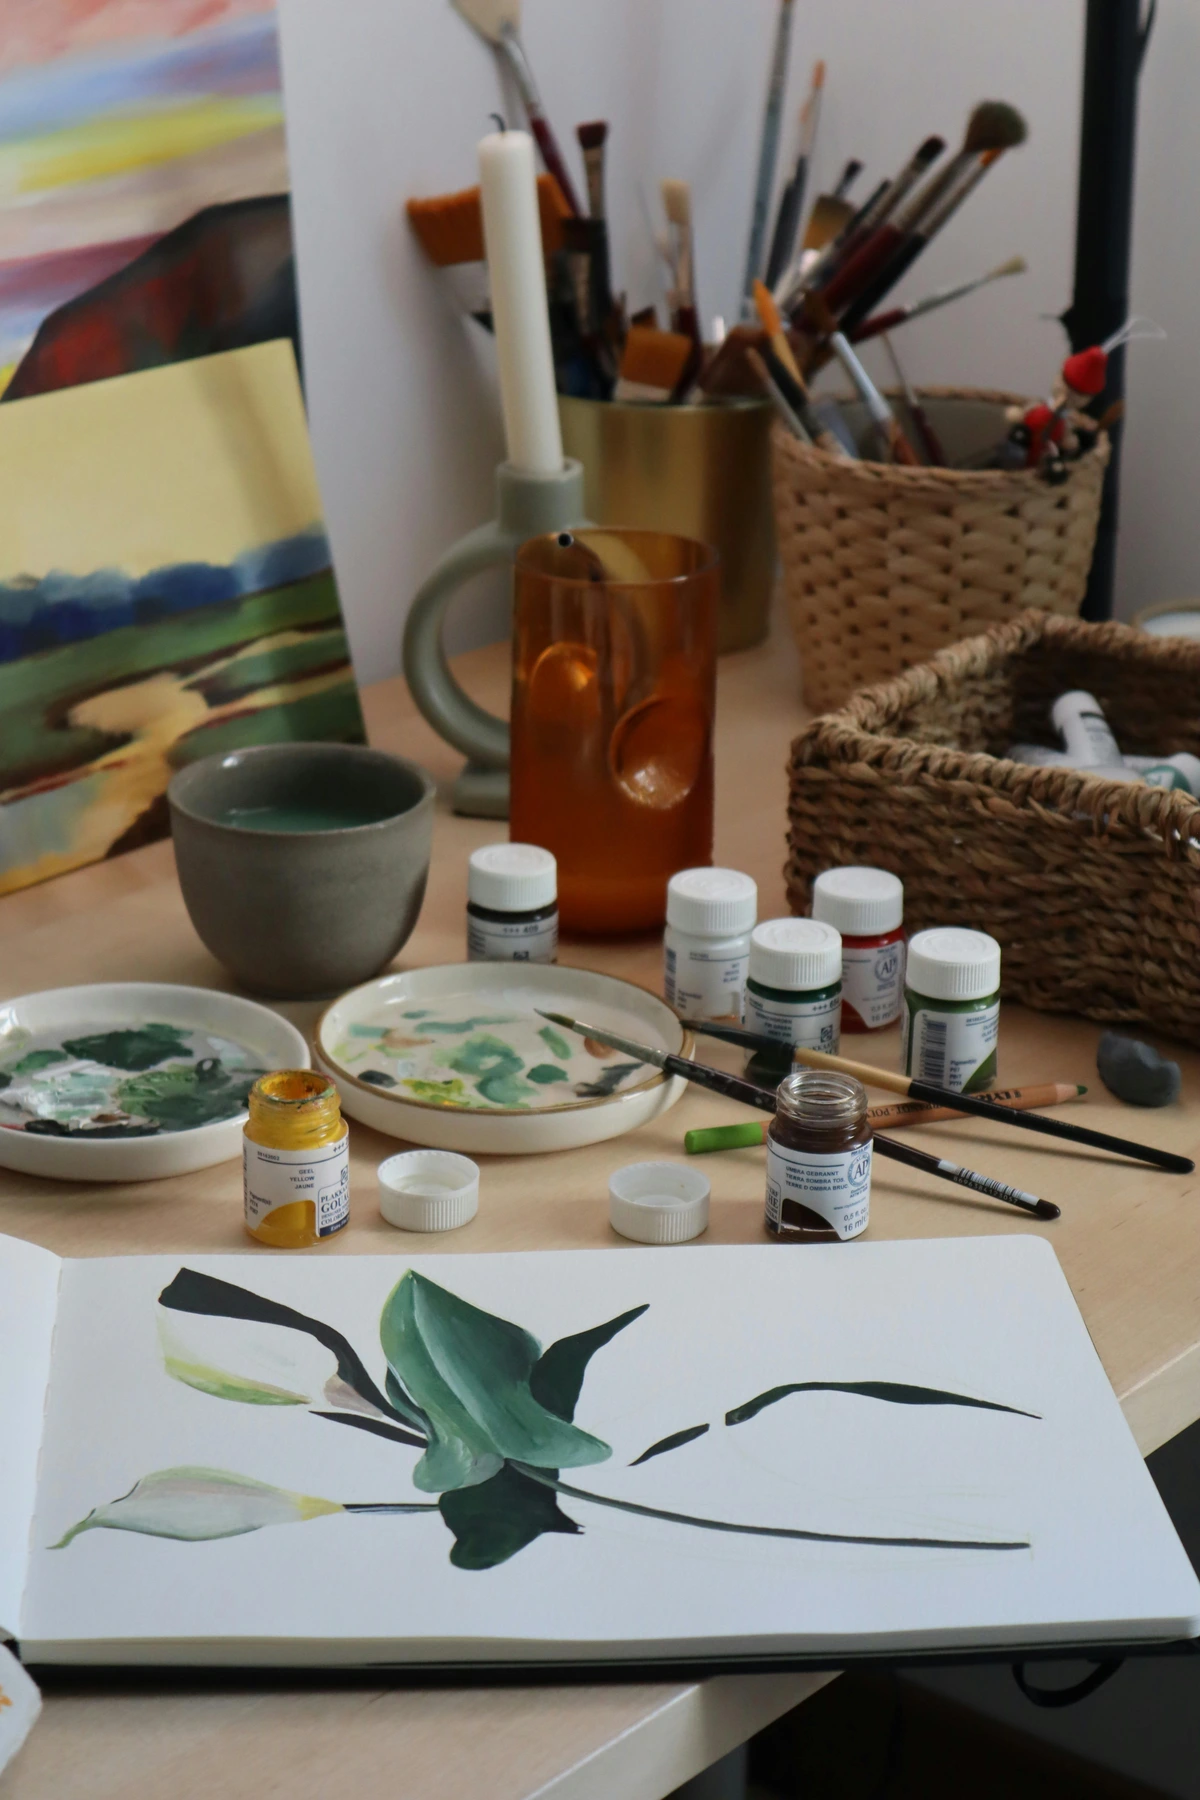
Our primary solvents for cleaning are petroleum distillates or natural terpenes. Understanding their properties is key to safe and effective use.
Solvent Type | Pros | Cons | Best For |
|---|---|---|---|
| Odorless Mineral Spirits (OMS) | Low odor, effective solvent, widely available, less volatile than turpentine, generally safer for most artists. | Still requires adequate ventilation, petroleum-based (not eco-friendly), can still irritate sensitive skin/lungs, slow evaporation compared to alcohol. | General palette cleaning, brush cleaning, thinning oil paint, studio work. |
| Traditional Turpentine | Powerful solvent, natural resin-based (derived from pine trees), traditional choice for oil painters, can impart a unique sheen to paint. Historically, it was the go-to, but modern science offers safer alternatives. | Strong, pungent, and potentially headache-inducing odor; highly volatile with more toxic fumes; highly flammable (a serious fire risk in the studio); can cause severe skin irritation and even chemical burns if prolonged contact occurs. Many artists find the fumes too overpowering, leading to headaches and nausea. Use with extreme caution and only in exceptionally well-ventilated areas, if at all. | Historically used for painting and cleaning, some prefer for specific mediums or traditional techniques (use with extreme caution). |
| Rubbing Alcohol (Isopropyl Alcohol) | Widely available, inexpensive, effective on fresh paint (especially acrylic or water-miscible oils), quick evaporation. | Can be very drying to skin, strong fumes (requires ventilation, just like other solvents), less effective on very dried, hardened oil paint, may not be suitable for all plastics (can cause some to haze or become brittle over time). While quick-drying, its effectiveness on stubborn oil paint is limited, so it's best for fresh, wet pigment or water-miscible oils. | Quick wipes for fresh paint, sanitizing non-porous palettes, cleaning water-miscible oils. |
| Citrus-based Solvents | Pleasant scent (often citrus), natural (derived from citrus peels), can be very effective at breaking down oil paint. | Can be very strong, some brands leave an oily residue that needs thorough washing, can cause allergic reactions in some individuals (always patch test!), may not be suitable for all plastics (can etch or soften certain types), can be expensive. While marketed as 'natural,' these are still powerful chemicals and should be treated with the same respect and ventilation requirements as traditional solvents. | Eco-conscious cleaning, breaking down stubborn paint, or specialized cleaning for specific pigments. |
A Quick Guide to Solvent Selection
Navigating the world of solvents can feel a bit overwhelming, but choosing the right one for the job can make a significant difference in both effectiveness and safety. Here’s a quick overview of when to reach for which type of solvent:
Solvent Type | Ideal for... | Best Use Case | Key Caution |
|---|---|---|---|
| Odorless Mineral Spirits (OMS) | General oil paint cleanup (wet/semi-dried), brush cleaning. | Everyday studio cleaning, thinning oil paint mediums. | Always ensure good ventilation, despite |
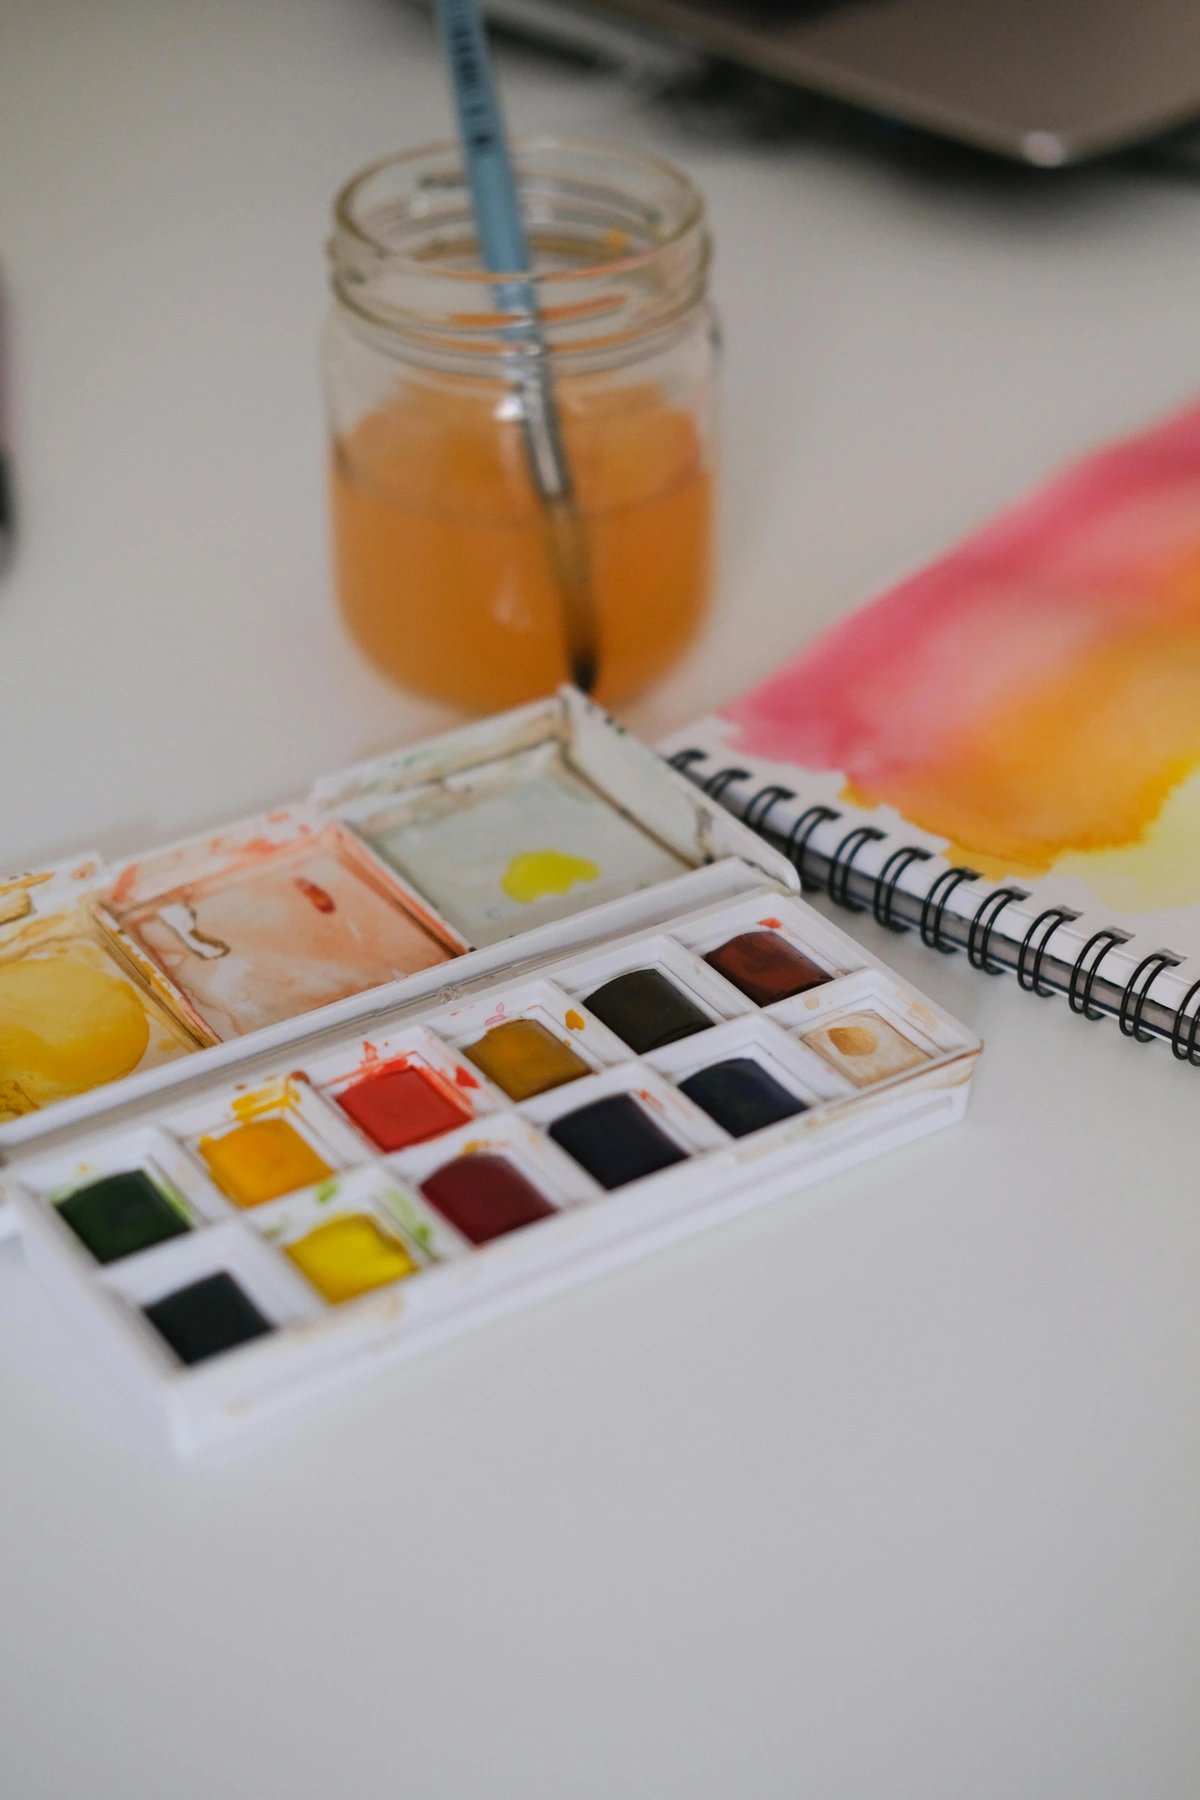
Non-Toxic & Natural Alternatives (Beyond Solvents)
For artists sensitive to traditional solvents or those looking to minimize chemical exposure, a growing number of non-toxic and natural alternatives offer effective cleaning solutions. These options can be a game-changer for studio health and environmental impact.
- Walnut Oil or Safflower Oil (as a cleaner): As mentioned, these artist-grade oils can be fantastic for 'like dissolves like' cleaning, especially for softening dried paint on palettes and brushes. They are completely non-toxic and even edible! Apply a small amount, work it into the paint, then wipe clean with a rag, followed by soap and water. The added benefit is that they are also conditioning to natural brush bristles and wooden palettes, making them softer and more flexible. This method is a gentle powerhouse for stubborn, dried-on paint.
- Master's Brush Cleaner and Preserver: While primarily for brushes, this solid, non-toxic soap can also be used effectively on palettes, especially for a thorough post-solvent wash. It's excellent at breaking down oil paint and conditioning surfaces. It's often scented and gentle on hands. I always keep a pot of this in my studio; it's a true workhorse.
- Murphy's Oil Soap (for wooden palettes): This vegetable oil-based soap is a traditional choice for cleaning and conditioning wood. For wooden palettes, a diluted solution can effectively clean and gently moisturize the wood, preventing it from drying out and cracking. Always rinse thoroughly after use. It can help maintain that beautiful patina.
- Baby Wipes (for fresh paint): For very fresh, wet paint and quick cleanups, fragrance-free baby wipes can be surprisingly effective on non-porous surfaces. They're mild, convenient, and a good option for small spills or minor palette tidying during a session. However, they are not a substitute for proper cleaning with solvent and soap, and should be considered a temporary solution for immediate small messes.
Essential Safety Precautions for Palette Cleaning
Before we dive into the nitty-gritty of cleaning, let's have a quick, serious chat about safety. I know, I know, it sounds a bit boring, but your health and wellbeing are, without question, far more important than achieving a pristine palette. I’ve learned these lessons, sometimes the hard way through minor irritations and allergic reactions, and I absolutely want you to avoid my mistakes! Think of this as preventative care for you, the most important tool in your studio.
1. Ventilation is Your Best Friend, Period.
This point is so critical, it cannot be overstated. Many art solvents, and even some pigments, emit fumes that can be genuinely harmful if inhaled in confined spaces over time, leading to headaches, nausea, dizziness, or long-term respiratory issues like asthma or organ damage. Ignoring ventilation is a direct risk to your respiratory health and overall well-being, and it’s a mistake I see far too often. Think of your studio air as another valuable resource – keep it clean! What's the point of creating beautiful art if you're compromising your health in the process?
- Open Windows and Doors: Always, without exception, work in a well-ventilated area. Open windows and doors to create a cross-breeze, allowing fresh air in and contaminated air out. Even a small crack can make a significant difference in air quality. If you don't feel a noticeable airflow, you don't have enough ventilation. Consider placing a fan near a window facing outwards to draw air out of your studio, creating negative pressure that pulls fresh air in from other openings. This is often more effective than just blowing air around.
- Strategic Fan Use: Employ a fan to actively circulate air. Position it to draw fumes away from your breathing zone and out of the room, rather than just stirring them up around you. Air purifiers with activated carbon filters can also be a good supplementary measure, but they are not a substitute for proper ventilation – they filter the air, but don't introduce fresh air. Think of it as an extra layer of protection, not the primary defense. I use one for general dust and pigment particle control, but never as my sole ventilation when solvents are active.
- Outdoor Work: If circumstances allow, seriously consider cleaning outdoors, especially for heavier duty jobs or when using stronger solvents. There's simply no better ventilation than fresh, open air! This is my personal preference for any substantial solvent use, as it completely eliminates concerns about fume accumulation indoors. Just ensure you're not disturbing others or harming the environment with your waste (which we'll discuss later!).
- Dedicated Studio Ventilation: If you have a dedicated studio, evaluate and invest in its ventilation system. Perhaps installing an exhaust fan near your workspace or a small, portable fume extractor is a worthwhile consideration for regular solvent use. Regularly check and clean any filters to ensure optimal performance. You might even consider an affordable air quality monitor to keep tabs on VOC (Volatile Organic Compound) levels in your studio, giving you objective data on your air quality – a truly smart investment for your long-term health. While air purifiers with activated carbon filters can supplement, remember they filter, not introduce fresh air, so they are not a substitute for proper ventilation.
2. Protect Your Skin and Eyes – They're Irreplaceable! Pigments and solvents aren't just messy; many can be irritants, sensitizers, or even toxic if absorbed through the skin or splashed into the eyes. Skin exposure can lead to dryness, cracking, dermatitis, or even systemic absorption of harmful chemicals into your bloodstream. Eye exposure can cause immediate irritation or more severe damage, potentially leading to permanent vision impairment. This isn't just about comfort; it's about protecting irreplaceable senses that are fundamental to your artistic practice.
- Gloves, Always Gloves: As mentioned in the "Cleaning Arsenal" section, wearing nitrile gloves is an absolute must. They are inexpensive, provide an excellent barrier against chemicals and pigments, and prevent your hands from looking like a permanent work of abstract art. Don't skip this step! Even with gloves, it’s a good practice to wash your hands thoroughly with soap and water after cleaning, just in case of any micro-leaks or accidental contact. Consider double-gloving for extra protection during heavy-duty cleaning sessions, especially when handling particularly aggressive solvents or pigments. Your skin will thank you in the long run.
- Eye Protection is Smart: While not always necessary for light cleaning, I strongly recommend considering safety glasses or goggles, especially if you're doing aggressive scraping of dried paint (tiny, sharp chips can fly unexpectedly and at surprising speeds!) or working with stronger solvents where splashes or aerosols are a possibility. Better safe than sorry when it comes to your eyesight – these are irreplaceable tools for an artist! A simple pair of clear safety glasses can save you a trip to the emergency room, and I've learned from experience that flying paint chips are no joke. A simple pair of clear safety glasses can save you a trip to the emergency room.
3. Basic First Aid for Chemical Exposure
Even with the best precautions, accidents can happen. Knowing basic first aid for chemical exposure is crucial. This isn't meant to replace professional medical advice, but to provide immediate, common-sense steps.
- Skin Contact: If solvents or pigments come into contact with your skin, immediately wash the affected area thoroughly with plenty of soap and water for at least 15-20 minutes. Remove any contaminated clothing. If irritation, redness, or pain persists, seek medical attention. Do not try to neutralize chemicals unless you are trained.
- Eye Contact: Flush eyes immediately with copious amounts of lukewarm water for at least 15-20 minutes, holding eyelids open. Do not rub eyes. Remove contact lenses if easily done. Seek immediate medical attention, even if symptoms seem mild, as chemical eye injuries can worsen over time.
- Inhalation: If you experience dizziness, nausea, headache, or respiratory irritation from fumes, immediately move to fresh air. If symptoms are severe or persist, seek medical attention. If the person is unconscious or not breathing, call emergency services immediately.
- Ingestion: If solvents or pigments are swallowed, do not induce vomiting. Rinse mouth with water. Immediately call poison control or emergency services. Have the product label or Safety Data Sheet (SDS) readily available to provide to medical personnel. This is a serious emergency.
Remember, prevention is always the best approach, but being prepared for an emergency is a sign of a responsible artist. Your health is your most valuable asset, enabling you to continue your creative journey for years to come.
3. Handle Solvents with Care
Solvents are powerful chemicals, and treating them with respect is crucial.
- Read Labels & SDS: Always read the safety data sheets (SDS) and labels for any solvent you use. These documents provide vital information on hazards, safe handling, and emergency first aid. Don't just glance at them – understand them. Think of them as your solvent's instruction manual; ignoring it is like building furniture without reading the directions! These documents are readily available online for most commercial art products.
- Flammability: Be acutely aware that many solvents are highly flammable. Keep them away from open flames, pilot lights, heat sources, sparks, and electrical equipment. Never smoke near solvents – that should go without saying! Store them in tightly sealed, original or clearly labeled metal or chemical-resistant containers, in a cool, well-ventilated area, away from direct sunlight. Consider a dedicated, fire-resistant cabinet if you store large quantities. I've heard too many stories of studio fires caused by carelessness; a little prevention goes a long way.
- Skin Contact: Avoid prolonged or repeated skin contact at all costs. If you get solvent on your skin, wash it immediately and thoroughly with soap and water for several minutes. Remove any contaminated clothing and launder separately. If irritation persists, seek medical advice. Even mild contact can lead to chronic dermatitis over time.
- Inhalation: As emphasized, ensure maximum ventilation. If you start to feel dizzy, nauseous, or experience a headache, immediately move to fresh air, ideally outdoors. If symptoms persist or worsen, seek immediate medical attention. In severe cases, a respirator with appropriate organic vapor cartridges might be necessary, but this is for specific situations and not a substitute for ventilation. Invest in your breathing; it's essential for a long creative life.
- Ingestion: Never ingest solvents. If swallowed, do not induce vomiting. Seek immediate medical attention and have the product label or SDS ready. Call your local poison control center immediately. This is a serious emergency.
- Spill Management: Have absorbent materials (like kitty litter, sawdust, or commercial chemical absorbents) readily available for small spills. For larger spills, ensure proper ventilation, evacuate unnecessary personnel, contain the spill (e.g., with absorbent booms), and follow product-specific cleanup instructions, or contact local hazardous waste services. A small fire extinguisher rated for chemical fires (Class B or ABC) is also a wise investment for any studio using flammable solvents. Know where your nearest emergency eyewash station or shower is located, especially if handling larger quantities. Preparedness minimizes panic and harm.
4. Proper Disposal
This is a big one, and often overlooked. You can't just pour paint-filled solvent down the drain or toss solvent-soaked rags in the regular trash. We'll cover this in more detail later, but for now, remember: improper disposal is not just irresponsible, it can be illegal and lead to severe environmental damage and health risks. Always check your local municipal waste regulations; they can vary significantly by region. For now, here are the absolute basics:
- Never down the drain: Solvents and oil paint contain chemicals that can harm plumbing and the environment.
- Designated containers: Keep a sealed "sludge" container for paint solids and a separate one for used solvent.
Safety at a Glance: Your Quick Guide
To reinforce these vital points, here's a quick summary of safety best practices:
Safety Precaution | Key Action | Why It's Important |
|---|---|---|
| Ventilation | Work in well-aired spaces, use fans/extractors, consider air quality monitor. | Prevents inhalation of harmful fumes, protects respiratory and long-term health. |
| Skin Protection | Always wear nitrile gloves (double-glove for heavy use). | Avoids chemical absorption, irritation, and allergic reactions. |
| Eye Protection | Consider safety glasses or goggles for scraping/splashes. | Protects against flying debris and chemical splashes, preserves irreplaceable eyesight. |
| Flammability | Keep solvents away from heat/sparks, store sealed in approved containers. | Prevents fires and explosions, safeguarding your studio and home. |
| Label Awareness | Read product labels and Safety Data Sheets (SDS) thoroughly. | Understands specific hazards, safe handling procedures, and critical first aid. |
| Spill Preparedness | Have absorbents ready, know cleanup steps, locate fire extinguisher. | Manages accidents safely, prevents further exposure or environmental harm. |
| Proper Disposal | Never down the drain; dry solids, recycle solvents via local facilities. | Protects plumbing, the environment, and community health, fulfilling civic duty. |
Alright, safety briefing over! Now that we're all protected, let's talk about timing.

The Psychology of Cleanup: Why a Clean Palette Fuels Creativity
Beyond the practical benefits, there's a profound psychological aspect to maintaining a clean palette. For many artists, the studio is a sanctuary, a place of contemplation and creation. A cluttered, dirty palette can subtly undermine that sanctuary, creating mental friction even before the brush touches the canvas. I've found that the state of my workspace directly impacts the state of my mind, and ultimately, the quality of my work.
- Reduces Decision Fatigue: A clean palette presents limitless possibilities. A dirty one presents obstacles – "Which patch of clean surface can I use? Is this dried blob going to contaminate my mix?" These micro-decisions add up, draining your creative energy before you even begin. A truly clear palette allows your mental energy to be dedicated solely to your artistic vision.
- Boosts Inspiration & Focus: A pristine surface is an invitation to begin anew. It clears the mental slate, allowing for fresh ideas and uninhibited exploration of color. It helps you enter a state of flow more easily, free from the distraction of past mistakes or accumulated mess. For me, it's like a fresh canvas for my thoughts.
- Fosters Respect for Materials: The act of cleaning is a mindful ritual. It's a way of showing gratitude and respect for your tools and materials, recognizing their role in your creative journey. This appreciation can deepen your connection to your craft, transforming a chore into an act of artistic stewardship.
- Creates a Professional Mindset: Regardless of whether you're a hobbyist or a professional, maintaining a clean workspace fosters a professional mindset. It signals to yourself (and anyone else who might see your studio) that you take your art seriously, valuing precision and care. This mindset can subtly elevate the quality and intention behind your work.
- Builds Good Habits & Discipline: Consistently cleaning your palette, even for a few minutes, reinforces a broader sense of discipline in your artistic practice. This discipline can spill over into other areas, like daily sketching or focused work sessions, fostering a more productive and fulfilling creative routine. It's a small win that builds momentum.
Pre-emptive Palette Care: The Art of Less Mess
While knowing how to clean is vital, mastering the art of prevention is even better! A few simple habits can drastically reduce the amount of paint that dries on your palette in the first place, saving you significant cleaning time and frustration down the line. Think of it as painting smarter, not harder.
- Use a Palette Cover or Plastic Wrap: For glass, ceramic, or acrylic palettes, simply covering your active paint areas with plastic wrap (e.g., cling film) or a dedicated palette cover between sessions can slow down drying significantly. This creates an airtight barrier that limits oxygen exposure, keeping your paint workable for days, sometimes even a week! This is particularly useful if you paint frequently and want to reuse mixes. For wooden palettes, this can still help, but complete drying is often still the goal to prevent mildew.
- Only Squeeze What You Need: This sounds obvious, but it’s a game-changer for waste reduction. Instead of squeezing out a huge dollop of every color, start with smaller amounts. You can always add more! This minimizes the quantity of paint left exposed to air and reduces the amount you'll need to scrape off later. Being mindful of your paint consumption is an eco-friendly practice.
- Designate Mixing Zones: Try to keep fresh paint at the edges of your palette and use the central area primarily for mixing. This prevents a chaotic buildup of dried pigment right where you need to blend, keeping your active mixing surface cleaner for longer. It's about strategic layout, much like a chef organizes their cutting board.
- Scrape Off Excess During Your Session: If you're done with a particular color or mixture, take a moment to scrape and wipe it off with a rag right then and there. Don't wait for the end of the session. This prevents a massive accumulation and ensures your palette stays tidy as you work.
By integrating these small, proactive steps into your painting routine, you'll find yourself spending far less time battling dried paint and more time doing what you love: creating. Prevention truly is the best form of palette care.
The “When”: Immediate Gratification vs. Dried-On Dread
Look, I'm a realist. Sometimes, life happens, or you're just too creatively drained to face the cleanup right away. We've all been there, staring at that colorful mess, yearning for a cup of tea instead of a scrubbing session. But honestly, the best time to clean your oil painting palette is immediately after you finish painting. Wet paint is a dream to remove, typically taking minutes. Dried paint? That's when you start questioning your life choices, and cleanup can stretch into a frustrating hour or more, often involving more aggressive methods. Procrastination truly is the thief of pristine palettes! This isn't just about saving time; it's about preserving your energy for actual painting.

Quick Wipes During a Session
I've found it incredibly helpful to do mini-cleans during a painting session. If I'm done with a particular color or mixture, I'll quickly scrape and wipe it off, perhaps with a solvent-dampened rag. This prevents a massive accumulation of paint, reduces the risk of accidental color contamination, and keeps my mixing areas clearer and ready for the next color. It's a small habit, a moment of mindfulness amidst the creative chaos, but it makes a huge difference in the overall cleanup and the clarity of your artistic process. Think of it as tidying up as you go, like a chef wiping down their station – a clean workspace enables a more focused and efficient workflow, letting you concentrate on the art itself. This proactive approach saves you from the looming dread of a monumental cleanup.
But fear not, both immediate and delayed cleanup scenarios are entirely conquerable. Let's tackle them one by one.
## Understanding Paint Drying Chemistry: Why Oil Paint Behaves That Way
Before we dive into the "how-to," it's incredibly useful to understand why oil paint gets so stubbornly attached to your palette. It's not just "drying out" in the conventional sense; it's a fascinating chemical process called polymerization (or oxidative polymerization). This understanding will not only help you clean more effectively but also inform your painting process and material choices.
- Oxidative Polymerization: Unlike water-based paints that dry through evaporation, oil paints dry by absorbing oxygen from the air. This oxygen causes the oil molecules to cross-link and form a strong, flexible, and ultimately insoluble polymer film. This process starts on the surface and works its way inwards. The denser the paint application, the longer it takes.
- Pigment's Role: Different pigments contain different binders and may react differently to oxygen. Some pigments, like earth tones, can accelerate drying, while others, like cadmiums, can slow it down. The chemical composition of the pigment itself also affects how strongly it bonds to the palette surface once polymerized.
- Medium's Influence: The oil medium you use (linseed, walnut, safflower) also influences drying time and the hardness of the dried film. Linseed oil, for example, forms a particularly robust film. Adding mediums like alkyds can significantly speed up the polymerization process. Each oil brings its own subtle properties: linseed oil forms the strongest, most flexible film, but yellows slightly over time; walnut oil dries slower and is less prone to yellowing; safflower oil is the slowest drying and least yellowing, often favored for whites and blues. Understanding these nuances helps explain why some paint blobs seem to fossilize faster or harder than others, demanding a more targeted approach during cleanup. The type of oil medium can fundamentally alter the molecular structure of the paint film, dictating its long-term durability and, yes, its resistance to your cleaning efforts.
- Environmental Factors (Humidity & Airflow): High humidity can sometimes slow surface drying, but excellent airflow (ventilation) generally accelerates the drying process by providing a constant supply of fresh oxygen. A stagnant, humid environment can lead to a slower, tackier dry, while a breezy, dry studio will see paints firm up much quicker. This is why proper ventilation is not just for your health, but also impacts your paint's working properties.
- Heat and Humidity: Higher temperatures generally accelerate polymerization, making paint dry faster and harder. Lower humidity can also contribute to quicker surface drying, although the interior may still be wet. This is why a warm studio or palette can lead to quick-setting paint.
Knowing this, it becomes clear why simply wiping off wet paint is so easy (the oil hasn't polymerized yet!), and why dried paint requires more aggressive methods that aim to break down those strong polymer bonds or re-emulsify the hardened oil. It's a chemical battle, and now you have the insider knowledge to win it!
Step-by-Step: The Grand Palette Cleanse
Now for the practical application! Understanding the fundamental difference between cleaning wet and dried paint is absolutely key to success. Each scenario calls for a slightly different approach, but with the right techniques, both are entirely conquerable. Here’s a quick overview of what we’ll cover, followed by the detailed steps:
Cleaning Scenario | Ideal Time | Difficulty | Tools Often Needed | Primary Method |
|---|---|---|---|---|
| Wet Paint | Immediately after painting | Easy | Palette knife, paper towels/rags, mild solvent, artist's soap. | Scrape, wipe, solvent wipe, optional soap wash. |
| Dried Paint | When procrastination strikes | Moderate to Difficult | Palette knife, fresh artist's oil, stronger solvents, razor blade (glass/metal/ceramic only), artist's soap. | Scrape, oil soak, solvent attack, razor blade (if applicable), soap wash. |
| Water-Miscible Oil Paint | Immediately or shortly after | Easy | Palette knife, water, artist's soap, paper towels/rags. | Scrape, water wipe, soap wash, dry. |
| Heavy Duty / Deep Clean | Periodically (e.g., monthly) | Moderate | All of the above, plus specialized scrapers or mild abrasives for hard surfaces. | Thorough scraping, repeated solvent application, deep soap wash, and inspection. |
For Wet Paint (The Easy, Ideal Route)
This is the scenario you want to aim for, my friends. Embrace the immediate cleanup – it will save you so much grief! This is the ideal time to clean your palette, a truly golden opportunity to make your artistic life significantly easier. Think of it as a small act of self-care for your future creative self.

- Scrape Off Excess Paint: Recovering Your Unused Colors Grab your trusty palette knife. This is your first line of defense. Holding it at a low, almost flat angle to the surface, gently but firmly scrape off any large mounds or unused dollops of wet paint. Don't be shy; aim to remove as much pigment as possible – the more you get off now, the less solvent you'll need later. Collect this excess onto a scrap piece of paper, an old newspaper, or even a dedicated "sludge" container. You’d be genuinely surprised how much usable paint you can recover and save for future underpaintings, toning canvases, or even experimental mixed media work! I often consolidate similar colors into small, airtight containers for later use, especially those precious earth tones or pre-mixed grays, minimizing waste of those valuable pigments from the best oil paint brands for artists. This is where the flexibility and thin edge of a good palette knife truly shines – it makes paint recovery incredibly efficient and reduces waste. Some artists even have a dedicated 'mud palette' where all their scraped-off colors go to become interesting grays and browns, preventing unnecessary disposal.

- Wipe It Down Thoroughly: With a fresh paper towel or a clean, lint-free rag, vigorously wipe away as much remaining paint film and residue as you possibly can. Don't underestimate this step; it's about physical removal before chemical. For wooden palettes, be gentle and always wipe with the grain to avoid forcing pigment deeper into the wood fibers and causing permanent staining (a common mistake that leads to irreversible discoloration). For glass, acrylic, ceramic, or metal palettes, you can be a bit more assertive in your wiping, using a firm, circular motion if needed. The strategic goal here is to remove the bulk of the pigment before introducing solvents, which significantly minimizes the amount of solvent you'll need, makes the process more efficient, and reduces your overall exposure to chemical fumes, keeping your studio healthier. This initial physical removal is surprisingly effective at lifting the majority of the wet paint.
- The Solvent Swipe: Dampen (but certainly don't saturate!) a clean section of a rag or a fresh paper towel with a small amount of your chosen solvent (OMS, Turpenoid, or even rubbing alcohol for a quick wipe on non-porous surfaces). Systematically wipe down the entire surface of your palette, working in small, manageable sections, until all visible traces of paint are gone. Change your rag or paper towel section frequently to avoid just spreading dissolved paint around – that's a common rookie error! For notoriously tricky corners, grooves, and tight spots, a solvent-dampened cotton swab, or even a pointed cotton bud, can be an incredibly effective secret weapon, allowing for precision cleaning. For most non-porous surfaces like glass, acrylic, ceramic, or metal palettes, this step is usually sufficient, leaving them sparkling clean and ready for the crucial next step of conditioning and final wash.
- Soap and Water Bath (Highly Recommended for All Palettes): For a truly pristine, squeaky-clean finish – and especially crucial for wooden palettes (which can absorb solvent residues over time and become sticky or damaged) – a thorough wash with a mild artist's soap (like a dedicated brush cleaner soap, which is often formulated to be gentle on skin and tools) and warm water is not just optional, it’s highly recommended. This step is absolutely critical for removing any lingering solvent residue, ensuring the surface is genuinely clean, conditioned, and truly ready for your next painting session, not just paint-free. I even give my glass palette this treatment sometimes; there’s nothing quite like the feel of a truly squeaky-clean palette, which also prevents future issues like paint not adhering properly or unwanted sheen. Rinse thoroughly under running water, ensuring all soap suds and dissolved paint are completely gone. The warm water helps to break down any remaining oils and ensures no film is left behind, leaving a perfectly neutral surface.
- Dry Completely and Store Properly: Pat your palette thoroughly dry with a clean, lint-free cloth. This step is particularly vital for wooden palettes; if left even slightly damp, they are prone to warping, cracking, or developing unsightly and unhealthy mildew, which can be impossible to remove. Allow them to air dry completely, ideally lying flat on a clean, absorbent surface, before storing. For glass, acrylic, ceramic, or metal palettes, a quick wipe is usually enough to prevent unsightly water spots or mineral deposits from hard water. Proper drying extends the life of your palette and prevents future problems, ensuring it's always ready for your next creative endeavor and preventing any residue buildup from humidity.
### For Water-Miscible Oil Paints (A Simpler, Eco-Friendly Route)
For more details on these versatile paints, you might want to explore what is the difference between acrylic and oil paint.
If you're one of the many artists who enjoy the convenience of water-miscible oil paints, your cleanup process is notably simpler – a major benefit of these paints and a relief for those sensitive to solvents! This eco-friendly alternative truly streamlines the post-painting routine, making studio cleanup a much less daunting task.
- Scrape Off Excess: Just like traditional oils, start by scraping off any large mounds of unused paint with your palette knife. Dispose of this solid paint waste responsibly. Consider saving larger quantities for later use, as discussed for traditional oils, especially for underpaintings or future monochromatic studies.
- Wipe with Water: Instead of solvent, simply dampen a rag or paper towel with clean water and wipe down the palette surface. You’ll find the paint emulsifies readily and comes off with remarkable ease. Repeat with fresh water until most visible paint is removed. For stubborn areas, a slightly warmer water temperature can sometimes help.
- Soap and Water Wash: Follow up with a good wash using artist's soap (or a mild dish soap) and warm water. This will thoroughly remove any lingering pigment and leave your palette perfectly clean and ready for your next session. This final scrub ensures no residue remains to affect your next colors.
- Dry Thoroughly: Ensure your palette is completely dry before your next use. While water-miscible paints simplify cleanup, good drying habits prevent issues with any palette material, particularly wooden ones, preventing warping or mildew.
For Dried-On Oil Paint (The Patience Game)
Ah, the dreaded fossilized paint. We've all been there – that moment when you return to your studio only to find a stubborn, rock-hard layer of paint clinging to your palette. This scenario undoubtedly requires a bit more elbow grease, a healthy dose of patience, and a strategic approach, but I promise you, it’s not impossible to conquer. Think of it as a small archaeological dig; you're unearthing your palette from layers of artistic history! Different pigments, especially those with faster drying oils or certain binders, can become incredibly tenacious once dried, requiring a more targeted approach.
- The Scrape-and-Pry Method: Start your assault with your most sturdy palette knife. For those truly thick, dried blobs of paint that seem fused to the surface, you’ll need to patiently find an edge, gently get under the paint, and begin to pry it up in smaller, manageable sections. Don’t try to remove it all in one heroic go; that’s a recipe for frustration and potential damage. Apply firm but controlled pressure, always angling the knife away from the palette surface to avoid gouging, especially crucial if you’re working with a wooden palette. Remember, patience is your greatest tool here; aggressive, frantic scraping can easily cause irreparable damage or even injury. Sometimes, a gentle twisting motion once you’re under an edge can help lift a stubborn chunk, almost like shucking an oyster. For very thin, transparent dried layers, a sharper, thinner palette knife can be more effective. For particularly tough, crusted areas, you might even find success by tapping the back of your palette knife with a small hammer or the heel of your hand to create micro-fractures in the dried paint, but always use extreme caution!
- Soak with Artist's Oil (My Secret Weapon!): This technique is my absolute secret weapon for softening stubborn, slightly to moderately dried paint, and it works wonders, particularly on wooden palettes! Apply a few drops of fresh artist's oil – linseed, safflower, or walnut oil are all excellent choices – directly onto the dried paint spots. You don't need a huge puddle, just enough to thoroughly cover the dried pigment. Let it sit and do its magic for at least 10-15 minutes, or even longer for truly ancient, fossilized paint (I’ve been known to leave it for an hour or even overnight if the paint is particularly stubborn, sometimes gently warming it with a hairdryer on a low setting for a few minutes to aid penetration!). The fresh oil will slowly re-emulsify the dried paint, effectively breaking down its hardened film and making it significantly softer and much easier to scrape away. This is the "like dissolves like" principle in action, and it’s a gentle yet powerful, non-toxic method that preserves your palette. After soaking, gently work the softened paint with your palette knife, then wipe away the oily residue with a clean rag. The beauty is its effectiveness without resorting to harsh chemicals.

- Solvent Attack (with Extreme Caution): For truly stubborn, paper-thin layers of dried paint that simply won't budge even with the oil-soak method, a slightly more aggressive solvent approach might be necessary. Dampen a rag with OMS (or even traditional turpentine, but be warned, this requires extreme ventilation and is generally not recommended for regular use) and lay it directly over the dried area for a minute or two to allow the solvent to penetrate and soften the paint film. Then, scrub vigorously with a fresh section of the rag. Repeat this process if needed, always ensuring adequate ventilation and, of course, wearing your gloves. For particularly resistant areas on non-porous palettes, a solvent-dampened Scotch-Brite pad (used gently!) can sometimes help, but be extremely careful not to scratch the surface. CRITICAL WARNING: Absolutely avoid paint strippers, paint removers, or harsh industrial solvents unless you are truly desperate and have exhausted all other options and are prepared for the risks. If you must use them, always test in an inconspicuous area first, as these chemicals are highly aggressive and can permanently damage your palette material (especially wood or certain plastics), leaving behind irreversible damage or chemical residues. Furthermore, they pose significant health risks; heavy-duty chemical-resistant gloves, eye protection, and maximum, dedicated ventilation in an isolated area are absolutely non-negotiable if you venture down this path. I personally try to avoid them at all costs due to their harshness and the potential for irreparable harm to both palette and artist, and I've heard countless horror stories of palettes being ruined by these aggressive chemicals, not to mention the health consequences.
- The Razor Blade/Scraper (Glass, Ceramic, or Metal Only!): This is your last resort for non-porous surfaces. If you're working with a glass, ceramic, or metal palette and have incredibly stubborn, paper-thin dried films of paint that resist everything else, a single-edge razor blade or a dedicated glass scraper can be remarkably effective. The key is technique: hold it at a very low angle (almost flat, about 10-15 degrees) to the surface and gently push it across, working under the dried paint film. CRITICAL WARNING: NEVER, ever use this on wooden or acrylic palettes. Doing so will inevitably and irreparably scratch, gouge, or destroy your palette surface, creating countless new nooks and crannies for paint to cling to next time. Always use extreme caution to avoid cuts to yourself (a slip of the blade can be nasty!), and dispose of used blades safely in a sharps container or a rigid, sealed plastic bottle – this step demands both skill and utmost care.
- Final Cleanse: Once the bulk of the dried paint is successfully removed, proceed with the thorough soap and water wash and complete drying process as meticulously described in the "For Wet Paint (The Easy Route)" section. This essential final step ensures that any last traces of pigment, solvent, or oil residue are completely eliminated, leaving your palette perfectly clean, pristine, and truly ready for your next masterpiece. It's not just about aesthetics; it's about conditioning the surface. You’ve earned that clean slate, and your next painting will thank you for it!
Cleaning Palette Knives and Other Tools: Don't Forget Your Companions
While the palette is the star of this guide, it's crucial not to neglect your other valuable tools, especially your palette knives and brushes. A clean palette knife isn't just about aesthetics; residual dried paint can affect its flexibility, blunt its edge, and contaminate your fresh mixes. Think of it as an extension of your palette – if one is dirty, it compromises the other.
Palette Knives
- Immediate Wipe-Down: The absolute best practice is to wipe your palette knife clean with a rag or paper towel immediately after each color application or mix. This removes wet paint effortlessly and prevents buildup.
- Scrape and Soak (for Dried Paint): If paint has dried, use another, stiffer palette knife or a dedicated scraper to gently chip off the bulk. For stubborn, thin layers, a quick soak in solvent (OMS) in a shallow container, followed by a vigorous wipe, usually does the trick. You can also use a small amount of artist's oil to soften very dried paint, much like you would for your palette.
- Final Wash: Always follow up with artist's soap and warm water to remove all oil and solvent residues, ensuring your knife is pristine and ready for its next use. Pay attention to the handle where paint can accumulate.
Brushes
Cleaning your brushes is a whole art in itself, and you can dive deeper into that with our guide on cleaning and caring for your paint brushes. However, for a quick cleanup during a session, or as a preliminary step, removing excess paint on a rag and a swirl in a brush washer with solvent is common. Always ensure a thorough final wash with artist's soap to maintain bristle integrity and prevent hardening.
Neglecting these tools creates a domino effect of mess and inefficiency. Keeping them clean is an integral part of maintaining a pristine and productive studio environment, truly extending the life of your investment and ensuring pure color application every time. It’s a holistic approach to studio hygiene.
Advanced Cleaning Tips & Tricks
Sometimes, despite our best efforts, a palette can accumulate layers of truly ancient, fossilized paint that seem impenetrable. While I advocate for prevention, here are a few advanced tips for those extreme cases:
- Heat Application (Caution!): For very stubborn, thick dried paint on non-porous palettes (glass, ceramic, metal), a gentle application of heat can sometimes help. Use a hairdryer on a low setting, moving it consistently over the dried paint for a minute or two. The heat can soften the paint, making it more pliable for scraping. CRITICAL WARNING: Never overheat; avoid direct contact with high heat for too long, especially with glass (thermal shock can crack it, leading to dangerous shards) or plastic (it can melt or warp permanently). Always test in an inconspicuous area, and ensure the palette isn't too hot to handle, using gloves or a cloth to protect your hands. I once cracked a beloved glass palette by being too aggressive with heat; learn from my mistake!
- Specialized Paint Removers (Last Resort): While I generally advise against them due to their harshness and health risks, there are a few art-specific paint removers designed for dried oil paint. These are not the same as industrial paint strippers, which are far too aggressive. If you opt for one, read the instructions meticulously, wear full PPE (gloves, eye protection, respirator if recommended), ensure extreme ventilation, and test a small area first. These are truly for worst-case scenarios and must be used with utmost care, as even art-specific removers can be powerful and potentially damaging if misused, often leaving behind residues that still need to be thoroughly cleaned. I consider these the nuclear option, only for when all else has failed and I'm prepared for potential damage.
- Dedicated Cleaning Scrapers: Beyond the standard palette knife, some companies make specialized scrapers with different blade profiles (e.g., wider, firmer blades, or blades with a slight curve) or ergonomic handles that can make tackling large areas of dried paint less strenuous. These are often used for general workshop cleanup but can be adapted for palette cleaning on hard surfaces, offering a bit more leverage and comfort than a standard palette knife alone. Investing in a dedicated heavy-duty scraper can be a real hand-saver for those major cleanup operations, reducing strain and improving efficiency when faced with significant buildup. Look for those with comfortable, ergonomic grips to save your hands during those challenging cleans.
Advanced Troubleshooting for Wooden Palettes
Wooden palettes, with their unique character and traditional appeal, can also present unique cleaning challenges due to their porous nature. While prevention is key, sometimes you need advanced techniques for those stubborn issues.
- Deeply Stained Wood (Beyond Simple Cleaning): For wooden palettes with very deep, pervasive pigment stains that resist even extended oil soaks, a very gentle sanding can be considered. Use extremely fine-grit sandpaper (e.g., 320 or 400 grit) and sand with the grain only, applying minimal pressure. The goal is to remove only the most superficial layer of stained wood. Be warned: this will remove any built-up patina and will absolutely require a full re-seasoning process (multiple coats of artist's oil, thoroughly wiped) afterward to restore its non-absorbent properties and prevent future staining. This is a measure of last resort, akin to major restoration, and should only be undertaken if you're prepared for the commitment of re-seasoning.
- Dealing with Mildew or Mold: If a wooden palette has been stored in a damp environment and developed mildew or mold (which often appears as fuzzy green, black, or white spots), immediate action is crucial. First, wear gloves and a respirator. Gently scrub the affected area with a soft brush dampened with a diluted solution of household bleach (1 part bleach to 10 parts water) or white vinegar. Rinse thoroughly with clean water, then allow to dry completely in a well-ventilated area, ideally in sunlight. If the mildew is extensive or has penetrated deeply, the palette might be compromised and should be discarded to prevent spores from spreading in your studio. Afterward, ensure better ventilation and humidity control in your storage area.
- Repairing Minor Gouges or Dents: For small, shallow gouges on a wooden palette, you can sometimes gently sand the area smooth with very fine-grit sandpaper, then re-season the affected spot (or the entire palette). For deeper dents, a wood filler designed for fine furniture can be used, carefully applied, sanded smooth, and then the palette must be fully re-seasoned. However, trying to perfectly restore the original smooth mixing surface can be challenging, and some imperfections might remain. Embrace minor battle scars as part of its history!
These advanced techniques require patience, care, and a clear understanding of your wooden palette's material. They are about extending the life of a cherished tool when simpler methods fall short, ensuring it continues to serve your artistic journey effectively, even if with a few more stories etched into its surface.
Advanced Material-Specific Cleaning Notes
Each palette material has its nuances, and advanced cleaning often means respecting those differences even more deeply:
- Wooden Palettes: For deeply stained wood that resists oil soaking, very fine-grit sandpaper (e.g., 220-400 grit) can gently remove superficial layers of stained wood. However, this will alter the surface and remove any seasoned patina, requiring you to re-season the palette entirely. Proceed with extreme caution and only if you’re prepared for the re-seasoning process.
- Glass/Ceramic/Metal Palettes: These can often benefit from a final wipe with a glass cleaner or automotive polishing compound (used very sparingly and followed by a thorough soap and water wash) to restore a truly pristine, streak-free, and frictionless surface. This can help prevent paint from sticking in microscopic imperfections. Always ensure no chemical residues remain before painting.
- Acrylic/Plastic Palettes: If a plastic palette has become hazy or slightly sticky from solvent exposure, a very gentle buffing with a plastic polish (like those used for car headlights) can sometimes improve its clarity and smoothness. This is a delicate process and should be tested on an inconspicuous area first, as aggressive polishing can worsen the problem. Avoid anything abrasive.
Dealing with Specific Pigment Stains: The Stubborn Offenders
While general cleaning methods work for most pigments, some colors are notoriously more tenacious than others, leaving behind faint ghosts on your palette even after a thorough scrub. Understanding these 'stubborn offenders' and having targeted strategies can save you a lot of frustration. These are often pigments with very fine particles or intense staining power.
- Phthalocyanine Blue (Phthalo Blue) and Green (Phthalo Green): These are perhaps the most infamous for their incredible staining power. Their fine, intense pigments can deeply penetrate porous surfaces like wood and even subtly tint acrylic palettes. They seem to latch onto everything!
- Alizarin Crimson and Quinacridone Magenta: These vibrant reds and magentas are also strong stainers, particularly on plastics and sometimes even slightly on wooden palettes, leaving behind a persistent pinkish hue.
- Dioxazine Purple: Similar to the phthalos, this deep purple has a very high tinting strength and fine particles that can embed themselves.
Strategies for Stubborn Stains:
- Immediate Action is Key: For these pigments, wipe them up immediately when wet. Don't let them sit and dry, especially on porous surfaces. This is your best defense.
- Oil Soak (The Gentle Attack): For dried stains on wooden palettes, the artist's oil soak method (linseed, walnut) is often the most effective and gentle way to lift these deep stains without damaging the wood. Let it sit for longer, perhaps overnight, to really penetrate.
- Razor Blade (Non-Porous Only): On glass, ceramic, or metal, a razor blade scraper is your most powerful weapon against dried phthalo stains. Used at a very low angle, it can literally shave off the thin film of pigment. Remember caution!
- Abrasive Sponges (Non-Porous with Caution): For glass or ceramic, a slightly abrasive scrub pad (like a Scotch-Brite pad, but test in an inconspicuous area first) with a strong soap or a solvent can sometimes help to physically scrub away embedded pigment particles. Use with a light hand to avoid micro-scratches.
- Sunlight (for some faint stains on wood/plastic): For very faint, superficial stains on some wooden or plastic palettes, direct sunlight can sometimes help to bleach them out over a long period, though this is unreliable and can also potentially cause warping in wood. Use with caution.
Ultimately, some deep stains, particularly on porous surfaces like wood, might become a permanent part of your palette's character. Embrace them as a testament to your vibrant artistic journey, but always strive for immediate cleanup to minimize their impact on your fresh color mixes. They become part of your palette's unique story, a visual diary of your artistic adventures.
The Role of Temperature in Cleaning: A Subtle but Significant Factor
While often overlooked, the temperature of your studio and palette can subtly influence the ease and effectiveness of your cleaning efforts. Understanding this can give you a slight edge in tackling stubborn paint or optimizing your routine.
- Warmth Softens Paint: Just as heat can accelerate paint drying, a gentle warmth can also help to soften dried paint films, making them more pliable and easier to scrape or dissolve. This is why a bit of warm artist's oil or even a hairdryer on a low setting (used with extreme caution on non-porous surfaces!) can be effective for dried paint. However, be careful not to make the palette too hot to handle or risk thermal shock with glass.
- Cold Hardens Paint: Conversely, a very cold palette will make dried paint even harder and more brittle, increasing the effort required for scraping. If you store your palette in a cold environment, allow it to come to room temperature before attempting a deep clean.
- Solvent Volatility: The evaporation rate of solvents is also affected by temperature. Warmer temperatures increase volatility, meaning solvents evaporate faster. This can be a double-edged sword: faster evaporation means less lingering odor, but also less working time for the solvent to dissolve paint. In colder temperatures, solvents work slower, but you have more time before they evaporate.
Considering these factors can help you strategically approach your cleaning sessions. A slightly warmed palette might make that stubborn dried paint release more readily, while working in a moderately cool, well-ventilated space might give your solvents more time to do their job without excessive evaporation.
Palette Maintenance: Keeping Your Workspace Pristine Between Major Cleans
Consistent care is far easier than battling a paint-encrusted monster. I've developed a few habits that keep my palette happy without requiring a full-scale assault every time.
1. Daily Wipe-Down
After each painting session, even if you don't do a full, deep clean, make it a non-negotiable habit to at least scrape off the excess wet paint and give it a quick wipe with a solvent-dampened rag. This simple act is incredibly powerful as it prevents paint from hardening overnight, saving you significant effort later. Think of it as hitting the "reset" button for your palette, keeping it always ready for spontaneous inspiration – no creative block caused by a messy surface!
2. Store Smart
3. Travel Cleaning Kits for Plein Air Artists
For those who venture outdoors to capture the world en plein air, a specialized travel cleaning kit is essential. You need to be efficient, minimize mess, and respect the environment. This isn't about deep cleaning, but rather about immediate tidiness.
- Mini Solvent Dispenser: A small, leak-proof container (e.g., an empty breath mint tin or a specialized brush washer with a tight lid) with a small amount of OMS for quick brush and palette knife wipes.
- Plenty of Rags/Paper Towels: Pack a good supply of dedicated, absorbent rags or sturdy paper towels. Designate one for initial wiping and another for cleaner solvent wipes.
- Portable Scraper: A compact, sturdy palette knife or a plastic scraper that can easily fit into your plein air kit. Prioritize tools that are lightweight and won't easily get lost.
- Sealed Waste Bag/Container: A critical item! Always carry a sealable plastic bag or a small, lidded container to collect all paint-laden rags and scraped-off paint waste. Never leave paint waste in nature.
- Water (for water-miscible oils): If using water-miscible oils, a small bottle of water and a compact brush washer will be your primary cleaning tools, making cleanup even simpler.
The key to plein air cleaning is quick, contained, and responsible action. You want to leave no trace, ensuring your beautiful outdoor studio remains pristine for everyone to enjoy.
4. Seasoning Wooden Palettes (A Quick Refresh)
How you store your palette between sessions can significantly impact its longevity and cleanliness. If you have a wooden palette, absolutely do not store it vertically leaning against a wall where gravity and uneven moisture can cause it to warp over time. Lay it flat on a clean, stable surface, perhaps on a clean sheet of paper, or hang it securely from a dedicated hook. Keep it away from extreme temperature changes, direct sunlight, or fluctuating humidity, all of which can damage wood and cause paint to dry unevenly. For glass, ceramic, or metal palettes, store them flat or in a protective sleeve to prevent chipping or scratching the surface. Disposable palettes should be kept in their original pad form, protected from dust and moisture. I personally keep my glass palette in a custom-made wooden box to prevent accidental drops or chips.

3. Seasoning Wooden Palettes (A Quick Refresh)
If you use a wooden palette, seasoning is a crucial, ongoing maintenance step that transforms a porous piece of wood into a non-absorbent, paint-repelling surface. Periodically rub a very thin, even layer of artist's linseed or walnut oil (safflower oil also works well) into the clean, dry wood. Let it soak into the wood for an hour or even a few hours, allowing the oil to polymerize within the wood fibers, effectively sealing the grain. Then, meticulously wipe off all excess oil until the surface feels dry to the touch, not sticky or tacky. This helps to condition the wood, making it significantly less absorbent and much easier to clean in the future, preventing those frustrating deep-set stains. Think of it like moisturizing and protecting your skin – it forms a vital barrier! A well-seasoned wooden palette will develop a beautiful, rich patina over time that's truly a joy to paint on, almost becoming a work of art in itself. This is an essential ritual for any wooden palette owner.
4. Separate Paint from Mixing Areas
5. Protecting Your Palette While Painting (Covers & Barriers)
Beyond simply cleaning, proactive protection during and between painting sessions can drastically reduce paint buildup and extend the life of your colors. This is about working smart and preserving your materials.
- Palette Covers/Lids: Many glass or plastic palettes come with custom-fitting lids or can be paired with one. These create an airtight seal, significantly slowing the drying of paint on your palette, keeping it workable for days. This is invaluable for artists who want to continue working with the same color mixes without having to remake them.
- Plastic Wrap: A simple and affordable solution. Tightly wrapping your palette (especially non-porous types) with cling film or plastic wrap between sessions prevents oxygen exposure, keeping your paint fresh and wet. It's an excellent hack for saving leftover mixes.
- Small Cups/Wells for Mediums/Solvents: Instead of pouring mediums or solvents directly onto your main palette surface, use small, dedicated cups or wells. This keeps your mixing surface free from spills and solvent residue, preserving its pristine quality for colors only. I often use tiny glass ramekins or metal dippers for this.
- Barrier Film (e.g., Waxed Paper): As mentioned with DIY palettes, you can temporarily cover sections of your palette with waxed paper or freezer paper. Mix on this disposable surface, then simply peel it off and discard, leaving your main palette relatively clean underneath. This is great for particularly messy sessions or experimental mixes.
These protective measures are not just about tidiness; they are about efficiency, economy, and maintaining the integrity of your paints. They allow you to pause your creative process without losing the usability of your carefully prepared colors, ensuring a smoother transition back into painting.
6. Regular Deep Clean:
A simple yet effective organization strategy can greatly reduce your cleaning burden. Try to designate specific, distinct areas for squeezing out fresh paint (often along the edges of the palette) and separate, central areas for mixing. This can help keep the main mixing zone cleaner for longer, preventing the "muddy" accumulation that happens when fresh colors are constantly mixed directly into dried remnants. Some artists even use disposable parchment paper or small glass shards over their main palette for temporary mixing, further isolating the paint. This thoughtful zoning can dramatically improve your color clarity and reduce overall cleanup time. It's about working smarter, not harder.
7. Routine Inspection for Damage
Make it a habit to periodically inspect your palette for any signs of wear or damage. Catching these issues early can prevent them from worsening and potentially compromising your palette's functionality or leading to more difficult cleaning challenges down the line. A proactive approach here can save your palette from early retirement and ensure it remains a reliable tool.
- Look for Scratches and Gouges: Especially on acrylic or wooden palettes, deep scratches can trap paint, making them harder to clean. On glass or metal, inspect for hairline scratches that can make scraping less smooth over time.
- Check for Chips or Cracks: For glass, ceramic, or stone palettes, examine the edges and surface for any chips or cracks. These can not only be dangerous but can also weaken the palette's structural integrity, leading to further breakage. If a chip occurs, smooth it with fine-grit sandpaper (for ceramic) or discard for safety (for glass).
- Assess for Warping (Wooden Palettes): Lay wooden palettes flat on a truly even surface and check if they lie flush. Any significant gaps indicate warping, which can affect comfortable handling and paint distribution. Minor warping might be mitigated by proper seasoning and flat storage, but severe warping is often irreversible.
- Feel for Tackiness or Residue: After cleaning, run your hand over the surface. Any persistent tackiness might indicate residual solvent, oil, or a compromised surface (especially with certain plastics). This can affect future paint adhesion or color purity.
- Monitor for Mildew or Discoloration: For wooden palettes, persistent dampness or improper storage can lead to mildew. For all palettes, watch for unusual discoloration that isn't pigment-related, which could indicate a chemical reaction or material degradation.
This routine inspection is a small act of due diligence that extends the life of your tools and ensures your palette remains a dependable and safe surface for your artistic endeavors. A well-cared-for palette is a reliable partner in your creative journey.
Palette Maintenance Checklist
To keep your palette in peak condition and ensure it's always ready for your next masterpiece, here's a quick checklist to integrate into your routine. Consistency here makes all the difference.
- Daily Post-Session Wipe-Down: Scrape off all wet paint and perform a quick solvent wipe. (Time: 2-5 minutes)
- Weekly Deep Clean (Soap & Water): Give your palette a thorough wash with artist's soap and warm water. (Time: 5-10 minutes)
- Regular Inspection: Periodically check for scratches, chips, warping, or unusual residues. (Time: 1-2 minutes, as needed)
- Proper Storage: Always store palettes flat (wood) or protected (glass/ceramic) in a stable environment. (Time: negligible)
- Wooden Palette Seasoning: Reapply artist's oil and wipe thoroughly every few weeks or months. (Time: 10-20 minutes, as needed)
- Organize Your Paints: Keep fresh paint separated from mixing areas. (Time: negligible, part of setup)
- Use Palette Covers: Cover active paint areas to slow drying between sessions. (Time: 1 minute)
- Clean Auxiliary Tools: Don't forget your palette knives and brush handles. (Time: 1-2 minutes, daily)
Integrating these small habits ensures your palette remains a pristine, inviting surface, always ready to welcome your next creative endeavor without any hidden frustrations. It transforms cleanup from a dreaded chore into a mindful act of artistic care, fostering a smoother and more enjoyable painting practice.
Palette Maintenance at a Glance: Best Practices
To summarize, consistent, thoughtful maintenance is key to a happy palette and a thriving artistic practice:
Maintenance Practice | Key Action | Benefit |
|---|---|---|
| Daily Wipe-Down | Scrape and wipe wet paint after each session. | Prevents hardening, reduces effort, maintains readiness. |
| Smart Storage | Store palettes flat, protected from elements. | Prevents warping (wood), chipping (glass/ceramic), scratching (all), prolongs lifespan. |
| Seasoning Wooden Palettes | Periodically apply and wipe off artist's oil. | Creates non-absorbent barrier, protects wood, easier cleaning, enhances patina. |
| Organized Mixing | Designate separate areas for fresh paint and mixing. | Keeps mixing zone cleaner, prevents cross-contamination, reduces waste. |
| Regular Deep Clean | Weekly/bi-weekly soap and water wash. | Eliminates residues, sanitizes, ensures pristine surface, extends tool life. |
| Inspect for Wear | Check for scratches, chips, or warping regularly. | Allows for timely intervention, prevents further damage, maintains functionality. |
| Covering Wet Paint | Use plastic wrap or palette covers for active paint. | Significantly slows drying, keeps paint workable for longer, reduces waste. |
- 5. Regular Deep Clean: While daily maintenance is crucial, don't underestimate the power of a weekly or bi-weekly deep clean. This involves the full soap and water wash, meticulously addressing any lingering residues or subtle build-ups that daily wipes might miss. This ensures a truly sanitized, pristine surface, ready for consistent, pure color mixing and extending the overall lifespan of your palette. It's a foundational step for optimal performance.
- 6. Inspect for Wear: Make it a habit to periodically inspect your palette for any signs of wear, such as deep scratches, chips, warping, or persistent tackiness. Catching these issues early can prevent them from worsening and potentially compromising your palette's functionality or leading to more difficult cleaning challenges down the line. Timely intervention can often save a palette from early retirement. A well-cared-for palette is a reliable partner in your creative journey.
Common Mistakes to Avoid When Cleaning Your Palette
We’re all human, and mistakes happen, especially when you're creatively exhausted after a long painting session. However, some common missteps in palette cleaning can lead to damaged tools, wasted materials, or, more importantly, pose health hazards. Learning from these pitfalls is just as crucial as learning the correct methods. Here are a few mistakes I’ve personally learned to avoid, often through trial and error, and I urge you to heed them – consider these my hard-won lessons so you don't have to repeat them:
- Delaying Cleanup (The Arch-Nemesis!): This is, without a doubt, the single biggest and most common mistake I see artists make, and one I'm guilty of myself sometimes! Wet paint is effortlessly easy to remove; dried paint is a genuine chore, often requiring aggressive solvents or scraping. The longer you procrastinate, the harder, more time-consuming, and more frustrating the cleaning process becomes, turning a simple task into a dreaded ordeal. Seriously, a few minutes now saves you an hour of scrubbing and potentially damaging your palette later. Consistency is key here – think of it as paying a small, easy fee now to avoid a huge, painful debt later, ensuring your creative momentum isn't broken by a dirty palette.
- Over-Reliance on Abrasives: While razor blades are fantastic for glass and metal, misusing them or using overly abrasive scrub pads on softer surfaces (like wood or plastic) is a sure way to ruin your palette. Abrasives create microscopic scratches and gouges where paint can then hide, making future cleaning even harder. Always choose the gentlest effective method for your palette material, reserving harsh abrasives for surfaces that can truly withstand them.
- Using Harsh Scrapers on Soft Surfaces: This is a recipe for disaster. Applying a rigid metal scraper or a razor blade to a wooden or soft acrylic/plastic palette will inevitably lead to irreversible gouges, deep scratches, and damage. Always know your tools and, critically, understand the material of your specific palette. A scratch on a wooden palette is a permanent home for pigment, making it harder to clean and potentially introducing unwanted texture to your mixes; a deep gouge on acrylic can make it unusable, as those crevices will constantly trap paint. Use the right tool for the right surface, always.
- Using the Wrong Solvent for Your Palette Type: While OMS is generally safe, using aggressive solvents like traditional turpentine unnecessarily on certain plastics can degrade them over time, causing hazing, brittleness, or even dissolving the surface, especially if they are not solvent-resistant. Similarly, some "eco-friendly" citrus solvents might leave residues that are hard to remove from porous surfaces, or even react with certain materials, leading to stickiness or permanent discoloration. Always be mindful of the compatibility between your solvent and your palette material – when in doubt, test a small, inconspicuous area first. This can save your palette from irreparable chemical damage.
- Improper Storage Leading to Warping/Damage: As discussed in maintenance, leaning a wooden palette vertically against a wall or storing any palette in extreme temperatures or humidity can lead to warping, cracking, or other damage. This not only ruins the aesthetics but can compromise the functionality of your mixing surface, leading to uneven drying or mixing issues, and affecting the longevity of the tool. A little foresight in storage goes a long way in protecting your investment, ensuring your palette is ready when inspiration strikes.
- Insufficient Ventilation (A Health Hazard): Ignoring or downplaying the absolute necessity for fresh air when using solvents is incredibly dangerous for your lungs and overall health. Solvent fumes, even from "odorless" varieties, accumulate in confined spaces and can cause respiratory issues, headaches, dizziness, and long-term health problems, including potential organ damage. Your studio should always feel fresh and breathable, not like a chemical lab – if you can smell the solvents strongly, you need more ventilation, immediately. This isn't just about temporary discomfort; it's about safeguarding your long-term artistic career and overall well-being.
- Neglecting the Final Soap and Water Wash: Many artists stop after the solvent wipe, thinking the palette is clean. However, this leaves behind solvent and pigment residues that can build up, attract dust, affect future paint adhesion, and even subtly yellow over time, potentially compromising the purity of your future color mixes. The soap and water wash is crucial for a truly pristine, residue-free surface that performs optimally for every session, ensuring no unexpected interactions with fresh paint. It's the difference between 'clean enough' and 'truly pristine.'
- Not Changing Rags/Paper Towels Frequently Enough: Wiping with an already saturated or paint-laden rag just spreads dissolved paint around, rather than removing it. This is inefficient and can actually push pigment deeper into porous surfaces, making them harder to truly clean. Always grab a clean section or a fresh rag for effective cleaning, ensuring you're lifting the paint away, not just moving it around. A fresh rag is a clean start for each wipe.
Disposing of Paint and Solvents Responsibly: Your Eco-Conscious Studio
This is a topic that, while perhaps not glamorous, is incredibly important for environmental health, community safety, and your own well-being. As artists, we work with various materials, some of which require thoughtful and responsible disposal. We have a role to play in protecting our planet, and being a responsible artist extends beyond the canvas to the way we manage our waste. Let's ensure our art leaves a beautiful legacy, not an environmental burden. Understanding and adhering to local municipal regulations for hazardous waste is not just good practice, it's often a legal requirement and a civic responsibility. Another aspect of eco-consciousness is making mindful choices at the point of purchase, supporting brands that prioritize sustainable manufacturing and packaging.
1. Solid Paint Waste
This includes scraped-off paint blobs, heavily paint-laden paper towels, rags, or cotton swabs.
- Let it Dry Completely: These materials should always be allowed to dry completely. Spread them out in a well-ventilated area (ideally outdoors or near an open window, away from children, pets, and heat sources) until they are thoroughly hard and brittle. This process allows the volatile solvents to evaporate safely. Once fully dry, the pigments are encapsulated and generally inert. At this point, they can often be safely disposed of with regular household waste, but always check your local municipal regulations, as rules regarding dried paint waste can vary significantly by location. CRITICAL FIRE HAZARD WARNING: Never put solvent-soaked rags or paper towels directly into a closed trash can when wet. The oxidation process of certain oils (like linseed oil) in a confined space can generate heat, leading to spontaneous combustion and a serious fire risk! Always spread these materials out in a well-ventilated, non-combustible area (ideally outdoors on concrete or a metal tray, away from any ignition sources, children, or pets) to dry completely before disposal. I've heard too many cautionary tales of studio fires from improperly disposed rags; a little prevention goes a long way in safeguarding your creative sanctuary. Always store these drying materials away from ignition sources. I've heard too many cautionary tales of studio fires from improperly disposed rags.
- Dedicated Container: I strongly recommend keeping a small, clearly labeled, lined trash can or a sturdy metal container with a tight-fitting lid specifically for collecting and drying paint waste. This prevents accidental mixing with other trash, ensures proper drying, and contains any lingering fumes during the drying process. Fire-safe waste cans (often marked with
OSHAcompliance) are an excellent investment if you generate a lot of solvent-soaked waste, as they are designed to safely contain spontaneously combustible materials. Investing in one is a small price for peace of mind.
2. Liquid Solvent Waste
This is where careful management truly comes into play, as liquid solvents can be particularly harmful to the environment if improperly discarded.
- Reclaim and Reuse Your Solvent: This is my primary and most recommended method, both for environmental reasons and to save money. After cleaning your palette and brushes, allow your dirty solvent to sit undisturbed in a sealed, clear container (like a glass jar) for a day or two. The heavier paint particles will slowly settle to the bottom, leaving clearer solvent on top. You can then carefully pour off (decant) the cleaner spirits into a fresh container for reuse in future initial cleaning stages. This recycled solvent will be slightly tinted but perfectly effective for preliminary cleanups, significantly reducing your solvent consumption. The thick sludge that remains at the bottom should be allowed to dry out (as described for solid paint waste) and then disposed of responsibly. This cyclical process dramatically cuts down on waste.
- Hazardous Waste Facilities: For truly heavily contaminated or unusable solvent that can no longer be reclaimed, or if you accumulate large quantities, the most environmentally sound and legally compliant option is to contact your local hazardous waste disposal facility or municipality. They have the proper procedures and infrastructure for environmentally safe chemical disposal. It goes without saying: never, ever pour solvents down the drain, into the ground, or into storm drains. These chemicals can severely harm plumbing systems, contaminate groundwater, pollute local ecosystems, and pose a significant threat to public health. Be a responsible artist and protect our shared environment – it's a critical part of our legacy, ensuring your passion doesn't leave a negative impact.
Responsible Disposal at a Glance: Your Quick Guide
Waste Type | Handling Method | Disposal Method | Key Consideration |
|---|---|---|---|
| Wet Paint (excess) | Scrape off with palette knife. | Consolidate, allow to dry completely. | Never rinse down drain. |
| Paint-Laden Rags/Paper | Spread out to dry in well-ventilated area. | Once dry, dispose with household waste (check local rules). | Flammable when wet with solvent; prevent spontaneous combustion. |
| Dirty Liquid Solvent | Allow paint solids to settle; decant clean solvent for reuse. | Heavily contaminated solvent: Hazardous Waste Facility. | Never pour down drain or onto ground; reclaim to reduce waste. |
| Dried Paint Sludge | Collect from settled solvent. | Allow to dry completely, dispose with household waste. | May contain heavy metals; ensure full dryness before disposal. |
| Razor Blades/Sharps | Place in a rigid, puncture-proof container. | Dispose according to local sharps waste guidelines. | Prevents injury to waste handlers. |
FAQ: Your Oil Painting Palette Cleaning Questions Answered
I often hear similar questions from artists about palette cleaning, so I’ve compiled some of the most common ones here to help you further master this essential skill. Think of this as a quick-reference guide for those moments of doubt.



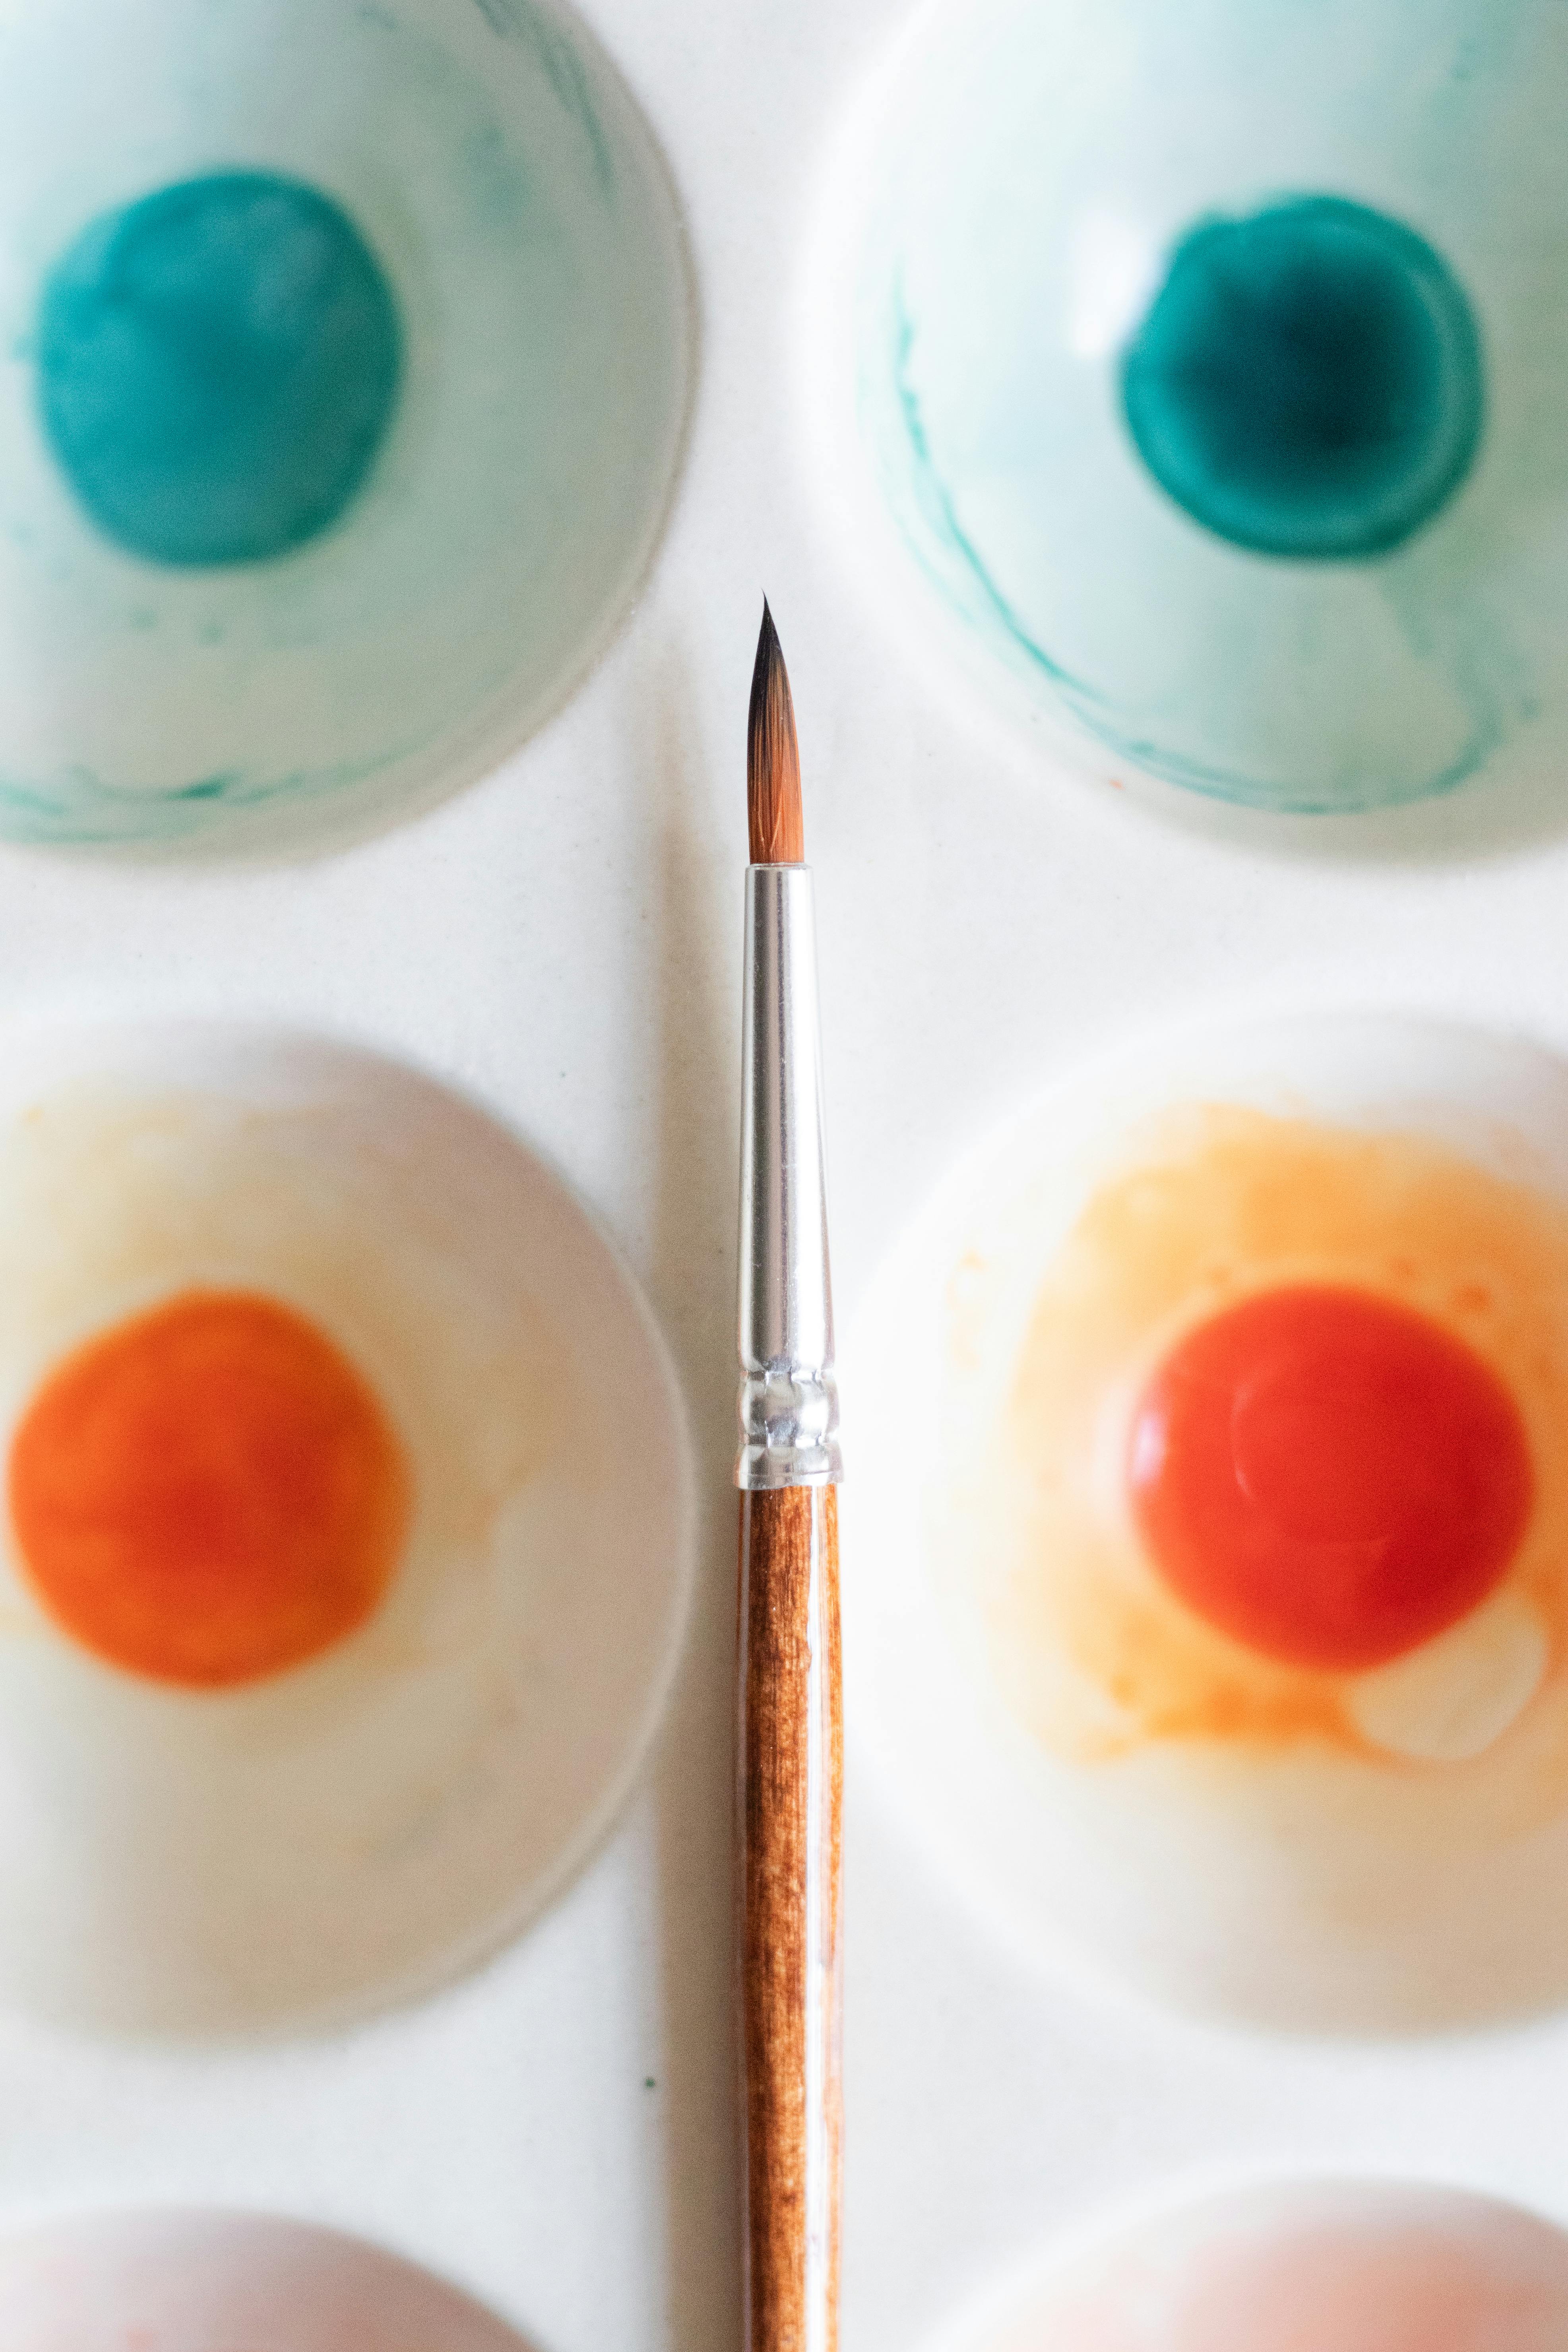





Q: What if I don't have artist's soap? Can I use regular soap?
A: While dedicated artist's soaps are formulated to be gentle on tools and skin while effectively breaking down oil paint, a mild dish soap (like plain Dawn or a gentle, fragrance-free variety) can work in a pinch for the final wash. Avoid harsh detergents or abrasive household cleaners, as these can be too aggressive for some palette materials and might leave behind residues. Always ensure a very thorough rinse with warm water to remove all soap film. For wooden palettes, a mild dish soap followed by a very light re-application of artist's oil (like linseed or walnut) as a conditioner can help prevent drying and cracking. So, yes, you can, but proceed with caution and prioritize rinsing!
Q: How do I remove dried paint from the edges or underside of my palette?
A: Ah, the sneaky spots! For dried paint on the edges of non-porous palettes (glass, metal, ceramic), a stiff brush (like an old toothbrush dedicated for studio use) dampened with solvent, or even a pointed palette knife, can help dislodge stubborn bits. For the underside, a razor blade scraper works wonders on glass/metal. For wooden palettes, try the oil soak method followed by a stiff brush or a solvent-dampened rag, taking care not to damage the wood. Prevention is best here: wipe the edges and underside during your regular cleanup to catch wet paint before it hardens. I've found a small, pointed rubber tool can also be surprisingly effective for delicate scraping on edges of acrylic palettes.
Q: Can I use household cleaning products, like Windex or Goo Gone, on my palette?
A: While some household cleaners might seem effective, I generally advise caution. Products like Windex (ammonia-based) or Goo Gone (petroleum-based) are not specifically formulated for art materials and can sometimes contain ingredients that might damage certain plastics or leave residues. Windex might work on glass in a pinch, but a final soap and water wash is always recommended to remove residues. Goo Gone can be effective for dissolving stubborn oil, but it's very strong and also requires thorough follow-up cleaning with soap and water to remove its oily residue. Always test in an inconspicuous area first, wear gloves, and ensure excellent ventilation if you choose to use them, but dedicated art cleaners are usually a safer bet. My general rule is: if it's not made for artists, proceed with extreme caution.
Q: My palette has a strong chemical smell even after cleaning. What can I do?
A: A lingering chemical smell usually indicates inadequate ventilation during cleaning, or that solvent residues were not completely removed. First, re-evaluate your ventilation setup; ensure strong airflow during and after cleaning, perhaps even running a fan for a while after cleanup is complete. Second, give your palette a thorough final wash with artist's soap and warm water, rinsing meticulously. For wooden palettes, ensure complete drying, as residual moisture can exacerbate smells. Storing your palette in a well-aired space when not in use can also help dissipate any remaining odors. If the smell persists, it might be deeply absorbed into a porous palette, in which case more aggressive cleaning (for non-porous) or re-seasoning (for wood) might be needed. Sometimes, airing it out outdoors on a non-windy day can work wonders.
Q: How do I clean a palette that's warped or heavily damaged?
A: Unfortunately, severe warping in wooden palettes is very difficult, if not impossible, to fully correct once it has set. Minor warping might be slightly mitigated by thoroughly re-seasoning both sides with artist's oil and storing the palette perfectly flat under heavy weight for an extended period, but success is not guaranteed. For palettes with deep gouges, cracks, or irreparable staining, particularly wooden or acrylic ones, it might be time to consider retirement. Glass or ceramic palettes with chips or cracks can be dangerous to use and should be carefully disposed of. In some cases, for very valuable or sentimental wooden palettes, a professional woodworker might be able to plane the surface flat, but this is often costly. Prevention through proper storage and immediate cleaning is truly the best defense against irreversible damage. A significantly compromised palette can hinder your creative process, making a clean, new surface a worthwhile investment for your artistic sanity.
Q: Can old, dried paint on my palette affect new paint mixes, even if it's not touching?
A: Absolutely. While direct contact is the most obvious way, dried paint can still subtly affect your fresh mixes. Firstly, it creates an uneven surface that makes smooth color mixing difficult, leading to frustrating brushstrokes. Secondly, tiny, invisible flecks of dried paint can flake off and inadvertently mix into your fresh colors, creating unexpected muddiness or texture – I've had perfectly planned colors go awry because of this! Thirdly, a palette that isn't truly clean can harbor residual oils or solvents that can subtly alter the consistency or drying time of fresh paint, sometimes causing an unwanted sheen or dullness. Finally, a messy palette is a psychological barrier, hindering clear color judgment and fostering a sense of disarray. So, yes, even if not directly touching, cleanliness promotes purity and precision.
Q: What's the best way to prevent dried paint from building up in the first place?
A: Prevention is always easier than cure! The best strategies include: 1. Immediate Cleanup: Scrape and wipe wet paint after every session, no matter how tired you are. 2. Designated Mixing Zones: Keep fresh paint at the edges and mix in the center, minimizing the spread of paint and avoiding accidental contamination. 3. Palette Covers: For glass or acrylic palettes, covering your active paint areas with plastic wrap or a dedicated palette cover between sessions can significantly slow drying, sometimes keeping paint workable for days. 4. Oil Barrier (for porous palettes): For wooden palettes, regular seasoning creates a non-absorbent barrier, preventing deep stains and making cleanup easier. 5. Don't Over-Squeeze: Only put out the amount of paint you anticipate using to minimize waste and the amount that needs cleaning. These habits will dramatically reduce buildup and make cleaning a breeze, allowing you to focus more on your art.
Q: Can I use baby oil to clean my palette?
A: While baby oil is a mineral oil (a type of petroleum distillate, like OMS but heavier), and it can certainly help to loosen and soften dried oil paint on your palette due to the 'like dissolves like' principle, it's not ideal for the final cleanup. Baby oil is designed to moisturize skin and is quite oily, meaning it will leave a greasy residue that is difficult to remove completely without a strong soap and water wash. This residue can then attract dust, affect the consistency of future paint mixes, or even cause unwanted sheen on your paint. Artist-grade oils (like linseed or walnut) are better for the 'oil soak' method as they are formulated to polymerize and dry, or OMS for general cleaning. If you use baby oil in a pinch, ensure an extremely thorough follow-up wash with artist's soap and warm water to remove all traces of its oily residue, leaving nothing behind to interfere with your art.
Q: How often should I clean my oil painting palette?
A: Ideally, you should perform a quick wipe-down and scrape-off after every painting session, especially with fresh, wet paint. This takes minutes and prevents hours of frustration later. For a full, deep clean involving soap and water, aim for weekly or bi-weekly, depending on your painting frequency, the amount of paint you leave on the palette, and the type of palette material. Consistent small efforts prevent major buildup and frustration, saving you time and extending your palette's life. Think of it like brushing your teeth – a little daily effort prevents a major dental emergency! A pristine palette is a happy palette, and a happy artist.
Q: Can I use vegetable oil to clean my palette?
A: Yes, to a certain extent! As we discussed, fresh artist's oils like linseed, walnut, or safflower are excellent for helping to emulsify and loosen dried oil paint, functioning on the principle of "like dissolves like." Regular cooking vegetable oils (like olive or sunflower oil) can work similarly, but they might leave a greasier residue that's harder to remove completely and could potentially go rancid over time, leading to unpleasant smells and stickiness – definitely something you want to avoid in your studio! For wet paint, a proper artist's solvent is still more effective. Regardless of the oil type, you'll always need to follow up with soap and water to thoroughly remove all oily residue and prevent stickiness. Stick to artist-grade oils for the best results, as they are formulated for stability and won't introduce unexpected issues to your painting surface, ensuring the longevity and purity of your artistic tools.
Q: My wooden palette is stained. Can I remove the stains?
A: Minor stains are a badge of honor, often part of the beautiful patina of a well-used wooden palette, and they absolutely do not affect its function. Deeply embedded pigment stains, however, are notoriously difficult, if not impossible, to remove completely without damaging the wood itself through aggressive sanding. The best approach is prevention: regular cleaning and consistent seasoning (with artist's oil) will help minimize new stains and maintain the palette's surface integrity over time. Embrace the character, but avoid the deep grime! Sometimes, a gentle sanding followed by re-seasoning can lighten superficial stains, but deep ones are usually permanent and become part of the palette's unique story, a visual timeline of your creative journey.
Q: Is it okay to use water with oil paint cleanup?
A: Yes, absolutely! Once you've removed the bulk of the oil paint with your palette knife and a solvent, washing with artist's soap and warm water is an excellent and highly recommended final step. This crucial step removes any lingering solvent residues and soap film, ensuring the palette is truly clean, not just paint-free. Just remember the golden rule for wooden palettes: ensure they are dried thoroughly and immediately after washing to prevent warping, cracking, or developing mildew. Water is your ally for the final rinse and ensuring a pristine surface, not for the initial breakdown of traditional oil paint (unless, of course, you're using water-miscible oils). This two-step process of solvent then soap and water guarantees a truly clean slate.
Q: What's the best way to clean a glass palette?
A: Glass palettes are generally the easiest to clean, which is why many artists, myself included, love them! Start by scraping off excess wet or dried paint with a palette knife, removing as much bulk as possible. Then, wipe thoroughly with a solvent-dampened rag, changing the rag often to avoid spreading dissolved paint. For any truly stubborn, paper-thin dried spots, a single-edge razor blade scraper (held at a very low, almost flat angle) is incredibly effective – just remember to be cautious and dispose of blades safely in a sharps container. Always finish with a good wash of artist's soap and warm water for a pristine, streak-free shine that truly reflects your colors and allows for accurate color mixing, making it feel brand new every time. This thorough approach ensures absolute color purity for your next painting session.
Q: Can I reuse my dirty mineral spirits?
A: Yes, and I wholeheartedly encourage it! Reclaiming your solvent is an excellent practice for reducing waste and saving money. Simply allow your dirty spirits to sit undisturbed in a sealed, clear container for a day or two. The heavier paint pigments will slowly settle to the bottom, leaving clearer spirits on top. You can then carefully decant (pour off) the cleaner spirits into a fresh container for reuse in subsequent initial cleaning stages. This process can be repeated several times, extending the life of your solvent significantly. The settled sludge should be allowed to dry and then disposed of as solid waste according to local regulations. It's a simple, yet powerful, eco-friendly habit that minimizes your environmental footprint and extends the life of your art supplies. I've found it also reduces the overall amount of hazardous waste I generate.
Q: How do I season a new wooden palette?
A: To properly season a new wooden palette, which creates a vital non-absorbent barrier, apply a generous layer of artist's linseed or walnut oil to both sides (avoiding fast-drying oils that gum up too quickly, which can make the surface permanently sticky). Let it soak into the wood for several hours (or even overnight). Then, meticulously wipe off all excess oil until the surface feels dry to the touch, not sticky or tacky – this thorough wiping is critical to prevent a gummy surface that will attract dust and unwanted debris. Repeat this process a few times over several days, or even weeks, building up layers of protection. This consistent application and thorough wiping creates a durable, non-porous finish, making future cleaning significantly easier and protecting the wood from pigment absorption. A well-seasoned palette is a joy to work on, developing a beautiful, rich patina that is unique to your artistic journey.
Q: What's the easiest palette material to clean for oil paint?
A: Hands down, glass palettes are generally considered the easiest to clean due to their completely non-porous, slick surface. Dried paint simply sits on top and can be scraped off effortlessly, often with a razor blade for stubborn bits (remembering the safety warnings!). Ceramic and metal palettes also rank highly for ease of cleaning for similar reasons, as paint adheres superficially and doesn't soak in, allowing for quick and complete removal. If ease of cleanup is your top priority, these materials are your best bet, offering both practicality and exceptional color purity.
Q: How do I clean up water-miscible oil paints from my palette?
A: The beauty of water-miscible oil paints is their simplified cleanup! After scraping off excess paint, you can often clean your palette effectively with just warm water and artist's soap. A damp cloth or sponge with water will dissolve the paint, and a final soap wash will remove all residues, leaving your palette perfectly clean. No harsh solvents needed, making it a very eco-friendly and artist-friendly option for those sensitive to fumes or looking to reduce chemical use in their studio – a true game-changer for many! This makes post-painting cleanup a quick and pleasant experience.
Q: What about those little dried bits of paint that get stuck in the texture of my palette?
A: Ah, the insidious little specks! For non-porous palettes (glass, metal, ceramic), a razor blade scraper (used with extreme care and at a very low angle) is usually the best bet for those thin, dried films. For wooden or acrylic palettes, where a blade isn't an option, your best defense is prevention through regular cleaning. For existing bits, try the oil soak method followed by vigorous scrubbing with a solvent-dampened rag or even a stiff brush designed for cleaning (like a dedicated nail brush, but strictly for studio use!). Patience is key here, trying to gently coax them out without damaging the surface. Sometimes a stiff, hog-bristle brush with a bit of soap and water can work wonders, especially if you work the bristles into the texture, lifting those stubborn specks. For particularly intricate textures, a wooden toothpick or a bamboo skewer can also be surprisingly useful for gentle, precise removal.
Q: Can I use different types of oils (e.g., olive oil) to condition my wooden palette?
A: While some non-drying vegetable oils (like olive or sunflower oil) can be used to condition wooden palettes, artist-grade linseed, walnut, or safflower oils are generally preferred. Non-drying oils can sometimes go rancid or leave a sticky residue that is harder to remove completely, potentially attracting dust and making your palette unpleasant to work on. Artist's oils are formulated to polymerize and create a durable, non-tacky finish, which is ideal for a painting surface and will prevent problems down the line. It's always best to use materials specifically formulated for art to ensure compatibility and longevity, ensuring your palette remains a stable and reliable mixing surface for years to come.
Q: My wooden palette has warped. Can I fix it?
A: Unfortunately, a significantly warped wooden palette is very difficult to restore to its original flat state, especially if the warping is severe or has occurred over a long period. Minor warping might be mitigated by re-seasoning both sides thoroughly and storing it perfectly flat under weight for an extended period (think heavy books or a stack of canvases!), but success is not guaranteed and often takes immense patience. Prevention through proper seasoning and storage is always the best approach to avoid this frustrating issue in the first place, saving you from a potentially unusable tool. A warped palette is a frustrating creative impediment.
Q: How can I make my studio more eco-friendly for palette cleaning?
A: There are several ways! Prioritize water-miscible oil paints if they suit your style, as they drastically reduce solvent use. Reclaim and reuse your solvents diligently by decanting them, extending their lifespan. Use reusable rags instead of disposable paper towels whenever possible, and wash them effectively for countless reuses. Ensure proper drying and disposal of all paint waste according to local regulations, preventing harmful substances from entering the ecosystem. Explore natural, non-toxic cleaning agents where appropriate, and always invest in good ventilation to reduce airborne pollutants, which is good for both you and the environment. Every small step towards sustainability makes a difference, contributing to a healthier planet and studio environment, reflecting a mindful artistic practice.
The Long-Term Value of a Clean Palette: A Legacy of Purity
Beyond the immediate benefits of a pristine surface and efficient workflow, there’s a deeper, long-term value to consistent palette cleaning. It cultivates a sense of discipline and respect for your materials that permeates your entire artistic practice. I've found that artists who care for their tools tend to create with greater intention and attention to detail. This isn't merely about maintenance; it's about fostering an environment where clarity of vision can flourish, unhindered by the chaos of neglect. Your palette, over years of dedicated use and meticulous care, becomes more than just a tool; it transforms into a testament to your journey, a silent companion reflecting the purity and vibrancy you bring to each new canvas. It’s a foundational element for a creative legacy built on precision and passion.
Conclusion: Embrace the Clean Slate – A Foundation for Creativity
Ultimately, cleaning your oil painting palette might initially feel like a chore, an unavoidable task that pulls you away from the pure joy of creation. But through my own journey, I’ve come to understand it not as an interruption, but as an integral, even sacred, part of the artistic process itself. It’s a ritual that honors your valuable materials, safeguards your health, and profoundly prepares you for the next exhilarating burst of inspiration, truly setting the stage for your best work.
A truly clean palette is far more than just tidy; it's an open invitation to pure, vibrant color, unadulterated artistic expression, and a clearer, more focused mind. It’s an investment in the longevity of your cherished tools and a testament to your dedication to your craft, reflecting the care you put into every aspect of your art. So, make that conscious choice to take the extra few minutes, breathe deeply (always with good ventilation!), and truly embrace the profound satisfaction of a pristine, ready workspace. Your future self, your beautiful artwork, and your expansive creative spirit will undoubtedly thank you for it. Now, go forth and paint with a clear palette and an even clearer mind – let your colors sing! And remember, the journey of an artist is a marathon, not a sprint, and proper care of your tools is essential for the long haul to your timeline of masterpieces. A well-maintained palette is a quiet promise to yourself of many more vibrant painting sessions to come. A clean palette is more than just a tool; it's a partner in your artistic evolution, a silent witness to every brushstroke and every moment of creative triumph. It empowers you to approach each new painting with clarity, confidence, and the pure joy of artistic exploration.
By embracing these practices, you're not just cleaning a tool; you're nurturing your artistic potential. You're setting a standard for excellence, not just in your art, but in your entire creative approach. This holistic view of studio practice is what truly distinguishes a dedicated artist. So, take pride in that clean palette – it's a reflection of your commitment to mastery, a clear signal that you're ready to create without compromise. Let your clean palette be the silent foundation upon which your most expressive and brilliant artworks are built. Go create something beautiful; the stage is set.