What is Decoupage? My Joyful Dive into the Art of Paper & Patience
Ever wondered about decoupage? Join me, Zen, as I unpack this enchanting craft! Discover its rich history, the simple tools you need, and even a step-by-step project to get you started. It's more than just paper and glue; it's a journey into creative transformation and the art of patience. Dive into this ultimate guide to decoupage!

Decoupage: The Ultimate Guide to the Art of Paper, Patience, & Transformation
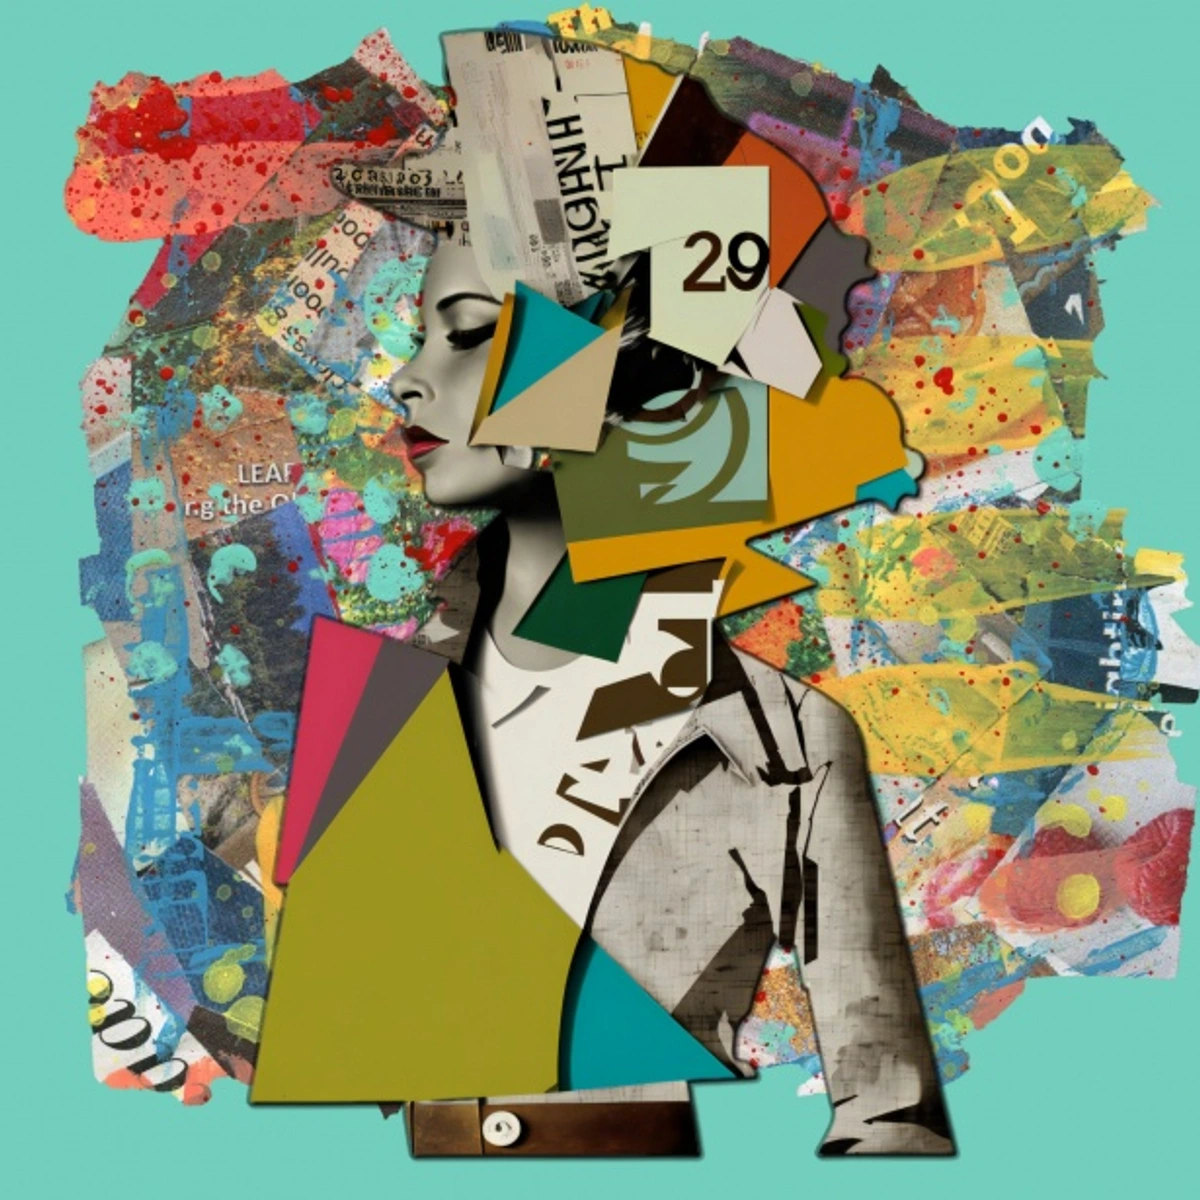
I know what you're thinking. Decoupage? Isn't that just... glueing paper onto things? And you know what? At its heart, yes, it absolutely is. But like so many simple things in art and life, the magic isn't in the complexity of the ingredients, but in the intention, the layering, and the sheer delight of turning something ordinary into something utterly unique. For me, as an artist often lost in the bold strokes of abstract art, there's a particular kind of quiet joy in the precise, yet playful, world of decoupage. It's an art form that truly embodies the principle of transformation in art, taking disparate elements and weaving them into a new narrative. It’s about taking pieces of paper – whether from old maps, beautiful napkins, magazine clippings, or even your own sketches – and giving them a new life, a new purpose, a new story on a different surface. If you've ever found yourself pondering the meaning of art, or simply looking for a hands-on way to express your creativity, decoupage might just be your next delightful obsession. Trust me, it was mine for a good while, and I still dip my toes in when I need a moment of meditative focus. The beauty of decoupage lies in its accessibility and its profound ability to transform not just objects, but also our perception of what "art" can be.
The Whisper of Potential: Why Decoupage Calls to the Creative Spirit
Perhaps it's the sheer democracy of the craft. You don't need a formal art education or a studio full of expensive supplies. Just a few basic materials, a sprinkle of curiosity, and a willingness to get a little messy. It's a gateway to artistic expression, much like sketching in a notebook, or learning a simple melody on a guitar. For me, it's a refreshing counterpoint to the expansive and sometimes daunting world of large-scale abstract painting. It allows for a focused, almost meditative practice that yields tangible, beautiful results. It's about finding that quiet joy in the small, deliberate act of creation, and seeing the potential for beauty in everyday objects. It's a craft that embraces the forgotten, the discarded, and the wonderfully patterned.
The Allure of Layers: What Exactly Is Decoupage?
So, let's get down to brass tacks. Decoupage (pronounced deh-koo-PAHJ) is an art form of decorating an object by glueing colored paper cutouts onto it in combination with special paint effects, gold leaf, and other decorative elements. Each layer is sealed with multiple coats of varnish or lacquer until the 'stuck on' appearance disappears and the result looks like painting or inlay work. The word itself comes from the French word 'découper,' meaning 'to cut out' – which, if you ask me, is wonderfully straightforward. No hidden meanings there, just good old cutting and pasting, elevated. The real magic happens as these layers build up, creating an illusion that the paper designs are not merely stuck on, but are seamlessly integrated, almost painted onto the surface. This effect is often what differentiates amateur decoupage from true artistry; the goal is to make the paper disappear into the object, leaving behind a smooth, durable, and visually rich finish. It’s like a visual alchemy, where humble paper transforms into something far more sophisticated and integrated. Think of it as painting with paper, where each cutout is a brushstroke, and the layers of medium are your glazes, building depth and luminosity. This continuous layering is what creates the illusion of a painted surface, where the paper designs become indistinguishable from the object itself. Historically, decoupage also served as an ingenious way to mimic expensive art forms like Japanese lacquerware, bringing a touch of luxury to a wider audience through clever craftsmanship. It's a fascinating example of how artistic innovation can democratize luxury, making intricate beauty accessible through ingenuity and craft.
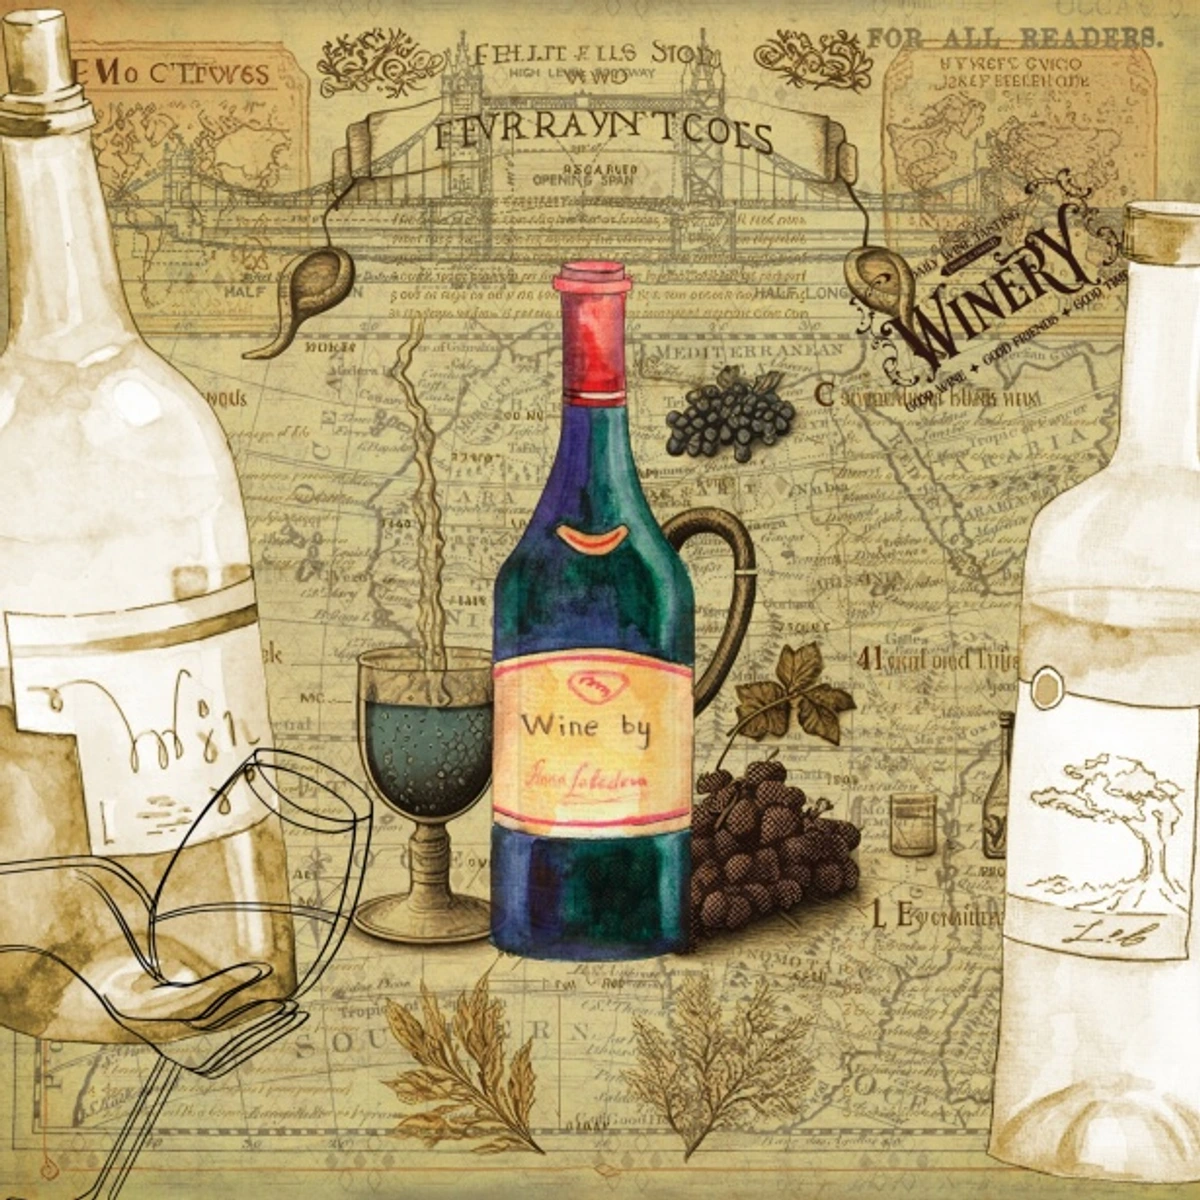
It’s a deceptively simple process that, when done well, creates stunning, durable, and often heirloom-quality pieces. Think of it as a cousin to mixed media art, but with a very specific focus on paper as the primary textural and visual element. I've often thought about how the deliberate placement of a paper cutout in decoupage mirrors the careful consideration of color and composition in art. It's all about building, layer by layer, until the piece sings.
The real joy in decoupage, for me, comes from the tactile nature of it. It's the crinkle of the paper, the smooth glide of the brush applying the medium, the satisfying transformation of a plain object into something with character and history. It's a craft that bridges the gap between painting and collage, inviting you to engage with both precision and playful spontaneity.
Popular Decoupage Styles and Techniques: A World of Paper Possibilities
While the core principle remains 'cut and paste,' decoupage has evolved into several distinct styles and techniques, each offering a unique aesthetic and challenge. It's truly incredible how many different looks you can achieve with essentially the same basic ingredients, simply by tweaking the approach.
While the core principle remains 'cut and paste,' decoupage has evolved into several distinct styles and techniques, each offering a unique aesthetic and challenge.
- Flat Decoupage: This is the most common form, where paper cutouts are applied flat onto a surface, sealed, and varnished until the edges virtually disappear, mimicking a painted finish. Most beginner projects start here.
- 3D Decoupage (or Papier Tole): This technique involves cutting out multiple copies of the same image and layering them with silicone or foam dots to create a raised, three-dimensional effect. It adds incredible depth and realism to flat images, making them pop off the surface.
- Napkin Decoupage: Utilizes very thin, often multi-layered paper napkins. The top decorative layer is carefully separated and applied, resulting in an almost transparent, 'painted on' look that blends beautifully with the background. It's delicate but offers stunning results.
- Fabric Decoupage: Yes, you can decoupage fabric onto surfaces! This method allows for unique textures and patterns, transforming items like shoes, tote bags, or even furniture with a soft, tactile finish. Special fabric decoupage mediums are typically used.
- Image Transfer: A more advanced technique where an image is transferred from a printed source (like a laser printout) onto a surface, often leaving behind only the ink, creating a truly integrated look without visible paper edges. This can create a wonderfully distressed or vintage effect.
- Faux Painting & Finishes Decoupage: This technique leverages paper cutouts to mimic the appearance of intricate painting, wood grain, marble, or other textures, often sealed under numerous varnish layers to create a convincing illusion. It's an artful way to achieve luxurious looks without specialized painting skills.
- Waxed Paper Decoupage: This lesser-known but beautiful technique involves applying a wax coating over your paper cutouts before adhering them. It gives a soft, translucent, almost ethereal look, and the wax can act as a natural sealant.
- Foil Decoupage: Utilizing metallic foils or thin metal leaf, this technique adds shimmering, reflective elements to your design, creating a luxurious and often antique aesthetic. It works beautifully for accents or entire surfaces.
- Paper Tole (Advanced 3D Decoupage): This is a highly intricate form of 3D decoupage where very fine details are cut from multiple identical prints, shaped, and then layered with precision to create an astonishingly realistic three-dimensional image. It's a true test of patience and fine motor skills.
Each style offers a different way to interact with paper and surface, inviting endless creative exploration. It's like having a whole toolkit of artistic approaches, each capable of yielding dramatically different results, from the subtle to the spectacularly bold.
This variety means there's a decoupage technique for every aesthetic and every skill level. I've dabbled in a few, and each one offers a unique challenge and reward, much like exploring different mediums in abstract painting.
A Little Jaunt Through History: The Enduring Narrative of Cut Paper
Now, for those of you who, like me, enjoy a good historical tangent – the roots of decoupage are fascinating! It didn't just pop up yesterday. Its origins can actually be traced back to Siberian tomb art, where nomadic tribes used cut felt to decorate burial items as early as the 12th century. This early application highlights a fundamental human desire to adorn and personalize objects, echoing through centuries of artistic expression. It's fascinating to consider how even in ancient times, the act of cutting and applying decorative elements served a profound cultural purpose, often linked to ritual and remembrance.
But what we recognize today as decoupage really took off in 17th-century Venice. Venetian artisans, keen to mimic costly imported Japanese lacquerware, started cutting out prints and applying them to furniture, then sealing them under many layers of varnish. This wasn't just about decoration; it was an ingenious economic solution, allowing European nobility to possess pieces that rivaled exotic Eastern imports without the exorbitant price tag or lengthy shipping times. This early adoption of intricate decoration showcased an enduring human desire for beauty and artistry, much like the broader evolution of art in interior design.
Beyond Venice, the craft found its way across Europe. In 18th-century England, a similar technique called japanning emerged. While japanning often involved elaborate painted designs that mimicked Asian lacquerware, it shared decoupage's principle of building up layers of varnish to create a smooth, durable, and often highly decorative finish. Though distinct in their primary decorative method, both showcased a European fascination with exotic Eastern aesthetics and a clever approach to achieving them through craft, occasionally integrating cutouts into japanned surfaces. In Germany, the craft evolved with the creation of lace paper cutouts for decorative purposes, reflecting regional artistic sensibilities.
Later, in 18th-century France, the craft was embraced by the aristocracy, earning its elegant French name, 'découper,' meaning 'to cut out.' Figures like Marie Antoinette were known enthusiasts, spending hours on intricate decoupage projects, often adorning screens, boxes, and small pieces of furniture. This royal endorsement further cemented its status as a sophisticated hobby, bringing it from the artisan workshops into the grand salons. Even in Victorian England, decoupage experienced a resurgence, often found adorning screens, boxes, and furniture, reflecting the era's love for elaborate ornamentation and domestic crafts. Collections of paper scraps, known as 'scrapbooks,' were popular, providing endless fodder for these projects, allowing individuals to express their personal tastes and narratives through visual collages.
It's a testament to its enduring charm that a craft once favored by royalty and savvy artisans is still thriving today in our homes and craft studios. It proves that good design in art transcends centuries, continuously reinventing itself and captivating new generations of creators. For me, knowing this rich history adds another layer of appreciation to every piece I create. It’s a quiet reassurance that even the simplest acts of creation carry a rich lineage, much like how ancient symbols can resonate in modern and contemporary art.
Why I (And Maybe You!) Love Decoupage: More Than Just a Craft
For me, decoupage is a wonderful antidote to the intensity of large-scale painting. It's detail-oriented, yes, but in a calming, almost meditative way, much like the quiet focus I find when building layers of color in my abstract pieces. Here’s why I think it’s such a gem, and why it might just capture your heart too:
- Accessible Creativity: You don't need to be an accomplished painter or sculptor. If you can cut and paste, you can decoupage. This low barrier to entry makes it incredibly appealing for anyone looking to tap into their creative side, perhaps even sparking a broader interest in art inspirations or even techniques like how to abstract art through a different medium. It's a wonderful starting point for exploring your artistic inclinations without the pressure of mastering complex drawing or painting skills. I've often seen beginners, intimidated by a blank canvas, find immediate joy and confidence through decoupage, which then opens the door to other art forms.
- Sustainability & Upcycling: Oh, how I love taking something old and making it new! Decoupage is fantastic for upcycling. That plain wooden box, that forgotten terracotta pot, that boring old tray – they all become canvases waiting for transformation. It's like giving an old soul a vibrant new outfit, and it's a great way to practice conscious consumption and upcycling in your daily life. Transforming a discarded item into a treasured possession is an act of defiance against disposable culture, and it feels incredibly rewarding.
- Personalization & Storytelling: The beauty lies in the selection of papers. Each snippet, each image, can be chosen to tell a personal story, reflect a passion, or evoke a memory. I've seen people decoupage old family photos onto keepsake boxes, and the result is just breathtakingly poignant. It's a truly unique way to create bespoke gifts or home decor that speaks volumes about the creator and the recipient. Imagine a plain wooden box adorned with snippets of old love letters, maps of meaningful places, or illustrations reflecting a cherished hobby – it becomes a tangible narrative, a silent conversation between object and owner.
- Therapeutic Process: There’s something incredibly satisfying about the repetitive actions of cutting, gluing, and sealing. It’s a mindful activity that allows you to slow down, focus, and find a rhythm. It’s a quiet rebel in our fast-paced world, encouraging patience and precision. I remember one particularly stressful period in my own artistic journey, feeling overwhelmed by large canvases. Decoupage offered a calming counterpoint, a gentle reminder that beauty can be built from small, deliberate acts. It's a wonderful way to practice mindfulness and creative flow without the pressure of a blank canvas. The repetitive rhythm of cutting, arranging, and smoothing acts as a powerful anchor, quieting the mental chatter and allowing a true sense of presence to emerge. It’s a meditative dance with paper and glue, a serene space in a noisy world.
- Community & Connection: Believe it or not, decoupage can be a wonderful shared activity. I’ve seen workshops where strangers bond over paper choices and smoothing techniques. Sharing ideas, showing off finished pieces, or even creating custom gifts for loved ones—it all fosters a beautiful sense of connection, whether you’re working solo or with a group. It’s a tangible way to spread a little joy, and who doesn't need more of that? In a world that often feels disconnected, these shared creative endeavors offer a vital sense of belonging. It's truly a craft that brings people together, much like the shared experience of appreciating art in a gallery. It’s also an accessible way to teach children about art and design in a fun, hands-on manner. I’ve witnessed countless workshops where conversations flow as freely as the glue, and new friendships blossom over shared artistic triumphs (and occasional sticky mishaps!).
These reasons, for me, transform decoupage from a mere craft into a form of therapeutic, expressive art. It’s a gentle reminder that beauty and meaning can be created with simple tools and a willing heart.
Gathering Your Treasure: Essential Decoupage Materials for Your Creative Journey
Alright, ready to get your hands a little sticky? You don't need much to start, which is another reason I adore this craft. Think simple, functional, and ready for a glow-up. Having the right tools and materials is like having a well-stocked color palette for a painter – each element has its purpose and contributes to the final masterpiece. As I often tell my students, you wouldn't start a large abstract piece without the right gesso, so don't embark on your decoupage journey without these essentials. Here's what you'll typically need to kick off your decoupage adventure:
Material  | Description | Why It's Essential |
|---|---|---|
| Object to Decorate | Anything from wood, metal, glass, ceramic, plastic, or even canvas. | Your canvas! Pick something smooth or easily prepped – it's your blank slate, ready for a new story. Consider old boxes, furniture pieces, plain vases, even jewelry blanks, or switch plates – almost anything can be decoupaged! |
| Paper Cutouts | Magazines, napkins, wrapping paper, printed images, fabric scraps, old book pages, maps, original artworks. | The visual heart of your project. Choose patterns and images that truly speak to you and your desired narrative. |
| Decoupage Medium | Special glue-and-sealer products like Mod Podge. Comes in matte, gloss, or satin finishes, and specialized formulas for fabric, outdoor use, or glitter effects. | This is your magic potion: it glues, seals, and acts as a durable finish, all in one, providing longevity and aesthetic appeal, and preventing yellowing over time. |
| Brushes/Applicators | Soft-bristled brushes (foam or synthetic) for applying glue and sealant. | For smooth, even application, minimizing streaks and avoiding bubbles. A good quality brush makes a world of difference in the final finish. |
| Scissors/Craft Knife | Sharp, precise tools for cutting out your chosen designs, from simple shapes to intricate motifs. | Essential for clean edges and intricate shapes, defining the aesthetic of your piece. Precision here prevents frustration later. |
| Water & Paper Towels | For cleaning brushes, wiping up excess glue, and general mess management (a must in my studio!). | Keeps things tidy, ensures a professional finish, and makes cleanup a breeze. Don't underestimate the power of a clean workspace! |
| Optional: Varnish/Sealer | For extra durability and protection, especially for high-use items or those needing a specific sheen. Options include matte, gloss, satin, outdoor-specific, or even marine-grade for ultimate protection. | Adds a professional, hard-wearing topcoat, giving that lovely 'built-in' look and protecting your artwork for years to come, extending its lifespan against wear, moisture, and UV damage. |
| Craft Knife & Mat | For precise cutting and intricate designs, a sharp craft knife and a self-healing mat are invaluable. | Essential for detail work, achieving crisp lines, and protecting your workspace from cuts. Always use a fresh, sharp blade for the cleanest cuts and less frustration. |
| Brayer or Smoothing Tool | A rubber roller (brayer) or a soft plastic squeegee helps flatten paper and remove bubbles effectively. | Achieves a truly smooth, professional, bubble-free finish, essential for seamless integration and a polished look. |
| Sandpaper (Fine Grit) | Very fine sandpaper (220 grit or higher) for smoothing edges and between varnish layers. | Crucial for achieving that seamless, 'painted-on' feel and a truly professional, integrated finish, making edges disappear. |
| Primer/Gesso (Optional) | For very porous surfaces (like unfinished wood) or very dark ones where you want a bright base. | Creates a consistent, light base for your papers to shine, preventing discoloration and enhancing vibrancy, much like preparing a canvas with gesso. |
| Protective Covering | Old newspapers, plastic sheeting, or a dedicated craft mat for your workspace. | Protects your work surface from glue and medium, making cleanup much easier and preventing damage to your furniture. |
| Small Dish/Palette | For pouring out decoupage medium, keeping your main bottle clean. | Prevents contamination of your main medium bottle and makes application easier and more hygienic. |
| Sealing Spray (Optional) | A clear acrylic spray sealer for delicate or hand-colored papers before decoupaging. | Prevents colors from bleeding when they come into contact with the wet decoupage medium, preserving the integrity of your chosen designs. This is a vital step for ink-jet prints or very thin, porous papers. |
| Gloves (Optional) | Disposable gloves (latex, nitrile) for keeping hands clean. | Protects your hands from glue and medium, especially useful if you have sensitive skin or want to avoid sticky cleanups. |
Having the right tools is half the battle, but understanding them is the other half. It's like knowing your palette in painting – each color and brush has its purpose.
The Importance of Quality Tools (and How to Care for Them)
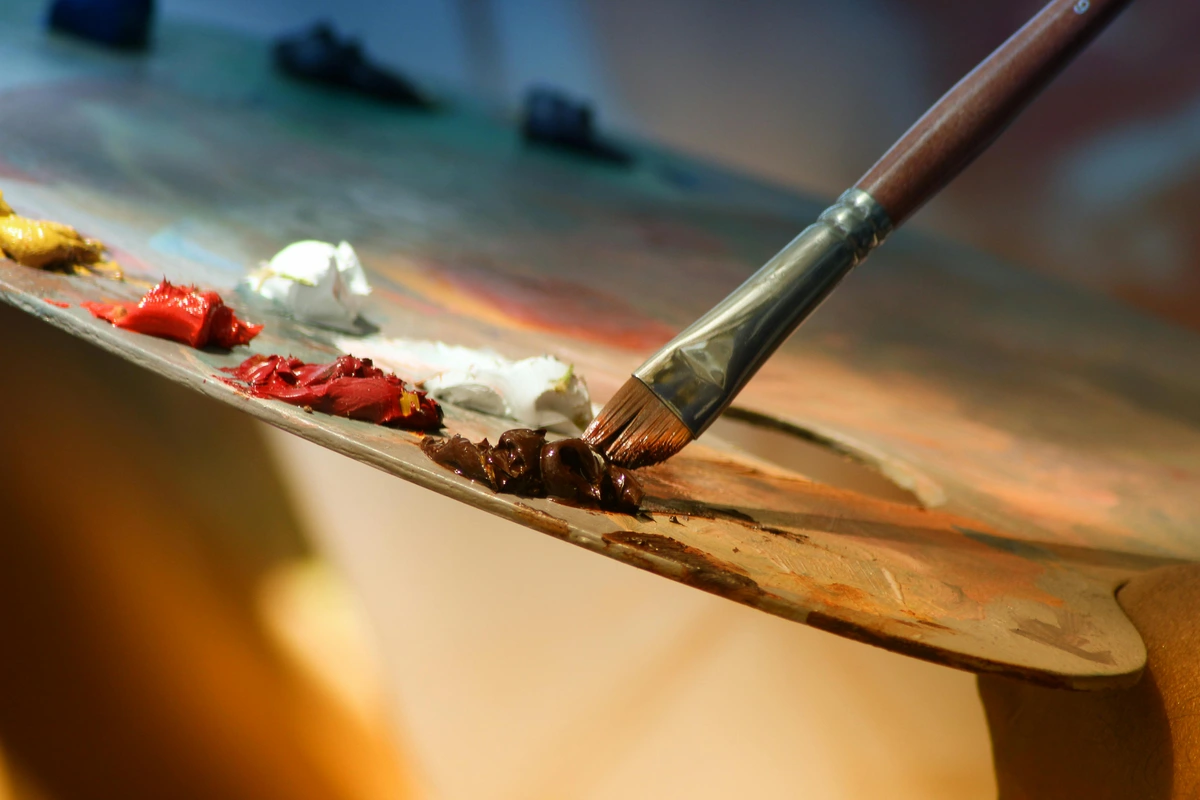
Just like a painter needs good brushes and quality paint types, the right tools make a significant difference in your decoupage experience and the final outcome. While you don't need to break the bank, investing in decent brushes and a reliable decoupage medium will save you a lot of frustration. Think of it as investing in your creative journey – trying to sculpt with a dull chisel is just painful! And, as with any art form, taking care of your tools ensures they'll serve you well for many projects to come. A good quality brush, for instance, provides smoother application and fewer streaks, directly impacting the professional appearance of your finished piece. It truly makes a noticeable difference, transforming a fiddly task into a joyful one.
A Quick Note on Paper Choices: The Heart of Your Design
Thin papers work best as they blend seamlessly into the surface. Think about delicacy – paper napkins (remember to separate the ply, usually just using the top patterned layer!), tissue paper, magazine pages, and thin printouts from a laser printer are ideal. These nearly transparent papers allow the background color to show through subtly, creating a beautiful integrated effect, almost as if the design was painted directly onto the object.
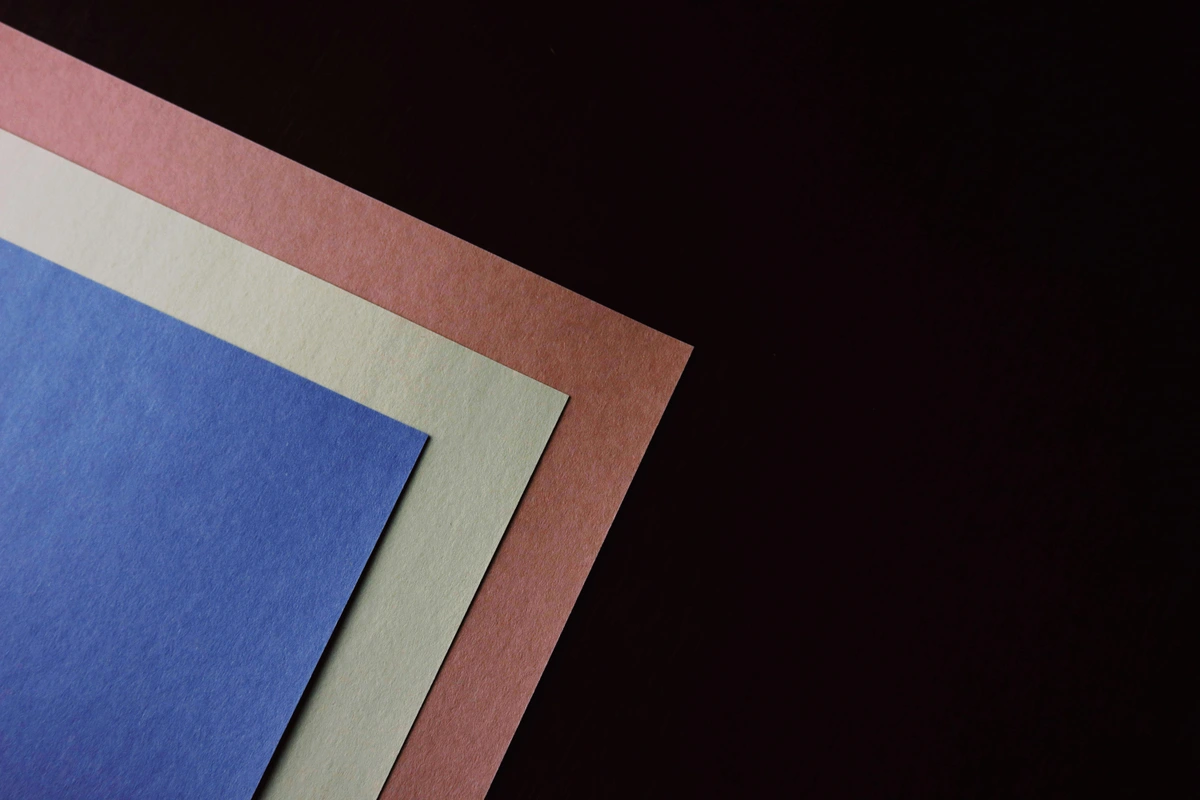
Thicker papers, like cardstock or heavier scrapbook paper, can certainly be used, but they might require a bit more work to flatten and might show their edges more, needing extra sanding and layers of medium to achieve that seamless look. When using thicker papers, try lightly misting the back with water or a thin layer of decoupage medium a few minutes before applying – this makes them more pliable and reduces the chance of wrinkles. You can also 'float' thicker papers onto a generous layer of medium applied directly to the surface, working quickly to smooth them out. If you're working with very thick or dark paper and need to trace a design, a light box can be incredibly helpful.
Always test a small piece first if you're unsure how a particular paper will react with your medium. Remember, embracing a bit of imperfection is part of the charm, something I've learned applies to both abstract painting and intricate crafts. It's all about finding your creative flow, and sometimes the most unexpected papers yield the most delightful results. A varied paper collection is like a diverse color palette – full of potential!
The paper you choose is the narrative of your piece, so pick wisely – or, better yet, pick a variety and see what stories emerge when you layer them together!
Understanding Decoupage Mediums & Glues
While the umbrella term is "decoupage medium," it's worth noting the subtle differences that can impact your project and the final outcome:
- All-in-One Mediums (e.g., Mod Podge): These are designed to be glue, sealer, and finish all in one. They come in various finishes (matte, gloss, satin, glitter, outdoor, fabric) and are incredibly convenient for most projects. They dry clear, are formulated to prevent yellowing over time, and offer a durable, protective layer.
- PVA Glues (White School Glue): While technically usable, regular white school glue isn't ideal for long-term decoupage. It can dry cloudy, may yellow over time, and doesn't offer the same durability or water resistance as specialized mediums. I'd reserve it for kids' casual projects or temporary decorations, as it simply won't stand the test of time.
- Specialty Glues: Some glues are formulated for specific materials (e.g., fabric glue for fabric decoupage, which maintains flexibility) or for certain effects (e.g., crackle mediums applied before decoupage to create an aged look, or heavy-duty glues for very thick embellishments). Always read the label and choose a medium appropriate for your project's demands!
Choosing the right medium is just as important as choosing your papers, so don't be afraid to experiment with different types as you become more comfortable. Just like an artist selects the perfect paint for a particular effect, a decoupage artist chooses the medium to achieve their desired finish, be it a subtle matte or a vibrant gloss. Experimentation is half the fun, so don't be afraid to try different finishes to see what resonates with your artistic vision.
This thoughtful selection of materials truly elevates the craft, allowing for subtle nuances and diverse artistic expressions.
Essential Brush Care for Longevity
Just like an artist cares for their paintbrushes – those extensions of our artistic will! – good brush care is absolutely crucial for your decoupage tools. It ensures smooth application, prevents unsightly streaks, and makes your brushes last for countless projects. Think of it as a small investment in your creative longevity, ensuring your tools are always ready when inspiration strikes. I've always seen my brushes as silent partners in my art, deserving of respect and proper care, whether they're spreading acrylic on canvas or medium on paper.
- Clean Immediately: Never let decoupage medium dry on your brushes. Rinse them thoroughly with warm water and soap (dish soap works great) immediately after use. This prevents hardening, keeps bristles supple, and ensures a clean application for your next project.
- Reshape: Gently reshape the bristles with your fingers before letting them dry. This helps maintain their form for future smooth applications, preventing splayed bristles that can cause streaking.
- Store Properly: Store brushes flat or handle-down (if possible, in a brush holder) to prevent the bristles from bending or the ferrules (metal part) from loosening. Proper storage is key to extending the life of your tools, protecting their shape and integrity.
Taking care of your tools is a fundamental part of any craft, and decoupage is no exception. It’s an investment in your artistic journey, much like nurturing your creative process from concept to canvas.
Preparing Your Surface: The Unsung Hero of Decoupage
Before any paper meets glue, proper surface preparation is paramount. It’s the difference between a lasting masterpiece and a frustrating mess. Trust me, I've learned this the hard way! A clean, smooth, and appropriately primed surface is the secret handshake to successful decoupage. It ensures optimal adhesion and a beautiful, professional finish, allowing your creative vision to truly shine.
- Wood: For unfinished wood, start by lightly sanding with fine-grit sandpaper (around 220-grit) to create a smooth, clean surface for adhesion. This removes any rough spots or impurities. Always wipe away all dust thoroughly with a damp cloth or tack cloth before proceeding. If you desire a specific base color or a brighter backdrop for your papers, apply a coat of acrylic paint or primer and let it dry completely.
- Glass & Ceramic: These surfaces are notoriously smooth, so thorough cleaning is essential. Wash them with soap and water, then wipe down with rubbing alcohol to remove any oils, fingerprints, or residue. This ensures maximum adhesion for your medium and helps prevent unsightly bubbles from forming under your paper.
- Metal: Clean metal surfaces thoroughly, removing any rust, grease, or grime. A light sanding can help create a "tooth" for the paint or primer to adhere, especially if the metal is very smooth or shiny. If rust is a concern or you want a base color, apply a metal primer designed for good adhesion.
- Plastic: Similar to glass, plastic surfaces benefit from a good cleaning with soap and water, followed by rubbing alcohol. Lightly sanding the surface will create a subtle texture that helps the decoupage medium grip better. For challenging plastics, a plastic-specific primer can be very beneficial for long-term durability.
- Terra Cotta: These porous natural materials will soak up a lot of medium if not pre-treated. To prevent this, seal them with a terracotta sealer or prime with gesso or a universal primer before decoupaging. This creates a barrier and ensures your medium works efficiently and your colors remain vibrant.
My First Foray: A Simple Decoupage Project (Let's Jazz Up a Wooden Box!)
This is where the rubber meets the road, or rather, where the paper meets the glue. For a beginner, a simple wooden box, a glass bottle, or even a plain picture frame is perfect. No need to go crazy with a grand piece of furniture right away! Learning by doing is truly the best way to grasp the nuances of this craft. It's an iterative process, much like finding your creative flow in painting, where each brushstroke informs the next. Here's how I'd guide you through it, step-by-step, with all the little tricks I've picked up along the way, ensuring a rewarding first experience.
A well-prepped surface is the foundation of a beautiful decoupaged piece. It's the invisible work that makes all the visible beauty possible.
Step 1: Preparing Your Chosen Object (The Foundation)
First things first, ensure your object is meticulously clean, dry, and prepped as outlined in our "Preparing Your Surface" section above. This foundational step is often overlooked but is absolutely critical for successful adhesion and a smooth, professional finish. Think of it like preparing your canvas – a well-primed surface makes all the difference! For our wooden box, this means a light sanding (220-grit is usually sufficient), a thorough wipe-down to remove all dust with a damp cloth or tack cloth, and perhaps a coat of acrylic paint or primer if you want a specific base color to complement your paper choices and enhance their vibrancy.
Step 2: Choosing and Cutting Your Papers (The Creative Heartbeat)
This is often the most creatively liberating part! Select your images, patterns, or text that tell the story you want your object to convey. Magazines, old book pages, printed botanical illustrations, or even personal photographs (laser-printed are best to prevent ink bleed, as inkjet can run when wet) are all fair game. Carefully cut them out with sharp scissors or a craft knife. Remember, no need to be too perfect if you're going for a more rustic or collage-like feel; sometimes a carefully torn edge can add wonderful, organic character and help the paper blend more softly. Pro Tip: For a softer edge that blends seamlessly, consider tearing your paper cutouts instead of cutting them, especially for larger pieces or those with delicate designs. If you're going for intricate designs, a sharp craft knife on a self-healing mat will be your best friend for precision. Think about the overall design elements you want to achieve: how will the colors interact? What about the scale of the patterns? Will they create a sense of movement or calm? Lay them out on your object before gluing to get a sense of the arrangement. This pre-visualization is a crucial step I often employ in my abstract compositions too, allowing me to play with possibilities before committing, ensuring a harmonious composition and preventing unexpected surprises.
Step 3: Applying the Medium (The Sticky Bit!)
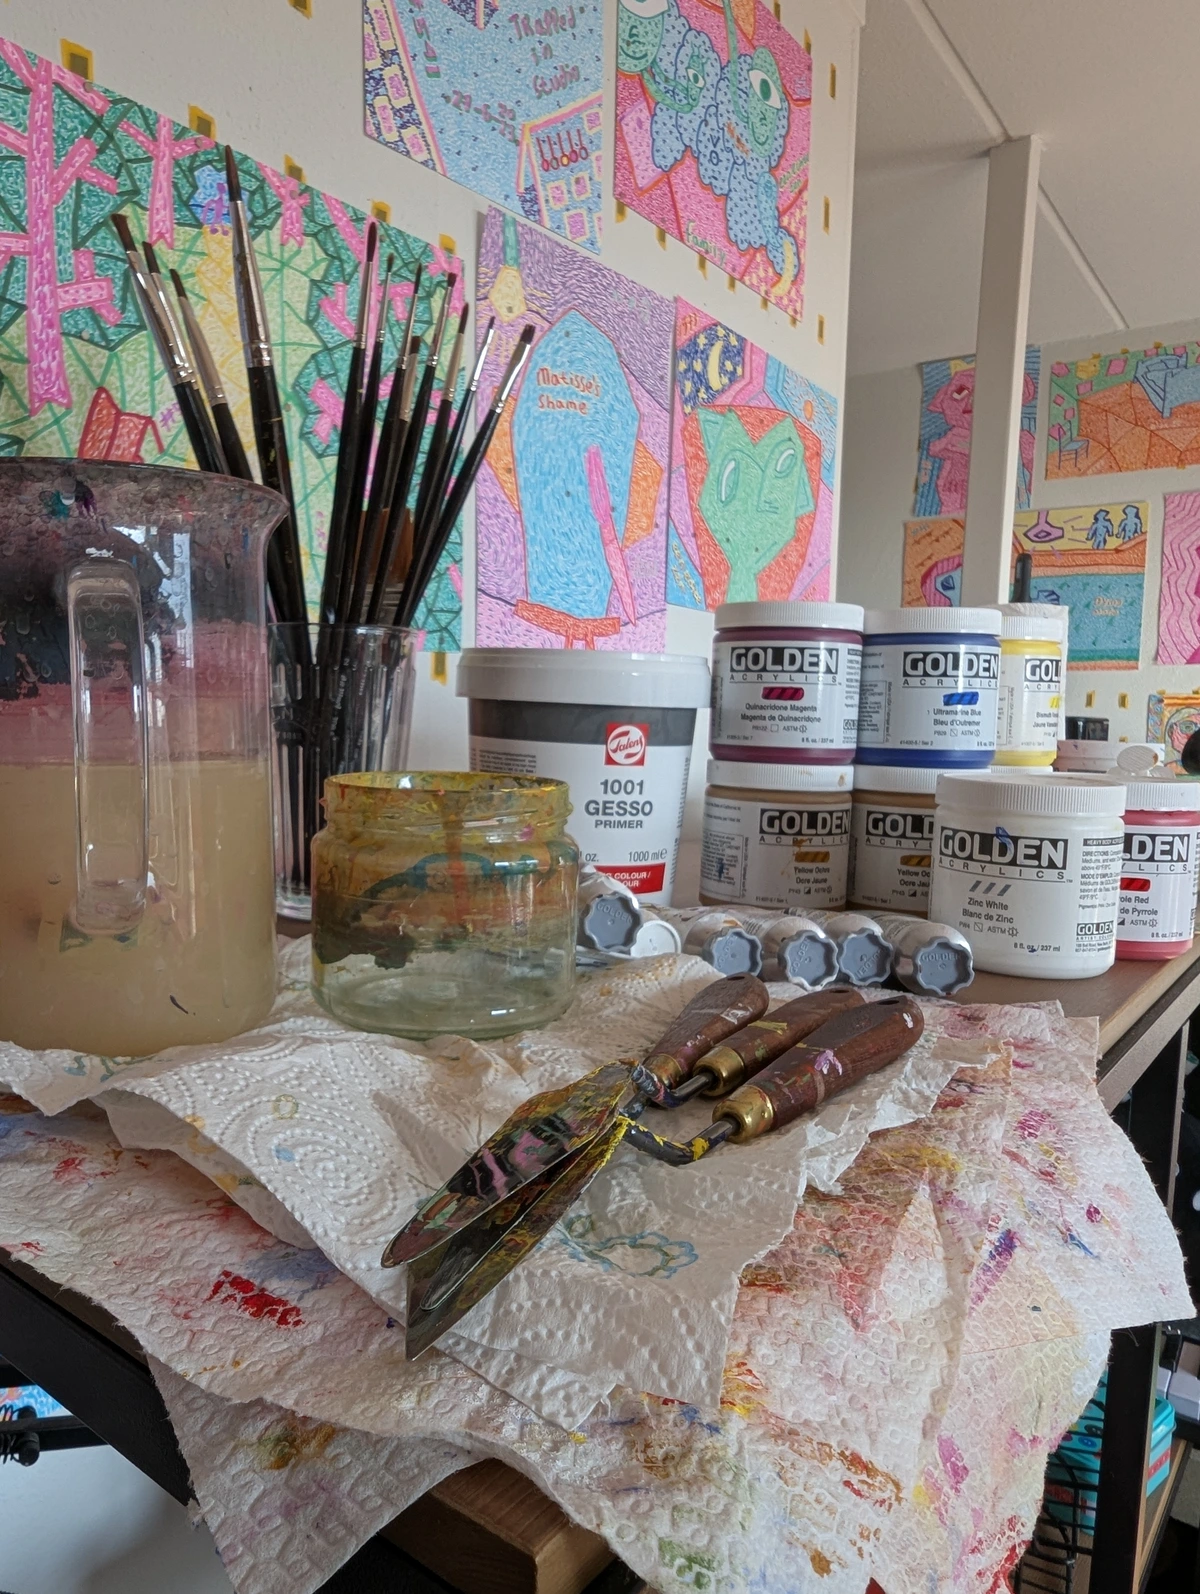
Using your chosen soft-bristled brush, apply a thin, even layer of decoupage medium to the back of one cutout. Don't be shy – you want it fully covered right to the edges to ensure complete adhesion – but don't drown it either, as too much medium can make thin paper tear and create excess wrinkles. The goal is a uniform, wet surface for the paper to bond securely. For very delicate papers like napkins or tissue paper, you can also apply the medium directly to the surface of your object first, then gently lay the dry paper on top. This 'direct-to-surface' method can sometimes reduce the risk of tearing fragile papers, allowing for smoother manipulation and minimizing the chance of bubbles. Remember, consistency is key – think of it like applying a thin, even glaze to a painting.
Step 4: Positioning and Smoothing (The Patience Game)
This is perhaps the most critical moment! Carefully place your glued cutout onto your prepared surface, ensuring its exact position. Once positioned, gently but firmly smooth it out with your fingers, a clean, dry brush, or ideally, a brayer (a small rubber roller) or a soft plastic squeegee. Work meticulously from the center outwards to push out any air bubbles, excess glue, or wrinkles. Bubbles are the enemy of a seamless finish, so take your time here. Pro Tip: A piece of plastic wrap laid over the wet paper can be a game-changer! It allows you to smooth with more pressure without tearing delicate designs, providing an essential barrier. For tricky areas like sharp corners or pronounced curves, making small relief snips in the paper before application can help it conform without buckling. This step takes patience, my friend. Don't rush it; those extra moments of careful smoothing will pay off immensely. I've ruined enough pieces by being too eager, believing that faster meant better – a lesson I apply to my abstract painting too! Remember, a truly smooth application is key to achieving that seamless, painted-on look, making your paper disappear into the object. Don't be afraid to lift and reposition slightly if needed, especially with thicker papers, but act quickly before the medium sets too much.
Step 5: Sealing It In (The Protective Embrace)
Once the cutout is perfectly in place and smoothed down, apply another thin, even layer of decoupage medium over the top of the paper. This layer is crucial; it seals the paper, protects it from environmental factors, and begins the process of building that smooth, integrated, almost painted-on look. Ensure you cover the entire cutout, extending slightly beyond its edges to create a strong seal. Repeat this sealing process for all your cutouts, layering and overlapping as desired to create your unique composition. This initial sealing layer locks your design in place and starts the magic of visual integration, making the paper appear as part of the surface rather than simply stuck on.
Step 6: Drying and Layering (The Art of Patience)
Patience is key here! Let each layer dry completely (check your specific medium's instructions, but typically 15-20 minutes to an hour, depending on humidity and the thickness of the application). Then, apply more thin, even layers of decoupage medium over the entire decorated surface, not just the paper cutouts. I typically do 2-3 coats for a good, basic seal and protection, allowing ample drying time between each. For a truly durable, glass-smooth finish that completely hides all paper edges and mimics a painted or lacquered surface, you might apply 5-10 or even more coats. This is where the magic of transformation truly happens, as the layers build depth and luminosity, almost like applying multiple translucent glazes to a painting. When aiming for this professional, seamless finish, lightly sand with very fine sandpaper (like 400-grit or higher) between the final layers (after several coats are built up and thoroughly dry). This meticulous layering and sanding process is what creates that beautiful, almost lacquered effect, making the paper designs appear to melt seamlessly into the object. Remember, slow and steady wins the race here; don't try to rush the drying, or you'll risk tackiness and a cloudy finish!
Step 7: Optional Final Varnish (The Finishing Touch)
If you desire extra protection, specific durability (e.g., for outdoor use, in which case a marine-grade varnish would be appropriate, or a food-safe sealant for items in contact with food), or a particular sheen (like a super high gloss, a velvety matte, or a subtle satin finish), apply a separate varnish or sealer after your decoupage medium has fully cured. This curing process usually takes 24-72 hours, so always check the product instructions for optimal results. This final step adds an extra layer of texture and significantly enhances the durability, making your piece ready for real-world use or display. It’s like the final protective glaze on a painting, ensuring its beauty endures for years to come and safeguarding your artistic effort.
Step | Action | Key Tip |
|---|---|---|
| 1. Preparation | Clean & sand your object thoroughly. Apply base paint or primer if desired. | A smooth, grease-free surface is absolutely key for optimal adhesion and a flawless finish. |
| 2. Cutouts | Carefully select and cut (or tear) your paper designs. | Think about your overall composition, color harmony, and scale. Thinner papers generally blend better. |
| 3. Apply Glue | Brush a thin, even layer of decoupage medium onto the back of a cutout (or surface for delicate papers). | Even coverage is crucial for good adhesion; avoid globs that can cause wrinkles or bubbles. |
| 4. Position | Place cutout on surface precisely, then smooth out bubbles from center outwards. | Work slowly and gently with a brayer or plastic wrap; patience is your best tool here to prevent tears. |
| 5. Seal | Apply another thin layer of medium over the placed cutout, extending slightly past edges. | This is the start of the 'no-edge' look, sealing the paper and bonding it to the surface. |
| 6. Layering | Let dry completely (15-60 min), then apply 2-3+ more thin layers of medium over entire surface. | Drying between coats is non-negotiable for strength, clarity, and smoothness. Don't rush! |
| 7. Finish (Opt.) | Apply a final varnish for extra protection, durability, or a specific sheen after full cure. | Adds significant durability, especially for frequently handled items, and enhances the final aesthetic. |
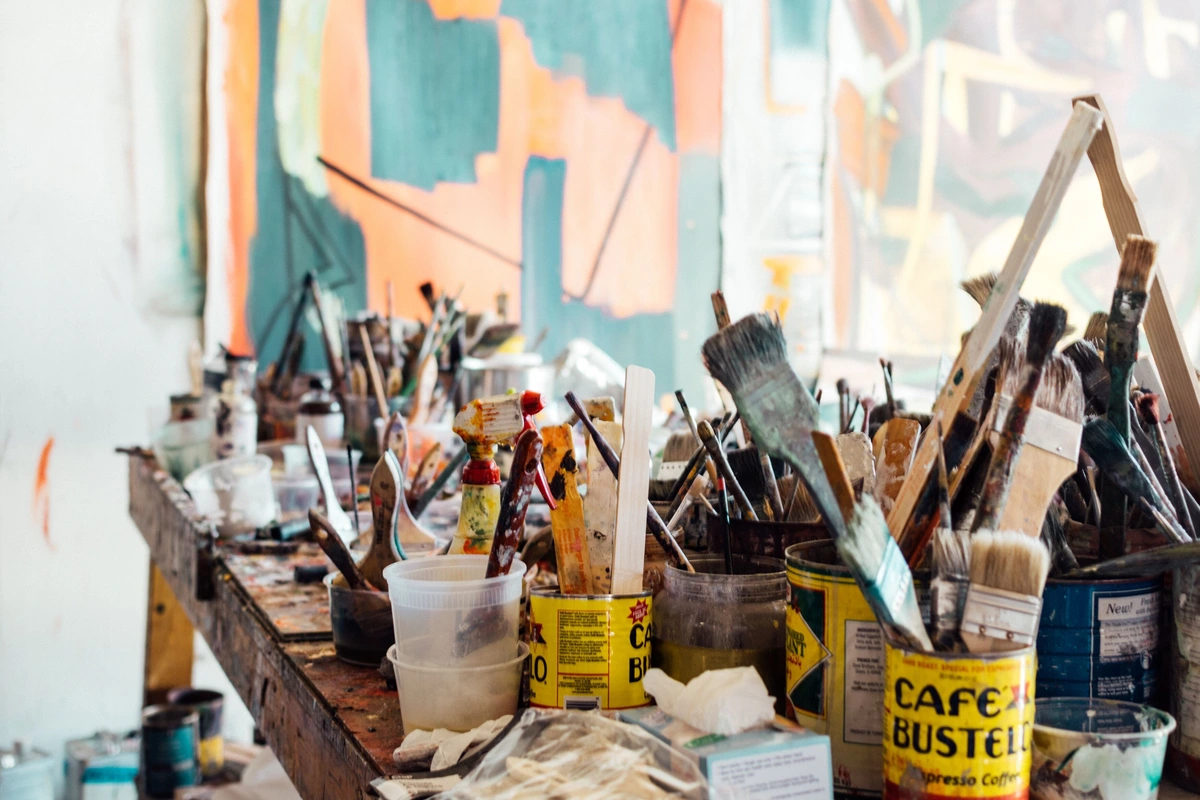
With these comprehensive steps, you're well on your way to creating your first decoupaged masterpiece. Remember, like any art form, practice makes perfect – or at least, perfectly charming! Don't be afraid to experiment and make it your own.
Tips & Tricks from My Own Crafty Corner: Learning from Experience
Having spent my fair share of time with sticky fingers and half-dried paper, I've picked up a few things that might save you some headaches – believe me, I've made all the mistakes so you don't have to! It's all part of the learning curve, a continuous journey of discovery and adaptation, much like developing your own unique art style. Here are some insights from my craft corner:
- Bubbles are the Enemy (or are they?): Seriously, those little air pockets can be frustrating. A fine-tipped tool (like a pin or craft knife) can be used to carefully prick small bubbles and then re-smooth them. For larger bubbles, a small slit with a craft knife allows the air to escape, then re-smooth with a brayer. But sometimes, a few tiny bubbles just add to the rustic charm, don't they? It depends on your art style, really. Don't let a few tiny imperfections deter you; they often contribute to the handmade character. The pursuit of perfection can sometimes stifle the joy of creation.
- Wrinkles Happen: Especially with very thin paper like napkins. Don't despair! Often, as the medium dries, minor wrinkles will flatten out. If they don't, embrace them as part of the handmade character. Sometimes a happy accident is just that – happy! For particularly delicate papers, try applying medium directly to the surface, then gently lay the dry paper on top and seal, rather than pre-gluing the paper itself. This can minimize tearing and wrinkles.
- Working with Delicate Papers (and preventing bleed): If you're using very thin papers, tissue paper, or hand-colored designs, they can be prone to tearing and color bleed when wet. A crucial trick is to spray the paper before application with a clear acrylic sealer (like a matte spray varnish). Let it dry completely, then proceed with decoupaging. This creates a barrier, making the paper stronger and preventing colors from running.
- Layer Thin, Not Thick: When applying the decoupage medium, resist the urge to glob it on. Thin, even coats are always better than one thick, uneven one. It dries faster and creates a smoother finish. Think of it like applying glazes in painting; thin layers build depth and luminosity without creating an uneven, sticky mess.
- Experiment with Adhesives: While all-in-one mediums like Mod Podge are fantastic, don't be afraid to explore. For specific needs, like fabric decoupage, there are flexible glues. For extreme durability, epoxy resins can be used as a final topcoat. Understanding your options expands your creative toolkit!
- Don't Rush Drying Times: This is probably the hardest rule for me to follow! But rushing leads to tacky surfaces, cloudy finishes, and general disappointment. Patience, my friend, is a virtue here. Go make a cup of tea, look at some of my art for sale, or take a walk.
- Consider Your Edges: If you're covering an entire object, how you finish the edges matters immensely. You can wrap paper around, sand it off for a distressed look, or use paint to create a clean line. This is where your inner designer comes out, making deliberate choices about the final presentation. For a truly seamless, professional look, gently sand the paper at the edges with fine-grit sandpaper (220-400 grit) once it's dry and sealed. This creates a flush transition, making the paper visually 'melt' into the object, which is often the mark of a truly professional decoupage piece.
- Working with Curved Surfaces: These can be tricky! Make small snips in the paper before applying it to help it conform to curves without wrinkling. Overlapping small pieces also works wonders.
- Preventing Color Bleed: If you're using very thin or hand-colored papers, sometimes the colors can bleed when wet with medium. A quick fix is to spray the paper with an acrylic sealer (like a clear matte spray paint) before decoupaging. Let it dry completely first!
- Heat Guns (Used Cautiously!): While patience is paramount, a low-setting heat gun (or even a hairdryer on cool setting) can gently speed up drying between coats. Keep it moving, hold it at a distance, and never overheat, or you risk bubbling your medium.
- Dealing with Heavier Papers: If you're using thicker papers, lightly mist the back with water or a thin layer of decoupage medium a few minutes before applying. This makes them more pliable and reduces the chance of wrinkles and buckling, making smoothing much easier.
- Creating a Distressed Look: For a beautifully aged or distressed effect, once your decoupage is fully dry and sealed, you can gently sand certain areas (especially edges and raised textures) with fine-grit sandpaper. This reveals hints of the base layer, adding a worn, authentic feel. You can also apply a thin layer of dark wax or antiquing medium, then wipe it back to emphasize cracks, textures, or recessed areas, adding depth and a sense of history. This is a wonderfully artistic way to add character and history to your piece, making it look like a treasured antique.
- Layering for Depth: Don't be afraid to layer different papers, or even tear edges to create soft transitions between images. This builds visual depth and interest, much like layering glazes in a painting. Consider transparency – a thin, translucent paper over a bolder pattern can create unexpected and beautiful effects, adding subtle nuances to your narrative. Experiment with overlapping textures, colors, and patterns to create a truly rich visual tapestry, making the eye want to linger and explore every detail.
Troubleshooting Common Decoupage Issues: Don't Let Them Dampen Your Spirit!
Even experienced crafters run into snags. Trust me, I've had my share of decoupage disasters, but each one was a valuable lesson! Here's a quick guide to some common problems and how I approach them – because every 'mistake' is just an opportunity to learn and adapt, much like an abstract painter might embrace an unexpected drip and turn it into a new feature. Don't let these minor setbacks dampen your creative spirit; they're just part of the artistic journey!
Even with the best preparation, things can go awry. Don't let it discourage you; consider it part of the learning curve and a chance to develop your problem-solving 'art muscles'!
Issue | Common Cause | My Go-To Fix |
|---|---|---|
| Wrinkles Won't Flatten | Paper too thick, too much medium, or rushed smoothing. | Gently prick with a pin and re-smooth. For stubborn ones, embrace the handmade character, or for very thin papers, accept slight texture. |
| Cloudy/Hazy Finish | Medium applied too thickly, insufficient drying time, high humidity. | Ensure thin coats, ample drying time between layers, and work in a well-ventilated, dry environment. |
| Paper Tearing | Paper too wet, pressing too hard, or overly delicate paper. | Use a lighter touch. Apply medium directly to the surface for delicate papers. Consider pre-sealing very thin or hand-colored papers. |
| Uneven Drying/Gloss | Inconsistent application of medium or inadequate drying time. | Apply thin, consistent layers. If persistent, a good quality topcoat varnish will often unify the finish. |
| Yellowing Over Time | Non-archival glue (PVA), or excessive exposure to direct sunlight. | Always use a dedicated, archival decoupage medium. For items in direct light, apply a UV-resistant varnish. |
| Bubbles Reappear | Air trapped beneath the paper during initial smoothing. | Prick with a fine pin, gently push out air, and re-smooth. Focus on thorough smoothing during initial application. |
| Edges Lifting | Insufficient glue at edges, or uneven pressure during smoothing. | Apply a bit more medium under the lifted edge and press down firmly. Ensure generous coverage right to the edges initially. For stubborn lifts, a small weight can help while it dries. |
| Cracking/Peeling | Insufficient coats of medium, improper surface prep, or excessive movement. | Ensure adequate layers of medium for protection. Re-prep and apply if peeling is extensive. Use flexible mediums for flexible surfaces. |
| Color Bleeding | Unsealed paper, especially hand-colored or very thin, reacts with wet medium. | Lightly spray delicate or hand-colored papers with an acrylic sealer (like clear matte spray paint) before decoupaging. |
Beyond the Basics: Where Can Decoupage Take You? Endless Creative Horizons
Oh, the possibilities! Once you've mastered the basics, decoupage can take you to some really exciting places, limited only by your imagination and the surfaces you choose to adorn. It's a journey into boundless creativity, much like exploring new mediums in mixed media art. Think about different surfaces and projects you can tackle:
- Furniture: Transform an old dresser or coffee table into a statement piece. Imagine an old map decoupaged onto a tabletop, or vibrant floral patterns on drawer fronts. This is where you can truly let your imagination run wild, perhaps even giving a nod to decorating with abstract art in bohemian chic interiors by using vibrant, cut-up abstract prints to create unique patterns and focal points. I've seen entire bureaus transformed into whimsical storybooks using decoupage – the effect is simply stunning and speaks volumes about the owner's personality.
- Terra Cotta Pots: Give your plant pots a personalized touch with botanical prints, quirky patterns, or even abstract designs. Decoupaged pots can elevate a simple houseplant into a decorative element.
- Canvases: Yes, you can absolutely decoupage onto a canvas! This opens the door to true mixed-media pieces, combining paper with paint, texture paste, or other embellishments. It can even lead to more complex creations like the ones I explore in my journey with mixed media, offering a fantastic way to create texture and depth in your art without traditional painting techniques. Think of collaged elements forming the foundational layers of an abstract composition, building narratives through diverse materials.
- Jewelry & Accessories: Create unique pendants, bangles, or hair clips using tiny paper cutouts sealed with decoupage medium and often finished with a clear resin for a super durable, glassy finish. Small scraps of paper or fabric find new life here.
- Wall Art: Combine multiple images and textures on a large board or stretched canvas for a striking collage effect. It's an accessible way to make a big impact and create bespoke wall decor without painting a whole abstract art for small spaces painting. I've even seen people create stunning gallery walls by decoupaging smaller images onto uniform boards or canvases and arranging them cohesively, creating a cohesive visual narrative. Imagine a series of panels, each telling a piece of a larger story through carefully selected paper elements, creating an immersive experience for the viewer.
- Decoupage on Fabric: Imagine transforming plain canvas shoes, a boring tote bag, or even accent pillows with vibrant fabric cutouts or paper designs! Special fabric decoupage mediums allow the paper or fabric to adhere securely and remain flexible after washing (following product instructions, of course). This is a fantastic way to upcycle and personalize textiles.
- Candle Decoupage: This is a truly magical technique! Using very thin paper (like napkin layers) and a gentle heat source (like a warm spoon or a heat gun on low), you can melt the top layer of a real wax candle just enough for the paper to become embedded and transparent, creating a beautiful, integrated design. The paper literally disappears into the wax, leaving a stunning, illuminated effect when the candle burns. Just be sure to use real wax candles and always follow safety guidelines when using heat; safety first, always! The result is an ethereal glow, transforming a simple candle into a glowing work of art.
- Decoupage on Stones/Rocks: Transform ordinary garden stones into decorative paperweights, garden markers, or whimsical gifts. The irregular shapes offer a fun challenge, and the results can be incredibly charming. Remember to seal them well for outdoor durability, protecting them from the elements.
- Personalized Phone Cases: Give your phone a unique, artistic touch by decoupaging a clear case with tiny cutouts, patterns, or even miniature reproductions of your favorite art. A clear, hard-wearing topcoat (like a two-part epoxy resin for maximum durability) is essential here for protection from daily wear and tear. This allows for constant artistic expression in your everyday life, turning a functional object into a portable piece of art and a conversation starter.
Display and Protection: Making Your Decoupage Last a Lifetime
You've poured your heart into creating a beautiful decoupaged piece—now, how do you ensure it stands the test of time? Proper display and protection are just as important as the creation itself, just like framing and hanging a painting correctly. It’s about preserving your artistic legacy, however big or small, allowing its story to be told for years to come, and ensuring your hard work truly endures.
Aspect | Importance | Key Practice |
|---|---|---|
| Final Varnish | Essential for durability and protection against wear, moisture, and UV damage. | Don't skip it! Apply a good quality varnish as a topcoat, especially for high-use items or those exposed to light. Choose UV-resistant formulas for items in sunny areas to prevent fading and preserve color vibrancy. Consider specialty varnishes for outdoor or food-safe applications. |
| Placement | Strategic placement prevents premature fading, cracking, and damage from environmental factors. | Avoid direct, prolonged sunlight if your varnish isn't UV-protective. Be mindful of environmental factors like extreme humidity or fluctuating temperatures, which can cause cracking or lifting over time. Treat your decoupaged piece like a precious artwork. |
| Cleaning | Gentle, appropriate cleaning maintains beauty without damaging the delicate layers. | For most items, a gentle wipe with a soft, damp (not wet!) cloth is sufficient. Avoid harsh chemical cleaners, abrasive scrubbers, or excessive soaking, as these can strip the finish or lift the paper. |
| Restoration | Decoupage is a forgiving craft, and small repairs can often extend the life of cherished pieces. | Small tears or lifting edges can often be carefully re-glued and re-sealed with more medium. A full re-varnish can revitalize older pieces, bringing back their luster and offering renewed protection. |
| Handling | Careful handling prevents accidental damage and preserves the integrity of your artwork. | Handle delicate items with care, supporting them properly. Avoid stacking heavy objects on top of decoupaged surfaces, especially during the initial curing period when the medium is still hardening. |
| Storage (for collections) | Proper storage protects pieces not currently on display from dust, light, and environmental degradation. | Store in a climate-controlled environment, away from extreme temperature changes or humidity. Wrap delicate items in acid-free tissue paper or cotton cloth to prevent scratching and deterioration. |
| Handling | Careful handling prevents accidental damage and preserves the integrity of your artwork. | Handle delicate items with care, supporting them properly. Avoid stacking heavy objects on top of decoupaged surfaces, especially during the initial curing period when the medium is still hardening. |
| Storage (for collections) | Proper storage protects pieces not currently on display from dust, light, and environmental degradation. | Store in a climate-controlled environment, away from extreme temperature changes or humidity. Wrap delicate items in acid-free tissue paper or cotton cloth to prevent scratching and deterioration. |
Advanced Decoupage Techniques to Explore: Pushing the Boundaries of Paper Art
Once you've mastered the fundamentals, a whole new world of creative possibilities opens up. It's like moving from sketching basic forms to exploring complex composition in art and color theory. These techniques can add incredible depth and character to your projects, allowing you to truly express your unique artistic vision.
- Crackling Effects: Special crackle mediums can be applied before or after decoupaging to create a beautiful aged, crackled finish on your surface. This works wonderfully for vintage-themed pieces.
- Distressing & Antiquing: After your decoupage is complete, you can gently sand edges, apply a dark wax, or use antiquing mediums to give your piece a wonderfully worn, antique look. This can be particularly effective on furniture or wooden boxes.
- Adding Dimensional Elements: Don't limit yourself to flat paper! Incorporate small embellishments like beads, charms, dried flowers, or even small metal findings onto your decoupaged surface before applying final sealing layers.
- Photo Decoupage & Image Transfers: Take your personalization to the next level by decoupaging personal photos onto objects – think cherished memories on keepsake boxes or personalized trays. For an even more integrated, almost vintage look, explore advanced image transfer techniques where the ink from a printed image is transferred directly onto the surface, often leaving no visible paper. This creates a beautifully custom, truly unique piece of art, blending personal history with artistic expression and offering a deeply personal touch to any item.
- Mixed Media Integration: Don't limit decoupage to just paper and glue! Combine it with painting, stenciling, stamping, or even embellishments like beads, glitter, or dried botanicals before your final sealing layers. This pushes the boundaries of the craft into true mixed media art, much like I do in my abstract work, where different elements coalesce to form a new whole. It's about letting diverse materials interact to create a richer, more complex visual narrative, adding layers of meaning and texture.
- Reverse Decoupage (for Glass): A captivating technique where you apply your cutouts to the back of a clear glass object (like a plate or vase), facing outwards. The medium and paint are then applied over the top, creating a beautiful, protective, and often translucent effect when viewed from the front. It's a clever way to add depth and a wonderful optical illusion, making your design appear suspended within the glass.

These advanced techniques truly demonstrate the versatility and artistic potential of decoupage, moving beyond simple craft into sophisticated art. They invite you to continuously learn, grow, and challenge your creative boundaries, just as I do in my own artistic practice.
These advanced techniques truly demonstrate the versatility and artistic potential of decoupage, moving beyond simple craft into sophisticated art. They invite you to continuously learn, grow, and challenge your creative boundaries.
Frequently Asked Questions About Decoupage: Your Curiosities Answered
Q: Can I use regular Elmer's glue for decoupage?
A: While you can technically use white school glue (like Elmer's), I wouldn't recommend it for serious or long-lasting projects. Dedicated decoupage mediums like Mod Podge are specifically formulated to be archival, offering superior adhesion, a completely clear (non-yellowing) finish, and better durability against cracking or peeling over time. They also often include built-in finishes (matte, gloss, satin), which is a nice bonus you won't get with standard PVA glue. Save the Elmer's for the kids' craft table!
Investing in the right materials, especially your decoupage medium, makes a significant difference in the longevity and appearance of your finished work.
Q: How do I avoid wrinkles and bubbles?
A: Ah, the age-old question, and one that plagues even experienced crafters! The absolute best approach is a combination of techniques: apply very thin, even coats of medium, use thin papers whenever possible, and always smooth from the center outwards immediately after placement. A brayer (a small rubber roller) is incredibly helpful for this, or even a clean, soft plastic squeegee. For delicate papers, laying a piece of plastic wrap over the wet paper before smoothing can prevent tearing. If a small bubble persists, a tiny prick with a pin can allow the air to escape, then re-smooth. But truly, patience and practice are your greatest allies here; don't expect perfection on your first try!
Q: What kind of paper is best for decoupage?
A: Generally, thinner papers like napkins (remember to separate the decorative top layer!), tissue paper, magazine pages, and printed laser copies work wonderfully. The thinner the paper, the more it will blend into the surface, giving that seamless, painted-on look and minimizing visible edges. Thicker papers (like cardstock) can be used, but they might require more layers of medium and sanding to hide their edges and create a smooth finish. Always consider the transparency and texture you want for your final piece. Sometimes, the 'wrong' paper can even create an interesting, unexpected texture if you embrace it!
The choice of paper is a powerful artistic decision, dictating the visual texture and narrative of your decoupaged piece.
Q: How long does decoupage take to dry?
A: Each coat of decoupage medium typically dries to the touch within 15-20 minutes, which is great for layering. However, for a full, hard cure and maximum durability – meaning it's completely set and resistant to damage – most projects need at least 24 hours, and sometimes up to 72 hours for really thick layers, multiple coats, or in humid conditions. It's crucial to allow this full curing time before handling the item extensively or applying a final varnish. Don't rush it; patience truly is a virtue in decoupage!
Q: Can I use different types of paper in one project?
A: Absolutely! Mixing and matching different paper types (napkins, magazine clippings, printed images, even thin fabric scraps) is a fantastic way to add depth, texture, and visual interest to your decoupage pieces. Just be aware that papers of varying thicknesses and absorbencies might behave differently with the medium. Thicker papers might need a bit more smoothing and more layers of medium to achieve that seamless look. I often love layering translucent papers over bolder patterns to create subtle, unexpected effects – it's all about experimentation!
Q: Is decoupage waterproof?
A: Basic decoupage mediums offer some water resistance once fully cured, but they are not fully waterproof. If you want your decoupaged item to be truly waterproof (e.g., for outdoor use or items that will be frequently wiped), you'll need to apply a specialized waterproof topcoat or a marine-grade varnish over the finished decoupage. Think about its intended use before deciding on the final sealer. Don't rely on standard mediums for a truly waterproof finish; that's just asking for trouble down the line!
Q: Can I decoupage over existing paint or varnish?
A: Generally, yes, you can decoupage over existing paint or varnish, but preparation is absolutely key. The surface needs to be meticulously clean, dry, and free of any grease, dirt, or wax. For glossy or very smooth surfaces, a light sanding with fine-grit sandpaper will create a "tooth" that helps the new medium adhere much better, preventing peeling or bubbling. If the existing paint is flaking, cracked, or unstable, it's always best to remove it first to ensure a stable foundation for your decoupage. A little prep work here saves a lot of heartache later!
Q: How do I clean decoupaged items?
A: For most items sealed with a standard decoupage medium and a light varnish, a gentle wipe with a soft, damp (not wet!) cloth is usually sufficient. Avoid harsh chemical cleaners, abrasive scrubbers, or prolonged soaking, as these can damage the finish, cause colors to bleed, or lift the paper. For items protected with a waterproof topcoat, you can be a bit more robust in your cleaning, but still, gentle care is always best to preserve the integrity and beauty of your artwork. Treat it like a cherished painting!
Q: What's the best way to get a perfectly smooth, glass-like finish?
A: Achieving that coveted glass-smooth finish is all about patience and thin layers. After applying your paper, build up 5-10 (or even more!) very thin, even coats of decoupage medium over the entire surface, allowing each to dry completely. For the ultimate smoothness, lightly sand with very fine-grit sandpaper (400-600 grit) between the final few layers, wiping away all dust before the next coat. Finish with a high-gloss varnish for that extra reflective quality. It's a meditative process, I promise, and the results are truly stunning!
Q: What kind of sealant should I use for outdoor decoupaged items?
A: For items that will be exposed to the harsh elements outdoors, you absolutely must use a high-quality marine-grade varnish or an outdoor-specific decoupage sealer. These specialized products are formulated to withstand UV rays (preventing fading), moisture, humidity, and temperature changes, offering significantly better protection than standard indoor mediums. Applying multiple thin coats, as per the manufacturer's instructions, and allowing for proper curing time is critical for long-lasting outdoor durability. This isn't a step to skimp on if you want your outdoor creations to endure!
Choosing the right sealant for the right environment is a decision that protects your artistic investment.
Q: Can I use a hairdryer or heat gun to speed up drying?
A: You can, but with extreme caution and only judiciously! Use a hairdryer on a low, cool setting, or a heat gun on its lowest setting, holding it a good distance (at least 6-8 inches) from your project and keeping it moving constantly. The goal is gentle warmth to aid evaporation, not direct, intense heat. Too much heat can cause a myriad of problems: air bubbles to expand and get trapped, paper to buckle or shrink, or the medium itself to become cloudy, sticky, or bubbly. While a little patience can be hard to come by, it's almost always the best approach for ensuring a flawless, long-lasting finish. Think of it like coaxing a delicate flower to bloom, not blasting it with a leaf blower!
Q: Do I need to prime dark surfaces before decoupaging?
A: It's highly recommended, almost essential, especially if you're using light-colored or translucent papers. Dark surfaces can easily show through thin papers, dulling the vibrancy of your colors and obscuring intricate patterns. A coat of white or light-colored primer will create a bright, opaque, and uniform base that allows your paper designs to truly pop and their original colors to remain true. Think of it as preparing a canvas for painting – you wouldn't start with a dark, uneven surface if you wanted bright colors to shine! This initial step is vital for achieving the kind of vibrant results seen in many contemporary abstract art pieces.
Q: Can I use fabric as a cutout instead of paper?
A: Absolutely! Fabric decoupage is a fantastic, tactile way to add unique textures and patterns to your projects, transforming objects with a completely different feel than paper. You'll typically want to use a specific fabric decoupage medium (like Mod Podge Fabric), which is formulated to help the fabric adhere securely and remain flexible after washing (if applicable). Cut thin fabrics (like cotton, lace, or silk), as thicker ones can be difficult to smooth and may fray at the edges. Pre-wash and iron your fabric before use to ensure it's clean and wrinkle-free.
Q: Is decoupage food safe?
A: This is a really important question! Most decoupage mediums and varnishes are not certified food safe once cured. If you're decoupaging items like platters, bowls, or coasters that will directly come into contact with unpackaged food, you absolutely need to apply a specialized, food-safe sealant over the finished decoupage. For purely decorative items like plates, I usually advise putting a physical barrier (like a doily, wax paper, or clear film) between the food and the decoupaged surface to be extra safe. Always read the product labels carefully for specific safety information. When in doubt, err on the side of caution – better safe than sorry, especially where food is concerned!
Understanding the level of protection your decoupaged piece needs is crucial for its longevity and ensuring your hard work stands the test of time.
Q: How can I create a personalized or custom decoupage piece?
A: This is where decoupage truly shines! For ultimate personalization, consider using personal photos (laser-printed for best results), old letters, or even drawings by loved ones. You can also print custom patterns or text on thin paper. For a truly bespoke piece, design your own collage from scratch, selecting images and colors that tell a specific story or evoke a particular memory. I find that creating custom pieces is one of the most rewarding aspects, as it transforms an object into a deeply meaningful gift or heirloom.
Finding Inspiration for Your Decoupage Projects: Unlock Your Inner Muse
The most exciting part of decoupage, for me, is the boundless opportunity for creative expression. Where do you find your muse? It’s often in the most unexpected places, much like discovering a hidden narrative in an abstract painting. For me, inspiration is a constant hum in the background, a gentle nudge to connect disparate ideas. Here are some avenues I often explore when seeking inspiration for any creative project, whether it's a large canvas or a small decoupaged box:
- Nature's Palette: Leaves, pressed flowers, botanical illustrations, even abstract textures from natural elements can inspire beautiful, organic compositions. The subtle shifts in color, the delicate veining of a leaf, or the rugged texture of bark can all spark an idea.
- Travel Memories: Old maps, postcards, tickets, or images from travel magazines can transport you back to cherished destinations and tell a story on your chosen object. Imagine a vintage map decoupaged onto a globe or a collection of travel ephemera adorning a keepsake box.
- Personal Narratives: Family photos, old letters, children's drawings, or snippets from meaningful books can turn an ordinary item into a deeply personal keepsake. Decoupaging these elements creates a tangible link to memories and personal history, making an object truly unique.
- Artistic Movements: Look to movements like Art Nouveau for intricate, organic patterns, Abstract Art for dynamic color combinations and bold forms, or even contemporary street art for raw energy and innovative visual narratives. The world of art offers endless visual fodder, from the bold strokes of Expressionism to the precise geometries of Op Art. Don't be afraid to let art history guide your contemporary creations, or to find abstract patterns in the seemingly random.
- Text & Typography: Don't underestimate the power of words! Old book pages, poems, handwritten letters, or interesting fonts can add a powerful narrative and visual texture to your decoupaged pieces. The interplay of text and image can create a rich, layered story, inviting viewers to 'read' your art.
- Color & Composition: Just like in painting, thinking deeply about color harmony, contrast, and composition in art will elevate your decoupage from simple sticking to thoughtful, compelling design. Consider how different elements guide the viewer's eye, creating a visual journey across your piece, and how colors evoke different moods.
- Text & Typography: Don't underestimate the power of words! Old book pages, poems, handwritten letters, or interesting fonts can add a powerful narrative and visual texture to your decoupaged pieces. The interplay of text and image can create a rich, layered story.
- Thematic Collections: Gather papers and images around a specific theme – vintage travel, botanical gardens, celestial motifs, or even a specific abstract style. This can help create cohesive and impactful pieces, ensuring a unified aesthetic and a clear message.
The beauty is that inspiration can strike anywhere. Keep an eye out for interesting papers, patterns, and images that resonate with you; you never know what will spark your next brilliant idea. My own abstract art often draws from seemingly disparate sources, just like decoupage combines diverse elements into a new whole.
credit, licence
Inspiration is truly all around us; the trick is learning to see it, and then having the courage to translate that vision into your art, much like I continually strive to decode my own abstract language. It's about cultivating an artist's eye, always seeking beauty and potential in the everyday.
Decoupage in the Modern Age: A Timeless Craft Reimagined
While its roots are ancient, tracing back centuries, decoupage is far from a relic. In today’s fast-paced, digitally-driven world, it continues to thrive and even evolve, proving its timeless appeal and adaptability. It’s a wonderful reminder that tactile, hands-on creation still holds immense value.
- Digital Printing: The accessibility of high-quality home printers means you can now create your own custom paper designs, print favorite photos, or even use digital artwork for your projects. This opens up unparalleled personalization.
- Online Communities & Tutorials: The internet is a treasure trove of decoupage inspiration, step-by-step guides, and passionate communities. From YouTube tutorials to craft blogs, learning new techniques and sharing your work has never been easier. It's a fantastic way to connect with fellow crafters and even explore AI as a co-creator for design ideas.
- Sustainability & Upcycling: In an era increasingly focused on eco-consciousness, decoupage shines as a prime example of upcycling and conscious consumption. It gives new life to forgotten objects and uses discarded papers, fabrics, and other materials, dramatically reducing waste and promoting creative reuse. This aligns beautifully with my own philosophy of finding beauty and potential in unexpected places, transforming the overlooked into the cherished. It’s a craft that truly embraces the 'reduce, reuse, recycle' mantra, turning trash into treasure and giving objects a second, vibrant life. What could be more satisfying than giving a discarded item a glowing, new story?
- Therapeutic Benefits: Beyond the aesthetic, modern interest in mindfulness and well-being has highlighted decoupage's therapeutic qualities. The repetitive, focused nature of cutting, gluing, and smoothing can be incredibly meditative and stress-reducing, offering a much-needed break from digital overload. It's a tangible way to practice presence and a wonderful form of creative art therapy, allowing you to slow down, disconnect from screens, and reconnect with your hands and your creative spirit. It’s a quiet rebellion against the relentless pace of modern life.
Decoupage is truly a craft that adapts and thrives, proving its timeless appeal in our ever-changing world. It's a beautiful intersection of history, personal expression, and practical skill.
My Final Thoughts on the Magic of Decoupage: A Continuous Journey
Decoupage, at its heart, is a celebration of transformation, much like art itself. It reminds me that beauty can be found in the mundane, and that with a little imagination and a lot of glue, anything can be reborn. It’s a craft that encourages you to slow down, to appreciate the details, and to find satisfaction in the process of creation. It's a testament to the idea that art doesn't have to be complicated or intimidating; it can be as simple as cutting out a pretty picture and giving it a new home. This deep connection between simple craft and profound artistic expression is something I continually explore in my own work, whether it’s through the deliberate layering of colors in a painting or the careful placement of paper in a decoupage project.
So, if you're feeling a creative itch, grab some paper, some glue, and an old box. See where the layers take you. And if you ever find yourself walking through the Den Bosch Museum, you might just spot a piece or two that quietly whisper stories of similar transformation. Who knows, perhaps your own decoupaged masterpiece will one day inspire someone else to pick up a brush – or a pair of scissors. The creative journey, after all, is wonderfully intertwined, connecting us to history, to others, and to our deepest selves. If you're looking for more contemporary, colorful expressions of art, feel free to explore my prints and originals.

Safety First in Your Craft Corner
While decoupage is generally a safe and relaxing craft, a few precautions ensure your joyful dive remains just that: joyful and safe. Think of it as setting up your art studio for a productive (and injury-free!) session.
- Ventilation: Work in a well-ventilated area, especially when using spray sealers, varnishes, or strong adhesives, to avoid inhaling fumes.
- Sharp Tools: Always use a self-healing cutting mat with craft knives and keep your fingers clear of the blade. Store sharp tools safely.
- Chemical Contact: If you have sensitive skin, consider wearing gloves when working with mediums and glues to prevent irritation. Always wash hands thoroughly with soap and water after crafting, even if you wore gloves.
- Child Safety: If crafting with children, ensure all materials are non-toxic and supervise them closely when using sharp tools. Teach them proper handling techniques from the start.
- Flammable Materials: Be aware of any flammable components in your glues or varnishes, and ensure good ventilation. Keep them away from open flames or heat sources.
Sharing and Gifting Your Decoupage Creations: Spreading the Joy
One of the greatest joys of crafting is sharing your finished pieces. Decoupage items make incredibly thoughtful and personalized gifts, imbued with your time and care. It's a wonderful way to connect with others and share a piece of your creative spirit.
One of the greatest joys of crafting is sharing your finished pieces. Decoupage items make incredibly thoughtful and personalized gifts, imbued with your time and care. Consider:










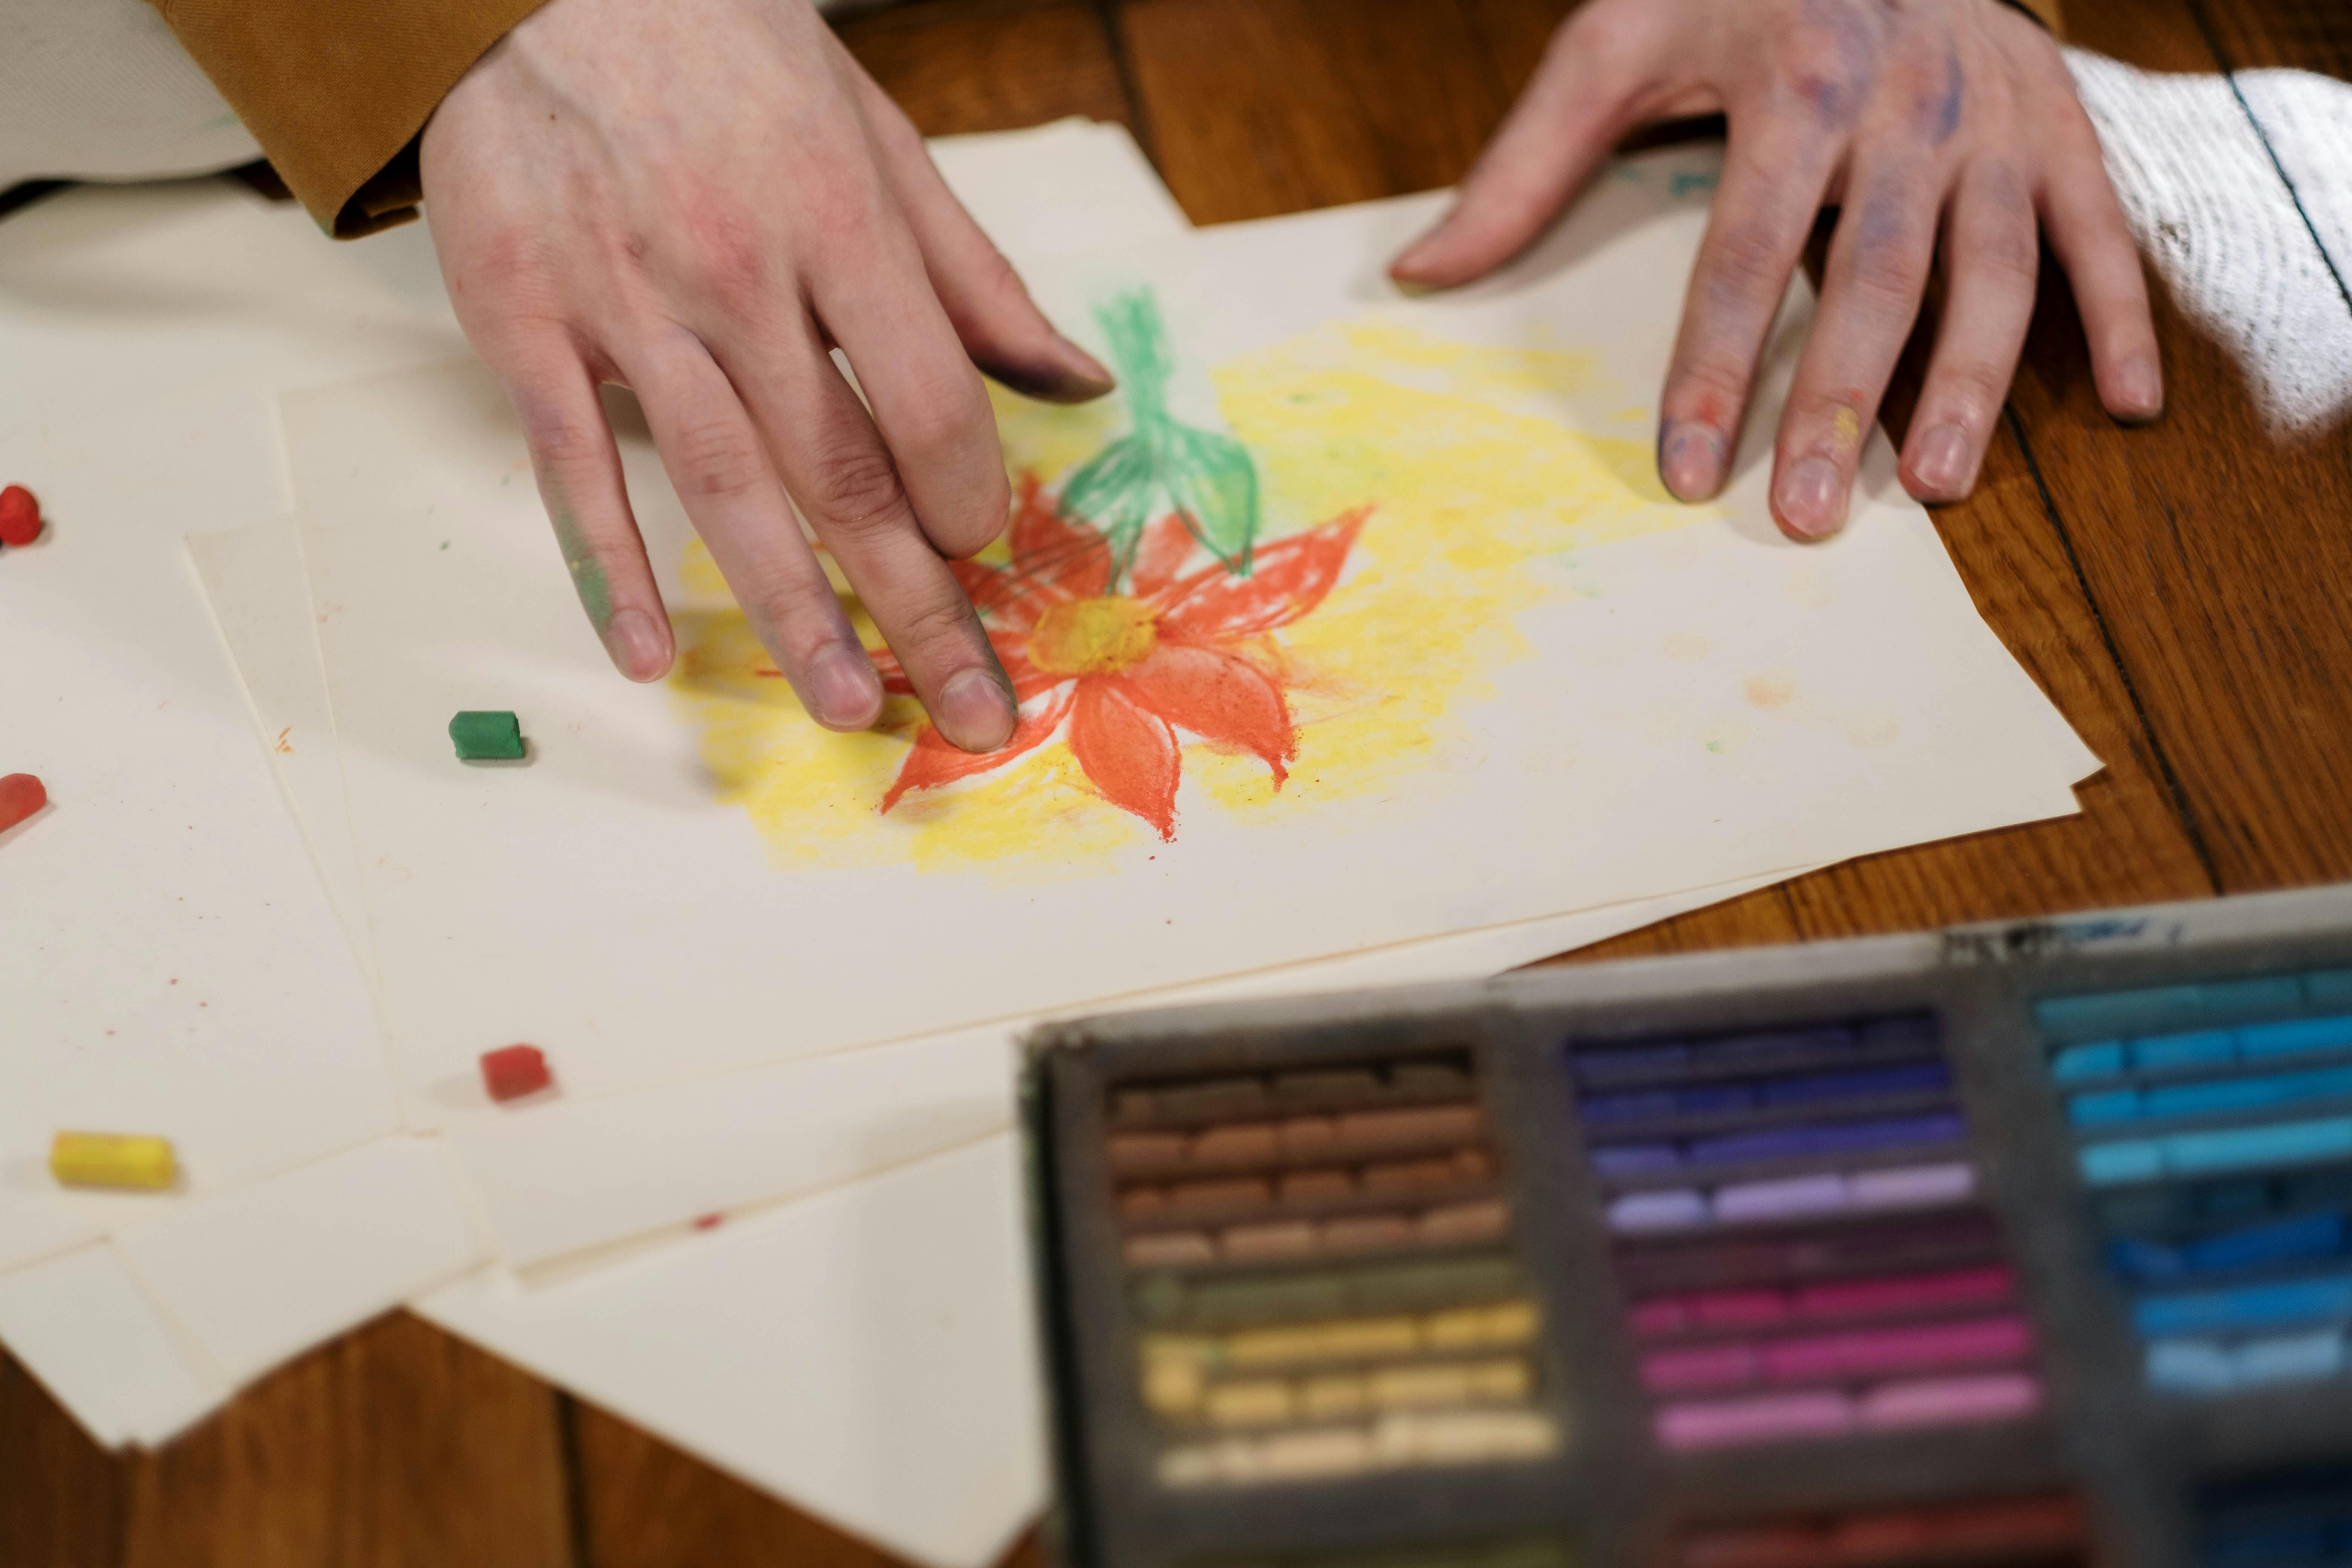



credit, licence
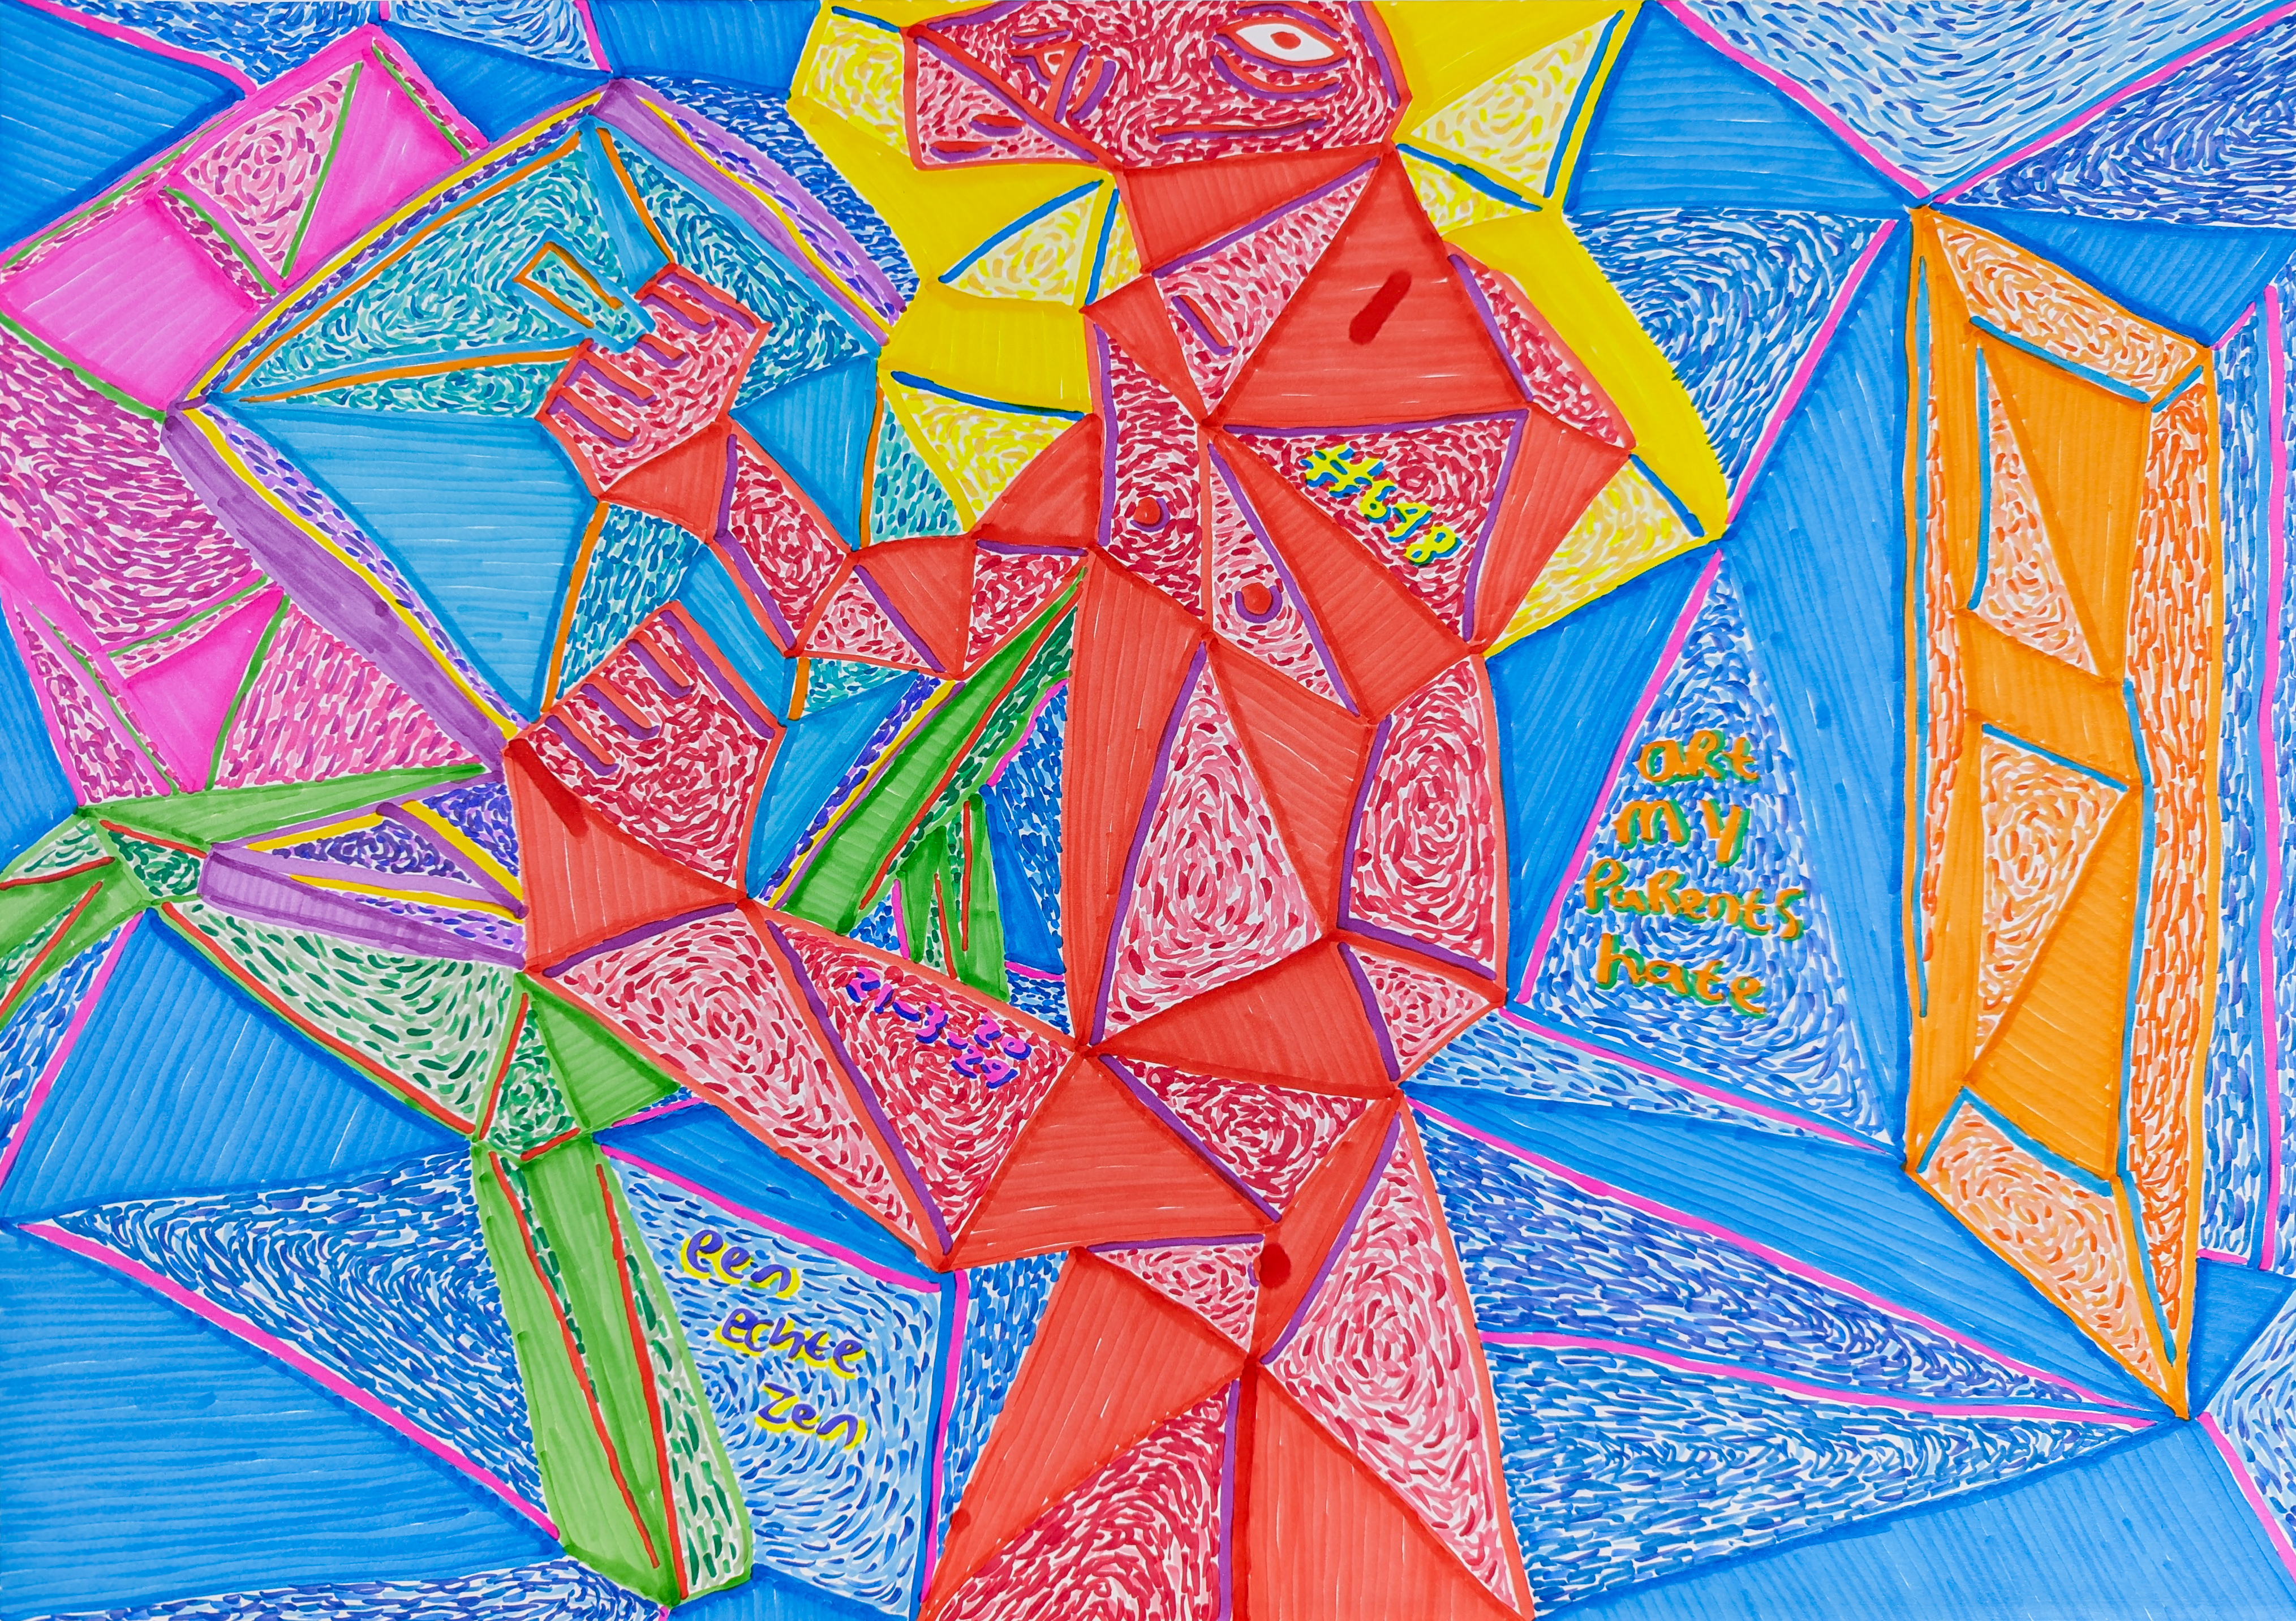
A safe craft space is a happy craft space, allowing you to immerse yourself in creation without worry.
Type of Sharing | Description | Benefits |
|---|---|---|
| Keepsake Boxes | Decoupage with photos or themed papers for birthdays, anniversaries, or baby showers. | Creates deeply personal and cherished gifts, preserving memories in an artistic way. |
| Home Decor | Personalized vases, trays, or wall art can brighten any space and reflect the recipient's style. | Adds unique, handmade touches to interiors, offering decor that mass-produced items cannot replicate. |
| Handmade Markets | If you find a true passion, sell your creations at craft fairs, local markets, and online marketplaces. | Connects you with a community of art lovers, potentially turning a hobby into a small entrepreneurial venture, like my own art sales. |
| Custom Orders | Offer to create custom decoupaged pieces for friends or clients, using their photos, themes, or color palettes. | Provides a deeply personal touch unmatched by ready-made gifts, fulfilling specific desires and visions. |
| Teaching Workshops | Once confident, share your knowledge and passion by teaching beginner's decoupage workshops. | Builds community, introduces others to the craft, and is a rewarding way to deepen your own understanding and appreciation. |
| Online Presence | Share your work on social media, blogs, or a personal website to reach a wider audience and inspire others. | Showcases your talent, builds a portfolio, and connects you with a global creative community. |