
Best Watercolor Paints for Professionals: An Artist's Guide
Ditch the student-grade stuff. I'll walk you through the best professional watercolor brands like Schmincke, Daniel Smith, and more. My honest, unfiltered review.
The Pro Watercolor Guide: My Unfiltered Take on the Best Paints & How to Master Them
I remember the exact moment I switched from student-grade to professional watercolors. It was a tube of Schmincke Horadam Ultramarine Finest, and I was trying to paint a simple sky wash. The color that flowed from my brush was so intense, so vibrant, it felt like I'd been painting in black and white my whole life and suddenly discovered color. It was a revelation – a true 'aha!' moment that shifted my entire perception of what was possible with paint. It was like suddenly being able to speak a language I'd only ever whispered, a secret language that unlocked a new dimension in my art. That day, my entire perception of what was possible with paint utterly shifted. It was exhilarating, a true awakening to the nuanced world of pigment and binder, a cheat code to visual poetry. And honestly, I haven't looked back since. This journey of discovery, this artistic awakening, is precisely what I want to share with you – because if you’re reading this, chances are you’re standing at a similar precipice, ready to dive deeper and unlock new possibilities in your own art. And I'm here to guide you through it, scar tissue and all, to help you bridge that gap from simply creating to truly mastering your medium.
So, you’re probably at that same crossroads, aren't you? You've put in the hours, filled countless sketchbooks, and now you’re feeling that undeniable pull to invest in tools that genuinely match your growing skill and artistic ambition. And you know what? That's not just valid, it's absolutely essential. It’s an act of self-respect for your craft, a quiet declaration that your art matters enough to give it the very best. Think of it this way: you wouldn't run a marathon in flip-flops, right? Your artistic journey deserves the right equipment. This isn't going to be a dry, technical list of pigments and binders (though we'll absolutely get into those juicy details, don't worry). This is a candid, deeply personal conversation about what makes a professional watercolor paint feel right, how it responds to your touch, and which ones I genuinely believe are worth your hard-earned money – not just for today, but for the longevity of your artistic journey. My goal here is to cut through the marketing noise, the endless choices, and share everything I've learned from years of slinging paint, making mistakes, and experimenting across countless palettes. This isn't just about reviewing products; it's a candid dissection of the often-subtle nuances of various top-tier brands, exploring the hidden depths of color characteristics, and giving you a clear roadmap for assembling a palette that truly elevates your work. Consider this your definitive, no-holds-barred guide to the paints that truly earn their stripes in a professional studio, enabling you to create art that sings, screams, or whispers, whatever your vision demands – and ultimately, helping you find your own unique artistic voice, a voice that speaks with clarity and confidence.
Perhaps you're here because you've seen my art or followed my timeline and are curious about the materials I use. Or maybe you're simply a fellow artist, hungry for insights that cut through the noise. Whatever brought you here, welcome. This guide is for you.
Why Trust My Take? A Glimpse Behind the Palette
You might be thinking, "Okay, but who are you to tell me about watercolors?" And that's a fair question! My journey with watercolor has been a long, sometimes messy, but always rewarding one. My abstract and figurative art often features vibrant, fluid elements, and professional watercolors are absolutely foundational to my practice. I've spent decades experimenting, making glorious mistakes, and learning the hard way what truly works. My work is a testament to the expressive power of these materials, and I bring that hands-on, studio-tested perspective to every recommendation I make. I'm not just reviewing products; I'm sharing the distillation of years of artistic obsession, all so you can avoid the pitfalls and leap directly into the joy of mastery. You can see how I use these materials in action on my timeline or browse some of my finished pieces on the buy page, if you're curious! I've poured countless hours into understanding how these pigments truly sing on paper, how they layer, lift, and granulate. I've been in the trenches, wrestling with muddy mixes and celebrating luminous breakthroughs, and it's that hard-won experience I'm offering you here.
First Things First: What Exactly Is Watercolor Paint?
Before we dive into the nitty-gritty of student vs. professional grades, let's just quickly ground ourselves in the basics. What are we actually talking about when we say "watercolor paint"? At its core, watercolor paint is a deceptively simple concoction, yet each component plays a vital role in the magic that happens on paper, from the delicate bloom of a wash to the intense saturation of a detail. It's essentially finely ground pigment suspended in a water-soluble binder. But let's break it down further, because understanding these elements demystifies the paint and empowers you to make more informed choices, transforming you from a passive user into an active, understanding creator. Knowing these ingredients helps you troubleshoot, predict behavior, and even intentionally manipulate your paints for unique effects. It's like understanding the melody and rhythm of a song, not just the lyrics.
Component | Description | Role in Watercolor | Personal Impact & Pro Insights |
|---|---|---|---|
| Pigment | The finely ground, colored particles that give paint its color. These can be natural (minerals, earth) or synthetic (man-made organic compounds). Often identified by a Color Index Name (e.g., PY3 for Hansa Yellow Light, PB29 for Ultramarine Blue), which acts as its unique chemical fingerprint. | This is the very soul of the color! Professional paints boast a higher concentration of pure, often single-source pigments, leading to unparalleled vibrancy, tinting strength, and lightfastness. This also means you need less paint for more impact, making tubes last longer. | When you invest in professional paints, you're investing in the purity of color. This means cleaner mixes, less mud, and art that genuinely lasts. Think of it as the difference between a high-definition photograph and a grainy low-res image. I always check the pigment codes; it tells you everything you need to know about what's really in the tube, not just the marketing name. It’s like knowing the exact ingredients in a gourmet meal – it ensures a predictable and delicious outcome, every single time. And let me tell you, when you’re building complex glazes, that purity is a non-negotiable. For a deeper dive, check out my definitive guide to color theory in art. |
| Binder | The adhesive that holds the pigment particles together and binds them to the painting surface (usually paper) once the water evaporates. | Gum arabic (derived from acacia trees) is the traditional and most common binder. It allows paint to be re-wetted, gives transparency, and ensures smooth flow. Some brands use proprietary synthetic binders like Aquazol (QoR), which offer unique properties like intense saturation, flow, and often a unique 'gummy' or viscous feel that I personally adore for its ability to create luminous layers. | The binder dictates so much of the paint's feel and how it performs on paper. A good binder ensures the paint flows effortlessly, re-wets like a dream (a huge plus for studio efficiency!), and doesn't get chalky or brittle. It’s the invisible hand guiding your brush, making the process a joy, not a fight. I’ve definitely fought with paints with poor binders, ending up with streaky washes that refuse to layer. It’s a frustrating experience that takes you right out of the creative flow. The unique binders in brands like QoR, for instance, open up entirely new textural and layering possibilities, which is why I’m always keen to experiment. |
| Vehicle | The liquid component that carries the pigment and binder, allowing it to spread and flow. In watercolors, this is primarily water. | Water is the medium! It activates the paint, allows for washes, glazes, and all the fluid effects watercolor is known for, from the softest bloom to the most intense saturation. The quality and even the temperature of water can subtly impact your painting, affecting drying times, the vibrancy of delicate washes, and how pigments settle. | Believe it or not, the water you use matters! Distilled water can sometimes offer purer results, especially with delicate washes and when you’re aiming for absolute clarity, avoiding mineral deposits that can subtly dull your colors over time. But honestly, good tap water is usually just fine for most of us, especially if it's not overly hard. Just avoid anything with heavy chlorine, as that can sometimes react with certain pigments, causing unexpected shifts in hue or dulling the overall brilliance. I've definitely noticed a difference in very subtle glazes when I switch to distilled water for a special project. |
| Additives | Minor ingredients that control various paint properties like drying time, surface tension, flow, and to prevent cracking in pans. These can include humectants (like glycerin or honey), dispersants (like ox gall), and preservatives (to prevent mold). | Humectants (like honey or glycerin) keep the paint moist, aid re-wetting, and improve flow and luminosity. Dispersants (like ox gall, though some brands like Holbein intentionally omit it for a more controlled flow) improve the even spread of paint and reduce surface tension. Preservatives prevent mold growth in the pans or tubes. These often contribute significantly to the unique "feel" and performance characteristics of a brand, impacting everything from how a wash settles to how easily paint lifts. | This is where the magic happens and brands get their unique personality. Honey (Sennelier, M. Graham) creates a luscious, moist paint that re-wets beautifully; ox gall improves flow and reduces surface tension, making for smoother washes. These subtle tweaks make a huge difference in how the paint dances on your paper, influencing everything from re-wetting to blending. It’s the secret sauce that makes each brand distinct, and often why I have favorites for specific techniques. For instance, the absence of ox gall in Holbein paints gives them a very controlled, almost 'grippy' feel that I adore for precision work. Understanding these additives helps you choose paints that align with your preferred working style, allowing you to manipulate the medium rather than fighting against it. |
So, when you squeeze out a tube or touch a wet brush to a pan, you're interacting with this carefully balanced symphony of components. The quality of each element, from the purity of the pigment to the type of binder, is what ultimately separates a fleeting practice paint from an archival masterpiece material that sings with luminosity. It’s an alchemy, really, and understanding it puts you in control of the spell.

What's the Real Difference, Anyway? Student vs. Pro: Why Your Art Deserves More
Let's cut through the marketing noise, because trust me, there's a lot of it out there. When you decide to pay a bit more for professional paints, you're not just buying a fancy label or a prettier tube design. Oh no. You're buying performance, longevity, and a vastly different artistic experience. It's like the difference between a mass-produced pop song and a meticulously crafted symphony – both can be enjoyable, but one offers a depth and complexity that the other simply can't match. The core difference boils down to a few critical aspects that impact everything from your mixing capabilities to the archival quality of your finished piece, fundamentally shifting what's possible on your paper. Investing in professional-grade watercolors is, in essence, investing in the future of your art and your own creative satisfaction. It's a statement that your vision deserves the best tools to come to life.
Feature | Student Grade | Professional Grade | Why it Matters (My Experience) |
|---|---|---|---|
| Pigment Load | Lower concentration, often relying on cheaper fillers/extenders (like chalk or clay) to increase bulk and cut costs. This means less actual color. | Extremely high, almost pure concentrated color, with minimal fillers. This intense saturation means a little goes a very long way, offering superior vibrancy, tinting strength, and mixing power. | This is huge! With student paints, I'd often layer and layer, trying to get intensity, trying to coax out a richness that simply wasn't there, only to end up with mud. Pro paints deliver that punch with a single, transparent wash, making color theory less of a struggle and more of a joy. It’s like turning up the volume on your entire painting, revealing a depth you didn't know was missing. I remember a specific landscape where I struggled to get a vibrant green for the foliage with student paints; switching to a professional Phthalo Green was like magic – instant depth and brilliance. |
| Lightfastness | Often fugitive (meaning they fade easily); colors can fade significantly, sometimes dramatically, within a few years or even months of light exposure, particularly in direct sunlight. This is heartbreaking if you've poured your soul into a piece, only to see it literally disappear. | Rigorously tested and rated for permanence by organizations like ASTM (American Society for Testing and Materials) or Blue Wool Scale (BWS). Look for ASTM I ('Excellent Lightfastness') or ASTM II ('Very Good Lightfastness'). This ensures your artwork will stand the test of time, resisting fading for generations. This isn't just a technical spec; it's a promise that your creative legacy will endure. | This is non-negotiable for me – it's an ethical responsibility to your art and anyone who views or collects it. I've personally seen beautiful paintings turn into ghosts because of fugitive pigments, and it’s truly a punch to the gut. If your art matters to you, or if you plan to sell it, invest in lightfastness. It’s an ethical commitment to your craft and your audience, and a fundamental act of respect for your own hard work. Don't let your artistic efforts literally vanish into thin air! I once created a stunning piece for a friend, only to see it visibly fade within a year because I hadn't checked the lightfastness. It was a heartbreaking lesson I never repeated. For a deeper understanding of color stability, you might find my guide on how artists use color illuminating. |
| Binder | Simpler, often lower-grade gum arabic, sometimes blended with synthetic additives to cut costs. This can result in paints that are chalky, difficult to re-wet, or less luminous. | Premium, high-quality gum arabic, meticulously refined. Many brands also incorporate natural plasticizers like honey, glycerin, or ox gall, which enhance moisture retention, ensure silky smooth flow, effortless re-wetting, and a beautiful luminosity. | The binder dictates the entire experience. Chalky paints are frustrating; they don’t flow, don’t blend, and often lift underlying layers – a truly annoying experience when you're trying to build delicate glazes. High-quality binders make the paint glide, blend like a dream, and re-wet instantly – saving you time and frustration and letting you focus on the art, not fighting your materials. |
| Color Range | Limited, often relying heavily on 'hues' (mixtures of cheaper pigments designed to mimic genuine ones) rather than true single-pigment options. This restricts mixing possibilities and color purity, often leading to muddy or dull mixes. | Vast, encompassing a spectacular array of unique, vibrant single-pigment colors, historical pigments, and innovative, often granulating mineral (like Daniel Smith's PrimaTek) options. This allows for cleaner mixes, unique textural effects, and a broader expressive palette. | Hues are fine for practice, but they often lead to muddy mixes and unpredictable results, especially when layering. Single-pigment colors are like pure notes in a symphony – they blend cleanly and predictably, allowing you to compose complex harmonies without discord. It makes mixing a joy, not a guessing game. I remember trying to mix a vibrant purple with a "Violet Hue" and ending up with a dull, brownish mess. Switching to a genuine Quinacridone Magenta and Ultramarine Blue was a revelation; the purples were vibrant and clean, exactly what I envisioned. This purity is why a deep understanding of what are the primary colors and their characteristics is so vital. |
| Behavior | Can be streaky, chalky, opaque, dull, or hard to re-wet from a dried state, leading to frustrating experiences and a lack of control over washes and blending. Often pill or tear paper with repeated layers. | Re-wets beautifully and instantly from pans or dried palettes, flows smoothly and predictably, offers nuanced and often complex granulation, maintains superb transparency for luminous glazes, and allows for extensive layering without disturbing previous washes. | This is where the joy of watercolor truly lies! Predictable flow, effortless re-wetting, and the ability to layer without lifting previous washes are game-changers. It feels less like fighting the medium and more like dancing with it. You gain control, and with control comes confidence and expressive freedom. I’ve seen my own work transform simply by switching to paints that cooperate. When you can build transparent glazes without disturbing the underlying layers, that's when the true luminosity of watercolor emerges, creating effects that shimmer with light. It’s pure magic, honestly. |
Basically, student paints are designed to be affordable and accessible for practice. They're great for sketchbooks and quick studies, absolutely, but they often come with hidden compromises. Professional paints, on the other hand, are engineered to be the absolute best possible expression of a pigment. They allow for more vibrant, cleaner mixes, better lifting for corrections and highlights, and perhaps most importantly, they create work that will last for generations. I've seen firsthand the heartbreak of a beautiful painting fading into a sad, ghostly version of its former self after just a few years because the artist skimped on lightfastness. If you plan on selling your art, or even just gifting it to someone you care about, lightfastness is non-negotiable. Your collectors (or your loved ones) expect their investment, emotional or financial, to not fade into a sad, ghostly version of its former self in a few years. It's about respecting your effort and your audience – and your own hard work, for that matter. I've had to learn this lesson myself, seeing a piece I poured my heart into lose its vibrant soul. Don't let your art become a fleeting memory; let it be a lasting legacy.
So, while student paints have their place for casual practice, the leap to professional paints is about elevating your craft to a level where your materials support, rather than hinder, your deepest artistic ambitions. It's a game-changer for control, vibrancy, and peace of mind. It's a subtle shift, but it's one that unlocks a whole new level of creative freedom and professional satisfaction. Don't just take my word for it – try a few professional tubes next to your student-grade ones, and I promise you'll feel the difference immediately.

But beyond lightfastness, there's a whole world of pigment behavior that truly sets professional paints apart, giving them a rich, complex personality. We're talking about properties like transparency (how much the white of the paper shows through, allowing luminous layers to build and creating that characteristic watercolor glow – crucial for that ethereal quality we all chase!), staining (how much pigment is absorbed into the paper fibers, impacting your ability to lift or correct mistakes, and also how well it layers without reactivating the underlying wash, which is key for building rich glazes), and granulation (where pigments settle into the paper's texture, creating a beautiful mottled, almost sparkling effect that I personally adore for landscapes and atmospheric effects, adding depth and visual interest – it's like tiny stars on your paper!).
Understanding Key Watercolor Characteristics
These subtle qualities are truly the language of watercolor, allowing artists to achieve a vast range of effects. Learning to 'read' them in your paints will unlock entirely new expressive possibilities, letting you speak with more eloquence through your art.
Let's break down these essential characteristics, because understanding them is like getting a cheat code to watercolor mastery:
- Transparency: This refers to how much light passes through the dried pigment, allowing the white of the paper or underlying layers to show through. It's the hallmark of traditional watercolor and crucial for building those luminous, glowing glazes that make the medium so beloved. I live for transparent colors; they're what give watercolor its ethereal, light-filled quality. Think of them like stained glass – light shines through.
- Staining: This describes how deeply a pigment penetrates and dyes the paper fibers. High-staining colors are notoriously difficult to lift or remove once dry (think Phthalo Blues and Greens!), making corrections tricky but also ensuring layers stay put. Non-staining colors, conversely, lift easily, offering more flexibility for highlights and subtle adjustments. Knowing your staining pigments helps you plan your layers and avoid frustration. I’ve definitely learned to respect my staining colors the hard way – once they’re down, they’re down.
- Granulation: Oh, this is a personal favorite! Granulating pigments settle into the paper's texture as they dry, creating a beautiful, mottled, almost sparkling effect. It adds incredible depth, visual interest, and an organic quality that I adore for landscapes, skies, and abstract textures. Daniel Smith's PrimaTek line is legendary for this, but many Ultramarines and earth tones granulate wonderfully. It’s like tiny stars appearing on your paper, a happy accident you can learn to harness!
More Expressive Characteristics
But it doesn't stop there. Professionals also consider:
- Flocculation: Similar to granulation, but often with a more pronounced clumping of pigment particles, creating a distinct, textural effect, particularly noticeable in some earth tones or mineral pigments. It can create an almost velvety texture that’s distinct from the more granular sparkle. I use this strategically for areas where I want a truly earthy, grounded feel.
- Opacity: How much a color covers previous layers or the white of the paper. While transparency is generally prized in watercolor, some pigments are naturally more opaque or semi-opaque (like Cadmiums or Naples Yellow), providing a strong, solid block of color. I use these strategically for bolder accents, focal points, or when I need a color to truly hold its own against lighter washes, almost like a whisper of gouache.
- Tinting Strength: This refers to how much a small amount of pigment can alter a mixture, which is crucial for economical mixing and understanding how dominant a color will be in a blend. A little Phthalo Blue (PB15) goes a very long way, trust me, I've accidentally overpowered entire mixes with it! Knowing your tinting strength helps you mix with confidence and avoid unintended mud.
- Lifting: The ease with which a dried color can be removed from the paper, either for corrections or for creating highlights and textures. A high-staining pigment is incredibly difficult to lift, while a non-staining one can be removed almost completely, which is invaluable for techniques like creating soft clouds or bringing back highlights. It’s one of watercolor’s more forgiving characteristics, a subtle eraser in your toolkit. These aren't just technical terms; they're expressive tools that professional artists rely on to create truly sophisticated and nuanced work. Understanding them is like learning the secret language of your paints, giving you complete control over your artistic narrative, allowing you to orchestrate subtle shifts in mood and depth.
For more on the different types of paints out there, you can check out my definitive guide to paint types for artists. Or, if you're just starting your journey, you might find my guide to essential watercolor supplies for beginners a helpful stepping stone.

Understanding Artist Grades and Series: Why Prices Vary (and Why It's Not a Quality Scale!)
Before we dive into my favorite brands – and trust me, there are some real stars in that lineup – let's briefly touch on something that often confuses newer artists: the "grade" and "series" labels. When you look at professional paints, you'll often see them divided into Series 1, Series 2, Series 3, and so on. This isn't a quality rating in the traditional sense; it's purely a pricing structure based on the rarity, inherent cost, and processing difficulty of the raw pigment itself. I've seen too many artists mistakenly think a Series 5 paint is 'better' than a Series 1, simply because it's more expensive. That's a common misconception I want to clear up right away. I fell for it too in my early days, thinking a higher price automatically meant higher quality in every aspect. But it's not about quality; it's about the journey that particular pigment took from the earth (or the lab) to your palette. Paints are priced by "series" based on the inherent cost of the raw pigment. Think about it: some pigments, like natural mineral pigments (e.g., Lapis Lazuli, Amethyst from Daniel Smith's PrimaTek line), are incredibly expensive to source, purify, and mill into a fine powder suitable for paint. These pigments are often rare, require complex processing, or are simply more difficult to extract from the earth. Others, like many synthetic organic pigments (e.g., quinacridones, phthalo colors), are more affordable to produce due to their abundance or simpler manufacturing processes. So, a Series 1 yellow like Hansa Yellow Light (PY175) or Hansa Yellow Medium (PY97) might be just as high-quality, as intensely vibrant, and as lightfast as a Series 5 Cobalt Blue (PB28) or Cadmium Red (PR108), but the cobalt or cadmium costs more because its pigment is inherently pricier to acquire and process. Think of it like precious metals versus common alloys – both can be beautifully crafted, but the raw material dictates the base cost. Don't be fooled into thinking a lower series number means lower quality – it simply reflects the pigment's cost. You're always getting professional-grade quality; you just have different price tags for different colors, and understanding this helps you build a palette without unnecessary financial anxiety, allowing you to prioritize the colors you truly need and avoid unnecessary splurges on higher series numbers simply for the sake of it. It's about smart investing, not just spending. I remember agonizing over buying a Series 5 color, thinking it would magically transform my art, only to realize later that a much cheaper Series 1 color was just as beautiful and performed just as well for my needs. Live and learn, right?
The Heavy Hitters: A Tour of My Favorite Pro Brands
Alright, let's get to the good stuff. Over the years, I've tried more brands than I can count – seriously, my studio is a graveyard of half-used tubes and forgotten pan sets. Some were utterly forgettable, but a select few have absolutely earned a permanent, cherished spot on my palette. These are the brands I return to again and again, the ones that consistently deliver, and the ones I trust for my professional work. Here are my top contenders, each with its own personality and unique strengths.

Schmincke Horadam
Ah, my first love. Schmincke is a German brand known for its incredible quality, a heritage of craftsmanship that truly shines through in every pigment. Their paints re-wet instantly, which is fantastic if you work with pans and value efficiency in your studio practice (or if you're like me and occasionally forget to re-wet them until the last minute). The colors are brilliant, and they have a buttery consistency that's just a joy to work with, feeling luxurious on the brush. They flow beautifully in wet-in-wet applications, allowing for seamless gradients and luminous washes that truly sing. For me, their granulation in colors like French Ultramarine is simply exquisite, adding such depth to skies and water – a texture that can truly elevate a landscape or a stormy sky. They also have an impressive range of genuine single-pigment colors, which, as I always say, are the key to clean, vibrant mixes. I did a more focused review of Schmincke Horadam watercolors if you want to dive deeper into their specific magic, but honestly, you can't go wrong starting with their foundational colors. I find myself reaching for them constantly, a testament to their reliability and pure joy of use. They're particularly forgiving if you're new to professional paints, offering consistent performance that helps build confidence. I remember using their Transparent Orange for a fiery abstract piece once, and the way it layered without disturbing the blues underneath was just breathtaking – pure luminosity. Their smooth flow makes them incredibly intuitive, almost like they anticipate your next move on the paper.

- Best for: Artists who love vibrant, pure color, desire exceptionally smooth and luminous washes, and appreciate instant re-wetting properties for both studio and plein air work. Ideal for botanical art, portraits, and expressive landscapes.
- Standout Colors: Ultramarine Finest (a true benchmark, I believe), Helio Cerulean, Transparent Orange, and their incredibly vibrant Quinacridone Magenta.
Daniel Smith
If Schmincke is the refined European classic, Daniel Smith is the innovative American powerhouse. They are famous for two things: a ridiculously massive color range and their PrimaTek line, which are paints made from actual ground minerals like Lapis Lazuli and Amethyst. Their paints are pigment-rich and many of them granulate beautifully, creating incredible texture that truly captivates the eye. Their legendary dot cards are a dangerous rabbit hole for your wallet (you've been warned!), offering a chance to sample a vast array of their unique colors, including their incredible PrimaTek line made from actual ground minerals. I mean, who wouldn't want to paint with Amethyst or Bloodstone? It's like bringing a piece of the earth directly onto your paper, an unparalleled connection to nature in your art. For those truly passionate about unique pigments, exploring these options can open up entirely new textural and color possibilities in your work, pushing the boundaries of what watercolor can do. I often find myself building entire landscapes or abstract pieces around a single PrimaTek color, letting its natural granulation and subtle shifts in hue dictate the mood and atmosphere. Their Lunar Black, for example, creates these mesmerizing, almost moon-like textures that are just impossible to replicate with anything else. It's like having a little piece of the cosmos on your paper.
- Best for: Texture lovers, landscape artists, abstract painters, and experimental color explorers who crave a vast palette and unique effects. If you love granulation, this is your brand. Their commitment to unusual pigments also makes them ideal for artists who want to explore beyond traditional color mixing.
- Standout Colors: Quinacridone Sienna (a staple!), Moonglow, Undersea Green, and frankly, literally any of the PrimaTeks – they're all little treasures. Also, their Transparent Pyrrol Orange is magnificent. And don't even get me started on their Interference and Duochrome colors if you want to add a subtle shimmer!
Winsor & Newton Professional
This, for many, is the benchmark. The old guard, the reliable stalwart. Winsor & Newton has been around forever, a brand absolutely synonymous with quality art materials, and their Professional line is undeniably one of the most reliable and widely available paints on the market. Their colors are consistently formulated with exacting standards, incredibly well-milled to a smooth consistency, and famously known for being highly lightfast across their range. This means your artwork will genuinely stand the test of time (and sunlight), a crucial factor for any serious artist. They might not have the immediate razzle-dazzle or experimental flair of Daniel Smith's mineral paints, but for pure, reliable color that behaves exactly as you expect, every single time, they are absolutely top-tier. They offer a great balance of transparent, semi-opaque, and granulating colors, making them incredibly versatile for almost any watercolor technique you can throw at them, from delicate glazes to bold washes. If you're unsure where to start your professional journey, I can confidently tell you that you absolutely cannot go wrong with W&N; they are the gold standard for a reason, providing a solid, dependable foundation for any artist's palette. Their consistency means you can rely on them whether you're working on delicate botanical details, bold abstract compositions, or traditional landscapes. I have a tube of their French Ultramarine that's been on my palette for years, and it's never once disappointed – always the same rich, granulating blue. It's the kind of reliability that allows you to focus purely on your artistic vision, rather than wrestling with your materials. They're a truly dependable companion in the studio, and I often recommend them as a foundational brand for anyone serious about professional watercolor. For a deeper dive, check out my thoughts in this reviewing the best professional watercolor sets.
- Best for: Artists who prioritize unwavering reliability, consistent performance, classic watercolor behavior, and a widely accessible range of high-quality, archival pigments. An excellent choice for beginners to professionals alike, offering versatility for all techniques.
- Standout Colors: Winsor Lemon, French Ultramarine, Permanent Alizarin Crimson, and a beautiful Indian Red. Their Cadmium Yellows and Reds are also famously vibrant and reliable.
Holbein Artists' Watercolors
Holbein, a truly distinguished Japanese brand, stands out in the watercolor world for its unique formulation: they purposefully don't use ox gall as a spreading agent. This often means their paints have a more matte, velvety finish and can be a bit more challenging to lift once dry – a characteristic some artists, especially those focused on precise layering and crisp edges, specifically seek out. However, don't mistake that for lack of intensity; their colors are incredibly vibrant and vivid, with a very smooth, consistent texture that feels almost creamy and luxurious. They are particularly known for their opaque-like vibrancy, especially in their artist watercolors, making them a superb choice when you need a punch of saturated, dense color that truly holds its ground. If you're looking for clean, pure color with a controlled application that resists excessive spreading, particularly when you need to layer without disturbing previous washes, Holbein is a fantastic, deliberate choice. This characteristic makes them a go-to for my precise botanical studies and detailed illustrations where I need absolute control over where the paint goes, allowing me to build up delicate glazes without fear of lifting previous layers. They truly excel when you need a crisp edge and vibrant, uncompromised color, maintaining an integrity that is simply beautiful to behold. I find their viridians and permanent yellows to be particularly exquisite for botanical details. If you've struggled with other brands bleeding into adjacent washes when you need crisp separation, Holbein's controlled flow will feel like a revelation.
- Best for: Illustrators, botanical artists, detailed fine art, and those who prefer a less spreading, more controlled application and matte finishes. Excellent for clean layers where previous washes need to stay put. I often find myself reaching for Holbein when I need to define intricate edges in a floral piece, where I absolutely cannot afford any bleeding. They're a precision tool in a world of flowing washes.
- Standout Colors: Opera (a genuine, non-lightfast color, but stunningly vibrant and popular, especially for florals), Horizon Blue, Brillant Pink, and the rich Permanent Yellow Deep. Their Jaune Brilliant and various opaque whites are also exceptional. Their Viridian is also a gorgeous, clean green that I use constantly for botanical work.
Da Vinci Artist Watercolors
Da Vinci, a respected American brand with a long and proud history, offers a truly impressive range of single-pigment colors known for their intense saturation and beautiful, predictable flow. They are often compared to Daniel Smith for their richness and high pigment load, but they frequently come at a slightly more accessible price point for many artists, making them an excellent value without compromising an inch on professional quality. Their paints re-wet beautifully, which is always a bonus, allowing you to easily pick up rich color from dried palettes. They maintain their vibrancy and purity even when significantly diluted, which is a hallmark of a professional paint. I've found them incredibly reliable for everything from expansive, luminous washes to the most intricate fine detail. This brand is a true workhorse, always delivering. In fact, many artists consider them a strong competitor to Daniel Smith in terms of pigment load and vibrancy, often at a more attractive price point. They are, in my experience, an exceptional value in the professional watercolor market, and I often reach for them for large studio works, particularly when I need to cover a lot of paper with intense, consistent color that won't break the bank. Their generous tube sizes for the price are a definite bonus! They're also an excellent choice if you're looking to create a comprehensive palette of single-pigment colors without the prohibitive cost sometimes associated with other top-tier brands. I've used their Quinacridone Sienna for entire abstract backgrounds, and it always delivers this incredible, glowing warmth, spreading evenly across large areas without fuss. Da Vinci really proves that you don't have to sacrifice quality for affordability, which is a huge win for any artist, especially those who paint large or frequently.
- Best for: Artists seeking high-pigment load, exceptional value, a broad range of pure single-pigment colors, and consistent, professional performance across all applications. If you're looking for a reliable, expansive palette without breaking the bank, look no further.
- Standout Colors: Permanent Alizarin Crimson, Phthalo Blue (Green Shade), Quinacridone Sienna, and a vibrant Cadmium Yellow Medium Hue. Their Cobalt Teal and Cerulean Blue are also fantastic granulators.
M. Graham & Co. Artists' Watercolors
Another American gem, M. Graham paints utilize a unique formulation featuring honey as a binder, much like Sennelier, but with their own distinct characteristics and a truly unique feel. The honey component keeps them wonderfully moist and vibrant in the pan or on your palette, making them an absolute dream to re-wet – you barely touch them with a damp brush, and they spring to life with intense color. They possess a gorgeous, rich consistency and incredible flow, making them fantastic for smooth, even washes and seamless blending, which is vital for achieving luminous effects. Many artists, myself included, find their colors particularly luminous and easy to blend, offering a sort of 'glow from within' quality that's hard to replicate. They might be a bit stickier in the palette due to the honey, especially in humid climates – a minor quirk I've learned to manage – but the exceptional performance and buttery feel are, in my opinion, more than worth that tiny inconvenience. It's a small trade-off for such vibrancy and ease of use, especially when I want to achieve those soft, ethereal blends that seem to glow from within. Their moist consistency also makes them a favorite for artists who like to work from a dried palette, as they re-activate almost instantly. I remember doing a portrait where I needed the skin tones to have this incredible softness and luminosity, and M. Graham's Azo Yellow and Quinacridone Rose created exactly that blend, almost like magic.

- Best for: Those who love luminous colors, smooth blending, exceptionally easy re-wetting from pans or tubes, and a rich, honey-based consistency.
- Standout Colors: Sap Green, Dioxazine Purple, Azo Yellow, and a beautiful Cobalt Teal.
QoR Modern Watercolors (Golden Artist Colors)
QoR (pronounced "core," like the core of an apple, not 'q-o-r', a detail that always makes me smile) is a relatively newer, yet incredibly impactful, player in the watercolor world. Developed by Golden Artist Colors, a company already renowned for their high-quality acrylics, they've truly innovated by using an exclusive, proprietary binder called Aquazol. This binder results in remarkably vibrant, intensely saturated colors that re-wet effortlessly and possess truly exceptional flow and depth. They are, in my experience, among the most vibrant and fluid watercolors on the market, offering incredible transparency and a rich, saturated finish that almost glows from within. Because of the Aquazol, they can feel quite different from traditional gum arabic-based paints – perhaps a little more 'gummy' or viscous – but in a refreshing and exciting way, allowing for unique layering and glazing effects that build luminosity beautifully. If you're looking to push the boundaries of traditional watercolor, experiment with new textures, or simply crave unparalleled vibrancy and a truly unique working experience, these are an absolute must-try. I find them particularly inspiring for my abstract pieces, where their intensity and fluid nature allow me to explore new dimensions of color and form, often creating stunning jewel-like glazes that seem to refract light from within the paper. Their unique handling makes them a true joy for experimental work. If you're coming from an acrylic background, the vibrancy and saturation of QoR might feel particularly familiar and exciting, offering a bridge to the fluid world of watercolor.
- Best for: Artists seeking modern vibrancy, intense saturation, unique handling properties for glazing and layering, and those open to exploring binders beyond traditional gum arabic. Excellent for artists who also work in acrylics and appreciate Golden's innovative approach. If you want colors that truly pop off the paper, QoR is a fantastic choice.
- Standout Colors: Cobalt Teal, Iridescent Gold, Quinacridone Gold (an exceptional version), and a stunning Permanent Violet. Their Quinacridone Magenta and Pyrrole Red Light are also incredibly potent. I'm also particularly fond of their Payne's Gray, which is this deep, rich, slightly granular dark that adds incredible depth to shadows without feeling flat. Their Sap Green is also a beautiful, rich hue that I use constantly for botanical work.
Sennelier l'Aquarelle
This venerable French brand has a delightful, well-known secret ingredient: local honey. This isn't just a marketing gimmick; the honey acts as both a natural preservative and a plasticizer, giving the paints a unique, luminous quality and a very smooth, almost silky flow that feels luxurious under the brush. They remain slightly moist and flexible in the pan, even after fully drying, and are incredibly easy to re-wet, which makes them ideal for artists who primarily prefer pans or work in dry climates where other paints might become brittle. The colors feel exceptionally bright and radiant on paper, almost singing with a delicate glow, and they're a well-loved favorite among botanical artists and illustrators for their clean, pure washes, subtle blending, and overall ethereal quality. There's a certain romanticism to working with Sennelier that I truly appreciate; it feels like you're tapping into a long, rich history of French artistry, a whisper of Monet in every stroke. The way they flow, the delicate bloom of color on the paper—it’s just a lovely experience that elevates the creative process, making every painting session a luxurious escape. They're also exceptionally smooth for glazing, building up subtle layers of color without disturbing previous washes, which is a hallmark of truly sophisticated watercolor technique. I once used their Opera Rose for a series of vibrant floral studies, and the sheer radiance of the color, combined with its effortless blending, made those paintings truly sing. Their honey-infused nature means they stay wonderfully moist on the palette, always ready to deliver that burst of luminous color. It's like a little piece of French elegance on your palette.
- Best for: Those seeking exceptional luminosity, smooth blending, effortless re-wetting, and a touch of traditional French artistry. Particularly cherished by botanical artists, illustrators, and portrait painters for their delicate yet vibrant washes.
- Standout Colors: Sennelier Yellow Light, Opera Rose (another stunning, though less lightfast, floral favorite), Royal Blue, and the vibrant Chinese Orange. Their Phthalo Green Light and Caput Mortuum are also wonderfully unique.
ShinHan Professional Watercolors
ShinHan Art is a well-respected Korean brand that has steadily gained a loyal following among professional artists for their vibrant, intensely pigmented watercolors. What I particularly love about ShinHan is their commitment to single-pigment colors and incredibly clean, pure hues. They offer a fantastic balance of quality and value, making them an excellent choice if you're looking to expand your professional palette without committing to some of the higher price points of European brands. Their paints re-wet easily, flow beautifully, and maintain their clarity even in complex mixes. I often recommend them for artists who prioritize clean, bright color, especially for illustration, graphic arts, or any work where a crisp, unmuddy palette is paramount. They’re a testament to the fact that exceptional quality doesn't always have to break the bank. Their commitment to clean, pure pigments means your mixes will be vibrant and predictable, reducing the chance of muddy results, which is a blessing for artists who value clarity. I've used their Permanent Red for striking abstract elements, and it always maintains its intense, pure hue, even in complex mixes – a real testament to its quality and reliability.
- Best for: Illustrators, graphic artists, fine artists who demand vibrant and pure colors, and those seeking excellent value in a professional-grade paint. Their clean mixing properties are a huge advantage, especially when you're working on projects where color purity is paramount, and you can't afford muddy results.
- Standout Colors: Permanent Red, Vandyke Brown, Viridian Hue, and their incredibly intense Brilliant Pink. Their Cobalt Blue is also a personal favorite, offering a clean, clear blue that mixes beautifully without overpowering other colors. Their Sepia is also a rich, warm brown that creates beautiful darks.
Pro Watercolor Brands: A Quick Comparison
To help you navigate this wonderful (and sometimes overwhelming) array of choices, here's a quick rundown of some key characteristics of the top professional brands we've just explored. Think of this as your cheat sheet to quickly identify which brand's personality might align best with your artistic temperament and current project needs.

Brand | Key Feature | Binder | Handling | Unique Aspect | Best For |
|---|---|---|---|---|---|
| Schmincke Horadam | Intense vibrancy, instant re-wetting | Gum Arabic, Ox Gall | Smooth, fluid, luminous washes | Buttery consistency, high transparency | Vibrant colors, smooth washes, botanical art |
| Daniel Smith | Massive range, PrimaTek mineral paints | Gum Arabic | Granulating, rich, textural | Literal ground minerals, unique effects | Texture, landscapes, abstract, color exploration |
| Winsor & Newton | Unwavering reliability, consistent quality | Gum Arabic, Ox Gall | Predictable, classic, well-balanced | Widely available, industry benchmark | Reliability, traditional techniques, all-round use |
| Holbein | Intense, vivid colors (no ox gall) | Gum Arabic, proprietary | Controlled, less spread, matte finish | Opaque-like vibrancy, excellent for precision | Illustrators, botanical artists, detailed work, controlled application |
| Da Vinci | High pigment load, exceptional value | Gum Arabic | Saturated, beautiful flow, re-wets well | Consistent performance, broad single-pigment range | Pigment intensity, value, large washes, versatile |
| M. Graham & Co. | Luminous colors, exceptionally easy re-wetting | Honey, Gum Arabic | Rich, smooth flow, vibrant | Stays moist in pans, 'glow from within' | Luminosity, smooth blending, portraiture, florals |
| QoR (Golden) | Modern vibrancy, intense saturation | Aquazol | Fluid, transparent, unique layering | Innovative binder, intense color depth | Modern effects, intense vibrancy, glazing, experimental |
| Sennelier l'Aquarelle | Luminous, smooth, honey-based formulation | Honey, Gum Arabic | Silky flow, easy re-wetting, radiant | Stays moist, traditional French artistry | Luminosity, smooth blending, botanical art, illustration |
| ShinHan Professional | Vibrant, clean, often single-pigment colors, excellent value | Gum Arabic | Smooth, consistent, good transparency | High-quality Korean brand, strong pigment load, very clean mixers | Illustrators, graphic artists, those seeking vibrant pure colors, good value |
Pans vs. Tubes: Does It Really Matter?
Oh, the eternal debate! I get asked about pans versus tubes all the time, usually with a slightly exasperated sigh, as if there's a single "right" answer. And honestly, it often feels like asking if you prefer coffee or tea – it's a deeply personal preference, a direct reflection of your working style, your artistic needs, and even your mood. The short answer is: neither is inherently "better"; they're different. But it's far more nuanced than that; they absolutely encourage different ways of working, and understanding these subtle differences can significantly impact your workflow, your finished pieces, and even your emotional connection to your materials. For me, it's about what frees me to focus on the art, not the logistics, and that balance is unique for everyone.
Format | Pros | Cons | My Takeaway |
|---|---|---|---|
| Pans (Half or Full) | Incredibly portable for urban sketching, travel, or plein air work – just add water! Excellent for precise color pickup for small details and intricate brushwork. Less waste for small amounts of paint; a little pan lasts surprisingly long. Ideal for artists who want to quickly switch between colors without fuss, and for building a carefully curated, compact palette. They also force a certain economy of paint, which can be a good discipline. | Can be harder to get a truly high pigment load for very large, intense, and completely even washes. Colors can become contaminated more easily if you're not diligent about rinsing your brush or have a messy painting style, though a quick wipe with a clean paper towel can mitigate this. | Pans are my go-to for speed and spontaneity. I love how they force me to be economical with paint, and the ritual of reactivating dried pans is surprisingly meditative. Perfect for capturing fleeting moments, especially when I'm out hiking or grabbing coffee with a sketchbook! They're like faithful little companions, always ready for an adventure. You can find some fantastic options in my best watercolor palettes for travel guide. |
| Tubes (5ml, 15ml) | Absolutely fantastic for generating large amounts of highly concentrated paint, making them ideal for expansive washes and backgrounds. Ensures fresh, pure color every time you squeeze it onto your palette, and you get the highest possible pigment load. Often more cost-effective for frequently used colors, as you control the exact amount, and they offer unparalleled vibrancy. | Can lead to squeezing out too much paint and potential waste if you're not mindful, especially with very potent pigments. Generally less portable than a compact pan set, and if caps aren't sealed properly, they can dry out or even burst (speaking from messy experience – always double-check those caps!). | Tubes are the powerhouse of the studio. When I need a serious, juicy wash, or a strong, opaque punch of color, tubes are indispensable. I squeeze out only what I need into ceramic wells, letting it dry, knowing it will re-wet beautifully for days. This approach gives me the best of both worlds: fresh paint when I need it, and a re-wettable palette for convenience. For major projects, they're simply non-negotiable for achieving that intense, luminous punch. |
| Liquid Watercolors | Highly concentrated, intensely vibrant, and flow beautifully, often behaving more like inks. Excellent for ink-like effects, strong glazes, very smooth washes, and aggressive staining. Some brands are dye-based, so check lightfastness carefully; others are pigment-based. | Can be difficult to lift, often staining surfaces aggressively. Less forgiving for mistakes due to their intensity. Not all brands are lightfast, so check labels carefully before using them for archival work. They can also bleed extensively, requiring careful masking if precise edges are needed, and they dry very quickly, which can be challenging for blending large areas. | I use these sparingly, often for specific, intense effects or mixed media pieces where I want an almost dye-like saturation, or for calligraphy and fine lines. They behave more like ink, offering a different kind of fluid magic, especially when I want a super intense pop of color or a specific staining effect that can't be achieved with traditional pan or tube watercolors. Think of them as a special effects tool, not an everyday workhorse. |
| Watercolor Pencils/Crayons | Portable, blendable, offer precise control. Can be used dry for drawing or wet for painting effects. Excellent for adding texture or details over dried washes, or for starting a piece with a drawing component. They bridge the gap between drawing and painting, offering unique expressive possibilities. | Less intense color yield than pure pan/tube paints for large, saturated washes. Can be waxy or difficult to layer extensively with traditional washes if applied too heavily, and some can be difficult to lift once wet, especially if they are heavily staining pigments. Be mindful of applying too much pressure, as it can burnish the paper. | These are fantastic for sketching on the go, adding details, or even underpainting. They offer a unique blend of drawing and painting, making them a versatile addition to a mixed-media toolkit. I often use them to lay down initial lines or subtle textures before going in with traditional washes, or for adding final, crisp details to an already dry painting. They're particularly good for urban sketching when I want to capture a scene quickly with both line and subtle color. You might also like my guide on the best drawing tablets for beginners for digital sketching options. |
The Hybrid Approach: My Personal Sweet Spot
I personally use both, and I've found that many seasoned watercolorists do too. It's not an either/or; it's a beautiful synergy. I have a meticulously curated travel palette filled with my favorite pan colors for urban sketching, capturing fleeting moments outdoors, or when I'm on the go. It’s light, compact, and lets me make art wherever I am, from a bustling cafe to a quiet forest. But back in the studio, where I tackle larger, more intricate pieces, I work primarily from tubes, squeezing out what I need into ceramic wells or a dedicated mixing palette. This approach gives me the best of both worlds: the convenience and portability of pans, combined with the raw power, freshness, and concentrated pigment of tubes for intense color and expansive, juicy washes. It's about adapting your tools to your artistic intentions, recognizing that different tasks demand different approaches. I might use my pans for quick washes and small details on location, and then reach for tubes in the studio to tackle expansive, multi-layered glazes. It's a strategic dance between portability and pigment intensity, allowing for maximum flexibility and letting my intuition guide my material choice for each specific project. For example, when I'm working on a large, expressive sky wash, I'll invariably reach for a generous squeeze of Phthalo Blue from a tube. But for the delicate details of a botanical illustration in my sketchbook, a small pan of Sap Green picked up with a fine brush is perfect. It's about efficiency and enabling spontaneous creativity wherever you are! I find this hybrid approach minimizes fuss and maximizes artistic flow, allowing me to adapt my tools to whatever inspiration strikes, whether I'm in my studio or out in the wild. It’s about leveraging the strengths of each format to best serve your artistic vision, whether that’s capturing a fleeting moment or building a complex studio piece.
If you're looking for a good starting point to explore either format, or a combination, I highly recommend checking out some of these professional watercolor sets. They often provide a balanced introduction to quality pigments and can help you discover your own preferences without having to buy every color under the sun individually. And if you're just dipping your toes in the water (pun intended!), there are some fantastic best watercolor paints for beginners that offer a taste of quality without a full commitment.
Building Your Professional Palette: Essential Colors and Beyond
Choosing your first set of professional watercolors can feel utterly overwhelming. I mean, walk into any art store (or browse online, which is even more dangerous!), and the sheer number of colors available is enough to make your head spin. My advice? Take a deep breath, start small, and build intentionally. You absolutely do not need a massive set of 48 colors right out of the gate; trust me, many of those will sit untouched, gathering dust, and honestly, they'll just make mixing more confusing. Instead, a thoughtfully curated palette of 10-15 core colors will allow you to mix an infinite array of hues, truly understand the personality of each pigment, and ultimately, give you far more control and confidence than a sprawling, unfamiliar collection. It's about quality relationships with your colors, not quantity, a true connection that allows for intuitive mixing. It’s like learning to play an instrument – you start with the basic scales and chords before you tackle a symphony. This approach builds a profound understanding of your materials.

The Power of a Split Primary Palette
This is my absolute go-to recommendation, not just for beginners, but for pros looking to refine their understanding of color. It's called the Split Primary Palette, and it's ingeniously simple yet incredibly powerful. It involves choosing a warm and cool version of each primary color (red, yellow, blue). Why? Because warm primaries lean towards orange, and cool primaries lean towards green or purple. By having both, you can mix incredibly vibrant, clear secondary colors, or, conversely, create rich, nuanced grays and browns by mixing across the warm/cool divide. It’s the foundational secret to luminous mixes and avoiding muddy outcomes. This approach allows you to accurately predict how your colors will interact, leading to cleaner secondaries and beautiful, nuanced neutrals, rather than unintentional mud. Mastering this palette is like having a secret weapon in your color mixing arsenal. It's a fundamental understanding that empowers you to create any color you envision, rather than relying on pre-mixed tubes for every shade. This isn't just about saving money; it's about genuine color mastery. For example, a warm yellow and a warm red will create a fiery, vibrant orange, while a cool yellow and a cool blue will give you a crisp, almost luminous green. Conversely, mixing a warm yellow with a cool blue will produce a muted, earthy green – perfect for those subtle natural tones. Understanding these biases is paramount.
- Warm Yellow: (e.g., Hansa Yellow Medium, Indian Yellow, New Gamboge) – These lean slightly orange and are perfect for fiery oranges when mixed with warm reds. I use a warm yellow when I want to create glowing sunsets or rich, golden light.
- Cool Yellow: (e.g., Lemon Yellow, Cadmium Yellow Light, Hansa Yellow Light) – These lean slightly green and create brilliant, clear greens when mixed with cool blues. Essential for crisp, natural foliage or vibrant springtime scenes.
- Warm Red: (e.g., Pyrrol Red, Cadmium Red, Transparent Pyrrol Orange) – These lean slightly orange and mix beautifully with warm yellows. Think of these for passionate, intense reds, perfect for poppies or bold abstracts.
- Cool Red: (e.g., Quinacridone Rose, Permanent Alizarin Crimson, Carmine) – These lean slightly blue/purple and create vibrant purples when mixed with cool blues. These are my go-to for delicate floral hues or rich, jewel-toned purples.
- Warm Blue: (e.g., French Ultramarine, Indanthrone Blue, Ultramarine Violet) – These lean slightly purple and create rich, deep purples with cool reds. French Ultramarine, with its beautiful granulation, is a constant on my palette for moody skies or deep shadows.
- Cool Blue: (e.g., Phthalo Blue Green Shade, Cerulean Blue, Manganese Blue) – These lean slightly green and create crisp, clear greens with cool yellows. Phthalo Blue is incredibly potent; a tiny touch creates vivid aquas and turquoises. Essential for clear water or vibrant skies.
With these foundational six colors – three warm, three cool – you can truly mix an incredibly vibrant spectrum of secondary colors (oranges, greens, purples) and nuanced, non-muddy grays and browns. Seriously, it's a game-changer for avoiding that dreaded 'mud' in your mixes. For example, a reliable split primary might include:
- Cool Yellow: Winsor Lemon (PY175) or Hansa Yellow Light (PY3)
- Warm Yellow: New Gamboge (PY153, PY97) or Indian Yellow (PY110)
- Cool Red: Quinacridone Rose (PV19) or Permanent Alizarin Crimson (PR177)
- Warm Red: Pyrrol Red (PR254) or Cadmium Red Light (PR108)
- Cool Blue: Phthalo Blue (Green Shade) (PB15) or Cerulean Blue (PB35)
- Warm Blue: French Ultramarine (PB29) or Indanthrone Blue (PB60)
Once you have this base, then you can thoughtfully expand. Add a few essential earth tones like Burnt Sienna (my desert island color, absolutely essential for landscapes and warm browns!) and Yellow Ochre (PY43). Perhaps a deep, versatile neutral like Payne's Gray or Neutral Tint (which helps mute other colors without making them dull). With these 9-10 colors, you'll be absolutely amazed at the infinite possibilities and what you can achieve. It's about smart choices, not endless tubes.

Beyond the Basics: Expanding Your Horizon
Once you're comfortable and confident with your core split-primary palette – when you truly understand how those essential colors interact – then, and only then, can you truly start to explore. And believe me, this is where the real fun begins! This is where you personalize your palette, adding colors that speak to your soul and your specific artistic vision. Consider:

- Granulating Colors: Oh, these are a joy! Daniel Smith's PrimaTeks are famously stellar for this, creating beautiful, organic textures that settle into the paper's tooth. Think Lunar Black, Sodalite Genuine, or Bloodstone Genuine. These add so much character to a wash.
- Convenience Mixes: While mastering color mixing is paramount, some pre-mixed colors are just too perfectly balanced and unique to pass up. Undersea Green (Daniel Smith) is a cult favorite for a reason, a complex, granulating green that shifts beautifully from warm to cool. Moonglow (also Daniel Smith) is a fantastic, moody dark that granulates beautifully into purple, blue, and green, perfect for deep shadows or evocative night skies. I consider these tools, not cheats, as they often combine pigments in ways that are difficult to replicate on the fly and offer consistent, nuanced results. They're a shortcut to sophisticated color without sacrificing artistic integrity.
- Unique Pigments: This is where you dive deep into the fascinating world of individual pigments. Explore colors like Perylene Green (a deep, earthy green with fantastic lightfastness), Transparent Pyrrol Orange (a fiery, clean orange), Quinacridone Deep Gold (a rich, glowing yellow-orange), or even iridescent and metallic options for special effects and a touch of magic. These can add unexpected sparkle or a subtle shimmer, perfect for fantasy art, abstract pieces, or adding a highlight that truly catches the light. Just be very mindful of their lightfastness and compatibility with other pigments; always test first! There’s nothing worse than creating a masterpiece only to have it fade or change unexpectedly over time because you didn’t check the pigment properties. Remember, your art is an investment, both emotionally and financially, and choosing archival materials is a crucial part of that commitment. I often use a touch of iridescent gold in my abstract pieces to catch the light and add an unexpected dimension. It's like adding a secret sparkle, a hidden gem for the viewer to discover.
Remember, always remember this: a smaller, well-understood palette is far, far more powerful and expressive than a sprawling one you don't truly know how to wield. Swatch your colors (obsessively, I do!), mix them, blend them, layer them, and learn their unique personalities. That's how you truly make them your own, how they become an extension of your artistic voice, and how you unlock their full potential. I keep a dedicated "swatch book" where I paint out every color, note its characteristics (staining, granulation, transparency), and record favorite mixes. It's an invaluable reference and a beautiful record of your color journey! This practice is the foundation of genuine color mastery, transforming you from a passive user to an active, intuitive creator. It allows you to speak the nuanced language of color with fluency and confidence.
A Final Thought: The Supporting Cast
Alright, let's talk about the unsung heroes, the crucial supporting cast that allows your magnificent professional watercolors to truly shine. Because here's a hard truth: the world's best, most vibrant, most luminous paint will still look utterly mediocre on bad paper. Investing in professional watercolors is only half the battle, maybe even less. To truly let them sing and capture your artistic vision, you need high-quality, 100% cotton watercolor paper and decent, responsive brushes. I'd argue that the paper is arguably even more important than the paint itself. In fact, if you're on a budget (and who isn't?), I'd wholeheartedly suggest splurging on the best paper you can afford before splurging on every single tube or pan of paint. It’s the very stage upon which your pigments perform, and a poor stage can utterly undermine the most brilliant performance, turning a luminous wash into a blotchy mess, or worse, pilling up into an unusable mess. It's the foundation of everything you do, the silent partner that makes or breaks your watercolor endeavors. I've had more frustrating painting sessions due to bad paper than bad paint, and that's saying something!
Paper: Your Painting's Foundation
Watercolor paper isn't just a surface; it's an active, essential partner in your painting process, a silent collaborator. I've learned this the hard way: trying to coax a luminous wash out of flimsy, poorly-sized paper is like trying to draw water from a stone – it’s frustrating and ultimately fruitless. Its absorbency, surface texture, and inherent stability directly impact everything: how your paints behave, how colors blend and flow, how well layers build up without lifting or disturbing previous washes, and ultimately, the luminosity and archival quality of your finished artwork. Choosing the right paper is truly foundational, allowing your colors to sing and your techniques to shine. I've learned this the hard way: a cheap paper will fight you every step of the way, creating frustrating results no matter how good your paints are.
Key Paper Characteristics: What to Look For
When you're choosing paper, these are the fundamental characteristics you need to understand. They're not just technical jargon; they directly influence your painting experience and results.
Feature | Description | Why it Matters for Pros |
|---|---|---|
| Feature | Description | Why it Matters for Pros (and My Personal Take) |
| :--- | :--- | :--- |
| Fiber Content | Refers to the material the paper is made from: typically 100% Cotton (rag) or Cellulose (wood pulp). | 100% Cotton is vastly superior for professional work: it's incredibly absorbent, much stronger, less prone to buckling, and allows for extensive lifting, scrubbing, and layering without damaging the surface, ensuring the longevity and archival quality of your work. Cellulose (student grade) is fine for practice, but cotton is absolutely essential for archival, professional pieces that you want to last for generations. I almost exclusively use 100% cotton for anything I intend to keep or sell; anything less feels like a compromise on my artistic integrity. It truly cradles the pigment, allowing it to bloom and layer in ways cellulose simply can't. It's the difference between painting on a sponge and painting on a robust, thoughtfully prepared surface. I cannot overstate the importance of this. |
| Weight | Measured in pounds (lbs) per ream or grams per square meter (gsm). Common weights are 90lb (190gsm), 140lb (300gsm), and 300lb (640gsm). | Heavier paper (like 140lb/300gsm or 300lb/640gsm) is crucial because it buckles significantly less and can handle much more water without warping. Lighter paper (90lb) will almost certainly require stretching if you want to avoid frustrating ripples that interrupt your washes and create unwanted textures. My go-to is 140lb – it's a great balance of cost and performance for most studio work and can often handle moderate washes without stretching. For very wet techniques, or when I'm feeling particularly ambitious, 300lb paper is a dream, allowing for endless layering without any fuss. |
| Surface Texture | Refers to the finish of the paper: Cold Press, Hot Press, or Rough. | Cold Press: My personal favorite and the most versatile. It has a slight texture (or 'tooth') that's great for capturing pigment, holding washes, and accommodating both detail and broad strokes. It's the workhorse of my studio, perfect for almost any application. Hot Press: Features a very smooth, almost slick surface, ideal for fine detail, precise botanical art, pen and ink work, or when you want colors to sit on top for maximum vibrancy. Think crisp lines! It allows for incredibly sharp edges and details, which is sometimes exactly what a piece demands. Rough: As the name implies, it has a heavily textured, pronounced tooth. This creates incredible granulating effects and adds dramatic texture, but it can be challenging for fine detail. I love it for expressive landscapes and abstract pieces where texture is paramount, letting the water and pigment create their own beautiful, unpredictable patterns. It's definitely an acquired taste, but one I've grown to adore for its unique character. |
| Sizing | Refers to a gelatin or synthetic agent applied to the paper fibers, either internally during manufacturing or externally as a surface coating. | Critically affects absorbency and how paint sits on the surface versus soaking in. Critically affects absorbency and how paint sits on the surface versus soaking in. Proper sizing prevents colors from sinking in and dulling by keeping the pigment on the surface, allows for more control over washes, ensures colors don't bleed uncontrollably, and facilitates lifting and blending. I’ve had unfortunate experiences with "unsized" or poorly sized paper where a beautiful wash just immediately dulls and sinks into the fibers, leaving me with a lifeless, blotchy mess. Proper sizing is the unsung hero of clean, vibrant watercolor and a key factor in achieving luminous effects; it truly lets the paint sing on the surface. It's the silent guardian of your colors' brilliance. Without good sizing, even the most vibrant pigments look dull and flat – it’s a critical component for achieving that characteristic watercolor luminosity. |
| Archival Quality | Refers to the paper's ability to resist deterioration over time, often due to being acid-free and pH neutral. | This is essential for any professional work you intend to keep or sell. Acidic paper will yellow and become brittle over time, compromising your artwork and making those beautiful colors fade into oblivion. Always look for "acid-free" or "archival quality" labels to ensure your masterpiece lasts for generations. It’s an investment in the future of your art, a promise to yourself and your audience that your work will endure. I’ve seen enough faded pieces to know that this is one area where you absolutely cannot compromise. It's an ethical commitment to your craft. |
| Paper Grain | Refers to the direction in which the paper fibers align during manufacturing: long or short grain. | While less immediately obvious than texture or weight, grain can subtly impact how paper tears, folds, and even buckles. For most artists, it's not a major concern unless you're tearing down large sheets, making books, or working with very specific directional washes where the grain might subtly influence paint flow. Knowing about it just adds to your overall understanding of the material, enriching your appreciation for the craft of papermaking. |
| pH Neutrality | A measure of how acidic or alkaline the paper is. pH neutral (or acid-free) paper has a pH of 7.0. | Closely related to archival quality. Acid in paper will eventually break down the cellulose fibers, causing yellowing, brittleness, and degrading your pigments. Always choose acid-free paper to protect your artwork from self-destruction over time. It’s a basic requirement for any serious piece of art, a fundamental standard for true longevity. Never skimp on this; your artwork deserves to endure. |
My absolute preference, if I had to pick just one, is 100% cotton, 140lb (300gsm) cold press paper. It's truly the most forgiving and versatile for my style, offering a lovely texture that grabs pigment beautifully for both washes and intricate detail. For those delicate botanical pieces or intricate line work, I might reach for hot press for its silky smooth surface, which allows for incredibly fine lines and crisp edges. And sometimes, for dramatic, expressive granulating effects, I'll even venture into rough paper to see what magic unfolds, embracing the unpredictable beauty it offers. Choosing the right paper is like selecting the perfect canvas – it sets the stage for everything that follows. I remember one particularly ambitious plein air painting where I tried to use a thinner paper, thinking it would be fine. The buckling was so severe that the beautiful sky wash I'd planned turned into a blotchy, uneven mess. Lesson learned: never underestimate the power of good paper!
Top Paper Brands to Consider
Just like with paints, there are a few standout paper manufacturers that consistently deliver professional quality, and whose products I trust implicitly. These brands have earned their reputation for a reason:
- Arches: The classic, the gold standard for many. Known for its incredible consistency, durability, and a unique surface texture that takes washes beautifully. A favorite of countless artists, and for good reason. It's the paper I often reach for when I want absolutely zero surprises and maximum control.
- Fabriano Artistico: Another historical heavyweight, offering beautiful surfaces (Traditional White and Extra White) and excellent, reliable performance that holds up to serious abuse. A top contender for any professional, especially if you enjoy a slightly softer feel to your paper. They offer a superb balance of absorbency and surface strength.
- Saunders Waterford: A superb choice, often praised for its ability to handle multiple washes without degradation or pilling. It’s a very robust paper that stands up well to lifting and scrubbing, making it forgiving for those moments when you need to adjust or correct a wash. I find it incredibly dependable for complex layering.
- Strathmore (400 or 500 series): While they have student grades, their professional lines (especially the 500 series, which is 100% cotton) offer a great balance of quality and accessibility, making them an great choice if you're looking for a slightly more affordable professional option without compromising too much on performance. Their 500 series is particularly excellent for studies and developing techniques.
- Canson Heritage: A relatively newer contender that has quickly gained a reputation for excellence. It's known for its superb sizing, excellent lifting qualities, and ability to handle multiple layers without pilling. A truly luxurious paper that performs beautifully, and one I've increasingly turned to for its consistent, elegant results. It feels truly modern in its performance while retaining a classic feel.
- Baohong: An increasingly popular Chinese brand, Baohong offers fantastic quality 100% cotton paper, often at a more accessible price point than some of the traditional European brands. Their Master's Touch line is particularly impressive for its excellent sizing and reliable performance, making it a strong contender for professional artists looking for great value. I've been pleasantly surprised by Baohong's performance, especially for larger works where budget is a consideration. They hold their own against much pricier alternatives.
The Art of Stretching Paper
If you, like many of us, work with lighter weight papers (anything below 140lb/300gsm), you'll quickly encounter a frustrating issue: buckling. As water hits the paper, the fibers expand unevenly, causing unsightly ripples and puddles that can ruin a wash and make control impossible. While 140lb (300gsm) paper often holds its own for moderate washes, for truly heavy, wet-on-wet techniques or for any lighter weight paper, the elegant solution is stretching your paper. This involves thoroughly wetting the paper (either by soaking in a tub or sponging it evenly), taping or stapling it securely to a rigid, non-absorbent board (like Gatorboard, a wooden drawing board, or even a heavy-duty acrylic sheet) while it's wet, and then letting it dry completely taut. Once dry, it will remain perfectly flat even with heavy washes. It's an extra step, yes, and it takes a bit of planning, but for truly smooth, unblemished washes and the ultimate control, it's absolutely non-negotiable for lighter weights and ambitious techniques. I learned this the hard way after a particularly ambitious sky wash buckled into an irreparable mess – a lesson I still remember vividly and now actively avoid! Consider it part of your artistic ritual, a meditation before the main event, ensuring your canvas is truly ready for your vision. It really is a game-changer for large, luminous washes.

Watercolor Blocks and Sketchbooks
Beyond individual sheets, you'll also encounter watercolor paper in blocks (where all four edges are glued down, providing inherent stretching and preventing buckling – ideal for artists who want to avoid stretching but still work with heavy washes) and sketchbooks (ranging from student-grade cellulose to professional 100% cotton). Blocks are fantastic for on-the-go or for studio work where you want absolute flatness without the hassle of stretching. Sketchbooks, especially those with good quality cotton paper, are invaluable for daily practice, studies, and capturing ideas. I keep various sketchbooks for different purposes, from quick color studies to more detailed compositional planning. For more on the magic of paper, I encourage you to read my review of the best watercolor paper to truly complete your professional toolkit and understand this foundational element. It delves much deeper into the 'whys' and 'hows' of paper selection and preparation, helping you make an informed decision that will elevate your art. Don't underestimate the power of good paper!
Brushes: Your Extension of Self
Good brushes, the right brushes, aren't just tools you hold in your hand; they truly become an extension of yourself, an articulation of your artistic will on paper. They are an investment, yes, and sometimes a significant one, but it's an investment that will last years – decades, even – with proper care, and one that will profoundly, significantly enhance your painting experience. The difference between a cheap, floppy student brush and a finely crafted professional one is palpable: professional brushes hold vastly more water and pigment, come to an incredibly fine, resilient point, maintain their shape, and release paint more smoothly and evenly than cheaper alternatives. This translates directly to more control, less frustration, more nuanced marks, and ultimately, better, more expressive art. They make the act of painting feel effortless and intuitive, almost like they're reading your mind and translating it directly onto the paper. It’s like the difference between trying to play a beautiful melody on a broken instrument versus one that sings under your touch. Your brushes become an extension of your artistic will, and that connection is invaluable.
Essential Brush Types & Materials
Just like you wouldn't use a screwdriver for a nail, different brushes serve different purposes. Understanding these core types will empower you to choose the right tool for the job.
Type | Shape & Use | Material | Notes & Personal Tips |
|---|---|---|---|
| Round | The absolute workhorse of any watercolor palette! Versatile for everything from the finest lines (with the tip) to broad strokes (with pressure), and for filling small to medium areas. | Kolinsky Sable (the traditional benchmark for its unparalleled snap, point retention, and incredible water-holding capacity – truly magnificent, though I'm increasingly leaning towards high-quality synthetics for ethical reasons and often recommend them wholeheartedly as the industry has made incredible strides in cruelty-free alternatives and often offer more resilience), Synthetic Sable (excellent, cruelty-free alternatives with remarkably similar performance at a fraction of the cost, and constantly improving, often outperforming lower-grade natural hair and offering more resilience and durability!), Squirrel (for very soft, even washes and fantastic water-holding, but less snap, making them ideal for delicate blending and atmospheric effects, though they don't hold a sharp point). | Every artist, without exception, needs a few good rounds in various sizes – they are the absolute cornerstone of any watercolor kit. Don't cheap out on your primary round brush; it makes all the difference in control and enjoyment. For a versatile start, a size 8 or 10 round is usually perfect; it's what I reach for about 80% of the time for everything from delicate glazes to fine details to controlled washes. It’s the brush that will spend the most time in your hand, so make it a good one! |
| Flat/Wash | Ideal for laying down large, even washes across expansive areas like skies or backgrounds; also fantastic for creating sharp, crisp edges, rectangular shapes, and for lifting color (especially with a stiffer synthetic). | Synthetic, Squirrel, Goat (often found in traditional Hake brushes, which are very soft and absorbent and hold a tremendous amount of water). | Essential for blocking in big color fields and creating uniform, luminous washes, or for quickly wetting large sections of paper. I love a good flat for crisp architectural lines too, or for lifting out clean highlights, especially with a slightly stiff synthetic flat. For massive skies or backgrounds, a dedicated wash brush (often a larger flat or an oval wash brush) is a true workhorse, allowing for seamless, streak-free applications without overworking the paper. They’re invaluable for those big, sweeping gestures. |
| Rigger/Liner | Characterized by very long, thin bristles with an excellent, resilient point; perfect for continuous, flowing lines like delicate branches, intricate hair, fine grass, calligraphy, or for signing your masterpiece with precision. They excel at creating expressive, gestural marks and adding delicate accents. | Synthetic, Sable. | Holds a surprisingly large amount of liquid, allowing for long, unbroken lines without having to reload frequently, giving you a smooth, uninterrupted stroke. Great for adding those last, delicate details that bring a painting to life, or for creating intricate patterns. I find them indispensable for adding texture to landscapes or fine details to portraits, especially when I need that perfect, wispy line. They demand a steady hand, but the results are incredibly rewarding. |
| Mop | A large, soft, incredibly absorbent brush, often with a distinctive rounded or flattened shape (like a squirrel mop or a traditional hake). Superb for massive, juicy washes and delicate blending where you want minimal harsh lines and a very soft transition. | Squirrel, Goat, Synthetic blends. | The ultimate brush for applying vast amounts of water and color, creating soft, ethereal effects. If you love expansive, dreamy washes, a good mop brush is your best friend. They can feel a bit floppy at first, but you'll soon learn to love their gentle touch and incredible capacity for holding fluid, which makes for truly luminous, even washes. They're unparalleled for creating soft, atmospheric backgrounds or for wetting large sections of paper evenly. |
| Dagger Striper | A unique angled flat brush with a pointed tip, excellent for long, tapering lines (like petals or leaves), calligraphy-like strokes, and expressive, varied marks. | Synthetic, Sable. | A specialty brush that adds unique versatility and a distinctive flair to your work. It's surprisingly versatile for organic shapes and expressive marks; I use it more than I initially thought I would, especially for creating dynamic foliage or abstract strokes with a calligraphic quality. |
| Fan | Features flat, splayed bristles; primarily used for softening edges, gently blending colors, creating textures like grass or foliage, and for lifting paint from a dried wash. | Synthetic, Hog Bristle (stiffer, for more aggressive texture). | A fantastic textural tool and a great problem-solver for softening areas or creating wispy effects. Don't overlook its ability to create subtle atmospheric touches, or to subtly blend two colors while they're still damp. |
| Hake Brush | A very traditional Japanese brush, typically wide and flat, with soft, absorbent goat hair. Superb for large, even washes, wetting paper, and applying ink or watercolor smoothly. | Goat Hair, Synthetic. | While mentioned under Flat/Wash, a dedicated Hake is a different beast. It's truly exceptional for those expansive, calm washes that require a massive amount of water and an incredibly soft application. A staple for traditional East Asian painting, but wonderfully effective in Western watercolor too, particularly for wetting large sheets of paper or applying very even background washes. |
| Filbert | A flat brush with an oval-shaped tip, combining some of the qualities of both rounds and flats. It creates soft, rounded edges and can be used for blending, filling, and expressive strokes. | Synthetic, Sable, Hog Bristle. | This is a great brush for rendering more organic shapes or blending large areas where you want softer transitions than a flat can provide. I find it useful for petals, leaves, or even abstract cloud formations where a gentle, diffused edge is desired. |
| Wash Brush (Large Oval/Flat) | Specifically designed for applying large, even washes across broad areas, often with a large, soft head. | Squirrel, Goat, Synthetic blends. | While flats can do washes, a dedicated large wash brush is a game-changer for big skies, backgrounds, or when you need to cover a significant area of paper with a seamless layer of color. They hold an immense amount of water and pigment, allowing for long, uninterrupted strokes and preventing streaking. I keep a few in different sizes for various project scales. |
Ultimately, your brushes aren't just implements; they truly become an extension of your hand, a direct conduit for your artistic vision onto the paper. Find a few good quality ones that feel right, that respond intuitively to your touch, and you'll treasure them, literally, for years. They are an investment – not just in materials, but in your comfort, your control, and the continuous refinement of your craft. For more on brushes, even if you are working with oils, many of the core principles of selection, care, and understanding their purpose apply universally across mediums, so I encourage you to check out my guide to the best oil painting brushes for artists. The wisdom is transferable, I promise. And for a specific dive into maintaining these precious tools, my guide on cleaning and caring for your paint brushes is an absolute must-read. Because let's be honest, a good brush is an investment, and like any good investment, it needs careful tending to truly flourish.
Investing in professional paints isn't just an upgrade in materials; it's a profound investment in your own artistic journey, a tangible commitment to the quality and longevity of your creative expression. It's telling yourself, and the world, that your work, your effort, and your vision are worth the best possible foundation. And let me assure you, from the bottom of my artistic heart, it absolutely is. These aren't just tubes or pans of color; they are pure potential, vibrant energy waiting to be unleashed by your unique vision. So go forth, experiment fearlessly, make glorious messes (that's how we learn, after all!), and create art that truly resonates, that sings from the paper. If you find yourself inspired by the possibilities these materials unlock, and want to see how these kinds of vibrant, professional watercolors are used in contemporary pieces, often alongside other mediums, you can always browse my work that is for sale on the /buy page, or see them in the context of my artistic journey and evolution on the /timeline. Happy painting, and may your washes be luminous, your colors sing, and your artistic journey be filled with endless, vibrant discovery, a journey I'm honored to share with you! Remember, art is a lifelong conversation, and the right tools simply make that conversation richer and more profound. It's like finding the perfect instrument to express your inner symphony – the right materials just make the music sound sweeter.
Maintaining Your Investment: Care and Longevity
Congratulations, you've made a smart investment in quality art materials! But making the investment is only half the battle; nurturing it is the other. Now, let's talk about how to protect that investment and ensure your professional tools serve you faithfully for years to come, truly becoming extensions of your creative will. Proper care of your paints and brushes not only extends their life, saving you money in the long run, but also ensures they perform optimally every single time you sit down to paint. Think of it as nurturing your artistic partners, ensuring they are always ready to sing for you.

Caring for Your Brushes
This is, without a doubt, probably the most critical aspect of art tool maintenance. A good quality brush, especially a natural hair one, is an investment. And a well-cared-for brush can literally last decades if treated with respect. Neglect it, and it will quickly become a sad, splayed mess, a frustrating reminder of poor habits. Here's how to keep them pristine, performing beautifully every time, and feeling like an extension of your hand, not a tool you're constantly fighting.
- Clean Immediately: This is rule number one. Never, ever let paint dry in the bristles, especially up near the ferrule (that's the metal part that holds the bristles). Dried paint here is a death sentence for a brush, causing bristles to splay, making it impossible to hold a point, and ultimately ruining the brush's integrity. I've tragically lost a few good brushes this way in my early days – don't make my mistakes!
- Gentle Cleaning: Use lukewarm (never hot!) water and a mild soap. Dedicated artist's brush soap is best, but a gentle hand soap or even baby shampoo works in a pinch. Gently swirl the brush in your palm or against a textured brush cleaning mat, working the lather through the bristles, then rinse thoroughly under running water. Repeat until absolutely no color comes out. Be patient; a thorough rinse is key to preventing residual pigment from stiffening the bristles and to avoid color contamination in your next painting session. I personally love the little brush cleaning mats with different textures; they really help get deep into the bristles without damaging them.
- Reshape: Once clean, gently reshape the bristles to their original point or chisel edge with your fingers before drying. This helps them maintain their form and ensures they're ready to make precise marks in your next session. Think of it as putting your brush to bed properly – it deserves a good night's rest after all that hard work!
- Dry Properly: Store brushes bristles-up in a container, or lay them flat on a towel on an absorbent surface, making sure air can circulate around the bristles. Never, and I mean never, leave them standing in water for extended periods – this allows water to seep into the ferrule, weakening the glue, rotting the handle, and ultimately ruining the brush by causing the bristles to splay irrevocably. Gravity is not your friend here! You can even get brush drying racks that hold them horizontally or angled downwards, which is ideal. Ensure good air circulation during drying, and if a brush needs a little extra love, a small dab of dedicated artist's brush conditioner (or even a tiny bit of hair conditioner, rinsed thoroughly) can help restore its softness and spring, especially for natural hair brushes. This extra step can genuinely extend the life of your prized tools, keeping them supple and responsive and feeling like new.
For a much deeper dive into keeping your brushes pristine, truly understanding the nuances of cleaning different materials, and extending their lifespan, you absolutely must read my comprehensive guide on cleaning and caring for your paint brushes. It's full of tips I've learned the hard way, so you don't have to!
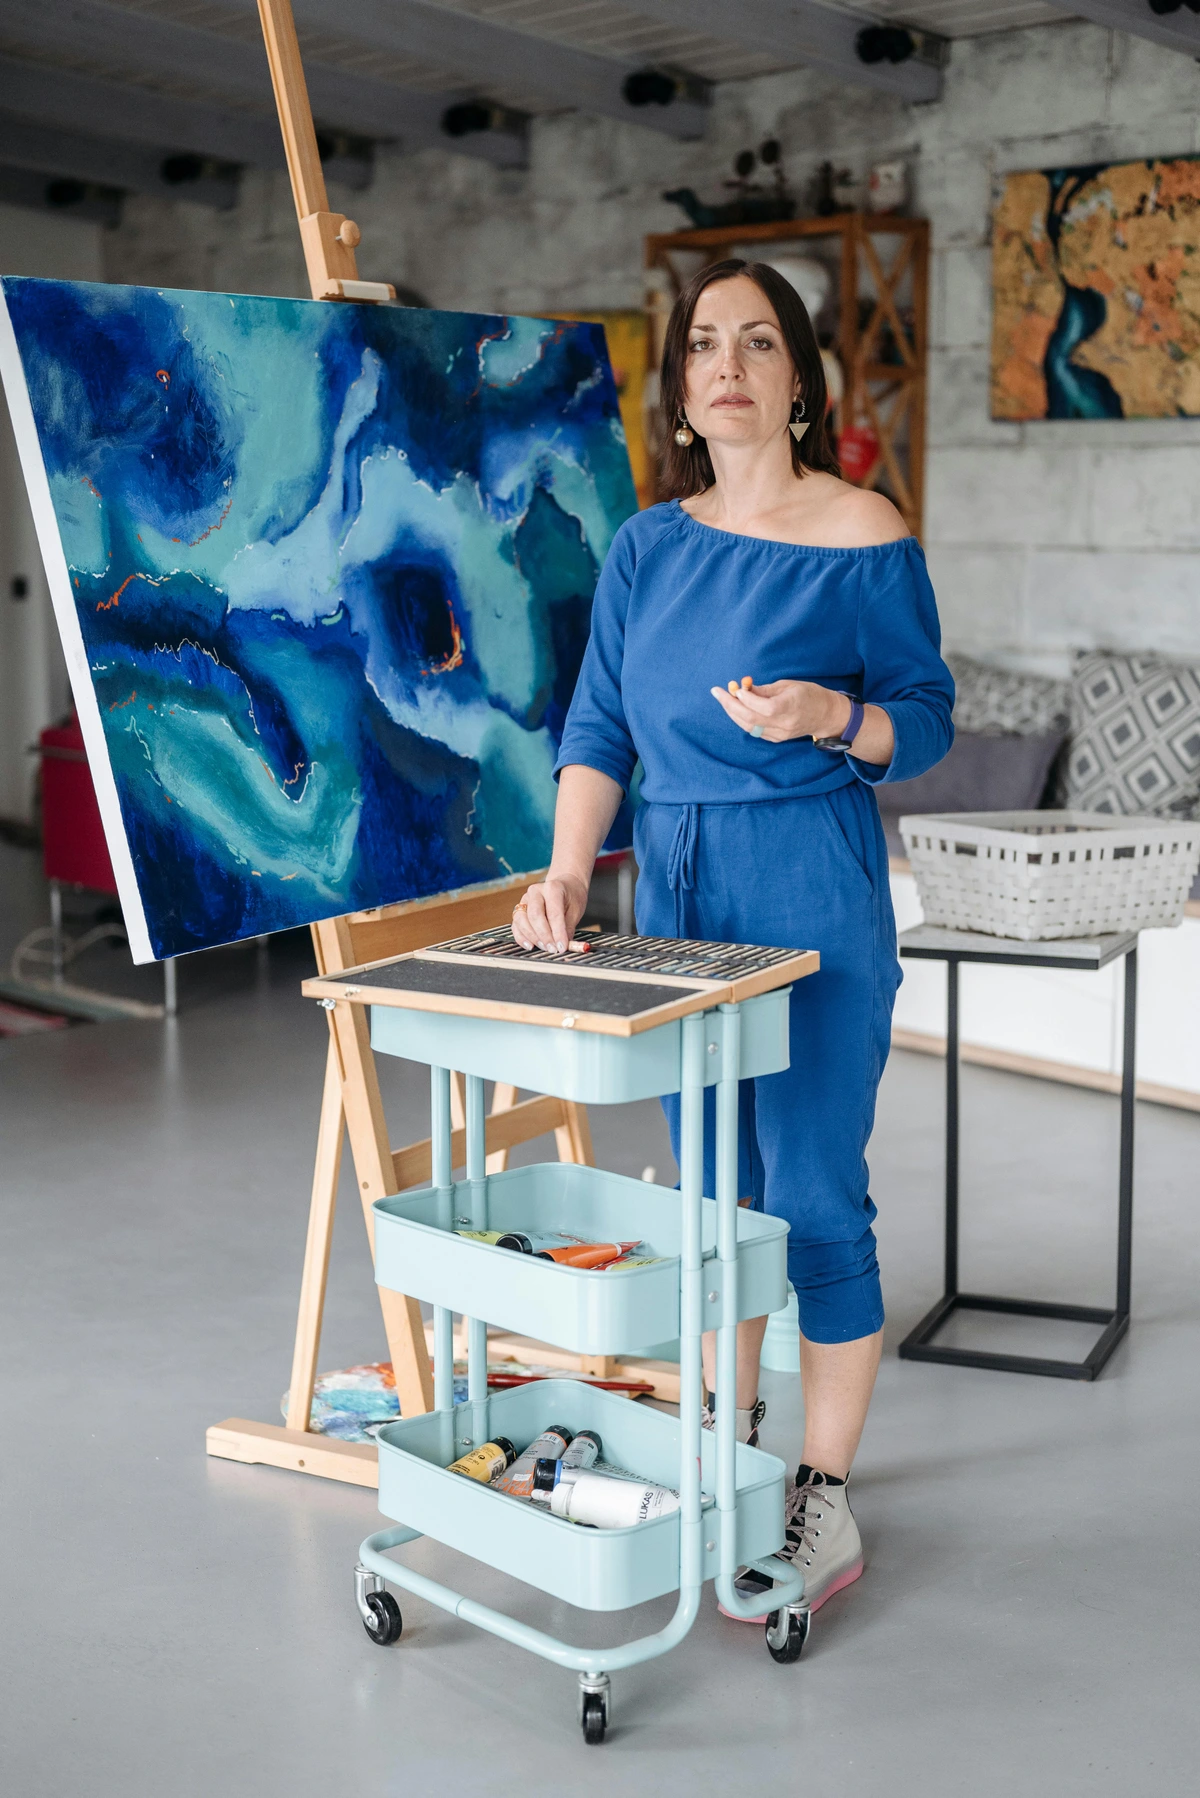
Caring for Your Paints and Palette
- Keep Pans Clean: After a session, wipe down your palette and the edges of your pans to prevent colors from mixing and drying into a muddy mess that can contaminate your next wash. A quick wipe with a damp cloth or a spray bottle with clean water can save you a lot of grief and ensure pure color for your next creative outburst. I have a dedicated cleaning cloth just for my palettes; it’s a simple habit that makes a huge difference.
- Store Tubes Properly: Make sure caps are tightly sealed to prevent paints from drying out – a small crack can lead to a completely solid tube that's almost impossible to revive! Store them upright if possible to prevent leakage, particularly with honey-based paints that can be a bit more fluid. I've learned to give each cap a quick extra twist to be sure, and I also store them in a drawer away from direct light and temperature fluctuations. I've lost too many tubes to dried-out paint because I was careless with the cap; don't make my mistake!
- Palette Etiquette: If you're working from a ceramic or plastic palette, clean it regularly, especially your mixing areas. While dried watercolor is usually easy to re-wet and reuse (don't waste that precious pigment, it's gold!), a clean palette helps keep your colors pure and prevents accidental muddy mixes. Think of your palette as your artistic workbench – a clean one leads to clear thoughts and pure colors.
Preventing Mold and Contamination
While professional paints contain preservatives, they're not invincible, especially if you live in a humid climate or leave your palettes exposed. Mold is the artist's silent enemy, and it can creep up if you're not careful!
- Keep it Clean: Regularly clean your palette, especially around the edges of pans or wells where moisture can linger.
- Dry Pans: After a painting session, allow your pan paints to fully air dry before closing the lid on your palette. Trapped moisture is an invitation for mold.
- Avoid Cross-Contamination: Use separate brushes or thoroughly rinse your brush when moving between colors. Introducing foreign particles (like food crumbs or dust) can also encourage mold growth. If you do notice a little fuzz, a cotton swab dipped in rubbing alcohol can often clean it up.
A little preventative care goes a long way in ensuring your professional tools continue to serve your artistic vision, becoming reliable extensions of your creative will rather than sources of frustration. It’s a small investment of time that pays huge dividends in the quality and enjoyment of your art.
Palette Management for Freshness
Beyond basic cleaning, I also think about how I manage my palette during and between painting sessions. For tubes squeezed into wells, I let them dry completely, knowing they'll re-wet beautifully. This saves paint and keeps things tidy. For fresh paint I'm using that day, I keep my mixing areas separate and clean. If I'm working on a long-term piece, I might cover my palette with plastic wrap to keep paint moist, especially if it's a humid environment. It's all about thoughtful preparation.
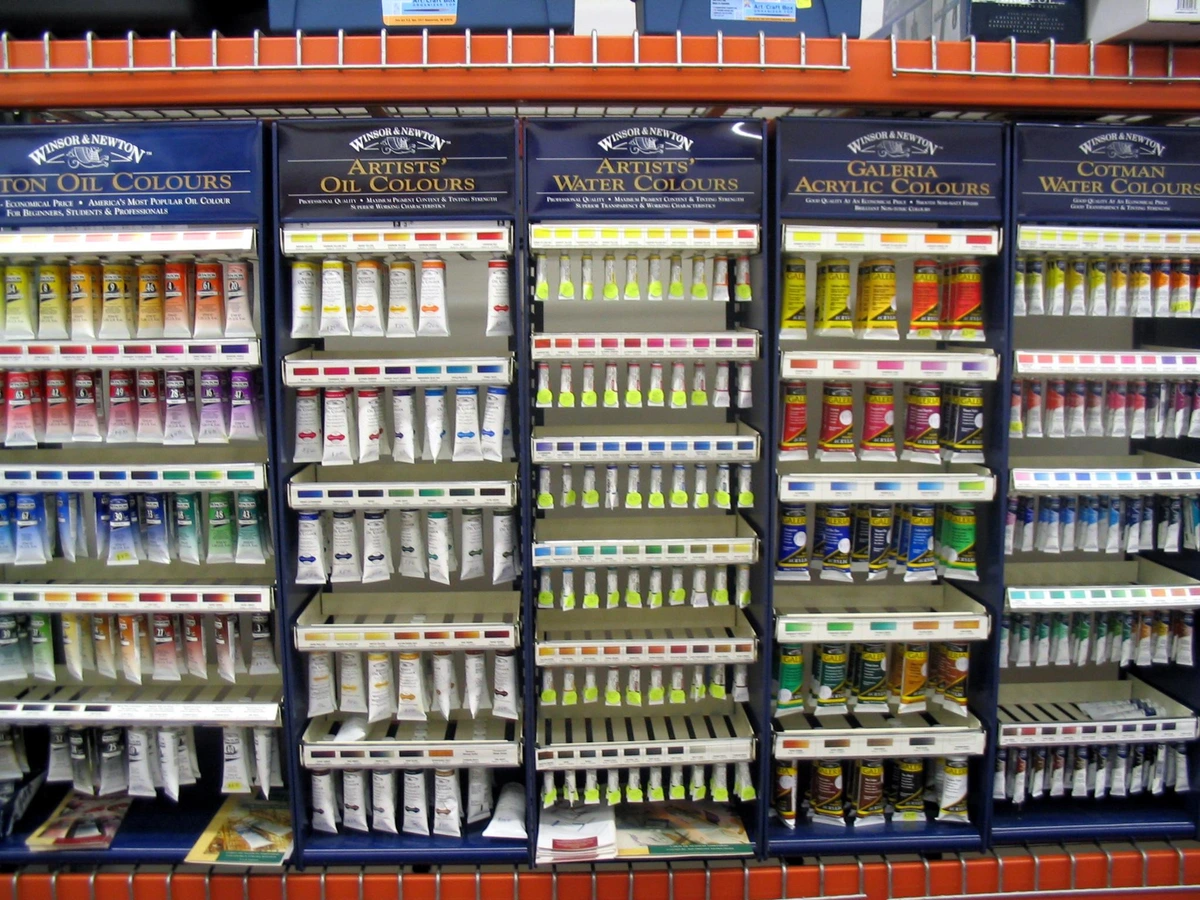
FAQ: Your Pro Watercolor Questions Answered
How do I choose between warm and cool colors?
Understanding warm and cool colors is fundamental to creating harmonious palettes and expressive art, bringing life and depth to your compositions. Warm colors (reds, oranges, yellows) tend to advance in a painting, evoking feelings of energy, passion, or sunshine. Think of a fiery sunset! Cool colors (blues, greens, purples) tend to recede, suggesting calmness, distance, or shadow. Imagine a misty forest. The trick is to identify the underlying temperature of each pigment. For example, a "warm" yellow will have a slight orange bias, while a "cool" yellow will lean towards green. Using a split primary palette, as discussed earlier, gives you both options, allowing you to mix incredibly clean, vibrant secondary colors or rich, nuanced neutrals. It's not about one being better than the other, but about knowing how to leverage their inherent qualities to create the illusion of depth, mood, and atmosphere in your work. It's a foundational concept that, once understood, truly unlocks your color mixing potential. I often play with this temperature contrast in my abstract work to create dynamic tension and visual interest, pushing some elements forward while others recede into a dreamy background. For more on this, my article on the psychology of color in abstract art goes into much greater detail.
Are professional watercolors really worth the cost?
Absolutely, and I say this from years of experience (and a few painful lessons!). For the pigment load, lightfastness, and nuanced handling properties, the difference between student and professional grade is night and day. You'll find yourself using less paint to achieve far more vibrant and intense color, and crucially, your finished work will be archival, meaning it won't fade or degrade over time. It's not just buying a product; it's an investment in the longevity and quality of your art, a commitment to your craft that truly pays off in the long run. Plus, the sheer joy of working with materials that respond to your touch is invaluable. It’s the difference between struggling against your tools and having them become a seamless extension of your creative will. Your art deserves that kind of support.
What are granulating colors, and how do I use them?
Granulating colors are pigments that, instead of settling smoothly, clump together and separate into visible particles as the paint dries, creating a beautiful, textured, often mottled effect. It's one of the most distinctive and beloved characteristics of watercolor, adding incredible depth and organic interest that can truly elevate a piece. Daniel Smith's PrimaTek line is famous for its extreme granulation, but many Ultramarines, Ceruleans, and earth tones (like Burnt Sienna) also granulate beautifully. To maximize granulation, use plenty of water, allow the paint to pool slightly, and use paper with a bit of tooth (cold press or rough). They are fantastic for landscapes (think rocky textures, misty skies, or dappled light), abstract work, and adding an unexpected layer of visual richness to your painting. It’s a happy accident that you can learn to control and harness, making the medium feel even more alive.
What does 'lightfastness' mean?
Lightfastness is a crucial measure for any professional artist; it indicates how resistant a pigment is to fading when exposed to light over time. Imagine pouring hours, days, even weeks into a piece, only for it to slowly disappear like a ghost over the years – that's what happens with fugitive (non-lightfast) pigments. The ASTM (American Society for Testing and Materials) rates pigments using Roman numerals: ASTM I is 'Excellent Lightfastness,' and ASTM II is 'Very Good.' For work intended for sale or display, I advocate almost exclusively for paints rated ASTM I or II. Anything less risks the integrity of your art and, frankly, the trust of your collectors. Always check the labels – it's a non-negotiable for serious work. It’s an ethical commitment to your art and your audience. I've personally experienced the heartbreak of a piece losing its vibrancy due to fugitive pigments, and I wouldn't wish that on any artist or collector.
What do the numbers on paint tubes mean (e.g., PV19)?
These are the Color Index Names, often called pigment codes, and they are incredibly important for understanding what's truly in your paint. This is the scientific name of the pigment, its chemical fingerprint. 'PV' stands for Pigment Violet, 'PY' for Pigment Yellow, 'PB' for Pigment Blue, etc., followed by a number that identifies the specific chemical composition of that pigment. For example, PV19 is Quinacridone Violet. Knowing these codes helps you identify single-pigment paints (which are usually cleaner mixers, offering more predictable results and less "mud") and avoid "hues" or mixes disguised as single pigments. It’s also invaluable for predicting how colors will behave and mix across different brands, and for understanding the true composition of your palette, which is essential for archival considerations and color theory mastery. Think of it as the chemical fingerprint of your paint – a direct line to understanding your materials on a deeper level. I always check these codes when buying new paints; it cuts through all the marketing names and tells you the real story of what you're getting, ensuring consistency across brands.
and work it into something new and unexpected! Remember, watercolor is about fluidity and adaptation; sometimes, a perceived "mistake" is actually an invitation to explore a new creative direction. It's all part of the artistic journey, and I've found some of my most interesting pieces have come from embracing those unexpected turns.
What's the difference between transparency and opacity in watercolor?
In watercolor, transparency means light can pass through the pigment, allowing the white of the paper (or underlying layers) to show through and create that characteristic luminosity and glow. This is what most traditional watercolors are valued for – the ability to build delicate, glowing layers that seem to radiate light from within. Opacity, on the other hand, means the pigment is dense enough to cover what's underneath, blocking the light. While some watercolor pigments are naturally more opaque (like cadmiums or earth tones, or even gouache-like colors found in some lines), watercolor is generally a transparent medium. I love playing with both, using transparency for delicate, luminous glazes that allow the paper to glow through, and a touch of semi-opacity for grounded, bold accents or when I need a color to truly stand out against a lighter background, almost like a whisper of acrylic. Understanding this balance, and knowing which pigments fall where on the spectrum, is key to sophisticated watercolor and achieving a wide range of expressive effects. It’s a subtle dance between light and shadow on the paper.
What's the difference between natural and synthetic pigments?
This is a fascinating rabbit hole! Natural pigments are sourced from minerals, plants, or animal products (though animal-derived pigments are rare now, often replaced by ethical synthetic alternatives). Think historical colors like ochres, umbers, or genuine lapis lazuli from Daniel Smith's PrimaTek line. These often have a subtle, earthy beauty, unique granulating qualities, and a deep connection to geological history. Synthetic pigments are created in a laboratory, often organic compounds developed specifically for their intense color properties, exceptional lightfastness, and vibrancy. Modern synthetic pigments (like quinacridones, phthalos, and pyrrols) are incredibly stable, vibrant, and often more lightfast than many natural alternatives, offering consistent performance and a broader color spectrum. I love both, embracing the earthy grounding and subtle variations of natural pigments, and the brilliant punch, consistency, and often superior lightfastness of modern synthetics. A balanced palette often includes a mix of these, allowing for a broader range of effects and characteristics that truly expand your artistic vocabulary and creative potential.

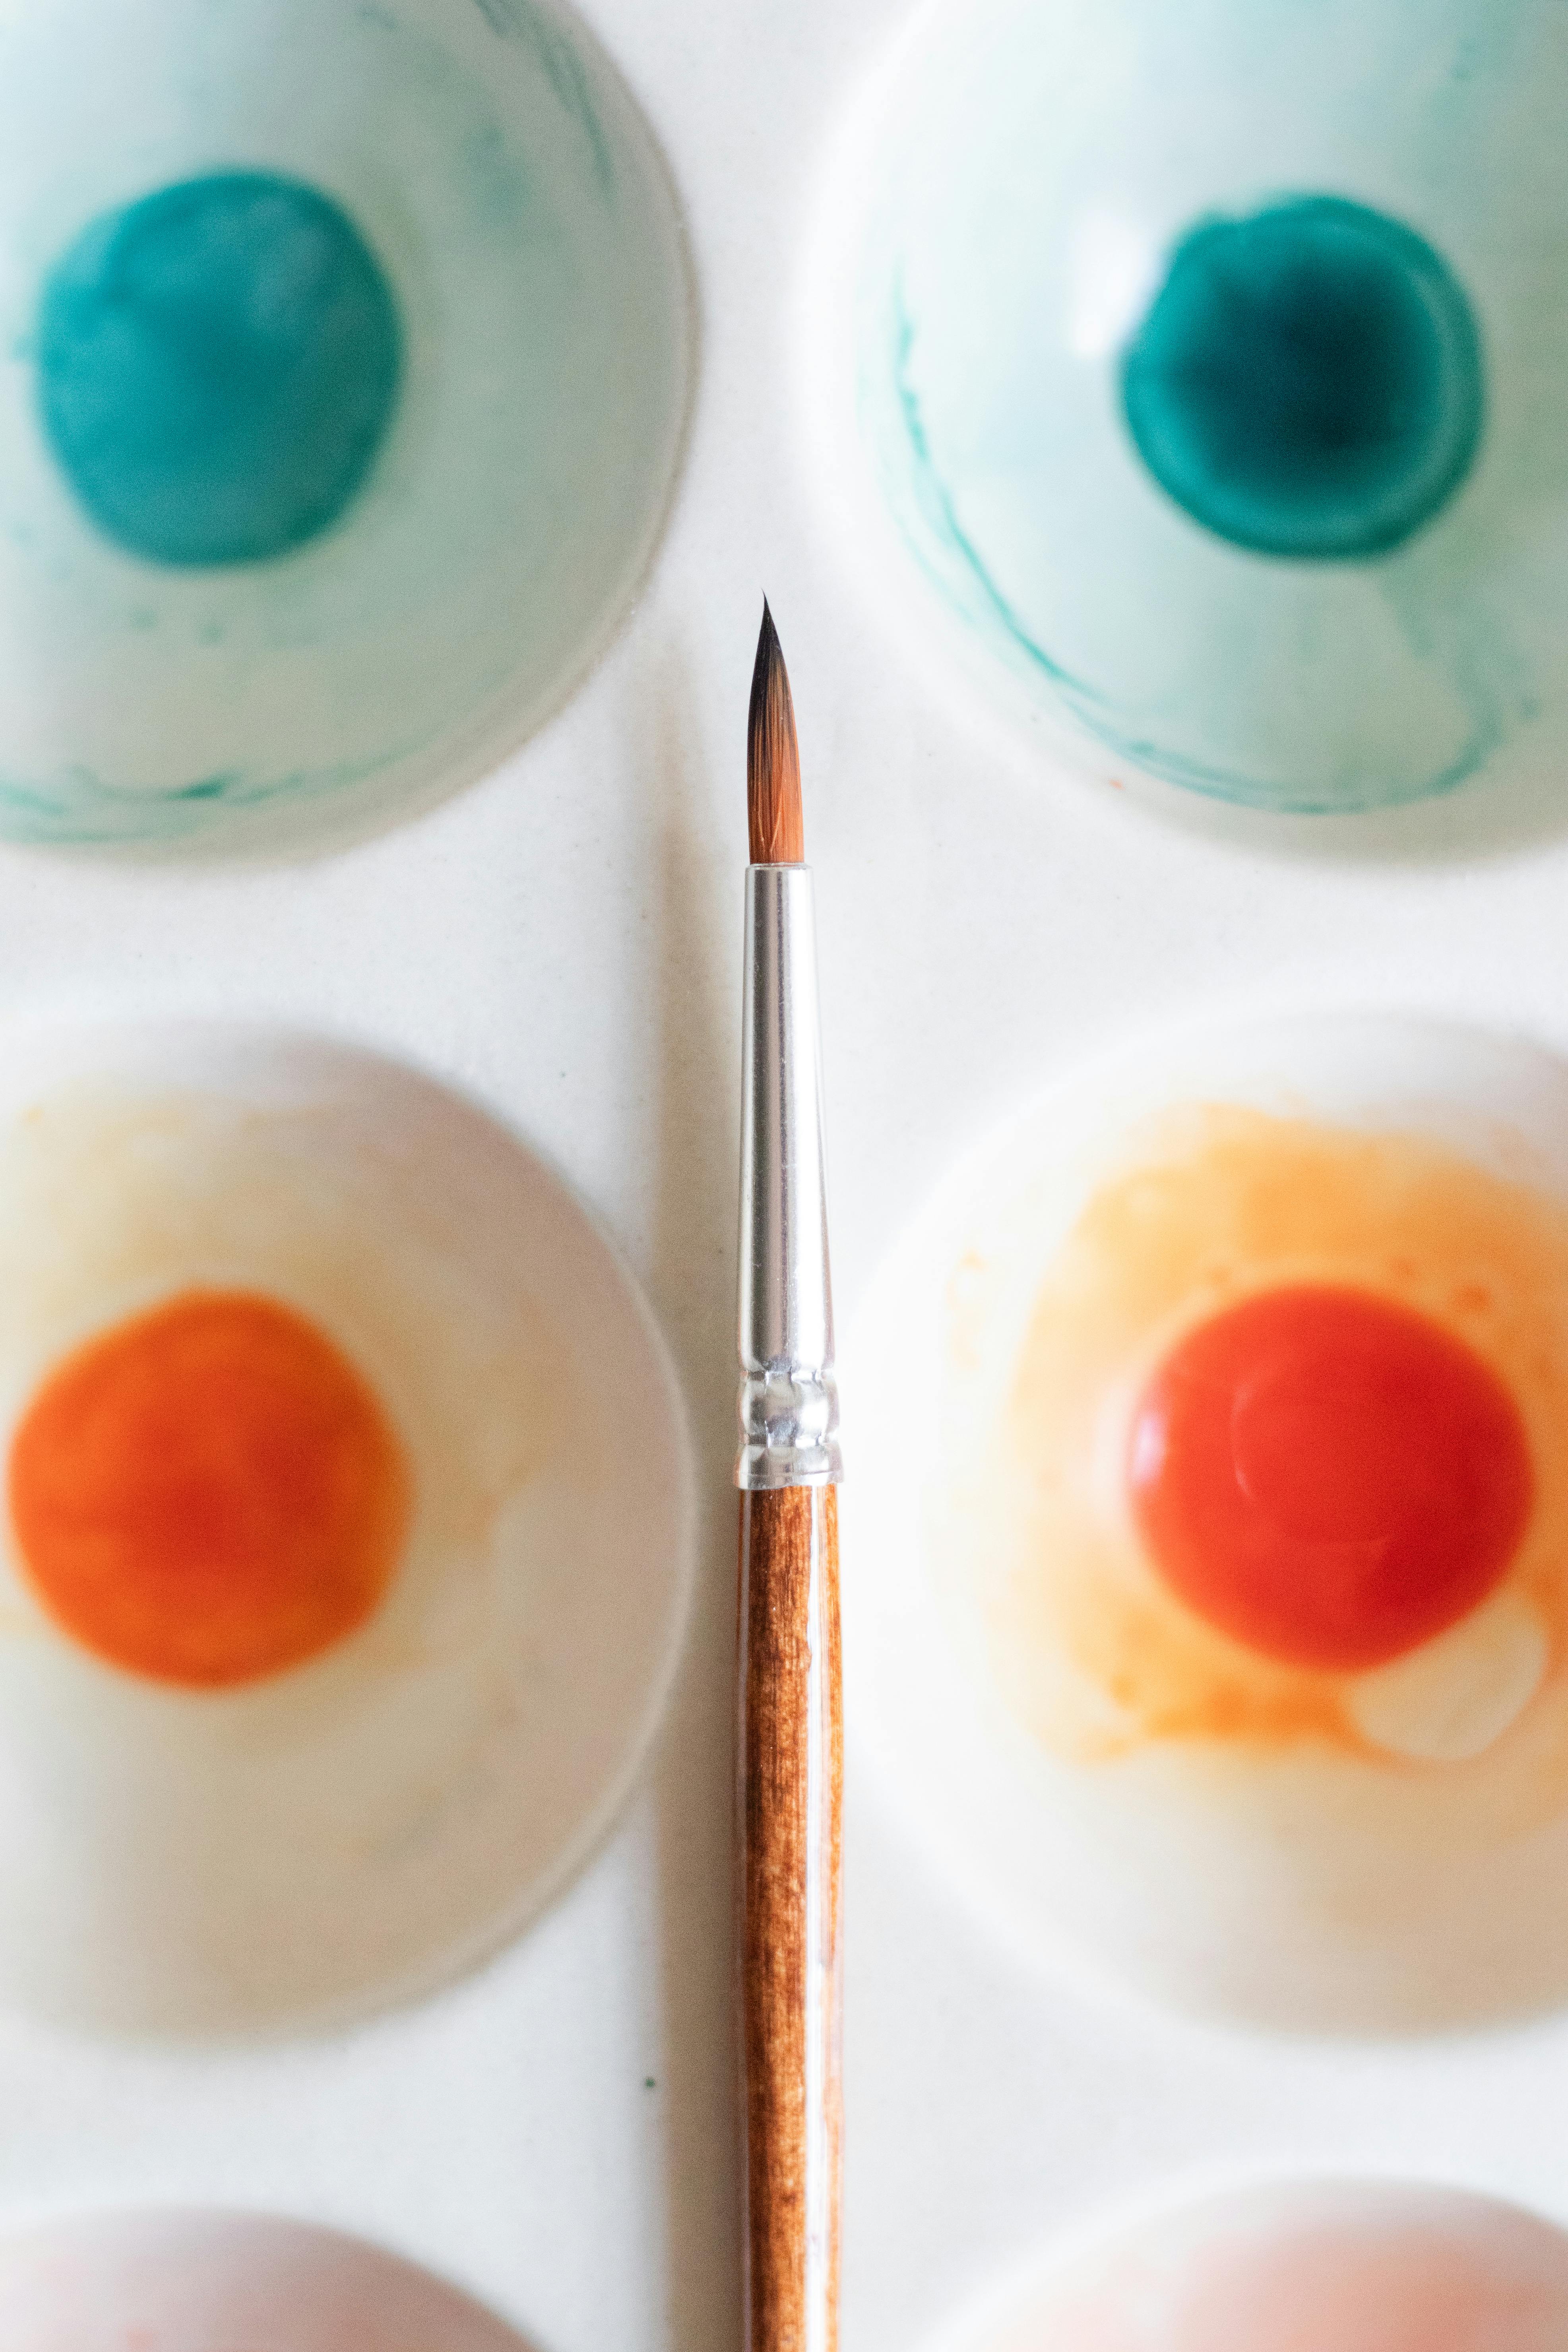
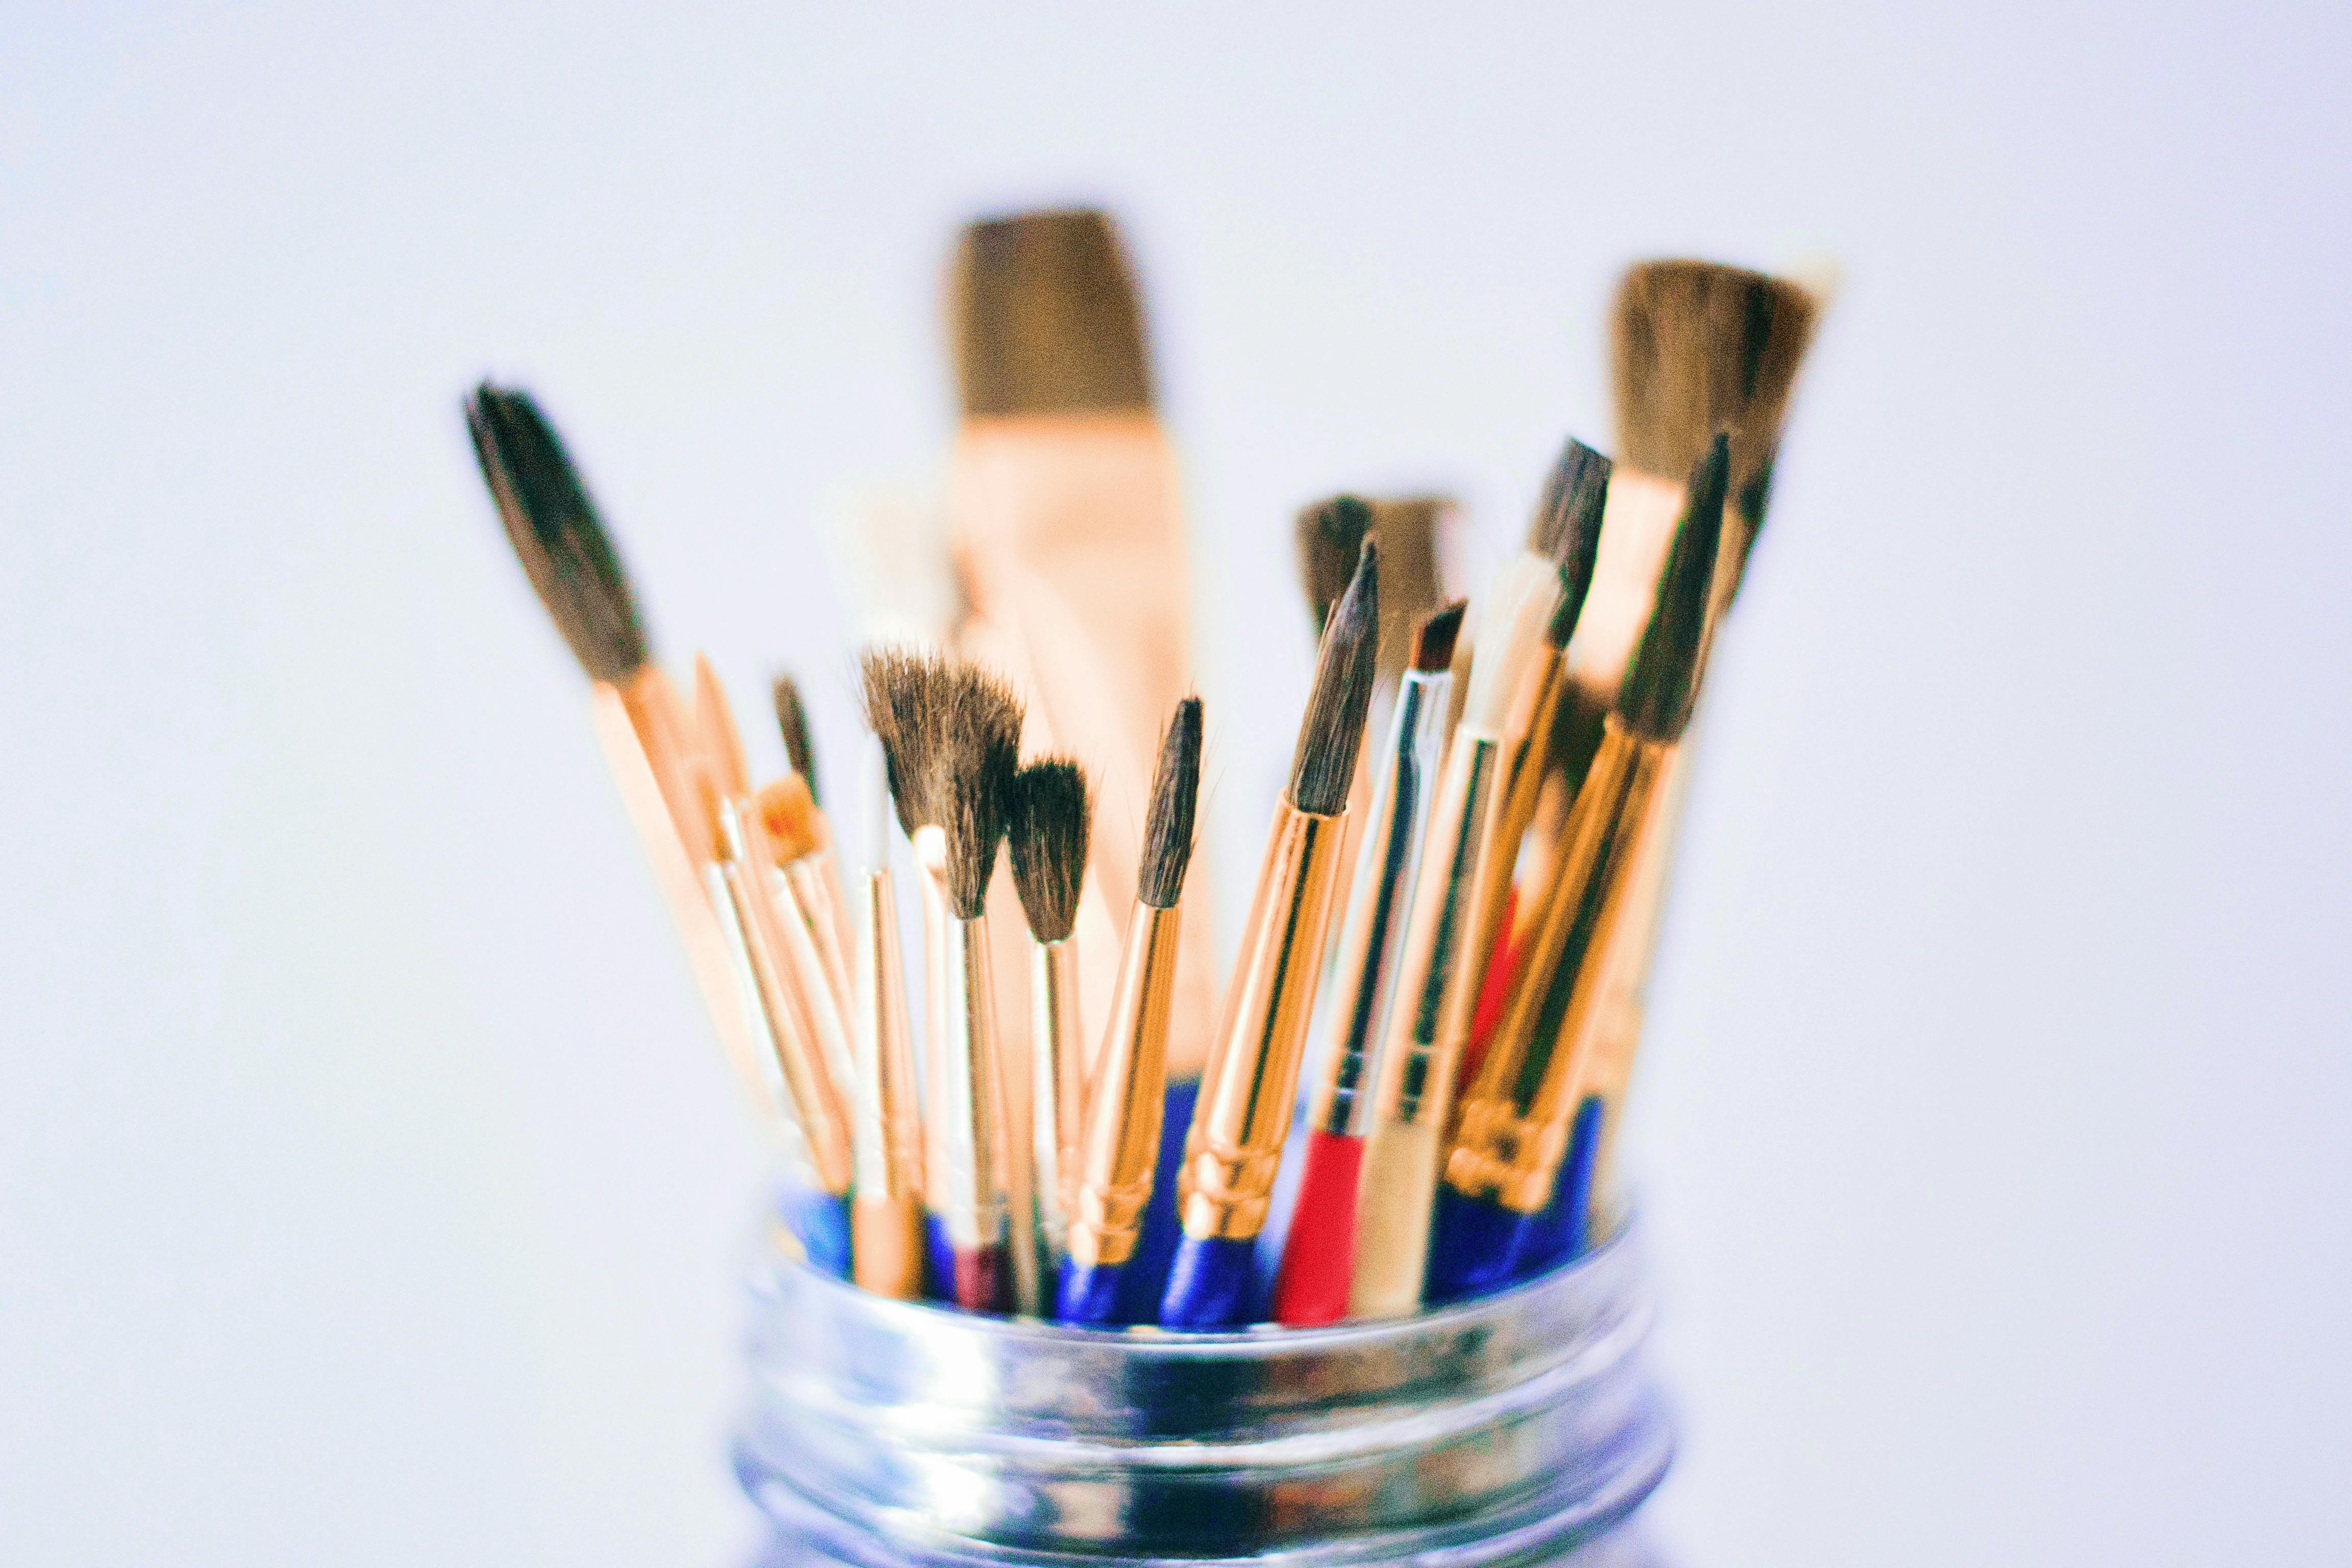
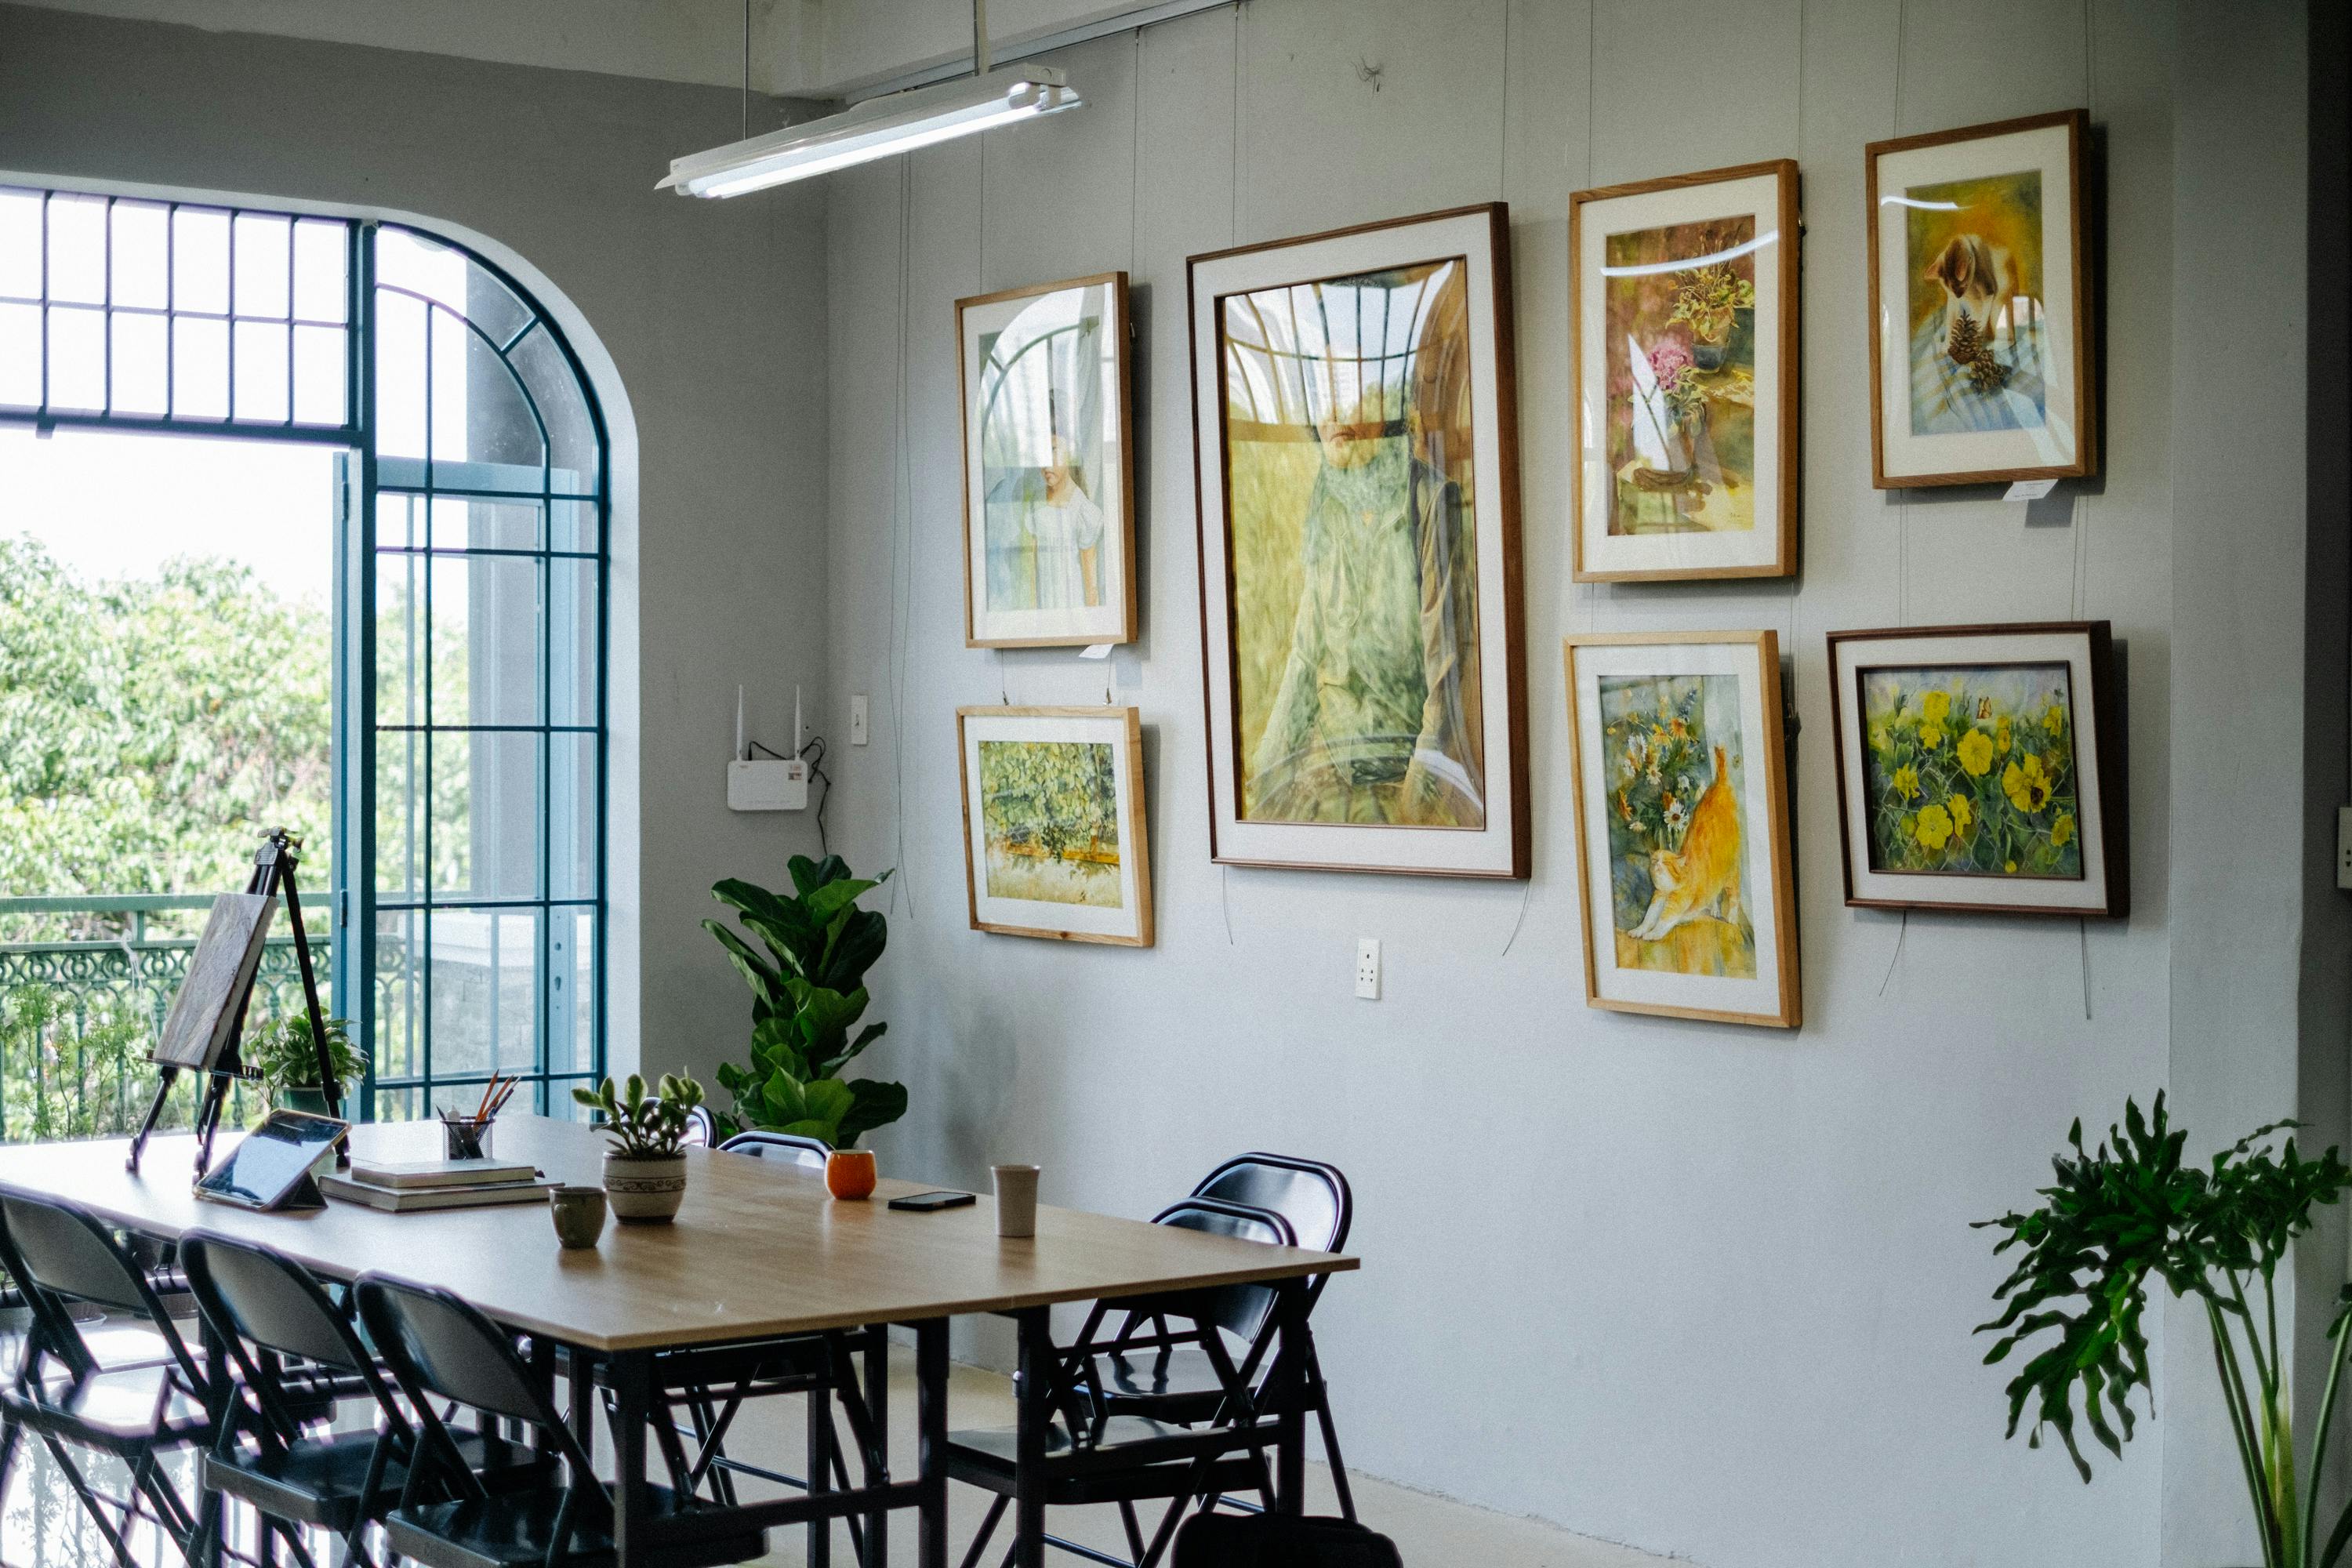
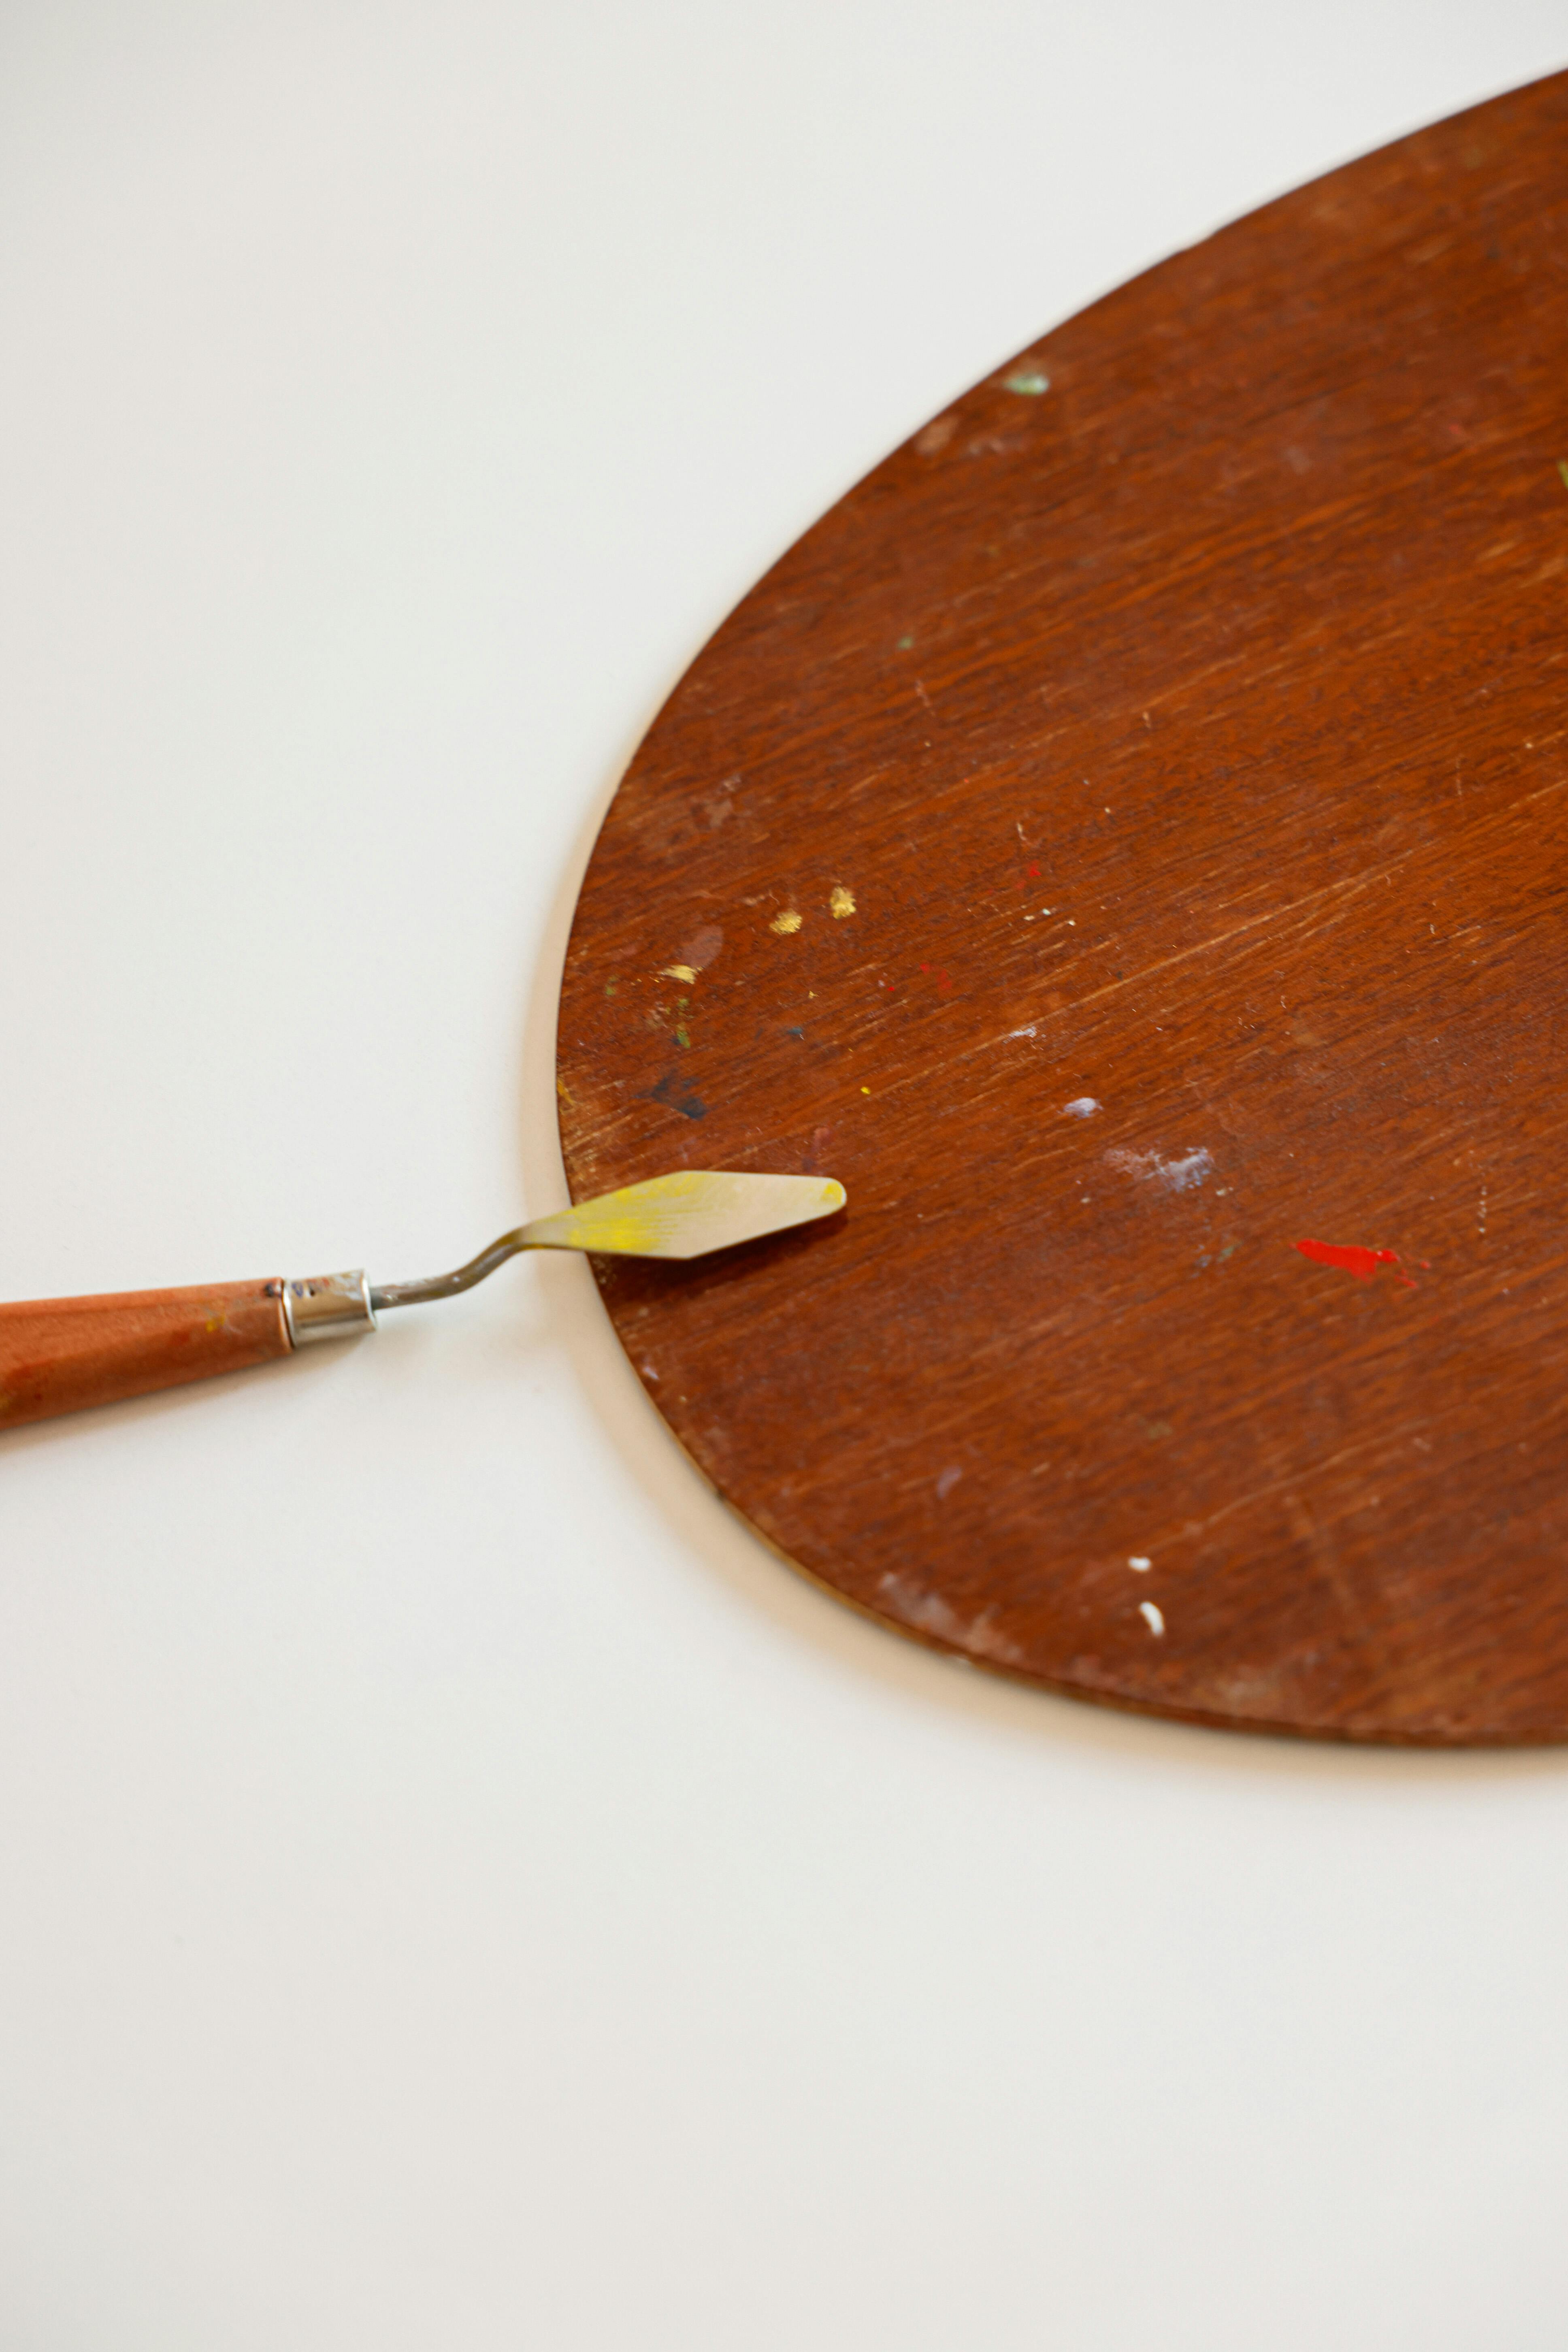
Can I use watercolor on surfaces other than paper?
While paper is the traditional and most common surface for watercolor, you absolutely can experiment with others! You can use specially prepared watercolor canvas, wood panels treated with gesso or a watercolor ground, or even fabrics. The key is to ensure the surface is adequately absorbent and sized to prevent the paint from simply beading up or soaking in uncontrollably. For me, paper is still king for its specific interaction with water and pigment, offering unparalleled luminosity and control, but don’t let that stop you from exploring! There's a real joy in pushing boundaries and discovering new ways to interact with your chosen medium and seeing how the paint behaves differently. Just ensure you prepare your surface correctly to avoid disappointment – a poorly prepared surface can lead to endless frustration. I've seen some incredible works done on Yupo paper (a synthetic paper that doesn't absorb paint, allowing for unique lifting and blending effects) or even vellum, creating vastly different visual outcomes. It's all about experimenting and seeing what sparks your creativity.
Are 'hues' really inferior to genuine pigments?
Generally, yes, for professional work. A 'hue' means the color is mimicked using a mix of other, usually cheaper, pigments rather than being made from a single, genuine pigment. For example, "Cobalt Blue Hue" is not true Cobalt Blue (PB28); it's typically a mix of Ultramarine and Phthalo Blue. While they can look similar in masstone, hues often lack the clean mixing properties, lightfastness, and unique characteristics (like granulation) of their genuine counterparts. They're like a cover band – they sound similar, but they're not the original, and sometimes that difference is profoundly noticeable. I recommend sticking to genuine single-pigment paints as much as possible for a cleaner, more reliable palette, especially when building your foundational colors. Hues can be fine for practice or very specific, non-archival projects, but for serious work, knowing what's truly in your paint offers both quality assurance and better mixing results. It's about maintaining the integrity and clarity of your color, ensuring your mixes are predictable and vibrant.
What is blooming/cauliflowers, and how do I avoid it?
"Blooms" or "cauliflowers" are those irregular, often beautiful but sometimes frustrating, splotches that appear in a wash when a drop of clean water or more pigment lands on a still-damp, but not wet, wash. The surface tension breaks, and the new moisture pushes the pigment to the edges, creating a feathered, organic pattern. While sometimes desired for special effects (especially in landscapes or abstract work, where they can add incredible texture to clouds or foliage), to avoid them:
- Work quickly and decisively: Apply your wash and leave it alone to dry evenly. Overworking a drying wash is a common culprit.
- Ensure even dampness: If you need to add more paint or water, make sure the entire area is equally damp, or wait until it's completely dry. That in-between stage is where blooms love to appear.
- Control your water: Be mindful of drips from your brush or stray splashes. Keep a paper towel handy to blot excess water from your brush.
- Angle your paper: A slight angle can help gravity pull the wash evenly, reducing pooling and the chance of blooms. Embrace them when they happen unexpectedly – sometimes the most beautiful discoveries are born from "mistakes"! I've definitely transformed a "failed" sky wash into a stormy masterpiece by leaning into the blooms.
What is 'lifting' in watercolor and when should I use it?
Lifting refers to the technique of removing wet or dried paint from the paper. It's an invaluable tool for corrections, creating highlights, or softening edges. You can lift wet paint with a clean, damp brush or a sponge. For dried paint, you'll need to re-wet the area first and then gently blot or scrub with a stiff brush (like a synthetic or hog bristle brush) or a damp sponge. The success of lifting depends heavily on the paper's sizing and the pigment's staining properties – some colors (like phthalos) are notorious for staining and are very difficult to lift, almost like they've become one with the paper. I use lifting constantly for creating clouds, bringing back highlights in hair or water, or refining a shape that's gone a bit too dark. It's a crucial part of watercolor's forgiving nature, allowing for second chances and subtle adjustments, transforming what might seem like a mistake into a subtle effect. Knowing which colors lift easily is a superpower!
Should I use masking fluid?
Masking fluid is a liquid latex product that you apply to areas you want to protect from paint, allowing you to create sharp, untouched white areas or preserve previous layers. It's a fantastic tool for preserving fine details (like highlights in eyes, thin branches, or intricate patterns) that would be impossible to paint around, especially when you're working with dark, staining washes. However, it requires careful application (use an old brush or a masking fluid pen, and clean immediately!), and must be fully dry before painting over it, and then gently removed (rub or lift with an eraser) only when the paint underneath is completely dry. My advice is to use it sparingly and strategically for those areas where absolute crispness is essential, as it can sometimes tear delicate paper or leave residue if not handled properly. It's not a crutch, but a precise surgical tool that can be a lifesaver for intricate work. I've found it invaluable for creating sharp edges around subjects in a loose, wet background.
How do I fix mistakes in watercolor?
Ah, the age-old question! While watercolor is often seen as an unforgiving medium, there are definitely ways to recover from mistakes. The first line of defense is lifting, as discussed above. For small areas, a clean, damp brush or cotton swab can work wonders. For larger areas, gently re-wetting and blotting with a sponge can help. If a color is too intense, you can layer a transparent, lighter wash over it to mute it, or even try to neutralize it with its complementary color (e.g., a tiny bit of red to mute a green). Sometimes, the best fix is to embrace the unexpected 'happy accidents' that watercolor often delivers, letting them guide you to a new creative path. It's about adaptation and finding beauty in imperfection. I've turned many a "mistake" into a unique textural element or an entirely new composition just by staying open to the possibilities. It’s all part of the journey, after all, and sometimes the most interesting art comes from those unexpected turns.
How do I choose a good travel palette?
Ah, the joy of painting on the go! A good travel palette should prioritize portability, durability, and a well-curated selection of colors. Look for compact, sturdy cases (metal or robust plastic) that seal securely to prevent leakage. Many artists prefer empty pan sets that they can fill with their favorite tube paints, allowing for a completely customized selection – this is my preferred method, as it gives me total control over my travel colors. Ensure there's adequate mixing space, ideally with a lid that doubles as a mixing surface. Don't overload it with too many colors; a strong split primary palette with a few earth tones is usually more than enough. My ideal travel palette is small enough to fit in my pocket, has a tight-fitting lid, and contains my 12 most-used, lightfast colors. It's about efficiency and enabling spontaneous creativity wherever you are! For more comprehensive advice, check out my guide on best watercolor palettes for travel.
How do I create smooth gradients?
Achieving a smooth, seamless gradient (or graded wash) is a hallmark of watercolor mastery. It takes practice, but here’s the secret:
- Wet your paper evenly: For a soft-edged gradient, wet the area where you want the wash with clean water first, ensuring an even sheen. This pre-wetting allows the paint to flow beautifully and prevents harsh lines.
- Load your brush: Start with a good amount of pigment on your brush for the darkest part of the gradient. Make sure your brush is saturated.
- Apply and dilute: Apply the color at one end of the wet area. As you pull the brush across, gradually dip your brush into clean water (or a lighter color if you're blending two hues) and continue pulling the wash, letting the pigment dilute and spread. The key is a continuous, even motion.
- Control the angle: Tilt your paper slightly to help the paint flow downwards smoothly, letting gravity assist in the blending. This prevents puddling and creates a more even transition.
- Don't overwork it: Resist the urge to go back into a drying wash. One or two passes are usually enough. The magic happens as it dries. Overworking will only lead to streaks and mud.
It's all about consistent moisture, quick application, and letting the water do its job! Practice, practice, practice is the real key here.
Can I mix different brands of professional watercolors?
Absolutely! That's one of the great joys of building a custom palette, a true freedom! Most professional watercolors are formulated with a gum arabic binder and and are perfectly compatible with each other. I regularly have paints from Schmincke, Daniel Smith, Winsor & Newton, and M. Graham living happily together on my studio palette, intermingling like old friends. Don't be afraid to experiment and combine the best qualities from different manufacturers – that's how you truly personalize your artistic toolkit and unlock unique color possibilities that no single brand can offer alone. It’s about creating your ultimate, bespoke palette, a reflection of your unique artistic preferences and needs. The only caution I’d offer is to be mindful of brands with very different binders (like QoR's Aquazol) when mixing directly on paper, but generally, in the palette, they play nicely.
How many colors do I really need to start with?
My strong advice is: don't buy a giant 48-color set! You'll likely end up using maybe a dozen of them regularly, and the rest will just confuse you. Instead, start with a carefully selected split-primary palette: a warm and cool version of each primary color (red, yellow, blue). That’s a powerful 6-color foundation. From there, I'd add a couple of essential earth tones like Burnt Sienna (my desert island color, seriously!) and Yellow Ochre, and perhaps a versatile neutral like Payne's Gray or Neutral Tint. With these 9-10 colors, you can mix an almost infinite spectrum and truly learn how colors interact, understanding their personalities rather than just their names. It's about quality and understanding, not quantity. A small, well-understood palette will yield far more sophisticated results than a massive one you don't know how to wield. Trust me on this: less is often more when it comes to truly mastering your materials and finding your unique artistic voice. It’s about learning to create your own symphony with a few well-chosen notes, rather than being overwhelmed by an entire orchestra.
How do I store professional watercolors?
Proper storage helps maintain the longevity and quality of your paints.
- Pans: Keep them in a closed palette box to protect from dust and light. If they become very dry, a drop of water can help re-activate them. Allowing them to fully air dry before closing the lid is crucial to prevent mold growth, especially in humid environments.
- Tubes: Ensure the caps are always screwed on tightly to prevent the paint from drying out – a single crack can lead to a completely solid, unusable tube! Store them upright if possible to prevent any leakage. If a tube becomes stiff, you might be able to revive it with a few drops of distilled water, though very dried-out tubes are best replaced. I’ve learned the hard way that a little vigilance with caps saves a lot of heartache.
- Dried Paint in Palettes: If you let tube paints dry in your palette wells (a common practice, and one I highly recommend for efficiency!), simply cover your palette when not in use to keep dust off. They will re-wet beautifully for your next session, making them incredibly convenient for studio work. Always store your paints and palettes away from direct sunlight, extreme heat, or freezing temperatures, as these can severely affect the binder and pigment consistency over time, potentially ruining your investment and altering your colors. Treat them like the precious tools they are! For more on managing your palette, check out my best watercolor palettes for travel which also offers studio organization tips.