
Beginner Oil Paint Sets: Your Journey to Vibrant Art Starts Here
Overwhelmed by oil paints? This guide helps you choose the perfect beginner set & essential tools. Explore pigment quality, 'fat over lean,' and embrace your vibrant artistic journey.
Beginner Oil Paint Sets: Your Journey to Vibrant Art Starts Here
Oh, the sheer joy (and yes, the mild terror) of embarking on an oil painting journey! I remember standing in the art supply store, completely overwhelmed by the rows upon rows of oil paints. Tubes promising vibrant hues, others whispering 'student grade,' and a whole wall dedicated to 'artist quality' that just looked intimidatingly expensive. Sound familiar? It felt like decoding a secret language, and honestly, a tiny part of me just wanted to grab the nearest tub of glitter and run – perhaps even considering if abstract expressionism could be achieved purely with shiny particles, which, let's be real, sounds like a lot less cleanup. My goal here isn't about finding the 'best' set in some grand, objective sense – because 'best' is so personal – but about helping you find your perfect starting point for oil painting, a journey that has led me to create vibrant, colorful, and often abstract art myself. I want to walk you through my thought process, share some lessons I learned (often the hard way!), and point you towards a few sets that genuinely make the learning curve a little less steep and a lot more fun. Consider this our little coffee shop chat about getting started with oils, encompassing both your initial paint choices and the accompanying tools you'll need to transform your blank canvas into a vibrant masterpiece. You’re in good company – I've been exactly where you are, lost in the shimmering chaos of an art store, perhaps even feeling a little overwhelmed by the potential for glorious, colorful mess, or the nagging thought of 'what if I pick the wrong blue?' So, to cut through that initial overwhelm and guide you towards your own vibrant beginnings, let's embark on this colorful journey together, making informed choices that will fuel your creative spirit and equip you with everything you need to start painting today. Embrace the beautiful, sometimes messy, rewarding process! In this guide, we'll explore not just the paints themselves, but also the enduring legacy of oils, what makes a good beginner set, essential tools, and my top picks to get you started.
Why I Fell in Love with Oil Paints: An Enduring Artistic Legacy
Before we dive into specific sets, let's just take a moment to appreciate oil paints themselves. That initial intimidation? Totally normal, but trust me, the rewards are immense. If you're on the fence, let me tell you, there's a reason artists have adored this medium for centuries. This rich history, filled with both challenges and triumphs, is what ultimately drew me to this incredible medium, shaping my own creative journey.
Consider the enduring masterpieces of history that owe their brilliance to oil paints, a testament to the medium's remarkable history:
- Renaissance Depth: Think Leonardo da Vinci's Mona Lisa with its unparalleled depth and subtle sfumato. The medium allowed for unprecedented realism.
- Baroque Drama: The dramatic chiaroscuro of the Dutch Golden Age, exemplified by Rembrandt's ability to capture such profound human emotion through light and shadow, almost making his subjects glow from within, has always been a profound source of inspiration for me. Or Vermeer's luminous skin tones.
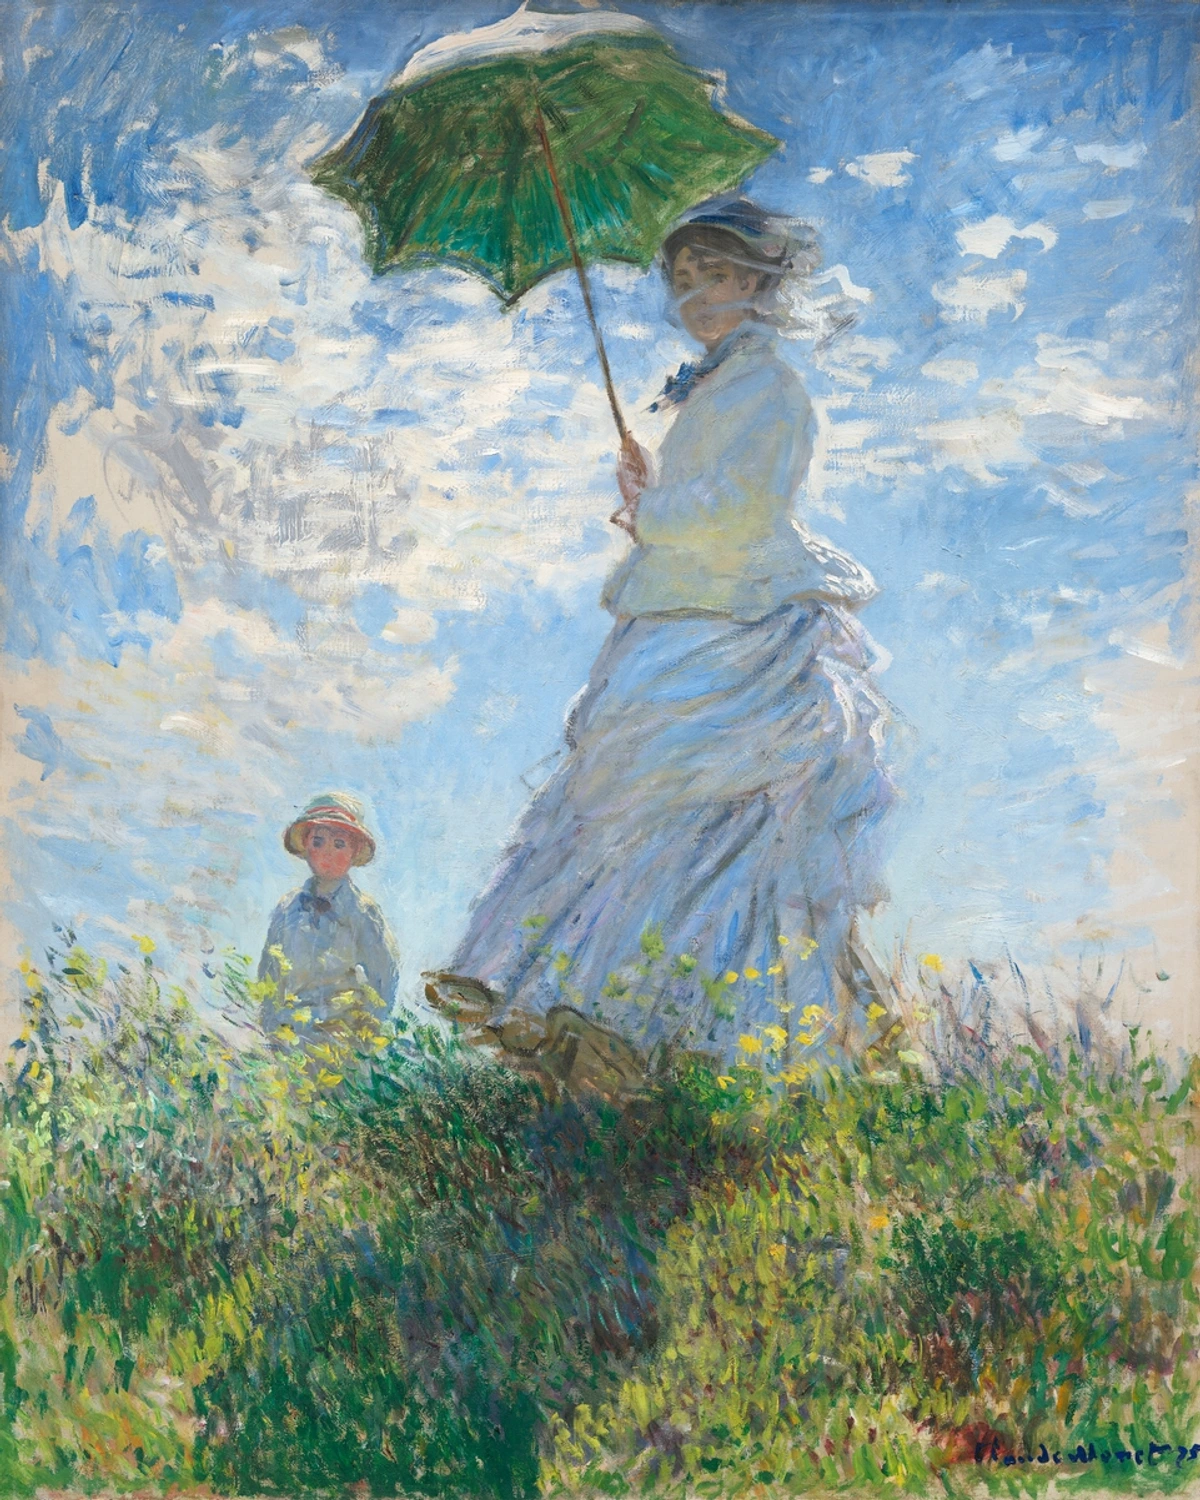
- Impressionist Light: The vibrant light of Impressionism from artists like Monet's Impression, Sunrise, where artists championed quick, visible brushstrokes and pure, unmixed colors, using the slow drying time to blend on the canvas.
- Post-Impressionist Expression: Post-Impressionists like Van Gogh explored impasto with thick, expressive applications, pushing the medium's textural boundaries.
Understanding this rich history helps us appreciate why, even with modern alternatives, oils remain a beloved and powerful medium for artists today. The medium's versatility has always been its superpower.
Yet, it wasn't always a smooth ride for those early masters. Imagine a world where pigments were ground from minerals by hand, often toxic, and the understanding of binders, drying times, and even cleanup was more alchemy than science. Artists back then contended with paints that yellowed unpredictably, cracked over time, faded drastically due to unstable pigments, and often required laborious, solvent-heavy cleaning processes that weren't always safe or pleasant. Early artists also grappled with the consistency of their prepared canvas surfaces, as standardized gesso or sizing was not readily available, leading to varying absorption rates and unpredictable drying times from one artwork to the next. Despite these challenges, the sheer expressive power and rich luminosity of oils pushed artists to persist, experimenting for centuries to unlock the medium's full potential. Later, the 19th century brought the revolution of pre-mixed paint tubes, freeing artists from the studio to paint 'en plein air' and leading to movements like Impressionism. The 20th century further diversified the palette with synthetic pigments, like the incredibly stable and vibrant Cadmiums and Cobalts, making art more accessible and colors more reliable and stable.
This enduring quality of oil paintings, their resistance to deterioration over time, is what we call permanence, a broader term encompassing lightfastness, durability, and resilience against environmental factors. The journey of these colors, from rare minerals like lapis lazuli for ultramarine to modern synthetic compounds, is a fascinating story of human ingenuity and artistic demand. Just as crucial as pigments, the evolution of binders – the oils that hold pigment particles together – was equally transformative. While linseed oil was (and still is) a workhorse, artists slowly discovered the varied properties of other oils like walnut, safflower, and poppy seed, dramatically expanding the medium's possibilities. It’s a testament to the enduring allure of oils that, even with such hurdles, they became the cornerstone of so many artistic movements.
For me, it was the blendability that first captivated me. You can just... keep moving it around. For ages! This means you have so much time to get your colors just right, to create those seamless transitions, those dreamy skies, or the subtle shifts in a portrait. It's incredibly forgiving, which, frankly, was a huge relief for my often-indecisive artistic self. And the richness! Oh, the sheer depth of color you can achieve with oils is just something else. They have this incredible luminosity that seems to glow from within, especially once they've dried and had a chance to cure. This 'drying' isn't just about water evaporating; it's a fascinating chemical process called polymerization, where the oil in the paint reacts with oxygen in the air, creating a solid, durable film. Think of it like a slow, deliberate magic trick. I remember my first attempts at exploring texture: my favorite techniques for adding depth to abstract paintings with oils, how the paint's inherent buttery texture just lent itself to thick, expressive marks, perfect for impasto. Yes, they take a while to dry – sometimes days, or even weeks for thicker applications – and yes, they involve solvents, which can be a bit intimidating. But honestly, the slow drying time is a feature, not a bug, especially for us beginners. It’s a chance to slow down, to breathe, to truly engage with the process rather than rushing against a clock. It's about feeling the butter-like consistency on your brush, the rich scent, and the gradual transformation on your canvas. And don't worry too much about the smell of the paints themselves; traditional oil paints generally have a mild, pleasant, oily scent. The stronger, more noticeable smells typically come from the solvents used for thinning and cleaning, which we’ll cover later.

What Makes a "Good" Beginner Oil Paint Set?
Now that we've fallen in love with the magic of oils, let's get practical about how to choose the right tools to start creating your own. Having marveled at the enduring legacy and unique qualities of oil paints, it's time to get down to the nitty-gritty: what exactly should you look for when choosing your very first set? So, you're ready to dive in, but where do you even begin with all those paint tubes staring back at you, whispering promises and making your wallet ache? It’s a question I grappled with for ages, convinced I needed to decode some ancient artistic secret. When I'm thinking about recommending a set, I'm not looking for something a master painter would use. No, we're looking for a balance. A set that offers quality without overwhelming the wallet or discouraging the budding artist. Here's what goes through my head:
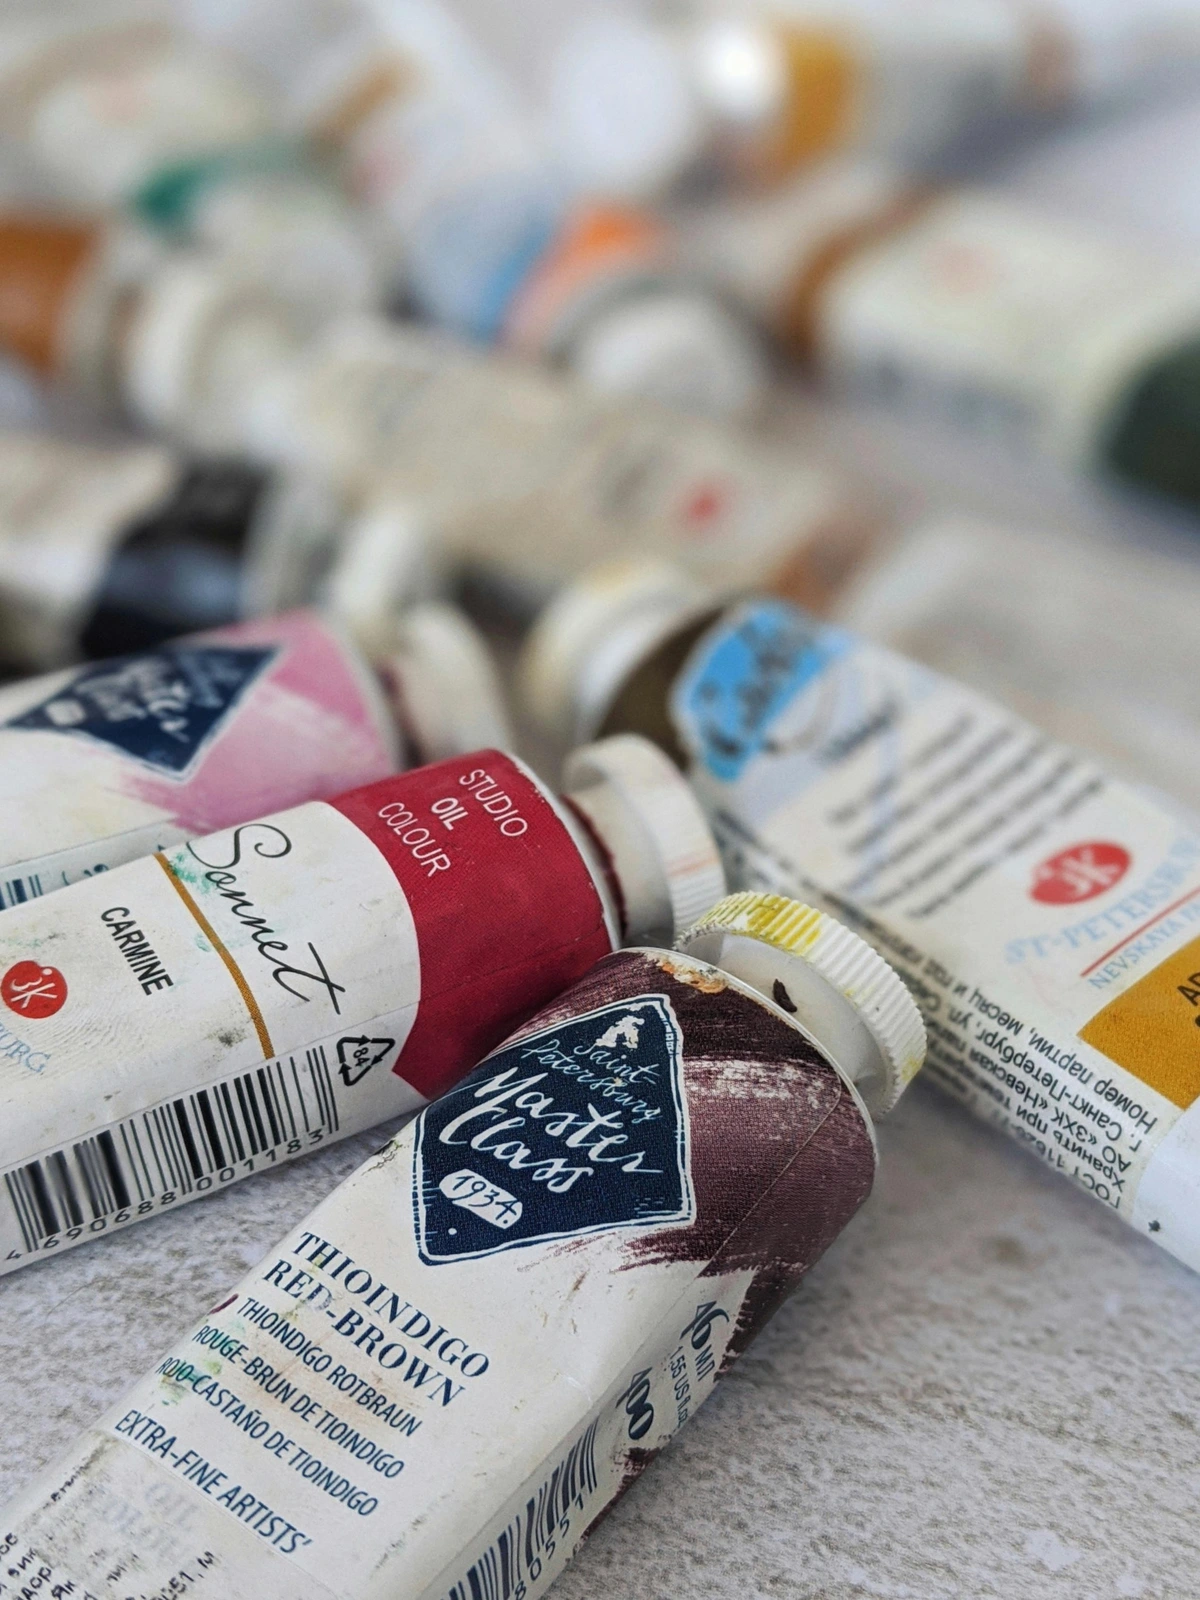
- Pigment Quality (Student Grade is Your Friend!): You don't need artist-grade paints right away. Seriously, save that for when you're selling your masterpieces! Student-grade paints, while they might have a lower pigment load (meaning less pure pigment and more filler) and thus a lower pigment-to-binder ratio, are perfectly adequate for learning color mixing, brush control, and developing your style. Fillers, often inert materials like chalk, barytes, or kaolin clay, are primarily used to reduce cost, but they also subtly impact a paint's opacity and texture. Think of it like a rich, full-bodied wine (artist-grade) versus a lighter, more accessible table wine (student-grade) – both are enjoyable, but one offers a more intense experience. In practical terms, a student-grade white might require several more layers to cover a dark underpainting compared to an artist-grade white, which offers superior opacity and tinting strength with fewer strokes. This teaches you patience and layering techniques, invaluable skills for any painter. They still offer good hue (the pure color), decent value (lightness or darkness), and sufficient saturation (intensity or purity of the color). For instance, while both Cadmium Yellow Light and Hansa Yellow Light deliver a vibrant yellow hue, Cadmium Yellow Light tends to be opaque and slightly warm, while Hansa Yellow Light is usually more transparent and cooler, demonstrating how different pigments create distinct characteristics within the same hue family. The key is that they should still be vibrant enough to excite you. And don't fret too much about lightfastness yet – that's how long a color resists fading over time. For practice pieces, it's not a major concern, but as you grow, consider it; if you ever plan to sell or exhibit your work, investing in lightfast pigments becomes crucial to ensure your art endures for generations, safeguarding your artistic legacy and potential investment value. This is why, as you progress, consider upgrading to artist-grade paints for any serious, archival work; it's an investment in the future of your art. Lightfastness is often rated by ASTM (American Society for Testing and Materials): I (Excellent), II (Very Good), III (Fair), and IV (Poor). Student-grade paints often fall into categories II, III, or IV, while artist-grade typically features I and II. Some fugitive pigments can fade significantly over time because they are often organic dyes or chemically unstable compounds; for example, Alizarin Crimson (particularly older formulations) and certain violets are known for their poor lightfastness, often shifting color or losing intensity when exposed to light over years. Another common example is Sap Green, which, when made with unstable yellow pigments, can quickly turn a dull brownish hue. Conversely, pigments like Ultramarine Blue or Cadmium Yellow are known for their excellent lightfastness, resisting fading for centuries. Professional artists prioritize this to ensure their work endures; student-grade sets often use cheaper, less stable alternatives, or blends, which is fine for learning but something to be aware of. Artist-grade paints also tend to feature more single-pigment colors, which leads to cleaner and more predictable mixes, something a beginner often discovers further down their creative journey.
- Color Selection (The Essential Palette): A good beginner set should give you a foundational palette. Think a warm red (like Cadmium Red Light), a cool red (like Alizarin Crimson or Quinacridone Red), a warm yellow (like Cadmium Yellow Medium), a cool yellow (like Lemon Yellow or Hansa Yellow Light), a warm blue (like Ultramarine Blue), a cool blue (like Phthalo Blue or Cerulean Blue), plus white, and maybe a black or an earth tone like Burnt Umber. Having both a warm and cool version of each primary color is essential for effective color mixing, allowing you to create a much wider spectrum of greens, purples, and oranges. This allows you to mix a vast spectrum of colors without being bombarded by dozens of pre-mixed tubes. Learning to mix is not only half the fun but also essential for understanding how artists use color effectively, laying the groundwork for understanding color theory. In fact, a limited palette forces you to understand color relationships deeply, which is invaluable for any artist. You'll truly grasp color theory this way.

- Consistency: The paint should flow nicely. Not too stiff, not too runny. You want something that feels good on the brush and spreads easily, whether you're working thin or building up a little texture. I remember getting a super cheap set once, and the paint was so stiff it felt like trying to spread cold butter with a toothpick. Not inspiring, let me tell you! On the other hand, a higher quality artist-grade paint often uses a single, pure binder chosen for optimal pigment binding and handling, leading to even more predictable and consistent results, which can be a joy to work with once you've honed your basic skills.
- Binder Basics: Understanding Drying Oils and Their Impact: Speaking of consistency, you'll soon encounter the terms 'lean' and 'fat' in oil painting, which refer to the oil content in your paint layers. This concept is intrinsically linked to the crucial "fat over lean" rule for durable paintings. While often overlooked, the binder (usually linseed oil or safflower oil) plays a crucial role. This isn't just about the type of oil, but also its oil content – the proportion of oil to pigment. This ratio also influences the paint's viscosity, or its resistance to flow; paints with higher oil content are typically more fluid and have a lower viscosity, while stiffer paints have higher viscosity. Think of it this way: paints with higher oil content tend to be more fluid, dry slower, and can feel 'fatter' on the brush, making them great for blending and smooth glazes. Conversely, paints with less oil can be stiffer, dry quicker, and are often better for impasto or initial, lean layers.The type of drying oil used as a binder profoundly affects the paint's properties:
- Linseed Oil: A common workhorse, it dries relatively quickly and creates a durable film, though it can yellow slightly over time, especially in whites and lighter colors. This yellowing is a gradual process that's usually imperceptible in student work and takes decades to become noticeable.
- Safflower Oil: Often preferred for whites and lighter colors due to its minimal yellowing, but it dries more slowly and can feel a tad 'slipperier.'
- Walnut Oil: Yellows even less than safflower, offers a beautiful fluid consistency, and has a pleasant nutty scent, making it a favorite for many.
- Poppy Seed Oil: Known for its very slow drying time and minimal yellowing, often used for delicate glazing or preserving freshness during long painting sessions.
Understanding these subtle differences helps you predict how your paint will behave and allows you to tailor your material choices to your technique. A good student-grade paint will have a consistent, smooth binder that doesn't feel overly oily or gummy. Generally, 'lean' paints have less oil, dry faster, and are for initial layers, while 'fat' paints have more oil, dry slower, and are applied over lean layers. Getting this wrong means cracks down the line – and nobody wants cracked art, right? To clarify, a 'lean' layer is one thinned with more solvent and less oil, drying relatively quickly. A 'fat' layer contains more oil and less solvent, drying more slowly. Why is this critical? Imagine trying to build a delicate, flexible glass structure (a 'fat' layer) on top of a concrete slab that's still curing and settling (a 'lean' layer). As the concrete beneath shifts and hardens, the glass above, being unable to flex with it, would inevitably crack. Conversely, applying a rigid, fast-drying layer over a flexible, slow-drying one ensures that the more flexible, slower-drying paint is on top, allowing it to move and dry without cracking the underlying, already stable layers. So, while we're going for economical, let's not sacrifice basic usability.
My Top Picks: Reviewing Oil Paint Sets for Beginners
With the foundational knowledge in hand, let's explore some practical options for your first oil paint set. Alright, enough philosophizing about what makes paint paint, let's get to the practical stuff! Based on my own dabbling and what I've seen others enjoy, here are a few types of sets (and some generalized examples) I'd point a beginner towards. Remember, these aren't endorsements of specific brands as much as they are profiles of what to look for, usually containing 6-12 essential colors in their entry-level sets, typically including a warm and cool red, yellow, and blue, plus white and an earth tone.
1. The Economical Explorer: A Solid Basic Starter Set
This is your entry point. Think something like a Gamblin 1980 set (known for its excellent consistency and rich, historical color palette – meaning it features colors that have been mainstays in artists' studios for centuries, offering a traditional yet vibrant range), Winsor & Newton Winton (a reliable workhorse for beginners with a long-standing reputation), or Sennelier Rive Gauche (offering a slightly higher pigment load for its price point). Sometimes, brands like Georgian (Daler-Rowney) can also offer good value in this tier. These sets usually offer 6-12 essential colors in decent-sized tubes, typically 20-37ml.
- What I love: You get a foundational palette that allows for extensive color mixing practice. The quality is reliable enough that you won't be fighting the paint. They're usually quite affordable, meaning less guilt when you inevitably squeeze out too much (I swear, my tubes have a mind of their own sometimes, and yes, I'm still guilty of creating what looks like a small paint volcano on my palette!). This set was my gateway to unlocking a world of color, where every mix is a small discovery. I recall one time trying to achieve a rich, deep forest green with a particularly chalky, low-pigment set – it was like trying to sculpt with mud! The paint just wouldn't layer or mix cleanly. While economical paints have their place, a baseline of usability is crucial. Look for sets where the white tube might be a bit larger – you'll go through white faster than any other color, trust me!
- A quick note: The colors might not be as intensely pigmented as artist-grade, but for learning, that's often a good thing – it teaches you to layer and build up color. And regarding that pigment purity, don't expect every tube to contain just one pigment. Manufacturers often blend a couple to achieve a desired hue economically. For instance, a common "Sap Green" is typically a blend of a yellow pigment and a blue pigment, rather than a single natural sap-derived pigment. This is perfectly fine for learning and doesn't hinder your artistic journey at this stage.
This set is ideal for testing the waters and building foundational skills without a significant investment, making it perfect for the artist who just wants to dive in.
2. The Serious Starter: Stepping Up a Notch
If you're feeling a bit more committed and want a noticeable jump in pigment quality without fully diving into the deep end, something like a Royal Talens Rembrandt (their student range, known for exceptional vibrancy) or a higher-end Winsor & Newton Winton set would be fantastic. These often come with a few more tubes, perhaps larger whites, a broader selection of core colors, or even a small medium like a bottle of refined linseed oil or a small alkyd medium to experiment with drying times. Their beginner sets typically include 8-12 tubes, often 40ml or 60ml, usually covering your essential warm/cool primaries, white, and a few earth tones.
- What I love: The colors will feel richer, more vibrant, and often have a better consistency right out of the tube. You'll notice better coverage, more vibrant mixes, and often, a really satisfying, almost buttery feel on the brush as the paint moves across the canvas. This improved consistency, thanks to higher pigment loads, often means the paint handles beautifully for techniques like smooth glazing (thin, transparent layers) or delicate scumbling (thin, opaque, broken layers). I remember upgrading to a Rembrandt student set and feeling like my brush was suddenly gliding instead of fighting. It felt like my brush was finally wearing silk slippers instead of clunky boots, making painting feel like a luxurious dance rather than a wrestling match. It's a revelation. It's a sweet spot between affordability and performance, giving you a taste of what quality oils can really do. These sets offer a more luxurious painting experience without breaking the bank, elevating your learning.
- Something to keep in mind: They'll be a bit more expensive, naturally. You might still find some hues are mixed pigments, but the overall experience is a step up.
Choose this set if you're ready to invest a little more for a noticeably enhanced painting experience and a more direct feel of artist-grade performance, pushing your creativity further.
3. The Water-Mixable Oils: For the Solvent-Shy Artist
Okay, a slight tangent here, but this is a game-changer for many! Brands like Cobra by Royal Talens, Winsor & Newton Artisan, or Gamblin's water-miscible oils are fantastic. They behave almost exactly like traditional oils but can be thinned and cleaned up with water, eliminating the need for harsh solvents. Honestly, when I first tried these, it felt like discovering a secret cheat code for oil painting! They achieve their water-miscibility through the addition of emulsifying agents which allow the oil and water to mix. These sets typically come in 6-10 tube assortments, similar in size to traditional student sets, offering a basic palette of primaries, white, and a secondary or earth tone.
- What I love: No turpentine fumes! This is huge if you're sensitive to smells or working in a small space. The cleanup is a breeze, and they still offer that beautiful blendability and rich color of traditional oils. This option truly opens up oil painting to so many more artists, making the medium incredibly accessible.
- A small caveat: They can feel slightly different, sometimes a bit 'gummier' or faster drying than traditional oils – though still much slower than acrylics. This is often due to the emulsifying agents altering how the paint feels and behaves, making it less 'oily' or traditional. And you'll need specific water-mixable mediums if you want to thin them or adjust drying times effectively, as traditional oil mediums can sometimes lead to less predictable results.
This option is perfect for those who want the joy of oil painting without the need for traditional solvents, or for artists working in shared or small spaces, making the journey much smoother.
Beginner Oil Paint Set Comparison
Set Type | Price Point | Pigment Quality | Typical Tube Count/Size | Key Benefit |
|---|---|---|---|---|
| Economical Explorer | Affordable | Student Grade | 6-12 tubes (20-37ml) | Great for extensive practice & fundamentals |
| Serious Starter | Mid-Range | Higher Student | 8-12 tubes (40-60ml) | Richer colors, better consistency & coverage |
| Water-Mixable Oils | Mid-Range | Student Grade | 6-10 tubes (20-37ml) | Solvent-free cleanup, accessible oil painting |
Beyond the Paints: Building Your Essential Oil Painting Toolkit
Alright, with our paint choices sorted, it's time to round out our toolkit. Because let's be honest, even the finest paints won't get far without a few trusty sidekicks. What's a masterpiece without its stage and supporting cast, right? This isn't about decking out a professional studio overnight – my own creative journey started with far less than I have now! Instead, let's focus on the absolute must-haves that will ensure your creative journey is smooth and enjoyable, even if it means a few paint splatters on your favorite shirt (consider it an artist's badge of honor!). For a deeper dive, you can always check out essential oil painting supplies for beginners.
Drawing Tools: Your First Marks
Before diving into paint, a simple pencil or charcoal stick for initial sketching directly on your canvas or surface can be incredibly helpful. It allows you to plan your composition and proportions without committing to paint immediately, saving you frustration (and paint!).
Surfaces: Your Canvas for Discovery
Start with canvas boards or paper designed for oils. They're much more forgiving and less expensive than stretched canvas while you're experimenting. The lower cost means you'll feel less intimidated by 'ruining' a canvas, which is fantastic because it encourages free experimentation and learning from mistakes without financial pressure. Plus, they often come pre-primed with a consistent layer of gesso, an acrylic-based primer that prepares the surface. This is different from traditional oil grounds which use lead or titanium white in an oil binder, requiring careful application and curing. For beginners, acrylic gesso is far more common, easier to use, and compatible with both oils and acrylics. Gesso's crucial job is twofold: it seals the canvas, preventing the oil from your paint from soaking into the fibers and causing the canvas to degrade over time, and it provides an ideal surface texture, or 'tooth,' which is the slight roughness that helps the paint adhere and allows for better control and layering, much like tiny microscopic hooks for your pigments. While canvas is traditional, other surfaces exist like wood panels (which offer a rigid, smooth surface) or even prepared metal, but for beginners, the forgiving nature and cost-effectiveness of canvas boards and paper are usually the best starting points.

Brushes: Your Artistic Extensions
A small selection is all you need: perhaps a flat brush (like a bright or flat), a round, and a filbert in varying sizes (say, a #4, #8, and #12). You don't need expensive sable brushes yet! Stiff hog bristle or synthetic brushes are perfect for oils. Hog bristle brushes are ideal for laying down thick paint and creating texture, while synthetic brushes excel at smooth blending, glazes, and finer details due to their softer nature.
Palette: Your Mixing Ground
Anything non-absorbent will do. A plastic palette, a ceramic tile, a glass pane, or even just some disposable palette paper. I've used old dinner plates in a pinch!

Palette Knife: The Impasto & Mixing Master
Often overlooked but truly indispensable, a simple metal or plastic palette knife is invaluable not just for mixing colors cleanly without damaging brush bristles, but also for applying thick, expressive strokes of paint (hello, what is impasto painting!) or perhaps most importantly for a beginner like me, scraping away 'mistakes' on the canvas, saving both paint and surface. It's like having a built-in 'undo' button for your oil paintings! Honestly, it's a game-changer for adding texture and manipulating paint in ways a brush can't, making it truly a versatile tool for any oil painter, even a beginner like yourself.
Solvents & Mediums: Modifying Your Paint
If you go traditional oils, you'll need an odorless mineral spirit (OMS) primarily for thinning paint for initial washes and, more importantly, for cleaning your brushes. Always ensure good ventilation when using any solvents, even so-called "odorless" ones! While they may not have a strong smell, OMS still releases Volatile Organic Compounds (VOCs) – airborne chemicals – into the air, which can be harmful without proper airflow. In fact, good ventilation is crucial whenever you're working with oil painting supplies, as some mediums can also emit fumes. And while we're on the subject, while some artists romanticize the 'smell of the studio,' let's be real – proper ventilation is about health, not just aesthetics! It's also worth noting that other solvents like turpentine exist, though they are often stronger smelling and less recommended for beginners due to their more potent fumes. The art world is increasingly exploring eco-friendly and solvent-free painting alternatives, such as using oil-based brush cleaners and mediums that do not require spirits, so if environmental impact is a concern for you, research into brands like Natural Pigments or M. Graham, which offer painting mediums based on natural oils and resins, allowing for solvent-free painting without sacrificing traditional techniques, might be a good next step for future exploration.
For mediums, a simple linseed oil will do wonders. Think of solvents as your cleaning crew and initial thinning agents, while mediums are more like your paint's personal trainers – they modify its working properties, improving flow for smoother blending, increasing transparency for luminous glazes, adding gloss, or even adjusting drying times for different oil painting techniques. Besides linseed, you might explore alkyd mediums for faster drying times (these are a modern innovation containing a synthetic resin that cures more rapidly than traditional oils, essentially making paint dry like acrylics but with oil characteristics). You could also try stand oil, a thick, honey-like linseed oil that creates smooth, enamel-like glazes with minimal yellowing and slower drying. Here’s a crucial concept to remember for durability: the “fat over lean” rule. Simply put, it means you should always apply paint with more oil ('fat') over layers with less oil ('lean') to prevent cracking. This prevents future cracking and ensures your painting cures properly over time, lasting for generations. And on a practical note, always dispose of oil-soaked rags and waste properly – many communities have specific guidelines for hazardous waste, and proper disposal prevents spontaneous combustion (yes, seriously, oily rags can self-ignite!) and protects the environment. Never just toss them in a bin.
Frequently Asked Questions (FAQ)
Q: How many colors do I really need in a beginner set? A: Six to eight essential colors – ideally including a warm and cool version of each primary (red, yellow, blue), plus white and perhaps an earth tone – are more than enough to learn color mixing effectively. Less is often more for beginners, as it forces you to understand how to create a wide palette from a limited selection, making fundamental color theory your primary goal, not a vast array of pre-mixed colors.
Q: Do I need expensive brushes for oil painting? A: Absolutely not! For beginners, sturdy hog bristle or synthetic brushes are excellent and far more economical. Hog bristle brushes are great for texture and thick paint, while synthetics are better for smoother blends. They can withstand the solvents and the thicker consistency of oil paint. Save the fancy sable brushes for later, if ever.
Q: What's the main difference between student and artist grade oil paints? A: The primary difference is the pigment load and thus the pigment-to-binder ratio. Artist-grade paints contain a much higher concentration of pure pigment and use fewer fillers, resulting in more vibrant, intense colors, better coverage, superior lightfastness, and often a smoother consistency. Artist-grade also typically offers a wider range of single-pigment colors, which ensures cleaner and more predictable color mixing, which you'll appreciate more as you advance. Student-grade paints use more fillers, making them more affordable, but still perfectly suitable for learning and practice.
Q: Can you explain the 'fat over lean' rule in more detail? A: Absolutely! This rule is crucial for the longevity of your oil paintings. 'Fat over lean' means applying paint layers with more oil ('fat') over layers with less oil ('lean'). Lean layers are typically thinned with more solvent, drying faster and becoming less flexible. Fat layers contain more oil, dry slower, and remain more flexible. Why is this critical? Imagine trying to build a delicate, flexible glass structure (a 'fat' layer) on top of a concrete slab that's still curing and settling (a 'lean' layer). As the concrete beneath shifts and hardens, the glass above, being unable to flex with it, would inevitably crack. Conversely, applying a rigid, fast-drying layer over a flexible, slow-drying one ensures that the more flexible, slower-drying paint is on top, allowing it to move and dry without cracking the underlying, already stable layers. This prevents future cracking and ensures your painting cures properly over time, lasting for generations.
Q: How do I clean my oil paint brushes effectively? A: Here's a step-by-step approach for effective brush cleaning, always keeping the 'fat over lean' principle in mind:
- Scrape off as much excess paint as possible using a rag or palette knife.
- Swirl brushes in an odorless mineral spirit (OMS) or appropriate water-mixable oil cleaner to break down and dissolve the oil-based paint (the 'fat' part).
- Wipe them clean, then wash thoroughly with warm water and mild soap (like dish soap or dedicated brush soap) until all color is gone to remove any residual oil and pigment thoroughly. This step is crucial as leftover soap can affect future paint adhesion.
- Rinse thoroughly to remove all soap residue.
- Reshape the bristles to their original form and let them dry flat or brush-side up to maintain their shape and prevent water from seeping into the ferrule.
Q: What about the smell and ventilation when using traditional oil paints? A: This is a crucial one! Traditional oil paints themselves have a mild, pleasant oil scent, often described as earthy or nutty. The stronger, more noticeable smell usually comes from the solvents (like turpentine or mineral spirits) used for thinning and cleaning. Even "odorless" mineral spirits still release fumes, just without the strong odor, so they're not truly odorless in terms of vapor release. Always ensure you work in a well-ventilated area – open windows, use a fan, or if possible, paint outdoors or in a dedicated studio with air purification. Good ventilation protects your health and makes the painting experience much more enjoyable!
Q: Can I revive hardened oil paints in a tube, and how long do they last? A: Unfortunately, once oil paint hardens in the tube due to exposure to air, it's generally unusable. The oil has oxidized, and the paint loses its creamy consistency. While occasionally a tiny bit at the very edge might seem salvageable for very experimental textural purposes (with significant caveats about consistency and archival quality), trying to use it for serious artwork often results in gritty texture, inconsistent drying, and compromised color integrity. It's usually best to discard it to avoid compromising your work. However, properly stored (caps tightly sealed, cool, dark place), oil paints can last for many years, even decades! The key is always preventing air from reaching the paint.
Embrace the Mess: My Journey Tip for Getting Started
And now, for arguably the most important lesson I learned, the one that almost made me quit before I even started: the mindset! But beyond the technicalities of paints and brushes, there's a crucial element that often gets overlooked: the mindset. Now that we've covered the 'what' of paints and essential tools, let's talk about the 'how' – or rather, the 'just do it'! I've lost count of how many aspiring artists tell me their biggest hurdle isn't talent, but the sheer, paralyzing fear of starting, of making a 'mistake,' or not having the 'perfect' supplies. Believe me, I've been exactly where you are! My own creative journey has been a winding path, often marked by self-doubt and the feeling of not being 'ready.' I vividly recall almost not buying my first set because I spent three days researching every possible brand, convinced I'd pick the 'wrong' one. In the end, I bought a set with a weird shade of purple I never truly loved or used. But that 'wrong' choice actually led to a breakthrough: it was with that very set that I first experimented with mixing my own nuanced greens and deep earth tones, pushing past the limitations of the tube colors and truly understanding how color relationships work. In fact, one of my most memorable 'mistakes' was accidentally knocking over an entire bottle of linseed oil onto a canvas. Instead of despairing, I was forced to embrace extreme fluidity, which led to a series of abstract washes that revealed the inherent beauty of transparent layers – a classic example of a "happy accident" leading to new artistic innovation. This is how art often thrives – through embracing the unexpected! That initial 'mistake' taught me invaluable lessons about color mixing, layering, and artistic resilience! What a waste of three days that would have been if I hadn't just bought something and started.
My Personal Journey with Mistakes
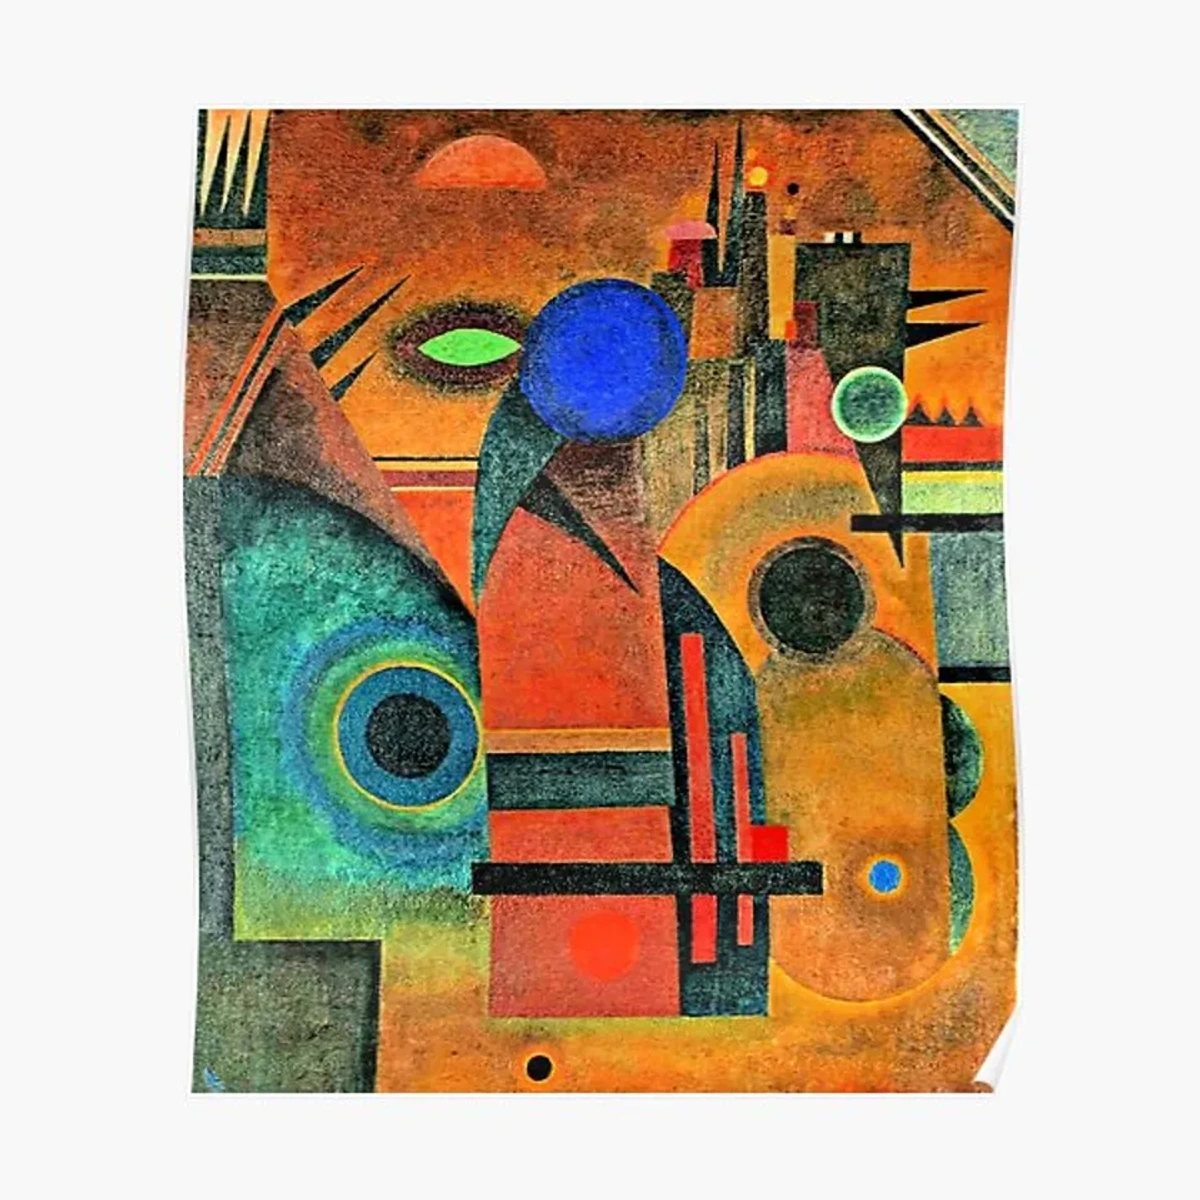
But you know what? The 'right' thing is often just what you have in front of you. A simple, decent beginner set will give you everything you need to experiment, to learn to mix, to understand brushwork, and most importantly, to fall in love with the process. Don't let the quest for the 'best' be the enemy of the 'good enough to start.' Just pick a set that feels right, maybe one of the "Economical Explorer" types, and just get paint on a surface. That's where the real learning happens. Embrace the mess, embrace the mistakes, and most of all, embrace the pure joy of creating something from nothing. Who knows where your abstract art journey might take you? And hey, if you ever feel utterly lost, sometimes a quick scroll through some art for sale, perhaps even some of my own vibrant abstract pieces, can be a surprising source of new inspiration – it often works for me when my brain decides to take a vacation! Finally, one last piece of advice for the future: once your oil painting is completely dry and cured (which can take anywhere from six months to a year, depending on paint thickness), consider varnishing it. Varnish protects your artwork from dust, dirt, and UV light, and it can also bring out the richness of your colors, making them pop. Think of it as a clear coat of armor for your masterpiece! The expressive freedom of abstract works, like those by Wassily Kandinsky, often begins with the very fundamental understanding of color and texture that you'll cultivate as a beginner with oils. It's a journey into spontaneity, a bit like intuitive painting.
Conclusion: Your Adventure Starts Now!
Ultimately, choosing your first oil paint set isn't about finding the definitive, ultimate answer; it's about finding your definitive starting point. The 'best' set is the one that gets you painting, that sparks your joy, and that allows you to embrace the learning curve. The most important thing is to simply begin. Don't let indecision steal your creative joy. This guide is just the beginning; the real learning happens with brush in hand, colors on the palette, and canvas before you. For further reference, you might also consider checking out a comprehensive glossary of oil painting terms. And if you ever get stuck or just need some inspiration, you know where to find some art for sale, perhaps even some of my own vibrant abstract pieces, which often begin with the very foundational oil painting techniques we've discussed today, that might just spark your next idea! I'd truly love to hear about your own first oil painting experiences in the comments below – what set did you choose, what was your first masterpiece (or glorious mess), or what challenge did you overcome that really stuck with you? Share your stories, and let's keep this conversation going! Tag me on social media with your first oil painting attempts – I'd love to see them! Perhaps you'll even discover a connection to the vibrant, expressive energy of my own abstract art or be inspired by a visit to my museum in Den Bosch!


