What is Fixative Spray for Drawing? A Comprehensive Guide
Discover the essential role of fixative spray in preserving drawings, preventing smudging, and extending the life of your artwork. This guide explains types, application, and benefits for dry media.
What is Fixative Spray for Drawing? A Comprehensive Guide
Ah, fixative spray! It's the silent, often overlooked hero in many an artist's toolkit. I know what you're thinking – another art supply to master? Another intricate step in a process already overflowing with them? But trust me, if you've ever poured your soul into a charcoal rendering, a delicate pastel study, or a nuanced graphite portrait, only to witness it tragically smudged by an accidental brush or a stray gust of wind, you understand the profound need for protection. That's where fixative spray enters the scene, not just as a convenience, but as a genuine guardian for your precious dry media artwork. This transparent, protective coating safeguards your hard work from smudging, dusting, moisture, and the slow creep of environmental damage and degradation. The concept of preserving delicate artworks isn't new; artists have sought ways to stabilize their drawings for centuries, initially relying on natural methods like diluted animal glues, gums from plants, or even milk-based solutions, before the advent of more sophisticated modern resins and synthetic polymers. I mean, can you imagine the heartbreak of losing a Renaissance-era charcoal study to a sudden gust of wind? It's why this problem of preservation has haunted artists for millennia. I've personally witnessed the heartbreak of brilliant pieces succumbing to neglect, and I promise you, a little bit of fixative goes a very long way in ensuring the longevity and integrity of your artistic creations. Consider this your definitive guide to understanding its magic, its mysteries, and how to wield it like a pro – turning fleeting moments of inspiration into lasting works of art, ready to be cherished for generations. We'll dive into the 'what,' the 'why,' and the 'how,' making sure you're equipped to make informed choices for your unique artistic journey. Because, ultimately, what is art if not an attempt to capture something fleeting and give it permanence? Fixative helps us achieve that quiet, profound magic.

The Unseen Shield: What Exactly is Fixative Spray?
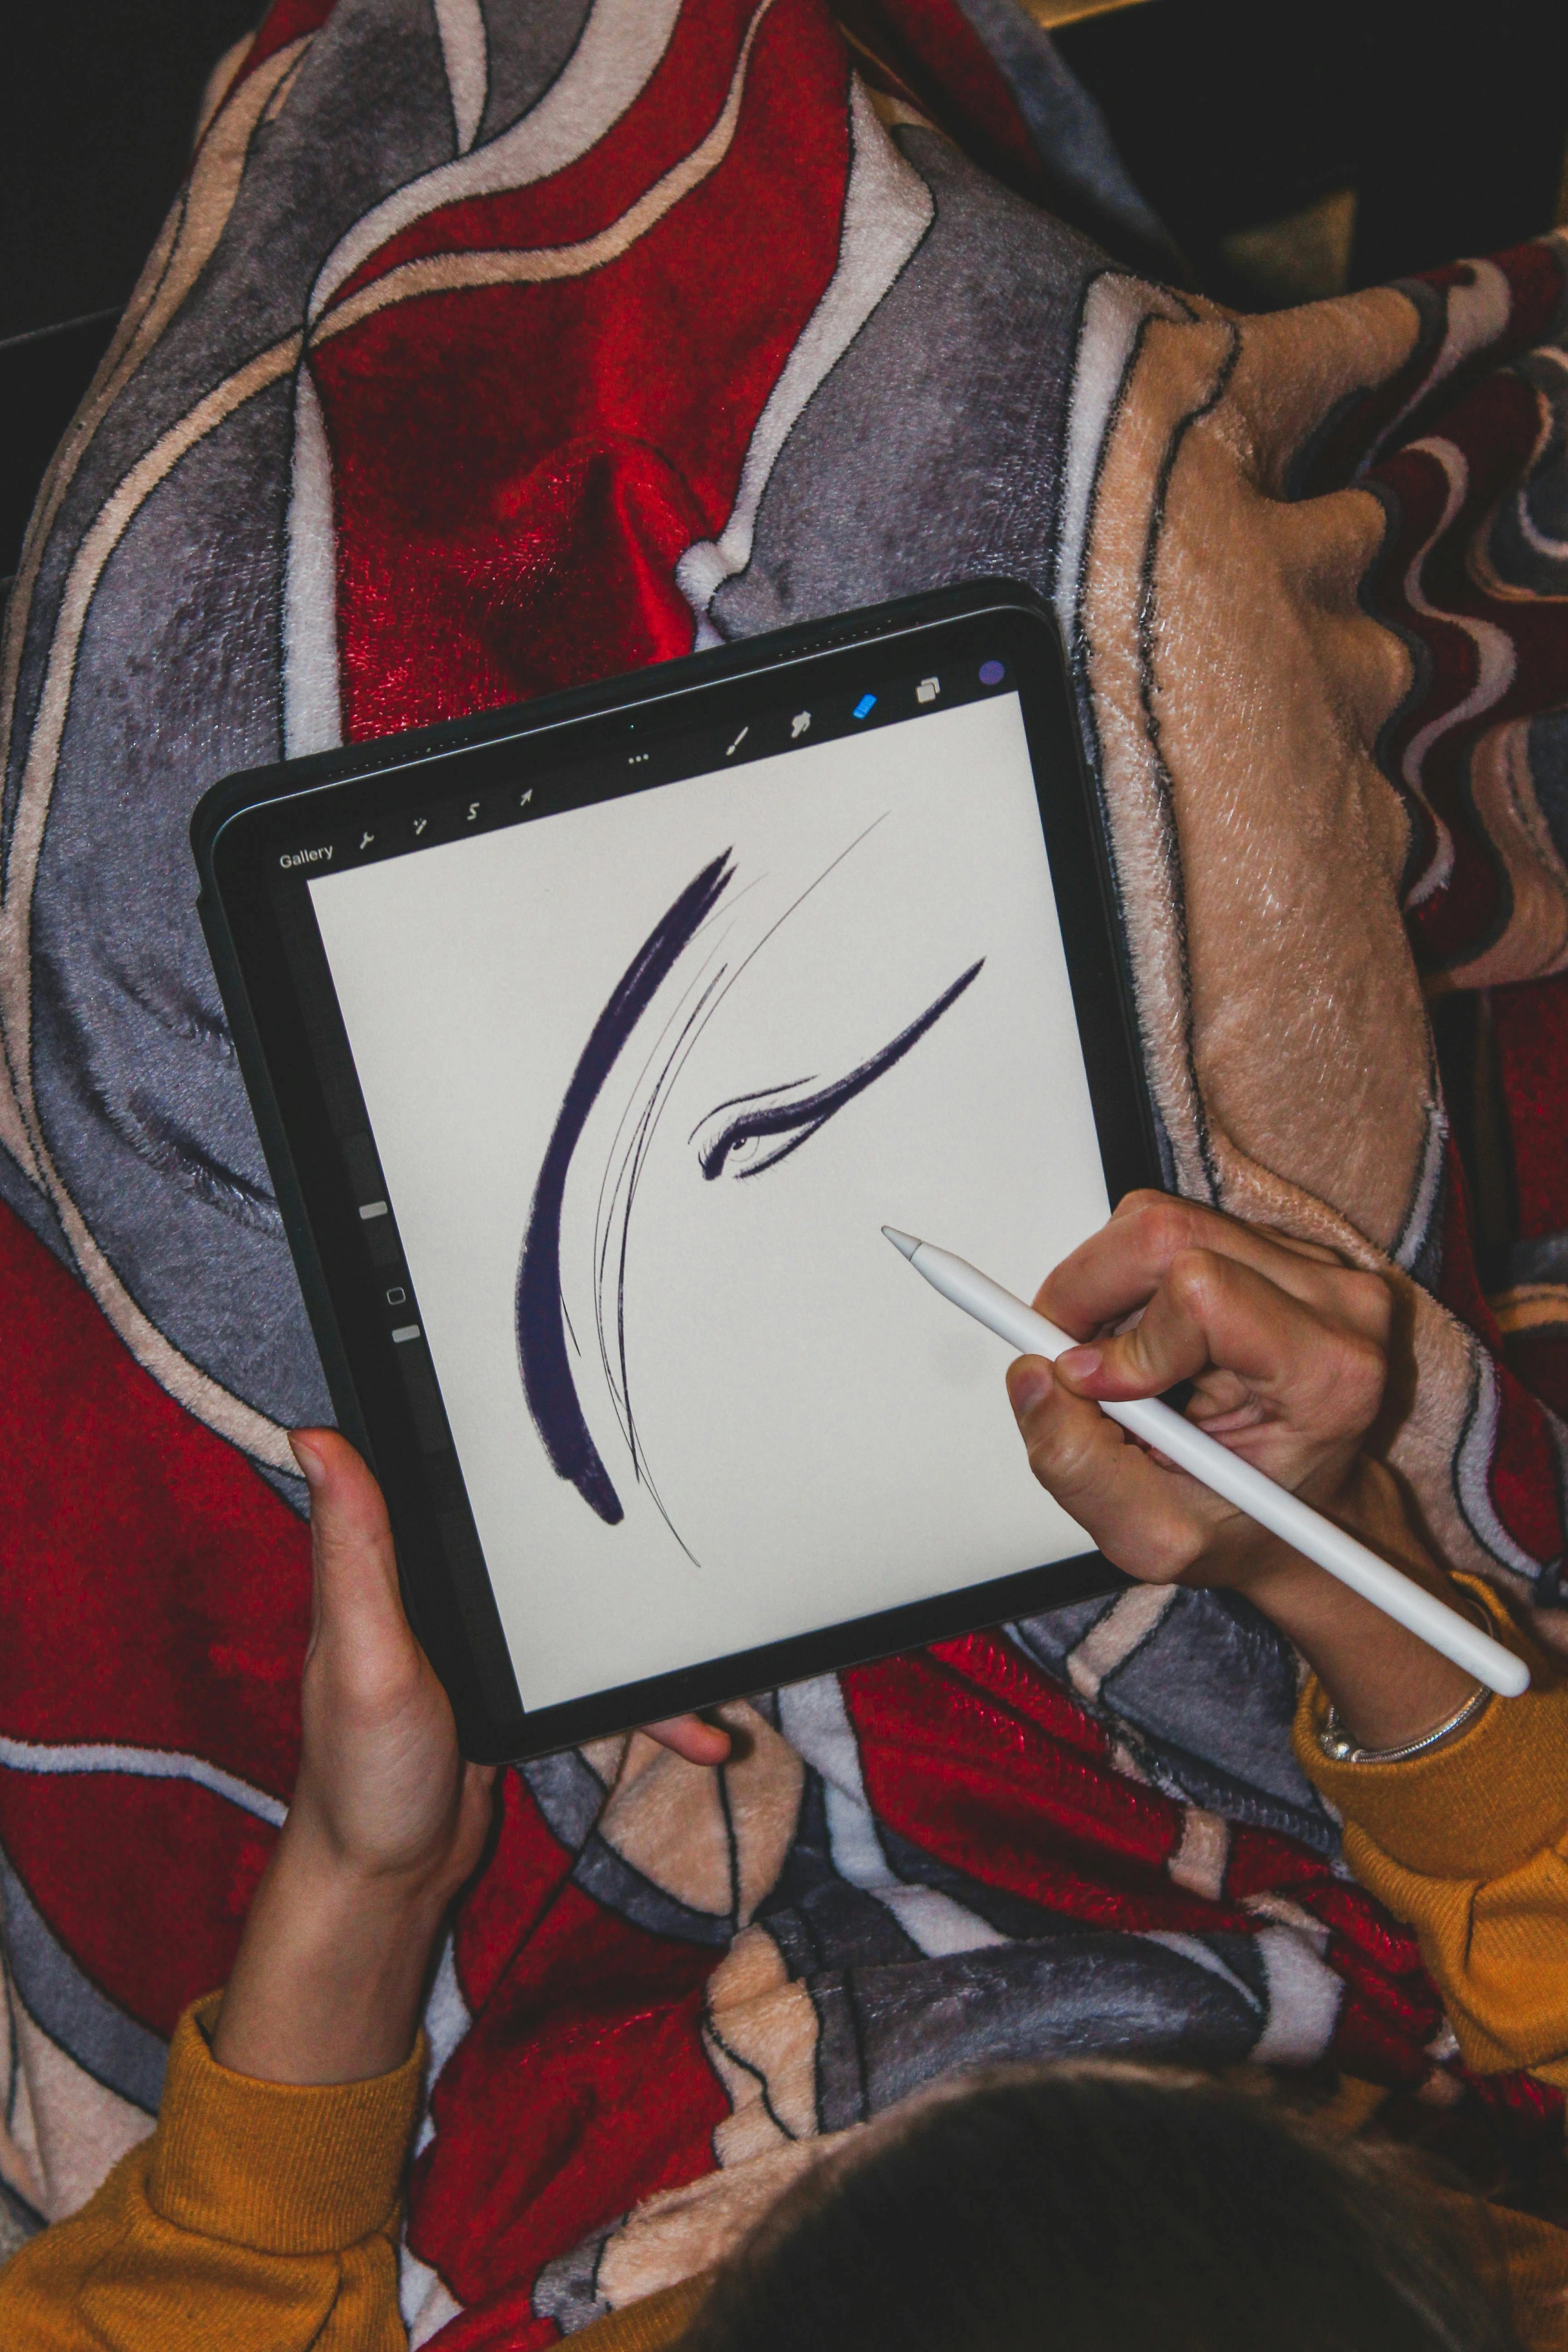
Let's get down to basics. At its core, a fixative spray is essentially a clear, fast-drying liquid, usually dispensed from an aerosol can (though pump sprays exist, and we'll talk about those!). Its mission? To create an invisible, protective layer over your artwork, binding those loose pigment particles – think charcoal, pastel, soft graphite – to the drawing surface itself. It's like a gentle hug for your art, preventing those delicate bits from being rubbed off or dislodged. If you've ever watched a pastel masterpiece slowly shed its brilliance, or a charcoal sketch transfer itself to the back of another drawing, you know how crucial this can be.
Chemically speaking, fixatives are typically composed of a synthetic resin (often acrylic-based, but also vinyl, shellac, or casein for more traditional or specialized formulations) dissolved in a fast-evaporating solvent. These resins are the backbone, forming the clear film that provides protection. Acrylic resins are popular for their flexibility and non-yellowing properties, creating a durable yet subtle film. Vinyl resins, often vinyl chloride-acetate copolymers, are prized for their exceptional adhesion to various surfaces, forming a very strong, clear, and flexible bond, though some formulations can be less flexible than acrylics. Traditional options like shellac or casein (derived from milk protein) are still used for specific effects or historical accuracy, though they can sometimes have limitations regarding yellowing or brittleness over time, which is why I'm usually cautious with them for long-term preservation unless it's for a very specific aesthetic. When you spray it, the solvent quickly flashes off, leaving behind a microscopic, clear film of resin. This film acts like a net, holding the fragile pigment particles firmly to the paper's surface without creating a heavy, plastic-like feel or obscuring the original texture – what artists often refer to as the "tooth" of the paper. Maintaining this tooth is critical, especially for workable fixatives, as it allows subsequent layers of dry media to grab onto the surface rather than just sliding off.
Think for a moment about the clever engineering of the aerosol can itself. Inside, the liquid fixative is under pressure, mixed with propellants. When you depress the nozzle, this pressurized mixture is released, and the propellants rapidly expand and vaporize, atomizing the liquid into an incredibly fine, even mist. This fine mist is crucial for achieving smooth, undetectable coverage and allowing the solvent to evaporate quickly. It's a marvel of material science, truly, designed to be seen but not perceived, a testament to how subtle chemistry can safeguard grand artistic visions.
But the magic of fixative extends far beyond simply stopping smudges. It's a key player in the archival quality of a piece. By forming a subtle barrier, it shields against insidious foes like dust, dirt, moisture, and even minor abrasive damage, preserving the artwork's appearance over the years. This foundational protection is reminiscent of how gesso protects canvas for painters; a subtle barrier that extends longevity. I've often thought of it as a quiet promise to the future, a way to ensure the dialogue between artist and viewer can continue for decades, even centuries, allowing your unique vision to transcend time. It's the silent protector ensuring your creative voice resonates long after you've laid down your tools.
More Than Just a Spray: The Profound Benefits of Fixative
I've seen artists agonize over whether to fix a piece, sometimes worrying it might alter their work, or perhaps even diminish the raw immediacy of a drawing. But the truth is, the advantages far outweigh the perceived risks, especially with quality products and proper technique. Employing fixative spray offers several profound benefits that safeguard your artistic legacy, acting as an essential bridge between creation and preservation.
- The Smudge-Proof Promise: Let's face it, for media like charcoal, soft pastels, and even some softer graphite pencils, smudging isn't a possibility; it's an inevitability without adequate protection. I've lost count of how many times a beautiful, intricate detail in a charcoal drawing has been obliterated by a careless sleeve, an errant elbow, or a curious pet's nose (yes, it happens, often when you least expect it! My cat, bless her fluffy heart, has a knack for finding the most vulnerable spot on a fresh drawing). Fixative creates an almost microscopic, invisible net that locks those delicate pigment particles right where you put them. This makes your artwork dramatically more resistant to accidental marks, whether you're just moving it across your studio, stacking it with other pieces, preparing it for a critique, framing it, or having it admired by an enthusiastic (and perhaps clumsy) viewer. Beyond mere smudges, fixative helps protect against the subtle abrasion that occurs when surfaces rub together, the tiny particles of dust that act like microscopic sandpaper, and even minor moisture damage from humidity in the air. It's like giving your art a force field against the everyday perils of the studio, gallery, and even your home.
- Archival Longevity: A Battle Against Time: This is where I think fixative truly shines, a quiet hero in the fight for permanence. We invest so much of ourselves, our time, and our resources in our art, only for invisible environmental factors like fluctuating humidity levels, relentless UV light from sunlight or certain artificial sources, airborne pollutants (such as ozone and sulfur dioxide), and even acidic materials in framing (like non-archival mats or backing boards) to wage a slow, insidious war against it. A good quality, artist-grade fixative acts as a formidable shield, significantly slowing down these degradation processes. It helps your artwork retain its original vibrancy, intricate detail, and overall integrity for years, ensuring that what you create today can be appreciated by generations to come. Think of it as purchasing a small piece of immortality for your creative efforts – a way to ensure the dialogue between artist and viewer can continue for decades, even centuries. For more on protecting your work, consider exploring our guide on how to apply gesso to canvas: a beginner's guide for foundational protection in painting, which shares some similar archival principles. And for the final presentation, our guide on the ultimate guide to framing your artwork can provide further insight.
- Enhanced Durability for Handling and Display: Think of fixed drawings as having a newfound resilience – they're simply more robust, less fragile, and far less nerve-wracking to manage. This translates to greater confidence when handling, transporting, or displaying your art. That constant, nagging fear of a minor bump, an accidental touch, or a gentle brush against the surface causing irreversible damage is greatly diminished. I've often seen artists hesitate to even touch their own unfixed works, almost holding their breath, but with fixative, you gain a sense of security that allows for easier matting, framing, and even shipping across distances, knowing the delicate surface is protected during transit or exhibition. This newfound durability means less worry when your piece is being handled by others, whether it's a gallerist, a collector, or a professional art handler. It's truly liberating.
- Unlocking Layering Possibilities (The Magic of Workable Fixatives): This is a game-changer for many artists, myself included, truly opening up new dimensions in dry media. Specific types, known as workable fixatives, are designed for application during the drawing process, not just at the end. They offer a light hold, stabilizing initial pigment layers without sealing them permanently or creating an impenetrable barrier. This 'temporary tack' allows you to add more layers of media on top without disturbing the underlying work, preventing unwanted blending or muddiness. Imagine building up incredible depth and complexity in a pastel piece, or a multi-layered charcoal drawing, confident that each stroke is secure and won't lift the previous one. It's truly transformative for achieving richer, more nuanced textures and deeper color saturation. Without it, some works that demand deep, saturated colors or intricate layered textures would simply be impossible to achieve, as each attempt to add pigment would disturb the layers beneath. It allows for a methodical, controlled build-up of your composition, transforming your approach to complex dry media pieces.
- Ease of Presentation and Framing: From a professional standpoint, a fixed drawing is simply easier and safer to handle, which is a huge relief when deadlines loom or important presentations are at hand. When you present your work to a gallerist, a potential client, or a professional framer, there's significantly less anxiety about accidental damage. The stabilized surface makes tasks like matting, mounting, and framing a much smoother, less precarious process without the constant fear of disturbing the delicate surface of the artwork. It presents a more polished and professional image, showcasing that you've considered the longevity and presentation of your creation, a subtle nod to your professionalism and care, and subtly increasing its perceived value. For more on preparing your art for display, check out our guide on how to mat a picture.
- Versatility for Mixed Media Exploration: This is a benefit that often gets overlooked, but it's incredibly powerful for pushing creative boundaries. Fixative can act as an isolating layer between different mediums, allowing artists to combine, for example, delicate pastels with stronger ink lines or even light watercolor washes, without fear of smudging or unwanted blending. This opens up a vast new world of mixed media possibilities, providing a stable foundation upon which to experiment and build complex textures and visual effects, transforming how you approach multi-layered artworks.
- Assistance with Digital Capture and Archiving: In our increasingly digital world, artists often need to photograph or scan their dry media artwork for portfolios, prints, or online sharing. Unfixed charcoal or pastel can easily smudge during handling or even distort under the light of a scanner. A light application of workable fixative (or a final fixative if the piece is complete) stabilizes the surface, preventing accidental damage during the digital capture process. It ensures that the digital representation accurately reflects your original artwork, free from smudges or lifted pigment, making the archiving process smoother and more reliable. I've found it invaluable for preserving the integrity of my pieces when preparing them for online exhibitions or print editions.
Factors Influencing Your Fixative Choice
Before we dive into the specifics of workable versus final fixatives, I think it's important to pause and consider a few overarching factors that should guide your selection process. Choosing the right fixative isn't just about grabbing the nearest can off the shelf; it's a thoughtful, almost strategic decision that profoundly impacts the longevity, final appearance, and even the future workability of your art. Here's what I always ponder before I commit to a spray:
- The Medium's Fragility: Is your artwork created with a very loose, powdery medium like soft pastel or charcoal, which absolutely demands strong adhesion to prevent frustrating displacement? Or is it a denser medium like a hard graphite pencil, where protection might be more about archival quality and subtle smudge-proofing than locking down heaps of pigment? The inherent fragility and unique characteristics of your chosen medium are paramount.
- Surface Texture and Absorption of Your Paper: Different papers have varying "tooth" (texture) and absorbency. A heavily textured paper (like cold-press watercolor paper or bristol vellum) might require a slightly different application technique or even a different type of fixative compared to a smooth, hot-press paper or plate-finish bristol. The fixative needs to penetrate slightly into the paper's fibers and around the pigment particles to create a secure bond. Understanding how your chosen paper interacts with the liquid spray is key to preventing pooling, buckling, or an ineffective bond. For instance, highly absorbent papers might 'drink up' too much fixative, requiring more coats, while very slick surfaces might have adhesion issues. Conversely, a paper with too much sizing (a substance applied to paper to reduce its absorbency) might resist the fixative, leading to uneven drying or a less effective bond. Always consider the unique interaction between your chosen paper and the fixative.
- Stage of Completion: Are you still actively working on the piece, intending to add many more layers and intricate details, perhaps even exploring mixed media approaches? In that case, a workable fixative is your obvious choice, a helping hand during the creative process. Is the piece entirely finished, signed, sealed, and ready for display, storage, or even shipping? Then a final fixative is what you need, the ultimate protector.
- Desired Finish: Do you want to preserve the original raw, non-reflective matte appearance of your drawing, allowing the paper's texture and pigment values to shine? Or would you prefer to add a subtle satin sheen for a touch of elegance, or even a high-gloss pop that intensifies colors and creates a more dramatic presentation? This aesthetic decision needs to be made upfront, as it's typically irreversible with final fixatives, shaping how your art is perceived.
- Archival Intent: How important is long-term preservation for this particular piece? For cherished artworks destined for posterity – perhaps a legacy piece or a commission – investing in a high-quality, acid-free, UV-resistant archival fixative is non-negotiable, aligning with museum-grade standards. For studies, practice pieces, or ephemeral works, you might opt for a less expensive, non-archival option (though I always lean towards archival principles whenever possible, because you never know which 'study' might become a masterpiece!).
- Environmental & Health Considerations: Are you working in a well-ventilated space, perhaps even outdoors, or do you need to consider lower-VOC (Volatile Organic Compounds) or non-aerosol alternatives due to studio limitations or personal sensitivities? Your personal health, the health of those around you, and your studio environment should always play a crucial role in your choice. Safety first, always. Many traditional aerosol fixatives contain potent solvents that contribute to air pollution and can be harmful to respiratory systems. Beyond traditional aerosols, there are also non-aerosol, pump-spray fixatives or even natural, casein-based options (like SpectraFix, which is diluted with alcohol) that produce significantly fewer fumes and VOCs, making them excellent considerations for those with sensitivities or limited ventilation. Always read product labels carefully for safety warnings and ventilation requirements, and never underestimate the importance of personal protective equipment like respirators.
- Environmental Impact and Sustainability of Materials: As artists, we are increasingly aware of our footprint. Beyond personal health, the broader environmental impact of our materials is a growing concern. Some traditional fixatives use propellants that contribute to greenhouse gas emissions, and their solvents can be pollutants. Are you committed to sourcing more environmentally friendly options, such as non-aerosol pump sprays, water-based formulations, or natural casein-based alternatives? This ethical consideration can and should influence your choice, guiding you toward products that align with a more sustainable art practice.
- Brand Reputation and Quality: Not all fixatives are created equal. Investing in reputable, artist-grade brands ensures consistent quality, proven archival properties, and reliable performance. Cheaper, off-brand options can sometimes lead to unpredictable results, frustrating color shifts, or even irreversible damage. This is one area where a little extra investment truly pays off in the long run.
- Drying Time and Environmental Factors: The speed at which a fixative dries and cures can be significantly impacted by your studio environment. Factors like humidity (which slows drying), temperature (optimal range is key), and airflow all play a role. Are you working in a damp basement studio, or a breezy, temperature-controlled space? Some formulations are designed for faster drying, which can be a huge benefit when working on multiple pieces or against a deadline, while others might require more patience. Understanding these dynamics helps you choose a product that aligns with your working conditions.
- Cost-Effectiveness vs. Long-Term Investment: While budget is always a consideration, it's vital to view fixative not just as a cost, but as an investment in the longevity of your artwork. Cheaper, non-archival options might save a few dollars upfront, but they can lead to irreversible damage and degradation over time, rendering your artistic efforts worthless. Conversely, a high-quality, artist-grade archival fixative, while a larger initial outlay, ensures your work continues, protecting its intrinsic value and your artistic legacy. I always encourage artists to think about the long game here.
- Interaction with Other Art Materials (e.g., Mounts, Frames, Overlays): It's not just about the medium and the paper; how your fixative interacts with other materials it might come into contact with is equally important. Will the fixative react adversely with the adhesives in your mat board? Will it stick to the glass if there's no adequate space? Some fixatives can cause a slight outgassing that might affect very sensitive photographic prints or other layered materials in a frame. Considering the entire presentation system—from matting and backing boards to adhesives and glazing—is a holistic approach that ensures no unforeseen chemical reactions compromise your artwork down the line. It's why I always recommend using archival-grade framing materials, regardless of your fixative choice.
Thinking through these points will help you narrow down the vast array of fixative options and make an informed, confident decision that truly benefits your artwork, safeguarding both its aesthetic and its longevity.

Workable vs. Final Fixatives: A Fundamental Comparison
Before we dive deeper, here's a quick table summarizing the fundamental differences between workable and final fixatives to help you get your bearings. Understanding these distinctions is paramount to making the right choice for your artwork, as their applications and properties are designed for very different stages of the creative process:
Feature | Workable Fixative | Final Fixative |
|---|---|---|
| Purpose | Stabilize layers, allow continued work | Permanent protection for finished art |
| Protection Level | Moderate, temporary | High, permanent |
| Layers Over | Yes, new media can be applied | No, not recommended; difficult to layer |
| Finish Options | Usually matte, very subtle | Matte, satin, gloss; noticeable sheen |
| Application Stage | During the drawing process, mid-stage | Upon completion of the artwork |
| Durability | Flexible, designed for continued work | Highly durable, strong adhesion, rigid |
| Resin Content | Lower concentration | Higher concentration |
| Reversibility | Generally difficult, not designed for it | Generally irreversible (with exceptions) |
Navigating the Fixative Landscape: Workable vs. Final & Beyond
Understanding the nuanced differences between types of fixatives is, in my opinion, one of the most crucial steps to mastering their use. It's not a one-size-fits-all situation; the right choice truly depends on your specific artistic needs and what stage your artwork is in.
Workable Fixatives: Your Creative Collaborator
I think of workable fixatives as your artistic assistant, your quiet collaborator in the studio. They're specifically formulated to provide a temporary, lighter hold on pigment, which is absolutely vital because they allow you to continue drawing and layering right on top of the fixed surface. While they offer a lower level of permanent protection compared to their 'final' counterparts, their value during the creative process is immeasurable. They buy you time, stability, and the freedom to explore without constant fear of accidental erasure.
- Definition: These are lighter solutions, often with a lower resin content and specifically formulated polymers, designed to provide a delicate, temporary bond. Their primary goal is to prevent smudging and pigment displacement while still maintaining a 'tooth' or slight texture on the drawing surface. This tooth is absolutely crucial because it allows subsequent layers of dry media to adhere effectively, rather than just sliding off. Think of it not as a solid, impenetrable wall, but rather a gentle, invisible net that stabilizes your work without entirely sealing it off, leaving the surface receptive to further marks.
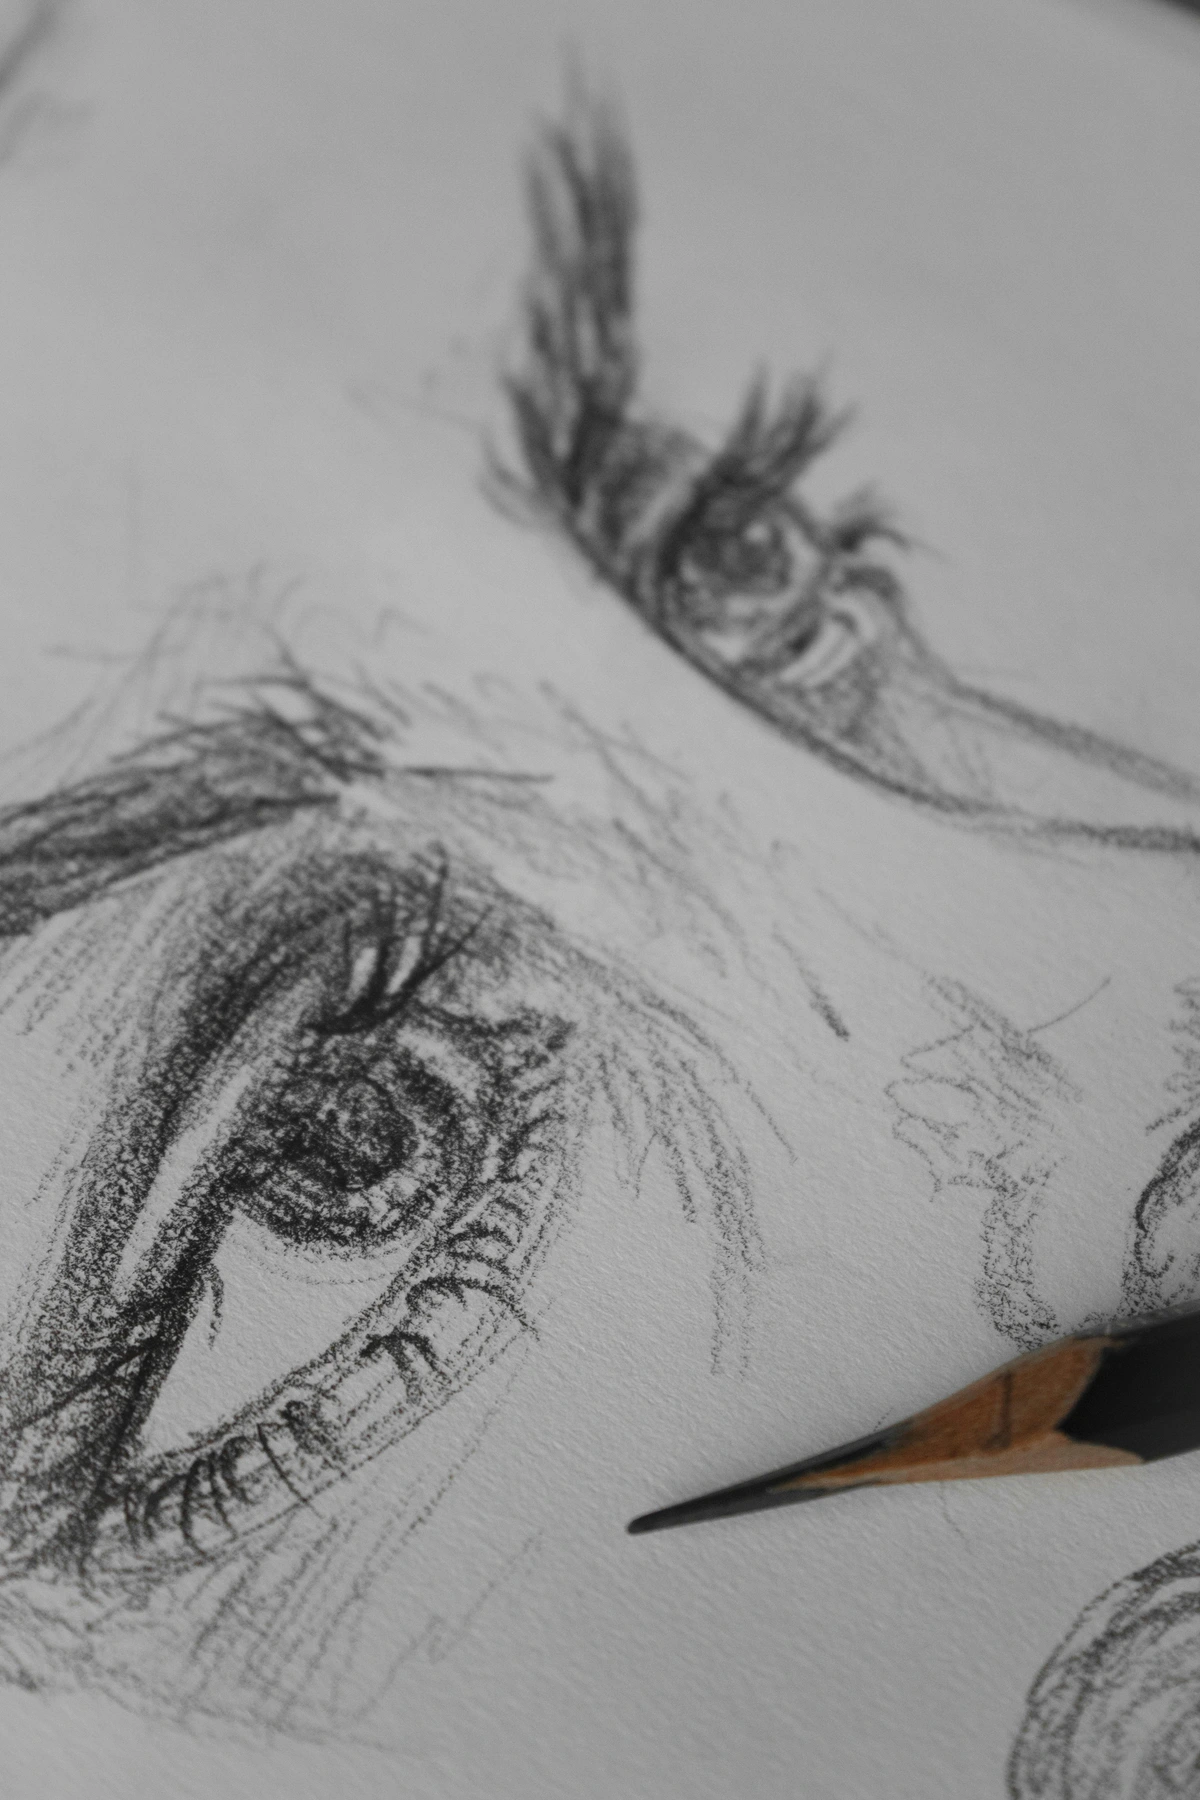
- Use Cases: I find them ideal for those critical mid-stage moments when you're building up intense layers in media like charcoal or soft pastel, ensuring that the vibrancy and depth remain without the underlying layers mixing unintentionally. They're also indispensable for stabilizing a detailed pencil drawing or graphite drawing before you scan it, photograph it for documentation, or even just set it aside for a while, knowing you'll return to add more detail or refinement later. For artists exploring complex narratives, this allows for a methodical, layered approach, much like building depth in a mixed media abstract. For me, they've been a lifesaver in portraiture, allowing me to secure foundational layers of tone before adding delicate facial features or intricate hair textures. They can even make subtle corrections easier by slightly 'lifting' a drawing off the paper, allowing for gentle erasure without excessive damage to the paper's surface. Another often overlooked benefit is how workable fixatives prevent the 'muddying' effect when layering different colors of pastels or charcoal. Without a light fixative, attempting to apply a new color over an existing one can simply blend the two together, diminishing vibrancy and clarity. Workable fixatives prevent this, allowing for crisp, distinct layers of color and tone, essential for achieving luminous and complex dry media pieces.
- Characteristics: Typically, workable fixatives dry to a very subtle, non-reflective matte finish, sometimes almost imperceptibly. This ensures they don't alter the visual appearance, color saturation, or value relationships of your artwork while it's still in progress. A good workable fixative should feel almost nonexistent once dry, preserving the original texture and luminosity of your chosen media, which is essential for maintaining control over your piece's development and avoiding unwanted sheen. They maintain the 'workability' of the paper, hence the name.
Final Fixatives: The Permanent Seal of Completion
Final fixatives, as the name strongly implies, are the ultimate protectors for your completed artworks. Once you've signed your name and declared a piece 'finished,' this is what you reach for. They provide a strong, permanent, and often archival protective layer. And here's a critical point: once applied, drawing over a final fixative is generally not advisable; the surface changes dramatically, becoming smooth and non-receptive, and new media won't adhere properly. Think of it as putting a beautiful, clear glass over your artwork.

- Definition: These are robust, more permanent coatings specifically designed to completely seal and protect the artwork's surface once it's deemed complete. They contain higher concentrations of durable, often acrylic or vinyl-based, resins that polymerize to form a sturdy, long-lasting film. This film effectively binds all pigment particles and creates a barrier against external threats, making the artwork far more resilient to damage from handling, environmental factors, and time itself.
- Use Cases: Final fixatives are applied to finished drawings, certain mixed media artworks, or anything you deem truly complete and ready for long-term display, storage, or transportation. It's the definitive last flourish, the ultimate act of protection for your hard-won creation, allowing you to confidently share your art with the world. Once applied, this layer provides a complete seal, meaning no further media can effectively be added to the surface without considerable difficulty and potential damage. It’s about securing the legacy of your artwork for future generations. What an incredible thought, to imagine your hand's work resonating decades, or even centuries, from now because of a little spray, isn't it?
- Characteristics: They offer maximum, long-term protection against smudging, fading from light, and environmental degradation (dust, humidity, pollutants). Crucially, they come in a variety of finishes – matte (non-reflective, preserving the original raw aesthetic), satin (a soft, subtle sheen that adds depth without strong reflection), and gloss (a high, reflective shine that intensifies colors and can create a dramatic, 'wet' look). This allows you significant artistic control over the final aesthetic presentation of your artwork. I've personally used gloss finishes to truly make colors pop in a vibrant pastel, while a matte finish is often my go-to for preserving the raw, unadulterated feel of a charcoal or graphite piece, particularly when I want to minimize any distracting glare. The choice of finish can dramatically alter how a piece is perceived under different lighting conditions and should be considered an integral part of the artistic process itself, influencing the viewer's experience. A matte finish, for instance, is excellent for minimizing glare, allowing the viewer to appreciate the subtle textures and values of media like charcoal without distraction. However, it can sometimes slightly dull colors. A gloss finish, conversely, will deepen and intensify colors, adding a luminous vibrancy, but it comes with the trade-off of potentially significant reflections and glare under strong light, which can sometimes make the artwork difficult to view. Satin finishes offer a beautiful compromise, providing a soft, subtle sheen that enhances color depth without excessive reflection, often making them a versatile and popular choice for a wide range of artwork.
The Chemical Concoction: What's Inside a Fixative?
Have you ever wondered what makes these sprays work? It’s a fascinating bit of chemistry, really, a delicate balance designed to protect without altering. At a basic level, fixatives are solutions of synthetic resins (most commonly acrylic, but also vinyl, cellulose derivatives, or even traditional casein or shellac-based derivatives for certain applications and effects) dissolved in fast-evaporating solvents. These solvents can include things like alcohol, acetone, petroleum distillates (like mineral spirits), or even more environmentally friendly, low-VOC options in modern formulations. When you depress the nozzle of an aerosol can, the liquid fixative is propelled out in a fine mist, often mixed with propellants. The solvent rapidly evaporates upon contact with the air and the artwork, leaving behind a clear, thin, flexible film of resin that encapsulates and adheres the pigment particles firmly to the drawing surface. Aerosol cans also contain propellants (often hydrocarbons like butane or propane, or sometimes compressed air), which help atomize the spray into that fine, even mist. This is precisely why proper ventilation is not just a suggestion, but a paramount safety measure – those solvents and propellants need to disperse safely and quickly, away from your lungs and your workspace!
To offer a clearer picture, here's a quick look at common components you might encounter:
Component Type | Examples | Function | Key Characteristics |
|---|---|---|---|
| Resins | Acrylic, Vinyl, Shellac, Casein, Cellulose Derivatives | Form the clear protective film, provide adhesion | Flexibility, non-yellowing (acrylic), strong adhesion (vinyl), traditional (shellac/casein) |
| Solvents | Alcohol (Ethanol, Isopropyl), Acetone, Petroleum Distillates (Mineral Spirits), Esters | Dissolve resins, evaporate quickly to leave film | Fast-evaporating, varying toxicity and odor levels, impacts drying time |
| Propellants | Butane, Propane, DME (Dimethyl Ether), Compressed Air | Atomize fixative into a fine mist, aid in even application | Creates fine spray, contributes to VOCs (except compressed air) |
| Additives | UV Inhibitors, Matting Agents, Plasticizers, Anti-Foaming Agents | Enhance archival qualities, control finish, maintain film flexibility, prevent bubbles | Crucial for longevity, aesthetic control, and smooth application |
The Art of Application: A Step-by-Step Guide to Fixing Your Work
I've seen the heartbreak of a perfectly rendered piece marred by improper fixative application – drips, frosting, unwanted sheen, or even color shifts. Trust me, proper technique isn't just a suggestion; it's the key to achieving optimal results and avoiding those frustrating, and often irreversible, pitfalls. Think of it as a dance, a careful ballet between your hand, the aerosol can, and the precious artwork before you.

1. Prepare Your Workspace and Artwork: Setting the Stage for Success
Before you even think about shaking that can, take a moment to set up your environment. Work in a well-ventilated area—seriously, I can't stress this enough!—preferably outdoors, or in a studio with an open window and a fan. Lay down newspapers or a drop cloth to protect your surfaces from overspray. Make sure your artwork is on a clean, flat surface, free from dust or debris. A soft brush or a can of compressed air can be used to gently remove any loose particles from the drawing itself; you definitely don't want to fix dust bunnies onto your masterpiece! This preparatory step is vital for both your health and the pristine finish of your artwork.

2. Shake It Like You Mean It: Homogenization for Optimal Performance
Don't even think about skipping this step! Thoroughly shake the aerosol can for at least one full minute. I often set a timer, because it genuinely feels longer than it is. This vigorous shaking ensures that the contents – primarily the resin solids and the solvents – are perfectly mixed and homogenized. Over time, the heavier resin particles can settle at the bottom of the can. Skipping this crucial step can lead to a host of problems: a weak or uneven spray pattern (too much solvent, not enough resin, or vice-versa), inconsistent coverage, clogging of the nozzle, and worst of all, frustrating splatters or "spitting" that can irrevocably mar your artwork. Think of it as waking up the fixative so it can perform its best, ensuring a smooth, consistent application every time.
3. The Goldilocks Distance: Not Too Close, Not Too Far
Mid-Application Nozzle Check: Preventing Spits and Splatters
It's frustrating when you're in the zone, spraying smoothly, and then the nozzle decides to spit a droplet right onto your nearly finished piece! This usually means the nozzle is starting to clog. If you notice any sputtering or an uneven spray pattern during application, immediately stop spraying, remove the nozzle (gently!), and give it a quick clean. You can clear it with a fine needle or by spraying it upside down with a burst of air. Reattach and test on scrap paper before continuing. A quick mid-application check can prevent a small annoyance from turning into a major artistic disaster, believe me, I've learned this the hard way!
This is all about finding that perfect sweet spot, that ideal distance for an ethereal mist. Hold the can upright and maintain a consistent distance of approximately 10-12 inches (25-30 cm) away from the artwork. I like to imagine a perfectly even, fine cloud settling onto the paper, almost like a light, gentle fog, or watching a subtle condensation form. A good visual cue is that the mist should appear fine and diffused, not like a direct stream. Holding it too close will result in a heavy, concentrated, uneven application, almost guaranteeing unsightly drips, a glossy finish (even if you wanted matte), and potentially altering or darkening colors due to over-saturation and pigment 'wetting'. Too far, and you'll waste precious product as the fixative dissipates uselessly in the air, resulting in minimal and ineffective coverage. Practice on scrap paper to get a feel for this distance; it's a skill worth honing, and it often becomes second nature with a little experience.
4. The Zen of Light, Even Coats: Building Protection Gradually
This is perhaps the most crucial rule, and the one I see artists struggle with most: always apply the fixative in several thin, even coats, never one thick, heavy layer. A heavy application is the enemy of a pristine finish; it can saturate the paper, alter colors (especially delicate pastels), create an undesired glossy sheen (even on 'matte' fixatives), and cause delicate papers to buckle, warp, or even wrinkle due to excessive moisture. The key is to build up the protective layer gradually, allowing each micro-layer to set. Start spraying off the edge of your artwork to ensure an even flow begins before it hits your masterpiece, then move in a smooth, continuous, sweeping motion across the entire piece, extending off the opposite edge. Keep your hand moving! Hesitation or stopping mid-spray will lead to blotches, unevenness, and a frustrated artist. Patience here truly is a virtue. Rushing this step or applying too thickly can not only lead to an uneven finish but also trap solvent between layers, leading to a sticky surface that never truly cures or even causes blistering beneath the surface as solvents try to escape.

5. The Crisscross Method for Comprehensive Coverage: No Spot Left Unprotected
For truly optimal and perfectly uniform coverage, especially on larger pieces, I highly recommend the 'crisscross' technique. Apply your first thin coat by spraying horizontally across the artwork, maintaining an even, sweeping motion. Allow this coat to dry completely. For the next coat, spray vertically across the artwork. This simple, yet effective, method ensures that any tiny areas or microscopic 'holes' missed in one direction are thoroughly covered in the other, guaranteeing that virtually every inch of your masterpiece receives adequate protection. It's a small step that makes a big difference in ensuring comprehensive, lasting coverage.

6. Patience, Young Grasshopper: Drying Time is Key
This isn't a race, and impatience here can undo all your careful work. Allow each coat to dry completely before applying the next, or before even thinking about handling the artwork. Drying times are usually specified on the product label, but they can vary significantly based on environmental factors like humidity, temperature, and the thickness of the application. I've found it can range from a swift few minutes in a dry, breezy room to half an hour or more on a damp day. Rushing this step can lead to a sticky surface, trapped moisture, an uneven, cloudy finish, and even fingerprints becoming permanently embossed into the surface. Don't rush it; your art, and your reputation, deserve the time for proper curing. For the final coat, I often recommend letting it sit overnight if possible. Remember, rushing the drying process can lead to a host of problems, from a cloudy or 'frosted' finish (often caused by humidity trapped under a quickly-dried surface) to a perpetually sticky feel, which will attract dust like a magnet. True curing takes time, allowing all the solvents to fully off-gas and the resin to harden completely. Your patience will be rewarded with a durable, beautiful finish.
7. Test, Test, Test: Your Artistic Insurance Policy
I cannot stress this enough – before applying fixative to your finished masterpiece, always, always test it on a scrap piece of paper using the exact same media, and ideally the same paper, you've used in your artwork. This small, crucial step can save you immense heartache and potential artistic disaster by confirming there are no adverse reactions. What are you looking for? Unexpected color changes (darkening or shifting, especially with pastels), unwanted textures (a powdery, sticky, or overly glossy finish), or any buckling or warping of the paper. It's your personal insurance policy against a bad fixative day, allowing you to catch and avoid issues before they become permanent on your valuable work. A few minutes of testing can save hours of regret.
Troubleshooting Common Fixative Issues: When Things Go Wrong
Even with the best technique, fixative can sometimes present challenges. It's frustrating, I know! But understanding common problems and their solutions can save your artwork—and your sanity.
1. The "Frosted" or "Cloudy" Finish: A Hazy Disappointment
- Problem: Your artwork looks hazy, dull, or has a white, frosty film, especially noticeable on dark areas. This is one of the most common and heartbreaking issues.
- Cause: The culprit is usually high humidity during application, or applying too many thick coats in rapid succession. The quick evaporation of solvents cools the surface, causing moisture in the air to condense and get trapped in the drying fixative film, leading to a cloudy appearance.
- Solution: Preventative measures are key: always spray in a low-humidity environment (below 60% relative humidity, if possible). Apply multiple very thin coats, allowing ample drying time between each. If you already have a frosted finish, sometimes a very light, quick spray of fixative (or even a gentle re-spritz with a fine mist of pure ethanol, if compatible and very carefully applied by a professional) in a dry environment can re-liquefy the surface and allow the trapped moisture to escape before it re-dries clear. However, this is risky and not always successful, so prevention truly is better than cure here.
2. The Sticky Surface: A Dust Magnet
- Problem: Your artwork remains tacky or sticky to the touch even after prolonged drying.
- Cause: This usually indicates either too thick an application, insufficient drying time between coats, or a very humid environment preventing full curing. Some older or cheaper fixatives might also contain unstable resins that simply don't dry completely.
- Solution: Ensure extremely thin coats and allow significantly longer drying and curing times, especially in humid conditions (sometimes overnight or even 24-48 hours for the final coat). If the issue persists, and the fixative is not too thick, sometimes a light dusting with archival talc (very gently brushed off) can reduce tackiness for framing, but this is a temporary solution and not ideal. In severe cases, there's often little that can be done without damaging the artwork.
3. Darkening or Color Shift: An Unwanted Transformation
- Problem: Your delicate pastel or charcoal drawing appears darker, duller, or has shifted in color after fixative application.
- Cause: The 'wetting' effect of the solvent on the dry pigment particles is the primary reason. Just like water makes dry sand look darker, the fixative liquid saturates the pigment, changing its refractive index and perceived color. Over-application, using a fixative with a high gloss finish, or certain fixative chemistries can exacerbate this.
- Solution: The best solution is prevention: always test on a scrap piece with the exact same media and paper. Use very light, mist-like coats. If some darkening occurs, it's often an irreversible optical effect. Choose a matte fixative if you want to preserve the original visual integrity of your dry media as much as possible.
4. Uneven Application, Drips, or Splatters: Visual Imperfections
- Problem: Visible streaks, drips, blotches, or areas of inconsistent sheen appear on your artwork.
- Cause: Holding the can too close, failing to shake it adequately, stopping or hesitating mid-spray, or a clogged nozzle are the main culprits.
- Solution: Refer back to our "Art of Application" section: maintain the correct distance (10-12 inches), shake the can thoroughly (1 minute minimum), keep your hand moving in smooth, sweeping motions, and start/end spraying off the edge of the artwork. Always clear your nozzle after use by spraying upside down for a few seconds. For existing drips, light localized scraping (extremely risky) or professional conservation might be the only options, often with limited success.
Understanding these common pitfalls and their origins empowers you to approach fixative application with greater confidence and foresight, minimizing the chances of artistic mishap.
Beyond the Spray: Important Considerations for Using Fixatives
Using fixative effectively isn't just about the spray itself; it's about a broader awareness of safety, compatibility, and long-term care. These are the details that often get overlooked, but from my experience, they make all the difference between a perfectly preserved piece and a heartbreaking accident.
- Ventilation and Safety: Don't Skimp on Protection: I'm going to say it again because it's absolutely paramount: prioritize proper ventilation. Seriously. Many fixative sprays contain strong solvents (Volatile Organic Compounds, or VOCs) that, while necessary for the fixative to work effectively, can be harmful if inhaled repeatedly or in enclosed spaces without adequate airflow. These chemicals can cause dizziness, headaches, nausea, and in the long term, more serious respiratory and neurological health issues. Investing in a good quality respirator mask specifically designed for organic vapors (look for cartridges rated for "organic vapor" or "OV") is not just recommended; it's an essential piece of safety equipment, especially if you're fixing multiple pieces, working with them frequently, or have any respiratory sensitivities. These masks are far more effective than simple dust masks at filtering out the microscopic chemical fumes. For a permanent studio setup, considering an exhaust fan or even a dedicated spray booth can significantly improve air quality. Always consider your long-term health over short-term convenience; it's simply not worth the risk. Furthermore, children and pets should always be kept well away from the spraying area during and immediately after application, as their smaller bodies are even more susceptible to chemical fumes. And remember proper disposal of empty cans according to local regulations – never just toss them in the regular trash. Furthermore, always keep fixative cans away from heat sources, open flames, and direct sunlight, as the propellants are highly flammable. If the chemical nature of fixatives is a concern, you might be interested in exploring more best eco-friendly art supplies for conscious artists for alternatives across your artistic practice.
- Understanding and Maintaining the 'Tooth' of the Paper: For dry media, the texture of the paper—its 'tooth'—is what gives the pigment something to grab onto, allowing for rich layers and vibrant color. A key consideration when using fixative, especially workable ones, is to ensure it doesn't completely flatten or fill this tooth. Too heavy an application, particularly with final fixatives, can create a smooth, slick surface that new layers of dry media will simply slide off. A good fixative should stabilize the pigment within the tooth without obscuring it, preserving the paper's original texture and its ability to accept further media. This balance is crucial for maintaining the integrity and workability of your drawing surface.
- Compatibility is Key: Always Test First: While modern fixatives are generally formulated to be compatible with most dry media, assuming universal compatibility is a gamble I'd never advise. Different binders in pencils, varying pigment purities, the acidity or alkalinity of certain pastels, and even the paper's sizing or pH can react unexpectedly. Always, always test the product on a scrap piece of paper using the exact same media and paper you've used in your artwork. This small, crucial step helps confirm there are no adverse reactions, such as unwanted color changes, darkening, or peculiar textures (like a sticky or powdery finish). It's your peace of mind in a can.
- Choosing Your Finish: Matte, Satin, or Gloss? This is an aesthetic decision that will profoundly impact the final presentation and perception of your artwork, so it's a choice to be made consciously before applying a final fixative. Matte finishes are fantastic for preserving the original, non-reflective, raw look of a drawing. They're often ideal for charcoal, graphite, or even muted pastels where you want to maintain a subtle, velvety feel and avoid any distracting reflections that might compete with the art itself. Gloss finishes can be dramatic, intensifying colors, deepening darks, and adding a vibrant, almost wet-look pop, which can be stunning for certain expressive pieces, particularly those with bold colors. However, be acutely aware that gloss can also introduce unwanted glare and reflections under certain lighting conditions, making the artwork harder to view from all angles without careful art lighting. Satin finishes offer a lovely middle ground, providing a subtle sheen that adds a touch of sophistication and depth without being overly reflective, often considered the most versatile choice. When making your choice, think carefully about where your art will ultimately hang and how it will be lit – this context is absolutely key.
- The Yellowing Threat: Archival Quality Matters: I've seen too many beautiful artworks degrade over time, losing their vibrancy and integrity, all due to the use of non-archival materials. This is a quiet tragedy, a slow erosion of artistic effort. Cheaper, non-artist-grade fixatives (and household substitutes like hairspray, which we'll discuss later) often contain acidic ingredients or unstable resins (like some synthetic lacquers or lower-grade shellac-based options) that will inevitably yellow, crack, become brittle, or even turn sticky (attracting dust and debris) over time, irrevocably damaging your artwork. These unstable polymers break down when exposed to light and air, undergoing chemical changes that manifest as unsightly discoloration and loss of structural integrity. Think of it as a ticking time bomb, and your art deserves better. High-quality, archival fixatives, however, are specifically formulated to be acid-free, pH neutral, and contain stable, non-yellowing resins. They are designed to resist yellowing, remain flexible, and maintain their protective qualities for decades, meeting stringent standards like ASTM D5098 for lightfastness and permanence. This is one area where I firmly believe it's worth investing in reputable, artist-grade brands. Your art deserves that respect and the promise of a long, stable life, a testament to your vision. It's an investment in the dialogue your art will have with future generations.
The Science of UV Protection and Lightfastness: A Deeper Dive
Beyond just binding pigments, a significant role of quality fixatives in archival preservation lies in their ability to offer protection against ultraviolet (UV) light. UV radiation, from both natural sunlight and certain artificial sources, is one of the primary catalysts for pigment degradation, leading to fading, discoloration, and embrittlement of paper. High-quality, artist-grade fixatives often incorporate UV inhibitors into their resin formulations. These inhibitors work in a few ways: they can absorb harmful UV radiation, convert it into harmless heat, or scatter it away from the artwork's surface. Think of them as tiny, invisible sunglasses for your art!
However, it's crucial to understand that even the best UV-inhibiting fixative isn't an impenetrable shield. It provides a significant enhancement to your artwork's longevity, but for truly maximum protection, a multi-layered approach is always recommended. This includes framing your artwork under UV-filtering glass or acrylic (which can block 90-99% of UV rays), and, most importantly, avoiding direct sunlight or intense, unfiltered artificial light sources in your display environment. Understanding lightfastness, or a pigment's resistance to fading when exposed to light, is also vital when choosing your dry media. A lightfast pigment combined with a UV-protective fixative and UV-filtering glazing creates the strongest possible defense against the relentless march of time and light.
- Proper Storage for Longevity and Safety: Treat your fixative cans with the respect they deserve to ensure their longevity and your safety. Store them upright in a cool, dry place, ideally at room temperature (between 65-75°F or 18-24°C), away from direct sunlight, open flames, or extreme temperatures. Extreme heat can cause dangerous pressure buildup within aerosol cans, leading to explosions, while extreme cold can affect the spray's consistency, leading to clogs and uneven application. Always ensure the cap is securely fastened to prevent accidental discharge or the drying and hardening of residual fixative within the nozzle, which, as I can attest, leads to incredibly frustrating clogs when you next try to use it. A well-maintained can is a happy can, and a happy can means a smooth, even spray when you need it most!
- Reversibility: A Tricky Question: Many artists, myself included, have wondered if fixative can be removed if a mistake is made or if the artwork needs conservation. The short answer for the average artist is: generally, no, not without significant risk of damaging the artwork beyond repair. While professional art conservators possess highly specialized techniques and solvents for partial or full removal, these processes are incredibly complex, require precise knowledge of chemistry and material science, are often prohibitively costly for most artists, and always carry inherent risks to the delicate pigments and paper. Conservators might use micro-suction techniques, solvent gels, or highly controlled vapor treatments, but even then, complete and invisible removal without any impact on the artwork is rarely guaranteed. This reinforces the absolute importance of thorough testing, thoughtful application, and ensuring you are completely satisfied with your artwork before applying a final fixative. Once it's on, it's on – so make it count, and be confident in your decision, as the chances of a DIY reversal are virtually zero, and professional intervention is a last, costly resort.
- Display and Framing for Ultimate Protection: While fixative is an excellent first line of defense, how you display and frame your artwork is the final, crucial step in its long-term preservation. For dry media, especially those with any texture, framing under glass or acrylic (ideally UV-filtering) is almost always recommended to create a physical barrier against dust, pollutants, and accidental touches. Ensure there is adequate space between the artwork surface and the glazing (using a mat or spacers) to prevent the fixative film from sticking – a common, frustrating issue where the fixative can adhere to the glass, causing irreversible damage. Opt for UV-filtering glass or acrylic wherever possible; while fixative offers some UV protection, specialized glazing blocks a much higher percentage of harmful rays. Avoid direct sunlight or intense, unfiltered artificial light sources, even with UV-protected glass, as no barrier is 100% effective against prolonged exposure. Thinking about these elements holistically ensures your art is cherished and protected for its entire lifetime.
Common Dry Drawing Media and Fixative Use
Different drawing media have varying needs for fixative, largely due to their unique pigment binders, particle sizes, and how they interact with the paper's surface. Understanding these subtle differences will help you tailor your fixative choice and application technique for optimal results:
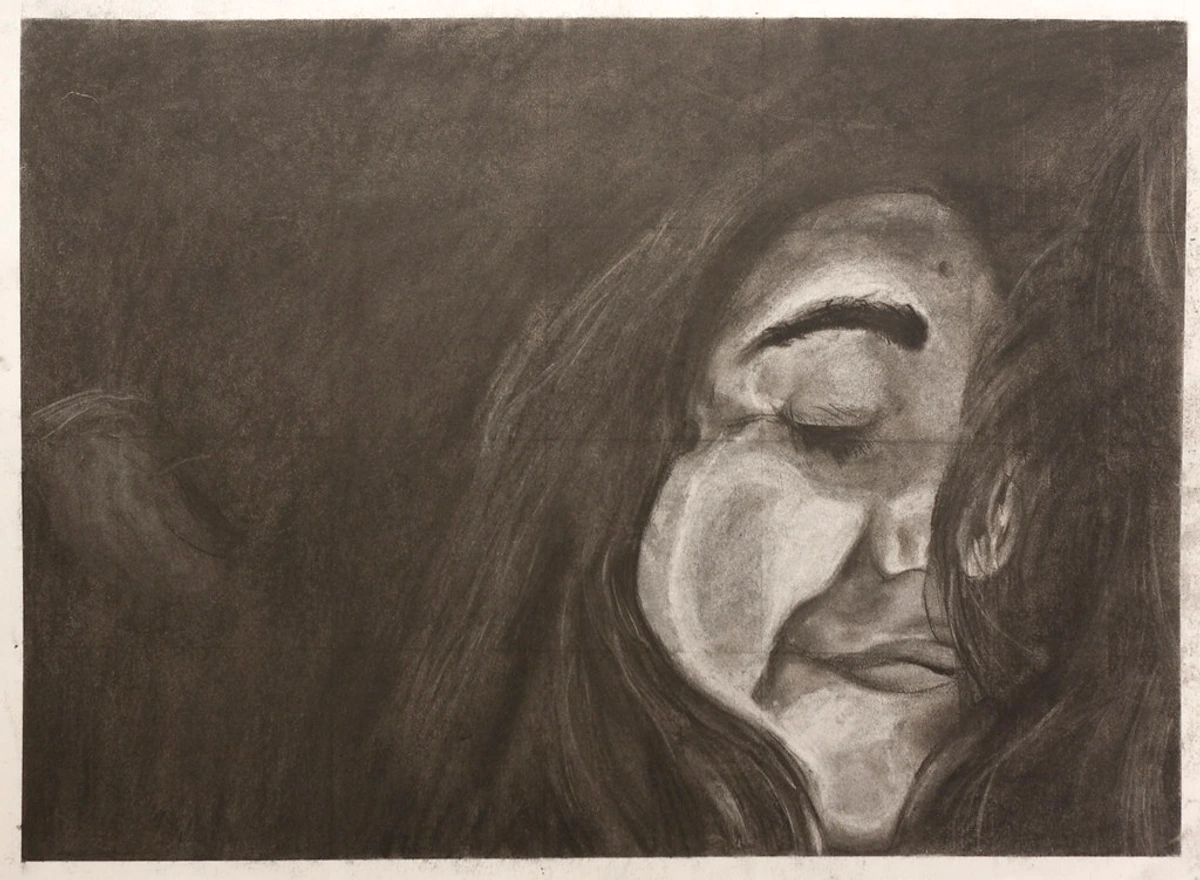
- Charcoal: Fixative is almost always essential for charcoal drawings due to the extremely loose, powdery nature of the pigment. It prevents the charcoal from smudging, transferring, and dusting off the paper. For deep blacks, multiple light layers of workable fixative can be incredibly useful during the drawing process to build up intensity without disturbing previous layers. A final fixative will then seal the completed piece. Learn more about working with this medium in our guide on understanding and using charcoal for drawing.
- Pastel (Soft & Hard): Similar to charcoal, soft pastels are notoriously delicate and require fixative to adhere the pigment to the paper, significantly reducing dust and smudging. Hard pastels are less powdery but still benefit from protection. Be aware that some fixatives can slightly darken or alter pastel colors due to the 'wetting' effect on the dry pigment particles, so thorough testing on a scrap piece using your specific pastels is absolutely crucial. Workable fixatives are invaluable for layering, allowing you to build rich, vibrant hues without muddying. You can explore this medium further in our article, what is pastel painting (yes, it's often considered a form of painting!).
- Graphite: While graphite is less prone to extreme smudging than charcoal or pastel, a light coat of fixative can still be highly beneficial for highly detailed or dark graphite drawings, especially those using softer pencils (like 2B and softer) where shine and transfer are more likely. It helps to set those deep tones and protect against accidental rubbing. Fixative can also reduce the 'sheen' or 'graphite shine' that sometimes appears under certain lighting conditions. Explore various options in our articles on best drawing pencils for beginners and best sketching pencils for artists.
- Colored Pencils: Fixative can protect colored pencil drawings from wax bloom (a cloudy film that can appear on wax-based pencils as wax migrates to the surface) and light smudging, particularly with softer, waxier pencils. It can also add a subtle layer of protection against minor abrasions and environmental dust. For tips on using this medium, see our comprehensive guide on how to use colored pencils for beginners.
- Chalk: Much like soft pastels, chalk drawings are extremely delicate and will readily smudge or dust off without protection. Fixative is crucial for binding the chalk particles to the paper, preserving their vibrancy and integrity. Be mindful that, similar to pastels, fixative can slightly deepen the colors of chalk, so a light hand and thorough testing are recommended to predict any color shift. Workable fixatives are also excellent here for building up layers of color and tone.
- Oil Pastel: These vibrant, creamy sticks present a unique challenge due to their high oil and wax content, which never truly dries to a hard, stable film. A specialized fixative designed specifically for oil pastels or a very light application of workable fixative can help stabilize the surface and reduce smudging and transfer. However, complete 'fixing' is difficult, and framing under glass (often with a mat to prevent contact with the glass) is almost always the best long-term solution for protection. Be cautious as some fixatives can react adversely with the oil, causing darkening, stickiness, or even a 'beading' effect; thorough testing is absolutely essential here. Our guide a beginner's guide to using oil pastels offers more insights into this unique medium.
- Pen & Ink: For most permanent, waterproof inks, fixative isn't strictly necessary for protection against smudging, as the ink itself forms a stable bond with the paper. However, for non-waterproof inks (like some fountain pen inks or washes) or if you're layering ink with other dry media like graphite or colored pencils, a very light coat of fixative can prevent smudging and offer a subtle archival barrier against environmental dust and pollutants. Always test on an inconspicuous area first to ensure there's no bleeding, feathering, or color change with your specific ink. For more on inks, check out our best drawing inks review.
Other Dry Media Considerations: Conté Crayons, Sanguine, and More
While charcoal and pastel often steal the spotlight when discussing fixatives, many other dry media benefit from careful application.
- Conté Crayons: These compressed pigment sticks (often clay-based) offer intense, rich colors, but they can smudge, especially the softer varieties. A light application of workable fixative can help layer colors and prevent accidental smudging during the process, while a final fixative is essential for preserving the finished artwork. Treat them much like hard pastels in terms of fixative needs.
- Sanguine/Sepia Crayons: These earthy, reddish-brown and brownish-black crayons are popular for life drawing and portraits. They share characteristics with charcoal and pastel in their powdery nature and susceptibility to smudging. Fixative is highly recommended for both workable layering and final protection, ensuring their delicate tones remain pristine.
- Wax Crayons/Grease Pencils: Due to their waxy or greasy binders, these media are generally resistant to smudging, and traditional fixatives may not adhere well or can cause adverse reactions (like darkening or uneven sheen). Specialized varnishes or sealants might be considered, but generally, framing under glass is the most effective protection. Always test thoroughly for any medium with a high wax or oil content.
- Water-Soluble Pencils/Crayons (before water application): If using these dry and intending to keep them dry, they can smudge like regular colored pencils. A light workable fixative can help. However, if you plan to activate them with water, fixative is generally counterproductive as it will seal the pigment and prevent it from dissolving, defeating the purpose of the medium. Consider the stage of your artwork carefully.
Here’s a quick overview to help you decide when and how to use fixative for common dry media:
Medium | Fixative Need | Key Considerations |
|---|---|---|
| Charcoal | Essential (High) | Prevents smudging/dusting. Use workable for layering, final for completion. Test for minimal color shift. |
| Soft Pastel | Essential (High) | Reduces dust, fixes pigment. Test thoroughly for darkening/color change. Workable is invaluable for layering. |
| Hard Pastel | Recommended (Medium) | Less powdery than soft pastels, but still benefits from protection against smudging and environmental factors. |
| Graphite | Recommended (Medium) | Beneficial for dark or soft graphite to prevent smudging and reduce sheen. Use light coats; harder graphite needs less. |
| Colored Pencils | Recommended (Low-Medium) | Protects against wax bloom (for wax-based pencils), light smudging, and minor abrasion. Use very light coats. |
| Chalk | Essential (High) | Crucial for binding particles. Similar considerations to pastels regarding color deepening and testing. Workable is great for building layers. |
| Oil Pastel | Specialized (Low-Medium) | Very difficult to fully 'fix' due to oil/wax content. Use specialized fixatives or very light workable coats. Framing under glass is often the best long-term solution. Thorough testing is paramount. |
| Pen & Ink | Optional (Low) | Not strictly necessary for waterproof inks. Useful for non-waterproof inks or when layering with dry media, providing a subtle barrier against smudging or environmental dust. Always test for bleeding/color change. |
| Conté Crayons | Recommended (Medium) | Similar to hard pastels; prevents smudging and allows for layering. Final fixative for completion. |
| Sanguine/Sepia | Essential (High) | Very prone to smudging due to powdery nature. Use workable for layering, final for durable protection. |
| Wax Crayons | Not Recommended | Traditional fixatives may not adhere well; framing under glass is best. Avoid unless using specialized sealants. |

Your Burning Questions Answered: The Fixative FAQ
I get a lot of questions about fixative, and rightly so! It's one of those art materials that can seem a bit mysterious, but the answers are usually quite straightforward. Here are some of the most common queries I encounter:

Q: Can I use hairspray as a fixative? I've heard artists do it!
A: While it might offer a temporary hold – and yes, I've heard the whispers and anecdotes too, particularly from cash-strapped student days, or when you're in a pinch – I strongly advise against using hairspray for any fine art you wish to preserve for the long term. Hairspray is formulated for hair, not paper and pigments! It contains ingredients like shellac, lacquers, plastics, silicones, perfumes, and other chemicals that are absolutely not archival. They will, without a doubt, yellow, crack, become brittle, or turn sticky (attracting dust and debris) over time, potentially damaging your artwork irrevocably. Think of it as a ticking time bomb for your art; the damage might not be immediate, but it will eventually manifest as an irreversible disfigurement. Always, always opt for artist-grade fixatives specifically designed for permanence and archival stability, formulated with non-yellowing resins and acid-free properties. Your artwork, and your artistic legacy, deserve better than a temporary hair product!

Q: Can fixative be used on digital prints?
A: Generally, no. Fixatives are formulated for traditional dry drawing media, not for inkjet or laser prints. Applying a standard art fixative to a digital print can lead to a host of undesirable and irreversible problems: ink smudging or bleeding, discoloration, loss of detail, uneven sheen, or a sticky surface. Digital prints require specialized coatings, often referred to as "inkjet varnishes" or "print sealants," which are designed to be compatible with digital inks and papers, offering UV protection and water resistance without compromising the print quality. Always use products specifically engineered for digital prints if you intend to protect them; traditional art fixatives are simply not the right tool for the job.

Q: How many coats of fixative should I apply?
A: My rule of thumb is typically 2-3 very light, even coats for most dry media drawings. The key word here is 'light,' almost a breath of spray. The goal is to build up a thin, almost imperceptible protective layer gradually, rather than trying to achieve full coverage in one heavy go. For extremely powdery media like soft pastels or charcoal, you might lean towards 3 light coats, giving ample drying time between each. For denser graphite drawings, 1-2 very light coats might suffice, as their inherent stability is higher. Applying too many or too-thick coats can lead to a host of problems: a glossy, unnatural texture (even with a matte fixative), darkening or dulling of colors (especially delicate pastels), or even unsightly visible drips and runs that are almost impossible to remedy without damaging the underlying work. Always, always allow each coat to dry fully before applying the next, which prevents trapping solvent and ensures optimal adhesion and clarity.

Q: What causes a 'frosted' or 'cloudy' appearance, and how do I avoid it?
A: Ah, the dreaded 'frosted' finish – it's a common heartbreak! This happens when moisture gets trapped in the drying fixative film, usually due to high humidity in the environment or applying coats that are too thick and not allowing enough drying time between them. The solvents evaporate rapidly, cooling the surface, which causes ambient moisture to condense. When this moisture is encapsulated by the drying resin, it creates a milky, hazy, or frosted appearance.
To avoid it, I cannot emphasize enough: always work in a low-humidity environment. If your studio is naturally damp, consider a dehumidifier. Also, apply fixative in several extremely thin, almost invisible coats, allowing each layer to dry completely (often 15-30 minutes) before applying the next. Rushing this process is the surest way to invite the frosty demon. If a slight haze does occur, sometimes a very light re-spray of fixative in perfectly dry conditions can re-liquefy the film, allowing the moisture to escape before it dries clear again. But this is a risky maneuver, so prevention is definitely your best strategy.
Q: Does fixative change the color of my artwork?
A: High-quality, artist-grade fixatives are formulated to be as transparent and non-reactive as possible, with the aim of minimizing color alteration. However, it's a known phenomenon that fixatives, especially when applied too heavily or in too many layers, can slightly deepen or darken colors. This effect is often most noticeable with delicate media like pastels, where the fixative 'wets' the pigment, much like water intensifies the color of dry sand or how saliva deepens the color of a rock. It's a subtle optical change due to the refractive index of the resin coating, and while sometimes desirable, it can also be an unwelcome surprise. This is precisely why I stress the importance of testing on a scrap piece first – it allows you to observe any potential color shifts, however subtle, before committing to your final artwork, ensuring there are no unwanted surprises that diminish your artistic intent.
Q: Are there any specific fixatives recommended for use with children's art?
A: This is a wonderful and important question! For children's artwork, especially pieces created with chalk, pastels, or soft pencils, a fixative can certainly help preserve their creative efforts and prevent smudging. However, due to the presence of strong solvents and propellants in many traditional aerosol fixatives, safety is a paramount concern.
My recommendation for children's art would be to look for acid-free, non-toxic, low-VOC, or natural, casein-based fixatives. Brands like SpectraFix (which is alcohol-based and often considered much safer for indoor use) are excellent choices. Alternatively, non-aerosol pump sprays can reduce airborne chemicals. Always ensure application is done by an adult in a very well-ventilated area, preferably outdoors, and keep children and pets away from the immediate spraying zone. For very young children's pieces, simply framing them under glass can be a perfectly adequate and completely safe method of preservation. The goal is to protect their precious creations without exposing anyone to unnecessary chemical risks.
Q: Is fixative necessary for all drawings?
A: Fixative is highly recommended, and indeed, almost essential, for dry media that are inherently prone to smudging and dusting, such as charcoal, soft pastels, chalk, and softer graphite pencils (like 2B and softer). For these media, it’s not just about preventing accidental smudges; it’s about securing the pigments to the surface for long-term stability and preventing airborne particles from settling in. For harder pencils (like 2H or harder), permanent colored pencils, or stable, waterproof ink drawings (like those made with Micron pens), it may not be strictly necessary for smudging, but a very light, archival coat can still offer an added layer of protection against environmental factors like dust, humidity, and minor abrasions. Ultimately, it's a nuanced decision based on the specific medium, the desired longevity of the piece, and how it will be stored, handled, or displayed. When in doubt, a light, tested coat of an archival fixative is generally a safe bet for any valuable dry media artwork, offering that extra layer of confidence.

Q: How do I store my artwork after fixing?
A: Great question! Fixing your artwork is a crucial first step, but proper storage is the final piece of the archival puzzle. Even after fixing, artworks need protection from physical damage, environmental fluctuations, and light.
For best results, store fixed drawings flat in acid-free archival boxes or portfolios. If stacking, interleave them with acid-free tissue paper or glassine sheets to prevent any potential sticking or transfer, even with a fully cured fixative. Avoid rolling unframed drawings, as this can crack the fixative film. Keep your storage area in a stable environment: cool, dry, and away from direct sunlight, extreme temperature changes, or high humidity (which can reactivate fixative tackiness over time). Never store artwork in basements or attics where environmental conditions fluctuate wildly. For framed pieces, ensure they are securely hung out of direct light and away from heat sources. Think of it as creating a mini-museum for your art right in your home or studio!
Q: How long does fixative take to dry?
A: Most fixatives are designed to be touch-dry within a few minutes – often 5 to 15 minutes, depending on the specific brand, the formulation, and crucially, environmental conditions. However, it's vital to distinguish 'touch-dry' (meaning it won't smudge if lightly touched) from 'fully cured' (where the resin film has completely hardened, created its full protective barrier, and bonded irrevocably). I always recommend allowing a longer period, typically 15-30 minutes between coats, and several hours (or even overnight, especially in humid conditions, cooler temperatures, or if multiple thick layers were applied) for a final coat to fully cure. Factors like humidity (which slows evaporation dramatically), temperature (warmer is generally faster, but extreme heat can be problematic), and the thickness of the application can significantly impact drying and curing times. Always refer to the specific product's instructions for the most accurate guidance, as variations exist, and don't rush the process!
Q: Does fixative make my art smell permanently?
A: This is a common concern, and thankfully, the answer is usually no, not permanently! Most artist-grade fixatives are formulated so that the solvents (which are responsible for the strong chemical odor) evaporate completely as the film cures. This off-gassing process typically takes several hours to a few days, depending on ventilation, humidity, and the thickness of the application.
Initially, yes, there will be a noticeable chemical smell right after spraying, which is why excellent ventilation is critical. As the solvents dissipate, the odor will fade. If an artwork retains a faint chemical smell for an extended period, it's often an indication of insufficient ventilation during drying, too heavy an application, or sometimes using an older or lower-quality product with less stable chemistry. For artists highly sensitive to odors, seeking out low-VOC or natural casein-based fixatives (like SpectraFix) can make a significant difference, as these products have a much milder or even negligible scent.
Q: Can I use fixative on wet media like watercolor or acrylic paint?
A: Generally, no. Fixatives are specifically designed for dry drawing media – think charcoal, pastel, graphite, colored pencils – where loose pigment particles need to be bound to the surface. Applying a typical fixative to wet media like watercolor, gouache, or acrylic paint is not only unnecessary (as these media usually dry to a stable, often water-resistant, film) but can also cause undesirable effects. It might lift or smudge wet pigments, create an uneven or cloudy finish, or react adversely with the paint binders. For paintings, you would typically use a varnish once the artwork is completely dry and cured, which serves a different purpose of providing a durable, often removable, protective layer and unifying the sheen. If you're curious about this, our guide on how to varnish an oil painting: a step-by-step guide dives deep into the topic. Always match your protective coating to your medium's requirements.
Q: What about mixed media pieces – how do fixatives fit in there?
A: This is where fixatives truly become invaluable for expanding your creative horizons! For mixed media, workable fixatives, in particular, can be a game-changer. They allow you to stabilize layers of dry media (like charcoal or pastel) before adding wet media (like ink or light watercolor washes) on top, preventing smudging, bleeding, or unwanted mixing. Think of it as creating temporary barriers between incompatible layers. For example, I often use a light spray of workable fixative over a charcoal base before defining details with ink. However, caution and testing are always advised. Ensure each layer is completely dry before applying the next, and always test on a scrap piece to check for any adverse reactions between your specific combination of media and the fixative. For the final protection of a completed mixed media piece, you might use a final fixative, or even a specialized mixed media sealant, depending on the predominant materials.
Q: Does fixative have an odor, and how strong is it?
A: Yes, most traditional aerosol fixatives do have a distinct, often strong, chemical odor. This is primarily due to the volatile organic compounds (VOCs) in the solvents and propellants. The strength of the odor can vary significantly between brands and formulations. Some artists find the smell quite strong and potentially irritating, which is why excellent ventilation and the use of a respirator mask are not just recommendations, but necessities. There are lower-VOC and even "odor-free" or natural casein-based fixatives available (like SpectraFix) that have a much milder or negligible scent, which can be a great option for artists with sensitivities or those working in less-than-ideal ventilation conditions. Always check product labels for warnings and ventilation instructions.
Q: What is the shelf life of fixative?
A: Like most art supplies, fixative does have a shelf life, though it's often quite long if stored properly. Typically, an unopened aerosol can of artist-grade fixative can last several years (3-5 years or even longer) when stored in a cool, dry place away from extreme temperatures and direct sunlight. Once opened or used, its effective life can be shorter, especially if the nozzle isn't properly cleared after each use, leading to clogs or a compromised seal. Over time, the solvents can slowly evaporate, or the resins might begin to polymerize or separate, leading to uneven spray, poor adhesion, or a cloudy finish. If your fixative starts to spray inconsistently, clogs frequently, or the solution appears cloudy or separated, it's likely past its prime. Always refer to the manufacturer's recommendations, but when in doubt, a quick test spray on scrap paper can tell you if it's still good to go.
Q: What's the difference between fixative and varnish?
A: This is a fantastic question and a common point of confusion, even among experienced artists! A fixative (what we're discussing here) is primarily designed for dry drawing media (charcoal, pastel, graphite) to bind loose pigments and prevent smudging and dusting, creating a thin, often permeable film that stabilizes the surface while largely preserving its original texture. A varnish, on the other hand, is generally used for paintings (oil or acrylic) to provide a much more durable, often removable, protective layer that can also unify the sheen of the artwork, deepen colors, and offer enhanced UV protection. Varnishes come in various types (e.g., dammar for oils, synthetic resins like MSA, acrylic emulsions) with different properties and levels of removability, as detailed in our guide on how to varnish an oil painting: a step-by-step guide. While some fixatives and varnishes share chemical components, their application, fundamental purpose, the media they are designed for, and their reversibility are distinctly different. You wouldn't typically use a fixative on a finished oil painting, nor would you use a heavy painting varnish on a delicate charcoal drawing – unless you intended to permanently alter its nature and texture.
Q: Can fixative be removed if I make a mistake?
A: For the average artist working in their studio, fixative should generally be considered a permanent application. Once it's on, it's on, and any attempts at removal are fraught with peril and often lead to irreversible damage. While professional art conservators possess highly specialized techniques for partial or full removal, these processes are incredibly complex, involve specific solvents and expertise, are often costly, and always carry inherent risks to the delicate artwork underneath. This is another compelling reason why the 'test, test, test' mantra is so vital, and why applying fixative carefully in light, controlled coats is paramount. Avoid the heartache by getting it right the first time; don't count on being able to undo it easily without professional intervention and a substantial budget!

Q: Can fixative be used on canvas or wood panels with dry media?
A: This is a nuanced question! While fixatives are primarily designed for paper-based dry media, if you are using dry media like charcoal, pastel, or graphite directly on a prepared canvas or wood panel (e.g., primed with gesso, like our guide on what is gesso in painting discusses), a fixative can be beneficial. The key is that the surface must have enough "tooth" or texture for the dry media to adhere to in the first place.
For these non-paper surfaces, treat the application much like you would for paper: use light, even coats, allow ample drying time, and always test on an inconspicuous area first. The fixative will help bind the loose pigments to the primed surface, preventing smudging and offering a layer of protection. However, if your dry media is merely a preliminary sketch beneath an eventual painting (e.g., an oil painting or acrylic painting), be cautious about using a heavy final fixative, as it could potentially create a barrier that later paint layers might not adhere well to. In such cases, a light coat of workable fixative might be more appropriate, or simply proceed directly to painting if the sketch is stable enough.

Q: How does temperature affect fixative application?
A: Temperature plays a surprisingly significant role in how effectively fixative performs. Ideally, you want to apply fixative in a moderate, consistent temperature range, typically between 65-75°F (18-24°C).
- Too Cold: If the can or the environment is too cold, the fixative solution can become thicker, making it harder for the propellant to atomize it into a fine mist. This can result in a coarse, uneven spray, larger droplets, sputtering, or even clogging of the nozzle. The solvents will also evaporate more slowly, prolonging drying times and increasing the risk of a sticky or cloudy finish.
- Too Hot: Conversely, extreme heat can cause the propellants to expand too rapidly, leading to excessive pressure within the can. This can result in an overly aggressive spray, wasting product, and potentially creating an uneven, heavy application or even blistering. Rapid evaporation in very hot conditions can also sometimes contribute to a cloudy finish.
For optimal results, always ensure your fixative can is at room temperature before use, and aim for a mild, stable environment for application. If your can is cold, gently warm it by placing it in a bowl of warm water for a few minutes (never hot water or direct heat!).
Q: Is there an expiration date for fixative?
A: Yes, fixative, like most chemical art supplies, does have an effective shelf life, though it's often quite generous when stored correctly. While you might not see a specific "use by" date printed prominently, manufacturers generally recommend using aerosol fixatives within 3 to 5 years of purchase, especially if unopened and stored in ideal conditions (cool, dry, away from direct sunlight and extreme temperatures).
Once a can has been opened or used, its practical lifespan can shorten, primarily due to the slow evaporation of solvents or the potential for resins to begin polymerizing or separating over time, especially if the cap isn't tightly sealed or the nozzle is left clogged. Signs that your fixative might be past its prime include inconsistent spraying, frequent clogging, a cloudy or separated solution, a significantly altered odor, or a finished film that remains sticky or discolors. When in doubt, always perform a test spray on scrap paper. If it looks or feels off, it's safer to replace it than risk your artwork.
Q: My fixative nozzle is clogged. How do I clean it?
A: A clogged nozzle is incredibly frustrating, often happening when you least expect it, usually right when you're in the middle of a crucial application! My go-to method is to remove the nozzle (gently, please!) and soak it in an appropriate solvent like mineral spirits, paint thinner, acetone, or rubbing alcohol (isopropyl alcohol) for about 15-30 minutes, or until the fixative residue softens. Then, use a fine needle, pin, or even a thin piece of wire to gently clear the opening. Always point it away from you! A great preventative measure is to hold the can upside down and spray for a few seconds immediately after each use; this often clears the nozzle of residual fixative that would otherwise dry and cause a clog, saving you future headaches. Always ensure you're doing this in a well-ventilated area, and never try to force anything, as you could damage the delicate nozzle mechanism.

Q: Does fixative make a drawing waterproof?
A: Not truly, or at least not in the sense of making it completely impervious to water. While fixative does create a barrier that can offer some resistance to minor splashes or high humidity, it typically does not make a drawing fully waterproof. Think of it as water-resistant, not waterproof, similar to how a light jacket might protect you from a drizzle but not a downpour. Heavy water exposure, like a spilled drink, getting caught in the rain, or even high condensation, can still damage or lift pigments, even on fixed artwork. If you genuinely require full water resistance for your artistic endeavors, you might be looking at different types of sealants specifically designed for waterproofing, or considering waterproof drawing media (like certain inks or acrylic-based paints) from the outset of your project. Fixative is about protecting dry media, not turning paper into plastic.
Q: Are there non-aerosol fixative options?
A: Yes, absolutely there are! While aerosol sprays are undeniably the most common and convenient format, some brands offer liquid fixatives that can be applied with a traditional mouth atomizer (a classic tool that creates a fine mist with your breath, requiring a certain lung capacity!), or an airbrush. These non-aerosol options offer greater control over the spray pattern and volume for some artists, particularly if they are sensitive to aerosol propellants, have environmental concerns, or prefer a very precise, tailored application for smaller, intricate works. The trade-off is that they can require a different skill set to master, meticulous cleanup of equipment, and often don't achieve quite the same ultra-fine, even mist as a professional aerosol. However, it's definitely an alternative worth exploring if aerosols aren't working for your specific needs, health concerns, or studio environment.
Q: What are the best fixative brands?
A: This is a bit like asking for the 'best' paintbrush – it often comes down to personal preference, the specific medium you're using, and your budget. However, I can certainly share some highly reputable, artist-grade brands that many professionals, including myself, trust. For general dry media, brands like SpectraFix (casein-based, natural, less toxic, and often less prone to darkening pastels), Grumbacher (a classic, reliable choice), Lascaux (especially their UV Protect fixatives, known for strong archival properties), and Sennelier (highly regarded, particularly for pastels) are excellent choices. For workable fixatives, Krylon Workable Fixatif is a popular and reliable option often found in many art stores. For those seeking low-VOC or odor-free options, a brand like Mod Podge Clear Acrylic Sealer (in a matte or satin finish) can sometimes serve as a light final coat, though it's not strictly a fixative. Always look for 'artist-grade,' 'archival,' 'acid-free,' and 'non-yellowing' on the label to ensure you're getting a quality product. My best advice? Research a few of these, read reviews specific to your media, and crucially, try a couple on test pieces to see what works best for your hand, your art, and your preferred aesthetic. Personal experience is invaluable here. For instance, SpectraFix is a favorite among pastel artists for its minimal color shift and natural composition, but it requires a slightly different application. Grumbacher Final Fixative is a classic for charcoal and graphite, offering reliable protection. Lascaux fixatives are often lauded for their superior archival properties and UV protection, making them a premium choice for highly valued works. Sennelier offers a range tailored specifically for pastels, known for maintaining vibrancy. And Krylon Workable Fixatif remains a go-to for many, including me, for those mid-stage layering needs. Each has its nuances, so a bit of experimentation is well worth the effort to find your perfect match.
Q: Does fixative protect against fading from light?
A: Yes, to a degree, and it's an important degree, a significant enhancement to your artwork's defenses! High-quality, archival fixatives often contain UV inhibitors (ultraviolet light absorbers) that help slow down the fading process caused by prolonged exposure to ultraviolet light. These inhibitors essentially absorb, scatter, or reflect a portion of the harmful UV radiation before it reaches the pigments, thus extending their life. However, it's crucial to understand that fixative is not a complete, impenetrable shield against strong, prolonged UV exposure. For maximum, comprehensive protection against fading, especially for notoriously light-sensitive pigments like many vibrant pastels or certain colored inks, I always recommend a multi-layered approach: frame artwork under UV-filtering glass or acrylic (which blocks a much higher percentage of UV rays), and crucially, avoid displaying the artwork in direct sunlight or under intense, unfiltered artificial light that emits a lot of UV. Think of fixative as a crucial first line of defense, a significant contributor to longevity, but not the only one in your arsenal for preservation.
Conclusion: Your Art, Preserved and Cherished
So, there you have it – the comprehensive lowdown on fixative spray. From its humble origins in artists' studios to its crucial role in modern art preservation, I hope I've demystified this often-overlooked, sometimes intimidating, but utterly essential tool. Fixative spray isn't just a can of chemicals; it's a vital safeguard for your drawings, an invisible ally ensuring that your artistic efforts, your fleeting moments of inspiration captured on paper, are preserved for years, even generations, to come.
By now, you should feel equipped to confidently navigate the different types of fixatives, master the proper application techniques, and thoughtfully consider the specific needs of your various drawing media. With this knowledge, you can effectively protect your cherished work from the perils of smudging, the relentless creep of fading, environmental pollutants, and the general wear and tear of time, allowing its story to continue far into the future.

I truly believe that investing in high-quality fixative is more than just buying art supplies; it's an investment in the longevity and enduring beauty of your artistic legacy. It's a statement that your art matters, and that it's worth protecting, ensuring your unique voice resonates for years to come. Now go forth, create, and preserve with confidence, knowing you have the tools to safeguard your vision! And, if you're looking for inspiration or perhaps a finished piece for your own collection that has been thoughtfully preserved, I invite you to explore my own artworks for sale – each piece a testament to the power of art that endures, a quiet conversation between the past, present, and future, meticulously protected to ensure its vibrancy for you to enjoy for years to come. Perhaps you'll find a piece that resonates, a creation made to last.


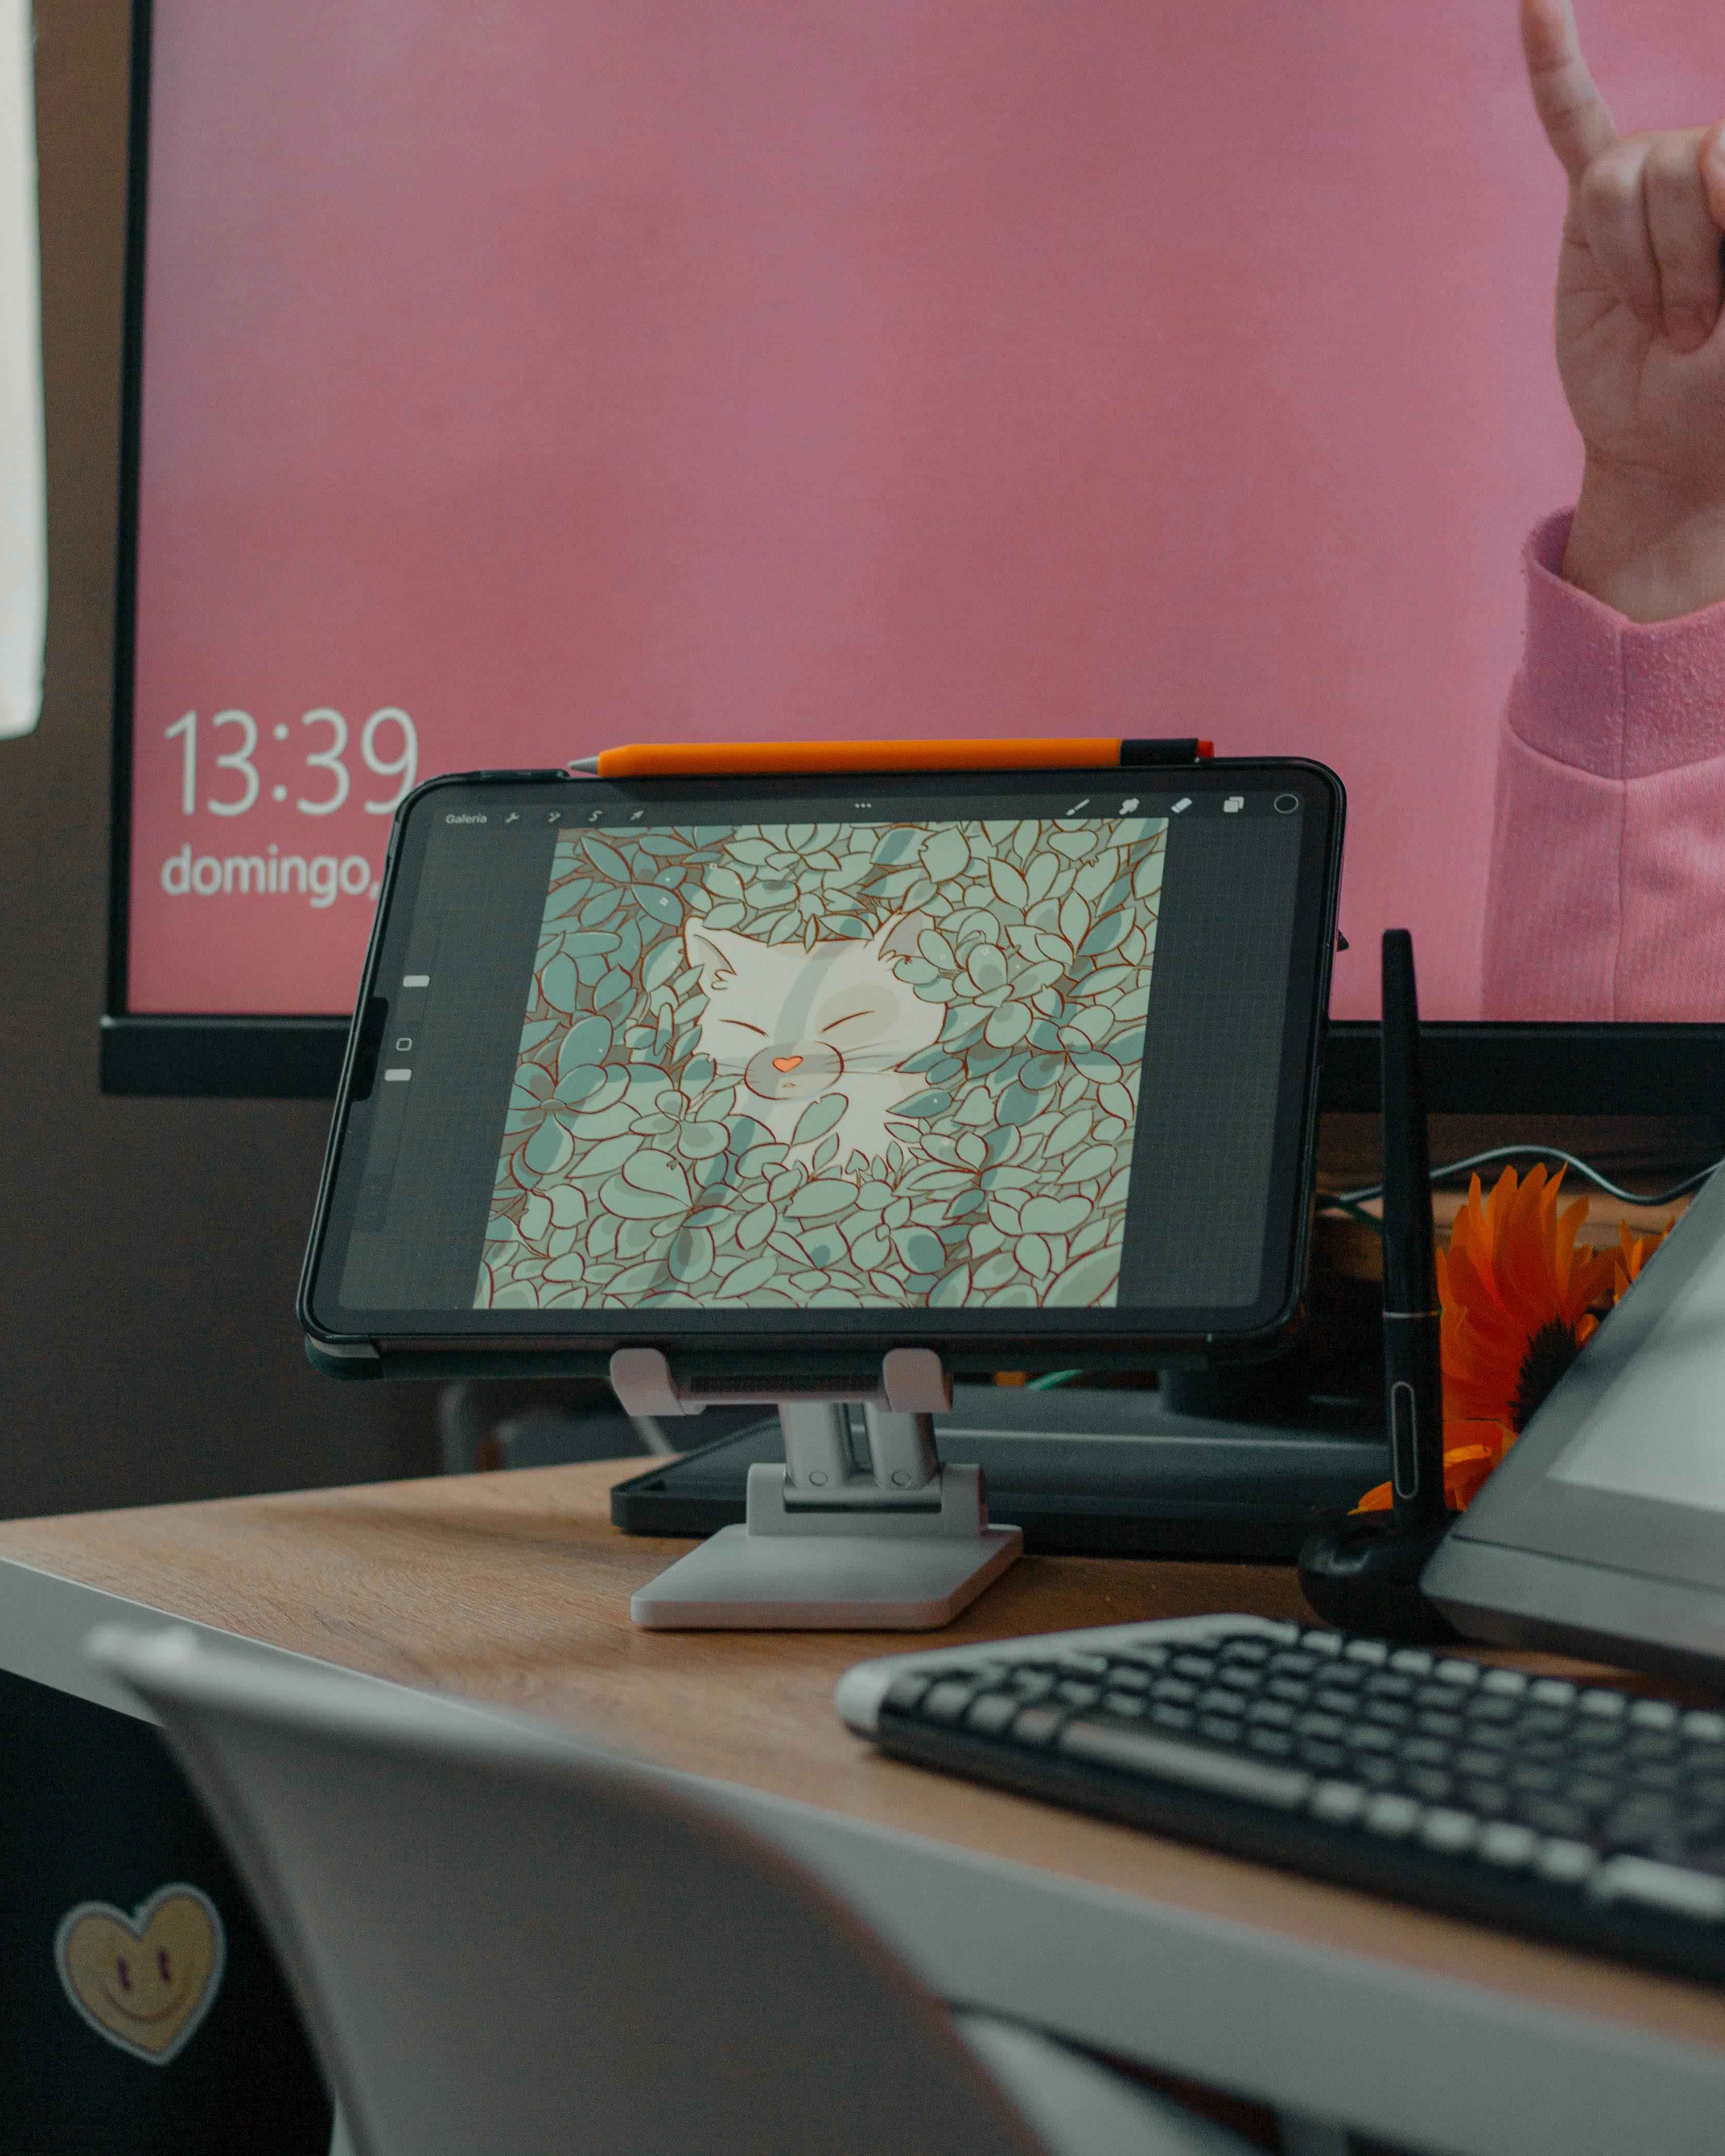
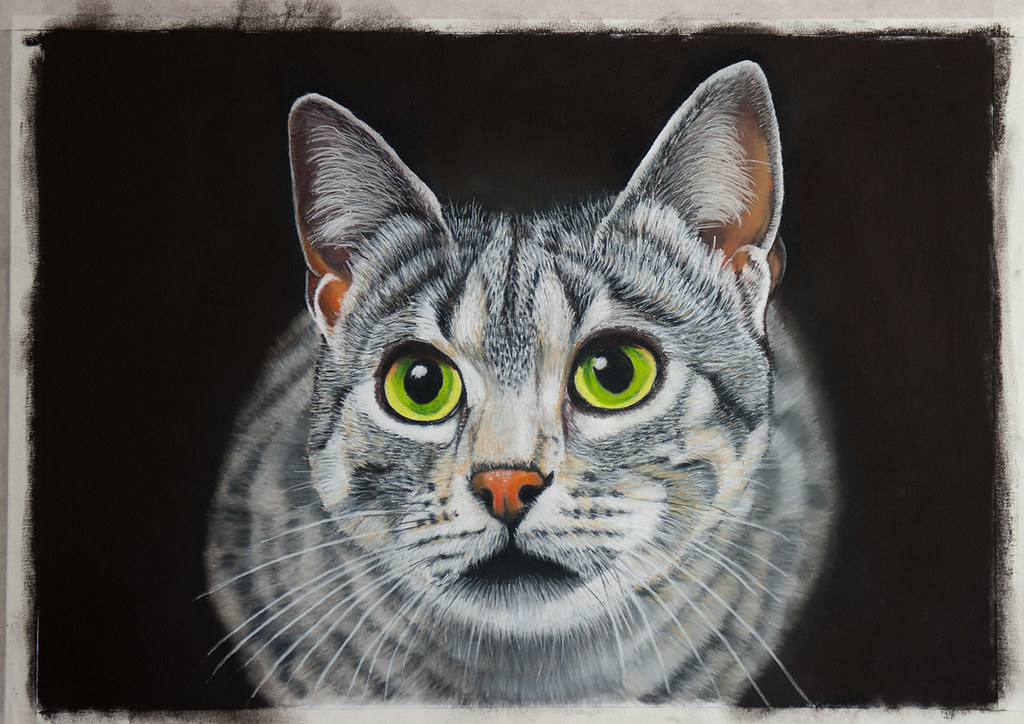