
How to Mat a Picture: Giving Your Art the Space It Deserves
Ever wondered why some framed art just *pops*? It's often down to a well-chosen mat. Join me as I walk you through why matting matters and how to do it yourself, turning your artwork into a masterpiece of presentation.
How to Mat a Picture: Giving Your Art the Space It Deserves (And Why It's a Game-Changer)
I have a confession to make. For a long time, I thought picture mats were, well, a bit stuffy. An unnecessary extra layer between me and the art, a kind of visual formality I just didn't quite 'get'. I was all about the raw canvas, the edge-to-edge frame, the direct connection, that raw, immediate impact. But then, I had one of those 'aha!' moments – you know, the kind where a seemingly mundane detail suddenly unlocks a whole new level of understanding and appreciation? That's precisely what happened with matting for me, and my entire perspective completely shifted. My world of art presentation, once focused purely on the immediate visual, cracked open to reveal a deeper understanding of aesthetic harmony and, crucially, lasting preservation. It was like suddenly being able to hear a subtle, crucial note in a symphony that I'd been missing all along – a quiet but profound revelation that transformed how I perceived the entire composition. This article, I hope, will be that 'aha!' moment for you, the definitive guide that cuts through the fluff and reveals the profound impact of proper art presentation. We'll dive deep into the 'why,' explore the essential tools, walk through the step-by-step process of cutting a perfect mat, and even venture into advanced techniques that truly make your art sing. Consider this your comprehensive roadmap to mastering the art of matting. My aim is to make this the ultimate, most comprehensive, and engaging source of information on picture matting you'll find anywhere, tailored for both budding artists and seasoned collectors.

It was less about formality and more about respect and preservation. It’s about giving the artwork room to breathe, creating a crucial buffer that protects it from the harsh realities of the world (and the frame glass!), and subtly guiding the viewer's eye to exactly where it needs to be. Think of it like a carefully chosen silence in a powerful piece of music, or the perfect dramatic pause in a gripping story; it allows the true star – your art – to shine without interruption or distraction. It’s a quiet stage that amplifies the main act, a thoughtful frame within a frame. Once I truly understood that, my entire approach to presenting art, both my own abstract pieces and those I've collected, changed fundamentally. And trust me, it's a game-changer for both artists and collectors alike – whether you're working with a definitive guide to paint types for artists, delicate essential watercolor supplies for beginners, or even a vibrant the definitive guide to mixed media in abstract art techniques materials and contemporary masters piece, the right mat makes all the difference in its longevity and visual impact. It's not just about aesthetics; it's a vital component of archival practice, a silent guardian for your creative output. My hope is to equip you with all the knowledge you need to mat your art like a seasoned professional, ensuring its beauty and integrity for years to come. Because, let's be honest, you want your art to be seen and appreciated for decades, right?
So, if you're anything like my past self, you might still be thinking, "Okay, it looks nice, but is it really worth the extra effort?" And to that, I say, absolutely, unequivocally yes! Matting isn't just about superficial beauty; it’s a critical component of archival presentation that every artist and serious collector needs to understand. It’s a subtle yet mighty protector and amplifier for your cherished pieces, transforming them from mere pictures into framed statements. It's an investment in the future of your art, ensuring its integrity and impact for generations to come. I truly believe that once you understand the 'why' behind matting, you'll never look at a framed piece of art the same way again.
Why Even Bother with a Mat? (It's More Than Just a Pretty Border, It's an Act of Preservation and Elevation)
So, why should you, a discerning artist or collector, invest time (or money) in matting your pictures? Beyond my personal revelation, there are some rock-solid, practical, and aesthetic reasons that elevate matting from a mere decorative choice to a crucial preservation strategy. And no, it's definitely not 'just a border.' It's a deliberate choice that impacts both the longevity and the visual narrative of your artwork. It’s an act of respect for the art and an investment in its future.
So, why should you, a discerning artist or collector, invest time (or money) in matting your pictures? Beyond my personal revelation, there are some rock-solid, practical, and aesthetic reasons that elevate matting from a mere decorative choice to a crucial preservation strategy. And no, it's definitely not 'just a border.' It's a deliberate choice that impacts both the longevity and the visual narrative of your artwork.
1. The Unsung Hero: Protection and Preservation (The Science Behind Longevity)
This is the big one, the functional reason I wish someone had hammered into me earlier (and perhaps in larger, bolder letters!). A mat creates a crucial air gap – sometimes called a 'breathing space' or 'microclimate' – between your precious artwork and the glass of the frame. Why does this matter so profoundly? Well, think about the silent assassins of art: humidity, temperature fluctuations, condensation, and even microscopic pests. Without that buffer, your art – especially sensitive media like photographs, watercolors, pastels, delicate prints, or even essential calligraphy supplies for beginners on fine paper – can stick directly to the glass. This isn't just an inconvenience; it leads to irreversible damage, catastrophic mold growth, or even the lifting and tearing of the artwork's surface. I've heard horror stories, and honestly, even experienced a minor scare myself once with a particularly beloved ink drawing – the paper fused slightly to the glass. It’s not a fun lesson to learn the hard way, especially when a simple mat can prevent it all. Plus, that air gap also acts as a first line of defense against dust and tiny airborne particles, preventing them from settling directly on your art and becoming a permanent fixture behind the glass. This is particularly vital for works on paper, which are inherently more fragile than, say, a robust oil painting on canvas. The slightest moisture can cause 'foxing' (tiny brown spots) or the dreaded 'acid burn' that slowly discolors your precious piece. It's about protecting against the insidious creep of environmental damage. This includes safeguarding against common culprits like UV radiation which can cause irreversible fading, and pollutants in the air that can subtly degrade paper over time. A properly matted piece acts as a buffer, shielding your artwork from these invisible threats and extending its lifespan significantly, creating a stable microclimate that slows down the aging process. It’s like putting your art in a mini-museum capsule, protecting it from the silent, often invisible, destroyers.
Beyond direct contact, a mat also helps protect against acid migration. Standard wood frames and non-archival backing materials can release acids over time, causing your artwork to yellow and become brittle. An acid-free mat acts as a barrier, a true archival shield. This also ties into why understanding definitive guide to paint types for artists is so important for choosing archival materials from the outset – because preserving your art starts long before it's framed. It's a continuous chain of care, and the mat is one of the strongest links in that chain. For example, if you're working with vibrant reviewing the best gouache sets for beginners, you absolutely want that protective layer. I've seen countless antique prints ruined by cheap, acidic matting over the years – a truly heartbreaking sight for any art lover. The mat is your artwork's first line of defense against chemical degradation from its surroundings. Think of it as a subtle bodyguard, ensuring your art's longevity.

2. The Aesthetic Amplifier: Visual Breathing Room and Enhanced Focus (Creating a Visual Sanctuary)
Imagine walking into a beautifully designed room. You wouldn't want the furniture crammed against every wall, jostling for attention, right? Every element needs its space to be appreciated. Art is no different. A mat provides visual respite, a neutral zone that allows the eye to process the artwork without being immediately confronted by the frame, the wall color, or even other nearby artworks. It quite literally gives the art space to breathe, enhancing its presence and impact, making it feel more deliberate and important. It can make a small, intimate piece feel more substantial and significant, or conversely, help integrate a vibrant abstract piece into a more subdued living space without it overpowering the room. It’s a subtle yet powerful tool, acting as a visual buffer that defines the artwork's personal space, elevating it from a simple picture to a focal point. This principle is as vital for choosing art for your living room, decorating with art in a powder room: maximizing impact in small spaces, or even collecting art for small apartments: maximizing impact in limited spaces, ensuring harmony and focus in any setting. It's about creating a 'pause' for the eye, allowing the viewer to truly absorb the artwork without external distractions. This thoughtful presentation can transform a casual glance into a contemplative moment, elevating the entire viewing experience. Psychologically, it signals to the viewer that the artwork is important, deserving of undivided attention. Whether you're displaying a vibrant abstract piece in a minimalist space or a delicate charcoal drawing in a richly textured room, the right mat ensures visual harmony and prevents the art from being 'lost' or clashing with its surroundings. It's about orchestrating a visual dialogue between the art and its environment, creating a sense of intentionality and quiet grandeur. This visual separation can also reduce eye fatigue, allowing for a longer, more appreciative viewing of the piece. The mat acts as a silent interlocutor, subtly guiding the viewer's gaze and framing their emotional response.

3. The Compositional Guide: Directing the Eye and Enhancing Balance (The Silent Storyteller)
A truly well-chosen mat acts as a powerful, yet understated, compositional element. It subtly, almost imperceptibly, guides the viewer's gaze directly to the art itself, creating a natural focal point. It can expertly balance an image, correct perceived proportions (making a slightly off-center piece feel perfectly balanced, almost magically), and even add an undeniable layer of sophistication. Think of it as a custom-designed spotlight or a velvet rope in a gallery, ensuring your art gets the undivided attention it deserves without shouting for it. This idea of visual flow and emphasis isn't just about what's within the frame; understanding understanding the elements of design in art a comprehensive guide and understanding balance in art composition absolutely extends to how the artwork is presented and framed, turning a simple picture into a carefully curated display. It's an extension of the artist's intention, a final brushstroke in the presentation. By carefully controlling the negative space around the artwork, the mat can either reinforce the existing composition or subtly correct perceived imbalances, ensuring the art is always seen at its best. It’s a silent conversation between the art and its surroundings. Think of it as applying the principles of understanding the elements of design in art a comprehensive guide and understanding balance in art composition beyond the canvas itself, extending them into the presentation. A well-chosen mat can subtly echo lines, colors, or textures within the artwork, reinforcing its themes and guiding the viewer's interpretation. It's a final, thoughtful stroke from the artist (or presenter) that completes the visual narrative. For instance, a landscape painting might benefit from a wider bottom mat, visually grounding the horizon line, while a dynamic abstract piece might use equal borders to emphasize its energetic movement.
Gathering Your Arsenal: What You'll Need for DIY Matting (Investing in Precision)
Before we dive into the nitty-gritty of cutting, let's talk tools. Now, I'm a firm believer in having the right tools for the job, but I also started with the basics. You don't need a professional framing studio to get great results, just a few key items and a healthy dose of patience. If you're serious about your craft, or simply serious about preserving your art, these are worthwhile investments. Think of them as the foundational elements of your home framing toolkit, your personal 'matting arsenal.' I remember gathering my first set of tools; it felt like preparing for a delicate surgical procedure, and in a way, it is! You're performing precision work on something you cherish, and having the right equipment makes all the difference. Investing in quality tools now will save you countless headaches (and potentially ruined mats) down the line. It's about empowering yourself to achieve professional results at home. Because, let's be honest, there's nothing quite like the satisfaction of a perfectly matted piece of your own creation. It’s an investment not just in tools, but in your ability to preserve and showcase your artistic legacy, transforming your home studio into a professional framing workshop. Remember, while the initial outlay might seem significant, the long-term savings from DIY framing, coupled with the peace of mind knowing your art is properly protected, make it an incredibly smart move for any artist or collector.

The Right Tools for the Right Job: Manual vs. Professional Mat Cutters (Choosing Your Precision Partner)
When it comes to cutting mats, you essentially have two routes: the manual approach, which is perfectly fine for hobbyists, occasional projects, and even smaller production runs; and the more professional, often larger, setup. I've used both extensively, and frankly, the manual method taught me a lot about precision, patience, and the nuances of blade control – skills that are invaluable no matter what tools you upgrade to. Don't be intimidated by the 'professional' label; a good manual cutter can yield stunning results.
Feature | Manual Mat Cutter Kit (Entry-Level) | Professional Mat Cutter (Benchtop/Tabletop) | |||
|---|---|---|---|---|---|
| Cost | Low to moderate (starts around $30-$100), excellent value for beginners. | Moderate to high (starts around $300-$1000+), a serious investment. | |||
| Precision | Good with practice, relies heavily on user's steady hand and accurate measurement. For best results, use a dedicated straight-edge and ensure square corners. | Excellent, consistent, machine-assisted accuracy with guides, stops, and integrated squaring mechanisms, reducing human error. | |||
| Speed | Slower, one cut at a time, requiring repositioning for each side and careful alignment. | Faster, especially for multiple mats or production runs, with integrated squaring and quick blade adjustments for repeated cuts. | Max Size | Limited by ruler length, typically 32-40 inches for the cutting guide, though longer straight edges can be acquired. | Up to 60 inches or more, depending on model; can handle large format art and provides stability for precise large cuts. |
| Skill Curve | Moderate, requires significant practice for perfect bevels and consistent results, especially mastering the 'overshoot' technique. | Lower for basic cuts, higher for advanced features like v-grooves or multiple openings, but offers greater consistency from the start. | Portability | Very high, easy to store in a drawer or on a shelf, ideal for small studios or home use, or for artists who travel. | Low, usually fixed on a table or requires dedicated space due to size and weight, as they are robust, stationary machines. |
| Blade Life | Standard utility blades or specific mat cutter blades, requiring frequent changes for sharpness (every 1-2 mats, depending on material). | Specialized blades, often longer life due to optimized cutting angles and heavier duty construction, but more expensive to replace. | Best For | Hobbyists, occasional pieces, learning the craft, artists with limited space or budget, or for smaller artworks that don't demand industrial precision. | Serious artists, small businesses, frequent matting needs, galleries, custom framers, or anyone working with large format or high-value art consistently. |
Regardless of your chosen tool, remember that precision is key. And a sharp blade is your absolute best friend. Trust me, a dull blade is the enemy of a clean cut and a source of endless frustration! Some advanced DIYers even invest in specialized sharpening tools to maintain their blades, though frequent replacement is often the simplest and safest option for most. Don't be a hero; change that blade often. Your mats (and your sanity) will thank you.
Here’s my indispensable checklist for DIY matting – these are the items I simply cannot do without, and I recommend you don't either. Consider this your essential shopping list for embarking on your matting journey, a journey that's surprisingly rewarding.
- Acid-Free Mat Board: This is non-negotiable, truly. Standard cardboard contains lignins and acids that will, over time, migrate into your artwork, causing it to yellow, become brittle, and degrade – a process often called 'acid burn.' Spend a little extra here; it's a small investment for the longevity of your precious art. Look for labels like 'acid-free,' 'conservation grade,' or 'museum grade' at art supply stores. If you see terms like 'lignin-free,' that's also a good sign, indicating the absence of wood pulp impurities that cause acidity. Remember, we're aiming for preservation, not just presentation. This is especially critical if you're working with delicate mediums or fine papers, whether you're using essential calligraphy supplies for beginners, fine art prints, or even your child's cherished drawings. Always check for a pH level of 7.0 or higher for true archival quality. Your artwork deserves nothing less than the best possible protection, a true legacy for the future. You can find these essential materials at most reputable art supply stores, both online and brick-and-mortar, and even some specialized craft stores. Always prioritize 'conservation grade' or 'museum grade' for truly irreplaceable pieces, as they are often made from 100% cotton rag, which is naturally acid and lignin-free, offering superior long-term stability and protection against environmental pollutants and pests.
- Utility/Craft Knife or Mat Cutter: A sharp blade is absolutely paramount for clean, crisp cuts. While a dedicated mat cutter (with its angled blade) will give you the most professional-looking bevel, a very sharp utility knife and a steady hand can certainly work for smaller pieces. My golden rule: replace blades often! Seriously, this is not where you want to cut corners (pun intended!). A dull blade isn't just frustrating; it's your enemy, leading to jagged edges, torn paper, and ultimately, a ruined mat. Trust me, I've ruined more than a few mats by trying to stretch the life out of a blade for 'just one more cut,' and the regret is real. Consider ergonomic handles for better control and reduced hand fatigue, especially if you plan on cutting many mats. A fresh blade makes all the difference, transforming a struggle into a smooth, satisfying glide. Always cut away from your body, use a sturdy ruler for guidance, and consider investing in a safety ruler with a finger guard. Proper blade disposal is also important to prevent accidents and protect future generations from your discarded sharp objects. The goal is to make clean, effortless cuts, which is only possible with a consistently sharp edge.
- Metal Ruler with a Lip (or a T-Square): This is crucial for guiding your knife straight and preventing it from slipping. A cork-backed or non-slip ruler is even better, as it won't shift during cutting – an absolute lifesaver. For larger pieces, a T-square is invaluable for ensuring your lines are perfectly perpendicular and square – a subtle difference that makes all the difference in the final look and screams 'professional.' Look for rulers with clear, precise markings that are easy to read. Some even have a built-in channel for mat cutter blades, providing an extra layer of stability. This is your straight-edge samurai sword, ensuring every line is true. For maximum accuracy, ensure your ruler is perfectly clean before use, as even tiny specks can throw off your measurements. A good quality, heavy-gauge metal ruler will also offer less flex, contributing to straighter cuts and preventing the bowing that can occur with flimsier plastic rulers, especially on longer cuts.
- Self-Healing Cutting Mat: Protect your workbench! This provides a safe, resilient surface for cutting and helps prolong the life of your blades by giving them something to sink into without dulling prematurely. Plus, it saves your beautiful table from looking like a battlefield. I use a large one that covers my entire working area, and I honestly don't know how I ever lived without it. They come in various sizes, so choose one that accommodates your largest potential mat board to ensure full protection and a stable cutting surface. It's the unsung hero of your crafting space, silently taking the hits so your surfaces don't have to. These mats come in various colors, but often feature grid lines which are incredibly helpful for squaring up your mat board and making initial measurements, transforming your workspace into a precision factory. They are a one-time investment that pays for itself by preserving your tools and workspace, a quiet testament to thoughtful preparation.
- Pencil and Eraser: For light markings that can be easily removed. I prefer a harder lead pencil (like a 2H) for faint lines that won't leave indentations or smudges on the mat board. An excellent quality eraser is also key – no cheap smudgy ones that just spread the graphite around! Remember, precision begins with your initial marks. For darker mat boards, a white or silver drawing pencil can be invaluable for making visible, yet erasable, marks without indenting the surface. These humble tools are the silent architects of your perfect mat, guiding every critical measurement. For extremely light mat boards, you might even consider a very fine-tipped mechanical pencil to ensure your lines are hair-thin and barely visible, preventing any ghosting from over-erasing. The goal is to mark just enough to guide your cut, but not so much that it becomes a permanent feature on your beautiful mat.
- Archival Linen Tape or pH Neutral Hinging Tape: For attaching your artwork to the mat. Again, 'archival' is the keyword. This tape is reversible, meaning it won't damage the art if it ever needs to be removed in the future. Seriously, no household Scotch tape, masking tape, or anything else; your future self, and the future value of your art, will deeply regret it. This is one of those small details that separate a true art lover from someone just hanging a picture, an irreversible mistake if ignored. Look for water-activated linen tape, Japanese paper hinges, or self-adhesive archival tapes specifically designed for art conservation. Their adhesive is formulated to be stable and removable, unlike common household tapes that can yellow and stain over time, becoming permanent stains. This isn't just tape; it's a promise to your art's future. The key characteristics are its stability, strength, and most importantly, its reversibility without causing damage or leaving residue. When applied correctly, these tapes form strong but flexible bonds that can be carefully undone if the art ever needs to be removed for conservation or re-framing, protecting its integrity for generations.
- Heavy Cardboard or Acid-Free Foam Core (for backing): To provide structural support behind your artwork and mat, keeping everything flat and stable within the frame. Just like the mat board, ensure this is acid-free to prevent acid migration and offer another layer of protection for your masterpiece. This also prevents bowing and ensures your art remains perfectly presented over time. Foam core, in particular, offers rigidity without excessive weight, making it an excellent choice for larger framed pieces. It's the sturdy spine for your matted creation, keeping everything aligned and protected. For most applications, 4-ply or 8-ply mat board (acid-free, of course) or 3/16-inch acid-free foam core is suitable. For very large or heavy artworks, a thicker foam core or even a specialized rigid archival board might be necessary to prevent bowing and provide robust long-term support. Remember, the backing board is just as important as the mat in creating a truly archival package.

With your tools at the ready, you're now armed and prepared to embark on the actual matting process. This is where the theoretical knowledge translates into tangible results, so take a deep breath and trust the steps. Remember, every master started as a beginner, and every perfect mat began with a first, careful cut.
The Ritual of the Cut: A Step-by-Step Guide to Matting Your Artwork (From Raw Board to Refined Presentation)
Before you even think about cutting, I always recommend doing a few practice cuts on scrap pieces of mat board. Seriously, it's invaluable. It allows you to get a feel for your tools, the blade pressure, and the overshooting technique without the pressure of potentially ruining your good mat board. Think of it as a warm-up exercise before the main performance – a dress rehearsal before opening night. This practice helps build muscle memory and confidence, which are crucial when you're working with your actual art.
Alright, deep breath. This is where the magic truly happens, and yes, it genuinely feels like a ritual of precision and patience. These two qualities – precision and patience – are your best friends here. I remember my first few attempts at cutting mats... let's just say they were character-building experiences involving a few crooked lines, some regrettable waste, and definitely a few choice words whispered under my breath (mostly aimed at myself). But with a bit of focus, a steady hand, and following these steps, you'll be creating professional-looking mats in no time. There’s an immense, quiet satisfaction when you pull off that perfect, clean bevel, transforming a simple piece of art into a gallery-worthy display. It's about translating your vision into a tangible, protective, and aesthetically pleasing border for your cherished artwork. It’s a craft that rewards attention to detail, transforming a simple piece of paper into a museum-worthy presentation. Don't be discouraged by initial imperfections; every cut refines your skill, and soon you'll find a rhythm that feels intuitive and precise. Remember, the journey from raw board to refined presentation is as much about patience and learning as it is about the final product.
Step 1: Measure Your Masterpiece (and Your Frame) with Precision (The Foundation of Success)
This might sound obvious, but I've seen countless projects go awry because of a rushed or inaccurate measurement. It's like building a house on a shaky foundation; it just won't stand the test of time (or look very good).
First, and I simply can't stress this enough, accurately measure your artwork. Let's denote its dimensions as Artwork Width (AW) and Artwork Height (AH). Use a good, rigid ruler or a precise tape measure. Accuracy here is paramount; even a slight miscalculation can throw off your entire mat. Then, measure the inside dimensions of your frame (Frame Width (FW) and Frame Height (FH)), going from rabbet to rabbet (that's the inner lip or recess where the glass and artwork will sit). Your cut mat board will need to fit snugly within this frame opening, ideally with about 1/16 to 1/8 inch of play – just enough to insert it without force, but not so much that it rattles around. Your artwork will then be centered within the mat's opening. Always, always, always measure twice, or even thrice, before marking or cutting. A mis-measurement here means a ruined mat, wasted material, and a good dose of frustration – trust me, nobody wants that! This isn't a step to rush, it's the foundation of a successful mat. Consider using a dedicated framing square to ensure perfectly true corners when measuring your frame rabbet and your mat board. I've learned this the hard way: a hasty measurement is a wasted mat, every single time. For very large artworks, consider using a long, steel ruler or even a laser measure for consistent results. And when you think you're done measuring, step away for a moment, then come back and remeasure one last time. It’s surprisingly effective for catching overlooked errors before they become costly mistakes.

Step 2: Determine Your Borders (The Art of Margins and Visual Weight)
This step is where you begin to truly frame the narrative of your art, both literally and figuratively. It's about creating a harmonious relationship between the artwork and its surrounding space, guiding the viewer's eye with subtle elegance.
This is where personal taste truly comes into play, and it's a crucial aesthetic decision that can dramatically alter how your artwork is perceived. While some prefer equal borders all around – a clean, modern look that suits contemporary pieces – there's a classic guideline, often called the "bottom weight" rule or the "optical center" principle. This suggests making the bottom border of the mat slightly wider than the top and side borders. Why? Because visually, a piece of art tends to feel like it's sinking if the bottom border is the same width as the top. A wider bottom margin creates an optical balance, making the artwork feel more grounded and stable within the frame. It subtly lifts the perceived center of gravity, elevating the art.
Experiment! You might aim for side margins equal to each other, a top margin slightly wider, and a bottom margin that's wider still. For example, if your sides are 2 inches, your top might be 2.25 inches, and your bottom 2.5 inches. This is where you develop your eye and truly make the presentation your own. I like to lay the art on the mat board and visually adjust until it just feels right, often trusting my gut more than a strict measurement rule at this stage, but always with that 'bottom weight' principle in mind. For larger artworks, you might find that wider margins (3-4 inches or more) are needed to truly give the piece enough visual breathing room, whereas smaller pieces can be overwhelmed by excessively wide borders. It’s an artistic decision in itself, extending the composition beyond the artwork's edges. A common starting point for the bottom weight rule is to make the bottom border 1/4 to 1/2 inch wider than the top and side borders. To visually test your borders, you can use strips of scrap mat board, or even cut paper, to lay around your artwork and see what feels most balanced before making any permanent marks. Trust your eye, but let the rules be your guide. For a minimalist look, you might even consider very narrow borders, but always ensure the bottom is still slightly wider to maintain that critical optical balance. This step is about enhancing the artwork's presence, making it a deliberate focal point rather than just 'stuck in a frame'.

Step 3: Mark Your Mat Opening (Lightly, Always Lightly – Precision is Your Ally)
This is where your vision truly starts to take shape on the mat board. Remember, these lines are your blueprint, so treat them with the utmost respect. They dictate the final outcome, so don't rush this delicate stage.
Okay, mat board face down, please. This is important because you'll be cutting from the back, and the bevel will angle away from the front. Using your trusty pencil (a light 2H is best) and metal ruler (or a T-square for guaranteed right angles), lightly mark the exact dimensions of your desired opening. Crucially, ensure these lines are perfectly perpendicular. A T-square or a good carpenter's square is invaluable here – don't eyeball it, unless you're aiming for a wonderfully wonky, abstract mat (which, admittedly, has its charm, but not for this project!). These marks will be your cutting guides. Remember, you can always erase pencil lines if they're light enough. If you press too hard, you'll leave an indentation that can show through on the front, especially on lighter mat colors, ruining the pristine surface. I made that mistake more times than I care to admit early on, trying to rush, and it always ended in regret. For darker mat boards, a white charcoal pencil or a silver gel pen can provide visible marks that are also easy to erase or wipe away after cutting. This is where the old adage 'measure twice, cut once' truly sings. Work in good, even lighting to ensure your marks are clear but faint. If you're using a dark mat board, a white or silver drawing pencil can provide visible, yet easily erasable, marks without indenting the surface. Precision at this stage is a silent guarantee of a stunning final product. Take your time, get comfortable, and ensure your lines are exact; these are the bones of your presentation.
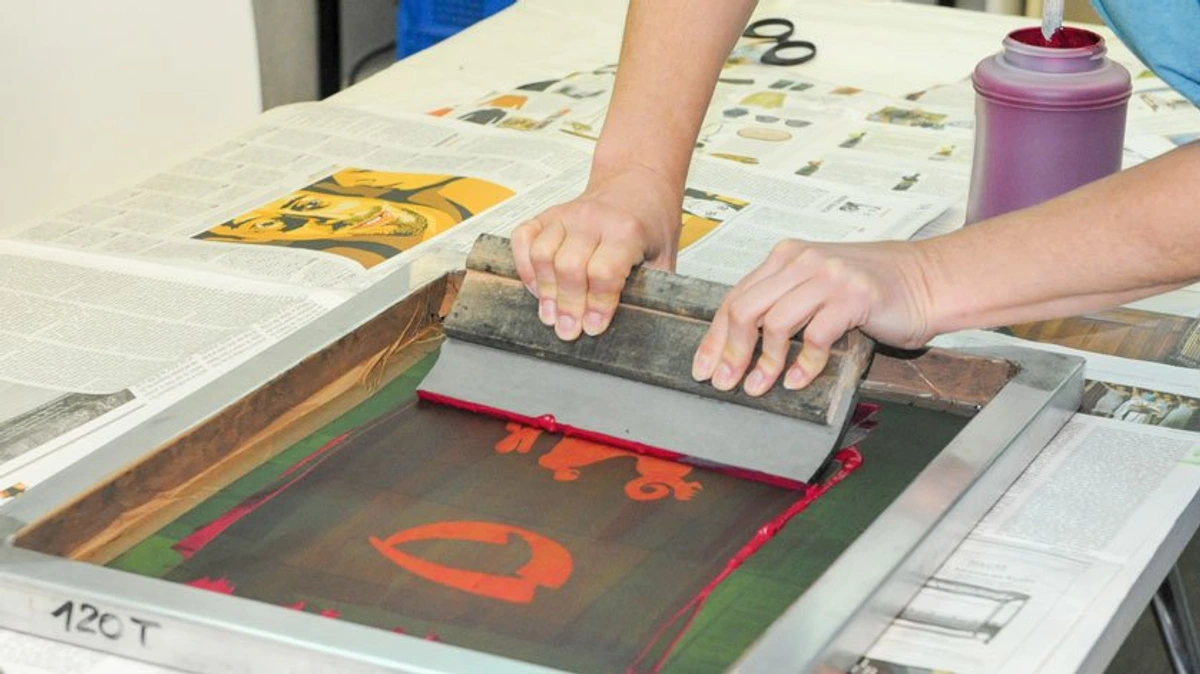
Step 4: The Bevel Cut (The Professional Touch – Mastering the Angled Edge)
This is often considered the most intimidating part, but I promise, with a little practice and the right technique, you'll be creating crisp, gallery-worthy bevels in no time. It's the detail that truly elevates your mat from DIY to delightful.
This is the part that often intimidates people, making them think 'professional framer only!' But honestly, it's simpler than you think with the right tools and a bit of nerve. A bevel cut means the edge of the mat opening is cut at a 45-degree angle. This creates a subtle shadow line around your artwork, adding depth and a truly professional, elegant touch that beautifully frames the art. Most dedicated mat cutters have a specific 45-degree blade setting, which makes this much easier than trying to freehand it with a utility knife.
Here's the process, and remember, practice makes perfect – seriously, use those scrap pieces of mat board!

- Position your mat board face down. This is absolutely critical! The bevel cut needs to angle away from the artwork, so it appears as a clean, sharp edge from the front. If you cut from the front, the bevel would angle towards the art, creating an ugly shadow. This is a common rookie mistake, so mark it clearly in your mind!
- Align your metal ruler precisely with one of your lightly penciled cut lines. Press down firmly to prevent any slippage during the cut. You might even want to place a non-slip pad under your ruler, or use a specialized ruler with a cutting guide. Stability is paramount.
- Set your mat cutter or utility knife to a 45-degree angle. If you're using a utility knife, this requires a very steady hand and consistent angling, which is why a dedicated mat cutter is a worthwhile investment. Start in a corner, pressing down firmly but not too hard initially (you don't want to tear the board or slip). The goal is control, not brute force.
- Score the line once, then make several passes, gradually cutting deeper. Do not try to cut through the entire mat in one powerful go, especially with a utility knife. This is how you get jagged edges and frustration. Patience is key here; let the blade do the work over multiple passes. Think of it like carving, not chopping.
- Overshoot the corners slightly (I aim for about 1/16 to 1/8 inch) into the next cutting line. This sounds counterintuitive, but it's the secret to ensuring a clean, sharp, perfectly joined corner when viewed from the front. If you stop precisely at the corner, you often get a tiny bit of uncut paper that looks messy – a true sign of a hurried job. Practice, practice, practice on scrap pieces first! Seriously, save yourself the heartache and mat board; practice cuts are invaluable for mastering this crucial technique. A common beginner error is 'undershooting' the corners, leading to small, unsightly tags of uncut paper. Overcutting ensures these are removed cleanly, creating that crisp, gallery-quality finish. It's the little detail that screams 'professional!' A fresh blade, as mentioned earlier, is absolutely paramount here. If your blade drags or tears the paper, it's time to change it. Maintain consistent downward pressure and a smooth, even stroke. Don't rush; let the blade glide, and focus on the angle. This control is what separates a good mat from a great one, allowing the bevel to meet seamlessly at the corners.
Step 5: Attach Your Artwork (The Archival Hinging Method – Allowing Your Art to Breathe)
This step is less about cutting and more about compassion for your artwork. It's about securing your piece in a way that respects its physical properties and ensures its longevity. Think of it as a gentle embrace, rather than a restrictive hold.
Once your mat opening is perfectly cut, it's time to attach your artwork. This step is crucial for the long-term health of your piece and must be done carefully to allow for the natural expansion and contraction of the paper due to humidity and temperature changes, preventing unsightly buckling or rippling. Think of it as allowing your art to breathe and flex with the environment, rather than forcing it into rigid submission – which, inevitably, leads to tears. This flexible attachment is a cornerstone of archival framing, preventing physical stress on the artwork. It's a fundamental principle of conservation, ensuring your art can age gracefully.
- Position your artwork face down on a clean, dust-free surface. Carefully place your freshly cut mat board on top, aligning the artwork perfectly within the mat's opening. Double-check this alignment from the front once before proceeding. This initial alignment is paramount – what looks good now will be permanently preserved, so take your time.
- Create a 'hinge' on the top edge. This is typically done with two small pieces of archival linen tape (or pH neutral hinging tape). Attach one edge of each piece of tape to the very top edge of the back of your artwork, leaving about 1/8 inch of the tape on the artwork itself. Then, fold the artwork back and attach the other edge of the tape to the back of the mat board, creating a small, flexible 'T-hinge' or 'pendulum hinge'. The artwork should essentially be suspended from the top of the mat, allowing it to move slightly with changes in humidity. For heavier artworks, you might use 'Japanese paper hinges,' which involve strips of thin, strong, long-fibered paper adhered with a reversible starch paste. These offer incredible strength while remaining fully archival and flexible. Think of these as tiny, flexible suspension bridges for your art, offering both support and freedom.
- Crucial detail: Do NOT tape all four sides of your artwork! This is a common beginner's mistake that completely restricts the paper, leading to buckling, creasing, and even tearing as the paper tries to move. This archival hinge method allows the artwork to hang freely and move subtly, preventing damage over time. It's a simple, elegant solution that professional framers swear by for good reason. Trust me, I've seen the irreversible damage caused by rigid attachment, and it's heartbreaking. For very large or heavy artworks, a combination of multiple T-hinges at the top and even some L-hinges on the sides (allowing for more lateral movement without restraint) can be employed. The key is to always allow the artwork to 'float' slightly, responsive to micro-environmental changes, which is why dry mounting is almost never recommended for valuable pieces or any artwork you intend to preserve.
Step 6: Final Assembly (The Moment of Truth!)
This is the grand finale, where all your careful planning and meticulous execution come together. It's the satisfying click of pieces fitting perfectly, transforming your workspace into a miniature gallery.
Now for the satisfying culmination! Carefully place your matted artwork, with its new archival hinge, into the frame. Ensure it sits flush and centered. Then, add a piece of acid-free foam core or heavy cardboard behind it for structural support and to press the mat against the glass. You might also add a barrier paper (like glassine or Mylar) between the backing and the artwork, especially if the foam core isn't museum grade, for an extra layer of protection. Seal the back of the frame, typically with framer's tape, to prevent dust and insects from entering – those tiny intruders are shockingly good at finding their way in. This 'dust seal' is often made with a specialized, breathable acid-free paper tape. You'll then use flexible framing points or brads to secure the backing package firmly within the frame rabbet. And voilà! Your masterpiece is now beautifully, professionally, and archivally presented. It's truly a moment of pride when you step back and see your art transformed, a testament to your patience and precision. You've just elevated your art from a simple picture to a true focal point, ready for display. For an extra layer of protection, consider adding a dust cover paper to the back of the frame, adhering it with a specialized acid-free framer's tape to create a completely sealed archival environment. Finally, select appropriate hanging hardware for your frame's weight and the wall type, ensuring your beautifully matted and framed artwork is securely displayed. Your masterpiece is now ready to captivate for generations, safe from the ravages of time and the environment.

Beyond the Basic: Elevating Your Matting Game (Unlocking Creative Presentation)
Once you've mastered the basics, trust me, there's a whole world of matting possibilities to explore. It's like learning the basic brushstrokes and then moving on to mastering glazing techniques in oil painting – the foundational skills unlock endless creative expression. This section is where we delve into more advanced techniques and considerations that can truly elevate your art presentation, moving from merely functional to profoundly artistic. It's about pushing the boundaries and letting your creativity truly shine, making the mat an integral part of the art itself, a visual extension of your artistic voice.
Understanding Mat Board Types: More Than Just Color (Choosing the Right Foundation)
Before diving into creative matting, it's good to know that not all mat boards are created equal. They differ in material, thickness, and, most importantly, their archival properties. Making an informed choice here is fundamental to both the visual impact and the long-term preservation of your artwork. Let's break down the common types you'll encounter. This knowledge is your secret weapon for ensuring your art is protected for generations and presented with optimal visual harmony.
Mat Board Type | Description | Archival Quality | Best For |
|---|---|---|---|
| Decorative Mat | Made from wood pulp, often buffered with alkaline agents to slow acid degradation to some extent, but not fully acid-free. Wide range of colors. | Good | Non-valuable prints, temporary displays, student work, or pieces with short-term exhibition needs, where longevity isn't the primary concern. |
| Conservation Mat | Made from purified wood pulp or often 100% alpha cellulose, pH neutral, and lignin-free. Offers significantly better protection than decorative mats, blocking acid migration more effectively. | Better | Limited edition prints, photographs, art of moderate value, or any piece you want to protect for several decades, offering a balance of cost and protection. |
| Museum Mat | 100% cotton rag, naturally lignin-free and acid-free. The highest standard of protection, designed for indefinite preservation, resisting environmental degradation and offering superior structural stability. | Best | Irreplaceable artworks, valuable pieces, historically significant documents, or any art requiring long-term, uncompromised preservation, such as museum collections. |
| Rag Mat | A general term, usually referring to cotton rag mats, denoting high archival quality and durability due to the inherent stability of cotton fibers. | Best | Any artwork requiring top-tier protection and longevity, often preferred by museums and serious collectors for its supreme archival properties. |
| Fabric-Wrapped Mat | A standard mat board (check core for archival properties) covered with linen, silk, or other fabric. Adds texture, luxury, and a tactile dimension to the presentation, making the mat an integral part of the artwork's aesthetic. These are often used to enhance the visual weight of an artwork or to complement a frame's finish. Remember to ensure the fabric itself is also pH neutral. | Varies (check core) | Enhancing specific art styles (e.g., traditional, historical portraits, textiles), creating a luxurious feel, or complementing a specific aesthetic where texture is desired. |
Alternative Mounting Techniques (Beyond the Standard Hinge – When Your Art Demands a Different Approach)
While traditional hinging is the gold standard for most works on paper, there are other methods for specific effects or artworks. Float mounting involves raising the artwork slightly above a backing board, often with subtle archival hinges or tabs, so that its edges are visible and a shadow is created, giving it a three-dimensional, airy feel. This is particularly striking for works with interesting deckled edges, transparent papers, or when you want the paper itself to be a feature, celebrating its texture and form. The negative space created around the floating artwork adds a contemporary touch that can be truly captivating, making the art appear to hover weightlessly. Then there's dry mounting, which uses heat-activated adhesive to permanently bond the artwork to a backing board. I'm generally wary of dry mounting for valuable or archival pieces, as it's irreversible and the heat can damage sensitive media, altering its texture or color, or potentially causing an unsightly sheen. Always consider the long-term impact on your art before choosing a permanent method. It's akin to knowing when to use thin washes or heavy impasto in painting; each technique has its place, but the stakes are much higher with irreversible mounting. Your choice here speaks volumes about your understanding of art preservation and your commitment to the artwork's future integrity. For most irreplaceable pieces, permanent mounting is a definite no-go.
V-Grooves and Multiple Openings (Adding Sophistication and Cohesion – Crafting Intricate Displays)
Beyond just the main opening, creative matting can involve a V-groove – a thin, etched line cut into the surface of the mat, typically about 1/4 inch in from the main opening. This subtle detail adds another layer of depth and visual interest, drawing the eye inward without adding more physical bulk, creating a subtle, elegant border within a border. It’s a sophisticated touch that can elevate a simple mat, adding a tailored finish that whispers elegance. And don't forget multiple openings! For series of small artworks, photographs, or even commemorative pieces, you can cut several windows into a single mat board, creating a cohesive display. Just be sure to meticulously measure and plan your layout to ensure perfect spacing and alignment – precision is amplified when you're dealing with more than one opening. For multiple openings, I recommend creating a detailed template first to avoid costly errors and ensure a professional result. These techniques are like adding delicate filigree to your art's presentation, transforming a simple mat into a work of art itself. The V-groove, specifically, works by catching light and shadow, creating a visual break that defines the edge of the artwork with understated grace, often enhancing minimalist pieces or traditional portraits.
Color Play and Double Matting (A Masterclass in Visual Harmony – The Palette of Presentation)
The color of your mat board can dramatically change how an artwork is perceived, almost like a mood ring for your art. While a neutral white, off-white, or light grey is always a safe, elegant bet, providing a clean, non-distracting frame, don't be afraid to experiment! I've found that pulling a subtle hue directly from within the artwork itself for your mat color can tie everything together beautifully, making the piece feel cohesive and deliberate. Conversely, a bolder, contrasting color can create a dynamic pop, especially for contemporary or abstract pieces like my own. It's about enhancing, not overpowering, and knowing when to make the mat recede or step forward. Consider the emotional tone of the artwork; a somber piece might benefit from a deep charcoal mat, while a vibrant abstract could pop with a bright, complementary hue. Always test swatches against your artwork in various lighting conditions to see the true effect.
And then there's double matting – a technique where two mats are layered on top of each other. Typically, the bottom mat is revealed only as a very thin line (1/8 inch or less, sometimes called a 'fillet' or 'liner') around the artwork. This adds incredible depth, a subtle pop of complementary or contrasting color, and an undeniable touch of sophistication. For a truly luxurious presentation, you can even explore triple matting, which, as the name suggests, involves three layers for even greater depth and visual interest, creating an almost architectural feel for your artwork. The subtle interplay of colors and depths can dramatically enhance the perceived value and artistry of the piece. It's a symphony of color and dimension, creating a bespoke setting for your art, a true masterclass in visual harmony and thoughtful presentation.
Glazing Options: Protecting Your Art from the Unseen (The Invisible Shield)
Beyond the mat, the choice of glazing (the glass or acrylic protecting your art) is another critical decision for long-term preservation and optimal viewing. Standard picture frame glass offers basic protection, but for anything you truly cherish, you should consider alternatives. Think of it as the final, transparent layer of defense against environmental threats and visual impediments.
- UV-Filtering Glass/Acrylic: This is an absolute must for valuable or light-sensitive artworks. It blocks a significant percentage (often 97-99%) of harmful ultraviolet (UV) rays, which are the primary culprits behind fading and discoloration over time. Think of it as sunscreen for your art. I've seen too many beautiful pieces fade over the years because they lacked this crucial protection, especially watercolors and photographs which are particularly vulnerable to light damage. This protection extends the life and vibrancy of your pigments dramatically.
- Anti-Reflective Glass/Acrylic: While not strictly for preservation, anti-reflective options dramatically reduce glare, allowing you to see the artwork itself, rather than reflections of your living room. It enhances the viewing experience immensely, making the art truly pop, almost as if there's no glass at all. This is achieved through special coatings that diffuse reflected light, giving an astonishingly clear view.
- Museum Glass/Acrylic: This combines the best of both worlds: superior UV protection (often 99%) with virtually invisible anti-reflective properties. It's an investment, but for your most treasured pieces, it's worth every penny, making the glass almost disappear. The clarity is astonishing, allowing the artwork to be viewed in its purest form without any visual interference. While glass is traditional, acrylic options (often called Plexiglas or Perspex) are lighter and shatter-resistant, making them ideal for larger pieces or in homes with children or in earthquake-prone areas. High-quality acrylics also come with UV and anti-reflective properties, matching or exceeding glass performance, often with better scratch resistance than standard acrylic. Always weigh the pros and cons based on your artwork's value, size, and display environment, considering factors like weight, safety, and long-term clarity.
Choosing the right glazing ensures your art is not only physically protected but also visually accessible without hindrance. It's a key part of the overall presentation strategy. Don't let reflections or UV damage steal the show from your cherished artwork. It's the invisible shield that guards your art's brilliance for years to come.
The Allure of the Shadow Box (When Your Art Needs Room to Breathe – Literally)
The Allure of the Shadow Box (When Your Art Needs Room to Breathe – Literally)
The Allure of the Shadow Box (When Your Art Needs Room to Breathe – Literally)
Sometimes, a flat mat just isn't enough to do justice to a piece, especially for artworks with significant texture, three-dimensional elements, or small objects you want to display alongside the main piece. This is where a the role of shadow boxes in displaying art comes into its own. A shadow box provides even more depth than traditional framing, allowing the art or objects to be set back from the glass. This creates a dramatic, multi-layered, and captivating three-dimensional effect. It's a different beast entirely from standard matting, requiring a different approach, but a fascinating one for certain types of art, like mixed media, collages, textiles, small sculptures, or cherished memorabilia you want to display alongside a photograph or drawing. When building a shadow box, ensure you use archival spacers and backing to maintain the protective air gap and prevent any objects from pressing against the glazing. Think of it as creating a miniature stage for your art, offering an immersive viewing experience that highlights its depth and physicality. It's a wonderful way to tell a deeper story with your display, inviting closer inspection and interaction, a truly unique presentation that can transform a collection of items into a cohesive narrative.
Floating Frames: An Alternative Approach (When the Canvas Itself is the Star)
Floating Frames: An Alternative Approach (When the Canvas Itself is the Star)
Floating Frames: An Alternative Approach (When the Canvas Itself is the Star)
For canvas art that you want to stand proud and take center stage without the traditional confines of a mat, a a guide to building a floating frame for canvas art is a fantastic alternative. This framing style leaves a small, deliberate gap between the canvas and the frame, making the canvas appear to 'float' effortlessly within its embrace. This is particularly effective for abstract art, pieces with beautifully painted edges (gallery-wrapped canvases), or any artwork where you want a clean, contemporary look that doesn't crop the edges. It's all about choosing the right presentation that best complements the specific artwork and its unique qualities, allowing the art to command attention without a heavy visual boundary. It’s a minimalist's dream, enhancing the art without distraction. This method is particularly popular for modern and contemporary abstract art for small spaces: maximizing impact in compact areas, where the raw edges or continuation of the painting around the canvas sides are part of the artwork's integrity. The subtle recess between the canvas and the frame creates a clean, sophisticated line that doesn't compete with the art, allowing it to truly command attention. It's a deliberate choice that communicates confidence in the artwork itself.
Common Matting Terminology (Speaking the Language of Preservation)
Navigating the world of matting can sometimes feel like learning a new language, with terms like "rabbet" and "alpha-cellulose" flying around. Don't worry, you're not alone! Understanding these key terms will not only empower you to make more informed decisions but also allow you to communicate more effectively with professional framers or fellow artists. Consider this your quick glossary, a cheat sheet to the essential vocabulary of art presentation.
Term | Definition | Why It Matters |
|---|---|---|
| Acid-Free | Materials with a pH level of 7.0 or higher, meaning they are free from acidic compounds that can degrade artwork over time. Often made from purified wood pulp or cotton. | Crucial for longevity: Prevents yellowing, brittleness, and "acid burn" on your artwork. Essential for archival preservation, ensuring your art's legacy. |
| Alpha-Cellulose | A highly purified form of cellulose from wood pulp, treated to remove lignin and other acidic components. Used in conservation and museum grade mat boards. | Superior archival material: Provides excellent, cost-effective archival properties, a step up from decorative mats. |
| Archival | Refers to materials and methods designed to protect and preserve artworks for an indefinite period without causing degradation. Synonymous with museum-grade or conservation-grade. | Ensures lasting value: Guarantees your art will endure for generations, maintaining its original condition and intrinsic value. |
| Bevel Cut | An angled cut (typically 45 degrees) on the inner edge of the mat opening, creating a subtle shadow and visual depth around the artwork. | Professional finish: Adds sophistication and draws the eye inward, enhancing the artwork's presentation, making it feel more deliberate. |
| Bottom Weight | The practice of making the bottom border of a mat slightly wider than the top and side borders, creating an optical balance. | Aesthetic balance: Prevents the artwork from appearing to "sink" within the mat, making it feel more grounded and visually stable. |
| Conservation Mat | Mat board made from purified wood pulp (alpha-cellulose) that is pH neutral and lignin-free, offering excellent protection for several decades. | Good long-term protection: A cost-effective choice for valuable but not irreplaceable artworks, balancing budget and preservation. |
| Deckled Edge | A natural, rough, or feathered edge on handmade paper, often left exposed in float mounting to highlight the paper's unique character. | Highlights craftsmanship: Adds an organic, artistic touch, especially for fine art prints or handmade papers, celebrating their unique textures. |
| Dry Mounting | A permanent mounting technique using heat-activated adhesive to bond artwork to a backing board. Generally not recommended for valuable or archival pieces due to its irreversibility. | Avoid for archival pieces: While useful for some displays, it can damage sensitive media and is irreversible, potentially devaluing the art. |
| Float Mounting | A mounting technique where the artwork is raised slightly above the backing board, making its edges visible and creating a subtle shadow, giving a three-dimensional effect. | Modern presentation: Emphasizes the artwork's edges and texture, ideal for works on beautiful paper or with unique borders, creating an airy feel. |
| Glazing | The protective layer of glass or acrylic used in framing, positioned in front of the mat and artwork. | Physical and UV protection: Shields art from dust, pollutants, and harmful UV rays that cause fading, preserving its color and integrity. |
| Hinging | The archival method of attaching artwork to the mat or backing board using small, reversible strips of pH-neutral tape, allowing the art to expand and contract naturally. | Prevents damage: Crucial for allowing paper to "breathe," avoiding buckling, creasing, or tearing, ensuring the art's longevity. |
| Lignin-Free | Materials that do not contain lignin, a natural polymer in wood pulp that breaks down to form acids, causing yellowing and brittleness. | Prevents degradation: A key indicator of archival quality, often found in combination with "acid-free," crucial for long-term stability. |
| Mat Board | A thick, rigid, acid-free board with an opening cut into its center, placed over the artwork to create a border and provide an air gap. | Protects and enhances: Creates visual space, protects from glass contact, and draws focus to the artwork, elevating its presentation. |
| Museum Glass/Acrylic | Premium glazing option that combines high UV protection with anti-reflective properties, making the glass almost invisible. | Optimal viewing and protection: Provides the best of both worlds, ensuring art is seen clearly and protected from light. |
| Museum Mat | The highest standard of mat board, made from 100% cotton rag, naturally acid-free, and lignin-free for indefinite preservation. | Ultimate preservation: Reserved for irreplaceable, valuable, or historically significant artworks requiring the best possible protection. |
| Rabbet | The inner lip or recess of a frame where the glass, mat, artwork, and backing board are seated. | Ensures fit: Accurate measurement of the rabbet is essential for the entire framed package to fit securely and prevent movement. |
| UV-Filtering Glazing | Glass or acrylic specially treated to block a high percentage of harmful ultraviolet rays. | Prevents fading: Essential for preserving the vibrancy and integrity of light-sensitive artworks over time. |
| V-Groove | A thin, etched line cut into the surface of the mat, typically parallel to and slightly inside the main opening, adding a subtle decorative detail. | Adds sophistication: Creates an extra layer of visual interest and depth without adding physical bulk, enhancing the mat's aesthetic. |
This foundational vocabulary will serve you well, whether you're debating archival options with a framer or simply understanding the components of your next framing project. It's about speaking the language of art preservation with confidence.
Common Matting Pitfalls (And How to Avoid Them, Because I've Made Them All)
We all make mistakes, especially when learning something new. I certainly have – many, many times. The key is to learn from them and, ideally, learn from my mistakes so you don't have to make them yourself! Here's a quick rundown of common matting errors and how to steer clear, because I've probably committed every single one of these at some point. Consider this your cheat sheet to matting success, a roadmap to avoiding unnecessary frustration and wasted materials.
We all make mistakes, especially when learning something new. I certainly have – many, many times. The key is to learn from them and, ideally, learn from my mistakes so you don't have to make them yourself! Here's a quick rundown of common matting errors and how to steer clear, because I've probably committed every single one of these at some point.
Mistake | Consequence | How to Avoid |
|---|---|---|
| Not using acid-free materials | Artwork discolors, yellows, and degrades over time | Always buy mat boards and tapes explicitly labeled 'acid-free' or 'archival' and look for certifications like conservation-grade or museum-grade. This is the single most important rule for long-term preservation. |
| Dull knife blade | Jagged, torn, or uneven mat edges | Change blades frequently; test sharpness on a scrap piece before cutting, and always have spares. A sharp blade minimizes effort and reduces the chance of slippage, leading to cleaner, safer cuts. |
| Rushing the cut | Crooked lines, over/undershot corners, frustration | Take your time; make multiple light passes instead of one heavy cut. Practice on scrap pieces! The slow and steady approach consistently yields superior, professional-looking results and saves you from wasting expensive materials. |
| Incorrect measurements | Mat opening too big/small, artwork not centered | Measure three times, mark once. Double-check all calculations before cutting, and use a consistent ruler and a dedicated framing square. Even a millimeter off can be glaringly obvious in the final presentation. |
| Taping all four sides of artwork | Artwork buckling, tearing, or creasing over time | Use the archival hinge method (top edge only) to allow for paper movement. Never restrict all sides, as paper naturally expands and contracts with humidity, and full adhesion will cause buckling or tearing. |
| Not using a cutting mat | Damaged work surface, dull blades | Always use a self-healing cutting mat to protect your table and tools. It's a non-negotiable investment that also helps prolong blade life and provides a stable surface for accurate cuts. |
| Cutting from the wrong side | Bevel angles towards the artwork, creating an ugly shadow | Always cut from the back of the mat board. Imagine the bevel sloping away from the front, creating that clean, professional edge you see in galleries. |
| Inconsistent blade angle | Uneven bevel, gaps at corners | Use a dedicated mat cutter or a steady hand with a ruler guide; practice consistency until it's second nature. An uneven bevel instantly detracts from the professional finish. |
| Forgetting to clean workspace/art | Dust, debris trapped between mat and glass | Ensure your workspace, artwork, and mat are spotless before final assembly. Use a soft brush or air blower, and wear clean cotton gloves when handling the artwork and mat to prevent fingerprints or dust transfer. |
| Not considering UV protection | Artwork fades over time from light exposure | Use UV-filtering glass or acrylic in your frame, especially for valuable pieces or those in direct sunlight. This invisible shield significantly slows fading and discoloration, preserving your art's original vibrancy. |
| Applying too much pressure in one pass | Tearing mat board, slipping blade, uneven cuts | Score lightly first, then deepen cuts gradually over several passes. Let the blade do the work; brute force leads to tears, slips, and frustration, compromising the mat's integrity. |
| Eyeballing squareness/perpendicularity | Crooked mat opening, unprofessional finish | Always use a T-square or carpenter's square for absolute precision when marking lines. Never guess, as even slight inaccuracies will be magnified and noticeable in the final presentation. |
| Improper Storage | Art vulnerable to pests, dust, or damage post-framing | Store framed art upright in stable conditions, away from humidity, extreme temps, and direct light. Consider archival boxes or sleeves for unframed matted pieces to protect them from dust and physical damage. |
| Ignoring Environmental Factors | Mold growth, paper degradation, discoloration | Maintain stable temperature and humidity in the display area, ideally around 70°F (21°C) and 50% relative humidity. Avoid hanging art in bathrooms, kitchens, or direct sunlight, which are notorious for causing rapid degradation. |
| Using Non-Specialized Tools | Inaccurate cuts, damage to materials, poor finish | Invest in proper mat cutting tools (a dedicated mat cutter, heavy-duty metal ruler with a lip, self-healing mat) for consistent, professional results. Makeshift tools often lead to frustration and ruined materials. |

Frequently Asked Questions About Matting
Matting can seem a bit mysterious, so I get a lot of questions about it. Here are some of the most common ones I hear, and some of my personal take on them. Hopefully, these answers will demystify the process and boost your confidence!
Q: What exactly is a mat? (Demystifying the Art World's Silent Partner)
A: A mat (or mat board) is a thin, flat piece of acid-free material, usually made from purified wood pulp or cotton rag, with an opening cut into its center. It's strategically placed between the artwork and the frame's glass, serving both crucial protective and aesthetic functions. Think of it as a carefully designed window through which you view the art, creating a visual boundary that helps focus the eye and allows the artwork to breathe. It defines the artwork's space, setting it apart from its surroundings and inviting the viewer to engage with it more deeply. Historically, mats have been used for centuries to protect and enhance artworks, evolving from simple paper borders to the sophisticated archival solutions we use today. It's the silent stagehand that ensures your art is always perfectly lit. Beyond its visual role, it creates a crucial microclimate, a buffer that helps protect the artwork from environmental fluctuations and direct contact with the frame's glass, ensuring its physical longevity. It acts as a miniature stage, elevating the artwork and creating a visual pause for the viewer.

Q: Why can't I just put my artwork directly into a frame with glass? (The Hidden Dangers of Direct Contact)
A: You can, theoretically, but it's strongly discouraged for most art on paper, especially anything of value or sentimental importance. Direct, prolonged contact with the glass is a recipe for disaster, a real archival no-no. It can lead to condensation and moisture build-up, which causes the artwork to stick permanently to the glass, lift delicate pigments, or even encourage mold and mildew growth in that damp, trapped environment. Over time, even static electricity can cause delicate media to lift and adhere to the glass, leading to irreversible damage or 'blocking' where the artwork fuses to the glass surface. The mat creates that essential, protective air gap, acting as a crucial buffer and preventing these catastrophic issues. Beyond the functional aspect, aesthetically, a mat almost always enhances the presentation significantly, making the artwork feel more complete, more deliberate, and more 'finished.' It truly is a silent guardian for your art, a bodyguard against environmental hazards and visual clutter that can compromise its integrity. Trust me, learning this lesson the hard way is a regret no one wants. This protective barrier isn't just a nicety; it's a fundamental principle of art conservation, preventing issues like 'blocking' where the art adheres to the glass, or even the growth of destructive mold in humid conditions. It's a small space with a monumental impact.
Q: Is it really necessary to use acid-free materials? (The Non-Negotiable Rule of Archival Preservation)
A: Absolutely, unequivocally, yes! This is not merely a suggestion; it's a non-negotiable for proper, long-term preservation. Non-acid-free materials, typically made from untreated wood pulp, contain lignins and other acidic chemicals that act like tiny, slow-acting destructive agents. Over time, these will break down, releasing acids that will inevitably migrate into your precious artwork. This causes irreversible damage: your art will yellow, become brittle, fade, and ultimately degrade, a process often referred to as 'acid burn.' Using archival, acid-free mats, backing, and tapes ensures your art remains in pristine condition for generations to come. I learned this the hard way with a few early pieces I didn't properly preserve, and it's a lesson I now emphasize to every artist and collector I meet. Think of it as an insurance policy for your creative output and a commitment to its legacy – you want your art to be seen and appreciated for decades, right? Always look for materials explicitly labeled 'pH neutral,' 'acid-free,' or 'conservation/museum grade,' and for cotton rag if the piece is truly irreplaceable. It's a small upfront investment that pays dividends in artistic longevity. This commitment to archival quality is a testament to your respect for the art and ensures its legacy, allowing future generations to appreciate it in its original glory. Always scrutinize labels and, if in doubt, ask for assistance at a reputable art supply store or framer.

Q: How do I choose the right mat color for my artwork? (Navigating the Spectrum of Style)
A: This is where the fun (and sometimes the agony) begins! Generally, a neutral color like white, off-white, or a light grey is always a safe and elegant choice, as it won't distract from the artwork and lets the piece speak for itself. However, you absolutely can, and often should, experiment! You can pick a subtle color from within the artwork itself to create a harmonious, unified look. Or, for a bolder, more contemporary statement, choose a contrasting color that makes a specific element pop. My advice? Lay out different mat colors with your art in varying lighting conditions and simply see what feels right to you. Sometimes, the 'right' color is the one that doesn't scream for attention, but rather quietly supports the art's narrative. Don't be afraid to trust your gut on this one – it's your art, after all, and your aesthetic choice. Remember, the goal is always to enhance, not overpower, the artwork itself. Consider how the mat color interacts with the wall color and the overall decor of the room as well. It's a design choice that can truly make or break the presentation, so give it some thought! Consider the emotional tone of the artwork; a somber piece might benefit from a deep charcoal mat, while a vibrant abstract could pop with a bright, complementary hue. The mat is another element of the narrative you're building around your art, so choose wisely and with confidence.
Q: Can I cut my own mats, or should I go to a professional framer? (DIY vs. The Experts)
A: You absolutely, unequivocally can cut your own mats! Especially for standard sizes and simpler openings, with the right tools and a bit of practice, it's an incredibly rewarding skill to master. There's a real sense of accomplishment when you create a perfect mat for your art. However, for very large pieces, unusually complex multiple openings (like for a triptych or a series of mini-artworks), or if you're simply short on time or patience, a professional framer is undeniably worth the investment. They have specialized, high-precision equipment and years of expertise that can handle almost anything. I've often leaned on a good framer for those really tricky, high-stakes pieces, and I even love picking their brains for tips; after all, they're the true masters, as you can learn from a good qa-with-an-expert-art-framer. Think of it as choosing between cooking a gourmet meal at home versus dining at a Michelin-starred restaurant – both can be excellent, but one requires significantly more skill and specialized equipment. It's about knowing your limits and when to call in the experts. For complex designs like multiple openings, oversized pieces, or when working with extremely valuable art, the precision and expertise of a professional framer are invaluable. They have industrial equipment and an eye for detail that can save you time, money, and potential heartbreak. They can also advise on specialized archival techniques that might be beyond the scope of a home studio.
### Q: What about textured or specialty mat boards? (Adding a Touch of Luxury and Unique Character)
A: Oh, this is where it gets really fun! Beyond the standard smooth, solid-color mat boards, there's a huge variety of textured and specialty options. You can find mats with linen finishes, suede textures, metallic sheens, or even hand-wrapped silk. These can add a truly luxurious and unique touch to your artwork, enhancing its aesthetic and complementing specific artistic styles. For example, a deeply textured piece of abstract art might sing when paired with a subtle linen mat. Just remember to always double-check their archival quality – the 'acid-free' rule still applies, no matter how fancy the surface looks! Always handle specialty mats with clean cotton gloves to avoid transferring oils from your skin, which can stain delicate surfaces. These specialty mats are like the perfect accessory, adding that extra 'oomph' to your presentation. They can add a layer of sophistication that standard mats simply can't, especially when paired with artworks that have a tactile quality or specific historical context. Just ensure they are acid-free, as beauty without preservation is a fleeting pleasure.
### Q: How do I clean and maintain a matted piece? (Ensuring Lasting Brilliance)
This is a practical question that often gets overlooked, but it's crucial for the long-term enjoyment and preservation of your framed art. Just like a beautiful garden needs tending, your art deserves a little care to stay pristine. The best defense is a good offense! First, ensure everything is meticulously clean before assembly to avoid trapping dust. Once framed, keep your art out of direct sunlight and away from areas with high humidity or extreme temperature fluctuations (like bathrooms or near radiators), which can promote mold growth and accelerate degradation. For routine cleaning, gently dust the frame and glass with a soft, lint-free cloth. If you need to clean the glass, spray a glass cleaner onto the cloth first, never directly onto the frame, to prevent liquid from seeping under the mat and damaging the artwork. With proper archival materials and careful handling, your matted artwork should remain beautiful for decades. Regular, gentle dusting is key, and avoid abrasive cleaners or cloths that could scratch the glazing. It's about treating your art like the treasure it is.
Q: What about textured or specialty mat boards? (Adding a Touch of Luxury and Unique Character)
A: Oh, this is where it gets really fun! Beyond the standard smooth, solid-color mat boards, there's a huge variety of textured and specialty options. You can find mats with linen finishes, suede textures, metallic sheens, or even hand-wrapped silk. These can add a truly luxurious and unique touch to your artwork, enhancing its aesthetic and complementing specific artistic styles. For example, a deeply textured piece of abstract art might sing when paired with a subtle linen mat. Just remember to always double-check their archival quality – the 'acid-free' rule still applies, no matter how fancy the surface looks! Always handle specialty mats with clean cotton gloves to avoid transferring oils from your skin, which can stain delicate surfaces. These specialty mats are like the perfect accessory, adding that extra 'oomph' to your presentation. They can add a layer of sophistication that standard mats simply can't, especially when paired with artworks that have a tactile quality or specific historical context. Just ensure they are acid-free, as beauty without preservation is a fleeting pleasure.
Q: How do I clean and maintain a matted piece? (Ensuring Lasting Brilliance)
This is a practical question that often gets overlooked, but it's crucial for the long-term enjoyment and preservation of your framed art. Just like a beautiful garden needs tending, your art deserves a little care to stay pristine. The best defense is a good offense! First, ensure everything is meticulously clean before assembly to avoid trapping dust. Once framed, keep your art out of direct sunlight and away from areas with high humidity or extreme temperature fluctuations (like bathrooms or near radiators), which can promote mold growth and accelerate degradation. For routine cleaning, gently dust the frame and glass with a soft, lint-free cloth. If you need to clean the glass, spray a glass cleaner onto the cloth first, never directly onto the frame, to prevent liquid from seeping under the mat and damaging the artwork. With proper archival materials and careful handling, your matted artwork should remain beautiful for decades. Regular, gentle dusting is key, and avoid abrasive cleaners or cloths that could scratch the glazing. It's about treating your art like the treasure it is.
Q: Can I reuse an old mat or frame?
A: You can, but with significant caveats. For mats, if it's not archival quality, or if it's discolored, damaged, or has even the slightest sign of mold, absolutely do not reuse it. It will compromise your new artwork. If it's a high-quality archival mat in perfect condition and the opening fits your new artwork perfectly, then yes, it's a sustainable choice. For frames, always inspect for structural integrity, damage, and ensure it can be properly sealed. Old frames often hide acidic backing materials, so be prepared to replace those with archival foam core. It's about ensuring the entire housing for your art is up to archival standards, not just individual components. Always err on the side of caution when it comes to preserving your art.
Q: What's the difference between mat board and backing board?
A: Good question! While both are typically made from paper-based materials, they serve different, albeit complementary, functions. The mat board (or window mat) is the front-facing board with the opening cut into it, serving primarily aesthetic and protective (creating the air gap) purposes. The backing board sits behind your artwork and mat, providing rigid support for the entire package within the frame. Crucially, both should be acid-free to prevent acid migration and protect your artwork. Think of the mat as the 'face' of the presentation and the backing board as the 'spine' – both essential for structural integrity and longevity. They work in tandem to create a stable and protected environment for your artwork. Often, the backing board will be a thicker, more rigid material like foam core, providing essential structural stability against bowing or warping over time, which the mat board alone cannot achieve.
Final Thoughts: The Art of Presentation (Your Masterpiece, Perfectly Framed)
Matting a picture is more than just a technical task; it's an act of care, a final flourish that frames your artistic vision. It acknowledges the journey of the art, from its conception to its display, and ensures it's presented in the best possible light. It's a small detail that makes a monumental difference in how a piece is perceived and preserved, elevating it from a simple object to a cherished artifact. It’s the finishing touch that truly honors the creator’s intent and the collector’s appreciation.
So, next time you're about to frame a piece, take a moment to consider the mat. It might just be the quiet hero your artwork needs. Whether it's a piece you created or something you've bought from local artists, giving it a proper presentation adds to its story. And hey, if you're ever looking for some vibrant, conversation-starting pieces to mat and frame, you know where to buy them (wink, wink).
Happy matting, and may your cuts be ever straight and your artwork ever cherished! Remember, the goal is always to make the art sing, and a well-chosen mat is the perfect accompaniment.


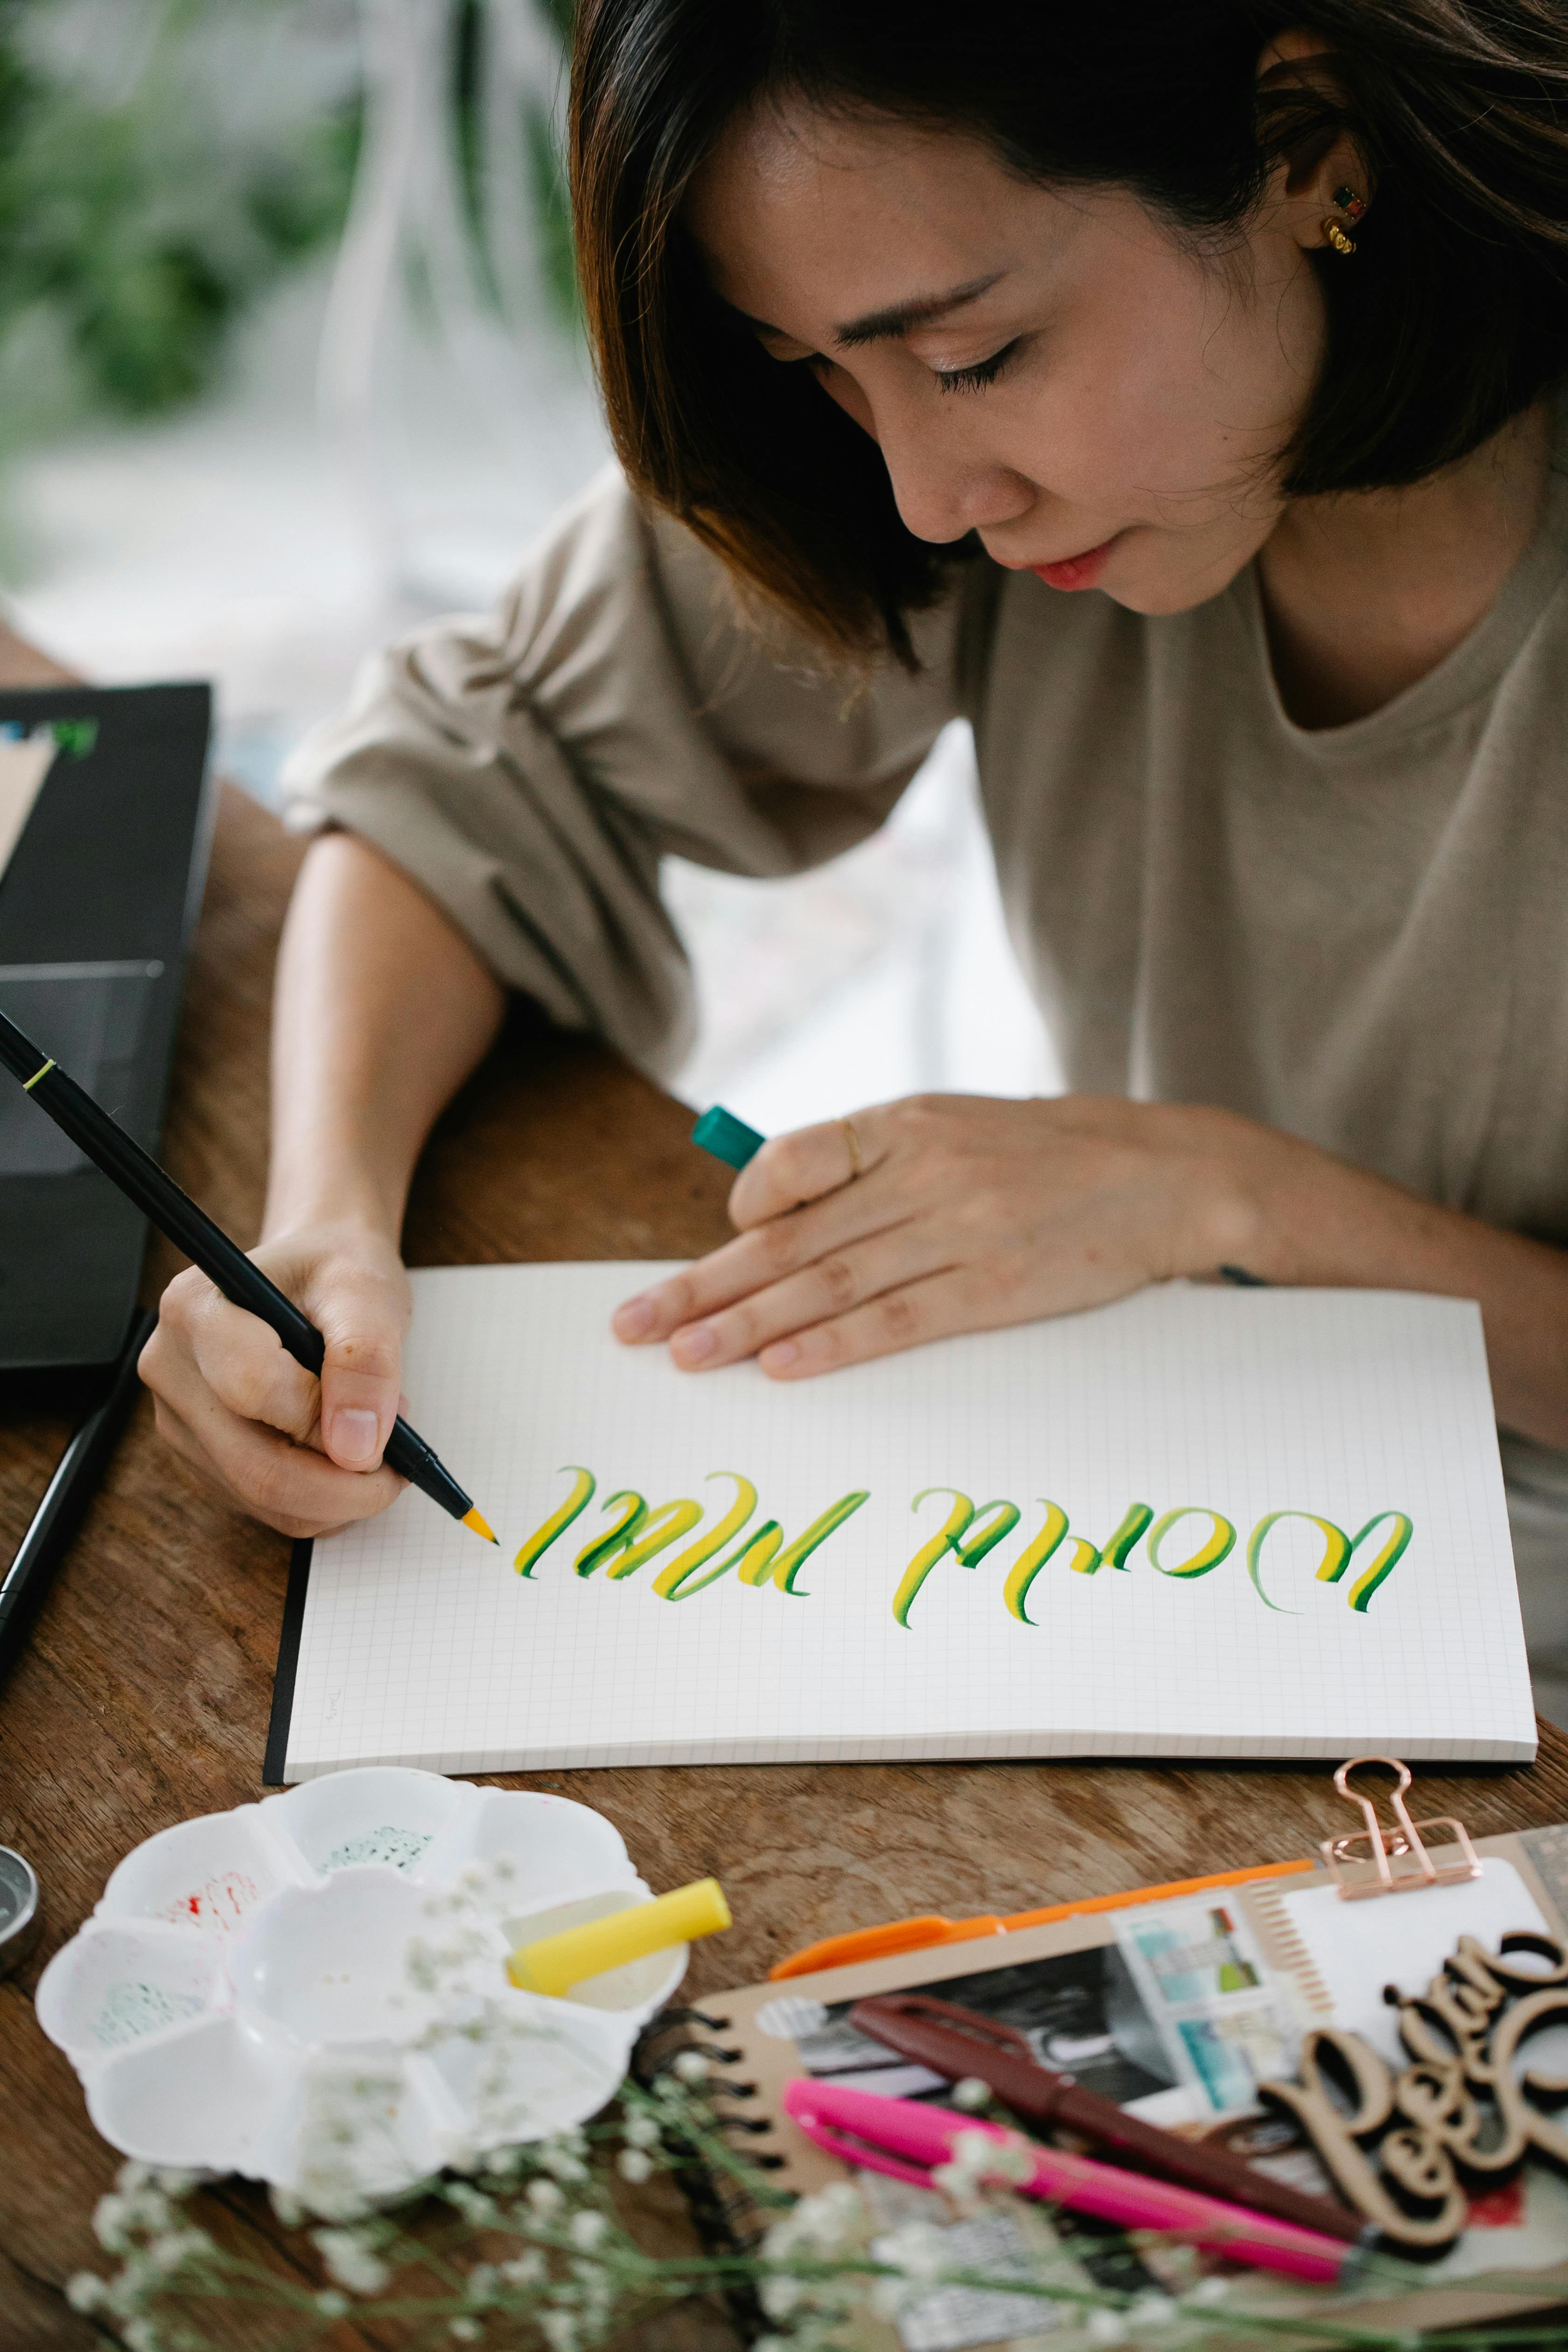