Oil Painting for Beginners: Your Ultimate Guide to First Strokes & Beyond
Unlock the world of oil painting! This ultimate guide for beginners covers essential supplies, studio setup, core techniques like alla prima and glazing, and how to mix vibrant colors. Overcome fears, embrace the slow rhythm, and start your artistic journey today with practical advice and personal insights.
Oil Painting for Beginners: Your Ultimate Personal Guide to First Strokes & Beyond (No Pressure, Just Fun!)
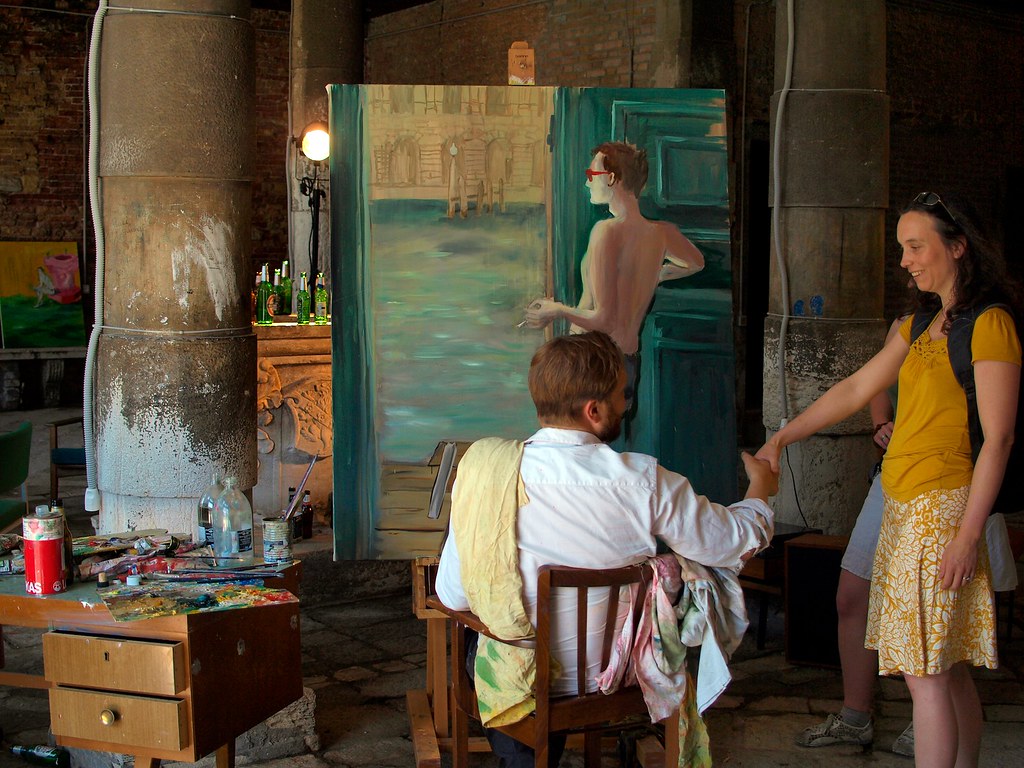
I remember staring at those vibrant, impossibly rich tubes of oil paint for the very first time. There was this thrilling mix of excitement and, let's be honest, a fair bit of intimidation. It felt like stepping into a grand, old studio, full of history and the ghosts of masters like Van Gogh or Rembrandt, all whispering, "Can you really do this?" Well, I'm here to tell you, from my own somewhat messy but incredibly rewarding journey, that yes, you absolutely can. And it's going to be an amazing adventure.
Ever felt intimidated by oil paints, thinking they're only for the pros? Does that sound familiar? If so, you're in the right place. Let me tell you, that couldn't be further from the truth. Oil painting, for all its storied past, isn't some mystical secret reserved for a select few. It's a medium that's incredibly forgiving once you get the hang of its rhythm, offering a richness and depth that few others can match. Think of it as a slow dance – you learn the steps, you find your groove, and soon you're gliding across the canvas with a confidence you didn't know you had. The beauty? You can scrape off mistakes, re-work areas extensively, and even lift paint, unlike the sometimes unforgiving nature of mediums like watercolor. My goal here isn't to turn you into a classical master overnight, but to give you a clear, encouraging roadmap to simply start your own vibrant artistic journey. This guide will walk you through everything you need to know, from essential supplies and setting up your space to mastering color mixing and core techniques, helping you conquer those initial fears and embrace the joy of creating.
Why Oil Painting? My Personal Take (and a Little History)
I've dabbled in a lot of mediums. Acrylics are a quick sprint, which I adore for my abstract work – you can see some of my explorations here. Watercolors whisper ethereally. But oil painting? It's different. It's a commitment, sure, but it pays dividends in terms of control, blendability, and that luscious, buttery texture. The rich, almost luminous quality you can achieve, the way colors seem to glow from within, is simply unparalleled. The drying time, which often scares people away, is actually its superpower. It means you can push paint around for hours, blend colors seamlessly, and build up layers with an incredible luminosity. It's like a conversation with your canvas that unfolds over time, rather than a quick chat. For me, it's the ideal medium for capturing subtle shifts in light for a portrait, or the atmospheric depth of a hazy landscape, where seamless transitions are key. Acrylics just dry too fast for that, and watercolors, while beautiful, don't offer the same kind of opaque layering power.
But my personal affinity for oils isn't just about the feeling; it's rooted in centuries of artistic achievement, where this medium has been the bedrock of masterpieces. Historically, artists would painstakingly grind pigments like lapis lazuli or malachite, then mix them with oils, often linseed, to create their paints. This manual, intimate process meant a deep understanding of each pigment's unique properties. Today, while we have the convenience of pre-made tubes, the underlying principles of pigment and oil remain. Oil paint has been the medium of choice for masterpieces across the Renaissance, Baroque, and Impressionist periods. Artists like Leonardo da Vinci leveraged its slow drying time to achieve the subtle, smoky transitions of sfumato (think Mona Lisa's enigmatic smile – a testament to patience). Rembrandt used its depth for dramatic chiaroscuro effects, making light emerge from profound shadows (the theatrical drama of light and dark). Monet and the Impressionists relied on the capacity of oils to blend wet-into-wet for incredibly soft edges and vibrant, broken color, capturing the fleeting effects of light and atmosphere (the essence of a fleeting moment). These nuanced effects were only truly possible with oils, allowing artists to build up color and light slowly, layer by layer, or blend directly on the canvas for luminous results. Understanding this lineage always grounds me, reminding me that even the masters started somewhere, pushing pigment around.

For a deeper dive into its rich heritage, you might enjoy reading about the history of oil painting from ancient pigments to modern masterpieces.
Now, a word of caution: while oils are incredibly forgiving, they do present some unique considerations. They can be more expensive than acrylics, some pigments have higher toxicity (though modern 'hue' alternatives mitigate this), and solvents require good ventilation. Also, oil paint, particularly if not properly prepared or layered, can yellow over very long periods. But don't let these deter you; with good practice and understanding, these are easily managed. It's a small price to pay for the unmatched richness and longevity this medium offers.
To give you a clearer picture of why I, and many others, gravitate towards oils, here's a quick comparison with some other popular painting mediums:

Feature | Oil Paints | Acrylic Paints | Watercolors |
|---|---|---|---|
| Drying Time | Slow (hours to days/weeks) | Fast (minutes to hours) | Very Fast (seconds to minutes) |
| Blendability | Excellent, allows for seamless transitions | Good, but requires quick work | Difficult, relies on washes and layering |
| Texture | Buttery, rich, allows for impasto | Versatile, from thin washes to thick impasto | Transparent, fluid, minimal texture |
| Luminosity | High, deep, vibrant colors | Good, but can dry slightly darker | Ethereal, translucent, delicate |
| Binder | Oils (linseed, poppy, walnut) | Acrylic polymer emulsion | Gum arabic |
| Mediums | Linseed oil, alkyds, solvents | Water, acrylic mediums, retarders | Water, gum arabic, ox gall |
| Cleanup | Requires solvents (OMS) | Soap and water | Soap and water |
| Beginner-Friendly | Forgiving due to slow drying, but perceived as complex | Very forgiving due to fast drying, easy cleanup | Challenging due to quick drying and transparency |
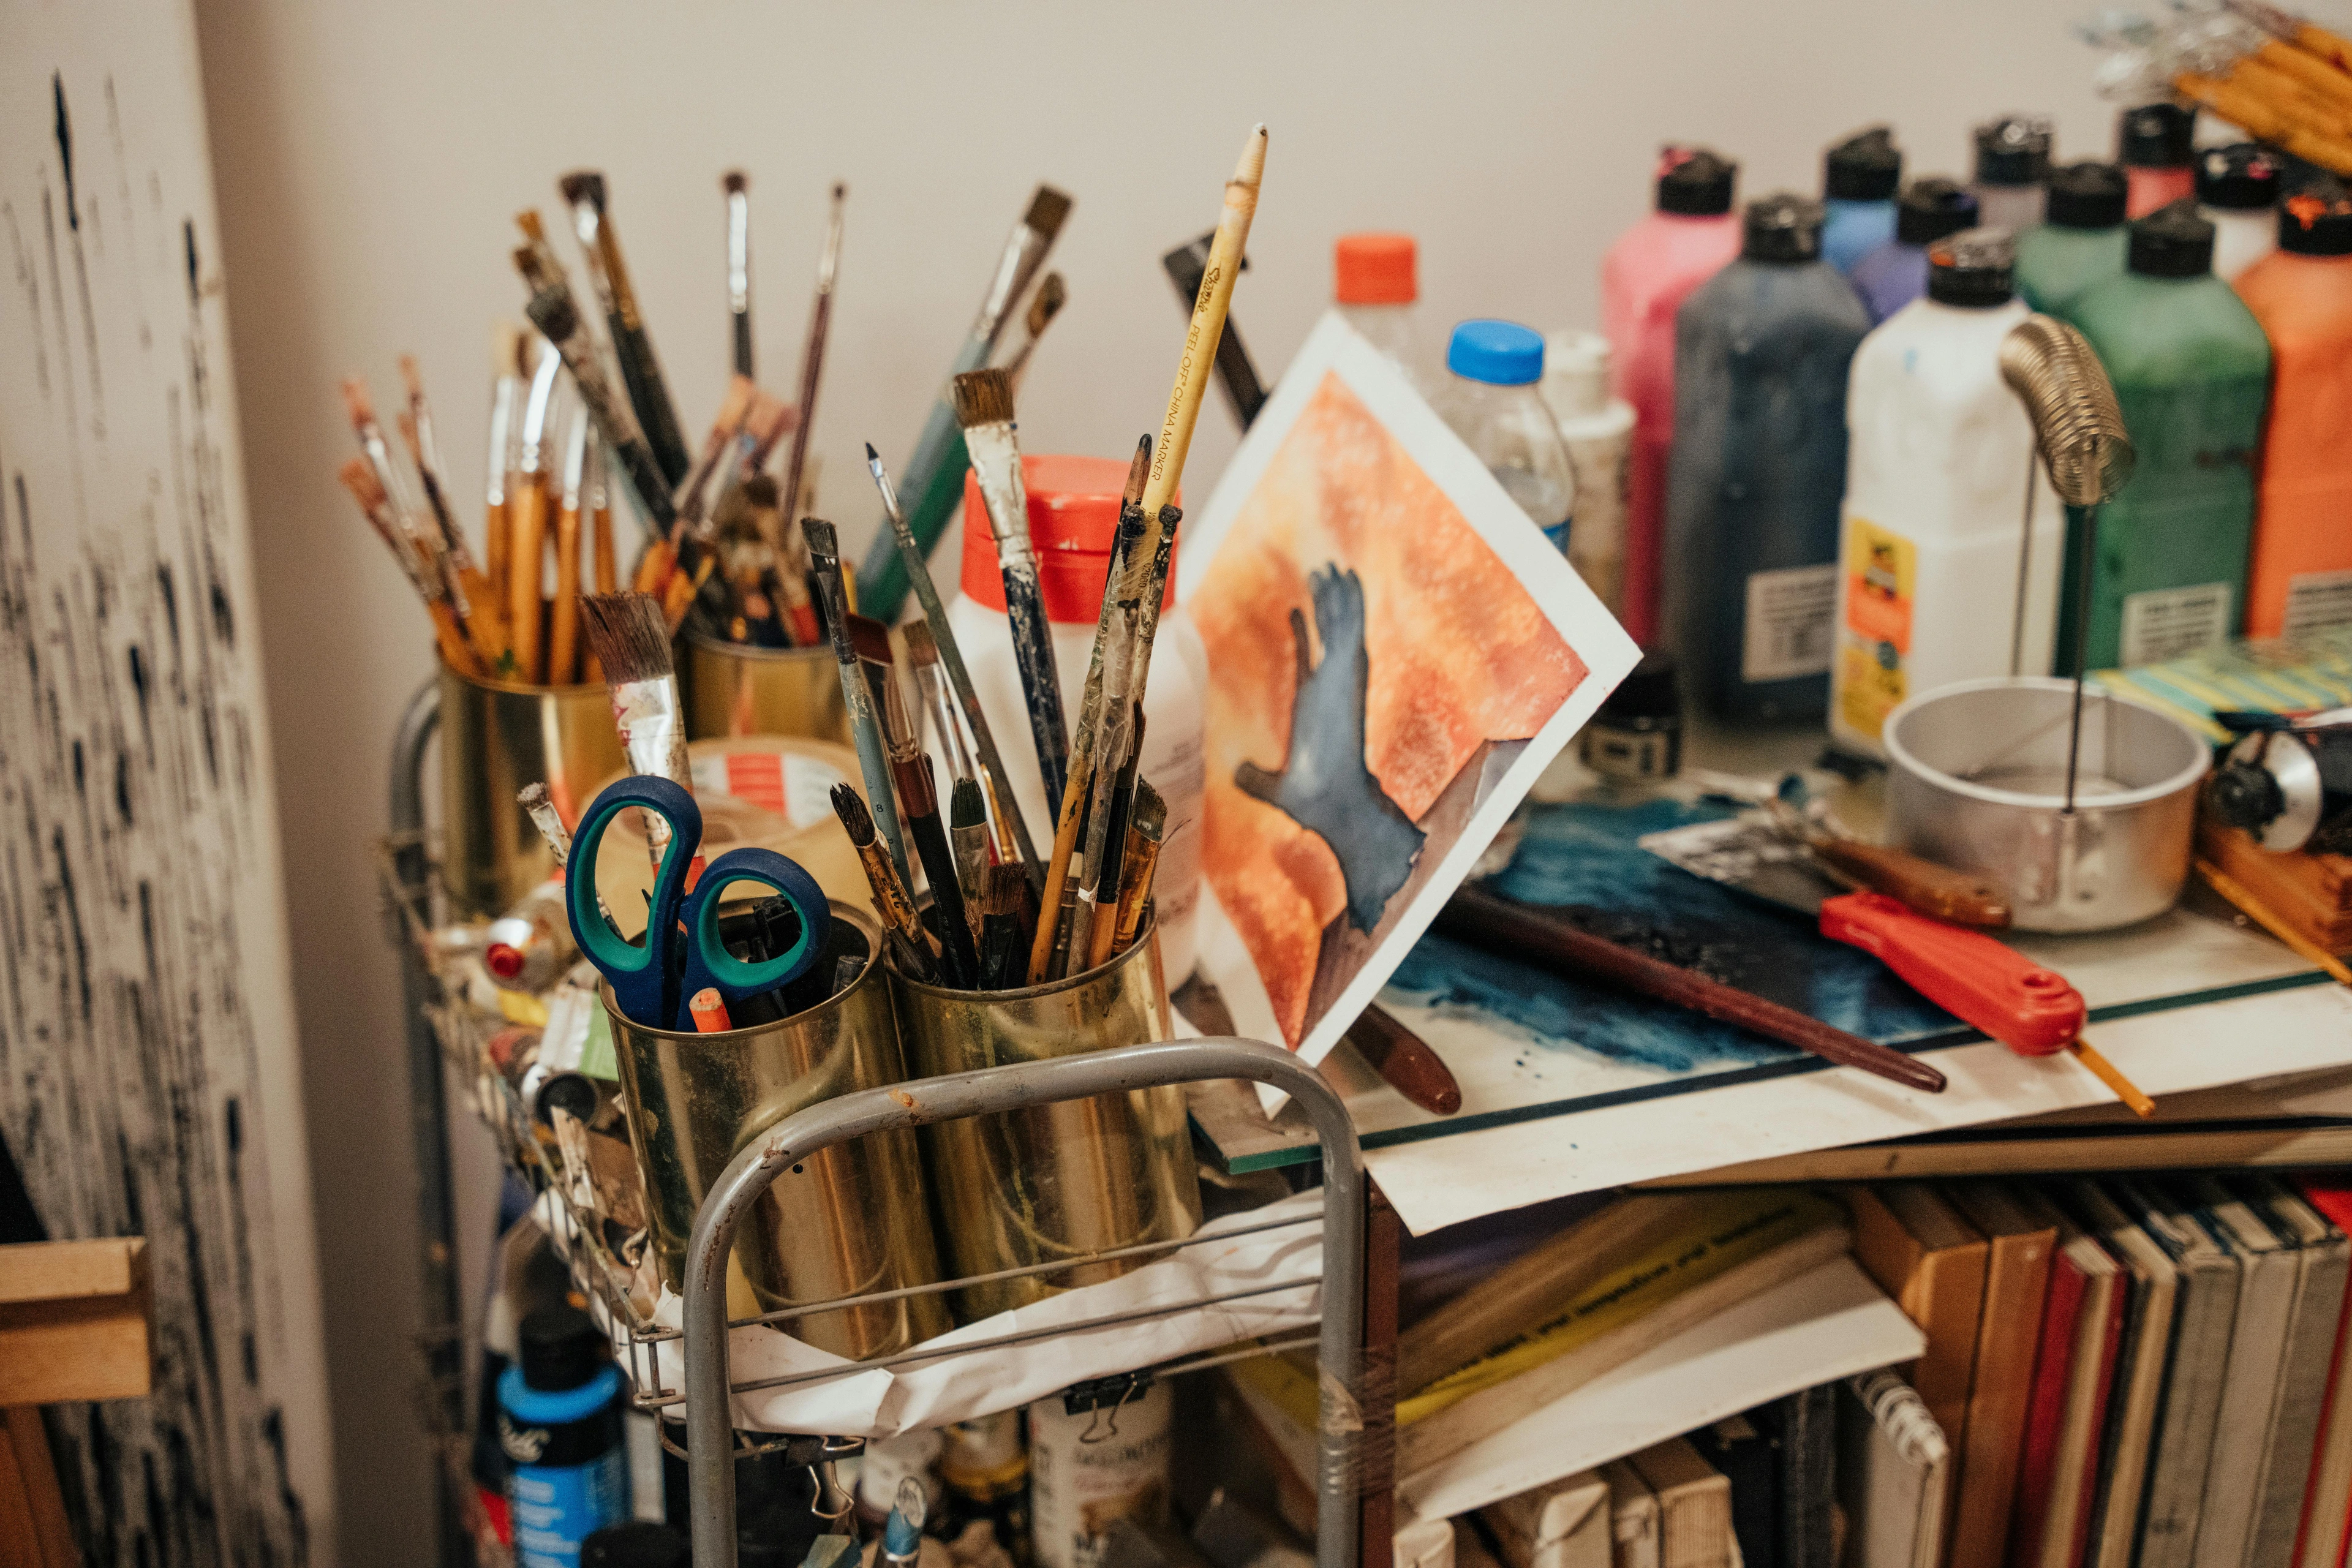
Essential Supplies: Your Starter Kit for the Oil Journey
Starting any new hobby can feel like you need to mortgage your house for supplies. Good news: you don't! For oil painting, you can begin with a surprisingly modest setup. I’m going to lay out what I consider truly essential, and then we can talk about nice-to-haves later. Trust me, you can always expand your arsenal once you're hooked. (And you will be!)
For a general overview of tools, this guide on essential oil painting supplies for beginners offers a good starting point. Just remember: the best art comes from intention and practice, not from the most expensive brushes.
Quick Start Checklist: What You Really Need
Item | Quantity/Size Recommended | Why it's essential for beginners |
|---|---|---|
| Oil Paints | 7-8 basic colors | Allows for extensive color mixing and experimentation without breaking the bank. Student-grade is perfect for learning without feeling wasteful. |
| Brushes | 3-5 versatile shapes/sizes | Covers a range from broad strokes to fine details, helping you explore different marks and get a feel for the paint's consistency. |
| Canvas Boards | 5-10 small sizes (e.g., 8x10") | Affordable, less intimidating, and encourages frequent practice without the pressure of a large, expensive surface. Pre-primed is key. |
| Linseed Oil | Small bottle | Your primary painting medium, it thins paint, increases flow, and adds gloss and flexibility. It makes the paint luscious and workable. |
| Odorless Mineral Spirits (OMS) | Small bottle | Essential for thinning paint sparingly (remember "fat over lean"!) and, most importantly, cleaning your brushes effectively and safely. |
| Disposable Paper Palette | 1 pad | Simplifies cleanup immensely, letting you focus on painting rather than scrubbing palettes. More painting, less chores! |
| Jars with Lids | 2-3 | For clean and dirty OMS (and maybe a rinse jar) – crucial for efficient brush cleaning and responsible solvent management. Safety and organization are friends! |
| Paper Towels/Rags | Plenty! | Indispensable for wiping brushes, blotting excess paint, and cleaning up inevitable messes. Consider them your constant companions. |

Surfaces: Where Your Magic Happens
Before you even squeeze paint, you need something to paint on. For beginners, I recommend starting small and affordable:
- Canvas Boards or Stretched Canvas: Start with smaller sizes (e.g., 8x10 or 9x12 inches). They're less intimidating, cheaper, and you can churn out more practice pieces without feeling wasteful. Ensure canvases are primed with gesso; this protective layer is crucial for oil painting. It prevents the oil from degrading the canvas fibers, creates a barrier to stop oil from sinking in (which leads to dull colors), and provides the necessary "tooth" (a slight texture or grip) for the paint to adhere effectively. Without sufficient tooth, paint can feel slippery and difficult to control. You can learn more about what gesso is in painting and how to prepare a canvas for oil painting if you're interested in the science. For a detailed comparison, check out how to choose the right canvas for acrylic vs oil. Experiment with different canvas weaves too – a smoother 'portrait' weave is great for fine detail, while a coarser 'landscape' weave can add subtle texture to your work. Linen canvases are often prized for their strength and fine weave, but cotton is a perfectly suitable and more affordable option for beginners.
- Wood Panels: These offer a rigid, smooth surface. They also need to be primed with gesso, and some artists love the lack of 'give' compared to canvas. If you're planning on extremely detailed work, a smooth panel might be your preference. You can even experiment with toning your canvas or panel – applying a thin, diluted layer of a neutral color (like a warm grey or earthy brown) as a ground before you start painting. This removes the stark white, helping you judge colors more accurately and establish a mood from the outset.
- Oil Paper: Specifically designed paper for oils is an inexpensive way to practice studies, sketches, and color mixing without committing to a canvas. It's often textured and coated to prevent oil absorption, giving it some "tooth" like a canvas.
- Disposable Paper Palettes: Forget about cleaning a wooden or glass palette (at least for now!). These tear-off paper pads are a lifesaver for mixing colors without the added cleanup chore. Though, if you want to explore more options, you can check out what is a palette knife and how to use it, which often involves a rigid palette surface.

The Paints Themselves: A Palette of Possibilities
Don't go buying the most expensive artist-grade paints just yet. Student-grade is perfectly fine, even recommended, for learning. You're experimenting, mixing, making mistakes – and that's exactly what you should be doing! Student-grade paints, while offering vibrant color and good performance, often use less expensive pigments and fillers, or lower pigment concentrations, compared to artist-grade paints, which helps keep them affordable. This makes them perfect for practice without feeling wasteful. If you're curious about specific brands once you get more serious, I've got a rundown on the best oil paint brands for artists that might be helpful.
While this guide focuses on traditional tube oils, know that other oil-based mediums exist. For instance, oil sticks are like large, creamy crayons, great for direct, expressive mark-making with a dry, painterly quality. Oil pastels offer a different texture and blending experience, behaving more like soft crayons with intense pigment. But for learning the fundamentals of blending and layering with precision, tubes are your best friend.

I suggest a basic palette to start. Think primary colors plus a few others to give you extensive mixing options. When choosing, you'll encounter terms like transparency (light passes through), opacity (blocks light), and lightfastness (how resistant the pigment is to fading over time). For beginners, don't overthink it, but know that these properties influence how your colors behave and last.
Here's my go-to beginner palette:
- Titanium White: You'll use a lot of this. A big tube is a good idea. This is your mixing workhorse, essential for lightening and tinting all other colors. Its high opacity makes it excellent for covering existing paint.
- Cadmium Yellow (Hue): The 'hue' means it's a synthetic alternative, less toxic, and often more affordable than genuine cadmium pigments. For beginners, 'hue' paints offer excellent performance, vibrant color, and a similar learning experience to their traditional counterparts.
- Cadmium Red (Hue): Similar to the yellow, a safer and cheaper alternative that performs beautifully for beginners.
- Ultramarine Blue: A lovely, deep blue, versatile for mixing a wide range of purples and greens. It's a foundational cool color, generally semi-transparent, almost velvety and infinite.
- Phthalo Blue (Green Shade): This blue is incredibly potent; a tiny dot can dramatically shift the color of a large amount of other paint. Approach it with caution – a little truly goes a long way! The "green shade" means it leans slightly towards green, making it fantastic for powerful greens when mixed with yellows. Its high tinting strength makes it a powerhouse for deep blues and darks, an electric force on your palette.
- Burnt Umber: A versatile, opaque dark brown, indispensable for mixing muted tones, earthy colors, and surprisingly rich blacks when combined with Ultramarine Blue. It's a workhorse neutral and a fast dryer.
- Ivory Black: For darker tones, though I often prefer mixing my own nuanced darks with blues and browns (like Ultramarine Blue + Burnt Umber) for more organic and less flat results. Ivory Black is typically opaque and slow-drying.
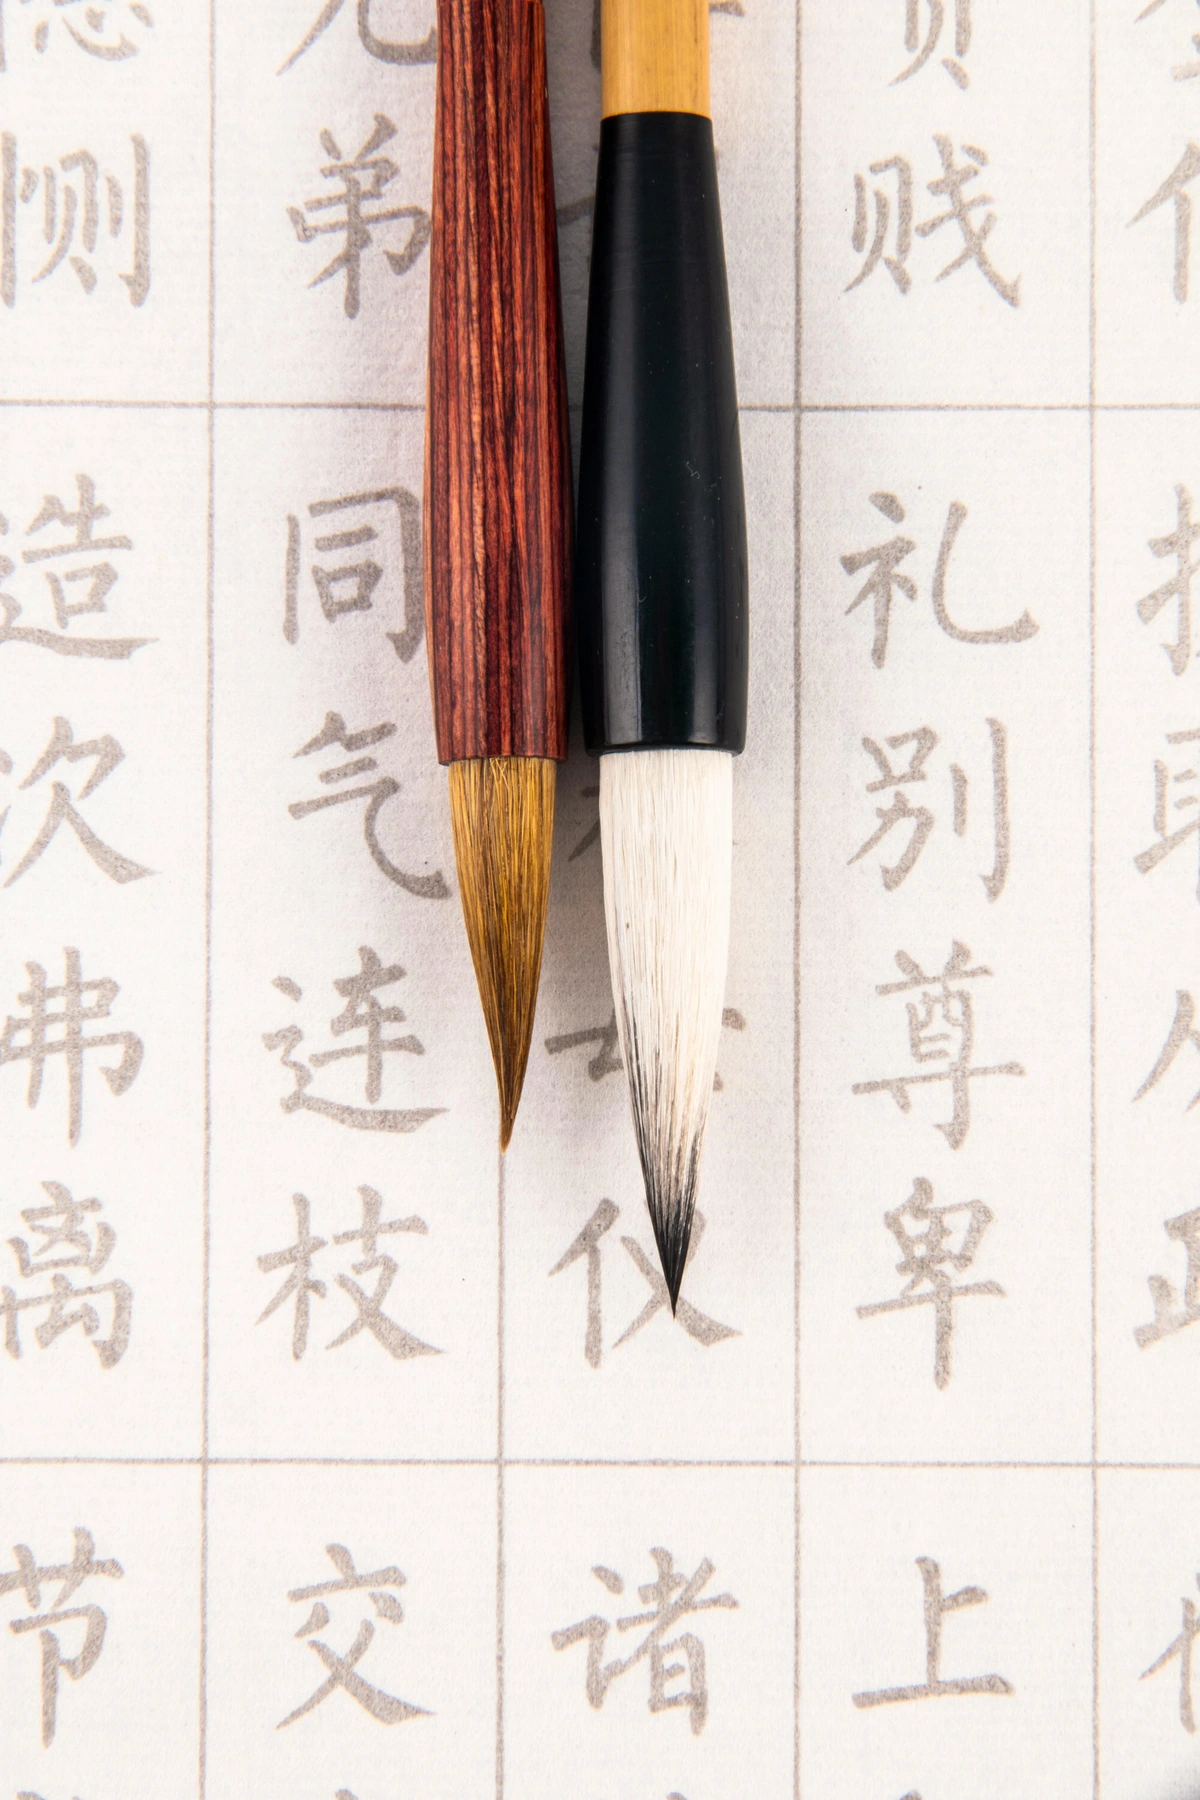
Brushes: Your Extensions of Self
Oh, brushes! These are where your intuition really comes into play. You don't need a huge collection to start. Focus on a few key shapes and sizes. For more detail, consider reviewing guides on best oil painting brushes for artists.
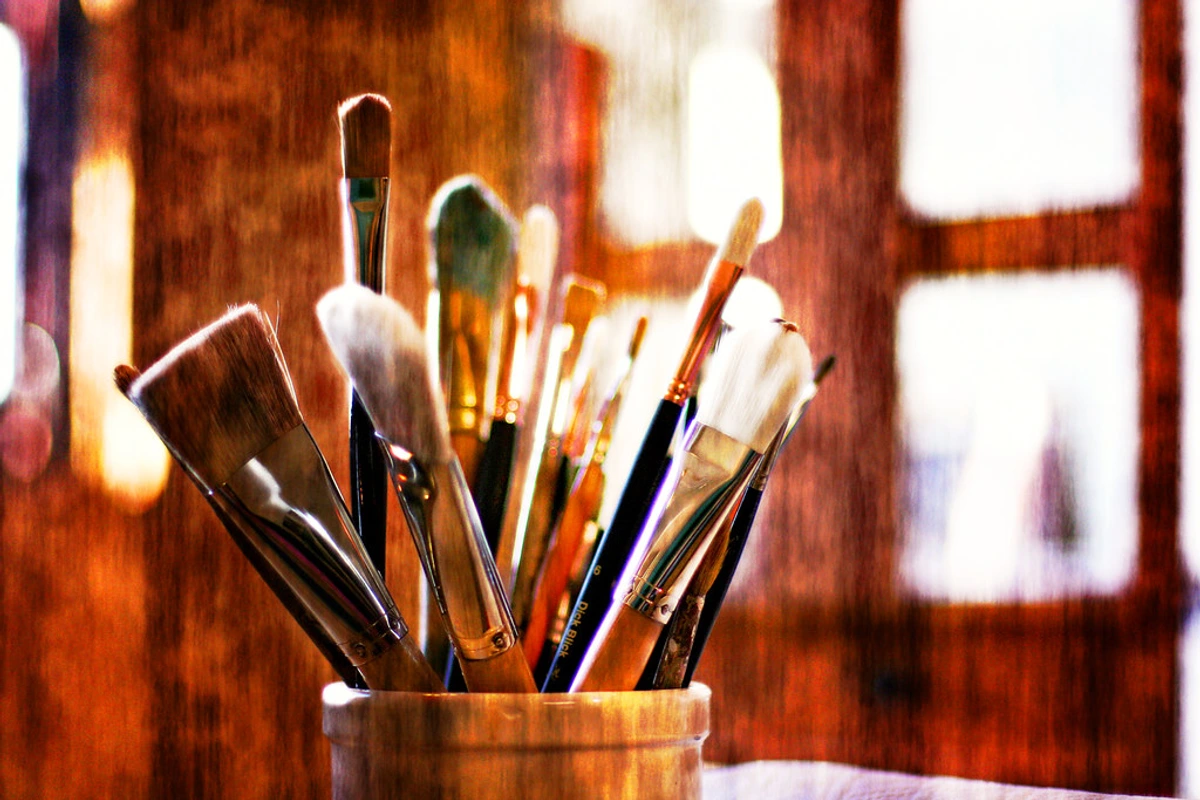
Here’s my go-to starter set, focusing on versatility:

- Flat Brush (Size 8-12): Great for broad strokes, covering larger areas, creating crisp edges, or laying down bold, flat areas of color.
- Round Brush (Size 4-6): Good for details, lines, and more controlled, expressive work, useful for rendering finer forms or outlines.
- Filbert Brush (Size 6-10): A personal favorite! It's a flattened round brush, offering a soft, rounded edge, perfect for blending and organic shapes – almost like a hybrid between a flat and a round, ideal for softer transitions.
- Small Detail Brush (Size 0-2): For those tiny touches, fine lines, and signing your masterpiece (when the time comes!).
Look for synthetic bristle brushes for beginners, as they are durable, retain their shape, and work exceptionally well with oils. Traditional hog bristle brushes (made from stiff pig hair) are excellent for impasto and holding a lot of thick paint, but can be harder to clean. Sable brushes (very soft animal hair) are typically reserved for fine detail or watercolor, and aren't usually ideal for the robust nature of oil paint. And remember, taking care of them is crucial; a good read on cleaning and caring for your paint brushes will save you money and frustration in the long run. I once left a favorite brush in a jar of dirty OMS for too long, and it came out looking like a startled porcupine – a hard lesson in brush hygiene!

Basic Brush Handling and Application
Don't underestimate the power of how you hold and use your brush! It's an extension of your hand and eye. Try experimenting with these basics:
- Varying Pressure: Light pressure creates delicate, feathery strokes; heavier pressure lays down more paint and creates bolder marks. Try both on a practice canvas.
- Using the Side: Don't just paint with the tip. Use the broad side of a flat or filbert brush for covering larger areas or creating interesting textured effects with a single sweep.
- Stippling: Gently tap the brush bristles onto the canvas to create a speckled texture. This is fantastic for foliage, rough surfaces, or adding subtle optical mixing.
- Edge vs. Flat: Experiment with creating crisp, clean lines with the edge of a flat brush versus soft, blended areas using the flat side of a filbert. Getting a feel for these subtle differences will quickly expand your expressive range.
Mediums & Solvents: The 'Secret Sauce' (and 'Fat Over Lean' Explained)
Mediums and solvents are the 'secret sauce' that unlock oil paint's incredible versatility, allowing you to control its flow, texture, and drying time. For a comprehensive overview, dive into what are painting mediums: a beginner's guide.
Now, let's talk about a crucial concept: 'lean' and 'fat' paint. Think of 'lean' paint as paint with less oil (thinned with more solvent, or straight from the tube if it's naturally lean) and 'fat' paint as paint with more oil (with painting mediums like linseed oil added). The golden rule is: fat over lean. This isn't just a suggestion; it's a pact with time, ensuring your painting lasts generations. You always want to apply more flexible, oil-rich paint over less flexible, solvent-thinned paint. This prevents cracking down the line as the painting cures, because the faster-drying lean layers are underneath the slower-drying fat layers, allowing them to expand and contract together. If you reverse this, the rigid lean layer underneath will restrict the movement of the flexible fat layer on top as they dry at different rates, leading to cracks. It's a fundamental principle for archival quality.
Here are your essential mediums and solvents:
- Linseed Oil: My go-to! It thins the paint, increases flow, and adds a lovely gloss and flexibility, making your paint 'fatter' and more luscious. Start with a small bottle. It helps create that luminous depth oil paintings are known for. While linseed oil is the classic, you'll encounter other oils as you progress: Poppy oil for whites and pale colors (less yellowing, but slower drying), Walnut oil (similar to linseed but less yellowing and faster drying), and Safflower oil (the slowest drying, good for delicate blending with whites). For now, linseed is perfect.
- Odorless Mineral Spirits (OMS): This is for thinning paint very sparingly (especially in initial, "lean" layers) and, crucially, for cleaning your brushes. Get a good quality, odorless one. While turpentine is a traditional solvent, its fumes are intense and honestly, not something I recommend for beginners in a home setting. OMS offers a much safer and more pleasant experience. My mantra: keep it simple and safe. Solvents, including OMS, can irritate sensitive skin, so wearing gloves is a good precaution if you have delicate skin or plan for extensive use.
- Other Mediums (For Later): As you progress, you might explore alkyd mediums (which speed up drying time considerably and add durability – great when you need a painting dry faster) or traditional dammar varnish (used as a painting medium and for final varnishing to add depth and unify sheen). But for now, linseed oil is all you need.
- Two or Three Jars with Lids: One for clean OMS, one for dirty. Label them! And if you want to be super organized, a third for a final rinse or as a dedicated brush washer. This simple step makes cleanup so much more organized and safer. Trust me, you do not want to mix them up. A dedicated brush washer with a mesh screen can also be a game-changer for keeping your solvents cleaner for longer.
Safety First: Protecting Yourself and Your Space
Before you dive headfirst into the creamy goodness of oil paint, let's have a quick chat about safety. Trust me, a little precaution goes a long way in ensuring your painting sessions are joyful and headache-free (literally). I once got so absorbed I forgot to open a window – regretted that for hours!

- Ventilation is Non-Negotiable: This is the big one, especially when working with Odorless Mineral Spirits (OMS). Open a window, use a fan, or ideally, both. Good airflow prevents fumes from building up, protecting your lungs and keeping your head clear. Treat your creative space like a well-ventilated workshop. Seriously, don't skimp on this.
- Avoid Skin Contact: While oil paint itself isn't highly toxic, some pigments (like genuine cadmiums, which we're wisely avoiding with 'hue' alternatives) and all solvents can be skin irritants. Wear gloves if you're sensitive, or simply be mindful and use barrier cream. And for heaven's sake, don't eat or drink while painting – you don't want to accidentally ingest paint or solvent residue. Common sense, but easily forgotten in the flow of creation.
- Proper Rag Disposal: Rags soaked in linseed oil (or other drying oils) can pose a fire hazard if balled up and left to dry. They can spontaneously combust! Always lay them flat to dry outside, or soak them in water and dispose of them in a sealed, non-combustible container. Better safe than sorry, always. I've heard too many stories...
- Child and Pet Safety: If you have curious little ones or pets around, ensure all paints and solvents are stored securely and out of reach. These are not toys or treats. A dedicated, locked cabinet is ideal if you have persistent explorers.
Setting Up Your Creative Space
You don't need a dedicated studio (though a dream, right?). A corner of a room, a kitchen table – anywhere you can set up comfortably with good light will do. Just make sure it’s a space where you won't mind a little paint splatter, because, well, it happens. A large drop cloth or old newspaper spread out beneath your easel and palette is always a wise move. My own studio has a permanent 'splatter zone' – it adds character, I tell myself.

- Good Light: Natural daylight is always best, as it helps you see true colors without distortion. If you're painting at night, invest in a good quality daylight-balanced bulb (around 5000K) to replicate natural light. This is crucial for accurate color mixing and judgment.
- Easel (Optional but Recommended): A simple tabletop easel or a freestanding one will help you paint vertically, which is better for perspective and posture than hunching over a flat surface. Plus, it makes stepping back to assess your work much easier. But for your very first attempts, a propped-up canvas on a table works perfectly fine.
- Paper Towels or Rags: Essential for wiping brushes, cleaning up messes, and general sanity. Keep them within arm's reach. I can't stress this enough – you'll use more than you think!
Color Mixing Fundamentals: Your Palette, Your Universe
Before we dive into making marks, a quick word on color. This is the heart of painting, and understanding basic color mixing will unlock so much joy and confidence. You don't need to be a color theory expert right away (though a definitive guide to color theory in art is a great read for later!), but these fundamentals are crucial. And remember, the real learning happens when you actually do it. For a deeper dive into how artists wield this powerful tool, explore how artists use color.
- The Color Wheel: This visual tool organizes colors by their relationships. You've got your primary colors (red, yellow, blue – those basic tubes you just bought!), which can't be mixed from other colors. Mix two primaries, and you get secondary colors (orange, green, purple). Mix a primary and a secondary, and you get tertiary colors.
- Complementary Colors: These are colors directly opposite each other on the color wheel (e.g., red and green, blue and orange, yellow and purple). They create strong contrast when placed side-by-side, making each other appear more vibrant. When mixed, however, they neutralize each other, which is incredibly useful for mixing beautiful, muted greys and browns. This is your secret weapon against muddy colors if used wisely! For instance, to create a rich, earthy forest green, try mixing Ultramarine Blue with a touch of Cadmium Yellow (Hue) and then neutralize it slightly with a speck of Cadmium Red (Hue) – the complementary color to green. Or, for a beautiful neutral grey, mix a tiny bit of Ultramarine Blue and Burnt Umber until you find the perfect balance.
- Analogous Colors: These are colors next to each other on the color wheel (e.g., blue, blue-green, green). They create harmonious, calm palettes because they share a common hue. Think of a serene seascape with blues, blue-greens, and greens, or a warm autumn landscape with reds, oranges, and yellows.
- Warm and Cool Colors: Colors also have 'temperature.' Reds, oranges, and yellows are generally considered warm colors – they tend to advance in a painting, evoking energy and warmth. Blues, greens, and purples are cool colors – they tend to recede, evoking calmness and distance. Understanding this can dramatically affect the mood and depth of your painting. You'll also discover that even within one hue, there are warm and cool versions (e.g., a warm yellow like Cadmium Yellow vs. a cool lemon yellow). This nuance is key for sophisticated color mixing.
- Value: This refers to the lightness or darkness of a color. It's arguably the most crucial element for creating form, depth, and the illusion of three-dimensionality. A painting with strong values will always have more impact, even if the colors are muted. Practice making a value scale with just one color and white/black (or Burnt Umber) to see how many different tones you can achieve. This skill alone will elevate your work significantly.
My advice? Dedicate a small canvas board or piece of oil paper just to mixing colors. See what happens when you combine Ultramarine Blue with Cadmium Yellow (Hue), or how a tiny bit of Burnt Umber can warm up any color. Try to mix a wide range of greys and browns using only your primary colors and Burnt Umber. Notice how adding a tiny bit of white or yellow can subtly alter them. It's truly magical. Experiment, play, and discover!
Your First Strokes: Just Jump In! (And Key Techniques)
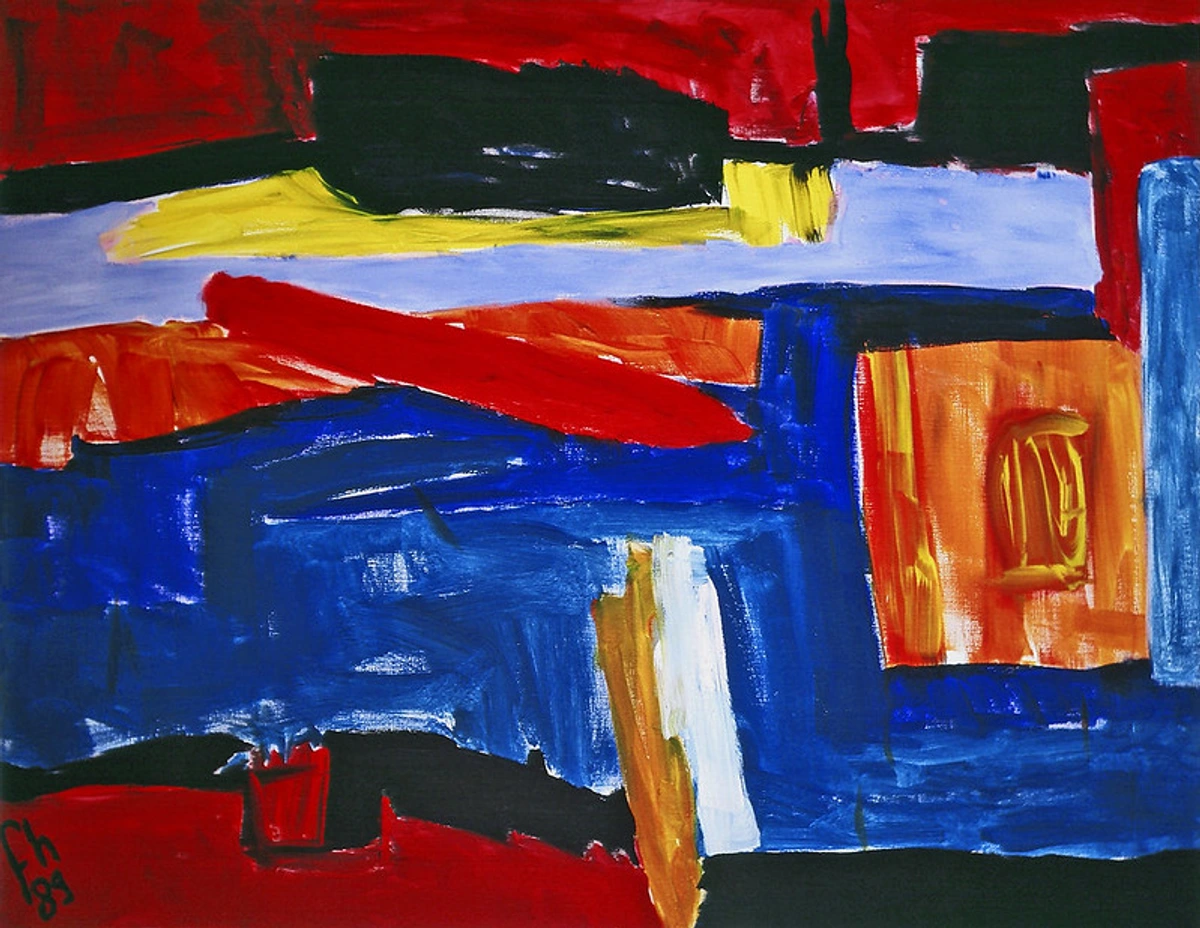
This is the scary part, I know. But it's also the most liberating. Don't aim for a masterpiece on your first try. Aim to learn how the paint feels, how it mixes, how it spreads. Think of it as playing. Trust me, I've had many 'failed' canvases that were invaluable learning experiences. Some of my most beloved abstract pieces (like those you can find here) started as playful experiments, simply embracing the process. What's the worst that can happen? You make a canvas full of interesting experiments! Embracing imperfection is key to unlocking your unique artistic voice.
Simple First Project Ideas:
- The Color Swatch Canvas: Don't paint an object. Just dedicate a small canvas to mixing and applying colors directly. Create gradients, blend two colors together, try to mix a specific brown or grey. Focus on the process of paint application and observation.
- The Monochrome Value Study: Pick one color (e.g., Ultramarine Blue) and create a painting using only that color and its tints (adding white) and shades (mixing with Burnt Umber/black). This is excellent for understanding value (the lightness or darkness of a color) without the complexity of multiple hues. Try painting a simple sphere to understand how light and shadow create form.
- The Single Fruit Still Life: Grab an apple, an orange, or a simple pear. Place it on a plain surface. Focus on its basic shape, the interplay of light and shadow, and the subtle color shifts. Try to capture the sheen on an apple or the rough texture of a pear's skin. It's a fantastic way to practice observation and basic form. Don't worry about perfection; just try to capture what you see.
- Abstract Shapes & Textures: Start with a few simple geometric or organic shapes. Fill them with different colors, trying to blend smoothly or create distinct edges. Experiment with different brushstrokes within those shapes (e.g., smooth blending vs. choppy marks). This lets you experiment with composition, color, and texture without the pressure of realism. Or simply make bold, expressive marks to see how the paint behaves, like in many abstract expressionist works. You can find some of my own process, full of such playful experiments, on my timeline.
- Scumbling Study: Pick a simple textured object (e.g., a rock, a piece of bark) or try to create a misty sky. Focus purely on applying paint with the scumbling technique (see below) to understand how it builds subtle texture and luminosity. No need for perfect realism, just explore the technique.
- Alla Prima Portrait Sketch: For a challenge, try a quick self-portrait or a friend's portrait using the alla prima (wet-on-wet) technique. Focus on capturing the main planes of the face and the overall impression quickly, without letting the paint dry. This forces you to be decisive and embrace the fluid nature of oils.
- Layered Landscape Study (Fat Over Lean): Choose a simple landscape reference. In your first, 'lean' layer, block in the sky, ground, and basic shapes, thinned with a bit more OMS. Once touch-dry, add your second, 'fatter' layer with more linseed oil, refining shapes and adding details. This helps you grasp the foundational layering principle.
Time to Get Your Hands (Figuratively) Dirty:
- Squeeze and Arrange: Squeeze a small amount of each color onto your palette, leaving plenty of space in the center for mixing. Arrange them like a color wheel (or warm/cool groups) for easier mixing. The satisfying plop of paint from the tube is part of the joy!
- Activate Your Paint: Dip your brush (or a palette knife, if you're feeling adventurous) into a tiny bit of linseed oil. You want to loosen the paint to a creamy, buttery consistency, not make it runny. A little goes a long way here. This step helps the paint flow smoothly from your brush. For your initial "lean" layers, a good starting mix is 1 part linseed oil to 3 parts odorless mineral spirits. As you build subsequent layers, gradually increase the oil content, for instance, to a 1:1 mix of oil to solvent for "fatter" layers.
- Load Your Brush: Pick up some paint. Feel its resistance, its creaminess. How much paint does your brush hold? How much pressure do you need to apply? This is about building muscle memory and intuition. The way the paint drags across the canvas, the sound it makes – these are all part of the unique experience of oils.
- Make Marks: Swirl it around, make lines, blotches, gradients. Just explore! Try mixing two colors directly on the canvas. See what happens. Sometimes I just throw paint on a canvas to clear my head; it’s wonderfully therapeutic. Embrace the imperfection, it's part of your unique artistic voice. Remember, the journey is the reward, not the perfectly polished end result.
- Lift Some Paint: A unique advantage of oils! While the paint is still wet, gently press a clean, dry brush or a crumpled paper towel onto an area, then lift it. You'll remove some paint, revealing the layer beneath or creating a soft highlight. This is fantastic for adding luminous effects or correcting small areas without starting over.
Key Oil Painting Techniques for Beginners:
- Alla Prima (Wet-on-Wet): This technique involves completing a painting in a single session, or while the paint layers are still wet. The extended drying time of oils makes this especially feasible and enjoyable for beginners, allowing for seamless blending directly on the canvas without worrying about layers drying too quickly. It's spontaneous and direct, perfect for capturing immediate impressions or for expressive, loose work. For a deeper dive, check out what is alla prima painting.
- Impasto: This is where you apply paint thickly, often with a brush or palette knife, so it stands out from the surface and retains visible brushstrokes or textures. Oils are fantastic for impasto because their body and slow drying time allow for sculpting the paint and building up significant texture that holds its form as it dries, adding a wonderful tactile quality to your work. Think of Van Gogh's swirling skies. Learn more at what is impasto painting.
- Glazing: At the other end of the spectrum, glazing involves applying thin, transparent layers of oil paint (often thinned with a medium like linseed oil) over dried paint layers. Each glaze subtly modifies the color and tone beneath it, creating incredible depth, luminosity, and richness. This technique was central to many Old Masters, allowing them to achieve glowing skin tones and atmospheric effects. It requires patience, but the results are truly magical. Learn more about mastering glazing techniques in oil painting.
- Scumbling: This is a dry-brush technique where you drag a small amount of thick, opaque paint lightly over a dry (or nearly dry) layer, letting the texture of the canvas or previous paint show through. It creates a soft, broken, often luminous effect – great for misty skies, textured surfaces, or adding subtle color shifts. Think of it as a whisper of color, adding a delicate veil.
- Dry Brushing: Similar to scumbling but can be used for more precise textural effects. Load your brush with very little paint, then drag it across the surface. This highlights the canvas tooth and creates a feathery, broken stroke, excellent for creating distressed textures, hair, or foliage. You might find a guide on dry brush technique for acrylic painting helpful for conceptual understanding, as the principle is similar even if the medium differs.
- Sgraffito: This fun technique involves scratching through a wet layer of paint to reveal the dried color or canvas beneath. You can use the back of a brush, a palette knife, or even a specialized sgraffito tool. It's fantastic for creating fine lines, textures, or adding unexpected highlights or details. Oil's slow drying time makes it perfect for this, giving you plenty of time to work.
Key Takeaways for Techniques:
- Embrace the slow drying time. It's a feature, not a bug, allowing for endless blending.
- Experiment with thick (impasto) and thin (glazing) applications. Both add incredible dimension.
- Don't be afraid to make a mess. That's how discoveries happen.
Common Art Supplies Pitfalls (and How to Avoid Them)
As a beginner, it's easy to stumble into some common traps. Here's what I've learned to watch out for – sometimes the hard way!
- Buying Too Many Expensive Supplies: It's tempting to want all the fancy artist-grade tools, but for a beginner, this is often a waste of money and can be intimidating. Start with student-grade paints and a curated set of brushes. You can upgrade later when you know what you truly need and prefer. I once blew a whole paycheck on a set of paints I barely used, convinced it would make me a master overnight!
- Buying Very Poor-Quality Supplies: On the flip side, extremely cheap, low-quality supplies can hinder your learning and frustrate you unnecessarily. They might not hold pigment well, brushes might shed bristles, or colors might be dull. Aim for good student-grade options – they offer the best balance of quality and affordability for beginners.
- Ignoring Cleanup and Care: Neglecting to clean brushes properly or dispose of oily rags safely can quickly ruin your tools and even create hazards. Good habits from the start will save you money and keep your creative space safe. Trust me, a ruined brush is a sad, sad thing.
What to Expect After Your First Sessions
Your first oil paintings might feel messy, your colors might not be perfectly blended, and yes, they will take longer to dry than you expect! This is completely normal. Don't let these initial experiences discourage you. Embrace the mess as part of the process, understand that mastering color takes time and practice, and learn to appreciate the slow, contemplative rhythm of oil painting. These initial "struggles" are not failures; they are invaluable lessons in disguise, teaching you the unique properties of the medium and guiding your hand towards mastery. Every single artist, no matter how renowned, went through this exact phase. Keep experimenting, keep playing, and most importantly, keep enjoying the journey.
Common Beginner Worries (and Why They're Not a Big Deal)
I’ve heard them all, and probably voiced most of them myself. Let's tackle a few of these artistic anxieties. Remember, every master was once a beginner, too!

Q1: Is oil painting difficult for beginners?
A1: Not as difficult as you might think! While it has a learning curve, its slow drying time makes it very forgiving for blending and corrections, which is actually great for beginners. The key is to start with basic supplies and simple exercises, focusing on learning the medium rather than perfection. The tactile, hands-on process of traditional oil painting also offers a unique, tangible connection to your art, a stark contrast to the often sterile feel of purely digital or AI-generated creations. It's an intimate dance with pigment and canvas that digital tools just can't replicate.
Q2: What's the biggest mistake beginners make in oil painting?
A2: Overworking the paint and getting frustrated with slow drying times are common pitfalls. Embrace the slow drying as an opportunity to blend and refine. Also, using too much solvent can strip the paint of its binder (the oil that holds the pigment together) and make it dull. Always remember the crucial "fat over lean" rule for layering to prevent cracking: paint with more oil (fat) over layers with less oil (lean). Another common mistake is not understanding that different pigments have different properties – some are transparent, some opaque, some dry faster than others. This affects how they mix and how layers build up. Experiment to get a feel for each color's character.
Q3: How do I clean my oil painting brushes?
A3: Start by wiping off as much excess paint as possible with a paper towel or rag. Then, swirl them in a jar of odorless mineral spirits (OMS) to dissolve remaining paint. Rinse them in a second jar of clean OMS, then wash thoroughly with soap (like an artist's brush soap or even mild dish soap) and water until all color is gone. Reshape and let them dry flat or brush-side up. This meticulous care is essential for the longevity of your tools. For a detailed guide, check out cleaning and caring for your paint brushes.
Q4: Do I need an easel to start oil painting?
A4: No, not strictly necessary for your very first attempts. You can prop your canvas up on a table. However, an easel does help significantly with perspective and comfort as it allows you to paint vertically, which many artists find more natural and better for assessing your work. A simple tabletop easel is a good, affordable starting point if you decide to invest.

Q5: How long does oil paint take to dry?
A5: This is the classic oil painting question! It varies wildly depending on the thickness of the paint, the pigment used, and environmental conditions. Thin layers can be touch-dry in a day or two, but thicker impasto layers (thickly applied paint) can take weeks or even months to feel dry to the touch. This is why oil painting requires patience! Remember that a painting isn't truly dry for varnishing until it's fully cured, which can take six months to a year or more for thick applications. So don't rush the process, just enjoy the journey.
Q6: Can I use acrylic gesso for oil painting?
A6: Yes, absolutely! Acrylic gesso is a standard and widely accepted primer for oil paints. It creates a barrier between the oil paint and the canvas fibers, protecting the canvas and providing a good tooth for the paint to adhere to. It's the most common choice for preparing surfaces. For more on preparing your surface, see how to prepare a canvas for oil painting.
Q7: Can I paint new layers over a dried oil painting?
A7: Absolutely! This is a core advantage of oil painting and fundamental to building up complex works. To prepare a dried oil painting for new layers, you might gently scuff the surface with a fine-grit sandpaper (very lightly!) or rub a very thin layer of painting medium (like linseed oil or an alkyd medium) over it. This provides a fresh surface for the new paint to adhere to. Always ensure the previous layer is truly dry to the touch before adding a new one, and remember the "fat over lean" rule to prevent cracking.
Inspiration & Practice: Fueling Your Artistic Fire
Starting is one thing, but keeping that artistic fire stoked is another! Here are a few ways I keep my inspiration flowing and my skills sharpening:
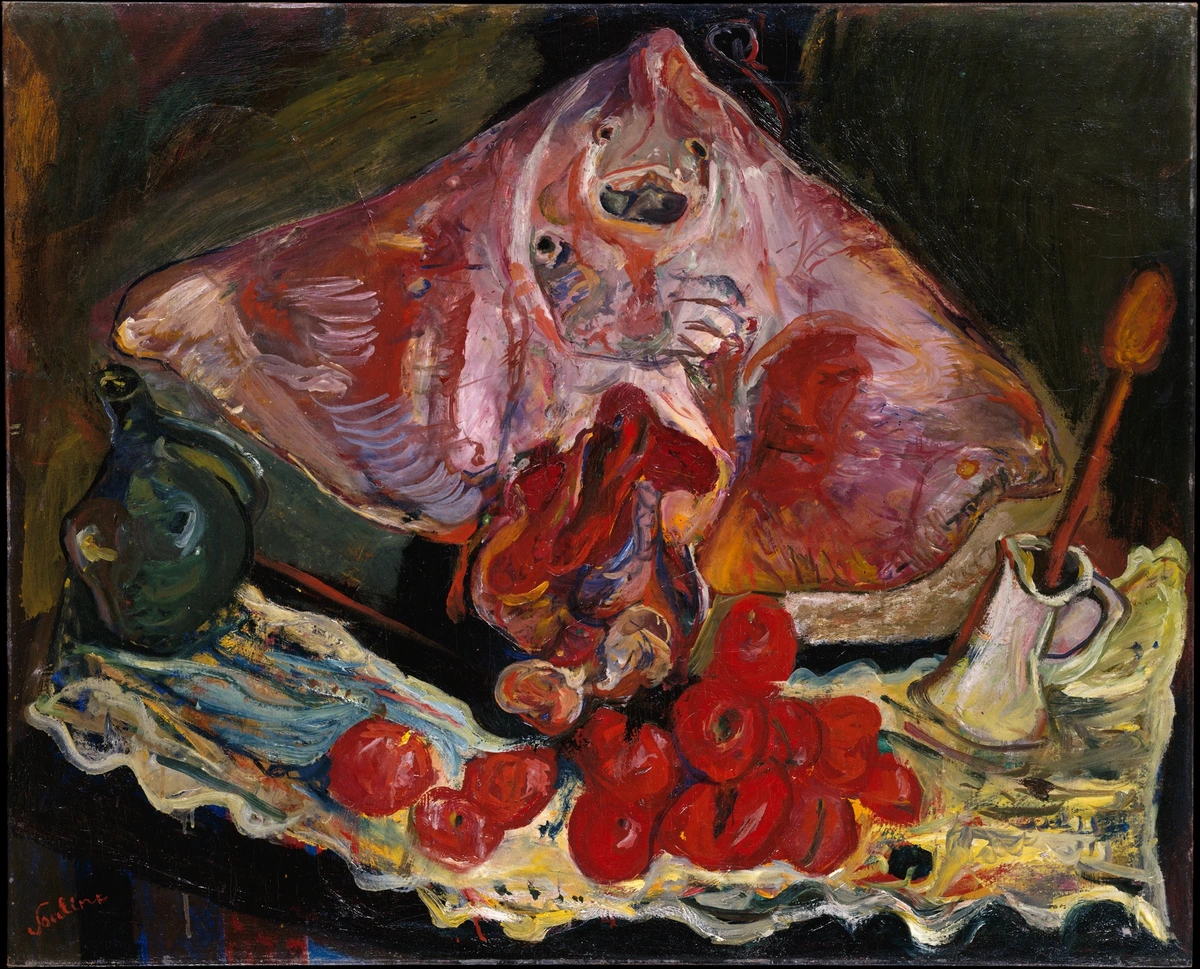
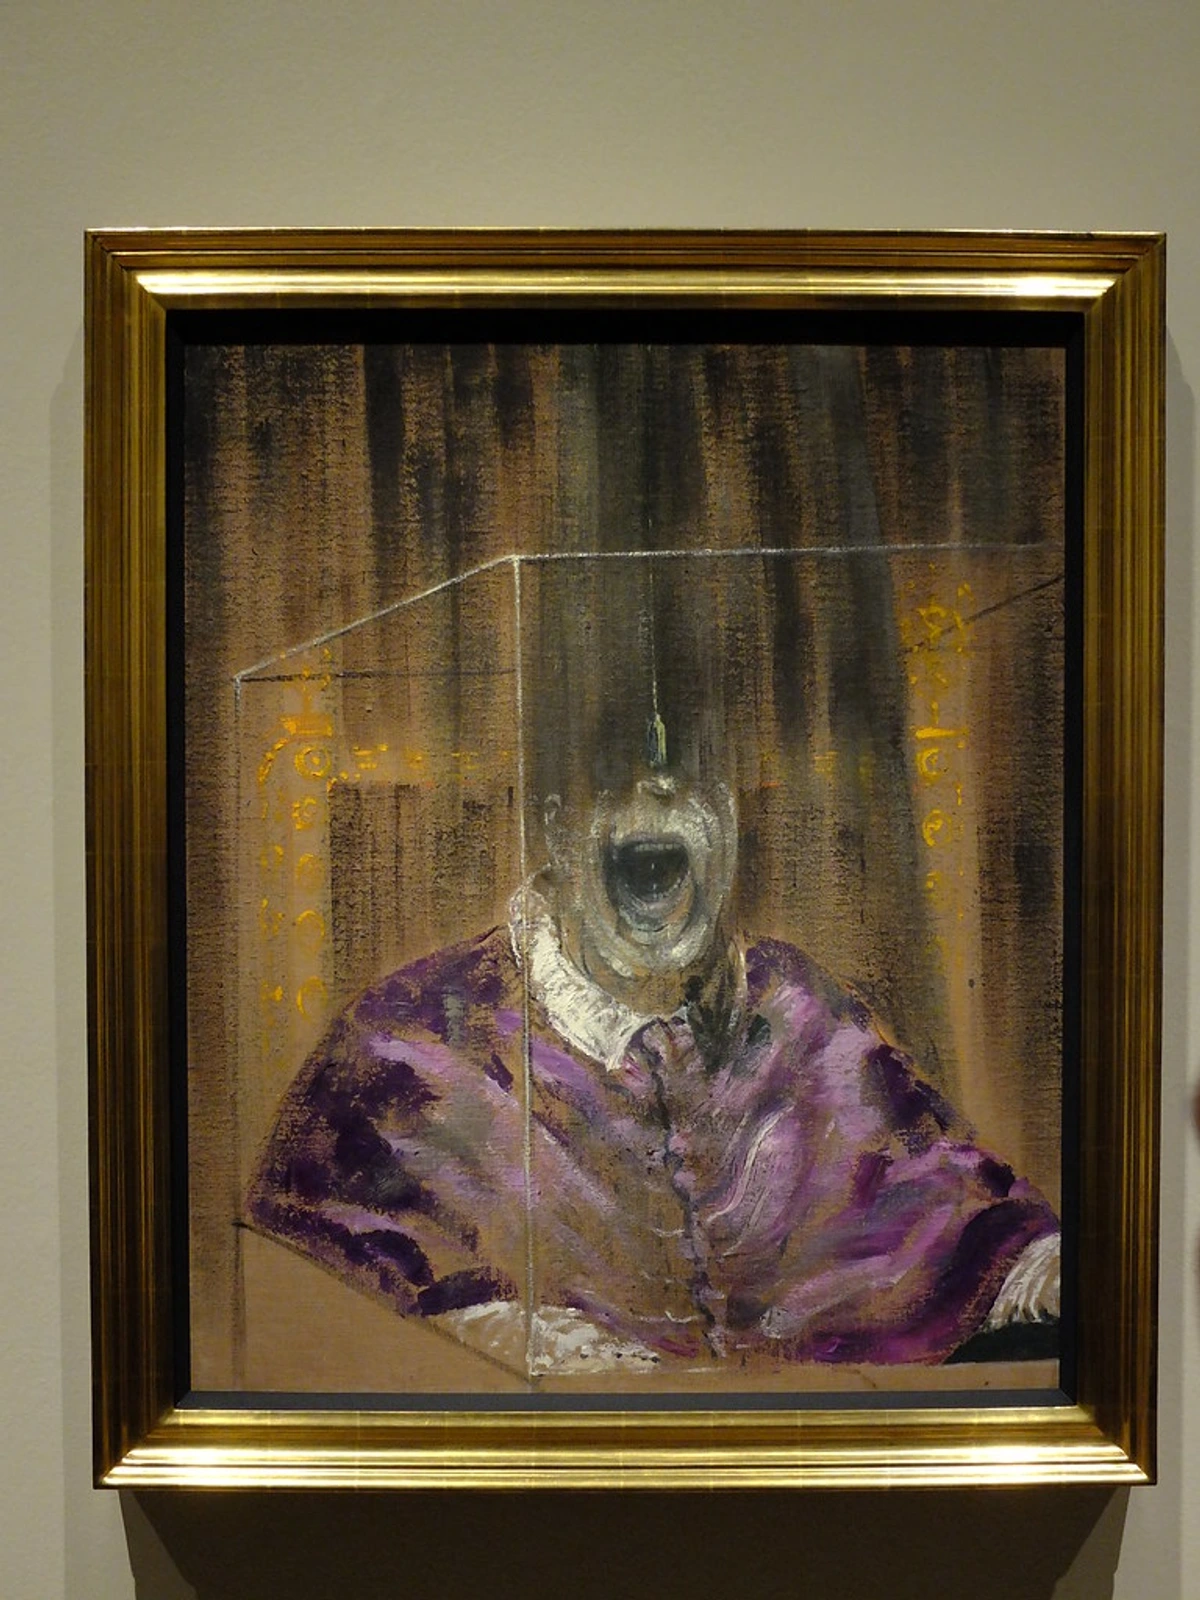
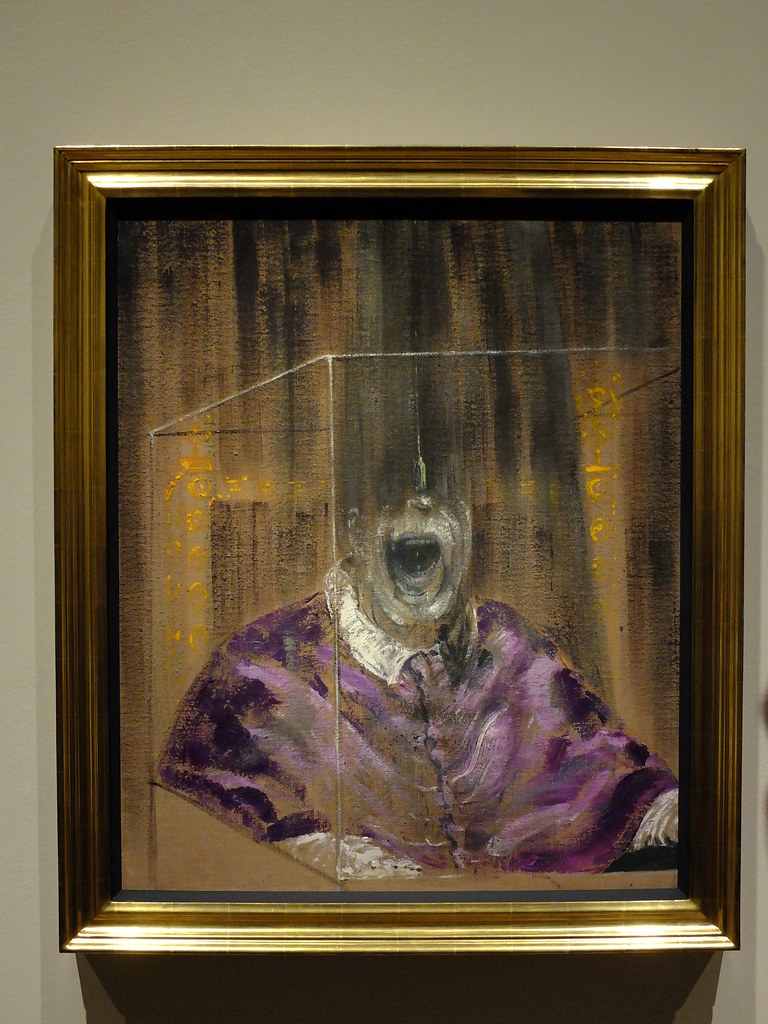
- Study the Masters (and Contemporaries): You don't need to copy them, but looking at how artists throughout history have handled light, color, and composition can be incredibly illuminating. Visit museums, browse art books, or explore online galleries and communities. Seeing a Francis Bacon painting in person can shake something loose in your own creative mind, inspiring new directions. This tactile engagement with physical art, observing the actual brushstrokes and textures, offers a richness that purely digital or AI-generated images often lack. It reminds us of the profound human connection embedded in every stroke, a deliberate choice in an increasingly virtual world. Check out exhibitions and art installations like those showcased at the Venice Biennale for diverse inspiration.
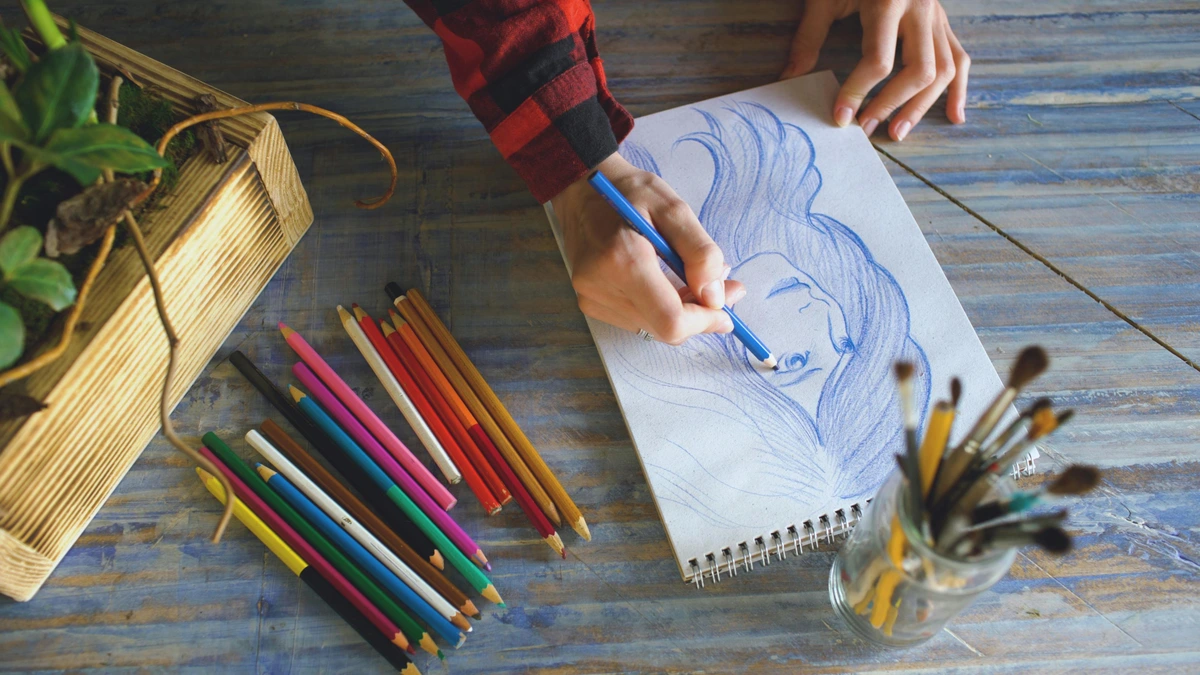
- Sketch, Sketch, Sketch: Even if you're oil painting, a small sketchbook is your best friend. It's a low-pressure way to capture ideas, practice drawing, and work out compositions before committing to canvas. No need for a fancy one; even a simple notebook works! I often fill entire notebooks with quick studies and color tests.

- Take Classes or Workshops: There's nothing quite like learning from an experienced instructor and being part of a creative community. They can provide immediate feedback and introduce you to techniques you might not discover on your own.
- Use Reference Photos (Wisely): It's perfectly fine to paint from photos, especially as a beginner. But try not to just copy them exactly. Use them as a starting point, extract elements, or change the colors to make it your own. The goal is to learn to see, not just to replicate.
- Embrace Play & Challenges: Sometimes, the best practice is simply to play with your materials. No goal, no pressure, just exploration. Mix colors for the sheer joy of it. See what happens when you make a specific mark. These moments often lead to unexpected breakthroughs. For instance, try a weekly challenge: "This week, create three distinct color mixes using only complementary colors!" My own timeline is full of such playful experiments.
- Journal Your Journey: Keep a journal of your painting process. Document challenges, breakthroughs, observations about color, and feelings about your progress. This self-reflection deepens your learning and helps you appreciate your unique artistic path.
Embracing the Journey: Finishing Touches and Your Inner Artist
Starting oil painting is less about creating a masterpiece and more about nurturing a connection with yourself and a timeless medium. It’s about slowing down, observing, and allowing yourself the freedom to make marks and discover. Don’t compare your beginning to someone else's middle or end. Your unique voice will emerge through every hesitant stroke and every triumphant blend. And remember, a properly executed oil painting, carefully layered and varnished, can last for centuries – a true heirloom you create.
One final, quick note: once your oil painting is completely cured (which, as we discussed, can take six months to a year or more, depending on paint thickness), you'll want to varnish it. Varnishing protects the painting from dust and UV light, and it unifies the sheen, making all the colors look equally vibrant. For a full step-by-step guide, check out how to varnish an oil painting: a step-by-step guide. But that's a step far down the line, once you're already deeply immersed in the world of oils!
So, grab those tubes, set up your space, and just begin. The worst that can happen is you create a canvas full of interesting experiments – and trust me, those are often the most valuable lessons of all. I've filled entire sketchbooks and canvases with what others might call 'failures,' but to me, they were all necessary steps on my own artistic timeline. So, what are you waiting for? Uncap those tubes, embrace the buttery texture, and start your own incredible oil painting adventure. Your unique artistic voice is waiting to be discovered, one stroke at a time! Ready to make your first mark and begin your vibrant artistic legacy? Share your first oil painting journey with me! Tag me on social media or send a message; I'd love to see what you create, perhaps even acquire some new pieces for your collection here.


