
How to Hang a Perfect Gallery Wall: Your Step-by-Step Guide
Transform your space with a stunning gallery wall! This comprehensive guide offers simple, actionable steps to plan, select, and hang your art like a pro. Get inspired!
How to Hang a Perfect Gallery Wall: Your Ultimate Step-by-Step Guide to Personal Expression and Professional Style
Ah, the gallery wall! It’s one of those decorating feats that can feel incredibly daunting, isn't it? I know, you’ve seen those effortlessly chic walls, brimming with personality and a perfectly curated collection, and maybe you've thought, "I could never do that." Well, darling, I'm here to tell you that you absolutely can – and in fact, you should! Creating a stunning gallery wall isn't about being an art expert, having a massive budget, or even owning a house that looks like it's straight out of a magazine. It's about a little planning, some simple steps, a dash of confidence, and most importantly, telling your own unique story. Think of it as a grand, visual conversation with your space, a beautiful testament to your personal journey, an evolving memoir on display. It’s an act of self-expression, a daily dose of inspiration, and a truly dynamic way to transform any room. Ready to make your walls not just sing, but truly soar? Let's dive in!
The Enduring Allure of a Gallery Wall: Why Your Home Needs This Visual Symphony: A Zenmuseum Perspective
Before we dive into the nitty-gritty, let's just sit for a moment with the 'why' of a gallery wall. For me, it's never just about filling a blank space; it's about creating a narrative, a visual conversation that invites discovery. It's an opportunity to gather pieces that resonate with your soul, from abstract art that stirs emotion to cherished family photos that evoke warmth. Think of your wall as a living, breathing canvas, constantly evolving with you. It's a testament to your aesthetic journey, a collage of moments and inspirations. It’s a chance to literally paint your personal history and aspirations onto the very fabric of your home. A gallery wall is far more than just a collection of framed items; it's a visual story, a reflection of your personality, and a dynamic way to fill a large space or add interest to a smaller one. It allows you to mix different art styles, incorporate abstract art, photographs, cherished mementos, and even sculptural pieces. It instantly adds depth, character, and a focal point to any room – far more engaging than a single piece of art, sometimes! I mean, who doesn't love a good story? And your gallery wall? That's your visual autobiography. It can even boost your home office productivity by providing inspiring visuals, a little visual pick-me-up during those long work-from-home days. It's a journey, not a destination, for your walls.

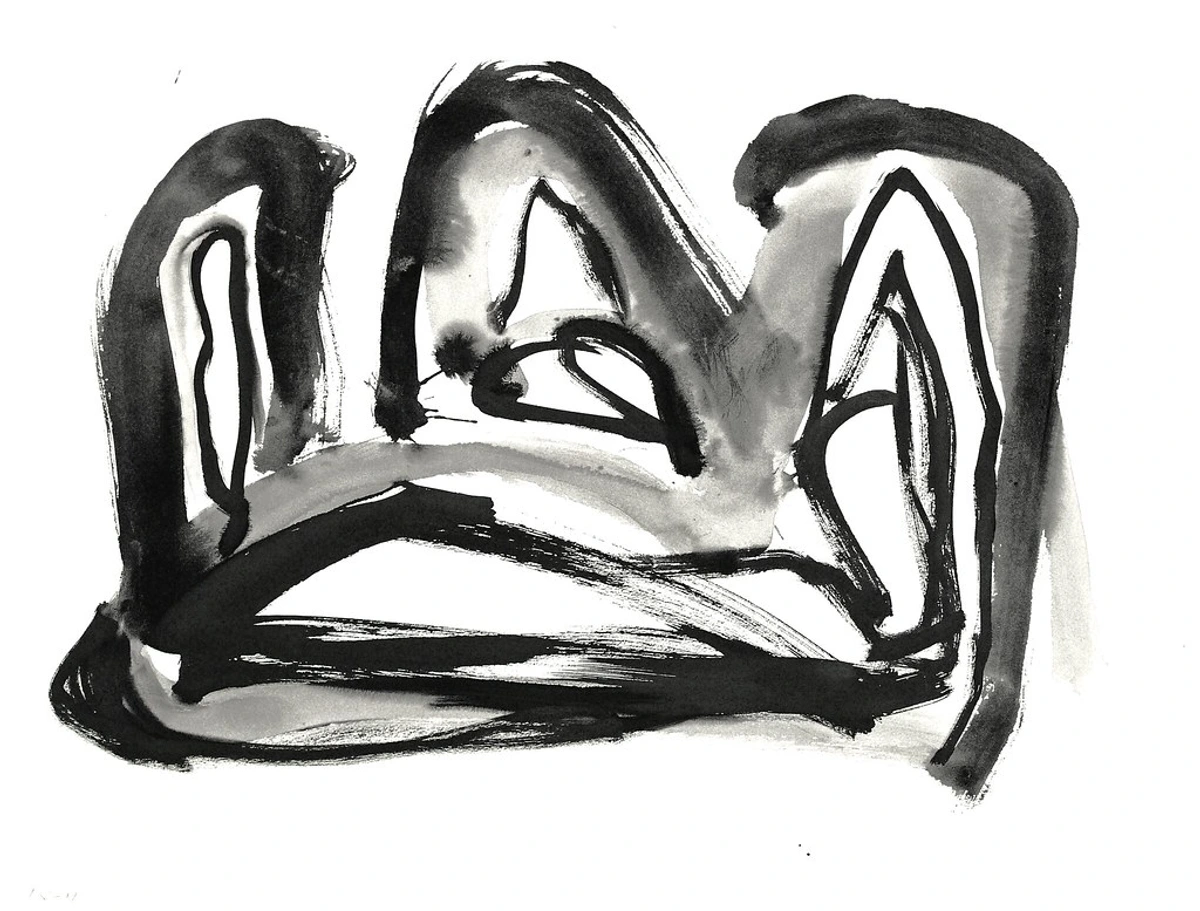
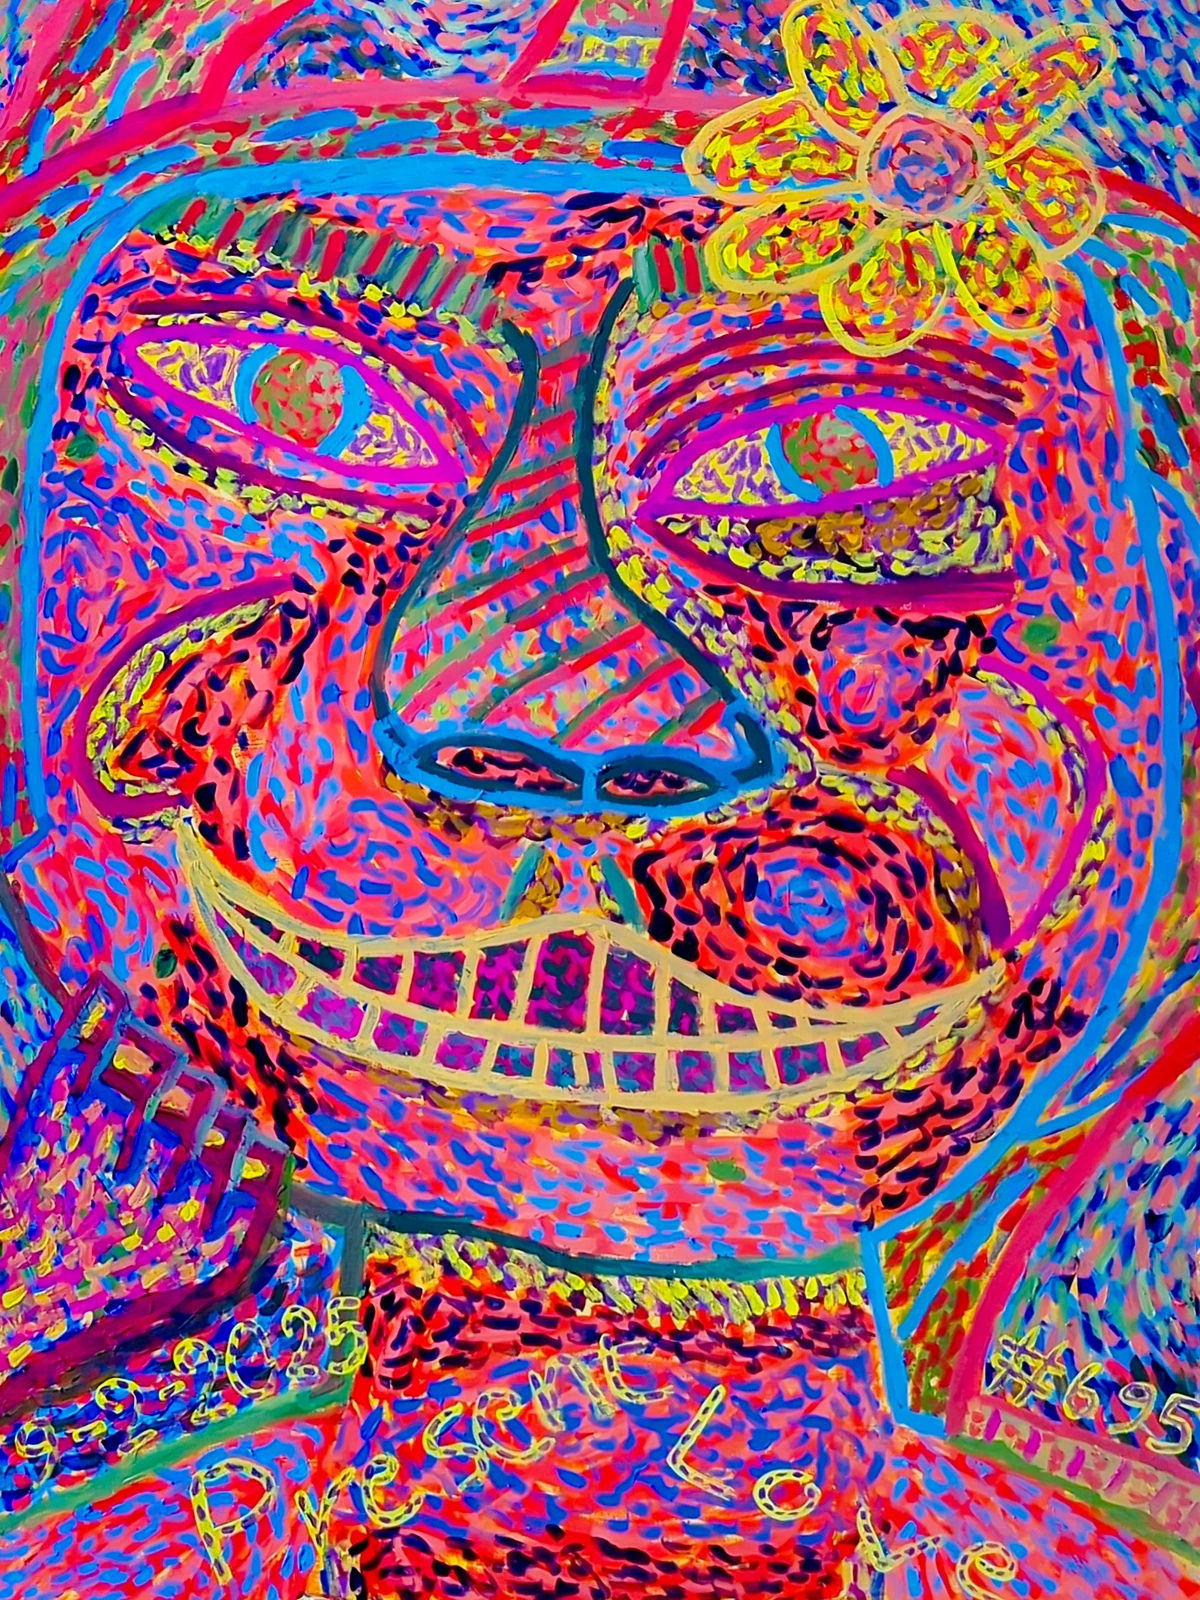
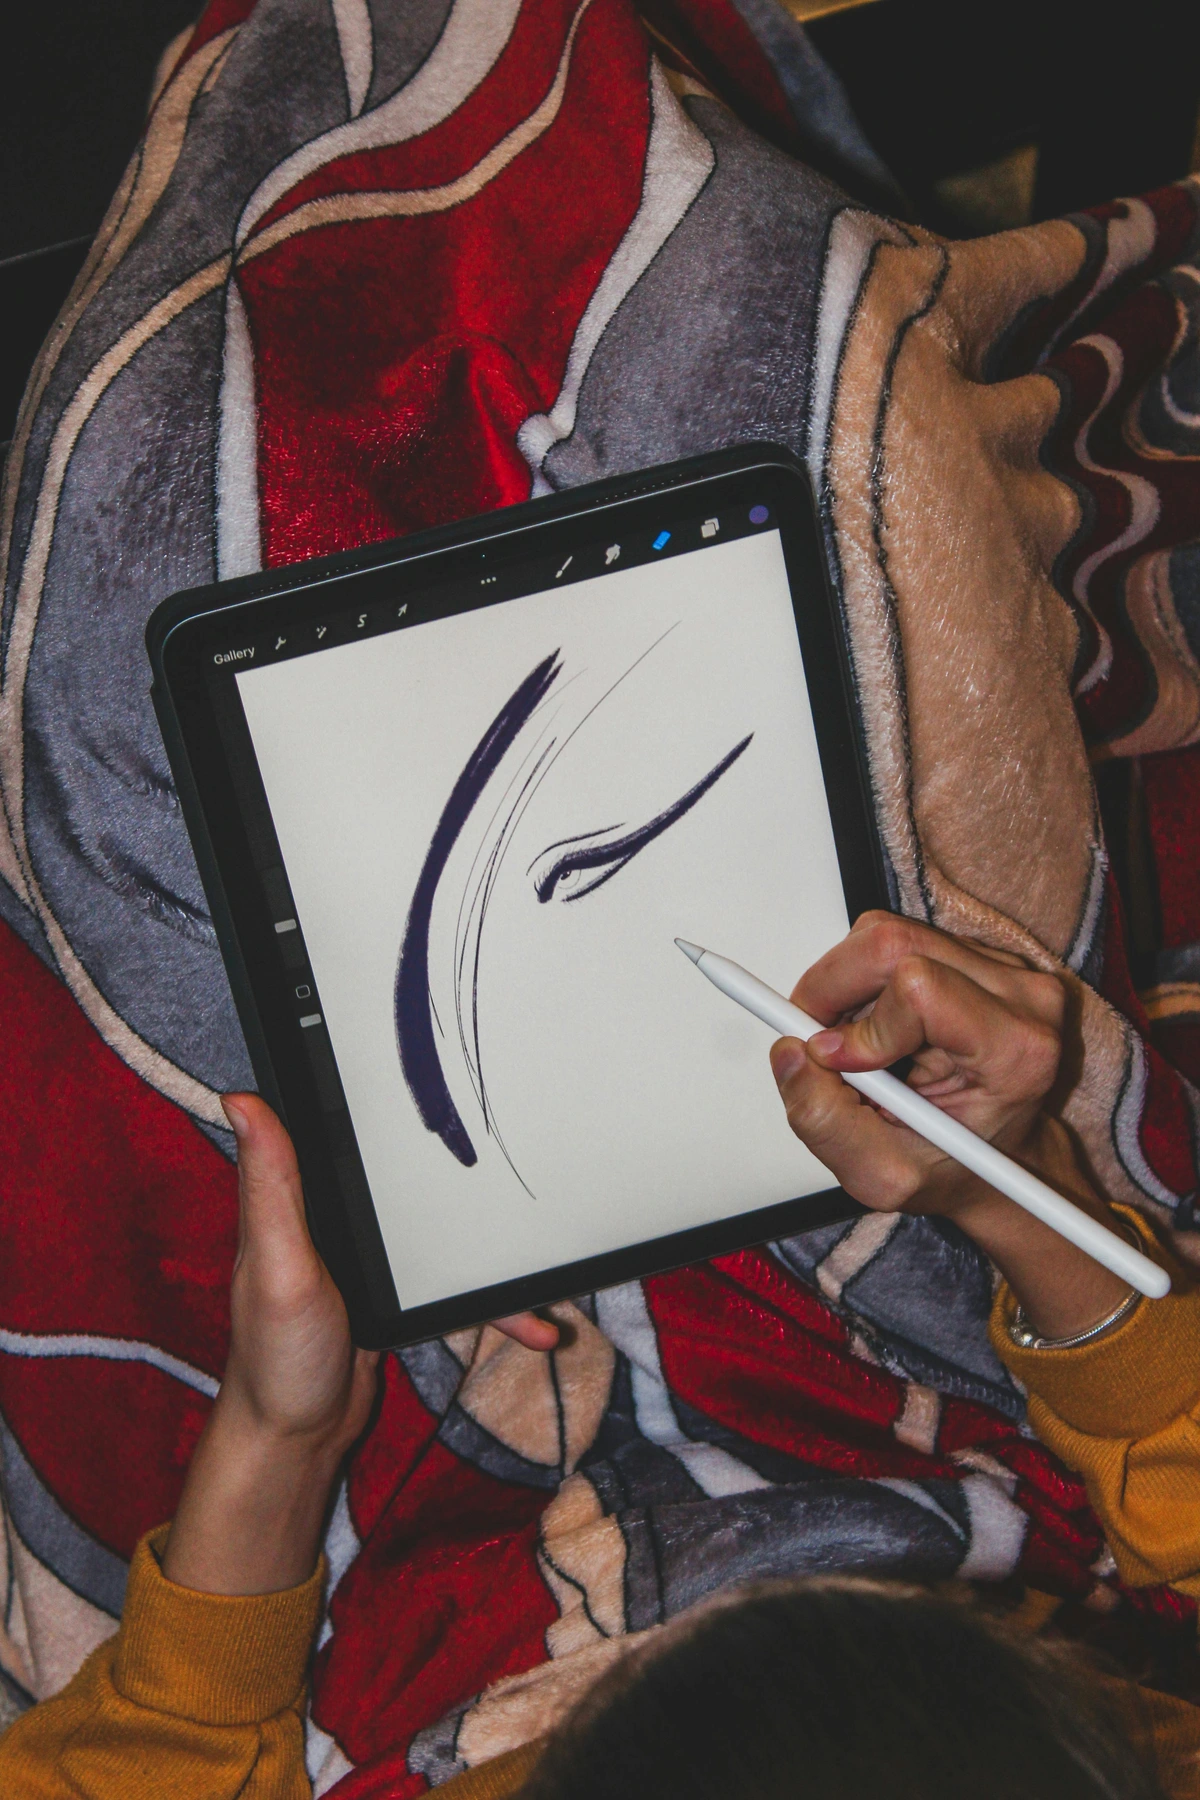
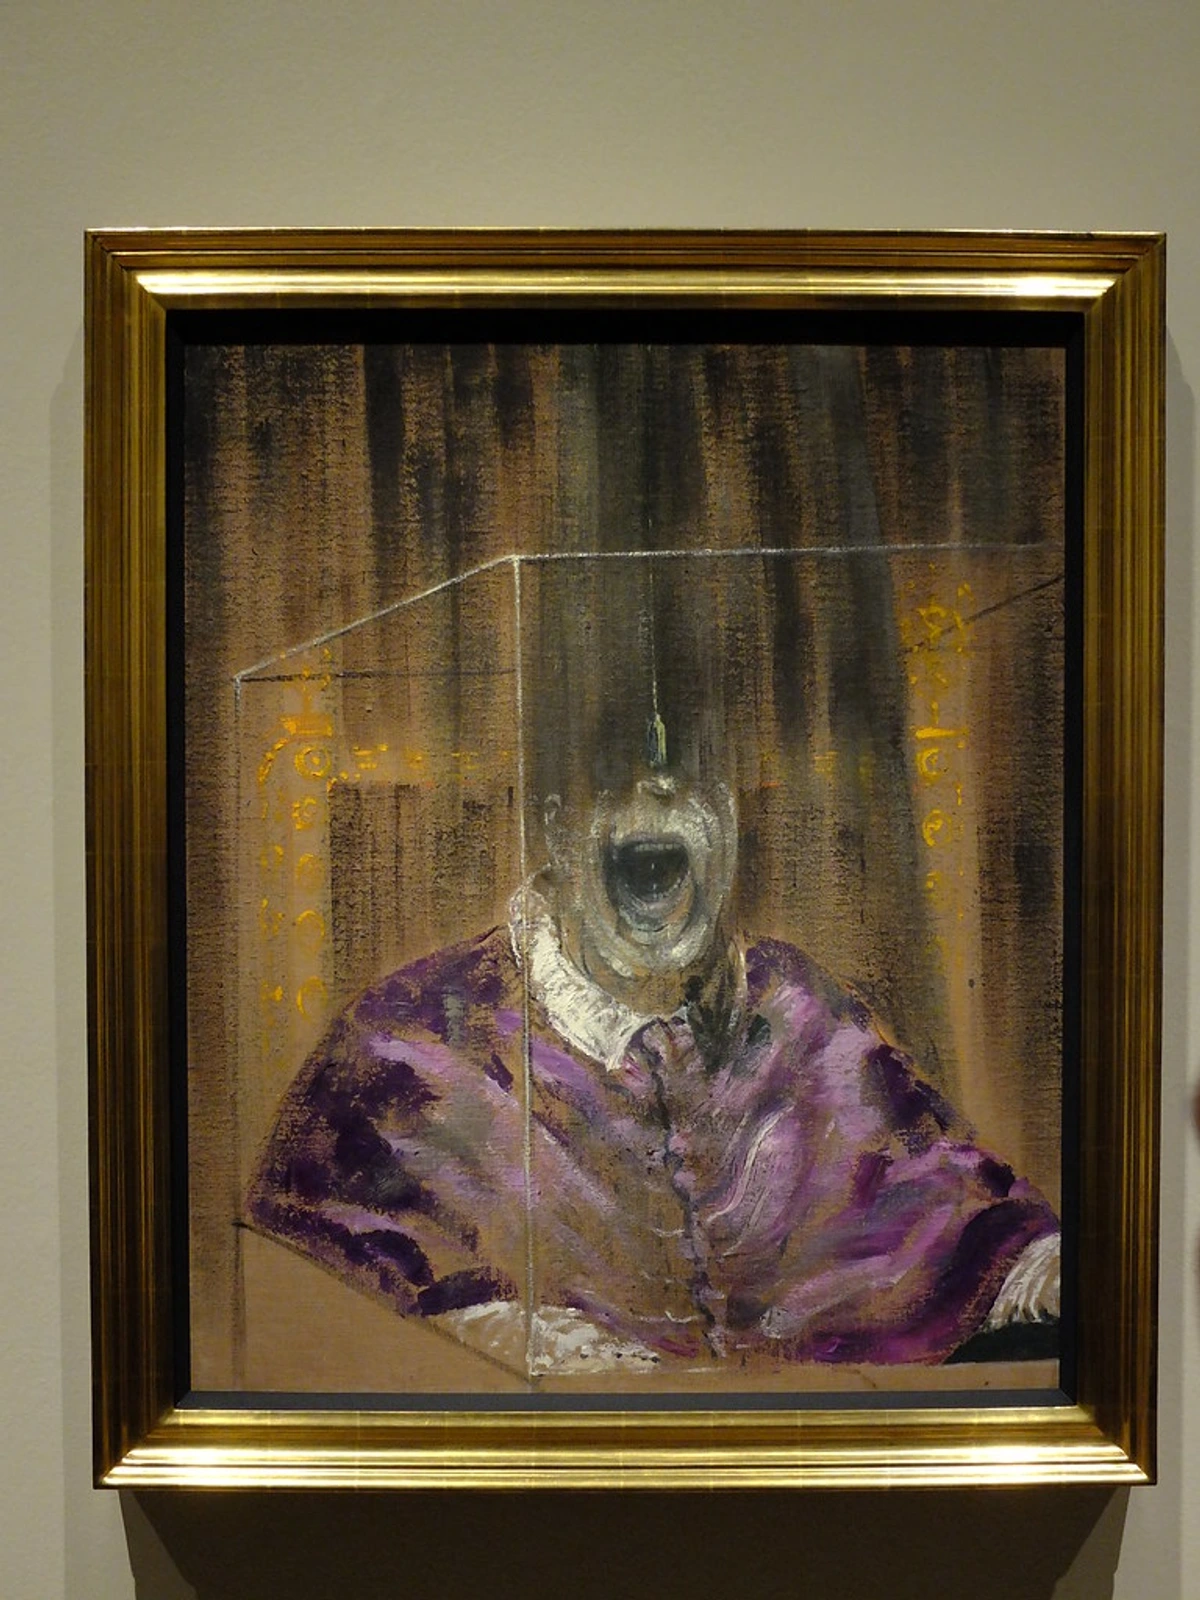
This vibrant abstract piece, for instance, hints at the kind of depth and character a well-curated gallery wall can bring. Who wouldn't want that kind of expressive power in their home? It's about making a statement, connecting with your space on a deeper level, and constantly refreshing your environment. A gallery wall is truly an investment in your well-being and personal aesthetic.
The Undeniable Benefits of a Gallery Wall: More Than Just Decoration
Let's be honest, we all want our homes to feel like us. We crave spaces that reflect our individuality, soothe our souls, and inspire our everyday lives. And a gallery wall is, in my humble opinion, one of the most powerful and flexible tools in your decorating arsenal to achieve just that. It's an investment in your personal well-being and a testament to your unique aesthetic journey. Here's why I think they're simply indispensable, offering far more than just surface-level decoration:
Benefit | Description | Example |
|---|---|---|
| Personal Expression | It's your story on display. Every piece, every photo, every memento reflects a part of you, your journeys, your passions, and your memories. It’s an unfiltered peek into your soul, if you will. | A mix of abstract art, travel photos, and a child's drawing, all sharing a subtle color palette, creating a cohesive visual memoir. |
| Dynamic Focal Point | A single large piece of art can be beautiful, but a gallery wall commands attention in a different way. Your eye dances from piece to piece, discovering new details and connections, making it a continuous source of visual interest. | An eclectic arrangement featuring a bold abstract painting as an anchor, surrounded by smaller, complementary photographs and prints, instantly drawing the eye upon entering the room. |
| Space Maximization | Gallery walls are masters of illusion. They can make a small wall feel grand and fill a large, awkward expanse with curated beauty. They utilize vertical space efficiently, drawing the eye upwards. | In a narrow hallway, a linear gallery wall of varied sizes hung vertically can create the illusion of higher ceilings and transform a utilitarian space into an inviting passageway. |
| Budget-Friendly Decor | You don't need to break the bank! A gallery wall allows you to mix expensive pieces with affordable prints, cherished family photos, or even vintage finds. It's about the collection and the curation, not just the price tag. | Combining a treasured original painting with affordable prints from local artists, framed postcards from travels, and unique textile art. |
| Versatility & Adaptability | Your tastes evolve, and so can your wall! A gallery wall is never truly 'finished.' You can easily swap pieces in and out, rearrange layouts, or add new finds as your collection grows, keeping your decor fresh and responsive to your current mood. | As you acquire new abstract art or redecorate a room, you can effortlessly integrate new pieces or swap out old ones without a complete overhaul. |
| Textural & Dimensional Interest | By mixing various media – from flat prints to sculptural objects, mirrors, or even small shelves – you introduce depth and texture that a single flat artwork simply can't achieve. This adds a rich, layered feel. | A gallery wall featuring framed watercolors, a small macrame hanging, a round mirror, and a tiny wall-mounted planter with a trailing vine, all contributing to a tactile and visually rich display. |
| Conversation Starter | Your unique collection will inevitably spark interest and discussion. Each piece holds a story, inviting guests to ask questions and engage with your personal narrative. | Imagine a guest discovering a vintage map next to a photo from your travels, leading to a delightful conversation about your adventures. |
| Storytelling Potential | More than just decor, a gallery wall allows you to craft a cohesive narrative, chronicling your adventures, milestones, and aesthetic evolution over time. | Grouping travel photographs with antique maps and souvenirs creates a visual diary of your global adventures. |
| Adapts to Changing Tastes | Unlike a single large piece, a gallery wall is inherently flexible. As your style evolves or you acquire new treasures, you can easily swap, add, or rearrange pieces. | Refreshing your living room? Simply rotate out a few older prints for new abstract digital prints to give the wall a whole new feel. |
| Creative Outlet | It provides a tangible way to express your creativity, experiment with aesthetics, and engage with your personal style in a hands-on manner. | Designing a themed wall for a child's room with their artwork, or a travel-inspired wall with souvenirs and photos, fosters a sense of accomplishment. |
| Supports Local Artists | By incorporating pieces from independent creators, you not only enrich your home but also contribute to the vibrant ecosystem of the art community. | Purchasing a unique abstract piece from a local artist and making it the centerpiece of your collection gives it a story and supports a creative dream. |
| Boosts Mood & Well-being | Surrounding yourself with art that resonates can create a positive and inspiring environment, reducing stress and enhancing daily joy. | A wall filled with calming landscapes, vibrant abstract art, or cherished memories can become a daily source of comfort and inspiration. |
| Educational & Cultural Value | Your curated collection can spark curiosity, invite learning, and expose both you and your guests to diverse artistic expressions and historical contexts. | Displaying vintage maps next to abstract pieces or cultural artifacts can initiate fascinating discussions about art history and global connections. |

Setting the Stage: Essential Pre-Planning Steps for a Flawless Gallery Wall
Before diving into the aesthetics, a little foundational work can save a lot of headaches later. This is where we lay the groundwork, ensuring your gallery wall isn't just beautiful, but also perfectly suited to your space and lifestyle. Think of it like this: a solid foundation means a stunning home, and the same goes for your wall art! It's about proactive problem-solving and intentional design, ensuring your masterpiece stands the test of time. Here's how to get started:
- Define Your Budget: Oh, the dreaded budget! But honestly, it's your best friend here. Determine how much you're willing to spend on frames, art, and hanging hardware. This will help guide your curation choices and prevent any unwelcome financial surprises. Remember, a stunning gallery wall doesn't have to break the bank; it's about clever curation! And trust me, some of my favorite pieces are the most unexpected, and certainly not the most expensive. It’s about the heart, not the price tag! Consider setting a tiered budget: a maximum for the entire project, and smaller allocations for individual pieces, frames, and tools. Don't forget potential costs for professional framing or specialized hardware if you have particularly precious or heavy pieces. A clear budget allows you to be creative within your means, leading to surprisingly ingenious solutions.
- Consider Future Growth: Are you a serial art collector, always finding new treasures? (I know I am!) If you plan to expand your collection, leave some intentional negative space or plan for an adaptable layout that can easily accommodate new additions without a complete overhaul. Think of it as leaving room for your visual story to grow, a conversation that never truly ends. Your art journey is continuous, and your wall should reflect that evolution, making it a truly living display.
- Assess Wall Condition: Before any hammering or drilling, take a good look at your wall. Check for any imperfections, nail holes, or uneven surfaces that might need to be addressed before hanging. A smooth, well-prepared canvas always makes for a better display, ensuring your art truly shines. Trust me, it’s worth the extra five minutes of spackling. Also, understand your wall material – drywall, plaster, brick, or concrete – as this will directly influence your choice of hanging hardware and installation techniques. This foundational step is often overlooked but prevents future headaches, especially if you're hanging art on brick walls where specialized tools are a must!
- Gather Inspiration: Before you commit, browse magazines, Pinterest, or even other homes you admire. What styles resonate with you? Do you prefer a grid gallery or a more organic salon style? Perhaps a specific art for minimalist interiors look? Having a clear vision, even if it's just a mood board, can be incredibly helpful. Don't be afraid to pull from diverse sources – sometimes the most unexpected combinations create the most magic and lead to truly unique gallery wall styles! Consider creating a digital mood board to visualize how different pieces and styles interact.
- Inventory Your Existing Art: You might be surprised by what treasures you already possess! Gather all the art, photos, and mementos you currently have that you'd like to include. This helps you see what you're working with before acquiring new pieces and often uncovers forgotten gems. Sometimes, that forgotten postcard from a memorable trip is exactly what your wall is missing! Don't underestimate the power of your own collection.
Before You Begin: Setting Your Intentions and Vision
Alright, let's talk about the initial mental prep. Before you even think about picking up a frame, I want you to spend a moment clarifying your vision. This isn't just about art; it's about setting a mood, defining a space, and understanding how your curated display will interact with the larger story of your home. It’s like setting the stage for your favorite play, where every piece has a role.
Choosing Your Wall: The Canvas for Your Story and Beyond
Not all walls are created equal, and not every wall is begging for a gallery. You need to consider the canvas itself, its personality, and how it interacts with the room, much like an artist considers their medium. It's about finding the perfect stage for your visual symphony. Here's what to ponder:
- Size & Scale: A grand, expansive wall can handle a sprawling, eclectic arrangement, while a smaller nook might call for a more curated, grid-like display. Don't try to fit a mansion-sized gallery on a tiny powder room wall (though, for a powder room, a compact, impactful display can be amazing!). Conversely, a single tiny piece on a huge wall can look lost, almost swallowed by the vastness. Proportionality is key! Think about how the gallery wall will contribute to the overall interior design of your space and how it will be perceived, especially when maximizing impact when choosing art for high ceilings.
- Purpose of the Room: Is it a cozy bedroom where you want calm and tranquility, or a bustling living room meant for lively conversation and entertainment? The art should echo the room's function, creating an ambiance that supports its primary use. Perhaps calm, flowing abstract art for a bedroom, or bold, vibrant pieces for a dynamic living area. Think about the mood you want to evoke – and how art can set it, perhaps even influencing your home office productivity.
- Existing Furniture: Your gallery wall should relate to the furniture it's above. A sofa, a console table, or even a bed can act as a grounding element, a visual anchor. Remember that 6-8 inch rule we'll talk about later? It's crucial here for creating that sense of deliberate placement. If you're struggling to choose, consider how art above the sofa can completely transform a space. It creates cohesion and harmonizing abstract art with existing furniture styles. Your art should dance with your furniture, not fight it! Think of your furniture as the anchor, and your gallery wall as its dynamic, captivating companion. This ensures a cohesive visual story that feels intentionally designed and prevents the art from feeling adrift.
- Lighting Conditions: This is often overlooked, but it's critical! Observe how natural and artificial light hits the wall throughout the day. Direct, harsh sunlight can fade delicate pieces and cause glare, while a poorly lit wall will diminish the impact of your display. Plan for appropriate lighting to protect and highlight your art, and consider UV-protective glass for precious pieces. This is where the language of light truly comes into play, transforming how your art is perceived and ensuring it always looks its best. Consider task lighting or spotlights to truly make your pieces pop.
- Wall Material & Integrity: Is it drywall, plaster, brick, or concrete? This will dictate the type of hanging hardware you need and whether you can easily make holes. Some materials require specialized tools and techniques – for instance, hanging art on brick walls requires specific anchors and a masonry drill bit. Don't underestimate this; the wrong hardware can lead to heartbreak (and holes to patch!). Understanding your wall's composition is foundational to a successful and secure installation.
- Traffic Flow: Consider how people move through the room. A sprawling gallery in a narrow hallway might feel cluttered or even be prone to bumps, whereas a linear arrangement could guide the eye beautifully and safely. Your art should enhance the space, not impede its function or create a visual bottleneck. A gallery wall should be an inviting journey, not an obstacle course!
- Consider the View from Other Rooms: How will your gallery wall be seen from adjacent spaces? Will it act as a captivating focal point through a doorway, or simply add visual clutter? Thinking about these sightlines ensures your display integrates harmoniously with your home's overall flow and enhances its visual impact, even from a distance.
- Architectural Features: Work with your room's unique architectural elements, not against them. A gallery wall can beautifully frame a window, accent a built-in bookshelf, or highlight a fireplace mantel. Embrace niches, alcoves, or even exposed brick, allowing these features to become part of your artful story.
Planning Your Masterpiece: The Foundation
Every great gallery wall begins with a solid plan. Think of it like building a house; you wouldn’t just start hammering nails. You need blueprints, right? For your gallery wall, the blueprint involves selecting your art, choosing your frames, and mapping out your layout.
1. Curating Your Collection: What Story Do You Want to Tell? (And How to Tell It!)
This is where the fun truly begins, and honestly, it's my favorite part! What pieces genuinely speak to you? Don't feel pressured to buy all new art. Look around your home! Do you have prints tucked away, old family photos, vintage postcards, children's drawings you adore, or perhaps even a beautiful abstract piece that needs a home? Perhaps you have some digital prints you've been meaning to frame. A gallery wall thrives on eclecticism and personal narrative. It's a chance to tell your story without saying a word, a visual autobiography playing out on your wall. When choosing art for a gallery wall, and building your personal art collection that reflects you, consider these crucial elements:
Thematic Cohesion vs. Deliberate Contrast: Finding Your Vibe
This is where your inner curator truly shines. Do you want a subtle, harmonious flow, or a dynamic, eye-catching juxtaposition? A gallery wall thrives on eclecticism and personal narrative, but that doesn't mean it has to be chaotic. Think about the overarching story you want to tell, the feeling you want to evoke. Maybe it's a monochromatic study, a celebration of vibrant abstract art, or a historical journey through family photos. The key is intentionality: even when mixing, a subtle thread—be it color, theme, or texture—can tie everything together beautifully. This is about creating a harmonious gallery wall with mixed media, where every piece finds its perfect partner.
- Theme: Do you want a cohesive theme (e.g., black and white photography, landscapes, abstract art) or a more eclectic mix? Both can be stunning, but the most impactful walls often find a unique balance.
- Color Palette: While not strictly necessary for an eclectic look, a unifying color palette (even subtle tones or a dominant hue) can tie diverse pieces together, creating a sense of calm or vibrant energy.
- Variety: Mix sizes, orientations (portrait vs. landscape), and even media. A painting next to a photograph, next to a textile piece – yes, please! This is where you get to play curator of your own mini-museum, creating depth and visual intrigue. Don't be afraid to combine abstract art with other art styles for a truly dynamic look.
Art Type | Why It Works | Tips for Integration |
|---|---|---|
| Photographs | Personal, sentimental, adds a human touch. | Mix candid shots with professional prints. Black and white can unify diverse photos. |
| Paintings | Adds texture, color, and artistic depth. | Don't be afraid to mix abstract with figurative. Consider a range of mediums like oils, watercolors, or acrylics. |
| Prints & Posters | Affordable, versatile, allows for diverse themes. | Great for filling gaps. Look for unique designs, vintage travel posters, or contemporary graphic art. |
| Textile Art | Adds warmth, soft texture, and a bohemian vibe. | Small macrame pieces, embroidered hoops, or even a piece of patterned fabric can introduce a tactile element. (Check out ideas for integrating textile art!) |
| Mirrors | Reflects light, creates an illusion of space, adds a touch of elegance. | Choose a mirror with an interesting frame. Place it strategically to reflect something beautiful. |
| Sculptural Items | Introduces 3D elements, breaks up the flatness, adds unexpected interest. | Small wall-mounted shelves with figurines, decorative plates, or even a mounted animal head (faux, of course!) can elevate the display. |
| Digital Art & Illustrations | Offers modern aesthetics, vast stylistic variety, and often affordable options. | Consider vibrant abstract digital prints or custom illustrations that add a contemporary edge. They're excellent for filling in gaps or introducing bold statements. |
| Maps & Atlases | Adds a sense of wanderlust, history, and a unique graphic element. | Frame vintage maps of places you've traveled or dream of visiting. Group smaller maps for a cohesive narrative, perhaps near a globe or travel mementos. |
| Found Objects & Memorabilia | Adds a deeply personal, tangible connection to your history and interests, providing unique texture and storytelling. | Shadow box a collection of antique keys, concert tickets, children's lost teeth, or even beautifully preserved botanical specimens. These pieces offer depth and unparalleled personal narrative. |
| Children's Art | Celebrates creativity, family, and adds an undeniable touch of joy and authenticity to your home. | Frame a collection of vibrant drawings, finger paintings, or handprint art. Varying sizes and simple frames can create a delightful, personal display. |
| Ephemeral Art / Mementos | Incorporates unique, often temporary, items that hold special meaning, adding layers of personal history and unexpected visual interest. | Frame a concert ticket stub from a memorable show, a pressed flower from a special occasion, or a handwritten note from a loved one. These personal touches transform a collection into a true narrative. |

2. Frame Game Strong: Cohesion vs. Contrast, and the Power of Presentation
Frames are the unsung heroes of a gallery wall, aren't they? They can truly make or break the overall look, acting as silent storytellers themselves. They are the stage around your art, the silent guardians of your cherished pieces. Here's how to approach them, whether you're aiming for sleek modernism or eclectic charm:

- Unified Look: For a sleek, modern, or minimalist vibe, stick to one type of frame: all black, all white, or all wood. This creates instant cohesion, letting the art itself be the star.
- Eclectic Charm: For a more bohemian or traditional feel, mix your frames! Think ornate gold, distressed wood, sleek metal, and simple black. The trick here is to ensure the overall vibe of the frames complements the art and your room. You want them to feel like they belong together, even if they're different.
- Matting: Matting can elevate a piece, drawing the eye in and giving smaller art more presence. It also creates breathing room between the art and the frame, which, trust me, can make a huge difference, especially for delicate or smaller works. Think of it as a subtle spotlight for your art, enhancing its importance and giving it that museum-quality feel. You can even experiment with double matting or colored mats for extra flair!
Frame Material/Style | Aesthetic It Creates | Best Suited For |
|---|---|---|
| Sleek Metal (Black/Silver) | Modern, industrial, minimalist, sophisticated. | Contemporary photography, abstract art, graphic prints. |
| Distressed Wood | Rustic, farmhouse, bohemian, cozy, organic. | Vintage prints, botanical illustrations, watercolors, abstract art in farmhouse interiors. |
| Ornate Gold/Silver | Traditional, luxurious, eclectic, antique. | Classical portraits, antique maps, bold abstract pieces for a contrasting effect. |
| Simple Black/White | Versatile, clean, crisp, allows art to pop. | Any style, but particularly effective for unifying diverse pieces or letting vibrant abstract artwork take center stage. |
| Natural Wood | Scandinavian, Japandi, organic, warm, minimalist. | Landscapes, nature-inspired art, line drawings, art in Japandi interiors. |
| Floating Frames | Contemporary, sleek, highlights canvas art by creating a gap around the edge. | Canvas paintings, especially abstract pieces, where you want the art to appear to float within the frame, adding depth and modernity. It's fantastic for raw-edged canvases or works that benefit from a minimalist, unencumbered presentation. |
| Shadow Box Frames | Creates depth and protects three-dimensional objects, perfect for displaying keepsakes and memorabilia, and adds a unique layered effect. | Ideal for showcasing found objects, small sculptures, vintage postcards, or a collection of cherished tickets, giving them a special, protected display. |
| Gallery Clip Frames | Offers a sleek, minimalist aesthetic by holding art between two panes of glass, often without a traditional frame, emphasizing the artwork itself. | Perfect for showcasing delicate paper prints, botanical pressings, or clean line art, providing an almost 'floating' effect against the wall. |
| Repurposed/DIY Frames | Infuses personality, sustainability, and a unique, handcrafted charm, allowing for creative expression and budget-friendly decor. | Salvaged antique window frames, intricately carved wooden pieces found at flea markets, or even frames painted in a custom color to match your decor. These pieces tell their own story before the art even goes in! |
The Power of Matting: Elevating Your Artwork
Matting isn't just a fancy extra; it's a vital design element that can dramatically enhance your artwork and protect it. It creates crucial breathing room, drawing the eye inward and preventing the art from touching the glass – which can cause damage over time due to condensation or adhesion. Think of it as a subtle spotlight for your art, enhancing its importance and giving it that museum-quality feel. You can experiment with double matting for added depth, creating a subtle border within a border, or even colored mats to pull out specific tones in your piece, creating a truly polished and professional look. It's an often-overlooked detail that can truly transform the perceived value and aesthetic of your display, making even an affordable print feel incredibly special and adding another layer of thoughtful curation.
Defining Your Gallery Wall Style: Beyond the Basics
Before you even think about layouts, take a moment to consider the vibe you're going for. Is it perfectly aligned and structured, or more organic and free-flowing? This decision often dictates your frame choices and overall arrangement, setting the stage for your personal art exhibition. Your chosen style should not only complement your art but also the overall interior design of your space, creating a harmonious and cohesive look.
Beyond the Grid: Combining Styles for Dynamic Impact
Who says you have to pick just one style? My absolute favorite thing to do is to blend them! Imagine a structured grid gallery that then organically flows into a more relaxed salon style on an adjacent wall. Or a linear arrangement that features a subtle cluster within it. The key is intentionality. Don't just throw things up; think about how the different styles complement each other and how they enhance the narrative you're trying to build. A little bit of controlled chaos can be absolutely stunning, reflecting a truly eclectic sensibility. This might mean starting with a precise grid of photographs and then letting a few unique, free-form abstract art pieces break the mold, creating an exciting visual tension. Or perhaps a more formal salon style in your living room seamlessly transitions into a playful, asymmetrical grouping in an adjoining hallway. The beauty lies in the unexpected yet harmonious blend.
Types of Gallery Wall Styles
Style | Description | Best For |
|---|---|---|
| Grid Gallery | Pieces are uniformly spaced and perfectly aligned, creating a clean, structured look. | Modern, minimalist interiors; large collections of similar-sized prints or photographs. |
| Salon Style | Frames are arranged organically, often from floor to ceiling, with varying sizes and shapes. Feels curated and maximalist. | Eclectic, bohemian, traditional spaces; mixing art, photos, and decorative objects. |
| Linear Gallery | Pieces are hung in a straight line, either horizontally or vertically, often above a piece of furniture. Simple and understated. | Hallways, above a sofa, for a sophisticated, understated feel. |
| Edge-to-Edge | Frames cover an entire wall section, creating a bold, immersive statement. Often uses consistent spacing. | Feature walls, large open spaces, for a dramatic and impactful display. |
| Staircase Gallery | Art follows the upward flow of a staircase, often with consistent spacing between the ascending pieces. | Staircase walls, creating visual interest on a transitional wall. |
| Horizontal Alignment | Pieces are arranged in a single, perfectly straight horizontal line, typically above furniture, emphasizing width and stability. | Ideal for anchoring a sofa, bed, or console table, creating a strong, clean visual line that grounds the space. |
| Vertical Ascent | Art is stacked vertically in a straight line, drawing the eye upwards and emphasizing height. | Excellent for narrow walls, between windows, or to accentuate high ceilings, adding a sense of grandeur and verticality. |
| Asymmetrical Grouping | A balanced, yet deliberately non-symmetrical arrangement of varying pieces, creating a dynamic, modern feel without strict rules. | Contemporary homes, open-concept living spaces, or anywhere you want a more artistic, less formal display without sacrificing balance. |
| Linear Vertical Stack | Pieces are perfectly aligned in a single, straight vertical line, emphasizing height and creating a clean, architectural statement. | Ideal for narrow walls, between windows, or to accent a tall piece of furniture, guiding the eye upwards and adding subtle drama. |
| Layered Display | Art pieces are deliberately overlapped, often leaning against the wall or on shelves, creating depth, texture, and a wonderfully informal, curated look. | Bohemian or eclectic interiors, bookshelves, mantels, or console tables where you want to build a rich, multi-dimensional vignette without hanging everything. |

3. The Layout: Mapping Your Vision with Precision and Playfulness
This is perhaps the most crucial step and, let's be honest, the one that causes the most anxiety. I know, I've been there! The fear of putting too many holes in the wall, only for it to look 'off,' is real. But don't worry, we're going to take the guesswork out of it, and I promise you, with a little patience, you'll nail it. It's all about envisioning the story before you commit, almost like an architect drafting a blueprint for a beautiful home. That perfect harmony and flow come from thoughtful preparation. It's about creating a visual story that feels both effortless and deeply considered. So, before you grab that hammer, let's nail down these foundational principles, ensuring your gallery wall isn't just hung, but designed:
The Ground Rules (My Personal Guide): From Museum Standards to Your Living Room
Alright, let's talk about the hard and fast rules – or rather, my personal guidelines – that I've found make all the difference. These are the secrets to a well-balanced, visually harmonious gallery wall that truly sings in your space, turning a mere collection into a curated masterpiece:
- Mid-Point Magic (Eye Level): This is a big one, a real game-changer for me. The center of your gallery wall (or the largest, most impactful piece if it's your focal point) should ideally be at eye level. For most people, this is typically around 57-60 inches (145-152 cm) from the floor. Think of it like a museum standard – it just feels right because it’s where our gaze naturally rests. It makes the art accessible, inviting you to connect with it without craning your neck, truly drawing you into the visual narrative. This is crucial for maximizing impact when choosing art for high ceilings. It's also about respecting the viewer's natural gaze – art should be seen, not strained for!
- Furniture Connection: If your gallery wall is positioned above a sofa, console table, or even a bed, ensure the bottom edge of the lowest frames is about 6-8 inches (15-20 cm) above the furniture. This creates a visual connection, grounding the display and preventing it from looking like it's floating aimlessly in space. It's about creating a cohesive vignette that truly complements your furniture, fostering harmonizing abstract art with existing furniture styles.
- The Power of Breathing Room (Consistent Spacing): This is absolutely key! Aim for consistent spacing between your frames. I typically recommend 2-4 inches (5-10 cm). Too close, and it looks cluttered; too far, and it loses its cohesion, appearing disjointed. Consistent negative space around your art is just as important as the art itself; it gives each piece room to breathe and shine. It's the silent partner in your visual symphony. Remember, the absence of art is just as important as its presence; it gives your eye a place to rest and appreciate each individual piece. This is vital for collecting art for small apartments.
- Measure Your Wall, Seriously: Before you do anything – anything – actually measure the width and height of the wall space you're working with. This helps you understand the canvas you have and prevents you from trying to fit too much, or too little, onto the wall. Don't forget to account for any architectural features, like windows or doorframes, that might impact your layout. Knowledge is power, darling! It’s all about working within your unique architectural story.
- Horizontal Harmony: When arranging multiple pieces horizontally, ensure their collective width doesn't exceed 2/3rds to 3/4ths the length of the furniture below. This creates a balanced, anchored look, preventing the art from looking like it's floating aimlessly and ensuring a sense of stability. It’s a beautiful way to create a focal point and ground the entire arrangement.
- The Importance of Verticality and Horizontality: This isn't just about placing art, it's about influencing how your eye moves through the room. Vertical arrangements draw the eye upwards, emphasizing height and creating a sense of grandeur. Horizontal layouts emphasize width, creating a feeling of stability and expanse. Choosing wisely can dramatically alter the perception of your space.
- Vertical Volume: For vertical arrangements, consider leaving more space above eye level for the eye to travel upwards, creating a sense of expansiveness and drawing attention to high ceilings. However, avoid placing art so high that it becomes difficult to appreciate; we want appreciation, not neck craning! For truly impactful displays, this is a secret to maximizing impact in small spaces.
Beyond the Floor: Digital Planning Tools
While I'm a huge advocate for the tactile, hands-on mock-up method (we'll get to that!), for those who love a bit of tech, there are also fantastic digital planning tools! Apps and websites (some even offered by frame retailers) allow you to upload photos of your wall and your art, then drag and drop virtual frames to experiment with layouts. This can be particularly useful for visualizing scale, color, and negative space, especially if you're working with a complex arrangement or want to share ideas with others before committing. It's a modern twist on the classic approach, offering another layer of confidence before you start hammering. Think of it as a virtual playground for your art!
The Mock-Up Method: Your Best Friend
This method is a game-changer, my friend. Trust me, you need to do this. I've tried to skip it in the past, thinking I could eyeball it, and regretted it every single time. It lets you experiment endlessly without putting a single hole in your precious wall, saving you from patching drywall and existential dread (we've all been there, right?). It’s your no-commitment playground for creativity, allowing you to fine-tune your visual story before committing to the actual hanging. This step is where you transform an idea into a tangible, achievable plan, removing the fear of commitment and ensuring a harmonious result.
- Trace Your Art: Lay all your framed art on the floor. Take some kraft paper, newspaper, or even old wrapping paper and trace each frame. Cut out these paper templates, perhaps using different colored paper for varying frame sizes to add another layer of visual distinction. This helps your brain process the arrangement more clearly.
- Label Everything: Write the name of the art piece on its corresponding paper template. Mark where the hook or wire hanger is on the back of the actual frame. This is critical for step 5, as it determines the actual nail placement, not just the frame's edge. Don't skip this; your future self will thank you!
- Play on the Floor: On a large clear area of your floor, arrange your paper templates. Play around with different configurations. Start with your largest pieces, then fill in with smaller ones. Think about visual balance (more on that later).
- Snap a Photo: Once you're happy with an arrangement, take a photo! This is your reference, your blueprint. Try a few arrangements and compare the photos – stepping away and looking at a flat image can often highlight imbalances you missed in person. Don't be afraid to try wildly different configurations at this stage; it's just paper!
- Tape to the Wall: Carefully tape your paper templates to the wall using painter's tape. Step back, squint, live with it for a bit. Adjust as needed. This is your final test run.
Tip for Success | Description | |
|---|---|---|
| Start with a Focal Point | If you have one large piece, place it first, then build around it. | |
| Work from the Center Out | For a more organic feel, define the center of your desired wall space and expand outwards. | |
| Balance, Not Symmetry | Aim for visual balance in terms of size and color, but don't feel pressured for perfect symmetry. | |
| Consider the Wall Shape | A staircase wall might lend itself to an upward-flowing arrangement, while a rectangular wall often works with a more grid-like or organic cluster. | |
| Embrace Negative Space | The empty space between and around your art is as important as the art itself. It provides visual rest and defines each piece. | Deliberately create areas of 'nothing' to make your 'something' stand out more. It's the silent partner in your visual symphony. |
| Consider the Room's Flow | Think about how people move through the room. Your gallery wall should guide the eye, not impede it, or create visual clutter in high-traffic areas. | In a hallway, a linear arrangement might be better than a sprawling salon style that demands stopping and prolonged viewing. |
| Integrate 3D Elements Thoughtfully | Don't be afraid to incorporate sculptural pieces, mirrors, or small shelves to add depth, texture, and unexpected interest. | A small floating shelf displaying a beloved figurine next to a framed print creates a dynamic, multi-dimensional vignette that invites closer inspection. |
| Mix Textures and Media | Don't be afraid to incorporate non-traditional items like mirrors, textile art, or small sculptural elements to add depth and interest. | A woven wall hanging next to a sleek framed print adds tactile contrast and visual intrigue. |
credit, licence
Okay, you’ve planned, you’ve mocked up, you’ve adjusted – now for the grand reveal! This is where your vision truly comes to life, the moment your carefully crafted story takes its place on the wall.
Time to Hang: The Step-by-Step Execution
With your layout approved, it's time for the moment of truth! Don't rush this part. Patience is your ally.

Tools You'll Need:
Alright, gather your troops! Having the right tools on hand will make this process so much smoother and more enjoyable. Trust me, there's nothing worse than getting halfway through and realizing you're missing a crucial item. Here's your essential toolkit, designed to make your hanging process efficient and stress-free:
- Your framed art and all those wonderful paper templates you just made.
- Painter's tape (your best friend for the mock-up phase – it's repositionable and won't damage paint).
- Pencil (for marking those critical spots, easily erasable).
- Measuring tape (precision is key, my friend, for accurate spacing).
- Level (a digital one is fantastic for accuracy, but a classic bubble level works just fine for ensuring everything is perfectly straight).
- Hammer or drill (depending on your chosen hanging hardware and wall type).
- Picture hanging hooks, nails, or screws (always choose appropriate hardware for your wall type and the weight of your art – more on this in a moment!).
- Optional but highly recommended: Command strips (for lightweight pieces or temporary arrangements – your landlord will thank you, and so will your walls!).
- Laser Level: For the truly obsessive (like me on a good day!), a laser level projects a straight line across your wall, making horizontal alignment a breeze and ensuring that crisp, clean look. It's a game-changer for grid-style layouts and large walls.
- Stud Finder: Essential if you're hanging heavier pieces, as it helps you locate the stronger structural elements (studs) behind your drywall. You definitely want to hit a stud if you can, especially for those more substantial works, or if you're hanging art on brick walls where specialized tools might be needed. Safety first!
- Wall Anchors: For pieces too heavy for just a nail in drywall where no stud is available, these provide extra grip and stability. They're mini-superheroes for your heavier art.
- Picture Hanging Kit: Often includes a variety of hooks, wires, and nails, which can be super handy for beginners or if you have a diverse collection of art of varying weights.
- Rubber Mallet: Gentler than a hammer for tapping in picture hooks, reducing the risk of wall damage. It's the polite way to hang art, preserving your pristine walls.
- Touch-up Paint & Spackle: Inevitable minor mistakes happen. Having these on hand for quick fixes is a lifesaver and a true sign of a prepared decorator. Always have a small kit for immediate repairs!
- Dust Cloth/Vacuum: To clean up any drywall dust after drilling or hammering. Keep your workspace tidy, darling, and protect your freshly hung art!
- Step Ladder or Stool: Don't try to stretch or reach precariously! A stable ladder ensures safety and precision, especially for higher placements and intricate adjustments.
- Your framed art and all those wonderful paper templates you just made.
- Painter's tape (your best friend for the mock-up phase).
- Pencil (for marking those critical spots).
- Measuring tape (precision is key, my friend!).
- Level (a digital one is fantastic for accuracy, but a classic bubble level works just fine).
- Hammer or drill (depending on your chosen hanging hardware and wall type).
- Picture hanging hooks, nails, or screws (always choose appropriate hardware for your wall type and the weight of your art – more on this in a moment!).
- Optional but highly recommended: Command strips (for lightweight pieces or temporary arrangements – your landlord will thank you, and so will your walls!).
- Laser Level: For the truly obsessive (like me on a good day!), a laser level projects a straight line across your wall, making horizontal alignment a breeze and ensuring that crisp, clean look. It's a game-changer for grid-style layouts.
- Stud Finder: Essential if you're hanging heavier pieces, as it helps you locate the stronger structural elements (studs) behind your drywall. You definitely want to hit a stud if you can, especially for those more substantial works, or if you're hanging art on brick walls where specialized tools might be needed. Safety first!
- Wall Anchors: For pieces too heavy for just a nail in drywall where no stud is available, these provide extra grip and stability. They're mini-superheroes for your heavier art.
- Picture Hanging Kit: Often includes a variety of hooks, wires, and nails, which can be super handy for beginners or if you have a diverse collection of art.
- Rubber Mallet: Gentler than a hammer for tapping in picture hooks, reducing the risk of wall damage. It's the polite way to hang art.
- Touch-up Paint & Spackle: Inevitable minor mistakes happen. Having these on hand for quick fixes is a lifesaver and a true sign of a prepared decorator.
- Dust Cloth/Vacuum: To clean up any drywall dust after drilling or hammering. Keep your workspace tidy, darling!
Hanging Hardware Guide: Choosing Wisely
The type of hardware you use depends entirely on the weight of your art and the type of wall you have. Don't skimp here; a falling frame is a sad frame!
Hardware Type | Weight Capacity | Best For | Notes |
|---|---|---|---|
| Small Nails | Up to 5-10 lbs | Very light frames, paper art, unframed prints. | Simple, leaves small holes. Best for quick, temporary arrangements. |
| Picture Hooks (Single Nail) | 10-20 lbs | Medium-weight frames, smaller mirrors. | My go-to for most standard pieces. Distributes weight better than a single nail. |
| Picture Hooks (Double Nail) | 20-50 lbs | Heavier frames, larger canvases. | Provides more stability and weight distribution. |
| Drywall Anchors | 10-75 lbs | Heavier pieces on drywall where no stud is available. | Requires drilling a pilot hole. Follow manufacturer's instructions carefully for weight limits. |
| Toggle Bolts/Molly Bolts | 50-100+ lbs | Very heavy pieces (large mirrors, substantial framed art) in drywall. | Provides superior holding power in hollow walls. Can be a bit more involved to install. |
| Adhesive Hooks/Strips | Up to 16 lbs | Very lightweight frames, temporary decor, rental properties. | Offers damage-free hanging and easy repositioning. Best for non-valuable pieces and smooth, clean surfaces. Always check weight limits carefully. |
| French Cleat | 50-200+ lbs | Very heavy, large pieces (mirrors, large canvases, shelving). | A two-part interlocking system that distributes weight evenly across a large area. Provides exceptional security, though it's a more involved installation. This is my absolute favorite for anything substantial, as it practically welds your art to the wall. |
| Toggle Bolts/Molly Bolts | 50-100+ lbs | Very heavy pieces (large mirrors, substantial framed art) in drywall. | Provides superior holding power in hollow walls. Can be a bit more involved to install. Ensure you understand the installation process for these, as they require a larger hole. |
| Brick/Concrete Hooks | Varies | Brick or concrete walls. | Specialized hooks that either clip onto mortar joints or require drilling into the masonry. |
| Monkey Hooks | Up to 35 lbs | Lightweight to medium pieces on drywall. | Super easy to install – just push and twist! Leaves a tiny hole. Great for quick and convenient hanging, though not for your most precious heirlooms. |
| French Cleat | 50-200+ lbs | Very heavy, large pieces (mirrors, large canvases, shelving). | A two-part interlocking system that distributes weight evenly across a large area. Provides exceptional security, though it's a more involved installation. This is my absolute favorite for anything substantial, as it practically welds your art to the wall. |
| Adhesive Hooks/Strips | Up to 16 lbs | Very lightweight frames, temporary decor, rental properties. | Offers damage-free hanging and easy repositioning. Best for non-valuable pieces and smooth, clean surfaces. Always check weight limits carefully. |
Preparing Your Walls: The Often Overlooked First Step
Before any hardware goes in, take a moment to ensure your wall is ready. This might sound obvious, but a quick wipe-down can remove dust and grime, especially if you're using adhesive strips. For a truly pristine finish, repair any existing holes or imperfections with spackle and touch-up paint. It's like preparing a canvas for a painting; a smooth, clean surface ensures your masterpiece (your gallery wall!) looks its absolute best. This small effort upfront can make a huge difference in the final, polished appearance.
Hanging Process: The Grand Finale
Alright, this is the moment of truth! With your planning complete and tools at the ready, it's time to bring your vision to life. Don't rush this part; patience is your greatest ally here, ensuring a flawless finish you'll adore for years. This is where your careful preparation pays off, transforming paper templates into a stunning reality.
- Mark Your Spots with Precision: This is where those hanger marks on your paper templates truly shine. For each template still taped to your wall, use your pencil to mark exactly where the nail or screw needs to go. Remember, this isn't the top of the frame, but the point where the actual hanging mechanism (wire, D-ring, sawtooth hanger) will rest. This tiny detail makes all the difference for accurate placement.
- Remove Templates: Carefully peel off all your paper templates. You should be left with a series of precise pencil marks on your wall, your roadmap to a perfect gallery. Double-check them one last time!
- Install Hardware Safely: Following your marks, install your chosen picture hanging hardware. If using nails, tap them in carefully. If using screws (especially with anchors), drill pilot holes first to prevent cracking and ensure a secure fit. Always double-check that your hardware is securely installed and can bear the weight of the piece, plus a little extra for good measure. And please, use caution – nobody wants to hit a pipe or electrical wire! A quick check with your stud finder for wiring can save a lot of headaches and costly repairs. Different wall materials require different approaches: drywall is relatively easy to work with (but needs anchors for heavier items), plaster can be brittle, and brick or concrete require specialized masonry drill bits and anchors. Always research the best method for your specific wall type.
- Hang Your Art, Piece by Piece: Gently lift and hang each framed piece onto its installed hardware. Ah, this is the satisfying part, the grand reveal! Take a breath, admire your work. For pieces with a wire, try to get the wire to rest at the lowest point on the hook for maximum stability and to ensure the art hangs flush. For D-rings or sawtooth hangers, ensure they're securely seated. For canvas art, particularly abstract art, make sure it's snug against the wall and level.
- Double-Check All Connections: Before you step away, give each piece a gentle tug or wiggle to ensure it’s firmly seated on its hanger. You don't want any unexpected midnight crashes or skewed art! This quick check provides peace of mind.
- Level Check & Refine: Use your level to ensure each piece is perfectly straight. Even the slightest tilt can throw off the whole vibe, so be meticulous here! Make small adjustments as needed. Sometimes you might need to slightly adjust the hook or the wire on the back of the frame to get it just right. Perfection is in the details, and a perfectly level piece of art is incredibly satisfying, truly elevating the entire composition. Don't be afraid to take a moment and get it just right!
- Step Back and Admire: Once everything is hung and leveled, take a good, long step back – ideally from a different room – and observe. Does the overall composition feel balanced? Are there any pieces that feel out of place or demand too much attention? Don't be afraid to make minor tweaks; it's your wall, and it has to feel right to you. Sometimes, a fresh perspective after a short break can reveal subtle adjustments that elevate the entire display. This is the art of the reveal, your moment of aesthetic satisfaction!
Beyond Basic Hooks: Creative Hanging Solutions
While nails and screws are your bread and butter, don't limit your imagination! There are other creative ways to hang art that offer fantastic flexibility or a specific aesthetic you might adore. Sometimes, thinking outside the box truly elevates the display. Consider:
- Picture Rail Systems: These are a dream for older homes or if you love to rearrange frequently without damaging your walls. Picture rail systems allow you to hang art from a molding near the ceiling using adjustable cords and hooks. Fantastic for renters or anyone who dreads patching holes!
- Invisible Wire Systems: For a sleek, almost floating look, consider invisible wire systems. These use thin, strong wires suspended from the ceiling to display art, creating a very clean, gallery-like aesthetic that truly makes the art pop as if by magic.
- Adhesive Hooks (like Command hooks): A renter's best friend for lightweight pieces! These offer a damage-free solution for hanging prints, small frames, or temporary displays. Just ensure you follow the instructions meticulously for proper application and removal to keep those walls (and your security deposit!) happy.
Each method offers a different visual impact and level of commitment, so choose what best suits your art and your living situation. For instance, in a child's room, I often lean towards picture rail systems or adhesive hooks for easy rotation as their tastes (and heights!) change. Don't limit yourself to just what's conventional; sometimes the most ingenious solutions are just a little outside the box.
Beyond Basic Hooks: Creative Hanging Solutions
While nails and screws are your bread and butter, don't limit your imagination! There are other creative ways to hang art that offer fantastic flexibility or a specific aesthetic you might adore. Sometimes, thinking outside the box truly elevates the display. Consider:
- Picture Rail Systems: These are a dream for older homes or if you love to rearrange frequently without damaging your walls. Picture rail systems allow you to hang art from a molding near the ceiling using adjustable cords and hooks. Fantastic for renters or anyone who dreads patching holes, as they allow for endless rearrangement without new holes!
- Invisible Wire Systems: For a sleek, almost floating look, consider invisible wire systems. These use thin, strong wires suspended from the ceiling to display art, creating a very clean, gallery-like aesthetic that truly makes the art pop as if by magic, perfect for a contemporary vibe.
- Command Picture Ledges: These offer the look of a narrow floating shelf without permanent wall damage, perfect for displaying small frames, layered art, or lightweight objects. They're a fantastic renter-friendly solution for adding dimension and can be easily removed.
- Wall Decals & Murals: While not traditional 'hanging,' integrating a subtle wall decal or a painted mural as a backdrop can tie a gallery wall together, creating a larger, cohesive artistic statement that goes beyond individual frames, adding a dramatic, personalized touch.
Alternative Hanging Methods: Beyond the Nail
Beyond the standard hook, consider integrating methods that add dimension, texture, or solve specific challenges. These can truly make your gallery wall a conversation starter, showcasing your creativity and resourcefulness:
- Grid Walls & Pegboards: For a truly dynamic and easily reconfigurable display, consider a full grid wall or pegboard system. It's fantastic for ever-evolving collections, kids' rooms, or home offices where you might want to frequently swap out pieces, add shelves, or hang small objects. It offers unparalleled flexibility and an industrial-chic vibe, allowing your wall to change as often as your mood.
- Art Leaning on Shelves/Floors: Who says art always has to be hung? Larger pieces can be casually leaned against a wall on the floor, or smaller pieces propped on a bookshelf or console. This adds a wonderfully relaxed, layered, and bohemian vibe, instantly making a space feel more curated and less 'stuffy'. Just ensure they are stable and not in high-traffic areas where they might be easily knocked over. It's a great way to showcase large abstract pieces without committing to permanent hanging and adds a fantastic sense of informality.
Enhancing Your Display with Digital Art & QR Codes
In our increasingly digital world, don't forget the power of technology to enhance your physical gallery wall. Consider displaying digital art on a high-resolution screen integrated into your collection, creating a dynamic, ever-changing piece. For physical artworks, a discreet QR code next to a piece can lead viewers to an artist's website, a detailed story about the artwork's origin, or even a personal anecdote about how you acquired it. This bridges the gap between the tangible and the digital, adding layers of context and engagement to your curated space. It's a modern twist that invites deeper interaction and storytelling. You're creating an experience, not just a display.
- Clipboards & Clotheslines: For a more informal, playful, or temporary display, clipboards mounted to the wall or a simple string/wire with mini clothes pegs can be charming ways to showcase prints, photos, or even children's artwork. It’s perfect for spaces that embrace a casual, changeable aesthetic, like a kid's bedroom or a creative studio, allowing for easy updates.
- Plate Hangers: For decorative plates, platters, or even small, intricately designed ceramic tiles, specialized plate hangers allow you to integrate them seamlessly into your gallery wall, adding a touch of traditional or global flair and a unique textural element.
- Magnetic Paint/Board: For an ultra-flexible solution, paint a section of your wall with magnetic paint or install a magnetic board. This allows you to easily attach and rearrange prints, photos, and lightweight objects with magnets, making changes a breeze and offering endless creative possibilities!
Post-Hanging Refinements: The Art of the Tweak
Sometimes, even with the best planning, a gallery wall might feel a little off once everything is up. Don't panic! This is where the magic of the 'tweak' comes in. Think of it as the final polish on your masterpiece.
Taking a Fresh Perspective
I always find that stepping back, way back – ideally to another room – gives you a completely different perspective. Squinting helps too, oddly enough! It's like resetting your eyes to see the overall composition rather than individual pieces. What stands out? Does anything feel out of place or demand too much attention? Don't be afraid to make small adjustments. Your gut feeling is often your best guide here. Sometimes, I even walk away for an hour or a day, and come back with fresh eyes. You'd be surprised how much clarity a little distance can provide! Consider taking a photo with your phone; a flat image can often highlight imbalances or areas that feel 'off' more easily than looking in person.
Achieving Balance and Visual Harmony
Even after hanging, a gallery wall might feel a little off, and that’s perfectly normal. It’s a living arrangement, after all! Here's how I approach refining it for maximum impact and that elusive professional look, transforming a collection into a truly cohesive artistic statement. It's about a conversation, a subtle dance between each piece, and the overall energy it brings to your home.
Consistent Spacing: The Unifying Element
As mentioned, aiming for consistent spacing between frames (2-4 inches is a good starting point) is crucial. This creates a grid, even if it's an invisible one, that makes the whole collection feel intentional and cohesive. Irregular spacing can make the wall look messy and accidental. While consistent spacing is usually the goal, a deliberate slight variation can create a more organic, free-flowing salon style, but this requires a very keen eye for balance to avoid looking haphazard.

Visual Weight: A Subtle Art
Think about the visual weight of each piece. A large, dark-toned abstract painting has more visual weight than a small, light-toned print. Try to distribute this weight evenly across your wall. If you have several heavy pieces on one side, try to balance it with lighter pieces or a larger, lighter-framed piece on the other. It's not about physical weight, but about how much attention a piece draws. Imagine a huge, dark, abstract painting next to a tiny, delicate watercolor. The abstract piece will inevitably pull your eye more. Try to distribute this visual weight evenly across your wall. If you have several heavy pieces on one side, balance it with lighter pieces or a larger, lighter-framed piece on the other. It's like finding the equilibrium on a seesaw – subtle, but impactful. This is also where the thoughtful use of negative space comes into play – giving each piece room to breathe actually enhances its visual impact and helps define the composition. Consider also the direction of visual weight; a series of pieces moving left-to-right can create a sense of progression, while a heavier piece at the bottom can ground the entire display.

Color and Contrast: The Silent Conversation
Beyond individual pieces, consider the overall color palette and contrast of your entire gallery wall. A collection of subtly toned sepia photographs will have a very different impact than a vibrant explosion of colorful abstract art. Think about how colors play off each other, creating visual pathways or intentional focal points. High contrast can create drama and energy, while a more subdued palette offers calm and sophistication. Even within an eclectic mix, a few shared hues can act as unifying anchors, pulling diverse pieces into a harmonious whole. Think about how colors can lead the eye, create a focal point, or even evoke a specific emotion – a vibrant pop of yellow drawing your gaze, or a calming blue creating a sense of serenity.
Creating a Narrative Flow: Your Wall's Silent Storyteller
Even after hanging, a gallery wall might feel a little off, and that’s perfectly normal. It’s a living arrangement, after all! Here's how I approach refining it for maximum impact and that elusive professional look, transforming a collection into a truly cohesive artistic statement.
Consistent Spacing: The Unifying Element
As mentioned, aiming for consistent spacing between frames (2-4 inches is a good starting point) is crucial. This creates a grid, even if it's an invisible one, that makes the whole collection feel intentional and cohesive. Irregular spacing can make the wall look messy and accidental.
Visual Weight: A Subtle Art
Think about the visual weight of each piece. A large, dark-toned abstract painting has more visual weight than a small, light-toned print. Try to distribute this weight evenly across your wall. If you have several heavy pieces on one side, try to balance it with lighter pieces or a larger, lighter-framed piece on the other. It's not about physical weight, but about how much attention a piece draws. Imagine a huge, dark, abstract painting next to a tiny, delicate watercolor. The abstract piece will inevitably pull your eye more. Try to distribute this visual weight evenly across your wall. If you have several heavy pieces on one side, balance it with lighter pieces or a larger, lighter-framed piece on the other. It's like finding the equilibrium on a seesaw – subtle, but impactful. This is also where the thoughtful use of negative space comes into play – giving each piece room to breathe actually enhances its visual impact and helps define the composition.
Creating a Narrative Flow: Your Wall's Silent Storyteller
Beyond just balance and spacing, consider the story your gallery wall is telling. Are there subtle connections between pieces? Perhaps a shared color, a historical period, or even a personal anecdote? Arranging pieces in a way that suggests a journey or a dialogue can elevate your display from a collection to a captivating narrative. This might mean placing a piece of industrial art next to a vintage photograph of a factory, or a piece with vibrant yellow next to a print featuring a summer landscape. The subtle interplay of themes, colors, and even historical periods creates a richer experience, a true visual feast.

Creating a Narrative Flow: Your Wall's Silent Storyteller
Beyond just balance and spacing, consider the story your gallery wall is telling. Are there subtle connections between pieces? Perhaps a shared color, a historical period, or even a personal anecdote? Arranging pieces in a way that suggests a journey or a dialogue can elevate your display from a collection to a captivating narrative. This might mean placing a piece of industrial art next to a vintage photograph of a factory, or a piece with vibrant yellow next to a print featuring a summer landscape. The subtle interplay of themes, colors, and even historical periods creates a richer experience, a true visual feast. For example, a collection of vintage botanical prints could be interspersed with a pressed flower from a cherished garden, or a series of abstract cityscapes might frame a photograph from your favorite urban adventure. It’s about creating a personal, evolving dialogue. You can even create mini-narratives within the larger wall, small clusters that tell their own specific tale before contributing to the grander story. Think about a visual timeline of your travels, a celebration of family milestones, or an exploration of a specific artistic style or period. This conscious storytelling is what truly makes your gallery wall yours.
Incorporating Non-Art Elements
Don't limit yourself to just framed art! This is where your gallery wall can truly come alive and become a multi-dimensional display. Mirrors, small shelves with decorative figurines, macrame wall hangings, or even a small plant can add texture, dimension, and unexpected charm to your gallery wall. Just be mindful of how these elements fit with your chosen spacing and overall theme. I've seen everything from small, beautifully bound books on tiny wall shelves (who knew?), to antique keys, to even a particularly striking piece of pottery! The goal is to add texture, dimension, and unexpected charm without making the wall feel cluttered. Remember, a curated mix feels intentional, a chaotic mix... well, that's just chaotic. Think about how these additions complement your existing art and the overall interior design of your space, creating a truly integrated display that speaks volumes about your unique taste. You might be surprised at how much character a small, well-placed sculptural item or a vibrant succulent can add to the composition! Think about how these additions complement your existing art and the overall interior design of your space, creating a truly integrated display that speaks volumes about your unique taste. Consider incorporating:
- Small Mirrors: Not just for checking your reflection, mirrors reflect light and create an illusion of space, adding a touch of elegance and breaking up the flatness. A collection of small, varied mirrors can be a gallery wall in itself, bringing sparkle and dimension!
- Decorative Plates/Trays: Beautifully patterned plates or small, ornate trays can be mounted with special hangers, adding a unique, often traditional, or global element. Grouping a few together can create a striking visual centerpiece or complement your framed art.
- Tiny Floating Shelves: These are perfect for showcasing small sculptures, vintage figurines, curios, or even a tiny air plant for a touch of greenery. They add a wonderful sense of depth and allow for easy rotation of smaller treasures, creating delightful micro-vignettes.
- Wall Sconces/Candle Holders: These can add a lovely ambient light and sculptural element, especially in an entryway or dining area. They introduce both light and form to your display, creating a cozy and inviting atmosphere.
- Textile Art: Beyond macrame, consider small embroidered hoops, woven wall hangings, or even a piece of beautifully patterned fabric stretched in an embroidery hoop for a soft, tactile touch. They add warmth and a bohemian sensibility, breaking up the hard lines of frames.
- Unique Hooks/Coat Racks: For a functional yet artistic touch, consider incorporating decorative hooks or a stylish, minimalist coat rack to display lightweight items like scarves or hats, turning everyday objects into art and adding a practical element to your display.
- Small Framed Quotes/Poetry: Inject personal meaning or inspiration by including framed excerpts of poetry, quotes, or even your favorite lyrics. It's another layer of storytelling, allowing your wall to speak volumes beyond just imagery.
- Architectural Salvage: Unique pieces like old grates, carved wooden fragments, or vintage signage can add incredible character and a sense of history, acting as sculptural elements within your arrangement.
- Collection of Empty Frames: Don't underestimate the power of an artfully arranged grouping of empty frames. Varying sizes, styles, and finishes can create visual interest and texture, even without artwork inside!
- Small Mirrors: Not just for checking your reflection, mirrors reflect light and create an illusion of space, adding a touch of elegance and breaking up the flatness. A collection of small, varied mirrors can be a gallery wall in itself!
- Decorative Plates/Trays: Beautifully patterned plates or small, ornate trays can be mounted with special hangers, adding a unique, often traditional, or global element. Grouping a few together can create a striking visual.
- Tiny Floating Shelves: These are perfect for showcasing small sculptures, vintage figurines, curios, or even a tiny air plant for a touch of greenery. They add a wonderful sense of depth and allow for easy rotation of smaller treasures.
- Wall Sconces/Candle Holders: These can add a lovely ambient light and sculptural element, especially in an entryway or dining area. They introduce both light and form to your display.
- Textile Art: Beyond macrame, consider small embroidered hoops, woven wall hangings, or even a piece of beautifully patterned fabric stretched in an embroidery hoop for a soft, tactile touch. They add warmth and a bohemian sensibility.
- Unique Hooks/Coat Racks: For a functional yet artistic touch, consider incorporating decorative hooks or a stylish, minimalist coat rack to display lightweight items like scarves or hats, turning everyday objects into art.
- Small Framed Quotes/Poetry: Inject personal meaning or inspiration by including framed excerpts of poetry, quotes, or even your favorite lyrics. It's another layer of storytelling.

Step Back and Observe
Periodically step back, ideally across the room, and take a fresh look. What stands out? Does anything feel out of place? Sometimes, a tiny adjustment can make a huge difference. Don't be afraid to move things if they're not quite right!
Beyond the Frames: Advanced Concepts for the Aspiring Curator
So you've mastered the basics, your gallery wall is looking fabulous, but you're itching for more? I get it. This is where we start playing with the big guns, thinking beyond just placement and into how your gallery wall interacts with the entire room, turning it into a true masterpiece of interior design. It's about creating an immersive experience, a dynamic dialogue between your art, your home, and your very soul, not just a static display. Let's delve into truly elevating your art installation.

Illuminating Your Masterpiece: Strategic Lighting
Lighting isn't just about seeing the art; it's about experiencing it. The right lighting can make your pieces sing, highlighting textures and colors, and creating a focal point that draws the eye. Think of it as painting with light, adding another layer of dimension and drama to your curated display. Don't let your beautiful art get lost in the shadows! Strategic lighting not only highlights your pieces but can also create mood, add drama, and influence the entire ambiance of your room. It's a crucial element in how to light and position abstract art for maximum impact.
- Picture Lights: These small, self-contained lights mounted directly above individual pieces create a dramatic, museum-like effect, highlighting textures and details. Battery-operated options are fantastic for renter-friendly solutions or if you want to avoid electrical work.
- Track Lighting: Versatile and adjustable, track lighting allows you to aim light at different pieces as your display evolves. Great for larger walls and offering flexibility to change your spotlight as your art collection grows. It's a dynamic choice for a dynamic wall!
- Recessed Lighting: If you're building or renovating, consider recessed lighting with adjustable gimbals to direct light onto your wall. This offers a very clean, integrated look that seamlessly blends into your ceiling.
- Wall Washers: These lights are designed to evenly illuminate an entire wall, creating a soft, ambient glow that highlights the overall collection rather than individual pieces. They're perfect for larger, more expansive gallery walls, creating a subtle, inviting radiance.
- Accent Spotlights: Similar to track lighting but often mounted individually, these can be aimed at specific pieces to draw attention and create focal points, especially effective for showcasing a standout abstract art piece.
- Natural Light: Embrace it! But also be mindful of direct sunlight, which can fade delicate artwork over time. Position your gallery wall to receive indirect, soft light, perhaps from a north-facing window, to protect your cherished pieces. You might even consider UV-protective glass for particularly valuable or delicate works. Remember, prolonged direct sunlight is the enemy of longevity for art, so protect your investment! |
- Gallery Spotlights: Small, focused spotlights can be individually aimed at specific pieces, creating dramatic highlights and drawing attention to texture, color, and intricate details. These are fantastic for showcasing a standout abstract art piece or any work you want to truly feature. |
- Integrated LED Strips: For a modern, seamless look, consider discreet LED strips installed behind or along the edges of your gallery wall. This creates a soft, ambient glow that enhances the overall display and adds a contemporary edge without harsh direct light. This is a subtle yet powerful way to add a sophisticated ambiance.
Art Care and Conservation: Protecting Your Investment
Your gallery wall is a collection of cherished pieces, and like any investment, it deserves care. Beyond avoiding direct sunlight, consider the environment. Humidity and extreme temperature changes can damage certain artworks, particularly those on paper or canvas. For valuable pieces, consider museum-quality glass that offers UV protection and reduces glare. Regularly dust your frames and art with a soft, dry cloth. For more intricate pieces or those with delicate textures, a soft artist's brush can gently remove dust. Remember, proactive care ensures your gallery wall continues to tell its magnificent tale for years to come. Consider investing in a hygrometer to monitor humidity levels, as extreme fluctuations can cause canvases to warp or paper to buckle. For delicate textiles or mixed media pieces, a soft-bristled artist's brush can be more effective than a cloth for dusting. And always, always handle framed pieces by the frame, not the glass, to prevent smudges and potential damage! Proper care ensures your art collection remains vibrant for generations.
Integrating with Room Decor: A Holistic Approach
Your gallery wall shouldn't exist in a vacuum. Oh no, darling! It's a vital, living part of your room's overall story, a participant in the grand dialogue of your interior design. Think about how it converses with your furniture, textiles, and existing color palette, creating a cohesive and inviting atmosphere. It’s about building a holistic aesthetic where every element supports and enhances the others, creating a truly immersive and personal space. This is where your house becomes a home.
- Color Echoes: This is a subtle but powerful trick! Pick up a dominant or accent color from your art (perhaps a vibrant blue from an abstract piece) and repeat it in a throw pillow, a vase, a book cover, or a small decorative object in the room. This creates instant cohesion, a delightful visual conversation between your art and your furnishings, making the entire space feel thoughtfully composed and intentionally designed.
- Textural Play: Opposites attract, even in decor! If your art is smooth and sleek (like a framed print), introduce soft, tactile textiles in your furniture or rugs (think velvet, chunky knits). If your art has a lot of texture (like a mixed-media abstract piece or a woven wall hanging), balance it with simpler, cleaner elements elsewhere. It’s all about creating a rich, sensory experience that delights the eye and the hand, adding depth and warmth to your space.
- Furniture as a Foundation: Use a console table, a credenza, a fireplace mantel, or even a bench beneath your gallery wall to ground the display. This isn't just about placement; it's about creating a unified vignette. Stack some art books, place a small sculpture, or add a plant to create a more layered, dimensional look. This is especially true when displaying art above the sofa, where the furniture literally provides the base for your visual narrative.
- Mirroring Styles: If your gallery wall leans modern, ensure your furniture has some modern lines. If it's bohemian, bring in some natural materials. The goal isn't to be matchy-matchy, but to have a consistent aesthetic language running through the room.
- Negative Space Integration: Just as important as the art on the wall is the negative space around it, and how that relates to the open space in the room. Don't overcrowd the room with furniture if your wall is already visually busy. Allow for breathing room everywhere, ensuring a sense of calm and visual balance. |
- Architectural Dialogue: Allow your gallery wall to engage in a conversation with the room's architecture. Does it highlight a high ceiling, frame a window, or soften a harsh corner? Use it to enhance the structural beauty of your space, turning architectural quirks into features. |
- Layering Textures & Materials: Beyond the art itself, think about how the materials of your frames (wood, metal, ornate), the textures of your art (canvas, print, textile), and the surrounding furniture (velvet, linen, leather) create a rich sensory experience. A tactile interplay adds depth and interest, making the room feel inviting and well-rounded.
Your Ever-Evolving Narrative: Embracing Change
The beauty of a gallery wall, my friend, is its inherent dynamism. It's not a static monument carved in stone; it's a living, breathing entity that can (and should!) change as your tastes evolve, as you acquire new pieces, or simply as you want to refresh your space. Don't be afraid to swap pieces out, introduce new finds, or even completely rearrange it! Your home, your rules – and your gallery wall should be a vibrant testament to that. It's about empowering your space to tell your ongoing story, without the pressure of permanent perfection. Consider it a joyful, continuous curatorial project. Consider:
- Seasonal Refreshes: A wall filled with vibrant summer scenes can shift to cozy, moody landscapes as autumn arrives, or festive winter prints for the holidays. It's like dressing your wall for the season!
- Themed Rotations: Perhaps you have a collection of travel photos from one adventure, and another from a different journey. Rotate them! Or swap out bold abstract art for more serene pieces when you crave calm.
- Integrating New Finds: As your art collection grows (and it will!), effortlessly integrate new pieces from your travels, discoveries, or even new creations. Your wall is a continuous, joyful process of rediscovery and personal expression.
- Life Milestones: A section dedicated to family photos can be updated as children grow, or to commemorate anniversaries and special events. Your wall chronicles your life!
It's a continuous, joyful process of rediscovery and personal expression. So, embrace the change, embrace the evolution, and let your walls tell the ongoing magnificent tale of you!
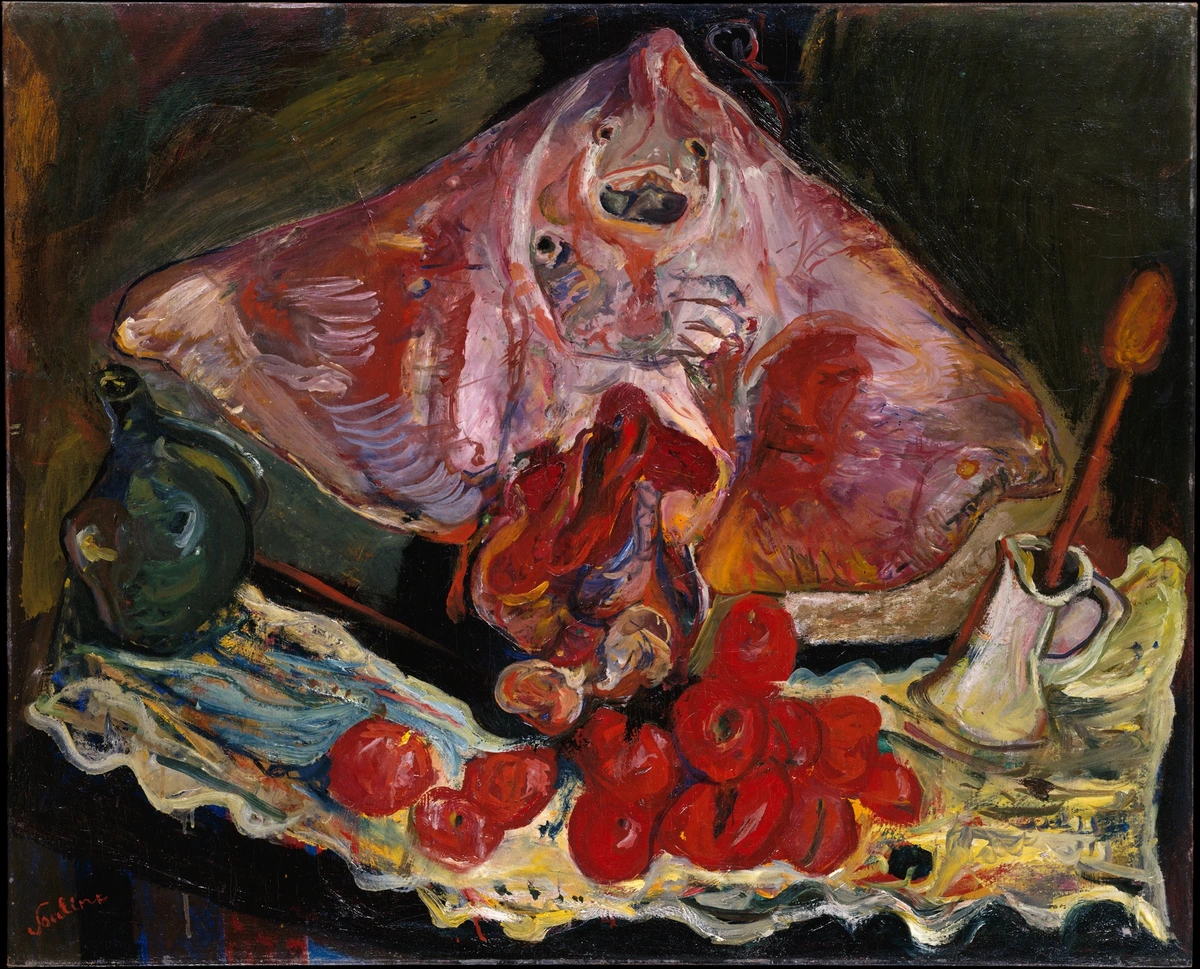
Troubleshooting Common Gallery Wall Woes
Even with the best planning, you might run into a snag or two. It's part of the process!
Problem | Solution | |
|---|---|---|
| Wall feels too busy/cluttered | Increase the spacing between frames, remove a few pieces, or simplify your frame choices to create more visual calm. | |
| Wall feels too sparse/empty | Add a few more pieces, incorporate a mirror or a small shelf, or reduce the spacing slightly between existing pieces. | |
| Pieces aren't straight | Re-level them! Sometimes the wall itself isn't perfectly flat, requiring a bit of finagling with the hardware. A second set of eyes can help. | |
| Uneven lighting | Consider how to light and position abstract art for maximum impact. Track lighting or small picture lights can highlight specific pieces. | |
| It just doesn't feel right | Trust your gut. Go back to the mock-up phase on the floor. Sometimes a completely different arrangement is needed. Don't be afraid to start over on paper! Remember, it's your home, and it has to feel right to you. | |
| Too much negative space | If your wall feels sparse, try tightening the spacing slightly between pieces, or introduce a few smaller, complementary items to fill in the gaps without overcrowding. | Consider a small sculptural item or a delicate plant to add dimension. |
| Difficulty finding the 'right' art | Don't feel pressured to buy everything at once! Start with a few anchor pieces, then slowly collect unique items that genuinely resonate with you over time. | Explore local art fairs, online marketplaces, or even your own photo albums for unique, personal pieces. |
| Too many holes in the wall | If you're a serial rearranger (like me!), consider using picture rail systems, adhesive hooks for lighter pieces, or focusing on larger, fewer pieces that make a big impact. | Employing picture rail systems means you only put holes in the wall once, then rearrange art freely with hooks and cords. |
| Art is fading or damaged | Re-evaluate your lighting. Ensure valuable pieces are not in direct sunlight. Consider UV-protective glass for sensitive artworks and control humidity levels if possible. | Install UV-protective glass on framed photos or prints exposed to sunlight, and use a humidifier/dehumidifier if your climate has extreme fluctuations. |
Gallery Wall Glossary: Terms to Know
Sometimes, all this talk of visual weight and negative space can feel a bit like a foreign language, right? Here’s a quick cheat sheet to some common gallery wall terms I use, just to make sure we're all on the same page and speaking the language of art display with confidence!

- Anchor Piece: The largest or most visually significant piece in your gallery wall, around which other pieces are arranged. It sets the tone and often the central point for your entire display, guiding the eye and the overall composition.
- Cohesion: The sense of unity and harmony among the various elements in your gallery wall, making them feel like they belong together despite their individual differences. It's the feeling that everything fits.
- Eclectic: A style characterized by mixing diverse elements, such as different art styles, frame types, and objects, to create a unique and deeply personal look. It's controlled chaos, in the best way, reflecting a rich and varied personal taste!
- Eye Level: The recommended height for the center of your gallery wall (or the main anchor piece), typically 57-60 inches (145-152 cm) from the floor, for optimal and comfortable viewing. This is where the human gaze naturally rests.
- Focal Point: The area or piece in your gallery wall that immediately draws the viewer's eye, acting as the starting point for visual exploration. Every good story needs a strong beginning, and every great wall needs a focal point to anchor it.
- Matting: A border of material (usually acid-free cardstock) placed between the artwork and the frame's glass, serving to highlight the art, provide crucial breathing room, and elevate its presentation to a museum-quality standard. It's the subtle frame within a frame.
- Mock-Up Method: The invaluable technique of arranging paper templates of your art pieces on the floor and then taping them to the wall to plan your layout before making any holes. Your walls (and sanity!) will thank you, preventing unnecessary mistakes and allowing for endless experimentation.
- Negative Space: The empty wall space around and between your framed pieces, which is just as important as the art itself for visual balance and allowing each piece to stand out. It provides visual rest for the eye, preventing the wall from feeling cluttered.
- Salon Style: A gallery wall arrangement characterized by an organic, often floor-to-ceiling display of various sizes and shapes, creating a maximalist and curated feel, reminiscent of historical European art salons. It's opulent, inviting, and wonderfully personal.
- Visual Weight: The perceived heaviness or impact a piece of art has within a composition, influenced by its size, color, detail, and contrast, guiding the viewer's eye. Balancing visual weight is key to harmony, ensuring no single piece overwhelms the others without intention.
- Grid Style: A gallery wall arrangement where pieces are uniformly spaced and perfectly aligned, creating a clean, structured, and often modern look. Precision and order are the hallmarks here, offering a sense of calm and sophistication.
- Art Grouping: A general term referring to any collection of art pieces displayed together, from a simple diptych (two pieces) to a complex gallery wall. It's simply art's way of hanging out together, telling a collective story.
- Proportion: The relationship of sizes between elements in your gallery wall and between the gallery wall and the room itself, crucial for visual harmony and ensuring nothing feels out of place or overwhelming. It's about finding that sweet spot of balance.
- Repetition: The use of similar elements (e.g., frame style, color, motif) throughout your gallery wall to create a sense of unity, rhythm, and intentional design. It ties everything together subtly, creating a cohesive visual language.
- Vignette: A small, pleasing group of objects or artworks arranged together to create a cohesive and visually interesting display, often on a wall or a tabletop, within the larger room context. These are little stories within your grand narrative. |
- Arrangement: The specific layout or positioning of art and objects within your gallery wall, dictating its overall visual flow and impact. It's your blueprint for success. |
- Composition: The way in which different elements of your gallery wall are combined and organized to create a unified and harmonious whole. This is the overarching design of your display. |
- Depth: The illusion of three-dimensionality created within your gallery wall, often achieved by mixing flat prints with sculptural items, mirrors, or layered frames. It's what makes your wall truly pop! |
- Grout Lines (for brick): The mortar lines between bricks, which can be strategically utilized when hanging art on brick walls to create natural alignment points or anchor specialized hooks. Don't underestimate their power! |
- Horizon Line: An imaginary horizontal line that can be used as a guide to ensure visual consistency and balance across a gallery wall, often aligned with eye level or furniture. It's a subtle trick for experienced curators. |
- Sightlines: The visual pathways or views created within a room, influencing how your gallery wall is perceived from different angles and adjacent spaces. Consider how your art looks from every entry point.
- Context: The surrounding elements, both within the gallery wall and the room, that influence how individual art pieces are perceived and understood. It's about the bigger picture, the dialogue between art and environment! |
- Aesthetic Flow: The smooth, uninterrupted movement of the eye across the gallery wall, guided by elements like color, line, spacing, and subject matter, creating a sense of visual continuity and a pleasant viewing experience. |
- Scale: The size of an artwork or element in relation to other elements within the gallery wall, and in relation to the surrounding room and furniture. Proper scale is crucial for balance, ensuring nothing feels dwarfed or overwhelming.
Frequently Asked Questions (FAQ)
Alright, my friend, let's tackle some of the most common questions that pop up when embarking on a gallery wall journey. Think of this as your quick-reference guide to calm any lingering nerves!
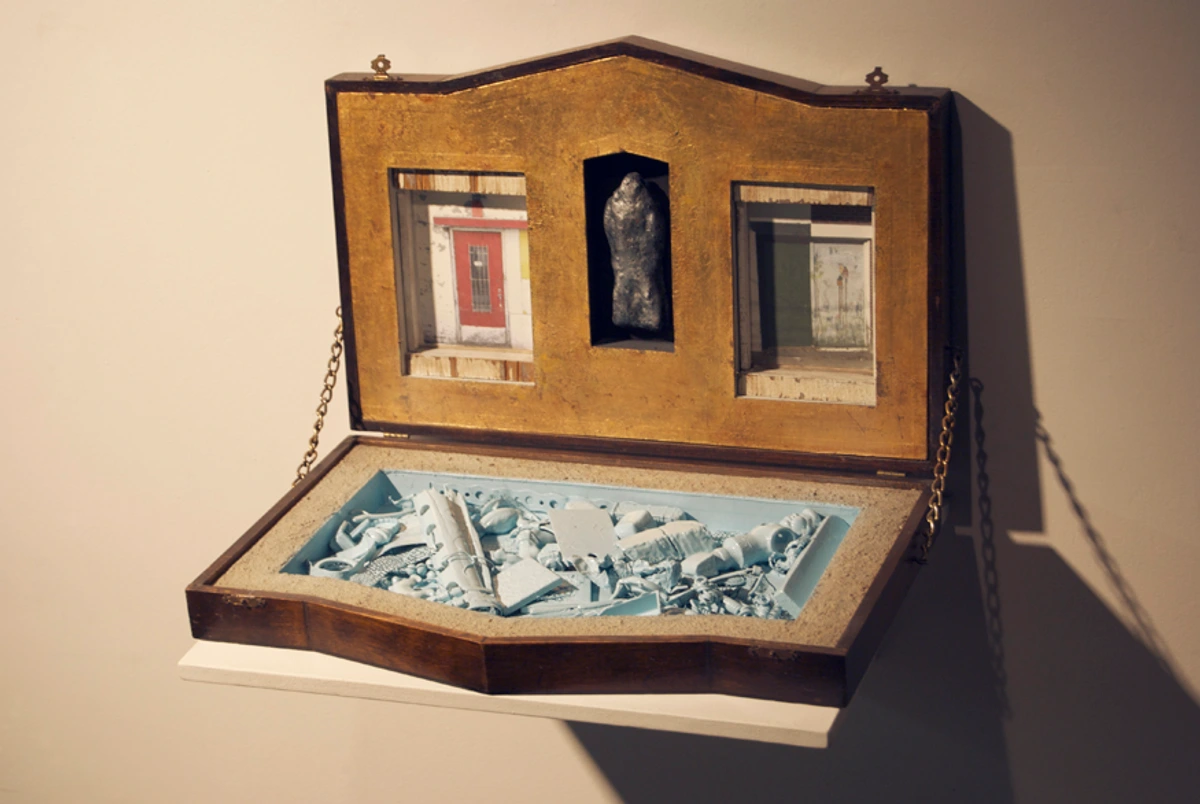
Q1: How high should a gallery wall be from the floor?
Generally, the center of your entire gallery wall, or the main anchor piece, should ideally be at eye level. For most people, this is typically around 57-60 inches (145-152 cm) from the floor. Think of it like a museum standard – it just feels right because it’s where our gaze naturally rests. If your gallery wall is positioned above a piece of furniture (like a sofa or console), ensure the bottom edge of the lowest frames is about 6-8 inches (15-20 cm) above the furniture. This creates a visual connection, grounding the display rather than having it float awkwardly. It's all about that harmonious relationship between art and furnishings.
Q2: What's the best way to arrange pieces for a gallery wall?
My absolute, hands-down favorite method is the mock-up method. Trust me on this one! Trace each of your framed pieces onto paper, cut out the templates, and then arrange them on a large, clear area of your floor. This allows you to experiment endlessly with different layouts without making a single hole in your wall. Once you're happy, tape the paper templates to your wall for a final preview. You can also start with your largest, most impactful pieces first and build your arrangement outwards, or opt for a precise grid-like structure for a more formal and minimalist aesthetic. For abstract art in small spaces, this method is particularly invaluable for optimizing every inch and ensuring every piece has its moment to shine, preventing a cluttered look.
Q3: Should all my frames match?
Not necessarily, and in fact, I often encourage you not to! For a super sleek, modern, or minimalist vibe, absolutely, sticking to one type of frame (all black, all white, or all wood) creates instant cohesion. However, for a more bohemian, traditional, or deeply personal feel, mixing your frames is where the magic happens! Think ornate gold, distressed wood, sleek metal, and simple black or white. The key is to ensure the overall vibe of the frames complements the art and your room, making them feel like they belong together, even in their beautiful diversity. It's about intentional contrast, not a free-for-all, making your gallery wall truly unique! When pairing abstract art with wood furniture, for example, the right frame choice can dramatically enhance the connection, creating a richer visual story.

Q4: How much space should I leave between frames in a gallery wall?
A consistent spacing is a game-changer! I generally recommend leaving 2-4 inches (5-10 cm) between frames. This helps create a wonderfully unified and intentional look, preventing the wall from appearing either too cluttered (when pieces are too close) or too sparse (when they're too far apart). You can, of course, adjust this slightly based on the overall size of your wall, the number of pieces you're including, and the aesthetic you're aiming for. Sometimes, for a truly maximalist salon style, I might go a little tighter, but always with intention and visual balance in mind.
Q5: Can I mix abstract art with other styles on a gallery wall?
Absolutely, yes! In fact, I highly encourage it. Mixing vibrant abstract art with photographs, traditional paintings, sculptural pieces, or even sentimental objects creates the most dynamic, personal, and intriguing displays. The secret lies in finding subtle common threads – perhaps a recurring color that appears in both a modern abstract and an antique portrait, a shared theme (like nature or architecture), or a consistent frame style that unifies disparate art. It’s all about creating a conversation between the pieces, making them feel like they belong together, even in their beautiful differences. This is especially impactful in open-concept living spaces where art can define different areas and guide the eye.

Q6: What if my gallery wall still looks off after I've hung everything?
Don't despair for a second, my friend! It happens to the best of us, even me! First, take a deep breath and a long step back – ideally into another room. Give it a fresh, unbiased look. Ask yourself: Is the spacing consistent enough? Is there an imbalance in visual weight? Sometimes, simply swapping two pieces, or even bravely removing one, can make an enormous difference. Go back to your photos of the mock-up, or if you're feeling truly stumped, even re-do the paper template stage on the floor. It's your space, and it absolutely has to feel right to you! Remember, even a single abstract piece can be a focal point, and sometimes less truly is more, especially when you're just starting your art collection. Trust your gut, and don't be afraid to make tweaks!
Q7: Can I hang a gallery wall in a hallway or a small space?
Absolutely, yes! Hallways are actually fantastic for gallery walls; they encourage lingering, discovery, and turn a transitional space into a destination. For smaller spaces, like a powder room or a cozy nook, focus on a tighter, more curated collection. Consistent spacing and perhaps a unified frame style can help a small gallery wall feel cohesive and intentional rather than cluttered. Consider a vertical arrangement to draw the eye upwards, maximizing the perceived height of the space. You might even find inspiration in my tips for maximizing art impact in small spaces, or even for decorating with art in a small balcony/patio. Every space, no matter how small, deserves a little artful attention – and a gallery wall is a perfect way to give it!
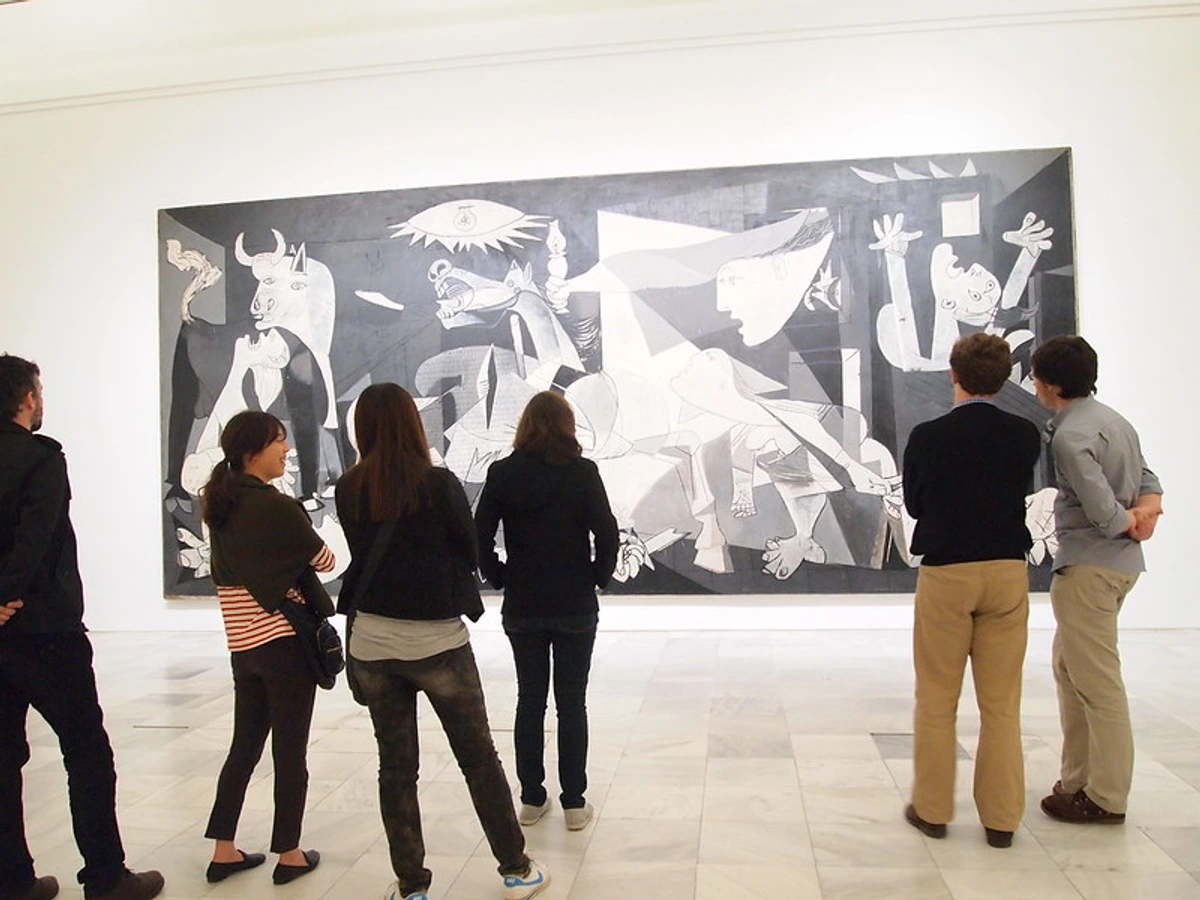
Q8: How do I incorporate larger, statement pieces into a gallery wall?
Ah, the drama of a statement piece! If you have one of these beauties, consider it your central anchor. My advice? Place it first, ideally at eye level, and then thoughtfully build your surrounding gallery around it. The goal is to ensure that smaller pieces complement and enhance it, rather than competing. You can use it as a central focal point from which other pieces radiate outwards, or as a strong visual element at one end of a linear arrangement, providing a powerful visual bookend. Just ensure there's enough breathing room around it so it doesn't feel suffocated. This approach works wonderfully for creating impactful displays, whether with a single abstract art piece or a grand traditional painting – it gives your wall a clear star and a compelling narrative starting point!
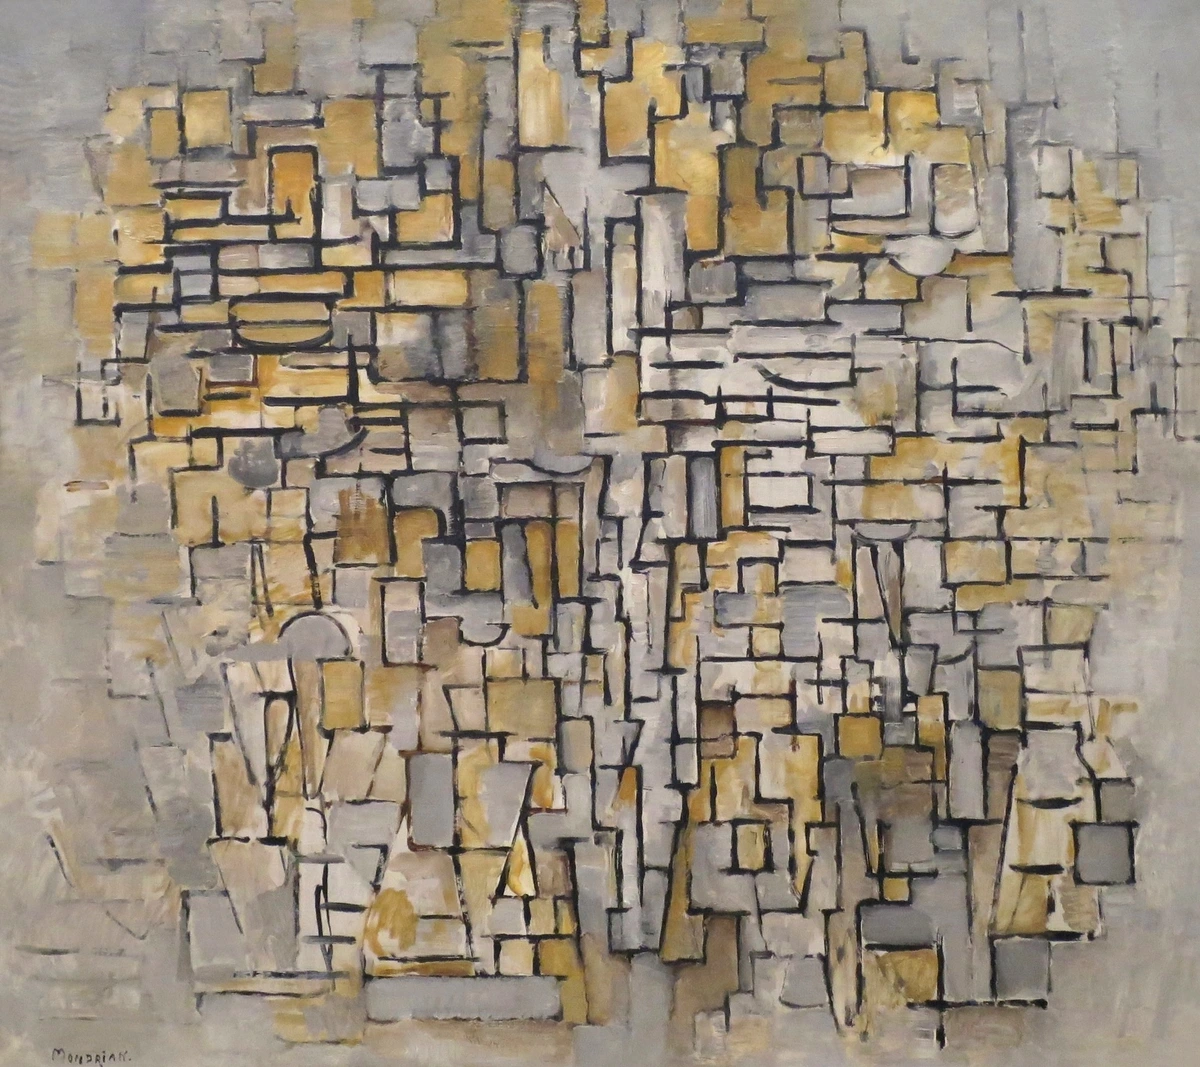
Q9: What's the best way to clean and maintain my gallery wall?
Good question! For frames and glass, a soft, lint-free cloth and a gentle, ammonia-free glass cleaner (especially if your glass isn't anti-glare) will work wonders. For art on canvas or paper, avoid direct contact; instead, simply dust gently with a very soft, clean brush or a microfibre cloth. Crucially, avoid harsh chemicals and direct, prolonged sunlight to prevent fading or damage to your cherished pieces – remember, UV rays are the enemy of longevity! And, just as a routine check, periodically ensure that all your hangers and hardware are still secure and stable. This is especially important for lighting and positioning abstract art for maximum impact over time, and for avoiding any unexpected tumbles. Think of it as preventative care for your cherished art collection.
Q10: When should I choose a vertical vs. horizontal layout for my gallery wall?
This really depends on the architecture of your space and the effect you want to create! A vertical layout works beautifully to emphasize ceiling height, making a room feel taller and more grand. It's ideal for narrow walls, between windows, or to complement tall furniture like a bookshelf or a tall dresser. It draws the eye upwards, creating a sense of ascent and drama and can make a small room feel more expansive.
A horizontal layout is excellent for emphasizing width and creating a grounded, expansive feel. This is often the go-to for spaces above sofas, headboards, or long console tables. It anchors the furniture below it and draws the eye across the room, providing stability and a sense of calm. Always consider the dominant lines and proportions of your room and existing furniture when making this decision. Sometimes, a mix of both within a larger salon style can be incredibly effective! Think about the grand salons of old, where art was curated to tell a story across expansive walls – a rich history of interior design and art indeed, showcasing how careful planning creates powerful visual impact!

Q11: Should I hire a professional for my gallery wall?
While this guide empowers you to DIY, sometimes a professional touch can make all the difference, especially for very large, complex installations, extremely heavy pieces, or if you simply lack the time or confidence. A professional art hanger or interior designer can offer expert advice on layout, hardware, and installation, ensuring perfect placement and security. It's an investment in peace of mind and a flawless finish, particularly if you have irreplaceable or highly valuable art pieces. Don't be afraid to seek help if the task feels overwhelming – it's often worth it for that museum-quality precision! After all, we hire experts for many things in life, why not for creating a truly stunning art display that will be admired for years to come?
Q12: How can I hang art without damaging my walls (especially in rentals)?
Ah, the renter's dilemma! Command strips and adhesive hooks are your absolute best friends for lightweight pieces. Just ensure you follow the instructions meticulously for proper application and removal. Picture rail systems are another fantastic, damage-free option if your rental has them, as they allow you to hang and rearrange art with ease. For heavier pieces, you might need to discuss options with your landlord, as some may permit specific types of anchors that create minimal, easily repairable holes. The key is communication and using the right tools for the job to keep those walls (and your security deposit!) happy. There's always a way to express yourself without sacrificing your deposit – it just requires a little more strategic planning for your how to decorate a wall project!
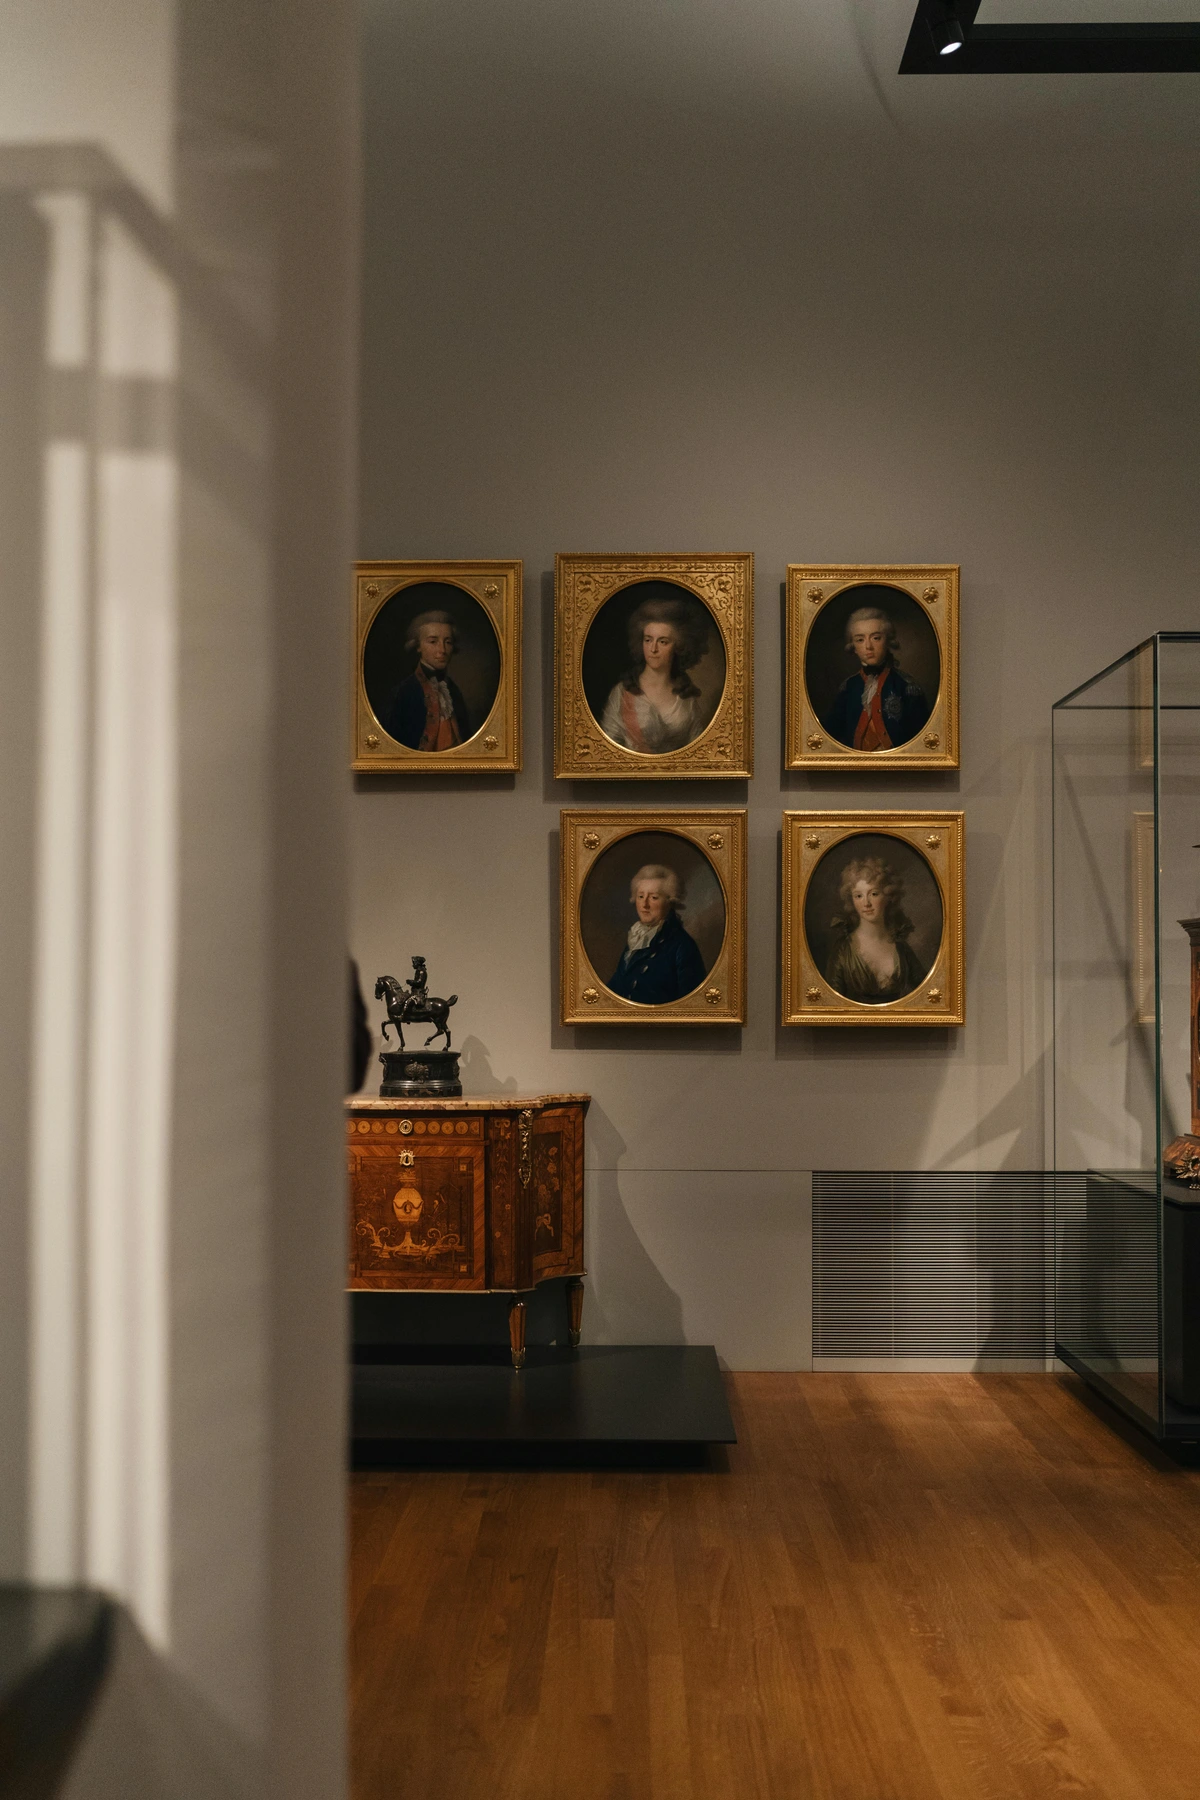
Q13: What about gallery walls in children's rooms?
Children's rooms are perfect for gallery walls! They're dynamic spaces that evolve with your child's interests, and what better way to celebrate their creativity? Focus on incorporating their own artwork, rotating it frequently, alongside playful prints, soft textile pieces, or even magnetic boards for ever-changing displays. Prioritize safety with lightweight frames, secure hanging methods (like Command strips or picture rail systems), and avoid heavy, breakable items where little hands might reach them. Make it a collaborative project to foster their creativity and ownership of the space, giving them a personal gallery that grows with them! This is a fantastic way to inspire creativity and self-expression.
Q14: How can I make my gallery wall truly unique and personal?
The secret to a truly unique gallery wall lies in authentic curation. Don't just buy art to fill a space; collect pieces that genuinely resonate with your story, your passions, and your experiences. Mix art with personal mementos – a vintage postcard from a memorable trip, a cherished heirloom, a child's first drawing, or even a framed piece of fabric from a meaningful garment. Embrace a diverse range of media and styles, but ensure there's a subtle thread (a color, a theme, a feeling) that ties everything together. Your wall should feel like a visual autobiography, uniquely yours, a reflection of your evolving self and your most cherished memories. This is the heart of curating your perfect gallery wall.
Q15: Can I use unconventional items in my gallery wall?
Absolutely, darling! This is where the magic truly happens. Beyond traditional framed art, consider integrating small mirrors, decorative plates, unique wall sconces, tiny floating shelves with curios, textile art, or even architectural salvage. These unconventional elements add texture, dimension, and unexpected charm, transforming your wall into a multi-dimensional display. Just ensure they are securely mounted, complement the overall aesthetic, and contribute to the narrative you're building. Don't be afraid to break the rules a little; your home is your canvas for self-expression, a place to showcase your unique flair and incorporate sculptural art in unexpected ways!
Q16: How often should I update my gallery wall?
There's no hard and fast rule, but I encourage you to think of your gallery wall as a living, breathing entity. Your tastes evolve, your life changes, and new treasures come into your possession. A seasonal refresh can be delightful, perhaps swapping out lighter pieces for moodier ones in autumn. You might update a section annually, or whenever you acquire a piece that sparks new joy. The beauty is its inherent flexibility – you can easily swap, add, or rearrange. The most important thing is that your wall continues to feel fresh, inspiring, and reflective of you. It's a continuous, joyful journey of personal expression!
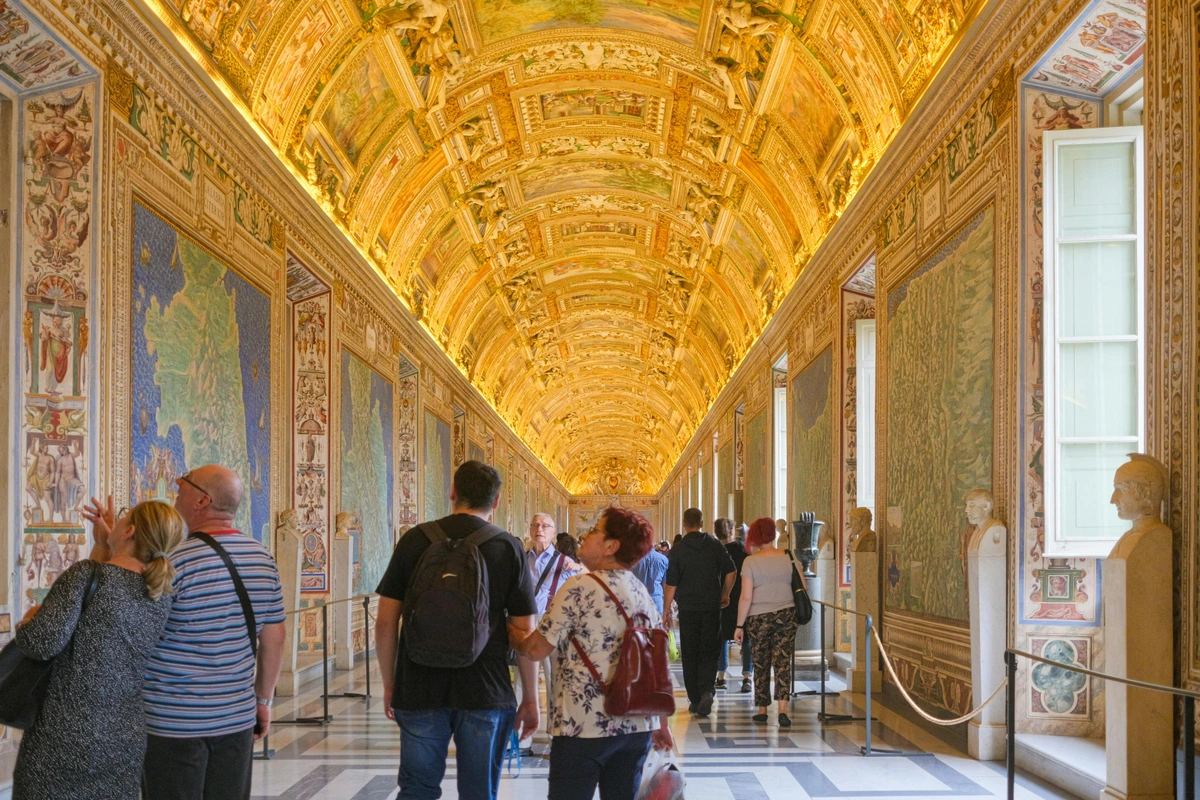
Q17: What's the best way to clean my frames and art?
For most frames and glass, a soft, lint-free cloth and a gentle, ammonia-free glass cleaner will work wonders. For art on canvas or paper, avoid direct contact; instead, simply dust gently with a very soft, clean brush or a microfibre cloth. Crucially, avoid harsh chemicals and direct, prolonged sunlight to prevent fading or damage to your cherished pieces. For intricate pieces, a can of compressed air can carefully dislodge dust from nooks and crannies. And remember, regular, gentle dusting is far better than infrequent, vigorous cleaning! Consider also using leaner frames on top of console tables or sideboards, or even easels for larger pieces, to add art without any wall commitment, offering flexible display options without permanent commitment to your wall surface.
Your Walls, Your Story: An Ever-Evolving Masterpiece
And so, my dear friend, we've reached the end of our journey – but really, it's just the beginning for you! Creating a gallery wall is so much more than hammering nails into drywall; it's a wonderfully personal, continuous journey. It's an unparalleled opportunity to express yourself, to boldly display your passions, and to truly make your home resonate with your unique energy. Please, please don't let the fear of making a mistake hold you back for even a second. Embrace the process, have genuine fun with it, and remember that even the most "perfect" gallery walls often evolve, shift, and grow over time, just like we do. It's a living, breathing testament to your life, a beautiful reflection of your journey!
Take a deep breath, grab your hammer (or your trusted painter's tape!), and let your creativity flow. You absolutely, unequivocally, got this! Remember, every great artist started somewhere, and your home is your most personal gallery.
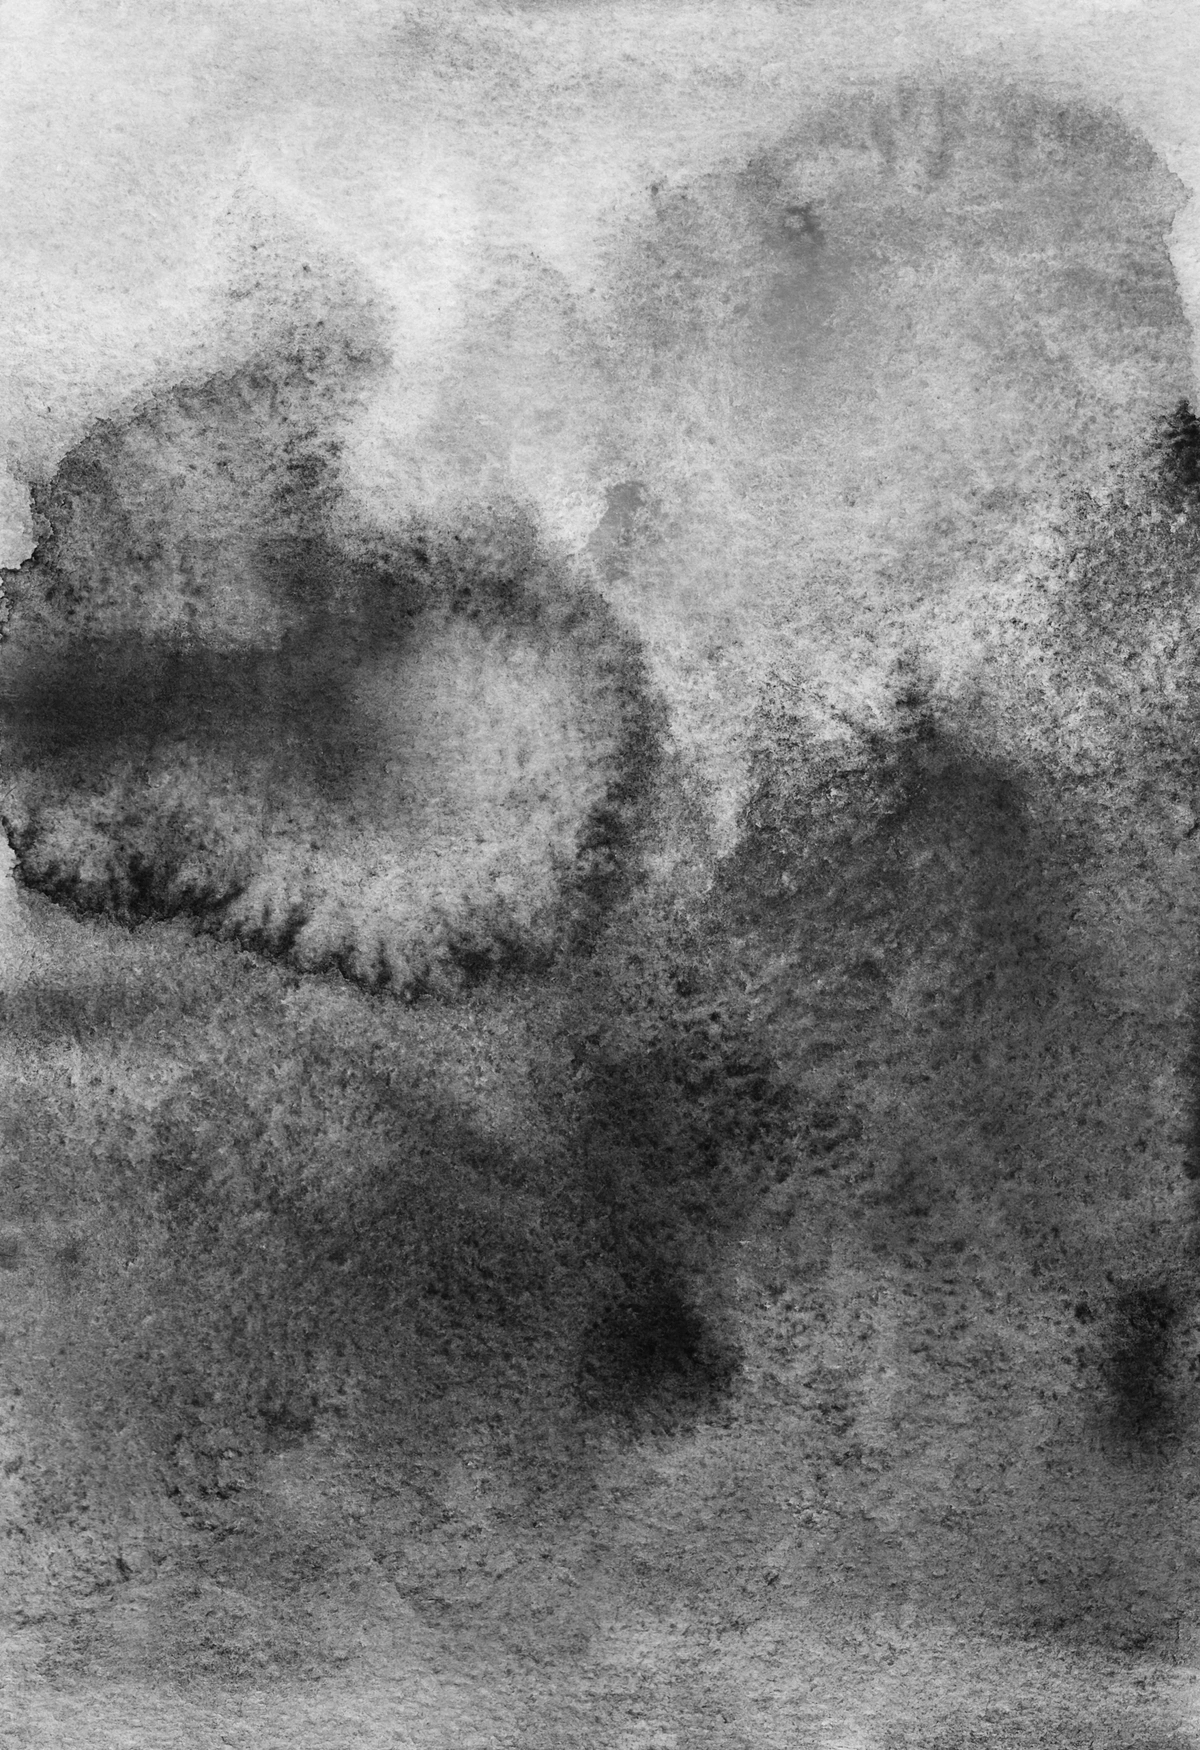
And hey, if you're ever on the hunt for those truly unique, contemporary pieces to add a bold burst of personality to your evolving collection – pieces that truly speak to your soul and tell your story – feel free to browse my work and buy some art that can become the next captivating focal point (or a subtle, beloved background player) in your unfolding visual tale. Happy hanging, my friend! Remember, your walls are not just walls; they are waiting, patiently and eagerly, to tell your magnificent tale. Just like the continuous timeline of art history, your gallery wall is an ongoing creation. It’s a space where memories are honored, passions are displayed, and your unique aesthetic unfolds with every carefully chosen piece. So go forth, my friend, and let your walls tell a story that is truly, beautifully yours. Happy hanging, happy creating, and happy living! You are the curator of your own extraordinary life, and your home is its most intimate gallery.


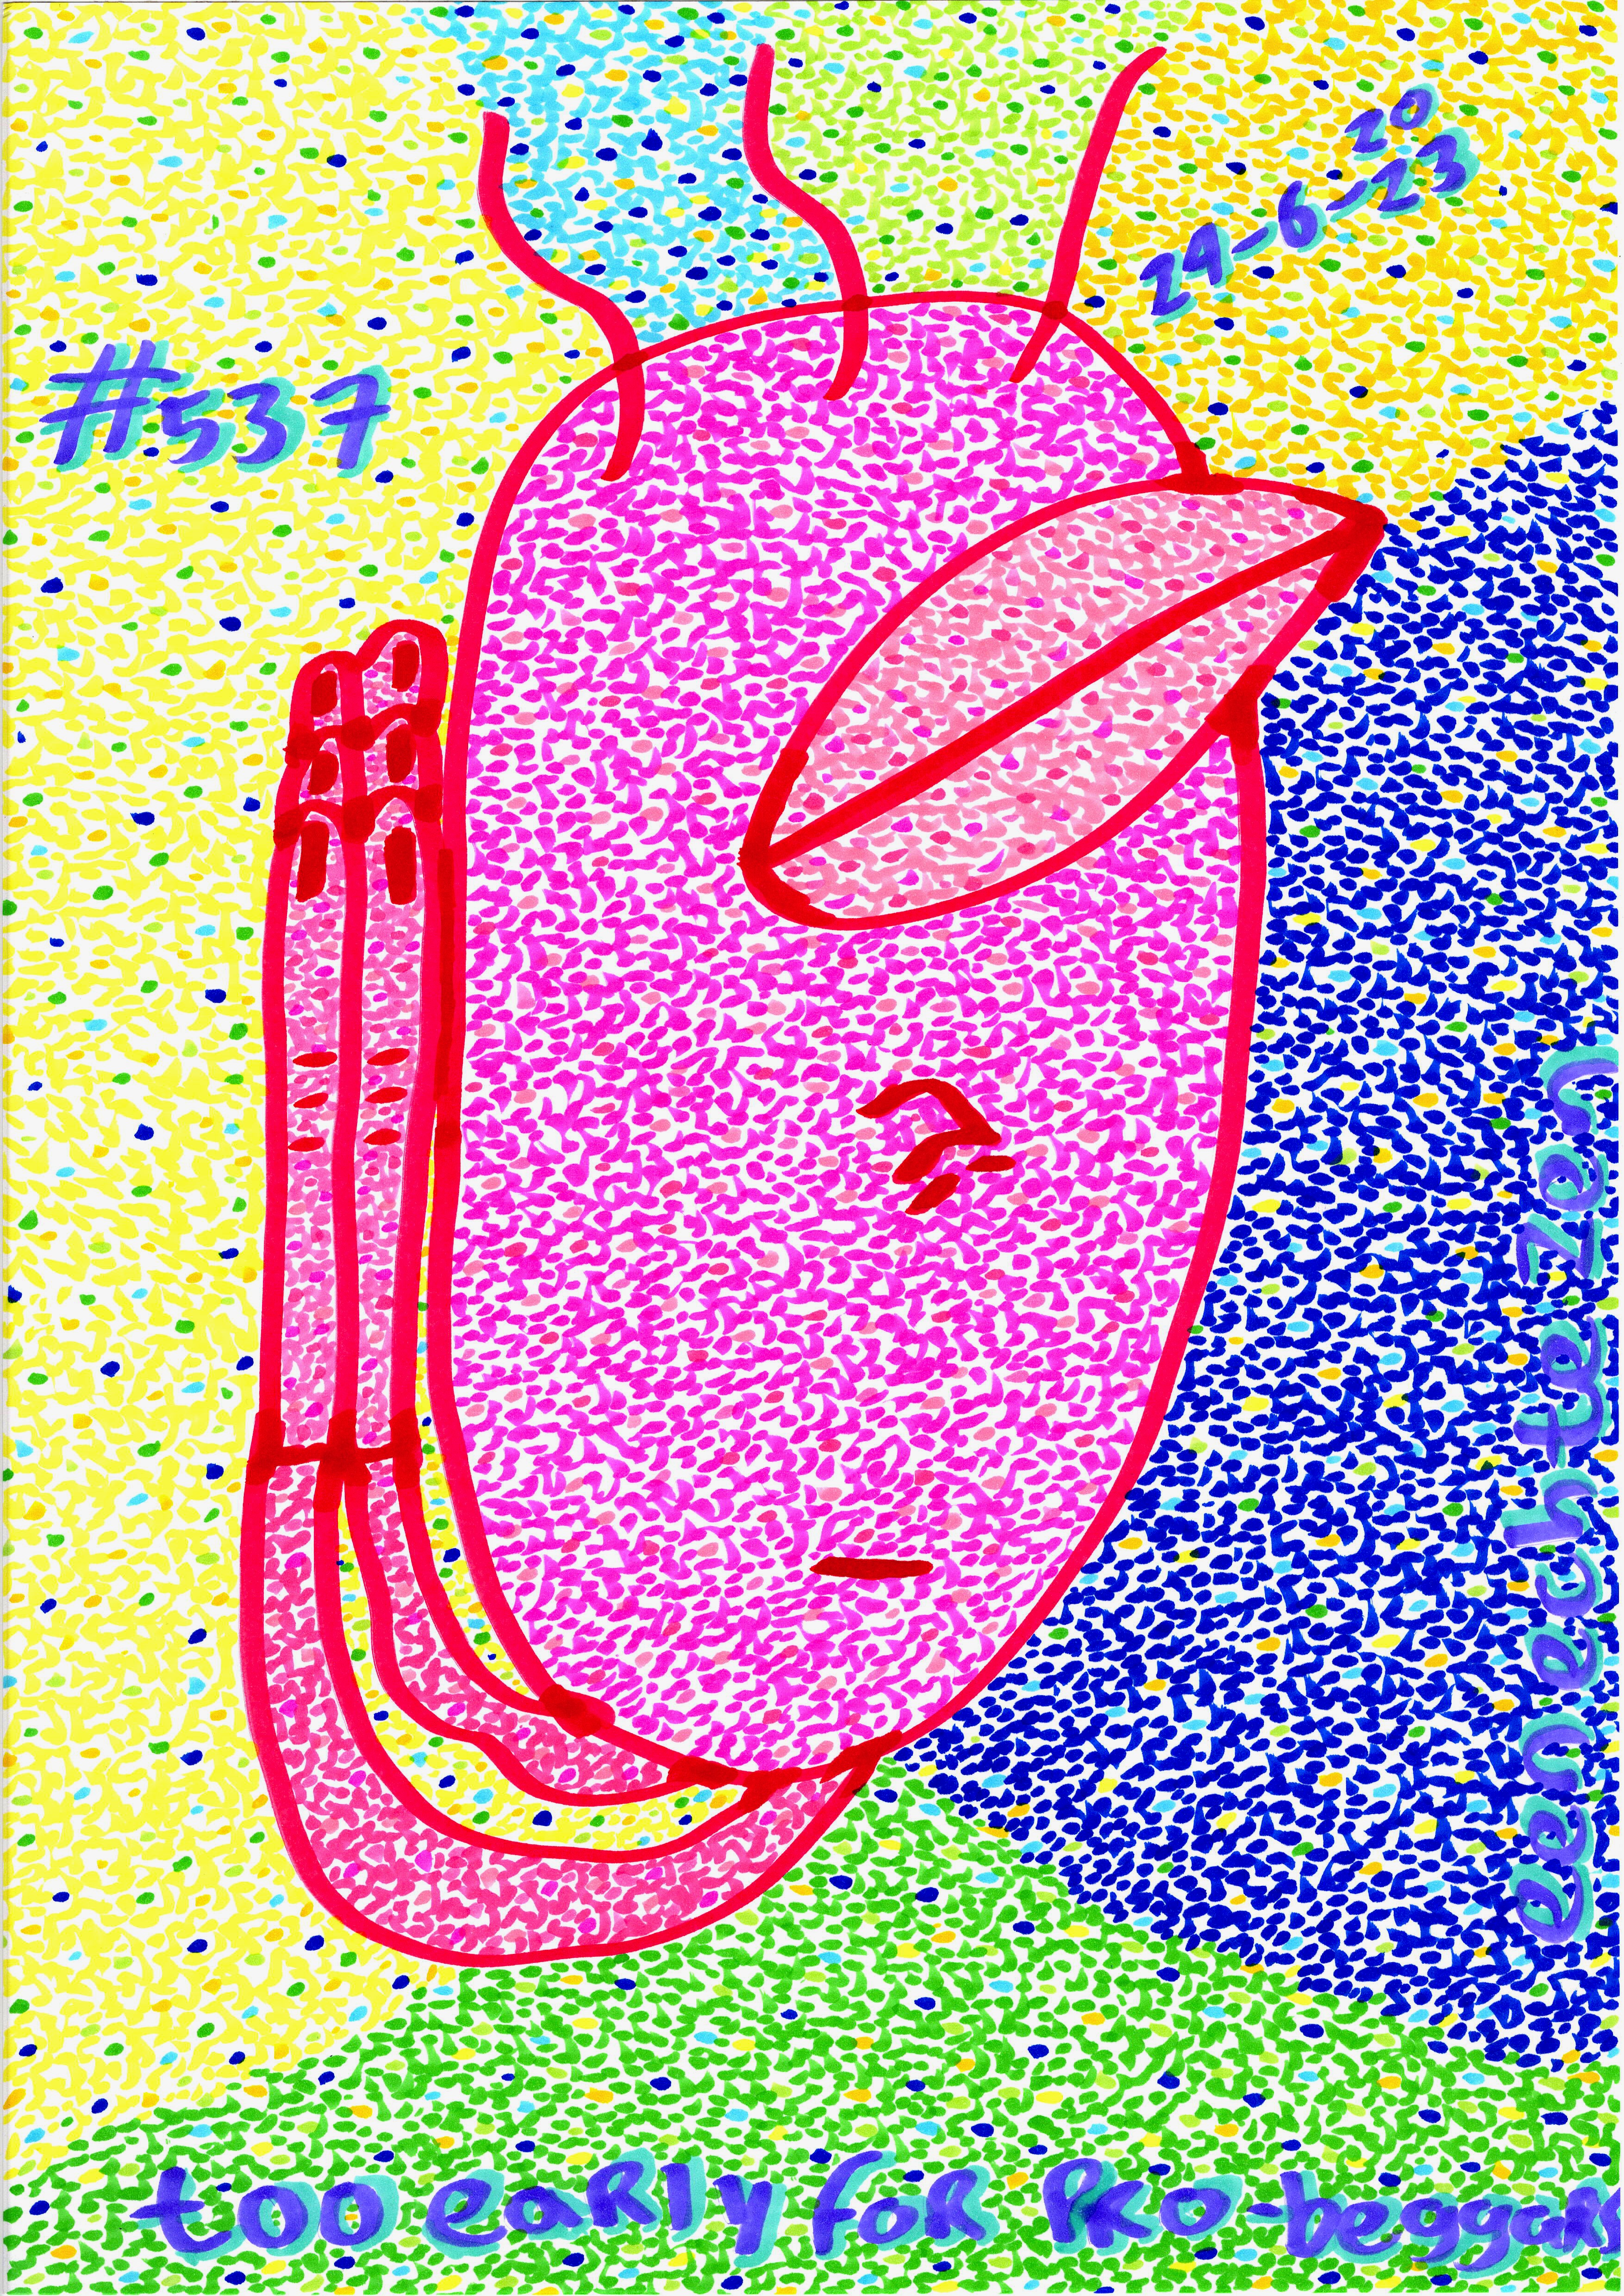
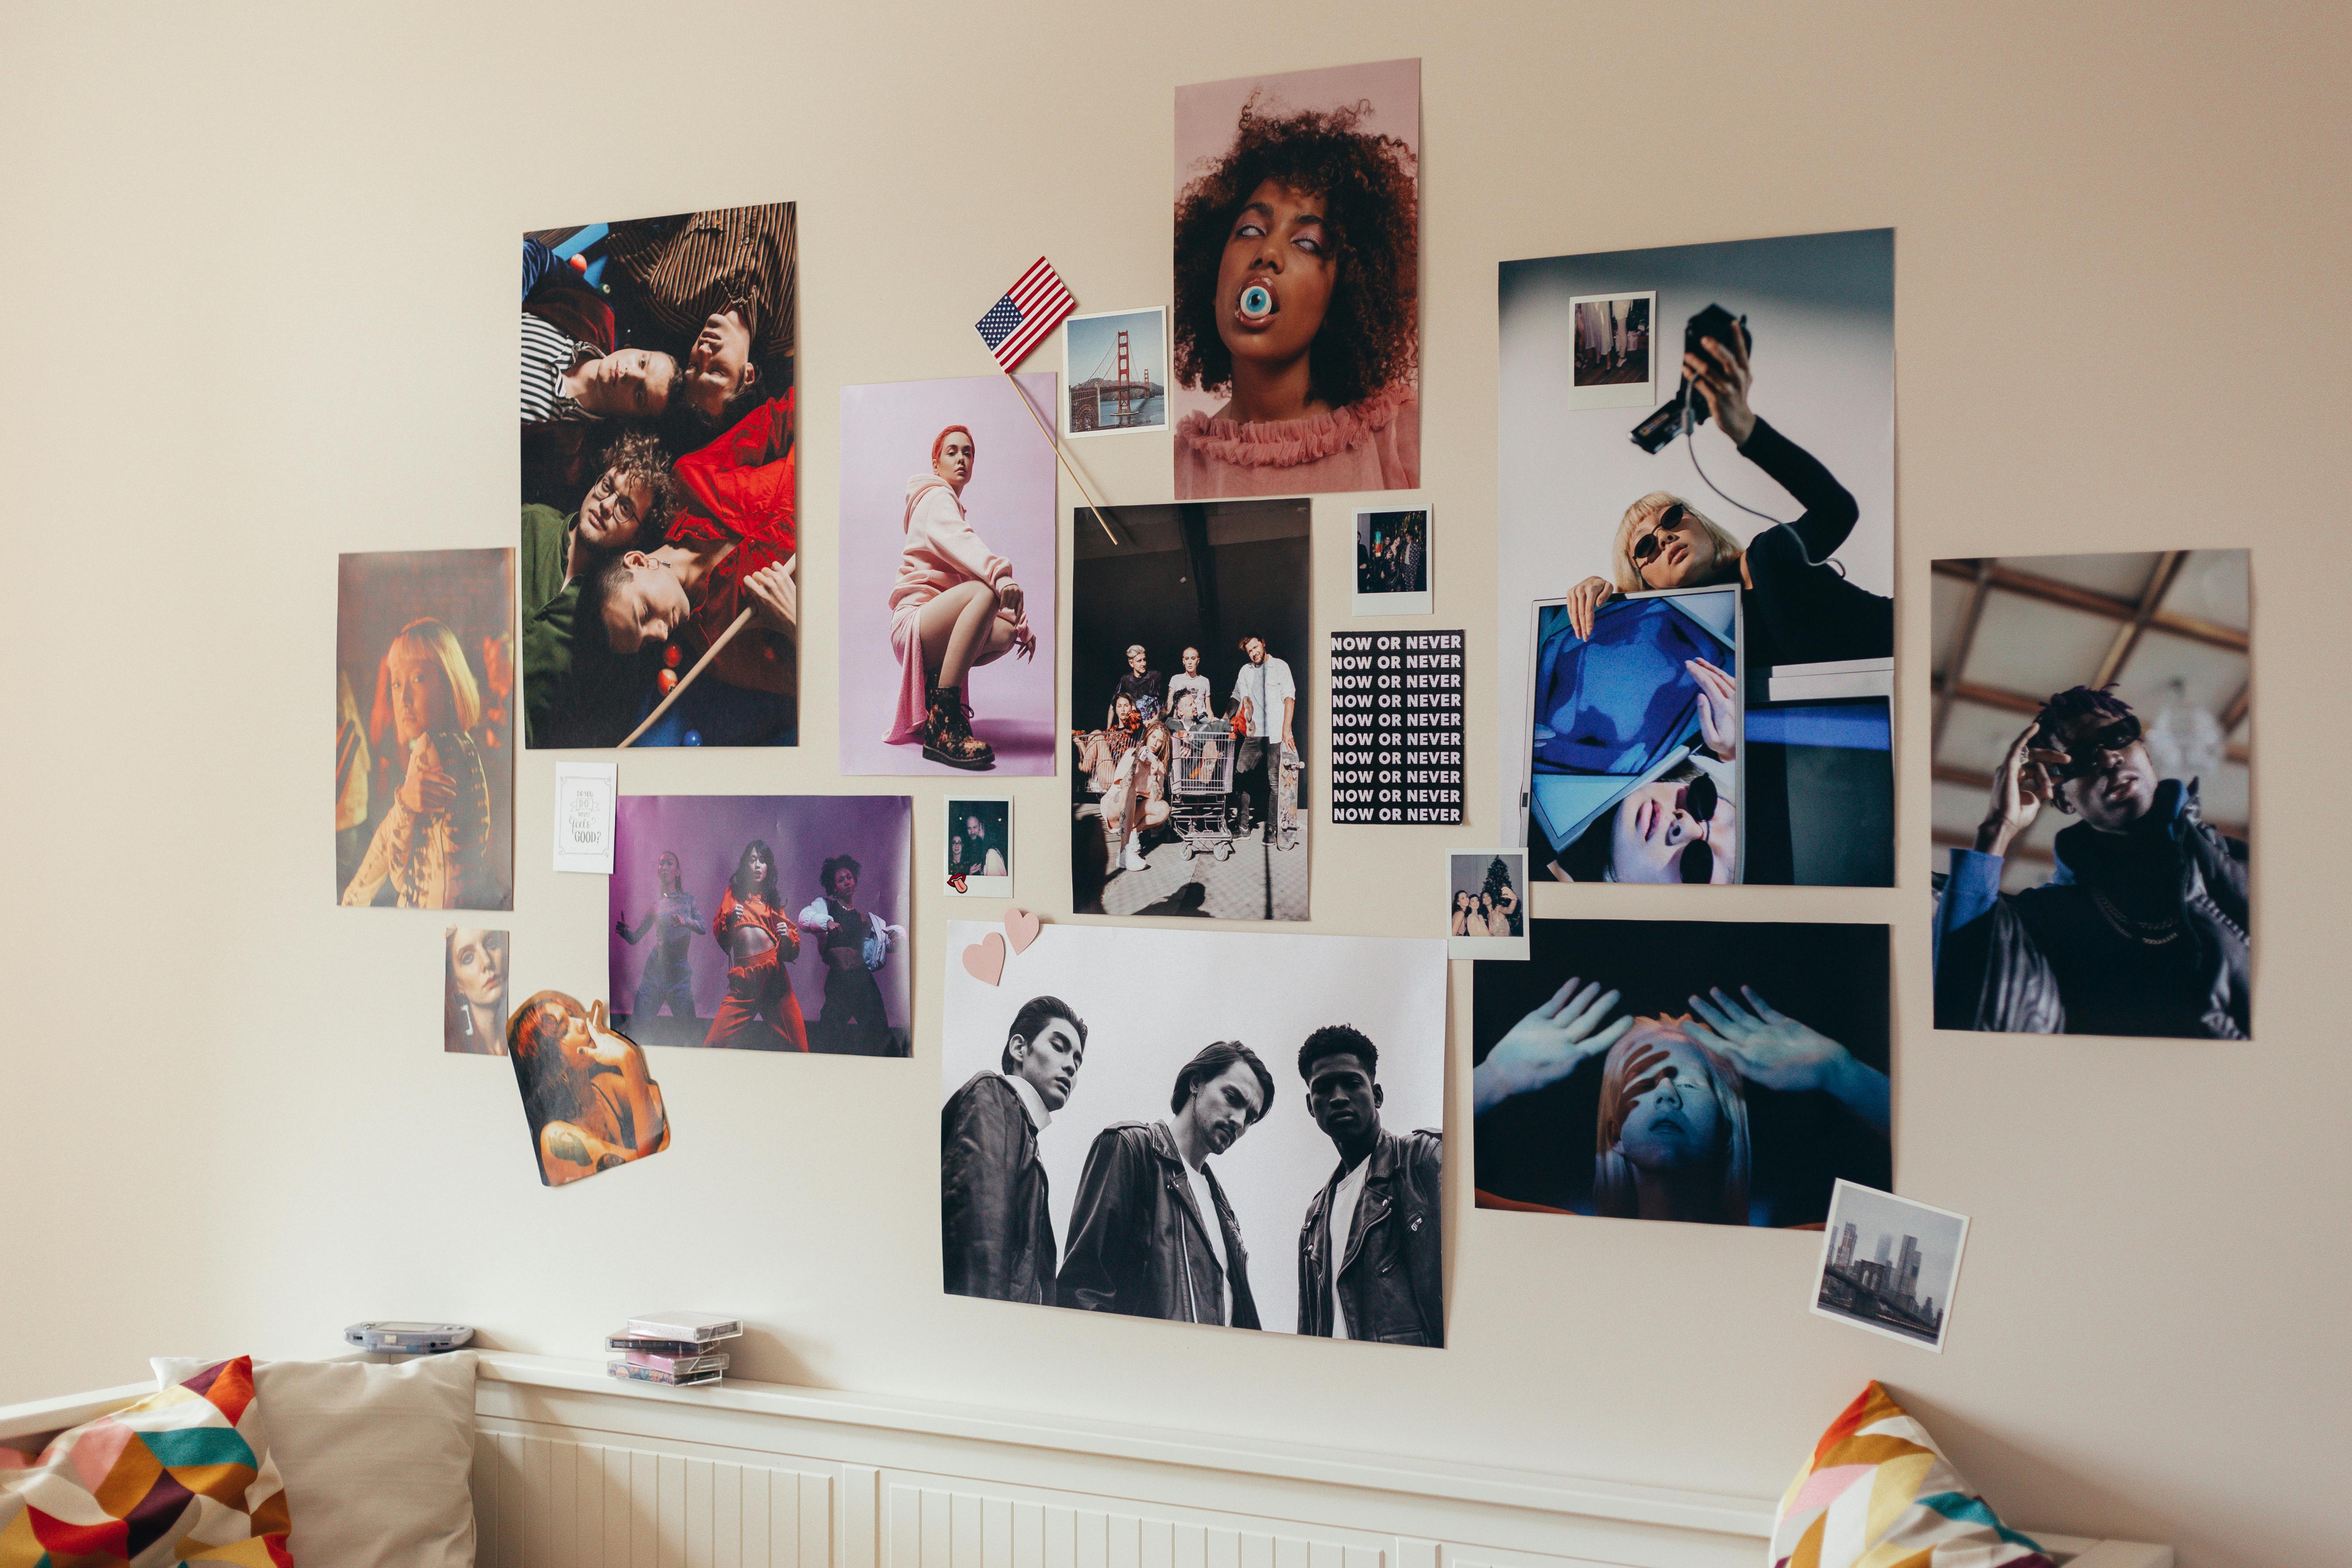
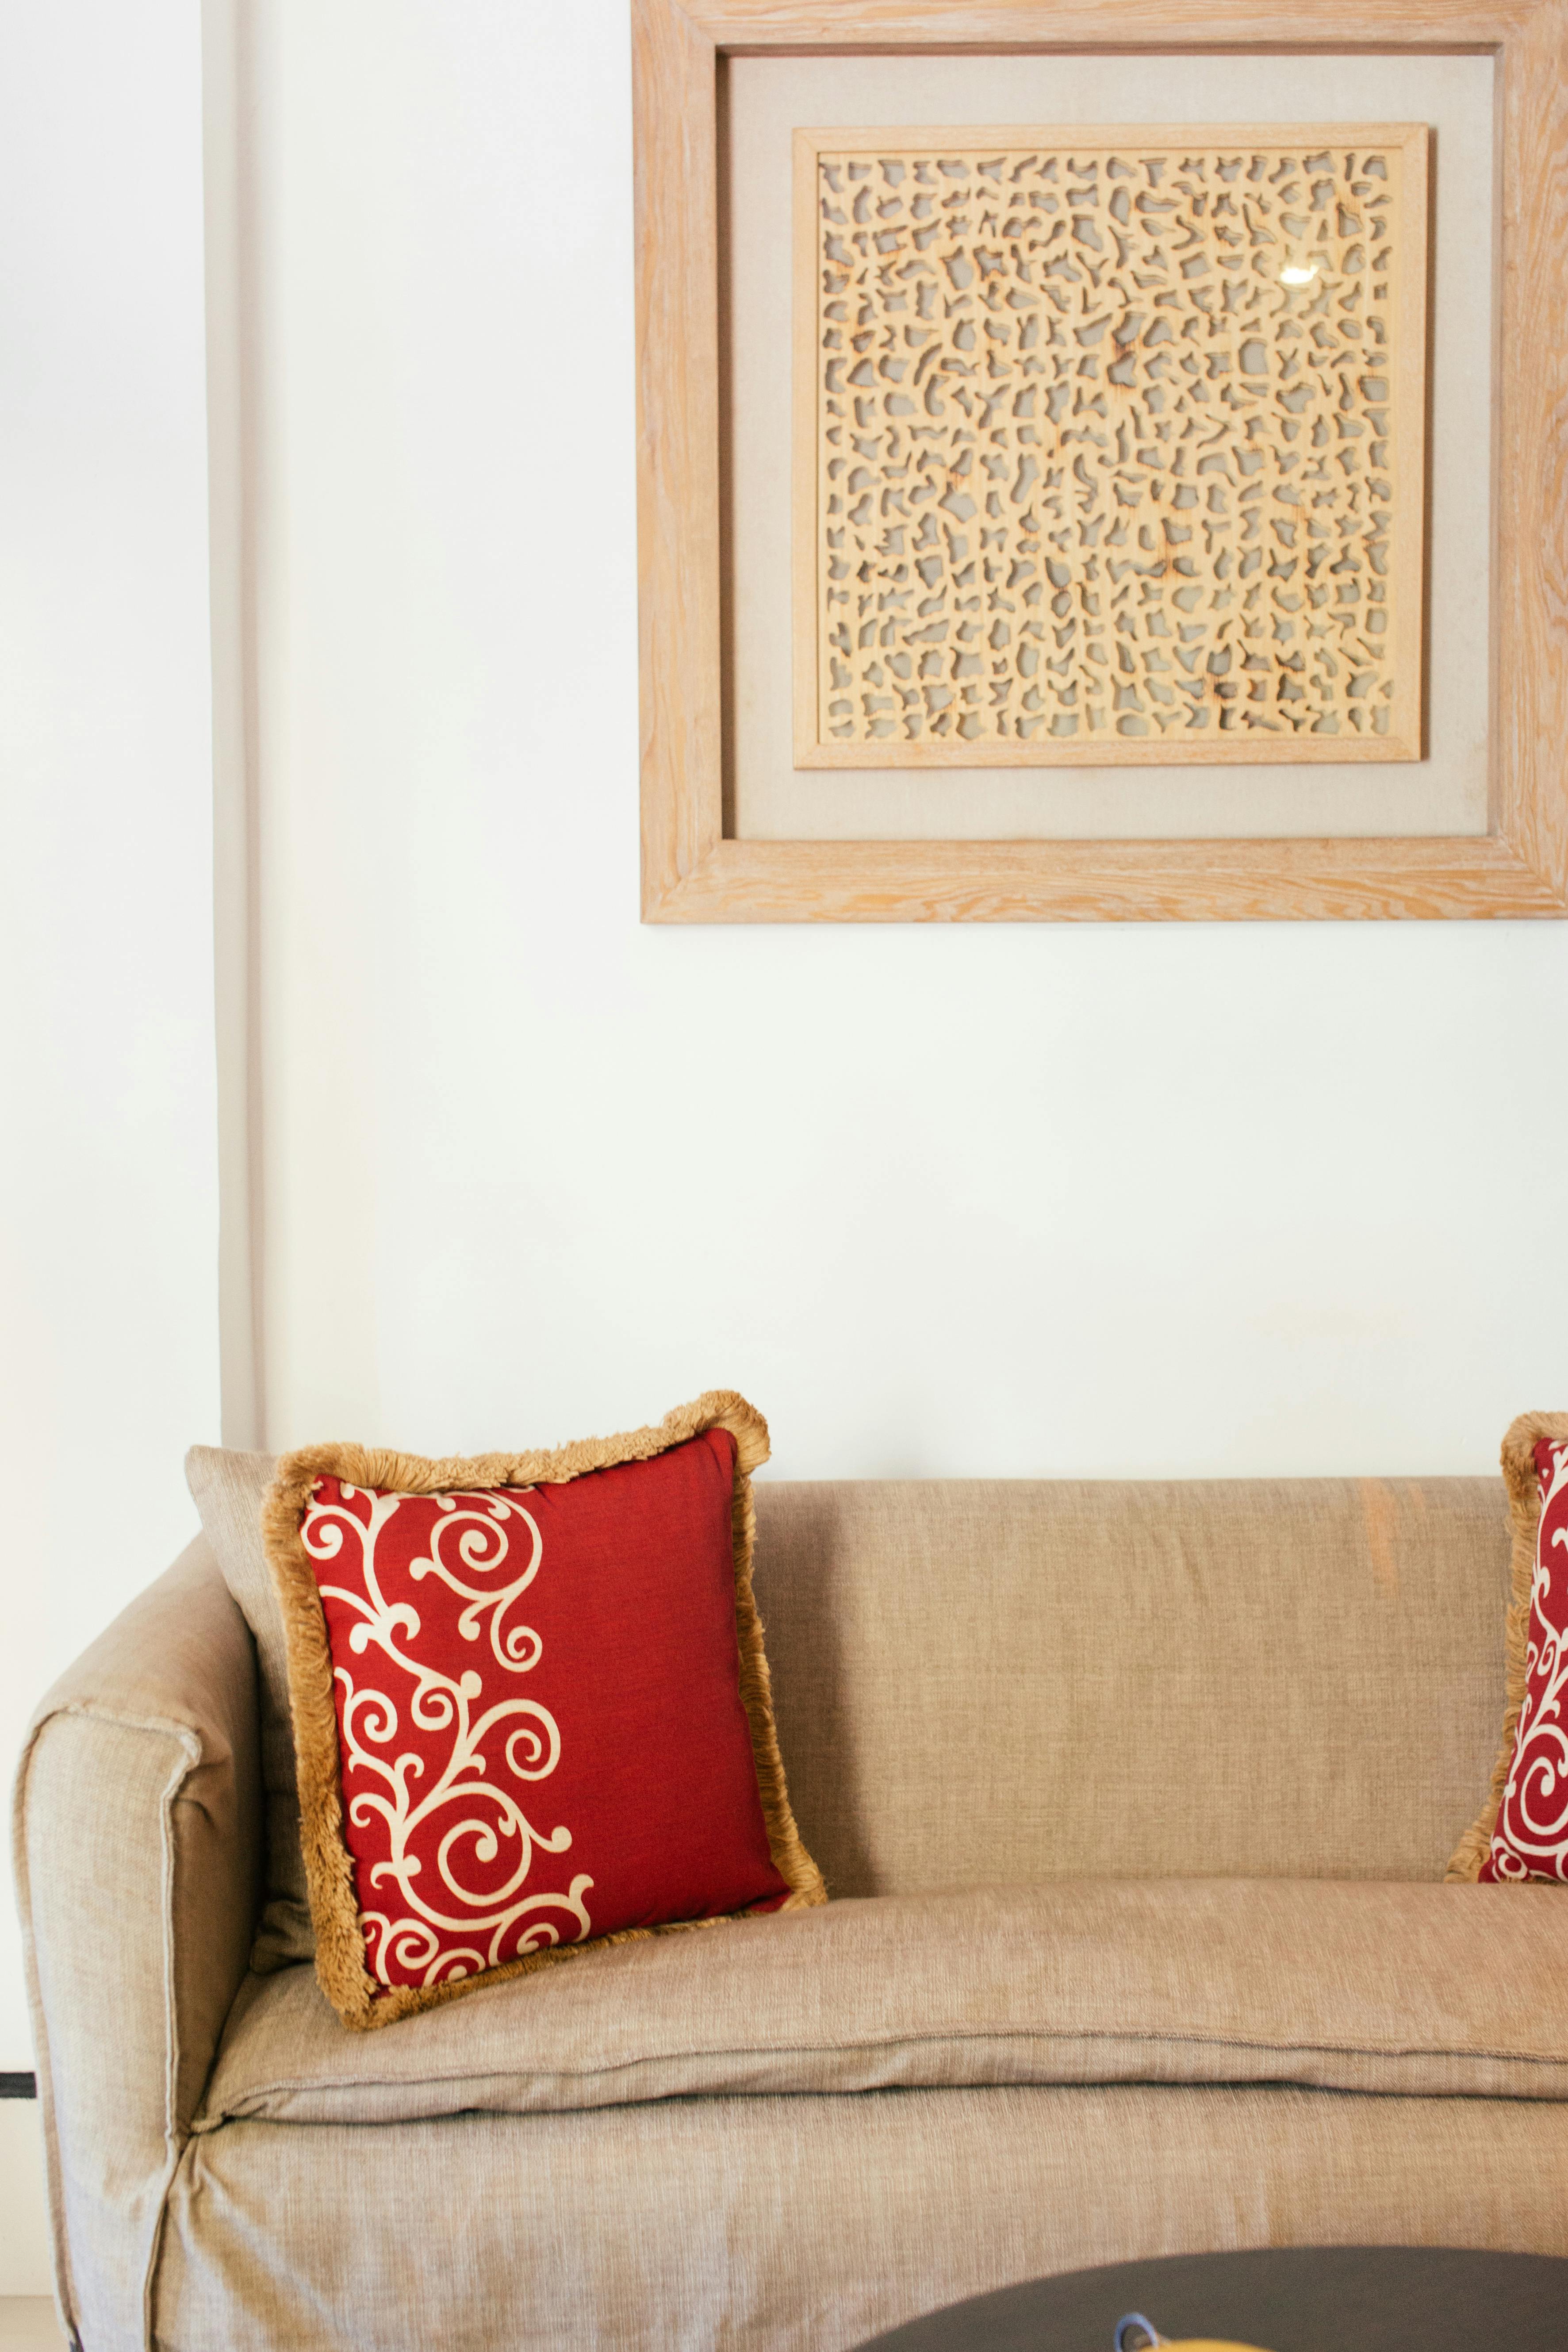
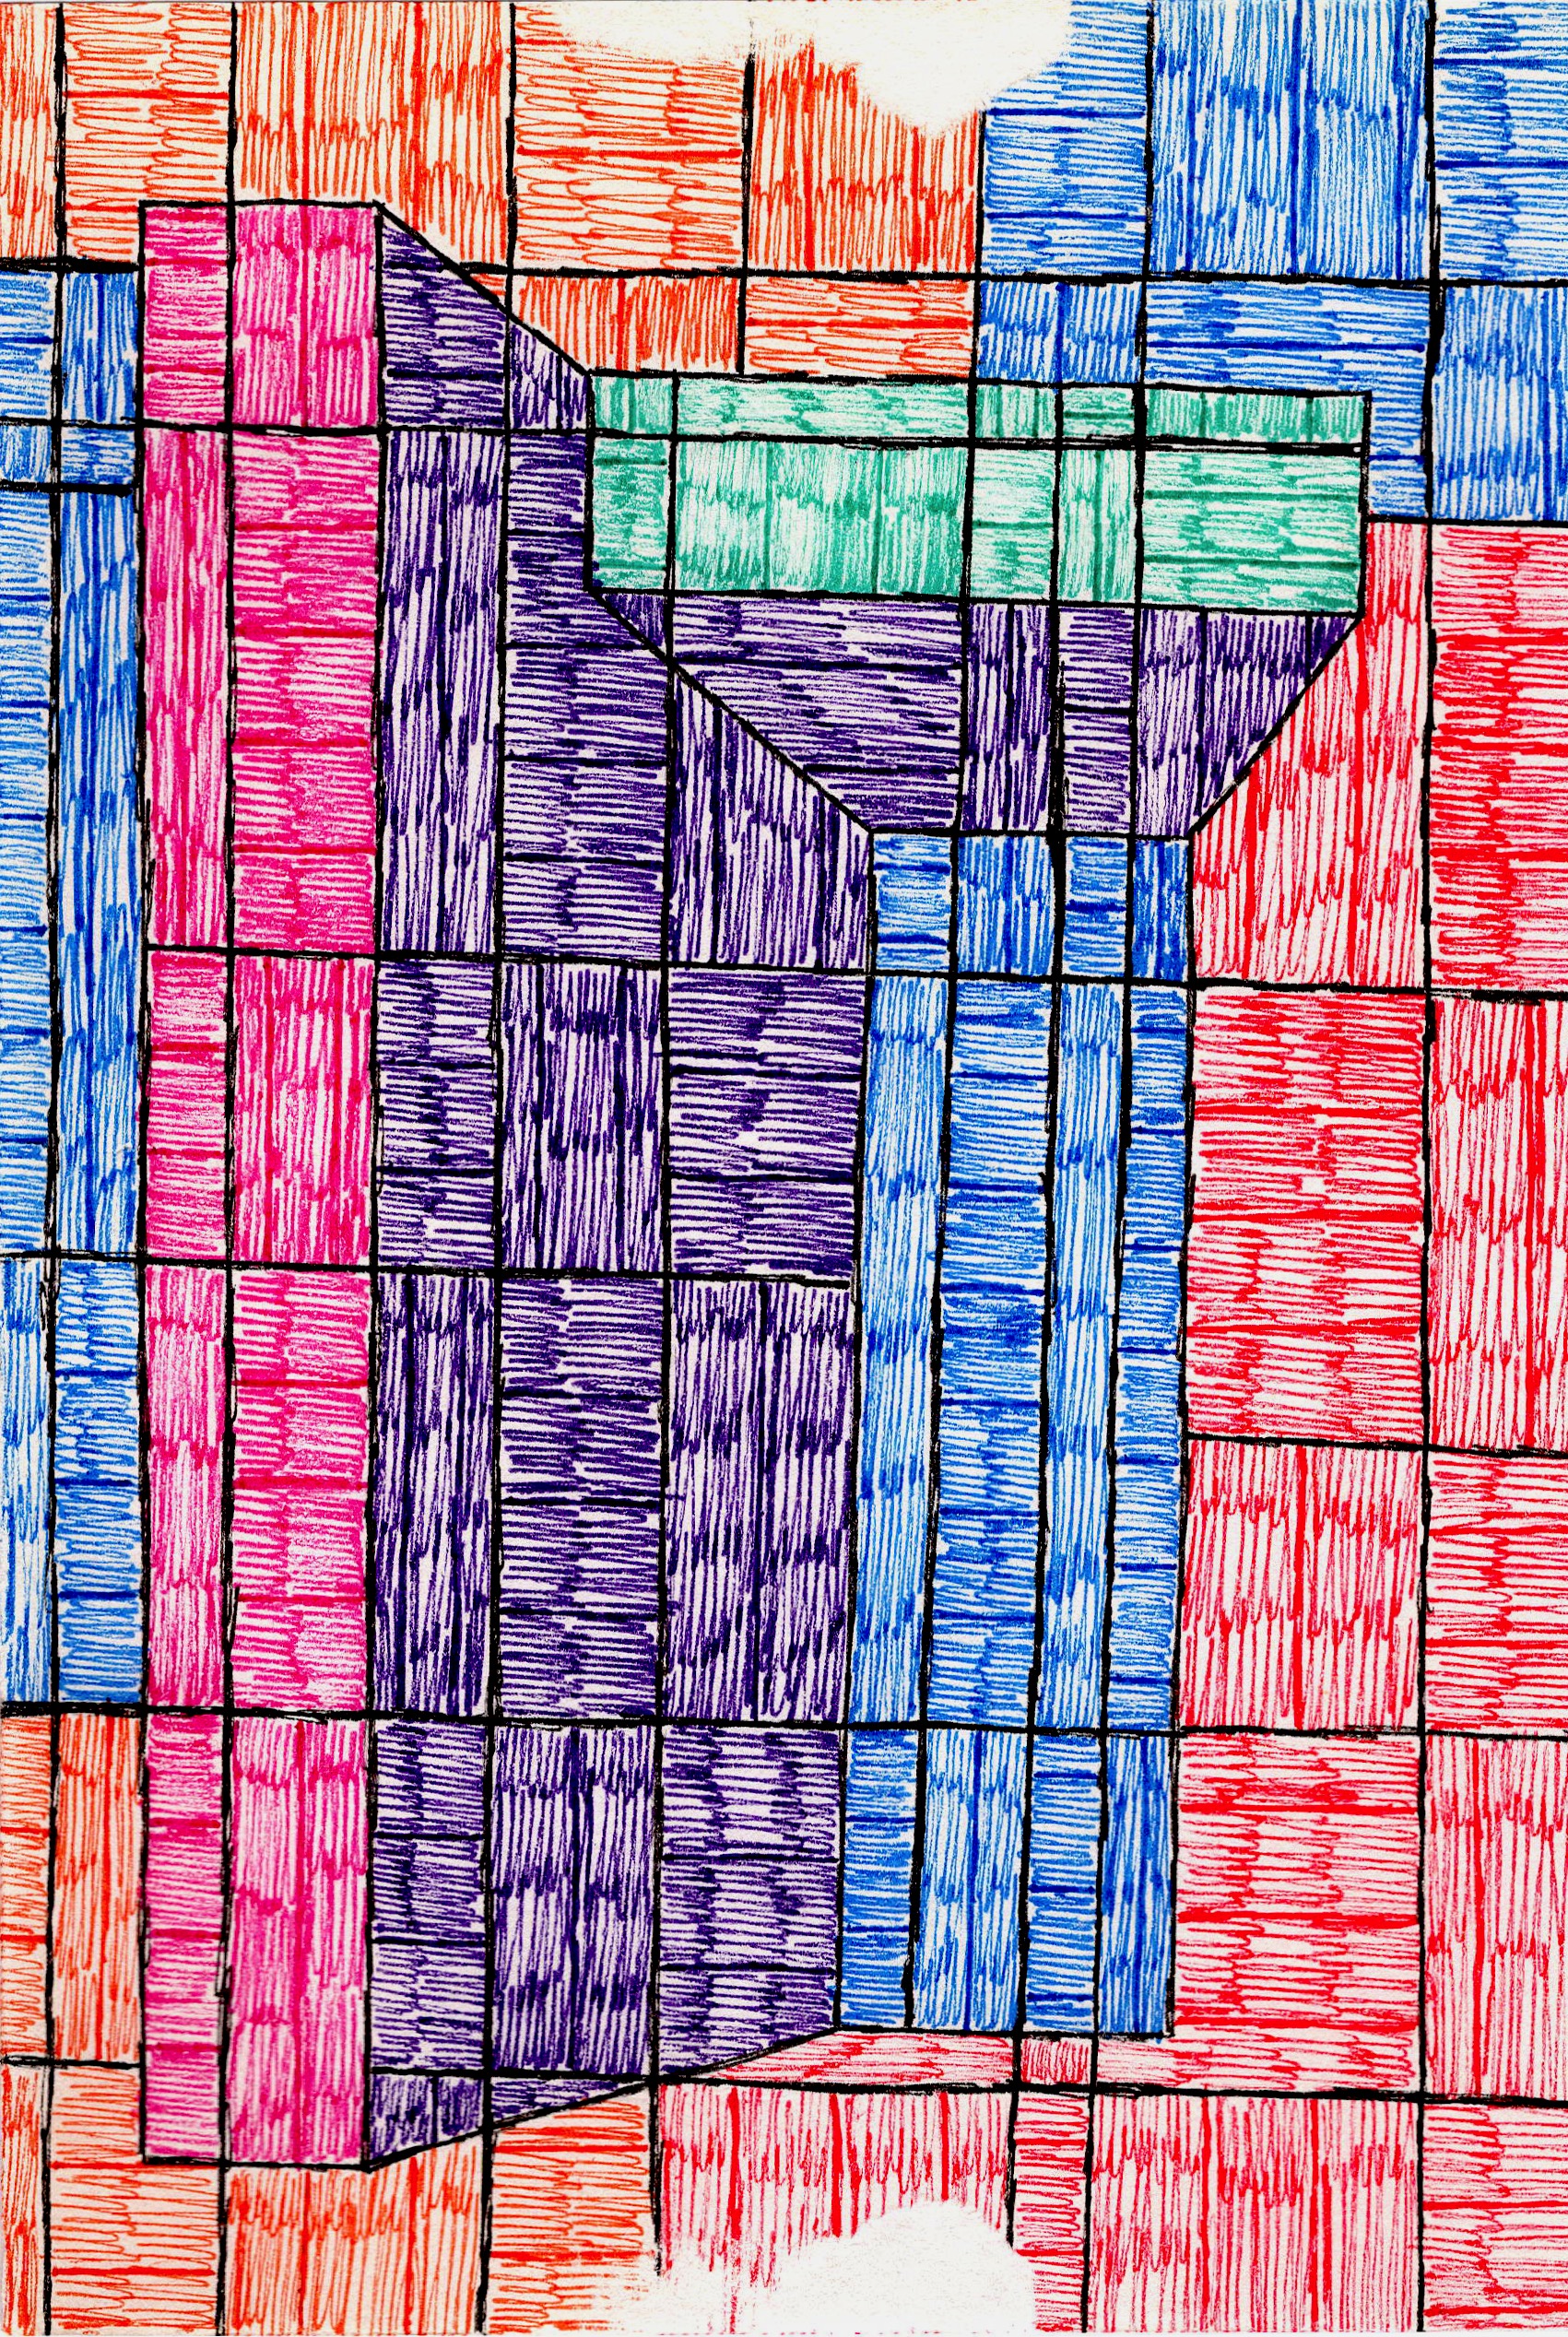
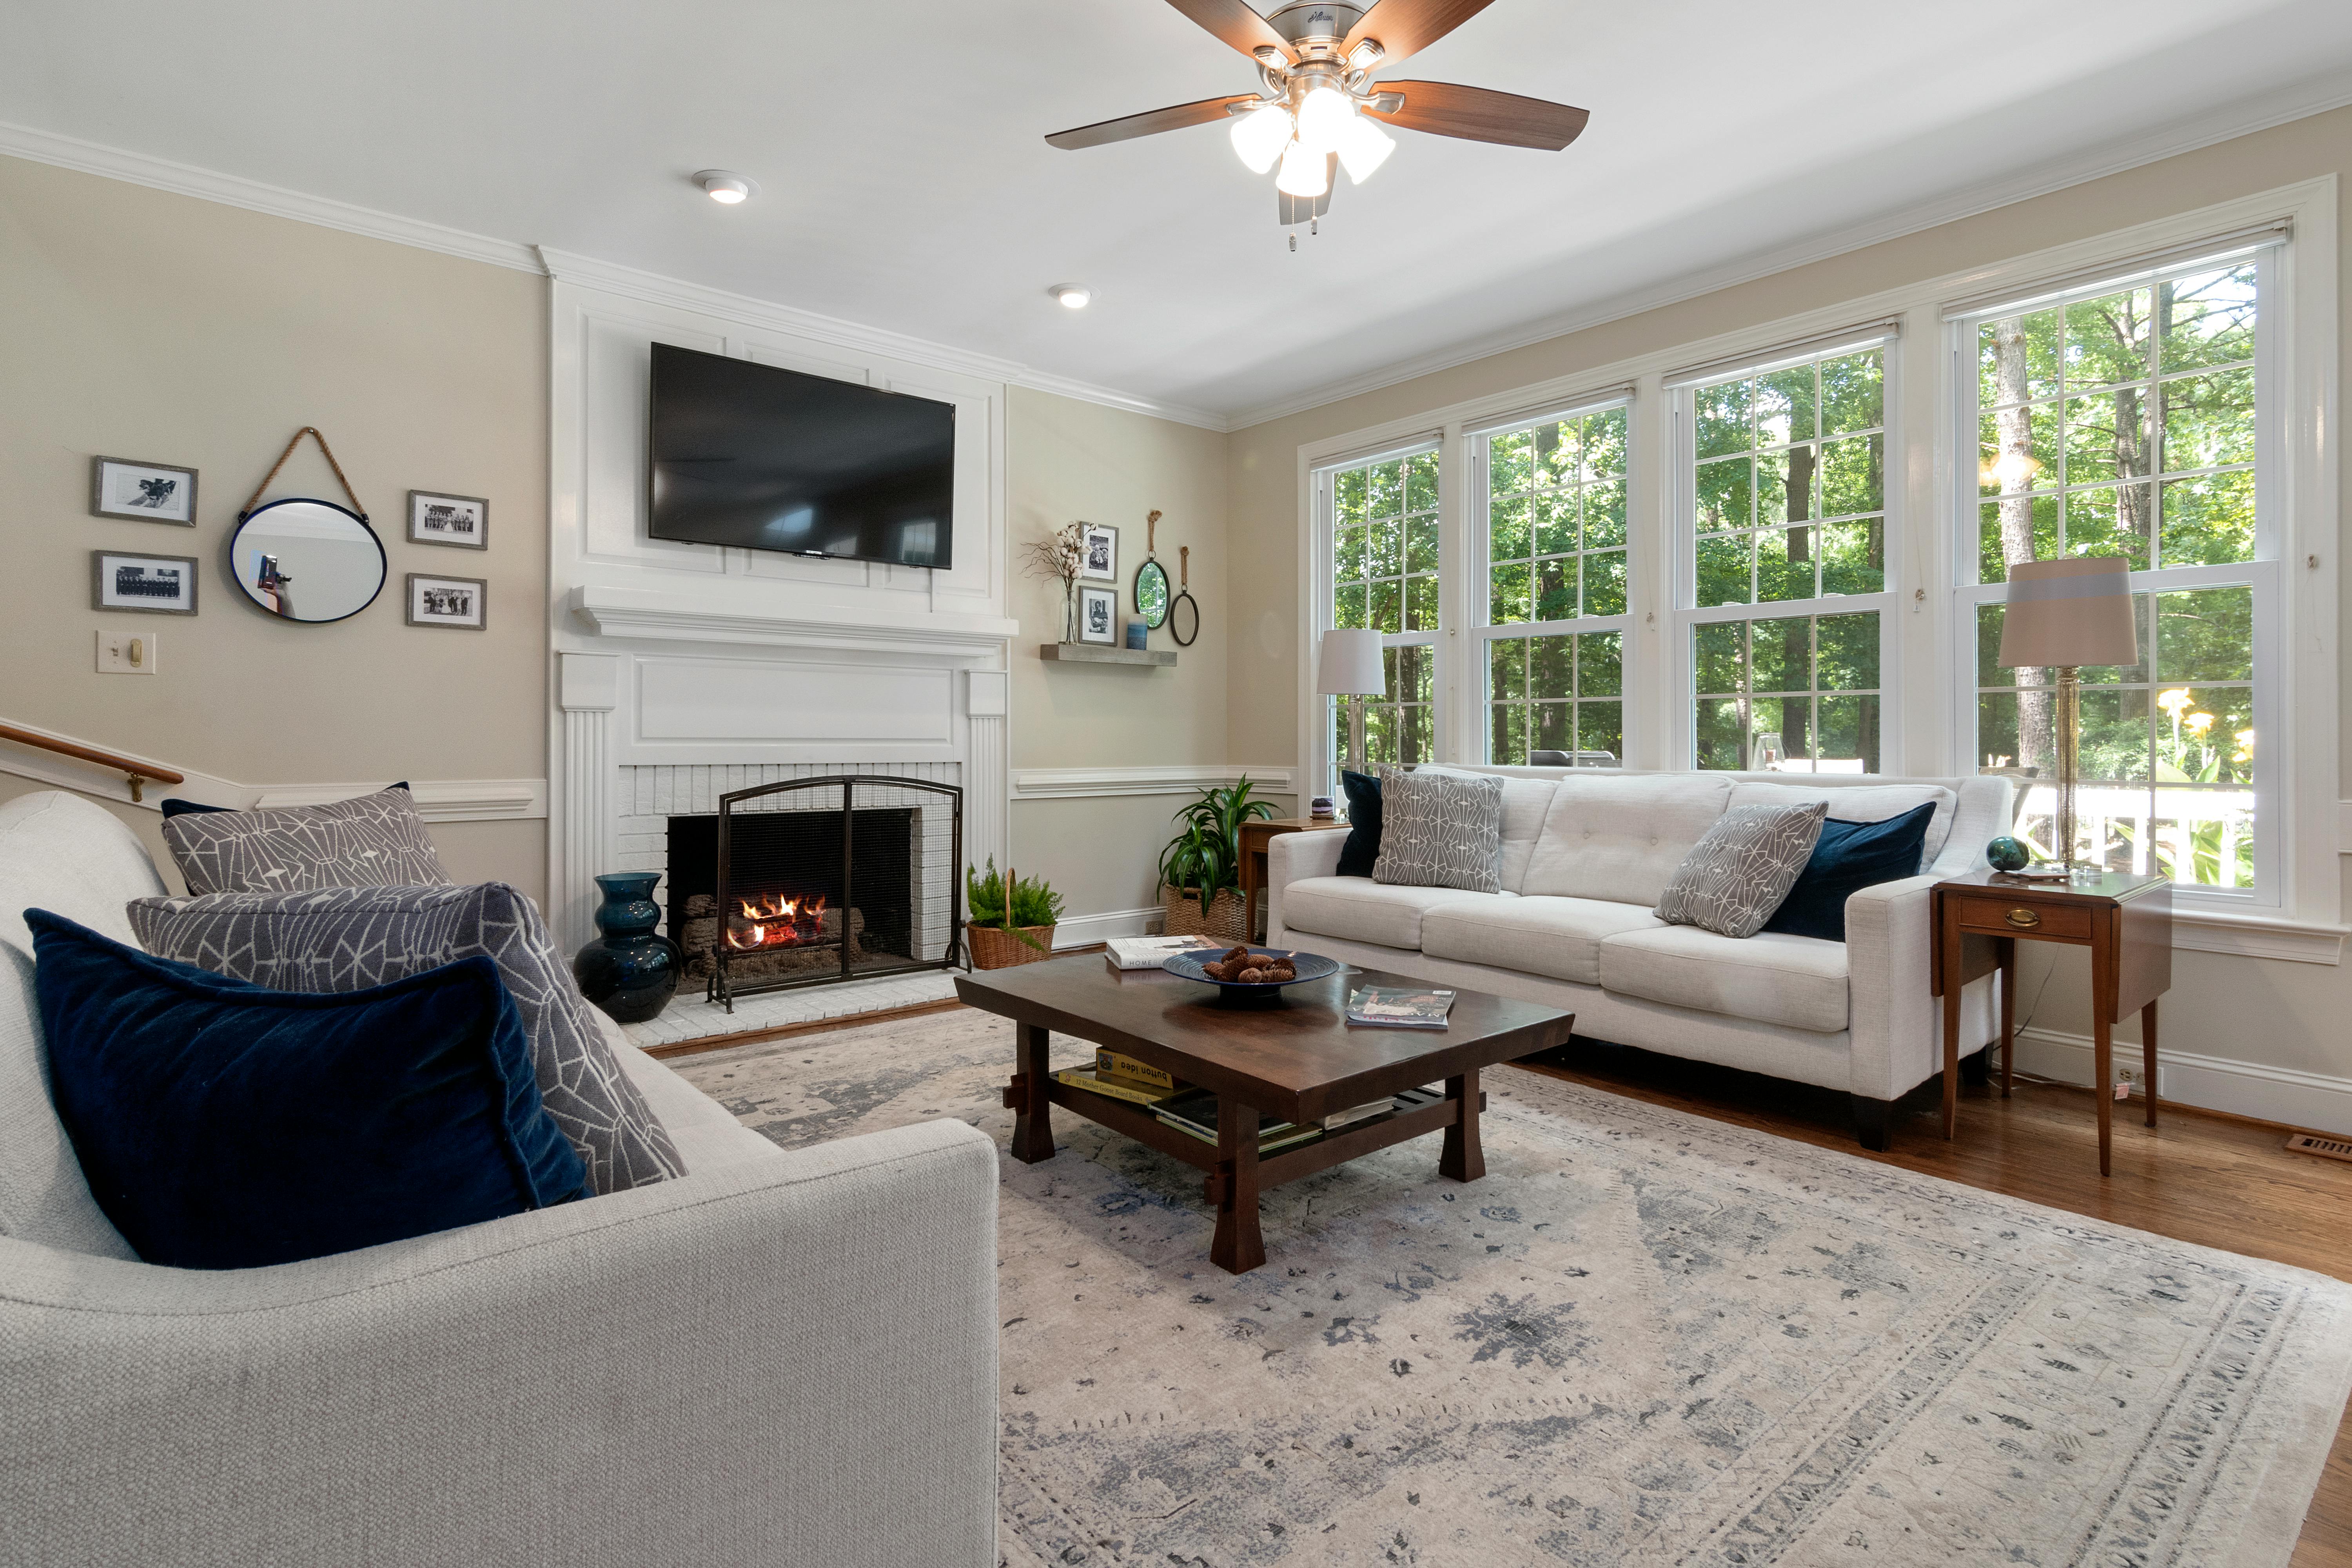