Best Acrylic Painting Brushes: An Artist's Candid Guide
Dive into my personal guide on choosing the best brushes for acrylic painting. Learn about types, materials, and care to elevate your artistic journey.
Best Brushes for Acrylic Painting: Your Ultimate Guide to Tools, Techniques, and Artistic Freedom
Let's be honest: finding the perfect paint brushes for acrylics can feel less like an exciting quest and more like an overwhelming deep-sea dive into a vast ocean of options. I've been there, staring at walls of brushes in art supply stores, utterly bewildered by the endless parade of rounds, flats, brights, and filberts. And don't even get me started on materials – natural, synthetic, blends – a swirling vortex of marketing jargon and conflicting advice that used to leave my head spinning.
For years, my approach was haphazard, grabbing whatever looked 'good enough,' only to battle splayed bristles, paint-caked ferrules, or brushes that simply refused to hold an edge. It felt like trying to conduct an orchestra with a single, frayed shoelace! But through countless hours of trial, error, and yes, a graveyard of ruined brushes, I've unearthed the secrets to what really works for acrylic paint, and more importantly, what feels like an authentic extension of my artistic spirit.
This journey of discovery isn't just a destination; it's a beautiful, ongoing exploration, and I'm here to share the hard-won shortcuts and insights I desperately wished I'd known earlier. Because the truth is, finding the right brush isn't just about technique; it's about fostering a profound, almost intuitive connection with your medium, allowing for an effortless flow of creative energy.
Whether you're a seasoned artist refining your toolkit or just embarking on your vibrant acrylic adventure, a solid understanding of your tools can truly revolutionize your entire painting experience. This isn't just a guide about what brushes to buy; it's the definitive deep dive into why they matter, how to use them effectively, and how to care for them so they become true extensions of your artistic vision, rather than mere implements. We'll delve into everything from the fundamental anatomy of a brush to the specific shapes, materials, and maintenance, ensuring you have all the knowledge to select the best acrylic paint brushes for your unique creative journey.
Think of it this way: a brush isn't just a tool, is it? It's an extension of your hand, your thought, your feeling. It's how you translate that spark of an idea into tangible color on a canvas. The right brush can feel like magic, effortlessly gliding across the surface, delivering precisely what your artistic vision demands. The wrong one? Well, that's often a wrestling match that leaves you and your canvas exhausted. Let's find your perfect partners in paint.
I’m going to share with you every single thing I’ve learned – from the fundamental anatomy of a brush to the specific shapes that unlock certain techniques, the materials that truly make a difference, and the non-negotiable care routines that will keep your cherished tools performing beautifully for years. My hope is that by the end of our conversation, you'll feel empowered, not overwhelmed, ready to choose your brushes with confidence and curiosity, allowing your art to flourish in ways you might not have thought possible. Are you ready to dive in and find your perfect partners in paint?

The Unsung Heroes: Why Brushes are the Heartbeat of Your Acrylic Journey
You know that feeling when everything just clicks in the studio? The paint flows, the colors sing, and your vision translates effortlessly onto the canvas? Often, the unsung hero behind that magic is a well-chosen brush. But why, specifically, do brushes matter so profoundly when it comes to acrylics? It’s a question I’ve pondered endlessly, especially after years of wrestling with the wrong tools. Let's delve into the unique demands acrylics place on our brushes, and why getting this right is an absolute game-changer.
Why Brushes Matter So Much for Acrylics

Acrylic paint is, indeed, a fascinating, dynamic beast. It's gloriously versatile, dries with a speed that can be both a blessing and a curse, and often boasts a beautiful, buttery consistency that artists adore. But here's the kicker: these very qualities, while making acrylics so universally appealing, also place unique and demanding requirements on your brushes. This isn't just a minor technicality; it's the absolute cornerstone of a successful, frustration-free acrylic painting experience. Just ponder this: acrylics cure through evaporation, and they do so with startling rapidity. If you're not meticulously careful, that sumptuous, vibrant paint can congeal into a rock-solid, brush-destroying mass in mere minutes (and trust me, I've had more than my fair share of brushes meet their untimely demise at the hands of the acrylic gods!). This swift drying time isn't merely a minor inconvenience; it profoundly dictates the precise brush qualities you absolutely need. You crave bristles that efficiently release paint, refusing to cling onto it, allowing you to work with agile speed and clean your tools with ease. This also means your brushes must possess the fortitude to withstand frequent rinsing without surrendering their crucial form. Conversely, certain acrylic applications, particularly with heavy body paints or impasto techniques, necessitate brushes imbued with significant resilience and inherent strength to effectively manipulate the paint without immediately splaying into an unruly mess. The sheer viscosity and textural range of acrylics, from translucent washes to robust gels and highly textured mediums, demands brushes that are supremely adaptable to varying loads and applications, steadfastly maintaining their shape and structural integrity through every demanding stroke. This expansive, dynamic range absolutely calls for tools that are equally versatile, transitioning seamlessly from the delicate precision of a fine-tipped round to the assertive push of a stiff bright. For example, a sumptuously soft, fine-tipped brush might be utterly exquisite for a delicate glaze, but it would be laughably useless for pushing a heavy impasto medium – and attempting to force it will only guarantee an infuriating wrestling match. It's like trying to cut a steak with a butter knife – you just won't get the results you're after, and you'll probably end up with a mess and a lot of frustration.
Unlike oil paints, which stay wet for ages, giving you ample time to blend and rework, acrylics demand brushes that can release paint smoothly and clean up quickly – often mid-stroke! And unlike watercolors, which are all about delicate washes and letting the pigment flow, acrylics often demand a brush with a bit more oomph – more spring, more durability, more ability to hold a thicker body of paint and really push it around. They need to stand up to vigorous scrubbing, heavy-body paints, and the occasional battle with a stubborn, semi-dry blob. The right brush not only makes the process smoother but also helps you conserve your precious paint and prevent undue wear and tear on your tools. Choosing the wrong brush can lead to paint waste, frayed bristles, and a general feeling of wrestling with your medium rather than flowing with it. For a deeper dive into paint types, you might find my guide on the definitive-guide-to-paint-types-for-artists insightful. And if you're curious about specific acrylic brands, I've also shared my thoughts in reviews like liquitex-basics-acrylic-paint-review and a comparison of golden-vs-liquitex-which-pro-acrylic-paint-is-right-for-you.
Here's a quick overview of why acrylic's unique properties dictate your brush choices:
Acrylic Property | Impact on Brushes | Ideal Brush Characteristics |
|---|---|---|
| Fast Drying Time | Paint can dry on bristles, making cleaning difficult and potentially ruining brushes. | Easy to clean, synthetic bristles that release paint efficiently, quick-drying fibers to minimize paint buildup. |
| Versatility | Ranges from thin washes to thick impasto, requiring adaptable tools for varying applications and paint loads. | Good 'snap' and resilience; ability to load and release various paint consistencies; robust, double-crimped ferrules for stability. |
| Polymer Binder | Can stiffen and damage natural hairs; demands durable bristles that resist adherence and polymer buildup. | Primarily synthetic bristles designed for durability, resistance to polymer buildup, and easy release of dried paint particles. |
| Water-Solubility | Frequent rinsing, prolonged exposure to water, which can degrade natural hairs and loosen ferrules. | Rust-resistant ferrules, bristles that don't become mushy or splay when wet, and maintain integrity through repeated cleaning. |
| Texture Range | From smooth glazes to expressive, textured strokes, demanding brushes that excel in varied applications and pressure. | A diverse set of shapes (rounds, flats, filberts, brights) and varying stiffness (soft synthetics for blending, stiff for impasto, resilient for pushing heavy mediums). |
| Abrasion Resistance | Acrylics can be worked vigorously on various surfaces, requiring brushes that withstand friction without fraying. | Highly durable synthetic fibers that resist wear and tear, maintaining their shape even with energetic scrubbing or scumbling. |
The Unseen Power: Brush Stiffness and Snap
When artists talk about the 'feel' of a brush, two terms consistently rise to the surface: stiffness and snap. And trust me, for acrylics, these aren't just technical terms; they are the very essence of a brush's responsiveness and control.
- Stiffness: This refers to the inherent rigidity or softness of the bristles. A stiff brush provides significant resistance and power, allowing you to confidently push thick, heavy-body acrylics, create pronounced textures (hello, impasto!), and generate bold, assertive marks. Think of it as the muscle in your toolkit. On the other hand, a softer brush offers less resistance, making it ideal for smooth blending, delicate washes, and subtle glazing, where a gentle touch is paramount. The 'right' stiffness isn't universal; it depends entirely on your technique and the specific effect you're aiming for.
- Snap (or Spring): This is the brush's remarkable ability to swiftly and assertively return to its original, pristine shape after pressure is applied and then released. For fast-drying acrylics, exceptional snap is a non-negotiable quality. A brush with poor snap will feel sluggish, flaccid, and frustratingly unresponsive, making it difficult to maintain precise control or achieve crisp edges. Conversely, a brush with great snap feels lively, responsive, and like a true extension of your hand, allowing for expressive, dynamic strokes that genuinely pop. It's the spring in its step, allowing you to work with speed and confidence.
The interplay between stiffness and snap profoundly influences how a brush interacts with your paint and the canvas. Understanding these qualities is like unlocking a secret code to more intuitive and effective acrylic painting. It's truly fascinating how a simple flick of the wrist can yield such varied results based on these inherent brush characteristics.
A Quick Look at Acrylic's History
It's also worth remembering that acrylic paint itself is a relatively modern invention, gaining popularity in the mid-20th century. Its evolution from industrial innovation to a staple artistic medium has profoundly influenced the tools artists use. Think about it: early painters didn't have to contend with paint drying in seconds, so their brush designs focused on different properties. As acrylics developed, so too did the demand for brushes that could handle its unique properties – rapid drying, polymer binders, and incredible versatility. Understanding this journey helps appreciate why certain brush characteristics are so crucial for this versatile paint. If you're fascinated by the backstory, I highly recommend checking out the-history-of-acrylic-painting-from-industrial-innovation-to-artistic-medium.

Getting the right brush isn't about being fancy; it's about making your life easier and your painting experience more enjoyable. When you have a brush that responds beautifully to your touch, it’s like the paint almost applies itself. It becomes an effortless extension of your creative will. And trust me, that makes a world of difference. It allows you to focus on the art itself, on the color and the form, rather than wrestling with a tool that's fighting against you.
The Anatomy of a Brush (and Why You Should Care)
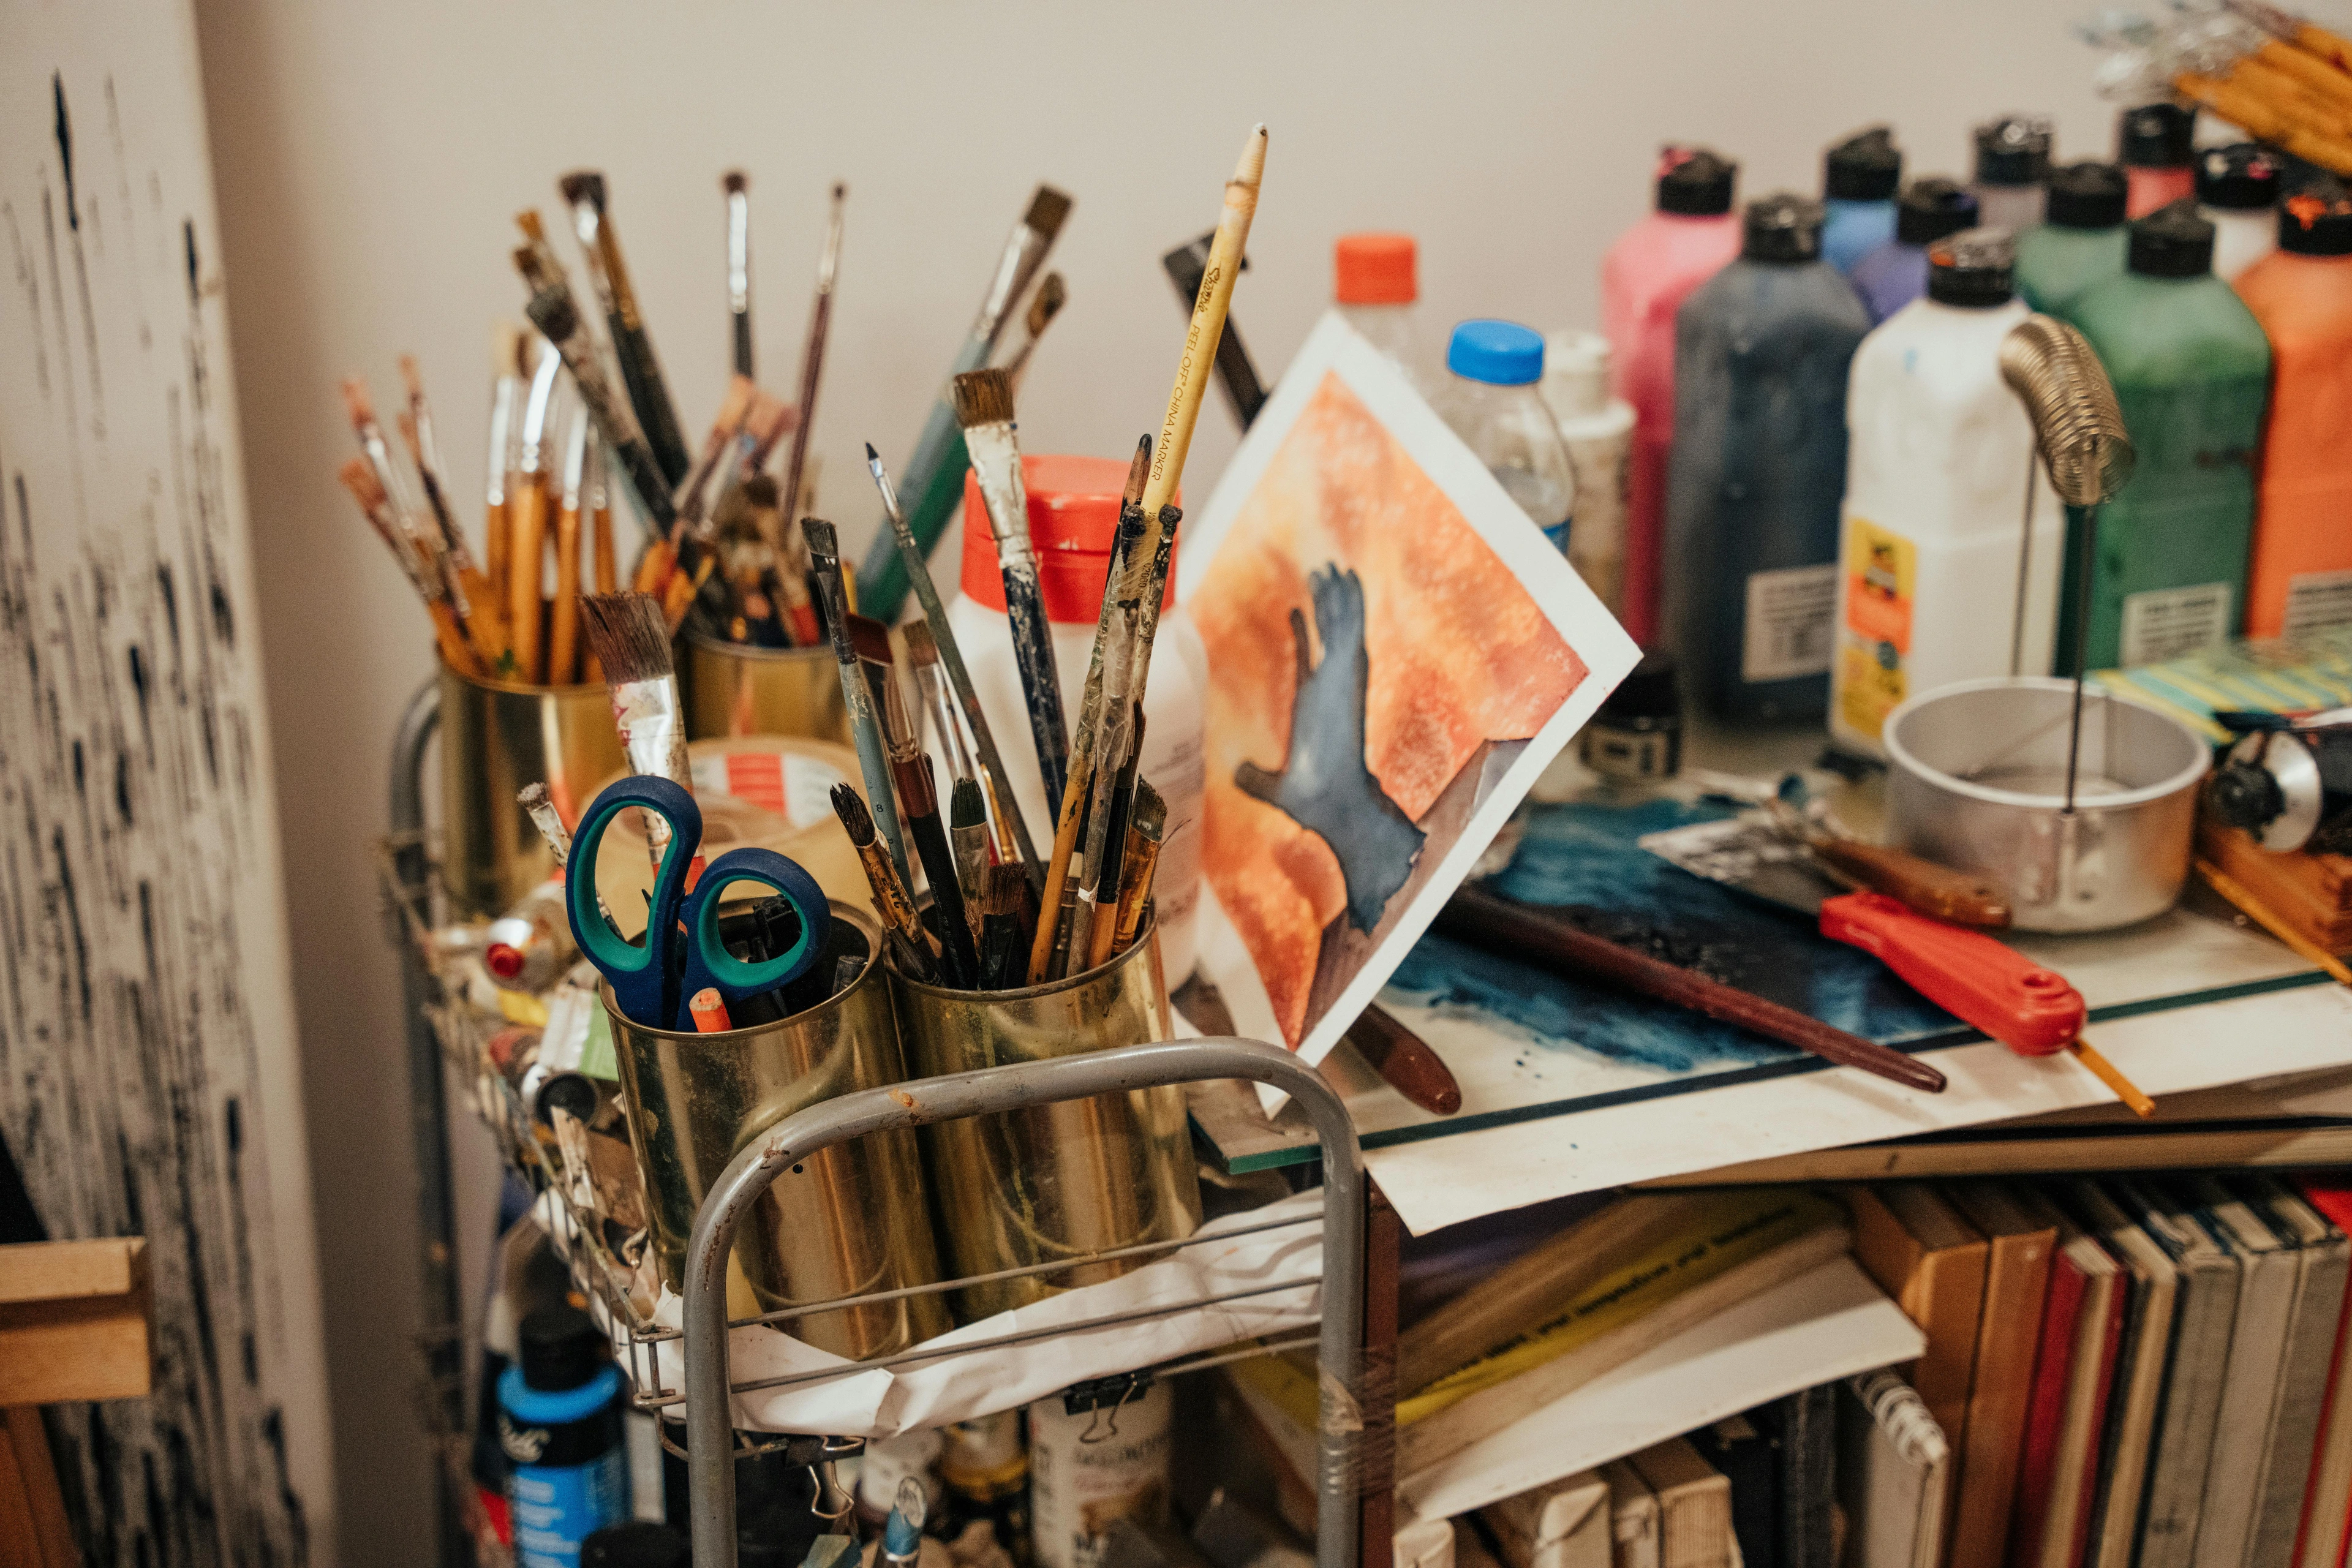
Before we dive into shapes and materials, let's quickly dissect a brush. Understanding these parts helps you appreciate why one brush feels different from another and what makes a good quality brush. It's not rocket science, just useful info. Knowing the anatomy is like knowing the parts of a car – you don't need to be a mechanic, but it helps you understand why some rides are smoother than others. I remember the first time someone explained the parts of a brush to me; it was like unlocking a secret language, and suddenly, I understood why certain brushes felt so much better. Let's imagine a classic paintbrush and break it down:
- Bristles (or Hairs): This is the undisputed business end, the part that actually makes intimate contact with your canvas, translating your artistic intention into tangible color and form. These hardworking fibers are responsible for holding the paint, smoothly transferring it to the surface, and ultimately creating your distinct mark. Their material (synthetic, natural, or a purposeful blend), their overall shape (be it round, flat, filbert, or any other specialized form), and crucially, their inherent stiffness or "snap" are all paramount characteristics.For acrylics, you absolutely want bristles with exceptional snap – meaning they eagerly spring back to their original, pristine shape quickly and assertively after pressure is applied. You also need a material that releases paint with impressive efficiency, eschewing excessive absorption of water or paint that can lead to frustrating clogs and splayed ends. The intricate way these bristles interact with your chosen paint and the underlying surface profoundly dictates the precise kind of stroke you can effortlessly achieve. Are they sumptuously soft and subtly absorbent, making them perfect for delicate glazes and fluid washes? Or are they staunchly stiff and wonderfully springy, rendering them ideal for assertive impasto work and building expressive texture? These nuanced details matter with a profound, almost spiritual, significance.Beyond the obvious basic shape, it's worth considering the brush's internal geography. Think of it like a miniature, perfectly engineered broom:
- Belly: The widest part of the bristle bundle, which acts as a reservoir for paint. A good belly means fewer trips back to the palette.
- Heel: The critical juncture where the bristles are securely crimped into the ferrule. This is a stress point and a common place for paint to dry and cause splaying if not cleaned well.
- Tip or Edge: The actual working part that precisely defines your stroke. This is where the magic of a fine point or a chiseled edge comes into play.
The meticulous way the bristles are carefully cut and shaped, whether culminating in a finely pointed tip for surgical precision or a blunt, chiseled edge for bold, declarative marks, profoundly influences their ultimate performance. High-quality synthetic bristles, especially those meticulously engineered for acrylics, will often possess microscopic irregularities – sometimes called micro-filaments – and sometimes even boast flagged tips (subtly split ends) specifically designed to better mimic the desirable paint-holding capacity and the graceful, smooth flow of natural hairs, all without inheriting their inherent drawbacks for acrylic applications. This sophisticated design significantly enhances their innate ability to pick up and distribute paint with remarkable smoothness and consistency. It's truly fascinating how technology has advanced to create fibers that feel almost alive in your hand. - Ferrule: Ah, the ferrule. This unassuming, yet utterly crucial, metal band is the stalwart connection point, seamlessly binding the business end (the bristles) to the handle you hold. It's most commonly fashioned from nickel-plated brass or aluminum, and its design is a testament to functional elegance: it must be perfectly seamless, intrinsically rust-resistant (a quality of paramount importance given the constant water exposure with water-based acrylics!), and, critically, firmly crimped to staunchly prevent any disconcerting wobbling or the disheartening sight of bristles abandoning ship. A shoddy, cheaply made ferrule, I can tell you from bitter experience, is a ceaseless wellspring of frustration – paint insidiously seeps in, bristles splay out like a startled peacock, and the entire apparatus simply disintegrates with alarming speed. Always, always look for a double-crimped ferrule for that indispensable extra layer of durability. This signifies that the ferrule is securely pressed onto the handle at no less than two distinct points, forging an exceptionally more secure and enduring bond. A truly seamless ferrule doesn't just act as an impenetrable barrier, preventing water and errant paint from seeping into the interior, thereby forestalling the insidious rotting of the wooden handle or the untimely loosening of the glue; it also meticulously ensures that the bristles remain perfectly aligned, a fundamental requirement for achieving consistent, flawless stroke quality and profoundly extending the overall longevity of your cherished artistic companion. It is, without a doubt, the unsung, metallic hero of the paintbrush world. Some high-end ferrules even feature an internal epoxy seal, providing an almost impenetrable barrier against water and paint infiltration, a small detail that makes a huge difference in the long run.
- Handle: This is the often-underestimated, yet profoundly important, part you actually hold – and its significance, believe me, cannot be overstated. Brush handles materialize in a fascinating array of lengths, each meticulously designed for specific artistic scenarios.
- Short handles are your steadfast companions for intricate, detailed, close-up work, typically executed at a table or desk, offering surgical precision and fostering an almost intimate connection to the canvas.
- Long handles are the classic preference for easel painting, granting you that invaluable distance from your canvas, allowing you to critically assess the overarching composition and enabling the execution of broader, more expansive, and vibrantly expressive strokes, subtly encouraging a looser, more fluid style.
- Beyond these, you'll even encounter extra-long handles, often employed for monumental mural work or when you genuinely need an even greater observational distance to critically appraise your magnum opus from afar.
Handle materials are equally diverse, spanning the spectrum from classic wood (often meticulously lacquered for enhanced protection) to sleek acrylic, sustainable bamboo, or even innovatively recycled plastics. However, comfort here is an intensely personal and subjective affair; a truly well-balanced handle should feel like a natural, effortless extension of your arm, essentially disappearing into your grip and profoundly minimizing fatigue during those deliciously long, immersive painting sessions. Seriously, never, ever underestimate the transformative power of a truly comfortable grip! Moreover, some handles are also thoughtfully ergonomically shaped to nestle more naturally within the contours of your hand, strategically reducing strain during extended creative endeavors, while others might incorporate a subtly textured grip for significantly enhanced control – perhaps a rubberized coating or a matte finish. These small touches can make a monumental difference during those epic, hours-long painting sessions. Ultimately, it’s an utterly personal quest to discover what feels authentically natural and intuitive to you. Don't underestimate the power of a brush that 'disappears' in your hand, allowing you to focus purely on your art.
Understanding Brush Sizes and Numbering
Before we dive into the shapes, a quick word on sizing. Brush sizes are indicated by numbers, but there's no universal standard across brands. A 'size 6' from one manufacturer might be slightly different from another, which, honestly, can be a bit annoying when you're trying to reorder a favorite! Generally, smaller numbers (000, 00, 0, 1, 2) denote very fine detail brushes, while larger numbers (6, 8, 10, 12, and up) indicate progressively larger brushes for broader strokes and coverage. For flats and brights, you'll often see sizes in inches (1/4", 1/2", 1", etc.). Don't get too hung up on exact conversions; instead, focus on the visual size and how it feels in your hand for the task you have in mind. I usually keep a mental note (or a physical one!) of the actual bristle width for my most-used brushes, rather than just the number.
When critically considering brush size, your primary thought should always gravitate towards the inherent scale of your canvas or working surface. Imagine attempting to render a miniscule detail with a vast, mural-sized brush – it would be an exercise in utter futility, a frustrating battle against inappropriate tools. Conversely, employing a gargantuan wash brush on a miniature, intimate piece would be equally ludicrous and impractical, leading to a chaotic mess rather than controlled artistry. For close-up, exquisitely intricate work, such as the delicate nuances of portraiture details, the microscopic textures of tiny still lifes, or the precise rendering of miniature landscapes, those micro-sized rounds, meticulous liners, and pinpoint detail brushes are your indispensable allies. Their diminutive scale grants you surgical precision and unparalleled control. Conversely, for expansive abstract pieces, grand landscapes, or efficiently covering vast backgrounds, you will instinctively gravitate towards those magnificently wider flats, assertive brights, and generous wash brushes. It truly is a fundamental dance of matching the perfect tool to the precise scope and grand ambition of your artistic vision. And sometimes, it's about having a range – using a larger brush for the initial 'block-in' of color, then moving to progressively smaller brushes as you refine details and add intricate layers. This tiered approach, much like zooming in with a camera, allows for both efficiency and precision. Think of it like a musician choosing an instrument – a delicate flute for intricate melodies, or a powerful drum for resonant rhythms. Each has its purpose, and the magic happens when you know which to pick.

The Importance of a Good Point or Edge
Before we dive into shapes, let's briefly talk about one often-overlooked aspect of brush quality: the integrity of its point or edge. This might seem obvious, but a brush that consistently forms a sharp point (for rounds) or a crisp, clean edge (for flats and brights) is paramount for control and precision. If your round brush comes to a splayed, ragged tip, or your flat has a fuzzy, uneven edge, it will be incredibly difficult to make the marks you intend. This is why proper care and, initially, choosing a high-quality brush, are so important. A good point or edge allows you to paint precisely, whether you're laying down a fine line or creating a clean color block. It truly makes all the difference when you're aiming for a clean, professional finish.
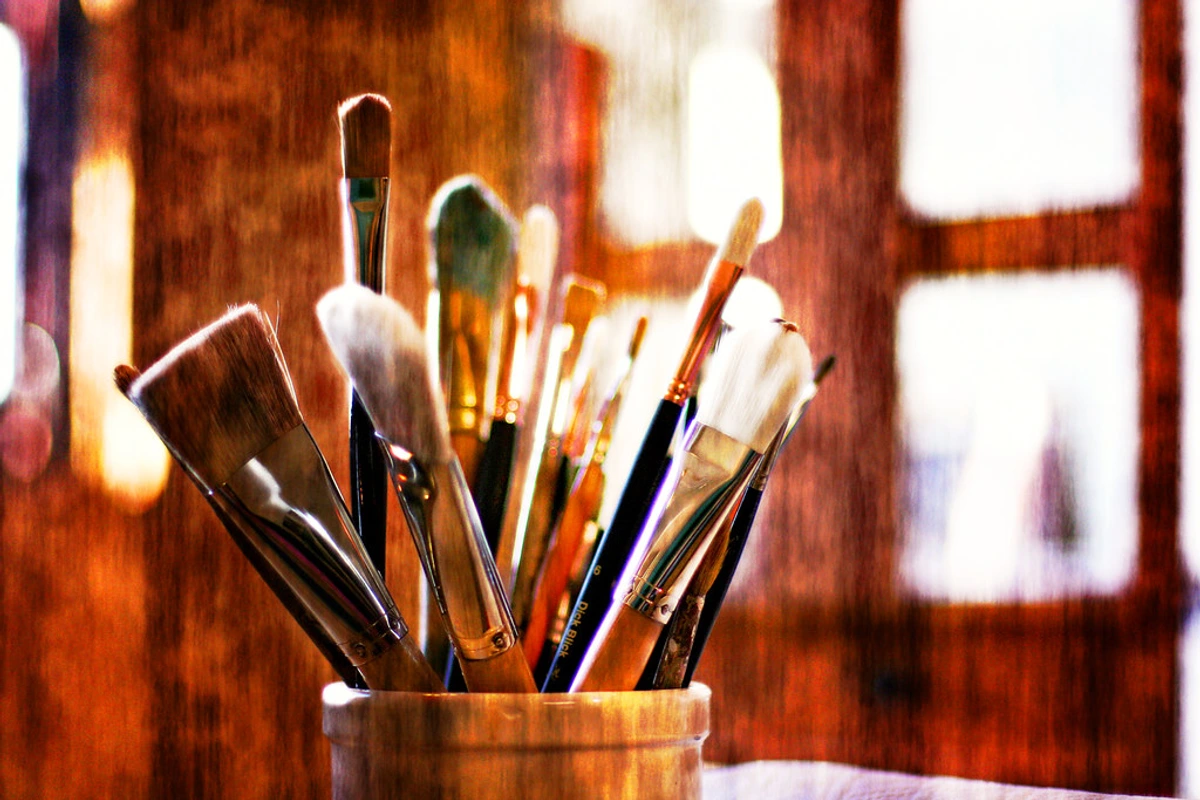
Essential Brush Shapes for Acrylic Painting (and When I Reach for Them)
This is where it gets fun! Each brush shape has its own personality and its own superpower. I certainly don't use every single shape out there – who has the studio space for that, let alone the mental bandwidth? – but these are my go-to's, the workhorses of my acrylic painting adventures. They're the core team that helps me tackle most challenges, from bold color blocking to delicate line work.
Brush Shape | Description | My Favorite Use for Acrylics | Common Sizes | Pro Tip / What I Love It For |
|---|---|---|---|---|
| Round | Tapered to a fine point, typically with a full belly. | Excellent for detailed work, lines, outlines, and controlled washes. Holds a lot of paint, so great for continuous strokes. | 000-12 | Oh, the round brush – it’s truly the chameleon of my toolkit, the absolute most versatile brush I own! I reach for it constantly, from the very first tentative sketches directly on canvas to laying down foundational drawing in paint, all the way through to adding those sparkling, pinpoint highlights. Use its needle-fine tip for unbelievably delicate lines, then roll it onto its generous belly for broader, more expressive strokes. A light touch can even achieve subtle blending in smaller areas. It’s a true workhorse, and honestly, if I could only grab one brush in a studio fire (terrible thought!), it would probably be a trusty medium round. I even use a slightly worn round for gentle scumbling, creating a diffused texture that’s hard to achieve with other shapes. |
| Flat | Square-ended with medium to long hairs. | Bold, chiseled strokes, sharp edges, filling larger areas, and blending. You can use its broad side or its thin edge. | 1/8" - 2" | The flat brush is my absolute champion for making a strong visual statement. It’s perfect for covering expansive backgrounds with remarkable speed, or for precisely carving out crisp, architectural lines and geometric forms that demand a strong, decisive mark. I often use its thin edge to deliver surprisingly delicate details, almost like a fine liner, while its broad side is fantastic for sweeping color across large areas. It's a powerhouse for creating dynamic compositions and adding a real sense of structure to my work. I particularly love using it for blocking in large areas of color with acrylics, especially when I’m working on a large-scale abstract piece and need to lay down a lot of paint quickly and evenly. |
| Bright | Shorter hairs than a flat, same square end, stiffer. | Similar to flats but gives more control for shorter, thicker strokes and impasto work. Perfect for pushing around heavy body acrylics. | 1/8" - 1.5" | My go-to for really moving thick paint and creating expressive, visible brushstrokes. Fantastic for adding texture and building up layers. When I need to really push and sculpt thick paint, the bright is my undeniable champion. It’s my go-to for creating those wonderfully expressive, visible brushstrokes and building up tactile layers. Because its hairs are shorter and stiffer than a regular flat, it grants me unparalleled control for precise impasto work, allowing me to build texture and add dimension with confidence. It’s the muscle in my brush collection, perfect for when I want the paint itself to have a physical presence. I find it indispensable when I'm working with heavy gel mediums, as it can really carve and define those textural elements. |
| Filbert | Flat ferrule with an oval-shaped end. | Creates soft, rounded edges without harsh lines. Great for blending, creating petals, or soft transitions. A real smooth operator. | 1/8" - 1" | Oh, the filbert! This is where gentle, seamless transitions come to life. With its distinctive oval-shaped end, it’s absolutely essential for achieving those coveted soft, rounded edges without any harsh lines. I grab it constantly for delicate blending, sculpting graceful flower petals, or crafting smooth, almost ethereal transitions in skies and organic forms. It's the ultimate smooth operator in my arsenal, and I honestly couldn't imagine painting portraits or creating natural, flowing shapes without it. It truly embodies the 'gentle touch' you sometimes crave in your painting. I even use a well-loved filbert for light dry-brushing, allowing its softened edges to create subtle, broken color effects. |
| Liner/Rigger | Very long, thin bristles, often with a fine point, designed to hold a good amount of thinned paint. | Super for intricate details, long continuous lines (like branches or hair), and calligraphy-style strokes. Requires a steady hand! | 000-6 | When my artistic vision demands a line so fine and uninterrupted it feels almost drawn by magic, the liner (or rigger) is my go-to. It's incredible for those intricate details, the delicate tendrils of a plant, wisps of hair, or even precise calligraphy-style strokes. While it certainly demands a steady hand and a bit of practice to master, the payoff is unparalleled elegance and precision. I also use it for signing my artwork, giving it a distinctive flourish, and for those tiny, pinpoint highlights that bring a canvas to life. My tip: always thin your paint slightly for liners to ensure a consistent, free-flowing stroke, almost like ink. |
| Fan | Bristles spread out in a fan shape, usually flat. | Softening edges, blending colors (especially subtle gradients), creating textures like grass, fur, or foliage. Very versatile. | 2-12 | The fan brush is pure magic for adding quick atmospheric effects or creating evocative natural textures. With a light touch, it can soften harsh edges in a blend, create gossamer-thin layers of color for subtle gradients, or effortlessly mimic the textures of distant trees, wispy clouds, or even fine grasses and fur. It’s less about drawing lines and more about suggestion, creating a sense of organic movement and diffused light. A secret weapon for adding that spontaneous, natural feel to your work. I find it particularly useful for breaking up solid blocks of color, making them feel more organic and less rigid. |
| Angled Shader | Flat, angled edge, offering both broad and fine stroke capabilities. | Precise strokes, sharp edges, and shading in tight spots. Great for cutting in or creating crisp details. | 1/4" - 1" | The angled shader is surprisingly versatile, a real multi-tasker in my collection. Its distinctive flat, angled edge allows for both broad, sweeping strokes and incredibly fine, precise lines, simply by changing the angle of application. It’s fantastic for creating razor-sharp edges, 'cutting in' around objects, or achieving precise shading in those tricky, tight spots. I find myself reaching for it frequently when rendering architectural elements, defining strong facial features, or anywhere I need precision and a clean, decisive line. It combines the best of a flat and a liner in one ingenious shape. I often use it for precise color blocking in abstract compositions where clean lines are paramount. |
| Wash/Glaze | Very wide, flat brushes, often synthetic or a blend, designed for even coverage. | Applying large, even washes of color, varnishes, or mediums. Great for backgrounds and smooth gradients. | 1" - 4" | For laying down expansive, perfectly even washes of color, varnishes, or various acrylic mediums, the wash or glaze brush is simply indispensable. Its considerable width and flat profile ensure smooth, streak-free coverage, making it my absolute favorite for priming canvases with gesso or establishing vast, unblemished color fields for backgrounds. For any large-scale work where you desire pure, unadulterated color without distracting brush marks, this is your steadfast companion. It’s the tool I turn to when I want to create a calm, uniform foundation or a luminous, transparent glaze over a broad area. Pro tip: ensure your paint is thinned consistently to avoid streaks and to achieve that beautiful, luminous effect with glazes. |
| Mop | Soft, rounded, full bristles, often natural squirrel or synthetic equivalent. | Creating soft, diffused edges, gentle blending, and absorbing excess water or paint. | 1/2" - 2" | The mop brush is the epitome of softness and grace in my collection. Its luxuriously soft, rounded, and full bristles (usually a high-quality synthetic equivalent of natural squirrel) are utterly perfect for creating those ethereal, diffused edges, achieving remarkably gentle blending, or even subtly absorbing excess water or paint from your surface. It’s the ultimate tool for soft, almost otherworldly transitions, giving your blends a truly seamless, airbrushed quality. I also love using it to gently lift color for diffused light effects or for creating hazy, dreamlike backgrounds. It’s the quiet whisper in your brush repertoire. Be gentle with it, as its softness is its superpower; vigorous scrubbing can damage its delicate fibers. |
| Detail/Spot | Extremely short, fine-pointed round brushes. | Micro-details, tiny dots, highlights, and precision work. Essential for hyperrealism or miniature painting. | 00000-0 | When even my smallest regular round brush feels like a lumbering giant, the detail or spot brush steps in to perform miracles. These are your absolute go-to tools for micro-details, for placing the tiniest of dots, for adding those crucial, sparkling highlights, or for any work demanding surgical precision. They are genuinely essential for hyperrealism, miniature painting, or adding intricate patterns. Imagine painting the glint in an eye, the delicate texture on a tiny leaf, or a microscopic highlight on a droplet of water – this brush makes it possible, allowing you to bring even the most minuscule elements to breathtaking life. A magnifying glass often becomes my best friend when I'm working with these tiny wonders! |
| Dagger Striper | Long, flat bristles with a sharply angled tip, mimicking a dagger blade. | Excellent for long, flowing lines of varying thickness with a single stroke, creating organic shapes like leaves or flower petals, and expressive calligraphy. | 1/4" - 1/2" | The dagger striper is a truly unique and incredibly expressive brush that offers remarkable versatility for dynamic, variable lines. Its long, flat bristles culminating in a sharply angled tip, much like a miniature dagger blade, allow you to create long, flowing lines that effortlessly transition from thick to thin with a simple twist of the wrist. It's utterly perfect for crafting organic shapes like graceful leaves, delicate flower petals, or for adding beautiful, calligraphic-style strokes that have a natural, spontaneous energy. If you want to inject movement and fluid rhythm into your work, this brush is an absolute joy to wield. I often use it for creating dramatic, sweeping gestures in abstract pieces, allowing its unique shape to dictate the flow. |
| Comb/Rake | Flat ferrule with widely spaced, stiff bristles that form distinct teeth. | Fantastic for creating hair, fur, grass, wood grain, and other fine linear textures. Use with a dry-brush technique for best results. | 1/4" - 1" | The comb, or rake, brush is my secret weapon for instantly injecting intricate texture into my paintings. With its flat ferrule and distinct, widely spaced, stiff bristles that resemble tiny teeth, it’s absolutely fantastic for quickly creating detailed linear textures. Think wispy hair, lush blades of grass, convincing fur, subtle wood grain, or even implied fabric textures. When used with a dry-brush technique, loading it sparingly and dragging it lightly across the surface, it delivers stunningly effective, broken marks that add incredible visual interest and realism. It’s a tool for immediate, tactile impact. For best results, use it with thicker paint that hasn't been overly thinned, allowing the bristles to grab the canvas and create those distinct lines. |
| Chisel Blender | A flat, firm brush with a very sharp, chiseled edge, typically shorter than a flat or bright. | Excellent for precise blending in tight areas, creating very crisp edges, or controlled impasto strokes. Offers great control. | 1/8" - 1/2" | When a standard flat brush feels too soft, or when I demand surgical precision in my blending, the chisel blender is my absolute go-to. This firm, flat brush boasts a truly exceptional, razor-sharp, chiseled edge, typically shorter than a traditional flat or bright. It's magnificent for achieving exquisitely precise blending in constricted areas, for carving out impeccably crisp edges, or for executing highly controlled impasto strokes that demand definitive placement. It offers a level of command that’s unparalleled when you’re working on fine details or require super-clean color blocking, making it an indispensable tool for meticulous artists. I often use it to create precise, hard-edged transitions in my abstract work where clean lines are paramount. |
| Oval Wash | A broad, flat brush with an oval-shaped tip, often larger than a filbert. | Ideal for smooth washes, blending large areas, and creating soft, rounded edges over bigger surfaces. | 1/2" - 3" | The oval wash brush is truly the 'gentle giant' of my blending arsenal. It’s a broad, flat brush with a gracefully oval-shaped tip, often significantly larger than a filbert, and it's absolutely fantastic for seamlessly laying down expansive, even color fields. When I need to blend large areas, especially on bigger canvases, and a filbert feels too small for the job, the oval wash steps in to create beautifully soft, rounded edges and smooth transitions across considerable surfaces. It’s an incredibly efficient tool for creating harmonious backgrounds or subtle gradients on a grand scale, ensuring a cohesive and effortless flow throughout your larger works. It’s particularly adept at creating those soft, atmospheric skies that merge seamlessly into distant landscapes. |
I find that with a good round, a solid flat, and a versatile filbert, you can tackle probably 80% of your acrylic painting needs. These are your foundational three, your bread and butter. The others? They're fantastic specialists, the secret weapons you bring out when you want to really broaden your expressive range, add unique textures, or tackle a particularly tricky detail. Don't feel pressured to buy them all at once; build your collection as your artistic curiosity expands, letting your projects dictate your next purchase. Sometimes, the most exciting discoveries come from experimenting with a brush you wouldn't typically consider for a certain effect!

Brush Materials: Synthetic is Your Best Friend (Mostly)

The Science Behind Synthetic Bristles
It’s easy to think of synthetic bristles as just 'plastic,' but that really undersells the incredible engineering that goes into making them perfect for acrylics. Modern synthetic brushes are marvels of material science, often crafted from specialized polymers like nylon or Taklon. These aren't just generic fibers; they're meticulously designed to mimic and often surpass the desirable qualities of natural hair, specifically for how they interact with acrylic's unique properties.
Think about taper and texture: high-quality synthetic bristles aren't uniform cylinders. They're tapered, just like natural hairs, to come to a fine point or a sharp edge. Many also feature micro-filaments – tiny, microscopic irregularities or textures along the bristle surface. This isn't just for show; these micro-filaments create surface area, allowing the brush to hold more paint and distribute it more evenly and smoothly, preventing that 'skippy' feeling you sometimes get with cheaper synthetics.
Then there's flagging: on some synthetic brushes, the very tips of the bristles are 'flagged' or split, much like the naturally occurring split ends on natural hairs. This further enhances paint retention and allows for smoother, more consistent strokes. This careful design ensures that while synthetic bristles don't absorb water like natural hairs, they do pick up and release paint efficiently, offering superior control and longevity, especially with acrylic's fast-drying, polymer-heavy nature. It’s truly fascinating to feel how these engineered bristles respond, almost intuitively, to the paint.
This is a big one, especially for acrylics. When I first started, I thought natural hair brushes (like sable or hog bristle) were always superior – a misconception I quickly learned to shed, much like a cheap natural hair brush sheds its bristles into a fresh layer of paint! Not so fast, my friend! The reality of acrylics demands a different kind of tool. The good news is, advancements in material science mean synthetic brushes aren't just an alternative; they are, in most cases, the superior choice, and often, a more ethical one too.
- Synthetic Bristles (Nylon, Taklon, etc.): These are, without a shadow of a doubt, my unequivocal top recommendation for acrylic painting. Why? Because they are meticulously engineered powerhouses: incredibly durable, they hold their meticulously crafted shape beautifully, exhibiting that crucial excellent "snap" or "spring" (meaning they vigorously return to their original form immediately after pressure). And, perhaps most importantly for acrylic artists, they are unbelievably easy to clean. The beauty of synthetics lies in their diversity; different types offer a broad spectrum of carefully calibrated stiffness and softness, providing you with a vast array of options. These are not mere 'plastic' bristles; they are sophisticated fibers, thoughtfully engineered to mimic, and often even surpass, the desirable qualities of natural hairs for specific applications. For instance, Taklon (frequently golden or brown in hue) is typically softer and finer, making it an exquisite choice for supremely smooth blending, delicate washes, and intricate detail work, almost eerily mimicking the luxurious feel of natural sable. It offers an incredible level of control for subtle gradations. In contrast, stiffer Nylon or other robust synthetic blends (often appearing white or clear) are the perfect formidable choice for aggressively pushing heavy-body acrylics, creating powerful texture, and confidently handling demanding impasto techniques. You'll also encounter specialized synthetic blends meticulously designed for maximum paint load, or those boasting advanced micro-filaments (tiny, specially textured strands) that meticulously pick up and release paint with astonishing smoothness, dramatically enhancing their paint-carrying capacity without being overly absorbent. Sometimes, you'll even find blended synthetic filaments that combine the best of both worlds – a softer fiber for paint retention and a stiffer one for snap, offering a versatile middle ground for artists who love to switch between techniques without changing brushes. These blends are particularly exciting for me, as they offer incredible adaptability. Acrylic paint, with its polymer binder and fast-drying nature, can be incredibly taxing on brushes, and synthetics bravely stand up to this challenge wonderfully, without succumbing to excessive water or paint absorption, which can cause delicate natural hairs to splay out or go completely limp. They're also remarkably less prone to damage from the potent chemicals often found in some acrylic mediums, such as flow improvers or retarders. Moreover, they are frequently more affordable and proudly cruelty-free – a profound win-win in my book, warmly supporting both your precious wallet and your artistic conscience. This ethical consideration is becoming increasingly important to many artists, myself included, and it’s wonderful to know that performance doesn't have to come at a cost to animal welfare.
- Natural Bristles (Hog, Sable, Squirrel, Camel, etc.): While natural bristles are, without a doubt, phenomenal for oil paints (think robust hog bristle for lush, thick impasto and vibrantly expressive strokes, as meticulously detailed in guides like best-oil-painting-brushes-for-artists!) and utterly sublime for watercolors (sable, for instance, offers astonishing water retention and exquisite, precise points!), they are, regrettably, generally far less than ideal for acrylics. Here's why: they possess an unfortunate tendency to greedily absorb water, which, when combined with acrylic's inherent properties, causes them to become mushy, limp, and prone to splaying out irrevocably, utterly losing their crucial shape and spring. This loss of integrity is catastrophically detrimental to precise control and crisp, intentional mark-making. Furthermore, attempting to meticulously clean dried acrylics from natural hairs can quickly transform into a genuine nightmare, as the tenacious polymer binder readily adheres to the microscopic scales of natural hair, and once dried, acrylic can inflict permanent, often irreparable, damage upon them. Even traditionally stiff hog bristle, while fantastic for texture, proves to be excessively absorbent for acrylics, leading to rapid clogging and premature deterioration. Therefore, for almost all acrylic applications, I consciously choose to bypass them, unless I am specifically aiming for a very particular, intentionally rough texture that only a hog bristle can genuinely impart, or perhaps utilizing a very soft, absorbent natural hair for highly specific dry-brush effects where I actively desire less control and a more diffuse, atmospheric mark. The fundamental issue isn't solely absorption; it's also the profound way acrylic's polymer binders can stiffen, congeal, and permanently dry within the natural hair shafts, inevitably leading to irreversible damage and a tragic loss of the brush's intended shape and optimal function. Beyond performance, the ethical considerations surrounding the sourcing of animal hair are also a significant factor in my decision-making, compelling me further towards the exceptionally advanced, high-quality synthetics, which have evolved to such a degree that they often demonstrably outperform natural hairs for the unique demands of acrylics anyway. It's a testament to modern innovation that we no longer have to compromise ethics for artistic excellence.


The Spectrum of Strokes: Matching Brushes to Your Vision
Now, this is where the theory truly meets the canvas! Understanding brush anatomy and materials is one thing, but knowing how to wield them to achieve your specific artistic vision – that's where the real magic happens. Each brush is a conduit for a particular kind of energy, a specific type of mark. It's not about having more brushes; it's about having the right brushes for the marks you want to make and the story you want to tell.
Choosing Brushes for Specific Techniques and Styles
Now that we've covered the basics of brush anatomy and materials, let's talk about how you might select brushes for particular artistic approaches. It's not always about having more brushes, but having the right brushes for the marks you want to make. Here's how I think about it:
- For Fine Details & Linework: You'll want those small rounds (000-2), liners, or riggers. Their fine points and ability to hold a good amount of thinned paint allow for incredibly precise strokes, perfect for delicate features in a portrait, the intricate veins of a leaf, or crisp outlines. A steady hand is your best friend here, but the brush does much of the heavy lifting. I often find a good liner brush makes all the difference for those crisp finishing touches. For truly tiny details, sometimes a spot brush with its extra-short bristles is the only tool that gives you enough control. If you're struggling with very small areas, try bracing your painting hand with your other hand, resting your pinky finger on the canvas for extra stability – it's an old trick that works wonders for micro-details!
- For Bold Strokes & Impasto: Reach for the flats, brights, or even comb brushes. Their stiffness and strong snap enable you to push thick, heavy-body acrylics around, creating visible brushstrokes and adding tactile texture to your work. This is where you can really build up layers and create a dynamic surface, perfect for exploring what-is-impasto-painting techniques. Don't shy away from a sturdy chisel blender here either; its firm, sharp edge can carve through thick paint with impressive precision. When I'm feeling particularly audacious, I sometimes even reach for an old, splayed bristle brush for these tasks – its imperfections can create wonderfully unpredictable, raw textures.
- For Blending & Soft Edges: Filberts are champions here, their rounded edges creating seamless transitions. Mop brushes also excel at softening edges and diffusing color without leaving harsh lines. For very subtle gradients, a soft, wide wash brush used with thinned paint can work wonders. This is crucial when you're trying to achieve smooth color transitions. Remember that the 'less is more' approach with paint load can make a huge difference when blending. One of my favorite tricks for a super soft blend is to use two brushes simultaneously: one with paint, and a clean, damp one immediately behind it to feather out the edges.
- For Washes & Glazing: Wide wash brushes or larger soft flats are ideal for applying thin, even layers of color or transparent glazes. They hold a good amount of thinned paint and allow for smooth, streak-free coverage, essential for building depth and luminosity in your painting. For a more in-depth look at transparent layers, check out the-art-of-glazing:-adding-luminous-depth-to-my-abstract-acrylics. The key here is consistent paint viscosity, often achieved with a dedicated glazing medium. I also find that working on a slightly tilted surface can help gravity assist in achieving those perfectly smooth, streak-free washes.
- For Textural Effects (Grass, Fur, Foliage): This is where fan brushes and comb brushes truly shine. Their unique bristle arrangements allow you to quickly create patterns and textures that mimic natural elements, adding realism or expressive flair with minimal effort. Don't be afraid to experiment with dabbing, dragging, and flicking motions. Even an old, splayed flat brush can be repurposed for fantastic, unpredictable textures here – sometimes, imperfection is exactly what you need. I sometimes load a fan brush with two slightly different greens and tap it lightly to create incredibly realistic, layered foliage effects.
- For Dry Brush Techniques: Stiffer, slightly splayed brushes (often older flats or brights that have seen some action) can be excellent for dry brushing. With very little paint on the brush, they create broken, textured marks that are fantastic for implying texture, creating highlights, or adding a weathered look. Dive deeper into this versatile technique with my guide on dry-brush-technique-acrylic-painting. The goal is to let the canvas 'grab' the paint, creating a lovely, broken texture rather than a solid block of color. It's truly a masterclass in subtlety, allowing underlying layers to peek through, adding incredible depth and luminosity.
- For Scumbling: This technique involves lightly dragging a stiff, almost dry brush over a dry painted surface, allowing bits of the underlying color to show through. It creates a broken, shimmering effect. Older flats or brights with stiff bristles are perfect for this, adding depth without heavy coverage. It's fantastic for creating atmospheric effects or softening a harsh transition without completely blending it away. I often use scumbling to create a sense of misty distant landscapes or the subtle shimmer of light on water.
- For Stippling: Using the tip of a stiff round brush or the corner of a flat brush in a dabbing motion creates a speckled, dotted texture. This is fantastic for conveying coarse surfaces, adding visual interest, or building up color gradually in a pointillistic style. A dedicated spot brush can also create incredibly fine stippling, perfect for micro-textures or subtle value shifts. This is a wonderfully meditative technique, building up color and value with countless tiny touches, and it can add a surprising amount of richness and complexity to a surface.
Experimentation is key! Sometimes, the 'wrong' brush can lead to the most interesting and unexpected results, so don't be afraid to deviate from these suggestions and see what magic you can create.
Technique | Recommended Brushes | Why They Work |
|---|---|---|
| Fine Details | Small Rounds (000-2), Liners, Riggers, Detail/Spot | Precise tips for delicate lines and tiny marks. |
| Bold Strokes/Impasto | Flats, Brights, Stiff Synthetics | Firm snap and stiffness to move thick paint and create visible texture. |
| Blending Soft Edges | Filberts, Mop brushes, Soft Synthetic Flats | Rounded edges or soft bristles create seamless transitions without harsh lines. |
| Washes/Glazing | Wide Wash brushes, Large Soft Flats, Mop brushes | Hold good amount of thinned paint for even, transparent coverage; soft bristles for subtle transitions. |
| Textural Effects | Fan brushes, Comb/Rake brushes, Old Splayed Brushes | Unique bristle arrangements create varied patterns and textures. |
| Dry Brush | Stiffer Flats/Brights (older brushes work well) | With minimal paint, create broken, textured marks, implying surfaces like wood grain or rough terrain. |
| Scumbling | Stiff Hog Bristle (if used for texture only), older Flats, Brights | Lightly dragged over a dry surface, leaves broken color, enhancing texture. |
| Stippling | Stiff Round, Older Flats (using the corner), Sponges | Dabbing motion creates a speckled, dotted texture. |
The Dark Side of Cheap Brushes: Why Quality Pays Off
Before we dive into what to look for, let me share a hard-won truth: cheap brushes are almost always a false economy. I've been there, lured by the promise of a massive set for a pittance, only to find myself battling constantly shedding bristles, ferrules that wobbled like a loose tooth, and shapes that splayed beyond recognition after a single painting session.
It's not just frustrating; it's a drain on your creative energy. You spend more time picking stray hairs out of your paint or fighting a brush that refuses to hold an edge than you do actually painting. This can be incredibly disheartening, especially for beginners who might mistakenly think they lack skill when, in reality, their tools are simply sabotaging their efforts.
A few good quality brushes will outperform, outlast, and out-inspire a mountain of cheap ones. They become extensions of your will, reliable partners in your creative dance. Investing wisely upfront saves you money, waste, and, most importantly, your precious artistic sanity. Consider it an investment in your joy, not just a purchase.
What to Look for When Buying Acrylic Brushes
Alright, so you know the shapes and materials. Now, how do you actually pick them out in the store (or online)? This is where the rubber meets the road, or rather, the bristles meet your hand. It's about translating that theoretical knowledge into a tangible, useful tool.

- Quality Over Quantity: This, my friend, is my undisputed mantra, practically tattooed onto the very fabric of my artistic consciousness – if, you know, I had a literal canvas for my brain! A select few, truly excellent quality brushes are, without question, infinitely superior to an unwieldy, massive set of cheap, mass-produced ones that grandly promise the world but consistently deliver only exasperating frustration. Inexpensive brushes are notorious for shedding their bristles into your pristine paint, their ferrules wobble with alarming instability and detach with disheartening regularity, and critically, they simply don't perform with any degree of reliability. This inevitably leads to uneven, streaky paint application, wildly splayed strokes, and a pervasive, utterly defeating feeling of wrestling with your rebellious tools rather than harmoniously collaborating with them. You'll find yourself devoting more precious creative energy to battling your equipment than to the joyous act of creating art, and honestly, that's a profound creativity killer. Investing wisely in quality brushes upfront will unequivocally save you both money and considerable heartache in the long run. It also translates directly into less waste over time, which, for our increasingly fragile planet, is always a significant plus. Think of it not as an expense, but as a crucial investment in your artistic sanity, the longevity of your creative practice, and the unwavering confidence to truly experiment without the nagging worry that your tools will betray you mid-stroke. It’s about empowering your artistic journey, not hindering it. Don't be afraid to start small; a single, truly exceptional round brush might be all you need to realize what you've been missing.
- Comfort and Balance: This is highly personal, but crucial for long painting sessions. Hold the brush. Does it feel good in your hand? Is it balanced? A longer handle is usually preferred for easel painting as it gives you some distance from the canvas, allowing you to see the bigger picture, while shorter handles are great for table work or detailed pieces where precision is key. The diameter of the handle also matters – some prefer thinner, others thicker. You want your brush to feel like an extension of your arm, disappearing into your hand rather than feeling like a clumsy appendage. Don't be afraid to try out different handles if you can, or at least pay attention to what feels good during use.
- Bristle Snap and Resilience: This is absolutely crucial for acrylics, a non-negotiable trait. When you're in the store (or unboxing online!), gently bend the bristles with your finger, pressing them lightly against a surface. Do they snap back readily and hold their original shape immediately and firmly? That's a sign of good quality synthetic bristles with excellent "snap" or "spring." If they stay bent, feel mushy, or appear flimsy, put them back – seriously. You want that satisfying resilience that allows for precise control, lively strokes, and the ability to push and pull thicker paints without the brush collapsing under pressure. This springiness is what gives you that responsive feedback and control, making the brush feel like a true extension of your hand, not a floppy noodle. I've had brushes that felt great in the package only to go completely limp the first time they touched water – a frustrating waste of money! I vividly recall the profound disappointment of purchasing brushes that felt wonderfully promising in their packaging, only to witness them go completely, irrevocably limp the very first moment they touched water – a truly frustrating and demoralizing waste of hard-earned money! It's like a good spring in a mattress – it supports you and returns to form, ready for the next move.
- Ferrule Check: Give the ferrule a gentle wiggle, and look closely at where it meets the handle and the bristles. It should feel absolutely solid, with no movement between the metal and the handle, and no gaps at the bristle base. If it wiggles, paint will eventually seep in, the glue will loosen, and the brush will fall apart faster than a house of cards in a hurricane. Not what we want! Look for a seamless ferrule, securely crimped, which is a hallmark of good craftsmanship. A cheap ferrule will betray you in the heat of creation, I promise.
- Brand Reputation & Warranties: While I'm not one to blindly follow brands, some manufacturers have a consistent track record for quality. Doing a quick search for reviews or asking fellow artists can save you a lot of trial and error. Brands that specialize in artist-grade supplies often invest heavily in research and development, resulting in superior tools. Some reputable brands even offer warranties or guarantees on their brushes, which can be a good indicator of their confidence in their product's durability. It's often worth paying a little more for a brand with a strong reputation, as it often translates to brushes that will perform better and last longer.
- Buying Brush Sets vs. Individual Brushes: For beginners, a small, high-quality starter set with a few essential shapes (round, flat, filbert) can be a fantastic entry point. These often offer a good value and give you a taste of different possibilities without overwhelming you. They're a great way to explore different marks and discover what you enjoy using. As you progress, however, you'll inevitably develop favorites or realize you need a very specific tool for a certain effect or technique (like using a palette knife for impasto!). That's when you'll want to buy individual brushes to replace well-loved workhorses or add those unique shapes as your needs evolve. Think of a set as a training kit, and individual brushes as tailoring your toolkit to your specific craft, honing it to perfectly match your artistic voice. Don't be swayed by massive, cheap sets; a smaller, quality set will always serve you better. And remember, a good handle that feels balanced and a ferrule that's absolutely solid with no wiggle are non-negotiables for any brush, whether in a set or bought individually. These small details significantly impact your comfort and the longevity of your tools.
Here's a quick checklist to keep in mind when you're brush shopping:
Feature | What to Look For | Why it Matters |
|---|---|---|
| Bristle Material | High-quality synthetic (nylon, Taklon, etc.) for acrylics. | Durable, retains shape, easy to clean, releases acrylics efficiently. |
| Bristle Snap/Resilience | Gently bend bristles; they should spring back immediately to their original shape. | Ensures control, lively strokes, and prevents brush collapse under pressure. |
| Ferrule Security | Wiggle the ferrule; it should be absolutely solid with no movement, securely crimped, and seamless. | Prevents paint/water seepage, brush falling apart, and maintains bristle integrity. |
| Handle Comfort & Balance | Hold the brush; it should feel good in your hand, balanced, and an extension of your arm. Consider length for your working style. | Reduces fatigue during long sessions, enhances control and connection to the canvas. |
| Bristle Shape Integrity | The point should be sharp (rounds), edge crisp (flats), or curve smooth (filberts) without stray or splayed hairs, even when wet. | Ensures precise marks, consistent application, and prevents unwanted textures or blurred lines. A brush that maintains its shape defines your stroke. |
| Brand Reputation | Research brands known for quality and durability in their acrylic brush lines. | Indicates consistent craftsmanship and reliability, potentially better longevity. |
| Hair Retention | Gently tug at the bristles; they should not come loose or shed excessively. | Prevents frustrating bristles in your paint and indicates a well-made brush with secure crimping. |

Caring for Your Brushes (My Non-Negotiables)
This might be the most important section, truly. Good brushes are an investment, and taking care of them means they'll serve you faithfully for years. Neglect them, and they'll be useless in no time. Trust me, I've learned this the hard way more times than I care to admit! There's nothing more frustrating than reaching for a favorite brush only to find it's a stiff, useless club. This section isn't just about prolonging the life of your tools; it's about preserving your sanity and ensuring a smoother creative process.

- Clean Immediately and Thoroughly: Acrylic dries fast, and dried acrylic is permanent. This isn't a suggestion; it's a command if you want your brushes to last. As soon as you finish a color, or finish painting, get that brush clean. I always have a water pot handy during painting (actually, two – one for the initial rinse to get the bulk off, one for a cleaner rinse to ensure no pigment remains – a total game-changer!). And I often use a brush cleaning mat with textures to really work the paint out from deep within the bristles – it's an absolute revelation for thorough cleaning. After painting, I wash my brushes with a gentle soap (I like artist's brush soap, which conditions the bristles beautifully, or even just mild dish soap in a pinch, just be sure it's not too harsh and always rinse thoroughly) and warm water until all traces of paint are gone. Really get into the base of the bristles near the ferrule, as paint loves to hide there and become a permanent, splaying wedge that can ruin your brush's shape and snap. For a deep dive into this, and trust me, it's worth the read, check out my guide on cleaning-and-caring-for-your-paint-brushes. Don't just rinse and forget; a good scrub with soap is essential. Seriously, a few extra seconds now saves you hours of frustration (or the cost of new brushes) later. It's truly the most impactful thing you can do for your tools. Some artists even use a small amount of rubbing alcohol for stubborn, semi-dried bits, but I always follow that with a thorough soap and water wash and then recondition them.

Maximizing Brush Longevity: Advanced Care and Troubleshooting
- Reshape and Dry Flat/Head Down: This step is vital for a brush's longevity and performance. After cleaning, gently reshape the bristles to their original form using your fingers. This is important to maintain the brush's intended shape and snap, ensuring it performs as designed during your next painting session. For rounds, make sure the point is sharp; for flats, ensure the edge is crisp. Then, and this is absolutely crucial for preventing water damage and ferrule failure, dry them either flat on a towel (ensuring good air circulation) or, ideally, head down. You can use a brush holder specifically designed for drying, or even suspend them over a container to allow gravity to pull any remaining moisture away from the ferrule. Never store them head-up in a jar when wet; gravity will relentlessly pull water into the ferrule, eventually loosening the glue, causing rust, and making those bristles wiggle loose – a slow, sad death for a good brush. I even use brush shapers for my favorite rounds, which are little plastic tubes that gently hold the bristles in shape as they dry, and they are incredibly effective.
- Proper Storage: Once your cherished brushes are absolutely, unequivocally dry, the next vital step is to store them in a manner that meticulously protects their delicate bristles. I employ a thoughtful combination of storage solutions: beautifully designed brush rolls (which are utterly fantastic for travel and, crucially, for keeping insidious dust off), sturdy old jars (where I store dry brushes, bristles-up, thoughtfully grouped by size or type), and sometimes even charming old pencil cases for my smaller, more delicate companions. The overarching goal is elegantly simple: to assiduously prevent the bristles from succumbing to bending, crushing, or any other form of regrettable deformation. Understand this: a bent bristle is, for all intents and purposes, a permanently bent bristle, and it can throw off your carefully calibrated strokes entirely, sabotaging your artistic intentions. So, bestow upon your brushes a safe, uncrowded, and respected home. For longer-term storage, ensure they are meticulously dust-free, as even minute particles of dust can disastrously interfere with your smooth paint application. Moreover, consider the ambient humidity of your storage area; excessively humid conditions can compromise wooden handles or even lead to mildew, while overly dry conditions can sometimes make bristles brittle. A stable, moderate environment is always best for preserving the pristine condition of your tools.

When to Consider Replacing a Brush
Even with the most meticulous care, brushes are ultimately tools designed for use, and they will, inevitably, show signs of wear. Knowing when to respectfully retire a brush or relegate it to 'utility' duty (like mixing or applying gesso) is key to maintaining the quality of your artwork and your own artistic sanity. It’s a bit like knowing when to change the tires on your car – you can push it, but eventually, performance suffers and frustration mounts. Here are a few signs that a brush's prime might be over:

- Permanent Splaying: If, despite repeated thorough cleaning and reshaping, the bristles consistently splay out and refuse to return to their original form, its ability to create precise marks is compromised. This is particularly frustrating with detail brushes, where a splayed tip renders them almost useless for intricate work.
- Loss of Snap/Spring: When the bristles become irrevocably limp and no longer 'snap' back, it loses its responsiveness and control, making effective paint manipulation a struggle.
- Excessive Shedding: While a new brush might shed a few initial hairs, persistent shedding into your paint is a sign of ferrule failure or poor bristle binding.
- Loose or Rusted Ferrule: A ferrule that wiggles, is visibly rusted, or has detached from the handle is a safety hazard and will prevent consistent performance.
- Severely Damaged Bristles: If bristles are deeply caked with dried paint beyond revival, or are permanently bent, frayed, or chewed (by you, your pet, or a curious child!), it's time for a replacement.
Remember, it’s not a failure to replace a worn-out tool; it's a testament to the work it has helped you create and an investment in the quality of your future art. Sometimes, letting go is an act of artistic self-care.
Troubleshooting Common Brush Issues
Even with the best care, sometimes things go wrong. Here are a few common problems and what you can do:
- Permanent Splaying: Often caused by paint drying in the ferrule or vigorous scrubbing. If it's minor, a good cleaning with brush soap and reshaping while wet can help. For more stubborn splaying, try a brush shaper fluid, which can help coax the bristles back into alignment, or even a thin rubber band to hold the shape while drying. However, prevention is always better than cure, so meticulous cleaning is your best defense. I've salvaged a few beloved brushes this way, but it's always a bit of a gamble, and sometimes, a splayed brush is simply ready for retirement or relegated to mixing duties.
- Stiff or Hard Bristles: Almost always dried acrylic! This is the acrylic artist's ultimate heartache. Refer to the "How do I revive stiff acrylic brushes?" in the FAQ for solutions, but be prepared that sometimes, a heavily caked brush might be beyond saving. My personal approach involves soaking in warm water with a dedicated brush cleaner, gently working the bristles with my fingers, and sometimes even very carefully using a toothpick to dislodge dried paint at the ferrule. But again, prevention is the absolute key here; immediate and thorough cleaning will save you this frustration.
- Loose Ferrule: If the metal part wiggles, the glue has failed. You can try to fix this with strong, waterproof epoxy glue, but it's often a temporary solution. A loose ferrule is not only frustrating but can also compromise your control. It's often a sign that it's time to retire the brush or demote it to a 'utility' brush for mixing or varnishing. Sometimes, a loose ferrule can also be a sign of continuous water seeping into the handle, slowly rotting the wood, especially with cheaper brushes or improper drying habits.
- Shedding Bristles: This often happens with cheaper brushes, or sometimes with new brushes that need to shed a few loose hairs. If it continues after a few uses, it's usually a sign of poor manufacturing or a compromised ferrule bond. While annoying, if the brush otherwise performs well, you can sometimes gently trim the offending bristles, but if it's constant, it's probably time to replace it. A good quality brush should hold onto its bristles, not leave them scattered across your canvas like breadcrumbs. I once had a brush that shed so much, my painting looked like it had grown hair – never again!
- Losing Point/Edge: If your round brush no longer comes to a fine point, or your flat loses its crisp edge, it's often due to vigorous use, improper drying, or paint buildup in the ferrule. Thorough cleaning, reshaping while wet, and using a brush shaper fluid (as discussed in the FAQ) can help. For persistent issues, try boiling water for a few seconds (carefully, protecting the ferrule!) and then reshaping. If it's severely misshapen, it might be relegated to mixing or background work, or simply retired with gratitude for its service.
Beyond the Brushes: Other Tools I Love
While brushes are undeniably the stars of the show, they're not the only players in my studio. Sometimes, a brush just isn't the right tool for the job, or I'm looking for a different kind of mark-making or texture. Don't be afraid to think outside the traditional brush box! The world of art supplies is vast and full of delightful surprises, waiting for your creative touch to unlock their potential.
I often grab a palette knife (not just for mixing paint, but for applying thick impasto textures – which you can learn more about in what-is-impasto-painting – creating crisp edges, or even scraping paint off the canvas – very liberating, almost like hitting a reset button!). Palette knives come in a huge array of shapes and sizes, from pointed trowels to broad, flexible blades (mine are a mix of metal and plastic, each with a different flex!), each capable of creating unique textures. For a deeper dive, check out my thoughts on what-is-a-palette-knife-and-how-to-use-it and mastering-the-palette-knife:-advanced-techniques-for-abstract-texture. I especially love using the broad, flat palette knives for creating large, sweeping textures or for laying down smooth, consistent backgrounds without any brushstrokes, giving a very clean, modern feel. They are truly indispensable for bold, expressive mark-making.
But it doesn't stop there. Beyond the traditional bristles and blades, I'll also reach for:
- Silicone Shapers: These are, quite frankly, incredible, almost revolutionary tools in my studio. They exist in a fascinating hybrid space somewhere between a traditional brush and a palette knife. Characterized by their remarkably flexible silicone tips, which come in a diverse array of shapes (think chisel, cup, taper, and flat), they are absolutely fantastic for vigorously pushing paint around, achieving seamless blending without leaving a single tell-tale brush mark, and meticulously creating clean, precise lines – all without absorbing even a speck of paint, unlike traditional bristles. Their non-porous nature means they are unbelievably easy to clean, a true blessing when working with sticky acrylics, and they consistently deliver a unique, unparalleled level of control over your chosen medium. I love using them for sgraffito techniques (scratching into wet paint), for applying masking fluid, or for carving into wet paint to create intricate details and fine lines. They offer a tactile experience distinct from brushes, allowing for sharp edges and smooth transitions without any bristles getting in the way, making them perfect for controlled texture work or when you want a completely smooth, almost clinical finish. You can discover even more about these versatile tools in my guide to beyond-the-brushstroke:-my-favorite-tools-and-techniques-for-creating-dynamic-abstract-textures.
- Sponges: For organic textures, nothing beats a natural sea sponge; its irregular pores create incredibly authentic, unpredictable patterns. For more uniform or geometric effects, synthetic sponges (even household ones!) work wonders. They’re brilliant for dabbing, lifting, and creating soft, diffused backgrounds, dappled textures like foliage, or even creating unique cloud effects. You can cut them into different shapes for specific marks, too.
- Found Objects: And here’s where the true spirit of artistic playfulness often surfaces – sometimes, I'll even repurpose common household items, transforming them into impromptu, yet wonderfully effective, art tools. Think old credit cards or rigid plastic for creating incredibly sharp scrapes and interesting linear textures, crumpled paper for generating wonderfully random and organic textures, or even bubble wrap for imprinting captivating, repetitive patterns onto your canvas. Seriously, do not ever be afraid to boldly experiment! I’ve used everything from twigs and feathers to toothbrushes and old combs to create unique marks. Acrylics, in their remarkable versatility, are incredibly forgiving in this regard, and often, the most delightful and unexpected discoveries, the most exciting 'happy accidents,' spring directly from this kind of uninhibited exploration. You can also profoundly amplify this experimentation by thoughtfully exploring different acrylic painting mediums to dramatically alter the paint's inherent texture, viscosity, and crucial drying time, all of which can profoundly influence your ultimate tool choice – sometimes rendering a less conventional 'tool' even more remarkably effective than a traditional brush. For instance, attempting to navigate a heavy gel medium with a delicate traditional brush might result in a frustrating struggle, whereas a robust palette knife or a supple silicone shaper will effortlessly glide through it, creating magnificent, unhindered effects. And if your artistic heart truly beats for abstract art, then acrylic mediums, as I’ve discussed in best-acrylic-mediums-for-abstract-artists, are destined to become your most cherished confidantes and collaborators.


Maximizing Your Toolkit: Combining Brushes with Mediums and Surfaces
Understanding brushes is one thing, but truly mastering acrylic painting involves seeing your tools as part of a larger ecosystem. The brushes you choose will interact with your paints, your mediums, and the surface you're painting on in unique ways. This interplay is where the real magic happens.
- Paint Consistency Matters: This is a crucial, often overlooked, aspect of truly maximizing your toolkit. Take a moment to truly consider the inherent consistency of your paint. Is it a highly fluid acrylic, a dense heavy body, or perhaps a gloriously thick impasto gel? Each distinct consistency possesses a unique, symbiotic relationship with your chosen brush, and understanding this dynamic is paramount. A delicate, soft-bristle brush, for instance, might be absolutely exquisite for applying gossamer-thin fluid glazes, allowing for graceful, transparent layers. However, this same brush would undoubtedly struggle, splaying out and losing its integral form, when confronted with the assertive resistance of heavy body paint, rendering precise application frustratingly difficult. Conversely, a staunchly stiff hog bristle (if you choose to venture into that realm) or a robust, unyielding synthetic flat will confidently move thick paint with authoritative precision, generating magnificent texture and bold marks. Yet, this same powerful brush might leave undesirable harsh streaks or prove overly aggressive when paired with delicate fluid acrylics. The golden rule here is simple: always, always meticulously adjust your brush choice to precisely match the paint's viscosity. Think of it as a culinary analogy: you wouldn't use a delicate teaspoon for a hearty, thick stew, nor a robust ladle for a nuanced consommé. Each requires its perfectly matched utensil. This fundamental understanding of brush-paint interplay is, without exaggeration, absolutely foundational to achieving your desired artistic outcomes.
- The Art of the Dry Palette: Extending Paint Open Time Beyond simply thinning your paint, consider how you keep your acrylics workable on the palette. Because they dry so quickly, investing in a good stay-wet palette or even just learning tricks to keep your paint from skinning over can dramatically impact your brush choice and technique. A dried blob of paint can quickly ruin a delicate brush. I often spritz my palette lightly with water, or cover it with a damp paper towel during short breaks. This simple act keeps my paints supple, ensuring my brushes can pick up and distribute color smoothly without battling sticky, half-dry pigment. It means less frantic rinsing and more focused painting, truly allowing your brushes to perform at their best.
- The Power of Mediums: Acrylic mediums are your secret weapons! Using a flow improver will make your paints more watery, perfect for delicate washes with a soft mop or wash brush. A heavy gel medium, on the other hand, will add body and texture, making palette knives and stiff brights more effective. Different mediums open up a whole new world of possibilities for your brushes, allowing you to achieve effects that would be impossible with paint alone. I often use best-acrylic-mediums-for-abstract-artists to alter textures and drying times, truly expanding the versatility of even a basic brush set. For a broader understanding of how these transformative agents work, explore what-are-painting-mediums-a-beginners-guide.
- Surface Sensitivity: The specific surface you choose to paint upon is another profoundly influential factor that directly dictates your optimal brush choice. A luxuriously smooth, meticulously gessoed canvas will allow your brushes to glide effortlessly across its expanse, making the creation of delicate lines and the achievement of seamless blending an almost intuitive pleasure. Conversely, a deliberately textured surface, such as a coarse linen or even the inherent grain of wood, will actively 'grab' at your bristles, creating dramatically different effects with dry brush techniques or broken strokes, thereby intrinsically adding unique, inherent character and tactile depth to your marks. Possessing an intimate knowledge of your chosen surface empowers you to accurately anticipate precisely how your brush will behave and, consequently, to choose your tools with insightful intention. If you're working with raw, untreated canvas, always remember to diligently apply how-to-apply-gesso-to-canvas-a-beginners-guide beforehand. This crucial preparatory step creates that ideal, receptive working ground, not only protecting your canvas from paint absorption but also providing a consistent surface for your brushes. For a comprehensive look at preparing any canvas, you might also find my guide on how-to-prepare-a-canvas-for-acrylic-painting incredibly useful. The tooth – that wonderfully tactile texture or weave – of your canvas, for instance, can either beautifully enhance or subtly hinder your brushwork, so it is imperative to always consciously consider it before you even allow the first touch of paint to grace its surface. It’s not just a detail; it’s a foundational, deeply impactful decision that shapes the very essence of your painting.
This holistic approach to your materials empowers you to make more informed choices, pushing the boundaries of what's possible with your acrylic art. It's about seeing your studio as a symphony of interconnected elements, all working together to bring your vision to life. Understanding these relationships is truly the hallmark of a confident and evolving artist.
My Personal Brush Set Recommendation (A Starting Point)
If I had to narrow it down to a few essential brushes for someone starting or looking to upgrade their acrylic collection, these would be my picks. Think of it as your core team, ready for anything. It’s the foundational toolkit I’d hand to my younger self, knowing it would set me up for success without overwhelming me. This selection aims for maximum versatility and impact, covering a wide range of common acrylic techniques.
- Medium Round (Size 6-10): This, my friend, is your absolute artistic essential, your undisputed all-rounder, the quintessential workhorse of my entire collection. It’s quite literally the Swiss Army knife of brushes, adept at tackling everything from meticulously controlled washes to exquisitely precise lines and nuanced general detailing. Its gracefully tapered point facilitates impressively fine, almost surgical, work, while its generous, paint-hungry belly effortlessly holds a substantial amount of paint, enabling wonderfully continuous, flowing strokes. The sheer versatility of a good medium round is astounding; it's capable of delivering surprisingly delicate lines when wielded on its tip with a feather-light touch, yet can transform into a tool for broader, more expressively assertive strokes with increased pressure. I find myself reaching for this brush for almost every task imaginable, from those tentative initial sketches and laying down foundational drawing directly in paint, all the way through to adding sparkling highlights and meticulously refining contours. Honestly, if faced with the impossible choice of only one brush for the rest of my artistic life, this would unequivocally be it. It's the brush that offers the most 'bang for your buck' in terms of versatility.
- Large Flat or Bright (Size 1/2" to 1"): These are absolutely essential for injecting speed and efficiency into your painting, particularly when tackling larger areas. They consistently provide strong, powerfully directional marks and are utterly fantastic for bold, impactful color blocking. A well-crafted flat brush, wielded on its thin edge, can also deliver surprisingly crisp, razor-sharp lines, imbuing your work with compelling contrast and dynamic compositional energy. Brights, by virtue of their shorter and stiffer bristles, offer an even greater degree of command for vigorously pushing heavy body paints and expertly creating magnificently textured, expressive impasto effects. This category of brush is my undeniable go-to for making those bold artistic statements and efficiently establishing foundational color lay-ins, ensuring your canvas starts with confidence and authority. If I need to cover a large area of a canvas quickly and evenly, there's no better choice.
- Medium Filbert (Size 6-10): Ah, the filbert – this is truly my secret weapon, the unsung hero for achieving beautifully seamless blending, crafting exquisitely soft edges, and gracefully rendering organic, natural shapes. Its distinctive oval-shaped end is a master at facilitating smooth, almost imperceptible transitions, utterly devoid of harsh lines, making it the perfect tool for sculpting delicate flower petals, creating wispy, atmospheric clouds, or achieving those subtle, nuanced gradients in a compelling portrait. It truly feels like the gentle, reassuring hand in your brush arsenal, the ideal choice for when your artistic vision calls for a more natural, less rigid, and more flowing mark. I absolutely adore it for its ability to soften edges and imbue my work with a profound sense of natural flow and harmonious movement. It's the one I reach for when I want to avoid those tell-tale hard lines that can make a painting feel stiff.
- Small Liner/Rigger (Size 0-2): When your artwork yearns for those microscopic, exquisitely crisp lines or those pinpoint fine details that genuinely make a piece sing, the small liner or rigger is utterly indispensable. Envision delicately rendered branches, individual, impossibly fine strands of hair, elegant fine lettering, or those subtle, yet powerfully impactful, highlights – this brush brings them to life. While it certainly demands a steady hand and a degree of practiced control, the artistic results are incredibly rewarding, imbuing your painting with exquisite precision and captivating realism. This is precisely where the magic of those final, meticulous touches happens, the details that truly elevate a piece from good to breathtaking, transforming it into a nuanced story. I sometimes use it for creating delicate textures, too, by dry-brushing very sparingly.
Why these specific sizes? The medium sizes offer the best balance of control and coverage for most beginner and intermediate artists, allowing you to tackle a wide variety of tasks without needing a huge collection right away. The large flat provides efficiency for bigger areas, while the small liner ensures you can always achieve delicate details. This selection is designed to be versatile, empowering you to explore diverse techniques from basic-brushstrokes-for-acrylic-painting to more advanced how-to-blend-acrylic-paint-on-canvas-for-beginners.
Brush Type | Key Benefits for Beginners |
|---|---|
| Medium Round | Versatile for both lines and broader strokes, good paint load, and excellent for foundational drawing in paint. Your everyday workhorse for almost anything. |
| Large Flat/Bright | Excellent for blocking in large areas, creating sharp edges, and achieving textured strokes. Essential for dynamic compositions and efficiently laying down color. |
| Medium Filbert | Creates soft edges and blends beautifully, ideal for organic shapes, portraiture, or smooth transitions. Adds a gentle, natural touch and can be surprisingly precise on its edge. |
| Small Liner/Rigger | Precision control for fine details, delicate lines, and signatures. Perfect for adding those final touches that bring a painting to life, such as whispers of hair or distant foliage. |

With these four, you'll be well-equipped to explore a vast range of acrylic painting techniques, from basic-brushstrokes-for-acrylic-painting to more advanced how-to-blend-acrylic-paint-on-canvas-for-beginners. And for those looking to add different textures, don't forget to explore techniques like dry-brush-technique-acrylic-painting or even how-to-layer-colors-in-acrylic-painting, where the right brush can make all the difference.
Expanding Your Brush Arsenal: When and How
Once you've mastered your core set, you might start itching for more. This is a natural part of an artist's growth! It’s a sign that your artistic vocabulary is expanding, and you're ready to explore new forms of expression. Consider expanding your collection when:
- You consistently find yourself struggling to achieve a specific effect: For example, if you want very fine, consistent textures for grass, a comb brush might be your next purchase. Or if you're struggling with smooth, large-area blends, a larger oval wash might be the answer.
- You're exploring new techniques: Diving into delicate glazing? A very soft, larger mop brush might be ideal, or even a specialized glaze brush. Experimenting with expressive mark-making? A sturdy, stiffer bright or even a palette knife (as we discussed!) will be invaluable. Don't forget that silicone shapers also open up a world of mark-making possibilities for texture and blending without brushstrokes.
- You've worn out a favorite: Good brushes are workhorses, and they do eventually wear down. Replacing your most-used brushes is a sign of a productive artist!
Don't rush to buy every brush under the sun. Instead, let your artistic needs and curiosity guide your expansion, one thoughtful purchase at a time.
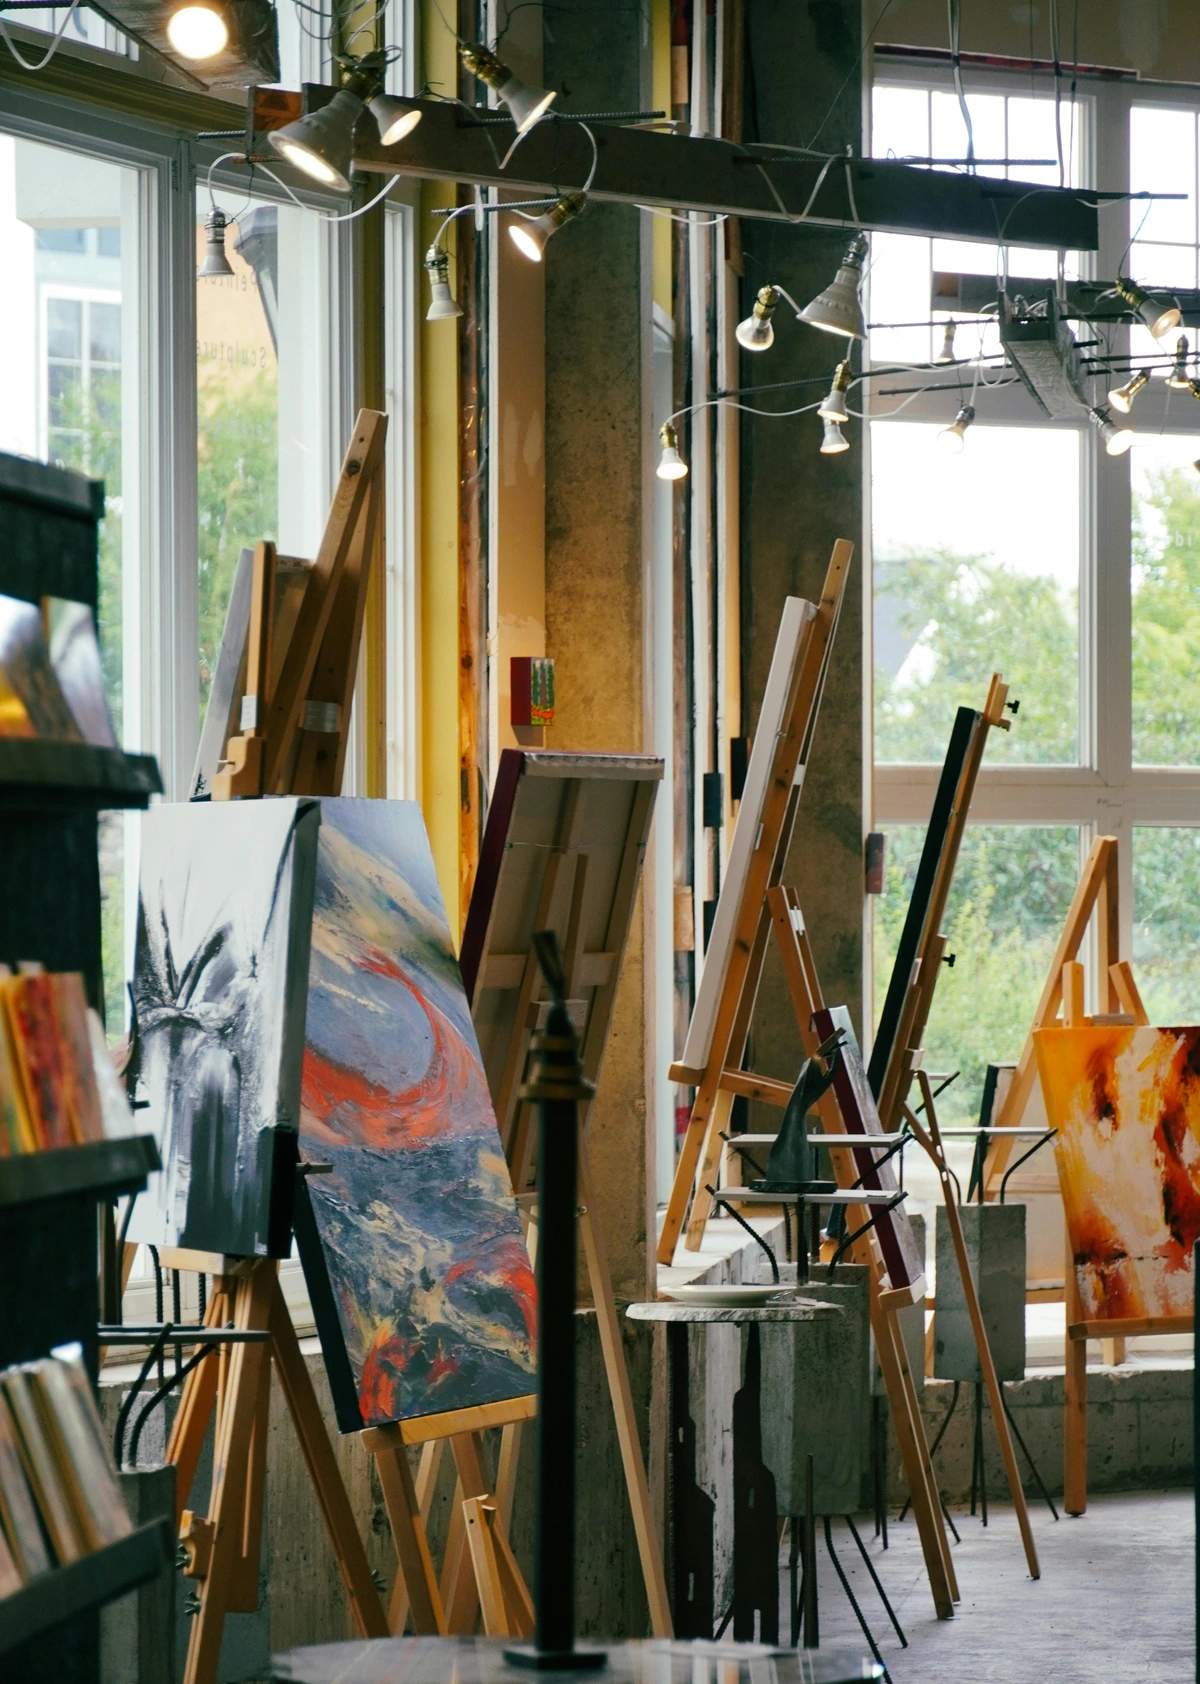
Frequently Asked Questions About Acrylic Brushes
Q: When should I consider upgrading my brushes?
A: This is a fantastic question that many artists grapple with! You should consider upgrading your brushes when you consistently find your current tools hindering your artistic vision rather than enabling it. This could mean your brushes are no longer holding their shape, shedding excessively, or simply not performing the way you need them to for more advanced techniques. It's also a good idea to upgrade when you've developed a clear understanding of your preferred painting style and what specific qualities you need in a brush. For example, if you're consistently doing fine detail work, investing in a high-quality detail brush with superior snap and point retention will make a world of difference. Don't feel pressured to upgrade prematurely; let your artistic needs and the demands of your projects guide your investment. Sometimes, an upgrade is less about getting a 'better' brush and more about getting the 'right' brush for a particular job.
Q: Are there specific brushes for working with textural mediums?
A: Absolutely! While many standard brushes can handle textural mediums, certain types excel. Stiffer brushes like brights and flats are fantastic for pushing and sculpting heavy gels and impasto mediums. For more aggressive textures, you might even find that natural hog bristle brushes (despite their general drawbacks for fluid acrylics) can create unique, broken textures with thick mediums due to their stiffness. Beyond traditional brushes, palette knives and silicone shapers become indispensable for textural work, allowing you to spread, scrape, and carve through thick mediums with precision and control without absorbing any of the material. Also, don't forget unconventional tools like old credit cards, sponges, or even household scrub brushes for interesting textural effects. The key is to look for tools that are robust enough to manipulate the medium without immediately splaying or losing their shape.
Q: How do I choose between a flat and a bright for impasto?
A: Both flats and brights are excellent for impasto, but they offer slightly different characteristics. A flat brush (with its medium to long bristles) will give you a bit more flexibility and a smoother, more expansive application of thick paint. It can create wider, more sweeping impasto strokes, and you can use its thin edge for sharper lines within the texture. A bright brush, with its shorter, stiffer bristles, offers significantly more control and a denser application of paint. It's ideal for more precise, sculptural impasto work, where you want to really push and define individual mounds or peaks of paint. Think of the flat as the 'broad stroke' impasto tool and the bright as the 'sculpting' impasto tool. If you're building up very heavy layers or creating distinct textures, a bright might be your preference, while a flat is great for broader, more fluid applications of thick paint.
Q: What's the best way to travel with brushes?
A: Traveling with brushes requires a bit of foresight to protect them from damage. Firstly, ensure all your brushes are absolutely clean and dry before packing to prevent mold, mildew, and dried paint issues. For protection, a brush roll is invaluable; it keeps each brush separate, prevents bristles from getting bent or crushed, and is compact. Alternatively, a hard-shell pencil case or a dedicated brush box works well, especially for longer trips or if you have delicate brushes. Some artists use PVC pipe caps or even toilet paper rolls as individual bristle protectors for particularly precious brushes. Avoid throwing them loosely into a bag, as bristles will inevitably get bent. Also, consider bringing a smaller, dedicated travel cleaning kit with a small brush soap and a travel-sized water container so you can clean your brushes immediately after painting, even on the go.
Q: What is the 'snap' of a brush?
A: The 'snap' or 'spring' of a brush refers to its ability to return to its original shape quickly and decisively after pressure is applied and released. For acrylics, a brush with good snap is crucial. It gives you precise control over your paint application, allows for lively and responsive strokes, and prevents the bristles from splaying out under the pressure of thicker paints. High-quality synthetic brushes are engineered specifically for excellent snap, ensuring consistent performance.
Q: What's the difference between natural and synthetic bristles for acrylics?
A: For acrylics, synthetic bristles are generally superior. They are more durable, maintain their shape ("snap") better when wet, don't absorb excessive water or paint, and are much easier to clean. Natural bristles (like sable or hog) absorb water, can become mushy, and are prone to damage from acrylic paint if not cleaned meticulously right away. I almost exclusively use synthetic for my acrylic work, saving natural hairs for my oil and watercolor explorations.
Q: Should I clean my brushes with solvents for acrylics?
A: Generally, no. Acrylics are water-soluble when wet, so warm water and a good brush soap are usually all you need for cleaning. Solvents are typically reserved for oil paints. Using harsh solvents on synthetic acrylic brushes can potentially degrade the bristles or loosen the glue in the ferrule, shortening your brush's lifespan. Stick to water-based cleaning for your acrylic tools. There are specialized brush cleaning fluids designed for dried acrylic, which often contain mild solvents, but these are typically used as a last resort for heavily caked brushes, and always followed by a thorough soap and water wash.
Q: How do I choose the right size brush?
A: Choosing brush size depends entirely on the scale of your work and the level of detail you need. For large canvases and blocking in broad areas, you'll want larger brushes (e.g., 1"+ flats, large washes). For medium-sized work and general painting, a range of medium rounds (size 6-10) and flats (1/2") are perfect. For fine details, highlights, or smaller canvases, you'll reach for smaller rounds, liners, or detail brushes (sizes 000-2). My advice is to consider the overall size of your canvas and the smallest detail you intend to paint, then pick a brush that makes that task feel effortless. It's often better to go slightly smaller for detail than to try to force a large brush into a tiny space – trust me on this one, I've tried!
Q: Can I leave brushes in water while painting?
A: For very short, fleeting periods – perhaps a mere minute or two while you momentarily grab more paint, intently consider your next artistic move, or switch between closely related colors – it's generally permissible to rest them, bristles down, in a water pot (though you absolutely must avoid allowing the ferrule to sit submerged for any extended duration). However, and I cannot emphasize this enough, for longer breaks, or most crucially, for any form of extended storage, the answer is a resounding, unequivocal absolutely not! The reason is simple yet destructive: water possesses an insidious ability to seep into the ferrule, which will relentlessly weaken the critical glue that binds the bristles, leading to unsightly rust, and, in a truly heartbreaking turn of events, eventually cause your cherished bristles to fall out and the handle to tragically detach. This is a slow, agonizing death for a good brush. Always make it an immediate ritual to remove brushes from water the moment you are done painting or taking any significant break, then clean them meticulously, reshape them lovingly, and dry them properly, as if their very artistic life depends on it (because, in essence, it does!).
Q: Are natural hair brushes ever useful for acrylics?
A: While I generally steer clear of natural hair brushes for typical acrylic applications due to their tendency to absorb water and acrylic polymers, there are a few niche scenarios where I might, very intentionally, use them. For instance, a very stiff hog bristle brush, if used with extremely thick impasto mediums, can create unique, coarse textures that are hard to replicate with synthetics. Or, a very soft natural hair mop brush could be used for extremely subtle dry-brush blending or lifting if you desire minimal control and a very diffuse effect. However, these are exceptions, and require meticulous cleaning immediately after use to prevent damage. For 95% of acrylic painting, synthetics remain the superior and safer choice.
Q: Can I use watercolor brushes for acrylics?
A: You can, theoretically, but I would wholeheartedly advise against it for anything beyond the most fleeting, very thin washes or exceptionally delicate details – and even then, I'd proceed with extreme caution and a healthy dose of trepidation. Watercolor brushes are typically designed to be exceptionally soft and are meticulously engineered to hold a significant amount of water and facilitate effortless pigment flow, qualities which acrylics, particularly heavy-bodied ones, do not always demand or tolerate well. Acrylic paint, especially if it's of a thicker consistency or, heaven forbid, allowed to dry even slightly within the brush, can rapidly and irrevocably ruin the delicate hairs of a good watercolor brush, permanently altering its crucial snap, rendering it limp, and drastically shortening its precious longevity. My strong recommendation? Stick to brushes meticulously designed and designated for acrylics or oils – your treasured watercolor brushes will undoubtedly express their profound gratitude. For a deeper dive into the world of proper watercolor tools, I urge you to explore my guide on essential-watercolor-supplies-for-beginners.
Q: How does brush shape influence expressive mark-making?
A: The shape of your brush is a direct language for your expressive intent! A round brush offers fluidity, control for delicate curves, and varying line thickness with pressure. A flat brush screams boldness, providing sharp edges, strong geometric blocks, and dynamic directional strokes. A filbert whispers softness and seamless transitions, ideal for organic forms and gentle blending. The long, delicate hairs of a liner sing songs of intricate details and flowing calligraphy. Even something like a fan brush speaks in poetic whispers of texture and atmospheric effects. Each shape has its inherent character, and by choosing consciously, you amplify your artistic voice, transforming mere paint into powerful expression. Experiment with different shapes to discover their unique vocabularies and how they resonate with your storytelling.
Q: Can I use one brush for multiple colors without cleaning?
A: In short, no, not really. With fast-drying acrylics, using one brush for multiple colors without thorough cleaning in between will inevitably lead to muddied colors and paint drying within the bristles and ferrule. While you might get away with a quick wipe on a paper towel for very similar colors if you're working extremely fast, it's generally a bad habit that impacts both your color purity and your brush's lifespan. Best practice is to have dedicated brushes for certain color families, or at the very least, rinse and clean meticulously when switching between distinct hues to maintain the purity of your colors and the health of your brushes. I’ve ruined too many good mixes by being lazy here! If I'm working with a limited palette or very close color values, I might use a dedicated 'dirty water' rinse pot for a quick swish, but it's never a substitute for a proper clean.
Q: What role does brush size play in achieving depth and perspective?
A: Brush size is a subtle but powerful tool for creating the illusion of depth and perspective in your painting. Generally, I recommend using larger brushes for elements in the foreground or for broad, expansive areas, which helps them feel closer and more substantial. Conversely, progressively smaller brushes are excellent for rendering details in the mid-ground and background. The smaller, more refined marks naturally recede, giving the impression of distance and atmospheric perspective. It’s a bit like how objects appear less detailed the further away they are in real life. By varying brush size strategically, you can effortlessly guide the viewer's eye through your composition, adding a profound sense of space and dimension.
Q: How often should I clean my brushes?
A: Ideally, immediately after each use, or even between changing colors if you're working quickly with fast-drying acrylics. This isn't just a suggestion; it's the golden rule of brush care for acrylics. Dried acrylic is permanent, and once it's caked into the ferrule or bristles, it's incredibly difficult, if not impossible, to remove without damaging the brush. Consistent, thorough cleaning will dramatically extend the life of your brushes, saving you money and frustration in the long run. Seriously, make it a ritual.
Q: What about eco-friendly/sustainable brush options?
A: This is a truly fantastic and, I believe, an increasingly vital question for conscientious artists today! I'm genuinely delighted to report that many forward-thinking brands are now actively innovating and offering significantly more sustainable brush options. When you’re shopping, make it a point to actively seek out brushes featuring handles crafted from sustainably sourced wood (often FSC-certified), rapid-growing bamboo, or ingeniously recycled plastics. Regarding bristles, high-quality synthetics are intrinsically a more eco-friendly choice than natural animal hair, especially when one considers the frequently opaque ethical sourcing concerns associated with some natural hairs. Some truly commendable brands are even pushing the boundaries further, offering brushes ingeniously fabricated from entirely recycled synthetic fibers, effectively transforming waste into wonderful tools. While it might require a touch more diligent searching, consciously prioritizing and supporting brands demonstrably committed to ethical and sustainable manufacturing practices is a magnificent way to nourish both your passionate art practice and our precious planet. Honestly, there’s a deeply satisfying sense of integrity and peace that comes with painting with a truly clear conscience, wouldn't you agree?
Q: Do I need expensive brushes to start?
A: Absolutely not! While artist-grade brushes offer superior performance and longevity, there are many excellent student-grade synthetic brushes that are perfect for beginners. The key is to choose quality over price: a few good student-grade brushes are better than a large, cheap set. Focus on brushes that hold their shape, don't shed bristles, and have firm ferrules. You can always upgrade later as your skills and needs evolve, but a solid foundation with good student-grade brushes will serve you incredibly well. I've found some real gems in the student ranges that I still use regularly for certain tasks – it's all about how they feel in your hand and how they perform, not the price tag.
Q: How do I revive stiff acrylic brushes?
A: If a brush has dried acrylic in it, it can be tough. For lightly stiff brushes, try soaking them in warm water with a dedicated brush cleaner solution (there are specific ones for dried acrylic that often contain mild solvents) or even fabric softener for a few hours/overnight, though be cautious with this as fabric softener can damage some glues and natural hairs over time. Gently work the bristles with your fingers to loosen the paint. For heavily caked brushes, honestly, they're often beyond saving, and sometimes it's best to accept defeat and replace them. This is why immediate cleaning is so crucial! Sometimes you just have to mourn the loss and move on.
Q: What's the best way to thin acrylic paint for washes or glazing?
A: While plain water can certainly thin acrylics, and many beginners intuitively reach for it, you need to proceed with caution. Using an excessive amount of water (generally, more than 30% water by volume is often cited, though some artists are even more conservative) can actually initiate the breakdown of the paint's crucial polymer binder. This detrimental effect can render your paint less permanent, diminish its essential adhesive quality, and unfortunately, dull its inherent vibrancy, leading to chalky, fragile results. For achieving the absolute best, most luminous, and most archivally sound results with delicate washes and transparent glazes, I unequivocally recommend utilizing a dedicated acrylic glazing medium or a specialized flow improver. These incredible mediums are specifically formulated to thin the paint without compromising its archival integrity or its vibrant color intensity, thereby allowing for beautifully smooth, exquisitely transparent layers that retain their full luminosity and strength. My advice is to always start with a very small amount of medium, gradually adding more until you precisely achieve your desired consistency – remember, a little often goes a remarkably long way! For a deeper dive into these transformative agents, you can learn so much more about best-acrylic-mediums-for-abstract-artists to explore a wealth of options, and even immerse yourself in specific glazing techniques. A flow improver is particularly good for reducing surface tension, allowing paint to spread more evenly without sacrificing color intensity.
Q: What's the difference between a bright and a flat brush?
A: Both bright and flat brushes have a square end and a flat ferrule, but the key difference lies in their bristle length and stiffness. A flat brush has medium to long bristles, offering versatility for bold strokes, sharp edges, and blending. A bright brush has shorter bristles than a flat, making it stiffer and providing more control for shorter, thicker strokes, precise impasto work, and pushing around heavy-body acrylics. Think of a flat as more general-purpose, and a bright as its more muscular, controlled cousin, specifically designed for heavier paint application and texture.
Q: Can I use different paint brands with the same brushes?
A: Absolutely! Brushes are tools, and they generally don't discriminate by paint brand. The most important factor is cleaning them thoroughly when switching between colors, especially if the brands have slightly different consistencies or drying times. Consistency in cleaning habits will ensure your brushes perform well across all your preferred paint brands. It's like a good chef's knife – it works equally well with different ingredients, as long as you keep it sharp and clean.
Q: How do I remove paint stains from my brush handles?
A: For fresh, still-wet paint, a simple damp cloth will almost always do the trick efficiently. However, for those tenacious, dried acrylic stains that seem to stubbornly bond with your brush handles, you will undoubtedly need to apply a bit more elbow grease and perhaps some specialized assistance. Alcohol wipes or a very mild abrasive cleaner (like a 'magic eraser' sponge) can sometimes prove effective, diligently lifting the dried paint without excessive scrubbing. Crucially, always exercise considerable caution to avoid inadvertently damaging lacquered, painted, or specially treated handles, as some cleaning agents can strip finishes or cause discoloration. As with so many aspects of brush care, prevention is the supreme key here: cultivating the habit of meticulously wiping your handles clean as you paint can save you an immense amount of effort, frustration, and potential damage later! A little bit of vigilant attention goes an exceptionally long way in preserving the aesthetic and functional integrity of your cherished tools.
Q: What is a brush shaper and how do I use it?
A: A brush shaper is a wonderfully ingenious liquid solution meticulously designed to help condition and, crucially, reshape your brush bristles, especially after a thorough cleaning or if they've unfortunately begun to splay out. The process is elegantly simple: after you've lovingly washed your brush until it's pristine, dip it into the shaper fluid, then gently, yet firmly, work the bristles with your fingers to guide them back into their original, intended shape (a crisp point for rounds, a sharp, unyielding edge for flats). Allow the brush to air dry completely. The fluid will subtly harden, acting as a temporary cast that holds the bristles perfectly in place. Once entirely dry, you can simply rinse it out, and your brush should emerge wonderfully revitalized, almost like new! Think of it as specialized, ultra-beneficial hairspray for your brushes – a real lifesaver for those beloved tools that need a little extra TLC.
Q: What's the ideal number of brushes to own?
A: This is a bit like asking "how many shoes do I need?" – it's highly personal! For beginners, I always recommend starting with a small, high-quality core set (perhaps 3-5 brushes in varied shapes and sizes, like a medium round, a large flat, a medium filbert, and a small liner). As you grow and explore different techniques, you'll naturally feel the need for specialists. Don't fall into the trap of buying a huge, cheap set; a few good brushes are infinitely better. Build your collection organically, letting your artistic needs and curiosity guide each purchase. Remember, it's about having the right tools for your vision, not just accumulating them.
Q: How do I store brushes between painting sessions (e.g., overnight)?
A: For short breaks or overnight, if your brushes are clean, you can store them upright in a jar, bristles facing up, to prevent bending. If they're slightly damp, definitely lay them flat on an absorbent towel or in a brush holder designed to keep them head-down (allowing gravity to pull moisture away from the ferrule). If you’re just pausing for a few minutes while you mix a color, you can keep them in your water pot, but never for long periods. The key is to avoid letting paint dry in them and to keep the bristles from getting deformed. For longer term storage, make sure they are completely dry to prevent mildew and damage. Investing in a good brush roll is also fantastic for protecting bristles and keeping dust off, especially if you have a collection of favorites.
Q: Can I use household cleaning products to clean my brushes?
A: While mild dish soap is generally fine for a quick clean, I'd be cautious with stronger household cleaners. Some can be too harsh for synthetic bristles, damaging their integrity or the glue in the ferrule. Stick to artist-specific brush soaps or very gentle, pH-neutral soaps. If you're unsure, test a small, less-favored brush first. It’s better to be safe than sorry when it comes to preserving your tools.
The Journey Continues, Brush in Hand: A Final Reflection
So there you have it, my friend. My thoughts, my experiences, and my hard-won lessons on this incredible quest for the best brushes for acrylic painting. Remember, this journey isn't about adhering to rigid, inflexible rules; it's about courageously finding what profoundly resonates with your unique creative spirit and your distinctive way of perceiving the world. Embrace the glorious mess, experiment boldly, and explore fearlessly – because that, I've found, is precisely where the most profound learning, and often the most exhilarating discoveries, organically happen. The right brushes, you see, are far more than mere tools; they are loyal, sensitive partners in your artistic journey, tirelessly helping you translate that intricate inner vision into tangible color and form on canvas. So, go forth, wholeheartedly embrace the tactile joy of paint and bristle, and never, ever stop creating! If your curiosity is piqued about my own artistic journey, or if you simply yearn to witness the compelling results these very brushes help me achieve, please feel free to visit my /den-bosch-museum or explore my latest creations, which are always available to /buy. You can also trace my artistic evolution and key milestones on my /timeline. I am perpetually adding new pieces and enthusiastically experimenting with different techniques, and you’ll often discern the direct, unmistakable influence of a cherished brush in the distinctive texture, the unique sweep, or the vibrant stroke of a painting. Happy painting, and may your brushes always be clean, true, and an authentic extension of your creative will! Keep painting, keep creating.
And just before you gracefully depart, here’s a little secret, whispered from one artist to another: the 'best' brush isn't necessarily the most astronomically expensive one, nor is it merely the one that everyone else is ecstatically raving about on social media. No, the true 'best' brush is the one that instinctively feels like an effortless extension of you. It's the one that intuitively understands your intentions, requiring no mental gymnastics or overthinking. It's the one you reach for, without conscious thought, every single time. That profound connection? That, my friend, is the real, undeniable magic – the true partnership, almost a dialogue, between artist and tool. So, trust your innermost instincts, joyfully get your hands delightfully dirty (and then, yes, meticulously clean those brushes!), and allow your magnificent artistic spirit to soar to new, breathtakingly vibrant heights. Remember, every single stroke you make, every captivating color you lay down, is an indelible part of your unique artistic story, and the right brushes are patiently waiting to help you tell it with unparalleled beauty and authentic expression. Now go, create something wonderful – the world is waiting for your unique vision!


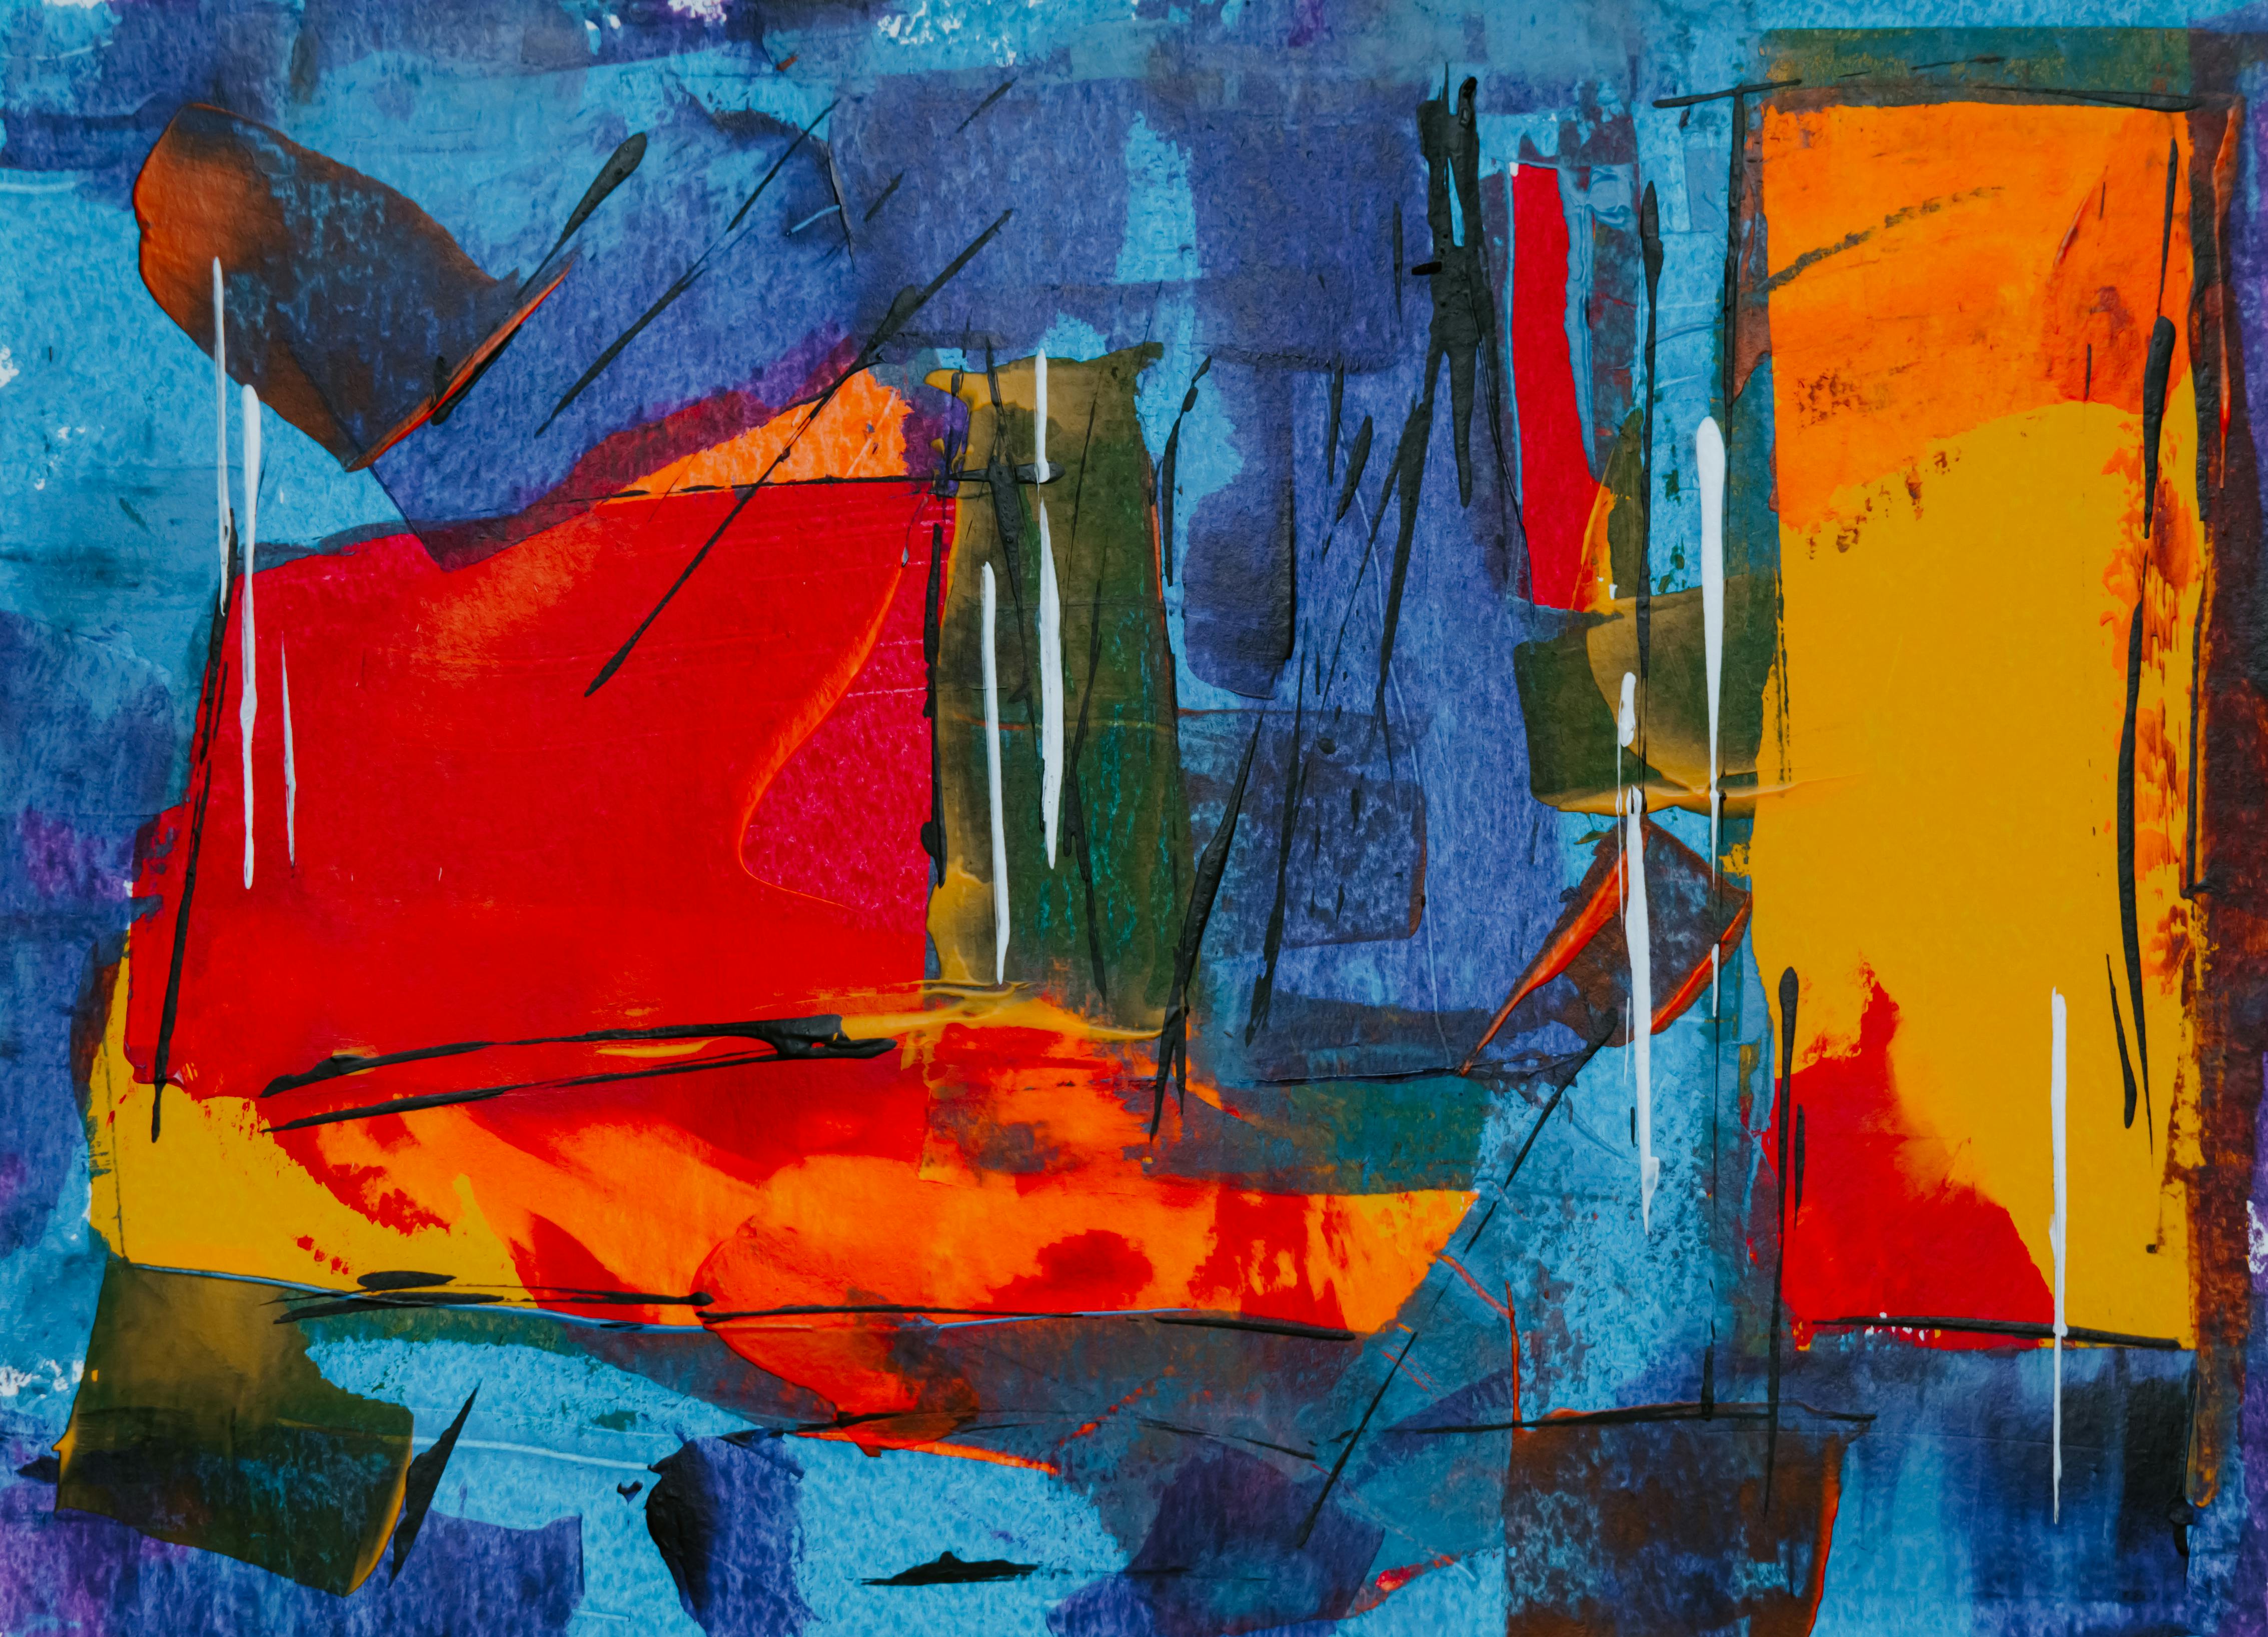
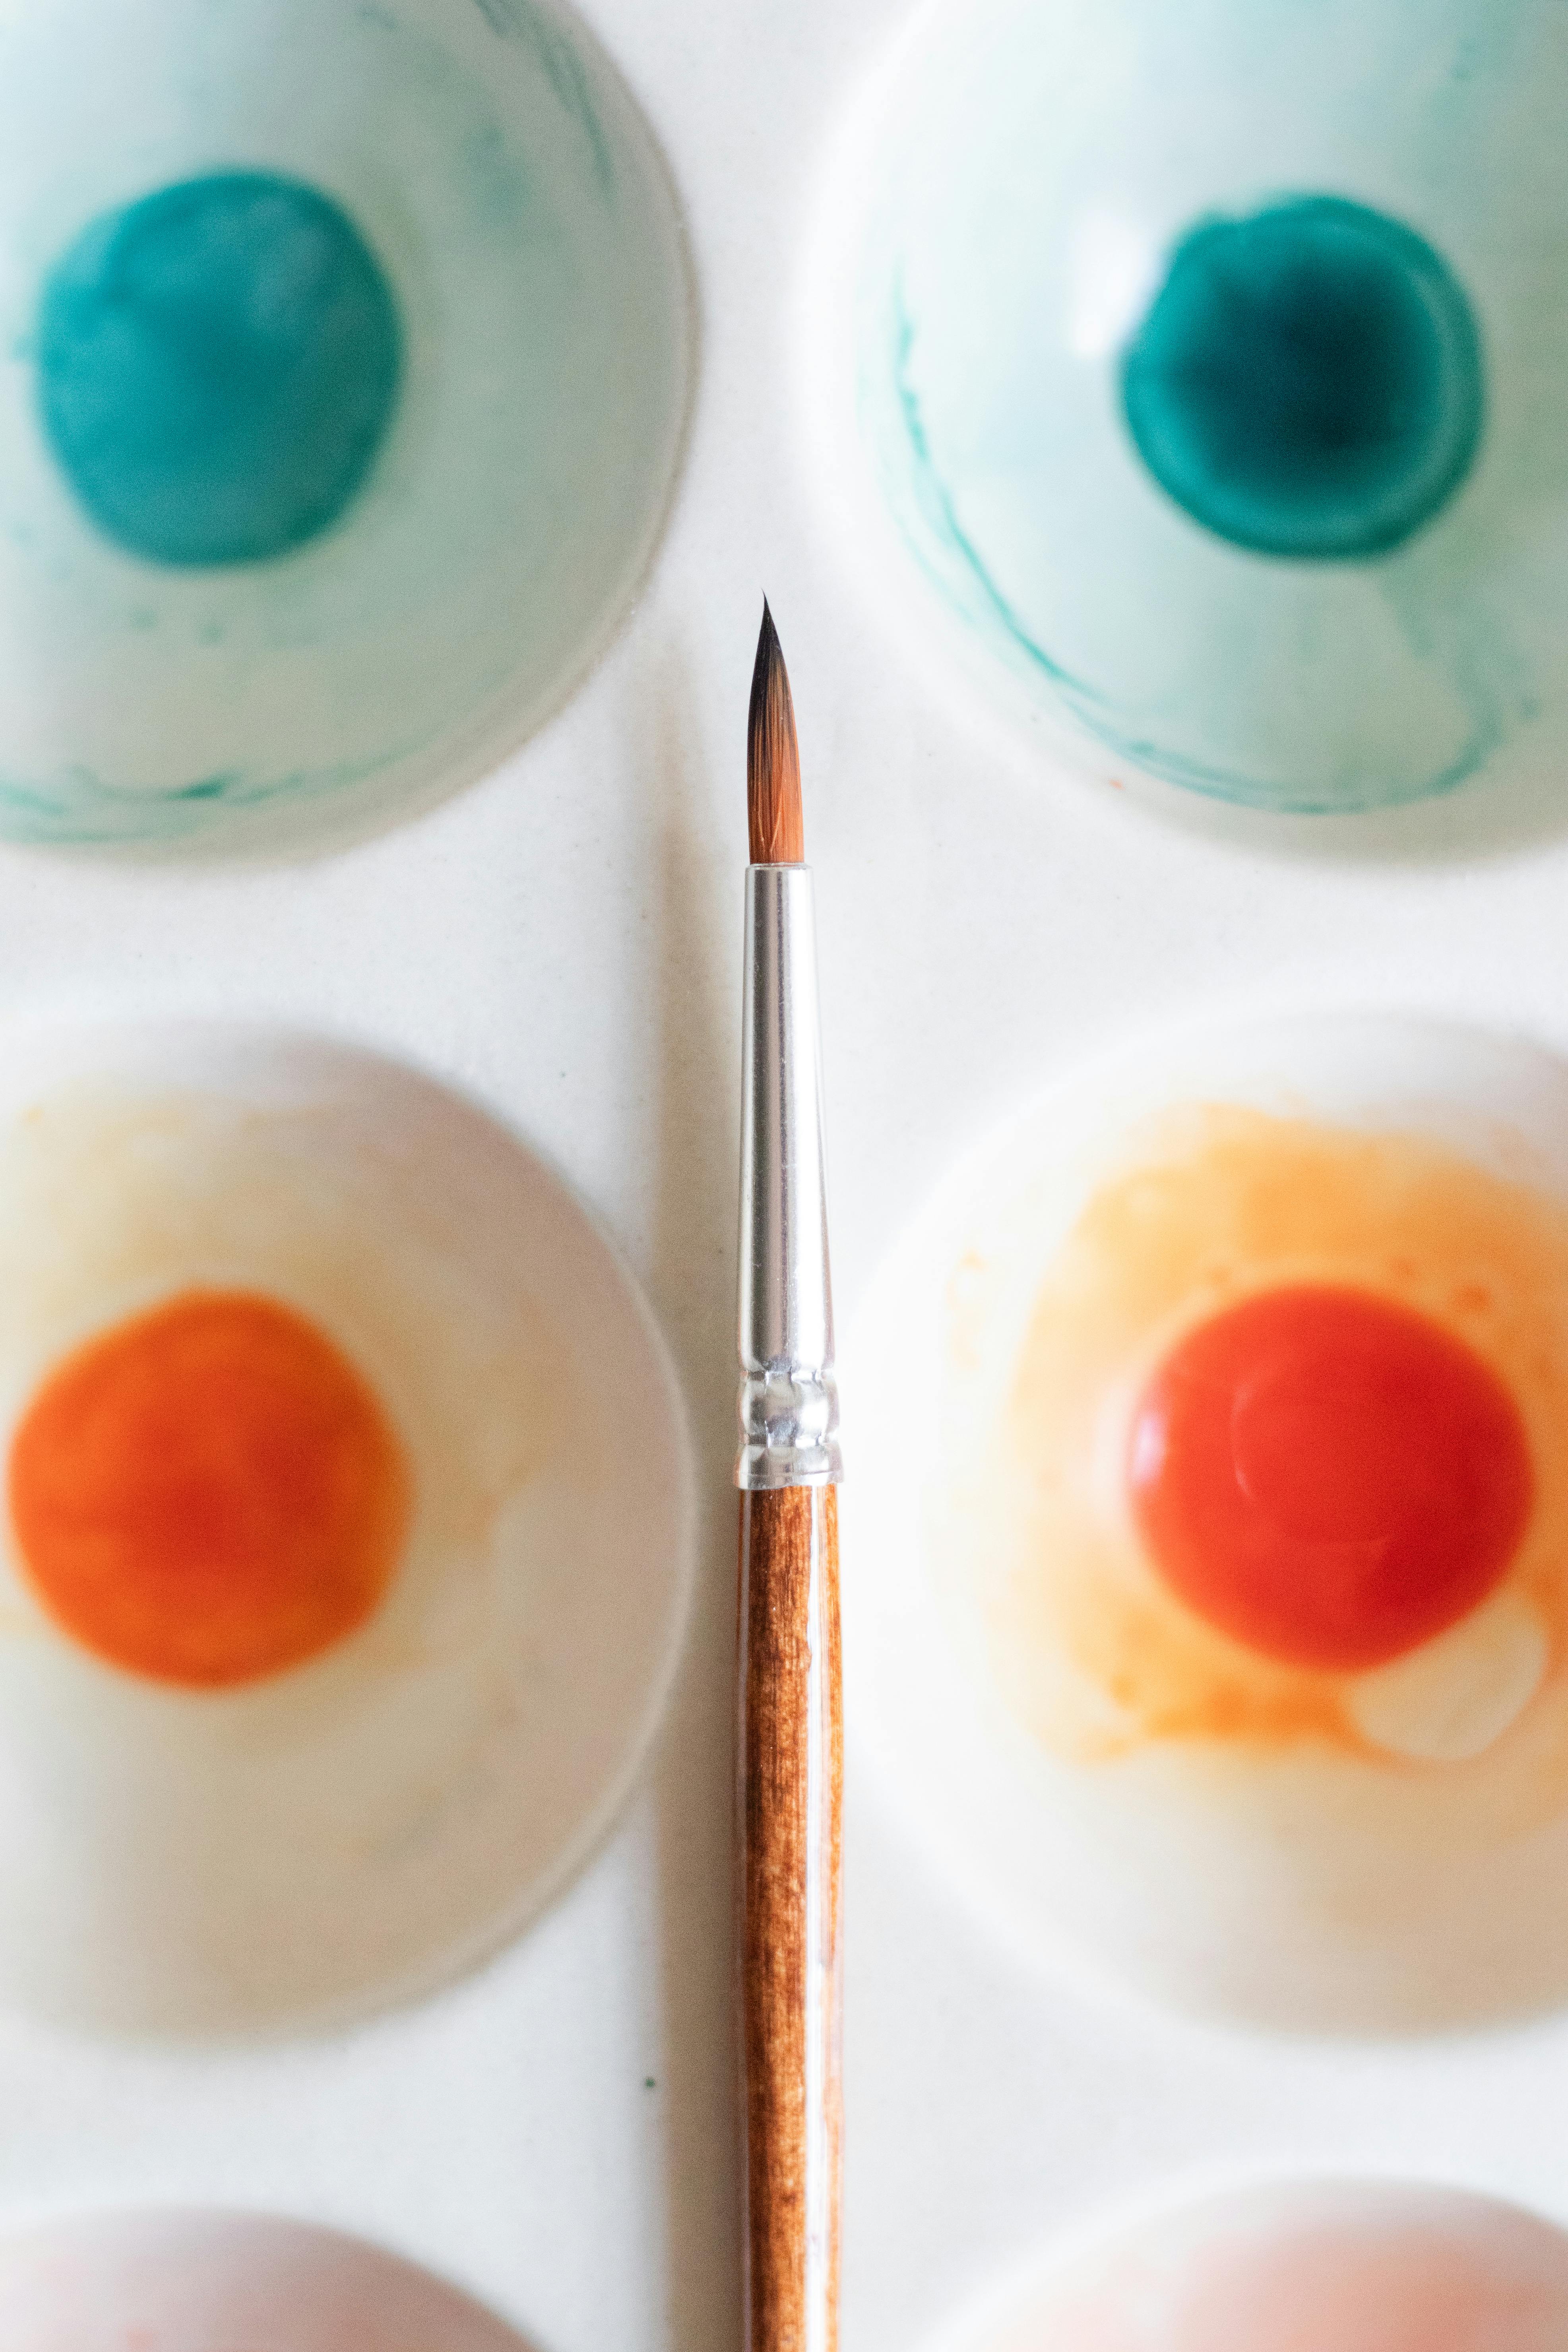