
Drawing Hands: Ultimate Guide to Realistic, Expressive Art
Conquer hand drawing! This ultimate guide offers practical steps, anatomy insights, perspective mastery, troubleshooting, and artistic perspectives for realistic, expressive hands.
How to Draw Hands: The Ultimate Guide to Realistic, Expressive Hands
Let's be honest, hands are often seen as art's true final boss, aren't they? I've lost count of the times I've sat, pencil in hand, staring at my own hand contorted into some impossible pose, only to transfer a lumpy, lifeless blob to paper. It’s frustrating, bewildering, and often enough to make you want to hide all your figures’ hands in their pockets forever. I remember one particularly agonizing evening trying to render a pianist's hands, and they ended up looking more like a cluster of overworked sausages than anything capable of delicate arpeggios. The sheer complexity felt insurmountable.
Yet, paradoxically, these incredibly challenging forms are also some of the most profound storytellers in art. They convey emotion, character, and action like almost no other part of the body, capable of expressing everything from tender love to fierce defiance. Mastering them isn't just about technical skill; it's about unlocking a whole new level of narrative and expression in your art. And trust me, if I can learn to love drawing them, so can you. I'm going to share the fundamental understandings and a hefty dose of patience that transformed my approach, so you can draw hands with confidence and imbue them with life. We’ll unravel the enigma of why they're so tricky, unearth foundational truths, and then embark on a practical, step-by-step journey – the kind of comprehensive, authoritative guidance I desperately wish I'd had when I started. But before we can conquer them, we need to understand precisely why they present such a formidable challenge. Let's dive into the anatomy and mechanics that make them so notoriously difficult. Ready to infuse your figures with unparalleled expressiveness? Let's dive in.
Why Hands Feel Like Art's Mount Everest
So, why do hands present such a formidable challenge? It's a perfect storm of complexity, I think. Unlike, say, a simple sphere, hands are dynamic, intricate, and constantly changing. I mean, just try to hold your hand perfectly still and notice all the tiny shifts and tremors! It's like they have a mind of their own, always moving. Now that we understand the formidable challenges hands present, let's equip ourselves with the foundational principles that will transform them from intimidating obstacles into expressive storytelling tools. Here's a breakdown of why they often feel so daunting:
Anatomy's Labyrinth: Bones, Muscles, and Tendons
Just beneath the surface lies a dizzying array of tiny bones (27 of them!), a network of muscles that allow for incredible dexterity, and numerous tendons. You don't need to become a surgeon, but a basic understanding of this underlying structure is a game-changer. I remember the moment it clicked for me – it was like suddenly seeing the scaffolding beneath a complex building, allowing me to understand why the hand moved the way it did.
Think of the carpals forming the wrist's flexible base – these are like the small, shifting pebbles at the base of a cliff, allowing for fluid rotation. It's this inherent looseness that allows for that subtle, almost imperceptible shift when you're resting your hand, don't you think? Then the metacarpals as the 'palm bones,' extending like the sturdy supports of a fan, giving the palm its structure and often dictating its overall width. The phalanges are the finger segments. What makes this so complex is how these bones articulate: the thumb’s unique carpometacarpal joint allows it to swivel and touch all other fingers, a critical movement for grasping, which often throws artists off! And the network of sheaths and ligaments guiding the flexor (for curling) and extensor (for straightening) tendons ensures precise, controlled movement. These tendons, especially on the back of the hand, create subtle, elegant ridges and depressions, becoming more prominent when the hand is flexed or tense – a detail often overlooked but crucial for realism. Understanding the thenar (thumb side) and hypothenar (pinky side) eminences helps define the fleshy pads of the palm, giving your hands volume and life – without them, hands look flat and lifeless. It's this internal architecture, supported by fat pads and skin elasticity that dictates how the hand moves and rests, and by understanding it, you can avoid drawing generic blobs and instead create convincing, living forms. The palm side has more prominent musculature, especially around the thenar and hypothenar eminences, while the back of the hand reveals more of the underlying tendons and bone structure.
The Elusive Dance of Proportion
Proportion in hands is incredibly flexible, yet there are underlying relationships that, once understood, make observation much easier. For instance, a common guideline I've found useful is that the middle finger is often roughly the same length as the palm (from the wrist crease to the base of the middle finger). Another useful guideline I use is that the span of the hand, from the tip of the outstretched thumb to the tip of the pinky, is often roughly equal to the length of the face. The fingers themselves taper, and their segments (phalanges) decrease in length as they move towards the fingertip. The thumb, with its unique swivel joint, has its own set of proportions and often extends to about the middle knuckle of the index finger. I also often think of the palm's width being roughly two-thirds of its length, though this can vary. The wrist, too, plays a part; its width often feels proportional to the palm, creating a natural flow from the forearm. These proportions are vital for accurate finger and hand drawing.
But here’s the kicker: these are guidelines, not rigid rules. Every hand is unique, which is why keen observation is paramount. I've seen hands with unusually long palms, or short, stubby fingers. The trick isn't memorization; it's learning to measure and compare what you see. For a deeper dive into overall sizing, check out our definitive guide to proportion in art. This delicate balance of proportions is only one piece of the puzzle. The way hands appear in space, especially when they move towards or away from us, introduces another layer of complexity.

The Tricks of Perspective & Foreshortening
This is where many artists, including my past self, stumble. When a hand is pointing towards or away from you, its perceived length dramatically shortens – that's foreshortening. It's not about distortion, but about how three-dimensional objects appear in two dimensions. Imagine holding a pencil directly pointing at your eye; you'd see mostly the circular end, not its full length. Now imagine several pencils, each representing a finger, pointing at you! My personal breakthrough came when I stopped trying to draw what I knew was there (a long finger) and started drawing what I saw (an overlapping, compressed shape) – it felt counter-intuitive at first, but the results were revolutionary. For extreme foreshortening, fingers can appear as simple wedges or even triangles, with the knuckles becoming crucial landmarks for establishing their direction in space. This is a concept beautifully explained in our definitive guide to perspective in art. Don't avoid it; embrace it by breaking the hand down into simple geometric solids first. If you want to really dive deep, our guide to mastering foreshortening drawing is a must-read.
The Foundational Truths: See, Simplify, Structure
Understanding why hands are so challenging is the first step; now, let's arm ourselves with the fundamental principles that will make them feel less like an insurmountable peak. Before you even touch the paper, I want you to shift your mindset. The biggest leap for me wasn't a technical trick; it was learning to see differently. Stop trying to draw "a hand" and start seeing the underlying structure, the movement, and the negative space around it. This is a bit like understanding the elements of design in art a comprehensive guide – breaking it down to its core components.

1. Understanding 3D Form and Perspective
Every part of the hand exists in three dimensions. Imagine wrapping each segment in a transparent cylinder or box. These aren't just outlines; they're solid forms with volume, almost like little dowels inside the hand. It sounds like Lego, doesn't it? But seeing your hand as constructible bricks makes it far less intimidating. When a hand moves, these forms rotate and overlap. This is also where the concept of hand planes comes in – the broad, flat or curved surfaces that define the hand's overall volume and how light will fall upon it. Think of these planes as the surfaces of a faceted gem – some catching the light directly, others angled away, all contributing to the hand's overall volume and how it interacts with light. For instance, the back of the hand might be a series of convex planes, gently curving outward, while the palm is a more complex, cupped surface with both concave and convex areas. My own "aha!" moment came when I started to see the hand as something constructible, not just an organic blob. For foreshortening, think of objects pointing towards you as a series of overlapping forms that gradually recede. A cylinder pointing at you will appear as an ellipse, and understanding the arc of that ellipse is vital. This principle is vital for making your hands feel weighty and real, rather than flat and pasted onto the page. Using simple geometric shapes (cubes, cylinders) to block out the hand in perspective first makes complex angles far more manageable. My advice? Don't shy away from these challenging angles; they're opportunities to flex your artistic muscle and apply your growing understanding of hand anatomy for artists.
2. The Big Shapes: Palm, Thumb, Fingers
Think of the hand as three fundamental masses. First, the palm – a sturdy, somewhat rectangular or trapezoidal block, perhaps like a slightly curved brick. This is the primary mass that sets the stage for the rest of the hand's pose. Second, the thumb mass – a distinct, fleshy wedge or cylinder attached to the side of the palm, with its unique mobility, like a half-cylinder ready to rotate. It’s crucial to treat this as a separate, powerful unit. And finally, the finger group – initially, see them as a single, bendable unit, another block or gently curved, segmented mass extending from the palm. Don't worry about individual fingers yet; this initial simplification is crucial for getting the overall gesture and proportion right. Also, pay attention to the subtle webbing between the fingers; it often forms small triangular or rounded shapes that are important for the overall negative space and silhouette. Focus on these primary forms; getting them right is like laying a solid foundation for a house.
3. Observe Negative Space
Just as important as the forms of the hand itself is the space around and between the forms. The gaps between fingers, the negative shape formed by a bent thumb, or the space between the hand and an object it's holding. Drawing these negative shapes can often be easier than drawing the positive forms directly, and they act as powerful guides for accuracy. For instance, when drawing a hand in a fist, observing the triangular negative space formed between the thumb and forefinger can be a more accurate guide than trying to draw the thumb's curved form directly. Or, for a hand gently cupped, notice the interesting, almost organic negative space created between the spread fingers and the curved palm – it helps define that delicate, receptive pose. It's a subtle but incredibly effective trick, especially when you're struggling to get a tricky angle just right. I use it constantly to double-check my proportions and placement.
4. Gesture and Expression: The Hand as an Actor
This is where the magic truly happens. A hand isn't just a collection of bones and muscles; it's an actor on your canvas. Is it relaxed? Tense? Clenched in anger? Reaching out in hope? The overall gesture communicates emotion and intent, often more powerfully than the face itself. Look for the flow, the arc, and the energy of the hand's pose. A hand in repose will have a gentle, S-curve; a hand gripping something will show tension in the muscles and prominent knuckles. Think about the story the hand is telling: a soft, open palm speaks of welcome or surrender, while a tightly clenched fist conveys power or frustration. Consider how a slightly cupped hand invitingly open differs from a flattened, rigid hand demanding attention. These subtle differences in tension, wrist angle, and finger spread speak volumes. A very tense hand, for example, might appear slightly more angular and compact, with all elements drawn in tightly. A hand's gesture can whisper secrets the face might never reveal. This expressive quality, often subtly emphasized by the tension (or relaxation) in the muscles and tendons and even the angle of the wrist, is what makes drawing hands so rewarding, despite the initial struggle. When you focus on the gesture first, the details fall into place much more organically.

The Step-by-Step Breakdown: Let's Get Drawing!
With these foundational truths in mind, let's translate them into practical steps on the drawing board. Here’s my personal, tried-and-true approach to tackling hands, broken down into manageable steps. Grab your pencil and paper (perhaps some of the best sketching pencils for artists or best drawing pencils for beginners if you're feeling fancy) and let's go! If you're looking for more general drawing techniques, check out our definitive guide to drawing techniques.
Step 1: The Palm as a Basic Shape
Start with the biggest, simplest geometric shape you can see for the palm. Is it a square? A trapezoid? An oval? A simple box in perspective? This will be your foundational block. Lightly sketch this shape, paying attention to its overall angle, tilt, and placement. Remember, the palm's shape isn't static; it flexes and cups, influenced by the position of the fingers and thumb. Also, consider the palm's thickness and its relation to the overall pose; it's a volumetric mass, not a flat plane. Don't press hard; these are just construction lines, like the scaffolding of a building. This step is all about establishing the hand's overall posture and main mass, giving you a solid base to build upon.
Step 2: Add the Thumb Mass and Connect to the Arm
With our basic palm shape in place, we now move to the highly mobile thumb. Visualize and sketch the thumb's muscular base, the thenar eminence, as a distinct wedge or a simple cylinder attached to the side of your palm shape. This mass originates higher on the palm than you might expect, giving the thumb its impressive range of motion – truly crucial for grasp! Remember, the thumb has its own complex carpometacarpal joint, allowing for its incredible swiveling motion – try to capture that sense of attachment and independent movement even at this early stage. This is a common pitfall: don't just tack the thumb onto the side; truly integrate its base into the palm. Also, at this point, lightly indicate how the hand connects to the wrist and forearm. Don't draw a disconnected hand! The wrist and forearm muscles (which control many of the finger movements) influence the hand's entire posture, so ensure it feels like a natural, flowing extension of the arm.

Step 3: The Finger Block (Avoiding "Sausage Fingers")
Now, for the fingers. This is where many fall into the trap of drawing individual, stiff "sausage fingers" too early. Trust me, I made this mistake for years, and my drawings suffered! Instead of drawing four terrified, individual fingers staring back at you, we coax them into a single, manageable entity first. Much friendlier, don't you think? Draw a single, rounded block or a gently curved, slightly flattened cylinder or tapering wedge where all four fingers will attach. Visualize this finger block as tapering from wider at the base where it meets the palm to narrower towards the fingertips, even before segmentation. This helps you establish the overall gesture and natural arch of the fingers as a group, which is absolutely crucial for dynamic and natural poses. You'll instantly see an improvement in the naturalness of the hand when you treat the fingers as a cohesive unit first. I often visualize a slight overhang where this block meets the palm, accounting for the prominent knuckles that will emerge. This step defines the collective shape and flow of the fingers, preventing that awkward, disconnected look and making your drawing fingers efforts far more successful.
Step 4: Segment and Articulate Individual Fingers
Once you have the finger block, begin to segment it. Lightly sketch in the four individual fingers. Remember their basic structure: each finger (except the thumb) has three segments (phalanges) separated by two knuckles. The middle finger is usually the longest. Each finger tapers gradually from the knuckle closest to the palm to the tip, often resembling a slightly rounded cone or a series of stacked, slightly diminishing cylinders. For a helpful mnemonic, the tip of the ring finger often aligns with the base of the fingernail of the middle finger, and the index finger's tip often reaches the middle joint of the middle finger. The pinky is, of course, the shortest. Pay attention to how they taper towards the tip, often like a series of slightly rounded cones or domes. Observe where the knuckles sit – they form prominent bumps and determine the finger's length and bend. This is crucial for drawing knuckles convincingly and bringing individual character and proportion to each finger, making them feel unique and purposeful.
Step 5: Refine the Joints and Introduce Natural Curves
This is where the hand truly starts to take form. Go back over your light lines and refine the joints and knuckles. Think of small spheres or cubes for the knuckles – those prominent metacarpophalangeal joints (MCPs) at the base of the fingers where they meet the palm, and the less prominent interphalangeal joints (IPs) along the fingers themselves. The MCP joints are more prominent because they're where the long metacarpal bones meet the finger bones, often backed by more musculature and allowing for significant rotation, like little ball-and-socket joints ready to do their dance. Just try not to make them look like tiny marbles stuck on! Notice how fingers rarely just bend straight down; there’s usually a beautiful, organic curve or arc to their movement. Try to capture that fluidity. This step is about transitioning from rigid geometry to the subtle, anatomical curves of the human form, making sure the joints feel like areas of flexion, with subtle bulges and depressions that suggest underlying bone and muscle. This step adds life and realistic movement, essential for any realistic hand drawing tutorial.

Step 6: Add Details and Surface Realism
Now, smooth out the construction lines, adding the subtle undulations of skin, muscle, and bone. This is where your observation skills really shine! I remember being amazed the first time I really paid attention to how a knuckle isn't just a bump, but a complex series of tiny folds and subtle changes in plane. It’s not just a smooth bump; it’s a landscape of subtle folds and changes in plane, like a miniature mountain range that tells a story of movement and tension. Add the major creases on the palm and around the knuckles – these aren't just random lines; they follow the natural movement of the hand, indicating underlying structure and points of flexion. Some creases are deep, following bone structure (like the lifeline!), while others are shallow skin folds. Pay particular attention to how veins and wrinkles appear; veins often trace paths along the back of the hand, following underlying bone structure, becoming more prominent with age or certain poses, while wrinkles typically form perpendicular to muscle movement and joint flexion, revealing history and tension. Don't forget the fingernails; they curve with the finger, typically revealing more of their surface when the finger is extended. Finally, consider the subtle shading: where does light catch the knuckles? Where do tendons or veins create slight, soft bumps or planar shifts under the skin? A well-drawn hand is a triumph of careful observation and layering, transforming simple lines into living, breathing form. This step brings the hand to life with texture and depth.
Step 7: Drawing Hands in Action: Grasping and Interacting
Often, hands aren't just posing; they're doing something. When drawing a hand grasping an object, the key is to understand how the hand molds around the object, rather than merely placing the object within the hand. The fingers and thumb will adjust their curves and positions to accommodate the object's shape – notice how gripping a round object causes fingers to curl more uniformly than gripping a flat object. Focus intensely on the negative space created between the hand and the object – this is often more telling than the hand's outline. Where do the fingers exert pressure? Where do they simply rest? What are the pressure points of grip? For example, when drawing a hand holding a curved mug, the fingers will create a gentle C-shape, with the thumb bracing on the opposite side. For a flat book, the fingers will flatten and press more uniformly along the edges, with the thumb often creating a distinct pinch grip. When grasping a spherical object like an apple, the fingers and palm will form a deeper, more encompassing cup, distributing pressure evenly. Also, consider the weight and texture of the object – a heavy object will cause the hand to grip more firmly, potentially changing the shape of the palm and finger placement, while something very hot might cause the hand to curl more tightly inward for protection. These interactions add a crucial layer of realism and storytelling to your drawing. Try drawing your own hand holding a pen, a phone, a mug, or even a soft cloth – the subtle shifts are endlessly fascinating, and even the weight or texture of the object can subtly influence the hand's posture and the tension in the muscles. This builds on principles from how to draw a still life where object interaction is key. This step is about bringing narrative and authentic physicality to your hands, making them feel integrated into the scene.
Beyond the Basics: Observation and Overcoming Common Pitfalls
Drawing hands is a journey, not a destination. Even after decades, I still learn new things. Here are some thoughts on refining your approach and tackling common frustrations that artists, myself included, regularly face. I still find myself staring at my own hand, twisting it this way and that, rediscovering its nuances even after all these years.
Drawing From Life vs. Reference
While photos are convenient, nothing beats drawing from life. Your own hand is the most accessible model! Hold it up, contort it, observe it in different lighting. Try simple poses like holding a coffee mug, resting it on a table, making a loose fist, or reaching for an imaginary object. Pay close attention to how light and shadow define the forms and planes. As you do, try practicing drawing the negative space around objects held by the hand – it's a fantastic way to understand the interaction and solidify your overall composition. For challenging poses or specific expressions, good photo references are invaluable. Look for clear lighting that defines the forms, and avoid overly flat or blurry images. Don't just copy; analyze the reference through the lens of shapes, perspective, and gesture that we've discussed. Life drawing trains your eye in a way photos simply can't, teaching you to interpret three-dimensional forms.
Different Mediums, Different Approaches
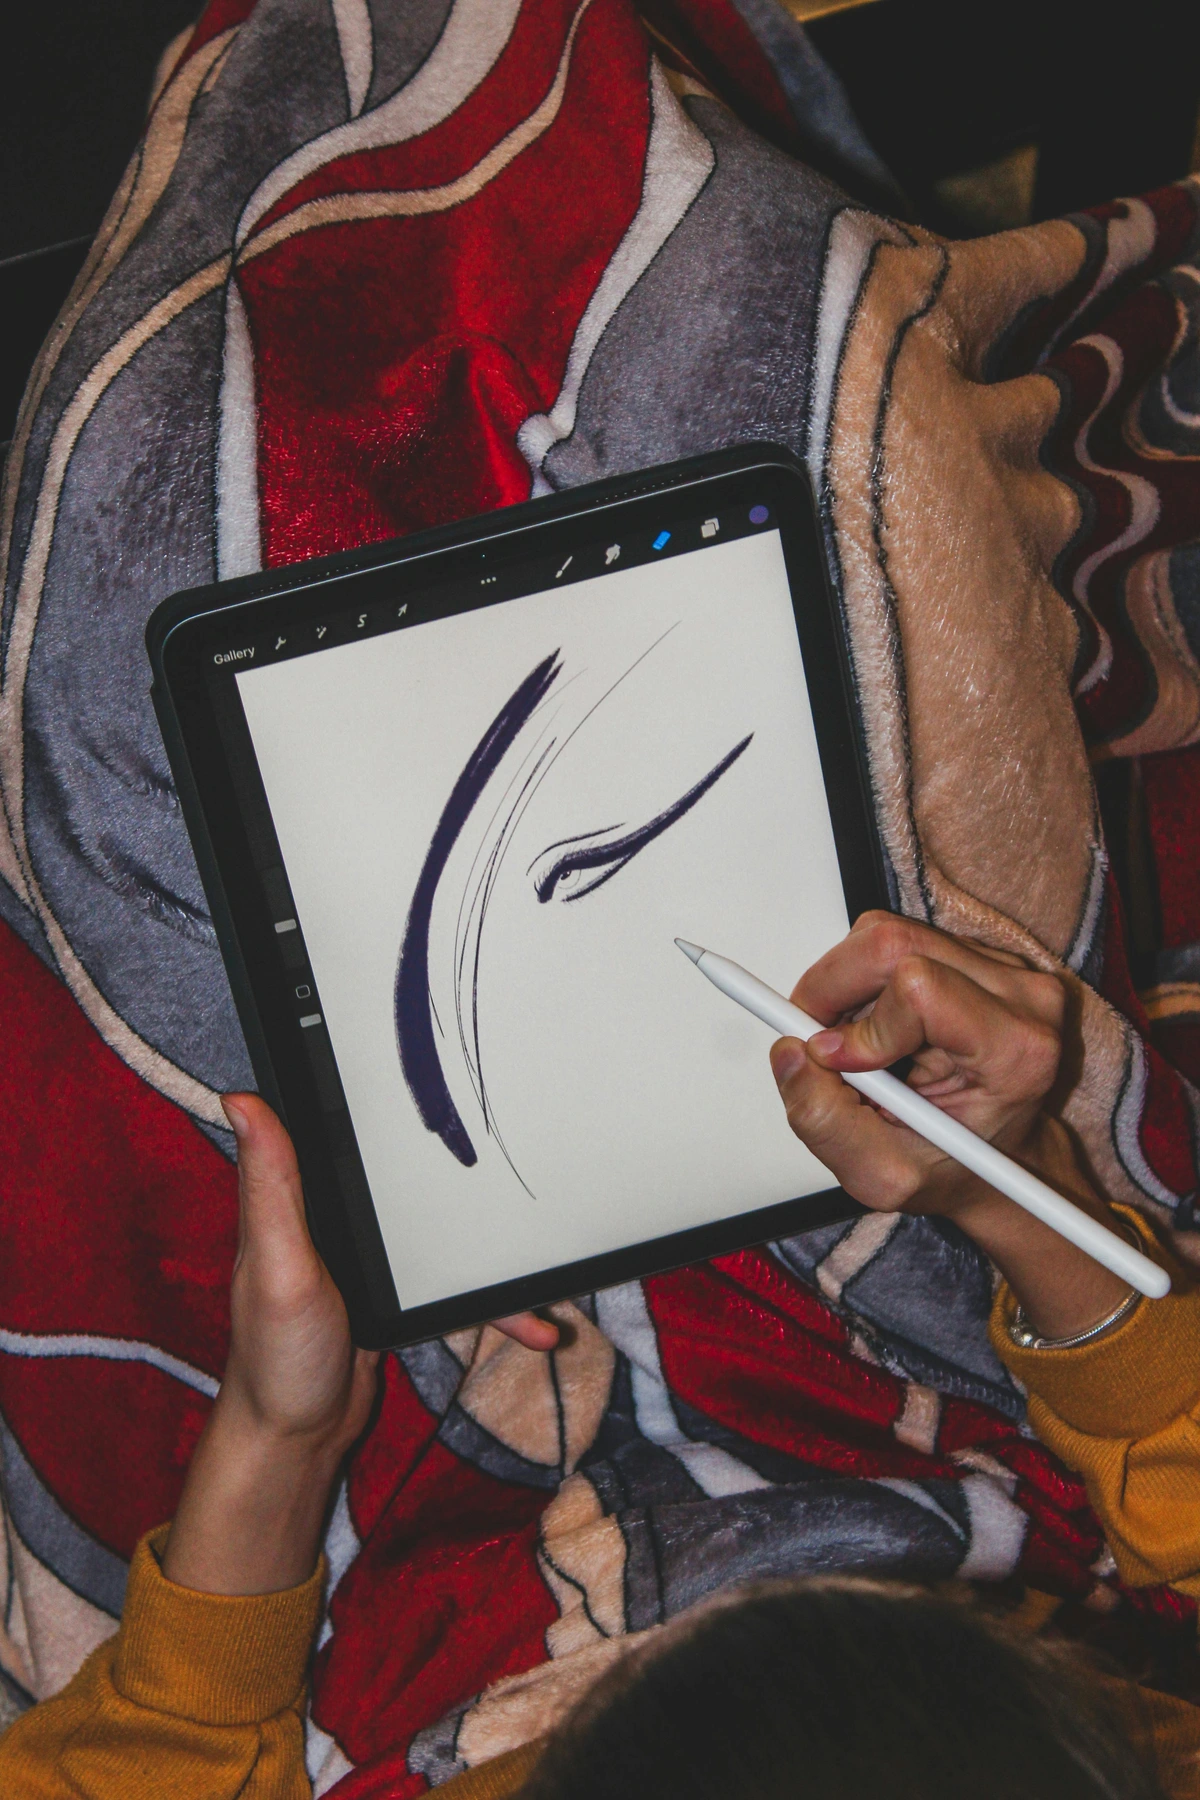
The principles of structure and observation remain the same, but the execution can vary wonderfully across mediums. With pencils, you can focus on delicate line weight to suggest form and texture, and use subtle blending to create smooth tonal transitions for realistic skin. Tools like putty erasers are fantastic for lifting light areas and creating subtle highlights, while kneaded erasers allow for precise adjustments without damaging the paper. For charcoal, think about broad strokes and rich, velvety tones to quickly define volume and dramatic shadows, capturing the hand's mass with expressive energy; smudging techniques can create soft transitions for flesh tones and shadows, emphasizing volume. Charcoal sticks are excellent for quick gesture studies. When drawing digitally (like on a tablet with a stylus, as seen below), you have the advantage of layers and easy corrections, allowing for more experimentation with form, gesture, and a wide range of brushes for different textures, including custom brushes for skin texture or subtle vein rendering. Watercolor lends itself to soft, ethereal washes for skin tones, while ink might demand a focus on strong outlines and cross-hatching to build form. Regardless of your chosen tool, the core observational skills are your greatest asset, allowing you to adapt to its unique properties. For more on digital tools, explore our article on top drawing tablets for digital artists.

Practice Poses and Studies
To build your visual library and confidence, I recommend regularly practicing these fundamental hand poses. Each offers unique challenges and insights for drawing a hand from imagination or reference:
- Relaxed Open Hand: Fingers gently curved, palm slightly cupped. Focus on the soft S-curve of the finger group – excellent for establishing natural repose and understanding subtle forms.
- Loosely Closed Fist: Fingers curled inward, thumb resting on the side. Observe the prominent knuckles and the tension in the palm – crucial for depicting power, restraint, or even quiet contemplation. This is a great exercise for drawing a fist convincingly.
- Hand Holding a Simple Object: (e.g., a ball, a pen, a mug). Pay attention to how the hand conforms to the object's shape and the negative space created – fantastic for understanding interaction and pressure points.
- Hand Resting on a Surface: (e.g., a table, a lap). Observe how gravity affects the form, how the fingers spread or cluster, and how weight is distributed – great for showing relaxation and contact.
- Pointing or Reaching Hand: Excellent for practicing foreshortening and dynamic gestures – challenging but incredibly rewarding for capturing action and direction.
- Hand Gently Cupped to Drink/Hold Water: Focus on creating a convincing concave shape with the palm and fingers, and how the negative space reveals the hand's contour as it contains liquid.
The Psychology and Nuance of Gestures: Telling a Story
Hands don't just hold objects; they hold meaning. Understanding the psychology behind common hand gestures can inject incredible depth into your characters and narratives. A hand open and reaching forward can signify pleading, offering, or welcome; a slightly curled index finger might suggest hesitation or contemplation. A tightly clenched fist, as we know, conveys anger, determination, or fear. Fingers splayed wide might show shock or rejection. But it's often the subtlety that speaks volumes. Consider the difference between an open hand reaching out (offering help) versus the same open hand but slightly rigid and palm-up (begging or demanding). The slight tension in a wrist, the gentle curl of a pinky, the way the thumb rests against the palm – these small details can communicate complex internal states, unspoken thoughts, or simmering emotions. A thumb twitching might indicate nervousness; fingers drumming, impatience; a hand tapping a surface, contemplation. When I approach a new drawing, I often ask myself: What is this hand feeling? What is it trying to say? This narrative focus transforms a technical exercise into an act of profound storytelling. Don't underestimate the power of a well-rendered gesture to add psychological depth. A hand's gesture can whisper secrets the face might never reveal.
Drawing Diverse Hands: Age, Body Type, and Expression
Not all hands are created equal, and that's fantastic for artists! Observing and understanding these differences adds immense realism and character to your work:
- Children's Hands: Generally plumper, softer, with less defined knuckles and wrinkles. Their knuckles are often less prominent, and the skin has a smoother, more "uncooked" appearance. Proportions might be slightly different, with shorter fingers relative to the palm and a more uniform, rounded appearance.
- Elderly Hands: Often feature more prominent veins, tendons, and knuckles. Skin can appear thinner, with more pronounced wrinkles, age spots, and sometimes a slight tremor in the gesture. Arthritic changes might also affect the shape of the joints, adding to their unique character. These details add a rich sense of history and lived experience.
- Muscular/Laborer Hands: May have larger, more defined knuckles, thicker fingers, calluses, and a more robust overall structure. The tension in muscles and tendons will be more evident, reflecting strength and constant use.
- Musician's Hands (e.g., Pianist, Guitarist): Often exhibit elongated fingers, subtle flexibility in the joints, and sometimes calluses specific to their instrument. Their relaxed posture might retain a hint of their instrument's form.
- Chef's Hands: Strong, dexterous, with well-developed palms and often fine motor control. They might show the marks of their trade, like minor scars or subtle toughness of the skin.
- Subtle Skin Tones and Textures: When rendering, think about the subtle color shifts, the translucency of skin over veins, and the fine lines and creases that vary across different skin types. Layering light washes or delicate pencil strokes can capture these nuances effectively, regardless of the hand's origin. Avoid flat, uniform rendering.
These variations aren't about stereotypes, but about capturing the unique story each hand tells through its physical form, making your art infinitely richer. My advice? Spend dedicated time observing hands around you – on the bus, in a cafe, your own family's hands. It's an endless wellspring of inspiration.
A Glimpse into Art History: Masters and Their Hands
Even the greatest masters wrestled with hands, recognizing their profound narrative power. It's a testament to the enduring challenge and expressive potential that artists continually strive to capture their essence. Exploring how different artists have rendered hands throughout history can be a huge source of inspiration for your own work. Perhaps visit a museum, or browse online, and just look at the hands in the paintings – what do they tell you?
- Leonardo da Vinci: Filled countless sketchbooks with meticulous anatomical studies of hands and feet. He understood that to depict the divine gestures, emotional states, and skilled actions so crucial in Renaissance art, he needed an unparalleled understanding of their underlying structure, specifically studying the tendons and ligaments that allowed for such precise movements. His The Last Supper features hands in an astonishing array of poses, each contributing to the psychological drama. He achieved this through detailed studies of individual muscles and bones, building form from the inside out.
- Albrecht Dürer: Another titan of the Renaissance, created incredibly detailed studies, famously in his Praying Hands, demonstrating not just technical mastery but also deep emotional resonance and devotion through his detailed rendering of skin texture and subtle folds. His detailed engravings often showcase hands with remarkable precision and character, achieved through masterful linework, cross-hatching, and subtle tonal gradations that sculpt form.
- Michelangelo: His Creation of Adam on the Sistine Chapel ceiling – the iconic nearly touching hands tell a profound story of divine spark and human yearning with incredible anatomical precision and emotional power. The raw power in his sculptures, like the David, is often reflected in the gripping tension of the hands, where sheer musculature and bony structure are emphasized to convey strength and life.
- Auguste Rodin: A master of sculpture, Rodin's hands often exist as powerful artworks in their own right. His The Burghers of Calais shows hands contorted in agony, despair, and courage, each telling a piece of the story. The raw, expressive power of his hand studies is unparalleled; he often conveyed raw emotion through exaggerated forms and textures, almost like a language of their own.
- Vincent van Gogh: While known for his vibrant colors, Van Gogh's figures, particularly his peasants, often feature gnarled, working hands that convey hardship, labor, and a deep connection to the earth. They are not anatomically perfect but expressively powerful, rendered with thick, impasto brushstrokes that emphasize texture and weight, contributing to the tactile sense of the hands.
- Egon Schiele: Schiele's self-portraits and figure drawings are renowned for their raw, often unsettling emotional intensity, frequently conveyed through exaggerated, angular, and deeply expressive hands. They are central to the psychological drama of his work. His distorted hands are often contorted, elongated, and highly gestural, a direct window into the sitter's (or his own) psyche, achieved through sharp, broken lines and minimal shading.
These artists, across different eras and styles, understood that hands are not mere appendages but central characters in the narrative, deserving of as much study and expressive intent as any face. Their works remind us that mastery comes not just from knowing the anatomy, but from understanding how to wield it for emotional impact. If you want to dive deeper into the works of these incredible artists, check out our guide to artists who mastered drawing hands.
Developing Your Hand Drawing Muscle Memory: Beyond Reference
While drawing from life and references is invaluable, the ultimate goal is to develop an intuitive understanding of the hand so you can draw it convincingly even from imagination. This is where muscle memory and an internalized anatomical atlas come into play. To truly master drawing a hand from imagination, consistent, varied practice is key.
- Speed Sketching: Practice drawing hands in various poses for very short durations (30 seconds to 2 minutes). Focus only on the main gesture and big shapes. Don't worry about perfection; this trains your eye to quickly capture the essence and energy. It's an excellent way to break free from overthinking.
- Gesture Drawing Without Outline: Try drawing hands using only shading or masses, without initial outlines, focusing on the volumes and forms created by light and shadow. This helps you think in three dimensions and develop a feel for the hand's bulk, connecting directly to principles of chiaroscuro. This goes hand-in-hand with mastering shading techniques in drawing and basic drawing techniques shading lines.
- From Memory: After a session of drawing hands from observation, try drawing some common gestures first (fist, open palm, relaxed grip), and then move to more complex ones from memory. Then, compare your memory drawing to a reference. Note the discrepancies and learn from them. This active recall solidifies your internal understanding.
- Anatomical Review: Periodically revisit anatomical diagrams and 3D models. Reinforcing your understanding of bones, muscles, and tendons strengthens your mental model, making informed drawing from imagination much easier.
- Sketchbook Studies: Dedicate a section of your sketchbook specifically to hands. Fill pages with quick studies, focusing on different angles, gestures, and types of hands. Building a sketchbook habit is invaluable here.
This continuous, varied practice builds a robust internal library of hand forms and movements, allowing your hand to flow more naturally and confidently on the page, even when a reference isn't immediately available.
Common Challenges & My Troubleshooting Tips
I've made every mistake in the book when it comes to hands, so let's learn from them together. This table summarizes the most frequent issues and how I personally approach fixing them – think of it as my little cheat sheet for when things go wrong.
Challenge | Why It Happens | My Troubleshooting Approach |
|---|---|---|
| Stiff, Lifeless Hands | Ignoring the natural flow and dynamism; a lack of initial gesture focus. Drawing fingers as rigid sticks. | I always start with the overall gesture of the hand. I look for the gentle S-curve even in a relaxed pose, and the subtle bend or cup in the palm itself. I use my own hand as a dynamic reference to feel the movement. I emphasize the natural arc of the fingers, not just straight lines. I also check how the hand connects to the wrist, ensuring a natural transition. |
| "Sausage Fingers" | Over-focusing on individual fingers too early, neglecting their collective form and tapering. | I begin with the finger block (Step 3) to establish the group's overall gesture and length. Then, when segmenting, I pay close attention to the tapering of each finger and the distinct bumps of the knuckles. I draw the spaces between the fingers (negative space) to define them, and I draw the tip of each finger as a slightly rounded cone or dome shape to avoid a blunt end. I also make sure the knuckles are articulated, not just smooth bumps, and consider how the length of the fingernails can contribute to the individuality of each finger. |
| Incorrect Proportions | Guessing measurements instead of actively observing and comparing. | I constantly compare lengths and widths: palm vs. middle finger, finger segments, thumb length. I use sighting techniques (measuring with my pencil) against my reference. I remember, proportions are relative, not absolute, and vary greatly between individuals. I try drawing the entire hand silhouette first to get the overall width and length accurate before adding detail. |
| Flat, Two-Dimensional Hands | Neglecting the hand's 3D form, especially foreshortening and how parts overlap. | I always think of the hand as a series of boxes, cylinders, and spheres in space, visualizing it in multiple planes (hand planes). I turn my own hand in front of me; I notice how parts overlap and recede. I don't just draw outlines; I think about the planes and surfaces. I imagine a strong light source and use shadows to define form, even in a simple sketch. I try to draw through the hand, imagining the hidden forms. |
| Disconnected from the Arm | Treating the hand as a separate entity rather than an extension of the arm and body. | I always sketch in the wrist and at least part of the forearm as a unified shape. The angle of the arm dictates the hand's natural hang or reach. I consider the elbow and shoulder in relation to the hand's position to ensure a cohesive figure. A good hand always feels like it belongs to a body. |
| Lack of Expression | Focusing solely on technical accuracy without considering the emotional intent and narrative role. | I think of the hand's role in the narrative. What emotion is it conveying? Anger, longing, relaxation? I exaggerate the gesture slightly to enhance expression. I study how hands are used in film, photography, and master paintings. I think about the story the hand is telling and how that emotion might affect the degree of tension or relaxation in the fingers, palm, and even the wrist. |
| Fingers Look Too Similar | Neglecting the individual differences in length, thickness, and curve of each finger. | After blocking in the finger group, I pay close attention to the unique length of each finger (middle longest, pinky shortest), and the slight variations in their taper and bend. I avoid making them uniform cylinders; instead, I observe the subtle differences in their volume and how they articulate. Each finger has its own personality and story. |
| Drawing Hands Without a Reference | Lacking an internal mental model of the hand's structure and typical poses. | I dedicate time to focused anatomical study and drawing my own hands in many poses. I develop a mental library of simple hand forms (fist, open palm, grasp). I also practice drawing gestures from memory, using my internal understanding of structure to inform my initial sketch, then refining it based on general knowledge and subsequent observation. |
| Unconvincing Fingernails | Drawing fingernails as flat, separate elements or ignoring their curve and perspective. | I remember that fingernails are part of the finger's form, curving around it, not just stuck on top. I observe their perspective – more of the top surface is visible when the finger is extended, more of the side when curled. I also note that the nail bed often tapers and isn't a perfect rectangle. They're a window into the finger's form and vital for realism. |
| Hands Holding Complex Objects | Overwhelmed by the object's shape or how the hand interacts with it. | I simplify both the hand and the object into basic geometric shapes first. I focus on the points of contact and pressure, and the negative space created between the hand and the object. I consider how the hand molds to the object's form, rather than just passively resting. I simplify the problem before tackling the details, often using a lighter pencil for initial construction lines. |

FAQ: Your Hand Drawing Questions Answered
Q: What are the main parts of the hand I should focus on when drawing?
A: When you're just starting out, it's easiest to see the hand as three core masses: the palm (a block-like structure), the thumb mass (a distinct wedge), and the collective finger group (a single, curved block). Beyond these main masses, pay attention to the subtle curves of the finger joints and the smooth transition from bone to flesh. After establishing these, you can break down the fingers into phalanges (segments) and define the knuckles. Prioritizing these big shapes ensures correct gesture and proportion from the outset and forms the backbone of drawing realistic hands.
Q: How can I make my drawn hands look less stiff?
A: Start by focusing on the overall gesture and natural curves of the hand, rather than individual fingers. Look for the gentle S-curve in a relaxed hand or the arc of the fingers when curled. Avoid drawing fingers as straight, rigid lines; always consider their natural bend and articulation at the joints. Also, consider the "lifelines" or major creases on the palm; these are not random lines but indicate flexion points and underlying bone structure, adding a sense of organic movement. Observing the flow from the forearm through the wrist into the hand also helps immensely, making the hand feel like a natural extension of the body.
Q: What is the biggest mistake beginners make when drawing hands?
A: The most common mistake is drawing "sausage fingers" – treating each finger as a separate, uniform cylinder too early. Instead, first establish the fingers as a single, cohesive block (the "finger block") to get the overall gesture and proportion correct, then segment them and refine their individual tapering. This prevents a stiff, unnatural look and is key for successful drawing fingers.
Q: How do I handle foreshortening in hands?
A: Embrace it! Think of foreshortening as a series of overlapping, three-dimensional forms receding in space. Break the hand down into simple geometric shapes (boxes, cylinders) first. Draw what you see (compressed shapes and overlaps) rather than what you know is there (the full length of a finger). It's about interpreting depth, not distorting reality, and creates a much more dynamic image.
Q: Is it better to draw from life or photos for hands?
A: Both are invaluable. Drawing your own hand from life provides a three-dimensional model you can manipulate and observe in different lighting, teaching you how to interpret forms in real space. Photo references are great for capturing specific, challenging poses or fleeting gestures. The key is to analyze the reference (life or photo) using the principles of structure, proportion, and perspective, rather than just copying lines. Aim for a balance of both to build a robust visual library.
Q: How do I draw convincing fingernails?
A: Remember that fingernails are not flat additions; they curve with the finger's form. Observe how their visible surface changes with the finger's angle (more top surface when extended, more side when curled). Also, note that the nail bed often tapers slightly, and the cuticle line is rarely a perfect, straight arc. They're a subtle detail that adds a lot to realism and helps to define the finger's form.
Q: What about drawing hands holding complex objects?
A: Simplify the problem! Break both the hand and the object into basic geometric shapes first. Focus on the points of contact and where the hand molds around the object, paying close attention to the negative space created between them. Consider the weight and texture of the object – a heavy object will cause the hand to grip more firmly, potentially changing the shape of the palm and finger placement. Don't be afraid to lighten your lines and refine as you go, ensuring the interaction feels natural and believable.
Conclusion: Your Hand Journey Begins Now
Drawing hands, I know, can feel like one of the most daunting tasks in art. I've been there, staring at a blank page, convinced my artistic future involved only drawing people with their hands firmly tucked into their pockets. But I've learned that with a systematic approach – breaking down the complexity into manageable shapes, understanding the underlying anatomy, embracing perspective, and most importantly, observing with fresh, informed eyes – the "final boss" becomes conquerable. It's a continuous journey of discovery, where every hand you draw, no matter how imperfect, teaches you something new. Remember, progress, not perfection, is the goal!
So grab that pencil, look at your own hand, and start sketching. Don't be afraid to make mistakes; they're just stepping stones to mastery. For a concrete challenge this week, try sketching your own hand in five different active poses (like grasping an object or pointing) for no more than 2 minutes each, focusing only on the big shapes and gesture first. Feel free to share your progress or any specific challenges you encountered in the comments below – we’d love to see your hand journey unfold! Your artistic expression is about to unlock a whole new level of nuance and storytelling. Now go forth and draw those magnificent, expressive hands!
Maybe you'll even consider displaying your art or even selling your prints, you can find more information about buying art here, visiting a museum here, or exploring an artist's timeline here.


