Best Budget Drawing Tablets for Beginners: Your First Digital Art Step
Ready to go digital without breaking the bank? I'll guide you through finding the perfect budget drawing tablet for beginners, sharing my personal tips and top picks.
The Absolute Best Budget Drawing Tablet for Beginners: My Personal Take on Going Digital Without Breaking the Bank – And Why It’s More Accessible Than You Think
I’ve always believed that creativity shouldn't be gated by a hefty price tag, and the world of digital art is no exception. For years, I found my rhythm in the tangible scrape of charcoal and the scent of turpentine, happily sketching with best sketching pencils for artists and experimenting with basic brushstrokes for acrylic painting. But then, the digital realm called, a siren song of endless colors, instant undo buttons, and a universe of new possibilities. The only catch? The daunting question that probably sounds familiar: finding a drawing tablet that wouldn't require selling a kidney.
This article isn't just a guide; it’s a candid conversation with someone who's navigated that exciting, sometimes overwhelming, journey without the financial stress. I remember the thrill, and let's be honest, the slight terror, of wanting to dip my toes into digital art. We'll explore how to choose the perfect entry-level tool and how it can profoundly impact your creative growth, connecting you with a vast world of online resources and a supportive community from day one. My goal here? To demystify the tech, share some unfiltered thoughts from one aspiring digital artist to another, and equip you with everything you need to know to make an informed decision, get drawing, and perhaps, just perhaps, spark a lifelong digital art journey.
I get it. The sheer volume of options can feel like drowning in a sea of tech specs, especially when you're trying to pinch pennies. If you're standing at that same precipice, wondering where to even begin without draining your wallet, you're in exactly the right place. I've been there, stared at the price tags, experimented with the good, the bad, and the surprisingly effective, and I've got some unfiltered thoughts to share – from one aspiring digital artist to another.
This isn't about the fancy, high-end tablets that cost more than my first car, or the ones that magically transform you into a digital art wizard overnight. Nope, we're talking about the champions of affordability, the unsung heroes that let you dive into digital creation without the financial guilt. Trust me, the gap between a budget tablet and a pro one is often in marketing, not in your actual ability to create something breathtaking – that journey starts with the right, budget-friendly tool, not the most expensive one.

I remember seeing an artist friend effortlessly sketch complex designs on her tablet, and it looked like pure magic. But underneath that magic was a tool that was surprisingly accessible, not some unicorn device only for the pros. This article is your candid conversation with someone who's walked that path, tripped, learned, and found the real gems – the ones that genuinely empower your creative vision.
Who is a Budget Drawing Tablet For? And Why is it So Important for Beginners?
This might seem obvious, but it's worth stating: a budget drawing tablet isn't just for those with tight purse strings. It's for anyone taking their first serious steps into the digital art world, curious about exploring new mediums, or even an experienced traditional artist looking to bridge the gap without a huge financial commitment. Think of it as your digital training wheels. It allows you to explore, experiment, and develop crucial muscle memory without the pressure of having invested hundreds (or thousands!) into a high-end setup. It's for the curious doodler, the aspiring illustrator, the seasoned painter wanting to dabble in new textures, and anyone in between. It democratizes digital art, making it a playground for all.
For a true beginner, the subtle differences between a 4096 pressure level tablet and an 8192 level one are often negligible compared to the fundamental act of learning hand-eye coordination with a stylus. Your brain needs to adapt to the new visual-motor connection, developing that crucial muscle memory that makes drawing feel natural and intuitive. A budget tablet allows you to focus purely on these foundational skills without the pressure of a massive investment.## Why Even Bother with a Drawing Tablet, Especially on a Budget?
It's a question I hear often, and frankly, it's a valid one if you're new to the digital art scene. Why invest even a modest amount in a dedicated tablet when you have a perfectly good mouse? The answer, as you'll soon discover, is surprisingly simple and profoundly impactful on your creative journey.
You might be thinking, "Can't I just use my mouse?" And sure, you could. I mean, I certainly tried in the beginning, stubbornly trying to coax a decent line out of a device clearly not made for artistic expression. I remember the sheer frustration, the shaky lines, and the complete lack of control – it felt more like wrestling a greased pig than creating art. But trust me, the difference between drawing with a mouse and drawing with a stylus on a drawing tablet is like the difference between finger painting and using a best acrylic paint brushes for artists with precision. The tablet offers a natural, intuitive experience, freeing your creative flow from the confines of a mouse's rigid clicks and allowing for genuine artistic expression.
Here’s why it’s a game-changer for beginners, even budget ones:

- Natural Feel: This is often the first thing new digital artists rave about. A stylus mimics drawing on paper almost instinctively. You know how a pencil or brush feels in your hand, right? That familiar tactile memory, that deeply ingrained muscle memory from years of traditional art, transfers much more easily with a stylus than trying to coax delicate lines or broad strokes from a rigid mouse. It just clicks – that's the only way I can describe it – in a way a mouse never will for genuine artistic expression. This immediate familiarity drastically reduces the cognitive load, allowing you to focus purely on your creative vision and expression rather than fighting with an awkward input device. Imagine trying to sign your name with a heavy brick, or paint a detailed landscape with a blunt stick; it's possible, but far from ideal. A stylus, conversely, feels like a natural extension of your hand, bridging the gap between physical and digital art. It's truly about minimizing friction between your idea and its execution on screen. This ease of use is paramount for beginners, as it allows for a seamless transition, letting you translate your artistic intent directly onto the screen without battling unfamiliar controls.
- Pressure Sensitivity: Ah, this is the crown jewel, the absolute game-changer! Imagine the subtle control you have with a physical brush or pencil. Press harder, get a thicker, darker, or more opaque line. Press softer, and you get a delicate, feathery, or transparent stroke. This isn't just a gimmick; it's the very soul of expressive digital art, allowing for incredible nuance in painting, sketching, and even basic drawing techniques shading lines. A mouse, bless its heart, operates purely in binary—on or off—which is why it simply can't compete here. Without pressure sensitivity, digital art feels flat; with it, your work comes alive, brimming with the life you inject through varied strokes. This dynamic response allows for truly organic lines, varying opacity, and a feeling of genuine control, mimicking the nuances of traditional mediums. It's the difference between a static image and one that breathes with artistic intention, giving your digital creations that handmade, organic feel.
- Digital Erasability & Non-Destructive Workflow: Unlike traditional mediums where a mistake might mean starting over (or a lot of messy erasing), digital art offers the magical 'undo' button. You can experiment freely, knowing you can always revert. Layers allow you to work on different elements of your artwork independently, meaning you can change the background without affecting your foreground character. This non-destructive approach is a huge confidence booster for beginners! It liberates you from the fear of a ruined canvas, encouraging bolder experimentation and accelerating your learning process. Imagine being able to try out 20 different color schemes without ever committing to one! This flexibility is not just convenient; it's creatively empowering, fostering a fearless approach to art-making, and allowing your ideas to flow without the pressure of permanent mistakes.
- Efficiency & Speed: This is where the long-term benefits really shine. Once you get the hang of it, a tablet significantly speeds up your workflow. I remember the sheer frustration of trying to lasso complex selections in Photoshop with a mouse; it was agonizingly slow and inaccurate. With a stylus, selecting intricate areas, navigating expansive canvases, and laying down intricate details become far more intuitive and quicker than fiddling with a mouse. Tasks that once felt tedious, like repetitive brushwork for texturing or blending, become fluid and rapid, allowing you to achieve more in less time. Your creative ideas can flow from your mind to the screen with minimal technical friction, transforming hours of struggle into moments of inspired creation. This translates to more time actually creating and less time battling your tools, a win-win for any artist.
- Precision: You get far greater control over your lines and shapes. No more shaky mouse lines! Whether you're inking a comic, doing delicate portraiture like capturing the subtle nuances of how to draw a realistic face a step-by-step guide, or sketching architectural plans, the fine motor control a stylus offers is unmatched by a mouse. This precision is invaluable for detailed work, from fine-line illustrations to complex graphic design elements, allowing your vision to translate directly onto the digital canvas, making every stroke count.
- Customization & Workflow Integration: Beyond the raw drawing experience, tablets are designed to integrate seamlessly into a professional digital workflow. Many come with customizable express keys (buttons on the tablet or pen) that can be programmed for your most used shortcuts – 'undo', 'zoom', 'change brush size', even launching specific applications. This level of customization dramatically speeds up your process, allowing you to stay focused on your art without constantly reaching for your keyboard or navigating menus. It truly transforms your digital canvas into a command center tailored to your unique needs, making your workflow feel like a seamless extension of your thoughts. I've found mapping 'undo' and 'brush size' to my express keys alone saves me literally hours of fiddling with menus.
- Ergonomics: It's generally more comfortable for your wrist and arm over long drawing sessions compared to a mouse. Your body will thank you later! The natural grip and fluid movement of a pen reduce the localized strain that often accompanies prolonged mouse use, helping to prevent common issues like carpal tunnel syndrome, tendonitis, and general wrist fatigue that can plague traditional digital artists. Investing in a tablet, even a budget one, is an investment in your long-term creative health, allowing for hours of comfortable, pain-free art creation.
- Long-Term Health Benefits: Beyond just avoiding strain, using a stylus encourages more natural whole-arm movements rather than just wrist movements. This can contribute to better posture and a more balanced distribution of physical effort, which is critical for artists who spend many hours at their desks. It's a subtle but significant shift that can make your artistic journey more sustainable over the years, protecting your most valuable tools: your hands and body. Investing in a tablet is an investment in your creative longevity.
- Unlock Digital Possibilities: This is where the digital realm truly differentiates itself. A drawing tablet grants you access to powerful art software and an almost infinite array of brushes, textures, and effects that would be impossible or incredibly costly to replicate in traditional mediums. It truly opens up a world of creative freedom, allowing you to replicate the rich textures of oil painting, create shimmering digital watercolors, design dynamic animations, or even experiment with cutting-edge 3D sculpting. The sheer versatility is mind-boggling! You can seamlessly explore everything from character design and comic art to intricate pattern making, concept art, storyboarding, and even fashion illustration, all within a single, dynamic, and non-destructive environment. This is the true magic, offering a limitless palette for your imagination.
- Access to Learning Resources and Community: The digital art world is booming with tutorials, online courses, and vibrant communities. Having a tablet means you can actively participate, follow along with digital painting demos, and share your work with a global network of artists, fostering growth and inspiration. This connection to a broader creative ecosystem is invaluable for both learning and motivation, providing endless avenues for skill development and feedback. You're not just buying a tablet; you're gaining a passport to a global art community eager to share and inspire. I've personally learned so much from online forums and tutorials that would have been impossible without a digital tool.
Beyond the Basics: How a Tablet Elevates Your Workflow
It's not just about drawing better; it's about drawing smarter, integrating your creative output into a more modern, interconnected world. This is where digital art truly flexes its muscles and goes beyond simple replication of traditional techniques. It’s about creating a holistic creative ecosystem that empowers your art at every stage, from initial concept to final presentation.
While the core benefits are clear, a drawing tablet also transforms your overall artistic workflow in ways you might not immediately realize. It's not just about replicating traditional art; it's about transcending its limitations and embracing new efficiencies. Imagine, for a moment, being able to iterate on a concept twenty times in the same amount of time it would take to paint one traditional canvas. Or being able to reverse a client's last-minute change with a single click. That's the power we're talking about here!

Consider integrating your digital sketches into graphic design projects, creating storyboards for animations, creating concept art for games, or seamlessly prepping your art for various print and web formats. It opens up a truly multi-disciplinary creative path, allowing your art to live in more places and reach wider audiences, from online portfolios to client presentations. This versatility is, in my opinion, one of digital art's greatest unsung strengths.
Another subtle but profound benefit is the ease of sharing and collaboration. With digital files, you can instantly send your work to clients, share it with online communities for feedback, or even collaborate with other artists on a single project. No more wrestling with scanners or struggling to photograph your physical artwork under perfect lighting! This digital fluidity streamlines the entire creative and professional pipeline, making your art journey less solitary and far more interconnected. I can't tell you how many hours I've saved not having to perfectly photograph a painting for a client; a quick export and it's done!
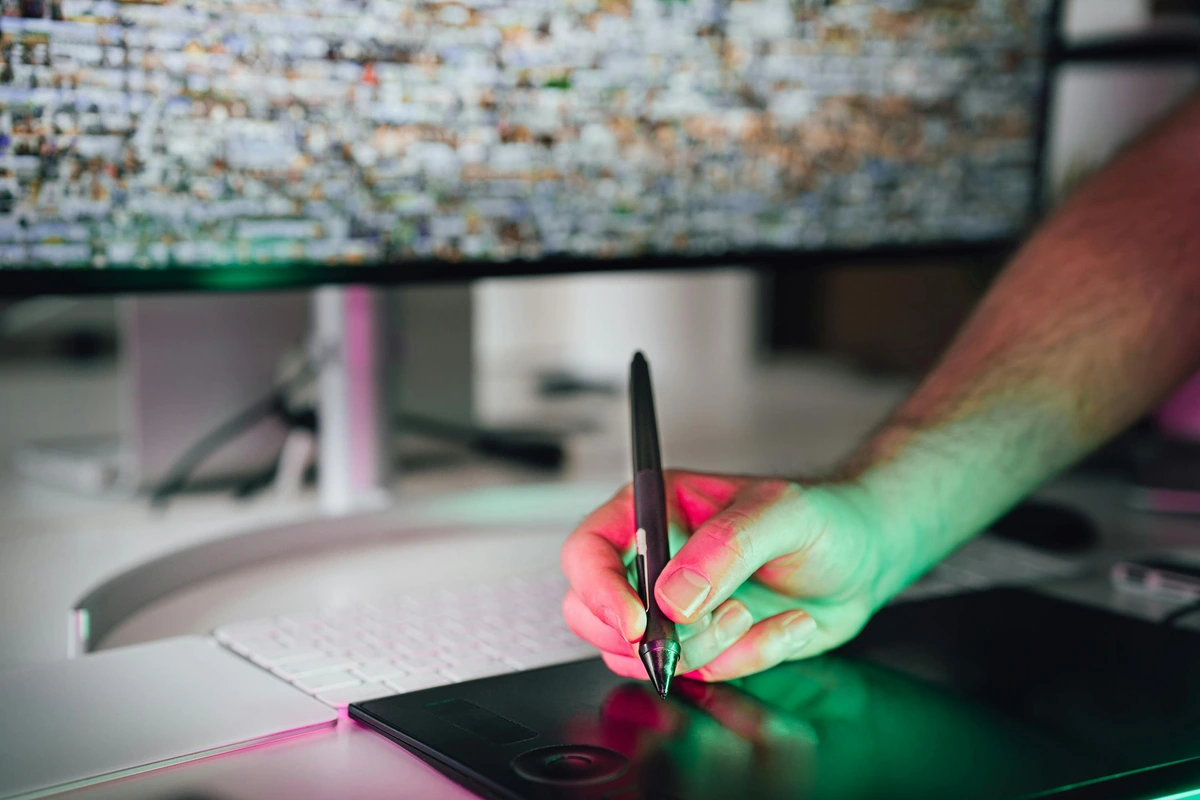
Ah, pen displays – these are the shiny, often aspirational devices that many artists dream of. These are tablets with a high-resolution screen built directly into them that you draw directly on. It feels incredibly natural, almost identical to drawing on traditional paper or canvas, a truly immersive experience. The "disconnect" you experience with a graphics tablet is entirely gone, offering unparalleled immersion. Brands like Wacom Cintiq, XP-Pen Artist, and Huion Kamvas are famous for these, and for good reason – they offer a truly seamless hand-to-eye experience, making them a joy to work with.
However, and this is the big "but" for our budget-conscious journey, they usually come with a significantly higher price tag, placing them firmly outside the "best budget" category for most true beginners. While they're amazing and definitely a long-term goal for many (myself included!), I strongly suggest starting with a graphics tablet to see if digital art truly clicks with you first, before committing to such a substantial investment. These are perfect for artists who require precise color accuracy, prefer the direct 'hand-to-screen' experience for intricate details, or those transitioning directly from traditional painting where that immediate visual feedback is paramount. For professional illustrators, animators, concept artists, and even fine art painters, these often become essential tools, truly enhancing efficiency for those whose livelihood depends on it. But for a beginner, the learning curve on a graphics tablet is manageable enough to fully justify the significant cost savings, allowing you to invest in software or learning resources instead. It’s a smart, pragmatic choice that won't hinder your artistic development. Don't feel pressured by the pros; start where it makes sense for you.
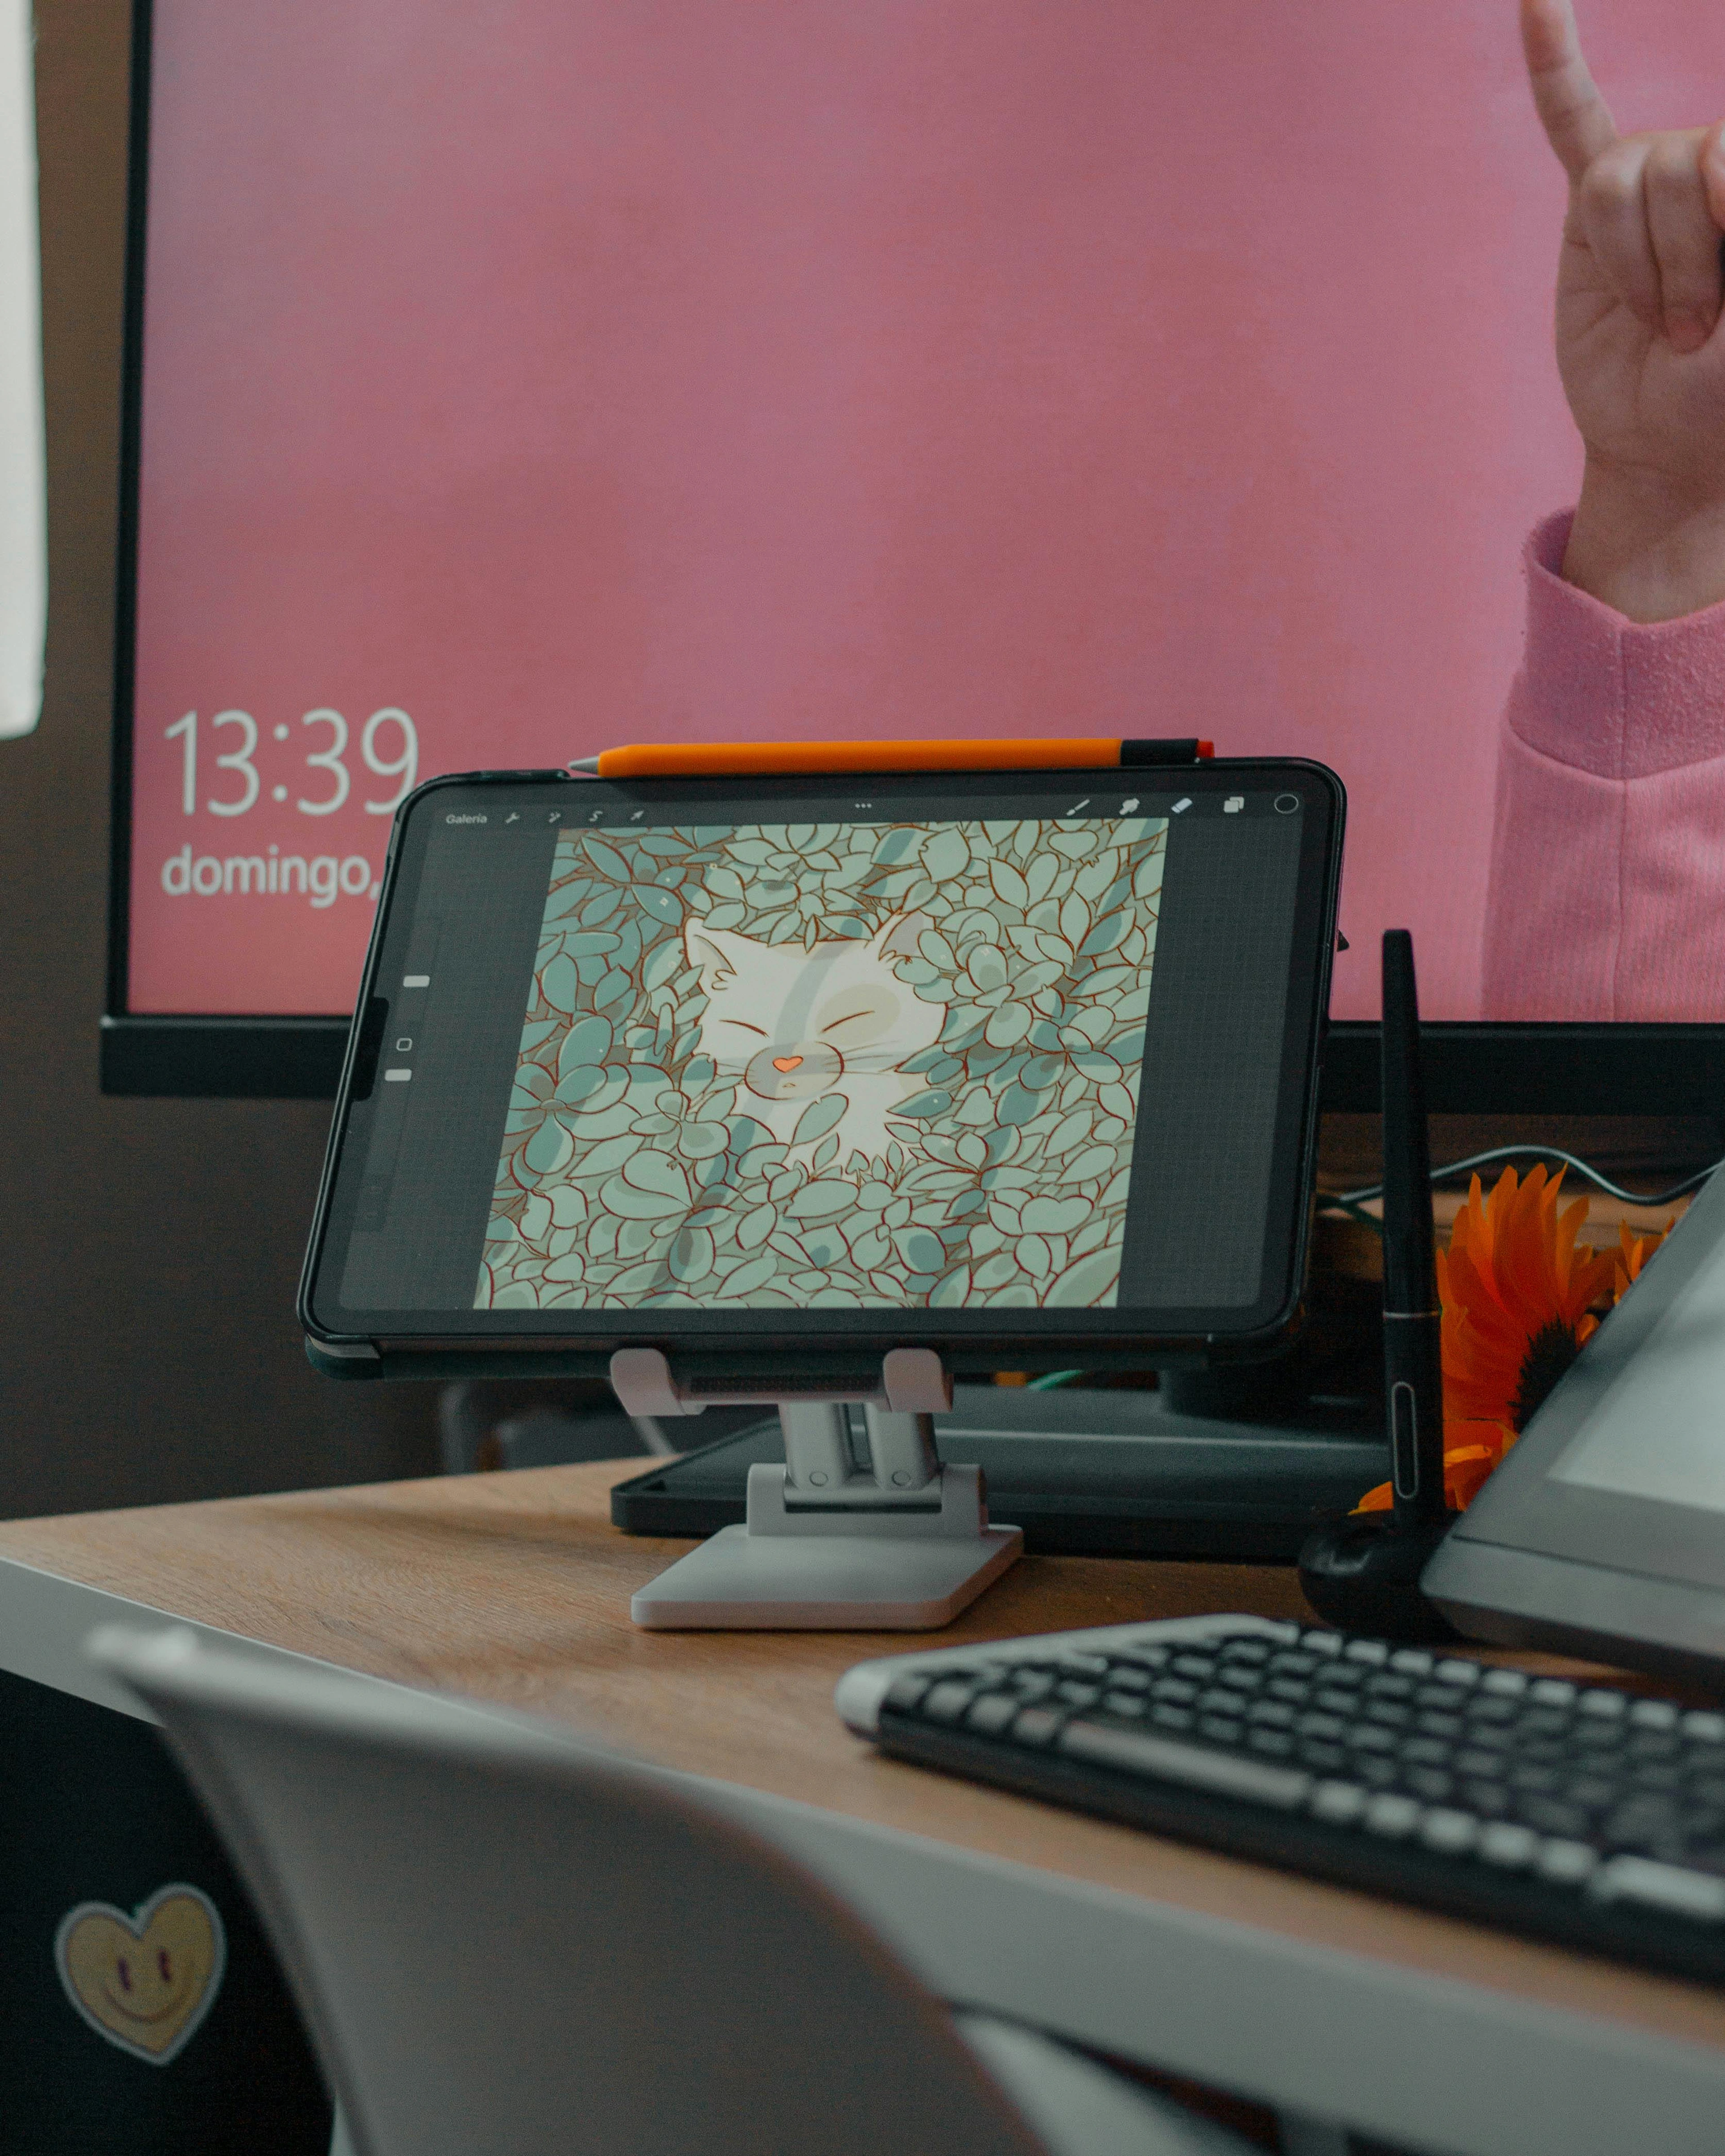
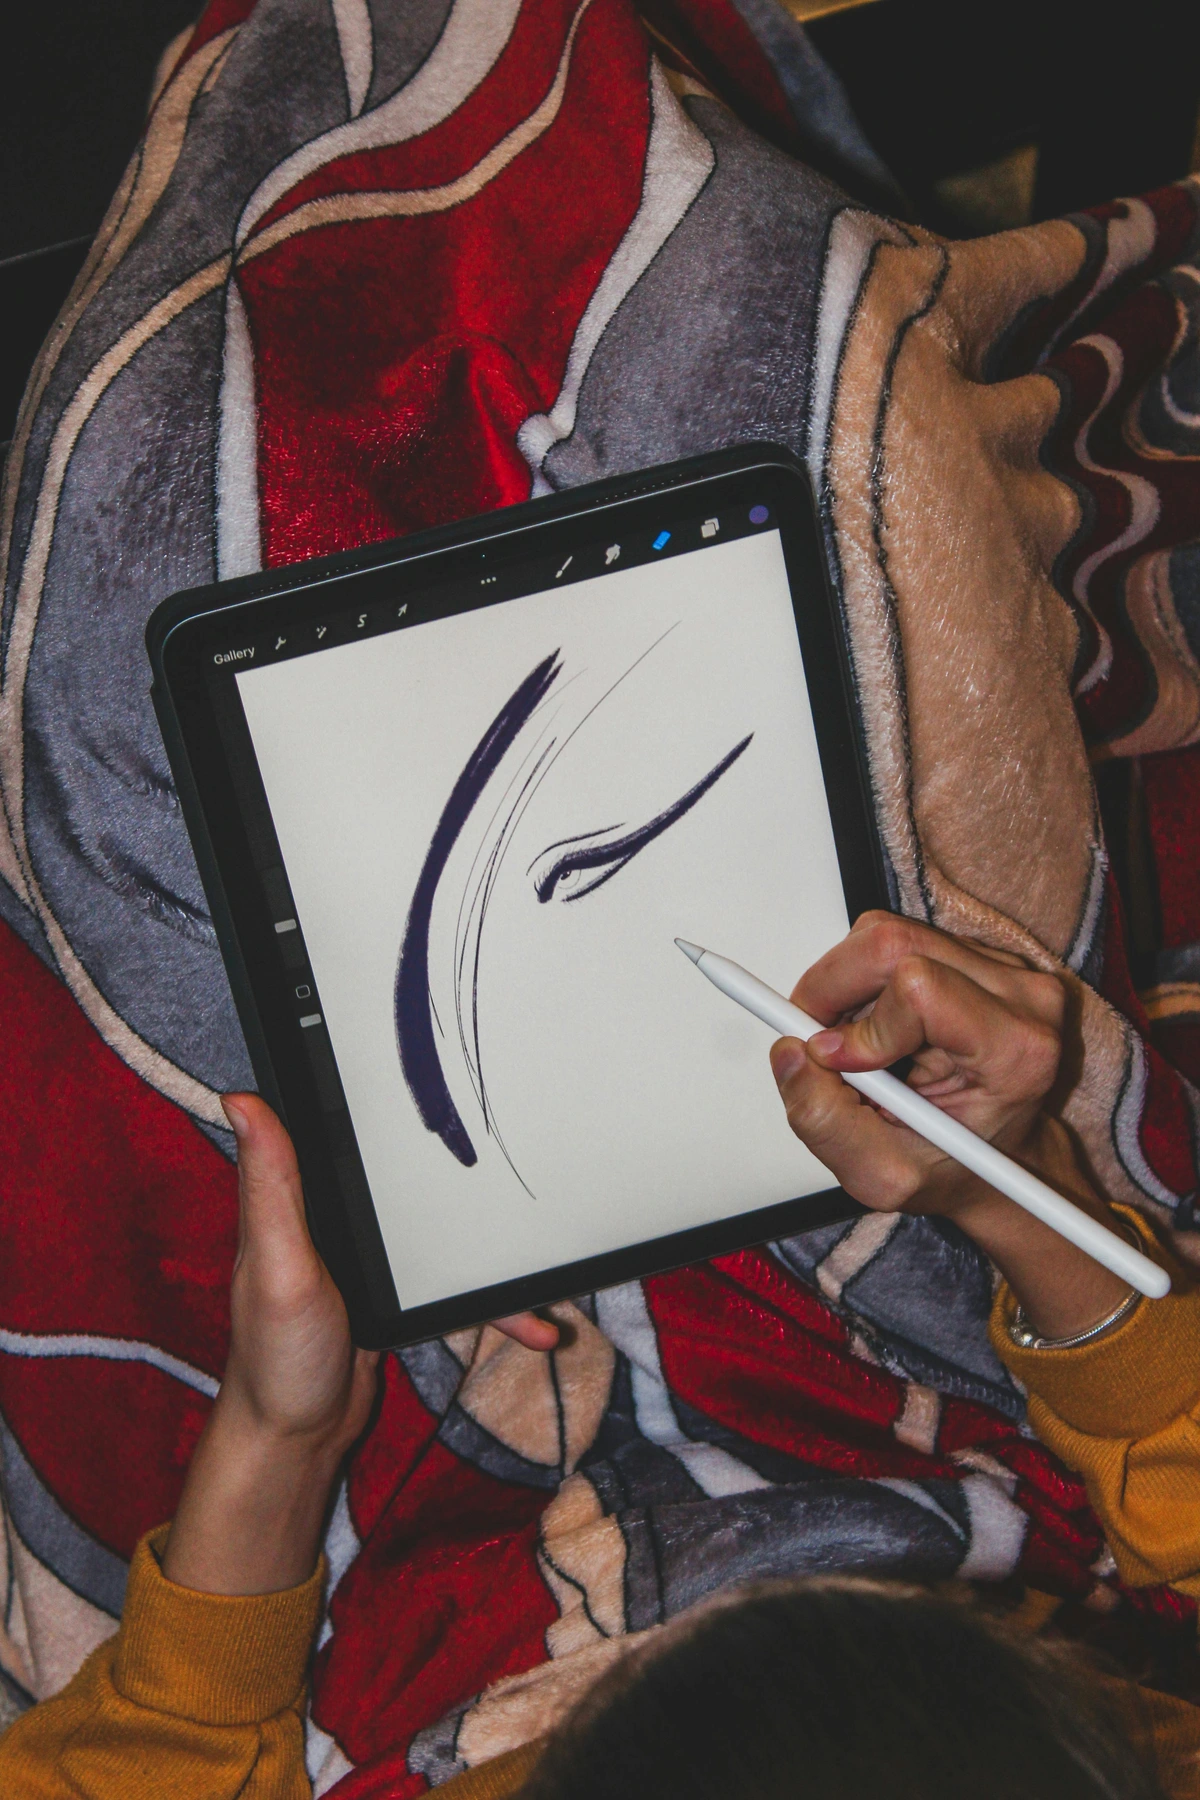
3. Standalone Tablets (e.g., iPad Pro, Samsung Galaxy Tab, Microsoft Surface) - Pricey & Portable Powerhouses
Finally, we have standalone tablets. These are essentially fully functional computers with integrated touchscreens that you can draw on, often with specialized, high-performance pens (like the Apple Pencil, Samsung S Pen, or Surface Pen). They're fantastic for ultimate portability, offering a complete creative studio in a truly compact form factor. You can draw, edit, browse, and share your work all without needing to connect to another computer. For artists who are constantly on the move, or who prefer a single device for all their creative and computing needs, these are incredibly appealing.
However, and here's the unavoidable truth for a budget guide, their price point is generally much, much higher than even a mid-range graphics tablet, making them a less common choice for someone specifically seeking a budget drawing tablet to start with. The premium price tag for the tablet itself, plus the additional cost of the dedicated, often technologically advanced stylus, consistently pushes them out of the entry-level budget category. While incredibly powerful and versatile for professional mobile artists or those with specific cross-platform needs, I wouldn't recommend them as a first-time budget drawing tablet unless you already own one for other purposes. It's a fantastic long-term goal, perhaps, but not a practical starting point when every euro counts. You'll often find yourself paying for the
Here's a quick comparison to help demystify the choices:
Feature | Graphics Tablets (Pen Tablets) | Pen Displays (Screen Tablets) | Standalone Tablets (e.g., iPad Pro) |
|---|---|---|---|
| Screen? | No (use computer monitor) | Yes (draw directly on screen) | Yes (integrated, fully functional) |
| Direct Drawing? | No | Yes | Yes |
| Portability | Very High (lightweight pad) | Medium (requires computer tether) | Very High (all-in-one device) |
| Price Range | Low to Medium | High to Very High | Medium to Very High |
| Target User | Beginners, budget-conscious, desktop users | Professionals, those prioritizing direct feel | Mobile artists, creatives needing full computing |
| Key Benefit | Affordability, excellent value | Direct drawing experience | All-in-one, powerful, portable |
What to Look For: Essential Features for Your First Budget Tablet
When you're sifting through the seemingly endless options for a drawing tablet, it's easy to get lost in a whirlwind of jargon and impressive-sounding numbers. I know I certainly did, spending countless hours down rabbit holes of reviews and forum posts! But for a beginner on a budget, not all specs are created equal. Let me break down the crucial features that actually matter, separating the marketing hype from the genuine game-changers that will genuinely impact your creative experience.
Pen Type: The Unsung Hero (or Battery Drainer?)
This is a surprisingly important factor, and one I wish I'd paid more attention to when I first started. The pen is your direct connection to your art, and its design can profoundly impact your comfort and creative flow.
Before we dive into the tablet's features, let's talk about the tool you'll actually be holding: the stylus, or digital pen. This, my friends, is where the magic truly resides. Your connection to the digital canvas. There are generally two types you'll encounter in the budget market, and this choice is more significant than you might initially think:

- Battery-Free (EMR - Electro-Magnetic Resonance) Pens: These are fantastic – a true gift to digital artists! They draw their power directly from the tablet's electromagnetic field, meaning no batteries to charge, ever. This makes them significantly lighter, often more slender, and inherently more comfortable for long drawing sessions. Crucially, it completely eliminates the frustration of a pen dying mid-stroke during a moment of inspiration. It's an elegant and reliable solution that's often a hallmark of quality, even in budget tablets. Brands like Wacom, Huion, and XP-Pen predominantly use this EMR technology for their graphics tablets, and finding this in a pen is a big green flag in my book. It's a testament to good design and a commitment to the user experience and, frankly, reduces one more headache you don't need.
- Battery-Powered Pens: These pens, as the name suggests, require a battery (usually AAA or AAAA) or need to be recharged periodically via a USB cable. They can sometimes be a bit heavier due to the internal battery, which, over long sessions, can lead to hand fatigue. And let's be honest, the annoyance of a dead pen mid-flow, or constantly remembering to charge it, is, well, annoying and disruptive to your creative process. Beyond the practical inconvenience, there's also the environmental consideration of disposable batteries. For a beginner on a budget, and really, for any artist, I highly recommend prioritizing battery-free pens if you can. It's one less thing to worry about, provides a smoother, more consistent creative experience, and often correlates with a more responsive and durable pen overall. Trust me, the creative flow is precious, and anything that disrupts it – like a dead pen – is a definite no-go.
Pressure Sensitivity: Your Expressive Power – The Heart of Digital Art
If there's one feature I could tell you to prioritize above all else, it's pressure sensitivity. This is, without a doubt, the most important feature of any drawing tablet. It dictates how many levels of pressure the tablet can detect from your stylus, and how subtly it can translate that into your digital strokes.
- What to Look For: Aim for at least 2048 levels, but honestly, 8192 levels is becoming the welcome standard even on many budget models. More levels translate directly to smoother, more nuanced transitions between thin and thick lines, light and dark shading, and varying opacity – basically, an incredibly fine degree of control over your digital strokes. This wide, granular range of sensitivity allows for truly incredible artistic expression, perfectly mimicking the delicate touch of a soft pencil, the broad sweep of a loaded brush, or the nuanced blending of pastels. It's what makes a digital drawing feel alive, giving your strokes personality and depth that a simple mouse click can never achieve.
- My Take: Do NOT compromise here. This is the absolute core of what makes digital drawing feel natural, expressive, and truly artistic. Without sufficient pressure sensitivity, your digital art will lack the organic life, dynamic quality, and emotional depth that makes traditional art so compelling. A mouse, for all its utility, operates purely in binary (on or off), which is why it can't come close to replicating this. This is where your investment, no matter how small, truly pays off in terms of creative freedom and artistic results.
Active Area: Your Digital Canvas Size – Finding Your Sweet Spot
Choosing the right active area is less about 'bigger is better' and more about 'what feels right for your workflow and physical space.' It's like choosing the size of your sketchbook – it's a personal preference that impacts comfort and efficiency.
This refers to the usable drawing surface on the tablet itself – essentially, how much physical space you have to move your pen to control the cursor on your screen. It's like choosing the size of your physical canvas or sketchbook.
- What to Look For: For beginners, a small to medium size (around 6x4 inches to 8x5 inches) is usually perfect. It's compact, portable, and doesn't demand huge, sweeping arm movements across your desk, which can be tiring. While larger tablets can feel expansive and luxurious, they also come with a higher price tag and might actually feel overwhelming or even awkward initially, especially if your desk space is limited or if you prefer fine, wrist-based movements. The key is finding a size that feels natural and doesn't cause you to constantly lift and reposition your pen just to navigate the screen.
- My Take: Don't fall for the "bigger is always better" trap here; it's a common rookie mistake. For most beginners, a smaller active area is actually preferable. It means less desk space used, is significantly easier to travel with, and almost always translates to a lower price point. My first budget tablet was genuinely tiny, and it worked wonderfully for countless sketches, illustrations, and even full digital paintings! Keep in mind that your monitor size matters too; a very small tablet paired with a massive monitor might feel a bit disjointed, requiring larger, more exaggerated hand movements to cover the entire screen. Consider your available workspace, your preferred drawing style (broad arm movements vs. precise wrist work), and how much physical movement you're comfortable with while drawing. It’s all about finding that sweet spot where your digital canvas feels like a natural extension of your physical desk. You want enough room to be comfortable, but not so much that you're constantly stretching or over-reaching.
Resolution (LPI - Lines Per Inch): Digital Detail
LPI (Lines Per Inch) measures how many lines per inch the tablet can detect. In essence, it speaks to the tablet's ability to translate your pen movements into fine, precise detail on the screen, like capturing the subtle nuances of how to draw hands step by step. While it sounds technical, for beginners, it's often less critical than other features.
LPI measures how many lines per inch the tablet can detect. In essence, it speaks to the tablet's ability to translate your pen movements into fine, precise detail on the screen, like capturing the subtle nuances of how to draw hands step by step.

- What to Look For: Anything above 2540 LPI is generally more than sufficient for beginners. In fact, many budget tablets proudly offer 5080 LPI, which is an abundance of detail that you'll likely not even push to its limits when you're just starting out.
- My Take: While this spec is important, it honestly matters less for beginners than pressure sensitivity or active area. Most modern tablets, even budget ones, will have a perfectly sufficient LPI. Unless you're doing highly intricate technical drawings right off the bat, you don't need to obsess over this number. Most modern tablets, even budget ones, will offer a resolution that far exceeds what a beginner needs.
Report Rate (RPS - Reports Per Second): Smoothness
This is how quickly the tablet sends information about your pen's position to your computer.

- What to Look For: Higher RPS means less lag, resulting in smoother, more responsive lines. Look for 200 RPS or higher. Imagine playing a fast-paced video game with input lag – it's frustrating, right? The same applies here. A decent RPS ensures your digital strokes appear on screen almost instantaneously as you draw them, maintaining that crucial connection between hand and art. Anything less and you'll feel that annoying, subtle disconnect, almost like trying to draw on wet paper.
- My Take: You'll notice a difference if this is too low. Aim for something decent to avoid frustrating delays between your hand movement and the line appearing on screen.
Customizable Express Keys: Workflow Boosters & Time Savers
These are those glorious physical buttons strategically placed on the tablet's surface (and sometimes on the stylus itself, usually two buttons near your grip) that you can program with your most frequently used shortcuts. Think essential commands like "undo," "redo," "zoom in/out," "change brush size," "switch to eraser," "toggle full screen," or even activating specific tools. I remember scoffing at these at first, thinking they were just 'extra clutter', but my word, did I eat my words! Being able to instantly switch brushes, toggle between my pen and eraser, or rapidly adjust brush size and opacity without ever breaking my creative flow is a massive time-saver and keeps me immersed in the art.
- What to Look For: Even a handful of these express keys (usually 4-8 on budget models) can make a monumental difference in streamlining your workflow, saving you countless trips to the menu bar with your mouse or keyboard. They truly help keep your focus locked onto the canvas. Think of essential commands like 'undo', 'redo', 'zoom in/out', 'change brush size', 'switch to eraser', 'toggle full screen', or even activating specific tools.
- My Take: While they're not strictly essential for starting your digital art journey, trust me, they become incredibly useful and almost indispensable very quickly. I initially thought they were a gimmick, but once you map 'undo' and 'brush size' to them, you'll wonder how you ever lived without them! It's like having a team of little assistants right at your fingertips, ready to execute your commands. They're definitely a "nice-to-have" feature, and often a deciding factor between two similarly priced budget tablets. Think of them as a customizable command center for your most frequent actions, designed to keep your hands on the tablet and your eyes on your masterpiece.
Software Compatibility: Does It Play Nice?
This is a non-negotiable. You need to make absolutely sure the tablet works seamlessly with your operating system (Windows, macOS, ChromeOS, Android) and, critically, with your preferred art software. Imagine buying a beautiful brush only to find it doesn't work with your best oil paints for beginners – frustrating, right?

- What to Look For: Most major brands universally support Windows and macOS. A fantastic development in newer budget tablets is the inclusion of Android compatibility, which lets you connect them directly to your Android phone or tablet for on-the-go sketching. This is a huge bonus for portability!
- My Take: This is critical, truly. Double-check this before you even think about buying! For free software, I passionately recommend exploring Krita, GIMP, or Autodesk Sketchbook. Knowing what software you plan to use (even if it's just one of the free ones) will guide your tablet choice. And don't forget the burgeoning world of browser-based tools if you need something truly lightweight and accessible.
Connectivity Options: Wired vs. Wireless (The Freedom Factor)
This choice is less about 'better' and more about 'what suits your workspace and preferences.' Both wired and wireless options have their merits and drawbacks, particularly in the budget category.
Most budget tablets connect to your computer via a USB cable. This is reliable, provides a stable connection, and often powers the tablet directly – which means no extra batteries to worry about! However, it does mean one more cable on your desk and limits your drawing distance from your computer. If your workspace is already a jungle of cables, this might be a small annoyance.
Some slightly higher-end budget tablets, and certainly many mid-range options, offer Bluetooth wireless connectivity. This provides incredible freedom of movement, allowing you to draw from a more comfortable distance or position without being tethered to your machine. I personally love the freedom of wireless; it allows me to shift positions, lean back, or even draw from a more relaxed posture. The trade-off is that wireless tablets require internal batteries (which need charging, yes, another thing to remember!) and can occasionally experience minor lag or connectivity drops, though modern Bluetooth technology has significantly improved reliability. Just make sure your computer has good Bluetooth support.
- What to Look For: For strict budget constraints, a wired tablet is perfectly fine and often more reliable – a solid workhorse. If your budget allows for a little extra, the freedom of a wireless connection is a definite luxury that many artists appreciate, and it can truly enhance your comfort during long sessions.
- My Take: My personal preference leans towards wireless for the sheer convenience, but for pure performance and zero latency, wired is always a safe bet. For your first tablet, either is fine, but understanding the pros and cons helps you choose based on your workspace and preference for mobility. Think about your current desk setup: are you okay with another cable, or is wireless a genuine quality-of-life upgrade for you? Sometimes, the simplest decision comes down to the tidiness of your desk!
Tilt Support: The Angle of Attack – Adding Expressive Nuance (A Lovely Bonus)
Some pens offer tilt support, meaning the tablet can detect the angle at which you're holding the stylus, much like a real pencil, charcoal stick, or paintbrush. This functionality allows for much more natural and intuitive shading, broader strokes, and a greater variety of line weights. It's especially useful for calligraphic work (where pen angle defines the stroke), painting large areas with textured brushes, or achieving a looser, more gestural feel. Essentially, it mimics the real-world behavior of a physical brush, allowing you to control the thickness, texture, and opacity of your lines simply by tilting the pen, rather than just adjusting pressure. If you've ever experimented with essential calligraphy supplies for beginners, you'll immediately understand the value here.
- What to Look For: Not all budget tablets have this, as it adds a bit more complexity and cost. However, if you're serious about digital painting, concept art, or calligraphic styles, it's a feature to actively consider. It's often found on slightly higher-end budget models and almost universally on mid-range and professional devices. It's a hallmark of a pen that's designed for genuine artistic expression.
- My Take: For absolute beginners, it's not strictly essential for starting your digital art journey. You can learn and create amazing art without it. But, if your budget allows for a tablet that includes tilt support, it's a really lovely feature that adds another significant layer of naturalism and expressiveness to your digital art. It can make certain artistic techniques feel far more intuitive and organic, truly enhancing that "feels like paper" experience. Think of it as going from a basic crayon to a proper, angled brush – a subtle but powerful upgrade that truly unlocks a new dimension of creative control. It’s a feature that will grow with you as your skills develop.
Build Quality and Durability: Will It Last?
While we're talking budget, "cheap" doesn't have to mean "flimsy." You want a tablet that feels robust enough to handle the occasional bump or being tossed in a bag. This is an investment in your creative journey, so you want it to last.
While we're talking budget, "cheap" doesn't have to mean "flimsy." You want a tablet that feels robust enough to handle the occasional bump or being tossed in a bag.

- What to Look For: Check reviews for comments on materials, cable durability, and pen construction. A solid, weighty feel often (but not always) correlates with better build.
- My Take: A budget tablet should still feel like a proper tool, not a toy. Think of it as a long-term investment in your artistic growth and comfort. My first budget tablet, while humble, was a workhorse for years! Look for reviews that specifically mention how the tablet has held up over time, and pay attention to comments about the pen's build, the cable connection, and the overall rigidity of the tablet body. A sturdy build gives you peace of mind, allowing you to focus on your art rather than worrying about your gear. It's about finding that sweet spot between affordability and reliability.
My Top Picks: The Absolute Best Budget Drawing Tablets for Beginners (My Unfiltered Recommendations)
Alright, after all that talk about specs, features, and the existential dread of too many choices, let's get down to the brass tacks – the actual tablets! Based on my personal experience, countless hours of research, and what I've consistently seen recommended across the digital art community for combining incredible value with solid performance, here are my top picks. These are the unsung heroes that won't require you to sell a kidney to start your digital art journey. I've focused on models that offer a fantastic balance of features for their price, aiming to give you the most bang for your buck. Think of these as your trusted first steps into a bigger, digital world, where your creative potential is the only limit.
1. Wacom Intuos (Small or Medium) - The Gold Standard for Beginners
When I think about where most serious digital artists start, Wacom is almost always the first name that comes to mind. It’s like the reliable, sturdy bicycle you learn to ride on – perhaps not the flashiest, but incredibly dependable and well-engineered.
- Best For: Reliability seekers, those making the leap from traditional mediums, artists who value driver stability above all else, and anyone who wants a "set it and forget it" experience. It's the sturdy, reliable friend you want by your side when you're just starting out.
Wacom is, for many, the industry standard in digital art hardware, and for very good reason. Their Intuos line offers fantastic entry-level options that feel like true professional tools, just scaled down to a more accessible size and price point. The build quality is consistently solid and robust, and their drivers are, in my extensive experience, incredibly reliable – a monumental plus for avoiding frustrating tech hiccups and getting straight to creating. I remember the sheer relief of just plugging it in and having it just work – something you truly appreciate when you're just starting out.
While they might be slightly pricier than some competitors in the budget bracket, the investment often pays off handsomely in terms of longevity, seamless performance, and general peace of mind. Wacom's reputation for quality, coupled with their excellent customer support, also means a strong resale value if you ever decide to upgrade, making it a very safe first purchase. They often come bundled with trial versions of popular creative software, which is a nice bonus for beginners, offering a glimpse into the professional ecosystem without immediate commitment. This blend of reliability and value makes the Wacom Intuos a true standout.
Feature | Wacom Intuos Small (Bluetooth) | Wacom Intuos Medium (Bluetooth) |
|---|---|---|
| Price Range | €70-€100 | €120-€150 |
| Active Area | 6.0 x 3.7 in (152 x 95 mm) | 8.5 x 5.3 in (216 x 135 mm) |
| Pressure Levels | 4096 | 4096 |
| LPI | 2540 | 2540 |
| Express Keys | 4 | 4 |
| Connectivity | USB & Bluetooth | USB & Bluetooth |
| Pros | Unmatched reliability, excellent drivers, compact, incredibly durable, good bundled software offers | Larger active area for more expansive movements, same Wacom quality |
| Cons | Can be slightly pricier than some rivals, 4096 pressure levels (still excellent, but some rivals offer 8192) | Same as Small, but larger footprint |
| Resale Value | Excellent (Wacom brand recognition is strong) | Excellent |
| Bundled Software | Corel Painter Essentials, Clip Studio Paint Pro (2-year license), Corel AfterShot Pro (2-year license) | Corel Painter Essentials, Clip Studio Paint Pro (2-year license), Corel AfterShot Pro (2-year license) |
2. Huion H420 / H640P / H610PRO V2
Huion has truly shaken up the drawing tablet market, offering compelling alternatives to the established giants. They’re like the ambitious indie studio making groundbreaking games – maybe not as polished as the AAA titles, but often more innovative and feature-packed for the price.
- Best For: Budget-conscious artists looking for feature-rich tablets, excellent pressure sensitivity, and often a larger active area without breaking the bank. These are the ambitious upstarts giving the established players a run for their money.
Huion has really stepped up its game in recent years, becoming a true force in the budget tablet market. They consistently offer incredible value, often packing a generous amount of features and high pressure sensitivity levels into a lower price point. If you're willing to potentially troubleshoot a driver or two (though their software has greatly improved), you'll get a lot of bang for your buck here. Huion tablets are particularly known for their rapid innovation, frequently introducing features once reserved for premium brands into the budget segment. Their active online community also provides ample resources for new users, which is a massive plus when you're navigating new tech. I've found their commitment to evolving their product lines truly impressive, demonstrating that 'budget-friendly' doesn't mean sacrificing cutting-edge features.
Feature | Huion H420 | Huion H640P | Huion H610PRO V2 |
|---|---|---|---|
| Price Range | €30-€50 | €40-€70 | €60-€90 |
| Active Area | 4.0 x 2.23 in (102 x 57 mm) | 6.3 x 3.9 in (160 x 99 mm) | 10.0 x 6.25 in (254 x 159 mm) |
| Pressure Levels | 2048 | 8192 | 8192 |
| LPI | 4000 | 5080 | 5080 |
| Express Keys | 3 | 6 | 8 + 16 Soft Keys |
| Connectivity | USB & Android support | USB & Android support | USB & Android support |
| Pros | Extremely affordable, very compact, good for signatures/quick sketches | Excellent value, great pressure sensitivity, good for beginners | Large active area, many express keys, solid performance |
| Cons | Very small active area, lower pressure levels | Drivers can be finicky for some, smaller active area for some | Drivers can be finicky for some, smaller active area for some, potentially less polished software |
| Innovation | Consistent updates and new features | Rapid innovation, often leading features | |
| Tilt Support | No (H420), Yes (H640P/H610PRO V2) | No (H420), Yes (H640P/H610PRO V2) | |
| Community Support | Large and established | Growing and active |

3. XP-Pen Deco 01 V2
XP-Pen is another strong contender that consistently punches above its weight in the budget category. The Deco 01 V2, in particular, has garnered a reputation as the workhorse of the entry-level market. If you're looking for generous drawing space without the premium price tag, this one is often the answer.
- Best For: Artists who want a large active drawing area, excellent performance, and pen tilt support at an incredibly attractive price point. This is the dark horse of the budget world, consistently over-delivering on features.
XP-Pen is another strong contender, consistently delivering quality products in the budget market. The Deco 01 V2, in particular, is a perennial favorite. Why? Because it offers a remarkably generous active area and a robust feature set for its price, making it feel like a much more expensive tablet. It's often recommended for beginners who feel cramped on smaller surfaces and crave more room to move their arm. The inclusion of pen tilt support at this price point further enhances its value, making it an excellent choice for artists wanting to explore more expressive brushwork, from calligraphy to broad, gestural strokes. It's a fantastic value proposition that punches well above its weight, proving that you don't always have to sacrifice size or advanced features for affordability.
Feature | XP-Pen Deco 01 V2 | ||
|---|---|---|---|
| Price Range | €50-€80 | ||
| Active Area | 10 x 6.25 in (254 x 159 mm) | ||
| Pressure Levels | 8192 | ||
| LPI | 5080 | ||
| Express Keys | 8 | ||
| Connectivity | USB & Android support | ||
| Pros | Large active area, excellent pressure sensitivity, good build quality, pen tilt support | ||
| Cons | Some users report driver issues, less established brand than Wacom, driver updates can be less frequent | ||
| Tilt Support | Yes | ||
| Software Bundle | Often includes trial or full versions of creative software | Often includes trial or full versions of creative software | Often includes trial or full versions of creative software |
Beyond the Specs: What Else Matters? – The Hidden Value
When you're navigating the waters of buying a budget tablet, the raw technical specifications are undeniably important. But, I've found that there are other, softer, often overlooked factors that can significantly impact your overall experience, sometimes even more than an extra thousand levels of pressure sensitivity! These are the 'quality of life' features that truly make a difference in your long-term satisfaction.
When you're navigating the waters of buying a budget tablet, the raw technical specifications are undeniably important. But, I've found that there are other, softer, often overlooked factors that can significantly impact your overall experience, sometimes even more than an extra thousand levels of pressure sensitivity!
- Customer Support & Warranty: Even the most meticulously engineered tech can sometimes have issues, or you might just have a simple setup question. A brand with responsive, knowledgeable customer support and a clear, fair warranty policy can save you an incredible amount of headaches and frustration. Always check reviews specifically for user experiences with a brand's support. This is particularly crucial for budget brands, as reliable support can bridge the gap between a minor, frustrating issue and a completely derailed creative session. Look for a minimum 1-year warranty; it's a small detail that offers huge peace of mind. A good warranty means the manufacturer stands behind their product, and that's invaluable.
- Returns Policy: Before you buy, know the return policy of the retailer (and the manufacturer). If the tablet just doesn't feel right for you, or if you encounter an unsolvable technical issue, knowing you can return it for a refund or exchange offers invaluable peace of mind. Nobody wants to be stuck with tech that doesn't gel with their workflow.
- Community & Resources: A strong online community (forums, social media groups, Discord servers, YouTube tutorials) dedicated to your chosen tablet brand or model can be invaluable for troubleshooting, sharing tips, and finding inspiration. Learning from others' experiences and having a place to ask questions can significantly accelerate your learning curve. It's like having a free, global support group for your digital art journey. Don't underestimate the power of collective knowledge and encouragement!
- Bundled Software: Some tablets come with free or discounted software licenses. While I advocate for free software, a bundled full version of a popular program can be a fantastic bonus and save you money down the line. Always check what's included, as these often provide a great starting point before investing in paid alternatives. Sometimes, these bundles alone can be worth a significant portion of the tablet's cost! Just make sure it's software you'll actually use, not just a bunch of bloatware.
What to Expect as a Beginner: The Learning Curve (It's Real!)
I won't lie to you: using a graphics tablet for the first time feels a bit odd. That whole "drawing here, looking there" thing takes some getting used to. It's like learning to ride a bike after years of walking – you know the motions, but the medium is different.

- Practice, Practice, Practice: This is non-negotiable, my friend. The more you use it, the more natural and intuitive it becomes – just like learning any new skill. Don't aim for masterpieces on day one; that's a recipe for frustration. Instead, dedicate short, regular sessions to simple, foundational exercises: practice drawing straight lines, perfect circles, smooth curves, and hatching exercises. Try tracing images you like, or follow basic drawing techniques shading lines tutorials specifically adapted for digital. There are literally tons of free resources and tutorials online waiting for you. Consistency beats intensity every single time. Start with simple doodles, embrace the learning process, and don't be afraid to make 'ugly' art – it's all part of the journey to finding your digital voice. Your muscle memory will develop, I promise.
- Embrace the Undo Button: This is your superpower in digital art! Unlike traditional mediums, you can experiment, make mistakes, and instantly erase them without a trace. Use it liberally. It's a fantastic tool for learning and reducing the fear of a ruined canvas.
- Experiment with Software: Each art program, like each set of physical brushes, feels a little different. Don't be afraid to try a few to find what truly clicks with you. Krita is a fantastic free option, but explore others too! You'll often find a program's interface and tools just 'speak' to you better than another. Many free programs offer robust features, so you don't need to spend a fortune to get started.
- Join Online Communities: The digital art community is vast and incredibly supportive. Join forums, Discord servers, or social media groups dedicated to digital art or specific software. Seeing other artists' workflows, asking questions, and getting feedback can accelerate your learning and keep you motivated. It's an invaluable resource for both technical help and artistic inspiration.
- Set Up a Comfortable Workspace: This might seem minor, but it's crucial. Ensure your chair is ergonomic, your monitor is at eye level, and your tablet is positioned comfortably. If your physical setup is awkward, it will only amplify the initial learning curve and can lead to discomfort. A comfortable workspace allows you to focus solely on your art. This also means good lighting, minimal distractions, and perhaps even a dedicated spot for your tablet.
Setting Up Your First Tablet: A Quick Guide
Generally, setting up your first digital drawing tablet is pretty straightforward. However, a few key steps can make all the difference between a smooth start and a frustrating tech battle. Trust me, I've seen (and made) all the mistakes, so let's get you set up for success!
- Unbox: Take everything out. Confirm all parts (tablet, pen, cable, extra nibs, nib remover tool) are present.
- Connect: Plug the USB cable from the tablet into your computer. If it's Bluetooth, follow the pairing instructions, ensuring your computer's Bluetooth is enabled and discoverable. A stable connection is key!
- **Install Drivers: This is absolutely crucial, and probably the most common step where new users run into trouble (and then give up!). Go directly to the manufacturer's official website (Wacom, Huion, XP-Pen – usually under "Support" or "Downloads") and download the latest drivers specifically for your model and operating system. CRITICAL: Before installing new drivers, always, always make sure to uninstall any older tablet drivers first (especially if you're switching brands or upgrading from an old tablet) to prevent frustrating software conflicts. Use a driver cleaner tool if the manufacturer provides one. Once downloaded, install them, and then immediately restart your computer. Seriously, do not skip this step! Generic drivers might allow basic functionality, but specialized drivers are what unlock the full magic of your tablet: pressure sensitivity, express keys, tilt recognition, and smooth performance. Without the correct, up-to-date drivers, your tablet is just an expensive, fancy mousepad – and who wants that? This single step often resolves 90% of all setup issues.
- Calibrate (if applicable): Some tablets, especially pen displays, might have a calibration option in their settings to align the pen to your screen. This ensures your cursor appears exactly where your pen tip is.
- Test: Open your preferred art software (Krita, Sketchbook, or even MS Paint for a quick check!) and start drawing! Play with different brushes and see if pressure sensitivity is working correctly (thicker/thinner lines based on pressure).
- **Customize (Optional but Recommended): Dive into the tablet's settings panel (usually found in your system tray or control panel). This is where you adjust pressure curves to match your hand, program express keys to your most used shortcuts (undo, zoom, brush size!), and tailor the active area to your comfort. Spend some time here; a personalized setup makes a huge difference in efficiency and comfort – it's where your tablet truly becomes yours.
- **Reboot and Re-test: After installing drivers and customizing settings, a fresh restart of your computer can often resolve minor glitches and ensure everything is properly initialized. Then, open your art software and give it a thorough test run! If you encounter issues, refer to the troubleshooting section below. Sometimes, a simple reboot is all it takes to get everything humming along smoothly.
Troubleshooting Common Issues: Don't Panic!
Even with the best instructions and the most optimistic attitude, sometimes things go a little sideways. That's just the nature of technology (and, let's be honest, art!). But don't panic! Most common issues with budget drawing tablets have surprisingly simple fixes. Here are a few glitches I've encountered (and overcome) and their quick solutions, so you can get back to creating without pulling your hair out.

- No Pressure Sensitivity: This is the most common and often most frustrating issue.
- Fix: Always, always, always reinstall the latest drivers from the manufacturer's website. Seriously, do it. Then restart your computer. Also, check your art software settings – sometimes pressure sensitivity needs to be enabled or calibrated within the program itself.
- Pen Not Responding:
- Fix: Check the USB cable connection. If it's a wireless tablet, ensure it's charged and properly paired via Bluetooth.
- Laggy Lines:
- Fix: This could be a low report rate (RPS), but also try closing other demanding applications, ensuring your computer meets the art software's minimum requirements, or updating your tablet drivers.
- Pen Input Lag or Jitter: This can feel like trying to draw on ice, with your lines never quite landing where you intended.
- Fix: This can sometimes be a driver issue, so reinstalling drivers is a good first step. It can also be caused by interference from other USB devices or even older USB ports. Try connecting your tablet to a different USB port, preferably a newer USB 3.0 port if available. Closing heavy background applications can also help, as your computer's resources might be strained. Ensure your computer's graphics drivers are also up to date. Sometimes, your computer is just trying to juggle too much at once, and a little decluttering of open applications can make all the difference. Also, check for any background software that might be trying to 'optimize' your cursor, as this can interfere.
- Cursor Jumps or Skips: This can be incredibly annoying when you're trying to draw a clean line, almost like your pen is having a mind of its own.
- Fix: Often caused by electromagnetic interference from other electronics. Try moving your tablet away from speakers, monitors, Wi-Fi routers, or other electronic devices. Also, check for driver conflicts, especially if you have other drawing input devices (like a trackpad or another tablet's software) installed. Sometimes, a faulty or cheap USB cable can also cause intermittent connection issues, leading to skips or jitters. Try a different, high-quality USB cable if possible. Ensuring your computer's USB ports are not overloaded can also help. A little investigative work can save you a lot of grief.
Free and Budget-Friendly Software to Get You Started
This is a crucial point, and one that often surprises beginners: you absolutely, positively do not need expensive software to start your digital art journey. The idea that you need to shell out a fortune for Photoshop is a myth that keeps many aspiring artists from even beginning. There are some truly excellent free options that I've personally used and enthusiastically recommend, offering professional-grade features without the professional price tag.
- Krita: My absolute favorite for digital painting and drawing, bar none. It's open-source, incredibly powerful, boasts a fantastic brush engine, and has a vibrant, supportive community. For a beginner diving into digital illustration or painting, Krita offers professional-grade tools without the professional price tag. It truly holds its own against paid software, offering everything from sophisticated brush customization to even animation capabilities. Seriously, try Krita first; you won't regret it, and you'll be amazed at what you can achieve for free. Its comprehensive suite of tools makes it ideal for everything from comic pages to intricate digital paintings – it's a true powerhouse for raster art.
- GIMP: A robust, free, open-source image editor often (and somewhat unfairly) compared to Photoshop. While it excels at photo manipulation, graphic design, and even web design tasks, it also includes a decent set of drawing and painting tools. It might have a steeper learning curve for pure drawing compared to the more artist-focused Krita, but it's a powerful and versatile option if you also need robust photo editing capabilities alongside your digital art endeavors. Think of it as a Swiss Army knife for digital media, capable of handling a wide array of creative tasks, even if it's not strictly tailored for painting from the ground up. It's an excellent choice if your digital art also involves a lot of image editing.
- Autodesk Sketchbook: This one has an interesting history – it was free for a long time, then went to a paid subscription, but it's still very affordable and sometimes free depending on your platform (check their website!). Its interface is incredibly user-friendly and intuitive, with a minimalist UI that puts your canvas front and center. This makes it a fantastic choice purely for sketching, inking, and conceptualizing, feeling very much like a traditional sketchbook without the digital complexities of other programs. It's a great entry point for those intimidated by more feature-heavy software, offering a clean and distraction-free environment for pure artistic creation. Sometimes, less is truly more when you're focusing on foundational drawing, and Sketchbook excels at that focused, fluid experience.
- Cloud-Based/Browser-Based Art Tools: For the absolute minimalist, or if you're on a very old machine or a public computer, consider browser-based options. Think Sketchpad.io, Aggie.io, or Pixilart. They might lack advanced features and offline capabilities but offer a quick, zero-installation way to doodle, experiment with basic digital painting, or collaborate with friends. It’s a great way to dip your toes in before committing to a download, or for quick conceptual sketches on the go. These are perfect for quick brainstorms, collaborative projects, or simply exploring digital tools without any commitment.
- Vectr / Inkscape: If you're leaning towards vector art (think scalable logos, sharp graphics, illustrations that need to resize perfectly without pixelation), these are great free vector editors. Vector art is based on mathematical equations rather than pixels, meaning you can scale your artwork infinitely without losing quality. This is distinct from raster art (like what you'd create in Krita or GIMP), which is pixel-based and can become blurry if enlarged too much. Knowing the difference helps you choose the right tool for the job! Inkscape, in particular, is a powerful open-source tool for creating scalable graphics, perfect for design work that needs to look crisp at any size.
Considering Paid Software: When to Upgrade Your Digital Toolkit
While the free software options I've listed are incredibly robust and perfect for getting started (and even for professional work!), you might eventually wonder about paid alternatives. Here's a quick thought on when you might consider them:

- Adobe Photoshop / Illustrator: The industry standard for a reason. Photoshop is unmatched for raster painting, photo manipulation, and complex layering. Illustrator is the go-to for vector art, perfect for logos, scalable graphics, and crisp illustrations. They come with a subscription model, which can be a barrier for beginners but offers unparalleled power and integration for professionals.
- Clip Studio Paint (Manga Studio): A favorite among comic artists, illustrators, and animators. It excels at line art, inking, and has fantastic perspective tools. It's available as a one-time purchase or a monthly subscription, offering a very powerful experience without the ongoing Adobe cost.
- Procreate (iPad Only): If you eventually venture into standalone tablets like the iPad, Procreate is almost universally lauded as the best drawing app for that platform. It's a one-time purchase, incredibly intuitive, and surprisingly powerful.
My advice? Master the free tools first. They will teach you the fundamentals. When you hit a wall, or a specific professional need arises that only a paid program can meet, then consider the investment. Your skill is always more important than the software's price tag. Don't let the shiny allure of expensive software distract you from the true work of developing your artistic voice and proficiency.
For those of you already familiar with traditional mediums like best alcohol-based markers for artists or essential charcoal drawing supplies for beginners, transitioning to digital can feel like learning a new instrument, but the fundamentals of composition and form remain. It's just a different set of tools, allowing for new possibilities, much like the vibrant, abstract pieces you'll find if you explore my own work.
Accessories That Enhance Your Budget Tablet Experience
While your budget tablet is perfectly ready to go out of the box, a few affordable accessories can significantly enhance your comfort, streamline your workflow, and even extend the longevity of your device. Think of them as small, quality-of-life upgrades that make a big difference, without breaking the bank.
- Drawing Gloves (Artist Gloves): These usually cover your pinky and ring finger, preventing friction between your hand and the tablet surface. They reduce smudges from natural oils and allow your hand to glide smoothly, especially during long drawing sessions. A very inexpensive comfort upgrade!
- Tablet Stand: Elevating your tablet to a comfortable angle can drastically improve ergonomics and reduce neck/wrist strain. Many budget-friendly, adjustable stands are available.
- Screen Protectors (for Pen Displays/Standalone): While graphics tablets don't have screens to protect in the same way, if you ever upgrade to a pen display, a matte screen protector can reduce glare and provide a satisfying, paper-like texture for drawing.
- Extra Nibs: Your pen's nibs (the tiny plastic tip) will wear down over time, just like a pencil lead. This is completely normal! Most tablets come with a few, but buying an extra pack when you purchase the tablet is a smart move.
- Pen Case/Holder: While many pens come with a holder, a dedicated case can protect your stylus from accidental drops or damage when not in use or during travel.
- Alternative Drawing Surfaces/Films: For graphics tablets, some artists find that applying a textured screen protector (even if it's not a screen) can give a more "paper-like" feel, adding a bit of tooth to the smooth plastic surface. This is entirely optional and a matter of personal preference.
Maintenance and Care Tips: Keeping Your Tablet Happy
Maintenance and Care Tips: Keeping Your Tablet Happy
So, you’ve got your budget drawing tablet. Congratulations! This isn't just a piece of tech; it's a gateway to endless creative exploration. How do you keep it performing at its best and lasting for years? A little care goes a long way, and trust me, your future self (and your wallet) will thank you for it.
- Protect the Surface: The drawing surface of your tablet can, and likely will, get scratched or worn over time from the constant friction of the pen nib. This isn't just cosmetic; it can affect pen glide and the overall feel of your drawing experience. To mitigate this, some artists use a thin, clear protective film or even a carefully taped-down sheet of smooth paper to add an extra layer of protection and subtly vary the drawing feel (some like a bit more "tooth"). Be mindful of pressing excessively hard with your stylus, as this significantly accelerates wear on both the nib and the tablet surface. If a specifically designed screen protector (even for opaque graphics tablets) is available for your specific model, it's often a worthwhile investment that can extend the life of your drawing surface and help maintain the tablet's resale value. Think of it as preserving your digital canvas!
- Replace Nibs: This is arguably the most frequent maintenance task, and one that's often overlooked by beginners. Your stylus nibs (the tiny plastic tip of the pen) will wear down, just like a pencil lead or a charcoal stick. This is completely normal! Most tablets come with several replacement nibs and a small, often tweezer-like tool to change them. Don't wait until the nib is completely blunt, worn to a sharp point, or worse, starts to scratch your tablet surface; a dull or misshapen nib can feel unresponsive, hinder your precision, and even damage the tablet. Pay close attention to the feel: if it starts to drag, feel rough, or create inconsistent lines, it's probably time for a fresh one. You can usually buy packs of replacement nibs directly from the manufacturer or reputable third-party suppliers. Regular nib replacement ensures optimal performance, maintains that smooth drawing feel, and prevents any potential damage to the tablet surface. Think of it like changing the oil in your car – small effort, big long-term gain for your artistic workflow.
- Clean Regularly: A soft, lint-free cloth is your best friend here. Gently wipe down the tablet surface to remove dust, natural oils from your hand, and eraser debris. For stubborn smudges, a slightly damp cloth with just water (or a mild, electronics-safe cleaner, never harsh solvents!) can work wonders, but always ensure the tablet is completely dry before use. Avoid harsh chemicals that could damage the delicate drawing surface, as this can degrade the drawing area over time and even affect pen tracking. A clean tablet is a happy tablet, and a happy tablet means a happy artist.
- Cable Management: If your tablet is wired, be kind to the USB cable. This little lifeline is surprisingly fragile! Repeated bending, tugging at sharp angles, or rolling over it with your chair can easily damage the cable itself or, worse, the port on your tablet or computer. Consider using cable ties or sleeves to keep it organized and reduce strain. Coil it loosely when not in use, and avoid extreme kinks. A damaged cable is a fast track to frustrating connectivity issues and intermittent performance, and nobody wants that when inspiration strikes! Treat your cables with respect, and they'll return the favor.
- Store Safely: When not in use, especially if it's a graphics tablet, treat it like a cherished sketchbook. Keep your tablet in a soft sleeve or a drawer to protect it from spills, dust, and accidental drops. For travel, a padded case is invaluable – it's a small investment that offers huge peace of mind. Even around your desk, just tucking it away neatly can prevent a calamitous coffee spill, a curious pet, or an errant elbow from sending it crashing. Proper storage extends the life of your device significantly and keeps that drawing surface pristine, ready for your next creative burst.
Frequently Asked Questions About Budget Drawing Tablets
Q: Do I need a screen on my drawing tablet to start?
A: Absolutely not! This is one of the most common misconceptions I encounter. While pen displays (with screens) are undoubtedly lovely and offer a very direct drawing experience, they are significantly more expensive. A graphics tablet (the opaque pad where you draw looking at your monitor) is the perfect, budget-friendly entry point. Trust me, your brain adapts faster than you think to that initial disconnect! It's a bit like learning to drive a car with a rearview mirror – you're looking forward, but your hands are doing the work elsewhere, and it becomes second nature. Many professional artists use screenless tablets for their main work, and I still use mine for countless tasks. It saves you a lot of money that can be better spent on art software, online courses, or even just more art supplies for your traditional practice! Starting with a screenless tablet allows you to build fundamental digital art skills without a hefty upfront investment, proving that creativity isn't bound by a price tag. It's truly a testament to how adaptable the human brain is!
Q: Can I use a budget drawing tablet with my phone or iPad?
A: This is a great question for the on-the-go artist! And I get it, portability is a huge draw. Some newer budget graphics tablets (like certain Huion and XP-Pen models) are now offering Android compatibility, allowing you to connect them directly to your Android phone or tablet. This can be fantastic for quick sketches, concept art, or working away from your main computer when you're traveling or just on the couch. However, they generally do not work with iPads unless specifically stated, as Apple uses its own proprietary accessories and ecosystem, often requiring an Apple Pencil for full functionality. Always double-check compatibility for your specific device; a quick search on the manufacturer's website will usually give you a definitive answer. It's a bit of a compatibility maze, but worth navigating if portability is a high priority for you.
Q: What's the difference between a graphics tablet and a pen display?
A: Ah, the classic distinction, and one that often confuses newcomers! A graphics tablet is a flat, opaque pad that you draw on with a stylus, while your artwork appears on your separate computer monitor. It's the "drawing here, looking there" experience, akin to using a mouse but with far greater precision and pressure sensitivity. This type prioritizes affordability and portability, and it's what this article focuses on. A pen display, on the other hand, has a screen built directly into the tablet itself, so you draw directly on the image you see, much like drawing on paper or a canvas. Pen displays offer a more natural, direct drawing experience but are typically much, much more expensive (think hundreds to thousands of euros), making graphics tablets the clear go-to for beginners on a budget. Both have their merits, but for starting out, the graphics tablet offers the best bang for your buck and allows you to confirm your passion for digital art before a massive investment. Don't let the allure of the screen distract you from the true learning experience.
Q: How long does a budget drawing tablet typically last?
A: This is a fantastic question, and the good news is: with proper care, a good budget drawing tablet can genuinely last for several years, becoming a steadfast companion in your artistic journey. It's not a disposable item! The main components that might wear out are the stylus nibs (which are easily replaceable and usually come with spares) and, occasionally, the USB cable if it's subjected to a lot of wear and tear. If you have a wireless model, the internal battery will eventually degrade, but this typically takes many years of regular use before you notice a significant drop in charge retention. The tablets themselves are generally quite robust, built to withstand a fair bit of creative passion! I've had some of my older, cheaper tablets for what feels like ages, still going strong, long outliving their initial price tag. Think of it as a tool that evolves with you – a silent, digital companion on your artistic adventures.

Q: What kind of computer do I need?
A: Good news! You absolutely do not need a super-powerful, high-end gaming rig to use a budget drawing tablet. That's another common myth. Most modern laptops or desktop computers (Windows or macOS) with a USB port and a decent amount of RAM (8GB is usually fine, 16GB is ideal if you're working with complex files) will work perfectly. The software you choose will have more impact on your computer's requirements than the tablet itself. If you're using very demanding software with massive canvas sizes and tons of layers, then yes, a more powerful machine helps, but for beginners using programs like Krita or Sketchbook, almost any contemporary computer will do. Even some Android phones and Chromebooks can now serve as capable hosts for certain budget tablets, further expanding accessibility and making digital art even more democratic. The barriers to entry are truly lower than ever, which is fantastic news for aspiring artists!
Q: Are budget tablets suitable for professional work later on?
A: This is a fantastic question that gets to the heart of long-term value, and one I get asked a lot. While budget tablets are absolutely excellent for learning, developing skills, and pursuing art as a hobby, many artists continue to use them even for professional work! Seriously. Especially if your style is primarily line art, comic creation, sequential art, or even specific types of illustration, a budget tablet is more than capable of producing professional-grade output. For highly detailed, large-scale digital painting, hyper-realistic rendering, or work requiring the absolute highest precision and color accuracy, you might eventually consider upgrading to a professional-grade pen display or a Wacom Intuos Pro. But here's the secret, and it's a profound one: it's truly more about the artist's skill, dedication, and vision than the specific tool in their hand. A budget tablet is more than capable of producing stunning, professional results, and many renowned digital artists started their careers on humble equipment. Your talent and consistent effort will always be more critical than the cost of your gear. Don't let gear acquisition syndrome (GAS) distract you from the actual work! Your talent and vision are always more important than the brand name on your tablet.
Q: Should I get a drawing glove?
A: Ah, the humble drawing glove! While not strictly essential, a drawing glove (often just a two-finger glove) can be a game-changer for comfort and cleanliness. It helps prevent your hand from dragging across the tablet surface, reducing friction and preventing smudges from oils on your skin. If you find your hand sticking or creating unwanted marks, a drawing glove is a very affordable solution. Many artists find it indispensable for smooth, uninterrupted drawing, particularly during long sessions. It's a small investment that makes a big difference in comfort and workflow, especially during those long, intense creative sessions.
Q: What's the best way to get over the initial learning curve?
A: The absolute best way to conquer that initial awkwardness is consistent practice. Think of it like learning any new instrument or sport – it's going to feel clunky at first. Dedicate short, regular sessions to simple exercises: drawing straight lines, perfect circles, and smooth curves. Don't try to create a masterpiece on day one! That's a recipe for frustration. Instead, focus on building muscle memory. Follow free online tutorials, try tracing photos, and most importantly, embrace the undo button. It's your digital superpower! The more you use your tablet, the more natural it will become, and soon you'll wonder how you ever drew without it! Remember, every expert was once a beginner. Focus on enjoying the process of creation, and the skill will follow. Don't compare your beginning to someone else's middle – your journey is uniquely yours, and that's a beautiful thing.
Q: How do I know when it's time to upgrade my tablet?
A: This is a feeling more than a hard rule, but generally, you'll start to notice the limitations of your current tablet when it begins to hinder your creative process. Perhaps you feel cramped by the active area, you're constantly wishing for more express keys for complex workflows, or you're craving that direct drawing experience a screen display offers. If you find yourself constantly battling your tablet's features rather than focusing on your art, or if your creative aspirations are pushing beyond its technical capabilities, it might be time to start researching those higher-end options. But don't rush it; master the basics on your budget champion first – skill trumps gear every time! An upgrade should feel like a natural progression that enhances your workflow, not a forced purchase. Listen to your artistic needs, not just the latest marketing hype.

Q: How important is color accuracy for beginners?
A: For true beginners, color accuracy on your monitor or tablet isn't the absolute highest priority. I know, I know, the art world can be intimidating with all its technical demands! But honestly, your main goal should be to get comfortable with the digital medium, understand your software, and develop your fundamental drawing and painting skills. While professional artists doing print work or client-specific color matching absolutely need calibrated, color-accurate monitors, you can safely defer that investment. Focus on learning color theory and developing your eye with whatever monitor you have. As your skills advance and your needs become more professional, then you can consider investing in a high-quality, color-calibrated display. Don't let "perfect color" be the enemy of "getting started"! Your creativity is far more important than a perfectly calibrated screen in the beginning. Focus on the art, and the technical refinements can come later.
Q: What about drawing on a laptop touchscreen or 2-in-1 device?
A: This is a great question, especially with the rise of convertible laptops and touch-enabled devices! While you can technically draw on many laptop touchscreens with a basic stylus (or even your finger!), it's generally not recommended for serious digital art, especially for beginners. Here's why: these screens often lack the crucial pressure sensitivity, tilt recognition, and fine control offered by dedicated drawing tablets and their specialized pens. The surface can also feel too slippery for precise control, and palm rejection (the ability to ignore your resting hand while you draw) is often poor, leading to frustrating accidental marks. For light doodling, basic annotations, or signing documents, they're fine, but for an authentic and expressive digital art experience, a dedicated budget drawing tablet will always outperform a generic laptop touchscreen. You want a tool built for the job, not just one that can do the job. A dedicated tablet offers an experience specifically optimized for digital art, and that's where the magic truly happens.
Q: Can I use a drawing tablet for non-artistic tasks?
A: Absolutely! While their primary purpose is undeniably art, drawing tablets are surprisingly versatile and can be fantastic productivity tools in a myriad of ways. I often find myself reaching for mine even when I'm not creating art. Many people use them for signing documents digitally, annotating presentations, taking handwritten notes in virtual meetings or online classes, marking up PDFs, or even just general computer navigation if they find it more ergonomic than a mouse. Some educators use them for teaching online, writing directly onto a digital whiteboard or emphasizing points in a shared document. They're not just for artists! A drawing tablet can improve efficiency and comfort in a variety of digital tasks, making it a valuable addition to any home or office setup, proving its utility far beyond the canvas. It's a surprisingly versatile piece of tech, a true multi-tasker in a creative's arsenal.
The world of digital art is vast, incredibly rewarding, and genuinely more accessible than you might think. Please, don't let the fear of expensive equipment or the myth of a steep learning curve hold you back. A budget drawing tablet isn't just an entry ticket; it's a perfectly capable, powerful tool designed to unlock your creative potential and bring your imaginative visions to life. It's the first brushstroke on a potentially epic digital canvas, a doorway to a universe of endless possibilities.
My sincere advice? Pick one of the excellent, budget-friendly options that resonates with you, download some fantastic free software (seriously, Krita is amazing!), and just start creating. Dedicate even a few minutes each day. Consistency, not intensity, is the secret sauce here. The joy, the freedom, and the sheer satisfaction of bringing your visions to life digitally is truly immeasurable.
Remember, every masterpiece, every incredible digital illustration you admire on social media or in a gallery, started with someone bravely putting their very first digital line down. Their journey, just like yours, began with a single, tentative stroke. Your journey begins now. Perhaps one day, your digital art will hang proudly in a den bosch museum, or be showcased alongside the artistic evolution you can explore on my timeline, just like the pieces I create and sell on my shop. Go on, create something beautiful, something wild, something uniquely you, because the only true limit is your imagination! The tools are here, the knowledge is at your fingertips, and the digital canvas awaits your unique touch. The only thing missing is your first stroke.


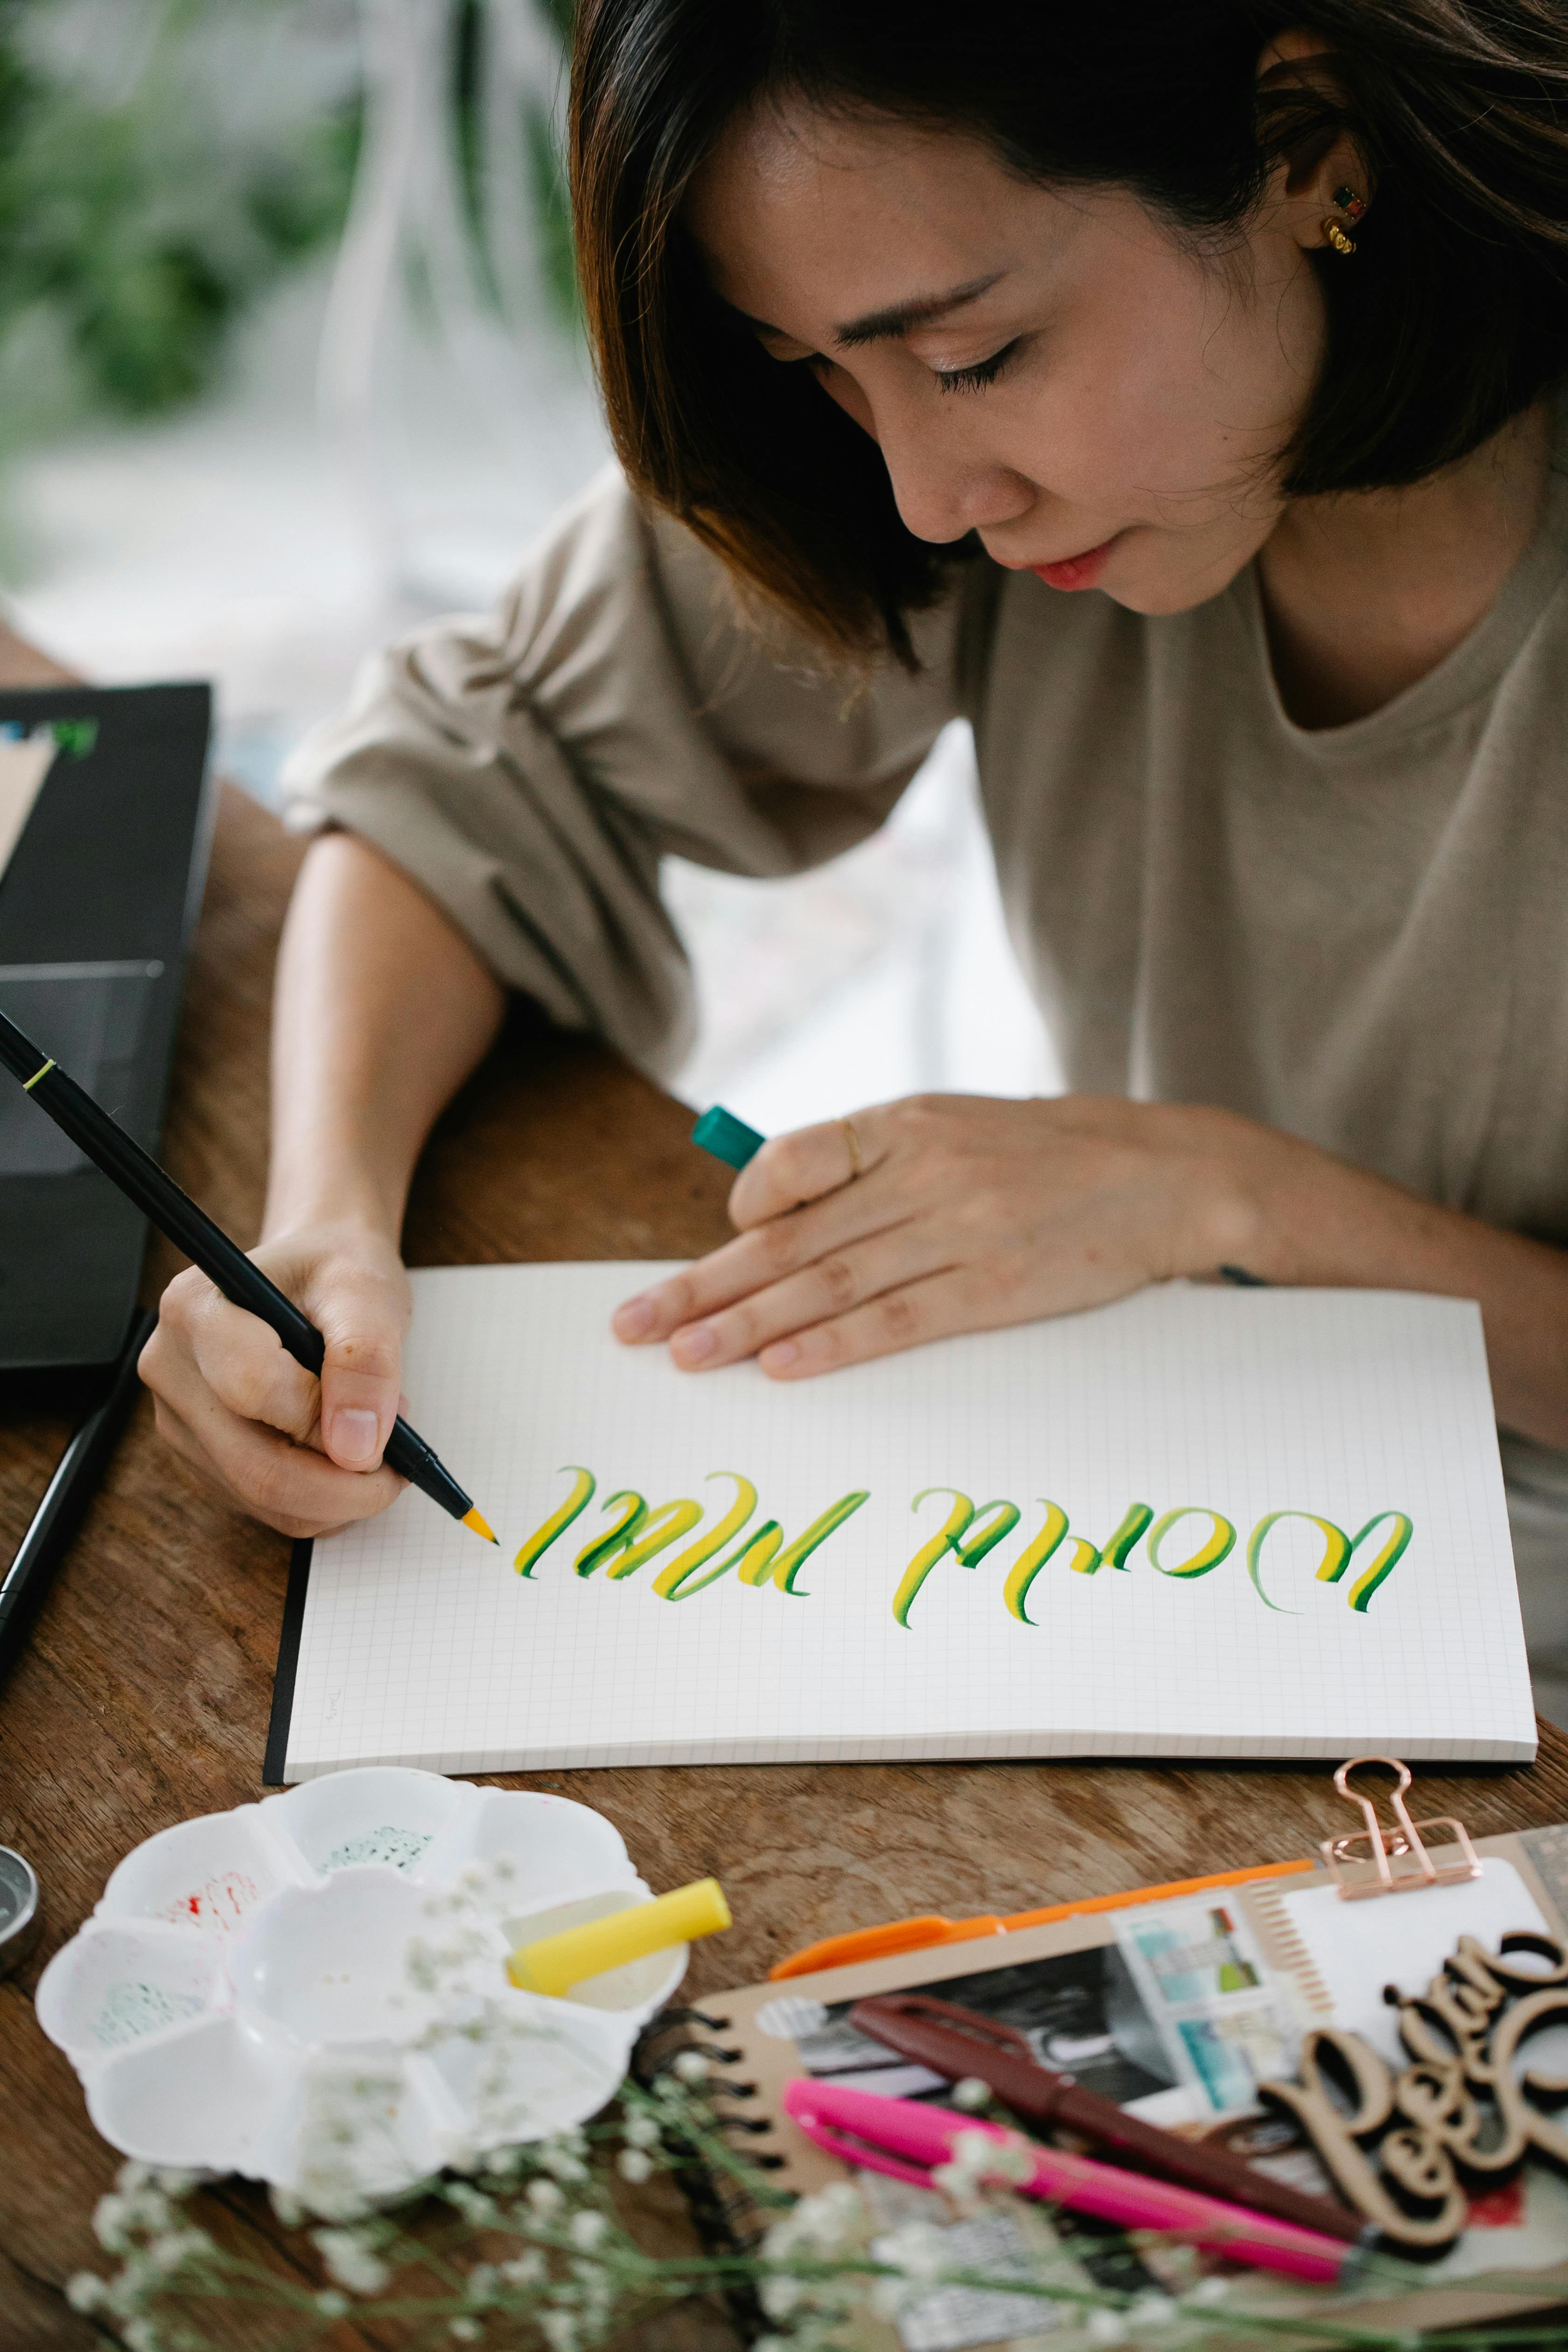