
The Ultimate Guide to Digital Art Apps: My Top Picks for Artists
Diving deep into the best digital art apps for artists of all levels. Discover my favorite tools, compare features, and find the perfect software to unleash your creativity, from Procreate to Photoshop and beyond.
The Ultimate Guide to Digital Art Apps: My Top Picks for Artists
I’ve been making art for as long as I can remember, and honestly, the shift to digital tools felt a bit intimidating at first. All those buttons, menus, and layers – it was a lot. I remember staring at Photoshop for the first time, feeling a cold dread about all the possibilities I didn't understand. But you know what? That initial overwhelm quickly melted away as I realized digital art wasn't just a different medium; it was a whole new playground of possibilities waiting to be explored. It’s a space where you can experiment fearlessly, make mistakes without wasting expensive materials (a huge plus for abstract art where happy accidents are often the best discoveries!), and find your unique voice in ways I never thought possible with traditional mediums. It’s like discovering a secret level in a game you thought you knew inside and out, packed with infinite lives and a reset button. But once I dove in, truly committed to making digital art work for me, I realized it wasn't just a different medium; it was a whole new playground of possibilities. It’s a space where you can experiment fearlessly, make mistakes without wasting expensive materials (a huge plus for abstract art where happy accidents are often the best discoveries!), and find your unique voice in ways I never thought possible with traditional mediums. It’s like discovering a secret level in a game you thought you knew inside and out.
Now, if you're anything like I was, you’re probably staring at a vast ocean of apps, wondering where to even begin. Fear not! I’ve spent countless hours drawing, painting, and frankly, sometimes just staring at my screen, trying to figure out which apps genuinely empower creativity and which just add to the digital clutter. This isn't just a list; it’s my personal walkthrough, a peek into the tools that have shaped my own artistic journey (which you can see evolving on my /timeline if you’re curious!). My goal here is to cut through the noise and give you a clear, honest assessment of the digital art apps that truly stand out. This isn't just about listing features; it's about finding the companions that will empower your unique creative process, whether you're a seasoned professional or just picking up a stylus for the very first time.
Why Embrace Digital Art? It's More Than Just Convenience
For a long time, I was a purist. Give me a brush, some canvas, and the smell of oil paint, and I was happy. But digital art changed my perspective entirely. It’s not about replacing traditional art; it’s about expanding it. Think about the vibrant, expressive colors you see in abstract art – now imagine having an infinite palette, undo buttons, and blending modes that could make ultimate-guide-to-wassily-kandinsky himself do a double-take. That’s the magic. Beyond the sheer aesthetic possibilities, digital tools also allow for incredible precision and control when you need it, alongside the freedom for wild experimentation. It's truly the best of both worlds.
Sure, there’s the obvious convenience: portability, no mess, easy sharing (think instant portfolio updates or sending a piece to a client in seconds!). But for me, the real game-changer is the sheer freedom. Want to try a new brush texture? Download one. Need to resize an element without redrawing? No problem. The iteration speed is incredible. This freedom to experiment fearlessly has been crucial for my own growth as an artist. And let's not forget the sheer joy of endless undo buttons – a luxury my traditional canvases never afforded me! Want to try a new brush texture? Download one. Need to resize an element without redrawing? No problem. The iteration speed is incredible. This freedom to experiment fearlessly has been crucial for my own growth as an artist.

Key Considerations: What Matters When Choosing Your Digital Canvas
Before we dive into the apps themselves, let's talk about what actually matters. Because let's be real, the "best" app is the one that works best for you. My needs might be different from yours, but these are the questions I always ask myself (and you should too!):
1. Your Device & Operating System
This is the big one, often the first filter you hit. Are you on an iPad, an Android tablet, a Windows PC, a Mac, or perhaps even a Linux machine (where Krita shines!)? Some apps are exclusive to certain ecosystems, and their performance can vary wildly between platforms. Procreate, for instance, is an iPad exclusive, and that alone might decide things for many artists. But if you’re on a Windows PC, you’ll be looking at entirely different beasts. Consider not just what you have, but what you want to work on—a powerful desktop for intricate detail, a tablet for unmatched portability and direct drawing, or a versatile hybrid setup like a Microsoft Surface or even a Chromebook that tries to offer the best of both worlds. Are you looking for a dedicated drawing device, or something that can handle heavy-duty rendering and animation? Think about where and how you want to create, not just what's sitting on your desk right now.
2. Your Art Style & Goals
Are you sketching cartoons, painting realistic portraits, designing intricate vectors for logos and branding, or perhaps exploring bold, contemporary abstract forms like those found in the-ultimate-guide-to-abstract-art-movements-from-early-pioneers-to-contemporary-trends? Knowing your primary artistic direction is paramount. Some apps excel at illustration, others at painting, and some at graphic design. For example, the nuanced differences between illustration-vs-fine-art-whats-the-difference can heavily influence your app choice. If you're a painter, you'll crave robust brush engines and realistic media simulation. If you're an illustrator, meticulous layer management, precise vector tools (essential for scalable work), and excellent line stabilization might be more critical. Even within abstract art, your specific approach – gestural, geometric, textural – can guide your choice. Do you need tools that let you build up rich, painterly textures, or ones that allow for clean, crisp shapes and compositions? Perhaps you're venturing into character design, where precise line work and easy color filling are paramount. Or maybe you're designing digital collages, requiring robust selection and blending capabilities. Every style, from hyper-realism to abstract expressionism, has its preferred toolkit, much like a traditional artist chooses between best-oil-painting-brushes-for-artists or best-acrylic-paint-brushes-for-artists.
3. Budget: Free, One-Time Purchase, or Subscription?
Digital art can be surprisingly affordable, but costs vary significantly. Some apps are free, offering an incredible entry point (like Krita!), allowing you to dive in without any financial commitment. Some are a one-time purchase (my personal favorite model, as it feels like a genuine investment rather than a recurring bill, and you own the software outright). Others are subscription-based, which can add up over time but often come with continuous updates, cloud features, and access to an entire ecosystem of creative tools. Consider your long-term commitment and financial comfort. Are you just dabbling, or are you planning a serious career where ongoing access to industry-standard tools and their latest features justifies a subscription? Remember, many paid apps offer free trials, which are invaluable for testing if the software truly clicks with your workflow before you commit any cash.

4. Learning Curve
Are you a seasoned digital veteran, someone who lives and breathes keyboard shortcuts, or just dipping your toes in the digital waters? Some apps are incredibly powerful but come with a steep learning curve, demanding patience and dedication to unlock their full potential (I'm looking at you, Photoshop! I still remember the frustration of trying to figure out layers and masks way back when). Others are wonderfully intuitive and beginner-friendly, allowing you to create something beautiful right out of the gate. Think about how much time you're willing to invest in learning new software versus how quickly you want to jump into creating. There's no right or wrong answer here; it's about what fits your personality and immediate goals. I remember feeling overwhelmed by Photoshop's layer masks early on, but eventually, that challenge led to a deeper understanding of digital composition. Sometimes, a steeper curve unlocks greater capabilities down the line.
5. Community & Resources
This is often overlooked, but it's a huge factor for growth and continued learning. Does the app have a thriving online community? Are there plenty of official tutorials, user-created videos, dedicated forums, and comprehensive documentation available? For a long time, I struggled alone, trying to figure everything out by brute force. But connecting with other artists using the same tools opened up a world of tips, tricks, and solutions, not to mention a source of immense inspiration. A strong, active community can dramatically shorten your learning curve, provide troubleshooting help, and keep you inspired through shared challenges and successes. Don't underestimate the power of collective knowledge! Beyond forums, think about dedicated YouTube channels, Skillshare or Domestika courses, official documentation, and even social media groups. These communities offer not just troubleshooting, but also challenges, critiques, and a sense of shared artistic journey. It’s like having an entire art school at your fingertips, often for free or a minimal cost.

My Top Picks for Digital Art Apps (and why I love them)
Alright, let’s get down to brass tacks. These are the apps I’ve spent the most time with, the ones I constantly recommend, and the ones that have truly earned their spot in my digital toolkit.

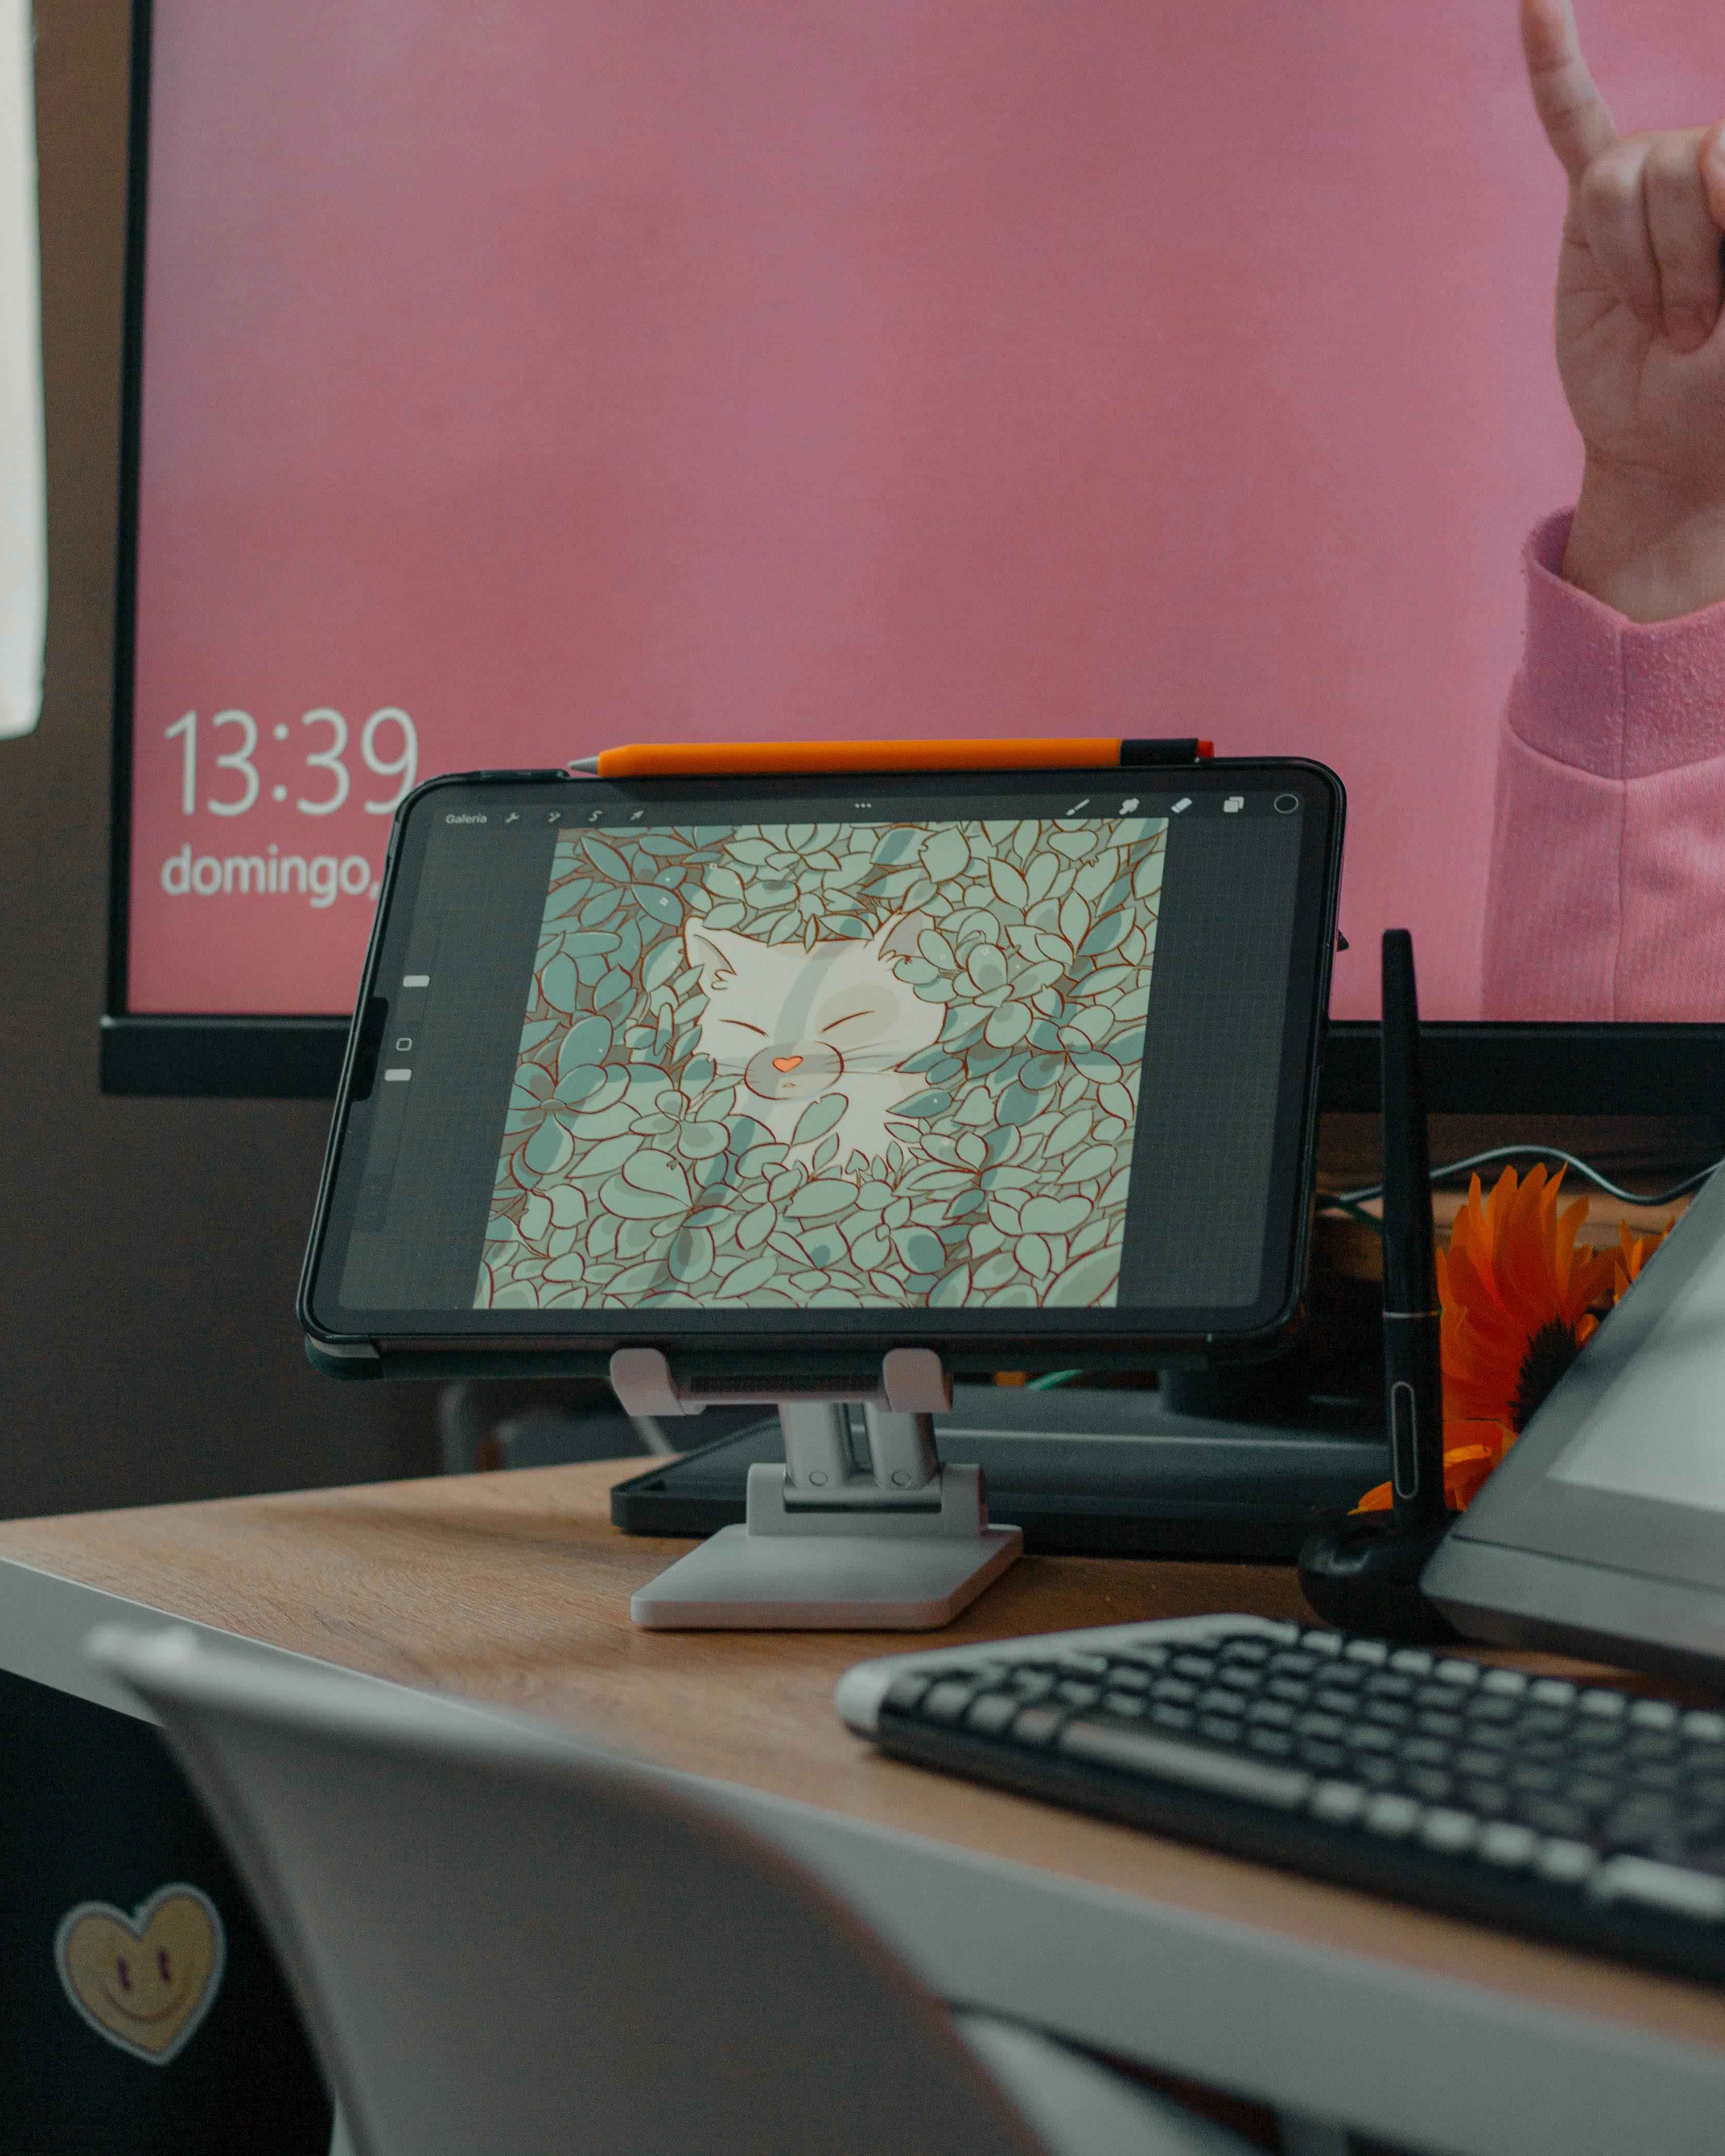
1. Procreate (iPad Only)
Oh, Procreate. If you own an iPad and an Apple Pencil, this is practically a no-brainer. It's often the first app I mention when someone asks about digital art, and for good reason! The interface is clean, intuitive, and designed specifically for touch and stylus input, making it feel incredibly natural. It just feels right. For my abstract work, the brush engine is incredibly versatile, allowing for everything from delicate lines to bold, expressive strokes, much like the dynamic compositions you see from masters of abstract expressionism like ultimate-guide-to-joan-mitchell-a-master-of-abstract-expressionism. Features like QuickShape (which snaps imperfect shapes into perfect ones) and the Reference Companion (a floating window for your reference images) are workflow game-changers.
- Who it's for: Illustrators, painters, concept artists, doodlers, and anyone who wants a powerful yet intuitive art studio on their iPad.
- Pros: Incredible brush engine, excellent color management, animation features, intuitive interface, one-time purchase, highly responsive.
- Cons: iPad-exclusive, no vector tools, limited text features.
- My Take: It’s almost unfair how good Procreate is for the price. It handles large canvases with ease, boasts a fantastic array of default brushes, and the ability to import or create your own brushes means endless possibilities for unique textures and effects. For my abstract work, I adore its blending modes and the way the Apple Pencil interacts so naturally with the canvas. I probably spend 70% of my digital art time here, often starting new pieces with its intuitive gesture controls and dynamic brushes. You can even record time-lapse videos of your entire creative process, which is fantastic for sharing! For artists who love dynamic lines and rich blending, Procreate's brush engine is truly top-tier, mimicking traditional media with surprising accuracy. It's the kind of app that just gets out of your way and lets you create, which is invaluable for staying in the flow state.

2. Adobe Photoshop (Desktop & iPad)
Photoshop. The grand old master. It’s like the ultimate-guide-to-leonardo-da-vinci of digital imaging software – powerful, versatile, and has been around forever. While I primarily think of it for photo manipulation and graphic design, its painting capabilities are seriously underrated. The brush engine is robust, and the sheer depth of tools for color correction, effects, and composition is unparalleled. If you're already in the Adobe ecosystem, it's a natural fit.

- Who it's for: Digital painters, illustrators needing strong editing tools, graphic designers, photographers, anyone needing industry-standard software.
- Pros: Industry standard, immense power and versatility, extensive plugin support, excellent for photo manipulation and composite art, great for final edits.
- Cons: Subscription-based (can be pricey), steep learning curve, can be resource-intensive, iPad version is still catching up to desktop.
- My Take: Photoshop is my digital art workhorse for finishing touches. When I need to adjust colors precisely, add intricate textures, or prepare my art for print (perhaps even for my own online shop at /buy), Photoshop is invaluable. It's truly a powerhouse for compositing and blending different elements seamlessly, making it perfect for mixed-media digital art. While it’s not my primary sketching app, it’s essential for refining, color grading, and elevating my pieces to a professional standard. Plus, its integration with other Adobe Creative Cloud apps, like Illustrator for vector work, can really streamline a complex project. For complex mixed-media pieces or preparing art for high-quality how-to-varnish-an-acrylic-painting or how-to-varnish-an-oil-painting-a-step-by-step-guide print, Photoshop's granular control over color, resolution, and effects is simply unmatched. It’s where I ensure my digital creations translate beautifully into the physical world.
3. Clip Studio Paint (Desktop & Tablets)
This one is a dark horse for many, but a champion for artists who focus on comics, manga, and animation. Clip Studio Paint (formerly Manga Studio) has one of the best line art engines out there – seriously, it makes inking feel like a dream, with incredible stabilization and vector layer capabilities. But don't let the name fool you; its painting tools are fantastic too, especially if you love a natural, traditional media feel. It’s available on pretty much every platform, which is a huge plus.
- Who it's for: Comic artists, manga artists, animators, illustrators, digital painters who want excellent line art and a natural drawing feel.
- Pros: Best-in-class line art, robust animation features, 3D model support for posing, active community, one-time purchase (perpetual license available, or monthly subscription), fantastic rulers and perspective tools.
- Cons: Interface can feel cluttered at first, some features can be overwhelming for beginners.
- My Take: I sometimes dabble in character design (even for abstract artists, it’s good to stretch those muscles!), and when I do, Clip Studio Paint is my go-to. The brush stabilization is divine, making smooth lines almost effortless – a true blessing for crisp line art. Beyond just drawing, its dedicated tools for panel creation, speech bubbles, and even 3D model import for posing references make it an absolute dream for comic and manga creators. The built-in perspective rulers are a lifesaver for complex scenes! If you’re into illustrative work, particularly sequential art or animation, you owe it to yourself to give it a serious look. It truly excels at mimicking traditional inking and painting techniques, offering incredible control, and its frame-by-frame animation tools are surprisingly robust for creating short animated clips or animatics. Even its 3D model import feature is a godsend for quickly blocking out tricky poses and perspectives without having to draw them from scratch.
4. Affinity Photo (Desktop & iPad)
Think of Affinity Photo as a very strong contender to Photoshop, but with a different payment model. It’s a one-time purchase, which is a huge draw for many artists, myself included. It offers a lot of the same professional features – powerful editing, non-destructive layers, great brush engine – without the subscription commitment. The learning curve is still there, but perhaps a bit gentler than Photoshop, and the iPad version is surprisingly robust. It's also part of a wider suite, with Affinity Designer for vector graphics and Affinity Publisher for layout design, offering a complete creative ecosystem without subscriptions.
- Who it's for: Digital painters, illustrators, photographers, graphic designers looking for a powerful Photoshop alternative without a subscription.
- Pros: One-time purchase, powerful photo editing and painting tools, excellent performance, non-destructive workflow, robust iPad version, part of a comprehensive creative suite.
- Cons: Fewer plugins than Photoshop, some unique workflows might take getting used to.
- My Take: I’ve found Affinity Photo to be a fantastic backup and sometimes even a primary tool for specific tasks. For instance, detailed texture work, intricate layering, or robust photo manipulation when I want to avoid Adobe’s subscription model, it’s brilliant. Its focus on a non-destructive workflow means I can always go back and tweak things without fear of ruining my original work. It feels like a very modern, thoughtfully designed piece of software that respects the artist's investment. If you're looking to build an entire creative toolkit without monthly fees, the Affinity suite is a truly compelling option. I often find myself turning to Affinity Photo for detailed compositing, photo bashing, or specific adjustments where I appreciate its speed and non-destructive filter layers. It feels like a powerhouse alternative that respects both my budget and my creative integrity.
5. Krita (Desktop - Free & Open Source)
Krita is a superstar in the free software world. It’s open-source, constantly being developed, and packed with features that rival paid alternatives. It’s especially strong for digital painting and drawing, with a highly customizable brush engine, excellent color management, and robust animation capabilities. If you’re on a budget or just curious to explore digital art without commitment, Krita is an absolute must-try.

- Who it's for: Digital painters, illustrators, comic artists, animators, students, and anyone on a budget who wants professional-grade tools.
- Pros: Free and open-source, powerful brush engine, excellent for painting and drawing, animation features, available on multiple platforms.
- Cons: Interface can be overwhelming for new users, occasional performance quirks (though constantly improving), no dedicated vector tools.
- My Take: Krita is amazing for being free. I’ve used it on my desktop for initial sketches and concept development when I want to experiment quickly without opening up my more heavy-duty software. It’s a fantastic entry point for aspiring digital artists. The active and passionate community around Krita also means there’s a wealth of free brushes, tutorials, and support available, making it even more accessible. It's a testament to the power of open-source development, truly giving professional tools to everyone.

Quick Comparison Table
To help you visualize the differences and make a more informed decision, here’s a quick overview of these fantastic apps:
Feature | Procreate (iPad) | Adobe Photoshop (Desktop/iPad) | Clip Studio Paint (Desktop/Tablets) | Affinity Photo (Desktop/iPad) | Krita (Desktop) |
|---|---|---|---|---|---|
| Primary Use | Painting, Illustration | Photo Edit, Painting, Design | Illustration, Manga, Animation | Photo Edit, Painting, Design | Painting, Illustration |
| Pricing Model | One-time purchase | Subscription | One-time/Subscription | One-time purchase | Free & Open Source |
| Learning Curve | Low-Medium | High | Medium-High | Medium | Medium-High |
| Key Strength | Intuitive, Brush Engine | Versatility, Industry Std. | Line Art, Comics, Animation | Non-Sub Photoshop Alt. | Free, Powerful Brushes |
| Platform | iPad | Win, Mac, iPad | Win, Mac, iPad, Android | Win, Mac, iPad | Win, Mac, Linux |
| Vector Tools | No | Yes | Yes | Yes | Basic (Shape tools) |
| Animation Features | Basic (Flipbook) | Basic (Timeline) | Advanced | No | Good (Timeline) |
| 3D Model Support | No | Yes | Yes | No | Yes |
| Drawing Assist Tools | Yes | Yes (Perspective Grid) | Yes (Perspective, Symmetrical) | Yes (Symmetry) | Yes (Perspective, Symmetry) |
| Community Support | Excellent (User Forums) | Extensive (Adobe Community) | Excellent (Official, User Forums) | Good (User Forums) | Excellent (Community Forums) |
| Color Management | Good | Excellent | Excellent (CMYK Support) | Excellent | Excellent (CMYK Support) |
| Cloud Sync | Manual | Extensive | Manual/Cloud Sync | No | Manual |
| Asset Library/Resources | Good (Brushes, Assets) | Extensive (Adobe Stock, Fonts) | Excellent (Assets Store, Brushes) | Good (Brushes, Stock Photos) | Excellent (Brushes, Resources) |

Choosing YOUR Perfect App: A Personal Journey
I know, I know. It’s a lot to take in. But here’s the thing I've learned about art, digital or otherwise: there's no single "right" answer, no magic bullet app. Your perfect app is a deeply personal choice, just like your favorite color palette or your preferred canvas size. I often find myself juggling a few of these, using Procreate for initial ideation and dynamic sketching, then moving to Photoshop or Affinity Photo for refining details, color grading, and preparing the final piece. My art, like the pieces you might find at the /den-bosch-museum, often involves layers of thought and execution, and my tools reflect that. It’s about building a workflow that empowers your unique creative process. Think of your digital art apps as a chef's kitchen – you might have a favorite knife for dicing, a specific pan for searing, and a stand mixer for baking. Each tool has its purpose, and together, they create a complete culinary experience. Digital art is no different.
My advice? Try them out if you can. Many offer free trials, or, in Krita's case, it's completely free to dive in. Don’t be afraid to switch if something isn't clicking. The goal is to find a tool that feels like an extension of your hand, not a barrier to your creativity. And remember, the best digital art setup often involves a combination of specialized tools, much like a traditional artist has a range of brushes, paints, and canvases.
Beyond the Canvas: Exploring Diverse Digital Art Forms
When we talk about digital art, it's easy to immediately think of painting or drawing. But the truth is, the digital realm opens doors to an incredible array of artistic expressions far beyond a canvas simulation. My own abstract work, for instance, often experiments with digital textures and compositions that wouldn't be possible with traditional paints alone. Think about:
- Motion Graphics & Animation: Bringing static art to life with movement, often used in film, advertising, and interactive experiences. Apps like Adobe After Effects, Cinema 4D, or even Clip Studio Paint’s robust animation features are crucial here. It's a whole different way of thinking about narrative and flow, adding the dimensions of time and sound to visual art. Think about bringing a character to life, creating dynamic abstract animations, or even crafting title sequences for films. Tools like Adobe After Effects, Toon Boom Harmony (for traditional animation), Blender (for 3D animation), or even Procreate's Animation Assist offer diverse entry points.
- Pixel Art: A nostalgic yet thriving art form where images are created pixel by pixel, reminiscent of old video games. It requires a different kind of precision and aesthetic, often employing specialized editors like Aseprite, Pixilart, or GraphicsGale for their dedicated tools and palettes. It’s an art form that thrives on limitations, forcing artists to make every single pixel count, resulting in charming, iconic, and often deceptively complex imagery.
- 3D Modeling & Sculpting: Creating three-dimensional objects and scenes, from characters and environments to abstract sculptures. Software like ZBrush (industry-standard for high-detail sculpting), Blender (an amazing free and open-source option for modeling, sculpting, and animation!), or Nomad Sculpt (an incredibly powerful and intuitive iPad app) are powerhouses in this space. This opens up possibilities for virtual exhibitions, augmented reality experiences, or even physical prints through 3D printing. The techniques are varied, from polygonal modeling for hard-surface objects to sculpting for organic forms. If you're curious about the tactile process of traditional sculpting, you might even find parallels with what-is-design-in-art.
- Vector Art: As mentioned earlier, this is resolution-independent art, perfect for logos, typography, crisp illustrations that need to scale infinitely, and intricate patterns. Adobe Illustrator and Affinity Designer are the go-to choices, allowing for incredibly clean and precise artwork that looks perfect at any size. From elegant typography to scalable logos, and from crisp web graphics to intricate patterns, vector art is the backbone of much of graphic design and illustration. It's about mathematical perfection, ensuring your lines and shapes are always flawless.
- Generative Art: Art created through algorithms and code, where the artist sets parameters and the computer generates the visuals. This is a fascinating intersection of art and technology, often involving programming languages like Processing or p5.js, or specialized software. It's about designing a system that makes art, rather than drawing it directly. This can range from simple algorithmic patterns to complex, evolving visual ecosystems. Beyond programming languages like Processing or p5.js, artists also use visual programming environments like TouchDesigner or integrate AI tools to create unpredictable yet compelling results. It’s a mind-bending way to explore aesthetics, often revealing beauty in mathematical chaos.
- Digital Photography & Photo Manipulation: While often considered a separate discipline, photography frequently intersects with digital art, especially when artists use photo bashing, compositing, or digital painting techniques to transform images. Apps like Adobe Photoshop, Affinity Photo, or even more specialized photo editors allow artists to blend reality with imagination, creating surreal landscapes, conceptual portraits, or entirely new visual narratives. It's where the captured moment meets boundless imagination.
- NFTs (Non-Fungible Tokens): While I'm personally quite skeptical of the broader blockchain and crypto art hype due to its environmental impact and market volatility, it's impossible to ignore the conversation around NFTs. Essentially, they're unique digital assets (often artworks) whose ownership is recorded on a blockchain. Many artists have explored this space as a potential new revenue stream, but it's fraught with environmental concerns and market volatility, so tread with extreme caution and do your research. It's a complex topic that requires careful consideration beyond just the artistic output itself, as discussed in understanding-the-ai-art-market-trends-opportunities-and-ethical-considerations-for-collectors.
- UI/UX Design: This is where art meets functionality, designing the interfaces and user experiences for websites, apps, and software. It requires a keen eye for aesthetics, an understanding of human psychology, and proficiency in tools like Figma, Adobe XD, or Sketch. It's digital art with a clear purpose: making technology beautiful and intuitive.
- Game Art & Asset Creation: From concept art and character models to textures and environmental design, digital artists are crucial to the video game industry. This involves a blend of 2D and 3D skills, often utilizing a combination of painting, sculpting, and modeling software to bring virtual worlds to life.
The point is, don't limit your imagination to just one form of digital expression. The tools are so varied that your creative playground truly has no boundaries. Embracing these diverse forms can lead to completely unexpected and rewarding artistic directions.

Essential Gear Beyond the Software
While this article focuses on the apps themselves, it's important to remember that software is just one part of the equation. To truly get the most out of your digital art journey, you'll need the right hardware. Think of it like choosing your brushes and canvas in traditional art – they make a difference! Here’s what I consider essential:

- Stylus/Pen: This is your digital brush, an extension of your hand. For iPads, the Apple Pencil is almost universally recommended for its seamless integration and superb pressure/tilt sensitivity. For other tablets and pen displays, Wacom, Huion, and XP-Pen offer excellent pressure-sensitive styluses. Make sure it's comfortable in your hand, offers good pressure sensitivity (often measured in levels, e.g., 8192 levels, which translates to a wide range of line thickness and opacity based on pressure), and ideally, features tilt support for more natural brush strokes and shading, along with excellent palm rejection to prevent accidental marks. Some even have customizable side buttons for quick access to undo or brush changes, which can be a real workflow booster.
- Drawing Tablet: This is where the magic happens, directly translating your hand movements into digital strokes. They come in two main types, each with its own charm:
- Pen Tablets (Screen-less): These are more affordable and incredibly durable, connecting to your computer and requiring you to look at your monitor while drawing on the tablet surface. It takes some getting used to the hand-eye coordination (I remember feeling so clumsy at first!), but they are incredibly powerful and ergonomic once mastered. Wacom Intuos, Huion H610Pro, and XP-Pen Deco series are popular choices. Don't let the lack of a screen deter you; many pros swear by them. I remember feeling so clumsy at first, staring at the monitor while my hand moved elsewhere, but with practice, it became second nature, almost like learning to drive a stick shift – a bit awkward initially, then incredibly rewarding.
- Pen Displays (With Screen): These are pricier but offer a much more intuitive, 'drawing on paper' experience, as you draw directly on the screen. Think Wacom Cintiqs, Huion Kamvas, or XP-Pen Artist series. iPads with Apple Pencils also fall into this category, offering a fantastic all-in-one solution for portability and direct drawing. For many, this direct visual feedback is a huge boost to creativity.
- Monitor (for Desktop Artists): If you're using a pen tablet or even a pen display, a good quality, color-accurate monitor is absolutely crucial. You want to ensure the colors you see on screen are as true-to-life as possible, especially if you plan to print your work. Look for monitors with good sRGB or Adobe RGB color gamut coverage. Investing in a monitor calibrator (a hardware device that measures and corrects your monitor's color output) can also make a huge difference, ensuring consistent color representation over time, which is paramount if you're preparing art for print or professional client work. Without it, the vibrant masterpiece on your screen might look dull and off-color when printed, and trust me, that's a heartache you want to avoid!
- Computer/Device Specs: Digital art, especially with larger canvases, high resolutions, and many layers (I sometimes have dozens!), can be incredibly resource-intensive. Ensure your computer (desktop or laptop) or tablet has enough RAM (16GB minimum, 32GB+ recommended for serious work), a capable processor (multi-core Intel i7/i9 or AMD Ryzen 7/9), a dedicated graphics card (GPU) for accelerated performance, and sufficient fast storage space (an SSD is a must-have) to handle your creative ambitions. Nothing kills creative flow faster than lag and crashes! You can find more detailed advice on this in articles like top-drawing-tablets-for-digital-artists, but the bottom line is: don't skimp on these specs if you're serious about digital art. A powerful machine will keep your creative flow uninterrupted, letting you focus on the art, not the frustration of a lagging brush stroke or a crashing application.
Investing in quality hardware can feel like a big step, but it truly unlocks the full potential of your chosen digital art apps.
Optimizing Your Workflow: Tips & Tricks
Once you’ve got your app and hardware sorted, the next step is to make your creative process as smooth and enjoyable as possible. A good workflow isn’t about rigid rules; it’s about finding what works for you to minimize friction and maximize flow. Here are a few things I’ve picked up along the way:
- Master Your Layers: Layers are one of the most powerful features in digital art, truly a superpower compared to traditional mediums. Use them! Separate your line art, colors, shadows, and highlights onto different layers. Experiment with layer groups for organization and blending modes for creative effects. This allows for non-destructive editing and incredible flexibility. Get into the habit of naming your layers clearly (even if it feels tedious at first) – trust me, future you will thank you when you're looking for 'background detail copy 3' in a complex piece! Learning to selectively mask areas and use adjustment layers for color corrections also unlocks powerful non-destructive editing techniques, meaning you can always go back and tweak things without permanently altering your pixels.
- Learn Keyboard Shortcuts: This is a game-changer for speed and maintaining creative flow. Most apps have extensive shortcut lists. Pick out the 5-10 you use most often and commit them to muscle memory. Better yet, many apps allow you to create custom shortcuts for your most frequent actions. Your hand will glide across the keyboard, and your eyes will stay fixed on your art, not hunting through menus, allowing you to stay immersed in your work. For those with dedicated macro pads or programmable mice, custom shortcuts become an even greater superpower, putting complex operations literally at your fingertips.
- Customize Your Workspace: Nearly all professional digital art apps allow you to customize toolbars, panels, and brush presets. Arrange things in a way that makes sense for your hand and eye movements, optimizing for ergonomics and efficiency. Remove clutter, bring frequently used tools front and center. If you have a multi-monitor setup, leverage it to spread out your workspace, perhaps dedicating one screen to your canvas and another to reference images, brush panels, and layer stacks. It's your digital studio; make it comfortable and intuitive for your unique process, minimizing distractions and maximizing creative flow.
- Backup, Backup, Backup: I cannot stress this enough. Digital files can disappear in an instant due to crashes, hardware failure, or accidental deletion. Set up an automatic cloud backup (Google Drive, Dropbox, iCloud, or specialized art cloud services) or regularly save to an external hard drive. Consider implementing version control by saving incremental copies of your work (e.g.,
Artwork_v1.psd,Artwork_v2.psd). Losing hours of work is soul-crushing – learn from my early, painful experiences! Consider using services like Google Drive, Dropbox, iCloud, or specialized art cloud services like ArtStation's cloud storage for automatic syncing. For truly critical projects, I even keep an external SSD backup. It might sound like overkill, but the peace of mind is priceless. - Experiment with File Formats: Understand the difference between file types like PSD (Photoshop Document - great for layered work), TIFF (high quality, also supports layers), PNG (excellent for transparent backgrounds and web graphics), and JPG (for web sharing with smaller file sizes and lossy compression). Choosing the right format for saving and exporting is crucial for quality, usability, and file size. Understand when lossless (like PNG or TIFF, which retain all original image data) versus lossy (like JPG, which discards some data to reduce file size but can degrade quality) compression is appropriate. For web display, WebP is an increasingly popular format that offers superior compression with good quality. If you're working on something with animation, GIF and MP4 become relevant. Each format has its strengths and weaknesses, and choosing wisely can impact both your artwork's quality and its usability.
- Take Breaks: Seriously. Staring at a screen for hours can lead to eye strain, repetitive strain injuries, and creative burnout. Step away, stretch, look out a window, or even doodle in a physical sketchbook. Set a timer if you need to; I often use the Pomodoro Technique to ensure I get regular breaks. Fresh eyes (and a rested body) can spot issues you missed while deep in the zone, leading to better art and a healthier you. I often use the Pomodoro Technique (25 minutes of work, 5 minutes break) to ensure I get regular breaks and maintain focus throughout longer creative sessions. It's amazing how a few minutes away can reset your perspective.
These little habits add up, making your digital art journey more efficient and much more enjoyable. Remember, the goal is to use the tools to serve your vision, not to be enslaved by them.

Frequently Asked Questions About Digital Art Apps
Q: Do I need an expensive tablet to do digital art?
A: Not at all! While high-end drawing tablets with screens (like Wacom Cintiqs or iPads with Apple Pencils) offer a premium experience, you can absolutely start with more affordable screen-less tablets (like Wacom Intuos or Huion models) connected to your computer. Even many smartphones have surprisingly capable drawing apps now – I've seen some incredible work done with just a finger on a phone screen! The most important thing is to start. I started with a tiny, basic Wacom tablet, and it was more than enough to get a feel for the medium and develop my skills. Don't let gear hold you back; focus on practice and passion. Many entry-level pen tablets cost less than a good set of traditional art supplies. You can find excellent options from Wacom (like the Intuos series), Huion, or XP-Pen that offer fantastic pressure sensitivity and a comfortable drawing experience for under $100. It's about getting started and building those fundamental skills.
Q: Are there any good digital sculpting apps?
A: Absolutely! Digital sculpting is a fantastic art form, especially for those interested in 3D characters, creatures, or abstract forms that can then be 3D printed or used in games and animations. On desktop, ZBrush is often considered the industry standard for high-detail organic sculpting, but it has a very steep learning curve and a unique interface. Blender is an amazing free and open-source option that includes robust sculpting tools alongside its comprehensive 3D modeling, animation, and rendering capabilities, making it a true powerhouse for any 3D artist. For iPad users, Nomad Sculpt is incredibly powerful and intuitive, often praised for bringing a professional sculpting experience to a portable device that feels very natural. Blender, in particular, has seen incredible advancements in its sculpting workspace, making it a viable (and free!) alternative to dedicated software like ZBrush, especially for artists already comfortable with its 3D environment. It’s a completely different creative muscle to flex, pushing you to think in three dimensions, and immensely rewarding.
Q: Can I really create professional art with free apps like Krita?
A: Absolutely! Krita, GIMP (for robust image manipulation), and Autodesk Sketchbook (which used to be paid but is now free and fantastic for sketching) are incredibly powerful tools that are constantly being improved by dedicated communities. Many professional artists (myself included, at times!) use a combination of paid and free software in their workflows. Remember, skill and vision trump the price tag of your tools every single time. It's not the brush, but the hand that wields it, as they say (or something more eloquent, probably). I've seen breathtaking work created in free software that rivals anything made in subscription-based programs. Your talent, dedication, and creative problem-solving are far more important than the cost of your tools. Beyond Krita, other powerful free tools include GIMP (for robust image manipulation, akin to a free Photoshop), Inkscape (for vector graphics, a free Illustrator alternative), and even the recently free Autodesk Sketchbook (fantastic for sketching and inking). It's truly a golden age for accessible digital art.

Q: How do I manage my digital art files?
A: Good file management is crucial, otherwise your digital workspace can quickly become a chaotic mess! I recommend establishing a clear, logical folder structure from the start: separate folders for 'Works in Progress,' 'Completed Art,' 'Brushes & Resources,' 'Reference Images,' and 'Client Work,' for example. Use consistent naming conventions (e.g., ProjectName_ArtworkTitle_Date_Version.psd) to make locating files easier later. Regularly back up your work to multiple locations – cloud storage (like Dropbox, Google Drive, or specialized art cloud services) and/or an external hard drive. For very large collections or intricate projects, consider implementing a simple version control system, or even a dedicated asset manager that can tag and categorize your files. Don't learn the hard way like I did, losing some early experimental pieces to a hard drive crash! For very large collections or intricate projects, consider implementing a simple version control system by saving incremental copies of your work (e.g., ProjectName_ArtworkTitle_v01.psd) or even a dedicated asset manager that can tag and categorize your files for easy searching. This level of organization can save you countless hours of frustration down the line.
Q: What's the difference between raster and vector art?
A: Great question! This is a fundamental concept in digital art that every artist should understand. Raster art (like photographs or traditional digital paintings) is made of pixels, those tiny colored squares that make up an image grid. When you zoom in far enough, you'll eventually see the individual squares, and the image can appear 'pixelated' or blurry if scaled up too much. Most painting apps, like Procreate or Photoshop, primarily create raster art. They're excellent for rich textures, complex blending, and painterly effects because they manipulate individual pixel data. Vector art, on the other hand, uses mathematical equations to create points, lines, and curves that define shapes and colors. This means it can be scaled to any size – from a tiny icon on a smartphone to a giant billboard – without losing any quality or becoming pixelated. The edges always remain perfectly crisp. Apps like Adobe Illustrator or Affinity Designer excel at vector art, which is fantastic for logos, typography, crisp illustrations, and anything that needs to maintain clean, scalable edges. Think of it like a digital drawing where the computer remembers the instructions to draw a circle, not just a bunch of colored dots arranged in a circle. This fundamental difference means raster is great for rich, nuanced, painterly effects but can pixelate, while vector is perfect for crisp, scalable graphics but might feel less 'organic' for freehand painting. Many artists, myself included, often combine both in a hybrid workflow, leveraging each for its unique strengths.
Q: What are some common mistakes beginners make?
A: Oh, where to begin? We all make mistakes, myself included (I've made almost all of these at some point!). Some common ones include:
- Not using enough layers (or too many!): Find a balance that works for your workflow. Layers are your friend for flexibility and non-destructive editing. I've definitely had canvases with over 100 layers, and others with just a few!
- Ignoring reference photos: Even abstract artists use references for color palettes, textures, lighting, or compositional inspiration. There's no shame in seeking inspiration and guidance; it's a foundation of art.
- Forgetting to save regularly: A crash or power outage can erase hours of work in an instant. Hit that save button often, and enable autosave features if your app has them! My rule is: if I'd be sad to lose it, save it, often with incremental version numbers.
- Not taking breaks: Eye strain, hand cramps, and creative block are real. Step away from the screen, stretch, look out a window, or even doodle in a physical sketchbook. Your eyes and mind will thank you.
- Comparing themselves too harshly: Everyone starts somewhere, and everyone's journey is unique. Focus on your own progress and learning, not others' finished masterpieces you see on social media. It's a journey, not a race, and comparison is the thief of joy (and creativity!).
- Working at the wrong resolution: Starting with a canvas too small for your intended output (e.g., printing a large piece from a tiny web-res file) can lead to blurry, pixelated results. Always consider your final destination – print, web, animation, etc. – and set your canvas dimensions and DPI accordingly.
- Not managing color profiles: Especially important if you plan to print your work. What you see on screen (RGB) might not perfectly match what comes out of a printer (CMYK) without proper color management. This can be a complex rabbit hole, but understanding the basics is crucial for consistent output.
Q: Is digital art "real art" compared to traditional art?
A: Oh, the age-old debate! And my answer is a resounding yes. Digital art requires the same principles of composition, color theory, anatomy (if figurative), and creative vision as traditional art. The tools are different, but the artistic intent, skill, and creative problem-solving are just as valid and often even more complex. To dismiss it is to dismiss an entire evolution of artistic expression, much like people once questioned photography as an art form, or even ultimate-guide-to-cubism in its early days. It's just another medium in a constantly expanding universe of human creativity, offering unique possibilities that traditional mediums simply cannot. The debate itself often feels quaint, considering how seamlessly digital tools are integrated into so many aspects of contemporary art, design, and even traditional studio practices today. As someone who started with oils and canvas, I can tell you that the fundamental challenges of creating something meaningful – composition, color, conveying emotion – remain the same, regardless of the medium. The tools change, but the artist's soul endures. The art world has moved on, and so should we!
Q: Can I sell digital art?
A: Absolutely! Many artists make a living selling digital art, and the possibilities are constantly expanding. This can include:
- Prints: Selling physical prints of your digital creations (giclée, canvas prints, metal prints) through print-on-demand services or your own studio.
- Merchandise: Licensing your art for use on t-shirts, mugs, phone cases, stationery, home decor, and countless other products.
- Commissions: Creating custom digital artwork for clients, from portraits to book covers to concept art.
- Stock Art & Resources: Selling your digital assets (custom brushes, textures, patterns, illustrations, mock-ups) on marketplaces to other artists and designers.
- Digital Downloads: Offering high-resolution files for personal or commercial use (e.g., printable art, social media templates).
- Art Marketplaces: Platforms like ArtStation, DeviantArt, Behance, Etsy, or even your own website (like my /buy page!) are fantastic places to showcase and sell your work. Remember to understand licensing and copyright if you're selling your work, especially for commercial use, to protect your intellectual property.
Q: How do I share my digital art online?
A: Most digital art apps allow you to export your work in various formats (PNG, JPG, TIFF). PNG is great for transparent backgrounds or crisp images with lossless compression, while JPG is good for smaller file sizes for quick web loading (though it uses lossy compression). You can then share on platforms like Instagram, ArtStation, DeviantArt, Behance, Tumblr, or even your own dedicated website. Consider creating a professional online portfolio to curate and showcase your best work in a cohesive manner; this is often the first impression a potential client or gallery will have. Think about your target audience and choose platforms where they are most likely to discover and appreciate your art. Engaging with communities on these platforms can also help grow your visibility and connect with other artists. When creating your online portfolio, think about telling a story with your work, not just presenting images. Explain your process, share your inspirations, and show your unique artistic journey. This personal touch is what truly captivates an audience.
Q: How often do these apps get updated?
Q: What about accessibility features in digital art apps?
A: This is a really important area that's thankfully getting more attention. Many digital art apps now offer a range of accessibility features to support artists with diverse needs. This can include customizable interface colors and contrast modes for visual impairments, adjustable brush cursors, simplified menu options, and robust keyboard shortcut customization (which can be paired with assistive devices). Some tablets and operating systems also have built-in screen readers, voice controls, and input remapping. It's always worth checking the specific app's documentation or community forums if you have particular accessibility requirements, as developers are continually working to make their software more inclusive. No artist should be excluded due to interface barriers!
Q: What are some good resources for learning digital art fundamentals?
A: Beyond learning the software, understanding art fundamentals like composition, color theory, perspective, anatomy, and lighting is crucial for growth. Many online platforms offer excellent courses:
- YouTube: A treasure trove of free tutorials from artists like Sam Does Arts, Sinix Design, or Marc Brunet.
- Skillshare/Domestika: Subscription-based platforms with structured courses on specific techniques, styles, and software.
- Proko/New Masters Academy: Excellent for traditional art fundamentals like anatomy and figure drawing, which translate directly to digital.
- ArtStation Learning: Offers professional courses from industry veterans, often focusing on concept art and illustration.
- Books: Classic art instruction books remain invaluable, and many have digital versions.
The key is consistent practice and applying what you learn. It's not about passively watching; it's about actively doing.
Q: How do I find inspiration when I'm stuck or facing artist's block?
A: Ah, the dreaded artist's block! It happens to everyone, myself included. Here are a few things I've found helpful:
- Take a break: Sometimes the best solution is to step away entirely. Go for a walk, visit a museum (in person or virtually, like the /den-bosch-museum), read a book, or listen to music. Let your subconscious work.
- Look outside your comfort zone: Explore art forms you don't usually engage with. Look at architecture, nature, fashion, or even scientific diagrams. Abstract artists often find inspiration in unexpected places! I sometimes look at old science fiction book covers, listen to experimental music, or even study patterns in nature to kickstart new ideas for color and form, much like exploring the history of art movements from ultimate-guide-to-cubism to contemporary trends. It’s about feeding your mind with diverse inputs.
- Go back to basics: Do some simple sketching exercises, draw from life, or revisit old tutorials. Sometimes a little focused practice can re-ignite the spark.
- Connect with other artists: Share your frustrations, see what others are working on, and participate in challenges. Community can be a powerful antidote to isolation.
- Experiment without pressure: Open your app and just doodle without any specific goal. Try a new brush, a wild color palette, or a different style. Removing the pressure to create a 'masterpiece' can free you up.
Q: Are there any digital art apps specifically designed for abstract artists?
A: While most general painting apps can be used for abstract art, few are exclusively designed for it. However, certain apps excel due to their robust brush engines, blending modes, and experimental features. Procreate, Krita, and even Photoshop are fantastic for abstract work because of their versatility in creating unique textures, gestural marks, and complex compositions. For more generative or algorithmic abstract art, you might look into coding environments like Processing or specialized fractal generation software. Ultimately, the 'best' app for abstract art is one that allows you to explore freely and manipulate color, form, and texture without getting in your way. Features like advanced blending modes, a customizable brush engine, and robust layer management are often paramount for building up complex, dynamic abstract compositions. I often find myself pushing the boundaries of what a "standard" brush can do, creating unique textures that become signatures of my abstract pieces.
Q: What's the best way to learn a new digital art app quickly?
A: The quickest way to learn a new app is usually a combination of structured learning and active experimentation. Here's my typical approach:
- Official Tutorials: Start with the developer's official tutorials or quick-start guides. They often cover the core functions efficiently.
- YouTube & Online Courses: Search for beginner-friendly tutorials. Many artists create excellent, free content. For a more structured approach, consider platforms like Skillshare or Domestika.
- Focus on Core Tools: Don't try to learn everything at once. Identify the tools you'll use most often (brushes, layers, selection tools) and master those first.
- Experimentation: Just dive in! Draw, paint, make mistakes. Play with settings, try every button. This hands-on experience is invaluable. Don't be afraid to break things or make ugly art; that's part of the learning process. Actively try to replicate effects you admire, and then experiment to make them your own. It's like learning a new language – immersion is key, and mistakes are inevitable, but necessary.
- Join the Community: Ask questions in forums or Discord servers. Other users are often happy to share tips and tricks.
Q: What's the deal with "pro" vs. "hobbyist" tools?
A: This is a common misconception! The line between "professional" and "hobbyist" tools is often blurred. While some apps are clearly industry standards (like Photoshop or ZBrush), many "hobbyist" apps offer immense power and are used by professionals, especially for specific tasks or because they prefer the workflow. Procreate is a prime example – incredibly popular with hobbyists, but also a staple for many professional illustrators and concept artists. Don't let labels define your tools; let your needs and preferences guide you. Often, the distinction comes down to the depth of features, integration with other software, and often, the price tag, but not necessarily the quality of art you can produce.
Q: Can I effectively use multiple digital art apps for one project?
A: Absolutely, and many professional artists (including myself) do! This is often called a hybrid workflow. You might start a sketch in a portable app like Procreate, then transfer it to Clip Studio Paint for precise line art and comic panels, and finally bring it into Photoshop or Affinity Photo for final color grading, effects, and print preparation. The key is understanding each app's strengths and how to export and import files between them efficiently (often using formats like PSD, TIFF, or PNG). Building a custom workflow that leverages the best features of several tools can be incredibly powerful and efficient, especially for complex projects. For example, you might block out initial ideas in Krita, refine line art in Clip Studio Paint, apply colors and textures in Procreate, and then bring everything into Photoshop for final compositing, color grading, and print preparation. Each app plays a crucial role in the overall artistic journey, much like different brushes contribute to a single definitive-guide-to-paint-types-for-artists painting.
Q: What are the environmental considerations or benefits of digital art?
A: This is a nuanced question. On the one hand, digital art significantly reduces material waste compared to traditional mediums – no wasted paint, paper, solvents, or canvases. That's a huge environmental benefit. However, digital art relies on technology, which has its own environmental footprint: energy consumption for devices, data centers, and the manufacturing and disposal of hardware. The rise of NFTs, with their reliance on energy-intensive blockchain technology, has also raised significant environmental concerns. So, while digital art eliminates many traditional art material impacts, it introduces others related to technology. It's a trade-off, and being mindful of our tech consumption and power usage is always a good practice. Choosing energy-efficient devices, extending the lifespan of your hardware, and using cloud services powered by renewable energy can all contribute to a more sustainable digital art practice. It's about making conscious choices where possible, acknowledging that every creative act has an impact.
Q: How do I choose or create a good set of digital brushes?
A: Choosing and creating brushes is a fantastic way to personalize your digital art experience. Here’s how I approach it:
- Experiment with Defaults: Most apps come with a solid set of default brushes. Play with them extensively to understand their properties (texture, flow, opacity, blending).
- Download Free/Paid Sets: Online marketplaces and artist communities offer countless free and premium brush sets. This is a great way to quickly expand your toolkit.
- Analyze Your Needs: Do you need brushes for specific textures (e.g., watercolor, oils, charcoal), specific line qualities (e.g., crisp, textured, sketchy), or unique effects? Your art style will dictate your brush choices.
- Create Your Own: Many apps allow you to create custom brushes from scratch or modify existing ones. This is where the real magic happens! Experiment with brush tips, grain textures, dynamics, and dual brushes to develop truly unique tools that fit your artistic voice. It can be a deep rabbit hole, but a rewarding one for discovering your signature style. When creating your own, experiment with dual brushes (combining two brush tips), texture sources, blending modes, and jitter/scatter settings to achieve truly unique effects. I often create my own custom brushes for my abstract work, as they allow for textures and expressive marks that are simply not available in default sets, becoming an extension of my artistic voice.
Q: What role does Artificial Intelligence (AI) play in contemporary digital art?
A: AI is rapidly changing the landscape of digital art, moving beyond simple tools to become a collaborator and even a creator. It's a fascinating, complex, and sometimes controversial topic, as explored in the-role-of-ai-in-art-curation-opportunities-and-challenges-for-galleries-and-collectors. Here are a few key roles:
- Generative Art: AI algorithms can create entirely new artworks based on parameters set by the artist, or even learn from existing styles to generate unique pieces. The artist becomes more of a curator or director, guiding the AI's creative output.
- Image Upscaling & Restoration: AI can enhance the resolution of smaller images, restore old or damaged photographs, or even de-noise artwork without losing crucial detail.
- Content Creation & Ideation: AI can generate ideas, create mood boards, or even produce quick concept sketches based on text prompts, acting as a brainstorming partner.
- Deepfakes & Synthetic Media: This more controversial application involves AI generating realistic fake images, videos, or audio, raising ethical questions about authenticity and manipulation.
Q: Should I get a screen protector for my tablet?
A: For pen displays and iPads, a screen protector is a pretty good idea! Not only does it protect your screen from scratches and stylus wear (especially if you tend to draw with a heavy hand like I do!), but many also offer a matte, paper-like texture that significantly enhances the drawing experience. This added friction can make drawing feel more natural, reducing the slippery feel of glass. Just make sure to get one specifically designed for your device to ensure proper fit and stylus responsiveness.
- Style Transfer: AI can apply the artistic style of one image to the content of another, creating compelling hybrid visuals.
- Assisted Creation: AI-powered tools can help with tasks like automatic coloring, upscaling images, creating seamless textures, or even suggesting compositional layouts, streamlining parts of the artistic workflow.
A: This varies greatly between developers, and it's a good question to ask when choosing software! Subscription-based software like Adobe Photoshop typically receives frequent updates with new features, bug fixes, and performance improvements, often on a monthly or quarterly basis, ensuring you always have the latest tools. One-time purchase apps like Procreate or Affinity Photo usually have less frequent but often substantial updates (e.g., once or twice a year, or a major version every few years), sometimes with a paid upgrade for a major new version. Free and open-source apps like Krita are developed by a passionate community, so updates can be less predictable but are often driven directly by user contributions and feedback, which is a unique advantage. It's always a good idea to check the developer's website, social media, or dedicated forums for their update schedule and roadmap. Sometimes, a "minor" update can introduce a game-changing feature, while a major version upgrade might completely re-imagine the interface or core functionality. Understanding this can help you decide if a subscription is worth the continuous innovation or if a one-time purchase offers enough stability for your needs.
Q: What about color profiles and printing?
A: This is a more advanced topic but a crucial one if you plan to print your digital art and want your colors to look accurate. Color profiles (like sRGB, Adobe RGB, ProPhoto RGB, or CMYK) are sets of data that define a specific range of colors that a device (monitor, printer, scanner) can reproduce. Monitors typically display in the additive RGB (Red, Green, Blue) color space, while most commercial printers use the subtractive CMYK (Cyan, Magenta, Yellow, Key/Black) color space. If you don't manage your color profiles correctly, what you see on screen might not match what comes out of the printer – vibrant digital blues might print duller, for instance. Many professional apps allow you to work in different color spaces and do soft proofing (simulating print output on screen). For best results, use a reputable print service that can advise on profiles, and consider learning the basics of color management and monitor calibration. It's a technical rabbit hole, but one worth exploring for professional results! My advice is to always communicate with your print provider, send them your files in the requested format, and if possible, do a test print. This small step can save you from costly re-prints and ensure your physical artwork truly reflects your digital vision.
The Journey Continues: Keep Experimenting!
If there’s one thing I hope you take away from all this, it’s that the world of digital art is incredibly exciting, accessible, and constantly evolving. Don't get bogged down by analysis paralysis, trying to find the absolute 'perfect' tool before you even start. My best advice? Pick an app that feels right, start creating, and don't be afraid to explore, switch, or combine tools as your needs and style evolve. The tools are there to serve your vision, not define it. My own work, always evolving, stands as a testament to the power of constant experimentation and learning – you can see some of my latest explorations and how my style has changed over time on my /timeline page, for example. The journey of an artist is one of continuous discovery, adaptation, and joyful creation, and digital tools are here to amplify every step.
Your artistic journey is uniquely yours, whether you’re drawing complex landscapes, designing intricate characters, or crafting abstract forms that challenge perception and push boundaries. Just keep creating, keep learning, keep sharing your unique perspective with the world, and remember that every stroke, digital or traditional, contributes to your growth. I know I will, and I can't wait to see what you create!


