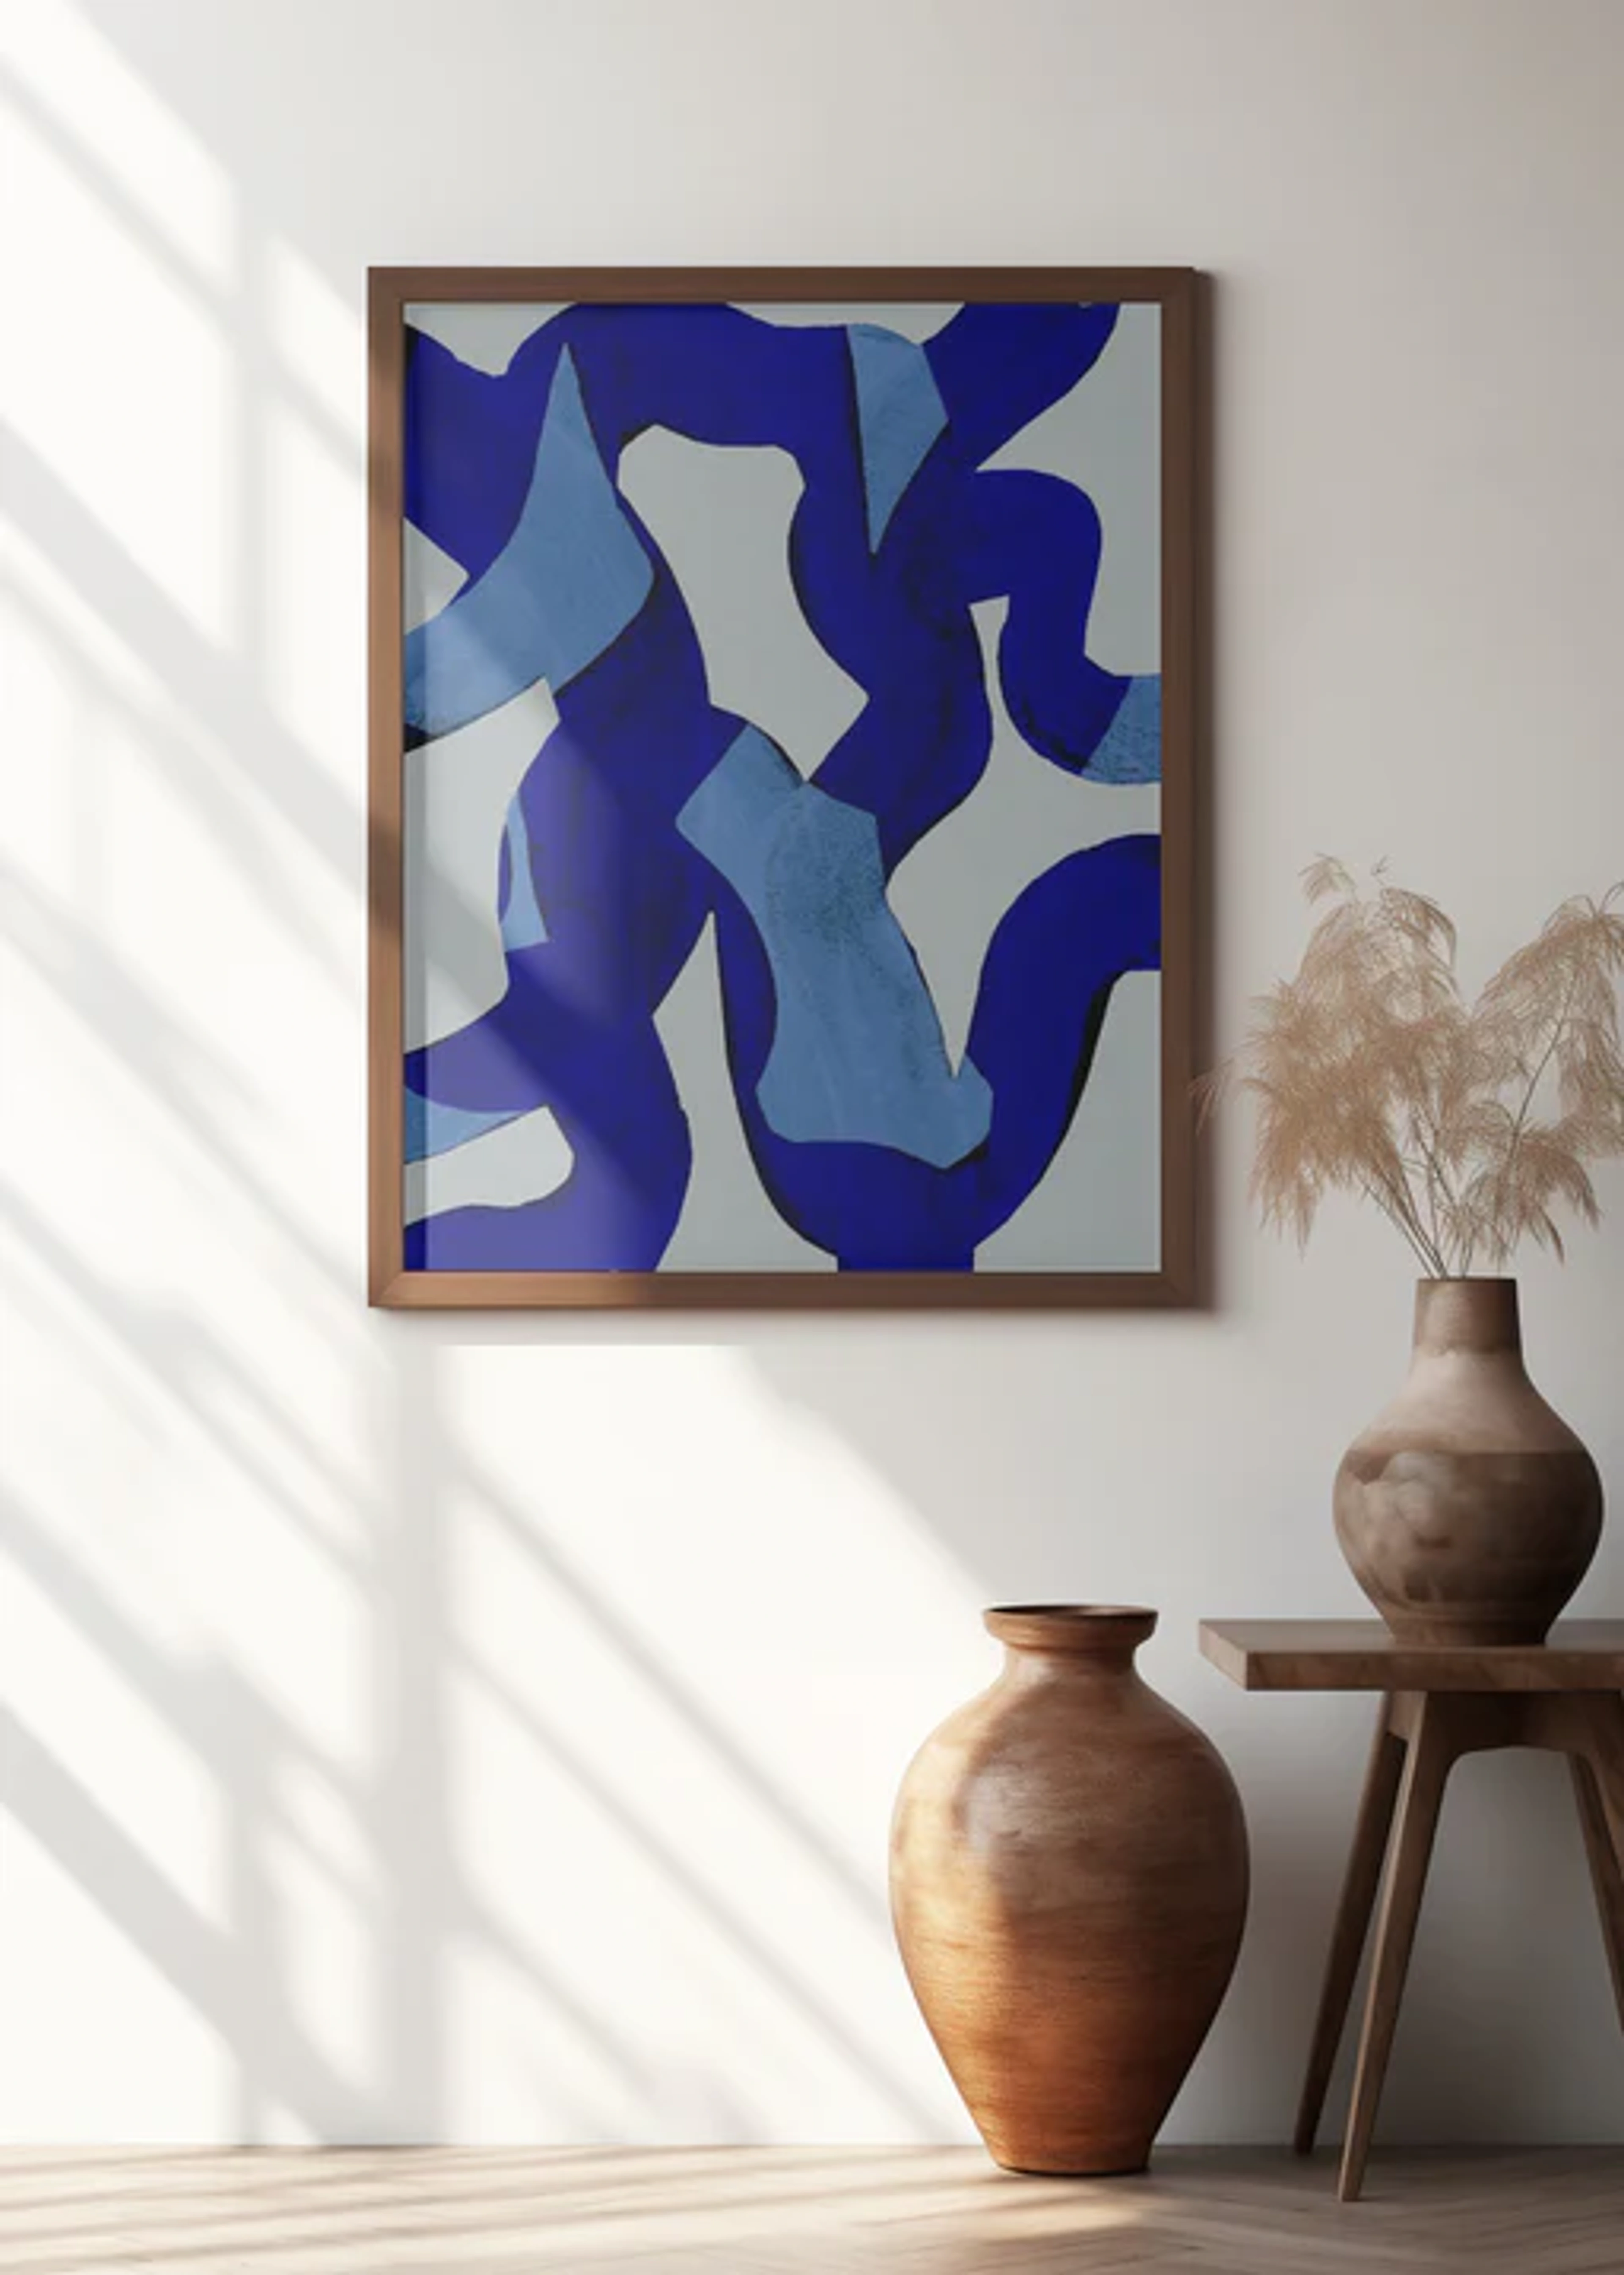
How to Frame a Canvas Painting: A Decorator's Guide to Elevating Your Art
Unlock the secret to transforming your canvas art into a masterpiece with the perfect frame. This guide explores floater vs. traditional frames, offering practical steps and design insights to make your art truly shine in any space.

How to Frame a Canvas Painting: The Ultimate Decorator's Guide to Elevating Your Art
Let's be honest, walking into an art supply store, or even just looking at a bare canvas, can feel a little daunting. All those choices! But trust me, as someone who lives and breathes art and interior design, there's one decision that consistently transforms a piece from "nice to look at" to "absolutely captivating": the frame. For years, I saw framing as a purely practical thing – a way to protect a painting from the big, bad world, or maybe just to make it easier to hang. But over time, especially with my own canvases coming to life, I realized it's so much more than that. A frame isn't just a border; it's like the perfect outfit for your artwork, something that truly completes its story and helps it sing in any room. It’s the final flourish that takes your canvas from a mere object to a focal point, a statement piece that commands attention.
I've always believed that the right frame has a transformative power, much like finding the perfect accent piece for a room that suddenly brings everything together. It’s not just about enclosure; it’s about presenting your vision. The right frame choice is absolutely crucial – it's the difference between "nice art" and "wow, look at that art!" I've seen it happen countless times: a canvas I thought was complete suddenly pops when framed correctly, revealing hidden depths or a newfound gravitas. This isn't just about protection; it's about presentation, perception, and perfecting the conversation your art has with its surroundings. It’s about creating an experience, telling a richer story, and giving your art the stage it truly deserves. In this definitive guide, we’ll demystify the entire process, covering everything from frame types and materials to matching your art with your space, and even the nitty-gritty of installation and long-term care. Consider this your comprehensive resource for making your canvas paintings truly shine. We’ll explore not just how to frame, but why it matters, ensuring your art is preserved and presented in a way that resonates deeply with you and your audience. This is your ultimate guide to turning a canvas into a captivating masterpiece.

The "Why" Behind the Frame: More Than Just Decoration
I often think of a bare canvas, fresh off the easel, as a beautiful raw diamond. It has immense potential, vibrancy, and a story to tell. But put that diamond in the right setting, and it absolutely sparkles. That's what a frame does for your canvas painting. It's not just an afterthought; it's a deliberate choice that elevates and completes the artwork, imbuing it with a sense of purpose and presentation. It transforms a piece from something simply created into something deliberately presented, signaling its importance and inviting a deeper engagement.

From a decorator's and art lover's perspective, a frame does a few magical things, extending far beyond simple aesthetics:

- It Defines the Art: It creates a clear boundary between the artwork and the wall, giving the eye a resting place and signalling, "This is important, pay attention here." Without it, a piece can sometimes feel lost or unfinished, especially on a busy wall. I've often seen beautiful art disappear into a white wall simply because it lacked that visual anchor, almost like a whisper in a crowded room. The frame acts like a stage for your art, drawing the audience's gaze. It elevates the piece from a mere decoration to a focal point, a deliberate statement that commands attention. A well-chosen frame can guide the viewer's gaze, inviting them to delve deeper into the artwork's narrative and details, much like a curtain rising on a theatrical performance. (And if you're ever struggling with a busy wall, you might find some useful tips in my guide on how to decorate a wall). The frame visually separates the creative work from its architectural environment, allowing its intrinsic qualities to stand out. It transforms a flat surface into a portal, a window into another world, by giving it distinct edges and a clear identity.
- It Protects Your Investment: Look, art is an investment, whether it's a priceless masterpiece or a cherished piece you created yourself. Canvas, while sturdy, isn't immune to the hazards of everyday life – bumps, scrapes, accidental touches, or the inevitable dust bunnies. A frame offers a crucial physical barrier, protecting the vulnerable edges and surface from minor accidents. Beyond that, a good frame helps mitigate environmental factors like humidity fluctuations, which can cause canvas tension to slacken or tighten over time, potentially leading to cracks in the paint. It can also act as a buffer against airborne pollutants, which over time can cause discoloration or deterioration of the paint surface. This is particularly relevant if you're thinking about displaying valuable pieces or your own hard-earned creations, ensuring their longevity and preserving their beauty and integrity for years to come. Think of it as a personal bodyguard for your art, safeguarding it from the subtle aggressions of its environment. For truly delicate pieces or those in high-traffic areas, a frame can even act as a crucial standoff, preventing direct contact and accidental damage, ensuring the integrity of the artwork's surface and edges. This physical protection is especially vital for pieces displayed in dynamic environments, or in homes with children or pets, where accidental bumps are always a possibility.
- It Creates a Sense of Completion: Have you ever seen a beautifully composed piece of music or a compelling film that just… ends abruptly? It feels unfinished, right? A canvas painting, even a magnificent one, can sometimes feel the same way without the right frame. The frame provides a definitive visual conclusion, signaling to the viewer that this is a complete, intentional work. It’s like the final flourish, the last perfect note that brings an entire symphony to a satisfying close. Without that border, the artwork can sometimes visually bleed into the wall, losing its distinct identity and impact. It says, 'This is a world unto itself, complete and resolved.' The frame essentially puts a period at the end of the artist's sentence, affirming the artwork's narrative and giving it a resolved, intentional presence.
- It Offers Archival Protection: Beyond visible hazards, a well-chosen frame, especially when paired with acid-free backing boards and proper mounting techniques, creates a micro-environment for your artwork. This helps shield it from invisible threats like airborne pollutants, acid migration from contact materials, and even subtle vibrations. When I say 'acid-free,' I mean materials that won't leach harmful chemicals onto your canvas over time, which can cause yellowing or brittleness – a conservator's worst nightmare! These specialized materials, often made from purified wood pulp or synthetic fibers, actively prevent harmful chemical reactions that can degrade your art. If you're invested in the long-term health of your art, considering the archival quality of your framing materials is a non-negotiable step. It’s like creating a time capsule for your masterpiece, preserving its condition for future generations. For comprehensive insights into material longevity, you might want to delve into my guide on the definitive guide to art materials from traditional to contemporary mediums. And yes, sometimes, even for canvas, UV-filtering glazing can be a wise addition, especially for works in brightly lit spaces, acting as a crucial sunscreen for your pigments. This combination of protective measures forms a formidable defense against the slow, insidious forces that can degrade your art over decades.
- It Enhances Longevity and Value: This point often gets overlooked, but it's incredibly important. Beyond mere physical protection, a thoughtfully chosen and professionally installed frame significantly contributes to both the longevity and the perceived value and prestige of a piece. From an art market perspective, collectors and discerning buyers often look for art that has been properly cared for, preserved, and presented – a tangible sign of respect for the piece. A quality frame signals that the artwork is cherished, taken seriously, and its long-term preservation has been considered. It communicates a narrative of care and discernment, influencing how the artwork is received and valued. It's a statement about the piece's importance, signaling to any viewer or potential collector that this artwork is something to be valued, a true investment in beauty and culture, rather than just an afterthought. A frame can subtly influence appraisals, signaling the artwork has been treated with the utmost care, a crucial factor in the art market. To learn more about the intricacies of collecting, check out our guide on collecting emerging abstract art a guide to discovering tomorrows masters. A piece in a high-quality frame, thoughtfully chosen, not only looks better but often retains its value more effectively over time.
- It Elevates the Aesthetic: This is where the decorator in me really, truly gets excited! The frame isn't just a container; it's an active participant in the artwork's visual dialogue. The right frame choice can subtly pull out recessive colors within the painting, making them pop, or provide a grounding counterpoint to a vibrant composition. It can enhance and complement textures, adding another layer of sensory experience, making a thick impasto piece feel even more sculptural. It can even dramatically influence the perceived mood of the painting – making a somber piece feel more contemplative or a vibrant one even more energetic, giving it a playful edge. It's about consciously shaping how the artwork is experienced. It can seamlessly tie the artwork into the existing decor, creating a harmonious visual flow, or, just as powerfully, it can make it a deliberate, impactful contrast, a stunning statement that commands attention. It’s all about creating that perfect visual symphony or a compelling solo performance that draws the eye and holds it captive. Think about how a minimalist black frame can intensify the drama of an abstract piece, or a gilded frame can bring a sense of regal depth to a classical portrait. It's a dialogue, a dance, a carefully orchestrated visual experience.
- It Creates a Visual Hierarchy: Before even directing the eye to within the piece, a frame immediately signals that the object it surrounds is art, and therefore, important. It establishes a visual hierarchy in a room, telling the viewer, "This is a focal point; your attention is requested here." In a world saturated with visual information, this initial signal is incredibly powerful.
- It Directs the Viewer's Eye and Focus: Think of the frame as a subtle, yet powerful, guide. It creates a visual boundary that immediately tells the brain, "Stop here; this is what you should be looking at." In a busy room or on an expansive wall, a frame helps prevent the eye from wandering, ensuring that the artwork commands the attention it deserves. It acts like a spotlight, highlighting the details and nuances of the painting within, drawing the viewer in for a more intimate and focused experience. Without that defined border, even the most striking piece can sometimes struggle to assert its presence. It prevents the artwork from visually 'bleeding' into the surrounding wall, ensuring it holds its own distinct space and impact.
- It Preserves Historical Context: For older or period pieces, a frame isn't just a border; it's a crucial part of its historical identity. A frame from the same era or in a complementary style can deepen the connection to the artwork's original context, offering a tangible link to its past. It's like finding the perfect antique locket for a treasured photograph – it tells a richer story together. This is especially true for museum pieces, where the frame is often considered an integral part of the art's provenance and presentation. Imagine a Baroque painting in its original, intricately carved and gilded frame – it tells a story not just of the art, but of the era, the craftsmanship, and the cultural values of its time. The frame itself becomes an artifact, enriching the overall historical narrative. This historical resonance adds layers of meaning to the artwork, allowing us to appreciate it not just as a visual object, but as a cultural document.
- It Provides a Professional Finish: Finally, and perhaps most simply, a frame provides a professional, polished finish that makes any canvas look more intentional and thoughtfully presented. Whether it's a quick study or a masterpiece, a well-chosen frame instantly elevates its perceived quality, transforming a raw canvas into a finished piece ready for display. It’s that final touch that says, 'This art is important, and it deserves to be seen in its best light.' A proper frame eliminates the 'DIY' feel and instills a sense of gallery-readiness. This sense of completion and professionalism is invaluable, transforming a simple canvas into a piece that exudes confidence and artistic intent.

Demystifying the Frame Types: From Floater to Open Back
When it comes to framing canvas, a fascinating array of styles exists, each with its own personality and its own way of interacting with your artwork. While the floater frame and the traditional frame often dominate the conversation, there are other contenders like the cassette (box) frame, the shadow box frame, and the increasingly popular open back frame. Understanding the nuances of each is key to making the best choice for your painting and your space. I've personally experimented with all of them, and they each bring something unique to the table, helping to tell the art's story in different ways. This section will guide you through the most common and effective canvas framing options, helping you match the perfect enclosure to your artwork's unique character and the aesthetic of your home. We'll delve into the specifics of each, helping you discover the ideal partner for your canvas, whether it's a vibrant abstract or a serene landscape.
Feature  | Floater Frame | Traditional Frame | Cassette (Box) Frame | Shadow Box Frame |
|---|---|---|---|---|
| Appearance | Canvas appears to "float" within the frame, recessed | Partially overlaps canvas edges, classic elegance | Canvas sits at back of a shallow box, modern and substantial | Deep box creating space around the art, ideal for dimensional pieces |
| Visibility | Entire canvas, including painted edges, is visible | Small portion of canvas edge is covered | Entire front surface visible, often deep sides | Art recessed, surrounded by a distinct border/space |
| Depth | Creates a sense of depth and modern space | Adds formality and can feel more substantial | Emphasizes depth, creates a prominent architectural presence | Enhances dimensionality for objects/textured canvases |
| Style Match | Contemporary, abstract, minimalist art, gallery look | Traditional, classical, formal, ornate art | Modern, textured, deep canvases, architectural settings | Modern, eclectic, for 3D elements, or a preserved artifact look |
| Best for Canvas Depth | Typically 1.5"+ gallery wrap; can be adapted for thinner | Any depth, often ¾" to 1.5"+ (with spacers) | Usually 1.5"+ to accommodate depth | Any depth, with ample space for added objects/elements |
| Edge Visibility (Wrapped Canvas) | Full, intentional display of painted or raw edges | Edges often partially covered; less focus on painted edges | Full front visibility; deep sides can be painted/finished | Full front visibility, edges often part of the internal presentation |
| Protection | Protects edges from bumps, minimalist approach | Protects edges from bumps, robust feel, rabbet protection | Robust all-around protection, sides act as a buffer | Comprehensive protection for vulnerable dimensional elements |
| Installation | Canvas secured from back, visible gap | Canvas secured from back, rests in rabbet | Canvas secured from back within the box | Art mounted to backing, then into deep frame box |
| Cost (General) | Medium to High | Low to High (depending on ornamentation) | Medium to High | High (due to custom depth and materials) |
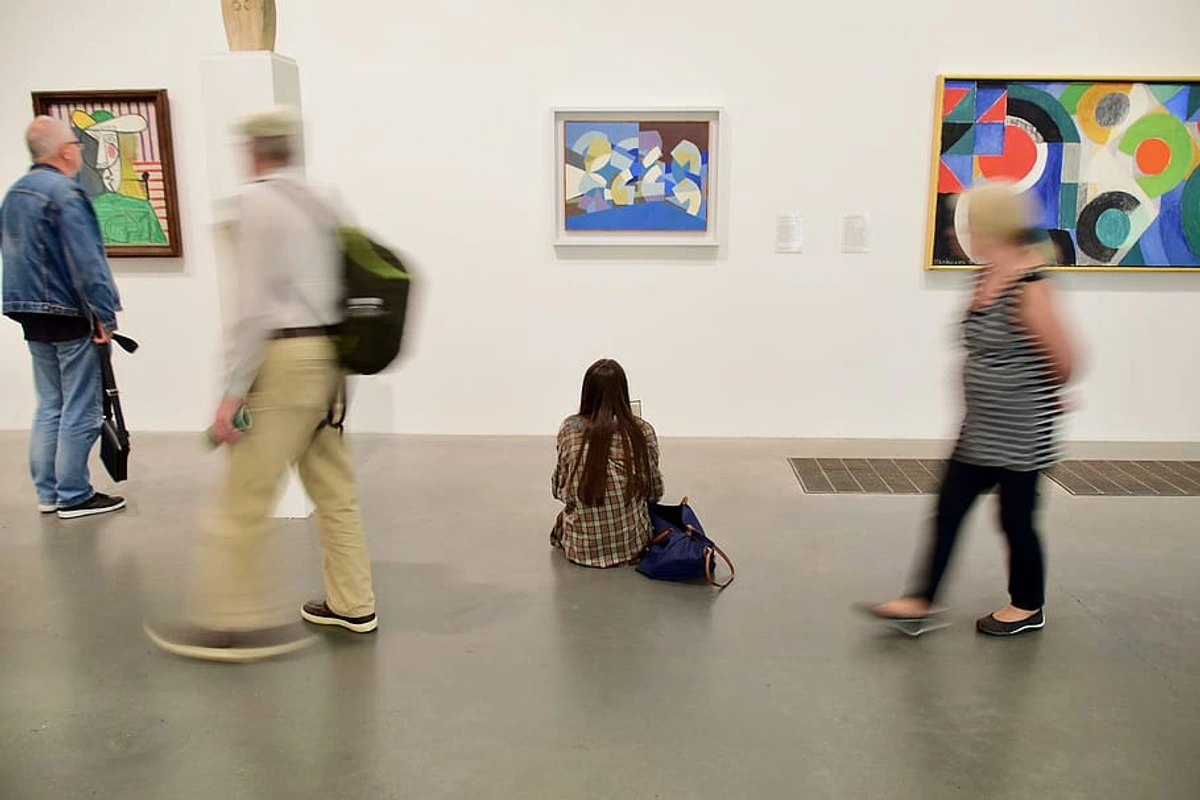
The Sleek Whisper: What is a Floater Frame?
Oh, the floater frame! This is my personal go-to for so many contemporary and abstract pieces – it just works with their energy. Imagine your canvas sitting slightly recessed within the frame, with a small, deliberate gap (often ¼ to ½ inch, but sometimes more or less depending on the desired effect) between the edge of the canvas and the inner edge of the frame. It's almost as if the artwork is floating effortlessly within the frame, hence the perfectly descriptive name! It's an illusion of weightlessness, where the art seems to defy gravity within its embrace, creating a captivating visual effect. This design is achieved by attaching the canvas from the back, allowing its edges to remain fully exposed and celebrated. This lack of a traditional rabbet means the entire artwork is visible, including the often-overlooked painted edges of a gallery-wrapped canvas. It's truly a marvel of minimalist engineering.
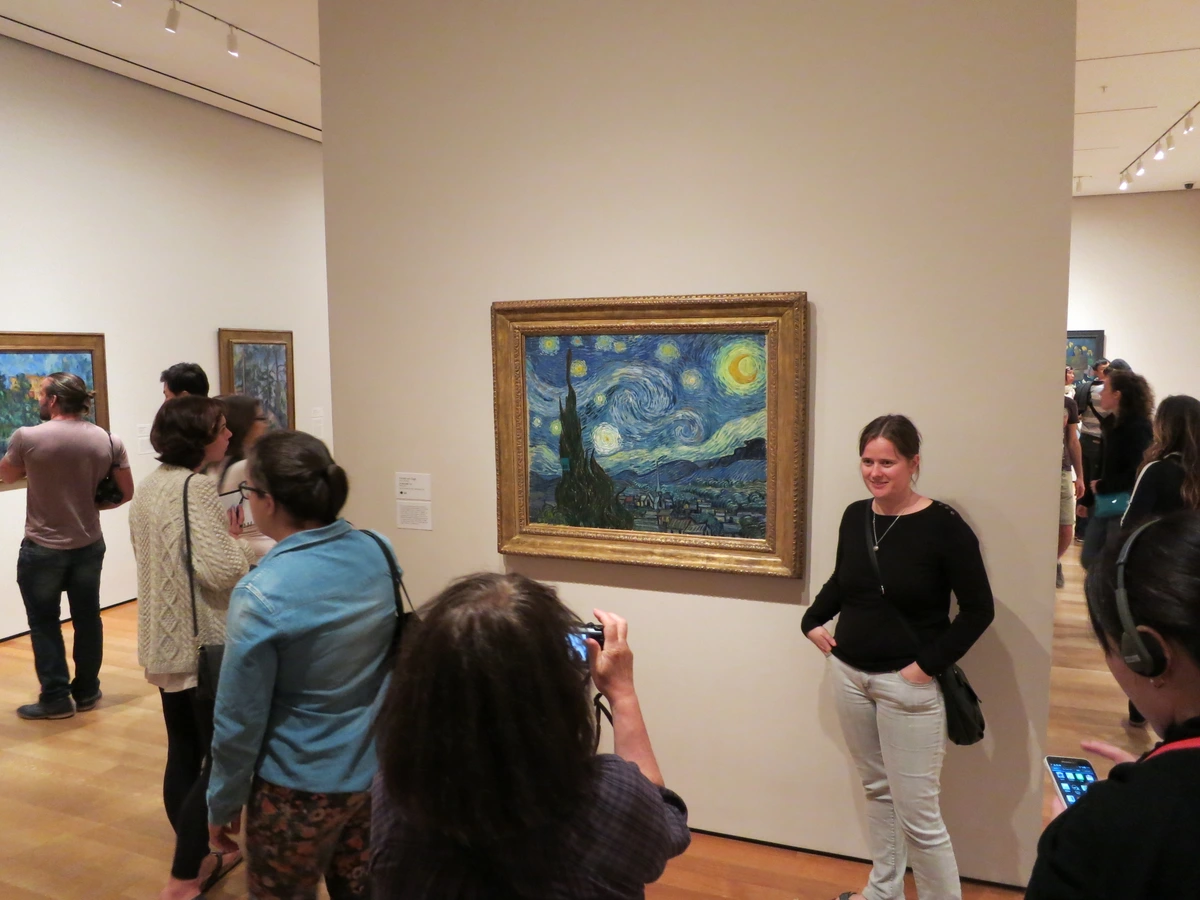
This style creates an incredible sense of depth, giving the art room to breathe, and exudes undeniable modernity. It's particularly brilliant because it allows the entire artwork, including the painted or intentionally raw edges of a gallery-wrapped canvas, to be fully visible. This is fantastic for pieces where the artist has carried the design or color around the sides, making those edges an integral part of the composition. The floater frame is designed not to distract; instead, it provides a clean, elegant, almost invisible border that enhances the artwork without ever overpowering it. If you're into that minimalist, gallery-style look, that museum-quality presentation, the floater frame is absolutely your best friend. They're typically crafted from high-quality wood (often in natural tones like maple or ash, or painted in sleek black/white) or durable aluminum, allowing for those signature clean lines and a truly modern aesthetic. I've found that the subtle shadow created by the 'float' adds another layer of visual interest without competing with the art itself. It's truly a masterclass in understated elegance, allowing the art to be the undisputed star. In fact, if you're feeling adventurous and want to delve into the DIY spirit, you could even try a guide to building a floating frame for canvas art yourself! These frames are not just functional; they are a statement of contemporary aesthetic, perfectly suited for the dynamic energy of abstract art or the clean lines of minimalist works.
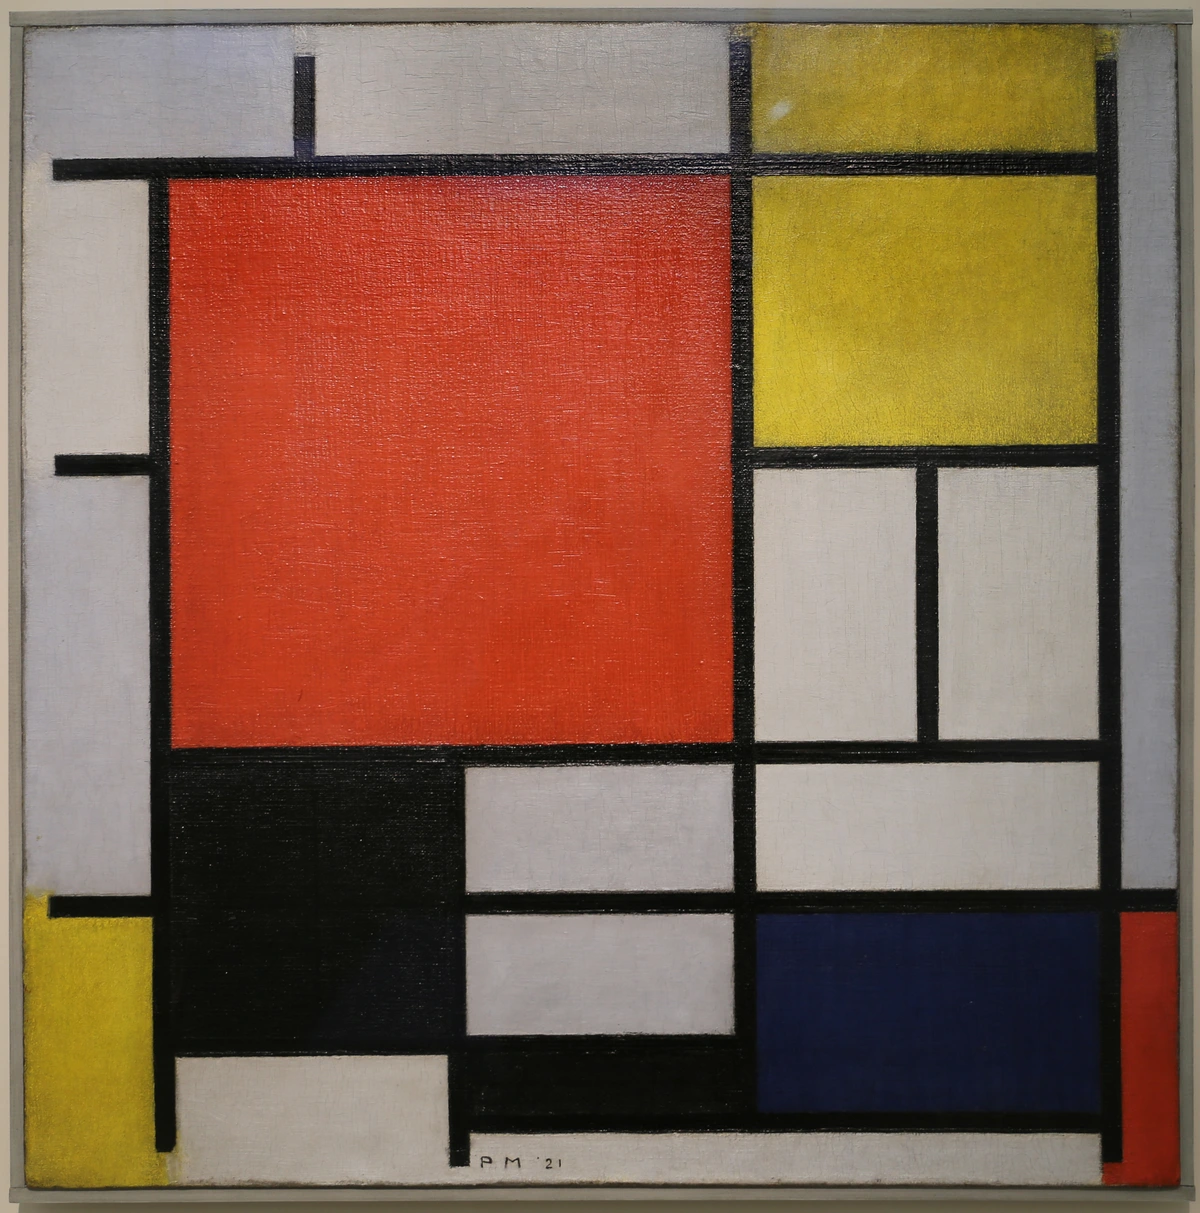
The Classic Embrace: What is a Traditional Frame?
Then we have the traditional frame, the timeless classic that immediately brings a sense of formality and heritage. These frames often partially overlap the front edges of the canvas, effectively covering a small portion of the artwork (typically about ¼ inch on each side), a feature known as the rabbet. This rabbet is the recessed lip that the canvas rests against, securely holding it in place. Traditional frames come in a vast array of styles, from ornate gold leaf to simple, classic wood profiles, and often feature a liner (a fabric-covered strip between the art and the frame) for an added layer of sophistication, though this is more common for works on paper or panel. A linen liner, for example, can add a beautiful visual break and texture. These frames are typically constructed with a rigid profile, often from wood, and can range from minimalist bands to elaborately carved and gilded designs. Their versatility makes them suitable for a wide range of artistic styles and periods. They are the workhorse of art presentation, offering both protection and a timeless aesthetic.
Traditional frames tend to bring a sense of weight and importance. They are fantastic for classic portraits, landscapes, or pieces where you want a more formal presentation. Think of a stately oil painting in an ornate, gilded frame – it’s a powerful statement that instantly evokes a sense of history and grandeur, almost transporting you to another era. These frames are usually crafted from high-quality wood, allowing for intricate carvings, various stains (from light oak to rich mahogany), or painted finishes, including classic gold leaf or distressed antique looks. While they do cover a small portion of the canvas edge, this is often negligible, especially if the artwork isn't meant to extend around the sides. When I'm aiming for a timeless, elegant look, or working with a piece that has a strong historical feel, a traditional frame is my first thought, sometimes even incorporating a high-quality acrylic or glass glazing for added protection, especially if the piece is particularly valuable or delicate. Just remember, glass on canvas is less common as canvas can breathe, but it's an option for specific protective needs, particularly if the artwork is unvarnished or prone to dust. For very deep canvases that might still require a traditional look, a custom spacer or a deeper rabbet can be incorporated into the design, allowing for the canvas to sit comfortably without being compressed.

The Modern Twist: What is a Cassette (Box) Frame?
Sometimes, a canvas is too deep for a traditional frame to really 'embrace' it, or you want something with more presence than a floater, but still contemporary. That's where the cassette frame, often called a box frame, comes in handy. These frames essentially create a shallow box around your canvas, with the artwork sitting at the back of the box, creating a distinct visual boundary. Unlike a floater that creates a deliberate gap, the sides of the cassette frame create a solid border that's flush with or slightly proud of the canvas's front surface, offering a sleek, architectural look. They provide robust protection and a clean line, making them ideal for modern art that might have significant depth or texture and needs a more substantial, yet understated, presentation. I often recommend these for canvases with very deep stretcher bars or for pieces that are mixed media and have slight three-dimensional elements, giving them a protective, gallery-style enclosure that feels incredibly intentional and modern and adds a sense of monumentality. Their deep profile adds a sculptural quality, making the artwork feel more substantial and integrated with its surrounding space. They are particularly effective for works where the sides of the canvas are integral to the aesthetic, providing a neat, contained presentation without obscuring any part of the art.
The Shadow Box: Creating Depth and Displaying Dimensions
Now, if you have a piece that truly demands space – perhaps a heavily textured canvas, a mixed-media piece with protruding elements, or even an artwork combined with objects – the shadow box frame is your ultimate ally. Imagine a deep box, often with an internal spacer or mat, that creates a significant void between the glazing (if used) and the artwork itself. This depth allows the art to breathe and truly showcases its three-dimensional qualities without any compression. It's not just a frame; it's a mini-diorama for your art, offering unparalleled protection while creating a dramatic, museum-quality presentation. Shadow boxes are particularly fantastic for creating visual interest, making the artwork feel like it's encased in its own dedicated, protected world. They are often used for preserving objects or collages, but for canvases with significant impasto or added elements, they offer a sophisticated and robust display solution. The added depth can also create fascinating shadow play, adding another layer of visual intrigue to your piece. For more insights on this specialized display method, you might find our guide on the role of shadow boxes in displaying art incredibly useful. The deliberate space around the art draws the viewer in, almost inviting them to step into the artwork's world.
The Minimalist Reveal: What is an Open Back Frame?
For those who love the raw, unadorned aesthetic of a stretched canvas but still want a finished look, the open back frame is a fantastic, minimalist option. These frames are essentially a thin, often shallow, profile that frames the front of your canvas, but leaves the sides and back entirely open. The canvas is typically secured directly to an archival backing board which then sits flush within the frame, or is mounted directly to the frame's inner lip. This style is incredibly popular for contemporary art, especially pieces where the artist's technique or the canvas's raw edges are meant to be part of the visual experience. It offers a subtle border that defines the artwork without enclosing it, allowing the art to appear as if it's simply emerging from the wall. I often choose this style for smaller, impactful pieces or when I want to create a very clean, unobtrusive presentation that truly lets the art breathe. It's the ultimate in understated elegance, acting as a whisper, not a shout, around your masterpiece. This frame type is particularly effective for large-scale, gallery-wrapped canvases where the sheer presence of the artwork is meant to dominate, with the frame serving only to provide a crisp, clean edge. It offers a sophisticated alternative to completely unframed canvases, providing that crucial visual definition without adding bulk.
The Art of Selection: Matching Frame to Art and Space
Choosing the right frame is truly an art in itself – a nuanced dialogue between your artwork, its frame, and the environment it inhabits. It's not just about aesthetics; it's about creating a cohesive visual statement, a harmony that elevates everything. I’ve made my share of framing mistakes over the years – a delicate piece dwarfed by a chunky frame, or a vibrant abstract hidden behind something too ornate. Each misstep taught me that this process requires thoughtful consideration and a deep understanding of the subtle power a frame wields. My aim here is to help you bypass those learning curves and get straight to that perfect match. So, let's dive into the fascinating interplay between your canvas, its potential border, and the room where it will ultimately reside. This isn't just about finding a container; it's about finding a visual partner that amplifies your art's voice and perfectly complements your living narrative. This section will walk you through the key considerations, from the intrinsic qualities of the art itself to the broader context of your interior design. We'll explore how to ask the right questions about your art and your space to arrive at a truly inspired framing solution.
Considering the Art Itself
Size and Proportion: A Visual Balance
Before even thinking about style, I always consider the sheer physical presence of the artwork. The frame should not only fit the canvas technically but also aesthetically. A tiny painting in an overly wide, deep frame can feel swallowed, while a massive canvas with a flimsy, thin frame can look unsupported and, frankly, a bit cheap. It's a dance of visual weight that can make or break the presentation. For larger, more impactful pieces, a frame with a broader profile or significant depth will provide the necessary grounding and presence, asserting the art's dominance in the space. Conversely, a delicate, intimate piece often shines in a more refined, thinner frame that maintains its subtle charm without overwhelming it, allowing its quiet beauty to speak volumes. My rule of thumb: the frame should feel like a natural extension of the artwork's scale, creating a balanced and confident presentation that enhances, rather than competes with, the art itself. Think of it as tailoring – the suit must fit the person, not the other way around. This principle is especially vital for pieces destined for high ceilings, where scale is paramount. Understanding the relationship between the art and its frame is key to creating a harmonious overall visual impact, contributing to the artwork's perceived importance and presence.
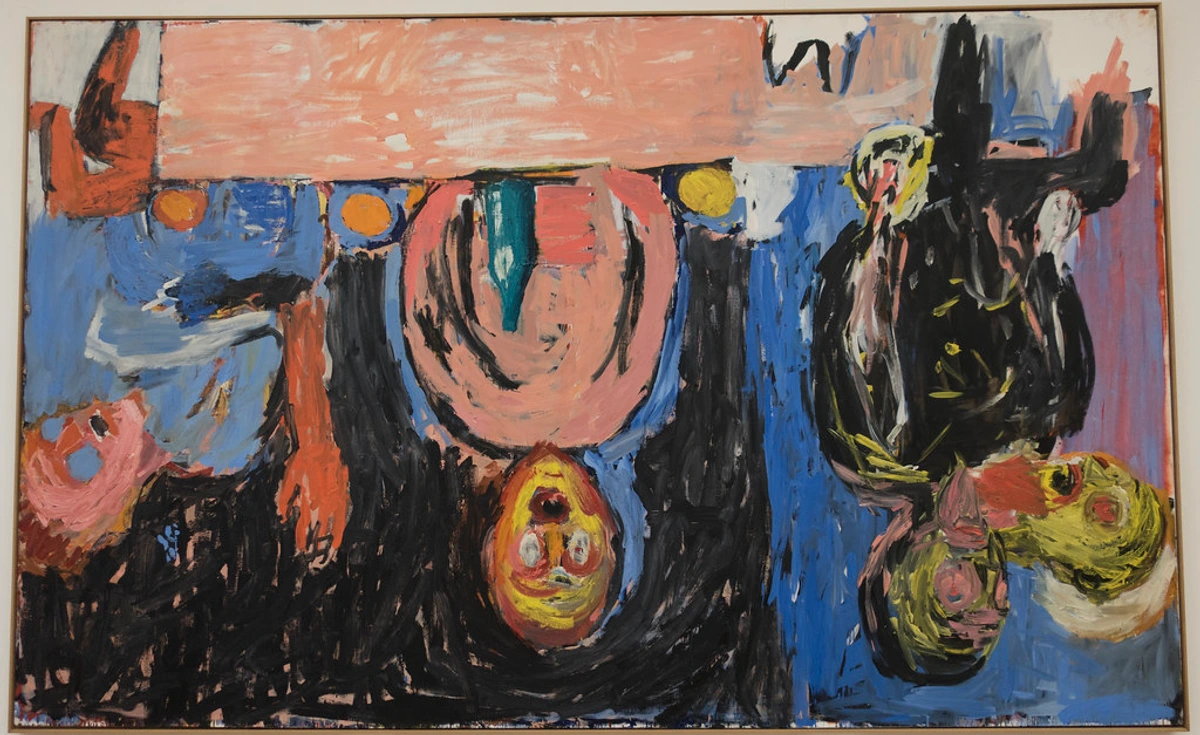
Framing Multiple Canvases: Creating a Cohesive Narrative
Have you ever considered displaying a series of canvases together? Perhaps a diptych (two pieces), triptych (three), or even a larger gallery wall composed of several related works. When framing multiple canvases that are meant to be seen as a cohesive unit, consistency is absolutely key. While you might be tempted to frame each piece individually in its own unique style, this can often lead to a chaotic and disjointed display that undermines the collection's impact. Instead, opt for identical or highly complementary frames (same material, color, and profile) across all pieces in the series. This creates a powerful visual rhythm, allowing the collection to read as a singular, intentional statement. If the canvases are part of a larger theme or story, using consistent framing enhances that narrative, inviting the viewer to move from one piece to the next as part of a continuous journey. Even for disparate pieces on a gallery wall, a unifying frame style can bring harmony to an otherwise eclectic collection. The frame, in this context, becomes the invisible thread that ties the individual stories into a grander narrative, transforming individual statements into a powerful symphony. It’s like curating your own mini-exhibition right in your home. Remember, the goal is to enhance the collective impact, letting the frames subtly reinforce the connections between the artworks.

- Style and Period: This is usually my first filter. What era or artistic movement does the piece belong to? This instantly narrows down your options.
- Contemporary & Abstract Art: For pieces with bold strokes, vibrant colors, dynamic compositions, or minimalist sensibilities (like many of my own abstract works), a floater frame is often the quintessential choice. It lets the art breathe, maintains its modern sensibility, and doesn't compete with the artwork's energy. Think clean lines, natural wood tones (like maple or ash), or simple black/white finishes that create a subtle, elegant boundary. The 'float' adds an illusion of depth that perfectly complements the dynamic nature of contemporary pieces. For a more substantial modern look, a cassette frame can also be excellent, especially for deeper canvases, providing a robust, architectural enclosure. I often find this style perfectly complements the raw, expressive power of abstract art in bohemian interiors or the serene simplicity of Scandinavian design, allowing the artwork to speak for itself without unnecessary embellishment. Sometimes, even a raw aluminum frame can enhance the industrial chic of certain abstract works. For a truly avant-garde or conceptual piece, a minimalist approach ensures the focus remains entirely on the artistic statement itself. For a deeper dive into the roots of this art, explore the ultimate guide to abstract art movements from early pioneers to contemporary trends.
- Traditional & Classical Art: Here, traditional frames with more elaborate profiles, intricate carved details, or rich, aged finishes (gold, silver, bronze, dark stained wood) can truly enhance the historical context and gravitas of the piece. They create an immediate sense of heritage and formality, acting as a historical gateway. For instance, a Baroque-style frame can instantly elevate a still life painting (like the one you see here) giving it a sense of historical grandeur and drawing the eye into its detailed world. For a more understated classical piece, a simple, dark wood frame with a subtle bead or cove can be equally impactful. You might even connect this to the evolution of art in interior design, where frames have always played a role in dictating a piece's perceived importance. For more insights on this genre, consider reading about the history of still life painting. Consider also how a traditional frame can anchor a piece by an Old Master, like a Rembrandt, reinforcing its profound historical and artistic weight.
- Impressionistic Art: Often, a simple, elegant traditional frame with a subtle profile, perhaps with a linen liner (though less common for canvas directly, a very thin, recessed liner can work) can beautifully complement the soft edges, atmospheric light, and delicate brushwork of Impressionist works without distracting from their ethereal quality. I often lean towards frames with a slightly muted gold or silver finish, or even a natural wood that has been gently distressed, to echo the natural light and subtle tones so characteristic of this movement. The goal is to provide a gentle embrace, not a loud interruption. The subtlety of the frame allows the eye to linger on the fleeting moments and atmospheric shifts that define this movement, such as those captured by Monet or Renoir.
- Pop Art & Modern Graphic Pieces: For the bold, graphic punch of Pop Art (think Andy Warhol's Campbell's Soup Cans, for example), a simple, stark black or white floater frame or a clean, minimalist traditional frame can be incredibly effective. The objective here is to let the vibrant colors and strong lines of the art speak for themselves without any competition from an overly elaborate frame. Sometimes, a sleek metal frame (like brushed aluminum) can also enhance the industrial, commercial aesthetic often found in these pieces. It's about providing a crisp, clean border that amplifies the art's directness and impact. To learn more about this influential period, check out our ultimate guide to abstract art movements.
- Canvas Type and Depth: This is a purely practical, but incredibly important, consideration. Not all canvases are created equal! A standard canvas often has thinner stretcher bars (around ¾ inch deep), while a gallery-wrapped canvas is typically deeper (1.5 inches or more) with the canvas stretched and stapled to the back of the bars, specifically allowing for painted edges that become part of the art. This depth significantly influences your frame choice. Floater frames are particularly well-suited for gallery-wrapped canvases precisely because they are designed to show off those deep, often beautifully painted edges, integrating them into the overall presentation. For thinner canvases, traditional frames are usually a natural fit, providing the necessary depth to hold the canvas securely. However, floaters can also work for thinner canvases by carefully managing the "float" gap – sometimes by adding a small spacer behind the canvas to push it forward slightly within the frame, creating the illusion of a deeper canvas. Knowing your canvas's exact dimensions, especially its depth, is the first step to avoiding frustrating misalignments and ensuring a professional finish. If you're creating your own canvases, understanding stretcher bar depth is crucial. You can find excellent resources on how to stretch a canvas or even how to stretch a canvas for painting to ensure you start with the right foundation. Moreover, for canvases with a high degree of tension or very specific dimensional requirements, a custom frame can compensate for any slight irregularities, providing a perfectly tailored fit that ready-made frames simply can't achieve. Always double-check the thickness of the canvas stretcher bars – a small detail that can make a huge difference in finding a frame with the appropriate rabbet depth. Ignoring canvas depth is a common mistake that can lead to an ill-fitting frame and a compromised presentation.
- Color Palette: This is where the magic really happens. Do you want the frame to harmonize subtly with the dominant colors in the painting, creating a cohesive flow and a seamless extension of the artwork? Or do you want it to provide a striking, intentional contrast that makes the art jump out, almost like a visual exclamation mark? A frame can cleverly pick up a subtle accent color from within the artwork, almost making it pop with renewed vibrancy and revealing a hidden depth you hadn't noticed before. For example, a deep blue in a tranquil seascape might be mirrored by a frame with a similar cool undertone, enhancing the painting's serene mood. Conversely, a vibrant red abstract could be framed in a sleek black to allow its fiery energy to truly explode from the wall, making it a powerful statement. Alternatively, it can be a neutral tone – a simple white, black, or natural wood – that allows the artwork’s own colors to truly sing without any competition, letting the pigments take center stage. Personally, I often lean towards frames that subtly echo a less dominant, perhaps unexpected, color in the art to create a wonderful sense of depth and thoughtful connection, a secret dialogue between the frame and the canvas. For instance, a thin frame that picks up a nuanced shade in a landscape can draw the eye further into the composition, making it feel more expansive and immersive. It's about finding that hidden conversation between the art and its border, making the whole greater than the sum of its parts. Don't be afraid to experiment, but always with the art's ultimate impact in mind. For more on how colors influence perception, delve into the psychology of color in abstract art beyond basic hues.
- Texture and Depth: This is especially relevant for modern abstract art. If your canvas has significant impasto (thick, raised paint application), collage elements, or a rich, tactile texture, a floater frame or a cassette frame is often ideal. They allow the entire artwork, including its dimensional surface and tactile edges, to be fully appreciated without being obscured by a rabbet, letting those sculptural qualities truly shine. Imagine a deeply textured canvas in a sleek, smooth metal floater frame – the contrast can be incredibly striking. For flatter works, both floater and traditional frames can work beautifully. The key is to ensure the frame’s own depth, texture, or ornamentation doesn’t accidentally overshadow the artwork’s inherent qualities. It’s a delicate balance, much like choosing the right fabric for a bespoke suit – the frame should enhance, not compete with, the art's intrinsic characteristics. For truly expressive textures, a palette knife might be an artist's best friend in creating that initial depth.
- Subject Matter & Mood: The emotional core of the artwork should always inform your framing choice. A serene, calming landscape, for instance, might beautifully call for a natural wood, a muted tone, or a softly distressed frame that evokes a sense of tranquility and reflects the peaceful scene. Conversely, a dramatic portrait, a powerful historical scene, or a vibrant abstract could demand something far more commanding, perhaps a rich, ornate traditional frame that echoes its grandeur, or a sleek, bold metal floater that amplifies its modern energy. The cardinal rule here is simple: the frame should reinforce, amplify, and extend the artwork's emotional resonance and narrative, never contradict or detract from it. It's about enhancing the story the art tells, becoming an active participant in its emotional delivery. I often ask myself, "Does this frame feel right for this piece? Does it deepen the mystery of a dark still life, or elevate the exuberance of a colorful abstract?" Trust your gut feeling on this one; the art will tell you what it needs to truly shine. Ultimately, the frame is the final brushstroke in the artwork's presentation, and it should speak the same language as the art itself. This connection between art and emotion is something I explore often in my work, particularly in translating emotion into abstract art my process of visual expression.
Harmonizing with Your Space
The frame is the bridge between the painting and its surroundings. So, the room's decor is just as vital in your decision-making.


- Room Style:
- Minimalist/Modern: Lean towards sleek floater frames or simple, unadorned traditional frames in black, white, or natural wood. These can beautifully complement a Japandi style home or a chic Scandinavian interior. The clean lines and uncluttered aesthetic of these frames seamlessly integrate with modern design principles, allowing the art to be a focal point without overwhelming the space. Think brushed aluminum for a true contemporary edge, or a thin natural maple for warmth. For truly minimalist spaces, sometimes even an open back frame can provide just enough definition without adding visual weight. The goal is to let the art breathe and speak for itself, with the frame providing subtle support rather than dominant embellishment.
- Bohemian/Eclectic: You have more freedom here! Mix and match textures, find a distressed wood frame, or even a brightly colored one that complements the room's vibrancy. A rustic wood or a vintage-inspired frame can really shine in a bohemian interior, adding to its collected, well-traveled feel. Don't be afraid to experiment with frames that have unique patterns or a slightly worn patina, as these can add character and depth to an eclectic space. I often find that incorporating elements like hand-carved details or reclaimed wood can further amplify the artisanal and unique spirit of a bohemian setting. Here, the frame can be as much a conversation piece as the artwork itself, contributing to the rich, layered aesthetic.
- Traditional/Formal: Ornate, gilded, or dark wood traditional frames will feel right at home, especially when decorating with art in modern farmhouse interiors or a classic, stately residence. Think a deep mahogany for a study or a gold leaf for a formal living room. For a truly opulent touch, a frame reminiscent of Victorian style interiors can amplify the grandeur. These frames are designed to command attention and convey a sense of enduring elegance, transforming a room into a timeless sanctuary. For art that requires a particularly luxurious touch, consider frames with intricate gesso work or hand-applied patinas. The elaborate detailing of these frames often echoes the craftsmanship of the artwork itself, creating a unified sense of historical richness.
- Industrial/Urban: Metal frames (like brushed steel or black aluminum) or raw wood frames can work beautifully, echoing the raw materials of an industrial interior. They offer a no-fuss, honest aesthetic, often complementing exposed brick, concrete, and metal accents. A chunky, unrefined wood can also create a compelling contrast with a sleek modern piece in such a setting, adding an unexpected layer of warmth against the cool, utilitarian backdrop. Think about raw steel or distressed black frames that highlight the gritty elegance of an urban loft, creating a stark yet harmonious balance with industrial decor.
- Coastal/Beach House: Light, natural woods (like bleached oak or white-washed finishes) or simple white frames are perfect for a bright, airy modern coastal home, enhancing that serene, relaxed vibe. I often find that frames with subtle textures or a slightly weathered look can further evoke the feeling of the sea and sand without being overly thematic. Think of frames that mimic driftwood or have a soft, matte finish to reflect the tranquil aesthetic. The aim is to extend the airy, tranquil feeling of the beach house, letting the artwork contribute to a sense of calm and natural beauty.
- Eclectic/Transitional: This is where you can truly play! Mixing frame styles can be incredibly impactful if done thoughtfully, creating a rich tapestry of visual interest. A modern artwork in a traditional frame, or vice-versa, can create a fascinating juxtaposition that tells a deeper story. It's about informed rebellion, making choices that spark conversation rather than simply blending in, often resulting in a space that feels uniquely curated and deeply personal. The key here is intentionality – every mix and match should feel deliberate, not accidental. This approach allows your art and frames to contribute to a layered, evolving aesthetic that feels unique to you, avoiding a sterile or overly 'matched' look. In these settings, the frame isn't just a border; it's a bridge between different design elements, creating a cohesive yet dynamic aesthetic.
- Wall Color & Texture: Don't underestimate the wall! Consider how the frame will interact – stand out or blend in – against the wall's color and texture. A dark frame on a light wall creates a strong, graphic silhouette, making the artwork a striking focal point, almost like an anchor. Conversely, a light frame on a dark, moody wall can make the art truly pop and feel illuminated, creating a dramatic halo effect. For rooms with low light, I often recommend lighter frames or frames with metallic accents to help brighten the piece and draw the eye, making the art feel more vibrant. If you have a textured wall, like exposed brick or a boldly patterned wallpaper, a simple, solid frame can provide a necessary visual break, allowing the art to stand out without competing with the wall's own character. The frame becomes the mediator between the art and its architectural backdrop, orchestrating a seamless visual dialogue. Think of the wall as the stage; the frame helps the art command the spotlight without being swallowed by the scenery. This interplay between frame and wall is crucial for defining the artwork's presence within the room, ensuring it doesn't just hang there, but truly belongs.
- Existing Furniture & Finishes: The frame acts as a connector, a subtle thread weaving through your interior. Does it echo the wood tones of your existing furniture, perhaps picking up on a rich walnut or a pale birch, creating a sense of natural flow? Does it complement the metal accents in your lighting fixtures or hardware – a brushed brass, a matte black, or a polished chrome – adding a metallic echo? Or does it harmonize with the fabric textures in your upholstery, perhaps a linen texture or a smooth velvet finish, adding another layer of tactile interest? While not every single element needs to match perfectly (that can feel a bit too coordinated, if you ask me, almost sterile), creating a thoughtful sense of visual continuity often leads to a much more cohesive, harmonious space that feels intentionally designed. For example, if you have a lot of dark wood furniture, choosing a similar tone in the frame can be very grounding and sophisticated, making the art feel like an inherent part of the room's composition. I always look for those subtle connections that make the entire space feel curated and intentional. The frame shouldn't fight with its surroundings; it should subtly enhance them, becoming an integral part of the room's design story. The goal is a visual symphony, not a clash of instruments.
- Room Function: The purpose and energy of the room definitely matter. For a formal dining room, you might lean towards something more traditional and elegant to encourage a sense of occasion and refined conversation. A casual living space, on the other hand, allows for more relaxed, perhaps even playful, choices, perhaps linking to a broader guide like choosing art for your living room or a small living room. For a powder room, often a small space for big statements, you might want something truly striking, unique, or even unexpected. For a home office, you might select a frame that promotes focus and calm, while a home gym (or choosing art for home gym) could benefit from something energetic and motivational. Think about a teenager's room needing something expressive, or a small bedroom benefiting from a serene frame. Even for a laundry room or a small balcony/patio, the right frame can elevate the space. Consider also spaces like a home bar or entertainment area, kitchen, or staircase, each demanding a unique framing approach. Every room has its own personality, and the frame should enhance that, making the art feel like it truly belongs there. This holistic approach ensures your artwork doesn't just hang on the wall, but truly lives within your home. The frame, in essence, helps the art fulfill its purpose in the space.
Custom vs. Ready-Made: A Practical Guide
Now, let's talk about the practicalities of acquisition – because let's be honest, even the most beautiful frame needs to be acquired somehow! This is often where budget, patience, and the unique characteristics of your artwork really come into play. I've used both ready-made and custom frames extensively throughout my decorating journey, and I can tell you unequivocally that each has its distinct place and purpose. It's about making an informed decision that aligns with your artwork's value, your aesthetic goals, and your wallet. Weighing the pros and cons of each option will help you make the best choice for your specific needs.
- Ready-Made Frames:
- Pros: Undeniably cost-effective, immediately available (which is great when you're impatient like me!), and perfectly suitable for standard canvas sizes. They offer a quick solution for displaying your art without breaking the bank. Modern ready-made options are increasingly diverse, making them a fantastic starting point for many pieces, and you can often find decent quality for a reasonable price. This makes them ideal for quickly refreshing a space or for art that isn't intended to be a long-term heirloom.
- Cons: The biggest drawback is limited style and size options. You might struggle to find a truly perfect fit for a non-standard canvas, and the aesthetic range can be quite narrow, limiting your design choices. They can sometimes look less tailored, less bespoke, and might not offer the same level of archival protection (materials might not be acid-free), which is crucial for valuable or sentimental pieces. Additionally, the construction quality can vary significantly, potentially leading to issues with durability over time. Always check the materials carefully if archival protection is a concern, as some ready-made frames use acidic components that can harm your art over decades.
- Best for: Standard-sized canvases, pieces where a precise, high-end match isn't critically important, or for temporary displays where you might want to switch out art frequently. They're also great for practice pieces, student work, or when you need a solution now for a quick art refresh. Think of them as the fast fashion of framing – accessible and stylish for a season, but perhaps not built for eternity.
- Custom Frames:
- Pros: The ultimate solution for a truly perfect fit, regardless of your canvas's dimensions. You gain access to a vast, almost infinite array of styles, materials, finishes, and archival options, ensuring your frame is as unique as your art. A custom frame can literally transform and elevate the artwork significantly, providing a polished, professional finish that makes a powerful statement, enhancing its visual impact and perceived value. It's like commissioning a bespoke suit for your masterpiece, tailored to every curve and contour. Crucially, a good custom framer will use archival-grade materials that won't harm your artwork over time, ensuring its long-term preservation and preventing issues like acid migration. The expert eye of a professional framer can also offer invaluable advice on aesthetic pairings and presentation techniques that you might not have considered.
- Cons: The main hurdle is that they can be significantly more expensive than ready-made options, and the cost can add up quickly with specialty finishes or large sizes. They also take time to produce (sometimes several weeks), so patience is definitely a virtue here. However, I always see this as an investment rather than an expense, especially for art that holds significant value or sentimental meaning. The wait, in my experience, is always worth it. While the initial outlay can be considerable, the long-term benefits in terms of preservation and aesthetic impact often outweigh the cost, especially for cherished pieces.
- Best for: In my opinion, custom framing is ideal for valuable artworks, irregular-sized canvases (which are common in abstract art), heirloom pieces, or when you simply want a truly bespoke look that integrates perfectly and thoughtfully with your specific decor and the art's unique character. When it comes to preserving a piece you truly cherish, or one you intend to pass down through generations, custom framing is the only way to go. If you're ever curious about the nitty-gritty of professional framing, a Q&A with an Expert Art Framer can provide incredible insights and help you understand the value proposition. It's an investment in both the art and its future. The peace of mind that comes with knowing your art is perfectly protected and presented is, for me, priceless.
I often think of custom framing as an investment in the overall presentation, almost like tailor-making an outfit – it just fits better. If you have an artwork you truly cherish, or a unique piece like my own original abstract canvases, then custom framing is almost always the superior choice.
Hybrid Approaches to Framing
Sometimes, the best solution lies in a hybrid approach. You might opt for a standard-sized ready-made frame and then have a custom mat or spacer cut to perfectly fit your non-standard artwork within it. This can be a cost-effective compromise that still provides a tailored look and crucial archival protection without the full expense of a custom frame. For example, a beautifully textured canvas might fit a standard frame, but a custom-cut linen liner can be added to give it a bespoke touch and create breathing room. This flexibility allows for creative solutions that balance budget with aesthetic and archival needs, offering the best of both worlds. It's all about making informed choices to best present your art.


Glazing: Your Art's Transparent Shield
Sometimes, your canvas needs more than just a frame – it needs a shield. While canvases traditionally don't require glass because the paint surface is often robust and sometimes varnished (and they need to ' breathe'), there are crucial instances where glazing becomes not just an option, but a necessity. This is especially true for valuable pieces, artworks in high-traffic areas, or those exposed to harmful environmental elements. Think of glazing as the invisible bodyguard for your precious art, offering a layer of protection against dust, physical damage, and the silent, insidious threat of UV light. Choosing the right glazing is a strategic decision that balances visibility, protection, and budget, ensuring your art remains vibrant for generations. It's a layer of defense that can dramatically impact the long-term health and vibrancy of your artwork.
Types of Glazing: From Standard to Museum-Grade
Not all glass (or acrylic) is created equal. The technology behind art glazing has advanced dramatically, offering a spectrum of options to suit different needs and budgets:
- Standard Glazing: This is your basic picture frame glass or acrylic. It offers good physical protection against dust and minor bumps but provides minimal to no UV protection and often has a high level of reflectivity, meaning you'll see a lot of glare and your own reflection. It's the most economical choice but comes with visual compromises, potentially obscuring details or creating distracting reflections in certain lighting conditions.
- UV-Filtering Glazing: A significant upgrade, these materials (both glass and acrylic options exist) are treated to block a high percentage of harmful ultraviolet (UV) light – often 97% to 99%. This is critical for preventing your artwork's colors from fading over time, a common and often irreversible damage caused by prolonged light exposure. Think of it as a high-SPF sunscreen for your art. This specialized treatment significantly extends the life and vibrancy of your pigments, safeguarding against the silent, insidious damage of UV radiation that can subtly degrade colors over years. This type of glazing is a non-negotiable for valuable pieces or any artwork displayed in brightly lit spaces, as UV damage is cumulative and often irreversible once it occurs.
- Non-Glare Glazing: Designed to reduce reflections, non-glare options have a matte finish or etched surface. While they help minimize distracting glare, they can sometimes slightly diffuse or soften the image, potentially reducing the sharpness of fine details. This is less common for canvas as the texture itself might create some glare, but it's an option to consider for certain visual effects. This type of glazing is particularly useful in rooms with strong overhead lighting or direct light sources where reflections would otherwise significantly impede viewing pleasure. It ensures the artwork remains the focal point, not the light reflecting off its surface. It's a trade-off: reduced glare for a slight softening of the image, a decision to make based on your viewing environment and the artwork's characteristics.
- Museum-Quality Glazing (Anti-Reflective & UV-Filtering): The crème de la crème of art protection. This glazing combines superior UV-filtering properties (blocking up to 99% of UV rays) with advanced anti-reflective coatings. The result is glass that is virtually invisible, allowing the artwork's true colors and details to shine through without any distracting reflections, making the art appear as if it's completely exposed. It's an investment, but for cherished artworks, irreplaceable family heirlooms, or pieces displayed in brightly lit areas, it ensures the colors remain vibrant, the details are crisp, and the viewing experience is unparalleled. I always recommend this for my most valued pieces because it offers the ultimate peace of mind and an uncompromised visual experience.
Environmental Factors and Glazing: Making the Right Choice
Your display environment plays a huge role in determining if and what kind of glazing you need. Consider these factors:

- Light Exposure: If your artwork is in a brightly lit room or, worse, directly exposed to sunlight from a window, UV-filtering glazing is almost non-negotiable. Sunlight is the biggest culprit in color fading, leading to irreversible damage over time. Even indirect sunlight over long periods can cause noticeable degradation, turning vibrant hues into dull, muted tones. Thoughtful placement away from direct sun, combined with UV-filtering glass, provides the ultimate defense against this common threat. Remember, the damage from UV light is cumulative; every ray adds up, slowly but surely diminishing your art's brilliance.
- Traffic & Vulnerability: For art in high-traffic areas, children's rooms, or public spaces where it might be touched or bumped, a robust glazing offers an essential physical barrier. In such cases, acrylic glazing is often preferred over glass due to its shatter-resistance and lighter weight, reducing the risk of damage if it falls. While glass offers superior clarity and scratch resistance, acrylic is virtually shatterproof, making it a safer choice for dynamic environments. For more on protecting art in busy spaces, see our guide on choosing art for high-traffic areas.
- Humidity: While glazing creates a micro-environment, extreme humidity can still be an issue. Always ensure proper sealing and archival backing if placing art in environments prone to significant humidity fluctuations, as this can lead to mold or paint degradation. Ideally, keep your artwork in an environment with stable humidity levels, typically between 45-55% relative humidity. Fluctuations can cause the canvas to expand and contract, potentially leading to cracks in the paint layers or warping of the stretcher bars. Consistent humidity is crucial for preserving the structural integrity of both the canvas and the paint layers, safeguarding against long-term deterioration.
- Viewing Experience: If you want the most immersive viewing experience, where the frame and glazing disappear, museum-quality anti-reflective glass is your best bet. It allows the artwork to take center stage without visual distractions, providing a truly unhindered appreciation of the piece.
Ultimately, the decision to glaze your canvas, and with what type, is a balance of protection, aesthetics, and budget. For invaluable pieces, the investment in museum-quality glazing is always a wise one; it's peace of mind for your precious art.
The Mechanics of Framing: Materials and Assembly
Beyond the aesthetic, understanding the structural components of a frame can help you make informed decisions about quality and durability. It’s not just about what it looks like on the surface, but how it's engineered to protect and present your art for the long haul. Let's peel back the layers and see what goes into a well-crafted frame, ensuring it's not just beautiful but also built to last for generations.
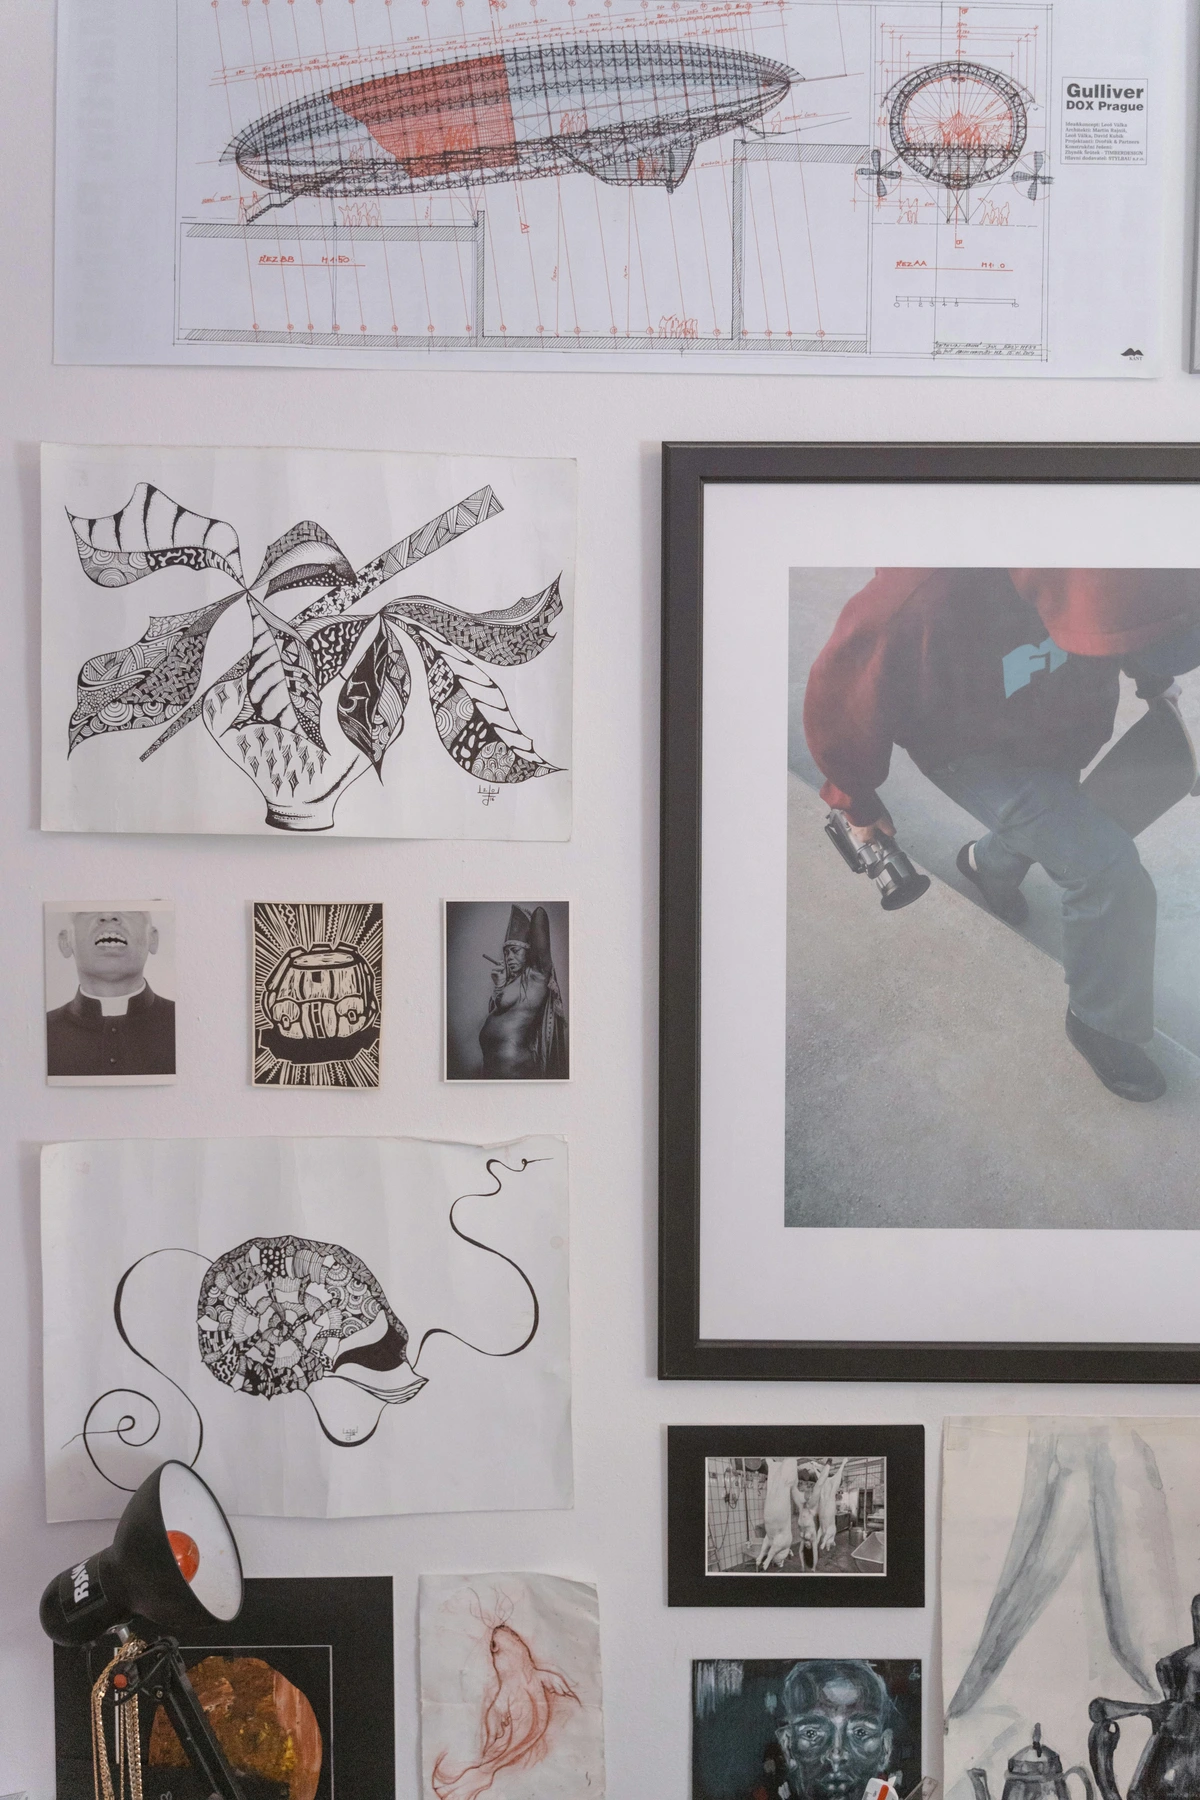
Frame Materials: What's It Made Of?
- Wood: This is the classic, time-honored choice, and for good reason. Hardwoods like maple, oak, ash, and walnut are incredibly durable, offer stunning natural grain patterns, and can be finished in countless ways, from a subtle clear coat to a rich, deep stain. Softwoods like pine are more economical but can be less resistant to warping or dings over time, so they might be better for smaller or less valuable pieces. Wood frames offer incredible versatility: they can be stained to reveal their natural beauty, painted in any color imaginable, or gessoed and gilded for an opulent, historical look. Consider natural wood for a warmer, organic feel that connects to nature, or a sleek black painted frame for dramatic contrast and a contemporary edge. The possibilities are truly endless, allowing for a deep connection to the art and interior. When choosing wood, also consider its sourcing; sustainable hardwoods are always a plus in my book, reflecting a commitment to environmental responsibility. Look for FSC-certified wood if possible, ensuring your aesthetic choice also supports ethical forestry. The weight and feel of a solid wood frame instantly communicate quality and craftsmanship, a subtle but significant detail that enhances the overall presentation of your artwork. The natural variations in wood grain can also add a unique character to the frame, making each piece truly one-of-a-kind.
- Metal (Aluminum): Often the material of choice for sleek, modern frames, particularly floaters and some cassette frames. Aluminum is lightweight, incredibly strong, and highly resistant to warping, making it a stable choice for larger pieces that might otherwise sag. It comes in a huge variety of finishes, from brushed silver and polished chrome to matte black and bronze, offering a sleek, sophisticated aesthetic. I find these particularly effective for minimalist, industrial-themed interiors, or for abstract art where a sharp, clean line is desired to complement the artwork's geometry. The clean lines and precise angles of metal frames can create a striking contrast with the organic flow and textured surface of a canvas, making for a truly dynamic presentation. For a truly contemporary feel, even anodized colors can add a vibrant, unexpected touch. The durability and precise manufacturing of metal frames also make them an excellent choice for achieving a consistent, high-end gallery aesthetic. Unlike wood, metal frames are often less susceptible to environmental changes like humidity, offering consistent stability.
- Polystyrene/Composites: An economical, often budget-friendly alternative, these frames are made from synthetic materials that can very convincingly mimic the look of wood or metal, complete with faux grain or metallic sheen. While they are more affordable and generally resistant to humidity changes (which is a plus in some environments), they may not offer the same longevity, structural integrity, or premium feel as solid wood or metal. Personally, I tend to reserve these for more temporary displays, student work, or less valuable pieces where budget is the primary driver. For cherished art, I always recommend investing in natural materials like wood or metal, which offer superior durability, aesthetics, and often, archival safety. You truly get what you pay for in framing, and the longevity of your art depends on it. Be wary of frames that feel excessively light or brittle, as these are often indicators of lower quality materials. These materials, though improving, still often lack the inherent strength and tactile richness that natural wood or metal provides, which can subtly detract from the perceived value of the artwork. When choosing these, opt for reputable brands that prioritize quality and mimic natural materials convincingly.
Inside the Frame: Mounting Your Canvas
Regardless of whether you choose a floater or traditional frame, the canvas needs to be securely mounted. This is where the 'how-to' really comes into play, and it's where attention to detail really pays off. Proper mounting ensures not only the aesthetic integrity but also the physical safety and preservation of your artwork.
Canvas Preparation Before Framing: The Unseen Foundation
Before you even think about putting your canvas into a frame, a little preparation can go a long way in ensuring its longevity and professional presentation. This is especially true for newly created artworks. Think of it as the unseen foundation that supports all your aesthetic choices, ensuring your art is ready for its grand debut. A properly prepared canvas is the first step towards a truly professional and enduring framed piece.
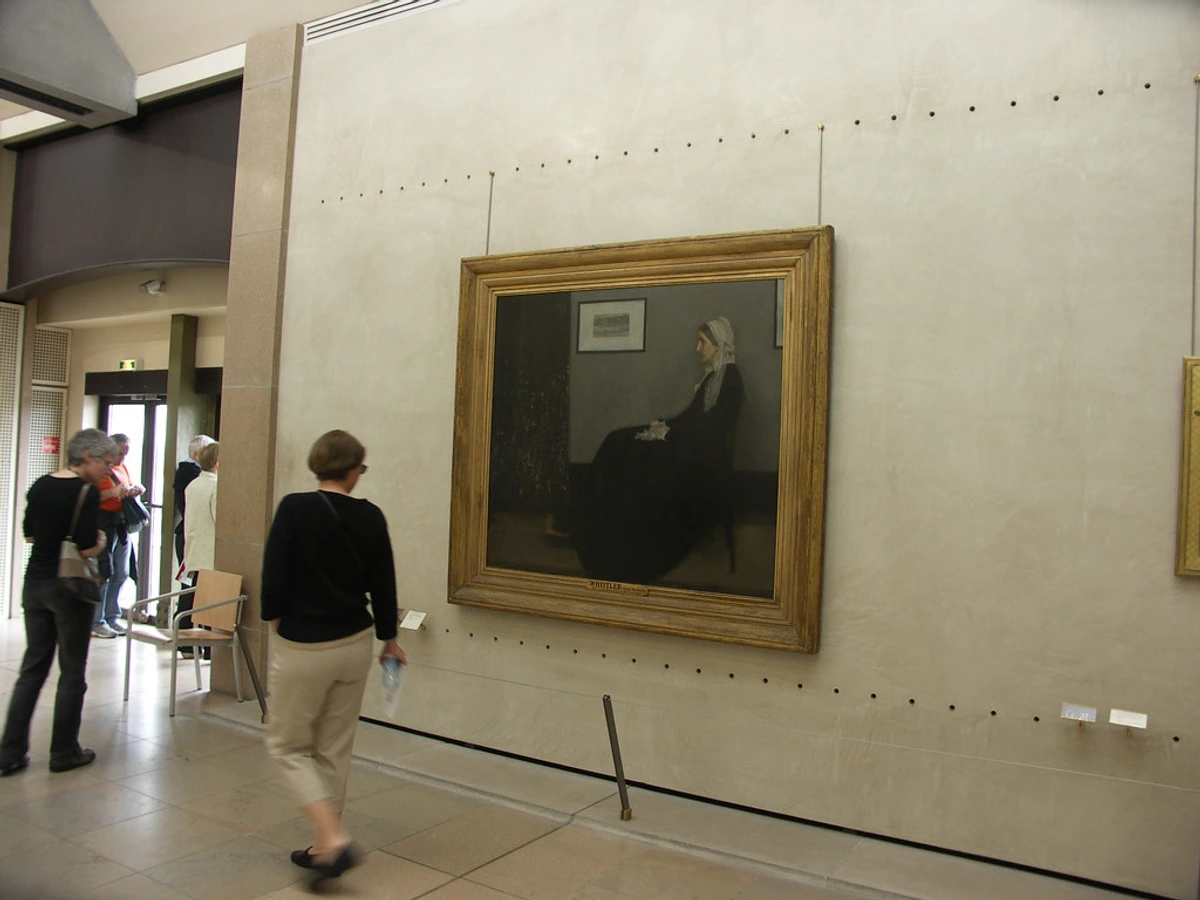
- Drying Time: Ensure your paint is fully cured. Oil paintings can take weeks or even months to completely dry, while acrylics dry much faster. Framing too soon can trap moisture, leading to mold or paint damage. Patience is key here! A good rule of thumb is to wait at least six months for oil paintings, even if they feel dry to the touch, as the inner layers can still be curing. This waiting period is critical to prevent off-gassing, which can cause discoloration of the varnish or even attack the canvas fibers over time. Never rush this step; your art's longevity depends on it. An uncured painting can also release volatile organic compounds (VOCs) that can degrade other framing materials, compromising the entire archival package.
- Varnishing: For many paintings, especially oils and acrylics, applying a protective varnish is a crucial step before framing. Varnish provides a non-yellowing, protective layer against dust, dirt, and UV radiation, and it can also unify the sheen of your painting, bringing out the depth of colors. Always ensure the varnish is completely dry before framing. For more on this, you can explore guides like how to varnish an acrylic painting or how to varnish an oil painting: a step-by-step guide. Different varnishes offer various finishes, from matte to high gloss, allowing you to subtly alter the painting's final appearance and enhance its visual impact. This decision is as much aesthetic as it is protective.
- Edge Finishing: For gallery-wrapped canvases intended for floater frames, ensure the painted or finished edges are clean, complete, and free of drips. These edges will be visible, so they need to look intentional and polished. For traditional frames where edges might be covered, this step is less critical but still good practice, as it contributes to the overall integrity of the piece. Some artists intentionally carry the painting's design around the edges, making this step an integral part of the artwork's composition. For others, a clean, single-color paint job on the edges provides a sleek, modern finish. The care you put into the edges reflects the overall professionalism of the artwork.
- Cleaning: Give the front and back of your canvas a gentle dusting with a soft, dry brush to remove any lingering debris, hair, or dust particles before sealing it into a frame. You don't want to trap any unwanted guests with your art! A lint-free microfiber cloth can also be very effective. I always recommend using a dedicated, clean soft-bristle brush, like a hake brush, for this delicate task, ensuring no abrasive particles are transferred to the canvas surface. Even the smallest particle, once trapped, can become a permanent distraction, so thorough cleaning is paramount.
- Stretcher Key/Wedge Insertion: If your canvas has stretcher keys (small wooden wedges often provided with pre-stretched canvases), now is the time to gently tap them into the slots on the inside corners of the stretcher bars. This expands the corners slightly, re-tensioning a slack canvas. Do this sparingly and gently to avoid over-stretching. Over-tensioning can cause the canvas to become brittle or even tear, so a light, even tap is all that's needed to restore tautness. This is a subtle yet effective way to counteract the natural stretching and relaxing of canvas over time due to environmental factors. It's a simple step that can revitalize a slightly slack canvas, bringing it back to its original taut presentation.
Taking these preliminary steps ensures your artwork is in the best possible condition to embark on its framed journey, protecting your creative investment for years to come.
Choosing Your Frame's Profile
Before we delve into the tools, let's briefly touch upon the frame's profile. This refers to the shape and contour of the frame's visible edge. A simple, flat profile creates a clean, modern look, while a rounded or scooped profile can add softness. Ornate profiles, with intricate carvings, lend themselves to classical pieces. The depth of the profile is also crucial: a deep profile can create a substantial, architectural presence, while a shallow one maintains a lighter touch. Choosing the right profile is an aesthetic decision that significantly influences how the frame interacts with both the artwork and the room, creating an illusion of depth or emphasizing a sleek, flat surface. It's an often-overlooked detail that can dramatically alter the final presentation.
Essential Tools for Framing Your Canvas
Before you begin, gather your tools! Having everything at hand makes the process smoother, more efficient, and ultimately more enjoyable. A well-prepared workspace prevents frustration, trust me! You'll likely need:
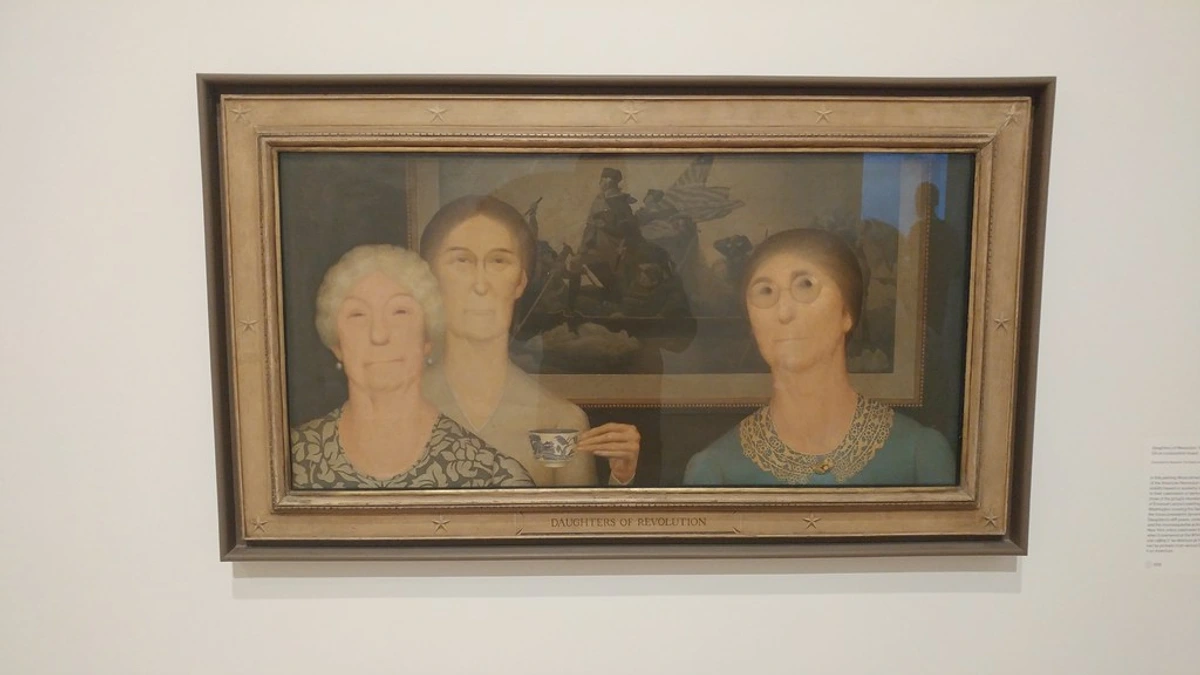
- Measuring Tape: For precise measurements of your canvas (length, width, and depth!) and frame to ensure a perfect fit. This is non-negotiable for accuracy, so invest in a good quality one. Precision here prevents headaches later!
- Pencil: For making light, erasable marks for screw points, centering, or adjustments. A soft lead pencil is best to avoid indentations, especially on delicate surfaces.
- Screwdriver (Manual or Electric): To securely attach clips, hangers, and other hardware. An electric drill with a clutch setting can save your wrists and prevent over-tightening, which can strip screws or damage the frame!
- Offset Clips or Z-Clips: These are small metal clips essential for securing the canvas from the back, particularly in floater frames (or traditional frames if using with spacers). Ensure you have various sizes to match different stretcher bar depths for a snug, secure fit.
- Turn Buttons or Framing Points: Primarily for traditional frames, these hold the canvas firmly against the frame's rabbet. Framing points require a special gun for quick, even insertion, but turn buttons are easily screwed in and are a good DIY option.
- Acid-Free Backing Board: (Highly recommended) For crucial protection against dust, environmental fluctuations, and physical impact from the back. Foam core or conservation board are excellent choices. This acts as a vital barrier against unseen threats to your art.
- Craft Knife or Scissors: For precise cutting of backing board, frame-sealing tape, or any other materials. A sharp blade is key for clean cuts and preventing frayed edges, which can detract from a professional finish.
- Frame Sealing Tape: (Optional, but professional) Acid-free, self-adhesive paper tape used to seal the back of the frame against dust and pests, creating a clean, finished look and added protection. This invisible barrier is crucial for long-term preservation.
- D-Rings, Picture Wire, or French Cleat: Your chosen hardware for safely hanging the final piece on the wall. Always match the hardware to the weight of your artwork and the wall type. Never compromise on hanging safety; your art deserves a secure display!
- Soft Cloth/Gloves: To handle the artwork without leaving fingerprints, smudges, or transferring oils from your skin. I always use clean cotton gloves when handling art; it’s a simple habit that makes a huge difference in preserving the pristine condition of both the art and the frame!
- Shims or Spacers: Small, temporary pieces of material (like coins or wood shims) used during assembly to ensure even gaps, especially with floater frames, guaranteeing a consistent and professional 'float.'
- Work Surface Protection: A clean, soft blanket or sheet to protect both your artwork and your work surface from scratches or damage during assembly. This simple step prevents preventable accidents and keeps your workspace tidy.

- Floater Frame Assembly: This is where you bring the "float" to life, giving your artwork that deliberate, ethereal suspension.
- Prepare the Canvas: This is crucial because the edges will be fully visible. Ensure your gallery-wrapped canvas is taut, clean, and any painted edges are complete and dry. For artists, this might mean carefully painting those edges or ensuring they are neatly gessoed. (If you're new to preparing your canvas, check out how to apply gesso to canvas). Sometimes, I'll even add a thin band of color to the edges that complements the main artwork, creating a subtle extension of the piece itself. This attention to detail on the edges is what truly sets a professionally framed floater apart. Remember, for a floater frame, the edges are an integral part of the presentation, so treat them with the same care as the front of the canvas.
- Positioning: Place the canvas face down on a clean, soft, protected surface. Carefully center the floater frame over the back of the canvas, ensuring that signature even 'float' gap (typically ¼" to ½", but sometimes customized) on all sides. This gap is the aesthetic cornerstone of the floater frame, so take your time to get it right – I often use small coins or spacers to ensure perfect consistency around all four sides. The goal is a perfectly balanced "hover" effect. You can even use small, uniform shims or blocks of wood to ensure the gap remains consistent as you move around the frame, guaranteeing a flawless 'float'.
- Securing: The canvas is secured to the frame from the back, allowing the float to be maintained. You'll typically use offset clips or Z-clips – small, L-shaped or Z-shaped metal clips that screw into the canvas stretcher bars and then into the frame. Ensure your screws are the correct length to avoid piercing through the front of your stretcher bars! For smaller canvases, I typically use at least two clips per side, strategically placed. For larger, heavier pieces, increase the number of clips and space them evenly around the perimeter to ensure robust, even pressure and prevent any sagging or movement. Sometimes, you might even use a small block of wood screwed into the frame, then into the stretcher bar for extra stability on very large works. Always check the screws are snug, but never overtighten. The key is to distribute the pressure evenly, minimizing any strain on a single point and ensuring the artwork remains perfectly suspended within its frame. This careful securing is what gives the floater its distinctive, professional look.
- Hanging Hardware: Always, always attach D-rings or a hanging wire to the frame itself, not the canvas stretcher bars. This ensures that the entire weight of the artwork is supported by the stronger frame structure, rather than putting strain on the canvas stretcher bars which could warp over time. Your art deserves a secure anchor, not a flimsy tether. For truly heavy pieces, a French cleat system attached to the frame is highly recommended for unparalleled stability and security. The type of hanging hardware should always be appropriate for the size and weight of the artwork, as well as the type of wall material it will be mounted on. Investing in good quality hangers is non-negotiable for safety and longevity. Don't let a beautiful frame be undermined by inadequate hanging hardware!
- Traditional Frame Assembly: Bringing a classic piece to life! This method is tried and true, but requires attention to detail and a commitment to preservation.
- Preparation: Before anything else, meticulously check for any dust, debris, or stray hairs on the front of the canvas and along the inside lip (rabbet) of the frame. You absolutely don't want anything trapped between the art and the frame, which can be a real headache to fix later! Use a soft, lint-free cloth and perhaps a can of compressed air for thorough cleaning. This pre-assembly cleanliness is paramount, as any trapped particles will be permanently visible once the frame is sealed, detracting from the artwork's presentation.
- Placement: Carefully and gently place the canvas into the frame opening from the back. The front edges of the canvas should rest snugly and evenly against the rabbet (the recessed lip) of the frame. Ensure it's perfectly centered and straight – take a moment to eyeball it from the front to confirm. Small shims can be used to ensure a perfectly level fit if needed, especially with slightly irregular canvases. The goal is a uniform, even border all around the artwork, a subtle balance that enhances its classical aesthetic.
- Securing: To hold the canvas firmly against the frame's rabbet, you'll use turn buttons (small swivel clips that rotate into place), offset clips (similar to floater clips but often mounted differently to push the canvas forward), or framing points (small metal tabs inserted with a specialized framing gun). The key here is even distribution around all four sides to prevent any bowing or movement of the canvas within the frame over time. Aim for roughly every 4-6 inches for consistent pressure, ensuring the canvas is held firmly but not overly compressed. For more robust security on larger pieces, using specialized framing points or even small L-brackets can provide an added layer of stability, preventing any shifting of the canvas over the years. This even pressure is vital for long-term stability and preventing damage to the canvas.
- Backing Board (Highly Recommended): For significantly enhanced protection against dust, environmental fluctuations, and accidental impact, I strongly recommend adding a backing board. This can be acid-free foam core or sturdy conservation-grade cardboard, cut precisely to fit the back of the frame. Secure it firmly with more turn buttons or framing points. This isn't just about aesthetics; it's about preservation, creating a stable micro-climate for your art and shielding it from potential damage from the rear. This barrier is crucial for protecting against acidic materials in the wall or external environmental factors that can subtly degrade the canvas and paint over time. It's a small investment that offers a huge return in terms of your artwork's longevity.
- Dust Sealing (Optional but Professional): For truly professional presentation and maximum protection against dust and environmental pollutants, apply acid-free frame-sealing tape (often a brown kraft paper tape) around the entire perimeter where the backing board meets the frame. This creates a crucial barrier, preventing airborne particles and even tiny insects from accessing the back of your canvas. It's a small detail that makes a huge difference in long-term preservation. This final seal not only protects but also gives the back of your frame a neat, professional appearance, signaling meticulous care. This is a step I never skip for pieces I truly cherish.
- Hanging Hardware: Crucially, as with floater frames, always attach the hanging hardware (D-rings, picture wire, or a robust French cleat system) directly to the frame itself. For heavier or larger pieces, I cannot stress enough how much I recommend a French cleat for superior support and a perfectly level hang that won't shift over time. Don't skimp on this step – your art deserves to be secure and safely displayed for generations! Ensure all hardware is rated for the weight of your framed artwork, and always select hardware that is appropriate for the wall material (drywall, plaster, brick, etc.), using suitable anchors for a secure installation. A strong frame needs equally strong hanging hardware for true peace of mind.
It’s easy to get caught up in the excitement of framing a new piece, but trust me, a few missteps can turn that excitement into frustration, or worse, damage your cherished artwork. After years of hands-on experience (and a few lessons learned the hard way!), I've compiled a list of common framing mistakes. Learning from these can save you time, money, and heartache, ensuring your framed canvas brings joy for years to come. By being aware of these pitfalls, you can navigate the framing process with confidence and avoid unnecessary setbacks.
Common Framing Mistakes to Avoid (And How I Learned From Them)
Believe me, in my journey as a decorator and artist, I’ve made nearly every framing mistake in the book. It’s part of the learning process, right? But hopefully, by sharing these common pitfalls, you can sidestep some of the headaches I’ve encountered and get straight to a beautifully framed piece.
1. Misjudging Frame Scale
- The Mistake: Choosing a frame that's either too delicate for a large, powerful piece, or too chunky for a subtle, intimate work. The frame should complement the scale and presence of the art, not diminish or overwhelm it.
- My Experience: I once put a tiny, intricate drawing into a very wide, deep frame, hoping to give it more presence. Instead, it just looked lost and swallowed up. Conversely, I tried to put a massive abstract canvas into a very thin, minimalist frame, and it simply didn't provide the visual weight needed to hold the piece together on the wall; it looked flimsy and unsupported. It's like dressing for a formal gala in flip-flops – a complete mismatch that undermines the intended statement.
- The Fix: Consider the visual weight and physical dimensions of both the artwork and the frame. A large, impactful painting often benefits from a frame with a broader profile or more substantial depth. A delicate piece might need a thinner, more refined frame to maintain its intimacy. Trust your eye – does the frame feel balanced with the art? The frame should provide a harmonious boundary, proportional to the artwork's overall scale and visual impact. Always step back and view the art and frame together from a distance, just as a viewer would, to assess this crucial balance. This is where an intuitive eye for design truly makes a difference.
2. The "Too Small" or "Too Large" Frame Fiasco (Measurement Mishaps)
- The Mistake: Trying to squeeze a canvas into a frame that's too small, or letting it get lost in one that's vastly oversized. This often happens with ready-made frames when the dimensions aren't exact, leading to a frustrating mismatch.
- My Experience: I once had an abstract piece with incredibly vibrant edges that I loved. I tried to fit it into a standard traditional frame that was just a hair too small. Not only did it obscure those crucial edges, but it put tension on the canvas, eventually leading to a slight warp. Disaster! This kind of mismatch can cause irreversible damage to the artwork's integrity and aesthetic.
- The Fix: Always measure your canvas meticulously (length, width, and depth of the stretcher bars!). Write these measurements down and double-check them. If it's not a standard size, seriously consider custom framing. It's an investment that pays off in presentation and preservation. Remember, the frame should complement, not consume, the art, and a precise fit is key. When in doubt, it’s always better to consult with a professional framer who has the tools and expertise for exact measurements.
3. Ignoring the Artwork's Style and Mood
- The Mistake: Pairing a delicate, ethereal landscape with a chunky, industrial metal frame, or a bold abstract with an overly ornate, gilded traditional frame. It's like putting a tuxedo on a beach bum – it just doesn't work, and creates a jarring visual discord.
- My Experience: I've been guilty of trying to force a frame because it was "on sale" or "looked nice on its own." The result was always a visual clash that made both the art and the room feel disjointed. I learned the hard way that a frame is a complement, not a distraction; it should speak the same visual language as the art. The frame should subtly whisper the art's story, not shout over it.
- The Fix: Revisit the "Art of Selection" section. Take cues from the artwork's period, subject matter, color palette, and emotional resonance. The frame should extend the art's story, not fight against it, acting as an empathetic border that enhances its narrative. Consider the emotional impact you want to create – does the frame amplify the art's drama, serenity, or energy?
4. Improper Lighting or Glazing Selection
- The Mistake: Hanging a piece in direct, harsh sunlight without proper UV protection, or choosing highly reflective glass that creates glare and obscures the artwork, making it difficult to appreciate.
- My Experience: I once had a beautiful, vibrant painting fade noticeably over a couple of years because I hadn't considered its exposure to a sunny window. And I’ve definitely bought frames with cheap, shiny glass that made it impossible to appreciate the art without seeing my own reflection instead! (Annoying, right?)
- The Fix: Assess the lighting conditions of your chosen display spot. If direct sunlight is unavoidable, invest in UV-filtering glazing (whether acrylic or glass) to protect your artwork from fading and irreversible damage. For rooms with ambient light, consider non-glare or museum-quality anti-reflective glazing to enhance visibility and ensure the art is seen, not just its reflection. Remember, the goal is to see the art, not the reflection! Also, consider adding dedicated art lighting, which, when properly aimed, can illuminate your artwork without adding glare or harmful UV rays.
5. Skimping on Hanging Hardware
- The Mistake: Using flimsy wire, inadequate hooks, or, worst of all, attaching hardware directly to the canvas stretcher bars (especially for larger, heavier pieces). This is a recipe for disaster, and trust me, gravity always wins, often with disastrous consequences for your cherished artwork. It's a risk that's simply not worth taking when you consider the value – both monetary and sentimental – of your art.
- My Experience: I once had a moderately sized canvas come crashing down because I used a cheap picture wire that frayed over time. Thankfully, no one was hurt, and the canvas was repairable, but the fright and the mess! It was a stark reminder that the last step is just as important as the first in the framing process.
- The Fix: Invest in quality hanging hardware appropriate for the weight of your framed art and the type of wall you're hanging it on. Always attach hardware to the robust frame, not the canvas. When in doubt, go for a French cleat for ultimate security, especially for heavier pieces – it's an absolute game-changer for peace of mind. Safety first, always! (You can find more detailed advice on this in articles like how to hang art on drywall or how to hang art on brick walls). Always check the weight rating of your hardware and ensure it significantly exceeds the weight of your framed piece for maximum security.
6. Neglecting the Backing Board and Sealing
- The Mistake: Skipping the backing board or not properly sealing the back of the frame, leaving the canvas exposed to dust, moisture, and pests, which can slowly but surely degrade the artwork.
- My Experience: I used to think the backing board was just an aesthetic detail, but then I saw how easily dust and even tiny spiders could find their way into an unsealed frame. More seriously, I learned how quickly environmental fluctuations could impact an unprotected canvas from the back, leading to subtle warping or even mold in humid conditions. It's an invisible threat until it's too late. It’s like leaving a door ajar for all sorts of slow-acting damage.
- The Fix: Always, always use an acid-free backing board to create a crucial protective barrier. For maximum preservation, take the extra step to apply frame-sealing tape around the perimeter where the backing board meets the frame. This creates a tight seal against dust, pollutants, and humidity fluctuations, safeguarding your artwork from unseen dangers and ensuring its longevity. It's a small effort for a huge return in preservation and peace of mind. This step is often overlooked in DIY framing, but it is absolutely critical for the long-term health of your art.
7. Overlooking the Room's Existing Decor
- The Mistake: Choosing a frame in isolation, without considering the wall color, furniture style, other decor elements, or the overall vibe of the room. The frame should integrate seamlessly.
- My Experience: I bought a gorgeous rustic wood frame for a painting, only to realize my living room had a distinctly modern, minimalist aesthetic. The frame, beautiful as it was, stuck out like a sore thumb, creating a visual clash that disrupted the room's harmony. It created a discordant note in an otherwise harmonious space.
- The Fix: Take photos of your room! Bring them to the framer (if you're custom framing) or have them handy when shopping. Consider the overall palette, material finishes, and the feel of your space. The frame should act as a bridge, harmonizing the art with its environment, making the artwork feel perfectly at home. Think about the frame as another piece of furniture, designed to complement, not compete with, its surroundings.
8. Rushing the Decision (Patience is a Virtue!)
- The Mistake: Making a quick decision under pressure or out of impatience, leading to choices you might regret later. A frame is a long-term commitment.
- My Experience: I'm notoriously impatient, but I've learned the hard way that framing is not a decision to rush. The wrong frame can live with your art for years, subtly diminishing its impact and making you constantly second-guess your choice. It's a decision that will affect your daily enjoyment of the piece, so it deserves ample consideration.
- The Fix: Take your time. Bring the art home, prop it up with different frame samples if you can, and live with the options for a few days. Ask for second opinions from trusted friends or even a professional. A thoughtful decision now will bring joy for years to come, making the investment of time well worth it. Trust your intuition, but also allow yourself time for reflection – the perfect frame will reveal itself when you're ready.
By being mindful of these common missteps, you can ensure your framed canvas painting looks its absolute best, a true testament to thoughtful design and presentation.
9. Over-cleaning or Using the Wrong Cleaning Products
- The Mistake: Being too aggressive with cleaning or using harsh chemical cleaners on either the frame or, even worse, the canvas itself. This can cause irreversible damage, fading, or discoloration.
- My Experience: In my early days, I once used a standard glass cleaner directly on a frame's delicate gilded finish, thinking I was doing it a favor. It stripped a small patch of the gold right off! Another time, I tried to wipe a dust smudge off an unvarnished canvas with a damp cloth, and it subtly lifted a tiny bit of pigment. Heartbreaking! These are the kinds of mistakes that underscore the importance of gentle, informed care.
- The Fix: Always err on the side of caution. For most cleaning, a soft, dry microfiber cloth is your best friend for both frame and canvas. For stubborn marks on wood frames, a slightly damp cloth (water only!), followed immediately by a dry one, is usually safe. For metal frames, spray a mild cleaner onto a cloth, never directly onto the frame. And for the canvas itself, beyond a very gentle dry dusting, always consult a professional art conservator for anything more substantial. Prevention is key here – a good backing board and proper environmental control reduce the need for aggressive cleaning. Remember, harsh chemicals can react unpredictably with paint pigments and frame finishes, leading to irreversible damage.
Maintaining Your Masterpiece: Care Tips for Framed Canvases
So, you've framed your canvas beautifully, and it's hanging perfectly on the wall. Fantastic! But the journey doesn't end there. Proper maintenance and care are absolutely crucial to ensure your artwork, and its stunning frame, remain in pristine condition for years, even decades. Think of it as nurturing your investment, a daily act of respect for the beauty you've brought into your space. After all, you've put so much thought into its presentation; now, let's keep it looking its best – because a well-cared-for piece only grows in value and enjoyment. This section will guide you through the essential steps to safeguard your framed masterpiece for the long haul.
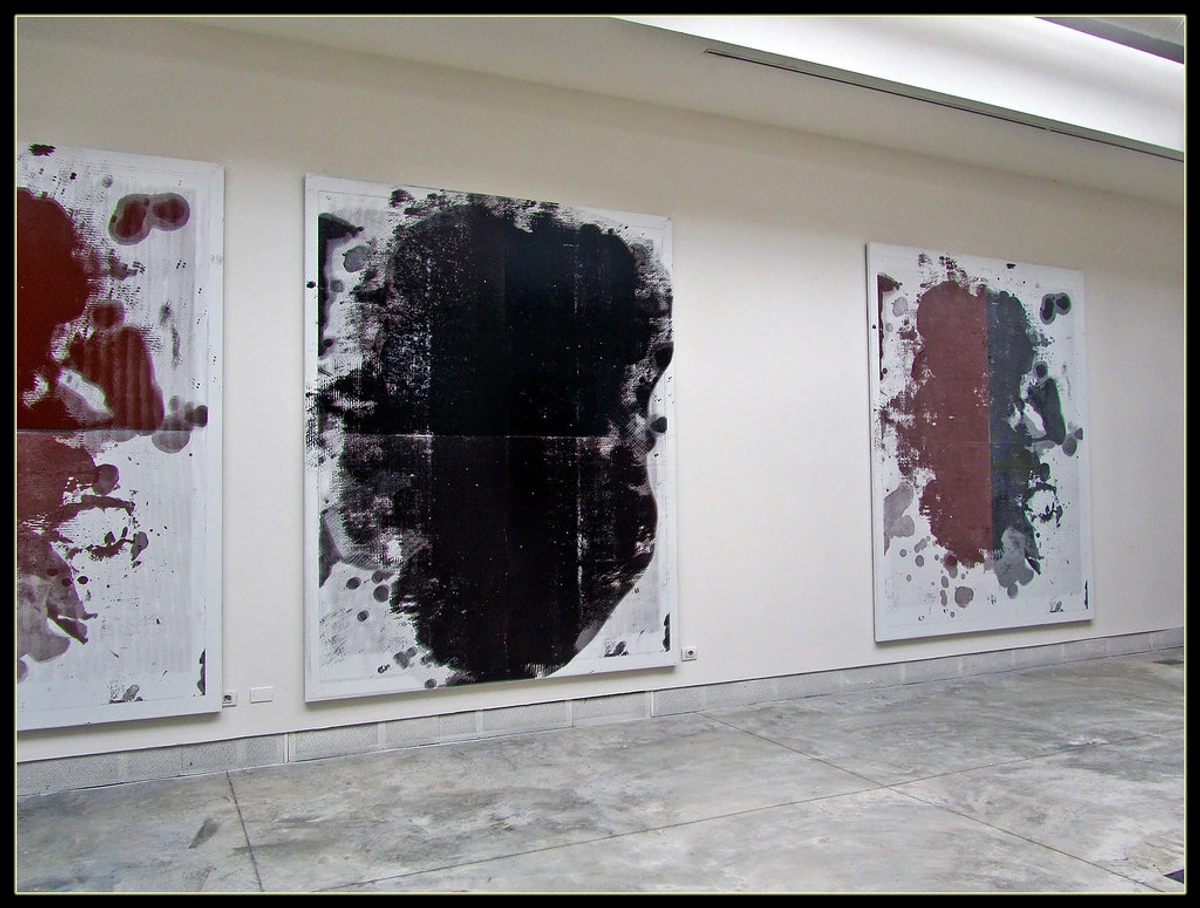
General Cleaning & Dusting
- Regular, Gentle Dusting: The simplest step is often the most overlooked, but it's your first line of defense. Use a soft, dry microfiber cloth or a feather duster regularly to gently remove surface dust from both the frame and the canvas. Avoid abrasive materials (like paper towels or rough sponges) that could scratch the frame or delicate canvas surface. Don't forget to gently dust the back of the frame as well, especially if it's not fully sealed, to prevent dust build-up within the frame itself – those hidden pockets can attract pests! For intricate frame details, a soft-bristle brush (like a clean makeup brush or a soft paintbrush) can be very effective at dislodging dust without causing damage. Regularity is key here; a little often is better than a lot rarely. This proactive approach prevents dust from becoming ingrained and harder to remove later.
- For Wood Frames: For stained or painted wood frames, a slightly damp cloth (dampened with water, never harsh chemicals, abrasive cleaners, or furniture polish, which can cause residue build-up, dull the finish, or even strip paint) can be used to wipe away stubborn grime. Always follow immediately with a dry, soft cloth to prevent water damage or streaks. For gilded frames, be extra cautious; a very soft, dry brush (like a clean, dry watercolor brush or a soft cosmetic brush) is often best to avoid damaging the delicate leaf. Remember, a light touch is always best when it comes to gilded surfaces; heavy pressure can cause flaking. For more in-depth care of wooden art objects, considering the advice in resources such as cleaning and caring for your paint brushes which share similar material care principles, can be beneficial. For unvarnished wood frames, a very light application of furniture wax (specifically formulated for fine wood) can sometimes be used to nourish the wood and provide a subtle protective layer, but always test in an inconspicuous area first.
- For Metal Frames: Metal frames are generally easier to maintain. A soft cloth, either dry or slightly damp with a mild glass cleaner (sprayed onto the cloth, not directly onto the frame, to prevent seepage into joints), can work wonders on smudges or light grime. Always wipe dry to prevent water spots and streaks, which can be particularly noticeable on polished metal or chrome finishes. To prevent corrosion or rust, especially in humid environments, avoid leaving any moisture on the frame. For brushed finishes, wipe in the direction of the grain to maintain its texture. The durability of metal frames makes them a low-maintenance option, but still deserving of regular care.
- Cleaning the Canvas Itself: This is where you need to be extremely careful, as the paint surface is the most vulnerable part of your artwork. For an unvarnished canvas, professional cleaning is almost always recommended if anything more than a very gentle, dry dusting with a soft brush is needed. For varnished canvases, a very slightly damp (water only!) soft cloth can sometimes be used for light surface dirt, but always test in an inconspicuous area first (like a small corner of the edge) to ensure no paint is removed or damaged. Never use household cleaners, solvents, or harsh chemicals on your canvas, as these can cause irreparable damage to the paint layers, color shifts, or even complete paint loss. When in doubt, call a professional art conservator – seriously, don't try to be a hero here. Their expertise in understanding different paint mediums, historical techniques, and conservation-grade materials is invaluable, ensuring your artwork is treated with the precise care it requires. If your canvas is behind glass, treat the glass as you would a metal frame, spraying cleaner onto the cloth first to avoid liquids seeping behind the glass and potentially damaging the artwork. For specific cleaning methods based on paint type, consider looking into guides like how to clean and care for acrylic paintings or how to clean and care for oil paintings.
Environmental Considerations
- Humidity & Temperature: Avoid hanging your framed canvas in areas with extreme or rapidly fluctuating humidity and temperature (e.g., directly above a radiator, in a very sunny window, near a poorly insulated exterior wall, or in a steamy bathroom – though sometimes you just have to put art in the bathroom, right? For those cases, check out my tips on how to choose art for a bathroom). These conditions can cause the canvas to expand and contract, leading to cracking, flaking paint, warping of the stretcher bars, and even mold growth over time. A stable environment, ideally between 45-55% relative humidity and 68-72°F (20-22°C), is absolutely key for longevity, preventing cracking, paint loss, and structural damage to both the canvas and the frame. Think of it as creating a comfortable, consistent micro-climate for your masterpiece. Consider investing in a simple hygrometer to monitor the humidity levels in your space, especially for particularly valuable or sensitive artworks. This proactive approach can make a world of difference. Maintaining these stable conditions is one of the most effective ways to preserve your art's long-term integrity.
- Direct Sunlight: While a frame offers some physical protection, prolonged and intense exposure to direct sunlight can still cause colors in your painting to fade, yellow, or become brittle over time, even with UV-protective varnishes. This fading is often irreversible, leading to a permanent loss of the artwork's original vibrancy and artistic intent. Position your art thoughtfully, avoiding direct rays from windows or skylights, especially during peak sun hours. If direct sunlight is unavoidable for a cherished piece, consider museum-grade UV-filtering glazing for traditional frames, which can block up to 99% of harmful UV rays. It's an investment, yes, but it’s worth every penny to protect those precious pigments and preserve the artwork's original vibrancy for generations. Remember, the damage from UV light accumulates over time, often subtly, until it becomes noticeable and too late to reverse. This is a critical factor in long-term preservation, and a good UV-filtering solution can make all the difference.
- Pest Control: Ensure your display environment is free from pests that could damage the artwork or frame, such as silverfish (attracted to paper and adhesives), dust mites, carpet beetles, or other insects attracted to organic materials like canvas, wood, or certain glues. A well-sealed backing board is your best defense here, creating a physical barrier against these tiny, destructive invaders. Regular cleaning, especially behind and around framed art, also helps deter them and removes potential food sources. Always be on the lookout for any suspicious activity – early detection is key! Using archival-grade materials throughout the framing process, including acid-free backing and sealing tape, also minimizes the appeal of the frame itself to certain pests. These seemingly small creatures can cause significant damage to your artwork if left unchecked, so vigilance is important.
Long-Term Storage Considerations
Sometimes, even cherished art needs to be taken down and stored. Whether you're moving, redecorating, or simply rotating your collection, proper long-term storage is just as important as proper display. Here's what I've learned, often through trial and error, to keep your art safe even when it's not on display:
- Climate-Controlled Environment: Just like with hanging, avoid attics, basements, or garages. These areas are prone to extreme temperature swings, high humidity, and pests. A spare room or a professional art storage facility with consistent temperature and humidity is ideal. Aim for temperatures around 68-72°F (20-22°C) and relative humidity between 45-55% to minimize the risk of damage from environmental fluctuations. Think of it as creating a stable 'safe house' for your art during its downtime.
- Protective Wrapping: For framed canvases, use acid-free materials. Wrap the artwork in glassine paper (which is non-abrasive and pH neutral and allows the artwork to 'breathe'), then a layer of bubble wrap (bubble-side out to prevent impressions on the art), and finally a sturdy moving blanket or cardboard box. Ensure it's securely taped, but avoid tape directly on the frame or canvas. For added protection against puncture or abrasion, a layer of archival corrugated cardboard cut to size, placed over the front and back of the wrapped artwork, can provide extra rigidity and defense during transport or storage. Proper wrapping is like a custom-fitted suit of armor for your art, protecting it from the bumps and scrapes of storage.
- Vertical Storage: Always store framed canvases upright, never flat. Storing them flat can cause pressure points and stress on the canvas and frame, leading to warping or damage. Use dividers between pieces to prevent them from rubbing against each other. Specialized art storage racks or even simple padded bins can help organize your collection while ensuring proper vertical support and separation, preventing accidental damage from stacking or leaning. Gravity is not always your friend, especially with heavy artworks, so upright storage is critical to prevent deformation.
- Labeling: Clearly label each box with its contents, orientation (e.g., "THIS SIDE UP"), and any special handling instructions. This prevents unnecessary unwrapping and potential damage during transport or rearrangement. Include the artist's name, title of the work, date, and any specific fragility notes. A clear inventory system can save countless hours and prevent potential mishaps during storage and retrieval. Good labeling is a small detail that makes a huge difference in managing and protecting your art collection.
- Insurance: For valuable pieces, ensure your artwork is properly insured for storage as well as display. It's a small cost for significant peace of mind. Consult with an art insurance specialist who understands the unique risks associated with fine art, including damage during transport, fluctuations in environmental conditions, or even theft. This proactive measure provides financial protection for your investment. Don't let a moment of forgetfulness turn into a significant financial loss; art insurance is a wise safeguard.
Advanced Framing Techniques & Considerations
Once you've mastered the basics, there are a few advanced techniques and considerations that can further elevate your framed canvas, especially for highly valued or unique pieces. These are the details that separate a good frame from a truly exceptional one.
Once you've mastered the basics, there are a few advanced techniques and considerations that can further elevate your framed canvas, especially for highly valued or unique pieces. These are the details that separate a good frame from a truly exceptional one, reflecting a deeper understanding of art presentation and preservation. These are the elements that transform a frame from a simple border into an integral part of the artwork's story and impact.
Specialty Finishes and Embellishments
This is where frames can truly become works of art in themselves, adding a layer of bespoke luxury to your piece. Beyond standard stains or paint, specialty finishes involve techniques that elevate the frame's aesthetic:

- Gilding: The application of real gold leaf (or other metal leaf) creates an opulent, shimmering surface. This technique, often dating back centuries, can range from brightly burnished gold to antiqued, distressed finishes that evoke historical grandeur. It's perfect for classical paintings or for adding a touch of unexpected luxury to a contemporary piece, creating a focal point that catches the light beautifully. The intricate process of gilding, often involving multiple layers of gesso, bole, and gold leaf, is a true art form in itself, bringing unparalleled richness and depth to a frame. This ancient craft elevates the frame to the level of sculpture, a testament to enduring artistry.
- Hand-Carved Details: For a truly unique and artisanal touch, hand-carved frames add sculptural elements, intricate patterns, or personalized motifs. These frames are typically custom-made to complement the artwork's style and can transform the entire presentation into a one-of-a-kind masterpiece, often telling a story within the frame itself. From delicate floral motifs to bold geometric designs, hand-carved frames elevate the artwork by creating a unique visual dialogue between the frame's craftsmanship and the painting's artistic expression. These bespoke frames are truly a collaboration between the artist of the canvas and the artist of the frame.
- Distressed & Patinated Finishes: These techniques create an aged, weathered, or worn look, adding character and history to a frame. From subtle distressing that mimics natural wear to richly patinated metals or woods that develop unique textures, these finishes can beautifully complement rustic, bohemian, or even industrial aesthetics, adding a sense of authenticity and depth. They can make a new frame feel as if it has a rich history, seamlessly integrating with vintage or antique decor.
- Custom Colors & Textures: Going beyond standard paint, a custom framer can match a specific color from your artwork, create unique textural finishes (like faux leather, fabric wraps, or heavily gessoed surfaces), or even apply specialized artistic treatments to the frame itself, making it an extension of the painting. This level of customization ensures a truly bespoke and harmonious relationship between the art and its frame.
- Spacers and Fillets: Sometimes, even in a traditional frame, you might want to create a slight visual separation between the canvas and the frame's rabbet, or protect the canvas surface (especially if textured or unvarnished) from touching the glazing. This is where spacers (thin, archival strips of wood, plastic, or foam hidden behind the frame) or fillets (small, decorative inner moldings, often with a contrasting finish) come in. They create a small, intentional gap, adding depth, enhancing air circulation, and ensuring no detrimental contact between the art and the frame or glass. Spacers are primarily functional, pushing the art forward or back within the frame, while fillets are both functional and decorative. Fillets, in particular, can add a beautiful decorative touch, creating a subtle internal border within the frame, often picking up a subtle color from the artwork to enhance its visual harmony, acting as a mini-frame within the main frame. This subtle detail can add incredible visual sophistication, especially when the fillet's color or material harmonizes with a less dominant hue or texture within the painting. These elements offer fine-tuning capabilities, allowing for precise control over the visual presentation and protection of the artwork.
- Liners: While more common for paper-based art that is matted, a fabric-wrapped liner (usually linen, sometimes silk or velvet) can sometimes be used with canvas in traditional frames. It provides a soft, elegant visual transition between the art and the frame itself, adding an extra layer of sophistication and helping to create visual "breathing room" around the artwork. This is especially useful for older, darker oil paintings, or those with very rich textures, as the liner can lighten the overall impression and draw the eye inward, preventing the art from feeling too enclosed. Liners come in various widths and colors, allowing for subtle customization and a refined touch. A crisp, white linen liner, for instance, can brighten a deep, moody landscape, making its colors feel more vibrant and accessible, while a darker fabric might add gravitas to a portrait. The liner acts as a gentle visual buffer, enhancing the artwork's presence without competing with it.
- Museum Glass/Acrylic: For ultimate protection and clarity, upgrading to museum-quality glass or acrylic is an an absolute game-changer. These materials offer superior UV protection (often blocking up to 99% of harmful UV rays, far more than standard glazing) and advanced anti-reflective coatings, making the glass virtually invisible. This means you see the artwork, not distracting reflections or glare, enhancing the viewing experience immensely, almost as if there's no barrier at all. The difference between standard glass and museum-quality is truly astounding; it feels like the art is entirely exposed, free from any barrier, allowing every nuance to be appreciated. This is definitely an investment, as these materials are costly, but for cherished artworks, irreplaceable family heirlooms, or pieces displayed in brightly lit areas, it ensures the colors remain vibrant, the details are crisp, and the viewing experience is unparalleled. I always recommend it for my most valued pieces and for any work I want to preserve for the very long term, seeing it as an essential investment in art's enduring legacy. The investment in museum-quality glazing pays dividends by preserving the artwork's integrity and maximizing viewing pleasure for generations. It’s the closest you can get to seeing the art utterly unhindered, while still offering the highest level of protection.
Troubleshooting Common Framing Issues: When Things Go Wrong (And How to React)
Even with the best intentions and careful planning, sometimes issues arise. Knowing how to troubleshoot common framing problems can save you stress, and more importantly, save your artwork. Here are a few scenarios I've encountered and how to approach them, because even the most meticulously framed piece can sometimes encounter unexpected challenges.

- Canvas Sagging or Loosening: Over time, especially with environmental fluctuations, a canvas can lose its tautness and appear saggy. This is often more noticeable on larger pieces. The Fix: For minor sagging, sometimes carefully re-tensioning the stretcher bars (if they are expandable) can help. However, for significant loosening, it's best to consult a professional framer who can safely re-stretch the canvas to its original tautness without damaging the paint surface. Never try to tighten the canvas by applying moisture or heat yourself, as this can cause irreversible damage to the canvas fibers or paint layers. Professional intervention ensures the artwork is safely restored to its intended tension. This is a common issue with canvases, and knowing when to call a pro is key to preventing further damage.
- Frame Gaps or Separation: If joints in your frame start to separate, creating visible gaps, it usually indicates a structural issue. This can be caused by changes in temperature and humidity, accidental impacts, or simply age and wear. The Fix: For minor gaps, wood glue can sometimes be applied with clamps. However, for serious separations or if the frame's integrity is compromised, a professional framer can assess whether it needs to be re-joined, reinforced, or, in severe cases, replaced. Ignoring these gaps can lead to further structural instability and potential damage to the artwork itself. A loose frame offers compromised protection and can significantly detract from the artwork's presentation.
- Dust or Debris Trapped Behind Glazing: This is incredibly frustrating, especially after you've sealed everything up. The Fix: If it's a new frame, carefully disassemble it, clean all surfaces (frame, glazing, canvas) meticulously, and reassemble, paying extra attention to sealing. For older, professionally framed pieces, or if you're unsure, it might be worth taking it to a professional framer to avoid damage. Prevention is key here: ensure your workspace is as dust-free as possible during assembly, and use antistatic cloths for glazing to minimize particle attraction. A tiny speck of dust can become a glaring distraction once encased, so diligence in cleaning is crucial.
- Artwork Shifting in Frame: If your canvas isn't staying put and is moving within the frame, it means it wasn't secured properly. This shifting can cause abrasion to the canvas edges, or if behind glazing, rubbing against the glass. The Fix: Carefully remove the backing, reposition the canvas, and use more turn buttons, offset clips, or framing points, spaced more closely together, to ensure a firm, even hold. Always double-check from the front after securing. Proper securing is not just about aesthetics; it's about protecting the artwork from internal movement and potential damage. A securely mounted canvas eliminates internal movement, safeguarding the artwork from subtle yet damaging abrasion.
Being proactive and addressing these issues early can prevent them from escalating and causing more significant, irreversible damage to your artwork.
When to Call a Professional
There are times when DIY simply won't cut it, and that's perfectly okay. Knowing when to step back and let the experts take over is a sign of true respect for your artwork. If you notice any of the following, it's definitely time to consult a professional art conservator or experienced framer – they are the superheroes of art preservation:
- Damage to the Canvas: Tears, punctures, holes, severe discoloration, active mold growth, flaking or cracking paint, significant warping of the stretcher bars, or any signs of insect infestation. These require delicate, specialized intervention that can often prevent further, more extensive damage. Trying to fix a tear yourself can often make it worse, so resist the urge! An art conservator has the specialized knowledge and materials to repair such damage without compromising the artwork's integrity or future value. Their expertise is paramount for delicate and complex canvas repairs.
- Frame Damage: Significant cracks, breaks, loosening joints, or compromised structural integrity that affects its ability to securely hold and protect the art. A broken or unstable frame can lead to a broken painting, so don't delay! Even hairline cracks can indicate underlying stress, which could compromise the art's safety. A professional framer can often repair or reinforce damaged frames, ensuring they continue to provide adequate protection and aesthetic appeal for your artwork. A compromised frame is a compromised safeguard for your art, so address issues promptly.
- Gilding or Ornate Detail Loss: Delicate repairs to antique gilded frames, intricate carvings, or historical finishes are best left to experts who understand the materials, historical techniques, and intricate restoration processes involved. Attempting these yourself can easily worsen the damage, and you might accidentally devalue an antique piece. These specialists have the subtle touch and historical knowledge required to restore such frames with authenticity and precision, preserving their artistic and monetary value. Restoring intricate details requires specialized skills that most DIY enthusiasts simply don't possess.
- Persistent Dirt/Grime: If gentle dusting isn't enough to remove ingrained dirt, smoke residue, or other persistent grime, don't risk damaging the piece with aggressive cleaning. A professional conservator has the specialized tools, solvents, and expertise to safely clean your artwork without causing harm. They can often work miracles, revealing the original vibrancy of a piece that seemed lost to time. They can identify the type of dirt and the best, least invasive method for removal, ensuring the artwork's integrity is maintained. Sometimes, a professional cleaning is all it takes to bring a piece back to its former glory without risking damage.
- Re-tensioning or Restretching: If your canvas has become noticeably slack, loose, or saggy over time, a professional framer can often safely re-tension or restretch it to restore its original tautness, preventing further damage to the paint surface (like paint cracking). This is a delicate process involving specialized tools and techniques, best not attempted at home, as improper handling can easily damage the canvas. Attempting this yourself can lead to tears, uneven tension, or paint cracking, further diminishing the artwork's condition. Professionals have the necessary equipment and experience to perform this restoration safely and effectively. This is a subtle art that requires a skilled hand to avoid irreversible damage.
- Unknown Artwork/Materials: If you have an artwork of significant value, unknown provenance, or made with unusual materials, always consult a professional for framing advice. They can identify the best archival practices to ensure its long-term preservation and advise on the most suitable framing options, potentially saving you from costly mistakes. When in doubt about the unique needs of a piece, a professional assessment is always the safest course of action.
- Large or Heavy Art: For very large or exceptionally heavy pieces, especially those requiring specialized hanging systems, professional installation ensures safety for both the artwork and your walls. It's often worth the cost for peace of mind, knowing your substantial investment is securely displayed. Don't risk injury or damage to your art by attempting to hang heavy pieces without professional assistance.
- Emergency Situations: In cases of flood, fire, or significant accidental damage, contact a conservator immediately. Their rapid intervention can often mitigate damage and guide proper salvage efforts. Time is often of the essence in emergency situations, and swift professional action can make a dramatic difference in saving your artwork.
Remember, a little proactive care goes a long way in preserving the beauty and value of your framed canvas painting. It's an act of respect for the art itself.
Hanging Hardware Types: A Quick Guide
To ensure your framed artwork stays securely on the wall, choosing the right hardware is crucial. This is the final, critical step in the framing process, and it's one you absolutely cannot skimp on. Your beautifully framed canvas deserves to be displayed safely and securely for all to enjoy. Always match the hardware to the weight of your artwork, and if in doubt, always err on the side of over-engineering the hanging system.
Hardware Type | Description | Best Use Case | Max Weight (Approx.) | Considerations |
|---|---|---|---|---|
| D-Rings & Wire | Metal D-rings screwed securely to the frame sides, then connected by sturdy picture wire | Light to medium weight frames | 20-30 lbs | Wire can stretch or fray over very long periods; ensure proper gauge wire and strong attachment points to avoid failure. Always ensure the wire is taut and the D-rings are firmly attached to the frame's structural wood, not just thin decorative edges. |
| Sawtooth Hangers | A serrated metal strip, typically nailed into the top center of a light frame | Very small, lightweight canvases or decorative items | 5 lbs | Only for very light pieces; can be less secure and prone to shifting. Easy to install. Not recommended for anything valuable. Ensure nails are long enough to properly anchor into the frame, and consider multiple hangers for wider pieces to prevent tilt. |
| Offset Clips | Small, L-shaped metal clips with screws to secure canvas to frame's stretcher bars and the frame | Securing canvas within floater or traditional frames | N/A (Internal) | Primarily for internal mounting, not for directly hanging on a wall. Ensure correct size for gap and screw length; too long and you'll pierce the canvas! |
| Z-Bar/French Cleat | A two-part interlocking system: one metal strip (or wood) on the wall, one on the frame | Heavy, large frames; maximum security, stability, and a perfectly level hang | 100+ lbs | Requires precise installation, but provides unparalleled support. Can be visible from the side if there's a large gap between wall and frame. Ideal for seismic zones due to its robust, interlocking design that prevents vertical or lateral movement once engaged. |
| Mirror Hooks | Heavy-duty hooks, often with multiple hardened steel nails for plaster/drywall | Very heavy frames | 50-100+ lbs | Hardware is visible; requires sturdy wall connection (studs or appropriate anchors). Excellent for substantial pieces. Not for hollow walls without anchors – always find a stud or use toggle bolts for drywall. |
| Strap Hangers | Similar to D-rings but elongated metal straps, offering more surface area for screws | Medium to heavy frames where D-rings might feel insufficient | 50 lbs | Offers more robust attachment than standard D-rings due to increased screw points. Requires frame sides wide enough for attachment. These provide excellent sheer strength, distributing the load over a larger area of the frame. |
| Picture Rail Hooks | Hooks that drape over a wall-mounted picture rail, often with decorative chains/cords | Flexible display for multiple pieces; traditional aesthetic | Varies by rail/hook | Allows for easy rearrangement without new wall holes; ideal for older homes or galleries. Requires picture rail installation. Ensure the rail itself is securely mounted to wall studs, as it bears the cumulative weight of all hanging pieces. |
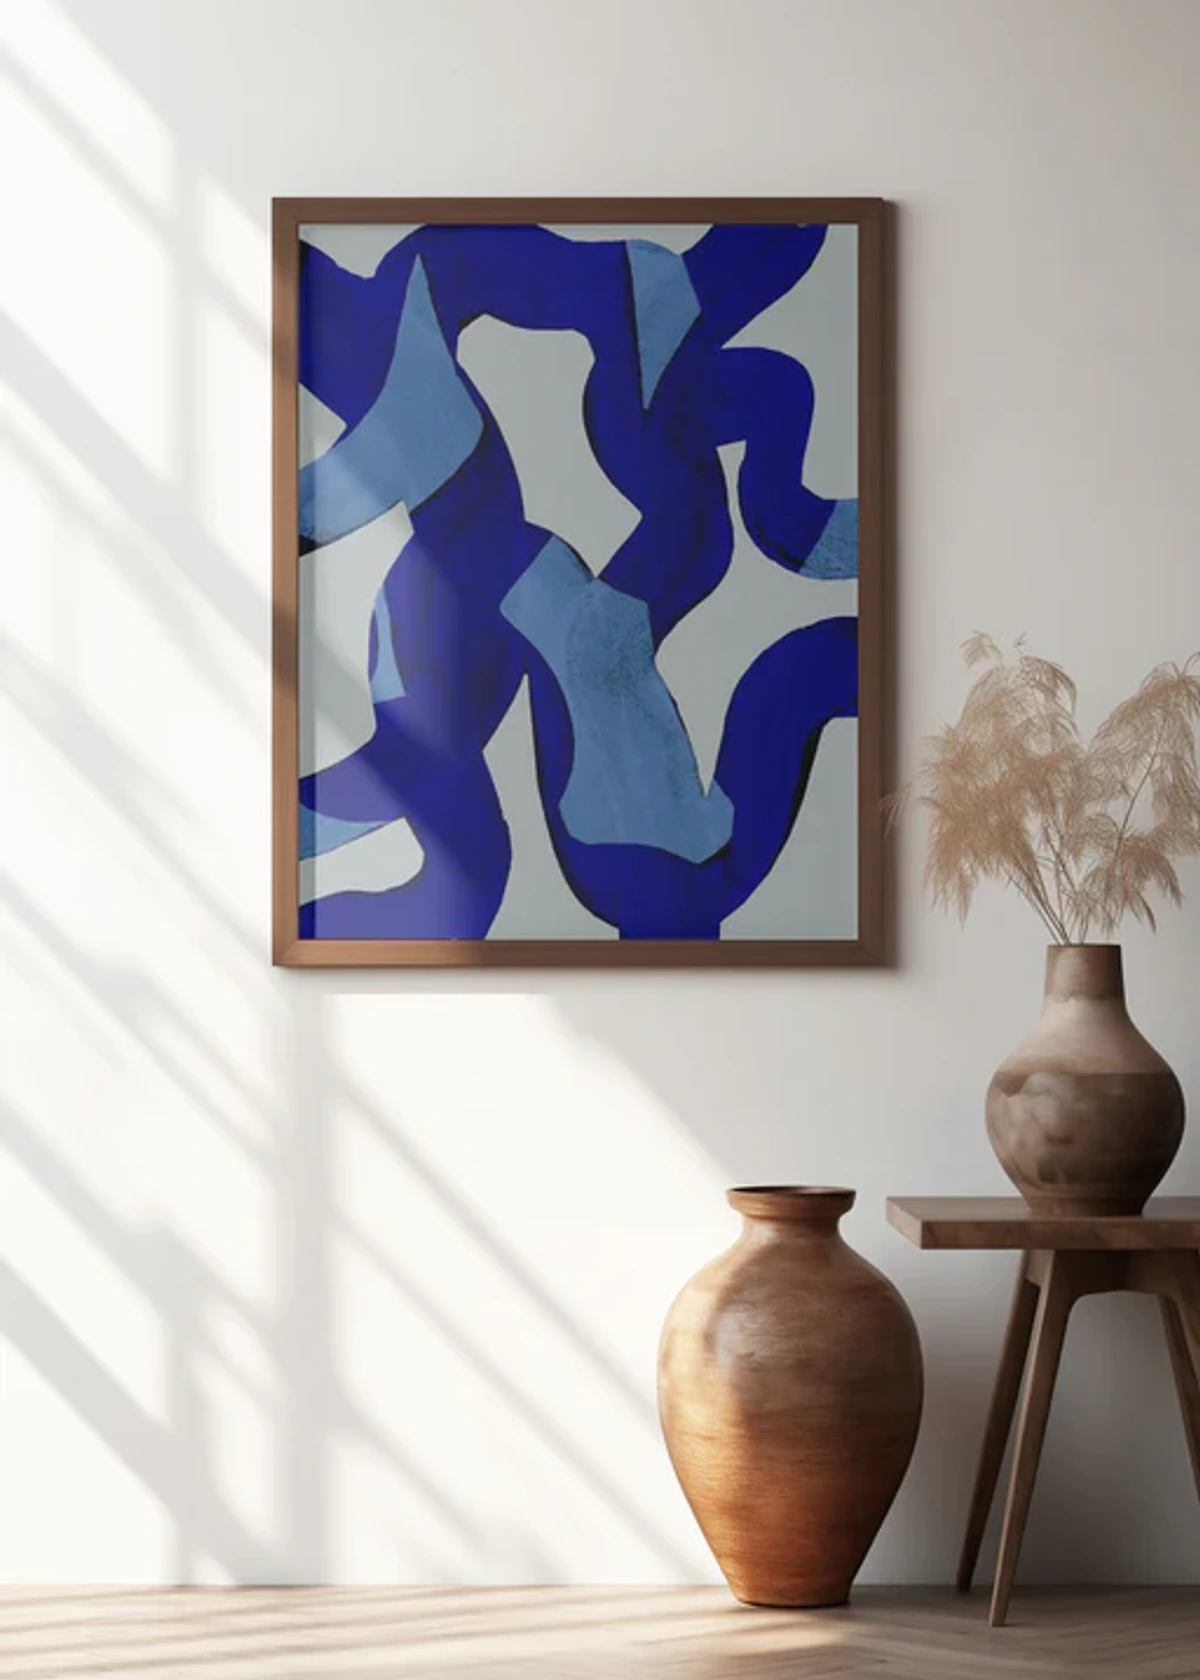









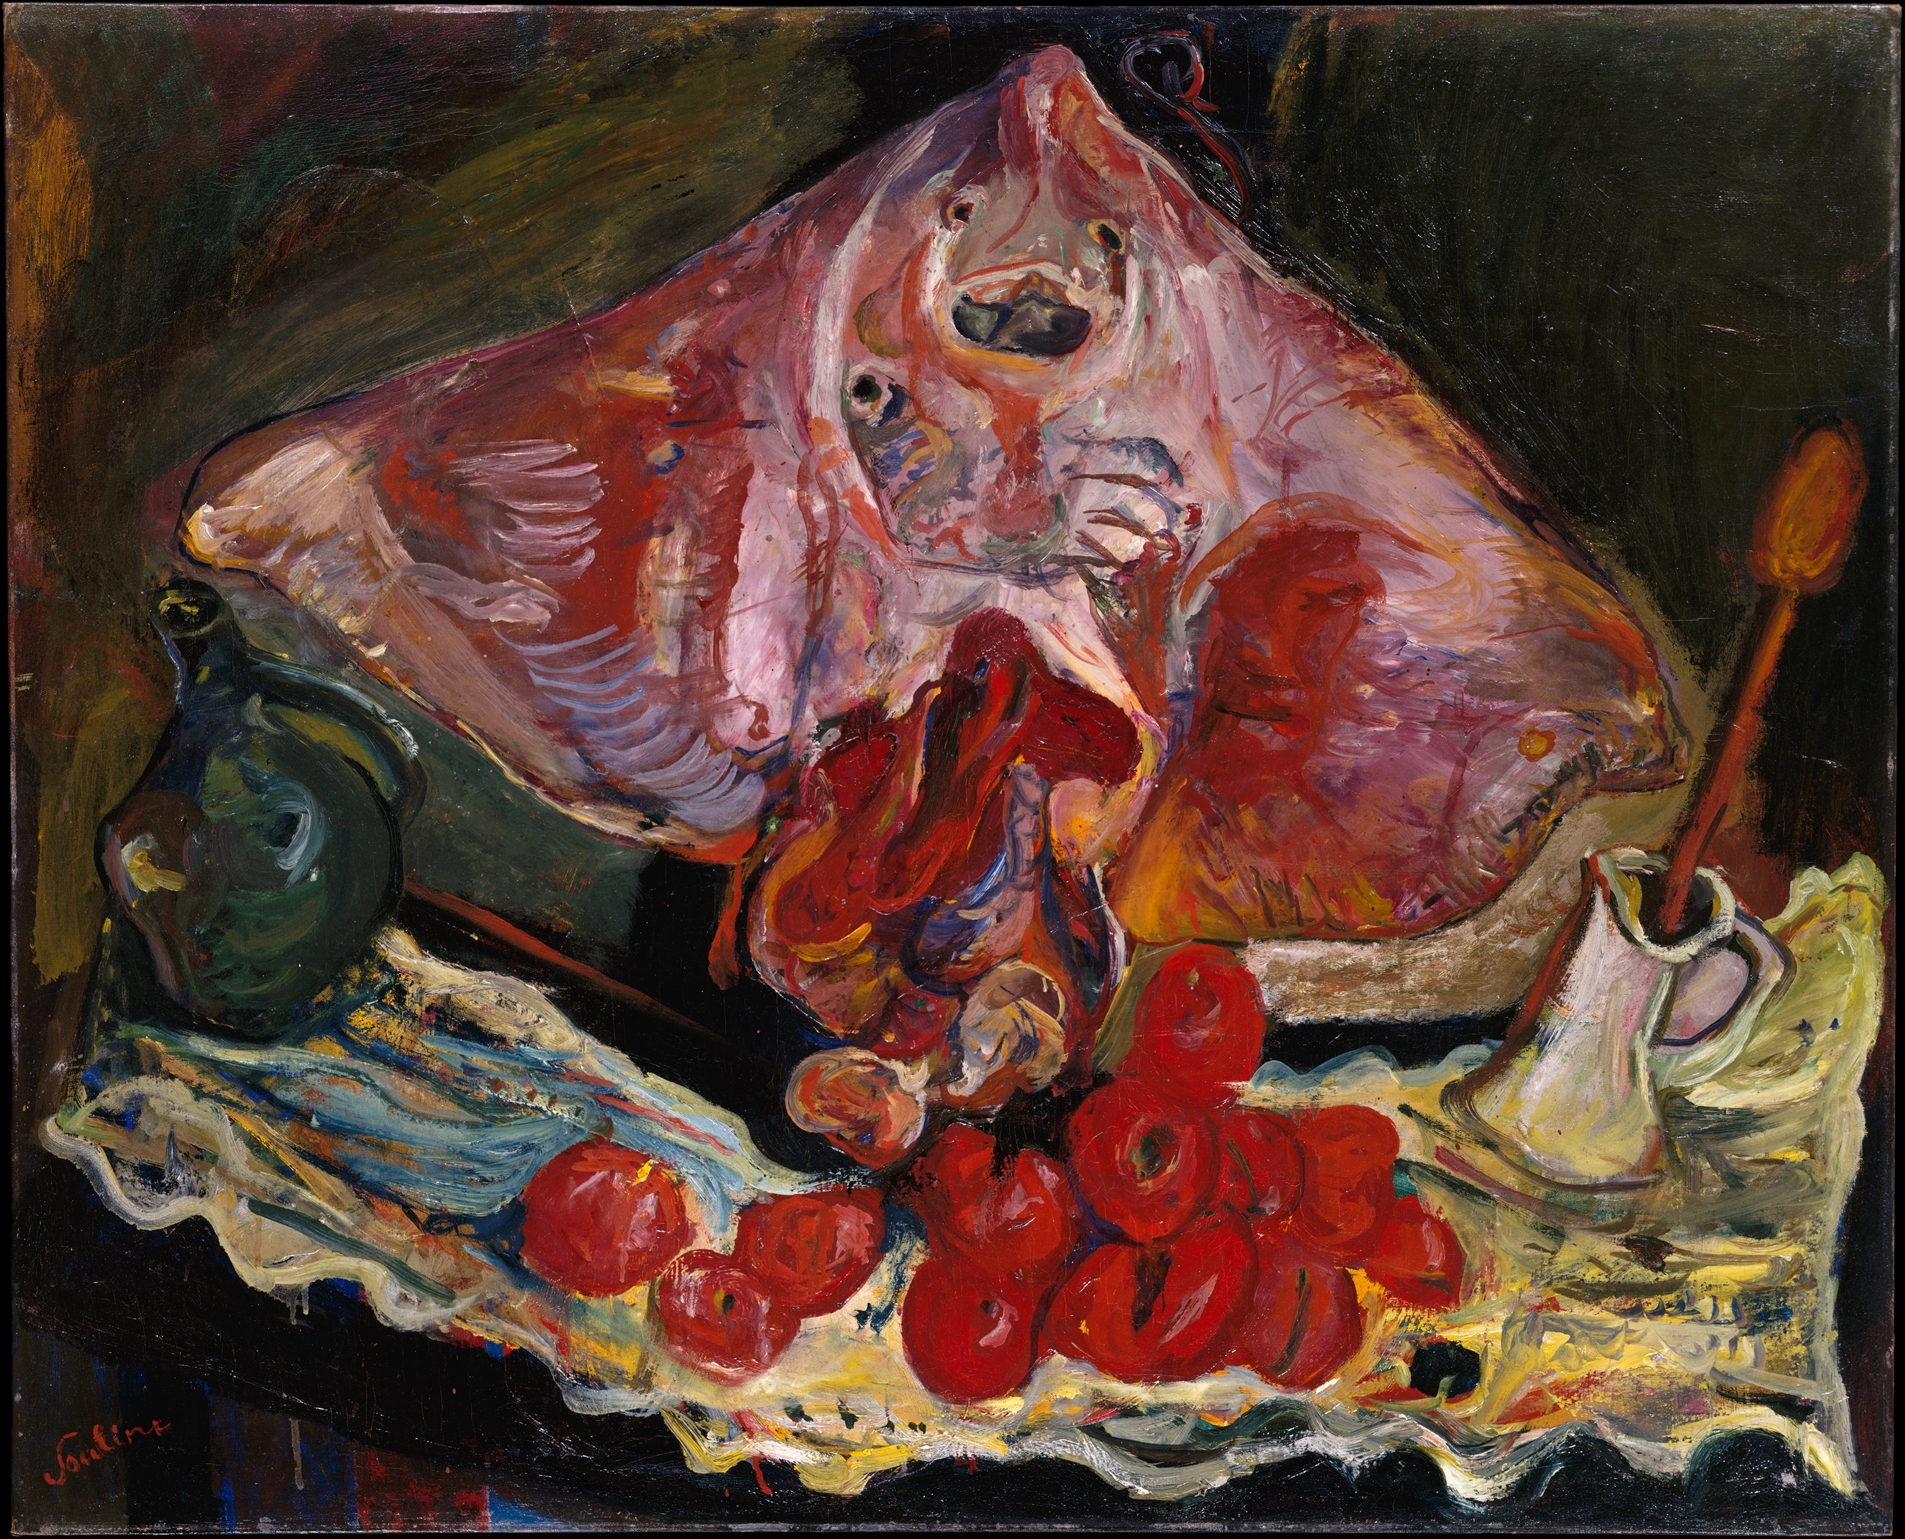
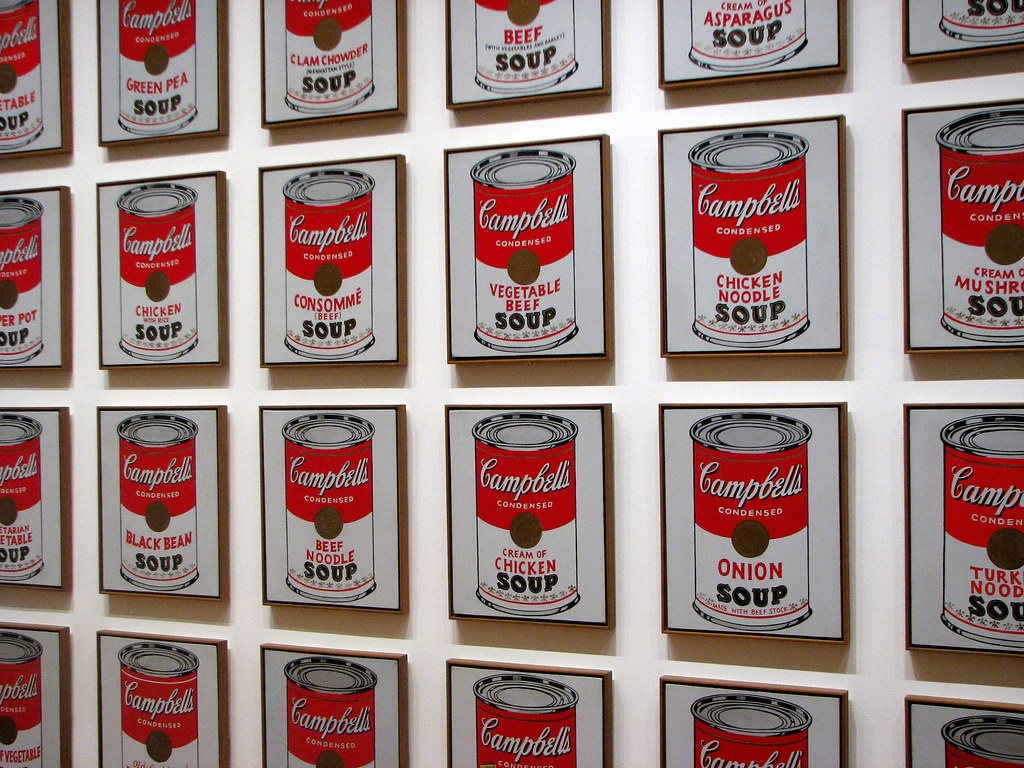


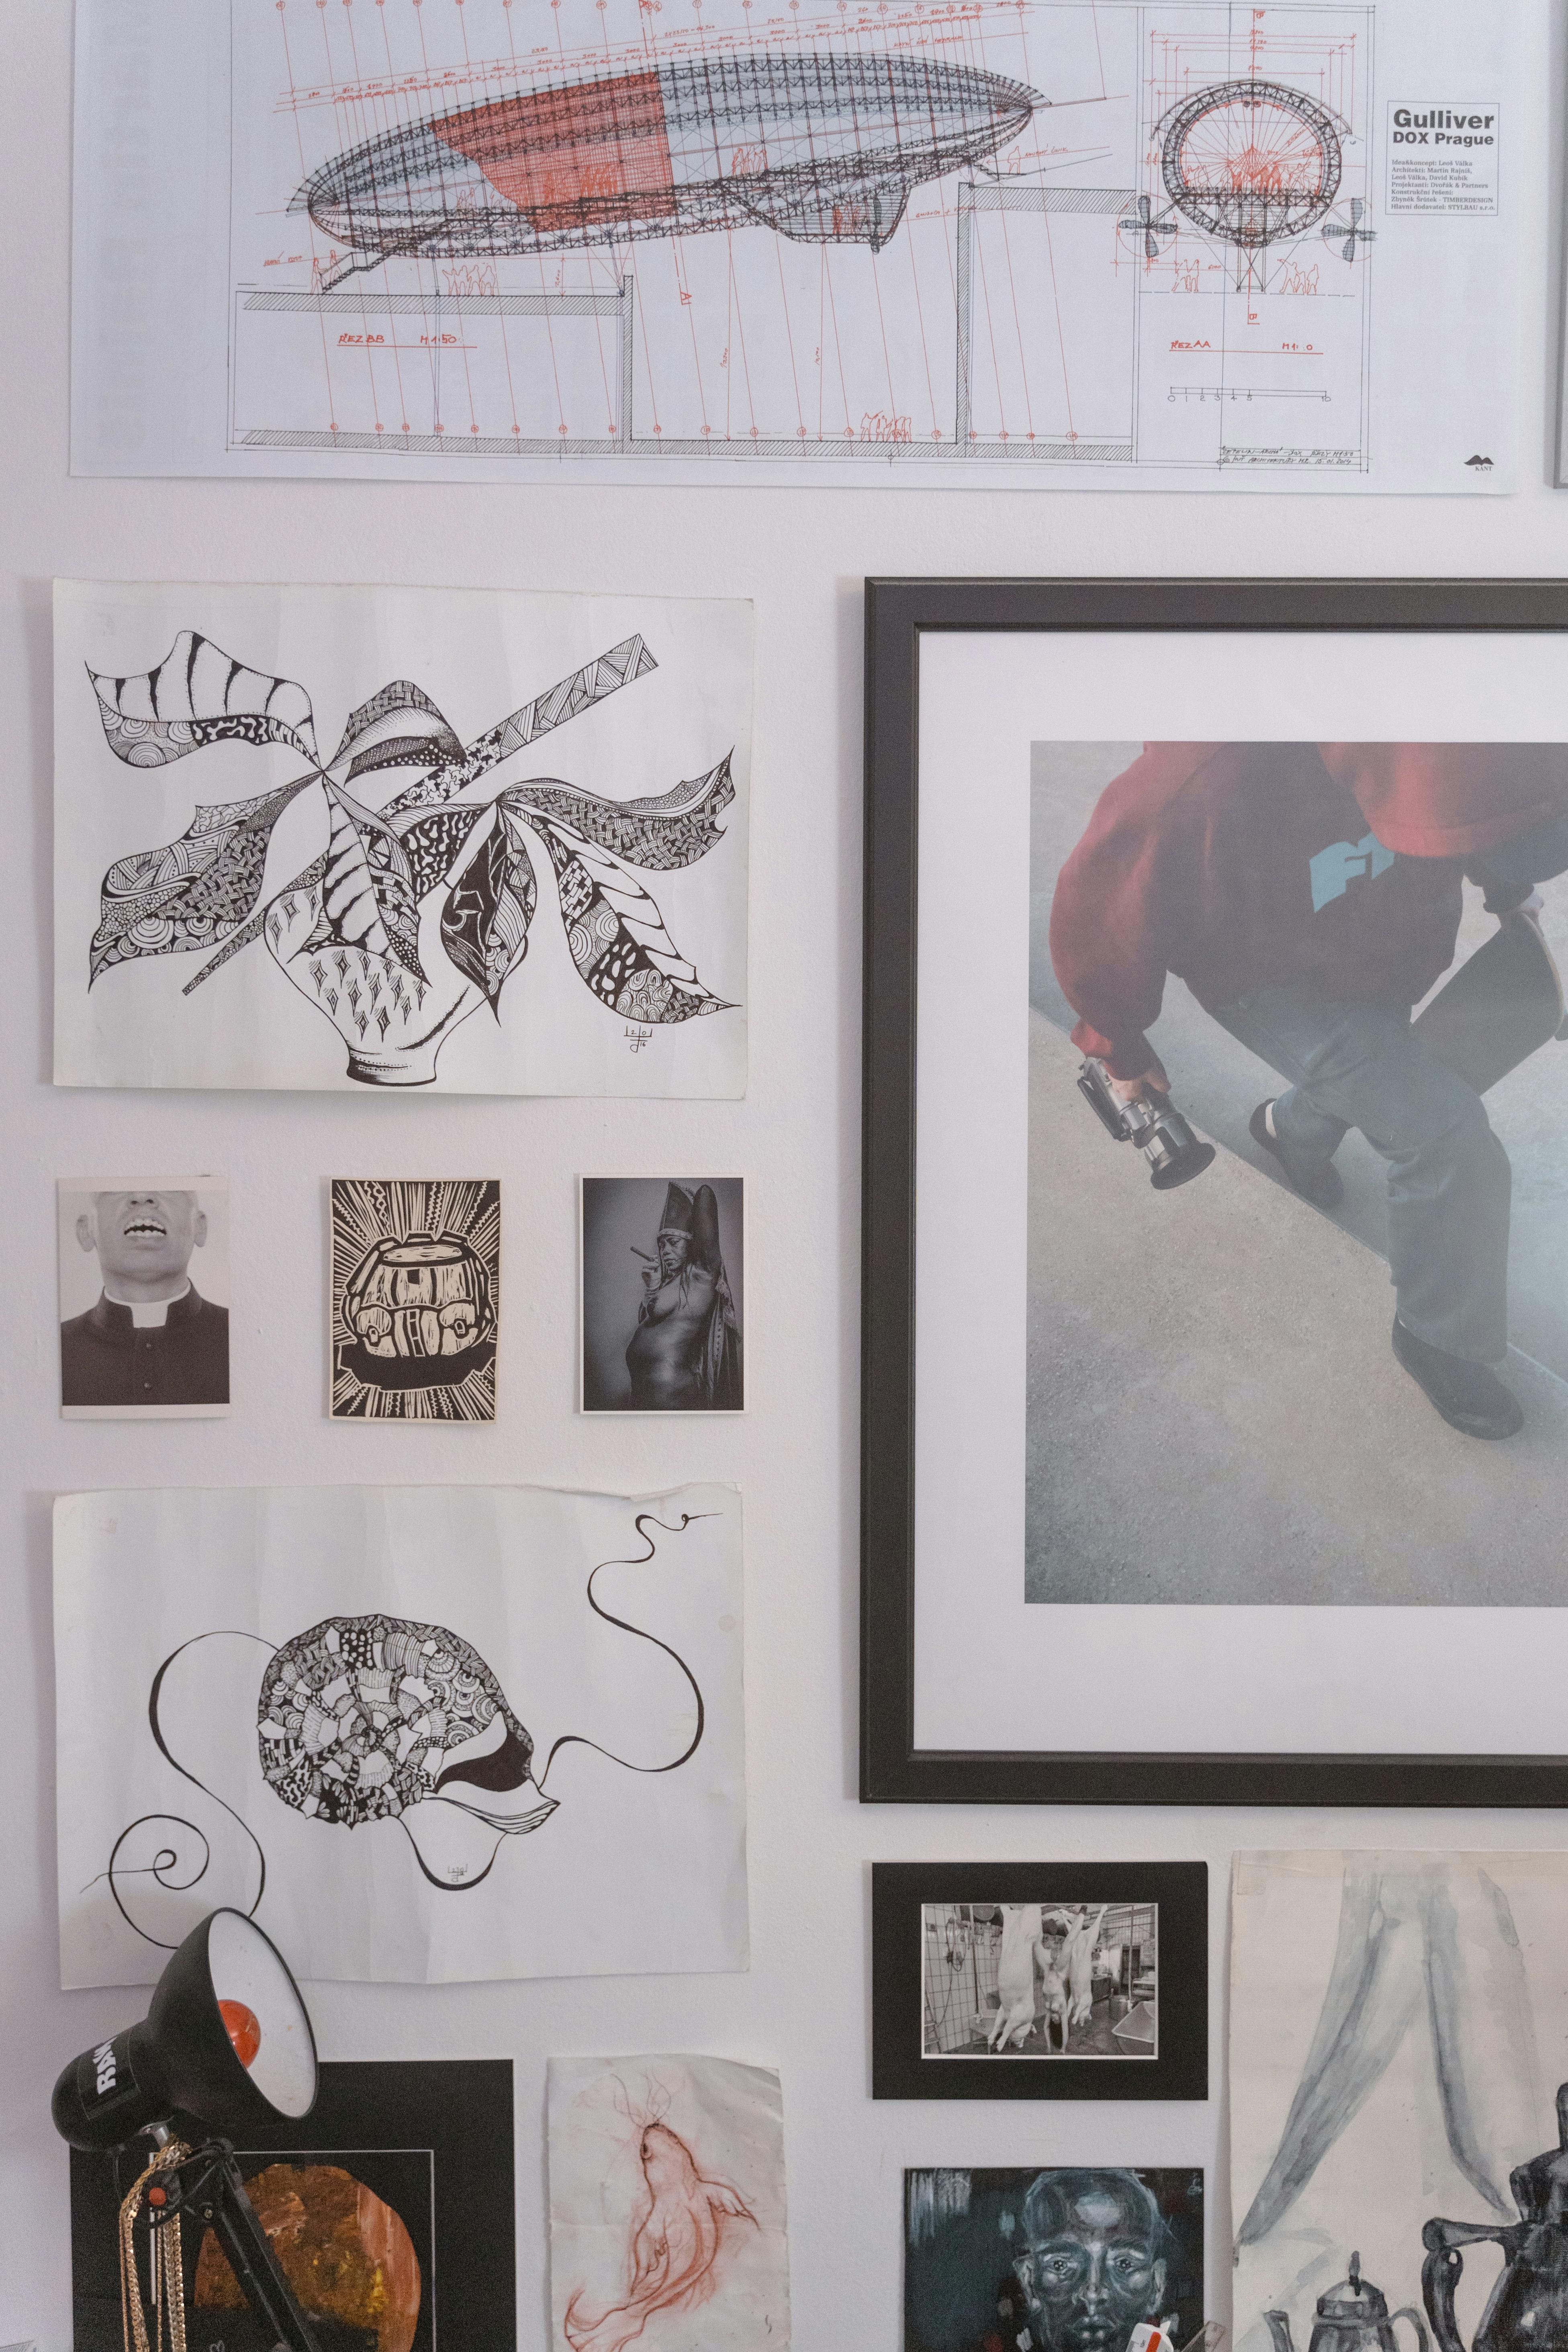


FAQ: Your Framing Questions Answered
I often get asked a lot of similar questions about framing, so I wanted to address some of the most common ones here. Think of this as a quick-reference guide to those nagging questions that pop up when you're deep in the framing process.
Q: Can I frame a canvas without glass?
A: Yes, absolutely! In fact, most canvas paintings are traditionally framed without glass. The paint surface, especially if varnished, is often robust enough for direct exposure, and many artists prefer the unhindered view of the artwork's texture. Glazing is primarily considered for added protection against dust, physical damage, and especially harmful UV light (in which case, UV-filtering glass is recommended). If you opt for no glass, ensure the canvas is varnished (if appropriate for the medium) and displayed in a relatively stable environment, away from direct sunlight and high traffic.
Q: Can I frame an unvarnished canvas?
A: Yes, you can. While varnishing offers significant protection, it's not strictly mandatory for framing. Many artists prefer the matte finish of unvarnished acrylics, for example. However, if unvarnished, your canvas is more vulnerable to dust, dirt, and UV damage. If you choose not to varnish, consider using UV-filtering glazing for added protection, and ensure your canvas is well-sealed from dust with a backing board. Regular, gentle dusting is also essential.
Q: How do I measure my canvas for a frame?
A: Measure the exact height, width, and importantly, the depth of your canvas stretcher bars. For traditional frames, the opening size of the frame should match the height and width of your canvas. For floater frames, the internal dimensions of the frame need to be slightly larger than your canvas to create that signature "float" gap (typically 1/4" to 1/2" on each side). Always measure multiple times and in several spots, especially with handmade canvases, as dimensions can sometimes vary slightly.
Q: Is it okay to use command strips or adhesive hangers for framed canvases?
A: For very small, lightweight canvases (think under 1-2 lbs) and for temporary displays, command strips can be an option, but I generally advise against them for anything of significant value or size. The adhesive can fail over time, especially with environmental changes, or damage the wall surface upon removal. For framed canvases, especially those with glass or substantial weight, reliable hanging hardware like D-rings, picture wire, or a French cleat system (securely mounted to studs or with appropriate drywall anchors) is always the safest and most professional choice. Don't risk your art for convenience!
Q: Can I re-use an old frame for a new canvas?
A: Absolutely! Re-using frames is a fantastic way to be sustainable and often gives a new piece a sense of history. Just ensure the frame is structurally sound, clean, and its style complements your new artwork. You may need to adapt the mounting hardware or add spacers if the new canvas has different dimensions, but with a little creativity, an old frame can find new life and truly shine with your art. Always inspect for any pests or old debris before inserting a new canvas.
Q: How often should I clean my framed canvas?
A: Regular, gentle dusting with a soft, dry microfiber cloth every few weeks or months is ideal to prevent dust build-up. For more thorough cleaning of the frame, follow the guidelines in the "Maintaining Your Masterpiece" section. For the canvas itself, especially if unvarnished, stick to very light dusting. If you notice any stubborn grime or damage on the canvas, it's always best to consult a professional art conservator to avoid irreversible damage. Prevention is key, so good placement and sealing can minimize cleaning frequency.
Key Takeaways
Before we wrap up, let's distill the most crucial points I want you to remember about framing your canvas paintings:
- Frames are Transformative: They are more than just borders; they elevate art, tell its story, and integrate it into your space, enhancing its presence and value.
- Understand Frame Types: Floater, traditional, cassette, shadow box, and open-back frames each offer distinct aesthetics and functions tailored to different art styles and presentation goals.
- Harmonize Art, Frame, & Space: A thoughtful selection considers the artwork's style, colors, texture, dimensions, and the room's overall decor for a cohesive and impactful pairing.
- Precision in Measurement: Meticulous measuring of your canvas's height, width, and depth is absolutely critical for a perfect fit and professional finish, avoiding costly errors.
- Prioritize Archival Protection: Always invest in acid-free materials for backing and consider UV-filtering or museum-quality glazing to safeguard your artwork from environmental damage and ensure its long-term preservation.
- Secure Installation is Non-Negotiable: Utilize robust hanging hardware appropriate for the artwork's weight, always attaching it to the frame structure itself, never directly to the canvas stretcher bars.
- Consistent, Gentle Maintenance: Regular, soft dusting with appropriate materials and avoiding harsh chemicals will significantly prolong the pristine condition and vibrancy of your framed art.
- Recognize Professional Expertise: For valuable pieces, complex framing needs, or any significant damage, do not hesitate to consult professional art conservators or experienced framers; their expertise is invaluable.
Bringing It All Together: Your Framed Masterpiece
And there you have it – a comprehensive journey through the nuanced, rewarding world of framing canvas paintings. It’s a craft that, when approached thoughtfully, elevates not just the art, but the entire space it inhabits. From the initial spark of inspiration that draws you to a piece of art, through the careful consideration of a frame that echoes its soul and complements your home, to the meticulous care that ensures its longevity, every step is an act of appreciation and a testament to your personal style.
Don't let the sheer number of options overwhelm you. Instead, approach framing as an exciting extension of your artistic vision and a vital component of art preservation. Trust your instincts, learn from potential missteps (we all make them!), and remember that the right frame isn't just an enclosure; it's a silent storyteller, a protective embrace, and a powerful enhancer of the visual dialogue your art creates within your home. It's about giving your cherished canvas the stage it truly deserves, allowing it to sing its story for years, even generations, to come. So go forth, measure twice, frame once, and let your art truly shine! And when you're ready to find that perfect piece to bring to life, remember to explore my gallery of original abstract art – perhaps your next masterpiece is waiting for its frame, ready to become a captivating focal point in your world!