The Art of Flow: Mastering Smooth Transitions in Painting
Discover professional techniques for effortless color blending in paintings. From wet-on-wet methods to glazing secrets, elevate your artistry with our comprehensive guide to seamless transitions.
The Art of Flow: Mastering Smooth Transitions in Painting
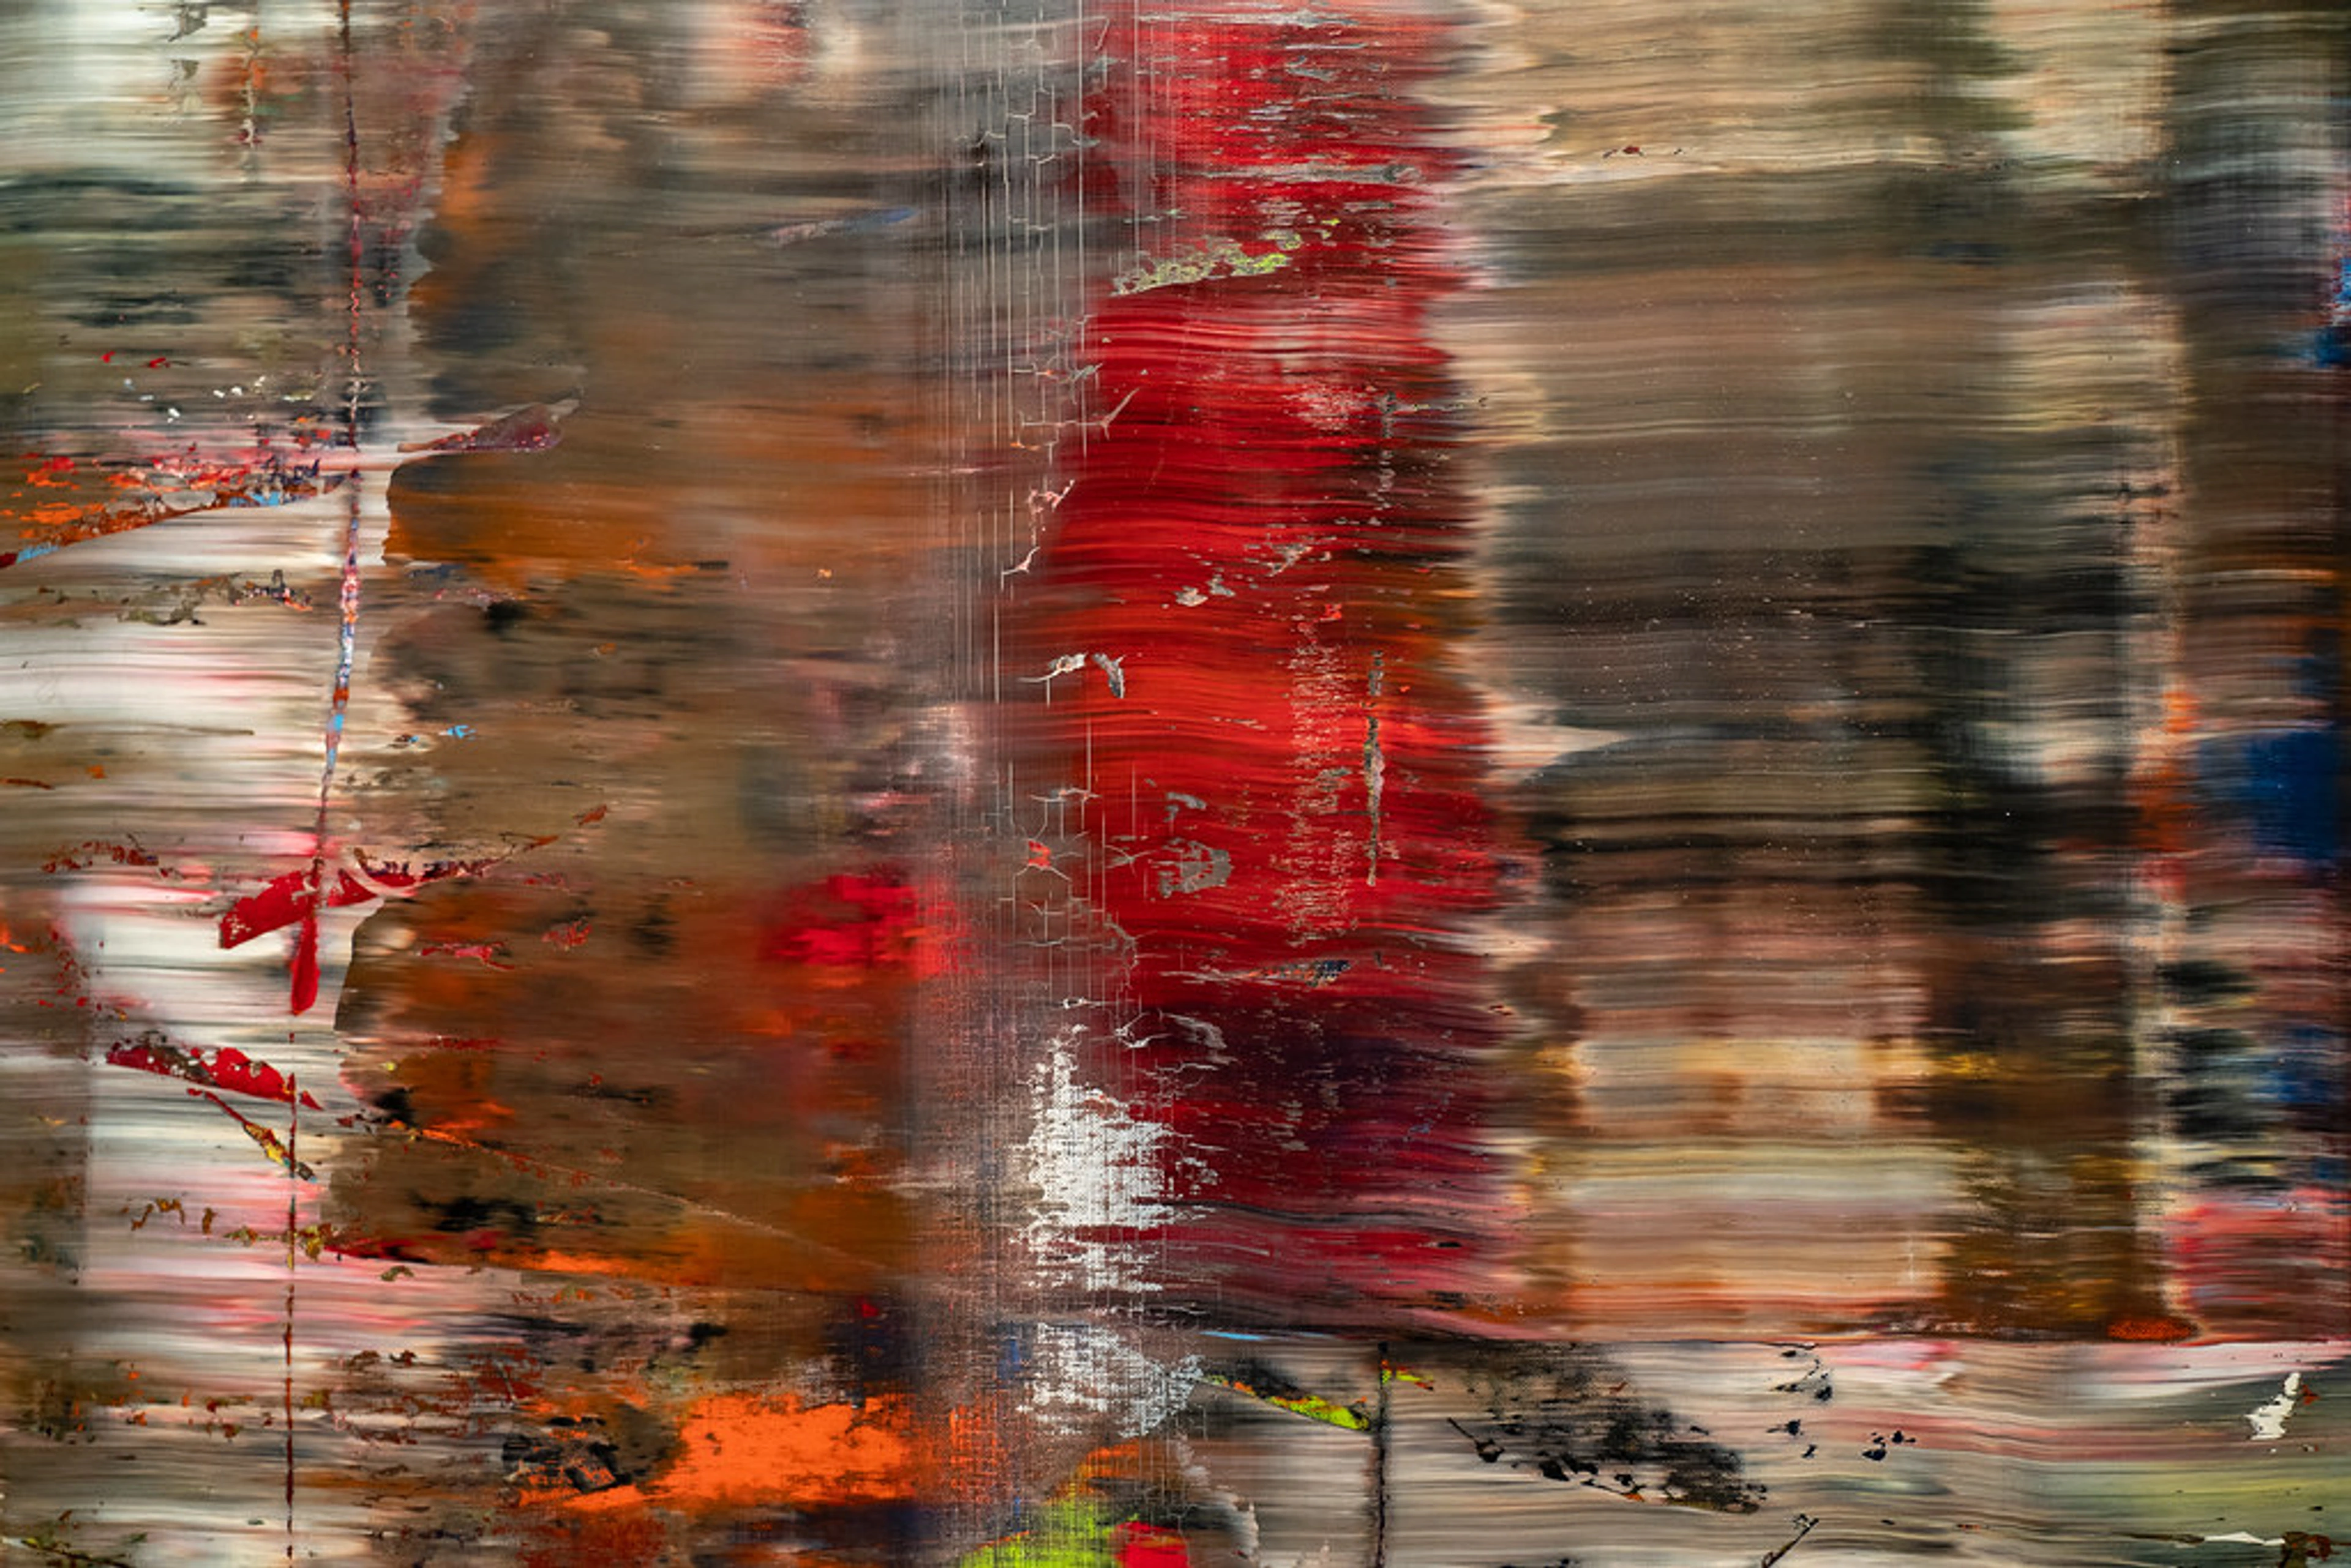
Ever stared at an edge in your painting that stubbornly resisted blending? I know the feeling intimately. That moment when colors clash instead of caress, when the flow you envisioned gets stuck somewhere between your brush and the canvas. It's frustrating, isn't it? But what if I told you those jarring edges could become your most expressive tool? Smooth transitions aren't just technical tricks – they're how we translate the sensation of wind on skin or the softness of dawn into paint. Today, we'll unravel how to make your colors dance together with the grace of a well-rehearsed waltz. Whether you're a beginner wondering why your sky looks like strips of colored paper or an advanced painter trying to capture the subtle glow of twilight, understanding transitions is your gateway to creating work that doesn't just show something, but feels like something.
What most painting tutorials don't tell you is that every edge holds a secret conversation between light, pigment, and time. I learned this the hard way during a brutal critique twenty years ago when my instructor pointed at a sunrise I'd painted and said, "The colors are correct, but the light doesn't move." That comment haunted me for months. The problem wasn't my color mixing – it was my transitions. They were too uniform, too mechanical, too afraid of the spaces between colors. Real light doesn't jump from yellow to orange in a straight line. It breathes. It hesitates. It folds into itself. And that's exactly what we're going to learn to capture.
Transitional techniques are what separate hurried paintings from ones that breathe. Whether you're working with watercolor washes that bleed into one another, oil glazing building depth through translucent veils, or acrylics demanding split-second timing, the principles remain curiously universal. The frustration you feel? It's actually your eye learning to see more deeply. This article is your complete guide – we'll move from the absolute fundamentals to professional techniques, troubleshoot every problem you've cursed at, and explore how masters from Sargent to contemporary abstract artists solve this eternal challenge. Consider this your single source for making edges disappear and paintings come alive.
I remember my first "successful" transition – a messy, overworked sky where the blue and pink somehow found peace after twelve attempts. The paper was nearly worn through, but something magical happened. My rigid control broke down, and I started listening to what the paint wanted to do. That's when edges softened. That's when the painting started singing.
Why Transitions Matter More Than You Think
Imagine a landscape painting where the sky meets the ground in a sharp knife-edge of blue and brown. Disorienting, right? Now picture that same horizon dissolving through rose-pink into violet. Instantly atmospheric, no? That’s the magic of transitions. They:
- Create optical illusions of depth by mimicking how light naturally softens edges
- Guide the viewer’s eye through your composition like a gentle current
- Conserve emotional energy – harsh edges shout, soft edges whisper
- Solve THE digital painting paradox: why our carefully blended edges look muddy in print
I once spent three weeks on a single sunset painting, only to have a collector observe how "the light felt like it was coming toward her." All because I’d blended the orange into violet slowly enough to create that gentle pull. Worth every frustration minute.
The Three Pillars of Effortless Blending
Before we dive in, let’s dismantle some myths. Smooth transitions aren't about fancy tools or innate genius. They rest on three fundamentals:

- Color Relationship Mastery – Not just mixing, but understanding how hues interact optically and chemically. Some pigments are bullies (cadmiums), others are wallflowers (quinacridones). Learning their personalities changes everything.
- Consistent Medium Ratios – The sticky culprit behind most blending fails, especially in acrylics and oils. Your medium-to-paint ratio affects viscosity, drying time, and how colors layer. Change the ratio mid-stream and your transitions turn to mud.
- Controlled Drying Layers – When patience becomes your best brush. Knowing when to wait and when to push forward separates amateurs from professionals. The sweet spot between too-wet and too-dry is smaller than you think.
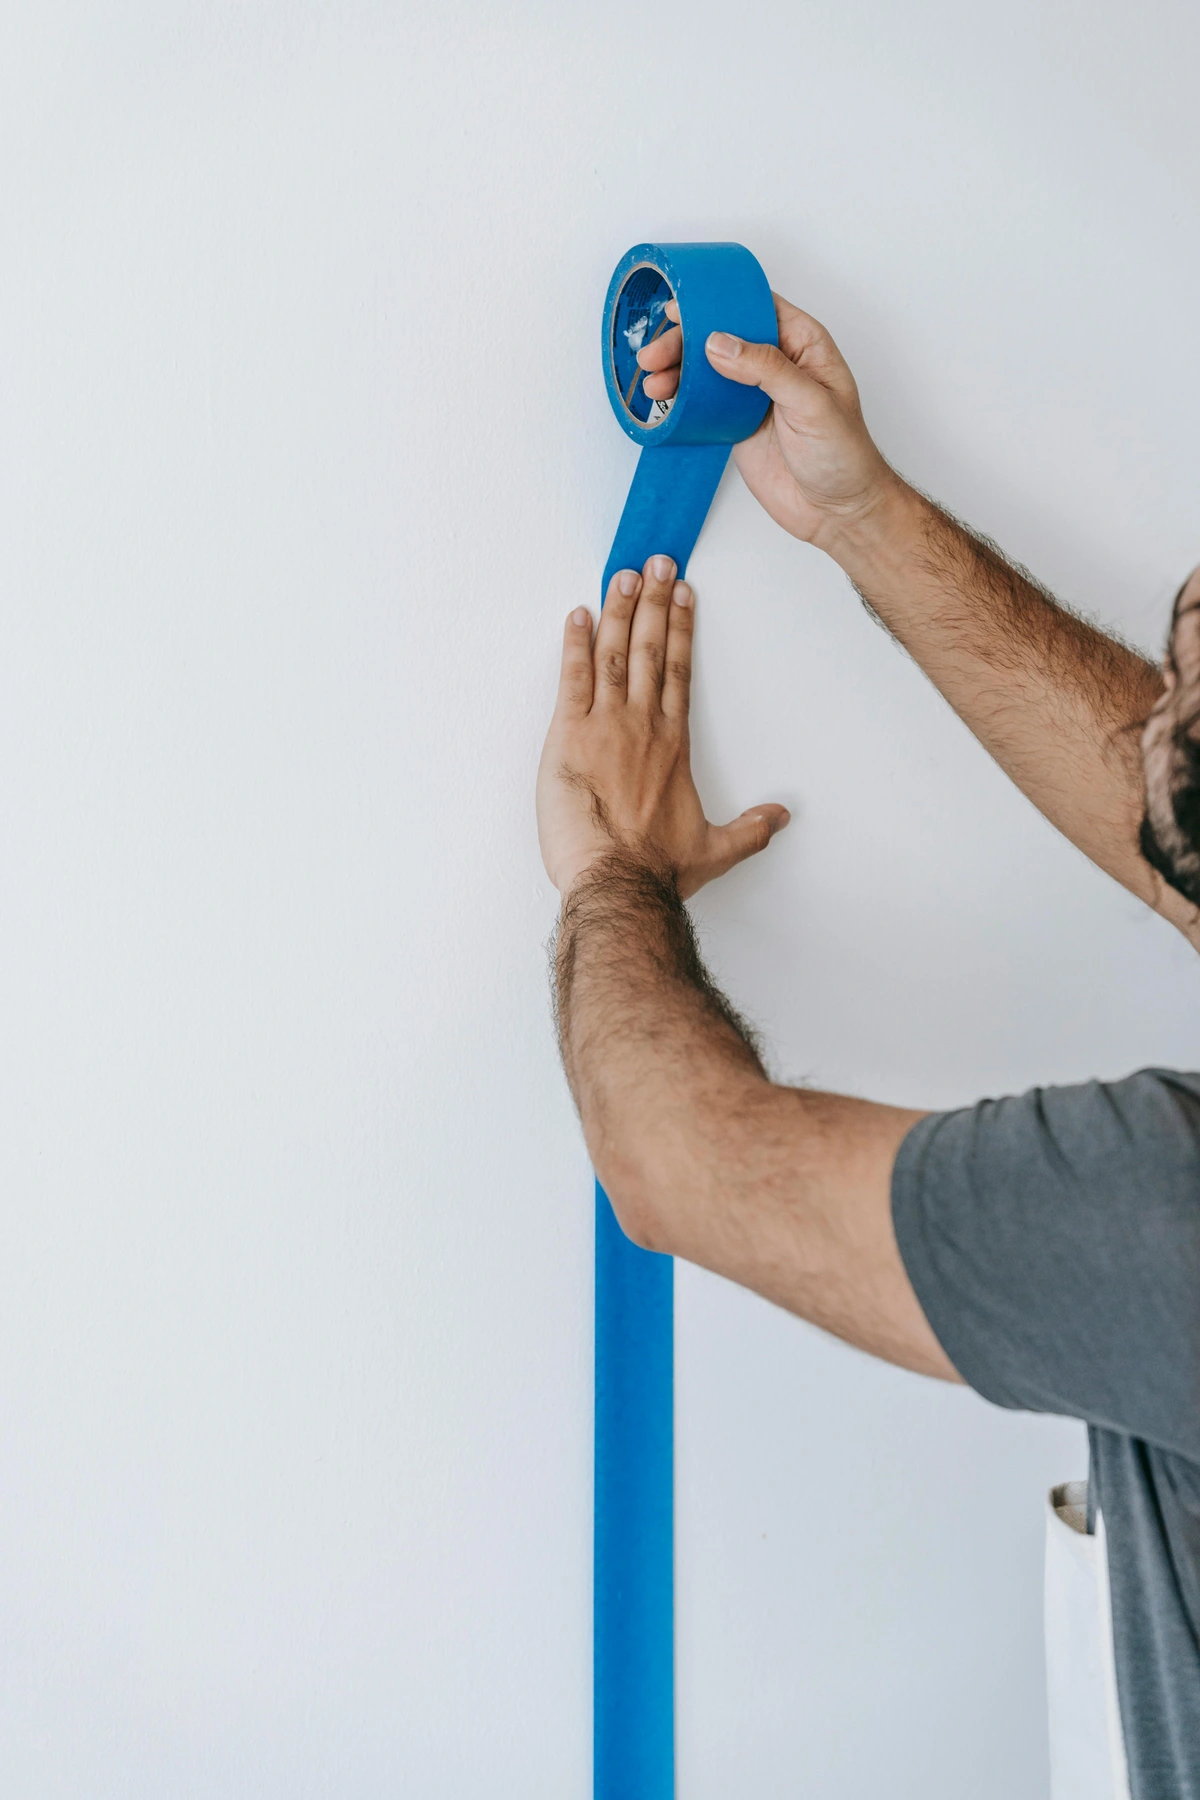
- Surface Preparation – The forgotten pillar. Raw canvas, gessoed board, and toned paper each demand different transition strategies. A thirsty surface drinks pigment unevenly, creating random hard edges where you want smoothness.
- Brush Choice and Care – A worn-out brush creates muddy transitions no matter your skill. Match your tool to the task. Different transitions need different brushes – flats for broad blends, rounds for precise ones, filberts for organic softness.
- Environmental Awareness – Temperature, humidity, and air circulation affect drying times dramatically. Paint in a dry, hot room versus a humid basement and you're practically using different mediums. Control what you can.
- Pigment Concentration Gradients – The physics of it all. Smooth transitions happen when you gradually change pigment density, not just hue. This is why dry-brushing works – you're literally depositing fewer pigment particles as you lighten pressure.
Pro-Level Transition Techniques
So you’ve grasped the theory. Let’s get your hands dirty with methods that consistently deliver velvety-soft edges:
The Wet-on-Wet Technique (Wet-on-Waterdance)
My go-to for atmospheric effects. Perfect for skies, oceans, and that moment you spill wine on your masterpiece (we’ve all been there).
Step | Action | Pro Tip | Common Mistake |
|---|---|---|---|
| 1 | Flood adjacent areas with clean water | Create a "moat" of water around hard edges | Uneven wetness causes blooms and backruns |
| 2 | Load brush with pigment VERY diluted | Think milk consistency, not cream | Too much pigment creates hard edges instantly |
| 3 | Touch brush to water boundary | Watch it bloom like ink in rainwater | Jumping the 'moat' – stay in the wet zone |
| 4 | Tilt canvas, encourage pigment flow | Gravity is your silent assistant here | Tilting too much creates unwanted drips |
| 5 | Lift excess with thirsty brush | Less is more – overdrawing creates mud | Pressing too hard damages paper surface |
| 6 | Let dry untouched | Walk away – seriously | Fiddling with half-dry passages guarantees mud |
Medium-Specific Notes:
- Watercolor: Pre-wet both sides of paper for maximum working time, but here's the kicker – different papers behave wildly differently. Hot-pressed is slippery and fast, cold-pressed gives you more control, rough is unpredictable but creates beautiful granulation effects.
- Acrylics: Add retarder to water (1:3 ratio) or use open acrylics for slower drying. But listen: too much retarder causes film weakness. I never exceed 25% retarder by volume.
- Oils: Pre-wet with odorless thinner instead of water, then work paint into the damp area. The thinner evaporates cleanly while the oil in the paint stays to bind properly.
- Gouache: Riskier due to rewetting, but possible with very controlled dampness. Use a spray bottle to mist, never brush water directly onto dried gouache unless you want chalky disaster.
- Digital: Use layers set to low opacity (10-20%), soft brush edges, and layer blending modes. Multiply for shadows, Screen for highlights, Overlay for mid-tone transitions. The principles are the same, just instant.
I once blended seven different yellows into this lemony haze for a harvest scene. Took six attempts and enough paper towels to dry a small dog, but the effect? People swear they can smell the citrus. All because I embraced the happy accidents that happen when you trust the wetness. The key was using different temperatures of yellow – lemon, gold, and ochre – letting their personalities mix in the water rather than on my palette.
What made it work was something counterintuitive: I didn't try to blend them smoothly. I let each yellow bleed into the next in uneven bursts, creating tiny variations in the transition that made it feel more natural, more like actual light hitting a field of wheat. Perfection is often the enemy of believability. Sometimes a slightly messy, irregular transition looks more real than a mathematically perfect gradient.
Here's my dirty secret: that painting has a major "mistake" that became the best part. I accidentally dropped a blob of cadmium yellow where I meant to use lemon yellow. Instead of trying to fix it, I worked around it, letting the warmer cadmium create a hot spot that became the focal point. The transition from cadmium to lemon yellow ended up being the most compelling passage in the entire piece.
Feathering and Drag Brushing: The Art of Controlled Release
Sometimes wet-into-wet creates too soft an edge. Feathering gives you surgical control over edge softness. This technique is all about the invisible handshake between pressure, paint load, and timing. You're not just dragging pigment – you're choreographing its gradual release from the brush.
I think of feathering as teaching paint to whisper instead of shout. You start with full voice (the loaded brush making solid contact) and gradually fade to silence (lighter pressure until the brush just kisses the surface). The transition happens in that fade, and how quickly or slowly you fade determines how soft or defined your edge becomes.
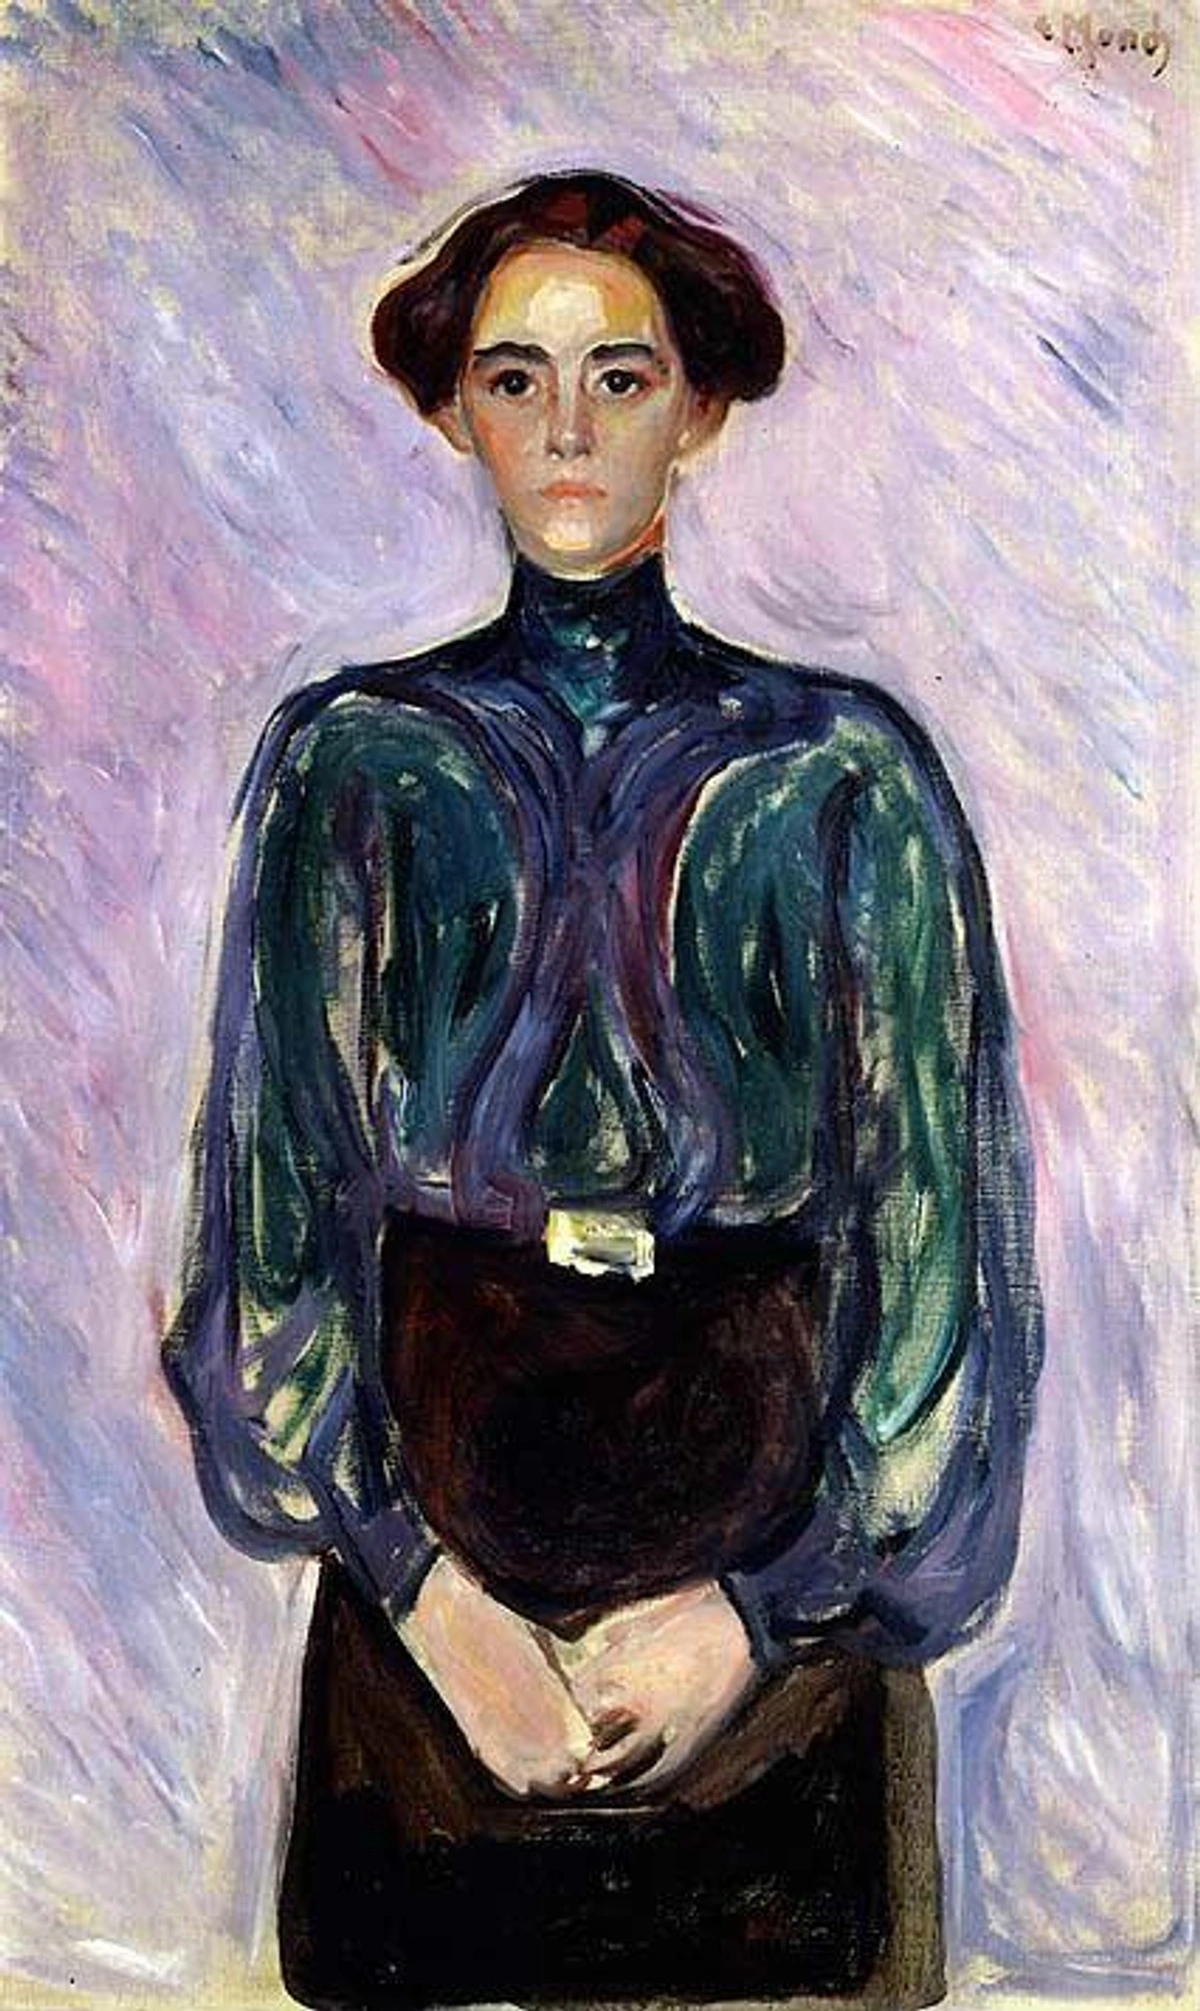
This was a breakthrough technique for me in portrait work. I used to struggle with jawlines and cheekbones – they'd either be too hard and mask-like or too soft and mushy. Feathering gave me that sweet spot where the form turns convincingly without losing definition. It's the difference between a face that looks painted and one that looks alive.
The Technique:
- Load a moderately damp (not wet) brush with paint – aim for "creamy" consistency, not watery
- Starting in the painted area, drag your brush toward the unpainted area at a consistent angle (I use ~45 degrees)
- Lift pressure gradually as you reach the edge – not suddenly, but like a fading musical note
- The stroke thins and lightens, creating a graduated transition as pigment releases unevenly
- Repeat parallel strokes, slightly overlapping, to build density without hard lines between strokes
The Advanced Move: Reverse feathering. Start at the edge with light pressure, drag inward with increasing pressure. This creates a different kind of soft edge – one that feels like it's emerging from nothing rather than fading into it. I use this for highlights that need to glow rather than sit on the surface.
Reading Your Stroke: The stroke tells you what you're doing wrong. If you see a hard line at the end, you lifted pressure too suddenly. If it's uniform with no gradient, your pressure was too consistent. If it's streaky, your brush was too dry or you dragged too fast. Practice on scrap until the stroke looks right, then trust that motion for the real painting.
Why it works: You deposit more pigment at the start of the stroke and less at the end as pressure decreases. This creates a natural gradient based on physics, not just color mixing. It's like using a fading echo instead of a hard stop – the pigment literally thins out as the brush releases its load gradually.
I use this constantly in portrait work – dragging from shadow into midtone, from midtone into highlight. But here's something interesting: the directional strokes also mimic how light naturally flows across forms. Light doesn't hit everything evenly. It's brightest where it strikes directly and softens as the surface curves away. Feathering recreates that natural fall-off pattern.
The stroke direction matters more than most painters realize. Feathering upward creates a lifting, rising feeling – perfect for dawn light. Feathering downward feels settling, heavy – great for dusk. Diagonal strokes feel dynamic and energetic. Horizontal strokes feel calm and stable. You're not just blending colors; you're directing the emotional energy of the light itself.
Brush choice matters enormously, but not for the reasons you think:
- Flats create wider, more uniform feathered edges because the bristle line is straight and even. Perfect for skies, large walls, backgrounds where you want predictable softness.
- Rounds give you more controlled, narrow feathered edges with a distinct centerline. I use these for detailed work like fabric folds or small facial features where precision matters.
- Filberts provide a softer, more organic shape because the curved edge naturally creates gentler transitions. These are my secret weapon for organic subjects like clouds, foliage, or skin where irregular softness looks more natural.
- Brights offer the sharpest control over the transition zone because the short, stiff bristles respond instantly to pressure changes. Great for architectural edges or anywhere you need surgical precision.
The Game Changer: Worn brushes. My best feathering brush is half-bald and looks like it should be retired. The broken-in bristles release pigment more gradually than new, stiff bristles. Keep a "feathering brush" that you never use for heavy applications – its job is just gentle pigment release.
Brush Angle Secret: The same brush creates different effects at different angles. Hold it perpendicular (90°) to the surface for maximum feathering. Tilt it toward the stroke (45°) for more defined edges. Painters rarely talk about this, but it's as important as pressure control.
I keep a "sacrificial brush" specifically for feathering – slightly worn, so it holds paint but releases it gradually. A brand-new, stiff brush fights you. A completely worn-out brush creates mush.
Here's how I "train" a feathering brush: I start with a medium-stiff synthetic brush, use it for regular painting until it's broken in (usually 20-30 hours of work), then retire it to feathering duty. I never wash it thoroughly – just rinse and shape, leaving a tiny bit of residual pigment. This preps the bristles to hold and release paint in that magical sweet spot.
Over the years, I've learned that different medium feathering requires different brushes. Watercolor feathering loves squirrel or kolinsky sable (the bounce matters). Acrylic feathering prefers soft synthetics (they don't get ruined by the plastic binder). Oil feathering works best with hog bristle that's been gently worn down (the spring holds paint but releases it smoothly). I keep separate feathering brushes for each medium – cross-contamination between mediums completely changes how they perform.
Scumbling: The Secret Weapon Against Mud
When blending gets too rich, scumbling saves the day. It’s like giving your painting a soft-focus filter while adding texture.
1. Dry-brush technique: Load stiff brush with opaque pigment
2. Tap (don’t stroke) lightly on dried layer
3. Vary pressure and direction like you’re patting a worried cat
This technique saved my abstract tulips last spring. The transitions were looking like cheap watercolor sets until I scumbled thin layers of viridian over the magenta bases. Instant depth without that murky brown everyone gets terrified of. The optical mixing created a luminous violet that direct mixing would have turned to mud.
But here's what I learned the hard way: you have to match paint consistency to the medium, and you have to work with the right drying time. Attempting to scumble watercolor over a barely-dry wash? Disaster. The paper rebelled, created blooms and backruns everywhere. Acrylic scumbling works best when the underlayer is touch-dry but still slightly flexible (usually 2-4 hours depending on thickness). Oil scumbling can happen anytime, but I prefer doing it when the underlayer is firm but not hard – a few days to a week of drying for most paints.
The tulip painting taught me another lesson: not to fear texture. The scumbled areas had visible brushmarks and irregular pigment distribution. From close up, they looked messy. From viewing distance, they made the tulips vibrate with energy. Sometimes your "mistakes" become the most interesting passages.
Stippling for Smooth Transitions: The Pointillist's Influence
Stippling is the pointillist's secret weapon – thousands of tiny dots that blend optically at viewing distance. But you don't need to paint like Seurat to use this principle. Most painters think stippling means painting individual dots, but that's only one approach. The real magic happens when you think of stippling as controlled texture that creates optical mixing.
I'll never forget visiting the Art Institute of Chicago and seeing Seurat's "A Sunday on La Grande Jatte" up close for the first time. From inches away, it's just thousands of colored dots – some bright, some dull, some warm, some cool. But as I walked backward, something miraculous happened. The dots disappeared and the scene emerged. The grass looked green, the water looked blue, the people looked like people. Then I realized: Seurat wasn't just painting a scene; he was encoding light itself, dot by dot.
That experience changed how I think about transitions. Why physically mix colors when you can place them side by side and let the viewer's eye do the work? The result is often more vibrant because you're not dulling pigments by over-mixing.
Practical Stippling for Blending:
Instead of mixing two colors on your palette, place small marks of both colors side by side. Your eye does the mixing. This maintains color vibrancy while creating smooth visual flows.
But here's where most tutorials miss the nuance: it's not just about dots. You can stipple with:
- Tiny dots (classic pointillism)
- Short dashes (more directional, creates energy)
- Little commas (organic, feels more natural for foliage or hair)
- Irregular dabs (textured, breaks up hard edges without being uniform)
- Cross-hatched marks (combines stippling with line work for complex transitions)
I use different mark types depending on what I'm painting. Dots for atmospheric effects like fog or distant landscapes feel right. Dashes work for water, fabric, anything with flow. Commas are perfect for organic subjects like flowers or hair where you want softness with direction. Irregular dabs create that broken-color impressionist look.
Traditional Blending | Stippling/Optical Blending |
|---|---|
| Mixes pigment physically | Mixes pigment in viewer's eye |
| Can create dull, muddy colors | Maintains individual color vibrancy |
| Faster for smooth gradients | Slower application, faster dry time |
| Risk of overworking | No risk of over-blending |
| Works best with analogous colors | Effective with any color relationship |
| Requires wet paint | Can work wet or dry |
The Science: When you place pure blue and pure yellow dots side by side, your retina processes them as separate stimuli. But your brain's visual cortex blends them into green without the pigment ever physically mixing. You get the vibrancy of pure color with the smoothness of blending.
I used this extensively in my Colored Vortex series – creating gradients from deep magenta through gold to turquoise that would have turned to grayish-brown if I'd mixed them traditionally. From ten feet away, viewers see seamless color flow. Up close, they discover thousands of individual color sparks. It rewards looking.
Glazing: The Tortoise Wins Every Time
Patience pays dividends here. Layers of transparent medium build transitions atom by atom. Glazing is how Renaissance masters created that impossible luminosity – building skin tones through dozens of translucent layers rather than mixing opaque flesh tones. If wet-into-wet is a sprint and scumbling is a jump, glazing is a marathon.
But here's what most painters misunderstand: glazing isn't just about layers – it's about light physics. Every transparent layer allows light to pass through, hit the white canvas or gesso beneath, and bounce back through all the layers to your eye. That's why glazed colors seem to glow from within. You're not looking at paint; you're looking at light that's been filtered through paint.
I learned this through painful experimentation. My early glazing attempts turned muddy and dark because I was using too much pigment in each layer, essentially building opaque layers instead of transparent ones. The breakthrough came when I started testing each glaze on white paper first, making sure I could see the paper through the dried glaze. If I couldn't, the mixture was too concentrated.
Why glazing creates magical transitions: Each transparent layer modifies the color beneath it while letting light pass through, bounce off the white canvas or gesso, and return through the layers. This creates depth you can't achieve through direct mixing. A red glaze over blue doesn't make purple; it makes a luminous, vibrating red-blue that changes depending on viewing angle.
The Physics Lesson: When you physically mix red and blue paint, you get purple because pigment particles are randomly distributed through the mixture. When you layer a red glaze over blue paint, light passes through the transparent red layer, reflects off the blue layer beneath, and travels back through the red layer to reach your eye. You're seeing red-filtered blue light, which creates a more complex, vibrant color experience than simple pigment mixing.
This is why museum paintings photographed under different lighting conditions look different. The glaze layers interact with the quality and direction of light, making the colors shift and vibrate. It's like looking at a stained-glass window versus a printed photograph of that window – one has depth and luminosity, the other is flat and static.
The Goldilocks Zone – Getting Consistency Right: Too thick and your glaze becomes opaque paint. Too thin and nothing happens. The perfect glaze consistency is "skim milk" – transparent enough to see your brushstrokes through it, but pigmented enough to tint the layer beneath.
Testing glaze strength:
- Brush a small test patch on white paper next to your palette
- Let it dry completely (critical – wet glaze looks darker)
- You should see a subtle tint, not an opaque color
- If it's too strong, add more medium; too weak, add more paint
Building complex transitions: Want to move from yellow to red? Don't glaze with orange. That's beginner thinking. Instead:
- Layer 1: Yellow base (let dry completely – this is non-negotiable)
- Layer 2: Very thin yellow-orange glaze (dry completely)
- Layer 3: Thin orange glaze (dry completely)
- Layer 4: Thin red-orange glaze (dry completely)
- Layer 5: Thin red glaze (dry completely)
The Waiting Game: Notice the repeated "dry completely" instruction? This is where most painters get impatient and ruin everything. Here's my waiting strategy:
- Work on multiple paintings simultaneously, rotating through them as layers dry
- Use a hairdryer on low heat (oils) or cool setting (acrylics) if you must speed things up
- Test dryness with your knuckle, not your finger – if anything sticks, it's not ready
- Plan glazing sessions for the end of your painting day so overnight drying happens naturally
- Keep a glazing journal noting drying times with different mediums and environmental conditions
Advanced Glazing: Instead of just changing hue, try changing value or temperature in your glaze sequence. A blue glaze deepens values without darkening hues. A yellow glaze warms everything without shifting color dramatically. These subtle modifications create transitions so smooth they seem to happen by magic.
Each layer modifies the previous one subtly. The result is a transition that seems to glow from within because light passes through all those transparent veils. It's the difference between a photograph of light and actually trapping light in pigment.

The Science Behind Glazing: Each transparent layer modifies the color beneath it while letting light pass through, bounce off the white canvas or gesso, and return through the layers. This creates depth you can't achieve through direct mixing. A red glaze over blue doesn't make purple; it makes a luminous, vibrating red-blue that changes depending on viewing angle.
When to Glaze:
- Building deep, glowing shadows without the chalky look of mixed black
- Correcting values without repainting entire sections (a blue glaze deepens values magically)
- Creating atmospheric perspective in landscapes where distance needs subtle color shifts
- Unifying disparate colors under a tinted veil that brings harmony to chaotic passages
- Adjusting color temperature subtly (cool shadows, warm highlights) without changing the base drawing
- Building portraits where skin needs that inner radiance rather than opaque coverage
- Creating jewel-like colors in abstract work where intensity matters more than brushstrokes
Optical Blending: The Lazy Genius Method
Sometimes the best transitions happen in the viewer's eye, not on your palette. Pointillists knew this – tiny dots of pure color blend into coherent images when viewed from distance. You don't need to paint dots, but understanding optical blending gives you a powerful shortcut for maintaining color vibrancy while creating smooth visual flows.
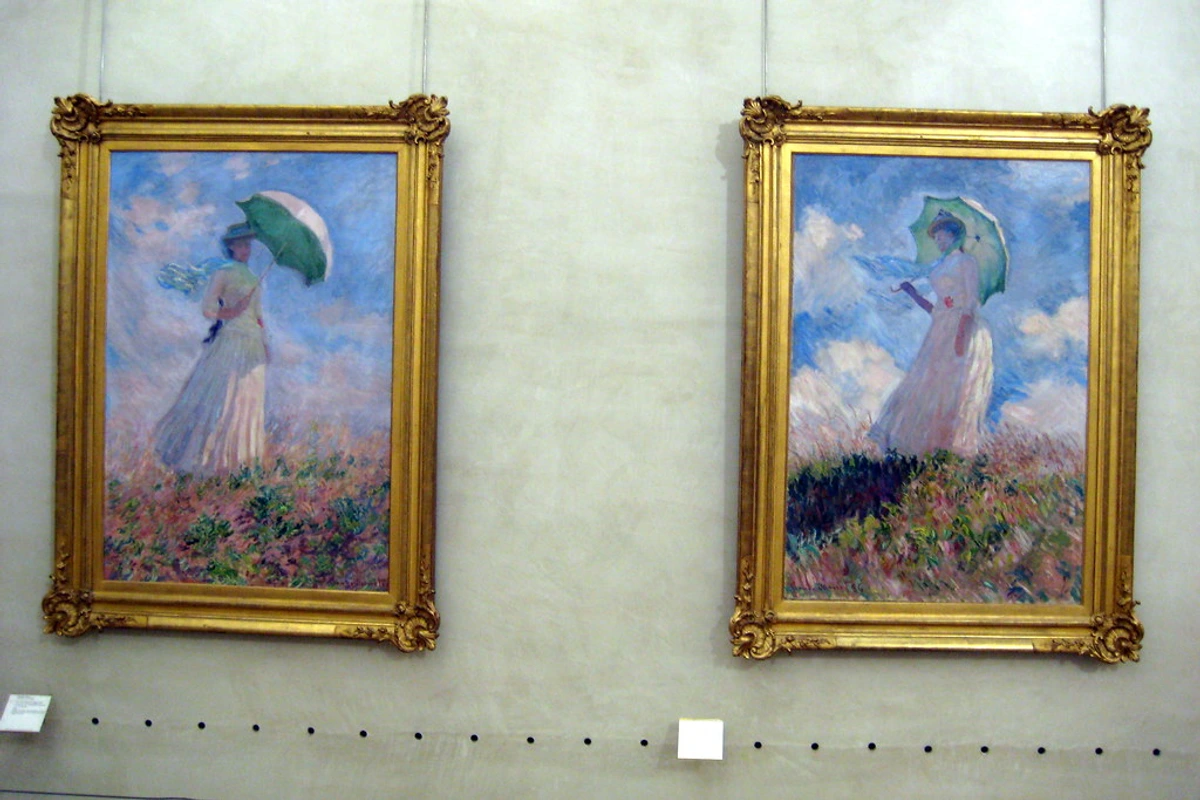
How it works: Place small strokes or patches of adjacent colors close together. At a distance, the eye mixes them. Up close, they retain their vibrancy. This avoids the muddy graveyard of over-mixed paint. It's why Monet's water lilies shimmer – patches of pure purple and green resolve into a unified surface from across the room but reward close looking with individual color sparks.
The Neuroscience: Your retina contains three types of cone cells sensitive to red, green, and blue wavelengths. When you see closely spaced dots of different colors, individual cones fire in response to their specific wavelengths. But your brain's visual cortex integrates these signals into perceived colors. A red dot next to a blue dot doesn't become purple on your retina – it becomes purple in your mind. This brain-level mixing preserves the vibrancy of individual pigments while creating smooth transitions.
I use this extensively in my abstract work – laying down patches of magenta, gold, and deep blue that resolve into a unified field from ten feet away but reward close looking with individual color sparks. It's the difference between painting a sunset and trapping actual light in pigment.
Practical Application: Start with your two key colors. Instead of mixing them on the palette, paint stripes or patches of each, leaving tiny gaps. Then fill those gaps with a third, intermediate color. The result looks blended but maintains individual color integrity. For a red-to-blue transition, paint red patches, blue patches, and fill gaps with violet. From a distance, it reads as smooth gradient. Up close, it reveals distinct color personality.
I use this extensively in my abstract work – laying down patches of magenta, gold, and deep blue that resolve into a unified field from ten feet away but reward close looking with individual color sparks.

Medium | Transparency | Drying Time | Blend Friendliness | Cost (per 250ml) | Best Use | Pro Tip \ |
|---|---|---|---|---|---|---|
| Acrylic gloss medium | High | 30 min | Moderate | $8-15 | Rapid layer building, experimental work | Mix with retarding gel for longer open time |
| Stand oil | Very High | 3-7 days | Excellent | $12-20 | Slow, deep glazing in oils, enamel-like finish | Add 1-2% cobalt drier in humid climates |
| Galkyd | Medium | 6-24 hrs | Very good | $15-25 | Speeding up oil drying, detailed work | Less yellowing than stand oil over time |
| Liquin | High | 12-24 hrs | Very good | $10-18 | All-purpose oil glazing, impasto techniques | Avoid in final layers—tends to darken |
| Watercolor medium | High | 1-2 hrs | Varies | $6-12 | Extending drying time, granulation effects | Add ox gall for better flow on hot-pressed paper |
| Digital layer modes | Perfect | Instant | Infinite | Free | Multiply for shadows, Screen for lights | Use low opacity (10-20%) for realistic blending |
Personal Hack: I keep three dedicated glaze-medium brushes: one for warm colors, one for cool, and one for earth tones. Cross-contamination between glaze batches is a silent killer of color purity. I learned this after a rose glaze picked up residual blue and turned my sunset muddy. Label your brushes with colored tape—red for warms, blue for cools, brown for earths. Trust me.
My rule of thumb? Wait until layers are "tacky, not sticky" before glazing. Press your knuckle – if dust sticks, it’s ready. If fingerprint shows, give it another hour. I learned this after ruining a favorite seascape by rushing. Still miss that painting.

Color Theory: The Unsung Hero of Smooth Edges
Blending succeeds or fails at the color stage. These relationships make transitions sing. It's not enough to know your color wheel – you need to understand how pigments physically and optically interact.
I remember my first color theory class. The instructor spent three hours on the color wheel, had us memorize complementary pairs, and sent us home with the impression that color mixing was just arithmetic – red + blue = purple, simple as that. What a beautiful lie that was. Real color mixing isn't arithmetic; it's chemistry, physics, and psychology all tangled together.
The problem with most color theory teaching is that it treats all reds as equal, all blues as interchangeable. But grab cadmium red and alizarin crimson – both "reds" – and watch how differently they behave in transitions. Cadmium red is opaque, warm, and assertive. Alizarin crimson is transparent, cool, and stains everything it touches. You wouldn't use them interchangeably any more than you'd substitute cayenne for paprika in a recipe.
Understanding pigment personalities transforms your approach to transitions. It's the difference between following rules and understanding why things work:

Understanding Pigment Personalities
Before we even talk about color mixing, we need to talk about pigment personalities. Not all blues are created equal—some are transparent and staining (like phthalo), others are opaque and liftable (like cerulean). You wouldn't pair a wallflower with a diva and expect harmony, right? Same with paint.
The Big Four Temperaments:
- The Stainer (Phthalo Blue, Alizarin Crimson): These pigments grab the paper or canvas and won't let go. Mix them into other colors and they dominate. For transitions, use them sparingly or as a final accent.
- The Gentle Giant (Ultramarine, Burnt Umber): Strong colors, but more forgiving. They mix well and can be lifted or modified. Perfect for base layers in transitions.
- The Ghost (Quinacridone Gold, Transparent Yellow): These are translucent and create luminosity without overpowering. They're the ultimate "bridge" colors for seamless transitions.
- The Bully (Cadmium Red, Cadmium Yellow): Dense, opaque pigments that cover everything beneath them. They're amazing for highlights but can kill a delicate transition stone-dead if used clumsily.
The Mixing Order Secret: You don't just pick colors; you choreograph them. I was trying to mix a sunrise gradient: yellow → orange → red. Mixing cadmium yellow into cadmium red created a muddy orange every time. Reversing the order—adding tiny amounts of red into yellow—created a brilliant, clean range of oranges. Why? Because yellow is naturally lighter and less dominant than red. Starting with the gentler pigment and gradually introducing the more aggressive one gives you control. The pigment you add last dominates the mixture.
- Analogous transitions: Blend adjacent hues (e.g., blue into violet) for natural flows
- Split-complementary moves: Soften transitions between primaries and their complements’ neighbors
- Triadic harmonies: Use tertiary colors as bridges between primary transitions
Here’s my trick when colors fight: Instead of forcing them to mix physically, create an optical middle ground. Paint a thin line between them in a value halfway between both. Your eye does the rest. Like a good conversation starter, that middle value creates common ground.

Troubleshooting: When Transitions Terrorize Your Canvas
Even Picasso had rough edges. Here’s how to recover when blending backfires:
Problem | Cause | Scientific Reason | Professional Fix | Prevention Strategy |
|---|---|---|---|---|
| "Muddy" blends | Overworking, overmixing, wrong pigments | Pigments physically mix into neutral gray/brown, killing chroma | Glaze with transparent yellow to restore warmth, or scumble light opaque color over top | Mix on palette not canvas, use compatible pigments, limit brushstrokes |
| "Streaky" transitions | Brush friction, inconsistent pressure, too much medium | Uneven paint film creates different refractive indices | Use softener brush with pure medium, or glaze over entire area to unify | Load brush evenly, use feather-light touch, maintain consistent medium ratio |
| Color "popping" | Values too close, overblending | Visual system can't distinguish edges without value contrast | Adjust value first (darken or lighten one side), then adjust hue if needed | Plan values before mixing colors, embrace intentional edges |
| "Chalky" appearance | Too much opaque white mixed in, wrong mixing order | Titanium white has high refractive index, creates opaque "veil" effect | Glaze with transparent color to deepen, use zinc/titanium mix for less opacity | Use transparent pigments for glazing, add white last and sparingly |
| "Bloomed" watercolor | Uneven drying, too much water in some areas | Differential evaporation creates backruns as wet areas flow into drier areas | Let dry completely, rewet evenly and lift carefully with thirsty brush | Ensure even dampness across wet area, use artist-grade paper |
| Cracking in oils | Lean layers over fat, insufficient drying time | Drying shrinkage exceeds film strength because top layer dries faster | Scrape and restart following proper layering, or wait months and varnish | Remember "fat over lean" always, use alkyd mediums to speed drying evenly |
| Acrylics drying too fast | Thin layers, hot environment, absorbent surface | Rapid water evaporation prevents proper film formation | Use retarder (1:4 with paint), mist with water, work in smaller sections, switch to open acrylics | Retarder + slow-dry medium combo, work in climate control |
| "Orange peel" texture | Wrong thinner/medium ratio in oils | Solvent evaporates too quickly, causing paint to "skin over" before leveling | Sand lightly when fully dry (220 grit), continue with fatter layers | Test medium ratios first, use artist-grade products, add oil to final layers |
| Sinking in (dull patches) | Too much solvent, absorbent surface | Binder is drawn into substrate, leaving pigment without gloss | Oil out with linseed oil/wax medium, varnish when fully dry | Use medium instead of pure solvent, seal porous surfaces with isolation coat |
| Impasto cracking | Too much medium in thick paint | Excessive medium creates weak, brittle film in thick applications | Scrape down with palette knife, rebuild with less medium and more paint | Follow manufacturer ratios, build gradually with texture paste for volume |
| Edge bleeding | Too wet substrate, wrong paper | Excess water carries pigment beyond intended boundary through capillary action | Lift immediately with dry brush, let dry and rewet evenly with controlled water | Test paper stretch first, control water load, use less absorbent paper |
| Discoloration over time | Fugitive pigments, poor varnishing | Pigment molecules break down under UV light or react with atmosphere | Consult conservator for reversal if possible, otherwise accept as patina | Use lightfast pigments (ASTM I or II), varnish with UV-protective coating |
| Over-diluted wash (watercolor) | Too much water, insufficient pigment | Transparent wash with no body can't hold edge or create intensity | Let dry, reapply with more concentrated pigment, or embrace as underpainting | Test color intensity on scrap first, load brush with creamy (not watery) paint |
| Brush marks too visible | Stiff brush, too much pressure, wrong consistency | Brush physically displaces paint rather than flowing over surface | Soften with finger or soft brush while wet, or sand lightly when dry and glaze over | Use softer brushes, thin paint properly, apply with lighter touch |
| Haloing/blooming (oils) | Oil separation, improper mixing, humidity | Binder separates from pigment, creating shiny and dull patches | Let dry completely (weeks), oil out, or apply isolation coat and continue | Mix thoroughly, avoid painting in high humidity, use well-ground paints |
| Speckled appearance | Contaminated brush, old paint, dirty medium | Foreign particles or dried paint flecks mix into fresh paint | Sand smooth when dry, apply glaze to unify, or embrace as texture | Clean brushes thoroughly, strain old medium, store paint properly |

My most successful recovery? When indigo and white refused to blend into a believable sky, I switched tactics altogether. I added streaks of transparent violet for distant clouds. Problem solved and more interesting than rendering it "correctly." Sometimes imperfection teaches us more. The client never knew it was a cover-up – they just said "the sky feels infinite."

Diagnostic Checklist: When Your Transition Fails
Before you scrape it all off, run through this mental checklist. Print this, tape it to your easel:

- Wrong timing? (Too wet/too dry) – Test with knuckle
- Wrong ratio? (Too much/too little medium) – Check your palette mix
- Wrong color choice? (Opaque over transparent, complementary collision) – Review pigment properties
- Wrong value? (Colors match in lightness/darkness) – Squint to check contrast
- Wrong temperature? (Warm and cool fighting instead of working together) – Identify warm/cool versions
- Wrong tool? (Stiff brush for soft blend, soft brush for texture) – Match brush to task
- Wrong surface? (Too absorbent, wrong tooth) – Test absorption first
- Wrong light? (Painting in poor light hides flaws until it's too late)
- Wrong sequence? (Fat-over-lean violation in oils, or vice versa in acrylics)
- Wrong expectation? (Some textures shouldn't be perfectly smooth)
Ninety percent of failed transitions trace back to one of these culprits. I've started keeping a "mistake journal" beside my easel – when something goes wrong, I write down what I think happened. Over time, patterns emerge. You learn more from your disasters than your successes. My journal taught me I consistently add too much medium to oil glazes and rush acrylic wet-into-wet timing. Know your personal demons.
When to Scrape and Start Over
Sometimes recovery isn't worth it. Here's my rule: if more than 50% of the passage needs fixing, or if you've already applied three corrective layers, stop. Scrape it off (oils) or paint over it (acrylics/watercolor on heavy paper).
The sunk-cost fallacy is real in painting. I've wasted weeks trying to "save" passages that should have taken two hours to repaint. Your time has value. A clean start often produces better results with less frustration.
How to scrape properly:
- Oils: Palette knife while wet, or razor blade/scraper when leather-hard
- Acrylics: Sand smooth when fully dry, then apply isolation coat before repainting
- Watercolor: Accept the mistake, plan around it, or start fresh – lifting never fully removes staining colors
Mental reframe: That "failed" layer becomes valuable underpainting. It gives you a foundation to work from, even if you cover it completely. Nothing is truly wasted – even failure teaches your eye to see better next time.

FAQ: Your Blending Questions Answered
Q1: Why do my acrylics get "gummy" when blending?
That’s the binder grabbing onto itself too eagerly. Fight back by adding 50% water or glazing medium to your paint. Never use more than 30% water without medium though – that’s how we get canvas-cracking drama we don’t want.
Q2: How can I blend oils without the dreaded "fat over lean" issues?
Start lean (more solvent, less oil) and end fat. Think transitions = first layers leanest. When building depth at transition points, use alkyd mediums to accelerate drying between glazes. And always wait 3-6 days before adding fat layers over lean ones. Your future self will thank you. If you screwed this up and see cracks forming, stop immediately, let it cure for months, then consider varnishing or... well, sometimes you just learn the lesson the hard way. Here's my sequence: Layer 1 (lean) = 3:1 solvent to oil. Layer 2 = 2:1. Layer 3 = 1:1. Layer 4+ (fat) = pure medium or stand oil. Never reverse this sequence.
Q3: Which brushes give the softest transitions?
Squirrel mop brushes for watercolors, softer synthetic filberts for acrylics, and natural hair rounds for oils. Personally? I keep one brush dedicated ONLY to softening edges. That thing’s like a magic wand for smoothness. You can see some of my favorites over at my studio shop though honestly, the best tool is often just a damp rag or finger.
Q4: Can I blend digital and traditional techniques?
Absolutely! I’ll often paint the base traditionally, then scan it and soften transitions digitally where my hands couldn’t achieve the level of refinement needed. Though I'm skeptical of NFT versions – the resolution rarely does the smooth transitions justice. A physical print shows what you truly achieved.
Try working on toned paper – the mid-tone base helps transitions feel unified.
Finding Flow Your Own Way
At the end of the day, smooth transitions aren’t technical checkboxes – they’re how we translate the feeling of softness into pigment. I once watched a painter spend ten minutes blending a single shadow edge. "Patience," she said when I asked. "The shadow isn’t rushing, why should I?"
Your journey will be unique. Some days you’ll conquer seamless skies. Other days, you’ll create jarring edges that somehow feel exactly right. Both are valid. What matters is developing that conversation – where your instincts and techniques finally understand each other. Now go make some colors dance together. I’ll be right here cheering you on.

Want to see how these techniques play out in real paintings? I’ve documented their evolution in my art timeline and you can experience the textures firsthand at my Den Bosch exhibition space.