The Beginner's Ultimate Guide to Digital Art Creation
Demystify digital art creation with this comprehensive starter guide covering software, techniques, file management, and the creative journey from sketch to masterpiece.
The Beginner's Ultimate Guide to Digital Art Creation
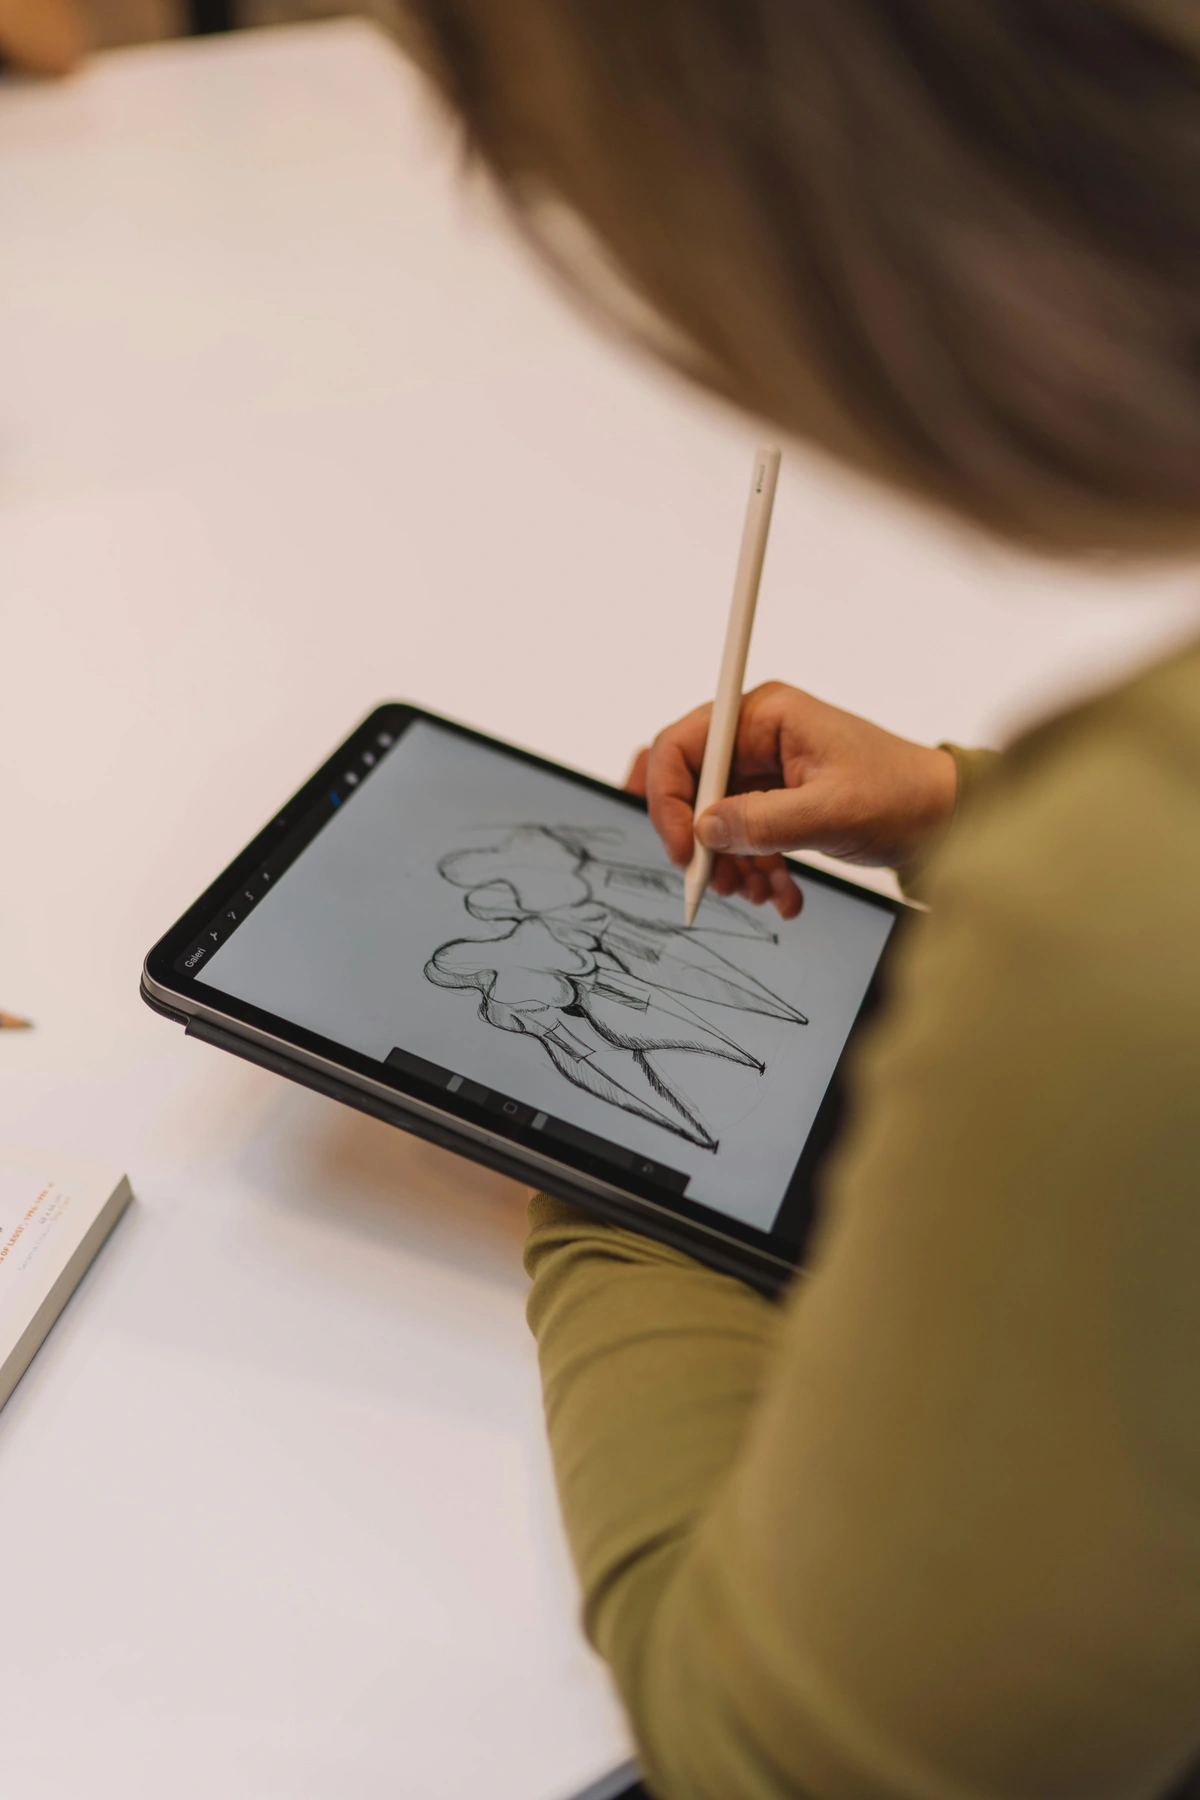
So you've finally decided to dive into digital art? I remember when I first opened Photoshop years ago—that interface looked like the cockpit of a spaceship, and I spent ten minutes just trying to figure out how to create a new document. But don't panic. That initial overwhelm is completely normal, and honestly, pretty universal. Digital art might feel like learning a new language at first, but it's actually an incredibly freeing way to create once you get past that steep initial learning curve.
And here's the thing nobody tells you: every single professional digital artist you admire started exactly where you are right now—staring at a bewildering array of tools, wondering if they made a terrible mistake. The difference between them and people who give up isn't talent or expensive equipment. It's simply the willingness to push through that initial "what the hell am I doing?" phase that lasts about three weeks.
Here's what nobody tells you upfront: the first three months will feel like you're drawing with your non-dominant hand while standing on one leg. Your lines will wobble, colors will look wrong, and you'll accidentally delete entire layers more times than you can count. But then something clicks—the tablet starts feeling like an extension of your hand, not a foreign object. Your brain rewires itself to think in layers and undo histories. Suddenly you're not fighting the tools anymore; you're using them to materialize what's been living in your imagination.
But here's the secret they don't put in the tutorials: that steep learning curve is actually your friend. The struggle of those first weeks builds neural pathways that make everything click later. Every accidental layer deletion, every moment of staring at a blank canvas wondering if you're even cut out for this, every "undo" click that saves you from yourself—these aren't failures. They're you building the foundation of your digital art brain.
Let's break it down together, step by step, without any unnecessary jargon.
Why Digital Art?
Before we jump into tools, let's talk about why digital creation matters. I mean, you have hands, you have paper—why complicate things with technology?
Here's the thing: digital art offers something no traditional medium can touch. Unlimited undos. I've literally saved paintings that would have been trash in any other medium just by hitting Ctrl+Z a few dozen times. You can experiment wildly with colors and textures without buying a single tube of paint or worrying about wasting materials. Plus, you can work from anywhere—your couch, a café, or even during a power outage if you remember to charge your tablet.
But beyond the technical advantages, there's something deeper happening. Digital tools democratize art in ways we're still figuring out. A teenager in their bedroom can access the same quality brushes as a professional studio. Someone with limited mobility can create in ways physical media might not accommodate. The barrier to entry isn't talent or expensive materials anymore—it's just willingness to learn.

Understanding Digital Mediums
Before we dive deeper into tools, let's clarify what we mean by "digital art." It's not one single thing—it's more like an entire art supply store digitized. Here's how most digital art breaks down:
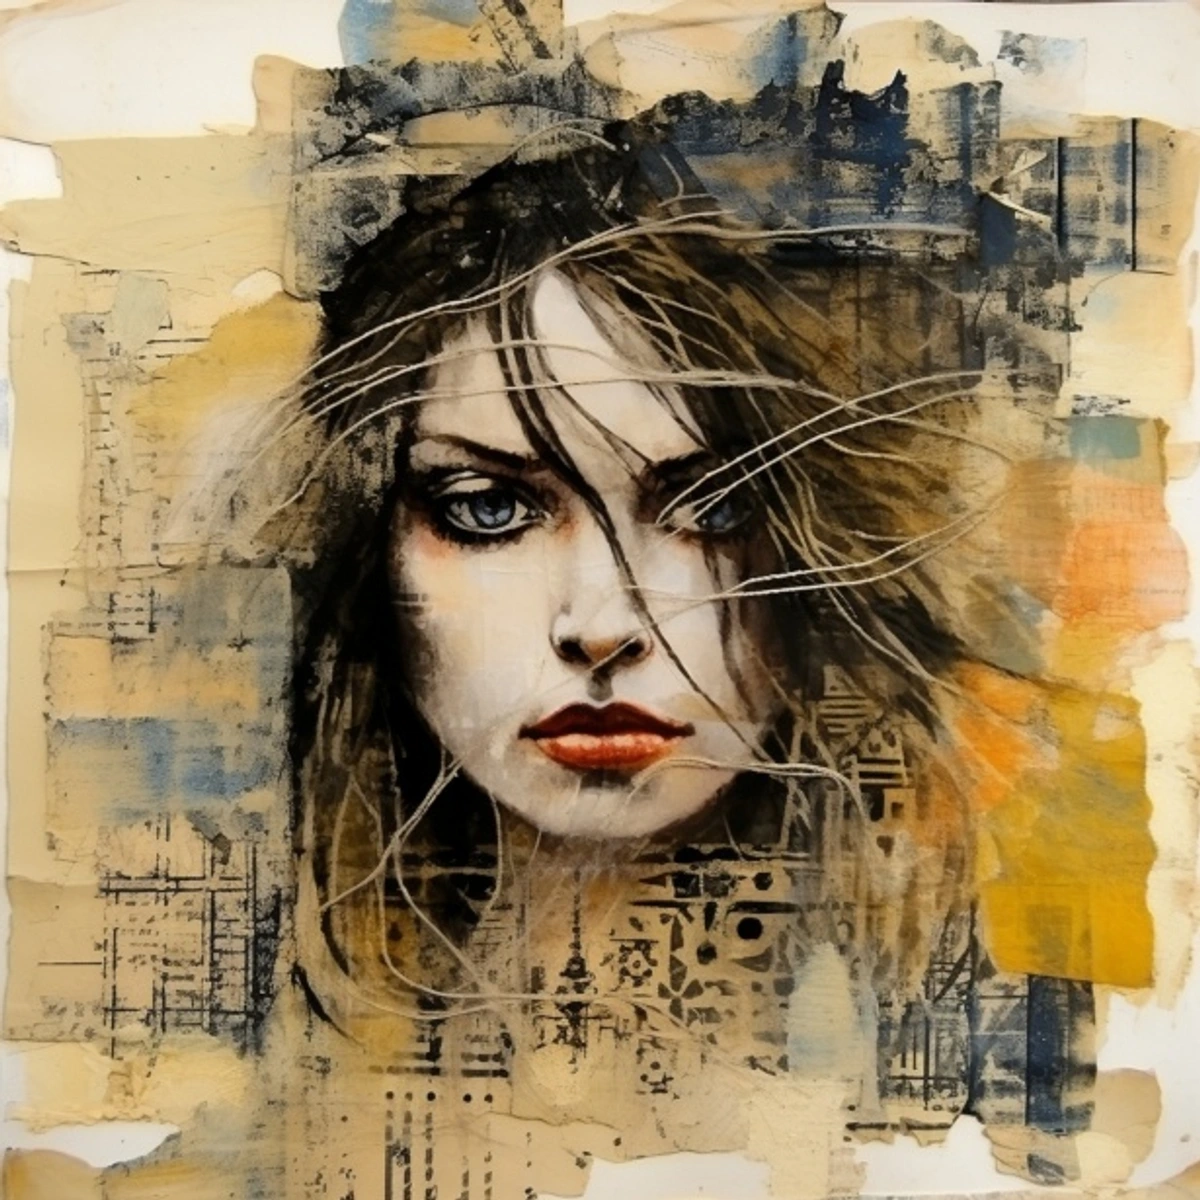
Digital Painting and Illustration
This is probably what you imagine first—creating paintings and drawings using digital brushes and tools that mimic traditional media. Artists use programs like Photoshop, Procreate, and Clip Studio Paint to create everything from portraits to fantasy landscapes to abstract compositions. The key advantage? You get all the creative freedom of painting with none of the cleanup or material costs.
3D Modeling and Sculpting
Some artists don't paint on a flat surface—they sculpt in virtual space. Using software like Blender (free!), ZBrush, or Nomad Sculpt, artists create three-dimensional models, characters, environments, and objects. These can be used for animation, video games, 3D printing, or even still images that look photorealistic.
Vector Art
Ever notice how some logos and illustrations stay perfectly crisp no matter how much you zoom in? That's vector art. Unlike regular digital painting (which uses pixels), vector graphics use mathematical paths and points. Adobe Illustrator is the industry standard, but Affinity Designer and Inkscape are excellent alternatives. Vector is perfect for logos, icons, typography, and illustrations that need to scale infinitely.
Pixel Art
Remember classic video games? That aesthetic is experiencing a major resurgence. Pixel art is exactly what it sounds like—creating images pixel by pixel, often with strict color palettes. It's incredibly meditative once you get the hang of it, and tools like Aseprite or Pyxel Edit are specifically designed for this retro style.
Generative and AI-Assisted Art
This is where things get really interesting. Artists are now using code, algorithms, and AI tools to create art that's partially or entirely generated by computers. While this is controversial in some circles, many artists are exploring AI as a creative partner—using it to generate ideas, explore variations, or create base images that they then paint over and refine.
Bottom line: Digital art isn't replacing traditional art—it's expanding what's possible. You might try several of these mediums before finding your favorite, and that's completely normal. I've spent weeks obsessed with pixel art, then months deep in 3D modeling, only to return to good old digital painting. Each medium teaches you something different about art and creativity.
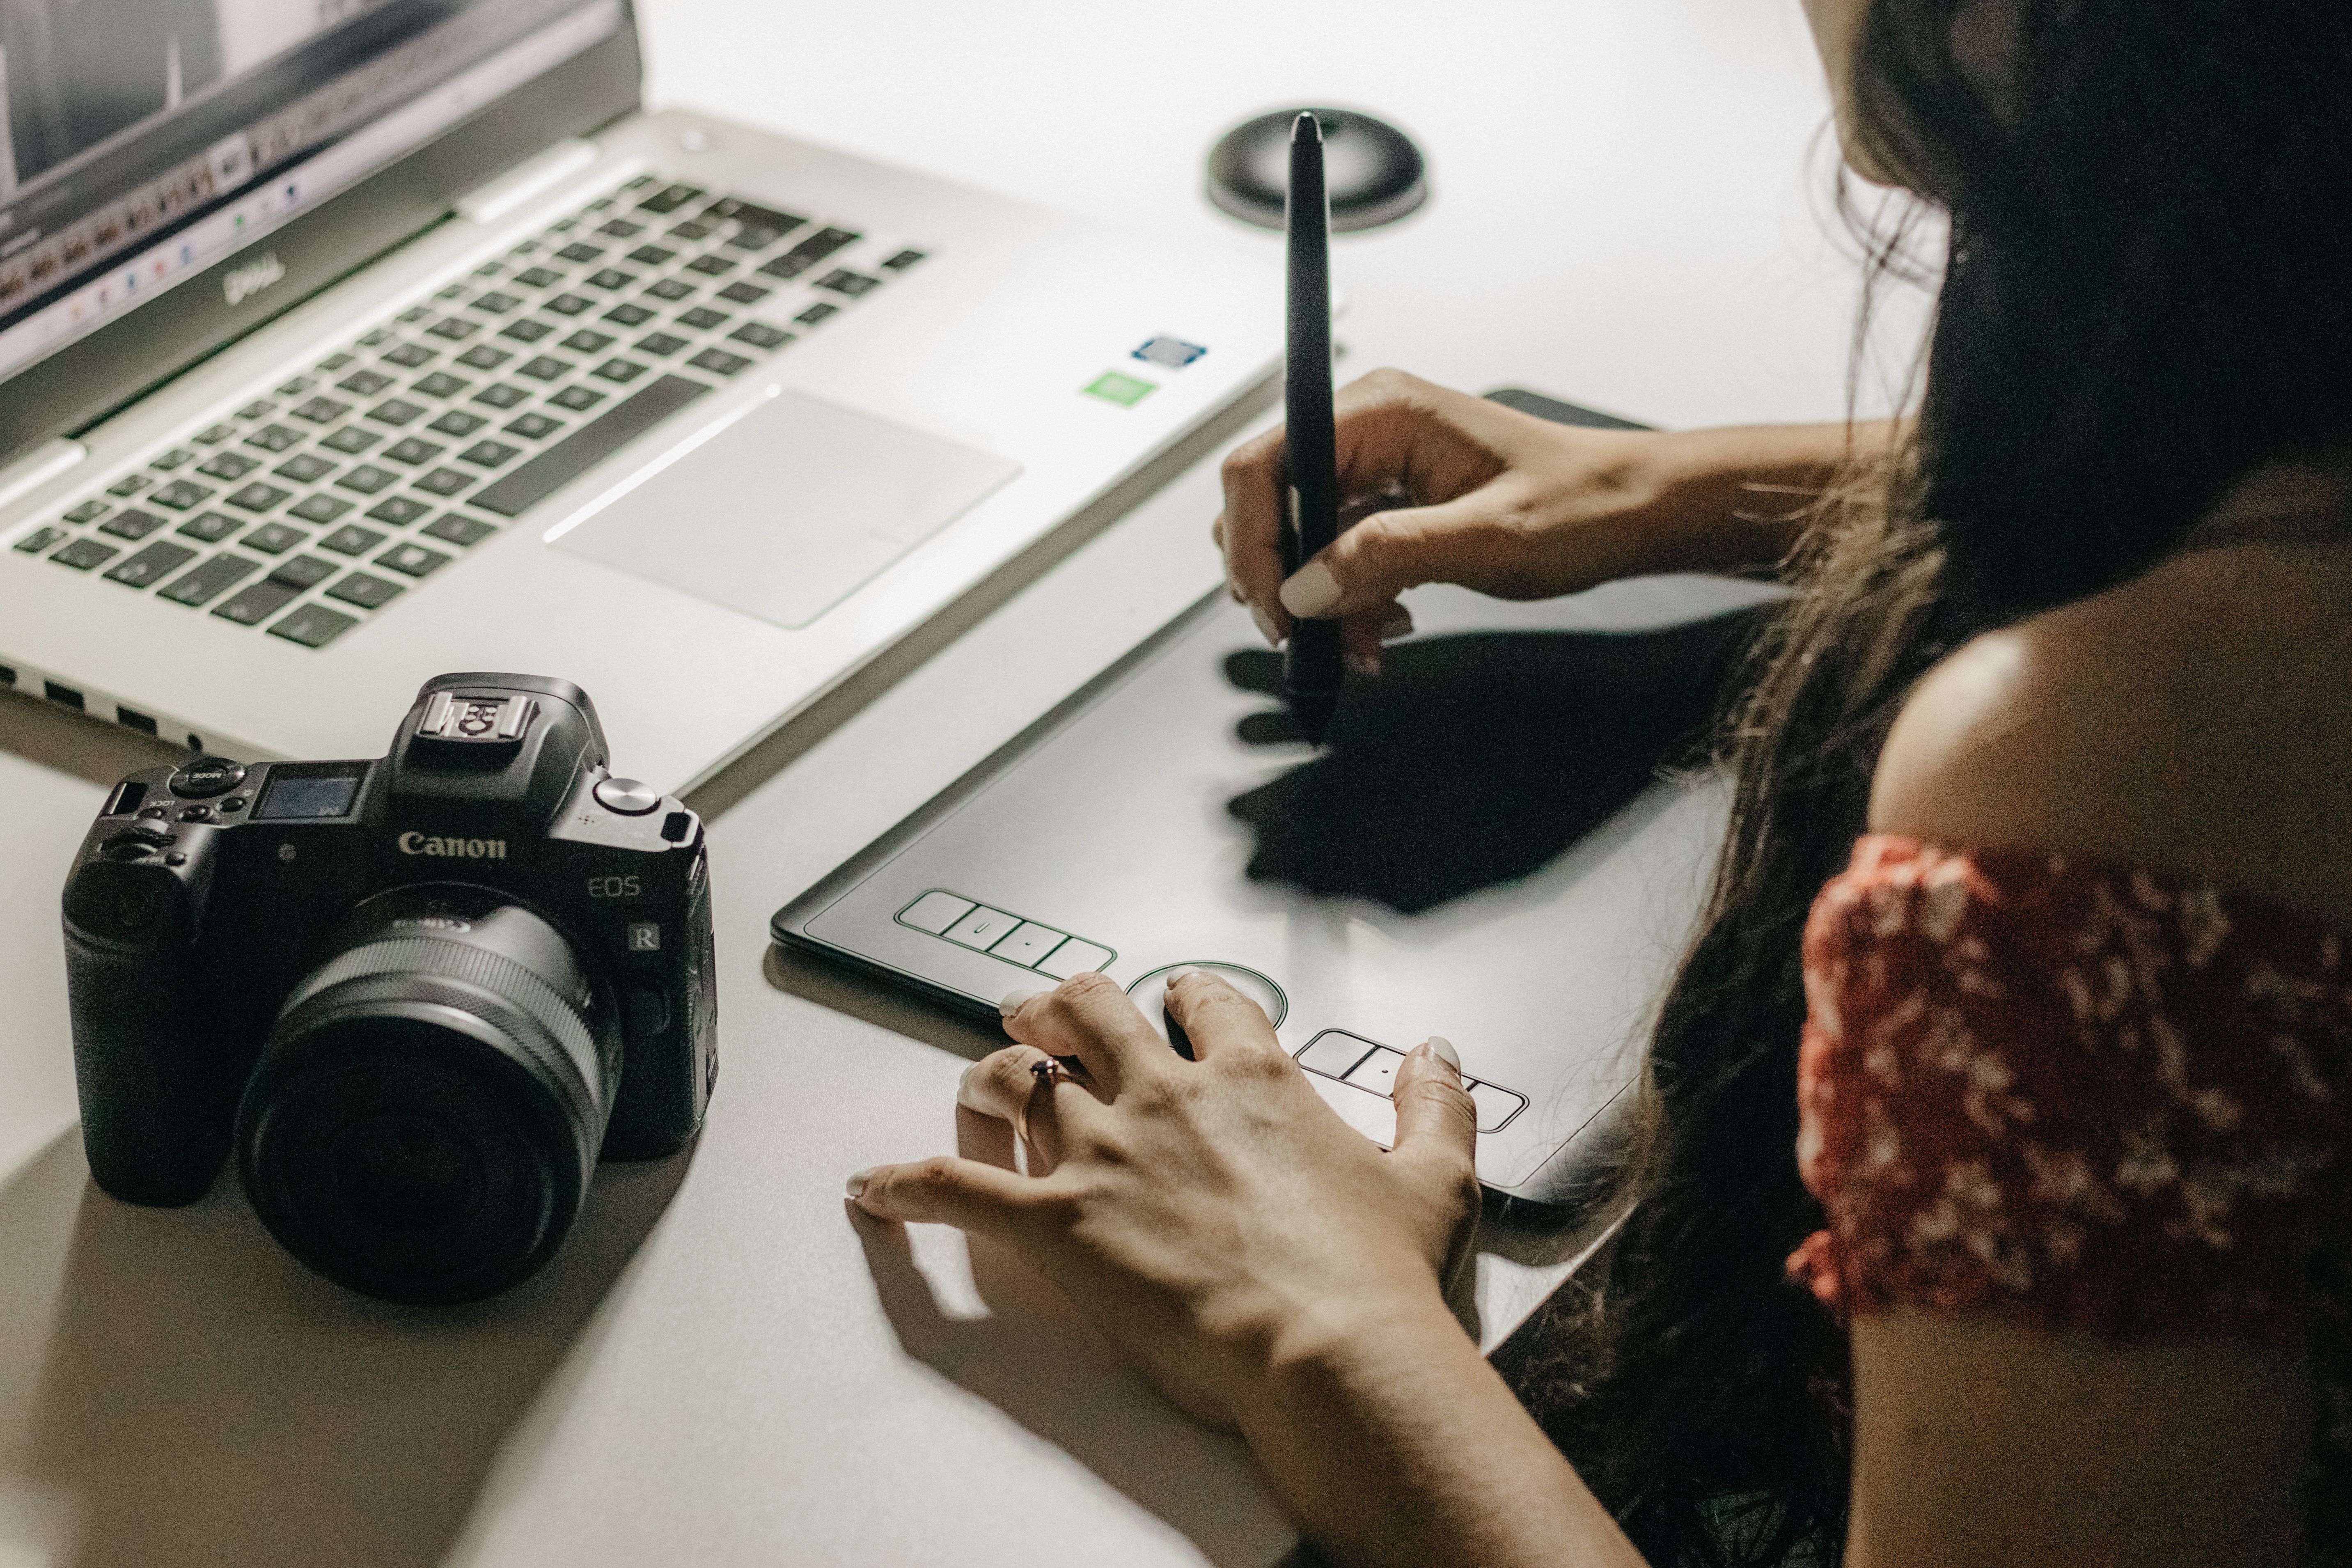
Essential Tools
Software: Your Digital Studio
Different programs feel like different art studios. Some are cozy and intuitive, others are industrial-strength paint factories. Here's what you'll likely encounter:
Here's something most tutorials won't tell you: your choice of software genuinely affects your art style. Some programs encourage loose, painterly approaches. Others push you toward clean vector lines and sharp graphics. The tool isn't just a tool—it's a creative partner that opens some doors while quietly closing others.
This isn't about finding the "best" software; it's about discovering which digital studio makes you forget you're using software at all.
Software | Platform | Best For | Difficulty Level | Key Feature | Price Range |
|---|---|---|---|---|---|
| Procreate | iPad only | Illustration, painting | Beginner-Friendly | Smooth strokes, brush engine | $10 one-time |
| Photoshop | Windows, Mac | Photo editing, complex graphics | Intermediate | Industry standard, layers | $10-20/month |
| Krita | Windows, Mac, Linux | Digital painting, animation | Beginner-Friendly | Free, powerful brush system | Free |
| Clip Studio Paint | Windows, Mac, iPad | Comics, manga, line art | All Levels | Specialized comic tools | $50 one-time |
| Affinity Photo | Windows, Mac, iPad | Photo editing, painting | Intermediate | Photoshop alternative | $55 one-time |
| Corel Painter | Windows, Mac | Natural media simulation | Advanced | Realistic brushes | $200-400 |
| Blender | Windows, Mac, Linux | 3D modeling, animation | Advanced | Free, industry-standard 3D | Free |
| Fresco | Windows, iPad | Vector/raster painting | Beginner-Friendly | Adobe ecosystem integration | $10-20/month |
| Rebelle | Windows, Mac | Realistic watercolor/oil | Intermediate | Physics-based paint simulation | $90 one-time |
| Infinite Painter | Android, iPad | Mobile painting | Beginner-Friendly | Powerful mobile features | $8 one-time |
| ArtRage | Windows, Mac, iPad | Natural media | All Levels | Traditional medium simulation | $50-80 one-time |

I started with Procreate precisely because it doesn't feel like you need a degree in computer science to use it. The brushes are so intuitive they almost read your mind. But hey, we're all different—some of you might thrive in Photoshop's complexity. Experiment to see where your creative heart sings.
If budget is tight, start with Krita. It's genuinely powerful and completely free, which removes all financial pressure while you're learning. That freedom matters more than premium features when you're just starting out.
The Trial-and-Error Method That Actually Works: Most software offers free trials. Here's my method: pick one program and commit to creating three complete pieces in it before moving on. One piece isn't enough—you'll barely scratch the surface. Three pieces forces you past the frustration curve into actual competence. If you still hate it after three pieces, that's real data, not just initial resistance to something new.
Hidden Costs They Don't Mention: "Free" software like Krita is genuinely free. But subscription software like Photoshop adds up quickly. Over three years, that $15/month becomes $540—more than buying professional software outright. Procreate's $10 one-time purchase almost feels like theft compared to what you get. Always calculate the five-year cost, not just the monthly price.
The real question isn't "which software should I learn?" It's "which software will I actually open and use regularly?" Pick the one that makes you excited to create, not the one you think you "should" learn because it's industry standard.
Platform Lock-In (The Sneaky Trap): Here's something I learned the hard way: software creates dependencies. If you build your entire workflow around Procreate, switching to Android later means leaving all your custom brushes and muscle memory behind. Photoshop traps you in subscription hell. Krita works everywhere but has fewer job opportunities. There's no perfect choice, only the one that fits your life right now and doesn't make future-you want to scream.
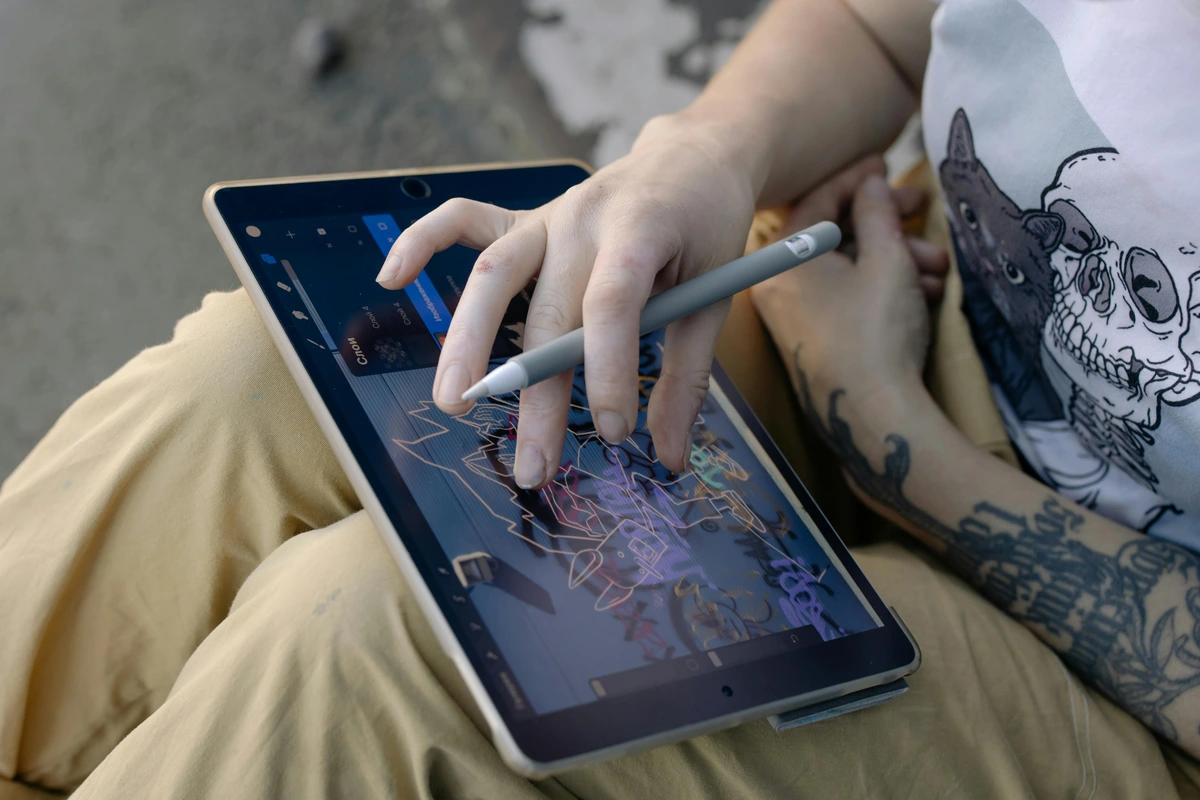
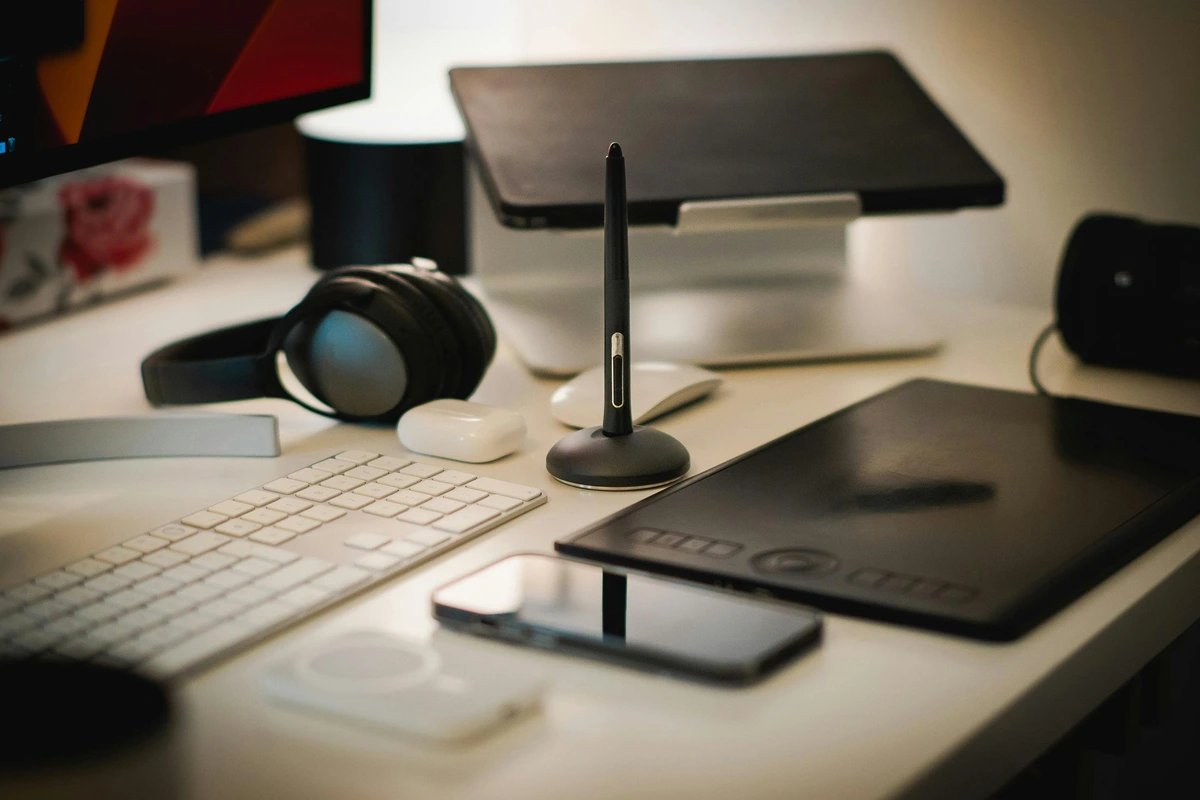
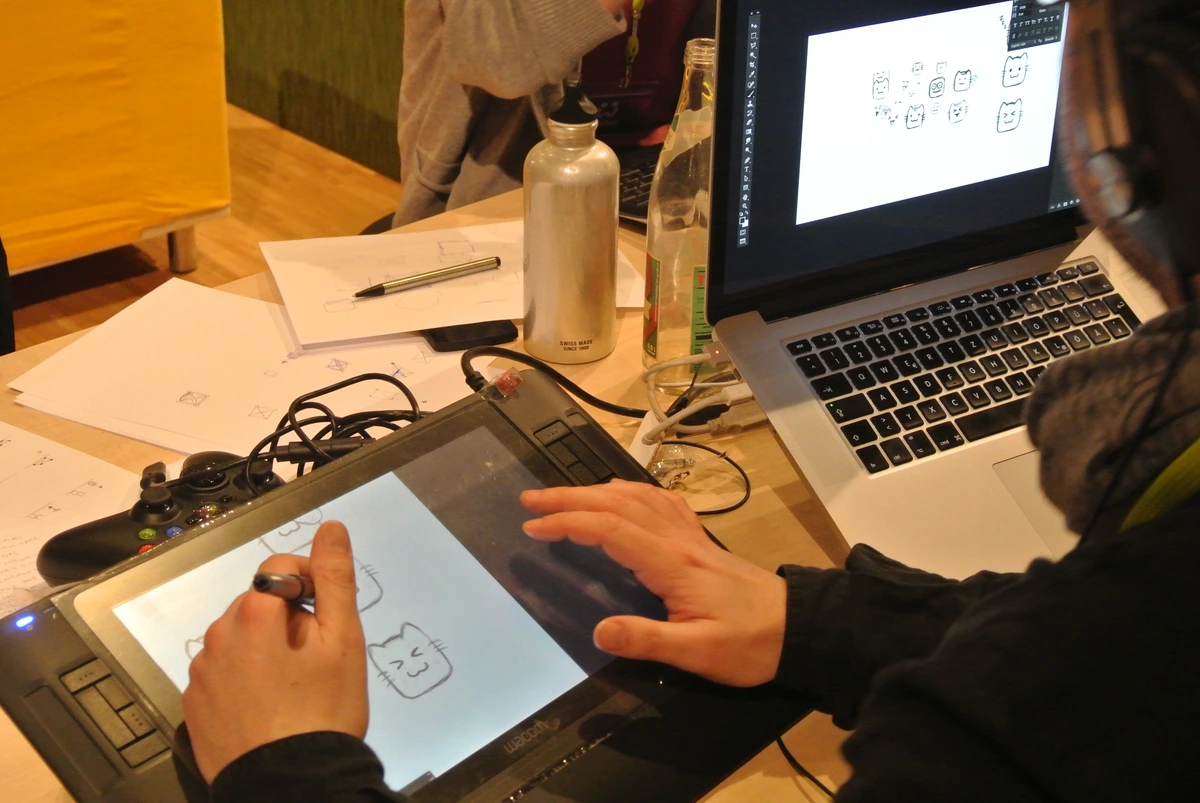
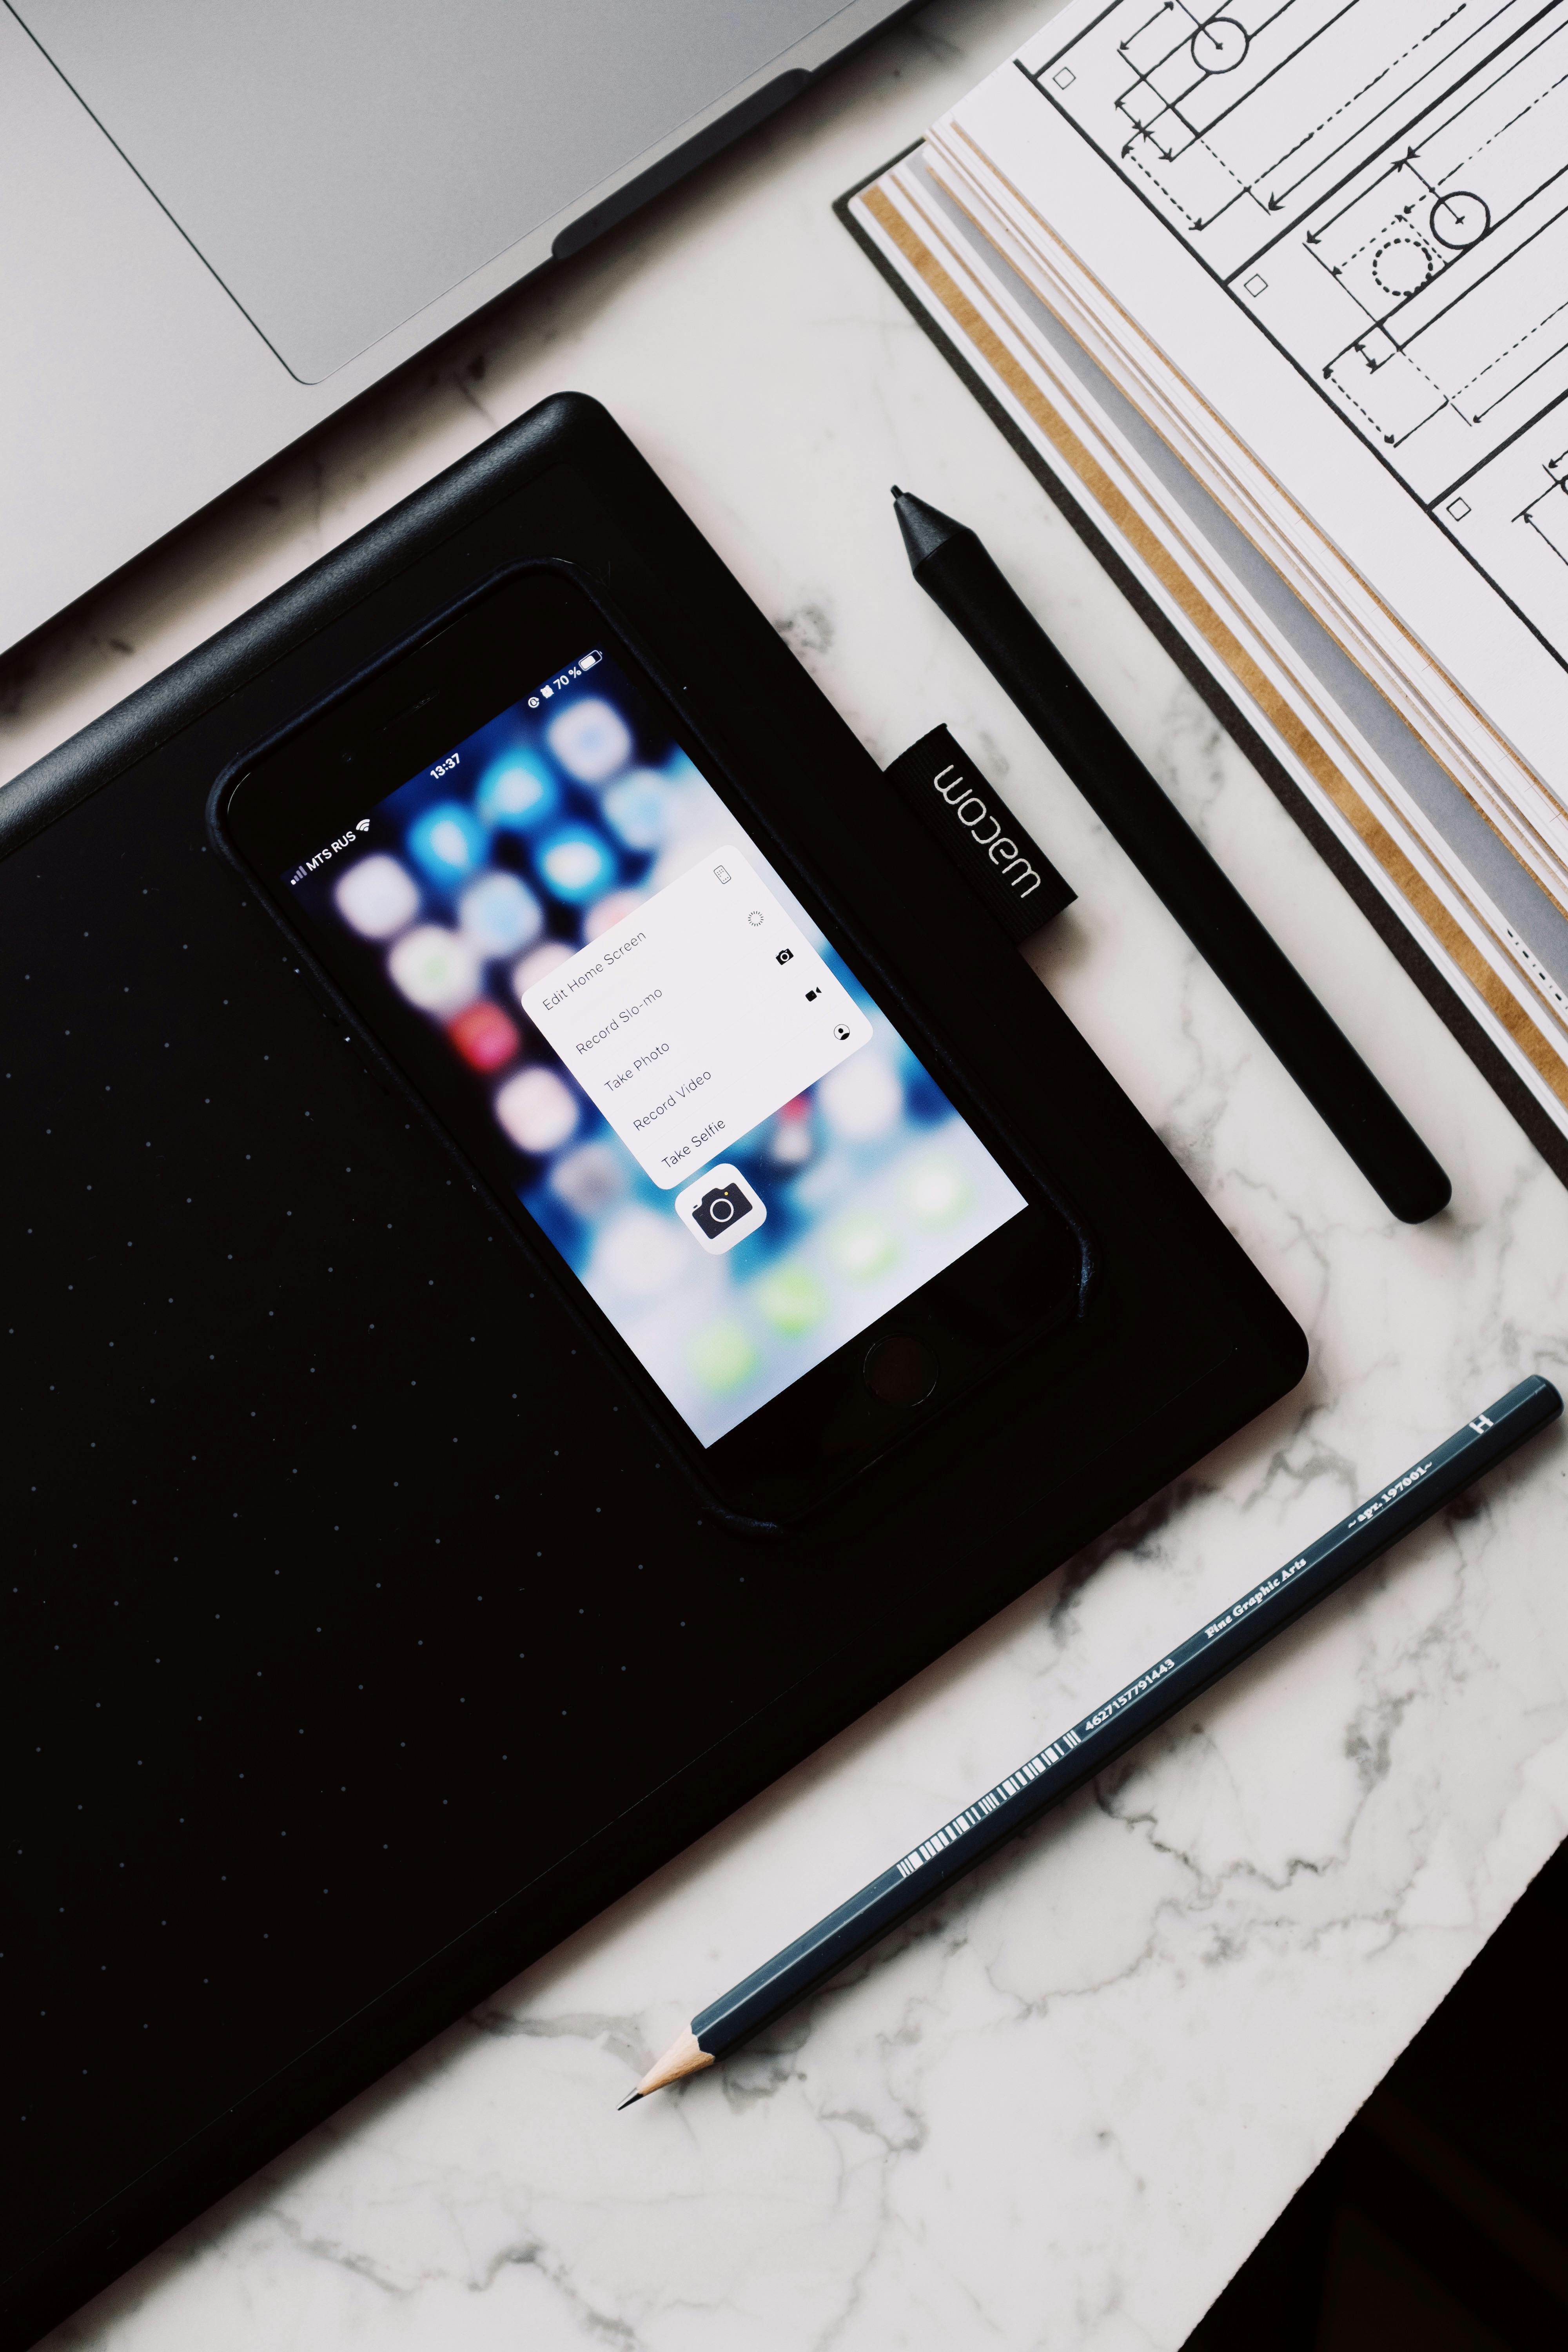
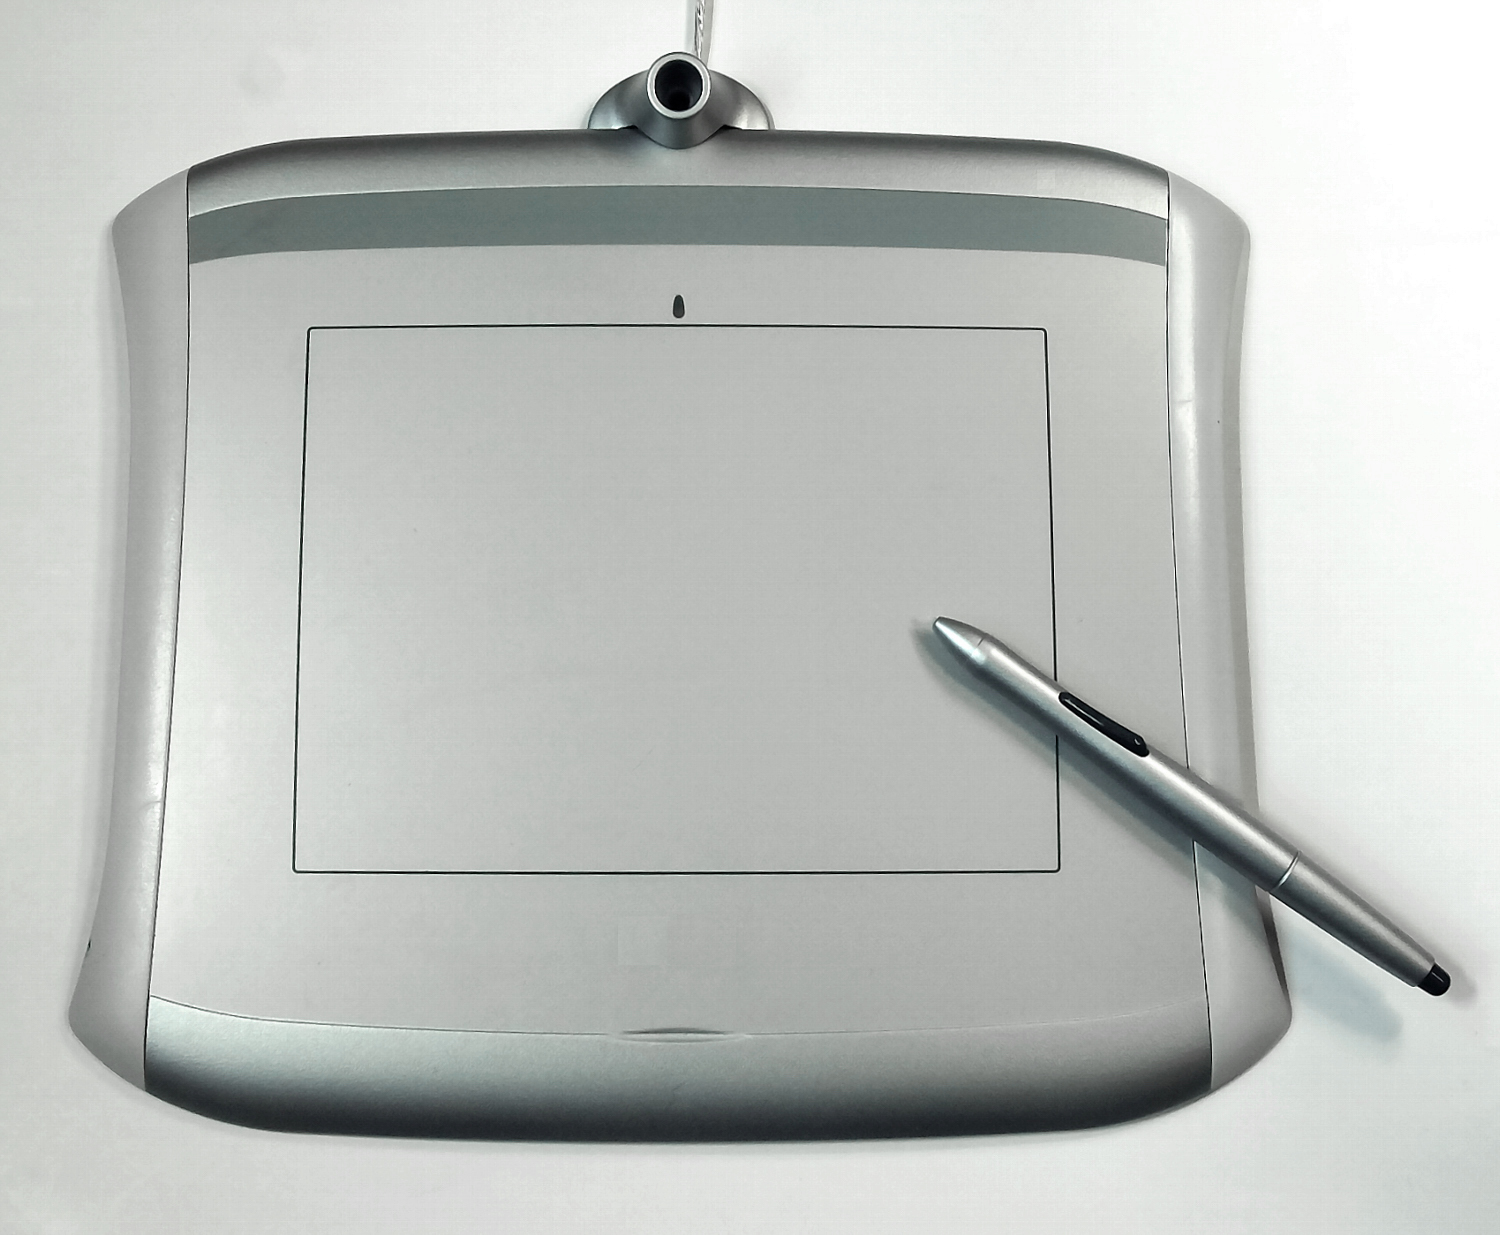
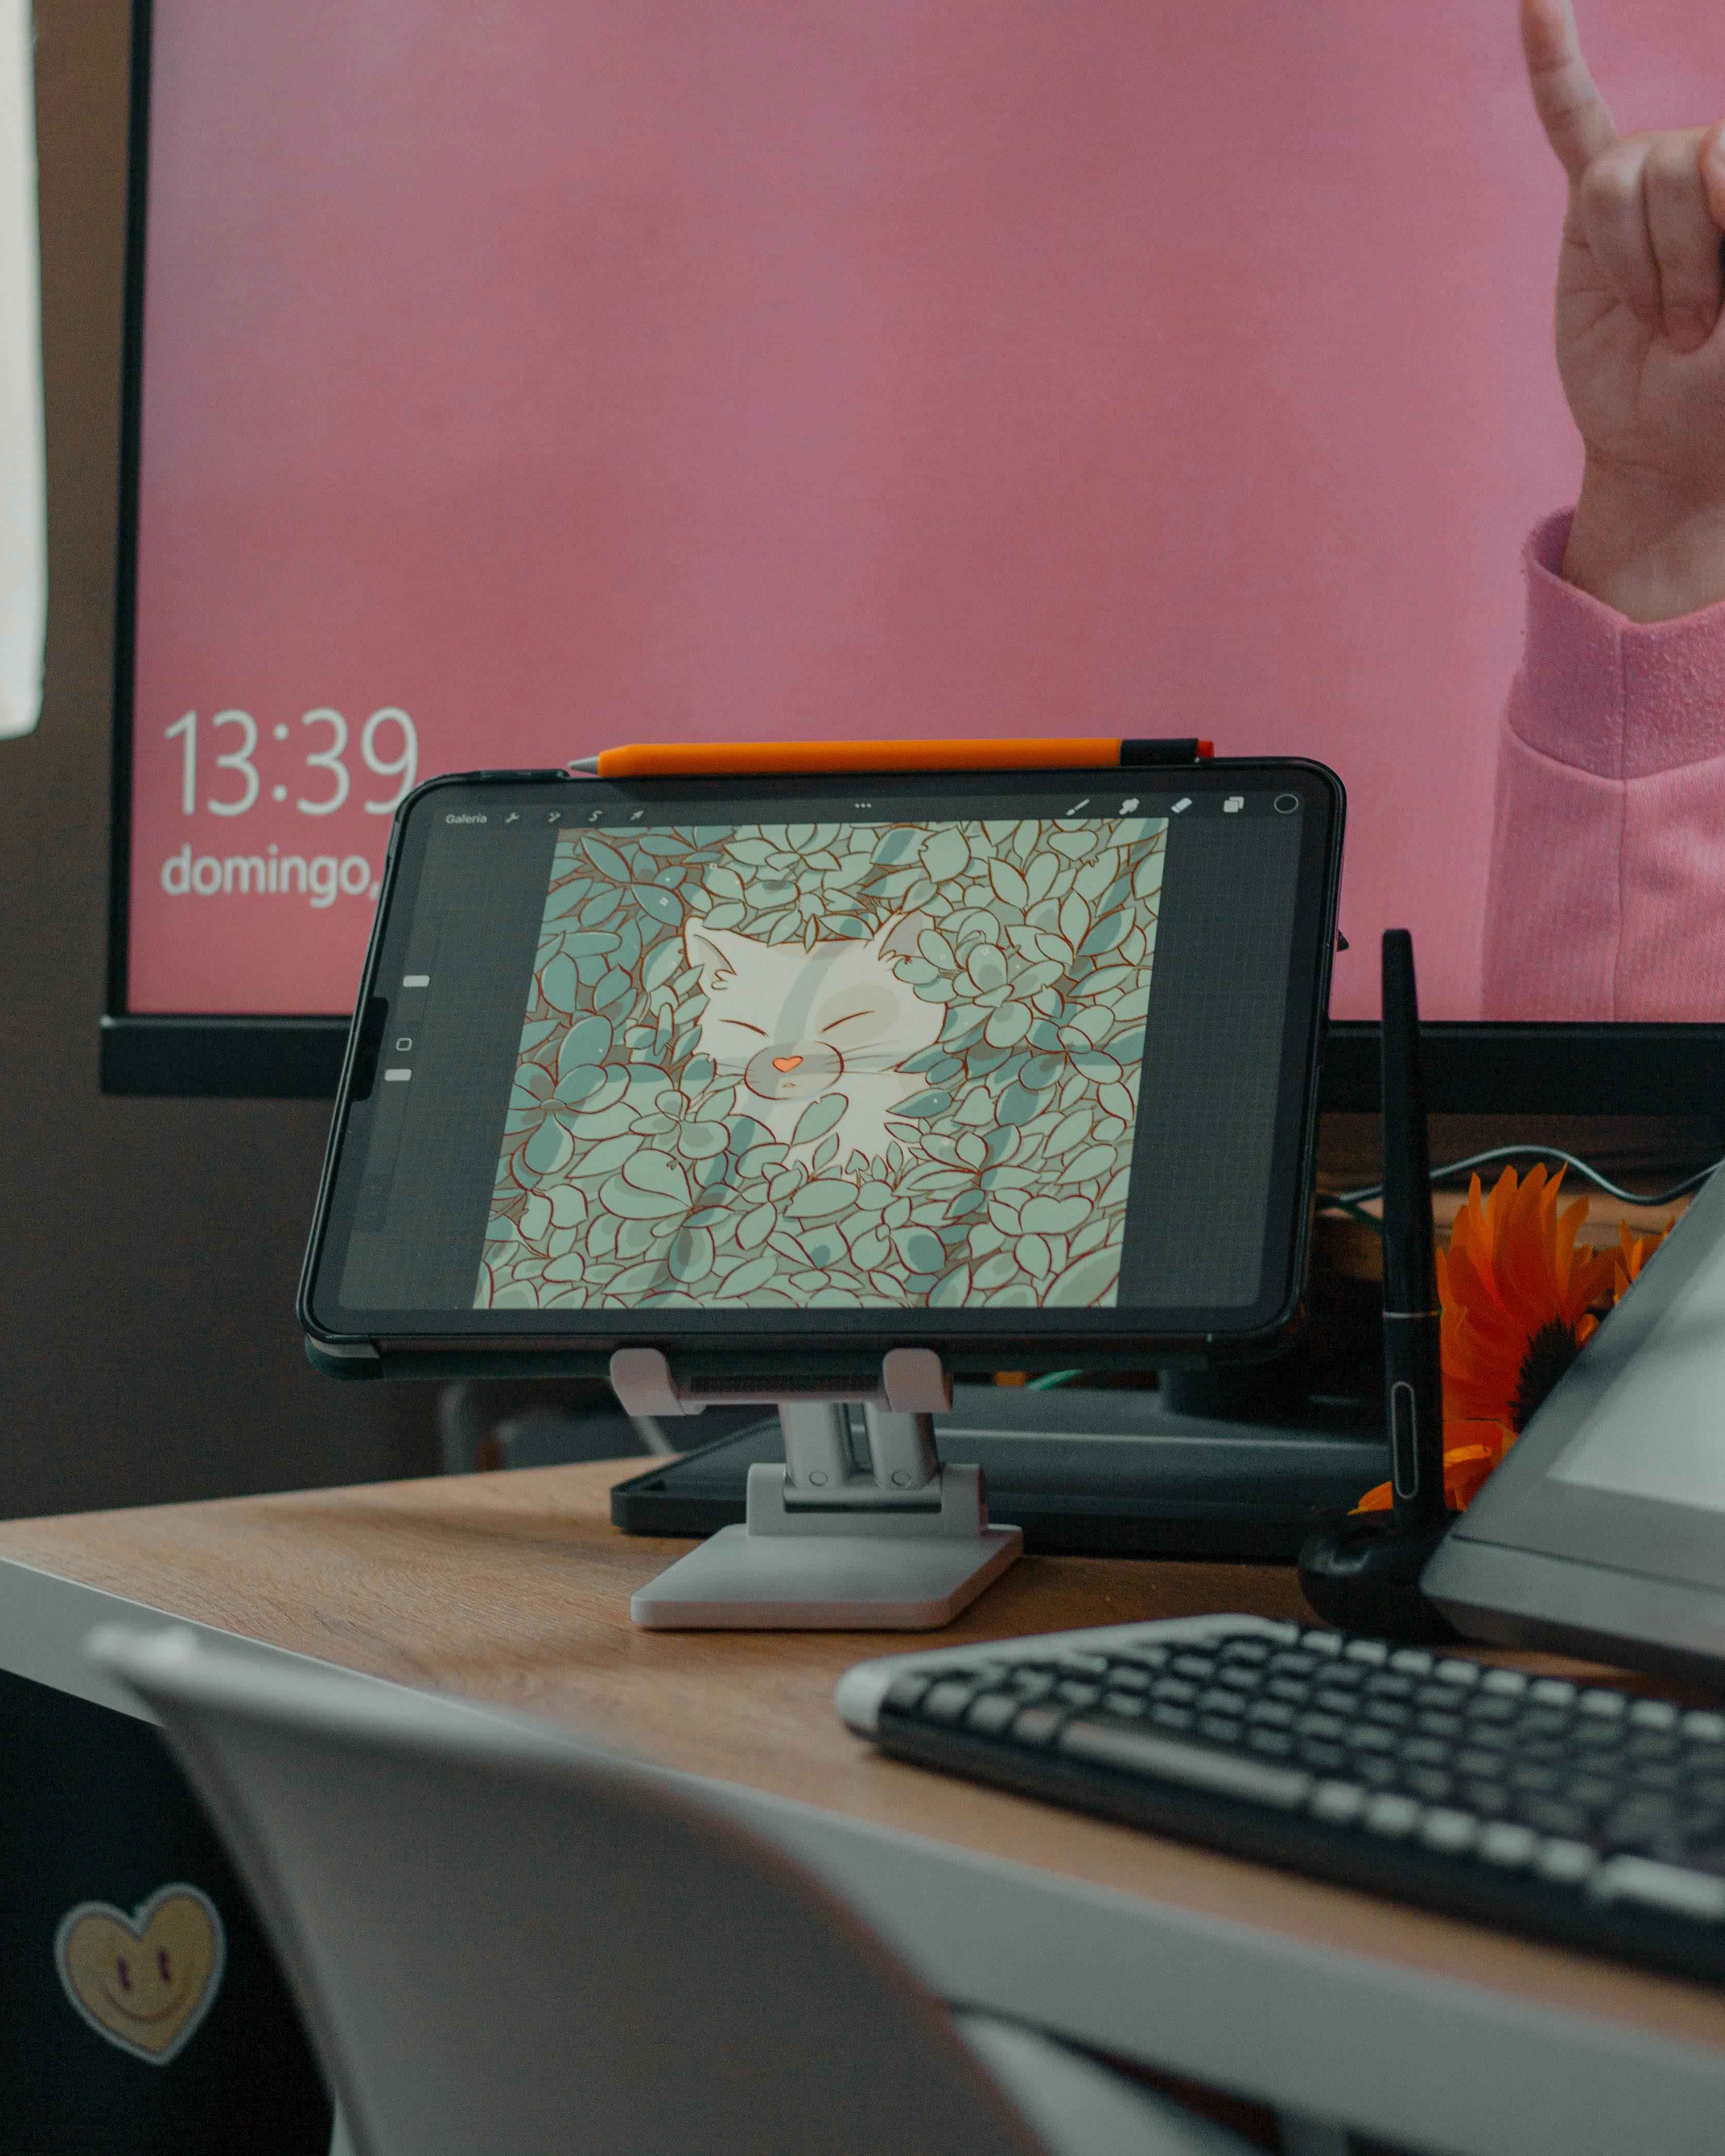
Hardware
Forget buying everything at once. Start simple. For the first three years of my digital art journey, I used a basic $60 drawing tablet and it was more than enough to create professional-level work. Here's a breakdown of what you actually need versus what marketing tells you to want.
Marketing wants you to believe you need the newest, most expensive equipment to create good art. The truth is genuinely uncomfortable for companies trying to sell you things: some of the most respected digital artists I know still use decade-old Wacom tablets they bought used on eBay. Your skills develop faster than technology becomes obsolete.

The single most important hardware investment isn't even art-specific: a comfortable chair and good lighting will do more for your art career than a $2000 display tablet. Eye strain and back pain are real productivity killers that no amount of pressure sensitivity can fix.
Absolute Beginner Essentials:
- A drawing tablet (Wacom Intuos has been the reliable entry point for over a decade)
- A stylus (usually comes with the tablet)
- A computer that can run your chosen software (check minimum specs before buying)
- A comfortable workspace (even just a clean corner of your desk)
- And that's literally it. You don't need a massive display tablet unless you're ready to spend hundreds more.
What You DON'T Need (Despite What Marketing Says):
- Drawing gloves (a piece of paper under your hand works just as well)
- "Artisan" screen protectors (basic matte ones are fine)
- Expensive ergonomic styluses (the one that comes with your tablet is designed specifically for it)
- Multiple tablets "for different purposes" (one quality tablet handles everything)
- The latest model every year (tablets don't go bad like milk)
The goal here is removing barriers between your brain and the canvas. Every extra gadget is one more thing to troubleshoot, one more battery to charge, one more distraction from actually making art.
Tablet Types Explained:
Type | Pros | Cons | Price Range | Best For |
|---|---|---|---|---|
| Basic Graphics Tablet | Inexpensive, durable, portable | No screen, hand-eye coordination needed | $50-150 | Beginners, students, budget-conscious |
| Display Tablet | Direct drawing on screen, intuitive | Expensive, less portable, cable management | $300-2000+ | Professionals, those with budget |
| Tablet Computer | Portable, complete system, touch interface | Expensive, less precise, shorter battery | $400-3500+ | Artists who travel, iPad users |
| All-in-One Computer | Powerful, large screen, desktop setup | Very expensive, not portable, space needed | $2000-5000+ | Studio professionals |
| 2-in-1 Laptop Tablet | Versatile, one-device solution | Compromise on both, stylus usually extra | $600-2500 | Multitaskers, students |
| Gaming Tablet | High refresh rate, low latency | Expensive, battery life | $800-2000 | Fast-paced sketching |
The Real Trade-Offs They Don't Mention: That basic graphics tablet? Learning hand-eye coordination takes about 20-30 hours of practice, then it becomes completely natural. Expensive display tablets? Heavy, fragile, and the cables create desk chaos unless you invest in expensive cable management systems. Tablet computers? Procreate is incredible, but you're locked into Apple's ecosystem forever.
What nobody talks about: parallax. Lower-quality display tablets have a slight offset between where you touch and where the line appears. High-end models eliminate this, but it costs real money. That $300 display tablet from Amazon might have parallax bad enough to drive you crazy, while a used $350 Wacom from three years ago feels perfect.
Key Hardware Specs That Actually Matter:
- Pressure Sensitivity: 2048 levels is plenty. 8192 sounds impressive but makes minimal practical difference.
- Active Area Size: 6x8 inches is comfortable. You don't need huge unless you have specific needs.
- Stylus Type: Battery-free pens are lighter and never die mid-session.
- Connectivity: USB-C is becoming standard. Make sure it works with your computer.
- Latency: Lower is better. Under 20ms feels instant. Over 50ms feels sluggish.
- Tilt Sensitivity: Enables natural brush rotation effects—a genuine game-changer for painting.
- Active Area Ratio: Should match your screen ratio to avoid distorted cursor movement.
The Hidden Ergonomics Nightmare
Here's what they don't tell you about hardware: the setup matters almost as much as the quality. Display tablets force you into specific viewing angles that can destroy your neck over time. Basic tablets can cause wrist strain if your desk setup is wrong. Tablet computers sound portable until you realize you need to hunch over them like Gollum with his precious.
The Setup That Changed My Life:
- Monitor at eye level (prevents neck strain)
- Tablet positioned so your elbow stays at 90-110 degrees (prevents shoulder strain)
- Keyboard and mouse within easy reach (prevents overreaching)
- Good lighting that doesn't create screen glare (prevents eye strain)
- Space to stand up and walk away (prevents creative blocks and blood clots)
People obsess over pressure sensitivity when they should obsess over whether they can work three hours without needing physical therapy. Your body is your most important tool—protect it.
My actual advice? Buy the cheapest reliable tablet you can find (I started with a used Wacom Bamboo from eBay for $30), and upgrade only when you've created enough art to justify it. The tools don't make the artist—consistent practice does.
Setting Up Your First Workspace
Before you create your first masterpiece, let's talk about your digital studio setup. A well-organized workspace—both physical and digital—makes creating art so much more enjoyable.

Physical Workspace Ergonomics
I used to think ergonomics was something only office workers worried about until I developed wrist pain from drawing at a weird angle for weeks. Trust me—proper setup prevents injury and makes long creative sessions sustainable.
Quick Ergonomics Checklist:
- Monitor height: Top of screen at or slightly below eye level
- Chair position: Feet flat on floor, knees at 90-degree angle
- Tablet position: Close enough that you're not overreaching
- Lighting: Reduce screen glare, ambient lighting to reduce eye strain
- Take breaks: Every 20-30 minutes, look away from screen, stretch hands
Digital Workspace Organization
When you first open Photoshop or Procreate, the number of panels, tools, and options can feel overwhelming. Here's how to tame that complexity:
1. Learn Keyboard Shortcuts (Seriously) Think of these as your secret weapon for speed. I once timed myself painting the same image with and without shortcuts—the difference was literally hours over a complex piece.
Essential shortcuts most artists use:
- B: Brush tool
- E: Eraser tool
- Spacebar: Pan around canvas (hold)
- Ctrl/Cmd + Z: Undo
- Ctrl/Cmd + S: Save (do this obsessively)
- [ and ]: Decrease/increase brush size
- Alt/Option: Color picker (sampler tool)
- Ctrl/Cmd + T: Transform selection
2. Create Custom Workspaces Most programs let you save custom tool arrangements. I have different setups for painting (brushes prominent), photo editing (adjustment panels visible), and illustration (layers panel expanded). Set yours up once and save it.
3. Customize Your Interface Most art software lets you change interface colors and button sizes. I make my interface dark gray instead of the default black—easier on my eyes during late-night painting sessions. Small customizations like this make a real difference in comfort.
Performance Optimization
Nothing kills creative flow like software lag. If your art program feels slow, here's the troubleshooting checklist I go through:
Problem | Likely Cause | Quick Fix |
|---|---|---|
| Brush lag/delay | Too much stabilizer, large brush | Lower stabilization, reduce brush size, close other apps |
| Interface feels slow | Not enough RAM allocated | Increase RAM usage in preferences, close browser |
| Brush strokes appear pixelated | Canvas resolution too low | Increase canvas DPI to 300+ |
| File takes forever to save/open | File size too large | Flatten layers occasionally, use Save As for smaller copy |
| Colors look different on other screens | Wrong color profile | Switch to sRGB color space, calibrate monitor |
Pro tip: If you're using Photoshop on an older computer, enabling "Use Graphics Processor" in preferences can dramatically improve brush performance. Most beginners don't realize this is turned off by default.
The Psychology of Your Creative Space
The physical space where you create matters more than you'd think. I used to draw hunched over my laptop in bed, and my art reflected that cramped feeling. Here's what I've learned about creating an inspiring workspace:
- Make it inviting: Add plants, good lighting, or art that inspires you
- Minimize distractions: Put phone away, close social media tabs
- Have reference materials handy: Whether that's books or Pinterest boards
- Make starting easy: Keep your tablet charged and ready, software open
- Personalize it: This is YOUR creative space—make it feel like you
The goal isn't to create a perfect Instagram-worthy studio. It's to create a space where you want to spend time creating. Even a corner of your bedroom with a small desk works if you make it feel like YOUR creative corner.
The Upgrade Test I Swear By: Don't buy better equipment until you can honestly say: "I'm consistently running into limitations with my current gear." Not "I think this might be holding me back," but: "This specific tool is preventing me from creating what I envision." When you find yourself hitting actual walls—the tablet resolution is too low for the details you need, or the latency makes fast sketching impossible—that's when you upgrade, not when the new shiny thing launches.
Most artists never hit those walls. They hit skill walls and blame their equipment. The tablet doesn't draw the art—you do.
The Second-Hand Secret: Used tablets save 30-70% off retail and work identically to new ones. Wacom devices especially are built like tanks—I've seen 15-year-old Intuos tablets still functioning perfectly. Facebook Marketplace, eBay, and artist forums are goldmines. Just verify they work before buying and make sure drivers are available for your operating system.
Reality check: That $300 you save buying used could pay for a year of good software, or a course that actually improves your skills, or just keep you fed while you build your portfolio. Smart money goes toward keeping you creating, not the latest tech flex.
The Digital Creative Process
This isn't about rigid rules, but here's how I typically approach a piece:
Before we dive into the technical process, let me be honest about the creative process itself. Anyone who tells you digital art is easier than traditional art is selling something. What digital removes is material friction—worrying about wasting supplies, toxic chemicals, storage space. What digital adds is options. So. Many. Options. Infinite canvases, unlimited layers, millions of colors, thousands of brush settings.
This abundance can become decision paralysis. The blank canvas becomes more intimidating, not less, when you have every possible choice at your fingertips. That's why having some kind of process—even one you constantly break—matters more in digital than traditional.

- Brain Dump - Quick scribbles, colors, random shapes. No pressure. Just let ideas flow.
- Set a timer for 10 minutes. Force yourself to create at least five completely different thumbnail sketches.
- Use bright, obnoxious colors. This breaks the fear of "ruining" good materials that traditional artists carry.
- Work small (under 1000px). Size creates pressure—small canvases feel disposable and experimental.
- Save everything but don't judge anything. You're mining for ideas, not creating masterpieces yet.
- Clean Sketch - Refining chaos into something recognizable. Procreate's "Stabilization" is a lifesaver here.
- Drop the opacity of your brain dump layer to 20-30%, create a new layer on top.
- Focus on loose, gestural lines. You're looking for energy, not precision.
- Use reference images but don't trace yet—references should inform, not dictate.
- Do three clean passes. First: basic shapes. Second: defining features. Third: refining details.
- Blocking Colors - Filling in large areas. Think of this as digital underpainting.
- Create separate layers for major elements (skin, clothing, background, etc.).
- Use flat colors first—no gradients or shading yet. You're mapping, not rendering.
- Check your values: convert your image to grayscale. If it reads well in black and white, your colors will work.
- Pick your color scheme deliberately: monochromatic, complementary, analogous, or triadic.
- Shaping & Shading - Adding depth with highlights and shadows. This is where magic happens!
- Establish your light source and stick to it—one primary light, maybe a smaller rim light.
- Use layer blending modes: Multiply for shadows, Screen or Add for highlights, Overlay for midtones.
- Create separate layers for shadows and highlights so you can adjust them independently.
- Build up gradually. Digital painting rewards patience and layering.
- Final Details - Tiny adjustments that make the whole thing pop.
- Add texture with custom brushes or texture overlays on low opacity.
- Zoom between 25% and 100% frequently—details that look good up close may ruin the whole composition.
- Add rim lighting, specular highlights, and atmospheric effects.
- This is where most people overwork a piece. Stop when adding more makes it worse, not better.
Honestly? Step 4 is where I get lost in time. Digital shading is like solving a puzzle where there's no wrong way to place the pieces.
But here's the thing I wish someone had told me: this process isn't linear. I used to get stuck trying to follow these steps in order like a recipe. The reality is much messier and more exciting. Sometimes you start with step 3 (colors) and work backward. Sometimes step 4 (shading) reveals what step 2 (clean sketch) should have been all along. The undo button makes this kind of creative chaos possible.
My real process looks more like this:
- Start with an idea (but not too specific)
- Make a glorious mess of scribbles and colors
- Step away for hours or days
- Come back and find the art hiding in the chaos
- Refine what's working
- Abandon what isn't
- Repeat until it feels done (or you're sick of looking at it)
Digital art rewards experimentation more than any traditional medium. You can paint over mistakes, completely change compositions, or start entirely new pieces without wasting materials. That freedom takes time to get comfortable with—I used to get paralyzed by all the options. Now I see it as the digital medium's greatest strength.
The Dark Secret of Digital Process: Most artists—including professionals—don't follow linear processes. We bounce between steps constantly. That "final details" phase might reveal a fundamental problem with the sketch, and suddenly you're back to step two. Digital makes this exploration invisible—all those false starts and major revisions disappear into the undo history.
This is liberating but also creates a dangerous illusion. When you see professional speed paints on YouTube, you're seeing the final successful attempt, not the seventeen abandoned versions that came before. Try not to compare your messy, iterative process to someone else's curated highlight reel.
Breaking Your Own Process: The process I outlined above works until it doesn't. When you find yourself mechanically following steps without thinking, that's when you deliberately break them. Start with color instead of line. Skip the sketch entirely and paint directly with shapes. Work on a tiny canvas when you usually work large. Use only black and white when you usually work in color. Shake up your process before your process hardens into creative limitation.

Core Techniques
This is where we separate the frustrated dabblers from the artists who stick around long enough to create something they're genuinely proud of. The techniques in this section aren't just mechanical processes—they're ways of thinking that will fundamentally change how you approach art-making.
Layers: The Most Misunderstood Superpower
Think of layers as transparent sheets you can draw on separately. That tree you drew? The sky behind it? The character running in front? All separate layers. This means you can change colors without ruining the whole piece. I once spent three days on a painting only to realize the main character's shirt was the wrong shade. If they'd been on a separate layer? Five seconds later, we're back in business.
Layers are digital art's best friend. Trust me.
I didn't understand layers for my entire first year of digital art. I thought they were just for keeping things organized, like separating your socks from your shirts. Then I watched a professional painter work, and I realized layers aren't organization—they're time travel. With proper layer structure, you can go back to any point in your painting process and change your mind without destroying hours of work.
The Layer Strategy That Will Save Your Sanity:
Organization Method | What It Does | When To Use |
|---|---|---|
| By Object | One layer per object (tree, person, sky) | Simple illustrations, comics, character art |
| By Function | One layer for line art, one for color, one for shadows | Complex paintings, fantasy illustration |
| By Material | One layer for skin, one for fabric, one for metal | Realistic rendering, texture-focused work |
| By Depth | Background layer, midground, foreground | Environmental art, landscape paintings |
But here's where layers get really interesting: blending modes. These change how layers interact with each other:
Blending Mode | What It Does | Why You Care |
|---|---|---|
| Multiply | Darkens everything, perfect for shadows | Natural-looking shading without muddy colors |
| Screen | Lightens everything, perfect for highlights | Glowing effects, light beams, magical elements |
| Overlay | Increases contrast, intensifies colors | Adding drama to flat lighting |
| Color Dodge | Creates intense, bright effects | Fire, magical energy, bright lights |
| Soft Light | Subtle contrast enhancement | Quick lighting fixes, adding depth |
| Color | Changes color without changing brightness | Perfect for correcting or changing colors |
The mistake most beginners make? Using Normal mode for everything because they don't understand blending modes. Spend one afternoon experimenting with each blending mode on the same image—the results will permanently change how you work.
Advanced Layer Management:
- Groups/Folders: Organize related layers together
- Clipping Masks: Restrict one layer's visibility to the layer below it
- Layer Masks: Hide parts of a layer without deleting them
- Adjustment Layers: Non-destructive color correction that affects all layers below
Problem | Layer Solution |
|---|---|
| Scared to experiment | Duplicate your layer first |
| Color looks wrong | Create an adjustment layer |
| Hard to organize | Group layers by meaning |
| Need to change something | Use layer masks, not eraser |
| Want to try alternatives | Keep variations in separate groups you can toggle on/off |
The irony? The most advanced artists often use fewer layers than intermediates. Beginners use 2-5 layers (not enough separation). Intermediates use 50+ layers (overthinking it). Professionals use 10-20 layers but organize them intelligently. Quality over quantity.

Brush Essentials
You'll spend most of your time with brushes. Here's what matters:
- Opacity/Flow - How "heavy" your mark is. Low opacity creates misty effects.
- Texturing - Brushes that mimic real-world paint, pencils, or ink.
- Custom Brushes - Downloadable brushes that save you hours of work.
My pro tip? Never underestimate simple round brushes. The pros use them ALL the time. Fancy brushes don't make the art - you do.
But here's what took me years to understand: brush settings matter more than the brush itself. A simple round brush with pressure sensitivity for size and opacity can do 80% of what those expensive brush packs promise. The secret isn't finding the "perfect" brush—it's learning to adjust the three settings that matter: size, opacity, and flow. Master those, and you can make any brush work for you.
I keep a simple test canvas open where I quickly test brush settings before committing to my actual piece. Thirty seconds of testing saves me from hours of frustration when the brush doesn't behave how I expected.
Color Theory for Digital Artists
Here's where many beginners get overwhelmed—color feels like magic that some people are born understanding and others aren't. I'm here to tell you it's absolutely learnable. Color theory isn't about rigid rules; it's about understanding relationships so you can make intentional choices instead of guessing.
The Practical Color Wheel (What You Actually Need to Know)
Don't worry about memorizing complex theories. Just understand these three relationships and your color choices will immediately improve:
1. Complementary Colors (Opposites attract) These are colors directly opposite each other on the color wheel—blue and orange, red and green, purple and yellow. When placed next to each other, they create maximum contrast and visual vibration. Use this when you want something to POP. But careful—too much complementary contrast can be harsh on the eyes.
2. Analogous Colors (Neighbors get along) These are colors next to each other on the wheel—like blue, blue-green, and green. They create harmony and unity. Most of my paintings use an analogous scheme as the foundation, then add tiny pops of complementary colors for interest.
3. Triadic Colors (Balanced triangle) Three colors evenly spaced around the wheel—like red, yellow, and blue. They create vibrant, balanced compositions. Tricky to use well, but when it works, it really works.
The Magic of HSB (Hue, Saturation, Brightness)
Most art software uses three sliders for color: Hue (what color), Saturation (how intense), and Brightness (how light/dark). Understanding these gives you superpowers:
- Hue: Where you are on the color wheel
- Saturation: How "colorful" vs. gray the color is
- Brightness: How close to white or black
Pro tip: I constantly adjust saturation and brightness more than hue. Desaturated shadows often look more realistic than pure black shadows. Bright, saturated colors in the focal point draw the eye naturally.
Value Does All the Work (Color Gets All the Credit)
This is the most important concept nobody teaches: if your values (lightness and darkness) work, you can make almost any color scheme work. A black-and-white version of your painting should still look compelling. If it doesn't, no amount of beautiful color will save it.
Quick value check: Most art programs have a way to temporarily view your painting in grayscale. Use this constantly while working. I switch to grayscale every 15-20 minutes to check if my values are still working.
Creating Mood with Color Temperature
Colors have "temperature"—warm (reds, oranges, yellows) and cool (blues, greens, purples). This isn't just descriptive; it's emotional:
- Warm light source: Creates cozy, intimate, sometimes dramatic feelings
- Cool light source: Creates calm, mysterious, sometimes melancholy feelings
- Warm shadows (cool light): Creates sunrise/sunset golden hour magic
- Cool shadows (warm light): Creates bright midday summer energy
Experiment: Try painting the same scene twice—once with warm light/cool shadows, once with cool light/warm shadows. The mood difference will blow your mind.
Digital Color Tools That Game-Changed My Art
1. Color Picker/Sampling Tool (Eye dropper) Life-changing once you stop feeling guilty about "cheating." Professional artists sample colors constantly. I sample from reference photos, other artists' work (for learning), even nature photos. It's not copying—it's learning color relationships.
2. Color Harmony Tools Many programs have built-in color harmony tools that show you complementary, triadic, or analogous color schemes. Stop guessing—let the tool show you options, then refine from there.
3. Adjustment Layers Hue/Saturation, Color Balance, and Levels adjustment layers let you try different color schemes without committing. Want to see your painting with a blue tone instead of red? Click once. Don't like it? Delete the layer. Pure magic.
The real secret? Limited palettes: I often limit myself to 3-5 colors for an entire painting. Fewer choices = more intentional decisions = stronger art. Try this: use only red, yellow, blue, white, and black for your next painting. You'll learn more about color mixing than you would with 50 brushes.
File Management
This isn't the exciting part of art, but it's absolutely crucial. I learned this the hard way when I lost months of work because all my files were named "Untitled-1.jpg" and my hard drive failed. Don't be me.
Here's the uncomfortable truth about file management: every artist thinks they're organized until they try to find something specific from two years ago. The system that works when you have 20 files becomes a nightmare at 200 files and completely collapses at 2000. Set up good systems early, even if you think you don't need them yet.

What makes digital art file management genuinely different from regular file management? Three things:
- Version control is part of your creative process (not just backup)
- Working files are 10-100x larger than final exports
- Metadata becomes crucial when you're searching for "that one sunset painting from 2018"
Digital art creates more versions, more experiments, and more "I'll come back to this later" files than any other creative medium. Without systems, you drown in your own output.
File Naming Strategy That Actually Works:
Instead of "dragon.jpg", use a system like:
YYYY-MM-DD_ProjectName_Version_FileType.extension
Example: 2024-03-15_DragonSeries_RedDragon_v02_Painting.psd
Why This System Works:
- Date first means automatic chronological sorting
- Project name groups related pieces together
- Version number prevents overwriting files you might want to return to
- File type tells you at a glance whether it's a working file or export
Common Mistakes to Avoid:
Bad Naming | Why It Fails | Good Naming |
|---|---|---|
final.jpg | There will be six "final" versions | 2024-03-15_Project_v03_Final.jpg |
Untitled_1.psd | Meaningless, impossible to search | 2024-03-15_Project_v01_Working.psd |
dragonpaintingfinalfinal.jpg | No version control | 2024-03-15_Dragon_v05_Export.jpg |
3.jpg | Absolute chaos | 2024-03-15_Concept_v01_Sketch.jpg |
Advanced Naming for Specific Use Cases:
- Client work:
YYYY-MM-DD_ClientName_ProjectName_v##_Stage.ext(e.g.,2024-03-15_Museum_Logo_v03_Revision.psd) - Studies:
YYYY-MM-DD_Study_Subject_Medium.ext(e.g.,2024-03-15_Study_SunsetClouds_OilDigital.tif) - Experiments:
YYYY-MM-DD_Experiment_BriefDescription_v##.ext(e.g.,2024-03-15_Experiment_TextureBrush_v02.kra)
The goal isn't perfection—it's being able to find what you need six months from now when you barely remember creating it. Good naming gives you back brain space for creating.

This means sorted folders automatically show your work chronologically, you can track versions, and you know exactly what each file contains at a glance.
The Three-Tier Backup System (Non-Negotiable):
- Working Storage: Your main computer/tablet drive
- External Backup: A physical external hard drive (back up weekly)
- Cloud Backup: An automatic cloud service like Backblaze, Dropbox, or Google Drive (continuous sync)
One backup is not enough. I've had external drives fail too. Three copies of important files mean you'll never lose years of work.
Setting up backups sounds boring until you lose work: I learned this the expensive way—not just money, but losing pieces I can never recreate. Here's exactly how to set up a bulletproof system:
For External Drives:
- Buy a reputable brand (Western Digital, Seagate, Samsung)
- Aim for 2TB+ storage (art files add up fast)
- Set a recurring weekly calendar reminder
- Consider two drives, alternating between them (paranoid? Maybe. Safe? Absolutely)
For Cloud Backup:
- Backblaze: $7/month unlimited storage, set-it-and-forget-it
- Google Drive: Great for smaller portfolios, 2TB for $10/month
- Dropbox: Good integration with some art software
- Important: Make sure your cloud service is continuously syncing in the background
The Psychology of Backups: The biggest backup failure isn't technical—it's human nature. We tell ourselves "I'll do it tomorrow" until tomorrow becomes never. The solution? Automate everything possible. Set your external backup to happen every Sunday at 2 PM automatically. Make your cloud backup completely silent and automatic. Remove friction, and backups actually happen.
The "Why Each Tier Matters" Breakdown:
Tier | Pros | Cons | Best For |
|---|---|---|---|
| Working Storage | Fast access, no setup | Can fail, no protection | Current projects only |
| External Drive | Fast backup/restore, cheap, no internet needed | Physical failure, manual process | Weekly archive, version history |
| Cloud Backup | Automatic, offsite, fire/theft proof | Slow restore, internet required, monthly cost | Continuous protection, disaster recovery |
The Backup Psychology Problem: Most artists don't back up until after losing work. I get it—backups feel like insurance you never use until disaster strikes. But external drives fail at about 5% per year. Laptops get stolen. Accidents happen.
Here's what changed my backup habits: I started backing up failures, not just successes. Turns out, I want to keep my abandoned experiments and "failed" pieces way more than I expected. Those failures are sources of future ideas. Once I started seeing every file as potentially valuable, backup became automatic.
Cloud Backup Services Compared:
Service | Best For | Price/Month | Unique Feature |
|---|---|---|---|
| Backblaze | Artists with large files | $7 unlimited | Truly unlimited, set-and-forget |
| Dropbox | Collaboration | $12 for 2TB | Best sync, sharing capabilities |
| Google Drive | Google ecosystem users | $10 for 2TB | Integrates with Google services |
| pCloud | One-time payment option | $175 lifetime | Pay once, keep forever |
| Sync.com | Privacy-focused | $8 for 2TB | Zero-knowledge encryption |
The REAL Cost of Not Backing Up: I lost two months of work in 2019 because I was "too busy to set up backups." That's roughly 60 hours of painting time gone forever. At even minimum wage, that's $870 of my time. The external drive would have cost $60. Cloud backup would have been $7. Cheap insurance, expensive lesson.
Set up automatic cloud backup today. Right now, before you finish reading this sentence. I'll wait.
Folder Structure That Scales:
Digital Art/
├── Current Projects/
│   ├── 2024/
│   │   ├── ProjectName_A/
│   │   └── ProjectName_B/
├── Completed Works/
│   ├── 2024/
│   │   ├── Commercial/
│   │   └── Personal/
├── Resources/
│   ├── Brushes/
│   ├── Textures/
│   ├── References/
│   └── Tutorials/
├── Studies & Practice/
│   ├── 2024/
│   │   ├── Life_Drawing/
│   │   └── Color_Studies/
├── Client Work/
│   ├── ClientName_A/
│   └── ClientName_B/
└── Personal Work/
    ├── 2024/
    └── Sketches/
Within each major folder, create subfolders by year: 2023, 2024, etc. Your future self trying to find that one piece from three years ago will thank you.

Why This Structure Works:
- Flat hierarchy: Never more than 3-4 levels deep
- Year-based sorting: Makes finding old work obvious
- Separate in-progress from completed: Prevents overwhelm
- Separate personal from client: Essential for taxes and portfolio curation
Folder Organization Psychology: Artist brains work differently when filing. We remember visual content, not file names. That's why you need folder thumbnails when possible. Most operating systems let you add preview images to folders—use this! A visual preview of the folder's contents helps you find things years later.
The "Scorched Earth" Archive Strategy: Here's a controversial take: delete more. Not everything you create deserves permanent storage. Every six months, go through your Current Projects folder and be ruthless:
- Abandoned sketches older than 1 year? Export a low-res JPEG for reference, delete the working files
- Failed experiments? Keep one version, delete seventeen iterations of the same failed idea
- Early work you're embarrassed by? Keep 2-3 representative pieces, archive the rest
Storage is cheap, but attention is expensive. Every file you keep is a decision you might have to make later. Be selective about what you carry forward.

File Formats Explained:
Format | Best For | Pros | Cons |
|---|---|---|---|
| PSD | Photoshop, layered projects, working files | Preserves layers, widely compatible | Large file sizes |
| TIFF | Archival, print, cross-platform | Lossless, layers supported, print-safe | Very large files |
| PNG | Web display, transparency needed | Lossless, supports transparency | No layers, no CMYK for print |
| JPEG | Web sharing, general use | Small file size, universal compatibility | Lossy compression, no transparency |
| EXR/ORA | High dynamic range, advanced compositing | Preserves extreme data, advanced users | Large, niche support |
| KRA | Krita working files | Open source, powerful features | Limited to Krita users |
| CLIP | Clip Studio Paint files | Excellent brush engine, comic tools | Limited ecosystem support |
| PROCREATE | Procreate working files | iPad optimized, seamless workflow | iPad only, limited export options |
Fomat Selection Strategy (When You're Confused):
Your Goal | Best Format | Why |
|---|---|---|
| Keep everything editable | Software native (PSD, KRA) | Preserves layers and future flexibility |
| Archive finished work | TIFF | Lossless, widely compatible in 10 years |
| Post to social media | JPEG at 90% quality | Small size, good enough quality |
| Portfolio website | PNG for graphics, JPEG for photos | Transparency vs file size trade-off |
| Print at home | TIFF or high-quality JPEG | Best quality for physical output |
| Professional printing | TIFF with CMYK color space | Printers' preferred format |
| Back up everything | Native + TIFF | Redundancy protects against format obsolescence |
Export Settings That Won't Ruin Your Work:
- JPEG for web: Quality 85-92%, sRGB color space, remove metadata
- PNG for transparency: 24-bit depth, keep metadata for copyright
- TIFF for archive: No compression, keep layers, embed color profile
- Never export once: Keep master files in native format, export for specific uses
The format landscape changes every five years. PSD files from 2005 still open today, but proprietary formats from dead software disappear forever. When in doubt, save a TIFF backup alongside your native format.
Save layered PSD/TIFF files as your master copies, then export flattened PNGs for sharing online or JPEGs for general use. Never overwrite your layered master files.
Pro tip for archiving: Every 3-6 months, I go through my working files and do a "master archive" export. I keep the layered original, but also export full-resolution flattened TIFFs and web-ready PNGs of everything. Then I put these archives in separate backup locations. Why? Because software becomes obsolete, but flat image formats will likely be readable for decades. Future-proof your art.
Collaborating Without Chaos
Sharing files with clients, printers, or collaborators adds another layer of complexity. Here's how to avoid version nightmare:
Client delivery checklist:
- Final high-resolution files (usually TIFF or PNG)
- Web-ready versions (smaller, compressed for online)
- Any source files they specifically requested
- A README.txt explaining what's in each file (I know, it sounds extra, but clients love this)
- A PDF showing the work (even just screenshots arranged nicely)
File naming for client work:
ClientName_ProjectName_vFinal_DeliveryDate_FileType.ext
Example: ZenMuseum_BrochureIllustration_vFinal_2024-03-15_Print.tif
This prevents the "I think this is the final version... or is it?" panic that happens three months later when the client asks for changes.
Transitioning from Traditional Media
Coming from oils, watercolors, or charcoal? You might feel digital lacks "soul" at first. Here's how to bridge that gap:
- Mimic traditional tools until you find digital favorites. There's watercolor brushes that'll blow your mind.
- Use pressure sensitivity! It feels natural after working with real brushes.
- Print your work! Seeing art on paper changes your perspective on it.
- Remember: digital is different, not worse. It has muscles traditional art doesn't. Like that undo button. Oh, that glorious undo button.
Common Mistakes & Fixes: A Survival Guide
Every artist makes mistakes, but digital artists have an advantage—mistakes are easier to fix and learn from. Here are the most common ones I see, along with what's actually happening and how to fix them.
Mistake | What's Really Happening | How to Fix It |
|---|---|---|
| Shaky lines | Hand not used to tablet movement, too much wrist | Slow down your stroke speed, use stabilizer settings, draw from elbow/shoulder |
| Overworking the piece | Fear of "finishing", perfectionism | Step away for hours/days, return fresh, set artificial time limits |
| Mud colors | Overmixing on one layer, poor layer separation | Use separate layers for each major color area, use multiply/screen for clean shadows/highlights |
| Generic, boring art | Not developing unique style, relying too much on defaults | Study artists you admire, break rules intentionally, experiment |
| Everything looks flat | No understanding of light sources, values too similar | Establish one clear light source, check values in grayscale |
| Pixelation artifacts | Drawing at too low resolution, over-zooming | Start at high resolution (300dpi+), don't zoom past 100% for final details |
| Brush too uniform | Pressure sensitivity not adjusted, using same settings | Vary opacity/flow with pressure, use multiple brushes in one piece |
| Color scheme doesn't work | Too many colors, no color harmony | Limit palette to 3-5 main colors, use complementary/analogous schemes |
| Tablet feels disconnected | Poor driver setup, wrong aspect ratio | Calibrate tablet area, match screen ratio, update drivers |
| Can't match traditional quality | Unrealistic expectations, wrong tools | Accept digital as different medium, find its unique strengths |
| File corruption | Software crashes, power loss, failed saves | Always save incrementally (Save As), enable auto-save, good backup |
I once spent 12 hours straight on one illustration only to realize it looked like every other fantasy character on DeviantArt. Brutal lesson in finding your own voice instead of just replicating what you see online.
The Dark Psychology of Common Mistakes:
Many mistakes come from deeper cognitive biases we don't recognize:
Shaky Lines: Not just technical—it's anxiety manifesting physically. You're scared of making the wrong mark, so you hesitate, and hesitation creates wobble. The solution isn't just slower strokes; it's giving yourself permission to make bad marks.
Overworking: Perfectionism dressed up as dedication. Digital art's infinite undo capability tricks us into thinking the perfect version exists if we just keep tweaking. It doesn't. At some point, you're just making different, not better.
Muddy Colors: Fear of commitment. You're afraid to paint bold colors because what if they're wrong? So you paint timidly, overmixing to avoid strong choices. Digital art rewards boldness—commit to your color choices on separate layers where you can easily change them if needed.
Generic Art: Comparison paralysis. You see amazing art online and unconsciously imitate it instead of developing your own voice. The solution isn't to stop looking at other art—it's to consume more varied influences and ask "what would I do differently?"
The "I'll Fix It Later" Trap: Digital artists develop a dangerous habit: leaving problems for future-you to solve. That slightly off anatomy? The color that doesn't quite work? The composition that feels unbalanced?
"Eh, I'll fix it later."
But here's what actually happens: you build more on top of the problem, making it harder to fix. Future-you arrives, sees the accumulated work, and says "eh, too much effort to fix now."
The Fix-It-Now Rule: When you notice a problem, fix it before moving forward. Not "later," not "when I finish this section"—immediately. Problems compound. Fixes stay simple if you catch them early.
Finding Your Artistic Community
Art can feel lonely when you're working alone in your room, but the digital age has created unprecedented opportunities for connection and community.

Why Community Matters:
- Feedback and critique: Fresh eyes catch problems you've stared at too long
- Motivation: Seeing others create inspires you to keep going
- Learning: Other artists share techniques, brushes, resources
- Opportunities: Job postings, collaborations, and friendships happen in communities
- Accountability: Posting regularly keeps you creating regularly
Where to Find Your People (And What Each Really Offers):
Platform | Best For | Community Vibe | Hidden Reality |
|---|---|---|---|
| DeviantArt | General art community, all skill levels | Mixed, established platform | Declining activity, clunky interface |
| ArtStation | Professional portfolio, industry connection | Professional, competitive | High barrier to entry, intimidating for beginners |
| Broad audience, visual portfolio | Social, algorithm-driven | Algorithm punishes posting irregularities | |
| Twitter/X | Quick updates, networking, industry talk | Fast-paced, conversational | Signal-to-noise ratio is brutal |
| Reddit (r/DigitalArt) | Specific feedback, niche discussions | Supportive, advice-focused | Moderation varies wildly |
| Discord servers | Real-time chat, live drawing, close-knit groups | Personal, collaborative | Requires active participation |
| YouTube | Tutorials, process videos, long-form content | Educational, inspirational | Comments aren't community |
| Twitch | Live streaming, real-time interaction | Interactive, skill-sharing | Performance pressure while creating |
| Bluesky | Artist-friendly social network | Emerging, positive | Small user base, growing |
| Pixiv | Japanese art community, anime/manga | Niche, established | Heavily anime-focused |
| Newgrounds | Animation, game art, indie scene | Alternative, supportive | Older demographic, indie-focused |
The Platform Selection Strategy That Actually Works:
Don't try to be everywhere at once. Pick one primary platform and one community platform:
Primary (where you post finished work):
- Beginners: Instagram or DeviantArt (lower barrier, broader audience)
- Intermediate: ArtStation (professional standards, job opportunities)
- Animators: Newgrounds or YouTube (motion-focused communities)
- Mobile artists: Instagram or Twitter (mobile-first platforms)
Community (where you get feedback and learn):
- Beginners: Reddit or Discord (supportive, focused feedback)
- Intermediate: Discord or ArtStation forums (more advanced discussions)
- Specialized: Niche Discord servers for your specific interests
This split approach prevents platform exhaustion while maximizing the benefits of both audience-building and genuine community connection.
The Hidden Algorithm Reality: Every platform wants you to believe consistent posting will grow your audience. The truth is more complicated. Algorithms reward:
- Consistency (posting at same time/days)
- Engagement (comments, shares, saves)
- Watch time (how long people view your posts)
- Early engagement (activity in first hour after posting)
This creates a performance trap: you start optimizing for the algorithm instead of making good art. The artists who succeed long-term are the ones who treat algorithms as suggestions, not rules, and focus on building genuine connections with people who care about their work.
Red Flags In Art Communities:
Red Flag | Why It's Bad | What To Do |
|---|---|---|
| Only positive feedback | No growth, creates false confidence | Seek out critique-focused groups |
| Constant self-promotion | No actual community interaction | Find places that value participation |
| Cliques exclude newcomers | You'll never break in | Look for active welcoming committees |
| "Pay for feedback" schemes | Feedback should be free | Run away immediately |
| Drama and infighting | Destructive, not constructive | Protect your peace, find new communities |
Good communities feel like studios where everyone has their own easel but shares paint and advice freely. Bad communities feel like high school cafeterias with assigned seating.
Getting the Most from Communities Without Losing Your Soul:
- Be genuine: Don't just promote your work—participate in conversations
- Give feedback: Offer constructive critique to others; it helps you develop your own critical eye
- Share your process: People love seeing work-in-progress and learning from your mistakes
- Ask questions: Communities exist to help—use them
- Support others: Celebrate when community members succeed. Art isn't a zero-sum game
The Feedback Formula That Actually Helps: When giving feedback, specificity matters: ❌ "I love this!" (meaningless) ✅ "The way you handled the light on the water is stunning—it reminds me of Turner's seascapes." ❌ "Something feels off" (unhelpful) ✅ "The composition feels unbalanced to the left—maybe try cropping the right side?" ❌ "This is bad" (destructive) ✅ "The colors feel muddy in the shadows—have you tried using Multiply layers for cleaner shadows?"
When receiving feedback:
- Thank people even if you disagree
- Ask clarifying questions ("Which part specifically feels off?")
- Remember that taste is subjective—not all feedback needs to be implemented
- You're the artist—you choose which feedback serves your vision
The Participation Pyramid:
Level | Activity | Time Investment | Benefit |
|---|---|---|---|
| Lurker | Reading, never posting | 5 min/week | Very little—you're consuming, not connecting |
| Occasional Poster | Sharing work occasionally | 30 min/week | Minor—consistent presence needed for community |
| Regular Contributor | Posting weekly, commenting | 2-3 hours/week | Moderate—you start building recognition |
| Active Member | Daily interaction, helping others | 5+ hours/week | High—genuine relationships, real growth |
| Community Leader | Organizing, moderating | 10+ hours/week | Very high—but burnout risk |
You don't need to be a community leader to benefit. Regular contributors get 80% of the benefits for 20% of the time investment.
I've met some of my closest friends through online art communities. Some I've never met in person, yet we've been supporting each other's art careers for over a decade. The internet can feel isolating, but it can also connect you with your exact tribe.
The Downside Nobody Talks About: Community comes with emotional labor:
- Watching others succeed while you struggle
- Endless self-promotion pressure
- Comparison that kills your confidence
- Internet drama and politics
- Parasocial relationships that feel real but aren't
These are real costs. Communities work best when you:
- Curate your feeds ruthlessly
- Take breaks when overwhelmed
- Remember that online metrics don't define your worth
- Keep some work private (not everything needs to be shared)
- Protect your creative energy above all else
Good community feels like a warm studio full of friends. Bad community feels like a job you don't get paid for. Learn to tell the difference early.
Dealing with Comparison and Impostor Syndrome (The Real Battle): Every artist—including the ones whose work you admire—struggles with feeling like a fraud sometimes. The difference between artists who thrive and those who quit often comes down to how they handle this feeling.
When you find yourself paralyzed by comparison, it helps to understand what's actually happening in your brain:
What Comparison Actually Is: You're comparing your behind-the-scenes struggle with someone else's highlight reel. You see their finished, polished piece. You feel your own messy, incomplete work. The gap feels infinite, but you're not seeing the seventeen abandoned versions they never posted, the pieces they hate but other people love, the years of practice that came before this moment.
The Three Types of Comparison and How to Handle Them:
Type | What It Feels Like | The Reality | How To Handle It |
|---|---|---|---|
| Upward Comparison | "I'll never be that good" | They have 10,000+ hours more practice | Study their work analytically instead of emotionally |
| Downward Comparison | "At least I'm better than them" | False confidence, stops growth | Celebrate their progress while pushing yourself harder |
| Lateral Comparison | "We started together, why are they better?" | Different growth trajectories | Focus on your unique path, not their progress |
Impostor Syndrome Coping Strategies That Actually Work:
- Keep a "done" list, not just a "to-do" list: Track your progress so you can see how far you've come
- Create a "not good enough" folder: Save your old work and look at it when you feel stuck
- Share your process, not just finished pieces: This normalizes the struggle everyone experiences
- Use comparison as information: "What can I learn from this?" instead of "Why aren't I that good?"
- Set process goals, not outcome goals: "I'll draw for 30 minutes daily" not "I'll create a masterpiece"
- Remember that artists you admire feel the same way: Impostor syndrome never goes away, you just get better at ignoring it
When Comparison Becomes Motivating (The Healthy Version): Healthy comparison sounds like:
- "Their color theory is incredible—I want to study how they use complementary colors"
- "The way they handle lighting is inspiring—maybe I should practice more dramatic lighting"
- "I admire their work ethic—how can I create a sustainable practice for myself?"
Unhealthy comparison sounds like:
- "I'll never be good enough"
- "Everything they create is perfect and everything I create is trash"
- "What's the point of trying?"
One is actionable information. The other is emotional poison. Learn to recognize which is which.
Your unique voice and perspective are valuable even if your technical skills aren't where you want them yet. Community should lift you up, not tear you down.
Advanced Community Building
If you want to go deeper than just participating in communities:
Starting your own Discord server:
- Focus on a specific niche (watercolor digital art, fantasy illustration, etc.)
- Set clear rules and expectations from day one
- Be prepared to invest significant time in moderation
- Create channels for different skill levels
- Host regular events (drawing challenges, critiques, Q&As)
I started a small Discord server three years ago with just 20 artists I admired. We now have 400+ members, and it's become my most valuable creative community. The key was deliberately keeping it small and focused on quality interaction over numbers.
Creating your own challenges: Monthly challenges (like Inktober but for digital art) can build community and improve your skills:
- 30-day character design challenge
- Color palette exploration (different palette each day)
- Technique focus (only hard-edge painting, only loose brushwork, etc.)
- Subject matter challenges (draw from life, draw from imagination, draw from reference)
Post your challenge results, encourage others to participate, and use hashtags so the community can find each other. These challenges become portfolio building and skill development wrapped in community engagement.
Mentoring and being mentored: Once you've been creating for a while, consider mentoring beginners. Teaching solidifies your own knowledge, and being mentored by someone more experienced accelerates your growth. Many communities have formal or informal mentorship programs.
The art world can feel isolating, but it doesn't have to be. Some of my closest friendships started with a comment on someone's DeviantArt post ten years ago. Be generous, be genuine, and remember that every artist you admire was once a beginner asking the same questions you are now.
The Truth About "Making It": Most "successful" artists I know still struggle with feeling like frauds. The goalposts just move. First you want to be "good enough to share." Then "good enough to get commissions." Then "good enough to make a living." Then "good enough to be respected by peers."
The secret nobody tells you: the feeling of "making it" doesn't exist. What exists is learning to find satisfaction in the work itself, regardless of external validation. The artists who survive long-term are the ones who fall in love with the process, not the outcome.
Comparison is unavoidable. Self-destruction through comparison is optional. The choice is yours.
Building Your Digital Art Foundation: Practice That Actually Works
The difference between artists who improve steadily and those who plateau isn't talent—it's how they practice. I spent years practicing wrong before I figured out what actually builds skills.
The 70/30 Practice Rule That Changed Everything
Spend 70% of your art time creating complete pieces (even if they're bad), and 30% on focused skill-building exercises. Most beginners do the opposite—they practice fundamentals forever without ever finishing anything. You learn different things from each:
70% Complete Pieces Teaches You:
- Problem-solving under real constraints
- How all your skills work together
- When to stop perfecting and call it done
- Your personal creative process
- Confidence in your ability to finish
30% Studies Teaches You:
- Specific techniques in isolation
- Faster skill acquisition
- Understanding of fundamentals
- Less pressure (it's just practice)
I used to avoid finishing pieces because they never lived up to my vision. Then a friend asked me, "How will you know what 'finished' feels like if you never finish anything?" That question changed my entire approach to practice.
The Portfolio Paradox (Why Less Is More)
Here's a counterintuitive truth: the artists who get noticed aren't the ones with hundreds of mediocre pieces online. They're the ones with 10-20 genuinely strong pieces. Quantity matters less than you think.
When I started, I thought I needed to post daily to build an audience. What actually happened? The pressure to produce made my work suffer. The pieces I spent real time on got far more attention than the daily posts combined. Depth beats frequency almost every time.
The exception? Process content. People love seeing your messy sketches, failed experiments, and work-in-progress shots. These don't need to be polished—they need to be genuine.
The real magic happens when you stop worrying about doing things "correctly" and start experimenting with what feels right for your vision. Seeing your ideas appear on screen—out of nothing but your imagination and a digital tool—never gets old.

Wrapping Up: The End Is Actually The Beginning
Digital art isn't about technical perfection—it's about creative freedom and possibility. I still mess up layers constantly, forget to name files properly, and regularly have to Google techniques I should know by now. But that's okay. Part of the joy is the learning process itself, not just the final result.
The real magic happens when you stop worrying about doing things "correctly" and start experimenting with what feels right for your vision. Seeing your ideas appear on screen—out of nothing but your imagination and a digital tool—never gets old.
What I Wish Someone Had Told Me When I Started:
- Your first 100 pieces will probably be bad—and that's the point. You're learning, not competing.
- Comparison is the fastest way to kill your creativity. There will always be someone better. Make peace with this now.
- Tools matter less than you think. The best artists can create with anything. Don't let equipment envy stop you from practicing.
- Community matters more than you think. Isolation kills more artists than lack of talent.
- Process > Outcome. Fall in love with making art, not with having made art.
- Style emerges from practice, not from forcing it. Stop trying to find your style—it will find you.
- Technical skill and creativity are different muscles. Don't neglect one for the other.
- Finished is better than perfect. Perfectionism is the enemy of progress.
- Art is a practice, not a destination. There's no "arriving"—only continuing.
- Your unique perspective is your greatest asset. Don't try to be someone else.
The Real Work Begins Now: Reading about digital art doesn't make you a digital artist. Watching tutorials doesn't make you skilled. Buying equipment doesn't make you ready. Only the actual, messy, frustrating, glorious process of making art will teach you what you need to know.
What To Do Next:
- Pick a software (I recommend Krita or Procreate for beginners because they remove financial barriers). Don't download seventeen different programs—pick one and commit to it for at least three complete pieces.
- Set up your tablet and spend one hour just making random marks—no art, just familiarizing yourself with how pressure feels, how the surface responds, how your hand moves across it.
- Create your first intentional piece (expect it to frustrate you—that's normal). The goal isn't to create something good—it's to finish something. A finished bad piece teaches you more than an abandoned perfect sketch.
- Join one community and share it, even if you think it's terrible. The feedback you'll get on that terrible first piece will be more valuable than weeks of solo practice.
- Repeat this process 100 times before you judge whether digital art is for you. The first 50 pieces are just you learning the tools. The second 50 are where you start making art.
The gap between your taste and your skill will feel painful at first. This is healthy. Your taste leads your skill forward. The artists who quit are the ones who can't tolerate that gap. The artists who succeed are the ones who use that gap as motivation.
You have permission to be bad at this. You have permission to experiment. You have permission to fail spectacularly. The undo button is right there. Use it liberally.
What are you actually waiting for?
So what are you actually waiting for? Open a program, make a glorious mess, and discover what colors and shapes live inside you. The undo button will be there if you need it, ready to rescue you from any honest mistakes.
The Psychology of Creativity: Understanding Your Creative Brain
Before we dive deeper into technique, let's talk about something most tutorials completely ignore: the psychological journey of becoming an artist. I've watched hundreds of beginners start this journey, and the ones who succeed aren't necessarily the most talented—they're the ones who understand how to work with their own psychology.
The Three Creative Stages Every Artist Navigates
Stage 1: The Honeymoon Phase (Weeks 1-4) Everything feels magical and new. Every brush stroke is exciting, every color choice feels significant. You're not worried about quality because you're just discovering what's possible. This phase is intoxicating but often misleading—it's easy to mistake novelty for natural talent.
Stage 2: The Valley of Disappointment (Months 2-8) This is where most people quit. Your taste has developed faster than your skills. You can see what's wrong with your work but don't yet know how to fix it. Every piece feels like a failure. This phase is brutal but completely necessary—it's the evidence that you're growing.
Stage 3: The Plateau of Competence (Month 9+) Things start clicking. You finish pieces you're actually proud of. The tools begin to feel natural. You still see problems in your work, but now you have strategies to fix them. This is where art becomes genuinely fulfilling rather than just frustrating.
The trap? Most people quit in Stage 2, right before the breakthrough they've been working toward. Understanding these stages helps you recognize that frustration isn't failure—it's progress.
Creative Burnout: The Artist's Silent Killer
Burnout doesn't happen because you're working too hard—it happens because you're not working in alignment with your natural creative rhythms. I learned this the hard way after pushing myself to create daily content for six months straight and ending up unable to look at my tablet without feeling exhausted.
The signs of burnout most artists miss:
- You keep opening the same file but can't make any decisions
- Everything you create looks "wrong" but you can't articulate why
- You're spending more time scrolling social media than creating
- You feel angry or defensive when you see other artists' work
- The excitement you once felt has been replaced by obligation
Burnout isn't cured by taking a break. It's cured by rediscovering why you wanted to create in the first place. The solution isn't "stop making art"—it's "start making art that feels like play again."
The Rekindling Strategy That Actually Works:
- Give yourself permission to create the worst art you've ever made
- Set a 10-minute timer and work on something tiny and low-stakes
- Create something purely for yourself—no social media, no clients, no audience
- Go back to whatever first made you fall in love with art
- Delete the word "should" from your creative vocabulary for one week
Most creative blocks aren't skill problems—they're permission problems. You've forgotten that you're allowed to make bad art, to experiment pointlessly, to create things nobody will ever see. Reclaiming that permission is more powerful than any technique tutorial.
If you're in the Den Bosch area, the museum often hosts digital showcases that might spark creativity—visit their schedule when you're ready for inspiration beyond your screen. There's something about seeing digital art in physical space that reframes what's possible.
And if you're looking for inspiration on how professionals present their work, the available digital prints in the shop show how technical skill translates into pieces people actually want to live with.
But honestly? The most important thing you can do right now is close this article, open your art program, and make something only you would make. Stop consuming tutorials and start creating. You've got this.
Frequently Asked Questions (FAQ)
How long does it take to get good at digital art?
The honest answer: You'll create something you're genuinely proud of around the 6-12 month mark if you practice consistently (30+ minutes daily). You'll feel competent around the 2-year mark. You'll realize how much you still have to learn around year 5. The timeline varies wildly depending on your art background, how much you practice, and what "good" means to you.
I created maybe 100 genuinely terrible pieces before I made something that made me think, "Wait, this is actually not embarrassing." That took about eight months of daily practice.
Do I need an iPad or expensive tablet to start?
Absolutely not. I created professional-level work for three years on a $60 basic Wacom tablet. The tool genuinely matters less than your willingness to practice. That said, iPads and display tablets are lovely if you have the budget—but they won't make you a better artist faster. Consistent practice does.
The only equipment that's non-negotiable is something that lets you draw directly on a surface (so not a mouse). Beyond that, your brain matters more than your gear.
What's the best software for absolute beginners?
Krita or Procreate, 100%. Both remove the financial barrier completely (Krita is free, Procreate is $10 once), and both have gentle learning curves while still being powerful enough to grow with you for years. Pick whichever fits your budget and device—you can't go wrong with either.
I started with Photoshop because it was "the industry standard," and I regret it. The subscription cost stressed me out, and the complexity made learning less fun. Switching to Procreate for iPad felt like someone removed concrete blocks from my creative feet.
Is digital art "cheating" compared to traditional art?
Only if you think having more tools is cheating. Digital art has different strengths and weaknesses than traditional media, but it's not inherently easier or harder—just different. The fundamentals of color theory, composition, light, and anatomy apply regardless of your medium.
I've heard this "cheating" argument for years, usually from traditional artists who've never tried digital. The irony? Most traditional artists I know who try digital struggle with it initially because it requires such different thinking. It's not cheating—it's a different creative language.
Why does my digital art look so flat?
Usually three reasons:
- You're not establishing a clear light source
- Your values (lightness/darkness) are too similar across the piece
- You're not using warm and cool colors effectively
Check your work in grayscale frequently. If your painting looks compelling in black and white, you're halfway there. If it looks like a muddy mess, fix your values before worrying about color.
Also: use reference photos. I know, it feels like cheating. It's not. Professional artists use reference constantly. Your brain doesn't instinctively know how light wraps around a cylinder—reference teaches you what to look for so you can internalize it later.
Can I make a career out of digital art?
Yes, but it's not the romantic fantasy people imagine. Most professional digital artists I know have diverse income streams: freelance illustration, teaching, print sales, licensing, and commercial client work. Relatively few make a living selling just their personal art.
I didn't make a full-time living from art until I'd been creating seriously for about five years. The artists who "make it" fastest are usually the ones who combine strong technical skills with business savvy—they understand marketing, client communication, and portfolio presentation, not just painting.
What's the biggest mistake beginners make?
Trying to learn everything at once. You don't need to understand every Photoshop feature, every brush setting, every color theory concept on day one. Pick one thing (like figure drawing or landscape painting), create 20 pieces focusing on that one thing, then add complexity.
The second biggest mistake? Not finishing work. Perfectionism kills more artists than lack of talent. A finished bad piece teaches you infinitely more than an abandoned perfect sketch.
How do I find my art style?
You don't find it—it finds you. Style emerges from consistent practice and making hundreds of unconscious micro-decisions that add up to something recognizable as "you." Don't force it, and don't try to copy someone else's style. Make lots of art, study artists you admire, experiment constantly, and eventually your style will emerge naturally.
I spent years trying to paint like artists I admired. My work got good when I stopped trying to be them and started trying to be me. Your style is already in you—it just needs thousands of brush strokes to come out.
Is it normal to hate everything I create?
Completely normal. Almost universal, actually. The gap between your taste (what you can recognize as good) and your skill (what you can currently execute) will feel painfully wide for the first couple of years. This is healthy! Your taste is pulling your skill forward.
The artists who quit are the ones who can't tolerate that gap. The artists who succeed accept it as part of the process and keep making work anyway. The pieces I hated six months ago often look pretty good to me now—which means my skill finally caught up to my taste.
How do I price my digital art if I want to sell it?
This is complex, but here's a simple starting formula: (Your hourly rate × Hours spent) + Materials cost + Licensing/commercial usage fees. For beginners: start with $15-25/hour and adjust up as you gain experience and clients. For print sales: use a 3-5x markup on printing costs depending on your market.
Here's what nobody tells you: underpricing hurts you AND other artists by lowering market rates. If you're not sure what to charge, ask other artists in your community, or use resources like the Graphic Artists Guild Handbook of Pricing and Ethical Guidelines.
I undercharged for years because I was afraid of pricing myself out of work. The result? I attracted cheap clients who treated me poorly and I was constantly stressed about money. Raising my rates (even though it terrified me) improved both my income AND my client quality.
What's the difference between saving a PSD, TIFF, and PNG file?
- PSD/Software native: Keep everything editable (layers, effects, etc.). Use for working files you might edit later.
- TIFF: Highest quality, lossless compression, works for print, supports layers. Use for archival copies and professional printing.
- PNG: Supports transparency, good for web display, lossless compression. Use for logos, graphics, and anywhere you need transparent backgrounds.
- JPEG: Smaller file size, universal compatibility, but lossy compression (loses quality each time you save). Use for web photos and casual sharing.
Always keep your layered PSD/TIFF files. Never overwrite them. Export copies in other formats for specific uses. I learned this the hard way when I needed to edit old work but only had flattened JPEGs.
How much should I practice?
Frequency beats duration. Thirty minutes daily is better than a seven-hour marathon session once a week. Your brain needs time between practice sessions to consolidate what you learned. Aim for consistency over heroic effort.
That said, any amount of practice is better than none. Some weeks I can only manage 15 minutes a day, and that's still enough to maintain momentum. The artists who improve fastest are the ones who show up daily, even if it's just for a quick sketch.
to study how professionals present their work commercially.
Zen Dageraad Visser is a contemporary abstract artist exploring the boundaries of color and form. Explore their creative journey for insights into artistic evolution.
Keywords: digital art for beginners, digital painting tutorial, how to start digital art, procreate vs photoshop, digital art file management, traditional to digital art transition, digital art tools, digital art techniques, digital art copyright, digital art FAQ, digital art software comparison, digital art hardware guide, how to choose a drawing tablet, digital art communities, overcoming artist's block, digital art careers, freelance digital art pricing, digital art portfolio tips, Krita vs Photoshop, Procreate alternatives, digital art file organization, backing up digital art, common digital art mistakes, digital art for traditional artists, getting started with digital painting, best free digital art software, pressure sensitivity explained, display tablet vs graphics tablet