How to Stretch a Canvas: A Step-by-Step Artist's Guide
Learn how to stretch a canvas on stretcher bars perfectly. My personal, step-by-step guide covers tools, techniques, and avoiding common mistakes.

How to Stretch a Canvas Like a Pro (Even If It's Your First Time)
Let's be honest, my first attempt at stretching a canvas was less than stellar. In fact, it was a floppy, stapled-mess of an experience that probably ended with me questioning my life choices as an artist. But don't let my early mishaps deter you! This isn't some mystic art reserved for old masters with dusty studios. Stretching your own canvas is a deeply satisfying skill that grants you unparalleled control over the very foundation of your artwork. It’s about building a perfect, drum-tight surface that sings under your brush. In this guide, I'm going to walk you through every single step, from understanding your materials to nailing those tricky corners, sharing all the lessons I've learned (often the hard way). Forget those flimsy, pre-stretched options from the art store – let's make something truly professional, together. Because, let's face it, when you're deeply invested in your creative process, the last thing you want is for your foundation to let you down. This isn't just about saving money; it's about art, integrity, and the sheer joy of creating from the ground up.

Why Stretch Your Own Canvas? The Unsung Benefits
Before we even touch a piece of wood or fabric, you might be asking yourself: "Why bother stretching my own canvas when I can just buy pre-stretched ones?" It's a fair question, and I'll admit, convenience is tempting. But trust me, the benefits of DIY stretching go far beyond just saving a few bucks (though that's a nice perk!). It's about asserting your creative autonomy from the very first step.
- Unmatched Control & Customization: When you stretch your own, you dictate every aspect: the quality of the wood, the type and weight of the canvas, the weave, and most importantly, the tension. This means you can tailor the surface precisely to your artistic vision and preferred medium. Want a super taut surface for detailed portraiture? You got it. Need a slightly more forgiving give for expressive impasto? You're in charge. This control extends to choosing specific materials like warp-resistant wood types and specialized canvas weaves to perfectly suit your unique painting style.
- Superior Archival Quality: You choose the materials. You can opt for kiln-dried hardwoods and premium, acid-free linen – choices often unavailable or prohibitively expensive in pre-stretched options. This directly translates to a more durable, stable, and long-lasting artwork that resists warping, sagging, and degradation over time. Think of it as investing in the future of your masterpiece, ensuring your art can be admired for generations. When you select materials, you're investing in the longevity of your artistic legacy.
- Cost-Effectiveness (Especially for Large Works): While the initial outlay for tools might seem like an investment, buying raw canvas and stretcher bars in bulk, especially for larger pieces, is significantly more economical than buying them pre-stretched. This allows you to scale up your ambitions without breaking the bank, making ambitious, large-scale works more accessible. For more on the foundation, check out what are stretcher bars for canvas.
- Deepened Connection to Your Art: There's an almost meditative, ritualistic quality to stretching a canvas. It's a physical connection to your materials, a foundational act of creation that deepens your understanding and appreciation for the entire artistic process. When you lay that first brushstroke, there's a unique satisfaction in knowing you built the very stage for your vision, a silent collaboration with your materials.
- Custom Sizes and Shapes: Ever tried to find a pre-stretched canvas in that quirky, non-standard size you absolutely need for your new series? It's a nightmare. Stretching your own opens up a world of custom dimensions and even irregular shapes, freeing you from the limitations of mass-produced options and empowering your creative freedom.
- Enhanced Durability and Longevity: This might sound like a subtle point, but it's crucial for the archival quality of your work. When you're in control, you can ensure every staple is perfectly seated, every corner meticulously folded, and the tension is absolutely even. This precision translates into a surface that is less prone to warping, sagging, or developing those dreaded 'ghost impressions' from the stretcher bars over time. It's about building a painting that truly stands the test of time, a legacy you can be proud of.
- Empowerment and Skill Development: Beyond the tangible benefits, mastering canvas stretching instills a profound sense of empowerment. It's a tangible skill that removes a barrier between you and your creative process, fostering self-reliance and a deeper understanding of your materials. Each stretched canvas is a testament to your growing mastery and artistic independence.
So, while it takes a bit of effort and practice, consider the immense payoff. It's not just a technical skill; it's an empowering step towards becoming a more intentional and capable artist, a true builder of your artistic destiny.
Understanding Your Materials: Making Informed Choices
Before we dive into the nitty-gritty of stretching, let's talk about the stars of the show: your canvas and your stretcher bars. Making informed choices here is paramount, as these decisions will profoundly impact the longevity, appearance, and even the feel of your finished artwork. It's not just about what you can afford; it's about what best serves your artistic intention. What many artists overlook, however, is the synergy between these materials. A premium linen on a flimsy pine frame is a wasted effort, just as basic cotton on high-end hardwoods might be overkill. It's about a holistic approach, where each component complements the other to create an optimal painting surface. It's like pairing the perfect wine with a gourmet meal – each element enhances the other to create a superior experience.
The Foundation: Choosing Your Stretcher Bars
Your stretcher bars are the skeleton of your painting. If the skeleton is flimsy or crooked, the whole body will suffer. This is why quality is non-negotiable, a silent promise to your artwork that it will be held with integrity. I often think of them as the silent, unseen heroes that support your entire creative endeavor.
- Wood Type: Most commonly, you'll find pine or fir. Kiln-dried wood is essential to prevent warping and twisting as it ages – trust me, a warped frame is a nightmare you don't want. Some premium bars use hardwoods for extra stability, though they come at a higher cost. Pine and fir are accessible and great for learning, but remember, they can be more susceptible to humidity changes. Hardwoods like oak, maple, ash, or even Poplar (a more affordable hardwood option) offer exceptional stability and resistance to environmental shifts, making them ideal for larger, more permanent works where structural integrity is paramount. Each wood type brings its own unique set of properties to your artistic foundation, and choosing the right one is like selecting the perfect instrument for a symphony – it profoundly impacts the final performance.
Stretcher Bar Wood Type Comparison
To give you a clearer picture, here's a quick rundown of common wood types for stretcher bars:
Wood Type  | Characteristics | Pros | Cons | Ideal For |
|---|---|---|---|---|
| Pine/Fir | Lightweight, common, relatively soft, often with visible knots. | Affordable, easy to find, good for most uses. Accepts staples well. | More prone to warping and twisting if not properly kiln-dried. Can have minor imperfections. Less stable than hardwoods, especially for larger sizes. | Beginners, smaller to medium canvases, general practice, student work. |
| Hardwoods (e.g., Oak, Maple, Ash, Poplar) | Dense, heavy, very stable, fine grain. | Excellent stability, highly durable, superior archival quality, resistant to warping and bowing. | More expensive, heavier (can add significant weight to large pieces), can be harder to cut and staple. | Large, professional works, archival pieces, experienced artists, commissions. |
| Finger-Jointed Pine | Smaller pieces of kiln-dried pine joined together with interlocking 'fingers'. | Cost-effective, uses wood efficiently, often more stable than solid pine due to shorter grain patterns. | Joints might fail over time if not well-made. Can still have minor imperfections or be less perfectly straight than premium solid wood. | Budget-conscious artists, smaller to medium works where absolute perfection isn't critical, student work. |
| Aluminum/Metal Bars | Lightweight, exceptionally rigid, resistant to environmental changes. | Unparalleled stability, completely warp-proof, ideal for extreme climates or very large works. Excellent archival choice. | Very expensive, require specialized tools for assembly, can be cold to touch. | Professional artists, very large scale works, high-value archival pieces, installation art. |
- Construction: This is where craftsmanship truly shines. Look for bars with precision-cut mortise and tenon joints (the classic interlocking system) that fit snugly without gaps. You want a satisfying "click" when they slot together, indicating a tight, stable bond. Some manufacturers also use spline joints or mitered corners with reinforced keys, but the key is always a tight fit. Finger-jointed bars, as we discussed, are a common and cost-effective option, but always, always check for straightness and the integrity of those finger joints – a failed joint can compromise the entire frame. For me, a well-constructed joint isn't just about assembly; it's about trust. It's knowing that the skeleton of your painting will hold up, silently supporting your artistic vision for years to come.
- Profile: This refers to the depth and shape of the stretcher bar. Standard profiles (often 3/4 to 1 inch deep) are perfectly fine for smaller works, providing adequate support. However, for larger canvases (say, over 30x30 inches or 75x75 cm), you'll definitely want "gallery profile" bars (typically 1.5 inches or 3.8 cm deep or more). Why the fuss? The deeper profile creates more distance between the canvas and the wooden frame. This is crucial for preventing a "ghost impression" – those faint lines or marks that can appear on your painted surface from the stretcher bar pressing against the canvas over time, especially with changes in humidity or heavy paint application. Equally crucial is a raised outer edge (sometimes called a "lip" or "bevel"). This subtle curve or raised edge ensures that only the very edge of the stretcher bar makes contact with the canvas, further minimizing the risk of those dreaded ghost impressions and protecting your painted surface from friction. Think of it as a subtle act of preservation, ensuring your brushstrokes remain pristine and undisturbed by the underlying structure. It's the kind of detail that separates a good stretch from a truly professional one.
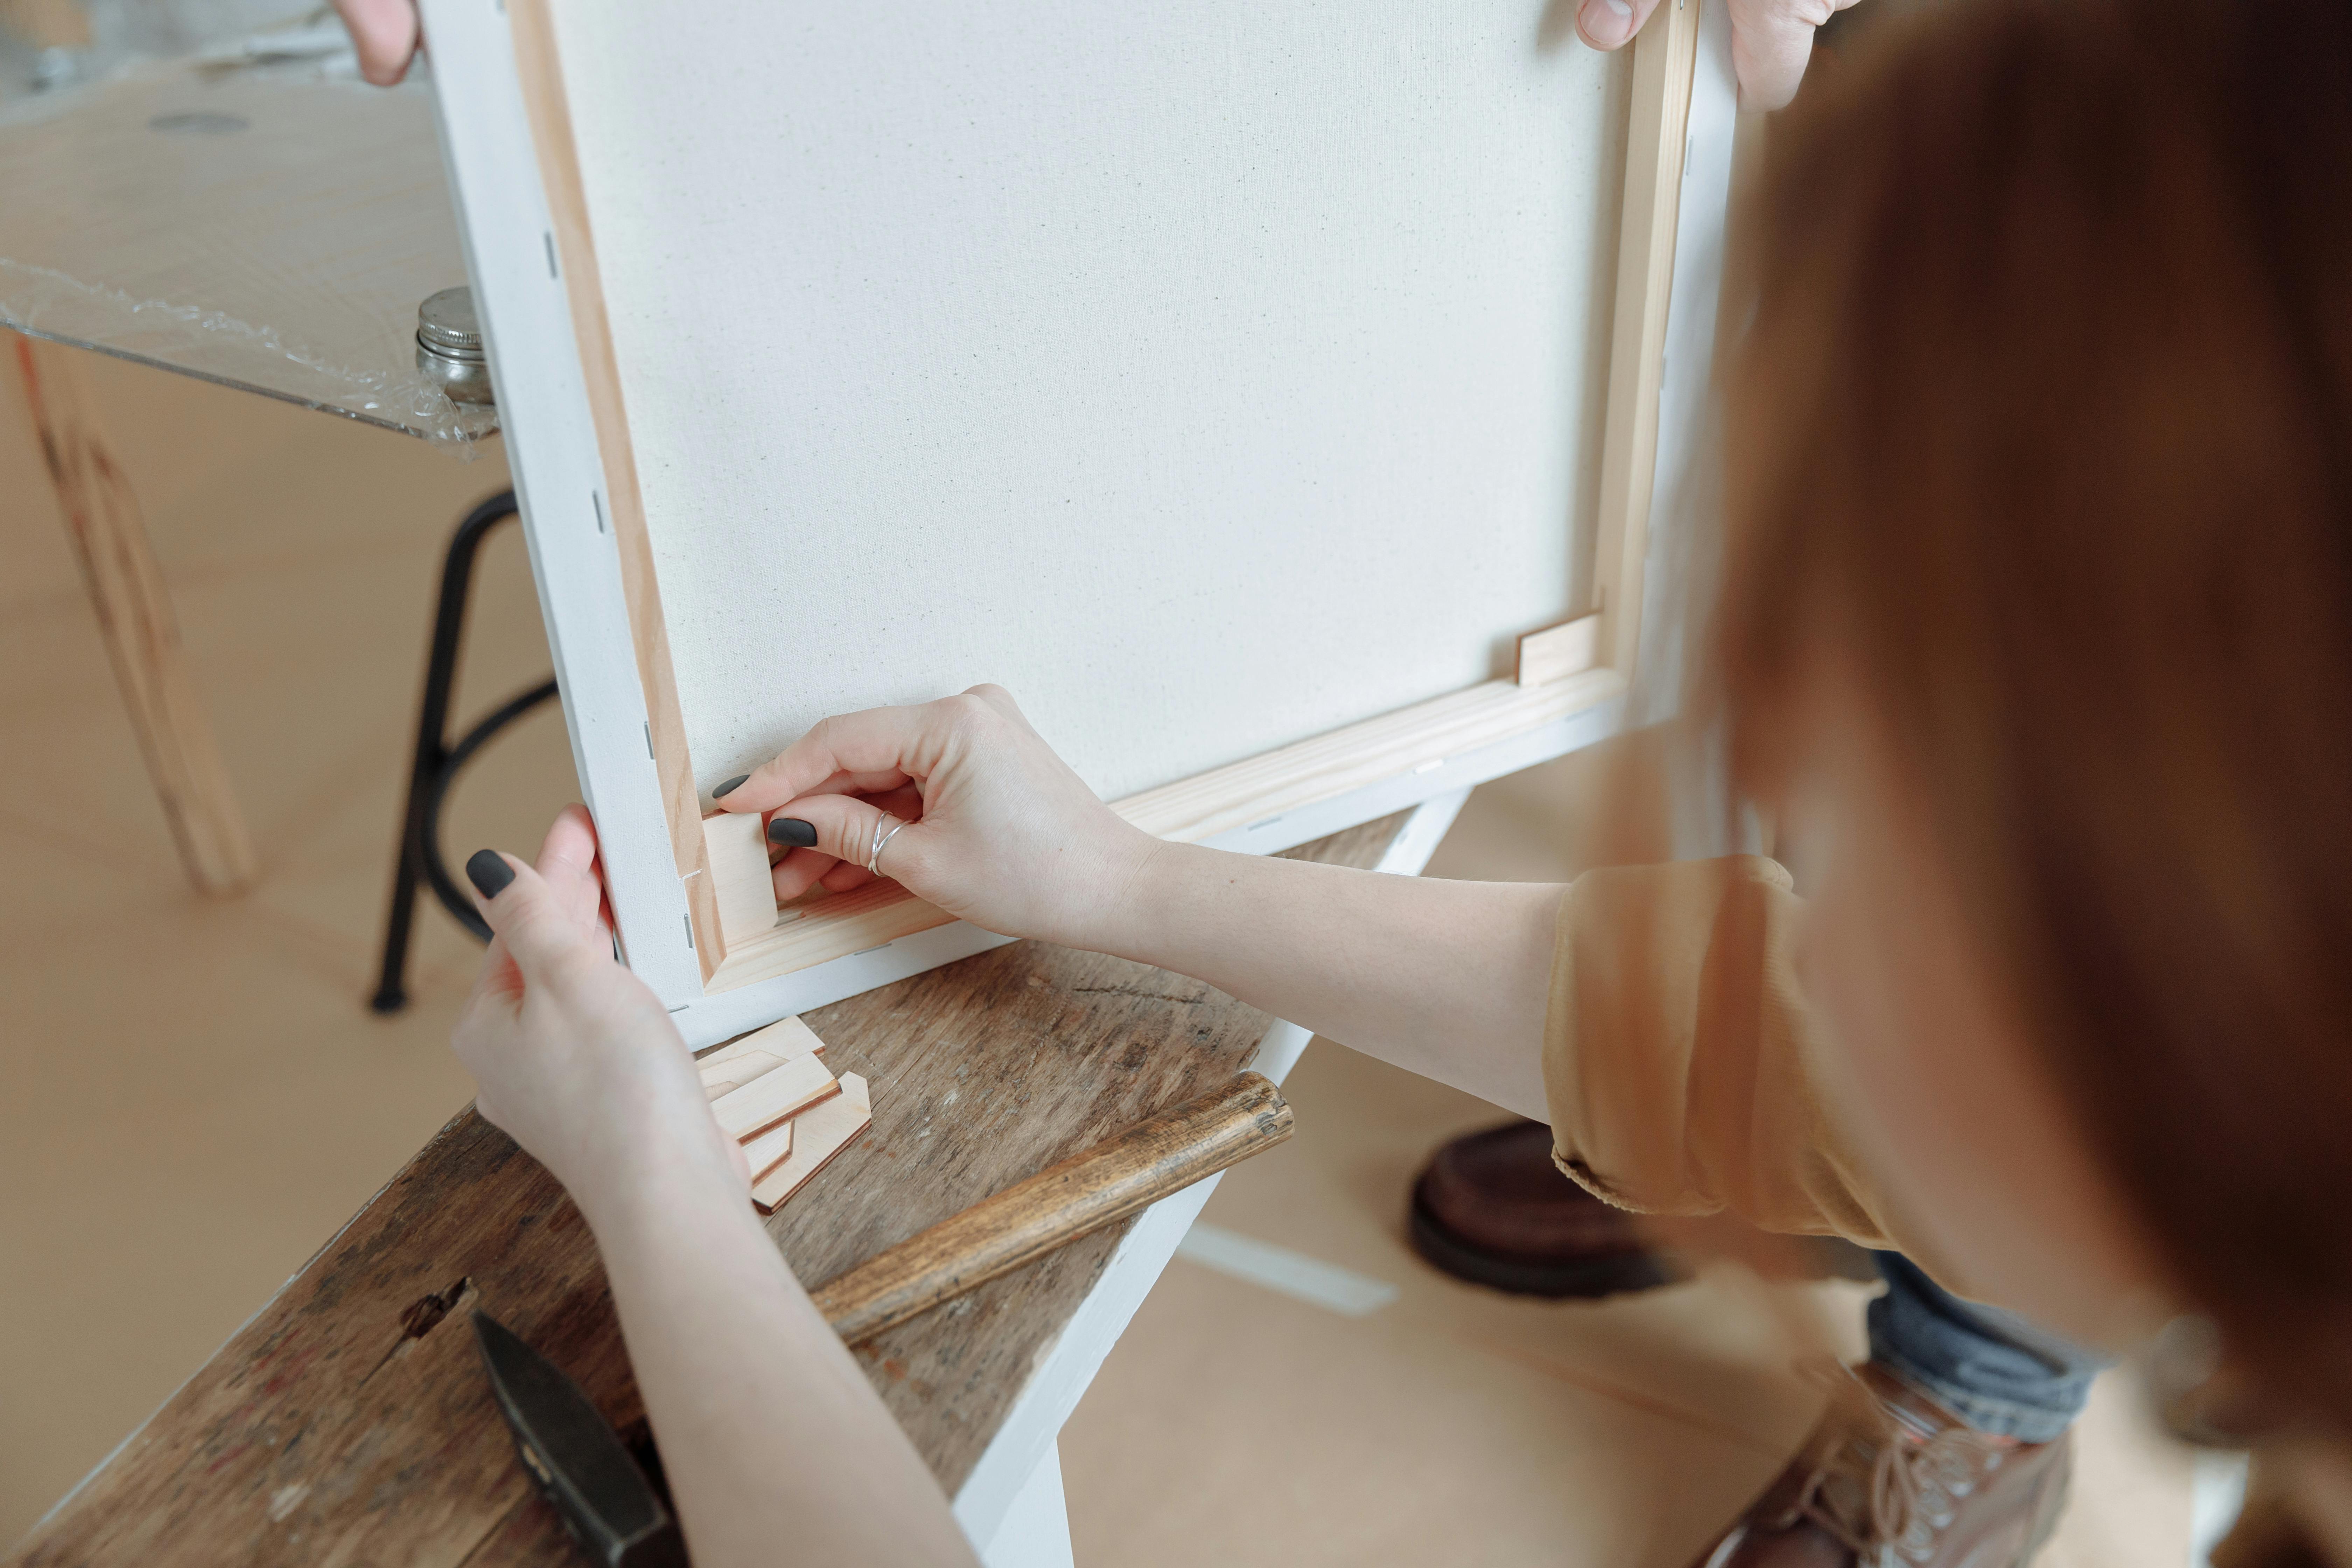
- Keys/Wedges: Many stretcher bars come with small wooden keys (sometimes called wedges). These are designed to be gently tapped into the corner joints after your painting is complete, allowing you to re-tension the canvas if it sags over time due to humidity changes or heavy paint application. Trust me, don't throw them away! They're your secret weapon against sag! I've seen countless canvases restored to their former glory with these humble little pieces of wood. They allow for a subtle, controlled expansion of the frame, bringing back that drum-tight surface without disturbing your finished artwork. They are, in essence, a built-in longevity mechanism.
Cross Braces and Corner Braces: For the Big Boys (and Girls)
For anything beyond, say, a 30x40 inch (75x100 cm) canvas, you're going to want to think about internal support. This means cross braces and sometimes corner braces. Think of them as the internal scaffolding that keeps your larger masterpiece structurally sound. Cross braces are additional stretcher bars that run across the interior of your frame, forming a cross or an 'H' shape (for larger rectangles). Their primary job is to counteract the immense, inward pulling tension of the stretched canvas, preventing the frame from bowing inward over time. They also provide crucial stability against outward bowing due to humidity changes, ensuring your entire surface remains perfectly flat and rigid. Without them, a large canvas can quickly become a flimsy, wavy mess. Corner braces (often metal L-brackets or small wooden blocks that slot into the interior corners) add extra rigidity to those crucial 90-degree angles, especially vital for very large pieces where any slight wobble or torsion can be disastrous for the painting's long-term stability. Some high-end bars even incorporate internal interlocking systems for braces, making assembly a breeze. For me, installing these braces is a moment of quiet satisfaction – it's like putting the final structural beam in a building, knowing it will stand strong against all forces.
The Skin: Selecting Your Canvas Fabric
The canvas is the very skin of your painting, the surface on which your vision unfolds. The choice here impacts everything from texture to how your paint behaves, and crucially, to its archival quality. Are you starting with raw, unprimed canvas (which I often do for ultimate control over the gesso)? Or have you opted for pre-primed (a fantastic time-saver)? Either way, understanding the fabric itself is paramount. And if you're going raw, don't forget the initial sizing – a crucial step often overlooked, but one that truly protects your canvas from the elements (and the acids in your oil paints!). The decision between raw and pre-primed is a deeply personal one, weighing convenience against ultimate control. For large-scale works or experimental pieces, I often lean towards raw, as it allows me to dictate every aspect of the surface from the ground up.
- Cotton Duck: This is the workhorse of the art world, especially for acrylic and oil painters. It's affordable, has a good amount of give, and is relatively easy to stretch, making it ideal for beginners. "Duck" refers to its tightly woven, plain-weave construction. Cotton canvas is measured in ounces (oz) or grams per square meter (gsm); a heavier weight (e.g., 10-12 oz) generally indicates a more robust and stable fabric. When using cotton duck, especially raw, consider that it benefits immensely from proper sizing and gesso application to prevent paint absorption and ensure archival quality. It's like preparing a good meal – the initial steps determine the final flavor.
- Linen: The connoisseur's choice, linen is made from flax fibers and is renowned for its strength, durability, and fine, irregular weave. It's less elastic than cotton, which makes it harder to stretch but results in a superior, more stable, and archival surface. Linen also ages beautifully, with a subtle texture that many artists adore. It's also significantly more expensive. Despite the challenge in stretching, the reward of working on such a robust and historically significant surface is immeasurable. For oil painters, in particular, the inherent properties of linen create a truly sympathetic ground for their medium.
- Synthetic/Poly-cotton Blends: These blends offer some of the best qualities of both natural and synthetic fibers. They can be very stable, resistant to environmental changes, and often have a more uniform weave, which is great for consistency. They're a fantastic, often more affordable option if you're looking for durability without the traditional 'imperfections' of natural fibers. For artists exploring contemporary or mixed media techniques, these blends can offer a consistent, resilient surface that stands up to diverse applications, and let's be honest, sometimes uniformity is exactly what you need to let your artistic chaos unfold.
Canvas Fabric Comparison: Choosing Your Surface
Fabric Type | Fiber Source | Characteristics | Pros | Cons | Best For | |
|---|---|---|---|---|---|---|
| Cotton Duck | Cotton Plant | Versatile, elastic, absorbent. Tightly woven, plain-weave. | Affordable, widely available, easy to stretch, good "tooth" for paint adhesion, comes in various weights (e.g., 7-15 oz). | Can be more susceptible to environmental changes (humidity). Less stable and archival than linen over very long periods. | Beginners, acrylic and oil painting, general practice, studies, vibrant and expressive work. | |
| Linen | Flax Plant | Strong, durable, stable, fine to medium irregular weave. Natural oils offer protection. | Superior strength and durability, excellent archival quality, resistant to sagging and environmental changes. Beautiful subtle texture. | Significantly more expensive, less elastic (harder to stretch), can be more challenging to find. | Professional artists, large-scale works, archival pieces, detailed painting, works destined for galleries/museums. | |
| Synthetic/Poly-cotton Blends | Polyester, Cotton | Combines natural and synthetic fibers. Often very stable and uniform. | Very stable, resistant to environmental changes, uniform weave (great for consistency), often more affordable than pure linen. | Can lack the "natural feel" of pure cotton or linen. May not be preferred by traditionalists. | Artists seeking consistency and durability, less traditional mediums, digital art integration, large production runs. | |
| Jute/Hemp Canvas | Jute/Hemp Plant | Coarse, strong, very rustic texture, durable, eco-friendly. | Environmentally sustainable, very strong, distinctive natural texture (adds character), unique aesthetic. | Very coarse texture (might not suit fine detail), less common, can be more challenging to prime and stretch smoothly. | Abstract, expressive, mixed media, experimental works, artists valuing natural, rustic aesthetic. | * Weave and Texture: The weave refers to the pattern in which the threads are interlaced, and this profoundly impacts the texture (or "tooth") of your canvas. Canvas comes in various weaves and textures, from very smooth (fine-grain, often a tight plain weave) to quite coarse (rough-grain, often a more open plain or twill weave). Your choice here is a deeply personal one, depending on your chosen medium, desired effect, and even your painting style. It's about finding that perfect partner for your paint, whether you're building up thick impasto or laying down delicate glazes. Knowing your weave is knowing your canvas. To give you a clearer picture, here's a quick rundown of common canvas textures and their ideal applications: |
Texture Type | Characteristics | Pros | Cons | Ideal For |
|---|---|---|---|---|
| Fine-Grain | Very smooth, tight weave, minimal visible texture. | Ideal for high detail, realism, smooth blends, thin washes. | Less "tooth" for thick paint, can feel slick. | Detailed portraits, realism, glazing, fine line work, hyperrealism. |
| Medium-Grain | Balanced texture, slight visible weave, versatile. | Most versatile, good "tooth" for various mediums, forgiving. | May not be ideal for extreme detail or very heavy impasto. | General acrylic and oil painting, landscapes, figure painting, abstract work. |
| Coarse-Grain | Pronounced texture, open weave, highly visible. | Excellent for impasto, expressive brushwork, textural effects. | Texture can interfere with fine detail, consumes more paint. | Abstract expressionism, mixed media, thick impasto, experimental techniques. |
| Understanding these nuances allows you to select a canvas that truly complements your artistic intentions, rather than fighting against them. |
Before You Begin: Gathering Your Arsenal
You don't need a massive workshop, but having the right tools makes the difference between a frustrating afternoon and a genuinely satisfying one. Think of this as your canvas-stretching toolkit.
Tool | What to Look For | My Two Cents |
|---|---|---|
| Stretcher Bars | Kiln-dried, straight wood with precision-cut joints and a raised outer edge. Consider types like finger-jointed pine or more stable hardwoods. | This is literally the skeleton of your art. Skimp here, and you'll regret it later. I've learned the hard way that warped bars lead to a warped painting, and nobody wants that. Always look for those integrated keys – they're your future self's best friend for re-tensioning. Seriously, learn all about stretcher bars. |
| Canvas | Cotton (versatile, affordable, various weights like 10-12oz) or Linen (strong, archival, less elastic). Consider weave (fine, medium, coarse) and primed vs. unprimed. | This is your actual playing field, the stage for your vision. My personal preference often leans towards unprimed canvas – it gives me total artistic freedom over the gesso application, which is crucial for my abstract work. But hey, pre-primed is an absolute lifesaver when you're short on time. |
| Canvas Pliers | Ergonomic, wide-jawed (3-4 inches wide is ideal) with a padded or rubberized grip to protect the canvas and your hands. Spring-loaded mechanisms can also be a plus. | Don't even think about doing this without them. Seriously, I'm a snob about this, and for good reason! Your fingers, no matter how strong, simply cannot replicate the even, powerful tension these tools provide. They're the secret sauce for that perfectly taut, drum-like surface, and trust me, your hands will thank you after the first canvas. I once tried to muscle through a small canvas without them, and my hands cramped up for days – never again! There are various types: some with a hammerhead for tapping staples, others with specialized grips. Find what feels right in your hand, because you'll be spending a lot of quality time together. |
| Staple Gun | A heavy-duty manual, electric, or even pneumatic staple gun (for frequent stretchers). Choose one with sufficient power to sink staples fully. | Your flimsy office stapler is going to be a guaranteed heartbreak. This is where you need some muscle! Invest in a proper, heavy-duty staple gun and get corrosion-resistant 8mm to 12mm (3/8" to 1/2") staples. The last thing you want are rusty staples ruining your masterpiece or creating tiny bumps. For occasional stretching, a good manual gun will suffice, but if you're planning on doing a lot of large canvases, an electric or even pneumatic gun is an absolute game-changer for speed and consistency. My rule of thumb: buy the best one you can afford – your future self will thank you. |
| Staple Remover | A dedicated staple remover tool, ideally with a thin, flat prying end. | This unsung hero is invaluable for troubleshooting! When you inevitably place a staple slightly off-kilter or need to re-tension an area, trying to pry staples out with a screwdriver is a recipe for damaged canvas and frustration. Get a proper tool; it saves so much heartache. |
| Sizing Agent | For raw canvas, a high-quality acrylic medium (like GAC 100) or traditional rabbit skin glue. | If you're going raw, don't skip this! Sizing is the invisible shield for your canvas, preventing paint acids from rotting the fabric and ensuring even absorption. It's often overlooked, but it's a non-negotiable step for archival quality, especially for oil painters. For me, it's about respecting the materials and giving my art the best possible chance to endure. Rabbit skin glue is traditional but a bit of a process (and smell!), while modern acrylic mediums like GAC 100 are much easier to work with and equally effective. Learn more about what are painting mediums to choose the right one for you. |
| Gesso & Brush | A high-quality acrylic gesso (or oil-priming if working with oils). For brushes, a wide, flat house-painting style brush or a gesso roller for smooth, even coats. | Gesso is not just paint; it's the guardian of your canvas, sealing, protecting, and providing that essential 'tooth' for your paint to grab onto. Never rush this step! Experiment with clear or colored gesso for different effects. You'll find gesso in various consistencies – fluid for smooth layers, or heavier-bodied for texture. Don't be afraid to experiment to find what works for you! For brush choices, my guide on how to apply gesso covers it all, and if you want to get serious about your brush game, check out the best brushes for acrylic painting or best brushes for oil painting. For a deeper dive, check out what is gesso in painting and reviews of the best gesso for canvas preparation. |
| Utility Tools | Measuring tape, T-square or set square, sharp scissors or utility knife, pencil. Consider corner clamps for larger frames. | These are the unsung heroes of precision. I've wasted too much time trying to eyeball 'square' – don't be me. These ensure your frame is perfectly square, your canvas centered, and your cuts so clean they'd make a surgeon proud. For larger frames, I've found that corner clamps can be an absolute godsend, preventing frustrating wobbles. A good measuring tape ensures accurate cuts, a T-square is non-negotiable for true right angles, and a sharp utility knife makes for clean edges that won't fray. |
The Main Event: Stretching Your Canvas, Step-by-Step
Alright, take a deep breath. This is the fun part, where the raw materials start taking on purpose, transforming from inert components into the vibrant stage for your art. Before we get hands-on, let's talk briefly about your workspace, because setting the right stage is half the battle.
Workspace Preparation: Setting the Stage
A clean, flat, and spacious work surface is absolutely non-negotiable. I usually clear a spot on my studio floor – and I mean scrub it – making sure it’s free of any dust, stray hairs, or debris that could transfer to the canvas. Believe me, I once found a perfectly preserved cat hair (mine, thankfully, not a client's!) firmly stapled into the back of a canvas after a rushed stretching session. Lesson learned: cleanliness is next to godliness in the studio! Good, even lighting is also crucial; you need to be able to spot any subtle ripples or inconsistencies as you work. Beyond that, consider the ambient humidity and temperature of your workspace. Extreme dryness or dampness can affect the canvas's tension during stretching, so a relatively stable environment is always best. Ideally, you want a room with a consistent temperature between 68-72°F (20-22°C) and a relative humidity of 45-55%. Fluctuations here can cause your canvas to expand and contract, potentially leading to sagging later, undermining all your hard work. Think of it as creating a calm, controlled environment that respects the natural properties of your materials. Put on some music you love, minimize distractions, and let's build a canvas – it's a meditative process, so lean into it!
Step 1: Assemble the Frame
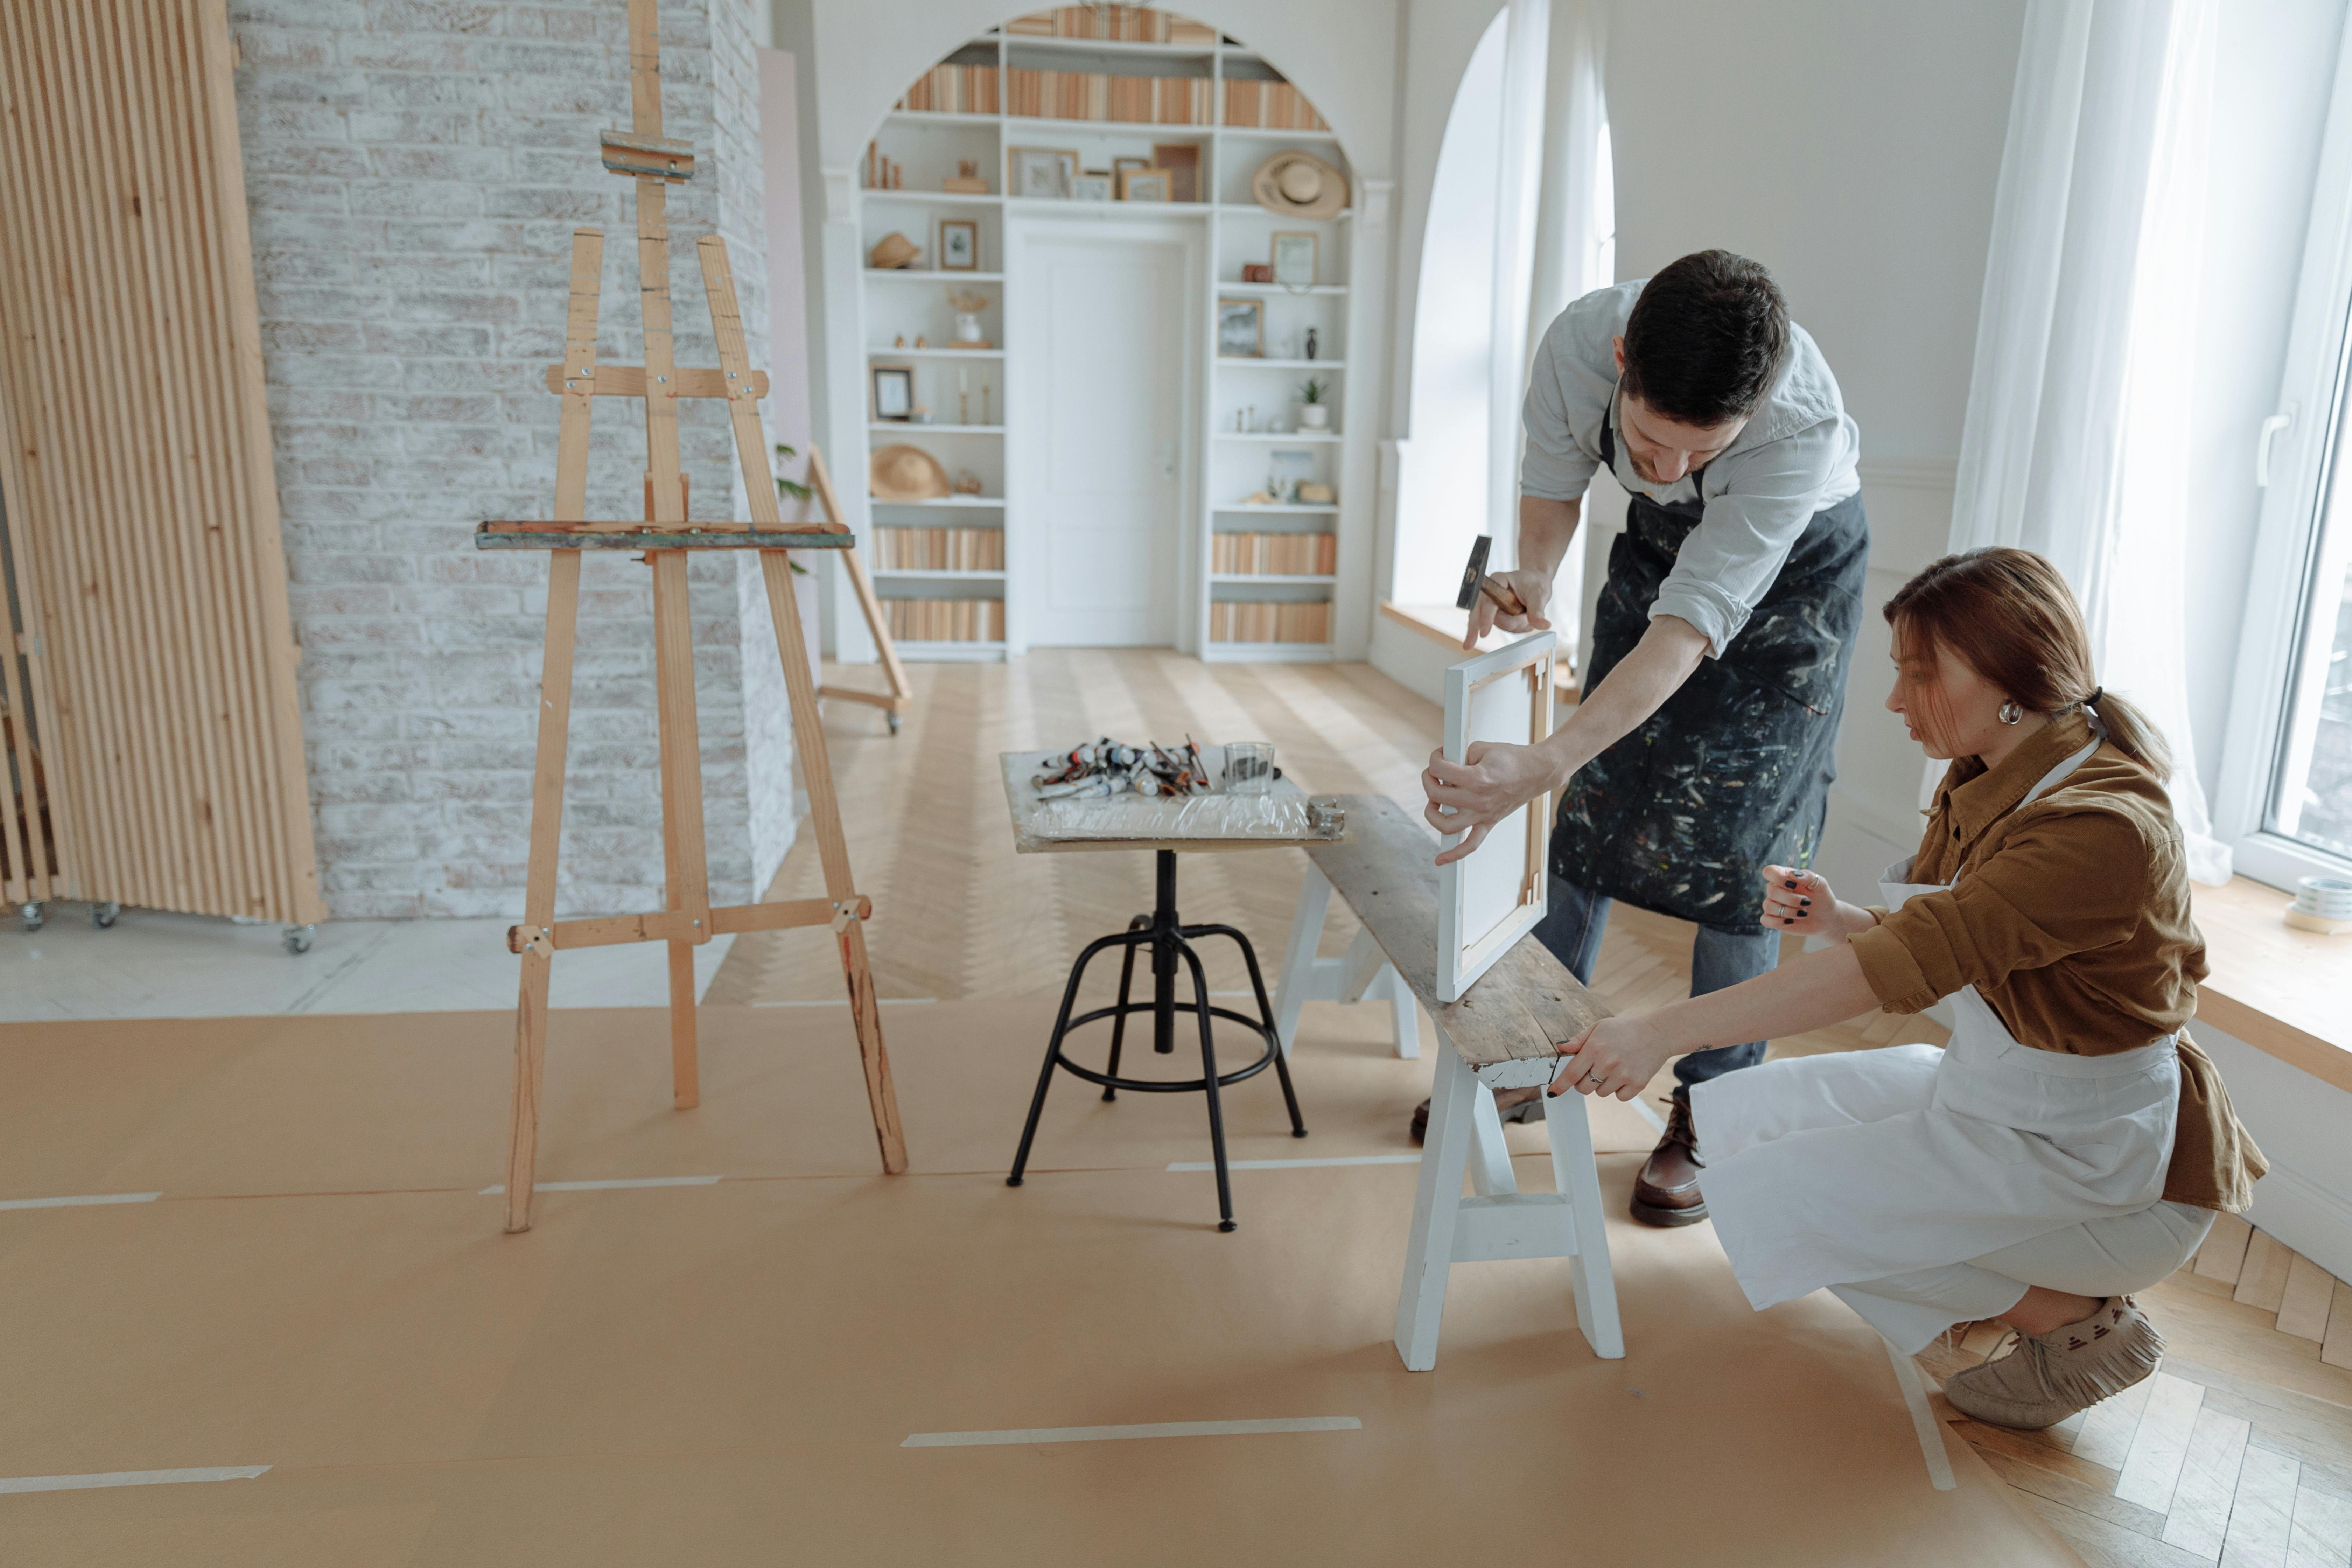
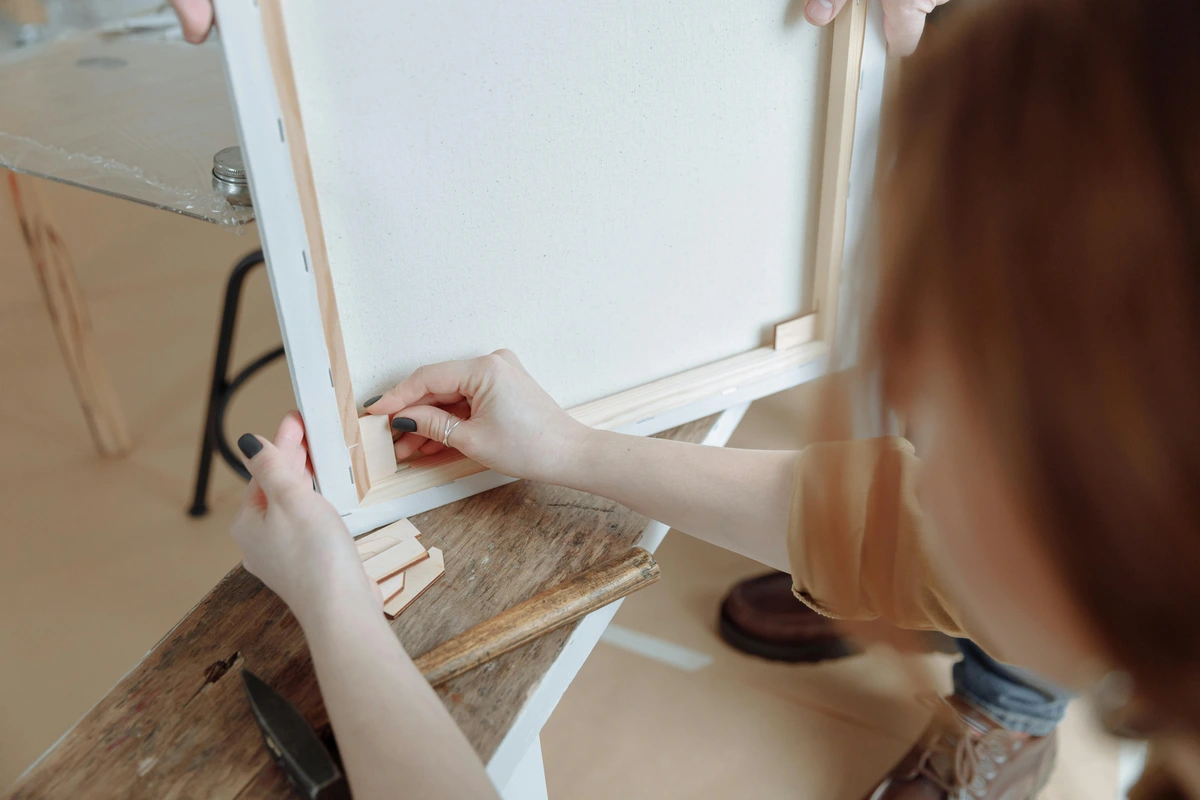
This step is usually straightforward, feeling a bit like adult LEGOs. The pre-cut corners of your stretcher bars are designed to slot into each other. Push them together firmly, ensuring the joints are flush and tight – a satisfying click is what you're after. A rubber mallet can be incredibly useful here for gentle persuasion, making sure the pieces are fully seated without damaging the wood. For larger frames, I sometimes use a couple of corner clamps to hold everything snugly while I check the squareness – they are an absolute lifesaver for maintaining rigidity during assembly.
Once assembled, immediately use your T-square or set square to meticulously check that all four corners are perfect 90-degree angles. This is critical, my friend. Even a slight deviation now will cause headaches later, resulting in a distorted painting surface that will haunt your dreams. If a corner is slightly off, don't panic; gently tap the frame on a hard, flat surface (like your clean floor) to nudge it into place. Sometimes, a stubborn joint might need a bit more persuasion with the rubber mallet, but always apply gentle, even pressure. If you're working with very large bars, sometimes clamping diagonally across the corners can help pull them into true square. Repeat this process until your frame is perfectly square, a perfectly aligned skeleton. This is also the time to lightly insert your stretcher keys (if provided) into the corner slots, but don't drive them in tightly yet – they're just resting there for now, like little placeholders, ready for their final job. Remember, a truly square and flat frame is non-negotiable; it's the bedrock of your masterpiece. I've learned that a few extra minutes spent here saves hours of frustration later, so resist the urge to rush this foundational step.
Step 2: Lay Out Your Canvas
Now, lay your canvas out on your clean floor or work surface. If you're using a primed canvas, the primed-side should face down. If it's unprimed, either side is fine. Take a moment to inspect the canvas for any significant wrinkles or creases. If it's particularly stubborn from being folded, you can give it a quick, dry pass with a warm iron (no steam, as moisture can cause shrinkage!).
Next, carefully place your assembled stretcher frame on top of the canvas. This is where your measuring tools come in handy. You want to ensure there’s a consistent overlap – typically at least 2-3 inches (5-7 cm) of excess canvas on all four sides. This extra fabric is crucial for you to grip with your pliers and for the staples to securely attach to the back of the stretcher bars. For larger canvases, pay attention to the grain direction of the canvas; ideally, the tighter warp threads should run parallel to the longer sides of your stretcher bars for maximum stability, as these threads have less stretch. A good trick for centering is to measure diagonally from corner to corner on the canvas to find its true center, then align your frame's center with it, or simply use your tape measure to ensure equal overhang on all sides. This meticulous centering now saves you from an off-kilter painting later. Misaligning the grain can lead to an uneven stretch, where one side might sag while the other remains taut – a subtle but frustrating flaw.
Common Canvas Grain Issues
Understanding canvas grain is crucial, especially when working with raw or larger pieces.
Issue | Description | Impact on Stretching | Solution/Prevention |
|---|---|---|---|
| Warp vs. Weft | Canvas has two sets of threads: Warp (lengthwise, tighter) and Weft (crosswise, more elastic). | Stretching against the warp can lead to uneven tension or sagging along one dimension. | Identify warp (often runs parallel to selvage edge) and align it with the longer side of your stretcher bars. |
| Off-Grain Weave | Threads are not perfectly perpendicular, creating a subtle diagonal distortion. | Can result in a frame that is perfectly square but a canvas that appears distorted or "off". | Difficult to correct. Prevention is key: purchase quality canvas from reputable suppliers. |
| Slubs/Imperfections | Random thick spots or knots in the weave. | Can create bumps or uneven areas on the painting surface, or resist even stretching. | Inspect canvas before cutting. Position imperfections where they will be covered by stretcher bars if possible. |
What if my canvas has a stubborn crease?
If your canvas has been folded or rolled tightly for a while, you might find some stubborn creases. A quick, dry pass with a warm iron (no steam, as moisture can cause unwanted shrinkage!) can work wonders. Lay the canvas face down on a clean, flat surface, place a clean cloth over the creased area, and iron gently. For very deep creases, some artists lightly mist the back of the canvas with water and let it dry naturally, pulling taut, but be very cautious with this, especially if the canvas is already primed, as it can affect the surface.
Step 3: The First Four Staples – Establishing Initial Tension
This is the moment of truth, the foundational step that sets the stage for the entire stretch. Think of it like tuning a drum: you're going to place just one staple in the precise center of each stretcher bar, always working systematically on opposite sides to distribute the tension evenly from the outset. This isn't a race; it's a careful dance, a foundational rhythm.
- Start with one of the longer sides of the frame. Gently pull the canvas taut with your hand – resist the urge to use the pliers just yet; we're just getting a basic, foundational hold. Sink a staple firmly into the exact middle of the back of that stretcher bar. Ensure it's fully seated and not protruding, creating a tiny anchor point.
- Immediately move to the opposite longer side. This is where your trusty canvas pliers become your absolute best friend. Grip the canvas firmly, pull it taut with a consistent, even pressure, and place a staple directly across from the first one. The goal here is a gentle, but noticeable, initial tension across the entire length. You're creating a subtle 'X' of tension.
- Repeat this exact process for the two shorter sides: one staple in the center of one short side, then move to the opposite short side, pull with pliers, and staple.
At this point, you should have four staples, one in the very center of each bar, creating a basic, diamond-like tension pattern across the canvas. This initial squaring and centering is paramount for a professional result – get this right, and the rest is much smoother sailing. This subtle 'X' of tension across the canvas is what sets the fundamental stability, and it will guide all your subsequent stapling, ensuring an evenly stretched surface. Don't underestimate the importance of these first four anchors; they are the true foundation! If you feel any immediate slack after these first four staples, don't hesitate to remove one or two and re-tension; it's far easier to correct now than later. A truly successful stretch is built on these early, precise decisions.
Step 4: The Stretching Sequence – Filling the Gaps with Precision
Now we begin to fill in the remaining gaps, systematically working our way towards a uniformly taut surface. The absolute key here is to always work from the center outwards and always alternate sides as you staple. This methodical approach is your best defense against ripples, waves, and uneven tension.
- Return to your initial starting side. Place a staple about 1.5 to 2 inches (3-5 cm) to the right of your center staple. Use your canvas pliers, pull firmly and consistently, and sink the staple.
- Immediately move to the opposite side. Place a staple 1.5 to 2 inches (3-5 cm) to the right of its center staple, pulling taut with the pliers with the same pressure you just used.
- Go back to the first side and place a staple 1.5 to 2 inches (3-5 cm) to the left of the center staple.
- Then, to the opposite side and do the same.
You're essentially "walking" the tension out from the center, like carefully lacing up a boot. Continue this pattern—center-out, alternating sides—until you have staples running along the entire length of each bar. Maintain a consistent spacing of 1.5 to 2 inches (3-5 cm) between staples. As you work, periodically flip the canvas over and gently tap the surface to feel the tension – it should be consistent across the entire area. You're listening for that subtle thump – a sign of evenness, not a high-pitched drum-tight ping just yet. Advanced Tip for Large Canvases: For very large canvases where a helper isn't available, I sometimes use clamps (like spring clamps or even woodworking clamps with padded jaws) along the edges where I've already stapled. This helps maintain the tension as I move to the next side, preventing slack from creeping back in. It's like having an extra pair of hands, and it can be a real game-changer. Important: Stop stapling approximately 3 inches (7-8 cm) from each corner. We're deliberately leaving the corners free for a special finishing technique.
What about very large or irregularly shaped canvases?
Stretching a massive canvas (or one with an unusual shape) introduces a few extra considerations. For very large rectangular canvases, as mentioned, cross braces are your best friends for stability. The stapling sequence remains the same (center-out, alternating sides), but the scale magnifies any inconsistencies, so take your time. You might even want to enlist a second pair of hands to help maintain even tension across vast surfaces. For irregularly shaped canvases, the principles are similar: establish central anchor points, then work outwards symmetrically. The challenge comes in adapting the corner folds and ensuring smooth curves, which often requires more trimming and precise staple placement. It's an advanced technique, but immensely rewarding!
Step 5: Taming the Corners – The Gallery Wrap and Beyond
This is often the part that new stretchers dread, and I get it – it looks intimidating! But I promise, it's really quite simple once you've done it a couple of times. The goal is a neat, flat, and unobtrusive fold that will look professional whether framed or left unframed. The most popular method, and my personal go-to for a clean, contemporary look, is the gallery wrap corner.
Gallery Wrap Corner: The Modern Aesthetic
This style is clean and allows the canvas to wrap around the side of the stretcher bar, ideal for modern, frameless presentation where your art continues seamlessly around the edges.
- Turn the canvas so you're looking at a corner, and you'll see a triangular flap of excess canvas sticking out – don't be intimidated by it!
- First, visualize the very tip of that triangle. You're going to pull it straight towards the center of the canvas, along the corner's diagonal line. Tuck it in tightly, aiming to create a sharp, clean point right at the very corner of the stretcher bar. A single, well-placed staple here can temporarily hold it, but often the subsequent folds secure it.
- Now, take one of the canvas flaps (let's say the top side) and fold it neatly and tightly over the corner. It should create a crisp, 45-degree angled edge running precisely from that corner point down the side of the stretcher bar. Smooth it down firmly.
- Hold it down with one hand and use your staple gun to put two or three staples in to secure it to the back of the stretcher bar. Make sure they're flush!
- Repeat this for the other adjacent flap, pulling it equally tightly over the first fold and stapling it down. The absolute key here is consistency: always fold the same side first (e.g., always the vertical flap over the horizontal, or vice versa) for all four corners. This ensures uniformity and a truly professional finish. Practice makes perfect here!
Common Corner Issues & Quick Fixes
Even with the best intentions, corners can be tricky. Here's a quick rundown of what can go wrong and how to address it:
Problem | Cause | Solution |
|---|---|---|
| Bulky/Uneven Corner | Inconsistent folding, too much canvas tucked. | Carefully remove staples, re-fold, ensuring tight tucks and consistent overlaps. Trim excess if needed. |
| Wrinkles at the Corner | Canvas not pulled taut enough before folding. | Remove staples around the corner, re-tension outwards from the corner, then re-fold and staple. |
| Tears at the Corner | Over-tensioning, sharp stretcher bar edge, old canvas. | Unfortunately, a tear often means starting over with a new canvas. Prevention is key! |
| Staples Showing on Side | Incorrect staple placement, shallow stretcher bar. | Ensure staples are on the back of the bar. Use deeper "gallery profile" bars for frameless display. |
Museum Wrap Corner (Alternative)
A less common but equally valid option, often preferred if you plan to frame the canvas, as it creates a very flat profile.
- Instead of pulling the very tip to the center, you simply fold one side flap over, then the other, creating a flatter, more layered corner. It might look a little bulkier from the side but is excellent for perfectly flat edges needed for framing.
- The essential rule remains: practice makes perfect, and consistency across all four corners is paramount.
When to Trim Excess Canvas
After you've successfully folded and stapled your corners, you might find you have quite a bit of excess canvas flapping around on the back. While some artists leave it – often tucking it under existing staples – I personally prefer to trim it down. It creates a cleaner, more professional finish, prevents potential bulging under the canvas if it's ever re-stretched, and makes it significantly easier to install hanging hardware later without interference. Using a sharp utility knife or heavy-duty scissors, carefully trim the excess fabric, leaving about a half-inch (1-2 cm) margin beyond your staples. This margin is crucial: be careful not to cut too close to the staples or the fold, as this could compromise the tension or cause fraying that might unravel the canvas over time. A clean, crisp edge on the back of your canvas is a sign of true professionalism. It's the kind of detail that speaks volumes about your dedication to the craft.

Step 6: The Final Check – Perfection is Achievable
Flip your newly stretched canvas over and take a moment to admire your work. This is the moment of truth, where all your careful effort comes together!
- Tension Test: Give the center of the canvas a light tap with your finger. It should feel uniformly taut and make a satisfying little thump, like a small drum. There shouldn't be any noticeable slack or soft spots. I often listen for a slightly higher pitched ping as I tap closer to the edges, indicating that even tension is being maintained right to the frame. The sound should be consistent across the entire surface.
- Visual Inspection: Look closely for any ripples, waves, or sagging, especially around the edges and corners. Also, place the canvas on a flat surface and check for any twist or warp in the stretcher bars themselves – sometimes vigorous stretching can subtly pull the frame out of square if not initially perfectly aligned. Pay attention to how the light hits the surface; any imperfections will be highlighted.
- Troubleshooting Minor Issues: If you do see any loose spots or ripples, don't panic. This is normal, especially when you're starting out. You can use a flat-head screwdriver or a staple remover to carefully pry out a few staples in that specific area, re-stretch more evenly, and then re-staple. It's a bit like fine-tuning an instrument – sometimes a small adjustment makes all the difference.
- Stretcher Keys: Now is the time to finalize the tension with those wooden stretcher keys (if your bars came with them). These small wonders allow for subtle re-tensioning. Gently tap them into the corner slots with a hammer, going little by little on all four corners, until the canvas achieves optimal tension. The key (pun intended!) is to work incrementally and evenly around all four corners, rather than driving one key in fully. You're aiming for slight, uniform outward pressure. Be careful not to overtighten, which can bow the frame and cause permanent distortion – a subtle thump when tapped is usually enough. Remember, these keys are for minor adjustments, not major overhauls.
- Final Staples: Once you're completely happy with the tension and appearance, you can add a few more staples along the length of each bar if you feel it needs extra security, ensuring consistent spacing. This is your last chance to reinforce your perfect stretch.
Congratulations! You've just transformed a flat piece of fabric into a professional-grade canvas, ready for your artistic vision. There's a profound sense of accomplishment in knowing you've built the very foundation of your masterpiece with your own hands.
Common Pitfalls & How to Dodge Them
We all make mistakes. I certainly have. Here are a few common traps and how to get out of them.
Problem | The Cause | The Solution |
|---|---|---|
| Ripples or Waves | Uneven tension. You likely pulled too hard in one area or didn't alternate sides consistently. | Remove the staples around the rippled area and re-stretch, making sure to pull evenly. |
| Warped Frame | Stretching one entire side before moving to the opposite. The frame has been pulled out of square. | This is tough to fix. Prevention is key! Always, always alternate sides to distribute the tension. |
| Staples Showing on the Side | The profile of your stretcher bars is too thin, or you stapled on the side instead of the back. | Always use gallery-profile bars (at least 1.5" deep) and staple on the back. This allows for frameless hanging. |
| Canvas Sagging Over Time | Changes in humidity or temperature, or very heavy paint application, can cause the canvas to slacken. | If your stretcher bars came with wooden keys, gently tap them into the corner slots to re-tension. For minor slack, a light mist of water on the back of raw canvas can cause it to tighten as it dries (use caution with painted surfaces!). |
| Bulky or Unsightly Corners | Inconsistent folding technique, or not trimming excess canvas effectively before folding. | Practice different corner wrap methods (gallery vs. museum). Ensure you trim excess fabric intelligently before the final folds, and be consistent with which flap goes over which. |
| Uneven Corners | Applying more tension to one side of the canvas than the other at the corner, or inconsistent folding. | Ensure equal tension is applied to both sides of the canvas when folding the corner flaps. Maintain consistency in your folding method for all four corners. |
| Canvas Tears During Stretching | Applying too much force with pliers, or sharp edges on stretcher bars (rare, but possible). | Use consistent, firm but not excessive pressure. Inspect stretcher bar edges for splinters. Work slowly and methodically. Unfortunately, tears often mean starting with a new piece of canvas. |
| Staples Not Sinking Fully | Using an underpowered staple gun or incorrect staples for the wood density. | Upgrade your staple gun to a heavy-duty model. Ensure you're using the correct length and gauge of staples for your stretcher bars. Try tapping partially seated staples with a hammer. |
| Over-tightening | Pulling the canvas with excessive force, especially during the initial stages. | Release some staples and re-stretch with less force. Listen to the canvas – a strained sound means too much tension. Prevention is key here; don't try to muscle it into submission! |
| Canvas Not Accepting Gesso Evenly | Inadequate sizing (for raw canvas), surface contaminants, or applying gesso too thickly. | For raw canvas, ensure proper sizing (e.g., with rabbit skin glue or acrylic medium) before gesso. Clean the canvas surface thoroughly. Apply gesso in thin, multiple coats, sanding lightly between them. |
To Prime or Not to Prime? The Gesso Question
Alright, your canvas is stretched, drum-tight and perfect. What's next? If you opted for raw, unprimed canvas, your final preparation step (and a genuinely crucial one!) is applying gesso. But wait, before gesso, for raw canvas, I always recommend a step called sizing. This is typically done with a thin coat of rabbit skin glue (traditional, but a bit smelly!) or a modern acrylic medium. Sizing seals the canvas fibers, protecting them from the acids in oil paint that can eventually rot the fabric from within. For acrylics, it prevents excessive absorption, ensuring your vibrant colors sit true on the surface, giving you a beautiful, slightly absorbent "tooth" to work on.
Think of gesso as the ideal intermediary between your raw canvas (or sized canvas) and your paint. It creates a stable, uniform surface that enhances paint adhesion, vibrancy, and crucially, archival quality. Gesso, typically an acrylic polymer emulsion mixed with calcium carbonate and other pigments, prepares the surface by making it less absorbent and providing "tooth" for the paint. You can choose traditional white acrylic gesso, which is wonderfully versatile for both preparing a canvas for acrylic painting and serving as an excellent base if you're preparing a canvas for oil painting. Beyond classic white, there are clear gessos (preserving the raw canvas look – a personal favorite for some of my abstract works), tinted gessos (for a colored ground, which can profoundly impact your painting's mood and often reduces the number of initial paint layers needed), and even specialized oil-priming gessos for oil painters who prefer a specific absorbency and feel. Exploring different gesso types and their applications is a fascinating rabbit hole! For an even deeper understanding of how mediums interact, consider what are painting mediums and what is gesso in painting.
Gesso Types: A Quick Guide to Your Priming Options
Choosing the right gesso can dramatically impact your painting experience. Here’s a brief overview of the common types:
Gesso Type | Characteristics | Pros | Cons | Ideal For |
|---|---|---|---|---|
| Acrylic Gesso | Most common, water-based, fast-drying, flexible. | Versatile for acrylics and oils, good adhesion, various consistencies. | Can be too absorbent for some oil painting techniques without proper layering. | Beginners, acrylic painters, general canvas preparation, experimentation. |
| Clear Gesso | Translucent or clear, allows canvas texture/color to show. | Preserves the natural look of raw canvas, subtle ground for glazes. | Less opacity, may require more paint layers for full coverage. | Artists wanting natural canvas texture, abstract work, subtle backgrounds. |
| Tinted Gesso | Colored gesso (e.g., grey, black, sepia). | Provides a colored ground, influences mood, can reduce painting time. | Requires careful color selection to avoid clashing with painting palette. | Creating specific atmospheres, tonal studies, historical painting techniques. |
| Oil-Priming Gesso | Oil-based, specifically formulated for oil paints. | Offers ideal absorbency and tooth for oils, traditional feel. | Requires longer drying times, not suitable for acrylics. | Traditional oil painters, artists valuing specific oil painting properties. |
FAQ - Your Burning Questions Answered
After running countless workshops, I know the questions that pop up most frequently about canvas stretching. Here are some of the common concerns and queries, answered directly and (hopefully) definitively.
Can I re-stretch an old painting?
Yes, absolutely! It's a fantastic way to breathe new life into a sagging canvas or even transfer a painting to a new frame. You'll need to carefully remove all the staples from the back (a staple remover tool is invaluable here), take the painting off the old frame, and then re-stretch it following the same steps outlined above. However, exercise extreme caution with the painted surface, especially if the paint layer is old, thick, or brittle, as it can crack. Work slowly, and consider having a second pair of hands for larger or more delicate pieces. This is also a good opportunity to clean the back of the canvas if it's accumulated dust. I've found that a gentle, even heat (like from a hairdryer on a low setting, held at a distance) can sometimes make an old, brittle paint layer slightly more pliable for re-stretching, but this is a very advanced technique and comes with significant risk.
How tight is too tight?
This is a subtle balance, but a crucial one. If you're pulling so hard that the wooden frame itself is visibly starting to bow or twist, or if you hear the canvas threads straining or snapping, you've definitely gone too far. Over-tensioning can lead to split canvas, bowed stretcher bars (which are very difficult to correct), or even damage to the paint layer over time. The canvas should feel taut and resonate with a drum-like thump when tapped, but it shouldn't feel like it's under extreme, unyielding stress. Remember, the canvas will naturally tighten a bit more once you apply gesso and especially as paint layers dry, so a little give initially isn't necessarily a bad thing. Trust your tactile feel – it should feel firm and responsive, not rigid and strained. I once tried to get a canvas so tight it felt like a table top, only to find the frame bowing slightly a week later. Lesson learned: gentle persuasion, not brute force, is the artist's way.

What's the real difference between cotton and linen canvas?
Ah, the age-old debate! The fundamental difference lies in their fibers and inherent characteristics. Cotton is derived from the cotton plant, is generally more affordable, and has a good amount of natural elasticity, making it quite forgiving for beginners to stretch. It offers a consistent, often coarser texture depending on the weave and weight. Its main drawback is that it can be more susceptible to environmental changes (humidity fluctuations can cause it to loosen) and is considered less archival over very long periods compared to linen. Historically, cotton gained popularity in the art world as a more accessible alternative to linen, democratizing the act of painting.
Linen, on the other hand, is woven from flax fibers and is truly the gold standard for professional and archival artwork. It's significantly stronger, more durable, and resistant to degradation over centuries. Its fibers are longer and more uniform, resulting in a tighter, more stable weave that resists stretching and sagging due to humidity. Linen's natural oils also help to protect it from deterioration. It has a beautiful, often irregular, fine-to-medium texture that many artists adore. However, it's considerably more expensive and its lower elasticity makes it a bit more challenging to stretch initially. For serious collectors and artists focused on longevity, linen is almost always the preferred choice. For centuries, master painters have favored linen, recognizing its unparalleled archival qualities and the subtle elegance it brings to a finished piece.
What is a keyed canvas and how do I use the keys?
Many high-quality stretcher bars come with small, wedge-shaped pieces of wood called "keys." These are designed to be gently tapped into the slots at the inner corners of your assembled stretcher frame. Their purpose is to slightly expand the frame outwards, effectively re-tensioning a canvas that has sagged over time due to humidity changes or the weight of paint. To use them, wait until your painting is completely finished and dry. Then, gently tap all four keys in a little bit at a time, alternating corners, until the canvas achieves the desired tightness. Don't hammer them in all at once, as this can distort the frame. They are a fantastic tool for maintaining the drum-tight surface of your artwork for years to come. Think of them as a fine-tuning mechanism for your canvas, allowing you to react to the natural ebb and flow of its environment.
What if my canvas sags after painting, and I don't have keys?
This is a common headache! If your canvas sags after painting and your stretcher bars don't have keys, you still have a few options. For minor slack, especially on raw or thinly primed canvases, you can very lightly mist the back of the canvas with distilled water. As the water evaporates, the canvas fibers will contract and tighten. Be extremely cautious with this method, especially with oil paintings or heavily textured acrylics, as too much moisture can affect the paint layer. Always test on an inconspicuous area first. For more significant sagging, you might need to carefully remove staples from the back, re-stretch the affected area with pliers, and re-staple. This is a more involved process, but often necessary to restore proper tension. For truly valuable pieces, or if you're uncomfortable with these methods, I'd always recommend consulting a professional art conservator; they have specialized tools and expertise for delicate re-stretching.
Do I really need canvas pliers?
Yes. I'm going to be a snob about this one. Could you stretch a canvas without them? Yes. Will it be as tight, even, and professional? No. They give you leverage and a wide grip that your fingers just can't replicate. It's like trying to chop wood with a butter knife – technically possible, but why would you? Or trying to paddle a canoe with your hands instead of an oar; it's possible, but far less efficient and effective.
Can I use household fabrics for stretching a canvas?
While you can theoretically stretch almost any sturdy fabric, I highly advise against using common household fabrics for serious artwork. Here's why:
- Composition and Longevity: Household fabrics (like bedsheets, denim, or drop cloths) are rarely 100% cotton, often containing synthetic blends, and are not designed for archival purposes. They will degrade, stretch unevenly, or react unpredictably to paint over time. Imagine painting a masterpiece on a bedsheet only for it to fall apart in a few years – heartbreaking, right?
- Sizing and Priming: They lack proper sizing and priming, meaning paint will absorb unevenly, colors will appear dull, and oil paint acids will directly attack the fibers. This can lead to a phenomenon known as "sink-in," where your vibrant colors lose their intensity as they are absorbed by the fabric.
- Stretch and Stability: Their weave is often inconsistent, leading to uneven tension, sagging, and a lack of long-term stability. You'll likely struggle to get a drum-tight surface, and it will be prone to slackening with changes in humidity. For practice, sure, experiment! But for any work you intend to keep or sell, invest in proper art canvas. It makes all the difference in the world for the artwork's integrity and longevity.
How do I choose the right staples for my staple gun?
Choosing the right staples is crucial for a secure and long-lasting stretch. Generally, you want 8mm to 12mm (3/8" to 1/2") corrosion-resistant galvanized steel staples. The length depends on the thickness of your stretcher bars; you want them long enough to securely grip the wood but not so long they poke through the front (that's a rookie mistake I've definitely made!). The gauge (thickness) of the staple also matters; heavier gauge staples (e.g., 20 gauge) offer more holding power but require a more robust staple gun. Always err on the side of slightly shorter rather than longer if you're unsure, and test on a scrap piece of wood first. Stainless steel staples are an even better archival choice if available, as they offer superior rust resistance. Avoid standard office staples at all costs – they will rust and eventually fail, leaving unsightly marks. If you're using a manual staple gun, a slightly thinner gauge might be easier to sink, while electric or pneumatic guns can handle heavier gauges with ease.
FAQ - Storage Solutions for Artists
Stretching your own canvas gives you a lot of control, but what about the canvas that isn't on a frame yet? Proper storage of both stretched and unstretched canvas is vital for its longevity.
How to store unstretched canvas (raw or rolled)?
Unstretched canvas, whether raw or prepared, needs careful storage to prevent damage.
- Roll, Don't Fold: Always roll your canvas onto a sturdy tube (art store cardboard tubes are perfect), never fold it. Folding creates permanent creases that are incredibly difficult, if not impossible, to remove. Trust me, I've learned this the hard way trying to salvage a folded piece.
- Face Out: Roll the canvas with the painted or primed side facing outwards. This reduces the risk of paint cracking, especially if the canvas has already been gessoed. If it's raw, either way is fine.
- Protective Layer: Place a layer of acid-free glassine paper between the rolled canvas and itself, particularly if it's painted. This prevents paint from sticking or transferring. Archival tissue paper can also work wonders.
- Cover and Store: Cover the rolled canvas with plastic sheeting or a canvas bag to protect it from dust, dirt, and moisture. Store it horizontally on a flat surface or in a dedicated art storage rack, away from extreme temperature or humidity fluctuations (ideally 68-72°F and 45-55% RH). Avoid standing rolls upright for long periods, as this can cause compression or warping. A dark, stable closet is often far better than a damp basement or hot attic.
How to store stretched canvas (blank or painted)?
Storing finished paintings or blank stretched canvases requires a different approach:
- Vertical Storage: Always store stretched canvases vertically, not stacked horizontally. Stacking can cause pressure damage, especially to textured paint layers. Think of it as protecting the delicate surface from any unnecessary pressure or friction.
- Spacers: Use spacers (foam core, cardboard, or specialty art spacers) between canvases to prevent them from touching. This protects surfaces from abrasion or paint transfer. Even a slight rub can damage a dry paint surface.
- Covering: Cover your canvases with breathable materials like old sheets or acid-free cardboard to protect from dust, but avoid airtight plastic for long-term storage, which can trap moisture and promote mold. Good airflow is essential.
- Stable Environment: Store in a stable environment, as detailed in the "Environmental Control" section. Avoid attics, basements, or garages where temperature and humidity swings are common. These fluctuating conditions are the enemy of canvas and paint alike, causing expansion, contraction, and ultimately, degradation.
Beyond Stretching: Display and Care for Your Canvas
Now that your canvas is perfectly stretched and ready for (or already bearing) your art, it's worth taking a moment to consider its long-term care and display. A well-stretched canvas isn't just a surface; it's a foundation that deserves proper attention to ensure its longevity. Think of it as protecting your legacy! I've seen too many beautiful pieces succumb to neglect, so let's make sure yours endures.
Framing or Not Framing?
One of the beauties of a gallery-wrapped canvas is its ability to be displayed unframed, with the painted image or clean canvas wrapping around the sides. This offers a modern, minimalist look that many contemporary artists (myself included) often prefer. If you choose to frame, selecting a frame that complements your artwork and protects the edges is paramount. The right frame can truly elevate your artwork, enhancing its presence and integrating it seamlessly into any space. If you're looking for inspiration, consider how to create a harmonious gallery wall to make your pieces sing together.
Choosing the Right Frame: A Guide to Presentation Styles
Frame Type | Description | Aesthetic | Best For |
|---|---|---|---|
| Floater Frames | Creates a subtle shadow line, making the artwork appear to "float" within the frame. | Modern, minimalist, sophisticated, unframed look. | Gallery-wrapped canvases, contemporary art, abstract pieces. |
| Traditional Frames | Classic styles with a visible border, often ornate or simple. | Formal, classical, protective, can be highly decorative. | Classical art, portraits, landscapes, works where a substantial border is desired. |
| Tray Frames | Similar to floater frames but with a more visible lip. | Contained elegance, contemporary with a subtle boundary. | Works that need a defined edge but retain a modern feel. |
| L-Bar Frames | Simple L-shaped profile, often used for a clean edge. | Understated, sleek, architectural, minimalist. | Modern and abstract pieces where the focus is solely on the artwork. |
| Shadow Box Frames | Deeper frames designed for dimensional artwork. | Creates depth, protects delicate surfaces. | Mixed media, collages, works with relief or objects on the surface. |
Art Insurance and Documentation
For valuable or professional works, especially those destined for exhibition or sale, proper documentation is as crucial as the physical care. This includes high-quality photographs, detailed records of materials used, dimensions, and creation date. Consider securing art insurance for significant pieces, protecting them against unforeseen damage or loss. This isn't just for established artists; even emerging artists should understand the importance of protecting their work. Think of it as another layer of security for your artistic legacy. Creating a comprehensive digital inventory of your artwork, including condition reports and purchase histories, is also an invaluable practice for both insurance and future sales.
Environmental Control
Canvas is a natural material, and like all natural materials, it reacts to its environment – it breathes, it expands, it contracts. Avoid displaying your artwork in direct sunlight (which is a notorious pigment-fader, trust me) or in areas with extreme temperature and humidity fluctuations (which can cause the canvas to expand and contract like a restless sleeper, leading to sagging or even cracking over time). A stable, consistent environment is absolutely key to preserving your masterpiece. Investing in UV-filtering glass for framed pieces or ensuring good air circulation can significantly extend the life of your artwork. Consider also art storage solutions for collectors for long-term protection.

Environmental Control Guidelines for Artwork
Factor | Ideal Conditions | Why it Matters |
|---|---|---|
| Temperature | 68-72°F (20-22°C) | Stable temperatures prevent material expansion/contraction, which can lead to cracking. |
| Relative Humidity | 45-55% | Crucial for preventing canvas sagging (too humid) or becoming brittle (too dry). |
| Light Exposure | Avoid direct sunlight; use UV-filtering glass/framing. | UV rays fade pigments over time, causing irreversible damage. |
| Air Quality | Clean, dust-free, good circulation. | Dust, pollutants, and stagnant air can degrade materials and promote mold growth. |
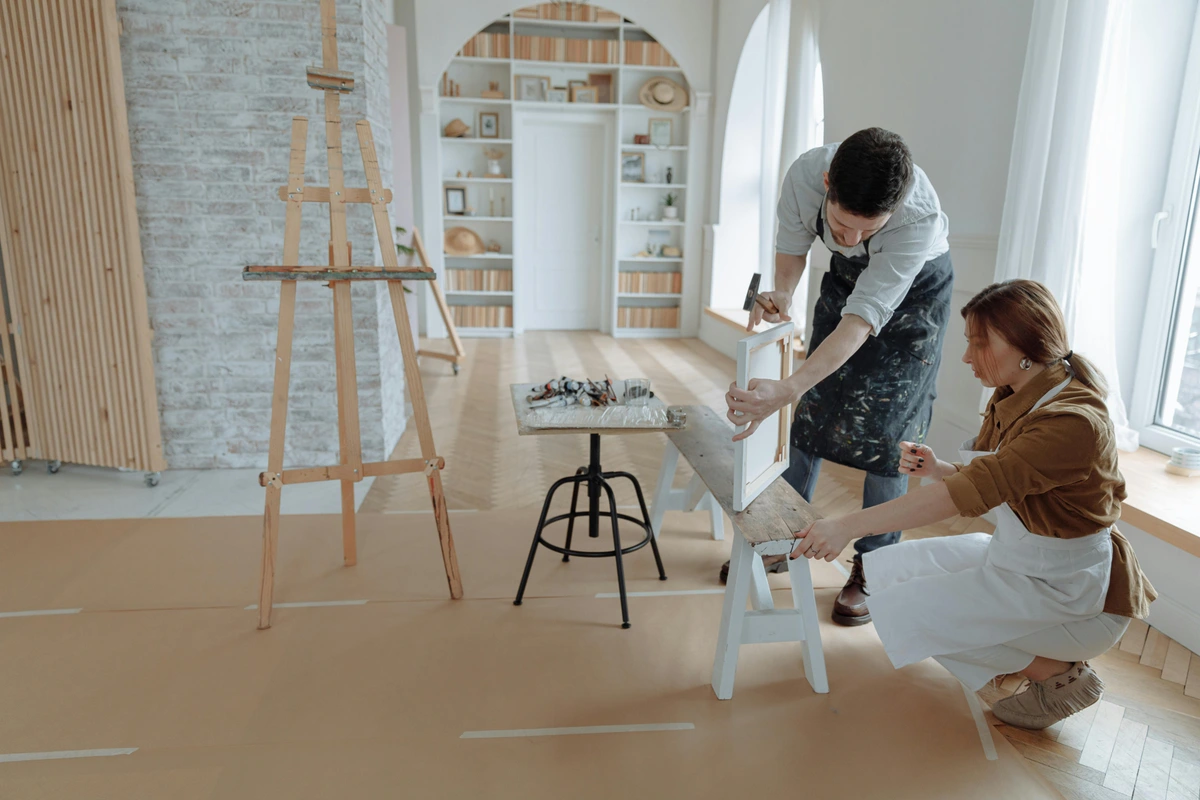
Conservation and Restoration: When to Call the Experts
While proper care goes a long way, sometimes canvases incur damage – a tear, a dent, or even just the effects of time. This is where conservation and restoration come into play. It's important to understand the subtle but significant difference between the two.
- Conservation focuses on preventing further deterioration, stabilizing the artwork, and addressing current issues without altering its original state. Think of it as preventative medicine for your art, ensuring its long-term health.
- Restoration aims to return the artwork to a previous state, often involving repairs or aesthetic improvements to integrate damaged areas. This is more akin to reconstructive surgery, carefully bringing back the original appearance. Always consult a professional art conservator for any significant damage to a valuable piece. They possess the specialized knowledge and tools to handle delicate artwork, ensuring its integrity and longevity. Trying DIY repairs on a cherished painting can, more often than not, cause irreversible damage. Trust me, it's worth the investment. Choosing a conservator often involves researching their specialization and reviewing their past work; you're entrusting them with a piece of your soul, after all.
Cleaning and Maintenance
For unpainted, gessoed canvas, a light dusting with a soft, clean cloth is usually sufficient. Once painted and varnished, cleaning generally involves a very gentle wipe with a soft, dry microfiber cloth. Harsh chemicals are a no-go! Always, always consult with a professional conservator for cleaning delicate or valuable artworks – they're the true heroes here. Regular, gentle dusting helps prevent build-up, which can become stubbornly embedded over time. The general rule of thumb: less is more when it comes to cleaning art.
- For Acrylic Paintings: Once dry and cured, acrylics are relatively robust. A soft, dry microfiber cloth is usually sufficient for dusting. For light surface grime, a very slightly damp cloth (distilled water only) can be used, but avoid rubbing aggressively. Ensure the cloth is barely damp to avoid introducing too much moisture.
- For Oil Paintings: Oils are more delicate, especially when unvarnished. Only use a soft, dry brush or microfiber cloth for dusting. Never use water or solvents on unvarnished oil paint! If you have an older oil painting that needs cleaning beyond dusting, a professional conservator is absolutely essential. Their expertise is invaluable for preserving the delicate chemistry of oil paint.
The Art of Varnishing: A Shield for Your Masterpiece
After all that effort, stretching, priming, and painting, the final step for many artists (myself included!) is varnishing. Think of varnish as a protective shield for your painting. It serves several crucial functions: it provides a uniform surface finish (satin, matte, or gloss), it can deepen and saturate colors, and most importantly, it offers a removable, protective layer against dust, dirt, UV radiation, and environmental pollutants. For oil painters, I highly recommend exploring how to varnish an oil painting to truly seal in your efforts. It's the final flourish, ensuring your hard work stands the test of time. The choice of finish (matte, satin, or gloss) is an artistic one, impacting how light interacts with your painting and affecting its overall presentation.
Conclusion: It's More Than Just a Surface
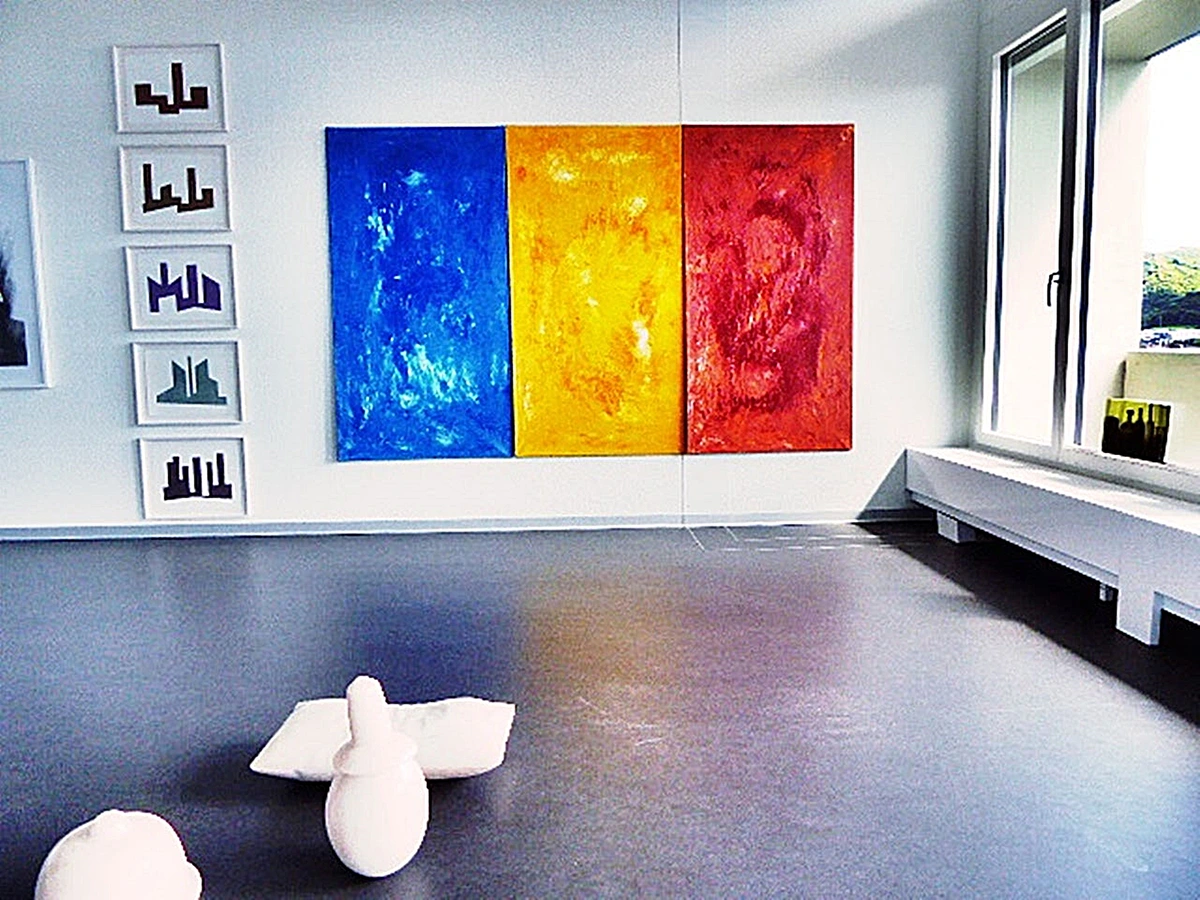
There you have it. You've taken raw materials—four humble pieces of wood and a sheet of fabric—and, through your own hands, turned them into a potential world. Stretching a canvas is more than just a task; it's a foundational ritual, a physical connection to your artwork before the first drop of paint is even squeezed from the tube. It’s a skill that puts you squarely in control, deepening your craft in ways you might not expect. The canvases for many of my own abstract pieces, those vibrant explosions of color and texture that you can view here, began their journey this exact way, right on my studio floor. There’s a profound, almost alchemical satisfaction in knowing that the very foundation of my art was crafted by my own hands, imbued with that initial energy. It's truly a labor of love that pays dividends in the final piece's integrity and your artistic satisfaction, a silent hum of accomplishment.
credit, licence
So, please, don't worry if your first few attempts aren't absolutely perfect. Mine certainly weren't – I had some truly floppy, embarrassing failures! Every staple you pull, every corner you fold, every slight adjustment you make, you're not just stretching canvas; you're learning, you're connecting more deeply with your materials, and you're building a unique, invaluable skill that enhances your entire artistic practice. The first time you lay a brushstroke onto a canvas you stretched yourself, you'll feel it in your bones. You'll understand, intrinsically, why it's worth every bit of effort, because you haven't just prepared a surface; you've invested a piece of yourself into the very soul of your artwork. And that, my friend, is a feeling no pre-stretched canvas can ever replicate – it's the quiet pride of a maker.
Glossary of Canvas Stretching Terms
To help you navigate the world of canvas stretching like a seasoned pro, here's a quick glossary of terms we've covered and a few others you might encounter, because knowing the language of your craft is a powerful thing:
- Archival Quality: Materials and methods used to ensure the longevity and stability of artwork over extended periods, resisting degradation.
- Canvas Pliers: Specialized tools with wide jaws and a padded grip, used to grip and pull canvas taut during stretching.
- Cotton Duck: A strong, plain-weave cotton fabric commonly used for canvases, measured by weight (e.g., 10oz).
- Cross Braces: Additional wooden bars inserted into larger stretcher frames to provide internal support and prevent bowing.
- Gallery Wrap: A method of folding canvas corners and stapling on the back, allowing the artwork to be displayed unframed with the image wrapping around the sides.
- Gesso: A primer, typically acrylic-based, applied to raw canvas to prepare the surface for painting, creating an even, absorbent "tooth."
- Ghost Impression: Faint lines or marks that appear on the painted surface due to the stretcher bar pressing against the canvas.
- Grain Direction (Warp/Weft): The direction of the threads in the canvas weave; warp threads (lengthwise) are generally tighter than weft (crosswise).
- Impasto: A painting technique where paint is applied thickly, often with visible brushstrokes, to create texture.
- Kiln-Dried: Wood that has been dried in a kiln to remove moisture, preventing warping and twisting.
- Keys/Wedges: Small wooden pieces inserted into the corners of stretcher frames to re-tension a sagging canvas.
- Linen: A premium canvas fabric made from flax fibers, known for its strength, durability, and archival quality.
- Mortise and Tenon Joint: A traditional woodworking joint used in stretcher bar construction, where a 'tenon' fits into a 'mortise'.
- Museum Wrap: An alternative corner folding method that creates a flatter, layered corner, often preferred for canvases that will be framed.
- Profile: The depth and shape of the stretcher bar (e.g., standard profile, gallery profile).
- Rabbit Skin Glue (RSG): A traditional animal-hide glue used for sizing raw canvas, primarily for oil painting.
- Sizing: A protective layer (like RSG or acrylic medium) applied to raw canvas before gesso, to seal fibers and protect them from paint acids.
- Staple Gun: A tool used to securely attach canvas to stretcher bars with staples.
- Stretcher Bars: The wooden frame components that form the skeleton of a canvas.
- Stretcher Keys: See Keys/Wedges.
- T-square/Set Square: Tools used to ensure the stretcher frame is perfectly square (90-degree angles).
- Tooth: The texture or absorbency of a primed canvas surface, which allows paint to adhere effectively.