
Best Watercolor Sets for Beginners: My Honest Guide to Getting Started
Lost in the world of watercolor sets? I've been there! Let me walk you through choosing the perfect beginner watercolor set, covering pans, tubes, pigment quality, and finding great value to kickstart your artistic journey.
Best Watercolor Sets for Beginners: Your Honest Guide to Getting Started
You've felt it, haven't you? That gentle whisper, "Try watercolor." I know the feeling. It's a truly captivating medium, all about light dancing with pigment, the glorious subtlety of washes, and the sheer joy of watching colors bloom on paper. Then, reality hits: the art supply store, or that overwhelming online search, transforming that gentle whisper into a frantic shout: "Where on earth do I start?!" Trust me, I've been there, utterly swamped by choice, wondering if I needed some secret artist decoder ring just to buy paint.
That initial overwhelm can be a real creativity-killer, a common frustration for anyone dipping their toes into a new artistic pursuit. But it doesn't have to be. My goal with this guide is to gently pull you through that confusion and light the way to your first, truly joyful watercolor experience. I'm here to cut through the noise and help you pick out a beginner watercolor set that won't break the bank, overwhelm your budding creativity, or leave you feeling like you bought a box of colorful chalk (we've all been there). We'll cover everything from pan versus tube, student versus artist grade, and even the essential accessories you'll actually use. So, let's embark on this vibrant journey together, shall we?
This isn't just a list; it's a conversation. I'm going to share what I've learned, what works, and what really matters when you're just starting out on your watercolor journey. We're looking for that sweet spot: quality enough to be enjoyable, but not so professional that it feels intimidating. We'll explore the characteristics of good beginner paints and sets, compare different types, and offer practical tips to get you started with confidence. Ready? Let's dive in.
Why Watercolor is the Perfect Medium for a Beginner (and My Personal Favorite)
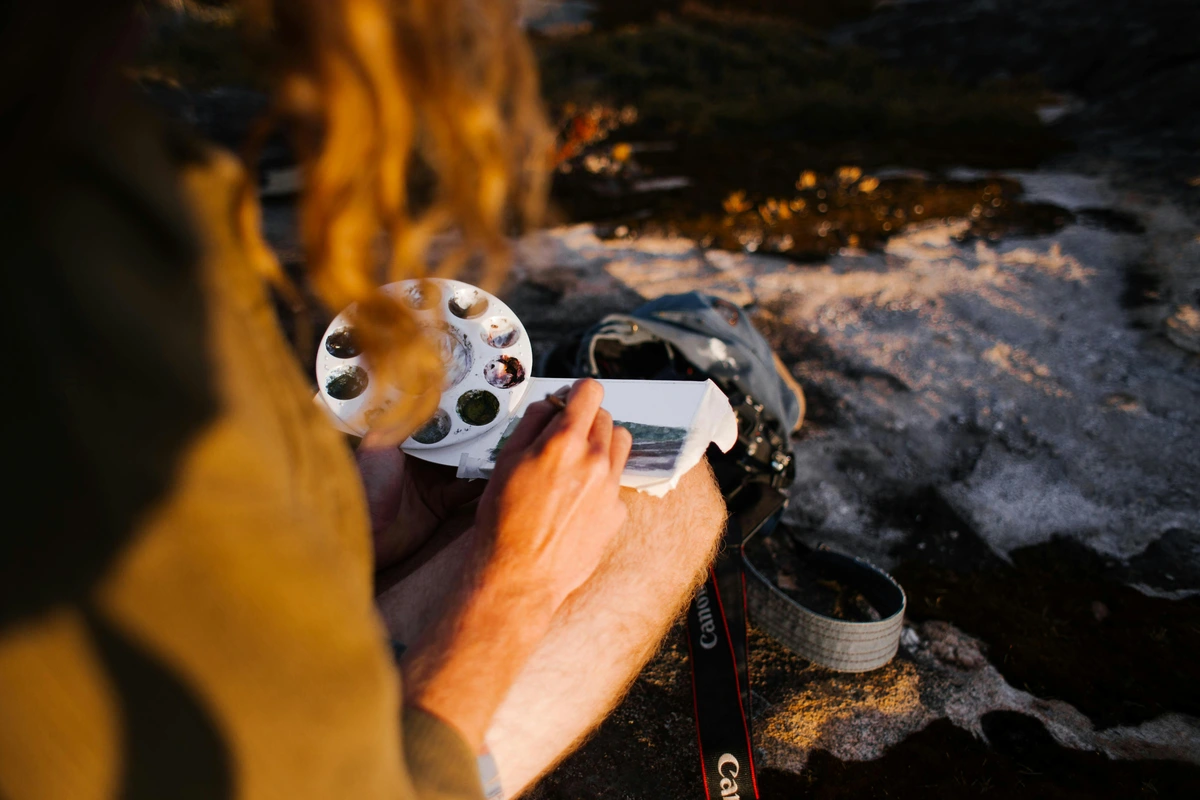
There's a reason so many artists, myself included, fall head over heels for watercolor. It's incredibly forgiving in unexpected ways, portable, and teaches you so much about patience and letting go. Unlike, say, oil painting, which requires a bit more setup and cleanup, watercolor can be as simple as a few pans, a brush, and a cup of water. It's the ultimate 'grab and go' art form. The quick drying time means you can layer colors without long waits, and the transparency allows for beautiful luminosity. It's a dance between pigment and water, a truly captivating experience. The way colors bloom and blend on paper can be almost meditative. I remember taking a tiny travel set on a hike once, sitting by a stream, and just splashing color onto a small pad. The freedom was exhilarating, a small moment of pure creative flow that still sticks with me. This is what I call The Zen of the Flow State – that magical place where time seems to disappear, and you're completely absorbed in the act of creation. Watercolor, with its immediate gratification and unpredictable beauty, is fantastic for finding that flow.
Beyond just its portability, watercolor also boasts a unique blend of control and unpredictability. You can guide the water and pigment, but often, the most enchanting results emerge when you simply let the medium do its thing. This balance teaches a profound lesson in letting go, a valuable skill not just in art, but in life itself. It's not about forcing a perfect outcome, but about collaborating with the water, observing its movement, and celebrating the unexpected beauty that unfolds. Plus, the minimal setup and cleanup mean less friction between you and your creative impulse, making it easier to start (and finish!) a project, even when you only have a few minutes to spare.

It teaches you to work with water – how much, how little, how it carries pigment. It forces you to embrace imperfections, because sometimes the most beautiful things happen when the water does its own thing, whether it's a happy bloom or an unexpected blend. And for a beginner, that can be incredibly liberating. It's not about perfection; it's about exploration and joy, a genuine way to connect with your inner artist.

What to Look For in Your First Watercolor Set: My "No Regrets" Checklist
When I first started, I thought more colors equaled more fun. Oh, past me, you sweet summer child! While a vast palette is tempting, it's actually more about quality and understanding what you're buying, especially when you're still figuring out your artistic voice. Here’s what I really focus on when recommending sets for new artists:
Understanding Key Characteristics: Transparency, Granulation, and Staining
Before we dive into formats, let's quickly touch on a few characteristics you'll encounter with watercolor paints. These aren't just technical terms; they genuinely impact how your paint behaves and how you approach your artwork. Understanding them, even at a basic level, will help you choose your first set with more confidence.
- Transparency: Watercolor is inherently transparent. This means the white of your paper shows through the layers of paint, giving it that characteristic luminosity. Most student-grade paints lean towards transparency, which is fantastic for learning layering techniques and achieving that signature glow. Think of it like layering colored glass – each piece adds depth without completely obscuring what's beneath.
- Granulation: Some pigments, when mixed with water, settle into the paper's texture, creating a beautiful, slightly grainy effect. Think of it like tiny specks of color. It's a unique characteristic that can add wonderful texture and visual interest to your work, especially in landscapes or abstract pieces. Not all colors granulate, but it's something to look for and experiment with – a happy accident often leads to exciting discoveries!
- Staining: Staining colors penetrate the paper fibers and are harder to lift (remove) once dry, much like a permanent marker on fabric. Non-staining colors sit more on the surface and can be lifted more easily, allowing for corrections or creating highlights with a clean, damp brush. For beginners, a mix is fine, but understanding this characteristic helps immensely when you want to make changes or preserve precise highlights.
- Lightfastness: This refers to how resistant a pigment is to fading when exposed to light over time. While less critical for practice pieces, it becomes very important if you plan to exhibit or sell your artwork. Artist-grade paints typically have higher lightfastness ratings. Student-grade paints vary, but for learning, it's not a deal-breaker.
- Permanence: This refers to the paint's ability to resist changes from environmental factors beyond light, such as humidity, heat, and chemical agents. High permanence means the paint will last longer under various conditions. Again, more crucial for professional work, but good to be aware of.
- Flow/Dispersal: How easily the paint spreads and mixes with water on the paper. Some pigments are very active and will bloom readily, while others are more controlled. This can influence your wet-on-wet techniques.
Pan vs. Tube Watercolors: A Tale of Two Formats
This is usually the first big fork in the road, and honestly, both have their merits for beginners. I've used both extensively, and each has its moment to shine.
Pan Watercolors: These are solid, dried cakes of paint that you activate with a wet brush. They often come in convenient plastic or metal sets, sometimes with a mixing palette and a small brush. Pans come in half-pan (smaller, ideal for travel sets and small works) and full-pan (larger, better for bigger brushes and washes) sizes. For beginners, half-pans are usually more than enough and offer a wider color selection in a compact space.
- Pros for Beginners: Incredibly portable, less messy, easier to control how much paint you pick up, great for sketching and small studies. You really only use what you need.
- Cons: Can be harder to get very vibrant, concentrated color (though good quality pans do a great job), can get muddy if you're not careful with your water.
Tube Watercolors: These are liquid, concentrated paints that come in, well, tubes! You squeeze out what you need onto a palette. Many artists also squeeze out tubes into empty pans and let them dry, effectively creating their own custom pan sets, which re-wet beautifully. This hybrid approach offers the best of both worlds: the portability and quick activation of pans, with the high pigment load initially offered by tubes. It's my go-to method for customizing my travel palettes!
- Pros for Beginners: Intense, vibrant colors straight out of the tube, easier to mix larger washes, feels more like "real" paint for some.
- Cons: Can be intimidating (how much to squeeze?), prone to waste if you squeeze out too much, require a separate palette, generally less portable.
My Take: For absolute beginners, especially those who want to experiment without a huge commitment, pan sets are often the way to go. They're less intimidating and more forgiving for learning water control. If you're feeling a bit bolder and want vibrant washes from the get-go, a small tube set is also a fantastic option – just be mindful of how much you're squeezing out!
Pigment Quality: Student vs. Artist Grade (and why you don't need the best right now)
This is where things can get confusing. You'll hear terms like "student grade" and "artist grade," and it sounds like you need the latter. Not true for beginners!
- Artist Grade: Made with a higher concentration of pure pigment, fewer fillers, superior lightfastness (won't fade as quickly), and generally more vibrant. Also, significantly more expensive.
- Student Grade: Contains more fillers (like dextrin) and less pure pigment. Colors might be slightly less intense, and lightfastness can vary. Much more affordable.
My Take: Stick with student-grade for your first set. Seriously. You're learning techniques, not creating masterpieces to hang in a museum (yet!). Good student-grade paints are perfectly adequate for learning to mix colors, understand transparency, and develop your style. The difference in price is huge, and the difference in your early learning experience is negligible. Think of it this way: you wouldn't buy a race car to learn how to drive, right? Student-grade paints are your reliable, forgiving first car. You can always upgrade later, and trust me, you'll appreciate the artist-grade paints more once you have a solid foundation and a clearer understanding of your own artistic needs. The only time lightfastness truly becomes a critical factor is if you plan to sell your art or exhibit it for long periods, but that's a bridge to cross much later! For now, focus on the joy of creation and learning the ropes. You can always check the lightfastness ratings (usually indicated by ASTM ratings like I, II, or III) on individual tubes or pan colors later on when you're ready to invest in professional-grade pigments for archival work.
Color Range & Mixing: Less is Often More
It's tempting to grab a set with 48, 72, or even 100 colors. Stop! For beginners, this is actually counterproductive. A smaller set with a good range of primary and secondary colors will force you to learn color mixing, which is one of the most fundamental skills in painting. Understanding how to mix your own greens, oranges, and purples from primary colors, and even creating nuanced tertiary colors, is far more valuable than having every shade pre-made. This skill unlocks an infinite palette and deepens your understanding of color relationships. You'll also learn about complementary colors – colors opposite each other on the color wheel – and how they can be used to create vibrant contrasts, make a color 'pop,' or, when mixed in small amounts, beautifully neutralize and deepen each other. Learning to choose a limited palette of warm and cool primaries will give you immense mixing power, teaching you to create harmony and discord in your paintings. It's a foundational step that many beginners skip, and then wonder why their colors look dull or uninspired. Trust me, the effort you put into understanding color theory now will pay dividends for years to come.
Look for a set with: a warm red (like Cadmium Red Hue), a cool red (like Alizarin Crimson Hue), a warm blue (like Ultramarine Blue), a cool blue (like Phthalo Blue), a warm yellow (like Cadmium Yellow Hue), a cool yellow (like Lemon Yellow Hue), and maybe a versatile earth tone like Burnt Sienna or Raw Umber. You might also find a convenience green like Sap Green useful, though learning to mix your own greens from yellows and blues is incredibly rewarding! Many watercolorists don't use white or black, relying on the paper for highlights and mixing darks from complementary colors. A set of 12-24 colors is often perfect, offering enough variety without being overwhelming.

Palette Considerations: Integrated vs. Separate
When you're choosing a set, especially pan sets, the palette often comes integrated into the lid or a removable tray. For tube sets, you'll almost always need a separate mixing palette.

- Integrated Palettes: Convenient for travel and compactness, but often limited in mixing space. Make sure the wells are large enough for your brush and for mixing decent quantities of paint.
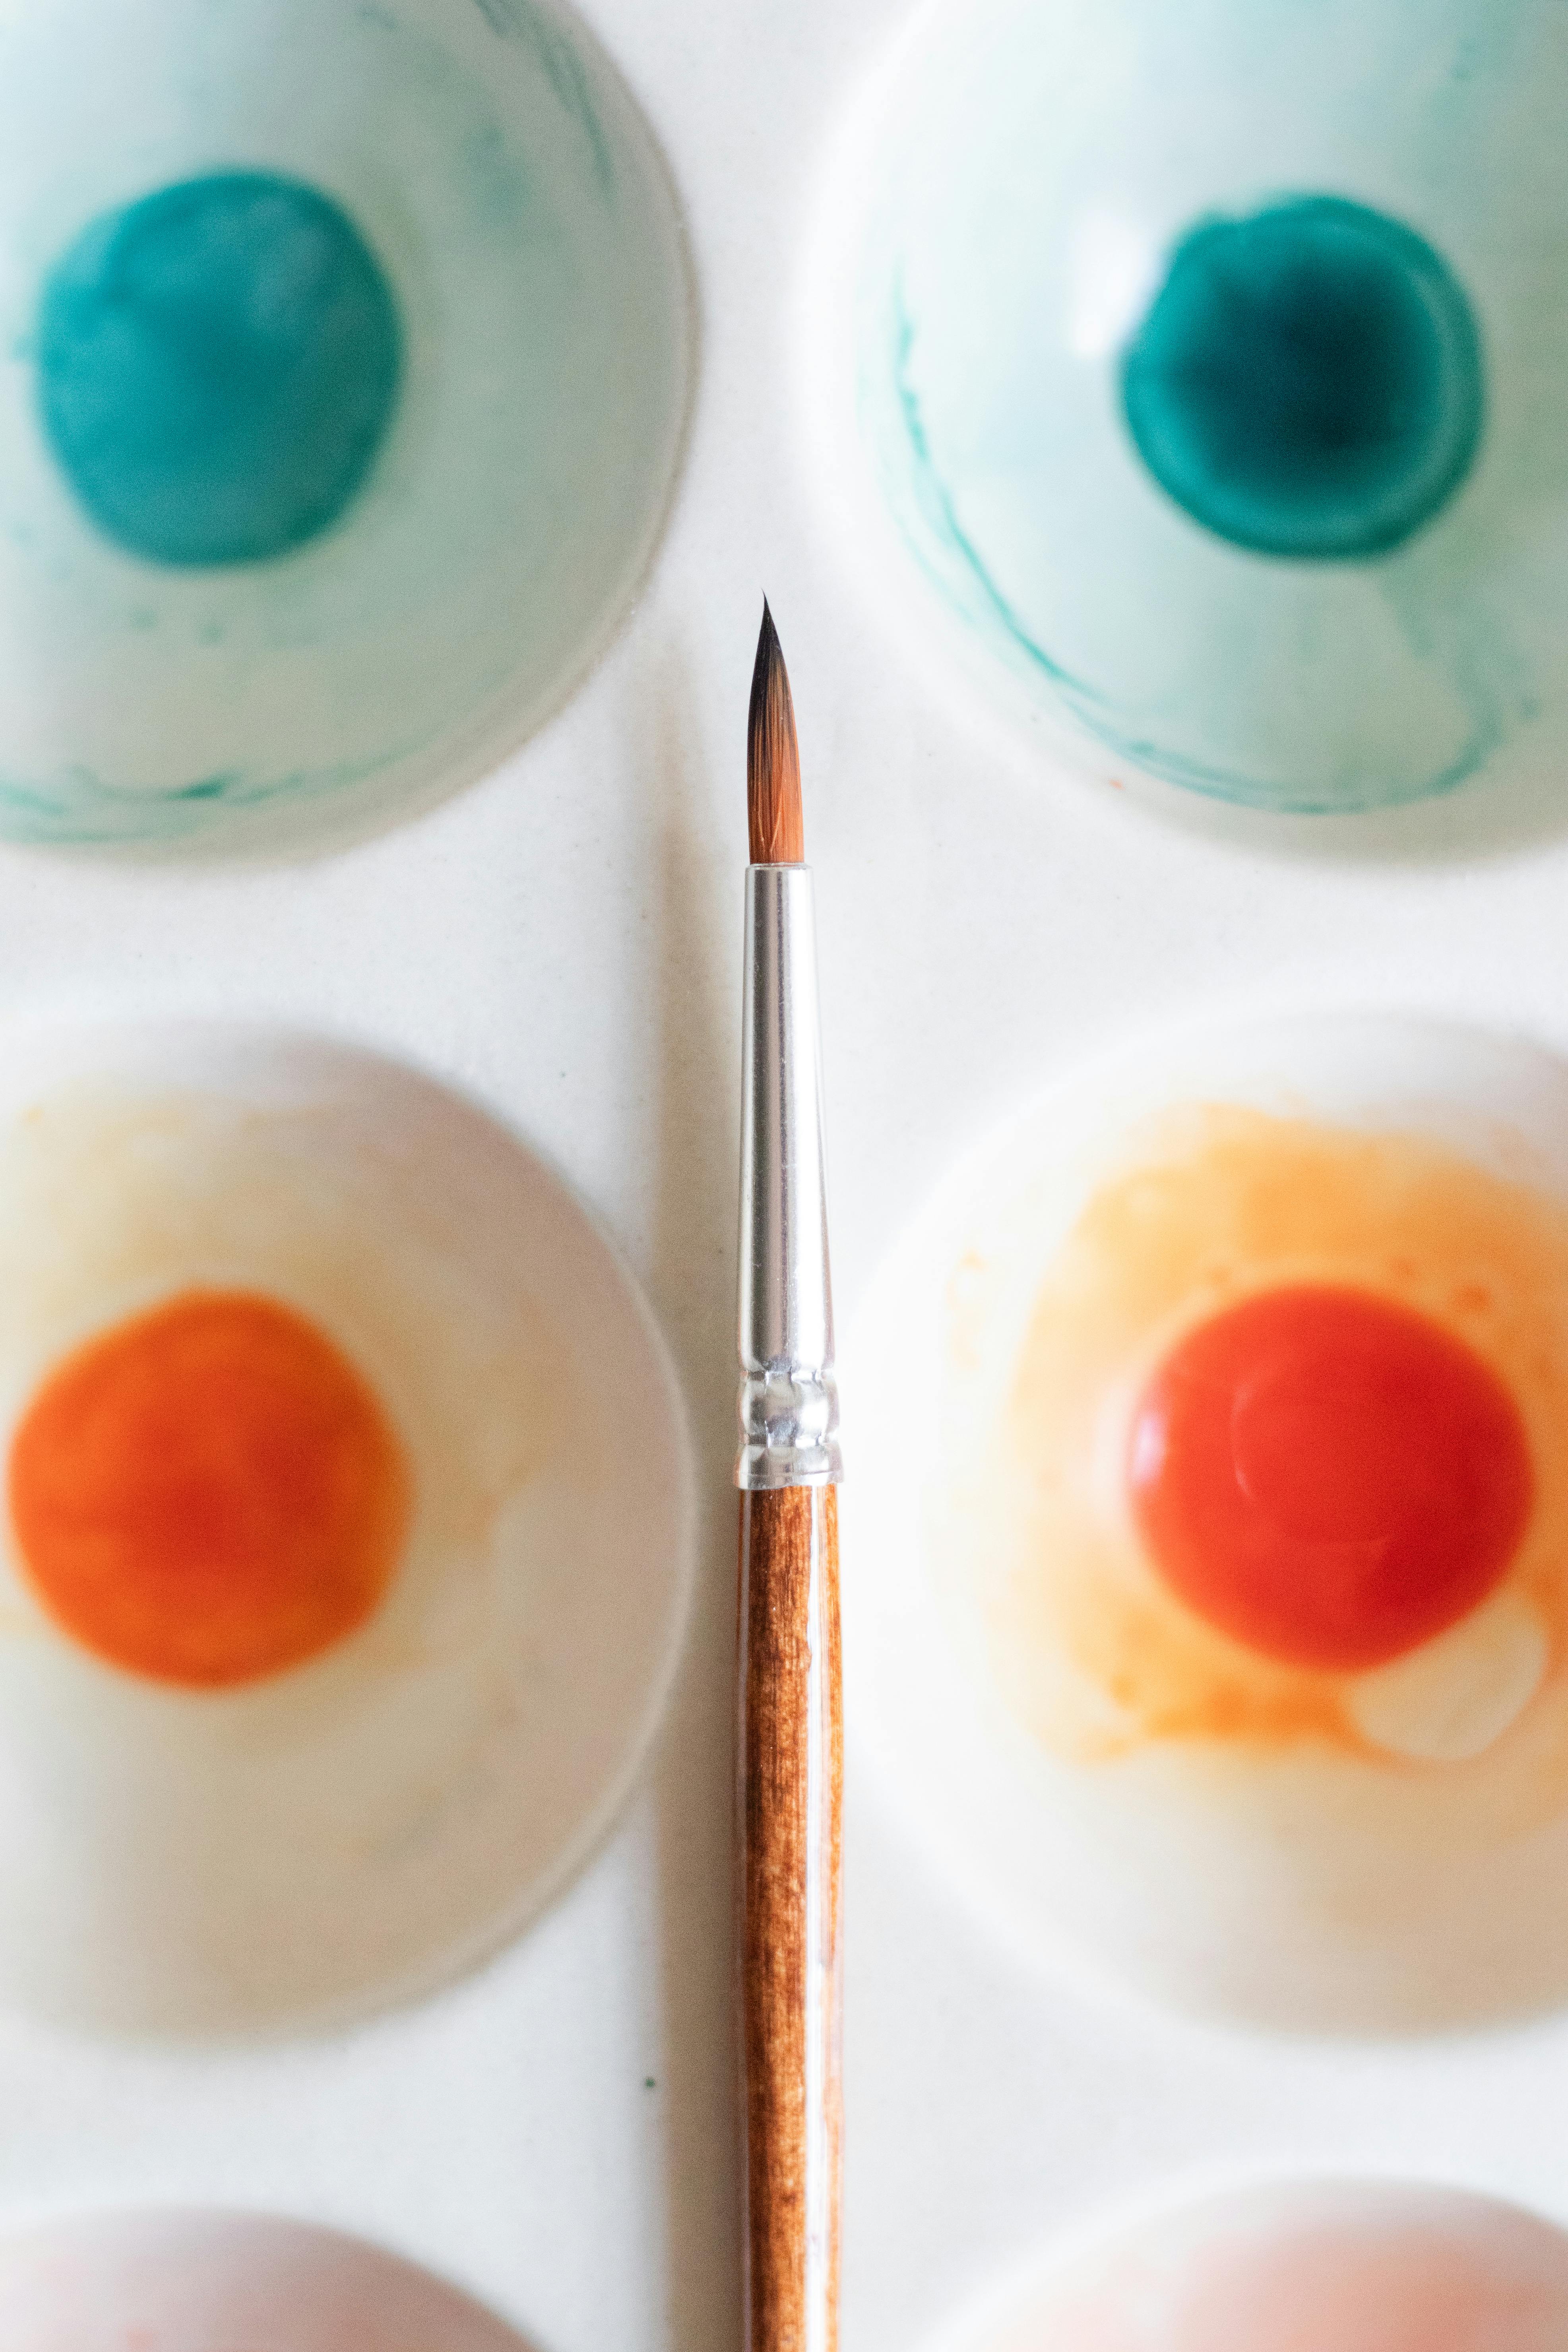
- Separate Palettes: Offers ample mixing space, which is great for larger washes and more complex color mixing. Ceramic plates, white plastic palettes, or even old saucers work wonderfully. They are generally easier to clean than integrated plastic palettes that can stain.
Included Brushes & Accessories: Bonus, Not Deal-Breaker
Many beginner sets come with a brush or two, and sometimes a small sponge or mixing palette. Treat these as a bonus, but don't expect them to be your forever tools. The brushes in most beginner sets are, shall we say, basic. They'll get you started, but you'll likely want to invest in a few decent brushes separately quite quickly.
Here’s what I recommend you consider for your initial brush arsenal:
- Round Brush (Size 6 or 8): This is your workhorse. A good quality round brush with a fine tip and a belly that holds water will be incredibly versatile for details, lines, and small washes. It's often the only brush I use for an entire painting!
- Flat Wash Brush (1/2 inch or 1 inch): Ideal for laying down even washes over larger areas, creating crisp edges, or blocking in shapes. These are fantastic for skies or creating geometric forms.
- Mop Brush (Small or Medium): Often made with natural squirrel or goat hair (though synthetic versions exist), these brushes hold an incredible amount of water and pigment, making them perfect for large, juicy washes and soft blending. While often seen as an intermediate brush, a good student-grade mop can open up new possibilities for beginners.
- Liner or Rigger Brush (Fine Tip): For delicate details, fine lines, and signatures. These brushes have long, thin bristles that can hold a good amount of paint for continuous lines.
- Water Brush: An incredible tool for on-the-go painting. It has a hollow barrel that holds water, which feeds directly into the synthetic brush tip. Perfect for urban sketching or journaling when a traditional water pot isn't practical.
Beyond brushes, don't forget other handy accessories that can elevate your experience:
- Natural Sponges: Great for creating unique textures, foliage, or soft cloud effects. A cheap kitchen sponge can even work in a pinch for textured washes!
- Masking Fluid (or Frisket): A liquid latex that you apply to areas you want to remain white. Once dry, you paint over it, and then peel it off to reveal crisp, unpainted areas. A fantastic tool for preserving highlights, but remember to use an old brush or a dedicated masking fluid tool for application, as it can be tough on bristles.
- Pencil (2B or HB): For initial light sketches that won't show through your transparent watercolor layers. Always sketch lightly! A common beginner mistake is pressing too hard, leaving visible graphite lines.
- Eraser (Kneaded Eraser): A soft, pliable eraser that lifts graphite without damaging the paper surface, perfect for lightening pencil lines before painting or picking up stray marks. It's like a magic eraser for graphite!
- Paper Towels or a Rag: Absolutely essential for blotting your brush, controlling water, quickly cleaning up spills, and lifting excess pigment from your paper.
- Spray Bottle (Small): A tiny spray bottle filled with water can be incredibly useful for re-wetting dried pans, keeping washes damp, or creating interesting wet-on-wet effects.
- Drawing Board/Support: If your paper isn't heavy enough or you're doing larger works, taping your paper to a rigid board (like a piece of plexiglass or even cardboard) can help prevent buckling.
For more on what brushes and other essential items to look for, check out my comprehensive guide on essential watercolor supplies for beginners. You can also explore the best watercolor brush sets for artists review for a deeper dive into brushes.
Value for Money: The Sweet Spot
This is ultimately about finding a balance. You don't want the cheapest set that will frustrate you with chalky, dull colors and poor performance. Those "toy" sets can genuinely discourage a budding artist. But you also don't need to splurge on artist-grade paints just yet; that's an investment for when you're sure about your passion.

Aim for a well-regarded student brand that offers a decent color range and vibrant enough pigments to be enjoyable and encourage learning. Look for brands known for consistent quality even in their student lines. Read reviews, especially those from other beginners, to get a sense of how the paints perform in real-world scenarios. A good value set will provide a positive learning experience without breaking the bank, setting you up for success, not frustration.

The Importance of a Sketchbook (Your Artistic Diary)
Before we dive into specific set recommendations, I want to briefly champion the humble sketchbook. This isn't just for drawing; it's your personal laboratory for watercolor. A dedicated watercolor sketchbook (with appropriate paper weight) is invaluable for:
- Swatching Colors: As we'll discuss, testing your colors is vital. Your sketchbook is the perfect place.
- Practicing Techniques: Experiment with washes, wet-on-wet, and lifting without the pressure of a
Since I can't recommend specific brands without potentially endorsing something I haven't personally reviewed extensively for beginners in this context, I'll recommend types of sets that consistently deliver good value and a positive experience for new artists. Think of these as categories you can search for, then look for a well-reviewed student-grade option within that category. It’s a bit like choosing a car – you know you want a reliable sedan for a beginner, but the specific brand might come down to personal preference and available deals.
1. The "Absolute Budget-Friendly Start": Basic Solid Pan Set
This is your entry point, often found in craft stores or online at a very accessible price point. It's typically a simple plastic case with 12-24 solid pans and a tiny, often-too-stiff brush (which, let's be honest, will likely be replaced quickly!). Perfect for quick sketches, travel, and just getting a feel for the medium without a significant financial investment. They are typically student grade, so manage your expectations on extreme vibrancy, but they should still allow for pleasant mixing and exploration of basic techniques.

- Good for: Kids, absolute beginners, sketching on the go, those on a very tight budget, or anyone just dipping a toe in to see if watercolor clicks. It's a low-pressure way to explore the medium.
- What to look for: Smooth application (no chalkiness!), decent mixing without becoming muddy too quickly (especially when mixing secondary colors), and pans that re-wet with relative ease. Brands commonly found in craft stores are a good starting point, but always peek at recent reviews for consistency. These sets are about playful exploration, not archival masterpieces. They're your first step, and a great one at that.
2. The "Step-Up Quality" : Mid-Range Student Pan Set or Small Tube Set
If you're willing to spend a little more, you can get a noticeable improvement in pigment quality and overall performance, even within student grades. These sets often come in a slightly nicer tin or plastic case, and the paints will be more concentrated, offering better color payoff, making your artwork feel more vibrant and alive.
- Pan Version: These often have 12-24 richer, more pigmented pans. You'll notice the colors are brighter and easier to lift with water, meaning less scrubbing with your brush. Some even come with a water brush, which is super handy, or a dedicated mixing tray built into the lid, which is a nice touch.
- Tube Version: A small set of 8-12 student-grade tubes (like a basic primary and secondary set) can be a fantastic way to experience the vibrancy and intensity of tube watercolors without going overboard. Remember, you only need a tiny squeeze of paint! You'll need a separate palette, like a ceramic plate, a dedicated plastic mixing palette, or even a small ceramic tile.
- Good for: Beginners who are serious about learning, those who want better color vibrancy, smoother washes, and improved mixing properties. These are excellent for home studio use and allow for more advanced techniques, without the hefty price tag of artist-grade paints.
3. The "Portable Powerhouse": Dedicated Travel Watercolor Set
Many brands offer specialized travel sets, often in sleek metal tins with half-pans, a fold-out mixing area, and sometimes a travel brush. These are designed for convenience, often with secure pan-holding mechanisms and robust closures, and are usually a step up in quality from the most basic pan sets. They're built to withstand being tossed into a bag and taken on adventures.
- Good for: Urban sketching, plein air painting, taking to classes, or just painting anywhere inspiration strikes.
- What to look for: Durable case (metal tins are often preferred for their robustness), secure pans (so they don't fall out when you're on the move!), good mixing wells that are easy to clean, and a compact, lightweight design. Many also come with a small, foldable travel brush and a ring on the bottom for easy gripping – thoughtful touches that make a big difference when you're painting on a park bench!

4. The "Hybrid & Customizable" Set: Empty Pans and Select Tubes
This isn't a pre-packaged set, but rather an approach I highly recommend for those who want ultimate control over their palette. You buy a set of empty half or full pans and then purchase individual tubes of student-grade paint. Squeeze a small amount of each tube color into a pan, let it dry for a day or two, and voilà! You have a custom pan set with the vibrancy of tube paints. This allows you to choose exactly the colors you want to work with, replacing only those you use most often.
- Good for: Beginners who are ready to curate their own palette, those who want specific colors not found in pre-made sets, and artists who enjoy the flexibility of tube colors in a portable pan format.
- What to look for: High-quality empty pans (metal tins are durable), and individual tubes of student-grade watercolors that offer good value and performance. This route is slightly more involved initially but incredibly rewarding for long-term use.
Comparison Table: Beginner Watercolor Set Types
Feature | Basic Solid Pan Set | Mid-Range Student Pan/Tube Set | Dedicated Travel Set | Hybrid & Customizable Set |
|---|---|---|---|---|
| Cost | Lowest | Medium | Medium to Higher | Medium (initial investment) |
| Portability | Excellent | Moderate (tubes need palette) | Excellent | Excellent (once dried into pans) |
| Pigment Quality | Basic student grade | Good student grade | Good student grade (often) | Good student grade (curated) |
| Vibrancy | Moderate | Good | Good | Very Good (from tubes) |
| Mess Factor | Low | Moderate (tubes can be messy) | Low | Low (once dried into pans) |
| Ideal For | Trying out watercolor, kids | Serious learning, richer colors | Painting on the go, outdoor sketches | Curated palette, specific colors |
| Ease of Cleaning | Very easy | Moderate (if tubes dry on palette) | Easy | Very easy |

Getting Started: Essential Tips for Your First Watercolor Adventure

So you've got your set. Now what? Don't just stare at it! Here are a few quick tips to get you started on the right foot:
- Good Paper is Key: This is probably the most important tip I can give you. Cheap paper will buckle, pill (where the paper surface rubs up and forms little balls), and make you think you're bad at watercolor when it's the paper's fault! Invest in some student-grade watercolor paper (140lb/300gsm minimum). You'll usually find cold press (textured surface, good for washes and granulation) and hot press (smooth surface, great for fine details) options. Cold press is generally more forgiving for beginners. It makes a world of difference. For more details, check out my guide on /finder/page/best-watercolor-paper-for-artists-review.
- Two Water Jars (Seriously, Two!): Always have one jar dedicated to thoroughly cleaning your brush (this will quickly become the "dirty" jar, and that's okay!) and another for picking up clean water to mix into your paints. This seemingly simple trick is an absolute game-changer for preventing muddy colors and keeping your washes clear and vibrant. I can't tell you how many times I started with just one jar and regretted it almost immediately – it's a fast track to muddy mixes!
- Swatch Your Colors: Before you do anything else, make a swatch chart of all the colors in your set on the watercolor paper you intend to use. Don't just paint a block of color; try a gradient from dark to light, and maybe even a wet-on-wet dab to see how the color blooms. This helps you see how they actually look on paper, understand their transparency, and gives you an invaluable reference for mixing.
- Embrace Transparency: Watercolor is all about layering transparent washes. Build up your colors gradually, from light to dark, allowing each layer to dry before adding the next. This creates depth and luminosity. Think of it like looking through stained glass – each layer adds richness without completely obscuring what's beneath. You can also learn to 'lift' color with a clean, damp brush or sponge to create highlights or soften edges, which is another magical aspect of watercolor.
- Practice Basic Washes: Experiment with flat washes (an even layer of color across a section) and graded washes (color that fades smoothly from dark to light). These are foundational techniques. Also, try wet-on-wet (applying wet paint to a wet surface for soft, blended effects) and wet-on-dry (applying wet paint to a dry surface for sharper edges and more control).
- Don't Be Afraid to Make "Mud": Seriously, it's part of the learning process. You'll figure out what colors combine beautifully and which ones create a dull mess. That's how you learn! And sometimes, a little bit of controlled 'mud' can be useful for creating shadows, muted tones, or earthy landscapes – it's not always a bad thing!
Beyond the Basics: When to Upgrade

Once you've spent some time with your beginner set, you'll start to notice its limitations. Maybe certain colors aren't as vibrant as you'd like, or they lack the intensity for your vision. Perhaps you're struggling to get smooth, even washes, or finding that colors don't lift as cleanly as you'd like. You might find some pigments are less lightfast, meaning your beautiful artwork might fade over time. These are all signs you're ready to explore artist-grade paints. When that time comes, I've got you covered with my comprehensive review of reviewing the best professional watercolor sets.
It's a natural progression, and a wonderful one at that. Don't rush it, but don't be afraid to take that next step when you feel the call. Upgrading your materials isn't about spending more money for the sake of it; it's about matching your tools to your growing skill and artistic ambitions. The right tools can genuinely enhance your experience, but they are never a substitute for practice and passion. And remember, art isn't about the tools, it's about the journey and what you create with them – the joy, the exploration, and the unique voice you discover along the way.
Frequently Asked Questions (FAQ)
Q: What kind of paper should I use for practice?
A: For practice, I always recommend a student-grade watercolor paper with a minimum weight of 140lb (300gsm). Anything lighter will buckle, warp, and pill too easily, leading to unnecessary frustration – trust me, I've fought with thin paper many times, and it's never worth it! Cold press is generally the most versatile and forgiving surface for beginners, as its slight texture handles washes and granulation beautifully. Hot press paper has a smooth surface, great for fine details, but less forgiving for lifting and initial washes. Rough paper has a very pronounced texture, wonderful for expressive landscapes. For now, stick to cold press. Save your more expensive artist-grade paper for when you feel more confident in your techniques! My article on best watercolor paper for artists review goes into much more detail.
Q: What's the main difference between student and artist-grade watercolor paints?
A: The primary difference, from my perspective, is the pigment concentration and lightfastness. Artist-grade paints use more pure, finely ground pigment with fewer fillers and often a single pigment per color, resulting in more vibrant, intense colors that are less likely to fade over time. Student-grade paints have more fillers (like dextrin), sometimes use a blend of pigments to mimic more expensive colors, making them more affordable, but sometimes less intense and with varying lightfastness. For beginners, student grade is perfectly adequate; you won't notice the difference until you're more advanced and your techniques demand more from your materials. Think of it as learning to drive – you don't need a sports car right away!
Q: What is Gouache, and can I use it with watercolor?
A: Gouache (pronounced "gwash") is like watercolor's opaque cousin! It's a water-soluble paint, similar to watercolor, but with added white pigment or chalk that makes it opaque and matte when dry. This means you can paint light colors over dark colors, unlike traditional transparent watercolor. Absolutely, you can use it with watercolor! Many artists love to combine the transparency of watercolor with the opaque accents of gouache for highlights, strong details, or areas needing a flat, solid color. It's a fantastic way to add another dimension to your work and expand your creative toolkit. If you're curious, I have a guide on what is gouache painting and reviewing the best gouache sets for beginners that might interest you! They are truly wonderful companions.
Q: Do I need a specific type of brush for watercolor?
A: Yes, but you don't need many to start! Soft, absorbent brushes are best for watercolor. A good round brush (size 6 or 8) is your absolute workhorse for most things, excellent for details, fine lines, and washes, as its belly holds a good amount of water. A flat wash brush (1/2 inch to 1 inch) is great for broader strokes, creating even washes across larger areas, and achieving crisp edges. Beyond those two, experiment! Synthetics are fantastic for beginners as they hold a good amount of water, spring back well, offer good control, and are very durable. Natural hair brushes (like squirrel or sable) are often preferred by advanced artists for their superior water-holding capacity and pigment release, but come with a higher price tag. Don't feel pressured to buy expensive brushes initially. Check out my article on essential watercolor supplies for beginners for more detailed brush recommendations.
Q: How do I choose the right paper for my project?
A: Your choice of watercolor paper depends on your desired outcome and the techniques you want to explore. For general practice and learning, cold press paper (140lb/300gsm) is highly recommended. Its slightly textured surface is wonderfully versatile for most techniques, including washes, lifting, and granulation, and is generally more forgiving for beginners. If you're focusing on fine details, botanical illustrations, or pen and ink work, hot press paper (with its smooth, almost satiny surface) might be better. For expressive, textural landscapes or when you want the paper to really grab and emphasize granulation, rough paper can offer unique and dramatic effects. Regardless of the surface texture, always prioritize 140lb (300gsm) or heavier paper to minimize buckling and frustration. My guide on best watercolor paper for artists review dives much deeper into this important topic!
Q: Can I use masking fluid with watercolor?
A: Yes, and it's an absolute game-changer for preserving white areas or creating crisp edges! Masking fluid (sometimes called liquid frisket) is a liquid latex-based product that you apply to areas of your paper you want to protect from paint. Once it dries (it usually turns a light yellow or grey), you paint over it. After your watercolor is completely dry, you gently rub or peel off the masking fluid with your finger or a rubber cement pick-up to reveal the pristine white paper (or the layer of paint underneath). It's fantastic for intricate details like highlights, distant stars, or delicate white flowers. Just make sure to apply it with an old brush or a masking fluid pen, as the latex can be tough on fine brush bristles, and crucially, remove it only when all paint is completely dry to avoid tearing your paper surface.
Q: What's the difference between full pans and half pans?
A: This is pretty straightforward! Full pans are larger, rectangular blocks of dried watercolor paint, offering more pigment per pan. They're excellent for larger brushes, when you need to pick up a lot of color quickly for a big wash, or for artists who use a limited palette but in larger quantities. Half pans are, as the name suggests, half the size of full pans. They contain less paint but allow you to fit more colors into a compact set, making them ideal for travel or small sketching kits where variety is key. Many artists buy tubes of paint and squeeze them into empty full or half pans, letting them dry to create their own custom, portable sets. Functionally, they behave identically once re-wet with water; it's simply a matter of size, how much paint you need to pick up at once, and portability.
Q: Can I mix different brands of watercolor paints?
A: Absolutely, yes! Most watercolor paints are entirely compatible with each other, regardless of brand or even grade (student or artist). I often find myself mixing a favorite vibrant blue from one brand with an earthy brown from another to create unique shades. It's one of the great freedoms of watercolor! Just be mindful that student-grade paints might have slightly different working properties, transparency, or intensity compared to artist-grade ones, but they won't react negatively or cause any chemical issues when mixed. Don't be afraid to experiment and create your own unique palette from various sources.

Q: How important are sketchbooks for watercolor?
A: Incredibly important! A good watercolor sketchbook is not just for sketching; it's your personal laboratory for experimentation, practice, and discovery. It's a low-pressure environment where you can try new techniques, swatch colors, experiment with compositions, and make mistakes without fear or the pressure of a "finished" piece. Choose one with decent watercolor paper (at least 90-140lb/200-300gsm) so it can handle the moisture without buckling too severely. I always, always recommend beginners keep a dedicated watercolor sketchbook. It's where you'll track your progress, build confidence, and develop your unique artistic voice. Plus, it's portable – perfect for spontaneous creative moments, whether you're at a coffee shop or by a quiet stream!
Q: How do I choose colors for my first palette if a set isn't ideal?
A: If you find that pre-selected sets don't quite hit the mark, building your own limited palette is an excellent way to start and truly understand color mixing! I'd recommend beginning with a warm and cool version of each primary color. For reds, think a warm red (like Cadmium Red Hue) and a cool red (like Alizarin Crimson Hue). For blues, a warm blue (like Ultramarine Blue, which leans purple) and a cool blue (like Phthalo Blue, which leans green). For yellows, a warm yellow (like Cadmium Yellow Hue, leaning orange) and a cool yellow (like Lemon Yellow Hue, leaning green). Add a versatile earth tone like Burnt Sienna or Raw Umber, which are invaluable for mixing muted colors and shadows. You might also consider a convenience green like Sap Green (though learning to mix your own greens from your blues and yellows is incredibly rewarding and deepens your understanding!). This small, carefully chosen selection will allow you to mix a surprisingly vast array of colors and truly master the fundamentals of color theory, giving you much more control and understanding than a massive pre-made set.
Q: How do I store my watercolor pans or tubes?
A: For pans, the key is to let them air dry completely after use before closing the lid. This prevents mold growth and keeps your paints fresh. Tubes should always be capped tightly immediately after use to prevent them from drying out and becoming unusable. Store both pans and tubes away from extreme heat, cold, or direct sunlight to maintain their consistency and longevity. Really, it's pretty simple; watercolor is very unfussy and forgiving when it comes to storage!

Q: What is a 'blooming' or 'cauliflower' effect?
A: This beautiful, sometimes frustrating, effect occurs when a fresh drop of water or a new wash is introduced into an area of paint that is still damp but not completely dry. The water pushes the pigment to the edges of the wet area, creating a distinctive pattern that looks a bit like a bloom, or yes, even a cauliflower! This happens because the surface tension of the fresh water disrupts the partially dried pigment. While often seen as an accidental 'mistake' by beginners, many artists learn to control and even embrace this effect for organic textures, soft cloud formations, or interesting abstract backgrounds. It's a hallmark of the wet-on-wet technique and something you'll definitely encounter (and maybe even learn to love!) on your watercolor journey.
Q: Should I draw my subject out with pencil before painting?
A: For beginners, absolutely, yes! Drawing your subject lightly with a pencil before applying watercolor provides a roadmap and helps immensely with composition and proportion, reducing guesswork and building confidence. It gives you a framework to work within before committing to paint. Use a light touch with a hard lead pencil (like a 2H or 3H) so the lines don't show through your transparent washes or leave deep indentations if you need to erase. Over time, as you gain confidence, you might find yourself sketching less, using a colored pencil that blends with your painting, or even painting directly, but it's a valuable and recommended step when you're starting out.
Q: What is a water brush?
A: A water brush is a fantastic, versatile, and incredibly portable tool for watercolor! It has a hollow barrel that holds water, which feeds directly into the synthetic brush tip. You can control the water flow by gently squeezing the barrel, allowing you to go from dry to very wet applications. They're perfect for sketching on the go, urban journaling, or when you just don't want to carry a separate water jar (or two!). While they won't replace traditional brushes for every technique (especially large, even washes), they're incredibly convenient for beginners and travel, making it easier to paint whenever inspiration strikes.
Q: Are there any common mistakes beginners make besides muddy colors?
A: Absolutely! Beyond muddy colors (which we've already covered!), common beginner mistakes often include:
- Using cheap paper: It buckles, pills, and frustrates. Seriously, invest in good watercolor paper – it makes all the difference!
- Overworking the paint: Watercolor prefers to be left alone once a wash is down. Too much scrubbing or re-wetting can disturb the paper fibers, making it difficult for subsequent layers to sit cleanly.
- Not letting layers dry: This is a big one! Applying wet paint onto a damp (but not dry) layer often leads to unwanted blending, blooms, and a loss of luminosity. Patience is truly key in watercolor.
- Starting with too many colors: While tempting, a massive palette can actually hinder learning color mixing and understanding color relationships. A limited palette is your friend, forcing you to learn the fundamentals.
- Scrubbing your brush too hard in pans: This can damage your brush bristles and lift pigment unevenly, leading to chalky results. Gentle circles are enough to activate the paint.
- Using only one water jar: This is a fast track to muddy colors. Two jars (one for rinsing, one for clean water) are essential!
- Fear of making mistakes: Every artist, no matter how experienced, makes
Q: How do I clean my watercolor palette?
A: Cleaning your watercolor palette is usually very straightforward! For pan sets with integrated palettes, simply wipe them down with a damp cloth or sponge after use. For separate plastic or ceramic palettes, you can rinse them under the tap. If you have dried paint you want to remove, a little gentle scrubbing with a soft brush or sponge usually does the trick. Staining colors might leave a faint tint on plastic palettes, but don't worry, this won't affect future mixes or contaminate your new colors. Ceramic palettes are much less prone to staining, which is why many artists prefer them.

Q: What are "blooms" or "cauliflowers" in watercolor, and how do I avoid them?
A: "Blooms" or "cauliflowers" are those interesting (and sometimes frustrating!) patterns that appear when an area of a wash is re-wetted while it's still damp, but not completely dry. The new water, having less pigment, pushes the existing, partially dried pigment to the edges of the wet area, creating a feathered or uneven edge that looks a bit like a geographical bloom or, yes, a cauliflower floret! To avoid them, the golden rule is patience: let each wash dry completely before adding another layer of water or paint. A hairdryer on a cool setting can speed this up. If you want to intentionally create them for organic texture, cloud formations, or abstract effects, then by all means, introduce water into a damp wash – but do so with intention!
Q: Why is my watercolor paper buckling or warping?
A: Ah, the dreaded buckle! This happens when the paper gets too wet and isn't heavy enough to withstand the moisture, causing the fibers to expand and contract unevenly. Your best bet is to use heavier watercolor paper, ideally 140lb (300gsm) or more, as its density helps it resist warping. If you're working with lighter paper, you can "stretch" it beforehand by wetting it evenly and taping it to a rigid board (like MDF or plexiglass) with gummed paper tape, allowing it to dry taut. However, honestly, just getting heavier paper is the easiest and most frustration-free solution for beginners. You can find out more in best watercolor paper for artists review.
Q: Can I use watercolor with other mediums?
A: Absolutely! Watercolor plays exceptionally well with many other mediums, making it a fantastic choice for mixed media artists. You can combine it with:
- Pen and Ink: For outlines, details, or adding graphic elements and crisp lines, either before or after your watercolor washes.
- Colored Pencils: For added texture, subtle shading, or to enhance details and sharpen edges after your washes have dried. My article on in depth review of prismacolor premier colored pencils might spark some ideas!
- Gouache: As mentioned earlier, gouache is opaque watercolor and can be used for highlights, opaque accents, or areas needing strong, flat color that would otherwise be difficult to achieve with transparent watercolor. They are perfect companions!
- Pastels (Oil Pastels or Soft Pastels): For layering over dried watercolor to add texture, vibrant marks, or atmospheric effects, creating a beautiful contrast between the fluid washes and the dry, rich pigment of pastels. Check out best oil pastels for artists review for more.
- Acrylics (sparingly): Some artists use very thin, diluted acrylic washes over watercolor, or use acrylics for opaque details. However, be mindful of the layering order, as acrylics dry permanently and can't be re-wet like watercolor. It's usually better to apply watercolor first, then add acrylic elements on top.
- Graphite: Use a light hand for initial sketches, or incorporate darker graphite marks for definition and contrast within your painting.
- Charcoal: For expressive marks and strong values, often added after the watercolor layers are dry to provide depth and drama.
Don't be afraid to experiment; mixed media can open up a whole new world of creative possibilities and allow you to find unique artistic expressions, pushing the boundaries of what watercolor can do!

## My Final Brushstroke of Advice
Choosing your first watercolor set should be exciting, not stressful. Remember, the goal isn't to buy the most expensive or comprehensive set right out of the gate. It's about finding something that feels good in your hands, inspires you to experiment, and doesn't get in the way of your creative flow. The perfect beginner set is the one that gets you painting consistently, the one that you reach for again and again.
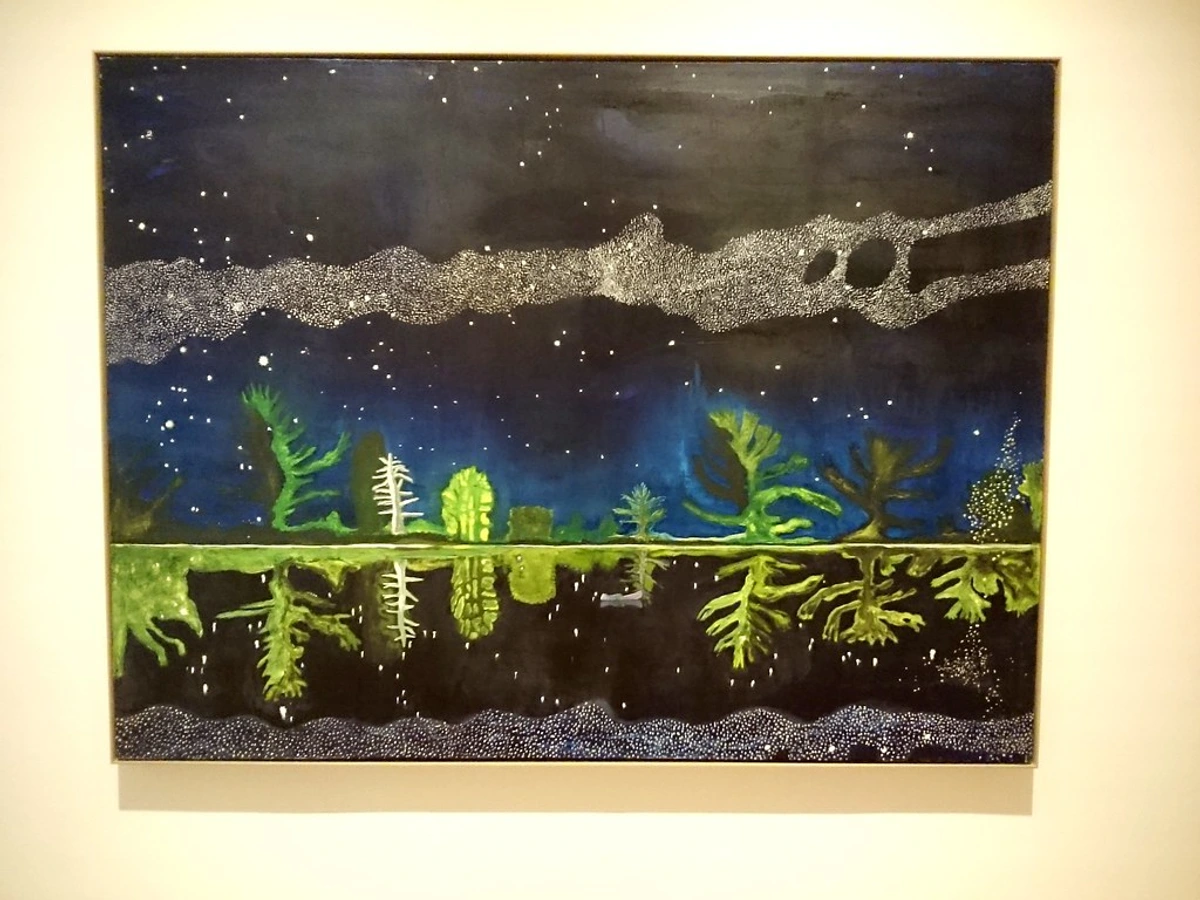
Don't overthink it. Pick a set that feels right, grab some decent paper, two cups of water, and just start putting color down. You'll learn so much by simply doing, by observing how the water and pigment interact, by embracing the "happy accidents." The journey of an artist is one of continuous discovery, and this is just the beautiful beginning of yours. And who knows, maybe one day you'll be creating abstract pieces that explore the very essence of color, much like the work you can find at the den bosch museum or even to buy for your own collection.
Happy painting, and remember: your unique style is waiting to be discovered, one splash of color at a time! The magic of watercolor isn't just in the tools, but in the creative joy you find along the way.


