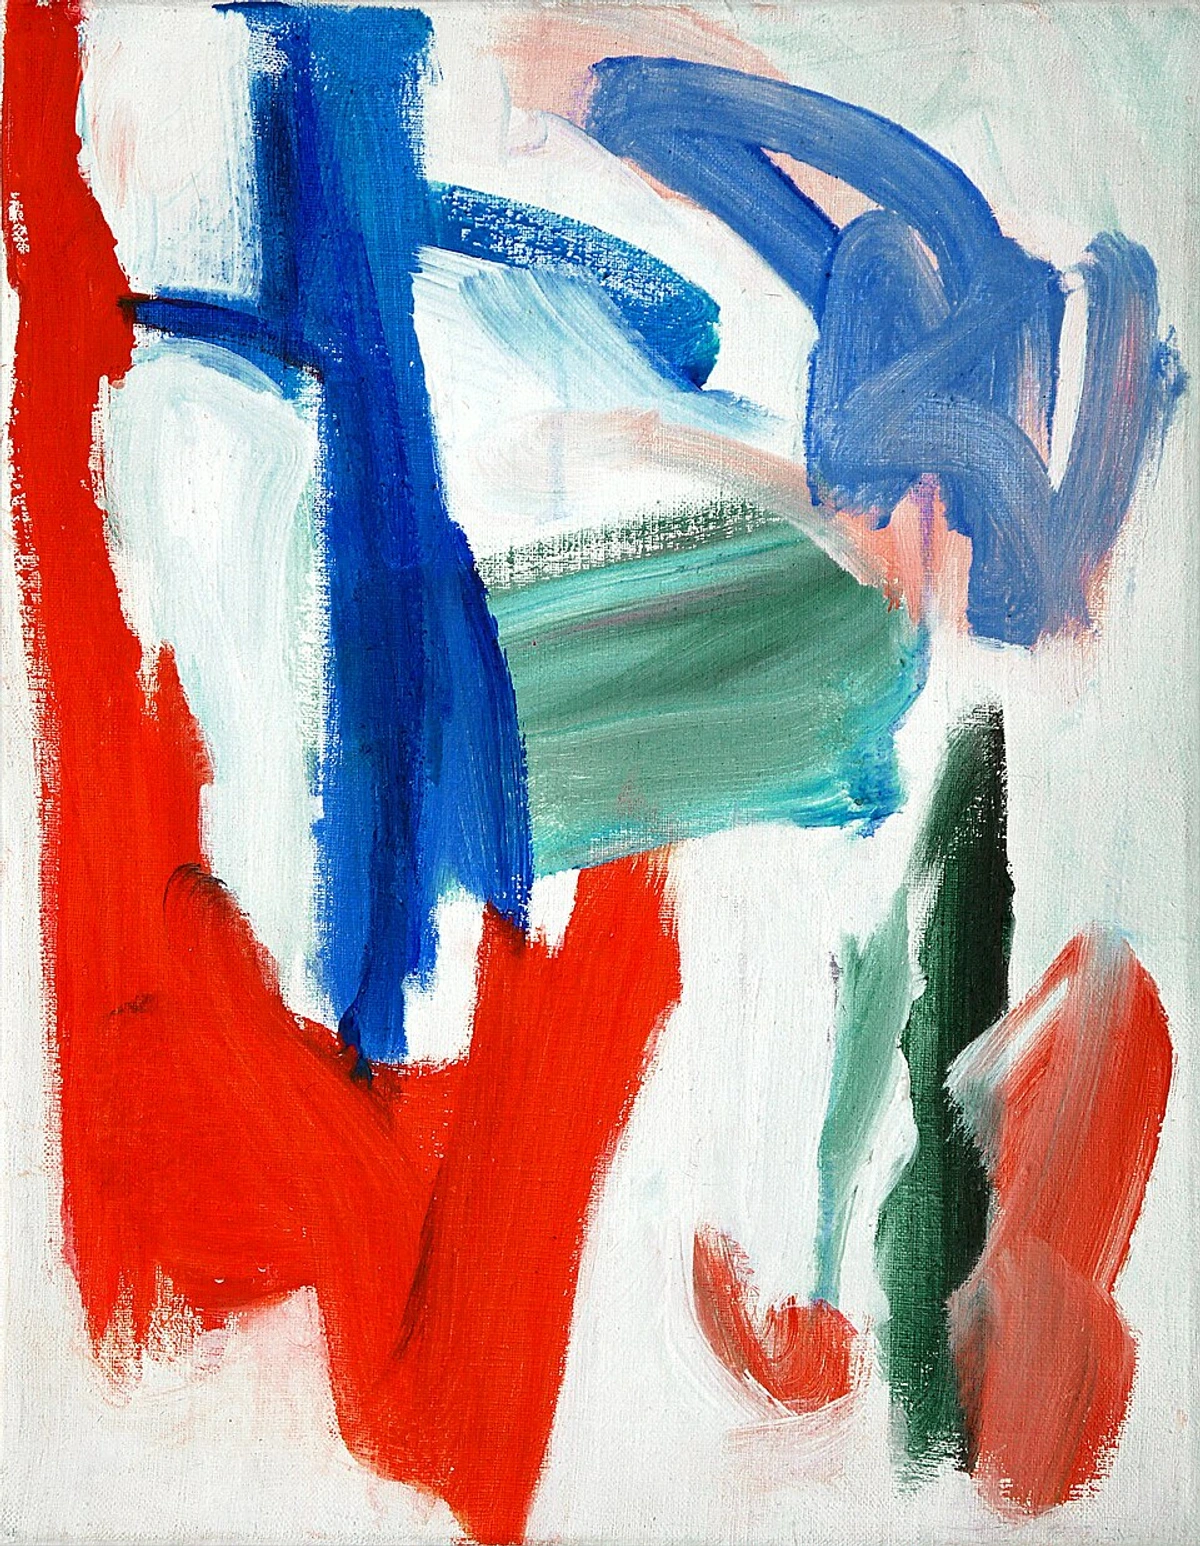
The Ultimate Watercolor Paper Guide: Fibers, Finishes, & Your Abstract Art
Unlock your artistic potential with this in-depth watercolor paper guide. Explore weights, textures, sizing, and manufacturing secrets. Learn how cotton, wood pulp, and eco-friendly options truly elevate your abstract art, from spontaneous explorations to delicate details.
The Ultimate Watercolor Paper Guide: Fibers, Finishes, & Your Abstract Art
Oh, watercolor paper. Honestly, for years, I didn't give it the attention it deserved. I mean, it's just paper, right? Pour water and pigment on it, and off you go. Oh, how wrong I was. My early abstract watercolor experiments were a chaotic mess, and I often blamed my technique, my brushes, even the fickle nature of the paint itself. But deep down, a nagging voice whispered, "Maybe it's the paper, genius." And, like most nagging voices, it was absolutely right. This isn't just a review; it's a confession. A confession of all the soggy sheets, the buckling horrors, and the utterly lost battles with cheap paper. It's also a celebration of those 'aha!' moments when I finally found a surface that danced with my brush instead of fighting it. So, let's talk about the unsung hero of watercolor – the paper itself. This choice, I've found, doesn't just dictate technical performance, but can profoundly influence the very mood and atmosphere of an abstract piece. We'll journey from the tangible — weight and texture — to the unseen magic of how paper is made, its foundational fibers, and the crucial role of sizing that truly make a difference, and hopefully, spare you some of the soggy sheet nightmares I endured along the way. Your artistic sanity will thank you, I promise. In this journey, we'll explore not just the core characteristics like weight and texture, but also the hidden science of fibers and sizing, and even how these papers come to be, from handmade traditions to modern machines.
Why Paper Isn't Just Paper: A Personal Revelation
You know how some days everything just clicks in the studio? The paint flows, the colors blend, and the composition feels effortless? Then there are those other days... where nothing works, and you want to throw your palette across the room. More often than not, I've found the culprit isn't my mood, or even the paint – it's the paper. Think of it this way: the paper is the stage for your watercolor performance, or maybe even the very soil from which your artistic vision grows. A flimsy, poorly constructed stage will collapse under the lightest tap, but a sturdy, well-chosen one can elevate the entire show. It's the silent partner, always there, ready to either support or sabotage your vision. Without the right foundation, even the most brilliant idea can crumple – I've seen more creative blocks caused by stubborn paper than by genuine lack of inspiration. Sometimes, the paper just fights you, refusing to let the pigment blend, or buckling so badly it feels like you're painting on a topographic map. One particularly frustrating afternoon, I was trying to layer delicate glazes for an abstract landscape, only for the cheap paper to pill and tear, turning my serene vision into a muddy mess. That was the day I truly understood that paper isn't just a surface; it's a co-creator, for better or worse.
For me, especially in my journey with mixed media, the paper's role is amplified. It needs to stand up not just to washes but sometimes to layering, scraping, and all sorts of playful abuse I put it through. And speaking of history, did you know artists weren't always so lucky? I was astounded to learn that before dedicated watercolor paper, masters grappled with materials like parchment and even ancient papyrus, which, while revolutionary for writing, offered little forgiveness for their delicate washes. Imagine the early Renaissance masters, constrained by materials that offered little forgiveness for their delicate washes – perhaps ink bleeding uncontrollably, the surface tearing with minimal manipulation, or pigments refusing to adhere evenly. This severely limited the possibilities of the medium. Then came the Renaissance, a period of immense artistic and scientific innovation, which also spurred advancements in papermaking to meet the demands of artists for more durable and absorbent surfaces. It's fascinating how the evolution of paper has truly shaped what's possible in the medium, taking us from simple washes to the complex layers we enjoy today. The development wasn't confined to Europe; ancient papermaking traditions in Asia, particularly China, laid foundational techniques that eventually spread globally, influencing European methods and allowing for the nuanced, layered works by artists like J.M.W. Turner to push the boundaries of luminosity and atmospheric effects. Artists like John Sell Cotman and Paul Sandby also pushed the envelope, recognizing the paper itself as an integral part of their expressive work. Even the industrial revolution, centuries later, played a part, making consistent, machine-made papers accessible, though often at the cost of the unique character of handmade sheets. It's a reminder that even the most 'basic' material has a rich story, evolving alongside the artists who pushed its limits, much like my own artistic timeline evolves with new discoveries.

Weight Class: How Heavy Is Your Artistic Foundation?
Ever wonder why some paper feels like a flimsy napkin and others like a solid board? It's all about the weight, people! The weight of watercolor paper is measured in pounds (lb) or grams per square meter (gsm). It's crucial to understand that 140lb refers to the basis weight – historically, the weight of 500 sheets of a specific, large size (like 22 x 30 inches). This system is a bit archaic because it depends on the original sheet size, making direct comparisons tricky across brands or regions. Personally, I prefer working with gsm because it's a more universal and consistent measurement regardless of sheet size, telling you exactly how much density the paper has. This density translates directly into how much abuse the paper can take before it buckles, warps, or otherwise rebels against your artistic vision. So, which weight do you think best suits your current painting style?
1. 140lb (300gsm): The Reliable Standard
If you're buying watercolor paper, chances are you'll often see 140lb. This weight hits the sweet spot for many artists. It's my go-to for daily creative explorations, often bought in handy pads (glued on one side) or blocks (glued on all four sides to prevent buckling, a true godsend for impatient artists like me).
- Why it works: It's thick enough to handle a good amount of water without excessive buckling. For most studio work and studies, this is perfectly adequate. It's also more affordable than its heavier counterparts, making it a great option for practice or when you’re building your first abstract piece and want to experiment. It's the dependable friend who's always there, ready for whatever creative chaos you throw its way.
- My tip: If you're doing very wet washes on 140lb paper, taping it down to a rigid surface with artist's tape or stretching it can prevent buckling. I've learned this the hard way more times than I care to admit! My studio has seen more warped paper than a funhouse mirror thanks to my impatience.
2. 300lb (600gsm): The Unstoppable Force
This is the luxury vehicle of watercolor paper. At 300lb, it's incredibly thick and rigid, a true heavyweight champion.
- When I splurge: For my most important pieces, especially those where I plan on using a lot of water, multiple layers, or mixed media elements that truly soak into the surface, 300lb is a dream. It rarely buckles, even with heavy washes, and feels incredibly stable under the brush. It handles everything with grace, from delicate washes to aggressive scraping techniques, making it ideal for my bolder mixed media experiments. Its robust nature, combined with a suitable texture and sizing, allows for advanced techniques like heavy lifting, extensive layering, and even light scrubbing without compromising the paper's integrity. It's also exceptionally forgiving for lifting paint, as its thickness and strong fibers can withstand the manipulation without pilling or damage.
- The downside: It's significantly more expensive. But sometimes, for that perfect piece you envision potentially ending up in a gallery (or someone's lovely home after they buy it from my site), the investment is absolutely worth it. The permanence and stability it offers are unparalleled. It's the paper that lets you forget about the medium and just create.
Lighter Weights (90lb/185gsm or less): For Sketches Only
Honestly, anything lighter than 140lb is pushing it for serious watercolor work. You'll get severe buckling, and the paper might even pill – where fibers come loose and form little balls – or tear with too much moisture. I reserve these lighter papers strictly for quick sketches, color swatches, or maybe even ink work where minimal water is involved. Don't set yourself up for frustration!
So, for most watercolor endeavors, leaning towards 140lb (300gsm) or heavier is a solid choice for stability and control.
Watercolor Paper Weight Comparison
Weight (lb) | Grammage (gsm) | Characteristics | Best Uses | Downsides |
|---|---|---|---|---|
| 140lb | 300gsm | Versatile, good absorbency, moderate buckling | General painting, studies, most techniques | May require stretching for very wet washes |
| 300lb | 600gsm | Extremely thick, rigid, highly absorbent, almost no buckling | Important pieces, heavy washes, mixed media, professional work, lifting | Expensive |
| 90lb (or less) | 185gsm (or less) | Thin, easily buckles, less absorbent, prone to pilling | Sketches, practice, ink work with minimal water | Prone to buckling, pilling, tearing; not for serious watercolor |
Ready to explore how the physical feel of paper changes your painting? Let's dive into textures next, then peek behind the curtain at how these diverse surfaces come to life.
The Big Three Textures: Feeling the Surface of Your Art
So, you've got your weight sorted, but what makes one paper feel so utterly different from another? The answer often lies in its texture, sometimes called its tooth or grain. When you first step into the world of watercolor paper, you'll encounter three main types of surface textures. It's like choosing between smooth jazz, a rock anthem, or a symphony – each has its own feel and demands. Which of these textures sparks your curiosity the most for your next abstract exploration?
1. Cold Press: My Everyday Companion
This is my absolute workhorse. Cold press paper has a slightly textured surface, often described as a fine grain or "tooth." It's not too rough, not too smooth – it's just right for most applications.

- Why I love it: It holds water beautifully, allowing for lovely washes without the paper getting oversaturated too quickly. The texture grabs pigment, giving your colors a wonderful depth and vibrancy – especially for those vibrant wet-on-wet abstract explorations. It's forgiving enough for lifting color but has enough grip for detailed work. If you're just starting out, or looking for essential watercolor supplies for beginners, cold press is where I’d tell you to begin your journey. It truly shines for achieving the varied textures often found in basic watercolor techniques for beginners. For techniques like dry brush, its moderate texture allows for a subtle broken effect, while for lifting, its surface is generally resilient. Its balanced absorbency, often due to a good level of internal and external sizing, makes it incredibly versatile.
- Best for: Wet washes, creating beautiful granulation effects, and pretty much anything you can throw at it. It's versatile, robust, and handles both broad strokes and finer details surprisingly well. Honestly, if I could only pick one, this would be it. My studio is usually littered with sheets of cold press, probably in varying states of artistic chaos.
2. Hot Press: The Smooth Operator
Ah, hot press. This paper has an incredibly smooth, almost slick surface. It's pressed under heat during the calendering (pressing) process, hence the name, resulting in a very fine, even texture. Its smoothness makes it perfect for applications where crisp lines and vibrant, ungranulated color are paramount.

- When I reach for it: Honestly, not as often as cold press. But when I want super crisp lines, intricate details, or need the paint to really sit on the surface and glow without any texture interfering, hot press is the one. It's fantastic for botanical illustrations, precise ink work, or anything where sharp edges and luminous pigment are key. Glazing on hot press can be absolutely beautiful, allowing for incredible luminosity. It's also fantastic for mixed media work where you might want fine detail alongside watercolor, or for creating clean, luminous backgrounds for other elements. Its smooth surface also makes it ideal for masking fluid, as removal is cleaner, and for techniques like splattering where you want distinct dots of pigment. I remember one commission for a delicate abstract piece featuring sharp geometric forms and glowing translucence of layered glazes; only hot press delivered that precise, ethereal quality.
- Challenges: It can be a bit tricky. Water tends to bead up initially, and it dries faster, which means you have to work quickly. Lifting color can also be more difficult without disturbing the surface. For someone like me who loves exploring texture, its smoothness can sometimes feel limiting, but sometimes that challenge is exactly what my art needs – pushing me out of my comfort zone and forcing a different kind of precision.
3. Rough: Embracing the Wild Side
Rough paper is exactly what it sounds like – it has a pronounced, uneven texture. Think of it as the untamed cousin in the paper family, wild and free. The deep, irregular valleys and peaks on its surface are its defining characteristic.
- My experience: I don't use it frequently, but when I do, it's for very specific effects. The deep valleys and peaks of the paper create incredible granulation and sparkle, especially with pigments that love to separate. It's amazing for expressive landscapes, bold abstract pieces where you want a raw, organic feel, or for enhancing dry brush techniques where the texture grabs just the high points of the brush, creating a truly broken, dynamic effect. This "broken color" effect is a hallmark of rough paper. Its rapid absorption (often combined with its texture) also lends itself well to vibrant splattering and interesting salt effects. I once tried to capture the chaotic energy of a storm in an abstract piece, and rough paper, with its refusal to be tamed, gave me exactly the unpredictable, raw texture I needed to convey that intensity. It's definitely not for the faint of heart, or for someone like me trying to do a quick, precise sketch – my detailed work on rough paper usually looks like it was done by a toddler with a crayon.
- Considerations: Detail work is almost impossible on rough paper. Your brush skips across the surface, leaving unpainted areas that become part of the texture, which can be frustrating if you're not aiming for it. It rapidly absorbs water, so be prepared for quick drying and intense pigment absorption. It's a choice for when you want the paper to really show itself in the final piece, demanding respect but rewarding with unparalleled organic beauty.
Ultimately, matching the texture to your technique and desired outcome is key to unlocking the full potential of your watercolor work.
Watercolor Paper Texture Comparison
Texture Type | Surface Feel | Best Uses | Challenges |
|---|---|---|---|
| Cold Press | Slightly textured, fine grain (tooth) | Versatile for washes, granulation, lifting, general studio work, abstract art, subtle dry brush | None really, it's the all-rounder |
| Hot Press | Very smooth, slick | Fine details, botanical illustration, ink, luminous glazes, crisp edges, masking fluid | Dries fast, water can bead, harder to lift without disturbing surface |
| Rough | Pronounced, uneven texture | Expressive landscapes, bold abstracts, strong dry brush effects, intense granulation, splattering, salt effects, broken color | Detail work difficult, rapid absorption, less forgiving |
So, with textures covered, how about we peek behind the curtain and see how these wonderfully varied surfaces are actually made?
The Heart of the Craft: How Watercolor Paper is Made
Before we dive into what paper is made of, let's talk about how it's actually made. Understanding the manufacturing process offers another layer of insight into its characteristics, affecting everything from its texture to its strength. And yes, even the quality of the water used in the process can subtly influence the final product, as mineral content or pH levels can affect fiber bonding and absorbency. It's a truly alchemical process, if you ask me.
Handmade vs. Mould-made vs. Machine-made: A Spectrum of Craftsmanship
- Handmade Paper: This is the artisan's touch personified. Crafted sheet by sheet by skilled hands, often using traditional methods where pulp is gathered on a mould and deckle, pressed, and slowly dried. This results in incredibly unique, irregular textures and highly individual sheets. The fibers are often randomly oriented and intertwined in all directions, contributing to an inherent strength and dimensional stability that feels incredibly organic and alive under the brush. They tend to be more expensive and absorb water differently due to their less uniform fiber distribution – a true joy for those who embrace unpredictability.
- Mould-made Paper: For me, this often feels like the best of both worlds. Produced on a cylinder mould machine, these papers retain many characteristics of handmade paper – like a strong, random fiber orientation and often those beautiful, feathery deckle edges (which are replicated to mimic the handmade look). The fibers are naturally interlaced in a robust, multi-directional pattern, offering excellent stability and absorbency, but with greater consistency than purely handmade sheets. It's a beautiful balance of tradition and efficiency.
- Machine-made (Fourdrinier) Paper: Typically the most economical, machine-made papers (often from a Fourdrinier machine) offer very consistent texture and weight. While perfectly functional, and the backbone of many student-grade options, they sometimes lack the subtle nuances and unique character of handmade or mould-made papers, feeling more uniform and less 'alive' to some artists. This consistency can be a pro for certain applications, but a con if you're chasing that organic unpredictability.
The Magic of the Deckle Edge
Have you ever noticed the soft, feathery, untrimmed edges on some high-quality paper? That's a deckle edge, and it's a hallmark of traditional papermaking, especially with handmade and mould-made papers. It's formed naturally during the manufacturing process where the paper pulp flows over the edge of the mould (a framed screen) and slightly seeps underneath, creating that distinctive, feathered edge. Artists often love deckle edges because they lend an organic, handmade, and sophisticated feel to a finished piece, often creating an artifact-like quality when framed without a mat. It's a small detail, but it speaks volumes about craftsmanship.
The Grain Direction: Long vs. Short
Beyond the surface, understanding if a paper has a long grain or short grain can also be surprisingly important, especially when stretching or folding. Paper tears and buckles more easily against the grain. Knowing your paper's grain direction can save you some frustration, especially on larger pieces where stability is key.
From the hands of artisans to the precision of machines, each manufacturing method imparts a unique character to the paper, shaping its interaction with your brush and pigment.
Now that you know how paper comes to be, let's talk about its secret ingredients: the fibers and the invisible sizing that truly dictate its performance.
The Unseen Heroes: Fibers, Sizing, and a Conscience
Beyond texture and weight, what the paper is made of and how it's treated are huge factors. These are the things you don't always see but definitely feel, like the invisible forces that shape a piece of art itself. What secrets do these unsung heroes hold? It’s a reminder that even in our art, we hold a responsibility to the planet. Traditional paper production often involves extensive deforestation and significant water usage, making sustainable alternatives all the more crucial. Does the material and treatment of your paper influence your creative choices?
Cotton vs. Wood Pulp: A Material Difference
Most quality watercolor papers are made from either 100% cotton (often called "rag" paper) or wood pulp. When thinking about their environmental impact, it's worth noting that while using cotton rag paper often repurposes textile industry waste, virgin cotton farming can be water-intensive and require significant pesticide use. Wood pulp, while renewable if managed sustainably, can contribute to deforestation if sourced irresponsibly, and its processing often involves more chemicals, leading to greater environmental concerns if not managed with care. This is where exciting alternatives like bamboo come into play, offering a rapidly renewable source that is strong, absorbent, and often comes with a lovely, subtle texture, and often a smaller environmental footprint due to its rapid growth and fewer processing chemicals. There are also recycled paper options available, which can be an excellent sustainable choice, though artists should be aware that the consistency and archival qualities might vary more than with virgin fibers. Personally, I'm always looking for ways to make my art practice more sustainable, so these considerations often weigh on my choices.
- 100% Cotton: This is the gold standard, and my clear preference. Cotton fibers are long and strong – at a microscopic level, they are naturally elongated and intertwined, allowing them to form a robust, interlocking matrix when pressed. This makes the paper incredibly durable, absorbent, and less prone to buckling. The longer the fibers, the more they interlock during papermaking, creating a stronger, more stable sheet that can handle significant manipulation. It holds water beautifully, allowing for longer working times and more even washes – a dream for layering glazes or working wet-on-wet. Cotton paper is also naturally acid-free, meaning your artwork will last for centuries without yellowing or becoming brittle – a crucial consideration for any serious artist building my timeline of work, and certainly for those pieces I hope to share with the world. Under the brush, it feels alive, responsive, almost collaborating with the paint to create rich, luminous effects.
- Wood Pulp (Student Grade): Often found in student-grade papers, wood pulp papers are more affordable but come with compromises. Their fibers are shorter and weaker than cotton, resulting in a less durable sheet. They are less absorbent, dry faster, and are more likely to buckle or warp. While fine for practice and initial experiments, I generally avoid them for finished pieces. They just don't offer the same control, vibrant pigment retention, or archival qualities. It's a bit like trying to run a marathon in flip-flops; you can do it, but why make it harder?
- Bamboo Paper: This is an exciting alternative! Bamboo is a rapidly renewable resource, and bamboo watercolor papers are often incredibly strong, absorbent, and offer a unique, subtle texture. I've experimented with them for specific abstract pieces, and they provide a lovely, earthy feel. They represent a fantastic, eco-conscious choice that doesn't compromise on quality, making them a personal favorite for certain projects.
Sizing: The Invisible Barrier
Sizing refers to a substance (traditionally gelatin, but now often a synthetic alternative for vegan-friendly papers) added to the paper, either internally (mixed into the pulp) or externally (coated on the surface). This is super important because it controls how absorbent the paper is – essentially, how much resistance it gives to water. Think of it as the paper's gatekeeper for moisture. If you're a vegan artist, always check for synthetic sizing! I once struggled with a paper that absorbed everything instantly, and I swore my paints were suddenly terrible. Turns out, it was just very lightly sized – a lesson learned the hard way!
- My discovery: Without sizing, watercolor paper would act like a thirsty sponge, absorbing paint instantly and preventing pigment from sitting on the surface to create those vibrant washes and blends we love. Good sizing allows the paint to sit on the surface for a while, giving you crucial time to blend, lift, and manipulate it before it fully dries. This "sizing degree" directly impacts techniques:
- Heavy Sizing: Paint sits on the surface longer, allowing for more blending time, easier lifting, and crisp edges. Ideal for controlled washes and glazing. The water will bead more on the surface, giving you maximum control.
- Light Sizing: Paint is absorbed more quickly, leading to faster drying, more intense granulation, and sometimes less control over wet-on-wet blends. The water soaks in quickly, and pigments might appear duller. You can even test a paper's sizing yourself: drop a tiny bit of clean water on a corner. If it soaks in immediately, sizing is minimal; if it beads or sits for a moment, the sizing is stronger. If you ever find a paper that is too absorbent for your liking, a very light, even spray of a watercolor ground or a dilute acrylic medium can sometimes reduce its thirst, though this is an advanced technique that can drastically alter the paper's feel and should be approached with caution.
- Internal vs. External Sizing: Think of internal sizing as adding a water-resistant ingredient directly into the paper's "dough" (pulp slurry) during manufacturing, making the whole sheet less absorbent throughout its core. External sizing, on the other hand, is like giving the finished paper a protective coat or glaze on its surface, primarily affecting how water initially interacts with the paper. Most quality papers use a combination, carefully balanced to provide that sweet spot of absorbency and workability. This balance, often referred to as the "sizing degree," is what truly dictates how the paper reacts – too much external sizing can make the paper feel almost plastic-y, causing paint to bead excessively; too little internal sizing means it'll drink water like it's been in a desert. This intricate interplay is a huge part of the "hidden science" I mentioned earlier.
- Beyond Sizing: Other Treatments (like Optical Brighteners): While sizing is the primary treatment, some papers might have other subtle surface treatments or coatings for specific purposes, such as enhanced brightness. Often, this brightness is achieved through optical brightening agents (OBAs), which can make paper appear whiter initially but can degrade over time, causing yellowing or a duller appearance. This directly affects the archival quality and longevity of your artwork, a significant consideration for any serious painter. These are less common in traditional watercolor papers but worth being aware of, especially if you encounter papers with unusually specific claims of "extra white" or "brilliant" surfaces.
Fibers and sizing are the quiet architects of your paper's performance, profoundly shaping how your watercolors will behave and endure.
So, with all these technical details swirling, how do you put it all together to find your perfect paper?
My Go-To Paper Combinations (You've Asked, So Here They Are!)
Okay, after years of trial and error (and more errors than trials, let's be honest), I've settled on a few papers that consistently deliver. While I'm not going to give you specific brand names right now – preferences can change, and artisanal mills or well-established brands evolve, much like my own art practice – I can tell you that my favorite papers always fall into these categories. These are the unsung heroes that consistently support my creative flow, providing reliable starting points for my artistic explorations:
Paper Type | Weight | Why I Love It | Best For My Work | Why it works for my abstract style |
|---|---|---|---|---|
| 100% Cotton, Cold Press | 140lb (300gsm) | My everyday hero, reliable for consistent results, handles layers & lifting with grace. It feels responsive, holding the paint just long enough for me to manipulate it. | Energetic abstract explorations & structured pieces. | Its texture catches pigment beautifully for organic granulation, perfect for building subtle depth and spontaneous flow, allowing for dynamic layering without the paper losing its integrity. The way the fibers absorb water creates a luminous glow I adore. |
| 100% Cotton, Cold Press | 300lb (600gsm) | Incredible stability, allows intense layers without buckling. It offers a luxurious feel under the brush, a true sense of permanence. | My most ambitious intuitive painting experiments. | Stands up to vigorous wet-on-wet techniques and heavy mixed media additions without complaint, allowing ultimate freedom to build dense, textured compositions or delicate, translucent washes. It's the ultimate canvas for fearless exploration. |
| 100% Cotton, Hot Press | 140lb (300gsm) | Super crisp lines, intricate details, luminous, ungranulated washes. I love how the pigment just floats on the surface, offering pure, unadulterated color. | Delicate commissions, precise studies, sharp geometric abstracts. | Provides a smooth canvas for precise ink lines and vibrant, untextured glazes that make colors truly sing, especially for sharp geometric forms or delicate, layered translucence, offering a stark contrast to textured pieces or for creating underlying structural elements that pop with crispness. |
Connecting the Dots: Paper and My Abstract World
Ultimately, the paper I choose isn't just about technical performance; it's about how it allows me to express my artistic vision. For my abstract work, where I often layer colors and embrace the unpredictable flow of water, having a paper that can handle those demands is paramount. It allows me to focus on the emotional connection and the unfolding narrative within the piece, rather than wrestling with a buckling surface. The right paper is an extension of my hand, a silent collaborator that understands my desire for vibrant hues and subtle textures. For instance, the way cold press's subtle texture breaks up a wide wash allows me to create organic, shifting landscapes of color – soft edges and natural transitions that are a cornerstone of my abstract expression – without needing to add physical texture mediums. The inherent color of the paper, whether a brilliant white or a softer, warmer cream, also subtly influences how pigments appear, allowing me to adjust my palette to achieve either stark contrast or gentle harmony. It's the foundation upon which my abstract language truly comes alive. How does the paper you choose influence your abstract expression?

How to Find Your Best Watercolor Paper
So, how do you navigate this vast world of paper to find your perfect partner in paint? My favorites might not be your favorites, and that's perfectly okay! Art is intensely personal, and so is your relationship with your materials. Here’s how you can embark on your own paper quest, a journey of discovery that's just as much fun as the painting itself:
- Buy Samples: Many art stores sell single sheets or small blocks of different papers. This is the best way to try before you commit to a whole block or roll. Think of it as dating different papers before settling down.
- Consider Different Forms: Beyond individual sheets, paper comes in blocks (glued on all four sides to prevent buckling, ideal for travel), pads (glued on one side, great for studies), and rolls (offering ultimate freedom for custom sizing, especially for large works). Each form has its own benefits depending on your workflow and project scale.
- Test Consistently: When you get a new paper, test it with the same techniques you typically use: a flat wash, a graded wash, wet-on-wet, lifting, dry brush. But also try with granulating pigments, salt effects, or even a few splatters. See how it reacts with different types of watercolor paints – a student-grade paint might behave differently than a professional one, and some pigments are just more granulating than others. Don't just noodle around; approach it like a scientific experiment for your art.
- Document Your Findings: Keep a little notebook. Jot down the paper type, weight, brand, and your observations. What did you like? What didn't you like? This creates a valuable reference for your artistic journey, helping you remember those 'aha!' moments and avoiding past frustrations.
- Don't Be Afraid to Experiment: Just like I encourage the power of imperfection, don't be afraid to try papers that seem outside your comfort zone. You might surprise yourself and discover a new favorite that opens up entirely new creative avenues! And hey, if you find a combination that truly sings for you, drop a note in the comments – I love hearing about other artists' discoveries.
Still got questions swirling in your mind? Let's tackle some of the most frequently asked ones.
Frequently Asked Questions About Watercolor Paper
Q: Can I use regular drawing paper for watercolor? A: You can try, but I'd strongly advise against it for anything beyond a very light sketch. Honestly, I've seen artists try it, and it's a recipe for frustration! Regular drawing paper isn't designed to handle water and will buckle severely, pill, and likely lead to very frustrating results. Even student-grade watercolor paper is significantly thicker and has been treated to better withstand moisture. Invest in even student-grade watercolor paper if you're serious about the medium. Your artistic sanity will thank you.
Q: What's the difference between student-grade and artist-grade paper? A: Beyond just the fiber content (often wood pulp for student, 100% cotton for artist), artist-grade papers offer superior consistency in texture, sizing, and absorbency, ensuring predictable results. This consistent sizing degree is crucial for how paint behaves on the surface, allowing for more control in techniques like glazing or lifting. They also boast better archival qualities, meaning your art will last longer without degradation. Student-grade is fine for practice, but artist-grade elevates your finished pieces.
Q: What does "acid-free" mean, and why is it important? A: "Acid-free" means the paper has a neutral pH. This is crucial for the longevity of your artwork. Acidic papers will yellow, become brittle, and deteriorate over time, potentially ruining your hard work. If you want your art to last, always choose acid-free paper. It's about preserving your creative legacy.
Q: Which paper is best for specific watercolor techniques like dry brush, splattering, or masking fluid? A: This is a great question! For dry brush, rough paper excels, as its pronounced texture grabs only the highest points of your brush, creating beautiful broken lines and sparkle. Cold press also works well for a subtler dry brush. For masking fluid, hot press is often preferred due to its smooth surface, which allows for clean, crisp lines and easier removal of the fluid without tearing the paper. Cold press can work, but the texture might make masking fluid removal a bit trickier, especially with delicate designs. For lifting color, cold press and especially 100% cotton papers are usually most forgiving, allowing more pigment to be removed without damaging the fibers, while hot press can be harder without disturbing the surface. For splattering or salt effects, rough or cold press papers often yield the most interesting and unpredictable textures, as their surfaces and sizing encourage pigment to settle in varied ways. Always consider the combination of weight, texture, and sizing when matching paper to your technique.
Q: How do I choose watercolor paper for specific abstract art styles (e.g., gestural vs. geometric)? A: For gestural or expressive abstracts where you want organic flow, granulation, and dynamic textures, a 140lb or 300lb cold press or rough paper is often ideal. Rough paper, in particular, can deliver a very raw, energetic feel. Their textures and absorbency really bring those unpredictable water-and-pigment interactions to life. For geometric, minimalist, or precise abstracts that demand crisp lines, luminous glazes, and clean edges, a hot press paper (140lb or 300lb) will be your best friend. Its smooth surface allows for unparalleled detail and vibrant, untextured color application. For layered, translucent effects in any style, 100% cotton paper with good sizing will give you the working time you need. It's all about matching the paper's inherent properties to the visual language you're trying to achieve.
Q: Should I tape my watercolor paper down? A: For lighter weights (like 140lb/300gsm), yes, absolutely, especially if you plan on using a lot of water. Taping it down to a rigid board with artist's tape helps prevent buckling. For very heavy washes or certain paper types, stretching the paper before painting is the most effective preventative measure; even with tape, 140lb paper might still show some minor buckling with extremely wet techniques. For heavier weights (300lb/600gsm), it's usually not necessary unless you're doing extremely wet work – they're pretty robust on their own.
Q: My paper buckled! What can I do? A: Don't panic! Once your painting is fully dry, you can try to flatten it. Place the painting face down on a clean, flat surface. Lightly mist the back of the paper with clean water (avoiding the painted side!). Then, place a clean sheet of paper or blotting paper over the back, followed by a heavy, flat object (like a stack of books or a piece of plywood). Let it sit for at least 24 hours, or even a few days, checking periodically. This often helps to restore flatness, especially for lighter papers. For very stubborn buckles, a dry mounting press or professional conservation might be needed, but usually, gentle pressure works wonders.
Q: How do I store my watercolor paper and finished artwork? A: Store your unused paper flat in a cool, dry place, away from direct sunlight, humidity, sources of heat, or strong odors. Acid-free folders or flat files are ideal. For finished artwork, proper storage and archival framing are crucial. Ensure your frame uses acid-free matting and backing to prevent degradation over time. This prevents warping, discoloration, and damage, ensuring your precious paper and art are ready for their moment in the spotlight.
Q: What's the manufacturing difference between cold press and hot press? A: The primary difference lies in the final pressing stage. Cold press paper is pressed through cold rollers, which gives it that slightly textured surface. Hot press paper, on the other hand, is pressed through heated rollers (during the calendering process), which smooths out the fibers and results in its characteristic slick finish. This heat treatment is what accounts for the dramatic difference in texture.
Q: How do I choose watercolor paper if I'm on a budget? A: A very practical question! Start with 140lb (300gsm) cold press paper, as it's the most versatile and generally the most affordable for quality. Look for student-grade versions of 100% cotton paper from reputable brands, as these can sometimes offer a great balance of quality and price. Buying in pads or large sheets to cut down yourself can also save money. Remember, even a good quality student paper is far better than regular drawing paper for watercolor, so invest what you can to avoid frustration and enjoy the process!
Q: Can I use watercolor paper for other media like acrylics or oils? A: While watercolor paper is specifically designed for water-based media, you can use heavier weights (like 300lb/600gsm) for very light applications of acrylics or even thin acrylic washes, especially if primed with gesso, but it's still not the primary intended use. However, it's not ideal for heavy impasto or full-bodied oil painting. Acrylics and oils are typically best on canvases or panels that offer different absorption and structural integrity. For a truly professional result with these other media, I'd recommend using papers specifically made for them, or traditional canvases. Don't force a square peg into a round hole, as my grandfather used to say – especially not with your art!
Final Thoughts on This Paper Journey
It might seem like a lot to think about for something as simple as paper. But trust me, finding the right surface is one of those small, foundational decisions that can profoundly impact your confidence and the joy you find in painting. Don't be afraid to try new things, make mistakes (that's my superpower!), and discover what truly resonates with your unique artistic voice. Your watercolor journey deserves the best stage you can give it. Go forth, experiment, and let your artistic spirit soar – on the perfect paper, of course!


