Art Markers: Ultimate Guide to Types, Blending & Pro Tips for Artists
Unlock creative potential with this ultimate guide to art markers! Explore alcohol vs. water-based, discover top brands, master blending techniques, and gain pro insights for all artists.
The Ultimate Guide to Art Markers: Types, Blending, & My Quest for Vibrant Color
Alright, let's talk markers. For a long time, I genuinely thought a marker was just… a marker. You know, grab whatever was handy, scribble a bit, and call it a day. But oh, how wrong I was! My dive into the vibrant, sometimes frustrating, but ultimately rewarding world of coloring with markers has taught me a thing or two. I still vividly remember one particular piece, trying to conjure a really smooth gradient – a subtle shift from a deep indigo to a soft lavender. I was using some random markers I'd picked up on a whim, and the result was less a graceful blend and more a patchy battlefield. Frustration? Absolutely. That's when it hit me: like so much in art, the tools aren't just tools; they're extensions of your intention. They either help your artistic vision sing or make you stumble. My studio sometimes smells like a craft store that's had a small incident with a rubbing alcohol factory, if you catch my drift!
Today, I want to share the unfiltered truth – my personal favorites, the hidden quirks, and why investing even a little thought into your tools can utterly transform your creative process. Consider this your definitive resource, a deep-dive into everything from different types and blending techniques to longevity and cost. This comprehensive guide is designed to help you make informed choices, whether you're a complete novice or a seasoned pro, and truly master marker art. We'll start by demystifying the core ink differences, explore various techniques, then dive into the physical attributes of markers themselves, before I share my personal favorites. We'll explore the unique feel of different marker types, delve into their history, uncover advanced blending strategies, consider crucial paper choices, and finally, I'll share my personal top picks to get you started or level up your artistic journey.

So, if you've ever felt that disconnect, or you're just starting and feeling overwhelmed by the sheer number of options out there, you're absolutely in the right place. This isn't just a guide; it's my personal journey, born from countless hours of coloring, experimenting, and yes, sometimes even messing up spectacularly. We'll explore the nuances, pitfalls, and pure joys of marker art, so you can skip some of those patchy battlefield moments I endured. Markers bring a completely different kind of magic to the table, a magic that often gets overlooked. For me, it's about speed, pure intensity of color, and that wonderfully satisfying, almost effortless flow. When you need a fast, vibrant, and consistent color application that’s distinct from the painterly feel of watercolors or the layered depth of colored pencils, markers offer a unique and powerful solution.
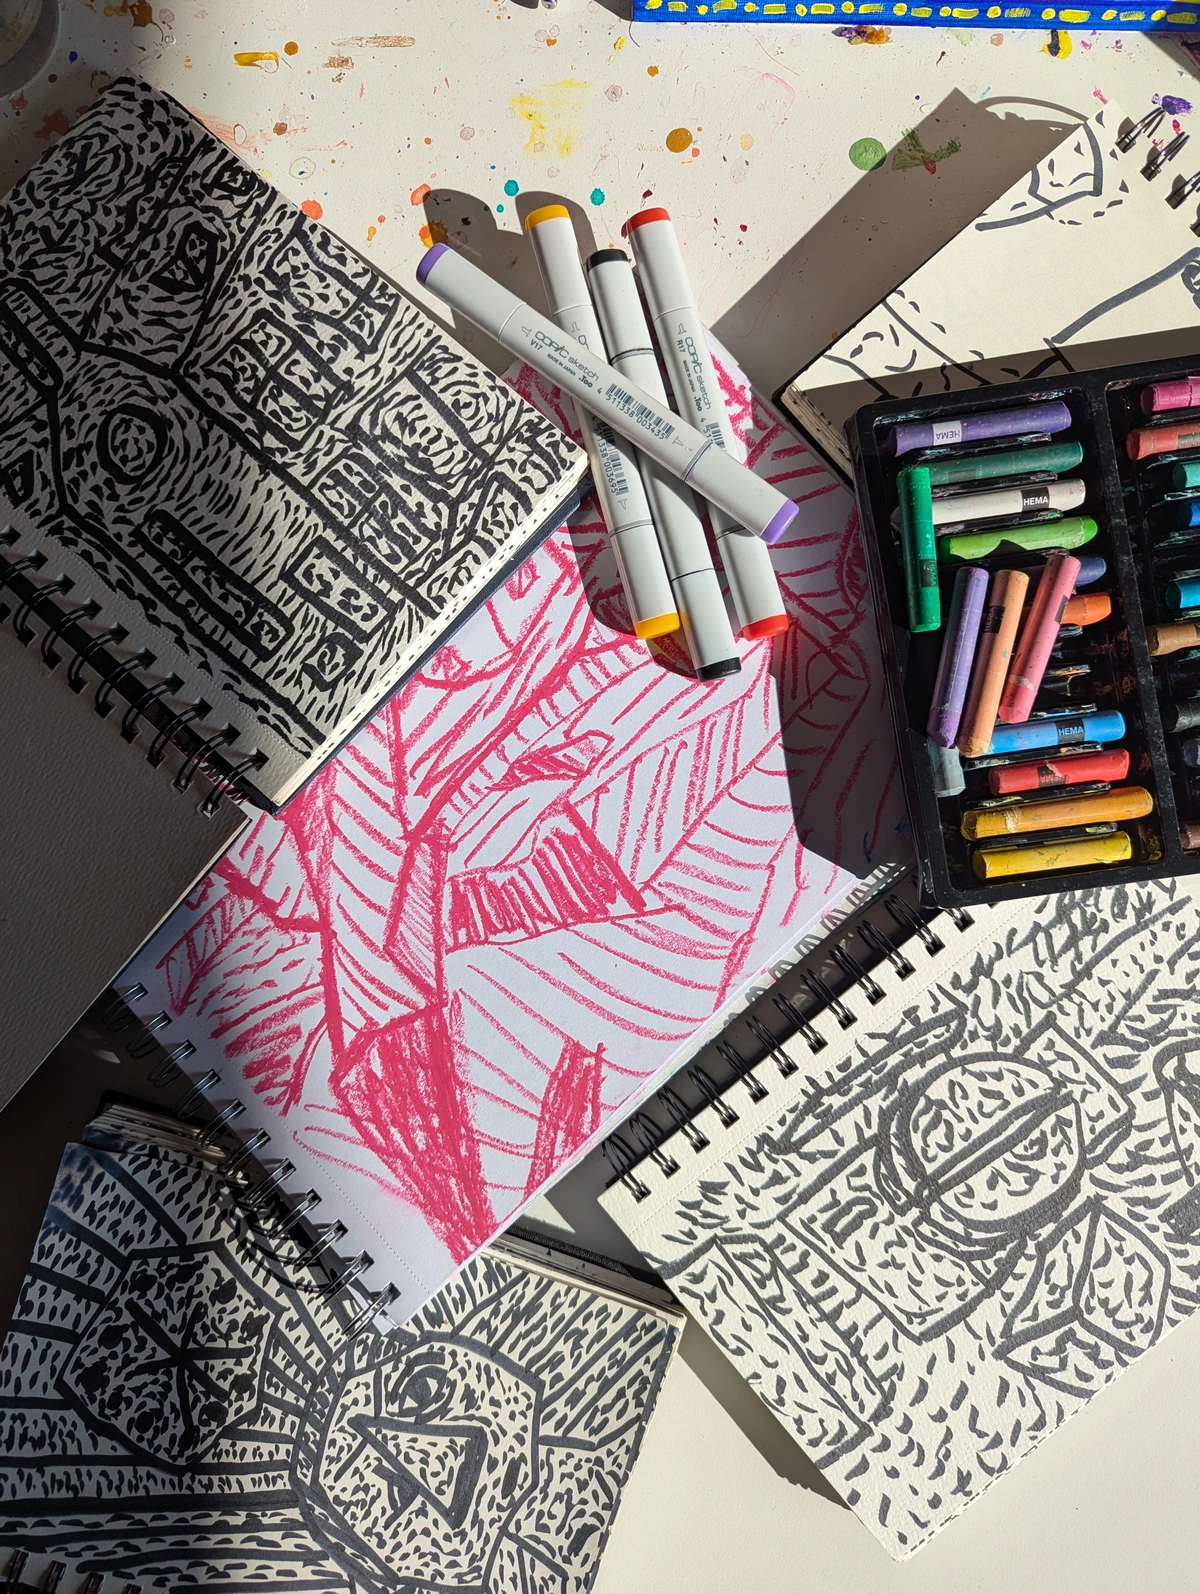
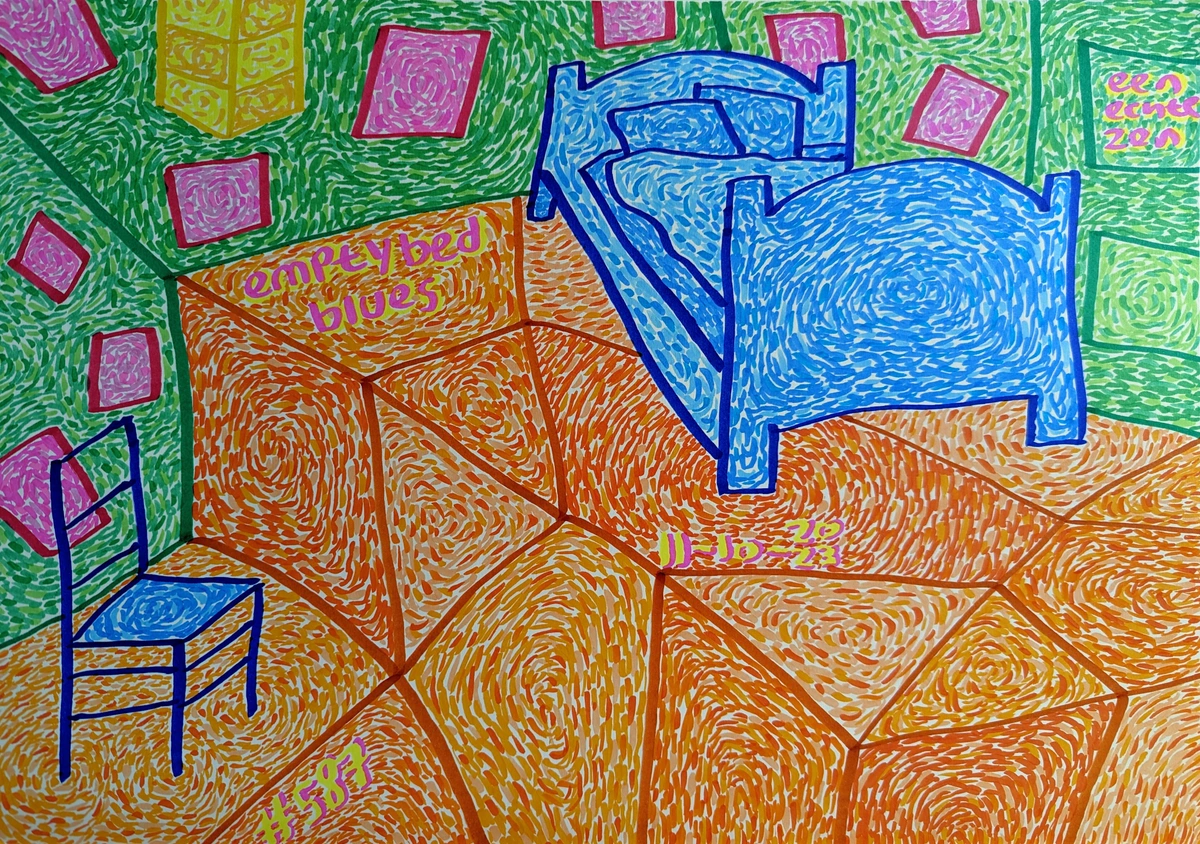
Their brilliance truly shines when you need to lay down large, vibrant, and consistent areas of color quickly. It’s like painting, but with the immediacy and control of drawing, a tactile experience that digital tools can only mimic but never quite replicate. There's something profoundly satisfying about the physical interaction of nib on paper, the subtle scent of the ink, the way colors blend directly before your eyes – a tangible, sensory connection to the art-making process that I find deeply grounding, especially in my abstract work. And when you learn to blend them properly – a secret we'll definitely unlock later – the results can be nothing short of stunning. This versatility makes them fantastic for everything from illustrative work and graphic design to comic art and, naturally, general coloring. They allow for bold statements and crisp lines in a way other mediums struggle to match. If you're wondering how artists use color to create immediate impact, markers are often a huge, often underestimated, part of that vibrant equation.
A Quick Dip into Marker History: From Ancient Reeds to Modern Nibs
Before we delve into the modern marvels, it's worth a moment to appreciate where markers came from. While the felt-tip pen as we know it emerged in the mid-20th century, the concept of a self-contained ink applicator has roots much deeper. Early forms can be traced back to ancient Egypt, where hollow reeds filled with ink were used for writing. Think too of early quill pens, precursors in their own right, and the continual quest for better ink delivery. Fast forward to the mid-1900s, and we see the first true 'modern' felt-tip markers appear. In 1944, a Japanese inventor named Yukio Horie developed the "Magic Marker," often credited as the first modern felt-tip pen, initially for industrial applications and drafting. This innovation in ink chemistry – the formulation and stabilization of dyes and pigments – paved the way for the artistic tools we cherish today. Other notable early contributors include Sidney Rosenthal, who patented a felt-tip marking device in 1953, and the widespread commercialization by companies like Speedry, further cementing the marker's place.
It wasn't long before artists and designers, always on the hunt for new tools, discovered their potential for vibrant, immediate color. Think of the explosion of commercial art, advertising, and comic books in the mid-20th century – markers became an indispensable tool for their speed, intensity, and clean lines. This period also saw movements like Pop Art, which embraced bold, flat areas of color and graphic lines, finding markers to be a perfect medium for achieving these aesthetic goals quickly and efficiently. This period saw rapid advancements in ink chemistry, leading to more stable, vivid dyes and pigments, and the introduction of new nib materials like synthetic fibers, which greatly improved ink flow and durability. Companies like Sanford, Winsor & Newton, and many others have since refined these formulations and designs, transforming simple office tools into the incredibly sophisticated instruments for art we have today. It's been a quiet revolution, really, from a humble writing tool to an indispensable artistic companion that allows for unparalleled color intensity and control.
All of this innovation ultimately led us to a fundamental fork in the road for marker users: the big divide between how inks are formulated, which dictates how they perform. So, let's explore that core difference now.
The Big Divide: Alcohol vs. Water-Based Markers – Understanding the Core Difference
Alright, my friend, this is where the real fun begins, where the rubber truly meets the road – or, more accurately, where the ink profoundly meets the paper. There are two primary types of markers you'll encounter in the wild, and understanding their fundamental differences isn't just helpful; it's absolutely key to choosing the right companions for your creative adventures. Each has its own personality, its own strengths and weaknesses, much like different paint types or drawing pencils.

Alcohol-Based Markers: My Go-To for Seamless Blends and Vibrant Intensity
These are often the undisputed darlings of professional artists and illustrators, and for incredibly good reason. The ink is, as the name suggests, alcohol-based, meaning it uses alcohol as a solvent. This solvent, often a blend of ethanol and isopropanol with added glycols (which slow drying slightly and improve flow), is the magic ingredient: it allows fresh layers to reactivate and seamlessly merge with previous ones before rapidly evaporating to create a smooth, streak-free finish. This fast drying time also significantly reduces smudging. I find them absolutely indispensable when I want to create those dreamy, seamless gradients, rich layered colors, or bold, saturated areas. For artists aiming for those dreamy, seamless gradients, alcohol markers are the undisputed champions, offering an unparalleled ability to merge colors. Think of them as tiny paintbrushes delivering pure, concentrated pigment, but with the immediate control of a pen.
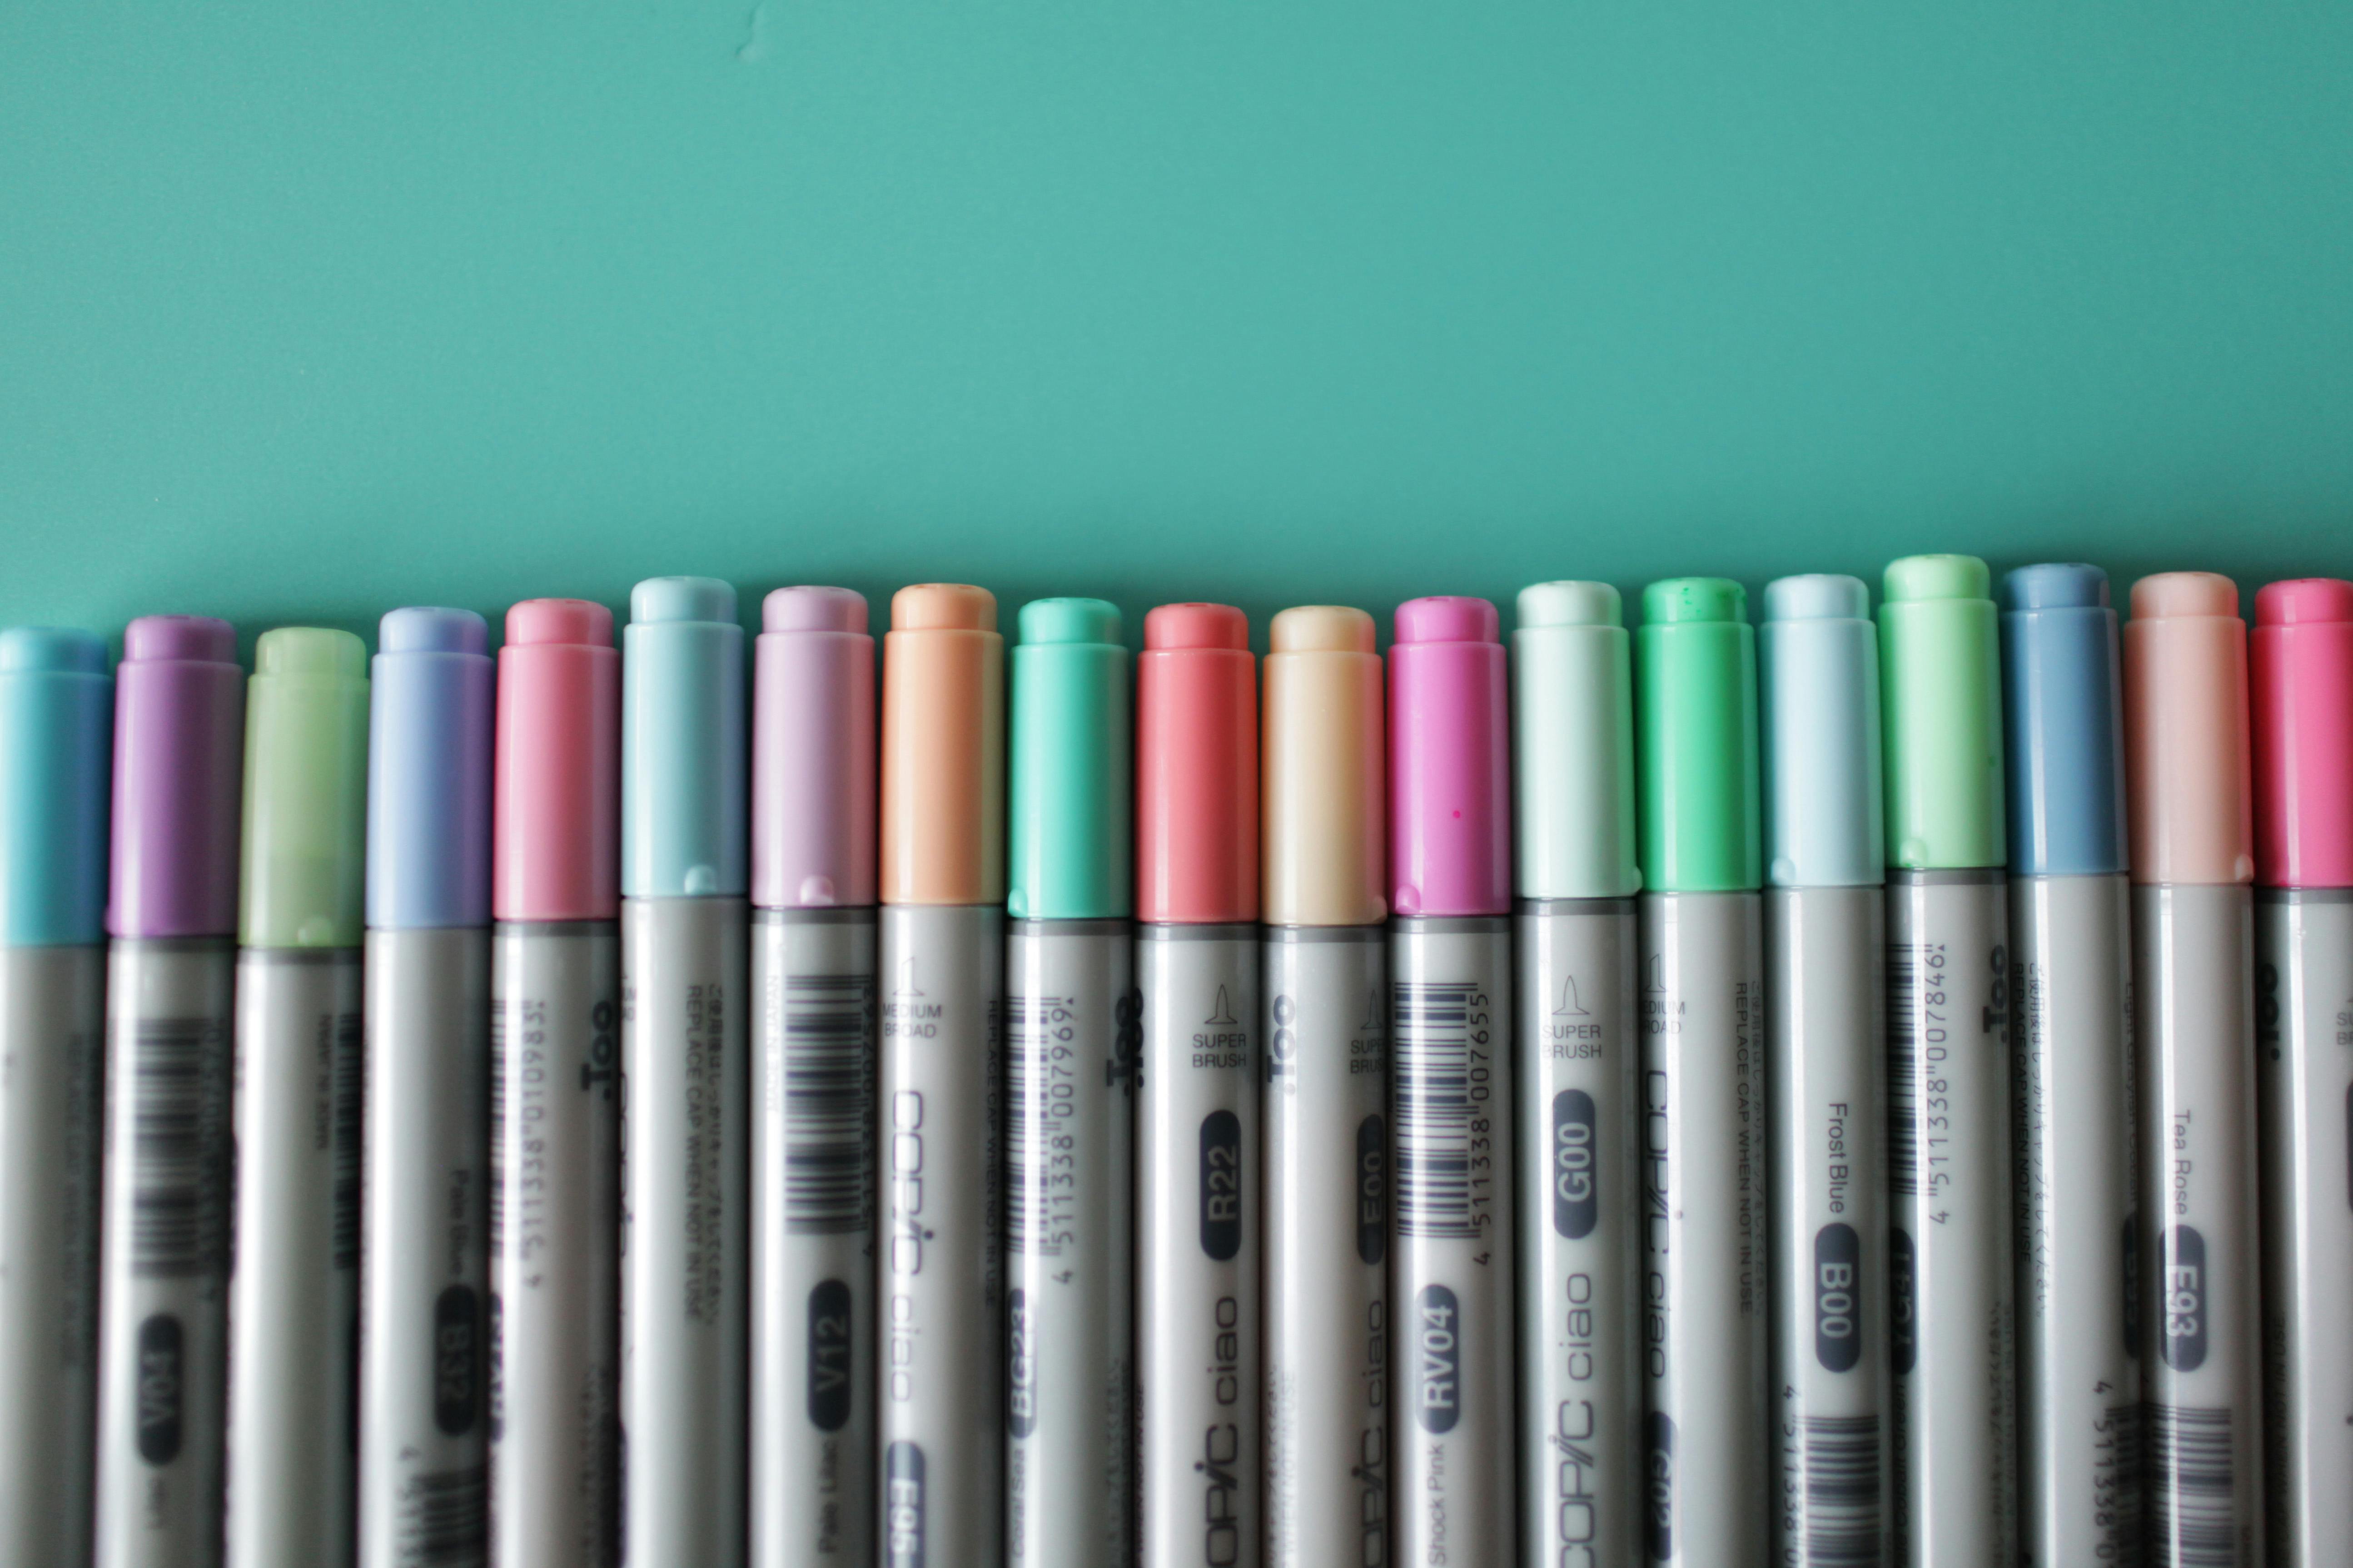
Many professional brands, particularly Copic, use a sophisticated color numbering system (like B00 for light blue, or R29 for a specific red). This isn't just random; it's a carefully designed system where numbers typically indicate hue (the pure color, like red or blue), saturation (the intensity or purity of the color), and brightness (how light or dark the color is, also called value or lightness). This HSB (or HSV) system makes it incredibly intuitive to select complementary shades for perfect blends and consistent results across different pieces. For example, in the Copic system, a number like B000 (Pale Thistle) represents an extremely light, desaturated blue. As the number increases within the same hue family (e.g., B02 (Light Blue), B06 (Violet)), the color generally becomes darker or more saturated, all designed to blend seamlessly with each other. It’s like having a color scientist in your marker set, guiding your choices! Most alcohol markers utilize dye-based inks, which are known for their vibrant, translucent qualities. These dyes use smaller color molecules dissolved in the solvent, allowing them to penetrate paper fibers more deeply, resulting in smooth transitions and intense saturation. While rare, some specialized alcohol markers may incorporate pigment-based inks for increased lightfastness, though this often comes with a trade-off in transparency and blending properties.

Pros:
- Exceptional Blending: This truly is their superpower. The alcohol solvent allows colors to melt into each other beautifully, especially when paired with a dedicated colorless blender marker. Achieving smooth, painterly gradients has never been easier, and techniques like layering (building up color saturation) and lifting (using the colorless blender to remove or lighten areas) are highly effective.
- Vibrant and Intense: The colors are typically incredibly saturated, vivid, and opaque, offering a rich color payoff that pops off the page, perfectly suited for the bold statements I often aim for in my abstract pieces. Many alcohol markers boast high ink saturation, meaning they deliver a large amount of pure pigment, contributing to their intense colors.
- Quick Drying: Their rapid drying time means less waiting around between layers and significantly reduces the chance of accidental smudging, keeping your workspace (and your art) cleaner.
- Permanent: Once dry, the ink is generally permanent and waterproof. This means it won't smudge or reactivate with water. (Though it's crucial to distinguish this from true archival lightfastness, which we'll discuss later.)
Cons:
- Bleed-Through is Real: This is perhaps their most notorious trait. Alcohol markers will almost certainly bleed through most standard paper, often dramatically. You'll absolutely need to use thick, specialized marker paper or, at the very least, place a protective sheet underneath your artwork to save your desk (and subsequent pages!). My first few attempts at using them on sketchbook paper ended with unintentional 'abstract expressionism' on the next page, and not in a good way.
- Fumes are a Factor: The alcohol base produces a distinct, sometimes strong, odor. Good ventilation in your workspace isn't just recommended; it's your best friend during those marathon coloring sessions, lest you find yourself accidentally painting with your eyes half-closed, for both your comfort and well-being. These fumes contain Volatile Organic Compounds (VOCs), which are chemicals that easily evaporate into the air and can pose health risks if inhaled over long periods. Keep those windows open!
- Initial Investment: Quality alcohol markers can be quite an investment, particularly at the professional end of the spectrum (looking at you, Copic!). However, as we'll see, this cost often comes with benefits like refillability and longevity.
- Limited Inter-Brand Compatibility: While some alcohol markers from different brands can be blended together, it's often a gamble. Different solvent formulations can react unpredictably, leading to muddy colors, patchy blends, or even damage to nibs. For truly seamless results, I highly recommend sticking to one brand within a project or testing compatibility on scrap paper extensively before committing.
My Favorite Brands:
- Copic: Ah, Copic. The undisputed gold standard, really. Yes, they come with a hefty price tag, but the sheer blendability, an unparalleled color range (we're talking hundreds!), and their truly refillable and replaceable nib design make them an investment that pays dividends if you're serious about your art. I've had some of my Copic markers for years, dutifully refilling them over and over (often up to 7-9 times per marker). They've been with me through countless projects, from detailed illustrations to abstract explorations. The different lines (like Sketch, Ciao, and Original) offer various barrel shapes and nib combinations, with Sketch being the most popular for its oval barrel and Super Brush nib, and Ciao being a more budget-friendly entry point. Their inks are dye-based. The marker's feel – its weight, balance, and comfortable grip – is also meticulously designed, reducing hand fatigue during long creative sessions. For an even deeper dive, check out my Copic markers review for professional artists.
- Winsor & Newton Promarker: These are my absolute workhorses, a fantastic mid-range option that consistently delivers. They typically feature dual tips (broad chisel and fine bullet). They boast great color saturation, impressive blendability, and are generally a bit more accessible price-wise than Copics. I’ve leaned on Promarkers for so many pieces where I needed reliable, vibrant color without breaking the bank. They really bridge that gap between enthusiast and professional quality. Their inks are dye-based. For a more detailed look, consider exploring articles about best alcohol-based markers for artists.
- Ohuhu: If you're on a tighter budget but still eager to explore the world of alcohol markers, Ohuhu has truly stepped up their game. They offer an impressive range for the price, often including both brush and chisel tips. While not quite Copic-level, they've come a long way in quality and blendability, making them an excellent entry point for aspiring artists. Their inks are also dye-based. These are a fantastic option for student-grade markers, offering performance far beyond their price point.
Water-Based Markers: For Finer Details, Lower Odor, and Watercolor Whispers
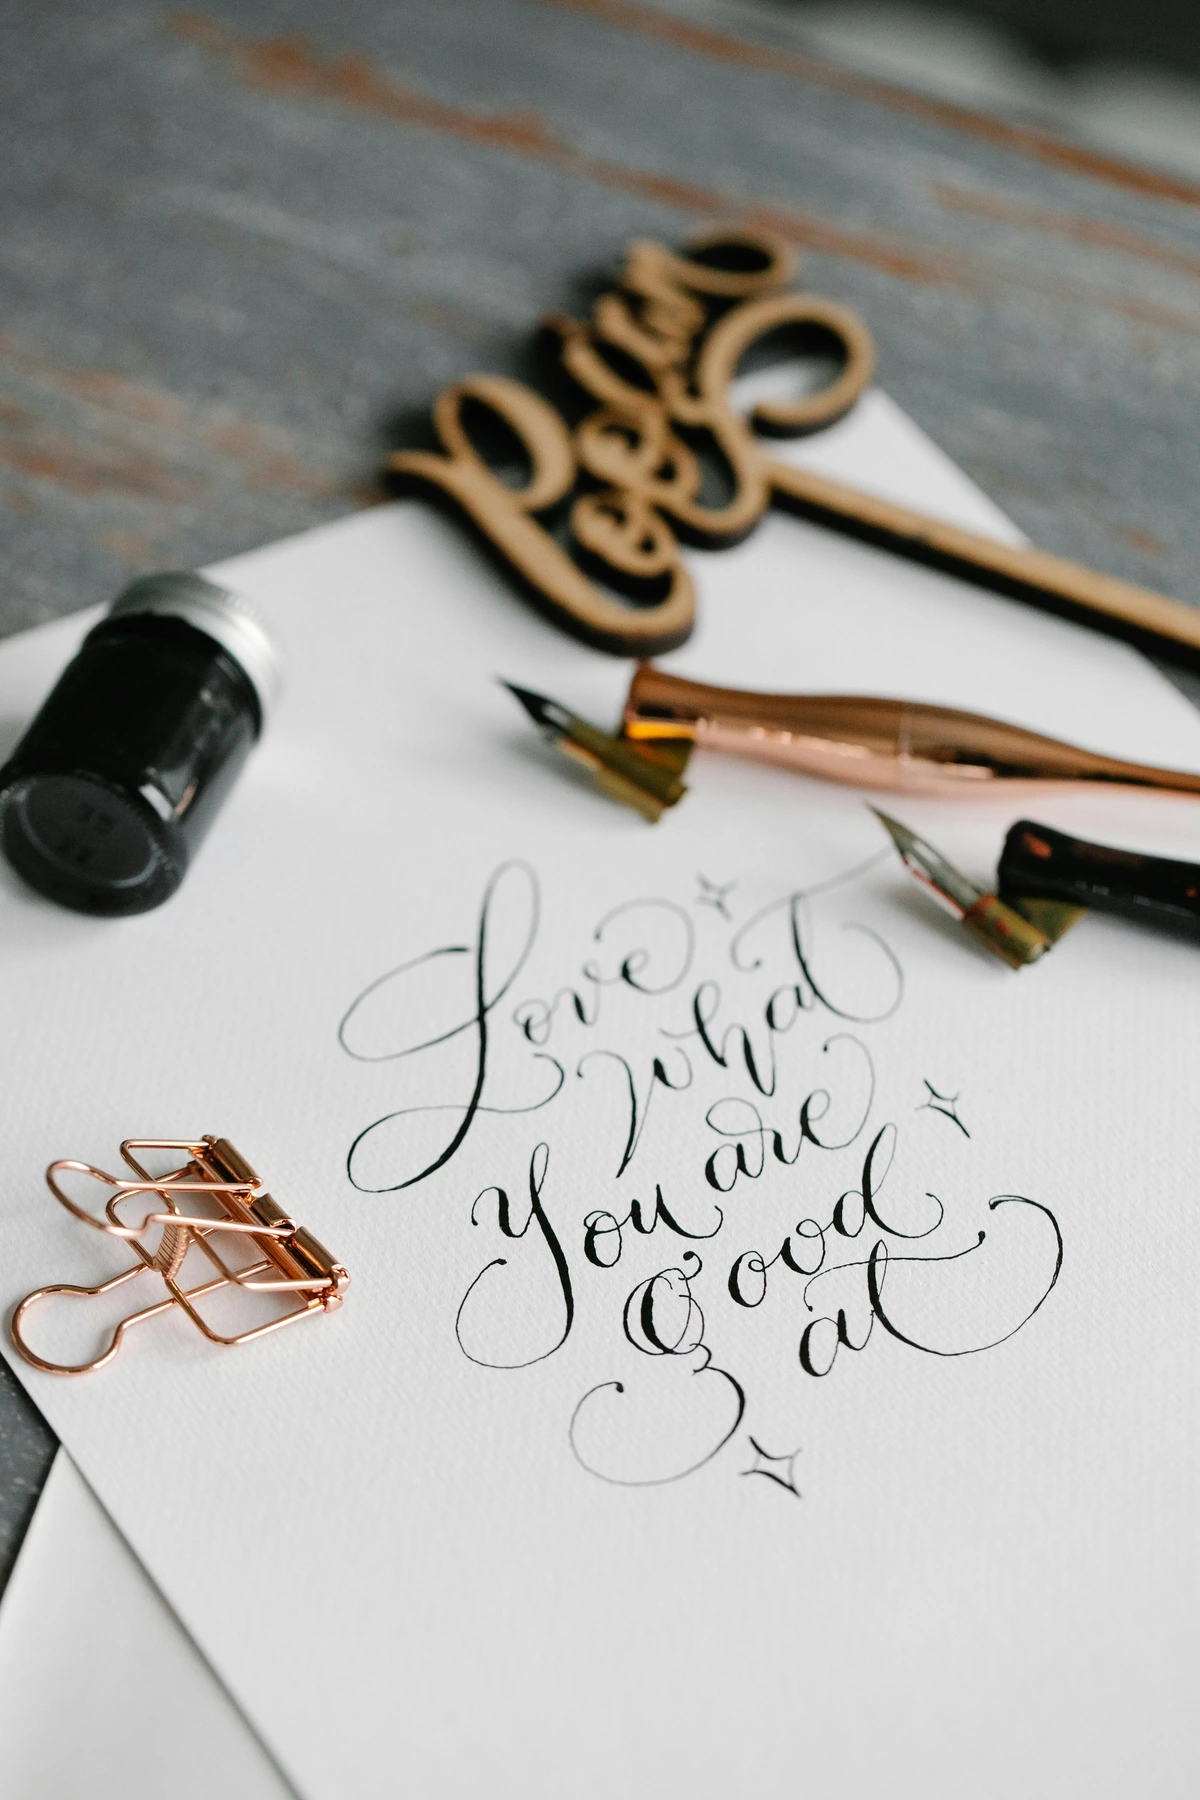
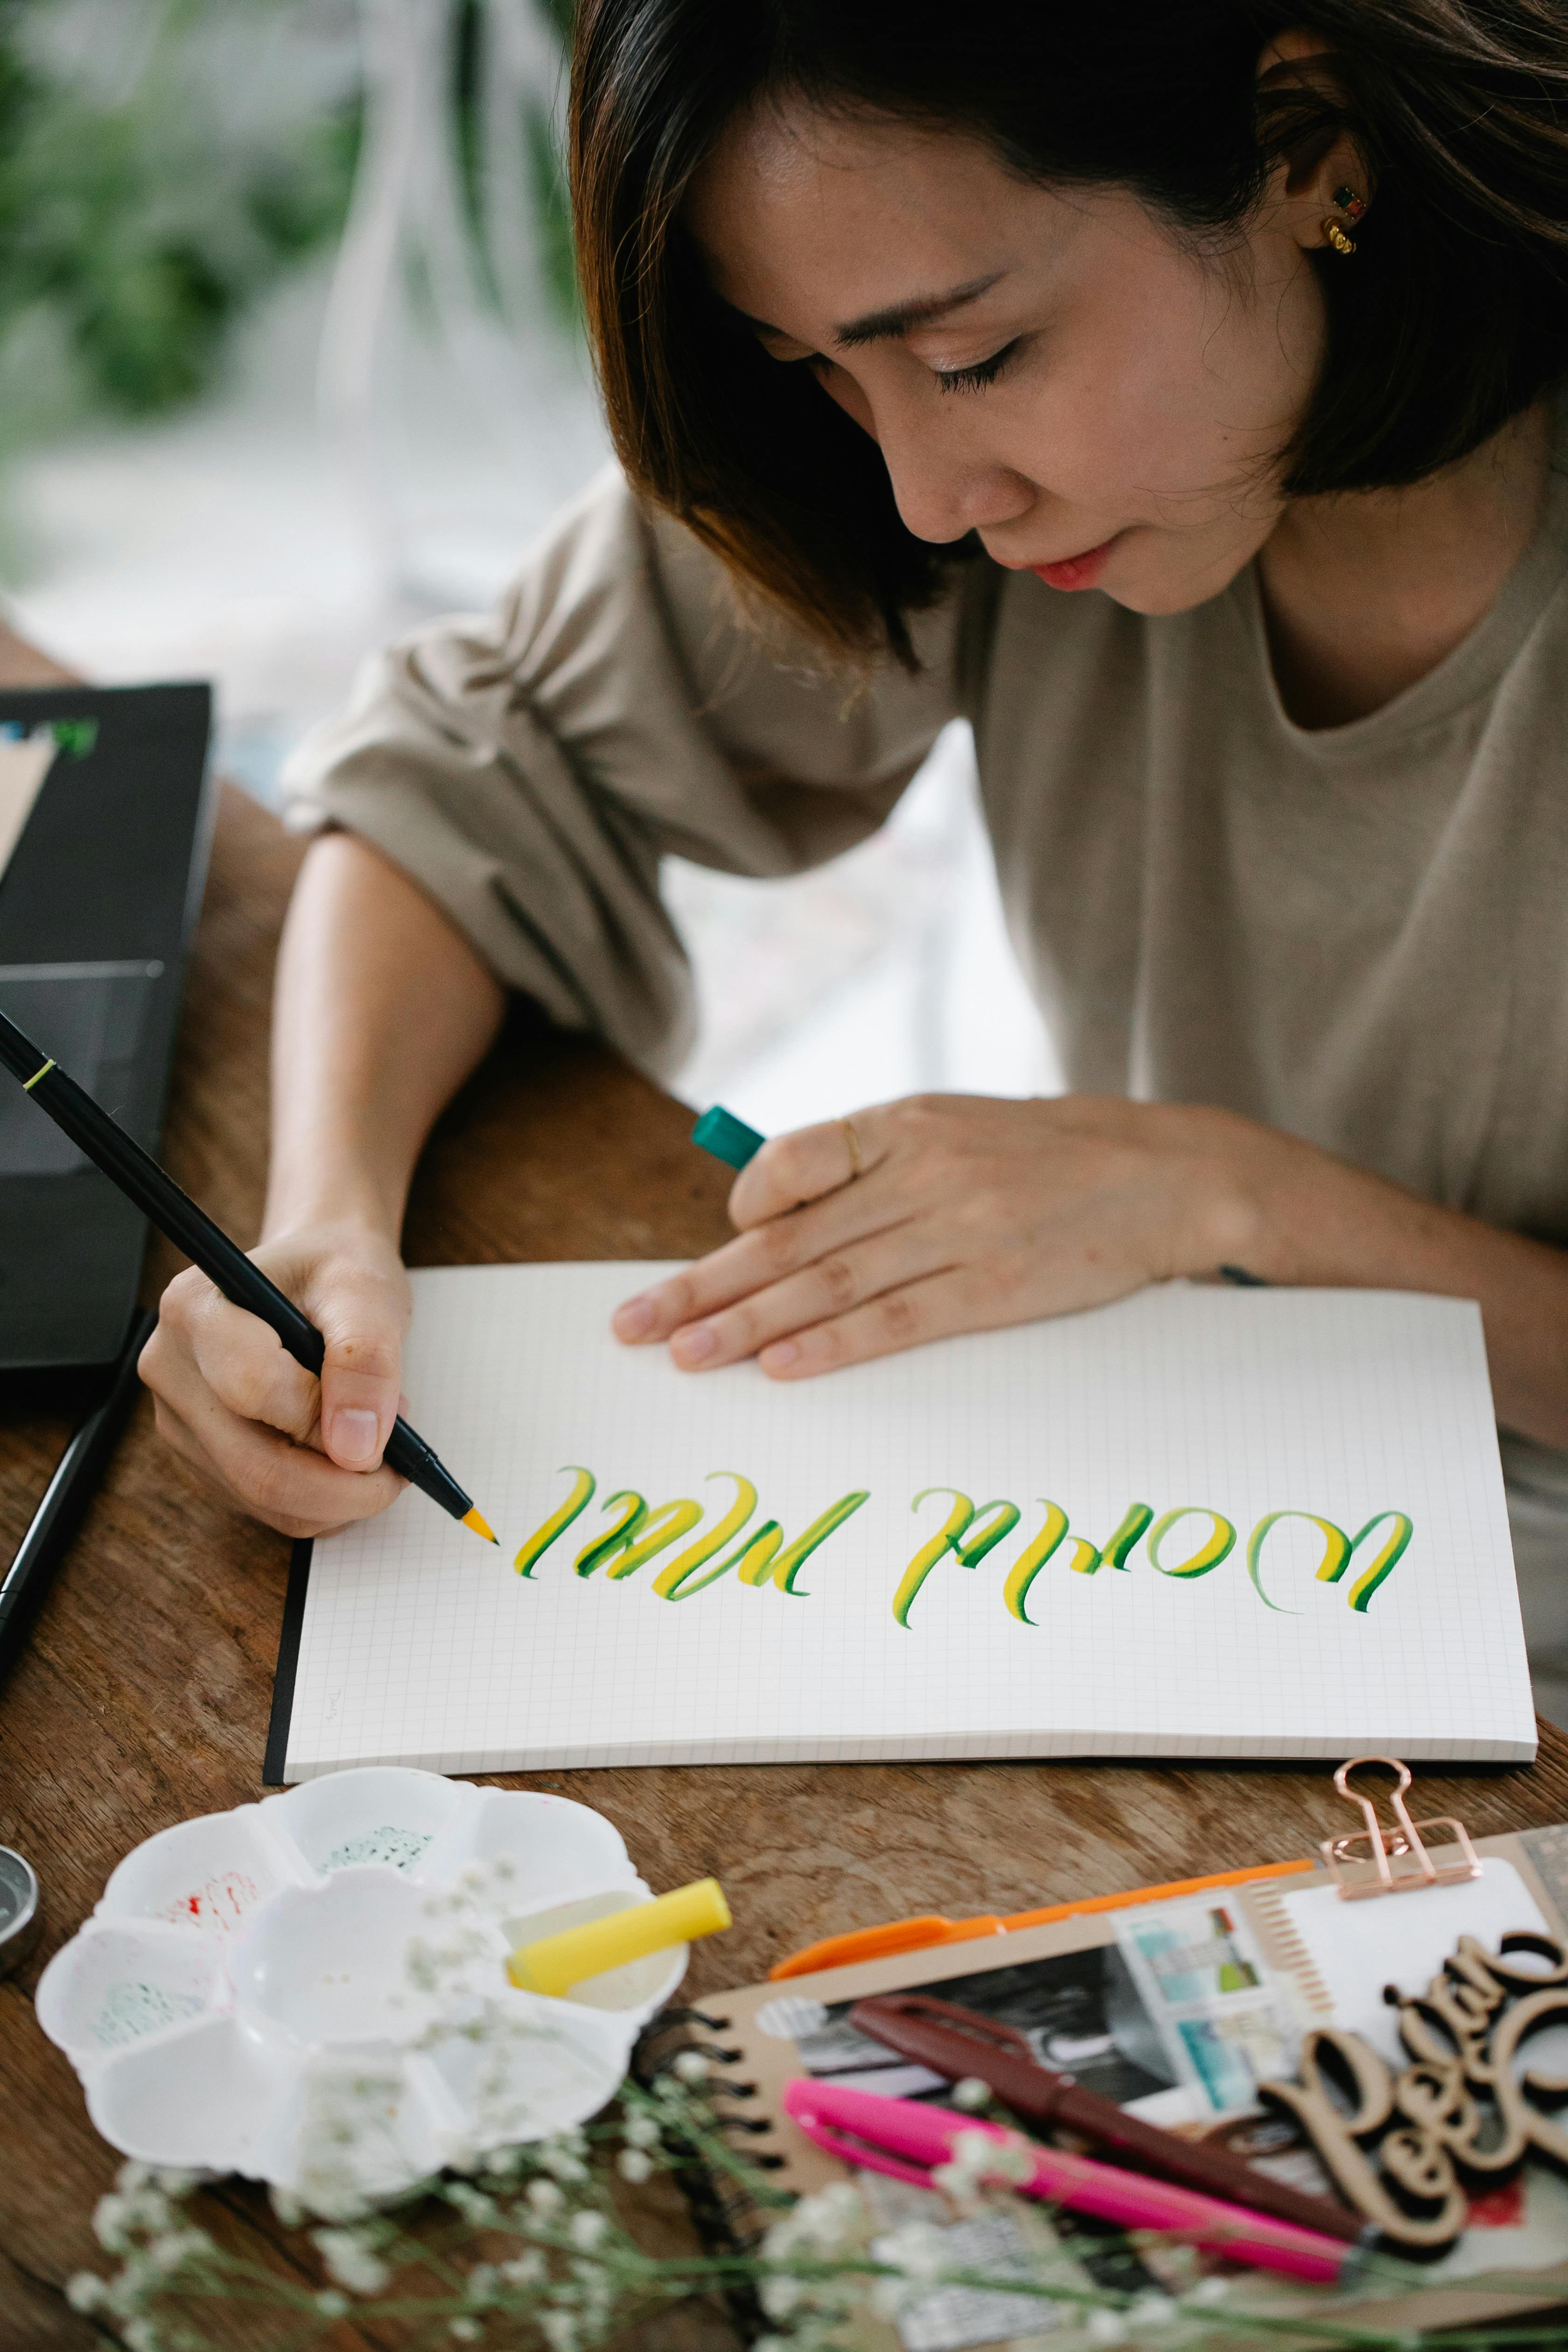
Water-based markers, as the name implies, utilize a water-soluble dye or pigment as their ink base, which makes them behave quite differently from their alcohol-fueled cousins. They're often favored for their remarkable versatility, significantly lower odor (a big plus for smaller studios or sensitive noses!), and, crucially, their ability to mimic traditional watercolor effects. Many come with wonderfully flexible brush-like tips that make them a dream for hand-lettering, intricate detail work, and even expressive washes. If you're into fine art illustration, delicate blending with water, or just prefer a gentler medium, these might just become your new best friend.
Pros:
- Less Bleed-Through: Generally much kinder to thinner paper than alcohol markers, meaning you might get away with slightly less specialized paper (though good quality still helps!). This minimizes the frustrating experience of ink seeping onto subsequent pages.
- Low Odor: A significant advantage! No strong chemical smell, making them ideal for use in smaller, less ventilated spaces or for those with sensitivities to solvent odors. No VOCs to worry about here.
- Water-Reactive Magic: This is a huge plus. Many water-based markers can be reactivated with water, allowing for beautiful watercolor-like effects such as washes, layering, and even lifting color for highlights. You can blend them with a wet brush directly on the page or from a palette, creating soft, translucent layers.
- More Affordable: Often less expensive than their alcohol-based counterparts, making them a great entry point into the world of markers, especially for hobbyists or students.
Cons:
- Dry Blending is Tricky: While they excel with water blending, achieving truly seamless blends on dry paper, without water, can be significantly harder than with alcohol markers. You might encounter more visible streaks or hard lines, especially on larger areas. It's tough to avoid that 'patchy battlefield' feel without adding water.
- Potential Streaking: Due to their slower drying time and water-soluble nature, applying large, even areas of color can sometimes result in visible streaks if not handled carefully or with the right paper. This is especially true if you try to work too slowly or re-apply over partially dry areas.
- Vibrancy Varies: The colors can sometimes appear less intense or saturated compared to the eye-popping vibrancy of alcohol markers, though this varies greatly by brand and pigment concentration.
- "Ghosting" on Thinner Papers: While less prone to full bleed-through than alcohol markers, water-based inks can sometimes cause "ghosting", where the color is visible as a faint shadow on the reverse side of thinner paper, even without fully bleeding through. This isn't damage, but it can be distracting.
My Favorite Brands:
- Tombow Dual Brush Pens: These are incredibly popular for a reason, and if you've seen beautiful hand-lettering online, chances are these were involved. One side boasts a flexible brush tip, perfect for expressive strokes and washes, while the other features a fine tip for precision. They're simply fantastic for hand-lettering, illustration, and, as I mentioned, can be seamlessly used with water to create stunning watercolor effects. I’ve spent countless hours practicing my script with these, and their versatility never ceases to amaze me. These typically use dye-based inks and are not refillable. They are an excellent choice for artist-grade water-based work.
- Faber-Castell PITT Artist Pens: These are a different beast entirely, utilizing highly pigmented India ink, which makes them permanent, waterproof, and beautifully lightfast once dry. India ink, unlike typical dye-based inks, contains fine pigment particles suspended in a shellac-based binder. These solid particles sit on the paper's surface rather than soaking into the fibers as dyes do. This unique formulation makes them truly lightfast, waterproof, and permanent once dry, offering exceptional archival quality for lines and details that need to last a lifetime. They come in various nibs, including brush, and are absolutely excellent for outlines, adding intricate details, and crisp accents. I swear by them for line work in my mixed media pieces, knowing those lines will stay put and retain their intensity for years to come. These pens use pigment-based inks and are not refillable.
- Crayola SuperTips: Okay, okay, hear me out! While not professional artist tools, for sheer fun, accessibility, and a surprising ability to blend on certain papers (especially, oddly enough, plain printer paper when layered!), Crayola SuperTips are my secret guilty pleasure. They typically feature simple bullet or wedge tips and use dye-based inks. They are not refillable. They're a fantastic way to experiment and just enjoy the act of putting color to paper, making them a quintessential craft-grade or kid-friendly marker.

Alcohol vs. Water-Based Markers: A Quick Comparison
To help you decide which side of the "marker divide" you might lean towards, here’s a quick overview of their key characteristics:
Feature | Alcohol-Based Markers | Water-Based Markers |
|---|---|---|
| Ink Type | Alcohol-soluble dye (mostly dye-based) | Water-soluble dye/pigment (dye-based or pigment-based) |
| Drying Time | Very fast | Moderate to slow |
| Blending | Exceptional on dry paper (with solvent) | Best with water; trickier on dry paper without streaks |
| Vibrancy | Often more intense and saturated | Can be vibrant, but sometimes less intense than alcohol |
| Bleed-Through | High (requires specialized paper/protection) | Low to moderate (kinder to thinner paper) |
| Odor | Distinct alcohol fumes (ventilation recommended) | Low to no odor |
| Permanence | Permanent, waterproof once dry (lightfastness varies) | Can be reactivated with water; permanence & lightfastness varies by brand |
| Lightfastness | Varies; often lower for dye-based inks (fugitive) | Varies; often lower for dye-based, higher for pigment-based |
| Ink Containment | Dyes dissolved in solvent; stable | Dyes/pigments suspended; pigment particles may settle |
| Typical Use | Illustration, graphic design, smooth gradients, comic art, concept art | Hand-lettering, intricate details, watercolor effects, kids' art, fine art illustration |
| Cost | Generally higher initial investment | Generally more affordable |

Mastering Marker Techniques (and Taming Their Quirks)
Knowing your marker types is one thing, but truly mastering them means diving into specific techniques. This is where you transform from a casual colorer to an artist who can coax incredible effects from their tools. These are the strategies I've learned to love, often through trial and error (mostly error, let's be honest).
- Layering for Depth and SaturationBoth alcohol and water-based markers thrive on layering, though the approach differs. With alcohol markers, you build up color by applying successive layers of the same or different shades. Start light, and apply another layer to deepen the color, allowing a few seconds for the alcohol solvent to evaporate between passes for control. This technique is often used to create a rich, dense saturation that makes colors pop. For water-based markers, layering typically involves applying a lighter color, letting it dry (mostly), then adding a darker color on top. With water, you can then blend these layers for a softer transition, creating nuanced tonal shifts.
- Creating Seamless Gradients (The Holy Grail)Achieving that smooth, dreamy color transition is often the ultimate goal. For alcohol markers, speed is your ally. Work from light to dark, applying the next color while the previous one is still slightly wet. Overlap the edges and use a colorless blender at the transition points to further soften and merge the colors. The alcohol in the blender reactivates the ink, essentially pushing the pigments together and allowing them to flow more freely, creating that sought-after seamless effect. For water-based markers, water is key. Apply your colors, then use a wet brush (or a water brush pen) to gently pull and blend the colors together on the paper, mimicking watercolor washes. This is often called a wet-on-wet technique. Alternatively, you can apply colors to a non-porous surface (like a plastic palette) and pick them up with a wet brush to create custom blends.

- Advanced Blending Techniques: Beyond the BasicsOnce you've mastered the fundamentals, you can experiment with more sophisticated blending approaches.
- Feathering: This involves using quick, flicking strokes from the edge of a colored area to create a soft, feathery transition into a lighter or uncolored area. It’s particularly effective for rendering fur, hair, or soft textures with alcohol markers.
- Reverse Blending: For alcohol markers, this technique involves laying down a darker color first, then using a lighter color (or a colorless blender) to push and move the darker pigment around. It requires a delicate touch but can create unique effects, especially for creating soft highlights within darker areas.
- Brush Blending (Water-Based): For water-based markers, you can apply ink directly to a palette and pick it up with a wet brush (synthetic brushes are great for precision, while natural hair brushes can hold more water for softer washes). This allows for a more controlled watercolor approach, creating custom color mixes and delicate gradations off-paper before applying them.
- Stippling and Adding TextureMarkers aren't just for smooth fills! For texture, consider stippling (creating patterns with dots) or short, choppy strokes. This is especially effective with fine-tip or bullet nibs. With alcohol markers, overlapping these textures can create a sense of depth and grit. With water-based markers, you can achieve unique, almost textile-like textures, especially if you apply water to stippled areas, letting the dots bloom and merge in interesting ways. For added texture, some artists also experiment with scratch art techniques, applying layers of marker and then carefully scratching away the top layers with a fine tool to reveal the colors beneath.
- Lifting Color for HighlightsSometimes you need to lighten an area or create highlights. For alcohol markers, the colorless blender is your best friend here. When applied, the blender's solvent reactivates the ink pigments, causing them to lift from the paper's fibers and concentrate at the edges of the applied area. Think of it like a solvent eraser, gently pushing the pigment away. You can then gently blot it with a clean paper towel. I remember on one piece, I accidentally colored over a crucial highlight; using the colorless blender to lift the pigment saved the day – and my sanity! For water-based markers, a clean, damp brush (synthetic brushes are more effective for scrubbing/lifting) can be used to gently lift color from the paper, either by blotting or carefully brushing away the pigment before it fully dries.
- Masking TechniquesIf you need crisp, untouched areas within a larger colored section, consider using masking fluid or frisket film. Apply these to the areas you want to protect, let them dry, apply your markers, and then carefully remove the mask. This is more commonly used with water-based mediums, but can be cautiously attempted with alcohol markers on very specific papers, though always test first to avoid damaging the paper surface.
- Working with Other MediumsWho says you can only use markers? Art is about exploration! I constantly combine markers with other mediums – a fine line pen for outlines, colored pencils for texture or subtle details, or even a touch of acrylic paint for accents. Understanding what painting mediums are helps unlock even more possibilities. Alcohol markers pair beautifully with colored pencils for adding rich details and depth over a base layer; for example, using brands like Prismacolor Premier or Polychromos colored pencils over a light alcohol marker base can create subtle variations in texture and depth that markers alone might struggle with. Water-based markers can be combined seamlessly with traditional watercolors, ink washes, or even fine-line pens for mixed-media illustrations. It’s all about creating the rich visual tapestry you envision.
Choosing Your Coloring Companions: What I Look For Beyond the Ink
Now that we've navigated the fundamental differences between alcohol and water-based inks and explored some key techniques, let's pivot to the physical characteristics of markers themselves – the design choices that profoundly influence their performance and your overall artistic experience. This is where my pragmatic side truly kicks in, because let's face it, art supplies aren't free, and I want to make sure every penny counts towards maximizing my creative output.
Nib Types: Finding Your Perfect Point (or Flexible Brush!)
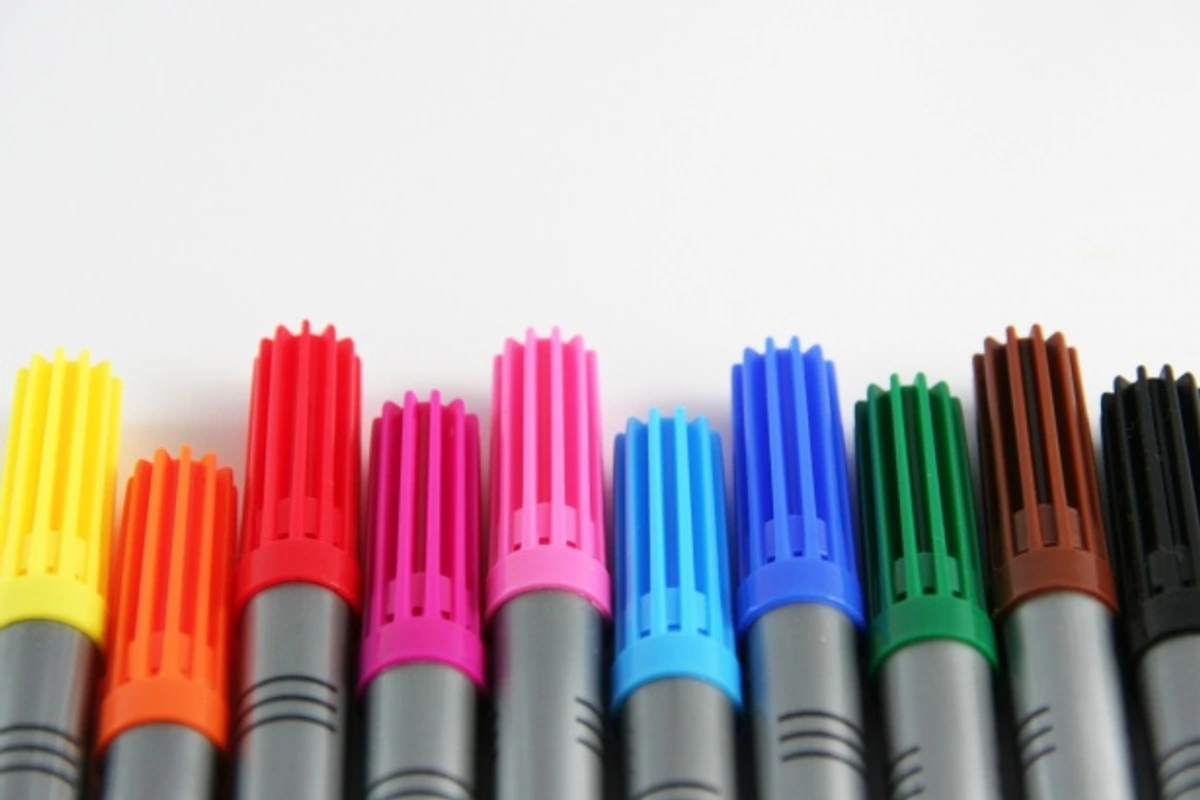
This is a monumental factor, perhaps even more so than the ink type for some artists. Markers are absolutely not one-size-fits-all, and the nib – that little felt or fiber tip that touches the paper – dictates everything from your line quality to your blending capabilities. You'll typically encounter three main types, but remember that nib materials (often durable synthetic fibers, sometimes compressed felt, or porous plastic) play a huge role in durability and ink flow, resisting fraying and maintaining shape over extended use:

- Brush Nib: My personal favorite for most coloring. This tip is wonderfully flexible and responsive, much like a paintbrush. It's amazing for expressive strokes, creating a wide range of line widths with pressure variation, and is a dream for smooth blending. Perfect for illustrations, hand-lettering, and covering large areas with varied texture. Quality brush nibs are usually made of durable synthetic fibers that resist splaying and maintain their point even with heavy use.
- Chisel Nib: Flat and angled, the chisel nib is fantastic for broad strokes, efficiently filling large areas with color, and achieving crisp, straight lines. Think graphic design, bold outlines, or adding dramatic flourishes. These are often made from a firm, compressed felt material.
- Fine Tip/Bullet Nib: Essential for precision work. These firm, pointed tips are perfect for intricate details, sharp outlines, and coloring in smaller, more confined areas where accuracy is paramount, such as line art or small sections of a coloring book. Made from compressed felt or a fine plastic filament, they offer consistent lines.
Many quality markers, like our friends Copic and Promarker, cleverly offer dual tips, typically combining a brush or chisel with a fine/bullet tip. This isn't just a neat feature; it's a huge benefit, offering the best of both worlds in a single pen. It saves you from constantly switching tools and significantly streamlines your workflow – a two-for-one deal that actually matters!
Color Range & Blending: The Very Heart of the Matter
Let's be honest, a marker set with only 12 colors is fine for a quick doodle, but for any serious coloring or detailed artwork, you absolutely need a decent color range. More importantly, you need colors that are designed to play well together. Does the brand offer carefully curated complementary shades and tones for achieving truly seamless gradients? Is there a dedicated colorless blender marker available, and – this is crucial – does it actually work effectively with the ink?
For me, a good color palette is like having a perfectly tuned orchestra – each note (color) has its rightful place, and they can all harmonize beautifully. Brands that invest in comprehensive color systems (like Copic's numbering, which we touched on, e.g., B00, B02, B05 all in the same blue family) demonstrate a deep understanding of how colors interact. This strategic approach to color development profoundly taps into the deeper psychology of color and how different hues don't just fill space, but evoke specific feelings and create atmosphere.

Refillability & Longevity: A Smart Investment for Your Art and the Planet
This point hits home for both my wallet and my conscience, and it's something I wish I'd understood earlier in my journey. The concept of refillability and replaceable nibs for markers, championed by brands like Copic, is a game-changer. This drastically extends the lifespan of your tools, making the initial investment significantly more palatable. It combats the wasteful cycle of discarding perfectly good marker bodies just because the ink ran dry. Beyond just saving money in the long run, choosing refillable options drastically reduces plastic waste and the overall carbon footprint of your studio. It's a small but meaningful step towards more sustainable art practices. While Copic is the most well-known, a few other brands (such as Chameleon and certain Kuretake lines) also offer refillable ink or replaceable nibs, though they are less common. Always check manufacturer specifications if this feature is important to you.
Let's consider the cost-benefit analysis for a moment. A non-refillable marker might cost $3-$5. A Copic Sketch marker might cost $7-$9. But a single Copic ink refill bottle, costing around $5-$7, can refill a Sketch marker approximately 7-9 times (and Ciao markers up to 12-15 times). This means, after the initial marker purchase, you're effectively paying less than $1 per refill, compared to buying a whole new marker. Over time, for a dedicated artist who uses many colors frequently, the savings are substantial, and the environmental benefit of significantly less plastic waste (and fewer discarded felt nibs) is undeniable. For non-refillable markers, consider disposing of them responsibly where possible, though specialized recycling options for art supplies are still limited.
Lightfastness: Does Your Art Stand the Test of Time?
Let's talk about lightfastness – a term that sounds a bit technical but is incredibly important for any artist whose work will see the light of day. Essentially, it describes how resistant a color's pigment is to fading, dulling, or shifting when exposed to light over time. For casual coloring in a sketchbook destined for a drawer, perhaps it's not a huge concern. But if you're creating art you intend to display, sell, or even pass down, lightfastness is absolutely crucial. Think of it as the marker's ability to resist sunlight's fading power.
It’s important to distinguish permanence from lightfastness. A marker can be permanent (meaning it won't smudge or reactivate once dry) but not lightfast (meaning its color will fade with light exposure). This is often the case with many vibrant dye-based inks, which use smaller, more delicate color molecules that are more susceptible to breaking down from UV light. These inks are often described as fugitive, meaning they are prone to fading or disappearing entirely over time. Some specific color families, particularly certain blues (like phthalocyanine blue in its untreated dye form), purples, and even some reds and yellows in dye-based inks, are notoriously fugitive. This is why many otherwise excellent coloring markers, while wonderfully vibrant, might not be suitable for archival display. Pigment-based inks, on the other hand, contain solid color particles suspended in a binder, making them generally more lightfast and archival. However, pigment-based inks can sometimes be less transparent or offer different blending characteristics compared to their dye-based counterparts, and are generally found in fine-liners or specialized art pens rather than broad-stroke coloring markers. When considering archival quality, think about what makes oil paints or professional watercolors stand the test of time.
[credit], [licence]
Imagine pouring hours of your soul into a vibrant piece, only for the colors to tragically dull and disappear within a few months or years. Heartbreaking, right? This is why professional-grade art supplies will often list their lightfastness ratings, sometimes adhering to ASTM (American Society for Testing and Materials) standards. These standards provide a reliable scale:
- ASTM I (Excellent): The color is expected to remain unchanged for 100+ years under museum conditions.
- ASTM II (Very Good): Expected to last 50-100 years.
- ASTM III (Fair): May shift or fade within 15-50 years.
Most professional marker inks aim for ASTM I or II, but it's crucial to verify, as many dye-based inks can be notoriously fugitive. Always check the product specifications if longevity is important to your artistic legacy, especially if you're comparing it to truly archival mediums like artist-grade oil paints or watercolors. Different pigments within dye-based inks also react differently to UV light; some blues and purples can be particularly vulnerable. If you're serious about creating art that lasts, I highly recommend doing a simple lightfastness test yourself: draw swatches of your markers, cover half of each swatch, and expose them to direct sunlight in a window for a few weeks or months. You'll be surprised what you learn!

Price Point: Balancing Artistic Passion with Practicality
The financial landscape of markers is vast, ranging from a few cents for a basic school marker to several dollars (or euros!) per professional-grade pen. It's a spectrum, indeed! My earnest advice? Start where you're comfortable, without pressure. You absolutely do not need the most expensive set to embark on your creative journey. A good mid-range set of alcohol markers (like the dependable Winsor & Newton Promarkers or the value-packed Ohuhu) or a solid collection of water-based brush pens (like the versatile Tombows) will give you a fantastic feel for the medium without needing to sell a kidney (believe me, I've considered it!).
[credit], [licence]
Think of it as an investment in your creative growth. As your skills evolve and your passion deepens, you can always upgrade, expand, or strategically add to your collection. The true joy, after all, comes from the act of creation itself, not solely from the cost of the tools you wield. It’s about finding the right balance that fuels your artistic fire without burning a hole in your wallet.
Beyond the Ink: Marker Care, Compatibility & Context
Beyond the ink and nib, the physical design and inherent characteristics of the marker itself play a crucial role in your artistic experience. Once you've wrapped your head around ink types and nibs, there are a few more nuanced factors that can genuinely elevate your marker experience. These are the little things that, over time, I've learned to appreciate (sometimes the hard way!).
Optimizing Marker Storage & Handling
It sounds simple, but how you store your markers makes a huge difference in their lifespan. Always cap them tightly after each use to prevent the ink from drying out prematurely. For most markers, especially alcohol-based ones, storing them horizontally is the golden rule. This keeps the ink evenly distributed across both nibs and within the central ink reservoir, preventing one side from drying out faster than the other or the ink pooling on one end. If stored vertically, gravity will pull the ink to one nib, drying out the other faster. For water-based markers, vertical storage can sometimes be acceptable, but horizontal is still generally the safest bet for even ink distribution. Avoid extreme temperatures and humidity; a stable room environment is best. Think of them as delicate instruments – a little care goes a long way in preventing dried-out pens and damaged nibs.
Keeping Your Tools in Top Shape: Marker Maintenance
Just like any quality tool, markers benefit from a little TLC. Maintaining them properly ensures consistent performance and extends their lifespan.
- Cleaning Nibs: If your marker nibs start to pick up other colors, appearing muddy or inconsistent (a common occurrence when blending a lighter color over a darker one), simply scribble them vigorously on a clean scrap piece of paper until they run clear again. This simple act keeps your colors pure and your blends crisp, preventing unintentional muddiness in your artwork.
- Replacing Nibs: For brands like Copic, one of their key advantages is replaceable nibs. If a nib becomes frayed, too soft, or damaged from heavy use, you don't need to discard the whole marker. You can purchase replacement nibs (brush, chisel, fine, etc.) and easily swap them out, breathing new life into your favorite tools and extending their usability for years. This also contributes to sustainability by reducing overall waste. Other brands like Chameleon and Kuretake also offer replaceable nibs for some of their lines.
- Detecting Ink Levels & Refilling: With refillable markers, knowing when to top up is crucial. Many have transparent barrels or an indicator. When the color starts to look streaky, dry, or inconsistent, it's a clear sign that the ink reservoir is running low. Always use the manufacturer's recommended ink to ensure color consistency, preserve the marker's original qualities, and prevent damage. While some artists experiment with third-party inks, this can often lead to unpredictable color shifts, inferior blending, or even damage to the marker's internal components. A quick refill often makes a dry-feeling marker as good as new! If a nib is clogged, a gentle wipe with a soft cloth dampened with the appropriate solvent (alcohol for alcohol markers, water for water markers) can sometimes clear it, but be careful not to oversaturate.
[credit], [licence]
Mixing It Up: Compatibility and Other Mediums
This is a tricky one. While it's generally best to stick within a brand for seamless blending (especially with alcohol markers and their specific solvent formulations), don't be afraid to experiment carefully. Some brands of alcohol markers can blend surprisingly well together, while others might react poorly, leaving muddy colors or damaging nibs. Always test on a scrap piece first! The same goes for mixing mediums: I often combine markers with colored pencils for texture or fine details, or even acrylic paint for accents. Understanding what painting mediums are can open up new possibilities. It’s all about creating the rich visual tapestry you envision.
The Digital Realm: Traditional Markers vs. Digital Mimicry
In our increasingly digital world, it’s worth a moment to acknowledge the rise of digital art apps like Procreate, Adobe Photoshop, or Clip Studio Paint, which offer brushes designed to mimic the effects of traditional markers. While these digital tools provide immense convenience – think endless undo functions, an infinite color palette, instant adjustments, texture customization, and easy sharing – they can’t quite replicate the tactile satisfaction, the unique ink flow, or the subtle paper interactions of physical markers. Digital tools excel at speed, iteration, and large-scale production, making them invaluable for concept art or rapid prototyping. However, for me, the beauty of traditional markers lies precisely in that tactile, tangible experience – the feel of the nib on paper, the subtle scent of the ink, the nuanced way colors spread and layer based on the paper's specific tooth and absorption, and the permanence of each stroke. Digital offers boundless experimentation; traditional offers a unique, grounding connection that many artists find irreplaceable and provides a tangible artifact that digital cannot fully replicate.
Breathing Room: Ventilation and Your Health
The distinct alcohol fumes from alcohol markers are the most obvious, but even some water-based markers can release Volatile Organic Compounds (VOCs) over prolonged use. VOCs are organic chemicals that have a high vapor pressure at ordinary room temperature, meaning they can easily evaporate into the air and, if inhaled over long periods, can pose health risks such as headaches, dizziness, or respiratory irritation. A well-ventilated space isn't just about comfort; it's a critical safety measure for your long-term health, especially during extended creative sessions. Consider open windows, fans, or even dedicated air purifiers if you spend many hours creating with markers. Your lungs (and your nose!) will thank you.
The Unsung Hero: Paper Selection and Tooth
Paper's 'tooth' refers to its texture or surface roughness, and it profoundly impacts how your markers behave. This is a critical factor, often overlooked by beginners, that can make or break your marker artwork. Different paper types also have varying absorption rates and coatings, all influencing the final result. Think of paper tooth like a landscape: some are like smooth glass, others like rough sandpaper – and each will treat your marker ink differently.
For alcohol markers, I always lean towards ultra-smooth, coated papers to minimize feathering and achieve those glass-like blends. Brands like Bristol board (especially the smooth plate finish) or specialized marker paper (e.g., Copic Marker Paper, Strathmore 400 Series Marker Pad, French Trade paper) are ideal. Their dense, often coated, and less absorbent surface allows the alcohol solvent to evaporate evenly, creating a seamless blend rather than soaking uncontrollably into paper fibers and causing unwanted 'blooming' or 'feathering' (where the ink spreads beyond your intended line, looking fuzzy). A paper with too much tooth or absorbency will cause alcohol ink to bleed and feather uncontrollably, leading to streaky, uneven results. Also consider paper weight (measured in gsm or pounds); heavier papers (e.g., 80lb/120gsm to 100lb/150gsm and up) are generally better for alcohol markers to prevent bleed-through and ghosting (where the color is visible on the reverse side without fully seeping through).
For water-based markers, you have a bit more flexibility. While smooth paper is still generally preferred for crisp lines and less streaking, a slight tooth can sometimes be desirable if you're aiming for a more watercolor-paper-like effect. Mixed media paper or even smooth hot-press watercolor paper (like Arches Hot Press) can provide some grip for layering and washes with water-based markers, allowing for beautiful, expressive effects when reactivated with water. While traditional watercolor techniques often benefit from textured paper for a unique tooth, markers, especially alcohol-based ones, perform best on smoother surfaces where ink can flow and blend without snagging. However, avoid very textured cold-press watercolor paper, as its rough surface can fray delicate brush nibs quickly. For best watercolor paper, you’ll generally want something with more tooth for traditional watercolor, but for markers, smoother is usually better. Also, be mindful of paper coatings (like on glossy photo paper), as these can react unexpectedly with marker inks, potentially leading to smudging or poor absorption. Recycled papers often have a higher tooth and can behave unpredictably, so always test first!
Buyer Beware: Spotting Counterfeit Markers
With the popularity of certain brands, unfortunately, comes the rise of counterfeits or low-quality imitations. I've sadly learned the hard way about the disappointment of fake art supplies. If a deal seems too good to be true, it probably is. Always purchase from reputable art supply stores or official brand retailers. Watch out for inconsistent packaging, poorly printed logos, off-color caps, or unusual smells. Genuine markers will have smooth ink flow, consistent color, and high-quality nibs that stand up to use. Your art (and your wallet) deserves the real deal.
My Top Picks for Different Artistic Journeys
Alright, with all that groundwork laid – and believe me, it's a lot to take in at first – let's get down to the brass tacks: my personal, hard-earned recommendations. Based on countless hours of my own trials, errors, and moments of pure artistic bliss, here are my go-to marker picks, thoughtfully categorized for wherever you might be on your unique artistic journey. Think of these as proven companions for your creative quest.
For the Beginner/Hobbyist: Getting Started Without Breaking the Bank
If you're just dipping your toes into the vibrant world of markers, or you simply want something fun and reliable for adult coloring books, there’s no need to spend a fortune right off the bat. My picks here focus on affordability, ease of use, and a solid introduction to the medium.
- Ohuhu Alcohol Markers (Brush & Chisel Set): Honestly, for the price point, these are phenomenal. They typically feature both a flexible brush tip and a flat chisel tip. They offer a generous color range, surprisingly decent blending capabilities for an entry-level alcohol marker, and a brush nib that feels quite good in the hand. You truly get a lot of bang for your buck here, making them an excellent first step into alcohol-based art. These use dye-based inks and are not typically refillable.
- Crayola SuperTips: No, seriously! Before you scoff, hear me out. These are cheap, readily available practically everywhere, and surprisingly versatile. They typically feature simple bullet or wedge tips. They're perfect for casual coloring, experimenting with layering, and offer a zero-pressure environment to just play. These use dye-based inks and are not refillable. It's a fantastic, unintimidating way to get comfortable with marker coloring techniques.
- Arteza Real Brush Pens (Water-Based): If your preference leans towards water-based inks and you're keen to experiment with watercolor effects, these are a fantastic, budget-friendly option. Their flexible brush tips allow for lovely washes and expressive strokes, providing a great introduction to water-reactive mediums. These typically use dye-based inks and are not refillable.
For the Aspiring Enthusiast: Stepping Up Your Game
So, you've caught the marker bug, haven't you? You're ready to invest a little more to see a significant leap in results and performance? Excellent! These options offer a distinct upgrade in quality and will allow you to explore more sophisticated techniques.
- Winsor & Newton Promarker (Alcohol-Based): As I mentioned earlier, these are my absolute workhorses. They typically feature dual tips (chisel and fine bullet). They represent excellent value for money, offer fantastic, consistent color payoff, and blend beautifully. They truly are a perfect bridge between beginner and professional quality, giving you the feel of high-end alcohol markers without the top-tier price tag. These use dye-based inks and while not designed for easy refilling like Copics, they offer excellent longevity.
- Tombow Dual Brush Pens (Water-Based): If your artistic inclinations lean towards illustration, intricate hand-lettering, or embracing watercolor-style art, these are an absolute must-have. The dual tips – a flexible brush and a fine bullet tip – are incredibly versatile, allowing for both broad strokes and delicate details, and the colors themselves are simply lovely and vibrant. They offer a rich experience for anyone serious about water-based techniques.
For the Professional: When Quality is Non-Negotiable
When your art is your livelihood, or you simply demand the very best tools to execute your vision without compromise, certain brands truly stand out. These are the markers that consistently deliver top-tier results, offer unparalleled control, and are built to stand the test of time and heavy studio use.

- Copic Sketch/Ciao (Alcohol-Based): These are, without exaggeration, the undisputed champions of the alcohol marker world. With their refillable bodies, replaceable nibs (Super Brush, Chisel, Fine), an unparalleled color range (over 350 colors!), and blending capabilities that are simply divine, they truly are an investment. But it’s an investment that pays significant dividends in terms of quality, creative freedom, and incredible longevity. The Sketch line offers an oval barrel and the popular Super Brush nib, while Ciao is a smaller, more economical option with a round barrel, also featuring the Super Brush. They are designed for artists who demand consistent, professional results every single time. These use dye-based inks. You can delve even deeper into their world with reviews like the one on Copic markers review for professional artists.
- Faber-Castell PITT Artist Pens (India Ink): For crisp lines, precise outlines, and truly permanent details – especially crucial in mixed media pieces or works intended for archival purposes – these pens are absolutely invaluable. Their use of lightfast, waterproof India ink ensures that your intricate line work will remain vibrant and unchanged for decades. With various nib sizes (brush, bullet, chisel, calligraphy), they are essential for finishing touches, intricate cross-hatching, or bold, expressive line art that needs to hold its own. These use pigment-based inks and are not refillable, but incredibly durable.
Artist's Wisdom: Lessons Learned (So You Don't Have To)
After all these years, countless projects, and probably making every single mistake in the book (and then some!), I've picked up a few habits and tricks that genuinely make coloring with markers a much more enjoyable and, crucially, effective experience. Think of these as little nudges from someone who's probably been there, done that, and smudged the paper.
- Always swatch your colors. Seriously, do it. Every time you get a new marker or even if you haven't used a set in a while. Colors always look different on paper than they do on the cap. Create a little swatch book or chart for your markers so you know exactly what you're getting and how they truly appear on your chosen paper. This saves so much guesswork and disappointment – trust me, I've had many a 'sunny sky' turn into a 'moody grey' because I skipped this step.
- Work light to dark. This is a golden, almost sacred, rule, especially with alcohol markers. It's infinitely easier to add more pigment and build up intensity than it is to try and take it away. Start with your lightest shades and gradually layer darker tones over them. What happens if you try to go dark to light? You'll likely just spread the dark pigment around, creating muddy, inconsistent results. My first few attempts were a patchy disaster because I rushed this.
- Blend while wet (alcohol markers). For those coveted seamless blends with alcohol markers, you need to work quickly. Layer your colors while the previous layer is still slightly wet. This is where those alcohol solvents really do their magic, allowing the inks to merge beautifully before they fully evaporate. Practice makes perfect here! What happens if you wait too long? You'll likely get harsh lines or patchy results – something I've learned the hard way more times than I care to admit, especially on larger areas.
- Think in layers, not solid blocks. Instead of trying to achieve full saturation in one heavy stroke, think about building up color in multiple, lighter layers. This gives you more control, minimizes streaking, and allows for much smoother blending and gradients. It's especially effective with alcohol markers and helps prevent over-saturating the paper too quickly.
- Use the right paper and understand its absorbency. This is probably the most underrated tip, and it will make a world of difference. Smooth, thick, and bleed-proof paper designed specifically for markers (like Bristol board or specialized marker paper) will absorb the ink beautifully, minimize feathering, and prevent frustrating bleed-through. For alcohol markers, always, always place a protective scrap sheet underneath your artwork! The paper's tooth and absorbency are critical; too much tooth will fray brush nibs, and too much absorbency will cause alcohol inks to bleed uncontrollably and dry too quickly, hindering blending. For best watercolor paper, you’ll want something with more tooth, but for markers, smoother is generally better.
- Know your solvent. Understand the fundamental difference between alcohol-based and water-based markers and how their solvents behave. This knowledge will guide your blending techniques, paper choices, and even your layering approach. Trying to blend an alcohol marker with water, for instance, won't work – you need more alcohol. Conversely, trying to dry-blend water-based markers can lead to streaks. It's like trying to mix oil and water; they just don't play well without the right intermediary.
- Clean your nibs. If your marker nibs start to pick up other colors, appearing muddy or inconsistent, simply scribble them vigorously on a clean scrap piece of paper until they run clear again. It keeps your colors pure and your blends crisp, saving you from unintentional color contamination.
- Don't be afraid to mix mediums. Who says you can only use markers? Art is about exploration! I constantly combine markers with other mediums – a fine line pen for outlines, colored pencils for texture or subtle details, or even a touch of acrylic paint for accents. Understanding what painting mediums are helps unlock even more possibilities. It’s all about creating the rich visual tapestry you envision.
- Embrace the Imperfect. You will make mistakes. Your blends won't always be perfect, your lines might wobble, or a color might bleed where you didn't expect it. Embrace these moments! They are part of the learning process, often leading to unexpected discoveries and unique artistic styles. My own abstract art thrives on embracing the spontaneous, and markers are a fantastic tool for that journey. The 'happy accidents' are often where true creativity blossoms.
[credit], [licence]
Frequently Asked Questions (FAQ)
Q: What's the single biggest mistake beginners make with markers?
A: Oh, without a doubt, it's typically two things: First, trying to use alcohol markers on thin, regular printer paper without any protection underneath. They will bleed relentlessly! Second, expecting alcohol and water-based markers to behave identically. They are fundamentally different, and embracing their unique properties is key to avoiding frustration.
Q: Can I truly achieve seamless blends with alcohol markers?
A: Absolutely! That's one of their most celebrated strengths. The trick, as I've found, is to work swiftly and efficiently. Layer your colors while the previous layer is still slightly wet, allowing the alcohol solvent to merge the pigments. Starting with lighter shades and building up to darker ones, and then using a dedicated colorless blender marker to soften edges and push colors around, will yield wonderfully smooth transitions. It definitely takes a bit of practice, but the results are incredibly rewarding.
[credit], [licence]
Q: Are those expensive professional markers really worth the investment?
A: This is a fantastic question, and my answer is a nuanced 'yes,' depending on your commitment and artistic goals. For me, given how frequently and professionally I use them, the superior color consistency, effortless blendability, refillability, and overall longevity of brands like Copic absolutely justify the initial cost. They truly are tools that grow with you. However, for a beginner, a quality mid-range set offers incredible value and a fantastic starting point to explore the medium without significant financial pressure. Think about your usage before diving into the top-tier.
Q: How can I prevent my markers from drying out prematurely?
A: The simplest rule is to always cap them tightly immediately after each use. Beyond that, for most markers (especially alcohol-based ones), store them horizontally. This ensures the ink remains evenly distributed to both nibs, preventing one side from becoming dry. Also, try to keep them away from direct sunlight, extreme heat, or very dry environments. For refillable brands, keeping a supply of ink on hand means you can revive them as soon as they start to feel a bit parched.

Q: What's the difference between dye-based and pigment-based marker inks?
A: This is key for longevity! Dye-based inks use colorants dissolved in a solvent (like alcohol or water). They offer incredible vibrancy and transparency but are generally less lightfast, meaning they can fade over time, especially with UV exposure. They use smaller color molecules that penetrate paper fibers. Pigment-based inks, on the other hand, contain tiny solid color particles suspended in a binder. They tend to be more opaque and significantly more lightfast and archival, as these particles sit on the paper surface rather than soaking in. This makes them the choice for works intended to last. Many professional markers, especially for linework (like Faber-Castell PITT pens with India ink), use pigments, while many vibrant coloring markers are dye-based.
Q: What's the best kind of paper to use for markers?
A: Choosing the right paper makes an enormous difference! For alcohol markers, you'll want a thick, ultra-smooth, bleed-proof paper such as Bristol board (plate finish), specialized marker paper (e.g., Copic Marker Paper), or heavy cardstock (e.g., 80lb/120gsm and up). These surfaces prevent feathering and ensure sharp lines. For water-based markers, you have a bit more flexibility, but a smoother, heavier paper (like smooth hot-press watercolor paper if you plan to use water effects) will generally prevent streaking and feathering, allowing for cleaner application. Remember, rougher papers can fray delicate brush nibs. My absolute top tip: Always do a test swatch on your chosen paper before committing to your masterpiece! For more details, check out guides on best watercolor paper for artists.
Q: What are the best markers for comic art or manga?
A: For vibrant, flat colors and smooth gradients that are characteristic of comic art and manga, alcohol markers like Copic Sketch/Ciao or Winsor & Newton Promarkers are the undisputed champions. Their seamless blending ability is crucial for dynamic coloring. For crisp outlines and inking, pigment-based fine-liners like Faber-Castell PITT Artist Pens or Micron pens are indispensable as they are waterproof and won't bleed when colored over.
Q: Can I refill non-refillable markers?
A: Generally, no. Most markers are not designed to be refilled, and attempting to do so can lead to damaged nibs, inconsistent ink flow, or colors that don't match the original. The internal mechanisms of non-refillable markers are often sealed. While some adventurous artists might try to 'revive' a dry marker with drops of alcohol or water, it's a temporary fix at best and usually not recommended for quality or longevity. Stick to brands specifically designed for refilling if that's a feature you need.
Q: How can I deal with streaky marker applications?
A: Streaking often occurs with water-based markers or when applying alcohol markers too slowly or on overly absorbent paper. To combat this, try these tips: for alcohol markers, work faster and blend while the ink is still wet; for water-based, use a wet brush for blending or apply light, even layers. Crucially, ensure you're using paper with the right absorbency for your marker type – smoother, less absorbent paper helps alcohol inks sit on the surface, allowing for better blending before they dry.
Q: Can I mix different brands of alcohol markers?
A: While it's tempting, mixing different brands of alcohol markers is generally a gamble. Each brand uses specific solvent formulations, and these can react unpredictably when combined. You might end up with muddy colors, patchy blends, or even damage to the marker nibs if the solvents are incompatible. My advice is always to test extensively on a scrap piece of your chosen paper before committing to your artwork. For truly seamless results, sticking to one brand within a single project is usually the safest bet.
Q: Are there other specialized marker types I should know about?
A: Absolutely! While alcohol and water-based markers cover a broad spectrum, there are other specialized types. Calligraphy markers often have chisel or brush tips and are designed for elegant lettering. Chalk markers use opaque, water-based pigment for a chalky look on non-porous surfaces like chalkboards or glass. There are also paint markers (often oil or acrylic-based) for opaque, durable lines on almost any surface, and even fabric markers for textiles. Each serves a unique artistic purpose beyond general coloring.
Conclusion: Find Your Flow, One Vibrant Stroke at a Time
So there you have it – my unfiltered, deep dive into the wonderfully vibrant, sometimes frustrating, but ultimately rewarding world of markers for coloring and art. From understanding the fundamental differences between alcohol-based and water-based inks, to mastering essential blending techniques and selecting the right paper (and why paper's tooth is so critical), we’ve covered a lot. My top picks for every stage of your artistic journey are here, along with critical insights into lightfastness, refillability, and proper maintenance.
Whether you're chasing intensely vibrant illustrations, painstakingly intricate details, or simply the pure, unadulterated joy of putting brilliant color to paper, rest assured: there is a marker out there perfectly suited for your artistic soul. My parting thought to you, dear reader, is this: Don't be afraid to experiment. Don't be afraid to make mistakes (I certainly still do, and often find beauty in them!). The most important thing is to simply pick up those tools, feel the unique flow of the ink on paper, and truly let your creativity take over. As you embark on your marker journey, remember to refer back to the sections on [paper selection] or [blending techniques] whenever you need a refresher. Who knows what incredible things you'll create, or how a newfound appreciation for these versatile tools might deepen your understanding of the art world around you? Go on, make your mark. Your artistic journey is waiting.

And if you're ever looking for a splash of abstract color to ignite your own space, or simply want to see the vibrant possibilities of art explored, feel free to explore the pieces I've created over on the main page. Happy coloring, and may your artistic journey be filled with vibrant discoveries!


