
The Definitive Guide to Portable Projectors for Artists: Enhancing Precision and Scale in Creative Practice
Explore essential features, expert recommendations, and practical advice for selecting the optimal portable projector. Enhance precision, scale, and creative workflow in your art practice.
The Definitive Guide to Portable Projectors for Artists: Enhancing Precision and Scale in Creative Practice
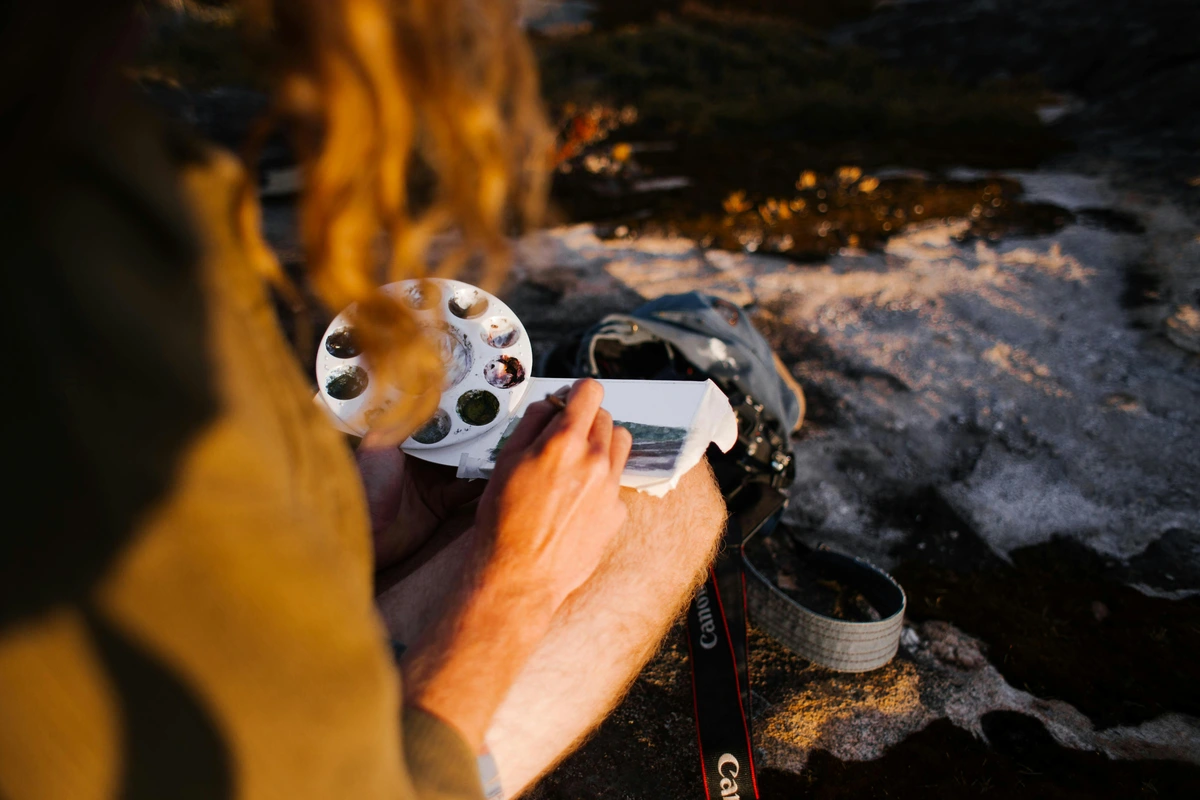
I’ll be honest, when portable projectors first hit the market, I saw them as novelty gadgets, maybe for a quick business presentation or a backyard movie night. I certainly didn't immediately connect them to the messy, tactile world of my studio. My hands-on, paint-stained world felt a million miles from anything

The Transformative Role of Portable Projectors in Artistic Creation
Portable projectors bridge the gap between digital ideation and physical execution, providing artists with dynamic tools to enhance their creative workflow and achieve new levels of precision and scale. Their utility extends far beyond simple tracing, empowering artists in numerous ways. It's a true manifestation of digital alchemy, where pixels transform into paint, light becomes a chisel, and ephemeral ideas solidify into enduring art.
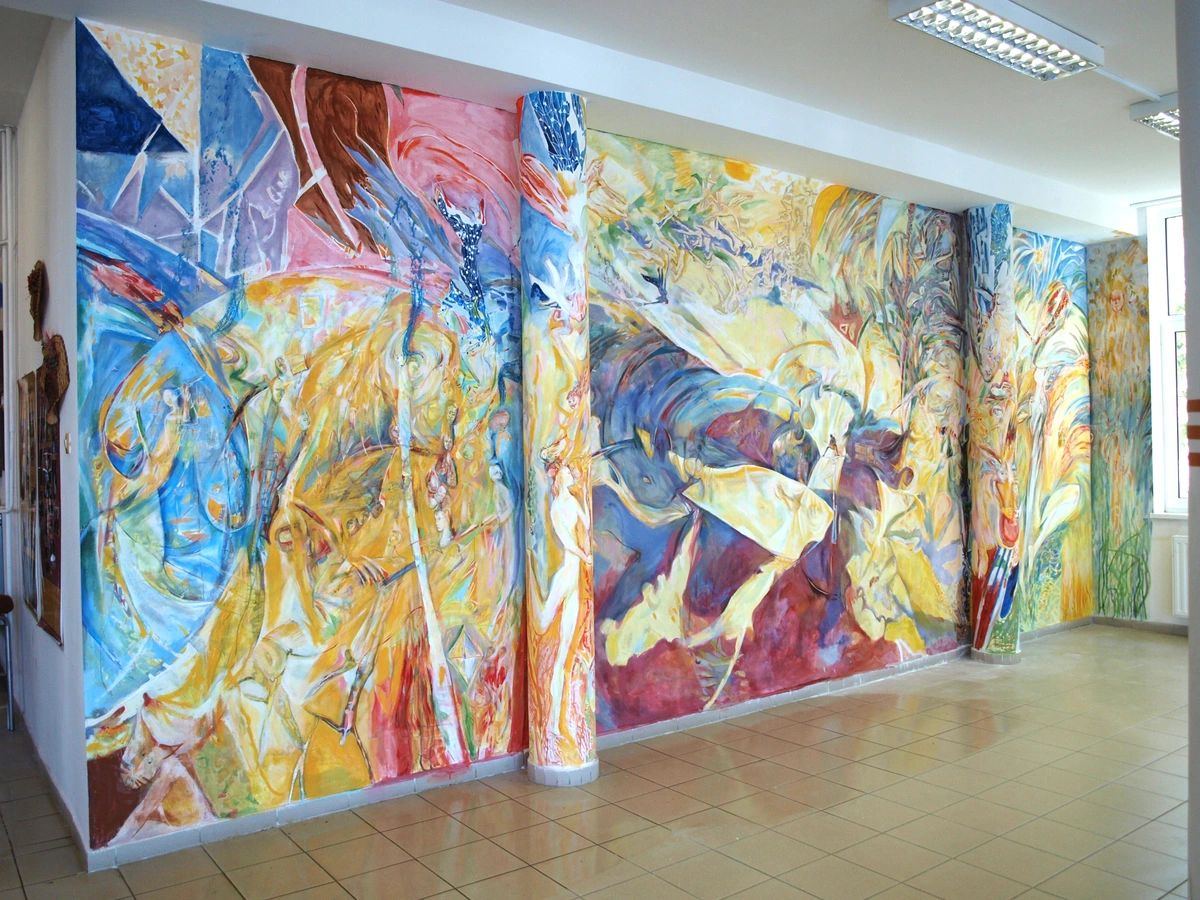
From the sprawling canvas of a muralist needing to perfectly align intricate street art designs (something I've seen firsthand transform massive projects, often for artists selling collectible art), to the sculptor projecting complex forms onto raw material for accurate carving guides, and even textile artists mapping patterns onto fabric without laborious hand-drawing – the applications are vast. Imagine a fashion designer projecting a complex garment pattern directly onto a unique fabric, ensuring perfect alignment before a single cut is made. But let's get even more specific. Imagine the freedom for digital sculptors to project a 3D model's contours onto a block of foam or clay, guiding their physical tools with digital precision, turning a virtual concept into a tangible form with ease. Or the sheer efficiency for architectural projection mappers who can prototype large-scale light installations directly onto buildings, seeing their visions come alive before a single cable is permanently laid. And what about jewelry designers? Projecting intricate patterns onto metal for etching or precise cutting guides can drastically speed up the process and reduce errors. Digital painters, illustrators, and animators also find them invaluable for translating their screen-based creations into physical works or for collaborating in real-time, perhaps even projecting storyboards for a new animation project or mapping character designs onto physical maquettes. It’s truly fascinating to see how a single piece of tech can touch so many different facets of the art world, constantly blurring the lines between digital and analog creative spaces, providing new avenues for artistic expression. Whatever your discipline, there's likely a way a portable projector can revolutionize your approach. It's about finding those moments where digital precision can elevate tactile creation.
Here’s a snapshot of how portable projectors empower diverse artists:
Artistic Discipline | Key Projector Application | Benefit for the Artist | Challenges Overcome |
|---|---|---|---|
| Muralists | Scaling and aligning large designs onto walls | Ensures proportional accuracy, saves time and effort | Manual gridding, uneven surfaces |
| Sculptors | Projecting forms/contours onto raw materials | Guides carving/shaping with digital precision | Tedious measurement, material waste |
| Textile Artists | Mapping patterns for fabric, embroidery, garment design | Eliminates laborious hand-drawing, ensures accuracy | Pattern distortion, repetitive work |
| Digital Sculptors | Projecting 3D model contours for physical creation | Bridges virtual-to-tangible, enhances precision | Translating complex forms |
| Projection Mappers | Prototyping large-scale light installations on buildings | Real-time visualization, reduces costly errors | Costly mock-ups, on-site adjustments |
| Jewelry Designers | Projecting intricate patterns for etching or cutting | Ensures symmetrical designs, saves delicate handwork | Micro-detail precision, repetitive patterns |
| Digital Painters/Illustrators | Translating screen-based art to physical canvases, collaboration | Maintains fidelity from digital to analog, facilitates teamwork | Scale and proportion loss |
| Animators | Projecting storyboards or character designs onto maquettes | Aids in physical model creation, real-time collaboration | Visualizing 3D from 2D, team cohesion |
Precision and Scale: Bridging the Digital-to-Analog Divide
For centuries, artists have employed grids, pantographs, and even devices like the camera obscura, along with simpler tools like lightboxes, to transfer images and scale designs. I remember painstakingly gridding out a large canvas, hoping I hadn't skewed anything! It was a painstaking, often error-prone process that demanded immense patience and an unforgiving eye. And don't even get me started on the frustration of realizing a crucial element was off-center after hours of painting! The portable projector, by contrast, streamlines this process dramatically, allowing for instantaneous projection of digital sketches, photographs, or reference materials directly onto any surface. This capability is paramount for maintaining proportional accuracy and intricate detail, especially when working on projects that demand flawless transitions from concept to canvas. It’s like having a master draftsman at your fingertips, ensuring everything lines up perfectly, which, let’s be honest, saves a lot of headaches and potential rework. If you're curious about traditional methods, I've found a good resource on reviewing the best light boxes for tracing and drawing. This isn't just about saving time; it's about eliminating the mental fatigue and potential for errors that can stifle creative flow. It liberates you to focus on the expressive act, rather than the tedious mechanics of transfer. I mean, who wants to spend hours gridding when you could be painting? The sheer mathematical precision you can achieve with a projector, particularly for complex geometric designs or replicating intricate anatomical studies, is simply unparalleled by manual methods. It's a fundamental shift in how we approach preparation, freeing up mental bandwidth for the true artistic endeavor.
To truly appreciate the projector's impact, let's briefly compare it to its predecessors:
Method | Precision | Scale Flexibility | Time Efficiency | Ease of Use | Key Limitation |
|---|---|---|---|---|---|
| Hand Gridding | Medium | High | Low | High (manual) | Tedious, error-prone, time-consuming |
| Pantograph | High | Medium | Medium | Medium | Limited scale range, mechanical constraints |
| Camera Obscura | High | High | Medium | Medium | Requires specific light conditions, stationary |
| Lightbox | High | Low | High | High | Only for small, translucent materials |
| Portable Projector | Very High | Very High | Very High | Very High (digital) | Requires power, image quality can vary |
This table really drives home the point, doesn't it? The sheer versatility and efficiency of a portable projector are unmatched by any single traditional method. It's a testament to how technology can truly augment artistic practice without diminishing its soul. It’s about being smart with your time and energy, so you can pour more of yourself into the truly creative parts.

Compositional Experimentation: Dynamic Design Exploration
One of the most compelling advantages of a portable projector is its capacity for live compositional adjustment. You can literally try on different compositions, scaling elements up or down, shifting them left or right, all with the flick of a finger. Artists can experiment with various layouts, scale elements, and even project abstract patterns or textures onto their work surface, seeing the immediate visual impact. This dynamic, real-time approach facilitates rapid iteration and visual problem-solving, allowing for bold artistic decisions before a single brushstroke is made. It’s an invaluable tool for exploring how to abstract art with digital precision, giving you the freedom to play without the commitment of paint. I've often used it to test out different weightings and balances, especially when thinking about understanding balance in art composition or the fundamental elements of art. This iterative process, where you can instantly see the impact of even minor changes – whether it's shifting a focal point or experimenting with a new background texture – is something traditional methods just can't match. It empowers you to go beyond static sketches, literally 'trying on' a new composition or even projecting ephemeral, digital brushstrokes directly onto your canvas to see how they interact with existing paint, fostering a truly intuitive and experimental creative flow. I've personally used this to great effect when exploring dynamic diagonals for a new abstract piece, instantly seeing how a shift of a few degrees could drastically alter the energy of the composition. It’s like having a superpower for visual problem-solving, letting you take bold risks without the commitment of a single drop of paint. How liberating is that? And the best part? No paint wasted, no canvas ruined – just pure, unadulterated experimentation.
Beyond just scaling, a projector facilitates real-time feedback that dramatically accelerates the design process. You can instantly modify your digital sketch, and see the changes reflected on your physical surface. This dynamic interaction allows for quicker adjustments, less rework, and a more fluid progression from concept to completion. It means spending more time creating and less time correcting, which, let's be honest, is every artist's dream. It's like having a digital assistant that instantly renders your thoughts onto the physical world, allowing you to refine your vision with unprecedented speed and confidence.
Facilitating Large-Scale Works: Murals and Canvas Expansion
Undertaking large-scale paintings, murals, or installations traditionally involves laborious scaling methods that can be physically demanding and incredibly time-consuming. Imagine trying to grid out a 20-foot mural by hand – it’s a recipe for errors, sore muscles, and a lot of frustration! A portable projector simplifies this immensely, projecting the design directly onto a wall or expansive canvas, allowing the artist to trace or freehand paint with confidence. This efficiency accelerates the initial stages of large projects, freeing up more time for the expressive execution that defines unique artistic vision. The ability to quickly scale and position a design means less time on logistics and more time on actual creation, which, for a public art commission with tight deadlines, can be absolutely crucial.
It also opens up possibilities for artists to experiment with different scales without the massive logistical overhead. Think about a public art installation – the ability to prototype designs on the actual site dramatically reduces costly errors and rework, saving both time and materials. For community art projects, a projector can facilitate collaborative design, allowing multiple artists to work on sections with shared guidelines, fostering cohesion in large-scale endeavors. If you're diving into large canvases, understanding how to stretch a canvas for painting is also a crucial skill, ensuring your surface is as ready as your projection. I've seen a mural team use a projector to break down a complex, curving design into manageable sections, each artist tackling their part with perfect alignment. It's truly amazing to witness how a little light can bring so many hands together in harmony, transforming a daunting task into a unified creative effort.
Beyond the initial tracing, projectors can also assist in site-specific planning for large-scale installations. Imagine being able to cast a design onto a building facade, not just to trace, but to understand how light and shadow will interact at different times of day, or how the piece will look from various public vantage points. This level of foresight is invaluable for public art commissions, where environmental integration and public perception are key. It allows for a level of pre-visualization that was once only possible through painstaking mock-ups or purely theoretical calculations.
Versatile Reference and Study: Beyond Simple Tracing
Beyond direct transfer, projectors serve as powerful reference tools. I've personally used them to project intricate architectural details onto a canvas to ensure historical accuracy, or to study complex anatomical forms for figure drawing, making sure every muscle and bone is exactly where it should be. Artists can project anatomical studies, intricate patterns, or even explore how different lighting affects a scene – imagine seeing how a digital sunset plays across your composition before you even mix a single paint color! This dynamic approach to light and shadow study is invaluable. They can overlay ephemeral textures or atmospheric effects, aiding in the development of depth and exploring texture in abstract art: techniques and materials in abstract works. This makes them a vital component for comprehensive visual study and creative exploration, offering a dynamic alternative to static reference images. What's more, I've used them to analyze the definitive guide to perspective in art by projecting grid systems onto photos, giving me a deeper understanding of how the masters achieved such depth. I've even projected reference images onto 3D models or sculptures, allowing for dynamic light and shadow studies before committing to a final form, which is a game-changer for sculptors and installation artists. This ability to instantly visualize light and shadow before applying a single stroke or cut is, for me, one of the most powerful aspects. It's like having a cheat sheet for understanding how light sculpts form in real-time. I've also found them invaluable for dissecting the compositions of historical masterpieces, projecting them onto a wall and tracing the underlying geometric structures that artists like those from the ultimate guide to cubism or ultimate guide to expressionism movements employed. It brings art history alive in a very tangible way.
Here are a few advanced reference applications I've personally found invaluable:
- Art Historical Analysis: Projecting master artworks to analyze their composition, perspective, or color theory, bringing art history to life in your studio. This really helps to understand the foundational principles behind movements like ultimate guide to cubism or ultimate guide to expressionism. You can even overlay historical prints or architectural drawings onto photographs of contemporary sites to visualize change over time – a powerful tool for historical illustration or conceptual art.
- Forensic & Scientific Illustration: Projecting complex diagrams, anatomical cross-sections, or crime scene reconstructions for meticulous accuracy in specialized illustration fields.
- Costume & Set Design: Projecting historical garments or architectural plans onto mannequins or miniature sets to ensure period accuracy and scale for theatrical or film productions.
- Live Model Projection: Instead of drawing from a static image, project dynamic lighting or subtle textures onto a live model to study how light interacts with form in real-time, enhancing your figure drawing or painting skills.
- Historical Accuracy: Projecting archival photographs or architectural blueprints directly onto a scene to ensure period-correct details.
- Anatomical Studies: Overlaying detailed anatomical diagrams onto figure drawings or sculptures for precise form and proportion.
- Light & Shadow Analysis: Experimenting with digital light sources projected onto your physical work to understand how different lighting scenarios impact the mood and depth.
- Complex Pattern Transfer: Accurately mapping intricate patterns for textile work, ceramics, or even tattoo designs onto curved surfaces. This allows for unparalleled precision in decorative arts, where consistency across a series of objects can be critical.
- Perspective Grids: Projecting custom grid systems onto reference photos or directly onto a canvas to master complex perspective challenges.

Beyond the Canvas: Projectors for Diverse Artistic Mediums
While the previous sections touched upon the general utility of portable projectors, their true versatility shines when we consider specific artistic disciplines. It’s not just about painting on a canvas; it’s about expanding the possibilities of almost any medium you can think of, blurring the lines between traditional and contemporary practice. I’m always amazed by the innovative ways artists adapt these tools, proving that creativity truly knows no bounds.
Performance Art & Stage Design
For performance artists, projectors are a game-changer, creating dynamic backdrops, interactive environments, and narrative elements that evolve in real-time. Imagine projecting shifting landscapes or abstract animations that respond to a dancer’s movements, blurring the lines between performer and environment in a truly immersive experience. For stage designers, they offer unparalleled flexibility to create complex scenery and lighting effects without the extensive physical build-out, allowing for rapid changes and intricate visual storytelling. This is where the magic of light becomes an art form in itself, transforming static spaces into living, breathing, immersive experiences. I've seen them used to project historical photographs onto actors, making them literally embody a character's past, or to create illusory architectural spaces that shift with the narrative. Beyond static backdrops, imagine interactive projections that respond to sound, movement, or even audience participation, blurring the lines between performer, environment, and spectator. It's a powerful way to integrate visual art directly into live performance, pushing the boundaries of what a theatrical experience can be. They can also create immersive environments for exhibition spaces, transforming a sterile gallery into a dynamic, sensory experience that engages viewers on multiple levels. And let's not forget the sheer logistical advantage: fewer physical props mean faster scene changes, less storage, and greater artistic agility – a dream for any director on a tight budget!
Sculpture & Installation Art
Imagine needing to carve a complex relief or assemble a multi-faceted sculpture with absolute precision. Projectors can cast outlines directly onto raw materials like wood, stone, foam, or even ice, acting as precise guides for cutting, carving, and shaping. For installation artists, they become a dynamic element themselves, projecting light and moving images to create immersive environments, transforming static spaces into living, breathing works of kinetic art movement in modern sculpture. This means less physical construction and more flexibility for ephemeral, site-specific works that can adapt and evolve. I've even seen them used to map intricate designs onto ceramic pieces before glazing, which is a game-changer for detailed pottery work, ensuring patterns wrap seamlessly around curved forms and maintaining perfect alignment across multiple surfaces. This capability dramatically reduces errors and allows for ambitious, complex designs in three dimensions, making it possible to create highly precise reliefs or even guide laser cutting for metal or glass elements. Furthermore, the integration of 3D modeling software with projectors allows sculptors to directly translate digital models onto physical materials, streamlining the process of creating complex forms and ensuring unparalleled accuracy from screen to tangible object. This fusion of digital design and physical fabrication truly pushes the boundaries of what's possible in contemporary sculpture.

Ceramic & Pottery
Transferring intricate designs onto curved or irregular ceramic surfaces for glazing or etching can be incredibly challenging, requiring a steady hand and immense patience. A portable projector simplifies this by casting patterns directly onto pots, tiles, or sculptural ceramics, allowing for precise application of underglazes, slips, or carving guides. This opens up possibilities for complex decorative motifs, textual elements, or even mapping abstract patterns onto functional ware, ensuring consistency and accuracy across multiple pieces, which is essential for series work. Imagine flawlessly reproducing a complex pattern across a dinnerware set – a projector makes that painstaking consistency suddenly achievable. It's a fantastic way to blend digital design with traditional ceramic techniques, allowing for a level of detail and uniformity that would be painstakingly difficult by hand, reducing frustration and increasing creative freedom. I've seen potters use them to create intricate repeating patterns on a set of bowls, something that would have taken hours of painstaking hand-drawing now done in minutes with digital precision. It truly democratizes complex decorative work, making it accessible even to those without years of freehand practice.
Textile & Fashion Design
For those working with fabric, the challenges of pattern transfer are well known. Portable projectors eliminate the need for intricate hand-drawing or pinning by projecting patterns, embroidery designs, or even full garment layouts directly onto cloth. This ensures accuracy and saves countless hours, whether you're creating a custom piece, preparing for a production run, or even working on detailed fashion illustration. It’s a precision tool that makes textile art (and even fashion illustration) more efficient and more accurate. Think about a complex quilting pattern needing perfect alignment, creating bespoke garment pieces that require exact measurements, or even creating custom shoes – the projector makes precision possible on virtually any textile, from delicate silks to rugged canvas, reducing waste and increasing efficiency. I've seen fashion designers use them to project elaborate garment prototypes directly onto raw fabric, allowing for immediate visual feedback and adjustments before a single cut is made, dramatically streamlining the design and production process. This also extends to digital pattern drafting, where designers can quickly test variations and see how a design drapes or flows on a virtual form, then transfer the finalized pattern directly to fabric for production. Imagine the freedom to iterate on a complex embroidery design, adjusting its scale and placement with a few taps before a single stitch is made!
Culinary Arts (Artistic Presentation)
While perhaps unexpected, even the culinary arts can benefit from projector precision. Imagine a chef wanting to replicate an intricate food plating design or stencil a delicate pattern onto a dessert with perfect consistency. Projectors can cast these guides onto plates, pastries, or even elaborate cake decorations, ensuring perfect symmetry and artistic flair in high-end culinary presentations. From intricate chocolate work to precise sauce drizzles, to even guiding detailed sugar sculpting or intricate stenciling on a multi-tiered cake, it’s a niche, but fascinating, application that speaks to the projector's universal utility in any field demanding visual precision and aesthetic perfection. Who knew a projector could make your dessert look like a museum piece? I've even seen intricate edible art, like detailed patterns on a large pastry or a multi-layered sugar sculpture, benefit immensely from the precision a projector offers, making sure every line is perfect and every element is consistently scaled. It's about bringing the same rigor and creativity of the visual arts to the ephemeral canvas of food.
Digital Art & Photography Integration
Many artists today blend digital and traditional practices, and portable projectors are a bridge between these worlds. Projectors are invaluable for previewing large-scale prints, ensuring color accuracy from screen to physical medium (a tricky business, as anyone who’s ever printed their own art knows!). Digital painters can transfer their intricate designs to canvas for a physical rendition, adding tactile qualities to their digital visions. Photographers can use them to manipulate light and shadow in a controlled environment for unique visual effects, exploring the nuances of how artists use color or even projecting textures onto models or sets. I’ve even seen artists create fascinating mixed reality installations, where projected light interacts with physical objects to create illusory spaces, blending the digital and physical in real-time. This can range from subtle textures overlaid onto sculptures to full-blown interactive environments that respond to viewers, transforming passive observation into an active, immersive experience. It’s a constant evolution of artistic expression, pushing the boundaries of what's possible and offering new dimensions for creative storytelling. They truly unlock a new realm where pixels and paint can coexist and enhance one another.
Critical Technical Specifications for Artist-Centric Projector Selection
Choosing the right portable projector involves a discerning evaluation of several technical specifications, each directly impacting its utility in an artistic context. This isn't just about throwing an image onto a wall; it's about translating your vision with precision. While general projector reviews often prioritize entertainment features like streaming apps or cinematic quality, artists must focus on criteria relevant to their specific creative demands, ensuring the tool truly serves their craft and not just their Netflix queue. Because let's face it, your masterpiece deserves more than a 'good enough' display. It deserves fidelity, clarity, and consistency.
Brightness (ANSI Lumens)
Brightness, measured in ANSI lumens, determines how well the projected image is visible in various lighting conditions. I've certainly struggled with a dim projector trying to trace in a brightly lit room – it's a frustrating dance with shadows and squinting. I once tried to trace a detailed botanical illustration onto a large canvas outdoors in broad daylight with a 200-lumen projector; it was less tracing, more interpretive dance with a faint ghost of an image. Never again! For studio use where ambient light can be controlled, 100-300 ANSI lumens may suffice. However, for well-lit studios, larger projections, or outdoor murals, a projector offering 500-1000+ ANSI lumens is highly recommended to ensure image clarity and vibrancy. Think about your typical working environment: if you're battling daylight, more lumens are your friend. If you're a night owl in a dimly lit studio, you might get away with less, but more is always better for image definition and color saturation. Remember, a brighter image can also help reduce eye strain during long sessions, making the artistic process more comfortable. This often overlooked benefit can significantly impact your creative endurance and overall well-being in the studio. It’s like turning up the lights on your physical canvas – suddenly, every detail becomes visible, and your work truly shines.
Resolution
Resolution dictates the sharpness and detail of the projected image. If you're transferring a delicate botanical illustration or a detailed architectural drawing, you absolutely don't want jagged, pixelated lines on your canvas – that defeats the purpose of precision! Native 720p (HD) is often a baseline for decent clarity, but 1080p (Full HD) is significantly superior for rendering fine lines, intricate details, and textual elements with precision. For highly detailed work, large-scale realism, or projections onto massive surfaces, aiming for the highest native resolution possible (even 4K, if your budget allows) is crucial to prevent pixelation and ensure your transferred image maintains the integrity of your original digital design. For abstract artists, this might be less critical than for realists – a little pixelation might even add to the aesthetic – but even then, crisp edges can make a difference in your composition, overall visual design (linking to understanding-the-elements-of-design-in-art), and the ultimate impact of the piece. I've personally found that even for abstract work, a high-resolution projection can bring a level of intentionality to line work and shape, preventing unintended fuzziness. It all comes down to how much fidelity your artistic vision demands, and whether you want pixelation by choice, not by accident. For photorealistic artists, a lower resolution can create a frustrating
Here’s a quick guide to matching resolution with your artistic needs:
Resolution Type | Ideal Use Case for Artists | Notes for Artistic Impact |
|---|---|---|
| 480p (SD) | Basic tracing, rough compositional sketches, low-detail work | Can appear pixelated; best for general blocking-in, not fine details |
| 720p (HD) | Mid-range detail tracing, compositional planning, teaching | Good balance of clarity and cost; suitable for most general uses |
| 1080p (Full HD) | Fine detail transfer, realistic portraiture, intricate patterns | Essential for precision-focused artists, minimizes pixelation |
| 4K (Ultra HD) | Large-scale realism, museum-quality reproduction, digital painting transfers | Unparalleled detail, but significant investment; future-proof for high-fidelity work |
Portability and Power Autonomy
True portability encompasses compact size, lightweight design, and critically, a robust battery life. I've hauled enough art supplies to know that every ounce counts when you're working on location, whether it's for a mural or a plein air session. Artists working on location, teaching workshops, or creating murals need a projector that can operate independently for several hours. This is where modern battery technology, often supporting fast USB-C charging or compatibility with standard power banks, truly shines. Many artists carry portable power banks anyway, making this an easy extension of their existing kit. Evaluate the projector's weight and dimensions, ensuring it fits easily into a kit bag without adding undue bulk, making it as convenient as your reviewing the best portable easels for plein air painting setup. For truly off-grid artistic adventures, some models can even be powered by portable solar chargers, making remote plein air sessions or large-scale installations in far-flung locations entirely feasible. This freedom from outlets can be genuinely liberating for creative practice, allowing you to chase inspiration wherever it leads. Imagine setting up a temporary studio in the wilderness, drawing inspiration directly from nature, and translating it onto a canvas with the aid of a projector powered solely by the sun – that's a level of artistic freedom few tools can offer. It's about bringing your studio to the world, not confining your vision to the studio.
Connectivity and Compatibility
Versatile connectivity ensures seamless integration with various devices. I find myself constantly switching between my laptop, tablet, and phone depending on what I'm referencing or demonstrating. Look for projectors with HDMI for laptops/tablets, USB for direct file playback, and Wi-Fi/Bluetooth for wireless mirroring from smartphones or tablets. These options provide maximum flexibility for accessing and projecting diverse digital content, whether it's a high-res photograph, a digital painting from your favorite app (perhaps using essential tools for digital painting beginners), or even a video tutorial. Some advanced models even offer built-in app stores, letting you access streaming services, productivity apps, or cloud storage directly, meaning you might not even need a separate device beyond the projector itself. Imagine pulling up a reference photo directly from your Google Drive or Dropbox, or even using a digital painting app built into the projector for on-the-fly sketching! The more ways you can connect, the less likely you are to hit a roadblock in your creative flow, which is always a bonus when inspiration strikes!
Wireless connectivity, in particular, has been a game-changer for many artists. The freedom from cables means less clutter in the studio, easier setup for workshops or demonstrations, and the ability to control your projected image from across the room. Just ensure your Wi-Fi connection is strong to avoid any frustrating lag during critical moments of creation. For collaboration, imagine instantly sharing a sketch from your tablet to the wall for a group critique – no more awkward huddling around a small screen!

Image Correction Capabilities
Keystone correction (both vertical and horizontal) allows the projected image to remain rectangular even when the projector is not perfectly perpendicular to the surface. This is invaluable for artists working in unconventional spaces or at awkward angles – because let's face it, not every studio has perfectly flat, accessible walls or ideal tripod placement! However, be aware that excessive keystone correction can sometimes slightly distort the image or reduce resolution, so it’s always best to position the projector as squarely as possible first to maintain optimal clarity. Auto-focus further enhances usability by automatically sharpening the image, saving precious time during setup, especially when you're itching to get started on a new idea. Some advanced models also offer four-corner correction, a truly remarkable feature that allows you to adjust each corner of the image independently. This is a lifesaver for projecting onto irregular surfaces, aligning with existing architectural features, or compensating for extreme off-axis projection. I've used this to perfectly align a grid onto a wonky gallery wall, something that would have been impossible with standard keystone correction alone. It's the kind of feature that, once you have it, you can't imagine living without, especially if your art takes you to unconventional spaces. For optimal geometric accuracy, always try to minimize the use of digital correction by physically positioning the projector as best as possible first.
Throw Ratio
The throw ratio defines the relationship between the projection distance and the image width. This is a crucial factor, and I’ve learned the hard way that not all studios are created equal when it comes to space! A short-throw projector can cast a large image from a short distance (e.g., 0.5:1 to 1.5:1), which is ideal for small studios or when projecting onto a nearby canvas without casting annoying shadows (something I particularly appreciate when working up close). A long-throw allows for greater flexibility in positioning the projector further away (e.g., 2.0:1 or higher), useful for very large murals or stage backdrops where you have ample distance and don't want the projector getting in the way. Knowing your working space and typical project scale will absolutely guide your choice here; it's not a one-size-fits-all situation. I once assumed a standard-throw would be fine for my compact studio, only to spend half my time wrestling with shadows from my own hand as I tried to trace. Live and learn! My advice? Measure your space, consider your typical working distance, and then choose. Choosing the wrong throw ratio can lead to significant frustration, forcing you to constantly reposition your work or the projector, interrupting your creative flow and wasting precious studio time. It's about optimizing your physical setup to complement your digital tools, creating a harmonious workspace.
Here’s a quick overview to help you decide:
Throw Ratio Type | Ideal Studio Size | Best For | Considerations |
|---|---|---|---|
| Short-Throw | Small to Medium, confined | Canvas work, detailed tracing, avoiding shadows, table-top projection | Often pricier, can have slight edge distortion at extreme angles, ideal for tight spaces |
| Standard-Throw | Medium to Large, flexible | General studio use, larger canvases, classroom presentations | Requires more distance, prone to shadows if working close to surface, good versatility |
| Long-Throw | Very Large, open spaces | Murals, stage backdrops, very large installations, outdoor events | Max distance needed, minimal shadow interference, usually less portable, powerful zoom often included |
Contrast Ratio
Contrast ratio indicates the difference between the darkest black and the brightest white a projector can display. For artists, a high contrast ratio (e.g., 1000:1 or higher) translates to greater depth, richer shadows, and more defined details in your projected image. This is particularly important when working with tonal studies, mastering subtle chiaroscuro effects, or when you need to differentiate subtle shifts in value within a monochrome piece. A good contrast ratio ensures that your projected reference doesn't appear flat or washed out, preserving the nuances of your original digital artwork and aiding in accurate color separation, much like a well-lit studio reveals the true depth of your physical work. Without adequate contrast, subtle shifts in value or color can be lost, making accurate transfer and compositional planning significantly more challenging, especially for realist painters or those focused on intricate light play. It's the difference between a flat image and one that truly pops with dimension and vitality.
Aspect Ratio
The aspect ratio is the proportional relationship between an image's width and height. Common aspect ratios include 4:3 (traditional TV/computer monitors) and 16:9 (widescreen, common for video). While many projectors auto-adjust, understanding this ensures your projected image doesn't appear stretched or compressed, maintaining the original proportions of your artwork. Matching the projector's native aspect ratio to your source material will prevent any unintended distortion, which, let's face it, can be a real headache when you're trying to achieve precise forms, especially in realism or portraiture. Imagine carefully composing a portrait in 4:3, only to have it stretched to 16:9 – not ideal for maintaining those subtle likenesses! Or a perfectly circular mandala becoming an oval. Consistent aspect ratio ensures your projected reference is a true reflection of your digital design, saving you from infuriating perceptual adjustments. For artists working with photography or digital compositions for print, maintaining the correct aspect ratio is paramount to preserving the integrity of their initial vision and avoiding unexpected cropping or scaling issues in the final physical output.
Durability and Build Quality
Given the active nature of artistic work, durability is a significant consideration. Let’s be honest, studios can be messy places – paint dust, charcoal particles, accidental bumps, and sometimes even the occasional spilled coffee! Projectors designed with robust casings, good heat dissipation, and sealed optics are less susceptible to dust ingress and minor impacts, prolonging their lifespan in a working studio environment. Think about what your creative space demands; if you're regularly moving equipment or working in a dusty medium (like pastels or charcoal), a more rugged build quality is definitely worth the investment. I’ve known artists whose studios resemble an archaeological dig after a particularly intense charcoal session – you definitely want sealed optics in that scenario! Some models even boast basic splash resistance or a higher IP (Ingress Protection) rating, which could be a lifesaver around wet mediums or in less-than-pristine outdoor conditions, adding an extra layer of peace of mind against accidental knocks, humidity, or even the subtle vibrations from heavy machinery in a shared workshop. It’s an investment in the longevity and reliability of your creative partner.

Energy Efficiency & Eco-Modes
Beyond raw power, consider a projector’s energy efficiency. Many modern portable projectors include 'Eco-modes' or 'Power-saving' settings. While these might slightly dim the output, they significantly extend the light source's lifespan and reduce energy consumption. For artists who use their projector for long sessions, or who are conscious of their environmental footprint, this is a practical and sustainable choice. It's also worth noting that LED and laser projectors are inherently more energy-efficient than traditional lamp-based models, offering a greener choice for your studio. This isn't just about saving money; it's about being a responsible creator in an increasingly conscious world.
Integrated Audio
While not typically a primary concern for visual artists, some portable projectors come with built-in speakers. These can be surprisingly useful for playing background music in the studio, providing audio for video tutorials during workshops, or even integrating sound into multi-media installations. Don't expect audiophile quality, but for convenience, it's a feature worth noting, especially if you plan to use your projector in a teaching capacity, presenting to a class, or for creating immersive experiences. It saves you from needing an extra speaker setup, simplifying your mobile studio or workshop kit.
Fan Noise
This might seem like a minor point, but in a quiet studio environment, the whirring of a projector fan can be incredibly distracting, especially during long, focused sessions. Many portable projectors are designed to be quieter than their larger counterparts, but specifications vary. Look for models with a noise level of 30dB or less for a more peaceful creative space. A silent projector, if you can find one, is pure bliss, but often comes with a premium price tag. For workshops or presentations, fan noise might be less of a concern, but for deep, contemplative art practice, where focus is everything, it’s absolutely worth considering. A loud hum can quickly break your creative flow and pull you out of the zone.
Energy Efficiency & Eco-Modes
Beyond raw power, consider a projector’s energy efficiency. Many modern portable projectors include 'Eco-modes' or 'Power-saving' settings. While these might slightly dim the output, they significantly extend the light source's lifespan and reduce energy consumption. For artists who use their projector for long sessions, or who are conscious of their environmental footprint, this is a practical and sustainable choice. It's also worth noting that LED and laser projectors are inherently more energy-efficient than traditional lamp-based models, offering a greener choice for your studio.
Integrated Audio
While not typically a primary concern for visual artists, some portable projectors come with built-in speakers. These can be surprisingly useful for playing background music in the studio, providing audio for video tutorials during workshops, or even integrating sound into multi-media installations. Don't expect audiophile quality, but for convenience, it's a feature worth noting, especially if you plan to use your projector in a teaching capacity or for creating immersive experiences. It saves you from needing an extra speaker setup.
Fan Noise
This might seem like a minor point, but in a quiet studio environment, the whirring of a projector fan can be incredibly distracting, especially during long, focused sessions. Many portable projectors are designed to be quieter than their larger counterparts, but specifications vary. Look for models with a noise level of 30dB or less for a more peaceful creative space. A silent projector, if you can find one, is pure bliss, but often comes with a premium price tag. For workshops or presentations, fan noise might be less of a concern, but for deep, contemplative art practice, it’s worth considering.
Light Source Technology (LED, Laser, Lamp)
The type of light source impacts not only longevity but also color performance, brightness consistency, and even the projector's form factor. Understanding these differences is key to a wise investment, directly influencing your artistic output and long-term satisfaction.

- LED Projectors: These are common in portable models due to their compact size, cool operation, and impressive lifespans (typically 20,000-30,000+ hours). They offer consistent brightness and color over time and are generally more energy-efficient. They’re excellent for artists prioritizing portability and long-term, low-maintenance use, often providing a good balance of features and affordability.
- Laser Projectors: The newer kid on the block, laser technology boasts even longer lifespans (often 20,000+ hours with minimal degradation), superior brightness, and often exceptional color accuracy with a wider color gamut. They tend to be more expensive but offer premium performance, making them ideal for professional artists where fidelity is paramount, particularly for large-scale or high-stakes projects.
- Lamp-Based Projectors (DLP with UHP lamp): While often offering high initial brightness at a lower upfront cost, traditional lamp-based projectors have significantly shorter lamp lives (2,000-5,000 hours typically) and require costly replacements. Their color and brightness can also degrade more noticeably over the lamp's life. For artists who value consistency and low running costs, LED or Laser is generally preferable, as the long-term expense and inconsistent performance of lamp-based models can be a real headache.
Light Source Longevity
Beyond raw lumens, consider the lifespan of the projector's light source. Most modern portable projectors utilize LED technology, offering impressive lifespans of 20,000 to 30,000+ hours. This means years of use without needing to replace expensive lamps, a huge advantage for artists who rely on their tools daily. Laser technology is also becoming more prevalent, offering even greater longevity (often 20,000+ hours with very little degradation over time) and often superior color reproduction and brightness stability. Traditional lamp-based projectors might offer higher initial brightness but come with the ongoing cost and hassle of lamp replacements and less consistent color over time. For me, the peace of mind of a long-lasting LED or laser source is a definite plus – one less thing to worry about when I’m in the zone, and a much better return on investment in the long run. It's a commitment to your craft, knowing your tools will last as long as your ambition. It frees you from the concern of unexpected equipment failure, allowing you to focus entirely on your creative process.
Color Accuracy
For artists who rely on faithful color reproduction, a projector with good color accuracy is paramount. I've heard the lament of many a digital artist whose vibrant on-screen colors turned dull or shifted on projection – it’s a disheartening experience! While some portable projectors prioritize brightness over color fidelity, a model that boasts a wide color gamut (e.g., sRGB, Rec. 709, or even DCI-P3 coverage) and calibrated output will ensure that projected images closely match their digital source, especially important for digital painting or detailed reference work. Always, always cross-reference projected colors with your original source on a calibrated display if color fidelity is critical to your artistic expression. You might even consider investing in a dedicated color calibration device for your projector if your work demands absolute color precision. This is also where understanding how artists use color and even the psychology of color in abstract art beyond basic hues comes into play, as different mediums and surfaces will inherently interact with projected light in unique ways, adding another layer to master. For critical applications, consider investing in a dedicated color calibration device for your projector to ensure the absolute fidelity between your digital source and projected image. It’s an extra step, but one that can save countless hours of color correction later. Without accurate color projection, the subtle nuances of your digital compositions can be lost, leading to frustrating discrepancies between your vision and its physical realization. This is particularly vital for digital artists transitioning their work to print or canvas. Remember, a projected color is always interpreted by the surface it hits, so understanding that interplay is key.
Key Technical Considerations at a Glance
To make your decision-making a bit easier, here’s a summary of the core technical aspects and what to aim for, depending on your artistic needs.
Feature | What it Means | Artist's Priority (General) | Optimal Range/Feature for Artists |
|---|---|---|---|
| Brightness | Image visibility in various lighting | High visibility, especially in ambient light | 500-1000+ ANSI Lumens (for versatility) |
| Resolution | Sharpness and detail | Crisp lines, accurate detail transfer | Native 1080p (Full HD) or higher |
| Contrast Ratio | Difference between darkest black and brightest white | Depth and detail in shadows | 1000:1 or higher |
| Aspect Ratio | Proportional relationship of width to height | Prevent image distortion, maintain original proportions | Match source (e.g., 16:9 for widescreen content) |
| Throw Ratio | Projection distance vs. image size | Space-efficiency, shadow avoidance | Short-throw (small studios) or Standard (versatile) |
| Color Accuracy | Fidelity of projected colors to source | True-to-life color reproduction | Wide color gamut (sRGB/Rec. 709 coverage) |
| Battery Life | Operating time on internal power | Extended use for location-based work | 3+ hours (with power bank compatibility) |
| Connectivity | Ease of connecting devices | Versatile options (HDMI, USB, Wi-Fi) | HDMI, USB, Wi-Fi, Bluetooth |
Curated Recommendations: Leading Portable Projectors for Artistic Endeavors
After diving deep into the technical jargon, it's time to talk about what truly matters: getting a projector that fits your unique artistic journey. I’ve spent countless hours sifting through reviews and testing different models, and I've boiled it down to a few categories that I think will resonate most with fellow creators. Remember, the 'best' projector isn't a single device, but the one that empowers your specific art practice and budget. These are less about specific brands and more about the feature sets I've found to be most impactful, considering both the technical specifications and real-world studio challenges. It's about finding that perfect balance that enhances your creative process without breaking the bank or becoming a source of frustration. After all, the ideal tool should disappear into the workflow, becoming an extension of your creative will, not a source of technical headaches.

Selecting a portable projector requires balancing features against specific artistic needs and budget constraints. The following categories highlight key considerations for artists. It’s about matching the tool to your unique creative ecosystem.
Projector Category | Key Artistic Benefit | Optimal Use Case | Technical Highlights | Considerations for Artists |
|---|---|---|---|---|
| High-Fidelity Studio Projector | Exceptional detail, precise color reproduction, professional-grade output | Detailed studies, digital painting transfers, print preparation, fine art photography projection | 1080p+ native resolution (4K often available), high contrast (2000:1+), wide color gamut (Rec. 709/DCI-P3), advanced optics | Requires controlled lighting, often larger/heavier, significant investment, professional calibration recommended, can be less portable |
| Ultra-Portable Field Projector | Maximum mobility, swift setup for on-location work, ruggedness | Outdoor murals, plein air studies, workshops, presentations, impromptu installations | Long battery life (3-5+ hours), lightweight (< 2 lbs), robust design (IP rating for dust/splash), USB-C charging, often LED light source | Often lower lumens/resolution (200-500 ANSI typical), best in dim light, can be pricey for specs, check durability for harsh environments |
| Versatile All-Rounder | Balanced performance for diverse studio applications, good value | General canvas work, compositional planning, digital sketching, teaching, casual presentations | Good balance of 720p/1080p, decent lumens (300-600 ANSI), flexible connectivity (HDMI, USB, Wi-Fi), keystone/autofocus | Excellent value, covers most common needs, may not excel in extreme conditions (very bright/dark), balance of features over specialization |
| Entry-Level Artistic Assistant | Cost-effective entry into digital projection, learning tool | Beginner tracing, basic reference, small to medium canvas work, experimentation | Adequate lumens (100-200 ANSI), basic features, competitive pricing, often 480p/720p native, simple connectivity | Lower resolution/brightness, suitable for controlled indoor use, might lack advanced features like color calibration, good for exploring the medium, a great stepping stone to more advanced models |
| Specialty Projector (e.g., Ultra-Short Throw) | Minimal space requirement, eliminates shadows, unique projection angles | Small studios, table-top projection, interactive installations, retail displays, art mapping | Extremely short throw ratio (often < 0.8:1), high brightness (often 1000+ ANSI), advanced lens technology, robust cooling, specialized optics | Very specific use cases, often significantly more expensive, limited portability, potential for subtle edge distortion, careful placement required, but unrivaled for specific spatial challenges |
Operational Guidance: Integrating a Projector into Your Artistic Workflow
Effective integration of a portable projector into an artistic practice involves a few key operational steps to maximize its benefits and ensure seamless creative flow.

Optimal Placement and Projection Surface Selection
Position the projector directly in front of the projection surface (canvas, wall, board) whenever possible to minimize the need for keystone correction. This sounds obvious, but I've definitely tried to project from awkward angles in cramped studios, only to spend more time correcting than creating! For optimal clarity, ensure the surface is clean and uniformly lit. A light-colored, matte surface will yield the best image quality, as glossier surfaces can cause distracting reflections and hot spots. Remember, the surface itself can act as a subtle filter – projecting onto a heavily textured or dark-colored wall will naturally alter your image. For canvases, proper preparation with gesso (how to apply gesso to canvas a beginners guide) can significantly improve projection quality, providing a smooth, bright base. Don't be afraid to experiment with unusual surfaces either; I've seen artists project onto flowing water, smoke, translucent fabrics for ethereal effects, or even natural elements like trees, truly expanding the boundaries of their artistic vision. Consider also projecting onto 3D objects or sculptures to aid in mapping complex designs onto non-flat surfaces, allowing for unprecedented precision in three-dimensional work. The key is to see the surface itself as an active participant in the projection, not just a passive receiver. What kind of unexpected dialogues can you create between light and material? The possibilities are endless, and honestly, a little experimentation is where the real fun begins! Remember, even the subtle texture of a fine art paper or the weave of a canvas can become an integral part of the projected image, adding unexpected depth and character to your work. A smooth, white surface is the ideal starting point for maximum fidelity, but the artistic potential of an unconventional surface can be truly captivating.
Device Synchronization and Content Preparation
Connect your digital device (laptop, tablet, phone) using the most stable connection available, preferably HDMI. While wireless options are convenient, a direct cable connection often offers less lag and more reliable performance – crucial when you're making precise marks and every millimeter counts. Ensure your digital image files are of high resolution and correctly oriented. Basic image editing software (even a free one!) can be used to crop, adjust brightness and contrast, or desaturate images for easier tracing, aligning with the principles of artistic expression. I often find desaturating an image helps me focus purely on form and line, rather than getting distracted by colors that might not translate directly to my chosen medium, especially when considering the psychology of color in abstract art beyond basic hues. For complex projects, preparing multiple layers of your digital image – perhaps one for outlines, another for shading guides, and even a layer for tonal values – can offer even greater control during the transfer process, allowing you to build up your artwork systematically and confidently. I often create a 'ghost' layer of my initial sketch, then a separate layer for key structural elements, and a third for subtle tonal shifts. This multi-layered approach acts like a visual scaffold, making even the most daunting compositions feel approachable and precise. This also allows for iterative refinement; you can project a base layer, trace it, then project a new, more detailed layer over your traced work, building complexity with controlled accuracy. It's like having an infinite undo button for your physical artwork – a true luxury!

Calibration for Geometric Accuracy and Focus
After positioning, use the projector's keystone correction to square the image. Then, fine-tune the focus until the lines are crisp and clear – this is where patience pays off, and it's a step you shouldn't rush! This precision is critical for transferring designs accurately, ensuring the integrity of your creative flow. I often project a simple grid pattern first to ensure perfect geometric accuracy before overlaying my artwork; it’s a simple trick that makes a huge difference. Many projectors also have built-in test patterns – use these to your advantage! They are designed to help you check for distortions, focus issues, and even dead pixels easily, ensuring your display is perfect. I always throw up a simple grid pattern and a circle to ensure geometric accuracy and no subtle curvature – it’s a quick sanity check that saves a lot of frustration down the line. This quick calibration step saves a lot of headaches later on and ensures your projection is as accurate as possible, giving you a solid foundation for your work. Don't forget that even subtle ambient light can impact how clearly you perceive these calibration patterns, so always perform this step in a controlled lighting environment. It’s the digital equivalent of squaring your canvas – a non-negotiable step for precision.
Troubleshooting Common Portable Projector Issues for Artists
Maintenance Tips for Longevity
Just like any valuable art tool, your portable projector benefits from a little care and attention. Regular maintenance can significantly extend its lifespan and ensure consistent performance:

- Lens Cleaning: The most common issue for blurry images is a dirty lens. Always use a soft, lint-free microfiber cloth specifically designed for optics. Avoid harsh chemicals or abrasive materials that can scratch the lens coating.
- Dust Management: Dust is the enemy of electronics. Periodically (and gently) wipe down the projector's casing. If your projector has air filters, clean or replace them according to the manufacturer's instructions. Avoid operating the projector in overly dusty environments, or if you must, consider a protective enclosure or models with a good IP rating for dust resistance.
- Ventilation: Ensure the projector's air vents are never blocked. Overheating is a primary cause of projector failure. Give it plenty of space for airflow, especially during extended use.
- Firmware Updates: Check the manufacturer's website periodically for firmware updates. These can improve performance, fix bugs, and even enhance compatibility with newer devices. Don't underestimate the power of a simple software update!
- Safe Storage: When not in use, store your projector in its protective carrying case, away from extreme temperatures, humidity, and direct sunlight. This prevents dust accumulation and accidental damage.
- Battery Care: For battery-powered models, follow best practices for lithium-ion batteries: avoid fully discharging the battery frequently, and store it with a partial charge (around 50-70%) if it won't be used for a long period.
Even with the best preparation and maintenance, you might encounter a glitch or two. I certainly have! Here are some common issues and my go-to solutions to keep your creative flow uninterrupted.
Image is Blurry or Out of Focus
- Check the focus ring/button: Most projectors have a manual focus ring on the lens or an auto-focus button on the remote. Give it a good twist or press; sometimes it just needs a little nudge.
- Projection Distance: Ensure you’re within the projector’s recommended throw distance. Too close or too far can prevent proper focus, making your image look soft or undefined. Always check your projector's manual for its optimal throw range.
- Lens Cleanliness: Dust, fingerprints, or smudges on the lens can significantly affect clarity. Gently clean with a microfiber cloth designed for optics, not your paint rag – that’s a common mistake! (Trust me, I've seen it happen. It just smears the paint.)
Image is Dim or Washed Out
- Ambient Light: This is the most common culprit. Dimming or turning off room lights, or using blackout curtains, will dramatically improve image vibrancy. I've learned the hard way that even a little sunlight peeking through a gap can ruin a perfectly good projection. It's like trying to see a subtle watercolor wash under harsh fluorescent lights – you just lose all the nuance. Think of your projection surface like a canvas: a dark base will always absorb more light, making your image appear dimmer. For critical work, consider using directional lighting that illuminates your work area but avoids spilling onto the projected image.
- Projector Brightness Settings: Check your projector’s menu for brightness or lamp mode settings. Ensure it's not in an 'Eco' or low-power mode if you need maximum lumens. Sometimes the projector defaults to a power-saving mode, which is great for battery life, but not for maximum visibility and color pop.
- Surface Color/Texture: A dark or heavily textured projection surface will absorb light and reduce contrast. Opt for light-colored, smooth, matte surfaces for best results. Think of it like painting on a dark canvas versus a white one – the base color profoundly affects everything, including your projected image.
Colors Look Incorrect or Shifted
- Color Profile Settings: Your projector likely has different color modes (e.g., 'Vivid,' 'Standard,' 'Cinema'). Experiment to see which best matches your source. On your digital device, ensure you're using a consistent color profile. This is especially crucial if you're working with digital art that adheres to specific color spaces like sRGB or Adobe RGB, as inconsistent profiles are a major source of frustration. For professional artists, dedicating time to properly calibrate your projector with a colorimeter can be a game-changer for achieving true color fidelity, ensuring what you see on screen is what you get on your canvas.
- Cable Connection: A faulty or loose HDMI cable can sometimes cause color distortion, color shifts, or even a complete loss of color. Try swapping it out with a known good cable; sometimes a cheap or damaged cable is the root of unexpected and subtle color issues.
- Projector Calibration: For critical color work, invest in a dedicated color calibration device for your projector (if supported) or manually adjust RGB levels in the projector's settings. While not always feasible for all portable models, some offer advanced color management, which can be a lifesaver for fine artists who depend on accurate color reproduction. Remember that environmental factors, like the color of your projection surface, can also subtly impact perceived colors.
Connection Issues (No Signal)
- Source Selection: Double-check that the projector is set to the correct input source (HDMI 1, USB, Screen Mirroring, etc.). It sounds obvious, but I’ve spent more time than I'd like to admit staring at a 'No Signal' screen before realizing I was on the wrong input – we’ve all been there! (Usually after a long day of painting, when my brain is already fried.)
- Cable Check: Ensure all cables (HDMI, USB) are securely plugged into both the projector and your device. A loose connection is a common culprit, so give them a firm push.
- Device Output: Confirm your laptop/tablet is set to output video. Sometimes a simple restart of the source device can fix it, or try toggling display settings (e.g., Extend Display, Duplicate Display) on your computer. Also, check your device's display settings to make sure it's detecting the external display.
- Adapters: If using adapters (e.g., USB-C to HDMI, or any display port adapter), ensure they are functioning correctly and are compatible with both your device and the projector. Cheap or generic adapters can be unreliable, so invest in a quality one if you rely on them for your workflow.
Projector Overheating
- Ventilation: Ensure the projector’s vents aren't blocked by canvases, cloths, or walls. Most projectors need adequate airflow to dissipate heat effectively. Keep it away from walls or fabrics that could obstruct the vents. Proper airflow isn't just about preventing shutdowns; it also contributes to the longevity of the projector's light source.
- Environment: If working in a hot environment (like a sun-drenched studio), try to cool the room or take breaks. Excessive heat can damage internal components and trigger automatic shutdowns, which is both frustrating and potentially costly.
- Dust Buildup: Over time, dust can accumulate inside the projector, impeding cooling. If you’re comfortable, carefully clean the internal fan and vents (refer to your manual for guidance), or consider professional cleaning, especially if you work in a dusty studio. This is particularly important if you work with mediums that produce a lot of particulate matter, like charcoal or pastels – those tiny specks can wreak havoc on sensitive electronics!
Image Distortion/Keystone Issues
- Reposition Projector: The best solution is always to position the projector as squarely as possible to the projection surface. This minimizes the need for digital correction and maintains the highest image quality.
- Keystone Limits: Understand that keystone correction has its limits. Too much correction can lead to a slightly blurry or distorted image due to digital manipulation. If you’re pushing the limits, try adjusting the projector’s physical angle first, even if it means moving a tripod or stack of books, instead of relying solely on digital correction. Physical adjustments always yield a cleaner, more accurate image.
- Four-Corner Correction: If your projector offers it, utilize four-corner correction for fine-tuning distortions that traditional keystone can't fix, especially useful on irregular surfaces or when precise alignment with architectural features is required. This offers a level of flexibility that standard keystone correction cannot. Always approach digital correction as a last resort, prioritizing physical adjustments for the purest image quality.
Advanced Applications and Best Practices
Beyond basic tracing, portable projectors can unlock a myriad of advanced creative possibilities when integrated thoughtfully into an artist's toolkit. They aren't just for transferring images; they are dynamic light-based tools that can reshape how you approach every stage of your artistic journey, transforming how you conceive, plan, and execute your work.
Ambient Lighting Management for Enhanced Projection
For optimal image quality, especially with lower lumen projectors, controlling ambient light is crucial. I can't stress this enough: even a little sunlight peeking through a window can severely wash out your projection! Dimming or turning off lights in the studio significantly enhances contrast and color vibrancy, allowing for clearer projection and more accurate transfers. Think about investing in blackout curtains for your studio or portable blackout blinds for on-location work, or simply scheduling your projector-based work for evenings or cloudy days. Directional lighting, pointed away from your projection surface, can also help maintain some visibility in the room while minimizing interference with the projected image. It’s all about creating a controlled environment where your projected image can truly shine, much like a carefully lit gallery piece, allowing for the true psychology of color to come through in your reference. A dimly lit studio also fosters a certain meditative focus, allowing you to truly immerse yourself in the creative act, unburdened by external distractions. Furthermore, experimenting with colored gels or filters over the projector lens can create unique atmospheric effects, changing the mood and tone of your projected reference in real-time, which can be an unexpected source of inspiration for your actual artwork. It's about shaping the light to best serve your vision, both on and off the canvas.
Leveraging Digital Image Manipulation for Projector Use
Before projecting, utilize photo editing software to optimize your images. This step is a game-changer and can save you immense frustration! Adjusting brightness and contrast can make lines stand out for tracing, which is incredibly helpful when you're focused on precision. Desaturating images can remove distracting colors, leaving only the essential forms – sometimes color can complicate the read of a complex shape, especially if you’re focusing on line or form. Experiment with filters to create outlines, graphic interpretations, or even 'posterize' your source material, tailoring it precisely for projection. This digital manipulation allows you to simplify complex images into their core elements, aiding in everything from initial sketches to visual storytelling techniques in narrative art. For instance, using a 'find edges' filter on a photograph can give you a perfect line drawing to transfer, while posterizing can help you identify key tonal areas for painting. For artists working with mixed media, digitally creating a collage or layering different textures before projection can open up entirely new compositional possibilities, merging the digital and physical in novel ways and setting the stage for truly unique artworks. This strategic use of digital tools before projection ensures that the light guides your hand with maximum clarity and purpose. It's like pre-visualizing your masterpiece before you even pick up a brush.
Innovative Applications: Texture Overlay, Live Performance Art, Educational Demonstrations
Projectors can be used to overlay textures, patterns, or even atmospheric effects directly onto a canvas, adding unexpected depth to abstract compositions. I've seen artists create incredibly unique effects by projecting dappled light or subtle patterns onto their work, letting the projected image guide their brushwork in real-time, creating a dialogue between light and paint. This is where exploring texture in abstract art: techniques and materials truly takes on a new dimension! In live art performances, they can create dynamic backdrops or interactive elements, transforming a stage into a shifting landscape or an evolving abstract piece, much like what is kinetic art movement in modern sculpture brings motion to physical forms. For educators, a portable projector is an invaluable tool for demonstrating techniques, dissecting compositions, or showcasing art historical references (like the intricate geometry of ultimate guide to cubism or the bold strokes of ultimate guide to expressionism) directly in a classroom or workshop setting, bringing art history to life. I’ve even heard of architects using them to visualize 3D models onto physical structures before construction, blurring the lines between art and design and allowing for precise adjustments on site, making them invaluable for public art commissions as well. This kind of real-time, large-scale visualization pushes the boundaries of traditional planning, bringing a fluidity to design that was once unimaginable. It's about letting light inform form in a truly dynamic way. Consider also using projectors for mixed reality art installations, where physical objects are augmented with projected digital content, creating illusory spaces and interactive experiences that blend the tangible and the virtual in fascinating ways. This is where art truly becomes an immersive and responsive experience.
Frequently Asked Questions on Portable Projectors for Artists
I often get asked specific questions about these devices, so I've compiled some of the most common ones here, along with my candid thoughts and experiences. Consider this a quick Q&A with a fellow artist, sharing insights from the trenches of creative practice!
How do portable projectors handle different surface textures?
Projecting onto heavily textured surfaces (like rough brick walls, heavily gessoed wood, or highly impasto canvases) will always result in some distortion or loss of detail, as the light interacts with the irregularities of the surface. However, projectors with higher lumens and contrast can often push through minor textures more effectively, providing a clearer image. For best results on very textured surfaces, I recommend simplifying your projected image to core outlines or major compositional elements. Ultimately, the surface itself becomes part of the art, absorbing or reflecting light in unique ways, which can be an interesting creative challenge in itself – sometimes those unexpected interactions are where the magic happens! Don't expect crisp lines on a heavily stuccoed wall, but embrace the organic interaction of light and texture. For fine detail on textured surfaces, consider making your initial projection in a darker environment to maximize perceived contrast, then work with ambient light for actual execution. It's a delicate dance between the digital and the tactile.
What accessories are essential for an artist using a portable projector?
Beyond the projector itself, I’d highly recommend a good quality tripod or stand for stable positioning – a shaky image is a frustrating image, and a wobbly projector is a recipe for headaches! A reliable power bank for extended use (especially on location) is almost non-negotiable for serious mobile artists, ensuring you don’t run out of juice halfway through a mural. And, of course, a durable, padded carrying case is crucial to protect your investment from studio mishaps or travel bumps. A wireless dongle (if not built-in) for screen mirroring can also be incredibly convenient, freeing you from cables, and for educators, a remote presenter can be invaluable for controlling presentations from across a room without touching the projector, keeping your hands free for demonstrating techniques. For those doing color-critical work, a dedicated color calibration device, while an extra investment, can pay dividends in accuracy. Another often-overlooked accessory is a simple white, portable projection screen or fabric, especially if you're working on surfaces that are not uniformly light-colored or smooth. This can dramatically improve image quality and color fidelity.
Can I use a projector to teach art workshops?
Absolutely! In fact, I think they’re invaluable for art education. Projectors allow you to demonstrate techniques on a large scale, showcase student work, or display art historical examples (like the precise compositions of ultimate guide to cubism or the emotional intensity of ultimate guide to expressionism) with ease. It makes explanations clearer and more engaging than trying to huddle around a small screen, fostering a more dynamic learning environment. Just ensure you have adequate brightness for your classroom environment, and perhaps think about integrating interactive elements with your students, like inviting them to sketch over projected forms in real-time or analyze famous artworks collaboratively. I've found that projecting a complex drawing and then sketching over it in a different color, live, for students to see, makes an abstract concept like 'line weight' or 'constructive drawing' immediately understandable. It can truly transform a workshop from passive listening to active engagement, sparking those 'aha!' moments. They can also be used to present detailed breakdowns of the definitive guide to perspective in art or the definitive guide to understanding light in art, making complex theories visually accessible to students. It's about creating an interactive classroom experience that transcends traditional methods.
Can I use a projector for tracing onto irregular or curved surfaces?
Yes, absolutely! This is one of the projector's major strengths over static tracing methods. While a perfectly flat surface yields the most geometrically accurate projection, many projectors now offer advanced keystone and, crucially, four-corner correction features. These allow you to adjust each corner of the image independently, squaring up the projection even on highly irregular walls, curved canvases, or complex sculptural forms. It might take a bit more fiddling with the settings to get it just right, but the flexibility is unparalleled, opening up entirely new creative possibilities for artists working beyond traditional flat mediums. It's truly liberating for projects like custom ceramics or carved reliefs, allowing you to bring digital precision to even the most challenging three-dimensional forms.
How does a projector compare to a lightbox for tracing?
While both are incredibly useful for tracing, they serve quite different purposes in an artist's toolkit. A reviewing the best light boxes for tracing and drawing is fantastic for small, detailed work on transparent or thin paper, offering consistent backlighting and allowing for intricate detail transfer. It’s perfect for desk-based precision work. A projector, however, offers unparalleled flexibility in scale and surface – you can project onto virtually anything, from a small canvas to a massive wall, or even irregular objects. It’s about choosing the right tool for the job; for larger or more varied surfaces, especially when you need to stand back and see the full composition, the projector wins hands down, while the lightbox remains king for intimate, desktop tracing. Think of it as a matter of macro versus micro scale – each has its domain of undeniable mastery.
What about security and copyright when projecting designs?
This is a crucial consideration for artists! When projecting your original designs, ensure your workspace is private to prevent unauthorized copying. If you're projecting copyrighted reference material, always be mindful of fair use guidelines and ensure you're using it for personal study or transformative work, not for direct reproduction without permission. Some projectors have password protection or secure login features for their smart functions, which can add a layer of security, especially in shared studio spaces. Always protect your intellectual property, just as you would with any other artwork you create, for your artistic vision is yours alone. After all, your creativity is your most valuable asset.
What is the minimum brightness required for a portable art projector?
For general indoor studio use with controlled lighting, a minimum of 100-200 ANSI lumens can be sufficient, especially if you're working in a dimly lit space where you can control all ambient light. However, for brighter environments, larger projections, or when color accuracy is paramount, 500 ANSI lumens or more is highly recommended to ensure clear visibility, accurate tracing, and vibrant color reproduction. Seriously, don't underestimate how much ambient light, even indirect, can wash out a projection! It's like trying to appreciate subtle hues in broad daylight – you lose all the nuance.
How does native resolution affect an artist's output?
Native resolution directly impacts the sharpness and clarity of the projected image. Higher native resolutions (e.g., 1080p Full HD or even 4K) prevent pixelation, allowing for the precise transfer of fine lines, intricate details, and subtle gradients. This is critical for maintaining the integrity of an artist's original design, especially when working on detailed realism, portraiture, or intricate graphic work. Lower resolutions can result in jagged edges or a 'screen door' effect, which might be acceptable for some abstract works (perhaps even adding to the aesthetic!), but will certainly be detrimental to precision-focused art. The clearer the image, the less guesswork involved in your transfer, ensuring your hand can follow your vision with absolute fidelity.

Are battery-powered projectors reliable for long sessions?
Many battery-powered portable projectors offer 2-4 hours of operation, which is sufficient for most sketching or setup sessions. For extended work, it is absolutely advisable to choose models with longer battery life or, better yet, to have a power bank or access to an AC outlet. I always carry a fully charged, high-capacity power bank, especially when working on a mural – running out of juice halfway through a critical tracing is not ideal, believe me! The reliability depends heavily on the projector's efficiency and the capacity of its battery, so check those specs carefully. Planning your power needs is as important as planning your composition – because nobody wants a dead battery to halt their creative flow just when inspiration strikes! A well-charged projector is a happy artist!
Can these projectors distort colors?
Yes, color accuracy varies significantly between projector models. Artists prioritizing faithful color reproduction should look for projectors that explicitly mention a wide color gamut (e.g., sRGB, Rec. 709, or DCI-P3 coverage) and offer color calibration options. Always cross-reference projected colors with your original source on a calibrated display – I’ve learned to never fully trust a projector’s out-of-the-box color until I’ve checked it against my known good display, especially when working on pieces for my own artistic vision. Even within a good model, factors like lamp age, environmental lighting, and even the color of your projection surface can subtly shift colors, so regular checks and adjustments are a good habit to maintain fidelity.
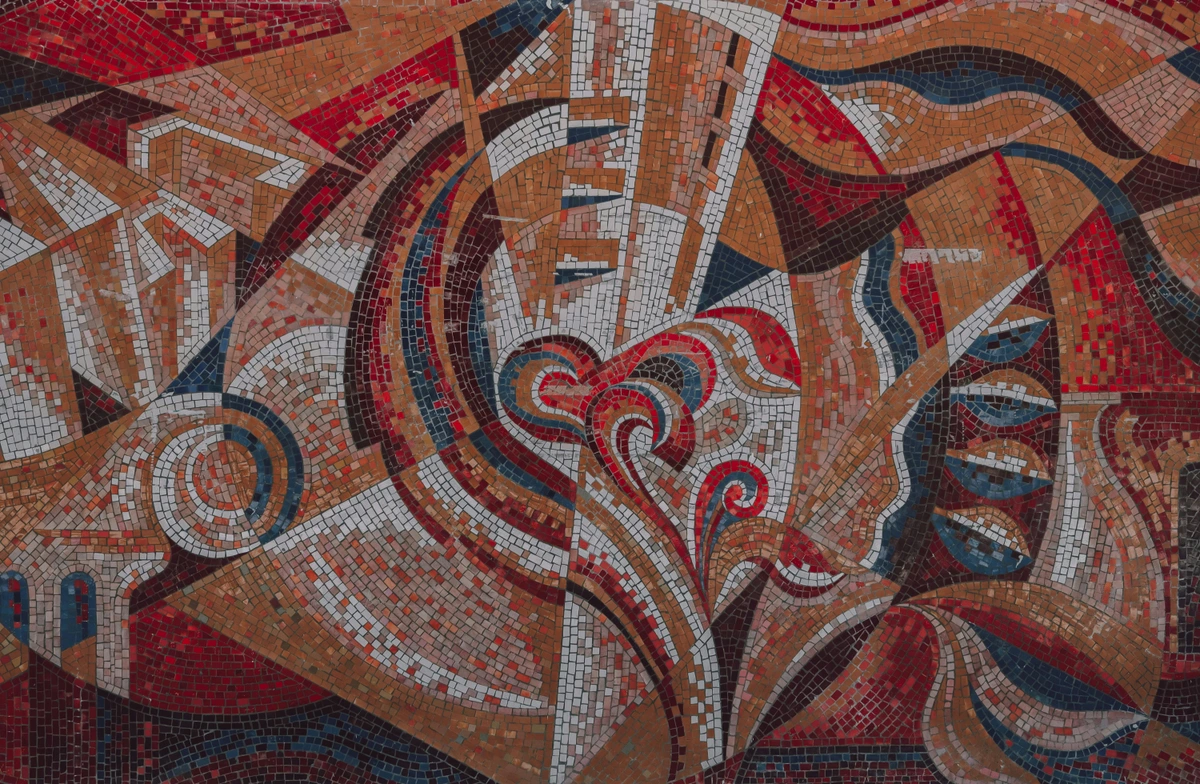
Is a short-throw projector always preferable?
A short-throw projector is highly beneficial in small studios or when projecting onto close-range canvases, as it minimizes shadows and allows for flexible positioning – a true blessing when you’re leaning over a canvas! However, for very large murals or when greater distance is available, a standard or long-throw projector can also be effective, often at a lower cost and with less potential for subtle distortion at the edges. The choice depends entirely on the artist's specific working environment and project scale. It's not about 'preferable' as much as 'most suitable for your situation' – I’ve found that one size definitely does not fit all in the art world, and your workspace dictates a lot of your equipment choices, just like it dictates your choice of canvas or medium! For example, if you're working on a mural in a large public space, a long-throw projector might be more practical for reaching high walls from a safe distance. Always choose the tool that best fits the job at hand.
What maintenance do portable projectors require?
Portable projectors generally require minimal maintenance, but a little goes a long way in ensuring longevity and consistent performance. Regularly cleaning the lens with a microfiber cloth and ensuring proper ventilation to prevent overheating are key. Some models may have dust filters that need periodic cleaning or replacement – and believe me, dust is the enemy of a clear, crisp image! Following the manufacturer's guidelines for filter cleaning/replacement, keeping firmware updated, and storing the projector in a dust-free, cool, and dry environment will significantly extend its lifespan. It’s a bit like caring for your brushes or canvases; a little preventative care goes a long way to ensure your tools are always ready when inspiration strikes, and it protects your investment. A well-maintained projector is a reliable partner in your creative journey.
Conclusion: The Evolution of the Artist's Toolkit
The portable projector has cemented its place as a vital, sophisticated instrument in the contemporary artist's toolkit. It embodies the intersection of innovation and tradition, offering unprecedented capabilities for precision, scale, and dynamic experimentation. By understanding the critical technical specifications and integrating these devices thoughtfully, artists can expand their creative horizons, streamline their processes, and bring their most ambitious visions to life with enhanced accuracy and efficiency. Embracing such technology does not diminish the artistry, but rather elevates the means through which collectible art is conceived and realized, allowing the artist to focus more profoundly on the expressive soul of their work. For me, it's about finding those tools that allow me to tell my story more clearly, more boldly, and with less friction, opening up new avenues for artistic vision and fostering a truly uninhibited creative flow. So, go forth, experiment, and let these little marvels of technology illuminate your next masterpiece. You might even find inspiration in the art displayed at a place like the den-bosch-museum, by exploring an artist's timeline of work, or by delving into the rich history of art movements like ultimate guide to cubism or ultimate guide to expressionism, seeing how innovation has always shaped creation and how artists have always adapted new tools to push boundaries. It's not about replacing the human hand, but about amplifying its potential, allowing the artist to explore new territories of expression with newfound confidence and capability. The future of art, after all, lies in the hands of those willing to embrace new tools to tell timeless stories. What will you create next?