How to Store Art Prints Safely: A Decorator's No-Nonsense Guide
Just bought a new art print but not ready to frame it? Learn the essential, decorator-approved steps for storing your art prints safely to prevent damage from light, humidity, and acid.

Preserve Your Passion: The Definitive Guide to Archival Art Print Storage
That moment when a new art print arrives – the anticipation, the unboxing, the sheer joy as the colors burst to life before your eyes. It’s a rush, isn’t it? A tangible piece of beauty, an investment, a fragment of soul brought into your life. But then, almost immediately, a familiar knot of anxiety tightens: how do I protect this? The perfect frame is still weeks away, or perhaps its permanent home is yet undecided. This isn't just about avoiding a rogue coffee ring or a heartbreaking crease; it's about safeguarding that initial spark, preserving a moment, an emotion, an investment that truly deserves to last.
I’ve witnessed too many gorgeous pieces of paper art meet a tragic, entirely preventable end. I'm talking about the kind of damage that makes your stomach clench: irreversible creases that slice through an image, disheartening fading that leeches the life out of once-vibrant colors, mysterious foxing spots that appear from nowhere like a rash, or the dreaded "acid burn" that turns luminous whites to brittle, sickly yellows. The sheer tactile devastation of a water stain or a jagged tear is something no art lover wants to experience. Believe me, I've been there with a print I carelessly left near a window – a painful lesson learned, one that cost me a beloved piece and a good bit of sleep. It's truly heartbreaking to see cherished artwork degrade prematurely.
So, let’s walk through this crucial, often overlooked, step between acquiring a piece that speaks to your soul and giving it a proud, permanent home on your wall. Getting this part right isn't just about good housekeeping; it's about ensuring your art retains its original vibrancy and integrity, looking just as stunning decades from now as it does the moment you unbox it. This definitive guide to archival art print storage is your go-to resource, filled with practical, actionable advice straight from someone who lives and breathes art. I've made all the mistakes so you don't have to, learning that genuine preservation comes down to understanding the 'why' as much as the 'how'. My goal here is simple: to make you the ultimate guardian of your art. We're going to dive deep into how to store art prints and the best practices for protecting paper art, equipping you with the knowledge to confidently implement archival art storage practices that truly work. It's simpler than you think, but it absolutely requires intention. So, let’s get started and turn that initial anxiety into lasting peace of mind.
The Three Enemies of Paper Art
Before we get into the how of protecting your art, let's really dig into the why. You're basically protecting your print from a formidable trio of silent destroyers. Think of them as the supervillains of the art world, constantly plotting to undermine the beauty and longevity of your cherished pieces. Understanding their tactics is the first step in thwarting them, trust me.
- Light (Specifically, UV Rays): This is, without a doubt, the most aggressive offender, the silent thief of color. I've seen vibrant blues turn dull grey and rich reds become pale pinks, all due to the relentless assault of UV rays. Sunlight is the primary culprit, its UV-A and UV-B radiation actively breaking down the chemical bonds in pigments and cellulose, leading to irreversible fading of inks and yellowing of paper at an alarming rate. But don't be fooled; even indirect ambient light from windows, fluorescent bulbs, or halogen lights contains UV components that will slowly but surely take their toll over time. Think of it like a slow, irreversible sunburn for your artwork. The damage from light exposure is cumulative and irreversible – once those pigments are gone, they're gone forever. Protection from light is not just important; it's absolutely paramount, the first line of defence. When framed, UV-filtering glass or acrylic (which comes in various levels of UV protection, from 70% to 99%) is an indispensable shield, but in storage, pure, unadulterated darkness is your best, most reliable friend. I’ve heard countless stories (and experienced a few myself) of beautiful pieces slowly fading into ghosts of their former selves because they were stored in a "mostly dark" closet that still got a sliver of sun in the afternoon. Every ray counts, and that sliver can make a world of difference over time. For ultimate archival art storage, darkness is king. Beyond direct sunlight, even seemingly innocuous light sources like LED bulbs can emit a small amount of UV radiation. Over time, this constant, low-level exposure contributes to the breakdown of pigments and paper fibers. To truly protect your investment, consider using blackout curtains in storage areas near windows and ensure any artificial lighting in the storage space is only on when absolutely necessary. Think of it this way: your art is an introvert, it thrives in quiet, dark spaces. Remember, there's no such thing as 'safe' light, only less damaging light. Even a small, consistent amount of light, over decades, can cause visible changes. My personal rule? If you can read a book in the room without the lights on, it's not dark enough for your precious art prints. For framed pieces displayed, positioning them on an interior wall away from windows and utilizing museum-grade UV-filtering glass or acrylic is your strongest defense against this insidious destroyer.
Understanding UV Rays and Lightfastness
When we talk about light damage, we're really focusing on the invisible spectrum – Ultraviolet (UV) radiation. UV-A, UV-B, and even UV-C (though less common in indoor environments) are the primary culprits. They literally break down the molecular bonds in pigments and the cellulose fibers of paper, leading to irreversible changes. This is where the concept of lightfastness comes in. As an artist, I obsess over the lightfastness ratings of my materials. This refers to how resistant a pigment is to fading or discoloration when exposed to light over time. Professional-grade art materials are often rated on a scale (e.g., ASTM ratings I-V, where I is excellent) – a crucial consideration for both artists and collectors. For you, the collector, understanding these ratings can give you an idea of the inherent stability of the pigments in your print. Even with the most lightfast pigments, however, prolonged UV exposure will eventually take its toll. Think of lightfastness as a strong immune system; it helps, but constant assault will still cause illness. Therefore, reducing exposure is always the paramount strategy for protecting paper art from light.
The Invisible Threat: Understanding UV Wavelengths
It's easy to dismiss light damage as just 'sun fading', but it's more nuanced than that. The electromagnetic spectrum is a vast thing, and it's the specific wavelengths in the ultraviolet range that do the most harm. UV-A (315–400 nm) is the longest wavelength, penetrating deepest and causing long-term damage like yellowing and embrittlement. UV-B (280–315 nm) is more energetic and causes immediate pigment fading. While UV-C (100–280 nm) is the most damaging, it's largely filtered by Earth's atmosphere and not typically a concern indoors unless you're dealing with specialized germicidal lamps (which, let's be honest, you shouldn't be using near your art anyway!). Knowing this helps me appreciate why even seemingly weak light can have a cumulative, destructive effect. It's not just about brightness; it's about invisible energy attacking your art at a molecular level.
- Humidity & Temperature Swings: Paper, at its core, is a plant-based material, and it 'breathes,' constantly absorbing and releasing moisture from the surrounding air. This means high humidity is an open invitation for disaster: mold, mildew, and an unsightly, permanent 'wavy' or 'cockled' appearance that ruins the flat integrity of the print. Conversely, excessively dry conditions can make paper brittle, cause colors to flake, and make it prone to cracking. But it's not just the extremes; extreme fluctuations in temperature and humidity are equally damaging, causing paper fibers to repeatedly expand and contract, leading to stress, cracking, and eventual degradation. This constant cellular 'gymnastics' weakens the paper's structure over time. Your art, much like a prized vintage wine, thrives in stability. It craves a boring, consistent environment—no drama, no rollercoasters. Aim for a relative humidity between 45-55% and a temperature around 68-72°F (20-22°C). Think of it as creating a mini-museum environment right in your home. Anything outside these ranges, or frequent shifts between them, acts like a constant stress test on the delicate paper fibers, leading inevitably to degradation. A simple hygrometer/thermometer (often available for under $20) in your storage area is an indispensable tool for monitoring these conditions and ensuring your art prints are safe. I've often seen the consequences of unstable environments firsthand – paper art can become irreversibly distorted, developing a 'memory' of its warped state that no amount of flattening can truly fix. Maintaining this consistent environment is arguably the most challenging, yet most vital, aspect of archival art storage. If your environment struggles to maintain these levels, a small, quiet dehumidifier or humidifier can be a game-changer, but always pair it with a reliable hygrometer to avoid overcorrecting and causing new problems. I've learned that consistency truly is king here, even more so than just hitting the right numbers – slow, steady wins the race against degradation. For more in-depth advice on environmental controls, you might find our guide on how to care for art prints particularly helpful.
The Science of 'Breathing' Paper
It might sound a little mystical, but paper really does 'breathe.' Its cellulose fibers are hygroscopic, meaning they readily absorb and release atmospheric moisture. This constant exchange makes paper highly susceptible to changes in its surrounding environment. When humidity is high, paper swells; when it's low, it contracts. If these changes happen rapidly or frequently, the internal structure of the paper experiences enormous stress. Imagine repeatedly bending a piece of metal back and forth – eventually, it will break. The same principle applies to paper fibers. This leads to issues like cockling (the wavy, distorted appearance), embrittlement, or even delamination of layers in multi-ply papers. This is why a stable relative humidity (RH) is so crucial; it keeps the paper fibers in a state of equilibrium, minimizing these damaging expansions and contractions. I've seen firsthand how a seemingly minor shift in RH can, over years, completely alter the physical integrity and aesthetic flatness of a print, making it impossible to frame without visible distortion. This subtle, almost imperceptible stress is a silent enemy, making consistent archival art storage essential.
The Impact of Extreme Conditions
Beyond just fluctuations, consistent extreme conditions are also hugely problematic. Prolonged high humidity (above 60% RH) doesn't just encourage mold; it can cause the paper to become soft and limp, making it incredibly vulnerable to physical damage. And in extreme cases, it can even cause certain types of inks to bleed or transfer. Conversely, a consistently dry environment (below 40% RH) can make paper so brittle that it becomes fragile to the touch, prone to cracking, and even cause adhesives in multi-layered prints to fail. I once saw a beautiful etching, kept in a desert-dry environment, literally crack when someone tried to unroll it. It was a heartbreaking reminder that finding that perfect middle ground is truly a delicate balance.
- Acid: Ah, the silent, insidious killer. This is the sneaky, invisible villain that works its magic over years, often unnoticed until the damage is done. Many everyday materials we might instinctively use for storage—like standard cardboard boxes, regular wood pulp paper, certain glues, and even some tapes—contain acidic compounds. Over time, these acids don't stay put; they migrate into your precious art print, chemically breaking down the paper fibers. This process, ominously called 'acid burn,' causes the paper to become brittle, discolored (often a sickly yellow or brown), and significantly weakens its structure. It’s precisely why old newspapers, despite their historical value, crumble and yellow so easily, sometimes just by looking at them. The solution, which I cannot stress enough, is to insist on materials explicitly labeled acid-free and, even better, archival quality. These materials are specifically designed to be pH neutral and free of lignin, the natural wood component that breaks down into damaging acids over time. Lignin is the major culprit in the accelerated degradation of paper. It's an invisible battle, but one you absolutely can win with the right arsenal for protecting paper art. Think of lignin as the slow-release acid bomb hidden within conventional paper. When exposed to light, heat, and moisture, it oxidizes, creating chromophores that cause yellowing and, more importantly, acidic compounds that literally eat away at the paper's integrity. Archival materials, by contrast, are often buffered with an alkaline reserve (like calcium carbonate) to counteract any future acid formation or migration, providing an extra layer of defense against this invisible enemy. This buffering capacity can be critical in environments where acid migration from other sources is a risk, literally sacrificing itself to save your art. It's truly fascinating, and critical, science for preservation. Remember, the damage isn't always visible immediately; it's a slow burn, accumulating over months and years, but the end result is almost always irreversible. That's why being proactive with acid-free materials is non-negotiable.
Understanding Acid Migration and pH
Acid migration is a chemical process where acidic compounds from one material transfer to an adjacent material. This is why a non-archival mat board can leave a yellow 'burn' mark on your print over time, even if it never directly touched the print's surface, or why storing an archival print next to an old newspaper is a recipe for disaster. The pH scale, which measures acidity and alkalinity, is logarithmic – meaning a material with a pH of 4 is ten times more acidic than one with a pH of 5, and a hundred times more acidic than one with a pH of 6! This exponential increase in acidity means even slightly acidic materials can be highly damaging over time. Archival materials are not only pH neutral (around 7.0) but are often buffered with an alkaline reserve (usually calcium carbonate) to provide a sacrificial buffer. This alkaline reserve is designed to neutralize any incoming acids from the environment before they can harm your artwork, effectively creating a chemical shield. It's a testament to the foresight of conservation science, literally building a defense mechanism into your storage materials to ensure the long-term archival art storage of your collection.
The Lignin Factor: More Than Just pH
While pH is crucial, it's not the only story when it comes to acidity. The presence of lignin is a major factor in paper degradation. Lignin is a natural polymer found in wood that, when exposed to light and air, breaks down into acidic compounds. This is why newsprint, which has a very high lignin content, yellows and becomes brittle so quickly. Archival papers are specifically processed to remove lignin, making them inherently more stable. So, when you see a product labeled 'acid-free,' it's good, but 'lignin-free' is even better, particularly for paper-based materials that will be in direct contact with your artwork for decades. It's the difference between merely being neutral and actively resisting the formation of future acids.
Understanding Paper Types and Their Vulnerabilities
Before we delve into the toolkit, it's helpful to understand the basic makeup of paper itself, because not all paper is created equal when it comes to longevity. This knowledge informs why certain archival materials are crucial.
The Science of Paper and pH
At its heart, paper is typically made from cellulose fibers, mostly wood pulp. The way these fibers are processed and what's added to them determines their stability, or rather, their inherent vice – a fascinating conservation term referring to the intrinsic qualities of a material that will lead to its eventual decay. The choice of paper, as an artist, is often a deeply personal one, but from a collector's standpoint, understanding its chemical makeup is absolutely vital for its long-term survival. This is why when we talk about archival art storage, we're often talking about the fundamental science of paper itself, right down to the microscopic fibers and their pH balance. Knowing a little bit about what your art is printed on empowers you to choose the right protection.
- Lignin: This is the natural "glue" that holds wood fibers together. In cheaper, non-archival papers (like newsprint), lignin is not removed. Over time, in the presence of light and moisture, lignin breaks down into acids, causing the paper to yellow, become brittle, and eventually self-destruct. This is the primary culprit behind "acid burn." Think of it as a ticking time bomb embedded in the paper itself, constantly working to undo its integrity.
- pH Level: This measures how acidic or alkaline a material is. A pH of 7 is neutral. Anything below 7 is acidic, and anything above 7 is alkaline (or basic). Archival materials typically have a pH of 7.0 to 8.5 (slightly alkaline) because this slight alkalinity acts as a "buffer" against acids that might migrate from the environment. This means they are not only inert themselves but also offer a mild defense against external acidic influences.
- Buffering: Archival paper and board are often "buffered" with calcium carbonate. This alkaline reserve neutralizes acids as they form or migrate into the material, extending its life significantly. It's like having a built-in neutralizing agent, sacrificing itself to keep your artwork safe. This is especially crucial for papers that might face environmental acidity over time.
The Different Grades of Wood Pulp Paper
Even within the broad category of 'wood pulp paper,' there's a spectrum of quality. You have:
- Groundwood Pulp: This is the cheapest and least stable, essentially just ground-up wood with all its lignin. Think newsprint. It degrades almost immediately.
- Chemical Wood Pulp: Also known as 'sulphite' or 'kraft' paper. Here, chemicals are used to remove some, but not all, of the lignin. It's better than groundwood but still not archival for long-term storage.
- Alpha Cellulose: This is highly refined wood pulp where most of the lignin and other impurities have been removed. When combined with acid-free processing and buffering, it can be considered archival, offering a more sustainable alternative to cotton rag paper while still maintaining excellent stability. This is often what you'll find in high-quality archival mounting boards or conservation boxes. It's a testament to how far paper science has come in creating stable, yet more accessible, materials.
Identifying Paper Quality: A Quick Check
While you won't always know the exact chemical composition of your paper art, a few simple observations can give you clues:
- Look for Watermarks: Many high-quality art papers (especially cotton rag) will have a watermark indicating the manufacturer and fiber content. Hold the paper up to a light source to check.
- Feel the Texture: Cotton rag papers often feel softer, more supple, and sometimes have a subtle texture compared to rigid, smoother wood pulp papers. However, this isn't a foolproof test. For example, a heavily sized watercolor paper might feel stiffer than a thinner, unsized wood pulp sheet, so context is key.
- Check the Edges: Deckle edges (natural, irregular edges) are often indicative of handmade or high-quality mould-made papers, which are typically more stable. These are the beautiful, feathery edges that occur naturally during paper formation, a sign of traditional craftsmanship.
- The 'Sniff Test': Seriously! Older, acidic papers (like newsprint) often develop a distinct, slightly vinegary or acrid smell as they degrade, a tell-tale sign of lignin breaking down into acidic compounds. Archival papers should smell neutral or faintly earthy, like fresh paper. If it smells like an old book or a dusty attic, it's a red flag.
Inks and Their Archival Nature: Pigment vs. Dye-Based
Beyond the paper itself, the ink used to create your print is another critical factor in its longevity. Not all inks are created equal, and their chemical composition dictates their resistance to fading and degradation. This is especially relevant for modern prints, particularly inkjet or Giclée prints, where the choice of ink can make a world of difference for archival art storage.
Ink Type  | Characteristics | Archival Considerations |
|---|---|---|
| Dye-Based Inks | Composed of colorants dissolved in a liquid. Produce vibrant, saturated colors. | Moderate Risk: Highly susceptible to fading and color shifts when exposed to UV light. While initially brilliant, they degrade faster over time, even with UV-filtering glazing. I've seen beautiful dye prints become ghosts of their former selves after just a few years of display. |
| Pigment-Based Inks | Made of solid pigment particles suspended in a liquid. More stable and resistant to environmental factors. | Excellent: Significantly more lightfast and resistant to fading, moisture, and chemical degradation. This is the standard for true archival art prints like Giclées. They literally encapsulate the color, making them more resilient. |
| Traditional Printmaking Inks (e.g., etching, lithography, silkscreen) | Vary widely depending on the medium (oil-based, water-based, etc.) and specific pigments used. | Variable: Generally good lightfastness if professional-grade pigments are used. Often oil-based, which can be very stable. Always inquire about the artist's materials, as some hobbyist inks may not be archival. The key is knowing the artist's commitment to quality materials. |
Understanding the ink type empowers you to make more informed decisions about display and storage. For example, a dye-based print absolutely demands stringent UV protection and minimal light exposure, even more so than a pigment-based one, regardless of the paper it's on. It’s like knowing if your car needs premium or regular gas – one choice can significantly impact its performance and longevity.
Beyond Wood Pulp: Specialty Papers and Their Archival Needs
While wood pulp and cotton rag are common, you might encounter other types of paper that require specific archival considerations. Each type has its own strengths and weaknesses when it comes to longevity and resistance to degradation. Knowing these nuances can significantly impact your archival art storage strategy and help you better appreciate the inherent qualities of your collection. It’s like knowing the difference between a delicate silk scarf and a durable denim jacket – both have their place, but you wouldn't store them the same way!
Before we dive into the table, remember that even within broad categories like 'wood pulp,' there's a vast spectrum of quality and processing. The origin and manufacturing process of a paper (e.g., Eastern papers often use different fibers and sizing) can dramatically affect its inherent stability. Knowing what kind of paper your art is on can guide your storage choices.

Paper Type | Characteristics | Archival Considerations |
|---|---|---|
| Wood Pulp Paper (e.g., standard drawing paper, posters) | High lignin content, acidic. | High Risk: Prone to rapid yellowing and embrittlement. Always use acid-free interleaving and containers. |
| Cotton Rag Paper (e.g., fine art paper, watercolor paper) | 100% cotton fibers, lignin-free, naturally pH neutral. | Excellent: Inherently stable and long-lasting. Still benefits from acid-free storage to protect from external acids. |
| Photographic Paper (e.g., silver halide prints, inkjet photo prints) | Complex layers, sensitive to chemicals. | Specific Needs: Requires inert materials (e.g., Mylar sleeves tested with PAT). Avoid PVC and acidic papers entirely. For detailed guidance on caring for these, explore our guide on how to care for works on paper: a collector's guide. |
| Newsprint | Very high lignin, highly acidic. | Extremely High Risk: Degrades very quickly. Not suitable for long-term preservation of anything on or near it. |
| Synthetic Paper (e.g., YUPO, archival digital art papers) | Made from plastic polymers (polypropylene), tear-resistant, non-absorbent. | Generally Excellent: Inherently acid-free and waterproof. Still needs protection from heat, direct sunlight (UV can degrade some plastics), and physical abrasion. |
| Vellum/Parchment (animal skin) | Animal skin, very durable, sensitive to humidity fluctuations. | Unique Needs: Requires highly stable humidity (around 50-60%) to prevent curling/cockling. Store flat, unrolled, often in custom enclosures. Very susceptible to insect damage. |
This isn't to say you need a chemistry degree, but understanding these basics helps you appreciate why investing in quality archival materials isn't just a recommendation, it's a necessity. It’s like knowing the difference between a cheap plastic bag and a specially designed food container for your leftovers—one works, the other works for a hot minute and then your food is gross. And let's be honest, who wants their precious art to be 'gross' after a few years? This foundational knowledge empowers you to make informed decisions that safeguard your collection for generations.
Your Storage Toolkit: Essential Materials for Archival Art Print Storage
Your primary goal is to create a stable, acid-free, and dark environment for your prints. Getting the right materials is the single most important part of the equation. If you remember one thing, make it this: archival quality is non-negotiable. It’s the bedrock of protecting paper art for generations, and truly, there are no shortcuts worth taking here. I've seen too many heartbreaking stories where a small compromise led to irreversible damage. Think of it as a chain of protection – every link, every material, must be archival, because one weak link can compromise the entire system.
Here’s a quick comparison of what to use and what to avoid for how to store art prints effectively, along with why these choices matter so profoundly:
What to Use, What to Avoid (and Why):
Good Choice (Archival) | Bad Choice (High Risk) | Why? |
|---|---|---|
| Acid-free portfolio or clamshell box | Standard cardboard box | Prevents acid migration, which is rampant in non-archival cardboard; provides robust physical protection and creates a stable micro-environment, shielding from dust, light, and minor physical bumps. These boxes are often multi-walled and made from lignin-free board, offering superior structural integrity and defense against accidental impacts. |
| Acid-free glassine or tissue paper | Plastic wrap or newspaper | Protects the delicate printed surface from scratches, dust, and prevents ink transfer (especially with fresh prints). Glassine is particularly smooth and translucent, ideal for separating prints, while archival tissue is more breathable. Crucial for protecting paper art. Avoid plastic wrap due to chemical off-gassing (PVC is a notorious culprit that degrades and leaches harmful plasticizers) and newspaper due to extreme acidity that will quickly migrate to your artwork, leaving irreversible yellow stains. |
| Wide-diameter archival mailing tube | The original narrow shipping tube | Minimizes paper stress and tight curling, making flattening easier when the time comes; ensures an acid-free interior and provides a stable cylinder for temporary storage. Original tubes are often acidic, too narrow, and made from inferior materials, causing permanent 'memory curl' and chemical damage. The wider diameter reduces the severity of the curl, preventing ink cracking. |
| Storing flat whenever possible | Folding or creasing the print | Maintains paper integrity, prevents permanent deformation, and avoids unsightly 'memory' curls. Creases are often irreversible and can crack the image surface, acting like a structural fault line in the artwork. |
| Climate-controlled room (like a closet) | Damp basement or hot attic | Stable temperature & humidity are crucial to avoid mold, pests, brittleness, and extreme thermal cycling that stresses paper fibers. These environments are prime breeding grounds for degradation, acting as environmental aggressors that silently attack your art. |
| Mylar sleeves (polyester) | PVC plastic sleeves | Mylar (inert polyester film) is chemically stable, clear, and provides a robust barrier without off-gassing. PVC degrades, yellows, and critically, leaches harmful plasticizers (phthalates) directly into your artwork, causing irreversible damage and stickiness. Always check for a 'crinkly' sound – that's a good sign it's Mylar, not soft, pliable PVC, which feels more rubbery. |
| Acid-free backing boards | Regular foam core or mat board | Prevents acid burn from the back of the print (a common, often unseen danger) and adds essential structural support, keeping your print flat and rigid. Look for solid archival board, not just 'acid-free' foam core that might still off-gas or degrade over time, as some foam cores can contain volatile organic compounds (VOCs). |
| pH testing pen or strips | Guessing | Verifies that materials are genuinely acid-free, often indicating the presence of a buffering agent. This is your insurance that the materials you're using are truly safe, providing an objective check against misleading labels. |
| Dedicated storage space (closet) | Anywhere convenient (kitchen, bathroom) | Ensures a stable environment, actively avoiding moisture, cooking fumes, greasy residues, and chemical exposure, all of which accelerate degradation or attract pests. These 'convenient' spots are often environmental disaster zones for paper, exposing your art to a constant assault of airborne threats. |
| Cotton gloves | Bare hands | Prevents the transfer of natural skin oils, acids, dirt, and microscopic residues that leave invisible, long-term marks and attract pests. It's the simplest, cheapest act of preservation, a small gesture that yields enormous returns in longevity. |
| Archival Adhesives (starch paste, PVA, reversible tapes) | Scotch tape, rubber cement, masking tape | Stable, reversible, and non-damaging, these prevent acid burn, yellowing, and permanent adhesion that destroys art. The key is reversibility; a conservator can remove these without harming the artwork, unlike aggressive, acidic household tapes that bond permanently, discolor, become brittle, and can literally tear away paper fibers during removal. |
| Acid-Free Mat Board | Standard mat board | Creates a safe, breathable buffer (a micro-climate) around the art when framed, preventing direct contact with glazing or frame materials, and allowing for controlled air circulation. This separation is vital to prevent condensation and mold growth directly on the artwork, especially with glass, and offers an aesthetic benefit of depth. |
| Tyvek (for wrapping, interleave for very large pieces) | Cheap plastic sheeting, bubble wrap directly on art | Tyvek is a breathable, inert, water-resistant, and lint-free material ideal for wrapping framed art or protecting very large prints. Avoid cheap plastics due to off-gassing and direct bubble wrap contact which can imprint on surfaces over time due to pressure and temperature changes. |
| Soft brushes/cloths (for dusting) | Rough rags, feather dusters, chemical sprays | Gentle, non-abrasive tools for light dusting without scratching surfaces or introducing harmful residues. Chemical sprays can cause irreversible damage to pigments and paper fibers, acting as harsh solvents that strip away the very essence of your art. |
| Integrated Pest Management (IPM) | Random pesticides/mothballs | A holistic approach focusing on prevention, monitoring, and non-toxic interventions to control pests without introducing harmful chemicals. Random pesticides can off-gas toxic chemicals into your art and the environment, while mothballs cause irreversible damage and a pungent odor. |
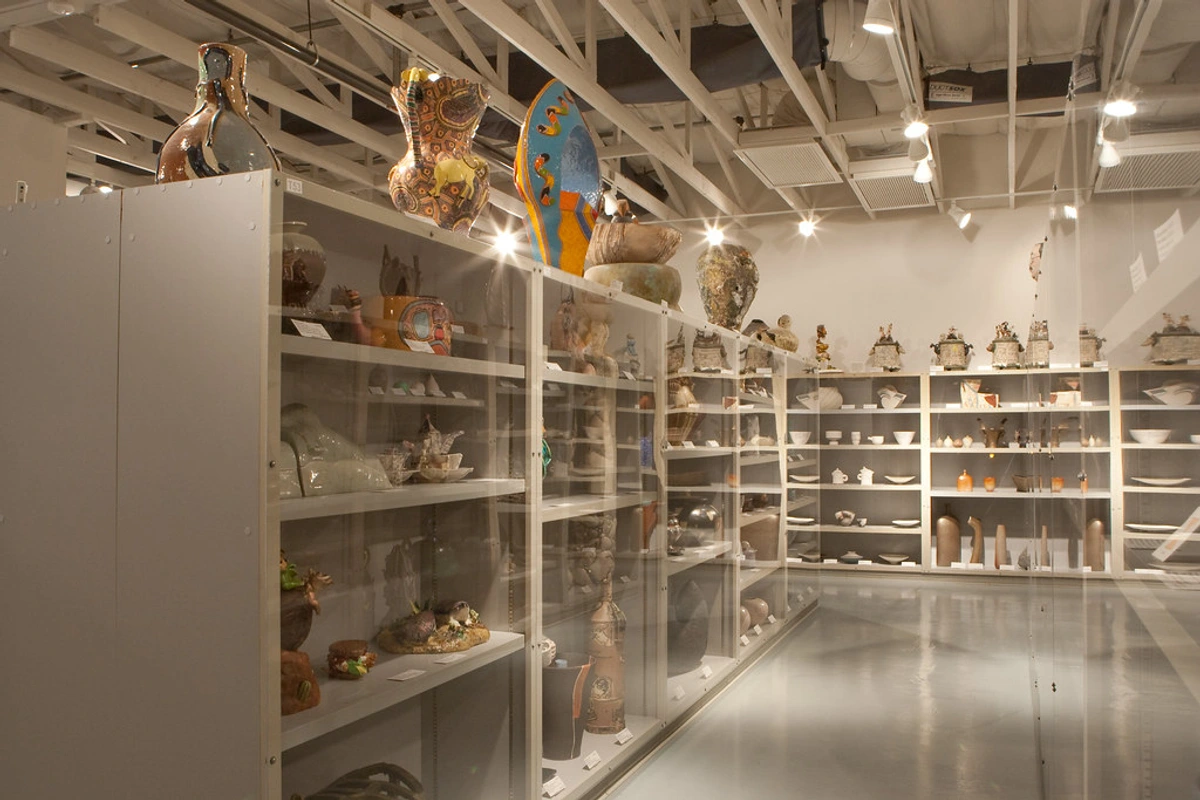
Looking at proper storage solutions can feel like a whole other world of collecting, as you can see in professionally managed collections. It's not just about buying "acid-free" things; it's about understanding the ecosystem of materials interacting with your precious art. I always recommend buying from reputable art supply stores or archival specialists – the peace of mind is worth every penny, and the knowledge they provide is often priceless. For even more detailed insights into establishing a comprehensive system, you might find our guide on art storage solutions for serious collectors invaluable. It really boils down to this: every single component that touches your artwork has the potential to either preserve it or destroy it. The stakes, for me as an artist and a collector, couldn't be higher, and the cost of prevention is always far less than the cost of restoration (or loss).
The Role of pH Testing Pens
I’ve found that even with the best intentions, marketing can be a tricky beast. A product might be labeled "acid-free," but does it truly meet archival standards? This is where a pH testing pen becomes your secret weapon. These pens contain a chemical indicator that changes color when it reacts with acid. A yellow color indicates acidity, while a purple or blue color indicates neutrality or alkalinity (often a sign of buffering). It’s a quick, inexpensive way to verify the claims on your storage materials. While not foolproof for detecting lignin or other harmful compounds, it provides an invaluable first line of defense against unknowingly introducing acidic materials into your archival system. I always keep one handy when buying new supplies; it's a small act of vigilance that can save a lot of heartache.
How to Use a pH Testing Pen
Using one of these pens is pretty straightforward, but a few tips can make it more effective. First, choose an inconspicuous area of the material you want to test – usually a corner or an edge, as the pen will leave a mark. Press the tip firmly onto the material and draw a small line. Observe the color change within a few seconds. If it stays yellow or turns a pale green, it's acidic. If it turns purple or blue, it's neutral or alkaline (buffered). The stronger the blue, the more alkaline it is. Just remember, this test only checks the surface pH; it won't tell you about lignin content or if the buffering agents are evenly distributed throughout the material. But it's an excellent quick check for immediate peace of mind, especially when you're faced with ambiguous 'acid-free' claims.
Common DIY Pitfalls to Avoid
I’ve seen it all, and believe me, the road to artistic perdition is paved with good intentions and cheap DIY solutions. Here are a few common mistakes I've witnessed, or even made myself, that you absolutely need to sidestep:
- The "It's Just Temporary" Trap: This is the most dangerous phrase in archival storage. That print you left rolled in its original tube "just for a week" can easily turn into a permanent, difficult-to-flatten curl after months or years. Temporary storage has a way of becoming long-term by default.
- The "Acid-Free-ish" Lie: Not all products labeled "acid-free" meet true archival standards. This is a big one! Always check for explicit mentions of "lignin-free," "buffered," or "PAT-tested" for photographic materials. A slightly acidic material is still acidic, and it will still damage your art over time. Don't be fooled by marketing; read the fine print and do your research. A pH testing pen, as I mentioned, can also be a valuable tool here.
- The "More Is Better" Fallacy with Adhesives: When repairing a tear, the urge to glob on a strong glue can be overwhelming. Resist! Non-archival glues and tapes are irreversible, will yellow, become brittle, and often cause more damage than the original tear. Always consult a conservator for repairs, or use only reversible, archival adhesives designed for paper. I've heard horror stories of people using super glue on paper – please, don't be that person.
- The "Mystery Box" Syndrome: Shoving prints into a random box from the garage without proper interleaving or climate control is a recipe for disaster. You're inviting dust, pests, mold, and physical damage. Every print deserves a clean, stable, clearly identified home. If you're going to put in the effort to collect, give your collection the respect it deserves. I've seen entire collections ruined by this kind of casual neglect, simply because the owner didn't want to invest in proper storage for a "few months".
- The "Looks Fine to Me" Environmental Check: Your eyes and senses alone aren't enough to detect subtle, damaging fluctuations in humidity or temperature. Invest in a reliable hygrometer/thermometer. What feels comfortable to you might be slowly suffocating your art. Trust the data, not just your gut feeling. Your art won't complain until it's too late.
- The "It's Just a Poster" Dismissal: Even if it's not a limited-edition fine art print, if a piece holds sentimental value or you want it to last, treat it with basic archival care. The principles apply universally to protecting paper art you cherish. I’ve seen beloved vintage posters degrade just as heartbreakingly as a valuable print.
Avoiding these common pitfalls is just as crucial as implementing the right solutions. It's about being proactive and informed, rather than reactive and regretful.
Where to Source Archival Art Storage Supplies: Don't Compromise on Quality
I get this question all the time! It's tempting to grab what's available at your local big-box craft store, but for truly reliable, museum-grade archival supplies, you need to be a bit more discerning. Your best bets are:
- Dedicated Fine Art Supply Stores: Many specialize in fine art and carry a range of archival papers, boards, portfolios, and even conservation-grade framing materials. Their staff are often knowledgeable and can offer tailored recommendations for your specific needs.
- Photography Supply Specialists: These stores often carry excellent Mylar sleeves, archival boxes, and cotton or nitrile gloves, as photographic prints require similar rigorous protection from environmental factors and chemical degradation. Look for products that specifically mention PAT (Photographic Activity Test) certification if you're storing photos.
- Online Archival Retailers/Conservation Suppliers: Several online companies specialize only in conservation and archival materials. These are often the most reliable source for everything from buffered tissue to flat files and custom enclosures. Look for brands that clearly state "acid-free," "lignin-free," "buffered," and comprehensive technical specifications like "PAT-tested" for photographic materials. These suppliers understand the science of preservation.
- Museum/Gallery Stores: While often more expensive, some museum or gallery stores offer a curated selection of archival products that have been vetted by professionals.
Avoid generic office supply stores or discount craft chains for long-term storage solutions; their "acid-free" claims sometimes don't hold up to true archival standards for decades of preservation, and their materials may still contain impurities or off-gas harmful chemicals. Always prioritize suppliers who provide transparent technical information about their products and have a reputation within the conservation community. It's an investment, yes, but one that safeguards priceless beauty and ensures your archival art storage efforts are truly effective.
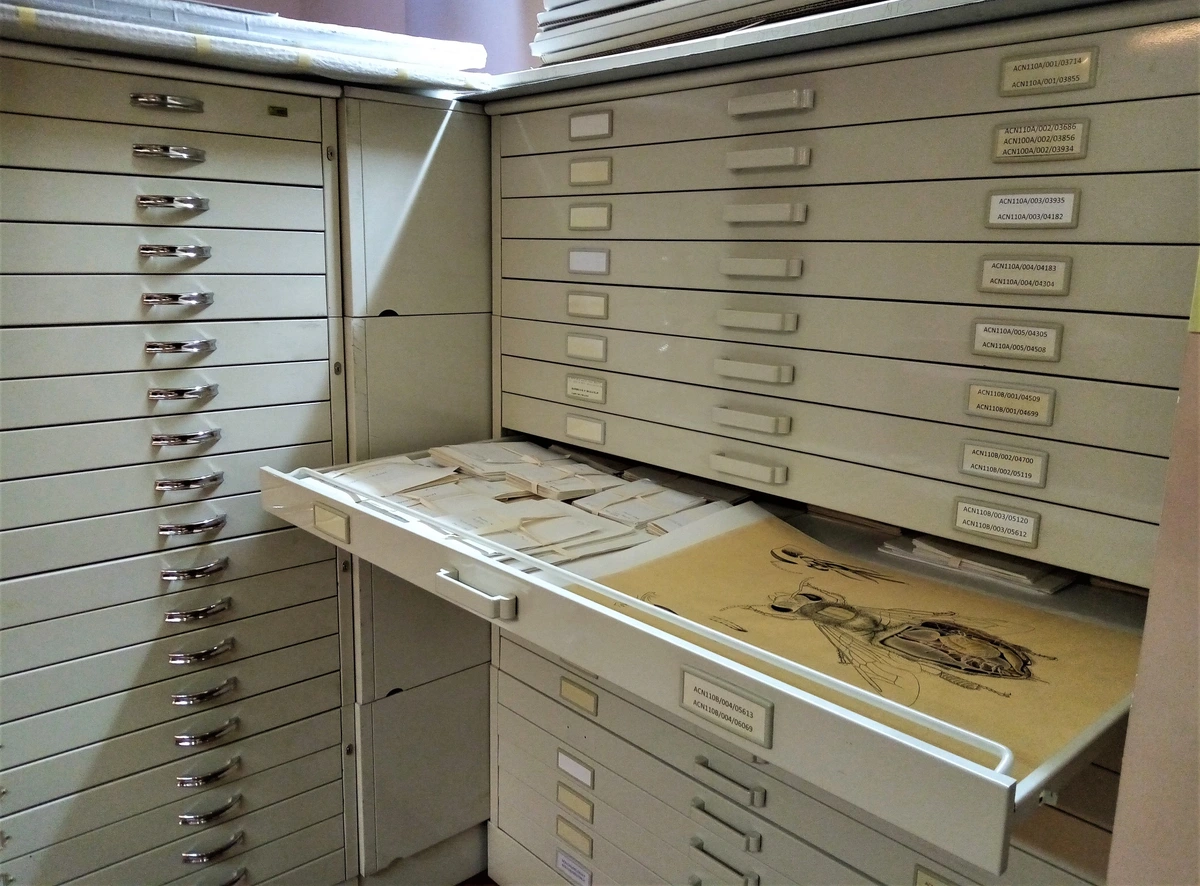
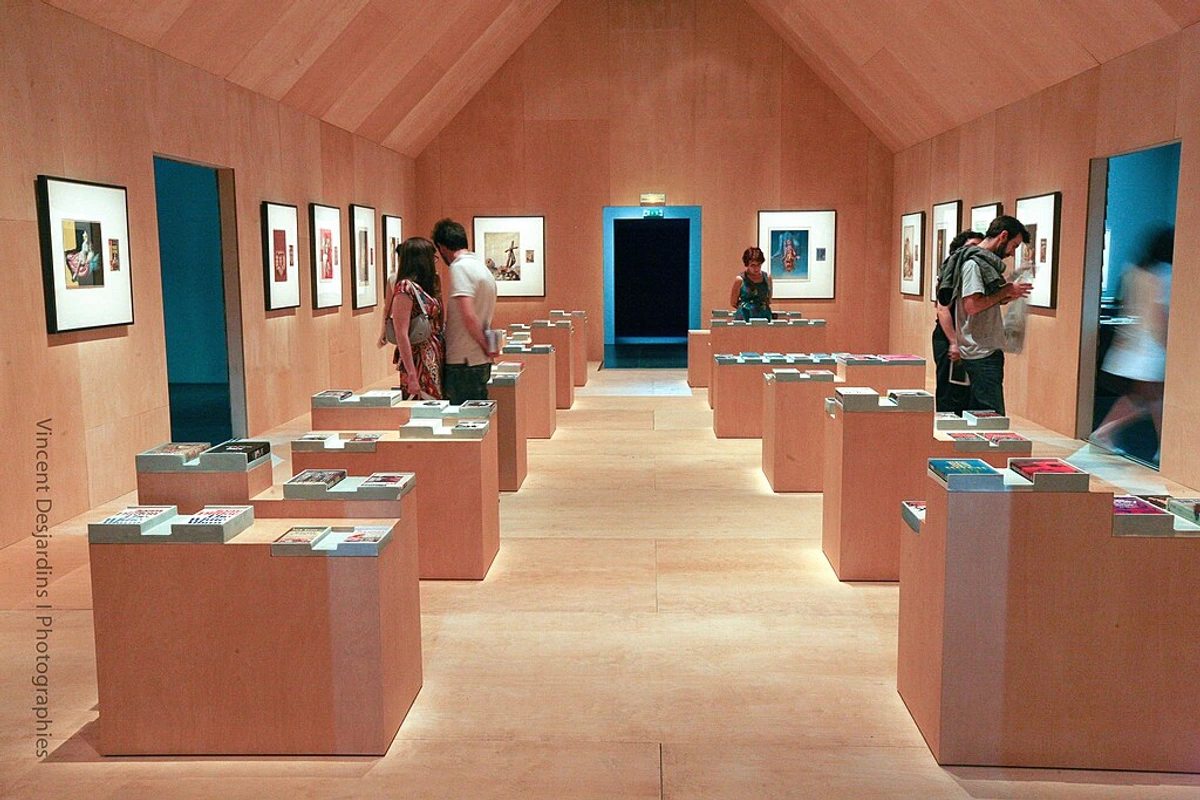
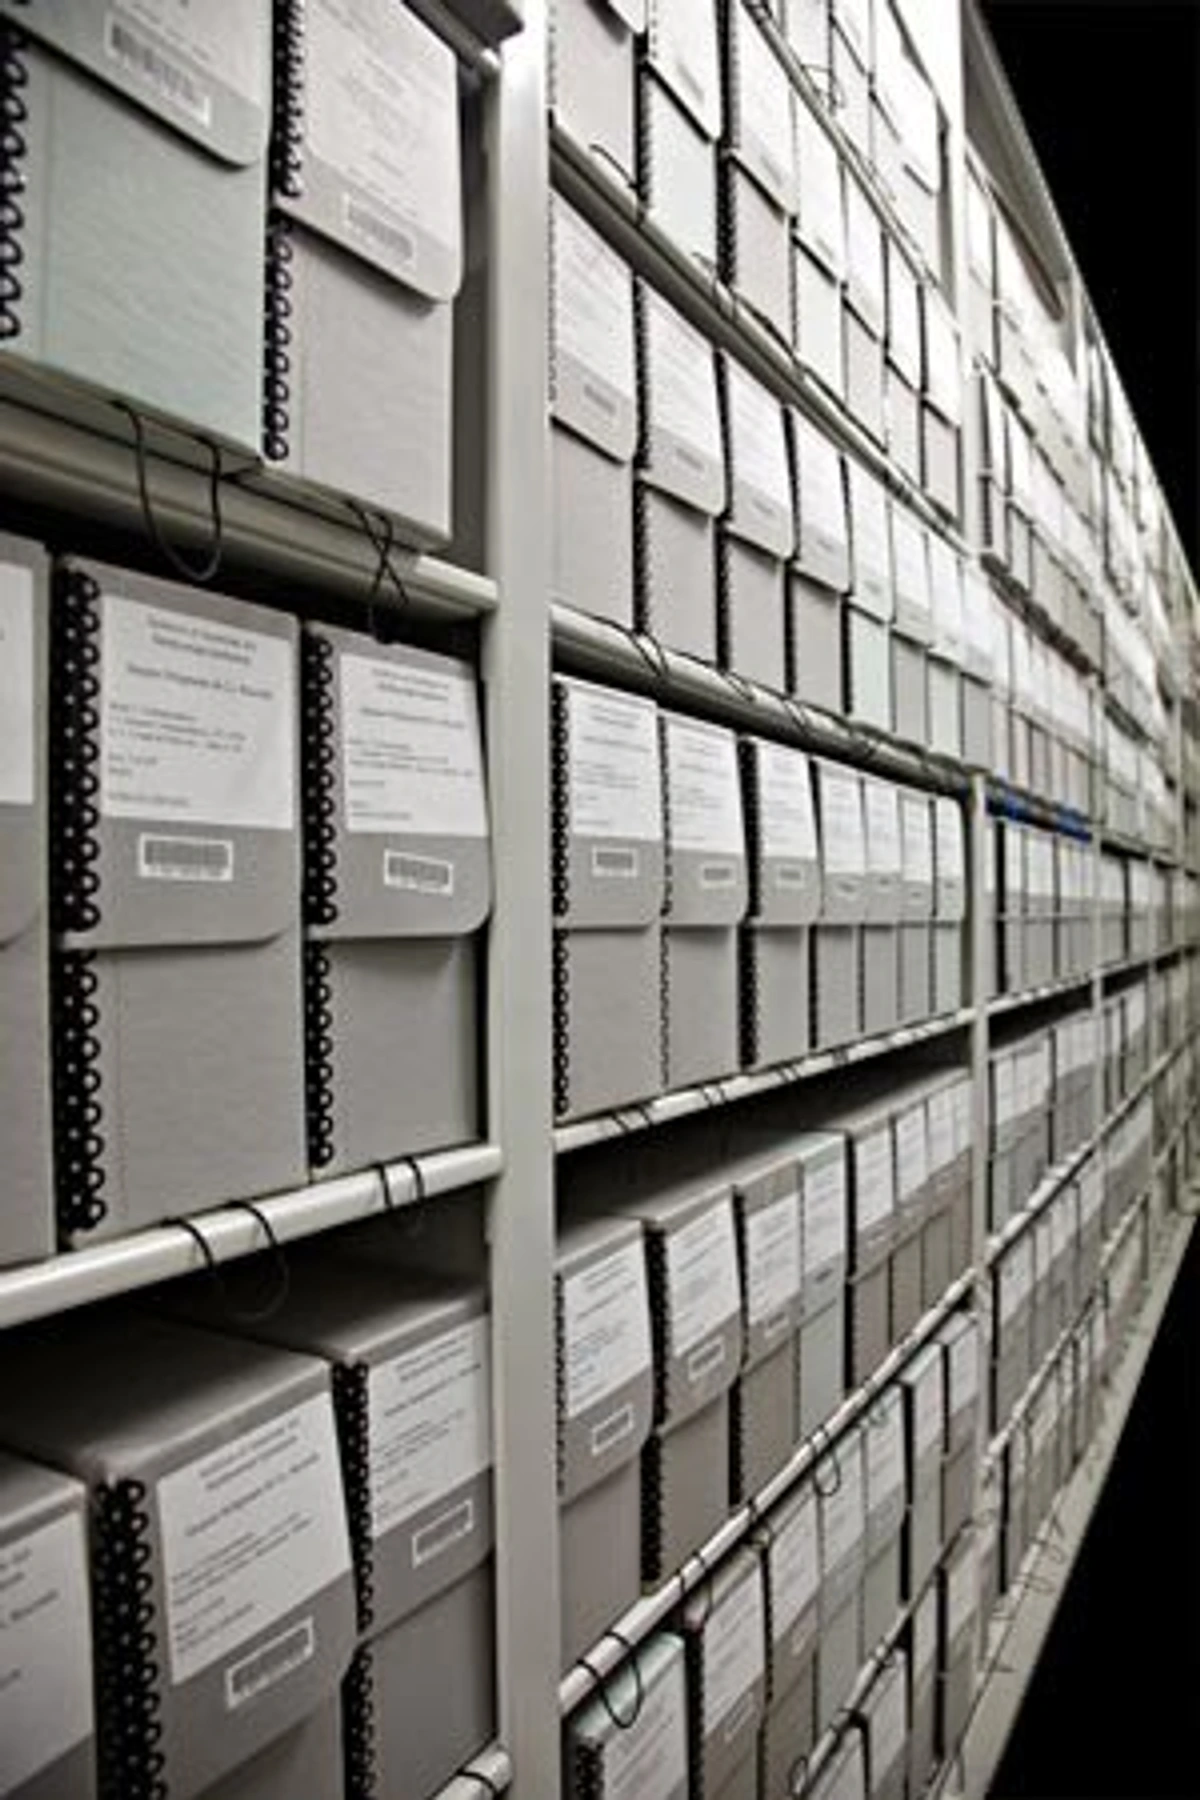
This visual is a good reminder of the institutional approach, which, while perhaps overkill for a home collection, highlights the rigorous standards we should aspire to. If it's good enough for national archives, it's good enough for your masterpiece.
The Gold Standard: Storing Prints Flat
Whenever you have the choice, and honestly, even if you think you don't, try to store your prints flat. This isn't just a suggestion; it's the universally recommended method by museums, galleries, and seasoned collectors alike. Storing flat keeps the paper fibers relaxed, prevents any stubborn memory of curling, and drastically reduces the risk of creases, folds, or distortions over time. It’s like letting your art exhale and simply be itself, unburdened, rather than holding its breath in a cramped tube. I often think of it as the ultimate form of respect for the artwork's original intent and material integrity. This is a non-negotiable principle for archival art storage.
Why Flat Storage Reigns Supreme:
- Prevents Creases and Cracks: Rolling, especially tightly, stresses paper fibers, leading to permanent creases or cracks in the print surface, particularly with thicker papers or heavily inked areas. These cracks are often irreversible, a permanent scar on your artwork. A sharp crease can literally break the paper fibers, creating a weak point that will degrade faster over time. I've seen prints that look like they've been attacked by a tiny spiderweb of micro-cracks, all from being rolled too tightly for too long.
- Eliminates 'Memory Curl': A print stored rolled for too long will develop a stubborn curl that is incredibly difficult, and sometimes impossible, to remove without damage. Flat storage avoids this entirely, saving you the headache (and risk of damage) during flattening. I've spent hours gently coaxing prints back to flatness, and it's a slow, nerve-wracking process, often requiring specialized weights and humidity control.
- Reduces Physical Stress: Paper naturally wants to lie flat. Forcing it into a rolled shape puts constant tension on the material, accelerating degradation and potentially compromising its structural integrity. This constant tension is like a slow, internal battle for the paper, constantly fighting against its natural state.
- Deters Pests and Dust: Flat, sealed containers like clamshell boxes or flat files offer a much more robust barrier against dust, environmental pollutants, and particularly, pests like silverfish or rodents who love undisturbed rolled-up papers. They can't easily sneak into a tightly sealed, flat container, making it a fortress for your art.
- Easier Access and Inventory: While it might take up more space, accessing a specific print from a flat file or portfolio is far easier and safer than unrolling multiple tubes. This minimizes handling, which is always a win for protecting paper art. Less handling means less risk of accidental damage, and a more streamlined system for managing your collection.
- Uniform Pressure Distribution: When stored flat in stacks, especially with proper interleaving, the weight is distributed evenly across the entire surface of the print. This prevents localized pressure points that can lead to indentations, warping, or transfer of texture from other objects. Rolled storage, by contrast, concentrates stress along the curve, which can be disastrous for sensitive papers and inks. It's all about gentle, even support for the long haul.
Step-by-Step Guide to Flat Storage: The Gold Standard for Archival Art Storage
- Prepare a Clean Surface & Hands: This might sound overly fastidious, but trust me, it's crucial for protecting paper art. Begin by thoroughly cleaning a large, flat, dry work surface. Any dust, crumbs, or stray liquid could easily damage your print. More importantly, wash your hands thoroughly to remove natural oils, lotions, or any residue that can transfer to the paper and cause permanent marks or discoloration over time. Even better, consider wearing acid-free cotton gloves (often available at art supply or photography stores) or nitrile gloves (especially for photographic materials, as cotton can shed fibers) when handling prints directly. Our skin's natural oils and residues, invisible to the naked eye, can leave permanent marks or attract dust and pests over time. Also, remove any jewelry, watches, or anything that could scratch or snag the delicate paper. Think of it as a small, essential surgical procedure for your art – hygiene is paramount. I can't stress this enough; I've seen seemingly invisible smudges appear years later as an unsightly brown stain, a testament to a moment of careless handling. This is your first line of defense for true archival art storage. Remember, even the cleanest hands leave behind some oils; gloves provide an impenetrable barrier.
- Interleave with Acid-Free Protection: This step is non-negotiable, especially if you're stacking multiple prints. Place a sheet of acid-free glassine or acid-free tissue paper directly on top of your print. Glassine, a translucent, smooth, and pH-neutral paper, is fantastic for preventing ink transfer and surface abrasion, as well as protecting against dust and environmental pollutants. Acid-free tissue offers similar protection, often being slightly softer and more opaque. The key is that these materials create an inert barrier, shielding the printed surface from dust, scratches, and any potential chemical reactions from other materials. If you're storing a stack, ensure a fresh sheet goes between each print. This isn't optional; it prevents the printed surfaces from sticking, scratching, or transferring pigment to one another. I learned that the hard way with a vibrant red print that accidentally kissed a white one – a permanent, tragic blush. Ensure these interleaving materials are also archival quality and specifically designated for art prints. For particularly delicate or valuable pieces, I sometimes even use a double layer of glassine or an individual Mylar sleeve for each print, placed within the interleaved stack. It might seem excessive, but that extra barrier can be the difference between pristine preservation and subtle surface damage. This barrier also helps absorb any minor fluctuations in humidity, creating a more stable micro-environment right at the surface of your art.
- Choose the Right Archival Container: This is where your investment in good materials really pays off for archival art storage. The container isn't just a box; it's a critical component of your art's long-term survival.
- For individual prints or smaller collections: A high-quality artist's portfolio is an excellent choice. These are specifically designed for art, often rigid, and readily available at art supply stores. Look for ones made from acid-free, lignin-free materials and a sturdy exterior to resist physical damage. Make sure the portfolio closes securely to prevent dust and light intrusion. Opt for those with sturdy handles if you plan to move them frequently.
- For larger collections or long-term storage: An archival clamshell box is your gold standard. These sturdy, acid-free, lignin-free boxes (often made from multi-walled board with an alkaline reserve) provide superior physical protection and create a stable micro-environment for your prints, shielding them from dust, light, and minor impacts. Ensure they fit your prints snugly but without pressure – too much room allows for shifting and potential damage, while too tight can warp edges. Look for boxes with metal-reinforced corners for added durability. I often prefer ones with a slight overhang on the lid for an even better seal against dust. For very large or fragile prints, you might even consider custom-made archival enclosures for the ultimate in protection.
- Consider Flat Files: If you have the space and budget, a flat file cabinet (like those used in architectural or art studios) offers the ultimate flat storage solution, allowing you to organize and access prints easily without stacking. They are a serious investment but offer unparalleled protection, organization, and ease of access. Each drawer provides its own microclimate and physical barrier, making retrieval incredibly safe and efficient. These are especially fantastic for large, unwieldy pieces.
- Individual Print Sleeves: For maximum protection, particularly for frequently handled or highly valuable pieces, consider Mylar sleeves (made from inert polyester film). These chemically stable sleeves offer transparent protection without any risk of chemical off-gassing, unlike cheaper PVC plastic sleeves that should be absolutely avoided. Mylar has a distinctive 'crinkly' feel and sound, differentiating it from soft, pliable PVC. Mylar sleeves also protect against fingerprints and minor abrasions. They are excellent for individualizing protection within a larger portfolio or box, allowing you to view and handle a print with minimal direct contact. Mylar sleeves that have passed the Photographic Activity Test (PAT) are ideal for photographic prints. You can dive deeper into these options with our guide to art storage solutions for serious collectors. Remember, the investment here is minimal compared to the potential loss of a cherished piece. I always tell people it's like buying a good insurance policy for your visual treasures, protecting not just the print but the story and emotion it holds. And speaking of insurance, you might want to look into understanding art insurance: protecting your valuable collection. Think of these containers as the first line of physical defense, creating a mini-sanctuary for your art within your home.
- Find the Perfect Resting Place: Once your prints are safely nestled in their archival containers, it's time to find them a home. A dark, dry, and consistently temperature-controlled location is key. Think of a deep closet shelf or under a bed in a main living area of your home. Avoid attics, basements, garages, or any external walls where temperature and humidity fluctuations are common. Also, avoid areas directly next to plumbing lines within walls, as a leak could be catastrophic and go unnoticed for too long. These areas are prone to extreme heat, cold, dampness, and pests – all mortal enemies of paper art. The goal is a stable, boring environment, much like you'd choose for yourself on a lazy Sunday, perhaps even more boring. Think interior closets, away from exterior walls that are more susceptible to temperature fluctuations. These are your art's spa days, every day. Consistent environment is paramount for protecting paper art. I often advise people to choose a spot they themselves would feel comfortable in during a heatwave or a cold snap. If you wouldn't keep a delicate book or a fine leather jacket there, your art shouldn't be there either. And if you have a flat file, ensure it's placed on a level floor, away from direct vents or heating elements.
This image reminds me that even when art is momentarily out of its ideal storage, mindful handling and temporary protection, like the interleaving here, are still important. Even a temporary stack should use archival interleaving to prevent direct contact and potential damage.
The 'If You Must' Method: Storing Prints Rolled
I get it. Life happens, and sometimes you acquire a very large print, or you're mid-move, and flat space is a luxury you simply don't have. While not ideal, and certainly not for indefinite periods, you can store a print rolled for a short period. But please, and I say this with all the earnestness of an artist who's seen the consequences, do not just use the tube it came in. Those are often death traps for paper, designed for one-way transport, not long-term archival art storage. This method should be considered a temporary stop-gap, not a permanent solution, and certainly not for highly valuable or delicate works.
This artwork, like many cherished pieces, demands respect for its material integrity, whether stored flat or temporarily rolled.
How to Roll a Print Safely: Minimizing Risk in Temporary Archival Art Storage
I truly believe in flat storage, but if you absolutely, positively must roll a print, here's how to minimize the damage. This is a temporary measure, a harm reduction strategy, not a long-term solution, okay?
- Bigger is Always Better (for tubes): If you absolutely must roll, ditch the flimsy, narrow tube your print likely arrived in. Those are for transit, not preservation. Invest in an archival-quality tube with the largest diameter you can find—I'm talking at least 4 inches (10cm) or more, ideally 6-8 inches (15-20cm) for truly large pieces. A wider tube creates a gentler curve, putting significantly less stress on the paper fibers and minimizing the dreaded "memory" curl that makes prints notoriously difficult to flatten later. Look for tubes made from acid-free materials – often labeled "archival storage tubes" – from reputable art supply or conservation material vendors. Ensure these tubes also come with acid-free caps to complete the protective seal. The wider diameter also minimizes the "memory curl" that can make flattening a print later a frustrating, crease-inducing nightmare. I've spent hours coaxing stubborn prints back into submission, and it's not fun; better to prevent it from the start. I often think of it as bending a fresh branch versus a dried twig – one will spring back, the other will snap. The wider the roll, the more flexible your art remains. Look for tubes that are robust enough to resist crushing if something heavy accidentally falls on them.
- Protect the Image (and Roll Smart): Before rolling, place a sheet of acid-free glassine or archival tissue paper over the entire image surface. This provides a crucial protective layer, preventing the image from rubbing against itself and mitigating the risk of ink transfer or surface abrasion. You can lightly secure this protective sheet to the print's edges with small pieces of archival tape (e.g., pH neutral linen tape on the margins only, and only if absolutely necessary) to keep it from shifting during rolling. Here's a pro tip: roll the print with the image side facing outward. Why? This helps prevent the delicate ink from cracking along the tight interior curve when it's eventually unrolled and makes it considerably easier to flatten the print later without damage. Gently roll the print and its protective sheet together, ensuring a smooth, consistent tension. The idea is to create a gentle, wide spiral, not a tight, stressed coil, distributing stress evenly across the paper fibers. I once saw a print that had been rolled image-side-in for too long, and when unrolled, the entire image had a spiderweb of micro-cracks – completely irreversible. Learning from those mistakes is key for protecting paper art. Imagine rolling a poster tightly and seeing the ink crack along the folds; that's what we're trying to avoid.
- Secure Without Damage: Once rolled, you have a couple of options. You can roll the print and glassine around the outside of a smaller, acid-free tube (acting as a core) or simply roll them together tightly enough to maintain their shape, then gently slide them into your larger archival storage tube. CRITICALLY: NEVER secure the rolled print with rubber bands, adhesive tape, or anything that will constrict, leave residue, or cause indentation. Rubber bands degrade over time, becoming sticky and acidic, and their pressure creates permanent deformation. Instead, use archival paper ties or a gentle wrap of acid-free tissue to keep the roll together if absolutely necessary before sliding it into the tube. Allow the rolled print to unfurl naturally inside the protective tube, where the tube's rigidity will hold its shape without applying destructive, focused pressure. I've seen prints permanently disfigured by a single rubber band left on for too long – a tiny mark that screamed "careless." This is crucial for protecting paper art. The goal is always gentle, non-abrasive support, not tight constraint. Think of it as a loose hug, not a vice grip. The less pressure, the better, to avoid creating new weak spots or distortions.
- Label and Store Horizontally: Cap both ends of the archival tube securely. Then, clearly and carefully label the outside of the tube with the print's title, artist, date, dimensions, and any relevant details using an archival marker (one that won't bleed or off-gas harmful chemicals). A consistent labeling scheme makes inventory and retrieval far easier. This prevents you from having to open every tube just to identify a piece, minimizing unnecessary handling. Finally, store the tube horizontally on a sturdy shelf in that same boring, stable, climate-controlled closet or storage area. Storing vertically can cause the print to sag over time due to gravity, leading to creases or uneven pressure points, potentially even deforming the tube itself. Proper archival art storage is all about consistency and gentle support. If you have multiple tubes, consider a simple shelving system to keep them organized and easily accessible without needing to pull them all out.
Mounting and Matting for Longevity (Even Unframed)
Even when storing prints flat, how they are supported within their archival containers can make a big difference. This is where proper mounting and matting techniques come into play, even if you don't intend to frame the piece immediately. This is about providing crucial physical support and preventing damage during handling and storage.
- Hinging: For works on paper, the safest method of attachment to a backing board is hinging with archival, acid-free linen tape or Japanese paper hinges, secured with reversible starch paste. This allows the artwork to expand and contract naturally with minor humidity changes, preventing buckling or warping. Never use permanent adhesives, dry mounting, or pressure-sensitive tapes directly on the artwork.
- Backing Boards: Always use a sturdy, acid-free, and buffered backing board (minimum 4-ply, ideally 8-ply for larger pieces) behind your print. This provides essential rigid support, preventing creasing or bending when the print is handled or moved within its storage container. It's the skeleton for your paper art.
- Window Mats: Even for storage, an acid-free window mat (a board with an opening cut in it) can offer an additional layer of protection. It creates an air buffer around the artwork, preventing it from touching any adjacent materials, and provides a barrier against potential abrasions to the surface. It also facilitates safer handling, as you can lift the mat rather than touching the artwork directly. For very delicate pieces, I sometimes store them in a mat package even before they're framed.
- Interleaving with a Mount: When storing multiple matted pieces, use a sheet of acid-free glassine or tissue between each one. This prevents any surface interaction and helps regulate the micro-environment within the stack. Think of each matted piece as its own protected unit within the larger archival system.
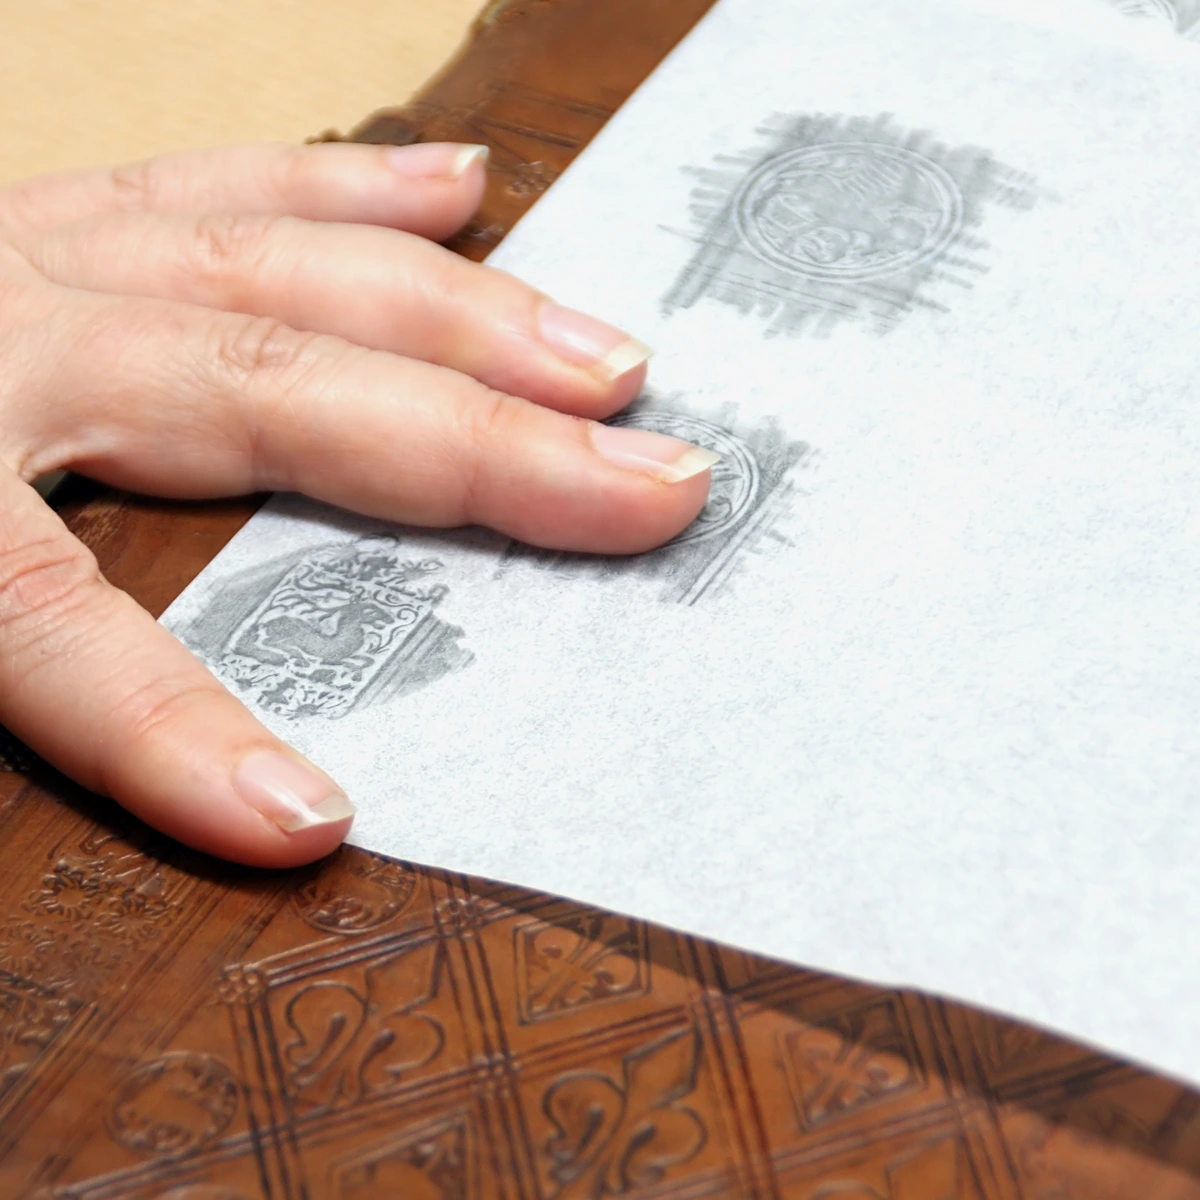
This image of an artist at work reminds me of the intrinsic value of art that we are striving to protect. Even if temporarily rolled, the artistry deserves respect and careful handling.
Environmental Monitoring: Your Art's Silent Guardian
Before we dive into the nuances of short-term versus long-term storage, let's talk about something fundamental: knowing your environment. You can invest in all the archival materials in the world, but if your storage space is a hostile environment, your art will suffer. This is where environmental monitoring comes in – it's like giving your art a health tracker, or perhaps more accurately, a dedicated weather forecaster just for its little world. It's an often-overlooked, yet utterly critical, aspect of archival art storage that provides actionable insights, rather than just hopeful assumptions. I've learned that a little data can prevent a lot of heartache.
The Indispensable Hygrometer/Thermometer
I mentioned it earlier, but it bears repeating: a good hygrometer/thermometer is your best friend. This small, relatively inexpensive device (you can find reliable ones for under $20, sometimes even integrated into smart home systems) measures both the relative humidity (RH) and temperature of a room. Why is this so important? Because it gives you real-time data to ensure your storage area consistently stays within those ideal ranges we talked about (45-55% RH and 68-72°F / 20-22°C). Without this, you're essentially flying blind, hoping for the best, and when it comes to protecting paper art, hope isn't a strategy. Think of it as a constant, non-judgmental report card for your storage environment. It's your early warning system for potential problems that are invisible to the naked eye, like a silent alarm for your cherished pieces. I've often seen collectors assume their basement is 'fine' because it's cool, only for their hygrometer to reveal a dangerously high humidity level just begging for mold. Data over assumptions, always.
The Silent Threat of Air Pollution
Beyond the more obvious enemies like light and humidity, there's another insidious threat that art sometimes faces, especially in urban or industrial environments: air pollution. Microscopic airborne particles, gases like sulfur dioxide, nitrogen dioxide, and ozone, can react with pigments, paper fibers, and even adhesives, leading to discoloration, embrittlement, and overall degradation. Think of it as a slow, corrosive attack on your artwork. While less of a concern for sealed archival storage, it's a critical factor for displayed art and for prints that are frequently exposed to the ambient air.
Sources of Indoor Air Pollution:
- Cooking Fumes: Oils and particulate matter from cooking, especially frying, can deposit on artwork, attracting dust and becoming acidic over time.
- Cleaning Products: Volatile Organic Compounds (VOCs) from household cleaners, air fresheners, and even new furnishings can off-gas harmful chemicals.
- Cigarette Smoke: A notorious destroyer, cigarette smoke leaves a sticky, acidic residue that yellows paper and dulls colors, and the smell is notoriously difficult to remove.
- Building Materials: Some glues, paints, and particle boards in your home can slowly release damaging gases.
Mitigation Strategies:
- Good Ventilation: Ensure adequate air circulation in your home, especially in areas where art is displayed. Air purifiers with HEPA and activated carbon filters can help remove particulate matter and gaseous pollutants.
- Sealed Storage: This is another reason why tightly sealed archival boxes are so effective – they create a protective micro-environment against external pollutants.
- Avoid Display in High-Risk Areas: Steer clear of displaying valuable paper art in kitchens, bathrooms, or near active smoking areas.
I often tell collectors to think of their art as having delicate lungs; they need clean, stable air just as much as we do. It's a layer of protection we don't often consider, but one that absolutely contributes to long-term archival art storage.
Emergency Preparedness: Protecting Your Collection from Disaster
While we focus on daily archival practices, what about the unexpected? Fires, floods, and natural disasters are terrifying prospects for any art owner. Being prepared can make a critical difference between total loss and successful recovery. It's the ultimate 'better safe than sorry' scenario for archival art storage.
- Digital Records & Off-Site Backups: This is non-negotiable. Have a thorough digital inventory (photos, descriptions, provenance, appraisal) stored securely off-site, in the cloud, or on an external hard drive kept elsewhere. If your home is compromised, your documentation shouldn't be too. This is your art's digital DNA.
- Emergency Contact List: Keep a readily accessible list of your insurance agent, a trusted art conservator (especially one specializing in disaster recovery), and emergency services. Time is often of the essence in disaster recovery.
- Elevate Your Art: If you live in a flood-prone area, store art on higher shelves or within elevated flat files. Even a few inches off the floor can save pieces from minor leaks or groundwater. Think of it as building a small ark for your art.
- Watertight Containers: For particularly valuable or vulnerable pieces, consider storing them within secondary, truly watertight containers inside your archival boxes. These could be heavy-duty plastic bins with secure, gasketed lids. It's an extra layer of defense against water ingress.
- Fire Extinguishers: Ensure you have appropriate, up-to-date fire extinguishers readily available in your home. While not directly for art, they protect your entire home and its contents. (Always ensure you know how to use them safely and effectively).
- Disaster Plan: Have a simple, written plan for what to do if disaster strikes. Where will you move your most valuable pieces? What steps will you take? Practicing it, even mentally, can reduce panic and improve your response time. I've found that having a clear head in a crisis is half the battle, and a plan helps immensely.
This isn't about living in fear, but about empowering yourself with foresight. A little preparedness goes a monumental way in safeguarding your art from the unthinkable.
Choosing a Reliable Hygrometer/Thermometer
When selecting a device, look for models with a clear, easy-to-read display and a reputation for accuracy. Digital models are generally more precise than analog ones. Some offer additional features like min/max readings, which are incredibly useful for seeing the extremes your environment experiences, not just the current snapshot. Calibration features are a bonus, allowing you to ensure its readings remain accurate over time. A reliable device is a small upfront investment that provides crucial intelligence for long-term preservation.
- Active Monitoring: Place one in your primary art storage area. Check it regularly, perhaps once a week, or more frequently during seasonal changes or if you notice any changes in your home's climate. Don't just glance at it; actively note the readings and be prepared to respond.
- Data Logging: Some advanced hygrometers offer data logging capabilities, allowing you to track fluctuations over time. This can be incredibly useful for identifying problematic patterns or validating that your efforts to stabilize the environment are working. This historical data can be gold for long-term analysis.
- Actionable Insights: If you see consistent readings outside the ideal range, it's a signal to take action. This might mean adjusting your home's HVAC, using a small dehumidifier or humidifier, or reconsidering the location of your storage. Without this data, you're essentially flying blind. For example, if you consistently see RH creeping above 60%, it's time to consider a small dehumidifier (compressor or desiccant type, depending on your climate and noise preference) to prevent mold and cockling. Conversely, if it dips below 40%, a humidifier might be needed to prevent brittleness, opting for models with auto-shutoff and easy cleaning to prevent bacterial growth. Always ensure these devices are well-maintained and their water reservoirs are regularly cleaned. Remember, a humidifier or dehumidifier should only be used as needed, based on your readings, not constantly unless your environment truly demands it.
Monitoring your environment is a proactive step that can prevent damage before it even begins, giving you peace of mind that your art prints are truly safe. It's a key component of effective archival art storage. It transforms passive hope into active, informed preservation.
Long-Term vs. Short-Term Storage: A Crucial Distinction
While the principles of archival storage remain constant, the intensity of your approach might vary slightly depending on how long you anticipate storing a print. It's a spectrum of vigilance, really.
credit, licence
(This image reminds me of documenting art, which is a key part of long-term care, even if it's not strictly "storage.")

Short-Term Storage (Less than 6 Months): The Critical Interim
This is the interim period between receiving your print and framing/displaying it. You still need to be diligent! I know it’s tempting to leave it be, but these first few weeks are crucial, often setting the stage for long-term health or immediate degradation.
- Immediate Protection: Immediately get it out of the original shipping tube (if applicable) and into at least acid-free tissue and a flat, sturdy container. Don't procrastinate on this; the initial shipping tube is a ticking time bomb for your art due to its acidic nature and tight curl. Consider using a temporary, larger diameter archival tube if flat storage is truly impossible for a few weeks, but prioritize flat. Ensure any temporary solution includes acid-free interleaving.
- Environment: Keep it away from direct sunlight, extreme temperatures, and high humidity. A spare bedroom closet or under a bed in a main living area are often acceptable, but actively monitor for any dampness or temperature spikes using a hygrometer. Think "out of sight, but not out of mind." Even for short stints, a stable environment is paramount for protecting paper art.
- Handling: Minimize handling. Every touch is a risk for damage or transfer of oils. If you must handle it, always wash your hands thoroughly or wear cotton gloves. Always support the entire print to prevent creases.
Medium-Term Storage (6 Months to 2 Years): The Complacency Trap
This is a tricky period, often underestimated. You've got it out of the original tube, but maybe you're still waiting for that perfect frame, or you're planning a redecoration. This is where complacency can really set in, and your art can suffer subtle, slow degradation from accumulated dust, unnoticed humidity shifts, or even opportunistic pests. Think of it as the 'teenager phase' of storage – it needs attention, even if it seems self-sufficient. This is often where I've seen minor issues become major headaches. Small issues can compound into irreversible damage during this period.
- Materials: Upgrade from basic acid-free tissue to Mylar sleeves for individual pieces, and ensure they're in a sturdy, acid-free, lignin-free portfolio or clamshell box. These aren't just for 'serious' collectors; they're vital for any piece you hope to keep in pristine condition. Don't forget acid-free backing boards for added rigidity and support. Investing in quality now saves a lot of headaches later.
- Environment: Continue strict adherence to stable temperature and humidity. A reliable hygrometer/thermometer isn't just a suggestion here; it’s a small investment with huge returns for archival art storage, actively informing your environmental controls.
- Rotation: If storing a stack of prints in a portfolio or box, consider rotating them every few months to ensure even pressure distribution. This helps prevent subtle warping or impressions from uneven weight and allows for periodic inspection. Flat files, with their individual drawers, negate this need entirely. Periodically check for any signs of pest activity or mold, especially in humid climates.
Long-Term Storage (2 Years or More)
This is where you pull out all the stops for archival art storage. Whether you're a serious collector with a growing inventory or simply storing an heirloom, maximum protection is key. This isn't just about preserving paper; it's about safeguarding history and personal investment, ensuring that the piece you cherish today can be appreciated by future generations. This is the big league of preservation, and it's where every detail truly matters.
- Materials: Non-negotiable use of all archival-quality materials: robust clamshell boxes (look for multi-walled, sturdy construction), individual Mylar sleeves, acid-free interleaving (glassine or tissue), and acid-free backing boards. Ensure everything is pH neutral and lignin-free. Remember, every component that touches your art matters – it's a closed system, and one bad apple can spoil the whole bunch. For certain valuable photographic prints, you might even consider sleeves that have passed the Photographic Activity Test (PAT-tested materials are verified not to react with photographic emulsions) or specific archival printmaking techniques. Always purchase from reputable archival suppliers.
- Environment Control: Seriously consider dedicated climate-controlled storage (professional art storage facilities are purpose-built for this) if your home environment fluctuates wildly, or if you live in an area prone to extreme weather. A high-quality hygrometer/thermometer in your storage area isn't just a smart investment; it's a non-negotiable tool for monitoring conditions and catching potential problems before they become irreversible disasters. I have one myself, and it's saved me from a few near-misses, allowing me to adjust my home environment or temporarily relocate pieces. Consistent monitoring is key for how to store art prints safely. Consider installing a smart sensor system that alerts you to significant changes and even allows remote monitoring.
- Pest Control: Ensure your storage area is free from insects and rodents. These can cause irreversible damage. This might involve regular cleaning, sealing entry points, and avoiding food nearby, as we'll discuss further in a dedicated section. An ounce of prevention here is worth a pound of cure, or, more accurately, a priceless artwork. Implement integrated pest management (IPM) strategies diligently, thinking about both chemical-free solutions and physical barriers.
- Access & Inventory: Keep a detailed, digital inventory, especially if you have many pieces. This should include photographs, dimensions, artist, title, acquisition date, and location. This helps minimize unnecessary handling when searching for a specific print. Consider categorizing your collection, much like a well-organized art collection. This also makes it easier to track the condition of each piece and perform regular check-ins without unnecessary rummaging. Trust me, rummaging is the enemy of pristine art, and a good inventory is your organizational superpower. You might find our guide on how to photograph your art collection for insurance particularly helpful for this step. Regular review of your inventory also reminds you of the treasures you possess! For your most valuable pieces, consider creating an 'art will' or specific instructions for their future care, a true act of legacy for your collection. Remember, securing comprehensive understanding art insurance: protecting your valuable collection is also a crucial part of long-term planning.
- Professional Cleaning & Inspection: For truly valuable works, consider a periodic inspection by a professional conservator. They can identify subtle signs of degradation, perform preventative treatments, and even gently clean surface grime that might accumulate over decades, ensuring the artwork maintains its original brilliance.
Moving and Shipping Art: A Collector's Guide to Logistics
Moving an art collection, whether across the room or across the globe, can be one of the most nerve-wracking experiences for a collector. The stakes are high, and the potential for damage is significant. This is not the time for DIY solutions, especially for valuable or delicate pieces. Think of it as a specialized logistical operation, requiring careful planning and the right resources to ensure your art arrives safely at its destination, maintaining its pristine condition for continued archival art storage.
Preparing for a Move
- Inventory and Documentation: Before anything else, ensure your art inventory is updated and thorough, including high-resolution photographs of each piece's current condition. This provides a baseline in case of damage and is essential for insurance claims. I keep a digital copy backed up off-site, just in case.
- Professional Assessment: For valuable or fragile pieces, consult with a fine art appraiser or conservator. They can advise on specific packing needs, potential vulnerabilities, and recommend specialized art handlers.
- Insurance Review: Contact your art insurance provider. Standard policies may not cover transit damage, especially if not packed by professionals. You might need supplemental coverage for the move. Never assume; always verify.
Packing for Transit
- Unframed Prints: For flat prints, the safest method for moving is to keep them in their archival portfolios or clamshell boxes. For larger pieces, consider custom-made art transport boxes or a sturdy, rigid art shipping case. Always ensure prints are interleaved and supported by acid-free backing boards.
- Rolled Prints: If you absolutely must roll, use the largest diameter archival tubes you have, with acid-free interleaving and image-side-out rolling, as discussed previously. Pack these tubes securely within a larger, cushioned box to prevent crushing or movement.
- Framed Art: As we covered in the 'Storing Framed Art' section, meticulous wrapping is key. Use acid-free tissue or Tyvek over the glazing, followed by ample padding (bubble wrap with bubbles facing out, or art foam sheets), and then a sturdy outer layer like corrugated cardboard or a custom-built art crate for highly valuable pieces. Ensure corners are protected with foam protectors. Always label clearly, indicating
I get a lot of questions about how to store art prints, and I'm happy to tackle some of the most common ones here. Think of this as your quick-reference guide to protecting paper art, because let's face it, sometimes you just need a straightforward answer without all the preamble.
Q: Can I just store my prints in the original shipping tube?
A: I'd strongly, strongly advise against it for anything more than a few days – and by few, I mean 3-5 at most. Original shipping tubes are typically very narrow, forcing your print into an extremely tight curl that's difficult to reverse without damage. More importantly, they are almost never made from acid-free, archival materials. This means the paper itself is actively degrading, and the tube could be off-gassing harmful chemicals. They are designed for one purpose: safe transit. Not for long-term preservation. Trust me, it's a false economy to use them. I've heard countless stories, and seen the evidence, of prints permanently scarred by this seemingly innocuous oversight. It's truly a 'penny wise, pound foolish' approach to archival art storage. Prioritize getting your art into proper flat storage or a wide-diameter archival tube as soon as possible. Your art deserves better than a temporary shipping solution becoming its permanent prison.
Q: What about framing a print without glass?
A: While some contemporary art installations or certain types of prints (like canvas prints, which aren't paper-based) might be displayed without glazing, for paper art, glass or acrylic is essential for protection. It shields against dust, pollutants, physical damage, and, with UV-filtering options, harmful light. Displaying a paper print without this barrier is like sending it out into the world naked – it's exposed to everything and will degrade much faster. I've only ever displayed unframed paper prints for very short-term exhibition purposes, never long-term, and even then, under tightly controlled conditions. Even the most careful environment has airborne particles and subtle humidity shifts that glazing helps mitigate. And if you're serious about long-term display, definitely look into QA with an expert art framer for more insights on glazing options. Modern glazing options include standard float glass, UV-filtering glass (blocking 70-99% of UV), museum glass (anti-reflective and UV-filtering, blocking 99% UV), and conservation-grade acrylic (lighter, shatter-resistant, and also available with 99% UV protection). It's an investment that pays dividends in longevity and maintains the integrity of your art.
Q: What does 'acid-free' or 'archival' actually mean?
A: Great question, and one I hear all the time! Essentially, 'acid-free' means the material has a neutral pH level, typically between 7.0 and 8.5. This is crucial because acidic materials will, over time, leach acid into your artwork, causing it to yellow, become brittle, and degrade (that 'acid burn' we talked about earlier). 'Archival' is a broader term, meaning the material is not only acid-free but also chemically stable, lignin-free (lignin is a component in wood pulp that breaks down into acid), and designed for long-term preservation without causing harm to sensitive materials like paper. Materials designated as "museum quality" take this a step further, meaning they meet the highest standards for conservation and preservation, often implying extensive testing and a proven track record of stability under diverse conditions. Look for certifications like the PAT (Photographic Activity Test) if you're really serious about film or photo prints, which verifies that a material will not react with photographic emulsions. It's the industry standard for serious art preservation for a reason. This isn't just marketing speak; it's a promise of longevity, a commitment to keeping your art pristine for generations.
Q: Are there different types of UV protection for framing?
A: Absolutely, and this is an area where investing a little more can yield significant returns. It's not a one-size-fits-all situation. When I talk to framers, I always inquire about the specifics. Here’s a quick overview of common glazing options and their UV protection levels:
Glazing Type | UV Protection | Characteristics & Considerations |
|---|---|---|
| Standard Clear Glass | ~45% | Basic protection, common in ready-made frames. Offers minimal UV filtering. Not recommended for valuable or cherished paper art, as it provides inadequate defense against fading. |
| UV Filtering Glass | 70-90% | A significant upgrade. Blocks most harmful UV rays (both UV-A and UV-B). Still reflective, but a good entry-level choice for long-term display, offering substantial protection for a reasonable cost. |
| Museum Glass | 99% | The gold standard. Blocks nearly all UV rays and is anti-reflective, providing incredible clarity. Makes the glass almost invisible, truly allowing the art to shine, with minimal distortion or color shift. This is what I recommend for my most cherished pieces, despite the higher cost. |
| Conservation Acrylic | 99% | Similar UV protection to Museum Glass, but lighter and shatter-resistant, making it ideal for large pieces, public spaces, or earthquake-prone areas. Can be prone to static (which attracts dust, requiring anti-static cleaning cloths), and can scratch more easily than glass. |
| Anti-Glare Glass/Acrylic | Variable (usually lower than conservation grades) | Primarily designed to reduce glare by diffusing light, but often at the cost of clarity, sometimes softening or dulling the image. UV protection varies. I generally avoid this unless glare is a severe, unavoidable problem, as it often sacrifices the crispness and vibrancy of the art itself. |
My personal philosophy? Always opt for the highest UV protection you can afford, especially for original works or limited-edition prints. It's an invisible shield, silently working to preserve the vibrancy and integrity of your artwork for decades. It's truly a crucial aspect of archival art storage for displayed pieces, extending the life of your art far beyond what standard glass could offer.
Q: How do I flatten a rolled print that's stubborn?
A: This requires patience, not brute force! The safest method for a mildly curled print is to unroll it carefully, wearing cotton gloves, and place it face down on a clean, flat, acid-free surface (like a large piece of archival board). Cover it with another sheet of acid-free glassine or archival tissue paper, and then place a clean, evenly distributed weight on top (e.g., several heavy, flat books, or more archival board). Ensure the environment is stable in terms of humidity (ideally 45-55% RH) – too dry can make it more brittle, too humid can encourage mold. Leave it for several days, even a week or two, checking periodically. For severely curled or delicate prints, or if you're nervous, consult a professional paper conservator. Never try to "iron" a print or use excessive heat, as this can cause irreversible damage to pigments and paper fibers. I once tried to rush it and ended up with a minor crease – a mistake I won't repeat! It's a testament to the delicate nature of paper art; sometimes, the best approach is the slow, gentle one. Remember, you're trying to coax the paper, not conquer it. Think of it as a massage, not a wrestling match, to achieve optimal flatness for archival art storage.
Q: What if my rolled print is really stubborn and resists flattening?
A: Ah, the truly defiant prints! I've encountered a few. If the weight method isn't working after a couple of weeks, you might need a very subtle, controlled increase in humidity to relax the paper fibers. This is where a conservator would use a humidity chamber, but at home, a very careful DIY approach might involve placing the print (still interleaved and weighted) in a clean, dry bathroom after a warm shower for about 10-15 minutes, then immediately returning it to its weighted, flat position in a stable environment. The key is controlled exposure; you want a gentle relaxation, not a damp disaster. Repeat this process over several days if necessary, but always err on the side of caution. If there's any doubt, or if the print is valuable, please, call a professional paper conservator. They have the expertise and specialized equipment to safely de-stress and flatten even the most recalcitrant pieces without causing damage. I learned this after nearly ruining a favorite print by being too impatient; a conservator saved it, but it taught me a valuable lesson in humility and patience when it comes to protecting paper art. Never force it, as torn or cracked paper is far more difficult and expensive to repair than a simple curl.
Q: How long can I keep a print rolled up?
A: My honest answer? The shorter, the better – ideally, no more than a few weeks. If you know you won't be framing a print for more than a month or two, it is absolutely worth the effort to find a way to store it flat. The longer a print remains rolled, especially in a narrow tube, the more it develops a permanent 'memory' curl, which can lead to permanent creases, severe cockling, or even flaking of the printed image. This curl can be incredibly stubborn and difficult to relax without risking creases, cracks in the ink, or other damage when you eventually try to flatten it for framing. Think of it as forcing your paper into an unnatural, stressful position for an extended period, which is the antithesis of good archival art storage. Seriously, prioritize flat storage if you value the longevity of your art. Every extra day rolled increases the risk of irreversible damage, and restoration costs far outweigh the cost of proper flat storage.
Q: What is a Giclée Print and How Should It Be Stored?
A: A Giclée print is a high-quality inkjet print, typically made with archival pigment inks on fine art paper. The term is often used to denote museum-quality reproductions, a point we explore further in our guide on what is giclee print. Because they use pigment-based inks, they are inherently more lightfast than dye-based prints, offering exceptional longevity (often rated for 100+ years). However, they are still susceptible to UV damage over time. The paper used for giclées is almost always archival, but it's crucial to follow all the standard archival art storage guidelines: store them flat, interleaved with acid-free materials, in an acid-free clamshell box or Mylar sleeve, in a dark, climate-controlled environment. The quality of the print doesn't exempt it from the 'three enemies'! In fact, its high value often makes meticulous storage even more critical, ensuring your investment is protected.
Q: What about humidity packs or desiccants in storage?
A: While popular for certain collectibles, I generally approach humidity packs (like silica gel packets or Boveda packs) with caution for art prints. They can help control humidity in very small, truly sealed containers, but they also require regular monitoring and replacement, and if they become saturated, they can actually release moisture back into the environment. Furthermore, over-drying the environment (below 40% RH) can make paper brittle and cause delamination or flaking in some artworks, leading to cracking. A consistent, passive environmental control (like a stable interior closet) combined with active monitoring (a hygrometer) and, if truly necessary, a dedicated climate control unit (humidifier/dehumidifier) is usually a safer and more reliable long-term strategy. The goal isn't to create an arid desert, but a gentle, stable balance (45-55% RH). Think of it as finding the paper's 'happy place.' I’ve also found that in anything but the smallest, most airtight enclosures, they're often not powerful enough to make a significant, sustained difference, giving a false sense of security, which is worse than no security at all when it comes to archival art storage.
Q: Should I use a dehumidifier or humidifier in my art storage area?
A: If you live in an area with highly fluctuating humidity, or if your chosen storage spot tends to be damp (like a basement, which I generally advise against for art), then then yes, absolutely. A small, quiet dehumidifier can be a lifesaver for maintaining that ideal 45-55% relative humidity range. Look for models with a built-in humidistat for automatic control and an auto-shutoff feature. Conversely, in extremely dry climates, a humidifier might be necessary, but this is less common for storage, as most homes already have some ambient humidity. Always monitor your environment with a hygrometer/thermometer to know when to adjust. This is about being proactive, not reactive, to environmental shifts, and making informed decisions to prevent damage. Remember to keep these units clean to prevent mold or bacteria from being circulated, as stagnant water can become a breeding ground for harmful spores.
Q: Is it safe to store art in a garage, basement, or attic?
A: A resounding NO. I know it's tempting to use those 'extra' spaces for archival art storage, but they are almost universally the worst possible environments for protecting paper art. Garages are prone to extreme temperature swings, car exhaust fumes, chemical odors, and pests (rodents and insects), not to mention increased fire risk from stored chemicals or vehicles. Basements are notorious for dampness, flooding risk, mold, and hidden leaks. Attics experience extreme heat in summer and cold in winter, causing rapid thermal expansion and contraction of materials (which stresses paper fibers and frames), and also pose a higher fire risk. These environments are the antithesis of the stable, climate-controlled conditions required for protecting paper art. Stick to interior closets, climate-controlled living spaces, or dedicated archival storage facilities for anything you cherish. Seriously, if you wouldn't keep your most delicate electronics there, don't keep your art there. Your art will thank you for providing a stable, benign home.
Q: Where can I buy archival-quality storage supplies?
A: This is a fantastic question and one that often causes a little confusion. While some larger craft stores might carry a small selection, your best bet for truly reliable, museum-grade archival supplies is a dedicated fine art supply store, a photography supply specialist, or online retailers that focus specifically on conservation and archival storage. Look for brands that clearly state "acid-free," "lignin-free," and "buffered" (if applicable) for paper products, and "inert polyester (Mylar)" or "polypropylene" for plastics. Beyond the labels, look for suppliers who actively provide technical specifications and can answer questions about product longevity and chemical stability. Avoid generic office supply stores for long-term storage solutions; their "acid-free" claims sometimes don't hold up to true archival standards. Invest a little in the supplier, and you're investing in your art's future. It's truly a case of 'you get what you pay for,' and for your cherished art prints, quality is non-negotiable.
Q: How often should I check on my stored prints?
A: This isn't something you need to do daily, but a quarterly or bi-annual check-in is a good practice, especially for long-term storage. Briefly inspect your storage area for any signs of dampness, mold, dust accumulation, or pest activity. Pay attention to any unusual smells. Gently open a few portfolios or boxes, wearing gloves, to ensure the prints themselves are still looking pristine and haven't developed any unexpected issues like cockling, discoloration, or surface abrasions. This is also a good time to update your digital inventory and perform a quick visual condition report, noting any changes. It's a quick preventative measure that can save you a lot of heartache (and potential restoration costs) down the line, catching problems early. Think of it as a regular wellness check for your art collection. And honestly, it's also a chance to reconnect with your collection and remember why you fell in love with these pieces in the first place. Early detection is key for protecting paper art effectively.
Q: How do I choose the right size art for my space after storage?
A: Ah, the transition from storage to display! This is where the magic happens. Choosing the right size of art for your space is more art than science, but I've found a few guidelines are immensely helpful. Generally, you want the art to feel proportional to the wall and any furniture it's displayed above. For instance, if hanging above a sofa, the artwork (or grouping of artworks) should ideally be about two-thirds the width of the sofa. Don't be afraid to go big if the wall can handle it – a single large piece can make a powerful statement. For smaller prints, consider creating a gallery wall to give them more presence. I always recommend mocking up the size with craft paper or painter's tape on the wall before committing to a frame or hanging. It’s all about creating visual harmony, and you can find more detailed advice on this in our guide on how to choose the right size art for your space: a decorators guide. A well-chosen piece enhances the entire room, turning a simple space into a curated experience.
Q: What if I have really valuable prints? Does anything change?
A: For truly valuable or irreplaceable prints, all the above guidelines become even more critical. You might consider professional fine art storage facilities, which offer climate-controlled, secure environments specifically designed for artwork, complete with advanced fire suppression and security systems. Additionally, ensuring comprehensive art insurance (more on that below!) and a detailed art appraisal from a qualified expert are non-negotiable. Every layer of protection, both physical and administrative, adds to the security of your investment and its long-term legacy. For these pieces, think museum-level care.
Storing Framed Art: A Different Set of Considerations and Enhanced Protection
Sometimes, you might need to store framed artwork, whether it's awaiting a new home, going into temporary storage during a move, or simply being rotated out of display. The principles of protection remain similar, but the practicalities differ slightly due to the added bulk and fragility of the frame and glazing. Think of it as protecting a multi-layered artifact, where each component plays a role in the overall preservation of the artwork within, and the outer layers are crucial for its journey into or out of storage.
Key Considerations for Framed Art Storage: A Holistic Approach
Protecting framed art is a holistic endeavor, where the frame, glazing, mat, and backing all work together to create a protective micro-environment around your precious print. When it's time to put these pieces into storage, you need to extend that protection outward, addressing both physical and environmental threats.
To summarize the essential materials for framed art storage:
Good Choice (Archival for framed art) | Bad Choice (High Risk) | Why? |
|---|---|---|
| Archival tissue paper or Tyvek | Plastic wrap (for contact with glazing), newspaper | Protects glazing from scratches and dust, and for Tyvek, its breathable, lint-free, and water-resistant properties offer excellent all-around protection. Crucially prevents plasticizer migration from harmful plastics (which can cause irreversible fogging or stickiness) and acid transfer from newspaper. |
| Acid-free corrugated cardboard, corner protectors | Standard cardboard directly against frame, no corner protection | Adds cushioning, structural support, and creates a critical buffer against impact, preventing direct contact with potentially acidic standard cardboard. Always opt for multi-ply archival corrugated board for robust protection, acting as a shock absorber. Foam or cardboard corner protectors guard vulnerable frame corners from dings, chips, and crushing, common points of damage during handling or storage. |
| Custom-made art crates, reinforced art boxes | Generic moving boxes, trash bags | Superior protection for valuable, oversized, or fragile framed pieces, offering a rigid, climate-controlled micro-environment during transit or long-term storage, shielding against impact, vibration, and environmental shifts. Generic moving boxes offer almost no protection and can collapse under weight. Trash bags provide no impact protection and trap humidity. |
| Climate-controlled storage unit (professional) | Self-storage locker (uncontrolled), garage/attic | Stable environment crucial for entire framed assembly, preventing warping, delamination, and degradation of both the art and its protective components (frame, mat, backing, glazing). Uncontrolled units expose your art to extreme temperature swings, humidity, and pests, accelerating damage. |
| Glass-Skin Film (for glass glazing) | No pre-emptive film on glass | A transparent, self-adhesive film applied to glass glazing that prevents shattering and keeps glass shards contained if the glass breaks. Essential for minimizing damage to the artwork itself during transit or impact. |
- Protect the Surface (Glazing or Artwork): If the artwork is glazed (has glass or acrylic), place a layer of archival tissue, clean Tyvek, or acid-free corrugated cardboard over the glazing to protect it from scratches, dust, and to prevent anything from directly touching the art if the glazing somehow breaks (which is rare with proper handling, but good to mitigate). For unglazed canvases, ensure nothing touches the painted surface directly, as it can be easily marred or imprinted. This initial layer is paramount for protecting paper art within the frame. For valuable pieces with glass glazing, consider applying a specialized 'glass-skin' film; this clear, temporary adhesive film prevents glass shards from scattering and damaging the artwork if the glass breaks during transit or an accident.
- Wrap Securely: Wrap the entire framed piece in a moving blanket, heavy-duty bubble wrap (with bubbles facing outward to avoid imprinting on the frame or glass over long periods, especially in fluctuating temperatures), or specialized art packing material (such as acid-free foam sheets). Be meticulous, especially around the corners, which are vulnerable to dings and chipping – specialized foam corner protectors are a great investment here. Secure the wrapping with painter's tape or stretch film, avoiding adhesive tape directly on the frame. I always use a generous amount of material; better safe than sorry, right? It's like dressing your artwork for a safe journey or a long, peaceful sleep.
- Provide Structural Support: For larger or heavier framed pieces, a layer of acid-free corrugated cardboard on both sides, cut to size, and then wrapped, adds significant structural rigidity and impact protection. For highly valuable or fragile pieces, custom-made wooden art crates are the ultimate solution, providing an almost impenetrable fortress against physical damage and environmental changes.
- Store Vertically: Always store framed artwork vertically, standing on its longest edge. This distributes the weight evenly and prevents undue pressure on the glass, frame, or art itself. Never stack framed pieces flat on top of each other; the cumulative weight can cause irreversible damage, and the hardware on the back of one frame can scratch the one below it. Think of it like books on a shelf – upright is best. This also minimizes the chance of glass breakage. For added protection, use foam spacers or archival cardboard between each framed piece to prevent rubbing.
- Create Separation: Place pieces of acid-free corrugated cardboard or foam core between individual framed artworks, especially if they are leaning against each other. This prevents rubbing, scratching, and potential chemical transfer between different materials. These simple barriers are incredibly effective, acting as sacrificial layers of protection.
- Environmental Stability: Just like unframed prints, framed art needs a stable, climate-controlled environment. Avoid direct sunlight, extreme temperature swings, and high humidity, which can affect not only the paper art within but also the frame's integrity, matting, and the adhesion of various components. Delamination, warping, and mold growth can affect the entire assembly. This is where your hygrometer/thermometer comes in handy, giving you objective data! If the environment is too dry, wood frames can crack; if too humid, metal frames can corrode.
- Label Clearly: Label each wrapped piece with its contents (artist, title), dimensions, and orientation (e.g., "THIS SIDE UP," "FRAGILE") using an archival marker on the outer wrapping. This prevents you from having to unwrap every piece to identify it, minimizing unnecessary handling and potential damage. Think about how museums store their collections—they prioritize vertical storage and meticulous wrapping for maximum protection. This approach will significantly extend the life and pristine condition of your cherished framed pieces. And if you're ever looking for more detail on the framing itself, our guide on how to frame a canvas painting offers some excellent insights.
This image reminds me that even when art is out of storage, on display, continuous vigilance over its environment and protection is key. The gallery setting, with its controlled light and careful presentation, offers a good model for our own homes.

Guarding Against Uninvited Guests: Recognizing and Preventing Pest Damage
It might sound like a horror story, but pests—from tiny silverfish to voracious rodents—can wreak havoc on paper art. They're drawn to cellulose (paper!), dark, undisturbed spaces, and stable environments – often exactly what your ideal art storage area unwittingly provides. It's a cruel irony, isn't it? But vigilance is your best defence, and trust me, an early intervention can save you immense heartache and potential restoration costs. Pests are perhaps the most insidious threat to archival art storage, as their damage can often go unnoticed until it's too late.
Common Art-Damaging Pests and Their Signs:
Understanding your enemy is the first step in defence. Here are the most common tiny invaders that threaten paper art and what to look out for. Knowing these signs is like having a secret weapon against the silent destroyers of your collection:
- Silverfish & Firebrats: These tiny, wingless, fast-moving insects love damp, dark, undisturbed places, often hiding in books, papers, and cardboard boxes. They'll munch on paper, particularly the sizing, starches, and adhesives, leaving irregular holes and surface abrasions, often with a 'grazed' appearance.
- Signs: Small, irregular holes with chewed edges, silvery scales (from their bodies that rub off), yellow staining, or actual sightings of the insects, often scurrying away when disturbed. I've had a few close calls with these sneaky creatures, and their damage can be quite distinctive, looking almost like a light scraping. Look closely at the surface of your prints and on the shelves for these tell-tale signs.
- Mice & Rats: Rodents love to nest in undisturbed areas and will chew through paper, cardboard, and even wood to create nests or to sharpen their teeth. Their damage is usually much larger and more destructive, often involving significant tears and shredding.
- Signs: Distinctive droppings (small pellets), gnaw marks on edges of paper or boxes, shredded paper for nesting material, or the presence of actual nests. Rodents are the bulldozers of the pest world, capable of causing widespread destruction quickly. The smell of rodent urine can also be a strong indicator.
- Booklice (Psocids): Tiny, almost invisible to the naked eye (often only 1-2mm), these non-biting insects thrive in humid conditions and feed on microscopic mold and fungi that grow on paper, as well as starches and adhesives. They don't directly eat paper but their presence indicates unhealthy humidity levels and potential mold growth, acting as an early warning system.
- Signs: A dusty appearance on paper (which might be the booklice themselves), tiny moving specks, or very fine surface abrasion. Often mistaken for dust or mold itself. These are subtle, but a warning sign that your environment needs adjustment – it's your paper's silent cry for help.
- Carpet Beetles: The larvae of these common household pests feed on natural fibers, including paper, wool, and silk. They are often found in dark, undisturbed areas, particularly where dust and debris accumulate.
- Signs: Small, irregular holes, usually less defined than silverfish damage, shedding larval skins (which look like tiny, translucent husks), and sometimes actual sightings of the small, oval-shaped beetles or fuzzy larvae. The damage often looks like small, shallow pits rather than clean holes.
- Cockroaches: These resilient insects are attracted to damp, dark environments and organic matter, including paper and adhesives. They leave behind stains and can chew on paper.
- Signs: Dark smears or irregular stains, chewed edges on paper, a distinct musky odor, and sightings of the insects themselves, often scuttling away when light is introduced. Their presence almost always indicates a high humidity problem and a need for immediate intervention.
- Termites: While less common for stored paper art directly, if your storage area is infested, termites can tunnel through adjacent wooden structures and sometimes even into paper-based materials, creating channels and causing significant structural damage.
- Signs: Mud tubes on walls or wooden structures, discarded wings near windows or light sources, or soft, damaged wood. This is a more serious structural issue, but its impact can extend to your art collection if left unchecked.
Prevention is Key: Your Strategy for Protecting Paper Art from Pests
- Cleanliness: Keep your storage area meticulously clean and dust-free. Regular vacuuming (with a HEPA filter if possible) is crucial, as dust isn't just unsightly; it can contain mold spores and provide a food source or nesting material for pests. A tidy space is a less inviting space for critters. I know it sounds obvious, but a dusty corner is practically a five-star hotel for many pests. Avoid using harsh chemical cleaners or air fresheners near your art, as their fumes can off-gas and cause chemical damage. This is foundational for protecting paper art from unwanted guests. This also includes keeping exterior areas around your home tidy to reduce breeding grounds for pests.
- Climate Control: As mentioned, stable humidity (45-55% RH) deters many pests, especially those drawn to dampness. Consistent, moderate temperatures also make the environment less appealing. An ideal climate for your art is generally not an ideal climate for most destructive pests. Think of it as making your storage area an uninhabitable desert for them.
- Sealed Containers: This is your physical fortress. Archival clamshell boxes and tightly capped, acid-free tubes offer excellent physical barriers against most insects and small rodents. Think of them as individual bunkers for your prints, creating a micro-environment that's difficult to breach, especially if they are truly airtight or nearly so. Make sure lids are tight-fitting and unbroken, without any gaps for tiny invaders. This is your primary mechanical defense.
- Elevate Off Floors: If possible, store boxes and tubes on sturdy, clean shelves rather than directly on the floor. This provides a crucial barrier against creeping dampness, potential minor flooding, and makes it harder for ground-dwelling pests to access your collection. It also aids in air circulation around the boxes, preventing stagnant air pockets. I always say, 'give your art a little lift in life'. Aim for at least 6 inches off the floor.
- Avoid Food & Drink: Never store food or drinks near your art. It's an open invitation for pests – crumbs and spills are irresistible attractants. Designate your storage area as a 'food-free zone,' a sanctuary from temptation. This applies to pet food too!
- Regular Inspection: During your regular quarterly or bi-annual check-ins, actively look for any tell-tale signs of pest activity – tiny holes, droppings, frass (dust-like insect excretions), or actual sightings of the critters themselves. Early detection is not just vital; it's the difference between a minor inconvenience and catastrophic damage. Pay attention to corners, undersides of shelves, and dark crevices. I make it a ritual, a quiet survey of my collection's wellbeing. Consider placing insect traps (non-toxic sticky traps) around the perimeter of your storage area as an early detection system.
- No Mothballs! While tempting, mothballs contain harsh chemicals that can off-gas, creating a toxic micro-environment that will undoubtedly damage your artwork and potentially your health. Avoid at all costs, there are safer, more effective methods for archival art storage. This is a classic example of a 'solution' that creates more problems than it solves.
- Seal Entry Points: Check for cracks or openings around windows, doors, and pipes in your storage area and seal them with caulk or weatherstripping to prevent easy entry for insects and rodents. A physical barrier is often the most effective. Think of it as hardening the perimeter of your art sanctuary. Don't forget small gaps around electrical outlets.
- Maintain Air Circulation: Ensure there's some air circulation in your storage area. Stagnant air can encourage mold growth, which in turn attracts certain pests. Don't seal everything up so tightly that it becomes a biological incubator; a gentle airflow is beneficial. A small, quiet fan on a low setting can sometimes help, especially in larger storage spaces. This prevents hot spots and stagnant, humid air pockets.
A little vigilance goes a long way in keeping your collection safe from these miniature marauders.
Handling Your Art Safely: Best Practices Beyond Storage
So much of what we've discussed revolves around how to store art prints and keeping them safe in their designated spots. But what about when your art is moving? Or when you simply need to take it out for a closer look, re-arrange, or prep for framing? Handling is where many accidental damages occur, often with frustratingly simple causes. This is where vigilance in the moment becomes absolutely critical. Here are some best practices for protecting paper art during these vulnerable moments, turning every interaction into a mindful act of preservation. Treat every piece, no matter its perceived value, as if it were a priceless museum artifact.
The Golden Rules of Art Handling:
- Always Wear Gloves: I know, I sound like a broken record, but acid-free cotton gloves (for general handling) or nitrile gloves (for photographic materials, as cotton can shed fibers) are non-negotiable when touching paper art. Our skin's natural oils, dirt, and even microscopic residues can leave invisible, permanent marks that become apparent years later. It's a cheap and easy preventative measure, truly the simplest act of protecting paper art. Don't skip it! Always keep a box near your storage area so you have no excuse.
- Clean, Flat Work Surface: Just like preparing for flat storage, always work on a large, clean, dry, and flat surface. Consider using a dedicated, smooth, acid-free work mat for this purpose. Clear away any objects, food, drinks, or sharp items that could accidentally come into contact with your print. This isn't just about cleanliness; it's about creating a safe, controlled workspace. A small oversight here can lead to irreparable damage.
- Support Fully: Never pick up a print by one edge or corner. Paper, especially larger pieces, is surprisingly fragile and will bend and crease under its own weight. Always slide a rigid, acid-free backing board underneath the entire print before lifting. For very large prints, use two pieces of archival board to create a 'sandwich' around the print for maximum support. Use both hands, supporting the board from underneath. Think of it as a delicate transfer, not a casual lift. Imagine the horror of a crease tearing through your favorite print because you were trying to balance it on one hand!
- Avoid Pinching or Creasing: Be incredibly gentle. Even a slight crease can leave a permanent mark. When moving a print, ensure there are no obstacles it might snag on. If rolling (as a last resort for transit), follow our detailed rolling guidelines. Avoid abrupt movements at all costs. Paper is surprisingly susceptible to minor impacts and folds.
- Minimize Exposure: Try to minimize the time your print is exposed to ambient air, light, or unstable environments. Get it from its archival home to its destination (or back into safe storage) as efficiently and safely as possible. Every second of unnecessary exposure is a micro-risk. Have your destination ready before you even touch the art.
- No Pointing with Fingers: When discussing an artwork with others, resist the urge to point directly at the surface with your finger. Use a laser pointer, a soft, clean brush handle, or simply gesture broadly. This prevents accidental smudges, scratches, or even the transfer of micro-particles. It's a small etiquette rule that makes a big difference in preservation.
- Temporary Transport: For moving prints around your home or to a framer, use a sturdy, acid-free portfolio or two large pieces of archival corrugated board taped securely at the edges (but not over the art itself). Ensure the print is interleaved with acid-free tissue. For valuable pieces going a longer distance, consider using a professional fine art shipper who specializes in understanding art shipping and installation: a collector's guide to logistics. They really know how to store art prints safely during transit.
Treating every interaction with your art as a delicate operation will drastically reduce the risk of accidental damage, ensuring its pristine condition for years to come. Remember, the damage often occurs in a moment of carelessness, not malicious intent.
Seeking Professional Help: Restoration and Conservation
Sometimes, despite our best efforts, damage occurs. A regrettable spill, an unexpected tear, or the slow, insidious creep of acid burn. While a little care goes a long way in prevention, once damage has occurred, DIY solutions are often more harmful than helpful. This is where professional art conservators come in – the superheroes of the art world, truly the unsung heroes of archival art storage and preservation. I've learned that knowing when to call in an expert is just as important as knowing the basics of handling your art yourself.

What is Art Conservation? (And How is it Different from Restoration?)
Art conservation is a highly specialized field dedicated to the preservation of cultural heritage. Conservators have extensive training in art history, chemistry, and specialized techniques to assess, treat, and stabilize artworks. Their primary goal is not to "fix" a piece to look brand new (though that can sometimes be a byproduct), but to preserve its historical and artistic integrity for future generations. This often involves slowing down deterioration, stabilizing materials, and undertaking reversible treatments. They are forensic scientists and skilled artisans rolled into one, meticulously working to ensure the art's story continues.
Restoration, on the other hand, typically aims to return an artwork to an earlier, often 'ideal,' state, sometimes involving more invasive and irreversible interventions to repair damage or replace lost elements. While conservation prioritizes preservation and minimal intervention, restoration focuses on aesthetic repair. Often, a conservator will perform both, but always with the ethical imperative of preserving the original intent and materials of the artist. It's a subtle but crucial distinction, one that emphasizes the long-term health of the artwork over immediate visual perfection.
When to Call a Conservator: Don't DIY a Disaster
Trust me, when it comes to a damaged art print, a conservator is your best (and often only) hope. Trying to "fix" things yourself with household glues, tapes, or cleaning solutions is almost universally a bad idea. You risk introducing new, irreversible damage or chemicals that will react negatively with the artwork over time. Think of it like a medical emergency for your art – you wouldn't perform surgery on yourself, right? You'd call a professional. Here are common scenarios that absolutely warrant a call to a professional paper conservator, because when it comes to protecting paper art, sometimes you need the big guns:
- Water Damage: Even a small amount of water can cause irreparable cockling, staining, ink bleeding, and the rapid growth of mold. If your art gets wet, immediately blot (do not rub!) with clean, absorbent paper towels, air dry it as quickly as possible in a stable environment (not in direct sun or heat), and contact a conservator. A conservator can often mitigate these effects and stabilize the paper. This is a common and often devastating type of damage, but not always a death sentence if caught early.
- Tears or Creases: Improper, DIY repairs (like using common household glues or sticky tape) can worsen tears, introduce new creases, or leave unsightly, irreversible adhesive residues that attract dirt and pests and stain the paper over time. Conservators use specialized, reversible adhesives and techniques to mend these delicate injuries without further harming the integrity of the piece, often making the repair almost invisible to the untrained eye.
- Mold/Mildew: These are living organisms that actively degrade paper and can spread rapidly. A conservator can safely remove mold and treat the paper to prevent recurrence without damaging the artwork. This is a health hazard for your art, and often for you too!
- Fading/Discoloration: While some fading is irreversible, a conservator might be able to stabilize further degradation or, in some cases, gently clean surface grime that contributes to discoloration. They understand the complex chemistry of pigments and paper, and can often slow down the march of time. I've seen them perform what feels like magic on discolored pieces.
- Acid Burn: They can often de-acidify paper to halt further deterioration caused by acidic materials, a crucial process for extending the life of your artwork. This is a scientific intervention that can literally add centuries to a piece's lifespan, neutralizing those insidious chemical reactions. It's truly a long-term investment in your art's future.
- Pest Damage: From silverfish munching holes to rodent nests, pest damage requires expert cleaning and, often, repair. A conservator can also advise on long-term pest prevention strategies, not just fixing the damage but helping you prevent future incursions. They've seen it all when it comes to tiny invaders.
- "Mysterious" Damage: If you're unsure what's happening to your art – unexpected spots, changes in texture, or unusual odors – a professional assessment is crucial. Early diagnosis can save your piece from further, irreversible decline. Sometimes, the problem isn't obvious, but the signs are there, and a trained eye can interpret them. Don't play guessing games with your art.
To find a reputable conservator, look for professional associations in your region (e.g., the American Institute for Conservation in the US, or ICON in the UK). They can provide directories of accredited specialists. Always seek out conservators with specific expertise in "works on paper" or "paper conservation," as this is a highly specialized discipline. This step is a true act of love for your art, securing its future even in the face of past misfortune. Think of it as a specialized medical intervention for your visual treasures.
A Little Care Goes a Long Way: The Enduring Value of Archival Art Storage
Thinking about art storage solutions for serious collectors can seem daunting, but it really boils down to a few simple, actionable rules for protecting paper art: keep it flat, keep it in the dark, and keep it away from acid and moisture. A little bit of intentional, informed care when you first receive a print ensures that you're not just preserving paper; you're preserving a piece of your aesthetic journey, a visual story, an investment in beauty that will bring joy for a lifetime. It’s a small effort, but the returns, in terms of sustained beauty and integrity, are immeasurable. Ultimately, proper archival art storage is a testament to your appreciation for the art itself, a quiet dedication that speaks volumes, safeguarding beauty for generations to come.
Transitioning from Storage to Display: The Next Step
Alright, you've diligently mastered the art of safe storage. Your prints are pristine, patiently waiting in their carefully curated environments, like quiet treasures in a vault. But what happens when you're finally ready to unveil them, to share their beauty with the world (or at least, your living room)? Getting your art from archival storage onto your wall also requires thoughtful consideration, not just to maintain its integrity, but to maximize its visual impact and ensure it continues to thrive in its new public role. It's the grand reveal, after all!
Key Display Considerations: Extending Protection from Storage to Showcase
- Framing: This is where the protection you started in storage continues. Choose archival framing materials – that means acid-free mats and backing boards, and critically, UV-protective glazing (glass or acrylic). Don't skimp here; it's the final frontier of defence against environmental assaults. UV glazing can block anywhere from 70% to 99% of harmful UV rays, drastically slowing down the fading process. Consider options like Museum Glass for superior clarity, anti-reflective properties, and UV protection, or conservation-grade acrylic which is lighter, shatter-resistant, and also available with UV protection. A good frame isn't just aesthetic; it's an active shield for your art. I always think of it as giving your art its superhero costume, its final, elegant layer of defense. For in-depth insights, check out our QA with an expert art framer, because good framing is an art in itself – a blend of aesthetics and preservation.
- Location: This might seem obvious, but it's often overlooked. Absolutely avoid hanging art in direct, unfiltered sunlight – that's a death sentence for colors and inks. Similarly, keep it away from heat sources like active fireplaces, radiators, strong incandescent bulbs, or even consistently sunny, unshaded windows. Also, avoid areas prone to vibration (e.g., near heavy doors or speakers) which can cause subtle, cumulative damage to the frame and the artwork itself. These areas create microclimates of extreme temperature and humidity swings, which, as we've discussed, are paper art's sworn enemies. Even a seemingly innocuous spot above a heating vent can cause long-term damage. Remember, consistency is key, even on display. If you wouldn't put a delicate plant there, don't put your art there either. Consider interior walls over exterior ones for more stable temperatures, and think about the traffic flow in the room to avoid accidental bumps or scrapes. For specific room considerations, you might look at our guides on how to choose art for a dining room or decorating with art in a powder room: maximizing impact in small spaces.
- Lighting: Beyond natural light, think about how you're illuminating your art. Professional art lighting, with UV-filtered bulbs (like LEDs with a low UV output), can beautifully highlight your piece without exposing it to harmful UV radiation or excessive heat. Look for LEDs with a color rendering index (CRI) of 90 or higher for accurate color representation, and always check their UV output specifications. Control the intensity and duration of artificial light; prolonged exposure, even from 'safe' bulbs, still contributes to cumulative light dose. Avoid halogen lights if possible, as they emit both significant UV and heat, accelerating degradation. Good lighting makes your art sing, bad lighting slowly mutes it over time. It's the difference between a spotlight that enhances and one that slowly destroys, literally. For more on this, our guide to how to choose the right lighting to enhance your abstract art collection could be invaluable.
- Placement & Scale: Now for the aesthetics! Think about how the art visually interacts with the room. Is it too high, too low, too small, or too large for the space? A poorly placed piece can throw off the entire room's balance. I've got plenty of thoughts on how to arrange pictures on a wall to create a harmonious gallery wall or a single impactful statement. The goal is harmonious integration, making the art feel like it belongs, rather than an afterthought. It's the final flourish, the last brushstroke, in your curatorial journey, bringing your carefully preserved piece to life. After all that effort in storage, you want it to shine its brightest!
The Importance of Framing Style
While we’ve talked about archival materials within the frame, the style of the frame itself also plays a role in how your art is perceived and, to some extent, how it’s protected. A well-chosen frame not only enhances the artwork aesthetically but can also provide an additional physical barrier. For paper art, I almost always recommend a frame with a mat; it creates breathing space around the artwork, preventing it from touching the glass, which is crucial for preventing mold and condensation. The style (e.g., minimalist, ornate, floating) should complement the artwork and your home's decor without overpowering the piece. It’s a delicate balance, and choosing the right frame can be an art in itself. For abstract pieces, a simple, clean frame often works best, as explored in how to choose the right frame for your abstract art. But for a detailed, intricate print, a more traditional frame might be appropriate. The frame isn't just a border; it's part of the presentation and protection package.
This transition from careful storage to thoughtful display is where the true enjoyment of your art begins! It's the culmination of all your protective efforts, allowing the piece to finally shine in its rightful place. But wait, there's a little more to consider for safeguarding your valuable collection.
Conclusion: Your Art, Preserved and Cherished
So there you have it – a comprehensive journey through the world of archival art print storage. From battling the silent enemies of light and acid to mastering the delicate dance of handling and the strategic science of display, we've covered the essentials. It might seem like a lot to take in, but remember, every small, intentional step you take is an act of love for your art. It’s a commitment to preserving not just paper and pigment, but the story, the emotion, and the investment that each piece represents. My hope is that this guide empowers you to approach your collection with confidence and a clear understanding that true enjoyment of art extends beyond the initial acquisition or the moment it hangs on your wall. It’s about ensuring its vibrancy, its integrity, and its ability to inspire for generations to come. Your art deserves a long, beautiful life, and with these practices, you're giving it the best possible chance. Now go forth, protect your passion, and let your cherished pieces continue to sing! Ultimately, the true value of archival storage isn't just about preventing damage, but about extending the life of beauty and meaning for yourself and for those who will appreciate your collection long after you. It's a legacy.
Protecting Your Investment: Documentation and Insurance
Beyond the physical act of archival art storage, there's another layer of protection that often goes overlooked: documenting and insuring your art. This isn't just for museum-level collections; it's a smart practice for any cherished piece you own. Think of it as the administrative backbone of your collection – boring, maybe, but absolutely essential. It's the framework that supports all your physical preservation efforts, ensuring that in the face of the unexpected, your passion isn't just lost to time.
The Power of Documentation
I'll be honest, documentation can feel like a chore, a dry, bureaucratic task compared to the joy of acquiring art. But trust me, creating a thorough record of your artwork is crucial for several reasons, not least of which is the peace of mind it brings. This isn't just about protecting your investment; it's about preserving the story and identity of each piece, a key part of responsible archival art storage. In the unfortunate event of loss or damage, good documentation can make all the difference.
Just as this self-portrait captures a moment in time, thorough documentation captures the history and condition of your art, ensuring its story is preserved.
- Proof of Ownership: In case of theft or damage, detailed documentation proves the piece belongs to you. It's your legal cornerstone, especially important for unique pieces. Keep copies in multiple secure locations (physical and digital). This can save you immense headache and potential legal battles.
- Condition Reporting: Regular, dated photographs and written descriptions of the artwork's condition help you track any changes over time. This is invaluable if you ever need to make an insurance claim or seek conservation, as it provides objective evidence of the artwork's state at various points. Think of it as a comprehensive health record for your art, showing its state at different points in its life.
- Identification: Clear images and details (artist, title, date, dimensions, medium, unique identifiers like edition numbers, edition size, and even unique flaws or markings) make it easier to recover lost or stolen art. This is your artwork's unique fingerprint in the world, essential for law enforcement or recovery efforts, and can significantly increase the chances of its return.
- Valuation: When it comes time for appraisal or sale, comprehensive documentation streamlines the process and can significantly impact the perceived value. A well-documented piece often commands higher prices because its history and authenticity are clear. For more on this, check out understanding art appraisals: what every collector needs to know and even a QA with an art appraiser. An undocumented piece is always harder to value and sell, shrouded in uncertainty.
The Role of an Art Appraisal
An art appraisal is a formal assessment of an artwork's monetary value by a qualified expert. This isn't just about getting a number; it's about understanding the factors that contribute to that value, such as authenticity, provenance, condition, rarity, and market demand. Appraisals are essential for insurance purposes, estate planning, charitable donations, and potential sales. A professional appraiser will research market trends, artist's sales history, and comparable works to provide an accurate, defensible valuation. I consider it a non-negotiable step for any significant piece in my collection; it provides an objective benchmark for its worth.
**What to Document:
Item | Details to Record |
|---|---|
| Basic Info | Artist, Title, Year, Medium (e.g., "archival pigment print"), Dimensions (H x W), Edition Number (if applicable), Signature location |
| Acquisition | Date acquired, Source (gallery, artist, auction), Purchase price, Provenance (history of ownership, if known), Certificate of Authenticity (CoA) details |
| Condition | Detailed description of current condition, noting any existing flaws, tears, creases, or discoloration. Take high-resolution photos from multiple angles, including close-ups of any details or damage (e.g., raking light shots to highlight subtle surface changes). Dated photographs are your best witness, providing an objective snapshot in time. |
| Location | Where the piece is currently stored or displayed. Track movements for transit or loan. |
| Insurance | Policy details, appraisal value, date of last appraisal, policy number, insurer contact |











Insuring Your Art Collection
I learned this lesson the hard way, many years ago, when a piece I cherished suffered accidental damage and my standard homeowner's policy offered next to nothing. Many homeowners' or renters' insurance policies offer limited coverage for artwork, often with significant deductibles or low maximum payouts. For valuable art prints or collections, consider a separate art insurance policy, sometimes called a "fine art rider" or "valuable articles policy." I cannot stress this enough – it's the financial counterpart to all your physical archival art storage efforts. Don't let a moment of forgetfulness turn into a financial loss. You can explore this further with our comprehensive guide on understanding art insurance: protecting your valuable collection. This is truly about protecting your passion from the unexpected.
Key Benefits of Art Insurance:
- Broader Coverage: Often includes perils not covered by standard policies, such as accidental breakage, mysterious disappearance, flood, fire, or damage during transit or even during professional conservation. This comprehensive scope is a huge advantage, providing peace of mind against a wider array of risks that standard policies just don't touch.
- Agreed Value: You and the insurer agree on the value of the piece upfront, so there's no dispute in case of a total loss. This eliminates arguments about depreciation or market fluctuations at the time of a claim, ensuring you receive the agreed-upon amount, rather than a depreciated 'actual cash value.'
- No Deductible: Many specialized art policies have no deductible, meaning you don't have to pay anything out-of-pocket for covered losses. This is a significant financial benefit, especially for smaller but still valuable pieces.
- Specialized Handling: Insurers may offer assistance with professional conservation or restoration if a piece is damaged. This can include connecting you with vetted conservators and covering the often significant costs involved, which can be astronomical for delicate paper repairs, ensuring your art gets the best possible professional care.
- Global Coverage: Many fine art policies offer worldwide coverage, protecting your art even when it's traveling or on loan, providing protection beyond the confines of your home.
How to Get Art Insurance:
- Inventory: You'll need a detailed, documented inventory (see above). This isn't just a recommendation; it's a non-negotiable requirement for obtaining specialized art insurance. The more detail, the better, as it substantiates your claim.
- Appraisal: For valuable pieces, a professional appraisal from a qualified art appraiser is often required to establish the artwork's current market value. This ensures your coverage reflects the true value of your investment, especially as art values can fluctuate. Make sure appraisals are updated periodically (e.g., every 3-5 years) to account for market changes, as the value of your art can change significantly over time. An outdated appraisal could leave you severely underinsured.
- Specialized Brokers: Consider working with an insurance broker who specializes in fine art to ensure you get the best coverage for your unique collection. They understand the nuances of art, and can tailor a policy to your specific needs, rather than a generic one. They often have relationships with top art insurers and can navigate the complexities of art valuations and coverage.
Building an Art Collection with Longevity in Mind
Ultimately, all these considerations – from meticulous archival art storage to detailed documentation and robust insurance – coalesce into a single philosophy: building and maintaining an art collection with longevity in mind. It's not just about acquiring beautiful pieces; it's about being a responsible steward of those pieces, ensuring they endure for future generations. For me, that means making conscious choices at every stage, from the artists I collect (who prioritize archival materials) to the display methods I employ. It's a continuous learning journey, and the rewards are immeasurable: a collection that not only brings joy today but tells a story for years to come. Thinking about the long game, even when you're just starting out, is the most profound act of appreciation you can offer your art.
Investing in documentation and insurance is the final, crucial step in protecting paper art as a valuable asset and ensuring its legacy, regardless of what life throws its way. It's the ultimate peace of mind for any true art lover.