Caring for Works on Paper: A Collector's Personal Guide
Join me in exploring the delicate art of preserving works on paper. From UV protection to ideal storage, this personal guide shares insights for every art collector.
The Art of Stewardship: A Collector's Personal Guide to Preserving Works on Paper
You know, there's a certain magic to owning a piece of art on paper. Maybe it's the immediacy, the raw connection to the artist's hand, or just the quiet intimacy of a drawing or print. But if you're anything like I was when I first started collecting, you might also have a tiny knot of anxiety forming in your stomach: "How on earth do I keep this beautiful, fragile thing from turning yellow, fading, or just generally falling apart?" It's a completely valid concern, and one I've wrestled with myself for years, often learning the hard way. This isn't just about preserving monetary value, though that's undeniably a part of it; it's about respecting the art, the artist's effort, and the palpable stories these pieces carry across time. I'll admit, my first real scare was with a cherished, vibrant lithograph. I'd hung it proudly in what I thought was a perfectly safe spot, bathed in what I naïvely believed was "gentle ambient light," only to discover a faint, sickly yellow halo forming around its pristine edges after a year. My heart literally plummeted. It was a textbook beginner's mistake, born of blissful ignorance about the insidious power of UV exposure, but it hammered home a profound lesson: true stewardship, the kind that truly honors the artwork, goes far beyond simply hanging them on a wall. I'll admit, my first real scare was with a cherished, vibrant lithograph. I'd hung it proudly in what I thought was a perfectly safe spot, bathed in what I naïvely believed was "gentle ambient light," only to discover a faint, sickly yellow halo forming around its pristine edges after a year. My heart literally plummeted. It was a textbook beginner's mistake, born of blissful ignorance about the insidious power of UV exposure, but it hammered home a profound lesson: true stewardship, the kind that truly honors the artwork, goes far beyond simply hanging them on a wall. It's about proactively crafting an environment where these delicate beauties don't just survive the silent march of time, but truly thrive, where their colors sing for generations, and where the paper gracefully resists unseen enemies. This, my friends, is the true art of stewardship: a passionate, informed commitment that elevates mere ownership into a profound act of preservation and respect. Come with me, and I'll share what I've discovered through triumphs and, yes, a few cringe-worthy, but ultimately valuable, blunders. This is my deeply personal, and sometimes painfully honest, guide to ensuring your paper collection remains as vibrant and meaningful as the day you first fell in love with it.
This journey isn't just about preserving paper; it's about safeguarding stories, emotions, and the very essence of artistic expression. Together, we'll navigate the often-overlooked details, turning potential anxieties into empowering knowledge, ensuring that the whisper of a pencil stroke or the vibrant splash of watercolor continues to resonate for decades, a testament to your informed and passionate care. Come with me, and I'll share what I've discovered through triumphs and, yes, a few cringe-worthy, but ultimately valuable, blunders. This is my deeply personal, and sometimes painfully honest, guide to ensuring your paper collection remains as vibrant and meaningful as the day you first fell in love with it.
Display Strategies: Beyond the Simple Hang
While proper framing is undeniably the cornerstone, a meticulously engineered protective bubble for your artwork, how and where you choose to display your framed (or even unframed) works on paper can, and will, significantly impact their longevity. It's about so much more than just aesthetics, dear collector; it's about strategic, thoughtful placement, and creative, proactive protection. I've learned, often through trial and error, that even the most perfectly framed piece can suffer if its immediate environment isn't considered with the same level of care. It's a bit like a chef meticulously preparing a dish, only for it to be served on a wobbly table in a drafty room – the effort in preparation can be undone by the environment.
Strategic Placement
We've touched on avoiding direct sunlight, but let's go a bit deeper. Think about the cumulative light exposure in any given spot. Is there a window across the room that, while not directly hitting the art, still floods the space with bright, unfiltered light for hours each day? Even indirect light, over time, can cause fading. As I've learned, it's not just about avoiding direct beams; it's about the total 'light dosage' your art receives, much like how too much sun on your skin, even indirectly, can cause a sunburn over time. Beyond light, also consider the subtle, yet insidious, threat of vibrations. Hanging a piece directly above a frequently used door, near a creaky floorboard in a high-traffic hallway, or adjacent to a washing machine, can subject it to constant, minute vibrations. Over decades, these imperceptible jolts can cause delicate media (like pastel or charcoal) to shed pigment, or even slowly weaken the paper fibers, leading to tears. It's like a tiny, relentless earthquake for your art. Consider:
- Interior Walls: Often, these are your best friends in terms of environmental stability. They're typically the most consistent in terms of temperature and humidity, precisely because they're buffered from the wild swings of external weather. Think of them as the calm, steady heart of your home, offering a more predictable micro-climate for your delicate paper treasures. They benefit from the thermal mass of the house itself, which helps to equalize temperature, and they're less likely to experience direct radiant heat gain from the sun or sudden drafts. Think of these interior walls as naturally insulated zones, providing a buffer against the external climate, thus offering a more consistent and forgiving micro-environment for your paper treasures. It's like finding the calm eye of the storm for your delicate collection.
- Rotational Display: This is a strategy I've enthusiastically adopted for my particularly sensitive or truly invaluable works. It's not about hiding them away forever, but about giving them a well-deserved rest. Consider displaying them for a defined period—say, 6 to 12 months—and then, with the utmost care, rotating them into dark, archival storage. This simple act significantly, almost magically, reduces their cumulative light exposure over their lifetime, effectively stretching their vibrant life for generations to come. It’s like a sabbatical for your art, allowing it to recuperate in the quiet embrace of darkness. This approach is particularly beneficial for highly light-sensitive mediums like watercolors, historic photographs, or works with fugitive pigments, where even the best UV glazing offers only partial protection over decades.
- Away from Heat/Humidity Sources: And again, let's reiterate this crucial, often overlooked point: absolutely avoid radiators, roaring fireplaces, HVAC vents that blast hot or cold air, and those notoriously erratic rooms like bathrooms and kitchens. These spots are not just 'less than ideal'; they are truly notorious for erratic temperature and humidity fluctuations, creating localized micro-climates that are, frankly, disastrous for paper. Imagine the constant stress on delicate fibers as they expand and contract with every temperature shift or blast of steam – it’s a recipe for cockling, embrittlement, and even mold. I once, quite naively, hung a cherished family photograph above a decorative, rarely used fireplace, only to discover subtle buckling after a particularly cold winter when the heat was on. A tiny regret, but a powerful lesson learned.
- Light Measurement: For highly sensitive works, or for the truly meticulous among us (and I count myself in that camp!), consider investing in a simple, affordable light meter. These clever devices allow you to measure lux or foot-candle levels, giving you an objective understanding of the light intensity your art is truly experiencing. Professional conservators often recommend keeping exposure below a very conservative 50 lux for very fragile items, and even less for extremely light-sensitive pieces like watercolors. This helps you understand the true "light dose" your art is receiving, often far beyond what your eye can perceive or your instincts might suggest. Remember, and this is a hard truth, light damage is cumulative and utterly irreversible; once that vibrant color has faded, once that paper has yellowed, it's gone forever. A light meter is your silent, objective guardian against this insidious foe. I once tried to gauge light levels by eye, only to find a cherished drawing slowly dulling – a meter would have prevented that quiet tragedy.
Strategic Lighting Design: Illuminating with Care
Beyond simply choosing the right bulb, the way you design your lighting can profoundly impact both the aesthetic experience and the longevity of your works on paper. It's an art in itself, balancing visibility with preservation, ensuring your art sings without suffering.
- Beam Spread & Angle: Consider the beam spread of your spotlights. A narrow beam will create a dramatic, focused effect but can also lead to uneven illumination and localized heat. A wider beam offers more uniform light. Experiment with the angle of incidence: generally, a 30-degree angle from the vertical is a good starting point to minimize glare and maximize the visual texture of the artwork, while ensuring light falls evenly across the surface. This thoughtful placement prevents hot spots and shadows that can detract from the viewing experience and, crucially, minimizes concentrated light exposure on any single area.
- Dimmers: Integrating dimmers into your lighting system is not just about mood; it's a powerful preservation tool. By reducing the intensity of light, even subtly, you significantly reduce the 'lux hours' your artwork receives, effectively extending its lifespan. It's a simple, elegant way to control light dosage, allowing you to appreciate your art at its best during viewing times, and then dial back the exposure during quieter moments. Think of it as giving your artwork a gentle, much-needed break from the spotlight. For the truly technologically inclined (and I confess, I'm slowly becoming one!), consider integrating your art lighting with smart home systems. This allows for automated dimming schedules, motion-sensor activation (so lights are only on when someone is viewing the art), or even remote control to ensure optimal light exposure without constant manual adjustment. It's a sophisticated, yet remarkably effective, way to manage your art's light diet with precision and ease.
Creative Protection for Unframed Works
Not all paper art belongs in a frame. Some pieces are meant to be handled, studied, or simply enjoyed unframed. For these, specialized display solutions are key:
- Solander Boxes/Clamshell Boxes: Oh, these are a true revelation for any collector of unframed works! These aren't just boxes; they're beautifully crafted, rigid, archival sanctuaries, meticulously designed to protect your drawings, prints, and photographs from the triple threat of light, dust, and inadvertent physical damage. They allow for easy, secure viewing and handling without exposing your precious art to the elements, preserving that immediate connection with the work. Within these boxes, I highly recommend storing individual pieces within their own acid-free folders or sleeves, especially if you plan to stack multiple works. This additional layer of protection prevents abrasion, provides further chemical buffering, and makes handling individual pieces even safer. These aren't just storage solutions; they’re mini-sanctuaries, keeping your unframed masterpieces flat, clean, and away from curious fingers or circulating dust, allowing them to breathe, but only just enough. And the tactile experience of opening one, carefully lifting the lid to reveal a hidden treasure, is a joy in itself.
- Plexiglas Display Cases/Vitrines: For those truly special, unframed pieces you simply must display, custom-made Plexiglas cases, or vitrines as they're elegantly called, can be an exquisite solution. They offer robust protection from dust, curious hands (and believe me, those curious hands are everywhere!), and even some environmental fluctuations, all while allowing for unimpeded visibility. However, here’s the crucial caveat: ensure the acrylic is specifically UV-filtering – a non-negotiable safeguard against fading – and, critically, that the case provides adequate air circulation. Without proper, gentle ventilation, condensation can become an insidious issue, which, as you can vividly imagine, is utterly disastrous for paper. Look for cases with discreet vents or tiny, almost invisible gaps, meticulously designed to allow for gentle, imperceptible air exchange, thereby preventing the buildup of stagnant, humid air, which is, I promise you, a prime invitation for mold and mildew to take up residence. I learned this the hard way when a beautiful, encased botanical print developed faint traces of mold after a particularly long, unventilated display period. Heartbreaking, truly.
- Encapsulation: Now, this is a technique typically reserved for particularly fragile or frequently handled documents, rather than fine art, but it's worth knowing about. Encapsulation involves carefully placing the artwork or document within a sleeve of inert polyester (often Mylar), which is then sealed along its edges. This offers remarkable physical protection, preventing tears and creases, while still allowing for two-sided viewing. Crucially, this is a fully reversible process and is fundamentally different from the irreversible sin of lamination. Unlike lamination, which permanently adheres plastic to paper with heat and adhesive, encapsulation creates a protective, removable sleeve, offering vital physical support without altering the original artwork in any way. It's a temporary embrace, rather than a permanent bond. Think of it as a custom-fitted, clear garment for your art, offering protection without commitment.
- Archival Portfolios: For an elegant, practical, and incredibly accessible way to store and view your unframed works, especially larger prints, drawings, or even photographic series, large-format archival portfolios are an absolutely fantastic choice. Think of them as sophisticated, oversized folders, meticulously crafted from robust, acid-free materials, often secured with ties or clasps. They allow you to store multiple pieces flat and impeccably protected, shielding them from dust, light, and minor physical damage. These are not just storage; they're excellent for curating what you display, allowing you to easily rotate pieces and keep less sensitive works safe, yet delightfully accessible for impromptu viewing or study. I often find myself pulling one out on a quiet evening, rediscovering pieces I haven’t seen in a while – it’s a wonderful ritual. It’s a quiet moment of connection, a private gallery at your fingertips.
Display Easels & Stands for Unframed Works
Sometimes, even unframed pieces deserve their moment in the spotlight, perhaps for temporary display or as part of a rotating exhibition within your home. For these instances, specialized display solutions are essential to ensure both visibility and protection.
- Archival Easels/Stands: For robust, yet delicate, unframed works—think thicker board-mounted drawings or smaller, more rigid prints—purpose-built archival easels or stands can provide a graceful display. Look for those constructed from inert materials like anodized aluminum, powder-coated steel, or conservation-grade acrylic, ensuring there are no acidic components or unstable finishes that could off-gas onto the artwork. The design should offer stable, even support across the entire back of the piece, preventing any stress points or potential for bowing.
- Slotted Mounts/Rails: For very delicate or thin unframed works, a system of archival slotted mounts or clear acrylic rails can allow for upright display without direct adhesive contact. These systems gently cradle the top and bottom edges of the artwork, providing stability while making the work appear to float. Again, ensure all materials are acid-free and inert, and that the system allows for easy, damage-free removal of the artwork. This method is often employed in museum displays for fragile documents or unbound prints, offering visibility without compromise.
Non-Adhesive Mounting Techniques for Unframed Display
Sometimes, you want to display an unframed piece, perhaps a delicate drawing or a historical document, but direct handling or framing isn't appropriate. This is where non-adhesive mounting techniques, common in museum settings, become incredibly useful. These methods offer support and visibility without permanently altering the artwork.
- Photo Corner Mounts: These are simple, yet ingenious. Acid-free photo corners, made from inert polyester or archival paper, are attached to a rigid, acid-free backing board. The artwork then slips into these corners, holding it securely in place without any adhesive touching the artwork itself. It's completely reversible and offers excellent support. I've used these for displaying smaller, unframed photographic prints or delicate etchings for temporary viewing.
- Mylar Straps/Slings: For larger or more fragile works, thin, inert polyester (Mylar) strips can be used to create custom slings or straps that gently hold the artwork to a backing board. The Mylar is adhered to the backing board with archival tape, forming a 'pocket' or 'strap' through which the artwork slides. This method distributes support evenly and avoids any adhesive contact with the artwork. It's a bit more involved, but incredibly secure and museum-approved.
- Magnetic Mounting Systems: A more modern approach involves using rare-earth magnets. Archival materials (e.g., Mylar, archival board) are placed over the edges of the artwork, and tiny magnets are placed on top of these, attracting to magnets embedded behind the backing board. This creates a visually clean, damage-free hold, perfect for temporary displays or for artworks needing frequent access, as long as the magnets never directly touch the artwork. I've seen these systems used effectively in contemporary galleries for works on paper, offering a minimalist aesthetic with maximum protection.
Going Deeper: Understanding Different Paper Art Mediums & Their Unique Needs
Before we dive into the nitty-gritty specifics, my fellow collector, it's absolutely worth taking a reflective moment to appreciate the sheer, breathtaking diversity within the realm of "works on paper." From the subtle, almost whispered nuances of a delicate graphite drawing to the vibrant, unapologetic intensity of a bold screenprint, each and every medium brings its own singular character, its own rich history, and, crucially, its own unique set of vulnerabilities. It’s a bit like a gardener knowing that while all plants yearn for water, a desert cactus has dramatically different hydration needs than a lush, humidity-loving fern. Understanding these exquisite nuances is the golden key that unlocks truly tailored preservation, allowing us to move far beyond generic, one-size-fits-all advice to a far more thoughtful, deeply informed, and medium-specific approach. This isn't just academic; it's about giving each piece the specific, nuanced care it truly deserves. I remember the thrill of discovering these differences, realizing that true care was not a blanket rule, but a deeply personal conversation with each artwork.
While the general principles of care apply broadly, different mediums on paper have their own quirks and vulnerabilities. It's like knowing that while all plants need water, a cactus has very different hydration needs than a fern. Understanding these nuances allows for truly tailored preservation. To truly appreciate the specific needs of each medium, it's also helpful to have a brief understanding of paper's own history and how that impacts its preservation. Early papers (pre-19th century) were often made from linen or cotton rags, making them inherently strong, durable, and generally acid-free – a conservator's dream! The industrial revolution, however, introduced wood pulp papers, often processed with chemicals that left residual acids, making them inherently unstable and prone to self-destruction over time (remember "slow fires"?). This historical shift means that a 17th-century drawing might, paradoxically, be more chemically stable than a 19th-century print, simply due to the paper it was created on.
Drawings: Charcoal, Pastel, Graphite
These captivating mediums—charcoal, pastel, and graphite—are often particulate, meaning their pigment particles delicately sit on the surface of the paper, rather than soaking deeply into its fibers. This inherent characteristic is precisely what makes them incredibly fragile, a single careless brush able to cause devastating smudging or even lift the medium entirely. While choosing the right, slightly textured paper can certainly help the medium adhere better, providing a microscopic 'tooth' for the particles to cling to, their fundamental vulnerability remains. I’ve learned to treat these works with an almost reverential caution, understanding that even the gentlest touch can disrupt their delicate surface. For a deeper understanding of one of these captivating mediums, explore our guide to understanding and using charcoal for drawing. If you're just starting, getting the right tools is key, and our guide to essential drawing supplies for beginners can point you in the right direction.
- Fixatives: Many artists, myself included for certain works, rely on fixatives to stabilize charcoal, pastel, and graphite drawings. While undeniably helpful, let me be clear: even the very best archival fixative isn't some magical, impenetrable shield. Think of it more as a very, very light, artist-grade hairspray for your art; it helps 'set' the particulate medium, but it certainly doesn't 'cement' it. My unwavering advice? Avoid touching the surface at all costs, even after fixation. And please, for the love of all that is archival, whatever you do, never try to use regular hairspray – it's a crime against art, containing acids, polymers, and chemicals that will, without a shadow of a doubt, yellow, embrittle, and irreversibly damage the artwork over time. I once heard a horror story from a conservator about a beautiful 19th-century charcoal drawing utterly ruined by a well-meaning owner's 'fix' with hairspray. It was a visual metaphor for good intentions gone terribly, tragically wrong. For those interested in the tools behind such delicate work, a review of Prismacolor Premier Colored Pencils offers insight into the quality materials artists often employ, highlighting the importance of every element in creating lasting art.
Ink Drawings: Iron Gall, India, and Modern Pigment Inks
Ink drawings, with their crisp lines and deep tones, hold a unique place in the world of works on paper. But "ink" is a broad term, and their preservation needs vary dramatically depending on the specific type of ink used.
- Iron Gall Ink: Historically significant, iron gall ink was common from the Middle Ages into the 20th century. Its beautiful dark lines can, however, become its undoing. Over time, it can corrode the paper it sits on, leading to severe embrittlement, haloing, and even complete loss of the paper where the ink was applied. This "ink corrosion" is a critical conservation issue, exacerbated by humidity. If you own a piece with iron gall ink, prioritize stable, dry conditions and consult a conservator about its stability. I once saw a stunning 17th-century manuscript where the ink literally ate through the paper, leaving behind ghostly cut-outs of text – a stark reminder of this ink's destructive power.
- India Ink (Carbon-Based): Often made from carbon black (soot) mixed with a binder (like shellac), India ink is generally very lightfast and stable. Its deep, matte black is permanent and typically poses fewer long-term chemical degradation risks to the paper itself. However, because it often sits slightly on the surface, it can be susceptible to smudging if rubbed or if exposed to water. Handle with care, and avoid any direct contact or humidity fluctuations.
- Modern Pigment Inks: Contemporary artists often use pigment-based inks, which utilize finely ground pigment particles suspended in a binder. These are generally very lightfast and stable, designed for longevity. Their stability depends on the quality of the pigments and the binder. Treat them with the same care as other drawings, focusing on stable environmental conditions and UV protection.
- Dye-Based Inks: These inks, commonly found in commercial pens, markers, and some older prints, are notoriously fugitive (prone to fading) when exposed to light. Their vibrant initial colors can quickly diminish, often leaving behind only the faintest ghost of the original drawing. UV-filtering glazing is absolutely essential for any artwork with dye-based inks, and even then, rotational display is highly recommended.
- Framing: For these particularly fragile drawings, proper framing isn't just a recommendation; it's an absolute, non-negotiable requirement. They demand a mat to create that crucial air gap, acting as a buffer that prevents the delicate, particulate medium from making any disastrous contact with the glazing. This contact, especially with changes in temperature or humidity, can lead to irreversible smudging or adhesion to the glass. Imagine the delicate particles of charcoal literally lifting off the paper and sticking to the glass – a heartbreaking, often irreversible, scenario. For optimal viewing and protection, non-glare or anti-reflective museum glass is often the preferred choice, allowing for stunningly clear viewing without obscuring the subtle, rich texture of the drawing, while also providing critical UV protection.
- Handling: Let me emphasize this: extreme, almost surgical, care is needed when handling drawings. These are, by their very nature, incredibly delicate. Even the slightest, most innocent brush against the surface can cause devastating smudging, lift the medium, or leave an irreversible mark. Always, always handle these works by the edges of their rigid support board, never by the drawing itself, and ideally, always with clean, archival gloves. It's a moment of vigilance that can save you a lifetime of regret.
Mixed Media Drawings: A Confluence of Preservation Challenges
Mixed media works, by their very nature, present a fascinating, yet complex, set of preservation challenges. When an artist combines, say, delicate pastel with robust acrylic, or luminous watercolor with gritty charcoal, they are, in essence, creating a miniature ecosystem of materials, each with its own unique sensitivities and vulnerabilities. It's a beautiful chaos, but one that demands a holistic, nuanced approach to care.
- Understanding the Materials: The first, and most crucial, step is to identify all the different mediums present. Is there a water-soluble component alongside an oil-based one? Is there a particulate medium (like pastel) over a sealed surface? Each material will react differently to light, humidity, and even touch. A conservator can often help in identifying these diverse components.
- Conflicting Needs: The greatest challenge in mixed media is often reconciling conflicting preservation needs. A fixative might protect charcoal but alter watercolor. Humidity might stabilize one material but cause another to cockle or bloom. The solution often lies in finding the lowest common denominator of fragility and setting environmental controls to protect the most vulnerable component. It's like having a diverse group of friends – you find the restaurant that makes everyone happy, not just one person.
- Framing and Handling: These pieces often require a deeply customized framing approach, typically with deep mats to ensure ample air space and, if possible, non-glare, UV-filtering museum glass. Handling requires extreme caution, as one medium might be fixed while another remains incredibly delicate. Always assume the most fragile component dictates the handling protocol. It's a constant exercise in thoughtful, informed care, but the rewards of preserving these innovative works are immeasurable.
Beyond Fixatives: Handling Unframed Drawings
For those precious drawings you haven't yet framed, or perhaps never intend to frame, handling them correctly is paramount. I learned this when a friend, well-meaning but oblivious, picked up a charcoal study by its corner – a fleeting moment that left a permanent thumbprint. My heart still winces.
- Always use gloves: My personal mantra for handling any paper art, but especially unframed drawings with their delicate, often particulate surfaces. Clean cotton or nitrile gloves are not just a nicety; they are your artwork's first, crucial line of defense. They meticulously prevent the insidious transfer of skin oils, acids, and dirt from your hands to the paper, which can cause irreversible stains or accelerate degradation. For particulate mediums like charcoal or pastel, they offer the added, invaluable benefit of minimizing accidental smudging from your fingers, preserving the artist's original intention. I keep several pairs strategically placed near my flat files – it's a small habit with immense protective power. I learned this when a friend, well-meaning but oblivious, picked up a charcoal study by its corner – a fleeting moment that left a permanent thumbprint. My heart still winces. When considering types, traditional white cotton gloves are excellent for most paper handling, offering a soft, absorbent barrier. However, if you're concerned about leaving behind minute cotton fibers, or if you need more tactile dexterity, clean, powder-free nitrile gloves are an excellent alternative, especially when handling photographic prints or very delicate surfaces. Just remember, even with gloves, gentle handling is paramount; they're a barrier against oils and dirt, not an excuse for a firm grip.
- Support from underneath: This is a non-negotiable rule, a golden standard for handling. Never, ever lift a drawing by its edges alone – that's a recipe for a heartbreaking crease, a tear, or a permanent bend. Instead, always, with utmost gentleness and intention, slide a rigid, acid-free support board underneath it and lift both together, providing complete, unwavering support. For larger or more unwieldy works, the "sandwich method"—where the artwork is carefully placed between two rigid, acid-free boards and then lifted as one unit—is not just invaluable, it’s essential. It prevents any flexing, creasing, or accidental damage from the paper's own weight, preserving its pristine condition. I once, in a moment of hurried oversight, watched the corner of a large print buckle under its own weight as I lifted it from just one side. That faint crease is still a reminder to move with intention.
- Minimize touching the surface: Let me be crystal clear on this: even when diligently wearing gloves, your mission is to absolutely minimize any direct contact with the drawing's delicate surface. Gloves are a barrier against oils, not an invitation for casual contact. Always, without exception, handle by the edges of the support board, guiding the artwork gently into place. Every single touch carries a tiny, almost imperceptible risk.
- Archival interleaving: This is a simple, yet profoundly effective, act of preservation when storing unframed drawings. Always, without fail, interleave each individual piece with a sheet of archival glassine or acid-free tissue paper. This meticulously crafted barrier serves multiple critical purposes: it prevents any disastrous smudging between stacked works, offers a crucial protective layer against dust and airborne pollutants, and acts as a chemical buffer. It’s a small, elegant detail that makes an immense difference in the long-term health of your collection, creating a pristine micro-environment for each work. Think of it as providing each artwork with its own soft, protective blanket within the larger storage solution.
Watercolors & Gouache
Watercolors and their wonderfully opaque cousin, gouache, both possess a captivating vibrancy that, I've learned, demands a very particular kind of careful consideration. Watercolors are, of course, renowned for their breathtaking, luminous transparency, allowing light to dance through the pigments. But this very quality, paradoxically, also means they can be exquisitely susceptible to light damage, especially when composed with fugitive (read: easily fading) pigments. It’s a delicate balance, appreciating their ethereal beauty while understanding their inherent fragility. For those new to gouache, we have a helpful guide on reviewing the best gouache sets for beginners which can help you start on the right foot.

credit, licence Finding the right paper is absolutely crucial for these works, influencing not just the aesthetic outcome but also the artwork's long-term integrity. The quality and composition of the paper itself play a monumental role in the longevity of watercolors. Poor-quality paper, especially those with high lignin content or an acidic pH, will inevitably yellow, become brittle, and weaken over time, directly compromising the integrity of the delicate paint layer. Pigments can also react unpredictably with acidic paper, causing color shifts or accelerated fading. Conversely, a high-quality, acid-free, 100% cotton rag paper provides a stable, buffered foundation, allowing the watercolors to maintain their luminosity and the paper its structural integrity for centuries. You might find our review of the best watercolor papers particularly insightful, as the paper itself forms a key, almost structural, part of the artwork's longevity. It's the silent foundation upon which all that luminous beauty rests. You might find our review of the best watercolor papers particularly insightful, as the paper itself forms a key, almost structural, part of the artwork's longevity. It's the silent foundation upon which all that luminous beauty rests.
- Light Sensitivity: Let me be blunt: watercolors are, without a doubt, among the most vulnerable mediums to fading from light exposure. This is a truth I've had to accept, often with a pang of regret for past oversight. Even the finest UV-protective glazing and diligently indirect light may not be enough for extremely sensitive, fugitive pigments over prolonged periods. For your most cherished watercolors, I implore you: consider implementing a rotational display strategy, moving these works off display periodically into the dark, protective embrace of archival storage. It’s crucial, profoundly crucial, to understand that not all pigments are created equal. Artists often employ a captivating mix of highly lightfast (wonderfully resistant to fading) and more fugitive (alas, prone to fading) pigments within a single work. Unfortunately, and this is the rub, you often can't tell the difference just by looking at the finished piece. If you are fortunate enough to know the artist or have access to documentation, actively look for mentions of ASTM (American Society for Testing and Materials) lightfastness ratings (I, II, or III, with I being the most lightfast). This information can be an incredibly powerful indicator of how much light exposure a piece can truly tolerate, guiding your display choices with informed confidence. I once had a beautiful, early 20th-century watercolor that, despite being behind UV glass, began to lose its most delicate pinks after several years of consistent display. The lesson: even with best efforts, some pigments are simply more vulnerable.
- Humidity: Ah, humidity – the tricky paradox for a water-based medium. While water is, of course, their very essence, excessive environmental humidity can be a truly insidious enemy, causing watercolors to 'bloom' (where pigments wick outwards), aggressively cockle or buckle the paper, and most insidiously, encourage rampant mold growth. Stable humidity is not just crucial; it is absolutely paramount. High humidity can not only cause the paper to cockle or buckle in disfiguring ways, but it's also a prime, open invitation for mold and mildew to flourish, manifesting as those unsightly, often irreversible, reddish-brown spots of 'foxing' that we dread with every fiber of our collector's being. Think of humidity control as a vital, invisible shield for your vibrant watercolors. I once saw a stunning watercolor literally 'bloom' overnight after a dramatic spike in humidity, and the subtle texture was forever altered. A heartbreaking sight.
- Binder Stability: The binder in watercolors and gouache is typically gum arabic, a water-soluble plant gum. While stable when dry, prolonged exposure to high humidity can cause the gum to become tacky, making the paint surface vulnerable to blocking (sticking to adjacent surfaces) or attracting dust. Furthermore, the gum arabic itself can be a food source for mold in very humid conditions. Maintaining stable, moderate humidity helps keep the binder in its stable, dry state, ensuring the pigments remain securely bound and the surface remains clean. Stable humidity is not just crucial; it is absolutely paramount. High humidity can not only cause the paper to cockle or buckle in disfiguring ways, but it's also a prime, open invitation for mold and mildew to flourish, manifesting as those unsightly, often irreversible, reddish-brown spots of 'foxing' that we dread with every fiber of our collector's being. Think of humidity control as a vital, invisible shield for your vibrant watercolors. I once saw a stunning watercolor literally 'bloom' overnight after a dramatic spike in humidity, and the subtle texture was forever altered. A heartbreaking sight.
- Pigment Characteristics & Transparency: Watercolors are uniquely defined by their transparency, allowing the white of the paper to reflect light through the pigment layers, creating that signature luminosity. Gouache, on the other hand, is intentionally opaque, designed to be applied in solid, flat fields of color. This fundamental difference affects their light sensitivity. Transparent watercolors with fugitive pigments are often more vulnerable to fading because the light can penetrate deeper and interact more directly with the pigment. Gouache, with its thicker, more opaque application, might offer a slight buffer, but it is by no means immune to light damage, especially for dye-based colors. Understanding these intrinsic qualities helps you make informed choices about display and protection. For those new to gouache, we have a helpful guide on reviewing the best gouache sets for beginners which can help you start on the right foot.
Historic vs. Modern Watercolors: A Tale of Two Eras
The evolution of watercolor paints, much like paper itself, has a profound impact on their inherent stability and preservation needs. What worked for a 19th-century artist might be very different from the materials a contemporary painter uses, and understanding this distinction is crucial for informed stewardship.
- Historic Watercolors (Pre-20th Century): Many older watercolors, particularly those from the 18th and 19th centuries, were often made with pigments that are now known to be highly fugitive (prone to fading). Organic dyes derived from plants and insects, or early synthetic pigments, might have been vibrant initially but lacked long-term lightfastness. The binders, while often gum arabic, could also contain other additives that impact stability. These works require extreme light control, often necessitating very limited display periods and robust UV protection.
- Modern Archival Watercolors: Contemporary artists committed to longevity often use modern watercolor paints formulated with highly lightfast, inorganic pigments. Manufacturers now provide ASTM (American Society for Testing and Materials) lightfastness ratings, guiding artists and collectors toward more stable choices. While these paints are significantly more resilient, they are not immune to light damage. All watercolors, regardless of age, benefit from thoughtful display strategies and protection from excessive light exposure. It's a quiet evolution in artistic materials, offering both challenges and opportunities for preservation.
A Brief History of Printmaking and Its Impact on Preservation
The history of printmaking is a fascinating tapestry woven with artistic innovation and technological evolution, each era bringing its own materials and techniques—and, crucially, its own set of preservation challenges. Understanding this historical context isn't just academic; it profoundly informs how we approach the care of these diverse works.
- Early Woodcuts & Engravings (15th-17th Century): The earliest prints, often religious or illustrative, were made on typically robust, laid papers using oil-based inks. While the paper itself could be acidic (leading to embrittlement over centuries), the inks were generally quite stable. Their primary vulnerabilities are physical damage due to handling and the inherent fragility of aged paper.
- 18th-19th Century Etchings & Lithographs: The rise of more nuanced intaglio processes and the advent of lithography brought finer papers, often wove, and a broader range of inks. This period saw increased use of fugitive (less lightfast) pigments, especially for hand-coloring, making them highly susceptible to fading. The paper quality also varied wildly, with some being highly acidic. The delicate plate marks of intaglio prints became a treasured feature, demanding careful framing that respected their texture.
- Late 19th - Early 20th Century: Chromolithography & Photomechanical Prints: The industrialization of printing led to mass-produced, often highly colorful prints (like chromolithographs). While vibrant, many used unstable dye-based inks and highly acidic wood-pulp papers, making them extremely vulnerable to light damage, foxing, and embrittlement. Photomechanical processes (like halftones) introduced new chemical vulnerabilities. It was a period of aesthetic flourish but often at the expense of longevity.
- Mid-20th Century to Present: Screenprints & Digital Prints: The pop art movement embraced screenprinting with bold, often acrylic-based inks that could be quite stable. However, commercial screenprints sometimes used fugitive dyes. The digital revolution brought inkjet prints, where the stability depends entirely on the ink type (pigment-based being vastly superior) and paper quality. The challenge here is discerning true archival quality from consumer-grade materials. This historical understanding underscores why a 'one-size-fits-all' approach to print preservation is simply inadequate; each print carries the legacy of its making, and our care must honor that journey.
Prints: Etchings, Lithographs, Screenprints
A Brief History of Printmaking and Its Impact on Preservation
The history of printmaking is a fascinating tapestry woven with artistic innovation and technological evolution, each era bringing its own materials and techniques—and, crucially, its own set of preservation challenges. Understanding this historical context isn't just academic; it profoundly informs how we approach the care of these diverse works.
- Early Woodcuts & Engravings (15th-17th Century): The earliest prints, often religious or illustrative, were made on typically robust, laid papers using oil-based inks. While the paper itself could be acidic (leading to embrittlement over centuries), the inks were generally quite stable. Their primary vulnerabilities are physical damage due to handling and the inherent fragility of aged paper.
- 18th-19th Century Etchings & Lithographs: The rise of more nuanced intaglio processes and the advent of lithography brought finer papers, often wove, and a broader range of inks. This period saw increased use of fugitive (less lightfast) pigments, especially for hand-coloring, making them highly susceptible to fading. The paper quality also varied wildly, with some being highly acidic. The delicate plate marks of intaglio prints became a treasured feature, demanding careful framing that respected their texture.
- Late 19th - Early 20th Century: Chromolithography & Photomechanical Prints: The industrialization of printing led to mass-produced, often highly colorful prints (like chromolithographs). While vibrant, many used unstable dye-based inks and highly acidic wood-pulp papers, making them extremely vulnerable to light damage, foxing, and embrittlement. Photomechanical processes (like halftones) introduced new chemical vulnerabilities. It was a period of aesthetic flourish but often at the expense of longevity.
- Mid-20th Century to Present: Screenprints & Digital Prints: The pop art movement embraced screenprinting with bold, often acrylic-based inks that could be quite stable. However, commercial screenprints sometimes used fugitive dyes. The digital revolution brought inkjet prints, where the stability depends entirely on the ink type (pigment-based being vastly superior) and paper quality. The challenge here is discerning true archival quality from consumer-grade materials. This historical understanding underscores why a 'one-size-fits-all' approach to print preservation is simply inadequate; each print carries the legacy of its making, and our care must honor that journey.
Prints—ah, what a vast, utterly captivating universe of artistic expression they encompass! They are a world unto themselves, a dazzling array of techniques, and their care, my friends, depends profoundly on the specific type of ink and, crucially, the paper that breathes life into them. Each and every technique, from the meticulous, crisp lines of an etching, the soft, painterly quality of a lithograph, to the bold, often graphic colors of a screenprint, presents its own distinct set of nuances in terms of vulnerability, resilience, and required handling. It's a continuous learning curve, understanding that a woodcut demands a different kind of vigilance than a delicate aquatint.
- Ink Stability: Generally speaking, modern prints tend to benefit from more chemically stable inks compared to their historic counterparts, a quiet testament to advancements in materials science. However, let me be clear: fading can still, and often does, occur. Here's a crucial distinction: pigment-based inks are almost universally more lightfast (meaning, more resistant to fading) than dye-based inks, which are notoriously more fugitive. If you can, through documentation or direct inquiry, ascertain the ink type, it can provide you with an incredibly valuable clue about its inherent stability and how much light exposure it can truly tolerate. It's like knowing the genetic makeup of your artwork, a vital piece of its long-term health puzzle.
- Historic Ink Compositions and Degradation: Before the widespread availability of modern, stable pigment-based inks, printmakers often used a variety of ink compositions, some of which present unique degradation challenges. Early oil-based inks (common in woodcuts and engravings) were generally quite stable, but the oils could, over centuries, leach into the paper, causing a subtle halo or discoloration. Later, some 19th-century lithographic inks and chromolithographs utilized dye-based components or pigments with poor lightfastness, leading to significant fading, especially in reds, yellows, and blues. Iron gall ink, also used in some prints, can suffer from the same corrosive properties as in drawings. Understanding these historical material choices helps conservators diagnose and treat existing damage, and informs collectors about the specific vulnerabilities of their older prints.
- Paper Type: Printmaking, as an art form, often calls for robust, beautifully textured papers that can withstand the rigors of the printing process itself. However, even these seemingly resilient papers are still profoundly susceptible to the relentless march of environmental factors and the occasional clumsy hand. I've seen far too many treasured prints bear the scars of avoidable edge tears and unsightly creases—common forms of damage that are a direct result of inadequate support and careless handling. Their robustness is relative, not absolute. Don't let their sturdy appearance fool you; a careless bend can still leave an irreversible mark.
Specialized Care for Historic Printmaking Papers
Just as inks evolved, so did paper, and different printmaking traditions often favored distinct paper types, each with its own characteristics and preservation challenges. Understanding these nuances helps in providing tailored care.
- Japanese Papers (Washi): Often used for woodblock prints and chine-collé, Japanese papers are renowned for their strength, flexibility, and translucence, often made from kozo, gampi, or mitsumata fibers. While generally strong, they can be incredibly thin and delicate. Their long, intertwined fibers make them resistant to tearing, but they are still susceptible to creasing and, if not properly sized, can absorb moisture and become cockled. They demand very gentle handling, minimal tension during framing, and stable humidity.
- Early European Laid and Wove Papers: Before the 19th century, European papers were largely handmade from linen and cotton rags, often exhibiting distinctive "laid" lines (from the wire mesh of the mold). Wove papers, with a more uniform texture, became prevalent later. While inherently more stable than wood pulp papers, older examples can still suffer from inherent impurities, residual processing chemicals, or become brittle with extreme age and fluctuating environments. They are particularly susceptible to physical damage like tears and folds due to their often crisp, less flexible nature.
- Pressure Marks: This is a subtle, yet deeply significant, characteristic of many printmaking techniques. Processes like etching, engraving, or even some lithographs leave subtle plate marks or a delicate embossing—a physical impression of the printing matrix—on the paper. These aren't imperfections; they are an integral part of the artwork's identity and provenance, a tangible connection to its creation. Therefore, it is absolutely paramount to avoid any framing choices that would aggressively flatten or, even worse, obscure these important textural elements. A good framer understands this and will frame your print to honor these subtle, yet profound, marks of its making. It’s like preserving the artist's fingerprint on the very fabric of the work.
- Handling Relief vs. Intaglio: The physical act of handling prints also differs subtly based on their technique. Relief prints, with their often bolder lines and thicker paper, are somewhat more robust against surface abrasion, though still highly susceptible to creasing. Intaglio prints, however, with their finely incised lines and delicate plate marks, are far more vulnerable to even the slightest rub, which can easily abrade the raised ink or flatten the subtle embossing that is so integral to their character. When touching an intaglio print (with gloves!), always remember its delicate texture and avoid any pressure on the image area itself.
Specific Printmaking Techniques & Their Vulnerabilities
Each and every printmaking method employs distinct, often complex processes, utilizes specific inks, and demands particular papers, all of which ultimately contribute to a unique set of vulnerabilities. It’s a fascinating, wonderfully intricate rabbit hole to explore, and let me tell you, knowing even just a little about these specific characteristics can prevent a lot of heartache, saved simply by a moment of informed understanding. It's the difference between blindly hoping for the best and proactively ensuring longevity. I remember learning about different print processes and feeling like I'd unlocked a secret language, suddenly able to better 'listen' to the needs of each piece.
- Relief Prints (e.g., Woodcuts, Linocuts): These bold, expressive prints often utilize thicker, more forgiving papers and incredibly robust inks, designed to withstand the pressure of the printing process. While seemingly sturdy, their primary risks still revolve around physical damage to the paper itself – think disheartening creases, unsightly tears, or accidental folds. And for older works, a quiet, insidious threat often lurks: the inherent acidity of the paper itself, a legacy of less refined historical manufacturing processes, relentlessly leading to embrittlement and discoloration over time. I once saw a beautiful 17th-century woodcut, robust in its imagery, but fragile as autumn leaves due to its acidic paper, crumbling with the gentlest touch.
- Intaglio Prints (e.g., Etchings, Engravings, Drypoint, Aquatints): These exquisite prints are beautifully characterized by their delicate, often subtle, plate marks – the distinctive impression of the printing plate pressed into the paper. These marks are not incidental; they are a fundamental, revered part of the artwork's integrity, a tangible connection to the creation process, and should, under no circumstances, ever be flattened or obscured during framing. The fine, intricate lines that define intaglio works are also particularly susceptible to abrasion, meaning even a gentle rub can cause devastating, irreversible damage. Treat them with the utmost, delicate respect they demand. I remember a conservator showing me a micro-abrasion on a centuries-old engraving, a tiny smudge that felt like a gaping wound to the artwork's history. It reinforced my awe for their fragility.
- Lithographs: These wonderfully fluid prints, created on a flat surface using often greasy inks, hold a unique place in printmaking history. Their very nature, however, makes them particularly susceptible to smudging – a fleeting moment of carelessness can leave a lasting mark. And for older examples, a word of caution: the inks used can sometimes be less stable, more prone to fading, than their modern, pigment-based alternatives. Furthermore, the often-used laid papers, with their distinctive textured lines, can, sadly, be prone to foxing, those unsightly reddish-brown spots that betray a history of fluctuating humidity. I once acquired a beautiful 19th-century French lithograph that, despite its charm, bore the tell-tale signs of foxing – a poignant reminder of past environmental neglect.
- Screenprints (Serigraphs): Ah, screenprints! Known and loved for their bold, often graphically flat, areas of vibrant color that command attention. While contemporary screenprints frequently benefit from remarkably stable acrylic inks, older examples, particularly those from the mid-20th century, might regrettably feature dye-based inks which are notoriously more prone to fading, especially those dazzling, yet fugitive, magentas and yellows. Beyond fading, the characteristic thickness of the ink layer can also be surprisingly susceptible to cracking, especially if the print is improperly rolled, folded, or subjected to careless creasing. Handle with informed reverence, for their bold beauty can belie a hidden fragility. I still remember the heart-stopping moment I saw a vivid pop-art screenprint, improperly rolled by a previous owner, with hairline cracks spiderwebbing across its bold yellow. A preventable tragedy.
- Chine-collé Prints: For the truly discerning collector, chine-collé prints are a particularly exquisite, yet delicate, marvel. This technique involves printing an image onto a thin, usually translucent, support paper (often Japanese paper), which is then simultaneously pressed and adhered onto a thicker, heavier backing sheet during the printing process. The delicate, almost ethereal quality of the thin paper, often with its unique texture, adds immense visual richness. However, this multi-layered construction introduces unique vulnerabilities: the adhesive used must be archival (traditionally wheat starch paste), or it will cause discoloration and embrittlement. The thin top sheet is incredibly susceptible to tears, creases, and abrasions, and any significant fluctuations in humidity can cause differential expansion and contraction between the two papers, leading to buckling or delamination. They demand framing with impeccable matting and UV protection, and handling with almost surgical precision, respecting their inherent, layered fragility.
Digital Prints (Giclée): Archival Considerations in the Modern Era
The advent of digital printmaking, particularly giclée prints (a term often used to denote high-quality inkjet prints), has opened up new avenues for artistic expression but also introduced a new set of preservation concerns. While often marketed as "archival," the longevity of a digital print depends entirely on its constituent parts: the ink, the paper, and any protective coatings.
- Pigment vs. Dye Inks: This is the most critical distinction. True archival giclée prints use pigment-based inks, where solid pigment particles are suspended in a liquid. These inks are highly resistant to fading and environmental degradation, with a projected lifespan of over 100 years. Dye-based inks, conversely, are liquid dyes dissolved in water. While initially vibrant, they are notoriously fugitive and will fade significantly over time when exposed to light, even with UV protection. Always confirm that a digital print is made with pigment inks.
- Archival Paper/Substrate: The paper used for digital prints must also be archival: acid-free, lignin-free, and preferably 100% cotton rag or alpha cellulose. The interaction between the ink and the paper is crucial for long-term stability. Poor-quality paper, even with pigment inks, will yellow and degrade.
- Protective Coatings: Many artists and printmakers apply clear, archival coatings (sprays or brush-on) to digital prints. These coatings can offer additional UV protection, increase scratch resistance, and provide a barrier against atmospheric pollutants. While not always necessary with high-quality inks and papers, they can add an extra layer of security.
- Handling and Display: Digital prints, especially those on delicate fine art papers, should be handled with the same care as traditional works on paper: use gloves, support from underneath, and frame with UV-filtering glazing and acid-free materials. Avoid any moisture contact, as even pigment inks can smudge or bleed if saturated before fully cured or coated.
Specific Printmaking Techniques & Their Vulnerabilities
Each and every printmaking method employs distinct, often complex processes, utilizes specific inks, and demands particular papers, all of which ultimately contribute to a unique set of vulnerabilities. It’s a fascinating, wonderfully intricate rabbit hole to explore, and let me tell you, knowing even just a little about these specific characteristics can prevent a lot of heartache, saved simply by a moment of informed understanding. It's the difference between blindly hoping for the best and proactively ensuring longevity. I remember learning about different print processes and feeling like I'd unlocked a secret language, suddenly able to better 'listen' to the needs of each piece.
- Relief Prints (e.g., Woodcuts, Linocuts): These bold, expressive prints often utilize thicker, more forgiving papers and incredibly robust inks, designed to withstand the pressure of the printing process. While seemingly sturdy, their primary risks still revolve around physical damage to the paper itself – think disheartening creases, unsightly tears, or accidental folds. And for older works, a quiet, insidious threat often lurks: the inherent acidity of the paper itself, a legacy of less refined historical manufacturing processes, relentlessly leading to embrittlement and discoloration over time. I once saw a beautiful 17th-century woodcut, robust in its imagery, but fragile as autumn leaves due to its acidic paper, crumbling with the gentlest touch.
- Intaglio Prints (e.g., Etchings, Engravings, Drypoint, Aquatints): These exquisite prints are beautifully characterized by their delicate, often subtle, plate marks – the distinctive impression of the printing plate pressed into the paper. These marks are not incidental; they are a fundamental, revered part of the artwork's integrity, a tangible connection to the creation process, and should, under no circumstances, ever be flattened or obscured during framing. The fine, intricate lines that define intaglio works are also particularly susceptible to abrasion, meaning even a gentle rub can cause devastating, irreversible damage. Treat them with the utmost, delicate respect they demand. I remember a conservator showing me a micro-abrasion on a centuries-old engraving, a tiny smudge that felt like a gaping wound to the artwork's history. It reinforced my awe for their fragility.
- Lithographs: These wonderfully fluid prints, created on a flat surface using often greasy inks, hold a unique place in printmaking history. Their very nature, however, makes them particularly susceptible to smudging – a fleeting moment of carelessness can leave a lasting mark. And for older examples, a word of caution: the inks used can sometimes be less stable, more prone to fading, than their modern, pigment-based alternatives. Furthermore, the often-used laid papers, with their distinctive textured lines, can, sadly, be prone to foxing, those unsightly reddish-brown spots that betray a history of fluctuating humidity. I once acquired a beautiful 19th-century French lithograph that, despite its charm, bore the tell-tale signs of foxing – a poignant reminder of past environmental neglect.
- Screenprints (Serigraphs): Ah, screenprints! Known and loved for their bold, often graphically flat, areas of vibrant color that command attention. While contemporary screenprints frequently benefit from remarkably stable acrylic inks, older examples, particularly those from the mid-20th century, might regrettably feature dye-based inks which are notoriously more prone to fading, especially those dazzling, yet fugitive, magentas and yellows. Beyond fading, the characteristic thickness of the ink layer can also be surprisingly susceptible to cracking, especially if the print is improperly rolled, folded, or subjected to careless creasing. Handle with informed reverence, for their bold beauty can belie a hidden fragility. I still remember the heart-stopping moment I saw a vivid pop-art screenprint, improperly rolled by a previous owner, with hairline cracks spiderwebbing across its bold yellow. A preventable tragedy.
- Chine-collé Prints: For the truly discerning collector, chine-collé prints are a particularly exquisite, yet delicate, marvel. This technique involves printing an image onto a thin, usually translucent, support paper (often Japanese paper), which is then simultaneously pressed and adhered onto a thicker, heavier backing sheet during the printing process. The delicate, almost ethereal quality of the thin paper, often with its unique texture, adds immense visual richness. However, this multi-layered construction introduces unique vulnerabilities: the adhesive used must be archival (traditionally wheat starch paste), or it will cause discoloration and embrittlement. The thin top sheet is incredibly susceptible to tears, creases, and abrasions, and any significant fluctuations in humidity can cause differential expansion and contraction between the two papers, leading to buckling or delamination. They demand framing with impeccable matting and UV protection, and handling with almost surgical precision, respecting their inherent, layered fragility.
Photographs: Historic to Contemporary
Photographs on paper—whether they are the hauntingly beautiful albumen prints of the 19th century, the iconic gelatin silver prints, or the vibrant, contemporary inkjets—each possess a unique, often complex, chemical and material composition that, I've learned, absolutely demands specialized, nuanced care. They are, in essence, fragile documents of light and time, and their preservation requires a profound understanding of their distinct vulnerabilities. It's like tending to a delicate ecosystem, where every element, from chemistry to environment, plays a critical role.
- Emulsion Damage: This is a particularly poignant vulnerability, especially for historic photographs. These delicate treasures can possess incredibly fragile emulsions—the light-sensitive layer that holds the image—which are lamentably prone to cracking, flaking, or, in humid conditions, disastrously sticking to glazing. Processes like the shimmering albumen prints, the subtly beautiful salt prints, and the distinctive Prussian blue cyanotypes each carry their own intricate, delicate chemical compositions and inherent susceptibilities to the ravages of light and an unstable environment. It's a constant battle against the forces of time and chemistry. I've seen 19th-century albumen prints with their surface literally peeling away, a heartbreaking testament to this fragility.
- Chemical Degradation: This is an invisible, yet profoundly destructive, enemy that often plagues older photographic prints. Residual processing chemicals, if not thoroughly washed out during their original creation, can act as insidious accelerants to deterioration, causing disfiguring yellowing, pervasive staining, or a dulling of the image over time. For such pieces, professional conservation isn't just an option; it might be the only hope to stabilize these ongoing chemical reactions. I've personally witnessed some truly heartbreaking examples of 'silvering' (a metallic sheen in dark areas) or irreversible fading on cherished old photographs that, had they received early, expert intervention, could have been beautifully mitigated. It's a powerful reminder of proactive care. Think of it as a slow, internal poison, silently eating away at the image from within.
- Modern Inkjets: Now, let's talk about the more contemporary realm of inkjet prints. While often remarkably stable and long-lasting, a testament to modern technology, even these can still be surprisingly susceptible to fading, especially if they weren't originally printed with true archival pigment inks. It’s crucial to understand that not not all inkjet inks are created equal; many consumer-grade dye inks are notoriously fugitive. Therefore, UV glazing isn't just a recommendation for these works; it is absolutely critical, a non-negotiable safeguard to preserve their vibrant, intended colors. Don't assume modernity equals invulnerability; I've had to learn that the hard way, witnessing a beloved contemporary print slowly lose its luminosity despite what I thought was sufficient protection. Always ask about pigment vs. dye inks when acquiring modern photographs!
Beyond the Print: Preserving Negatives and Transparencies
For many collectors of photography, the prints are only one part of the story. Negatives (film, glass plates) and transparencies (slides, chromes) are the original image-bearing materials and often hold immense historical and artistic value. Their preservation requires its own specialized considerations, distinct from paper prints.
- Environmental Control: Just like prints, negatives and transparencies thrive in cool, dry, and stable conditions. High heat can cause film to buckle, distort, or accelerate dye fading. High humidity can lead to mold growth on emulsions, ferrotyping (sticking to adjacent surfaces), or the dreaded "vinegar syndrome" (for acetate films), where the film literally eats itself. A consistent environment of around 18°C (65°F) and 30-40% RH is often recommended, and even colder storage is ideal for long-term preservation of color materials.
- Archival Enclosures: Never store negatives or transparencies in acidic paper sleeves or PVC plastic pages, which will off-gas harmful chemicals. Use only archival-grade materials:
- Polyester (Mylar/Polypropylene) Sleeves: These inert plastics provide physical protection, allow for safe viewing, and prevent dust and fingerprints.
- Acid-Free Paper Envelopes: Specifically designed for photographic materials, these offer a buffered, breathable environment and protect from light.
- Archival Boxes: Store sleeved negatives in acid-free, lignin-free boxes, either horizontally in flat-bottom boxes or vertically in drop-front boxes.
- Handling: Always handle negatives and transparencies by their edges, ideally with clean, lint-free cotton or nitrile gloves. The emulsion layer is incredibly delicate and susceptible to scratches, fingerprints, and dust. Avoid stacking directly on top of each other without proper interleaving.
- Digitization: For valuable negatives, consider high-resolution digital scans. While not a replacement for the physical original, digitization provides a critical backup and allows for wider access without risking the original. This is particularly important for deteriorating film formats.
Preserving Photographic Albums
Photographic albums, whether personal family heirlooms or curated historical collections, present a unique set of preservation challenges. Often, the very materials used in older albums—acidic paper, unstable glues, and PVC plastic sleeves—are actively detrimental to the photographs they contain. My heart aches for the countless faded, stained images I've seen, victims of well-meaning but ill-informed album choices.
- Deconstruction (if necessary): For severely compromised albums where the pages or binding are acidic, the best course of action might be careful deconstruction by a conservator. This allows individual photographs to be safely removed and re-housed in archival sleeves. It's a delicate process, as some photos may be firmly adhered.
- Archival Materials: If you're creating a new album or re-housing old photos, insist on acid-free, lignin-free paper for pages and inert polyester (Mylar) sleeves for individual prints. Avoid magnetic albums or any self-adhesive pages, as their glues are almost universally destructive. Labels should be written with archival pens or soft-lead graphite pencils.
- Storage Environment: Store albums flat in acid-free boxes within a stable, cool, and dry environment. Avoid stacking too many albums, as weight can cause damage to lower volumes. Rotational viewing can also reduce light exposure to delicate images.
Displaying Historic Photographs: Balancing Visibility and Vulnerability
Displaying historic photographs, with their often-fragile emulsions and unique chemical compositions, presents a particular challenge. The impulse to share their beauty and history must always be tempered by an understanding of their extreme vulnerability, especially to light.
- Extreme Light Limitation: For many historic photographic processes (e.g., albumen prints, salt prints, cyanotypes, early color processes), light is the ultimate enemy. Their inherent chemistry makes them far more susceptible to fading than modern pigment prints. Conservators often recommend very low light levels (e.g., 30-50 lux) and strictly limited display periods.
- Rotational Display is Critical: For truly valuable or highly sensitive historic photographs, rotational display is not just a recommendation but a necessity. Display a piece for a few months a year, then return it to dark, archival storage. This dramatically reduces the cumulative light exposure over its lifetime, preserving its delicate tones and details for future generations. It's a "now you see it, now you don't" approach, but it's vital for longevity.
- UV-Filtering Glazing: As with all works on paper, museum-quality UV-filtering glass or acrylic is non-negotiable. However, for historic photographs, even the best UV glazing offers only partial protection against the full spectrum of light damage. It reduces the rate of decay but doesn't halt it entirely.
- Framing and Mounting: Use only archival, acid-free, lignin-free materials for mats and backing boards. Ensure the photograph is hinged with conservation-grade materials and is never in direct contact with the glazing. Any mounting should be entirely reversible. Avoid dry mounting or permanent adhesives, which can cause irreparable damage.
A Glimpse into History: Unique Needs of Early Photographic Processes
The world of historic photography, my friends, is truly vast, breathtakingly beautiful, and endlessly fascinating. But these extraordinary pieces, unlike many modern counterparts, demand an even more specialized, almost reverent, level of care, precisely due to their incredibly unique and often delicate chemical compositions. It’s exactly like collecting rare, iridescent butterflies – undeniably beautiful, but, oh, so incredibly fragile, and requiring a gentle, informed hand to preserve their fleeting magic. I still get chills encountering a perfectly preserved daguerreotype; it's like stepping back in time, and the weight of that history demands profound respect and vigilance.
- Daguerreotypes, Ambrotypes, Tintypes: These exquisite, early photographic marvels—daguerreotypes with their mirrored surfaces, ambrotypes shimmering on glass, and tintypes etched onto metal—are incredibly, profoundly fragile, often encased within their original, protective housings. My most urgent advice: never, under any circumstances, attempt to remove them from this original housing; it is an integral part of their preservation. They are highly susceptible to not just physical damage, but also tarnish, scratching, and the insidious creep of moisture. The best you can do? Store them upright in sturdy archival boxes, within a supremely stable, dark, and dry environment. Think of their original cases as their tiny, invaluable coffins of protection. They are time capsules, and their original seals should be treated with almost sacred reverence. These ambrotypes and tintypes, in particular, are examples of the collodion wet plate process, which produced images directly on glass or metal. The collodion emulsion layer is incredibly fragile, akin to a delicate film of paint on a rigid support. Any attempt to clean or handle them without specialized training can result in irreversible scratches, flaking, or the complete loss of the image. Their fragility demands a truly hands-off approach, prioritizing the integrity of their original enclosure above all else.
- Albumen Prints: Ah, the quintessential photographic print of the 19th century, often possessing a rich, warm tone. But these beautiful prints, with their delicate albumen (egg white) binder, are remarkably vulnerable. Their emulsion can tragically crack, yellow, and become heartbreakingly brittle, especially under the relentless assault of light exposure and wildly fluctuating humidity. They are also notoriously prone to 'silvering' – a subtle, yet disfiguring metallic sheen that often appears in their darker areas over time. Their beauty is matched only by their fragility. I once inherited a stunning albumen portrait, but the delicate surface was tragically marred by hairline cracks, a silent testament to years of environmental neglect. It was a poignant lesson in their inherent delicacy.
- Salt Prints: As one of the earliest, pioneering photographic processes, salt prints possess a unique, often understated beauty, frequently characterized by a warm, reddish-brown tone. However, their historical significance is coupled with extreme vulnerability. They are profoundly susceptible to light fading – almost a given without stringent light control – and constant chemical degradation, a quiet, internal battle against their own composition. These are truly precious, delicate pieces of photographic history. To preserve them, you are not just protecting an image; you are safeguarding a fragile moment in the very dawn of photography.
- Cyanotypes: Instantly recognizable by their distinctive, almost ethereal Prussian blue color, cyanotypes hold a special place. While they might seem relatively stable to light initially, a deceptive resilience, let me assure you, prolonged, relentless exposure will, inevitably, cause fading – that deep blue slowly softening into a paler ghost of its former self. Furthermore, they are surprisingly susceptible to alkaline environments, where even a slight pH shift can tragically bleach that iconic blue color. They are a vivid reminder that even seemingly robust processes have their subtle, critical vulnerabilities. I once witnessed the subtle, yet irreversible, lightening of a cherished cyanotype after it was displayed near a newly painted wall – a silent bleaching, a powerful lesson in unseen chemical threats.
- Platinum and Palladium Prints: Ah, the aristocrats of the photographic world! Platinum and palladium prints are, with good reason, considered exceptionally stable and inherently archival. Their secret? They utilize noble metals—platinum or palladium—beautifully embedded directly into the paper fibers, rather than resting in a delicate emulsion on the surface. This remarkable composition makes them dramatically less susceptible to fading or chemical degradation compared to almost any other process. However, and this is crucial, while they resist chemical attack, they are still, undeniably, paper, and thus absolutely require robust protection from physical damage (creases, tears!) and, like all art, should be shielded from extreme environmental fluctuations. Even royalty needs its guards. Their stability is a blessing, but not an excuse for carelessness; physical damage can still be devastating.
Understanding these historical nuances allows for a truly informed approach to their preservation.
Protecting Your Investment: Insurance and Documentation
As a collector, my friends, your artworks are so much more than mere objects of beauty; they are, quite often, significant financial investments, embodying both passion and prudent foresight. Beyond the physical, almost sacred, act of preservation, it is profoundly prudent to consider their financial protection and, crucially, to maintain meticulous, unimpeachable records. I'll admit, this is often the less glamorous, more administrative side of collecting, but let me tell you, it offers an immense, almost luxurious, peace of mind—a robust safety net for your deepest passions. Trust me on this one; I learned this lesson, perhaps the hard way, after a minor, unexpected incident that suddenly brought the pragmatic, practical side of collecting into painfully sharp focus. It’s an investment in your future tranquility. Neglecting this aspect is akin to owning a priceless vintage car but forgetting to insure it – a risky gamble with profound potential for regret.
Appraisals and Insurance
Just as you insure your home or car, your art collection warrants protection. Accidents, theft, or unforeseen damage can be devastating, both emotionally and financially.
- Professional Appraisals: Periodically have your collection appraised by a qualified art appraiser. This establishes current market values, which is essential for insurance purposes and estate planning. Values can fluctuate, so stay updated. Many experts suggest a re-appraisal every 3-5 years, or if there's been a significant change in the artist's market or your collection's value. It’s like a regular check-up for your art’s financial health. For a deeper dive into this crucial process, consider our guide on understanding art appraisals: what every collector needs to know. I learned the importance of this after a piece I owned unexpectedly appreciated in value, and my insurance coverage was woefully inadequate for its new market price. A silent, financial fright!
- Specialized Art Insurance: This is not merely a recommendation; it is, in my experienced opinion, an absolute necessity. Standard homeowner's insurance policies, bless their generic hearts, often have woefully limited coverage for fine art, and their deductibles or payout limits might be tragically inadequate for your treasured pieces. This is where you need to seek out specialized art insurance providers, those who truly, deeply understand the unique risks and nuanced vulnerabilities associated with collecting. These bespoke policies often offer dramatically broader coverage (think "all-risk" policies, which, wonderfully, cover almost anything unless specifically excluded) and boast specialized claims handling by experts who genuinely comprehend the intricacies of art damage and valuation. It's not just insurance; it's a non-negotiable, tailored safety net for your unique, irreplaceable collection. Trust me, the peace of mind is immeasurable, especially when those unforeseen moments arrive, as they inevitably do.
- Agreed Value vs. Actual Cash Value: When selecting an art insurance policy, pay close attention to the valuation method. An agreed value policy is generally preferable for fine art. This means you and the insurer agree on a specific value for each piece before a loss occurs, and that's the amount you'll receive if the artwork is damaged or stolen. This removes ambiguity and potential disputes during a claim. An actual cash value (ACV) policy, common for other types of property, pays out the replacement cost minus depreciation, which is almost never appropriate for fine art, as art typically appreciates. Always opt for agreed value whenever possible.
- Agreed Value vs. Actual Cash Value: When selecting an art insurance policy, pay close attention to the valuation method. An agreed value policy is generally preferable for fine art. This means you and the insurer agree on a specific value for each piece before a loss occurs, and that's the amount you'll receive if the artwork is damaged or stolen. This removes ambiguity and potential disputes during a claim. An actual cash value (ACV) policy, common for other types of property, pays out the replacement cost minus depreciation, which is almost never appropriate for fine art, as art typically appreciates. Always opt for agreed value whenever possible.
- Choosing an Appraiser: Asking the Right Questions: When seeking an appraisal, always choose a qualified appraiser who specializes in the type of art you own (e.g., works on paper, contemporary art). Look for accreditations from reputable organizations such as the Appraisers Association of America (AAA), the American Society of Appraisers (ASA), or the International Society of Appraisers (ISA). Their expertise ensures an accurate and defensible valuation. Don't be shy about asking key questions: What are your qualifications and accreditations? Do you specialize in works on paper or this particular medium/era? Can you provide a sample appraisal report? What is your fee structure (hourly, flat rate, not a percentage of value)? Can you provide references? A transparent appraiser will be happy to answer these, giving you confidence in their expertise and methodology.
- Choosing an Appraiser: Asking the Right Questions: When seeking an appraisal, always choose a qualified appraiser who specializes in the type of art you own (e.g., works on paper, contemporary art). Look for accreditations from reputable organizations such as the Appraisers Association of America (AAA), the American Society of Appraisers (ASA), or the International Society of Appraisers (ISA). Their expertise ensures an accurate and defensible valuation. Don't be shy about asking key questions: What are your qualifications and accreditations? Do you specialize in works on paper or this particular medium/era? Can you provide a sample appraisal report? What is your fee structure (hourly, flat rate, not a percentage of value)? Can you provide references? A transparent appraiser will be happy to answer these, giving you confidence in their expertise and methodology.
Meticulous Documentation
Comprehensive records are invaluable for insurance claims, provenance, resale, and even your own enjoyment and understanding of your collection.
Digital Archiving Best Practices: Future-Proofing Your Documentation
In our increasingly digital world, creating robust digital archives of your art documentation is just as important as the physical records. A well-structured digital archive ensures accessibility, searchability, and provides a crucial backup against physical loss or damage. It's about building a digital fortress around your collection's story.
- High-Resolution Scans/Photographs: Beyond documenting the artwork itself, scan or photograph all physical documents (invoices, certificates, condition reports) at high resolution. Ensure image files are well-lit, in focus, and color-accurate. Save in archival formats like TIFF or uncompressed JPEG for primary files, and use compressed JPEGs for everyday viewing.
- Consistent File Naming and Metadata: Develop a consistent file naming convention (e.g., "ArtistName_Title_Year_InventoryNumber_DocumentType.tif"). Embed comprehensive metadata (artist, title, date, medium, dimensions, provenance, condition, location, appraisal date, etc.) directly into the image and document files using software that supports IPTC/XMP standards. This makes your files incredibly searchable and self-describing.
- Redundant Backups: This cannot be stressed enough. Store your digital archives in at least three different locations: on your primary computer, on a dedicated external hard drive, and in a secure cloud storage service. This "3-2-1 rule" (3 copies, 2 different media, 1 offsite) offers robust protection against hardware failure, theft, or disaster.
- Version Control: If you update condition reports or add new documentation, maintain previous versions in your archive. This provides a clear audit trail of changes over time, invaluable for conservation or provenance research.
- Secure Access: Protect your digital archives with strong passwords and, for cloud services, two-factor authentication. If sharing access, ensure permissions are carefully managed.
- Condition Reports: This is your artwork’s medical chart, its ongoing biography. Keep a detailed, almost forensic, record of the artwork's condition upon acquisition, meticulously noting any existing damages, previous repairs, or conservation history. This should include rich, descriptive prose and, crucially, high-resolution photographs captured from various angles, almost as if you’re creating a visual passport. Specifically, document the front (recto) and back (verso) of the artwork, noting any artist signatures, inscriptions, or gallery labels. Include close-ups of edges, corners, and any existing condition issues like creases, tears, or discoloration. Update this record diligently if any changes occur, no matter how seemingly minor; early detection is a conservator’s best friend. I, for one, keep both digital and physical copies, redundantly backed up, just in case. For an even more robust, future-proof approach, consider dedicated art collection management software or apps that allow you to centralize all this vital data, complete with images, automated reminders for appraisals or rotations, and even locations. It’s an upfront investment of time, yes, but, my friends, it’s an absolute lifesaver for organization, provenance tracking, and, ultimately, for your profound peace of mind. I once had a small tear in a print that, because I had a detailed condition report, was immediately identifiable as pre-acquisition damage, saving me from a potential headache during a later resale.
- Purchase Records: These are your legal deeds, your certificates of lineage. Meticulously maintain copies of invoices, original certificates of authenticity, and any pertinent correspondence related to the acquisition. These aren't just paper; they are your unimpeachable legal proofs of ownership and, critically, of authenticity. My advice? Scan them, photograph them, and, for goodness sake, back them up redundantly across multiple secure platforms! Think of it as creating an ironclad digital and physical fortress around your investment. I learned this when an unforeseen situation required me to prove ownership and authenticity quickly; without my meticulously organized records, it would have been a far more stressful and complicated affair.
- Provenance: This is the artwork's fascinating life story, its lineage, and documenting its ownership history (provenance) as thoroughly as humanly possible is an act of profound respect and strategic foresight. A well-documented provenance adds immense, often immeasurable, value and authenticity to your piece, gracefully tracing its remarkable journey through time, from the artist's hand through successive owners. It’s a compelling narrative that enriches the artwork itself.
- Photographs: Become your artwork's personal, meticulous archivist. Take high-resolution, professional-grade photographs of your artwork, ideally both framed and, if safely possible, unframed, captured from a multitude of angles. These aren't just pretty pictures; they are absolutely crucial for insurance claims, for indisputable identification in case of loss or theft, and for diligent condition monitoring. Think of them as irrefutable visual benchmarks.
- Conservation Records: These are the artwork's medical history. Keep every single report, every nuanced recommendation, and every meticulous invoice from any professional conservation work ever performed on the piece. This documentation is utterly vital, providing invaluable context for future care, informing potential buyers, and protecting your investment.
- Digital Backups and Security: Let me underscore this with utmost urgency: crucially, relentlessly, back up all your digital documentation. This isn't optional; it's a fundamental safeguard. Leverage robust cloud storage solutions, utilize secure external hard drives, or employ dedicated online platforms to offer multi-layered protection against the crushing devastation of data loss. And, please, for anything sensitive—financial records, personal details—always encrypt that information. Think of this meticulous digital hygiene as constructing an impregnable digital vault for your art's entire, irreplaceable life story. I had a hard drive crash once, a moment of digital terror, and only my diligent backups saved me from losing years of irreplaceable records for my collection.
- Home Inventory for Art: This is your command center, your artistic nerve hub. Seriously, consider creating a dedicated art inventory, either digitally (using specialized software or even a meticulously crafted simple spreadsheet) or physically. This intelligent system centralizes all your critical documentation, making it delightfully easy to track the condition, current value, and precise location for each and every piece in your cherished collection. It’s a bit of work upfront, a small investment of your precious time, but, my friends, it offers a monumental payoff in clarity, control, and profound peace of mind. For those truly serious about managing a growing collection, dedicated art collection management software or apps like Articheck, Collectrium, or even a robust personal database, allow you to centralize all this data, complete with images, automated reminders for appraisals or rotations, and even locations, truly streamlining your stewardship and making you the master of your artistic domain. My own art inventory system has saved me from countless moments of frantic searching and forgotten details, a testament to its quiet power.
- Advanced Digital Inventory Features: Modern art collection management software offers far more than just basic record-keeping. Look for features like: QR code integration for quick access to an artwork's digital file; environmental monitoring linkages that automatically log temperature and humidity data; conservation treatment tracking with before/after photos and conservator notes; location tracking for pieces on loan or in storage; and appraisal reminder notifications. These robust systems transform your documentation from a static list into a dynamic, proactive stewardship tool, centralizing everything you need to know about your collection's health and history. I can't tell you how many times this system has saved me from frantic searches for a specific document or prevented me from forgetting a planned rotation for a sensitive piece.
Digital Archiving Best Practices: Future-Proofing Your Documentation
In our increasingly digital world, creating robust digital archives of your art documentation is just as important as the physical records. A well-structured digital archive ensures accessibility, searchability, and provides a crucial backup against physical loss or damage. It's about building a digital fortress around your collection's story.
- High-Resolution Scans/Photographs: Beyond documenting the artwork itself, scan or photograph all physical documents (invoices, certificates, condition reports) at high resolution. Ensure image files are well-lit, in focus, and color-accurate. Save in archival formats like TIFF or uncompressed JPEG for primary files, and use compressed JPEGs for everyday viewing.
- Consistent File Naming and Metadata: Develop a consistent file naming convention (e.g., "ArtistName_Title_Year_InventoryNumber_DocumentType.tif"). Embed comprehensive metadata (artist, title, date, medium, dimensions, provenance, condition, location, appraisal date, etc.) directly into the image and document files using software that supports IPTC/XMP standards. This makes your files incredibly searchable and self-describing.
- Redundant Backups: This cannot be stressed enough. Store your digital archives in at least three different locations: on your primary computer, on a dedicated external hard drive, and in a secure cloud storage service. This "3-2-1 rule" (3 copies, 2 different media, 1 offsite) offers robust protection against hardware failure, theft, or disaster.
- Version Control: If you update condition reports or add new documentation, maintain previous versions in your archive. This provides a clear audit trail of changes over time, invaluable for conservation or provenance research.
- Secure Access: Protect your digital archives with strong passwords and, for cloud services, two-factor authentication. If sharing access, ensure permissions are carefully managed.
- Advanced Digital Inventory Features: Modern art collection management software offers far more than just basic record-keeping. Look for features like: QR code integration for quick access to an artwork's digital file; environmental monitoring linkages that automatically log temperature and humidity data; conservation treatment tracking with before/after photos and conservator notes; location tracking for pieces on loan or in storage; and appraisal reminder notifications. These robust systems transform your documentation from a static list into a dynamic, proactive stewardship tool, centralizing everything you need to know about your collection's health and history. I can't tell you how many times this system has saved me from frantic searches for a specific document or prevented me from forgetting a planned rotation for a sensitive piece.
- Digital Backups and Security: Let me underscore this with utmost urgency: crucially, relentlessly, back up all your digital documentation. This isn't optional; it's a fundamental safeguard. Leverage robust cloud storage solutions, utilize secure external hard drives, or employ dedicated online platforms to offer multi-layered protection against the crushing devastation of data loss. And, please, for anything sensitive—financial records, personal details—always encrypt that information. Think of this meticulous digital hygiene as constructing an impregnable digital vault for your art's entire, irreplaceable life story. I had a hard drive crash once, a moment of digital terror, and only my diligent backups saved me from losing years of irreplaceable records for my collection.
My First Encounter with Paper's Quirks (Why Paper Needs TLC)
I remember years ago, I had a lovely little print – nothing fancy, just something I loved – hanging in a spot I thought was perfect. Bright, cheerful, lots of natural light. Fast forward a year or two, and I noticed something subtle but heartbreaking: the vibrant blues were duller, and the paper itself had taken on a slightly sickly yellow hue around the edges. My heart sank, a knot of regret forming. I'd inadvertently committed one of the cardinal sins of paper care: exposing it to too much unfiltered light. It was a classic beginner's mistake, born of ignorance and enthusiasm, but it taught me a profound lesson about the quiet fragility of paper and the insidious, cumulative power of light damage. That subtle fading was a permanent scar, a reminder of my early, well-meaning but ill-informed, stewardship.
Paper, you see, isn't as robust as a stretched canvas or a sturdy sculpture. It's organic, often made from wood pulp, cotton rag, linen, or even more exotic fibers, and its specific composition dictates some of its inherent vulnerabilities. Each fiber reacts differently to its environment, making some papers more resilient and others heartbreakingly fragile. Think of it like a delicate flower; it thrives under certain conditions and wilts under others, and if you're not paying attention, you'll end up with a wilting piece of art. Understanding these vulnerabilities – and the unique characteristics of different paper types – is the first step in becoming a truly responsible collector, moving from a mere owner to a true steward of beauty.
The Foundation: Understanding Paper Itself
Before we dive into external threats, let's talk about the very material that forms the heart of your collection: paper. It's not just a blank canvas; it's an active participant in its own preservation (or degradation). Knowing a little about paper science can save you a lot of heartache.
What Makes Paper Vulnerable?
Paper, at its core, is a tapestry of organic cellulose fibers – whether from the humble wood pulp (often shorter fibers, less pure, and prone to acidity if not treated), resilient cotton rag (long, pure cellulose fibers, inherently strong and stable), elegant linen (similarly strong and durable, often found in older, high-quality papers), or even more exotic options like kozo (mulberry) or abaca (long, strong fibers yielding transparent, flexible Asian papers). Each fiber type bestows unique characteristics and vulnerabilities upon the paper: cotton and linen rag papers are generally the most stable and inherently acid-free, while untreated wood pulp papers, common in the 19th and early 20th centuries, are highly susceptible to self-destruction due to lignin content and residual processing chemicals. Understanding these fundamental compositions helps you appreciate the inherent fragility or resilience of a given artwork. These fibers are incredibly responsive to their environment, almost like tiny sponges. They're hygroscopic, which is a fancy way of saying they greedily absorb and then reluctantly release moisture from the air, leading to a constant cycle of expansion and contraction. This perpetual dance, especially when exacerbated by erratic environmental fluctuations, puts immense stress on the paper's delicate structure, eventually causing those heartbreaking buckles, cockles, and even tears. It’s like watching a living thing breathe, but with potentially damaging consequences if the 'air' it's breathing isn't stable. My own 'aha!' moment came when I saw a beautiful, framed drawing suddenly develop a subtle ripple across its surface after a particularly humid summer. The paper was literally trying to adapt, and it was stressing itself out. That visual 'breathing' of the paper was a profound lesson in its inherent, almost biological, responsiveness.
Beyond these physical stresses, paper wages a silent war against chemical degradation. The acids inherent in many papers (especially the older, wood-pulp-based varieties, a legacy of less refined manufacturing processes) and insidious environmental pollutants relentlessly break down those cellulose fibers. This leads to the dreaded yellowing, increased brittleness, and an insidious loss of structural integrity – a process conservators grimly, but accurately, refer to as 'slow fires.' These chemical attacks quietly, relentlessly, eat away at the beauty you cherish.
- Sizing and its Role: Beyond the fibers, paper also contains 'sizing'—substances added during manufacturing to control absorbency and improve printability, much like a primer on a canvas. Traditional sizing often involved gelatin, animal glues, or starch. While historically effective, some sizing agents can become brittle, discolored, or even become a food source for pests over time, especially in fluctuating humidity. Modern archival papers use synthetic, stable sizing agents that resist degradation and do not introduce acidity, providing a more robust and predictable foundation for your artworks. The choice of sizing, though invisible, plays a critical role in the paper's long-term stability and its interaction with mediums and environmental factors. And, as if they weren't enough, light acts as a merciless accelerant to these chemical reactions.
- Sizing and its Role: Beyond the fibers, paper also contains 'sizing'—substances added during manufacturing to control absorbency and improve printability, much like a primer on a canvas. Traditional sizing often involved gelatin, animal glues, or starch. While historically effective, some sizing agents can become brittle, discolored, or even become a food source for pests over time, especially in fluctuating humidity. Modern archival papers use synthetic, stable sizing agents that resist degradation and do not introduce acidity, providing a more robust and predictable foundation for your artworks. The choice of sizing, though invisible, plays a critical role in the paper's long-term stability and its interaction with mediums and environmental factors. And, as if they weren't enough, light acts as a merciless accelerant to these chemical reactions.
Understanding Paper Grain Direction: A Subtle but Significant Detail
Here's a subtle detail that can profoundly impact the long-term stability and aesthetic of your paper artworks, especially when framing: paper grain direction. Just like wood, paper has a "grain," which refers to the alignment of its cellulose fibers. This alignment happens during the paper-making process as the fibers settle. While often invisible to the naked eye, the grain direction dictates how the paper will naturally expand and contract with changes in humidity, and how it will react to pressure or stress.
- Expansion and Contraction: Paper expands more across the grain than with it. If a mat or backing board is cut with its grain running in a different direction to the artwork's grain, or if the artwork is hinged improperly, this differential movement can create internal stresses, leading to buckling, cockling, or even tearing over time. A skilled framer will always try to align the grain of the mat and backing board with the grain of the artwork.
- Aesthetic Impact: For unbound works or those intended to be handled, understanding grain can also affect how the paper drapes or folds. A sheet folded with the grain will have a smoother, cleaner crease than one folded against it.
- Testing for Grain: You can often determine grain direction by gently bowing the paper in both directions; it will offer less resistance and form a smoother curve when bowed with the grain. A conservator or experienced framer will always assess grain direction as a foundational step in conservation and framing.
The pH Factor: Acid-Free vs. Acidic Paper
When we utter the hallowed phrase "archival quality," often the first thing that springs to mind is "acid-free." And for profoundly good reason. The pH scale, a spectrum from 0 (most acidic) to 14 (most alkaline) with 7 representing neutrality, is, quite literally, your paper's best friend or its worst enemy. Most wood-pulp papers created before the late 20th century are startlingly acidic – an unfortunate byproduct of their original manufacturing. These papers are, in essence, programmed for self-destruction over time, a phenomenon that underpins the 'slow fires' I mentioned. In stark contrast, truly archival papers are meticulously processed to be acid-free (maintaining a pH of 7 or higher) and often contain a crucial alkaline buffer, such as calcium carbonate or magnesium carbonate. This buffer acts as a proactive shield, neutralizing any future acids that might try to sneak in from the environment, offering a built-in defense against future degradation. My advice, hard-won through experience, is always to seek out materials that are not only rigorously acid-free but also lignin-free for anything that dares to touch your precious artworks. Lignin, a complex polymer naturally found in wood pulp, is a particular villain; it degrades relentlessly, turning yellow over time, and aggressively contributes to paper's insidious self-destruction, often releasing further acidic compounds as it breaks down. This isn't just theory; it's a fundamental understanding that will profoundly change how you care for your collection, differentiating truly stable materials from those that might look innocent but are silently harming your art. It’s like choosing a health plan for your art: acid-free and lignin-free are the absolute non-negotiables.
- Alkaline Reserve: The Built-in Shield: Beyond merely being "acid-free" (a neutral pH of 7), truly archival papers often contain an alkaline reserve or "buffer," typically calcium carbonate or magnesium carbonate. This chemical additive acts as a powerful, proactive shield, neutralizing any future acids that might try to sneak in from the environment (e.g., atmospheric pollution, off-gassing from non-archival materials). It's like a self-defense mechanism for your paper, offering a built-in capacity to resist acidic degradation for decades, significantly extending its lifespan. Always look for papers and boards that explicitly state they have an alkaline reserve; it's a mark of superior, long-term preservation quality.
- Historical Paper-Making Defects: It's also worth acknowledging that older papers, particularly those made before modern quality controls, can harbor inherent flaws that impact their longevity. These might include residual metals from pulping processes (which can catalyze foxing), uneven distribution of sizing, or even microscopic impurities from raw materials. While you can't change these historical facts, recognizing that such inherent defects exist reinforces the importance of meticulous environmental control and professional conservation for antique works, as they often wage a quiet, internal battle against their own composition.
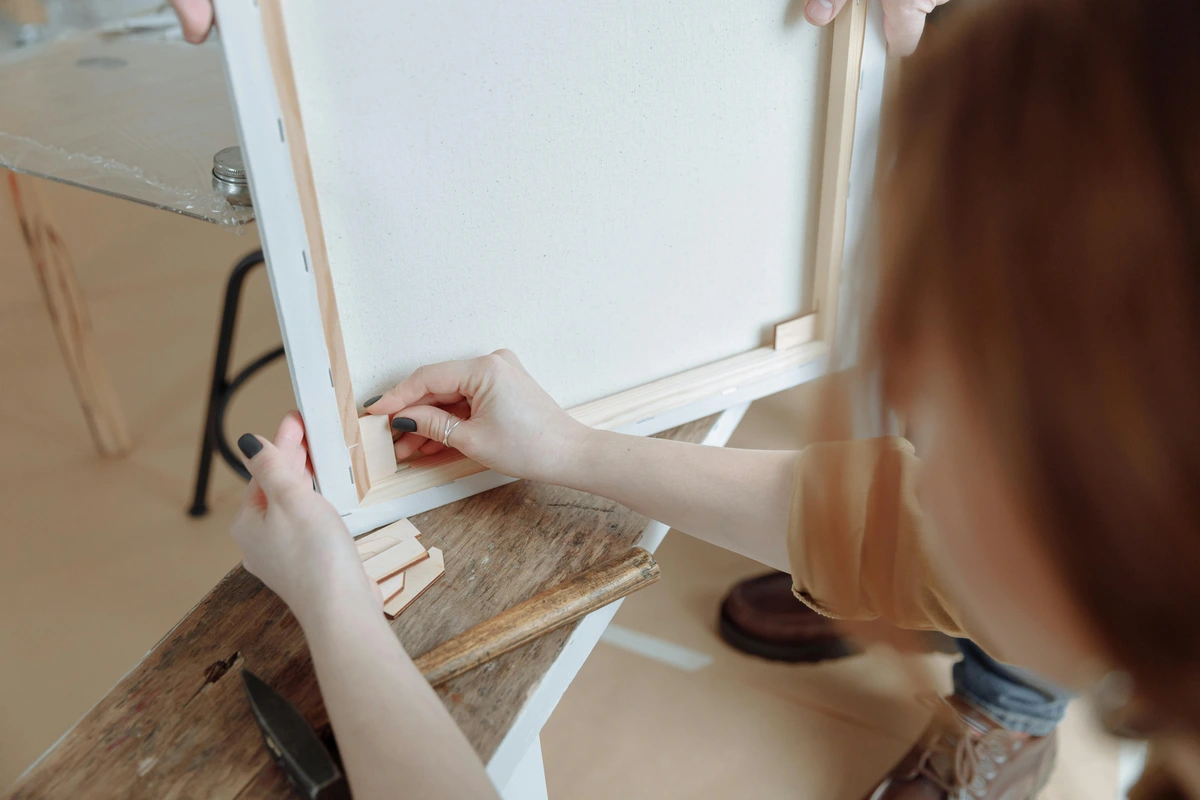
## The Unseen Enemies: Light, Humidity, and Temperature
Environmental Monitoring: Your Secret Weapon
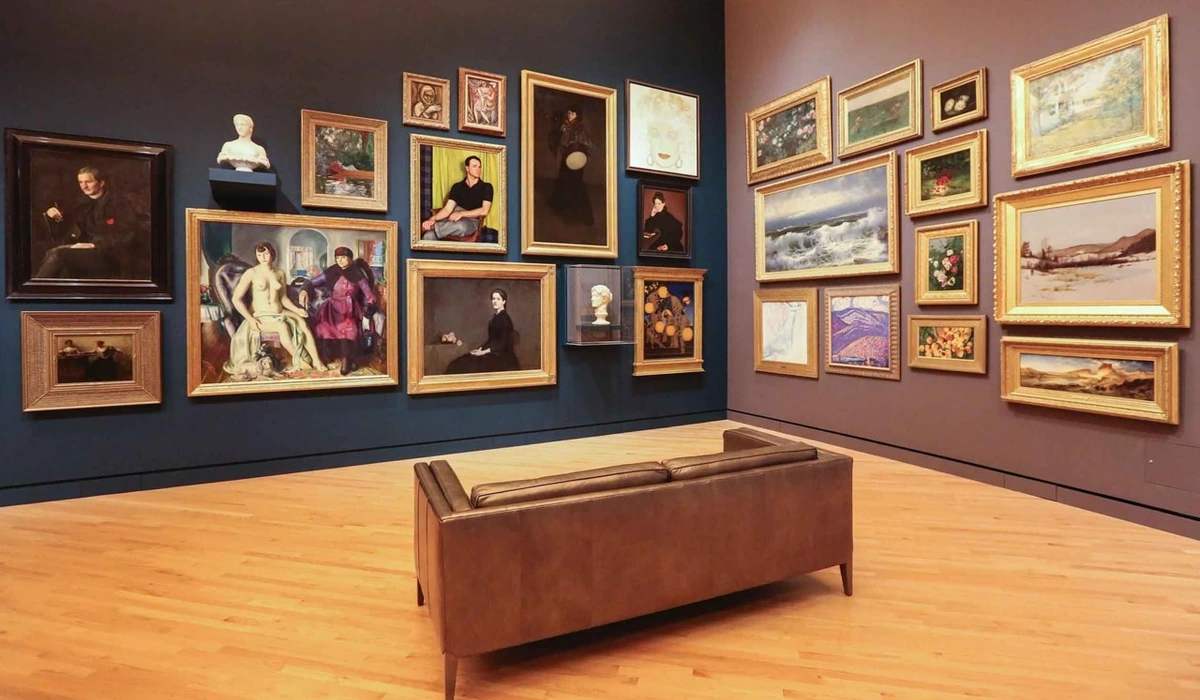
Before diving into the specifics of each enemy, let's talk about how you fight them: with information. I've found that one of the most empowering steps a collector can take is to actively monitor their art's environment. You can't fix what you don't know is broken, right?
Before diving into the specifics of each enemy, let's talk about how you fight them: with information. I've found that one of the most empowering steps a collector can take is to actively monitor their art's environment. You can't fix what you don't know is broken, right?
- Hygrometers & Thermometers: These simple devices measure relative humidity (RH) and temperature. As I mentioned earlier, a good quality hygrometer is invaluable. Place them strategically near your artworks – in display rooms, within storage boxes, or in flat files. This gives you real-time data on the micro-climates your art inhabits.
- Monitoring During Travel or Temporary Display: The greatest environmental risks often occur when artworks are moved or temporarily displayed outside of their stable home environment. For these situations, compact, battery-operated data loggers that can fit inside travel crates or temporary display cases are invaluable. They provide a continuous record of temperature and humidity during transit or exhibition, offering critical insights into any environmental stresses the artwork experienced. This data is essential for assessing risk and for future planning, ensuring that even fleeting moments of display don't compromise long-term preservation.
- UV Meters (less common for home use, but good to know): While professional conservators use specialized light meters to measure lux levels and UV radiation, knowing that different light sources emit different amounts of UV (which we'll discuss) is crucial for your display choices. Your eyes can’t see UV, but your art definitely feels it.
- Data Loggers: For a more comprehensive, long-term understanding of your environment, consider investing in data loggers. These small devices continuously record temperature and humidity over time, allowing you to identify trends, spikes, and consistent problems that a spot check with a hygrometer might miss. It's like having a silent, diligent assistant tracking your micro-climate.
- Monitoring During Travel or Temporary Display: The greatest environmental risks often occur when artworks are moved or temporarily displayed outside of their stable home environment. For these situations, compact, battery-operated data loggers that can fit inside travel crates or temporary display cases are invaluable. They provide a continuous record of temperature and humidity during transit or exhibition, offering critical insights into any environmental stresses the artwork experienced. This data is essential for assessing risk and for future planning, ensuring that even fleeting moments of display don't compromise long-term preservation.
- Data Loggers: For a more comprehensive, long-term understanding of your environment, consider investing in data loggers. These small devices continuously record temperature and humidity over time, allowing you to identify trends, spikes, and consistent problems that a spot check with a hygrometer might miss. It's like having a silent, diligent assistant tracking your micro-climate.
Professional Environmental Control Systems for Collections
While individual hygrometers and data loggers are excellent for localized monitoring, serious collectors with significant investments, or those planning dedicated art spaces, might consider professional-grade environmental control systems. These go beyond simple residential HVAC to offer precise, centralized, and often automated climate management, mirroring museum standards.
- Integrated HVAC with Humidification/Dehumidification: These systems offer granular control over both temperature and relative humidity across an entire space. They can maintain tighter tolerances and react more quickly to external changes, providing a highly stable environment for sensitive collections. This is a significant investment but offers unparalleled protection.
- Building Envelope Considerations: For new construction or major renovations, working with architects and engineers experienced in museum-quality climate control is crucial. This involves specialized insulation, vapor barriers, and air sealing to minimize external influences and maintain internal stability efficiently.
- Remote Monitoring and Alert Systems: Professional systems often include sophisticated data logging with remote access and configurable alert thresholds. If temperature or humidity deviates outside the set parameters, you receive an immediate notification, allowing for prompt intervention. This offers immense peace of mind, especially for collections in unattended spaces.
Monitoring isn't about paranoia; it's about informed stewardship. It empowers you to make adjustments before silent damage becomes visible and irreversible.
Professional Environmental Control Systems for Collections
While individual hygrometers and data loggers are excellent for localized monitoring, serious collectors with significant investments, or those planning dedicated art spaces, might consider professional-grade environmental control systems. These go beyond simple residential HVAC to offer precise, centralized, and often automated climate management, mirroring museum standards.
- Integrated HVAC with Humidification/Dehumidification: These systems offer granular control over both temperature and relative humidity across an entire space. They can maintain tighter tolerances and react more quickly to external changes, providing a highly stable environment for sensitive collections. This is a significant investment but offers unparalleled protection.
- Building Envelope Considerations: For new construction or major renovations, working with architects and engineers experienced in museum-quality climate control is crucial. This involves specialized insulation, vapor barriers, and air sealing to minimize external influences and maintain internal stability efficiently.
- Remote Monitoring and Alert Systems: Professional systems often include sophisticated data logging with remote access and configurable alert thresholds. If temperature or humidity deviates outside the set parameters, you receive an immediate notification, allowing for prompt intervention. This offers immense peace of mind, especially for collections in unattended spaces.
It’s often the things you can’t immediately see that cause the most damage. I've learned this the hard way with many things in life, not just art (don't even ask me about my first attempt at baking sourdough). But when it comes to paper art, these environmental factors are truly the silent destroyers.
Light: The Silent Fader

Light, especially ultraviolet (UV) light, is, without exaggeration, paper's archenemy. It's the unseen force that causes pigments to drain away into oblivion, paper to sallow or brown like old parchment, and can even insidiously weaken the fibers, rendering your beloved artwork brittle and fragile. I used to think "indirect light" was some kind of magical shield, but even that, over time, can prove to be a treacherous foe. What I've come to understand, often through regrettable experience, is that it's not merely about direct sunlight; it's about the cumulative light dosage and the specific wavelengths relentlessly striking your art. Even visible light, over long periods, instigates a slow, inexorable degradation. Think of it as a drawn-out, inevitable sunburn for your cherished pieces. I once watched the vibrant cerulean in a cherished etching slowly soften to a faded sky blue over years, simply from a consistently bright, but never direct, room. It was a silent tragedy. For a more exhaustive understanding of light's profound, almost artistic impact, delve into our definitive guide to understanding light in art. Remember, for highly sensitive works like watercolors or historic documents, conservators often recommend maintaining exposure at no more than 50 lux (a measure of illuminance), and even less for extremely fragile items. Think of it like a daily dosage: too much, and the damage compounds relentlessly.
- Placement is paramount: Avoid direct sunlight at all costs. Seriously. Even strong ambient light can prove deeply problematic. Train your eye to see light as an energy source. Consider hanging your piece on an interior wall, far removed from windows, or in a room graced with softer, controlled lighting. If moving an artwork isn't an option, consider applying high-quality UV-filtering films to your windows. These transparent films can block a significant percentage of harmful UV rays, offering a layer of protection similar to conservation glazing. They come in various tints and levels of UV blocking, and a professional installation ensures seamless integration with your home's aesthetic, providing an essential, invisible shield. If moving an artwork isn't an option, consider applying UV-filtering films to your windows. These transparent films can block a significant percentage of harmful UV rays, offering a layer of protection similar to conservation glazing. It's also crucial to understand that different light sources emit wildly different amounts of UV. Incandescent bulbs, for example, emit very little UV, but they do generate heat – another silent destroyer over time. Fluorescents, unless specifically filtered, can unleash a torrent of UV, acting like miniature, relentless suns for your art. LEDs, generally, are a much safer bet, offering minimal UV output and significantly less heat, making them a preferred choice for gallery or home lighting. However, even within the world of LEDs, quality matters. Look for LEDs with a high Color Rendering Index (CRI) of 90 or above to ensure true color representation without distorting the artwork's original palette. Warm (2700K-3000K) or neutral (3500K-4000K) white LEDs are typically recommended, as cooler temperatures can subtly alter perceived colors, sometimes making warm tones appear dull or blues too intense. Understanding these nuances allows you to bathe your art in light that both enhances and protects, a delicate balance I've spent years refining. However, and this is crucial, remember that all light sources, even the safest ones, contribute to the total "lux hours" – a conservator's term for the cumulative light exposure an artwork receives over its lifetime, and a metric I've learned to track for my most cherished pieces. Every single photon counts, in the long run.
Beyond the Sun: Understanding Artificial Light Sources
While natural light is often the most potent source of harmful UV and visible light, artificial lighting also plays a critical role in your art's long-term health. Not all bulbs are created equal, and understanding their different emissions can help you make informed choices for your display.
- Incandescent Bulbs: These traditional bulbs emit light by heating a filament. They produce very little UV radiation, which is good. However, they generate a significant amount of heat, which can accelerate the degradation of paper and pigments over time, especially in enclosed fixtures or close proximity to artworks. They are also energy-efficient.
- Fluorescent Bulbs: Older fluorescent tubes are notorious for emitting high levels of UV radiation, making them a poor choice for art lighting unless specifically fitted with UV-filtering sleeves or covers. Even modern "full-spectrum" fluorescents can emit some UV. They also tend to have a "cooler" color temperature that can subtly alter the appearance of artwork.
- Halogen Bulbs: A type of incandescent, halogen bulbs produce a very bright, crisp light often favored for spotlighting art. They emit more UV than standard incandescents and also generate considerable heat. If used, they absolutely require UV filters and should be positioned far enough from the artwork to prevent heat buildup.
- LED (Light-Emitting Diode) Lighting: LEDs are generally considered the safest and most energy-efficient option for art lighting. High-quality LEDs emit virtually no UV or infrared (heat) radiation. Look for LEDs with a high Color Rendering Index (CRI of 90 or above) to ensure accurate color rendition. They offer versatile options for beam spread and dimming, allowing for precise control over light levels without compromising preservation. My own collection benefits immensely from carefully chosen LED track lighting, allowing the art to shine without suffering. The color temperature of your lighting, measured in Kelvin (K), also plays a subtle yet significant role. While often chosen for aesthetic reasons, a balanced color temperature ensures the artwork's colors are rendered faithfully. Avoid very cool, blue-toned lights (above 5000K) which can feel harsh and subtly distort certain pigments over time, potentially accelerating some forms of degradation, even if UV is filtered.
- Practical Application of 'Lux Hours': While a conservator might track 'lux hours' with scientific precision, as a collector, you can apply this concept pragmatically. Imagine your most sensitive watercolor. If it's displayed in a room consistently receiving 100 lux for 8 hours a day, that's 800 lux-hours daily. By using dimmers, drawing curtains, or rotating the piece to dark storage for half the year, you can significantly reduce that cumulative dose. For example, dimming the light to 50 lux for those 8 hours halves the daily dose to 400 lux-hours. Displaying it for only 6 months of the year further reduces the annual exposure by half. This proactive management of 'light dosage' is one of the most powerful, yet accessible, tools in a collector's arsenal for extending the vibrant life of their paper treasures. Remember, any light is additive, and there's no reset button once the damage is done.
- The magic of UV-protective glazing: This is where the alchemy of good framing truly comes into play. Always, always opt for museum-quality glass or acrylic meticulously designed to block a significant percentage of UV rays. And this isn't a one-size-fits-all solution; the technology has advanced significantly. You'll primarily encounter options like:
- Conservation Clear Glass/Acrylic: This blocks a respectable 97-98% of UV light. It's a solid, economical choice for fundamental UV protection, offering a significant leap in safety from standard glass.
- Anti-Reflective Glass/Acrylic (e.g., Museum Glass/Acrylic): This, my friends, is the undisputed gold standard. It not only blocks an impressive 99% of UV light but also boasts an optical coating that virtually eradicates reflections, rendering the glass almost invisible. It’s a substantial investment, I won't lie, but the profound difference in viewing experience and the unparalleled superior protection it bestows are, in my seasoned opinion, immeasurably worthwhile.
- Low-Iron Glass: For those seeking ultimate clarity without the anti-reflective coating, low-iron glass (often sold under brand names like "Optiwhite") significantly reduces the greenish tint common in standard glass, offering truer color rendition. While not primarily UV-blocking, it’s often combined with UV coatings. * Plexiglas (Acrylic): Lighter and shatter-resistant than glass, acrylic is ideal for larger works or in areas susceptible to earthquakes or curious children. High-quality acrylic also offers 99% UV protection, making it a robust and safe option, especially for high-traffic areas or pieces requiring frequent transport. Each type presents its unique blend of clarity, glare reduction, and weight considerations. It's an investment, yes, but it’s a non-negotiable one if you want those colors to sing for decades to come, to retain the artist's original intention. One final, often overlooked consideration for framed works is their sheer weight. Larger frames, especially those with museum glass, can be surprisingly heavy. Always ensure you're using appropriate, robust hanging hardware—like D-rings with specialized picture wire, or security hangers for very heavy pieces—installed directly into wall studs or using heavy-duty drywall anchors. Never underestimate the importance of secure hanging; a fall can be catastrophic, undoing years of diligent care in an instant. I once witnessed a priceless print come crashing down due to flimsy hardware, a heart-stopping moment that underscored the absolute necessity of robust installation. Don't skimp here; your future self (and the artwork) will thank you for preserving its original, luminous vibrancy.
Glass vs. Acrylic: Making the Right Glazing Choice
When it comes to the transparent barrier protecting your framed art, the choice between traditional glass and modern acrylic (often called Plexiglas) isn't just about cost or aesthetics; it involves crucial considerations for safety, weight, and environmental protection. Each has its strengths and weaknesses, and the "right" choice depends on your artwork, its display environment, and your priorities.
- Glass:
- Pros: Historically traditional, feels substantial, often offers superior scratch resistance (though some new acrylics compete), and can be more cost-effective for smaller sizes. High-quality museum glass provides excellent UV filtration and anti-reflective properties.
- Cons: Heavy, especially in larger sizes, posing risks for hanging and transport. Shatters into dangerous shards if broken, potentially damaging the artwork. Can be prone to condensation if ventilation is poor.
- Acrylic (Plexiglas):
- Pros: Significantly lighter than glass (up to 50% less), making it ideal for large works, seismic zones, or high-traffic areas where safety is a concern. It's shatter-resistant, flexing rather than breaking into sharp pieces. High-quality acrylic offers comparable (often 99%) UV protection and excellent anti-reflective coatings.
- Cons: More susceptible to static electricity, which can attract dust or, for very delicate particulate media like pastel or charcoal, literally lift pigment off the surface (though anti-static acrylics exist). It can be more easily scratched than glass (again, scratch-resistant acrylics are available). Generally more expensive than basic glass.
- Making the Choice: For very large, valuable, or publicly displayed works, the safety and weight advantages of archival acrylic often outweigh its higher cost and scratch susceptibility. For smaller, private pieces where weight isn't an issue, museum-quality glass remains an excellent choice. Always prioritize UV-filtering properties regardless of material. I've switched to acrylic for many of my larger pieces, the peace of mind knowing they won't shatter during an unexpected bump is invaluable.
- Light Dosage and Rotational Display: Even with the best UV protection, cumulative light exposure still takes its toll. For particularly sensitive or valuable works, consider implementing a rotational display strategy. Display the artwork for 6-12 months, then move it to dark, archival storage for a similar period. This significantly reduces its total "lux hours"—a conservator's term for the cumulative light exposure an artwork receives over its lifetime—and extends its vibrant life. It's a strategy commonly used by museums, and one I've adopted for my most cherished pieces. I think of it as giving my art a much-needed 'light sabbatical,' allowing its colors to rest and recharge in darkness.
Practical Application of 'Lux Hours':
While a conservator might track 'lux hours' with scientific precision, as a collector, you can apply this concept pragmatically. Imagine your most sensitive watercolor. If it's displayed in a room consistently receiving 100 lux for 8 hours a day, that's 800 lux-hours daily. By using dimmers, drawing curtains, or rotating the piece to dark storage for half the year, you can significantly reduce that cumulative dose. For example, dimming the light to 50 lux for those 8 hours halves the daily dose to 400 lux-hours. Displaying it for only 6 months of the year further reduces the annual exposure by half. This proactive management of 'light dosage' is one of the most powerful, yet accessible, tools in a collector's arsenal for extending the vibrant life of their paper treasures. Remember, any light is additive, and there's no reset button once the damage is done.
Humidity & Temperature: The Shape-Shifters
Imagine your favorite sweater shrinking disastrously in the wash or stretching irreversibly out of shape. That's a rather apt metaphor for what happens to paper when humidity and temperature embark on a wild, erratic dance. Paper fibers, those delicate threads of cellulose, are constantly, almost breathlessly, absorbing and releasing moisture from the air, causing them to expand and contract. This incessant movement, exacerbated by environmental fluctuations, exerts immense, invisible stress on the paper's very structure, inevitably leading to buckling, cockling (that wavy, uneven surface), and even heartbreaking tears over time. It’s not just the extremes that cause problems; rapid, unpredictable fluctuations are often far more damaging than a consistent (if slightly imperfect) state. Imagine your paper perpetually trying to adapt; that constant, frantic movement ultimately weakens its fibers to the point of no return. I once had a small, unframed drawing stored in a room with a leaky window – a catastrophic error. The paper developed an alarming case of cockling, a puckering that was, for all intents and purposes, irreversible.
- Humidity: Ah, humidity. Too high, and you're rolling out the unwelcome mat for mold, mildew, and the dreaded "foxing" (those tiny, insidious reddish-brown spots that are actually caused by impurities in the paper reacting to moisture and airborne pollutants, often tragically exacerbated by fungal growth). Too low, and the paper can become unnervingly brittle, prone to cracking with the slightest touch. I speak from experience, having once discovered a delicate print developing a fine, almost invisible, filigree of mold after a particularly damp storage season – a mistake I vow never to repeat. Aim for a stable relative humidity between 45-55%, with minimal fluctuations throughout the day. While a whole-house climate control system is ideal for larger collections, more accessible solutions exist. For passive humidity control in smaller spaces, consider using silica gel packets (often indicating beads that change color when saturated) within sealed archival boxes or display cases. These absorb excess moisture and can be reactivated by gentle heating. Conversely, during very dry periods, a room humidifier with a hygrometer can introduce controlled moisture. The key is control and monitoring—avoiding sudden, dramatic changes is often more critical than hitting an exact number. Investing in a good quality hygrometer (a simple device that measures humidity) is a profound game-changer; it's your early warning system. For areas that wrestle with maintaining these levels, consider a small, quiet dehumidifier or humidifier; these can be truly transformative in crafting a stable environment. I personally have several strategically placed in rooms where art is displayed and stored, and crucially, within storage boxes or cabinets to monitor those critical micro-climates. These are relatively inexpensive and provide invaluable, real-time data about your art's immediate environment. Don't just guess; measure, monitor, and react! Remember, mold doesn't just look bad; it actively consumes paper fibers, leaving irreversible damage.
- Temperature: Extreme heat acts as an accelerant, speeding up the aging process and chemical reactions within the paper's delicate fibers. Extreme cold, especially when paired with high humidity, can lead to condensation, an equally insidious threat. The goal here is consistency. Try to maintain a consistent temperature, ideally between 18-24°C (65-75°F). Avoid hanging works near radiators, HVAC vents, or in bathrooms (which, let's be honest, are nothing more than humidity traps waiting to happen). These spots create unpredictable micro-climates that are truly detrimental to paper, fostering an environment ripe for unseen enemies to flourish. For larger collections or dedicated art spaces, a whole-house climate control system (HVAC with humidification/dehumidification capabilities) offers the most consistent and stable environment, though it's certainly a more significant investment. I've seen delicate paper turn prematurely brittle from being too close to a heat source, a slow, silent cooking of its very essence.
Air Quality: The Silent Assault of Pollutants
Beyond light, temperature, and humidity, there's another unseen enemy silently attacking your paper art: airborne pollutants. I once visited a friend's home, and the faint, acrid smell of fresh paint lingered for weeks. My first thought, after admiring their renovation, was "Oh dear, the art!" It's easy to overlook, but the air around us, especially indoors, can be a cocktail of harmful chemicals. Just as we protect our lungs from smog, we must protect our art from the invisible, corrosive agents in our atmosphere.
The Invisible Attackers
- Volatile Organic Compounds (VOCs): These are gases emitted from various solids or liquids, including fresh paint, varnishes, cleaning supplies, new furniture, and even some common art materials. VOCs can accelerate the degradation of paper, causing yellowing and embrittlement. Think of that "new car smell" or "new paint smell" – that's VOCs, and they're not art-friendly. They act like tiny, relentless assassins, silently breaking down the paper's delicate chemistry.
- Sulphur Dioxide & Nitrogen Dioxide: These common urban pollutants, often from vehicle exhaust or industrial emissions, can react with moisture in the air to form corrosive acids that attack paper fibers. Even if your home is sealed, they can still creep in. I consider them the invisible urban smog, silently settling on and damaging everything, especially vulnerable paper.
- Ozone: A powerful oxidizing agent, ozone (often generated by laser printers, photocopiers, and some air purifiers) can cause fading and embrittlement of paper. It's like a tiny, aggressive bleaching agent, slowly stripping away the life from your artworks.
Mitigating the Risk
- Ventilation: Ensure good air circulation, especially after renovations or when new items are brought into the space. Open windows when practical, but be mindful of outdoor pollution levels.
- Air Filtration: High-quality HEPA air purifiers with activated carbon filters can help remove both particulate matter and gaseous pollutants from the air. This is a worthwhile investment for a dedicated art space.
- Material Choice: Be mindful of materials used in your home. Opt for low-VOC paints, glues, and finishes, particularly in rooms where art is displayed or stored. When acquiring new furniture, textiles, or even books, consider 'off-gassing' them in a well-ventilated area (like a garage or spare room) for several weeks before introducing them into your main display or storage spaces. This allows the bulk of volatile compounds to dissipate before they can reach your artworks. Similarly, always ensure any framing materials (adhesives, backing boards not explicitly labeled archival) have had sufficient time to air out before being sealed with your artwork. Avoid storing art in rooms with strong chemical odors.
Monitoring Indoor Air Quality: Knowing Your Invisible Environment
Just as we monitor temperature and humidity, becoming aware of the invisible pollutants in your indoor air is a crucial step in proactive art preservation. You can't mitigate what you don't detect, and your nose isn't always the most reliable sensor.
- Home Air Quality Monitors: These devices, increasingly affordable and sophisticated, can measure levels of various Volatile Organic Compounds (VOCs), particulate matter (PM2.5, PM10), carbon dioxide (CO2), and sometimes ozone (O3). By understanding the baseline air quality in your art display and storage areas, you can identify sources of pollutants and take targeted action.
- Interpreting Data: Spikes in VOCs after painting, cleaning, or bringing in new furniture provide actionable insights. Consistently high particulate matter might indicate a need for better air filtration. This data empowers you to make informed decisions about ventilation, air purification, and material choices, creating a cleaner, safer breathing environment for both you and your art.
- Professional Assessments: For very valuable collections or dedicated art spaces, a professional indoor air quality assessment by an environmental consultant can provide a highly detailed analysis, identifying specific pollutants and recommending targeted mitigation strategies. This might involve testing for specific acids or gases known to harm paper.
- Distance from Sources: Keep artworks away from known sources of pollutants like active fireplaces, laser printers, or heavily trafficked areas with high levels of exhaust.
Pest Patrol: Guarding Your Collection from Critters
I once had a terrifying close call with silverfish in a forgotten box of old sketches – a lesson that solidified my vigilance against the tiny, insidious creatures that view your precious paper art as a gourmet meal. These aren't just an annoyance; they can cause irreversible, heartbreaking damage. Trust me, finding tiny, irregular holes or surface abrasions on a beloved drawing is a uniquely sickening feeling, a betrayal by nature's smallest, hungriest inhabitants.
Common Paper Pests
- Silverfish & Firebrats: These wingless insects love damp, dark environments and feast on cellulose, starch, and adhesives – meaning your paper, glues, and sizing are all on the menu. They leave irregular holes and surface abrasions, sometimes even creating a silvery sheen on the damaged areas. They are silent, relentless gourmands of your collection.
- Booklice (Psocids): Tiny, almost invisible insects that thrive in humid conditions, feeding on microscopic mold spores and organic debris. While not directly eating paper, their presence indicates high humidity, which does harm paper, and they can leave tiny fecal pellets, sometimes mistaken for dust. Think of them as tiny, walking humidity gauges, their presence a red flag for potential mold issues.
- Carpet Beetles & Clothes Moths: While known for textiles, the larvae of these pests can also damage paper, especially if it contains animal-based glues (like older bindings) or if they are seeking shelter. They're opportunistic diners, and a forgotten stack of prints can quickly become their next feast.
- Rodents: Mice and rats love to chew on paper for nesting material and can cause extensive, irreparable damage. I once heard a story from a colleague about an entire portfolio of valuable prints being turned into a cozy, albeit disastrous, rodent nest. The thought alone makes me shudder.
Vigilant Prevention
- Cleanliness is Key: Regularly clean display and storage areas. Vacuuming removes dust, debris, and potential insect eggs or food sources. Think of it as your ongoing, proactive defense against tiny invaders and silent decay. A clean space is a less inviting space for pests. Beyond routine cleaning, make it a habit to perform regular, thorough inspections of your artworks and storage areas. Once or twice a year, gently remove artworks from their frames (if safely possible) or storage boxes. Examine the front and back for any minute holes, tunnels, droppings, live insects, or unusual staining. Pay close attention to edges, corners, and areas where mat boards meet the artwork. Early detection is paramount; a small, localized infestation caught early can prevent catastrophic damage to your entire collection. It’s a silent, detective work that pays immense dividends in preservation.
- Humidity Control: As discussed, maintaining stable, lower humidity levels (45-55% RH) is the single best defense against most pests, as it inhibits mold growth, which many pests feed on. It's like cutting off their food supply; without the mold, many of these creatures simply won't thrive.
- Inspect New Acquisitions: Before bringing any new artwork, book, or even used furniture into your home, inspect it thoroughly for signs of pests. Isolate new items for a period if you're concerned. This is a crucial quarantine step; you don't want to inadvertently introduce a silent, munching army into your pristine collection.
- Seal Entry Points: Seal cracks, crevices, and entry points into your home. Ensure window screens are intact. Think of it as securing your fortress; tiny gaps are open invitations for trouble.
- Avoid Food & Drink: Never consume food or drink near your artworks, as crumbs attract pests. This one seems obvious, but a moment of carelessness with a crumb can lead to a lifetime of regret for your artwork. Those tiny morsels are a veritable buffet for insects.
- Elevate Storage: Avoid storing art directly on floors, especially in basements or garages. Use shelving or pallets to keep boxes off the ground. Floors are often cooler, damper, and a direct highway for pests. Elevating your art is a simple, yet powerful, protective measure.
- Integrated Pest Management (IPM): For persistent issues, consult a professional pest control service specializing in IPM for cultural institutions. They can identify pests and recommend targeted, non-toxic solutions. Never use chemical pesticides directly near artworks without expert guidance. Remember, you're looking for solutions that protect your art, not potentially harm it with harsh chemicals.
Eco-Friendly Pest Control for Art Environments
When it comes to pest control in an art collection, harsh chemical pesticides are almost always a last resort due to their potential to off-gas and damage artworks. Instead, focus on integrated, eco-friendly strategies.
- Monitoring Traps: Simple, non-toxic sticky traps (for crawling insects) or pheromone traps (for specific moths, if identified) can be incredibly effective for monitoring pest activity. They don't eradicate a large infestation, but they alert you to a problem early, allowing for targeted intervention before widespread damage occurs.
- Freezing (for minor infestations): For smaller, unbound items that can tolerate freezing (always consult a conservator!), controlled freezing can eradicate many insect pests. The item is double-bagged in archival plastic, slowly brought to a freezer temperature (-20°C/-4°F) for several days, then slowly thawed. This method avoids chemicals entirely.
- Anoxic Environments: For more valuable or sensitive items, conservators can create anoxic (oxygen-free) environments using specialized bags and oxygen scavengers. This method slowly kills insects at all life stages without chemicals or extreme temperatures, making it suitable for a wide range of materials. It's a testament to how science can gently, yet effectively, protect our treasures.
Preventing Micro-organisms: Mold and Mildew – The Silent Invaders
Beyond insects, your paper collection faces another formidable enemy: microscopic fungi in the form of mold and mildew. These aren't just unsightly; they actively consume paper fibers, leaving irreversible stains, weakening the material, and often posing health risks. Mold is a stark indicator of an environment that is fundamentally hostile to paper.
- The Root Cause: Humidity: Mold spores are ubiquitous; they're always in the air. They only become a problem when relative humidity (RH) consistently rises above 60-65% for extended periods. This creates the perfect breeding ground. Maintaining stable humidity between 45-55% is your most powerful weapon against mold.
- Good Airflow: Stagnant air allows humidity to concentrate and mold to flourish. Ensure good air circulation around your artworks, both on display and in storage. Avoid tightly packed shelves or enclosed spaces without any air exchange. A small fan in a storage room can make a significant difference.
- Cleaning Surfaces: Regularly dust and clean display and storage areas. Mold thrives on organic dust and debris. A clean environment removes potential food sources and reduces the number of spores present.
- Early Detection and Action: Look for any fuzzy, discolored spots (green, black, white, red) or a musty odor. If you detect mold, isolate the affected item immediately to prevent spread. Do not try to wipe it off; this can spread spores. Instead, gently package the item in a sealed plastic bag and consult a professional paper conservator immediately. They have specialized equipment and non-toxic methods (like controlled freezing or HEPA-filtered vacuuming) to safely remove mold and stabilize the artwork. My own terrifying encounter with mold on a prized drawing taught me that speed and professional intervention are everything.
- UV Light for Prevention (Cautiously): While direct UV light is harmful to art, a very brief, controlled exposure to UV-C light (from a specialized germicidal lamp) can sterilize surfaces and kill mold spores in empty storage areas or display cases. Never expose artworks directly to UV-C light, as it is incredibly damaging. This is a preventative measure for the environment, not a treatment for the artwork itself, and should be done with extreme caution.
Protecting your collection from these tiny invaders requires ongoing vigilance, but it’s a crucial aspect of long-term preservation.
Preventing Micro-organisms: Mold and Mildew – The Silent Invaders
Beyond insects, your paper collection faces another formidable enemy: microscopic fungi in the form of mold and mildew. These aren't just unsightly; they actively consume paper fibers, leaving irreversible stains, weakening the material, and often posing health risks. Mold is a stark indicator of an environment that is fundamentally hostile to paper.
- The Root Cause: Humidity: Mold spores are ubiquitous; they're always in the air. They only become a problem when relative humidity (RH) consistently rises above 60-65% for extended periods. This creates the perfect breeding ground. Maintaining stable humidity between 45-55% is your most powerful weapon against mold.
- Good Airflow: Stagnant air allows humidity to concentrate and mold to flourish. Ensure good air circulation around your artworks, both on display and in storage. Avoid tightly packed shelves or enclosed spaces without any air exchange. A small fan in a storage room can make a significant difference.
- Cleaning Surfaces: Regularly dust and clean display and storage areas. Mold thrives on organic dust and debris. A clean environment removes potential food sources and reduces the number of spores present.
- Early Detection and Action: Look for any fuzzy, discolored spots (green, black, white, red) or a musty odor. If you detect mold, isolate the affected item immediately to prevent spread. Do not try to wipe it off; this can spread spores. Instead, gently package the item in a sealed plastic bag and consult a professional paper conservator immediately. They have specialized equipment and non-toxic methods (like controlled freezing or HEPA-filtered vacuuming) to safely remove mold and stabilize the artwork. My own terrifying encounter with mold on a prized drawing taught me that speed and professional intervention are everything.
- UV Light for Prevention (Cautiously): While direct UV light is harmful to art, a very brief, controlled exposure to UV-C light (from a specialized germicidal lamp) can sterilize surfaces and kill mold spores in empty storage areas or display cases. Never expose artworks directly to UV-C light, as it is incredibly damaging. This is a preventative measure for the environment, not a treatment for the artwork itself, and should be done with extreme caution.
Hands-On Care: Handling and Display
This part feels a bit like being a surgeon, but with far less drama (usually). The way you physically interact with your paper art is just as important as controlling its environment. I've learned that a moment of carelessness can undo years of diligent environmental control. It’s about building habits, treating every piece as if it were priceless, and moving with intention.
Gentle Hands, Always
You wouldn't grab a delicate butterfly with a vice grip, right? Treat your paper art with the same reverence.
- Gloves are your friends: Those clean cotton gloves aren't just for fancy art handlers; they are your artwork's first line of defense. They prevent the oils, acids, and dirt from your hands from transferring to the paper, which can cause irreversible stains, fingerprints, or accelerate degradation over time. I keep several pairs right by my art storage area and framing workbench. When considering types, traditional white cotton gloves are excellent for most paper handling, offering a soft, absorbent barrier. However, if you're concerned about leaving behind minute cotton fibers, or if you need more tactile dexterity, clean, powder-free nitrile gloves are an excellent alternative, especially when handling photographic prints or very delicate surfaces. Just remember, even with gloves, gentle handling is paramount; they're a barrier against oils and dirt, not an excuse for a firm grip. Always move with intention and a light touch. For particularly large or unwieldy works, I employ the 'sandwich method': carefully place the artwork between two rigid, acid-free boards and carry them together, providing full support and preventing any flexing or creasing. My own hands, despite my best intentions, have oils and tiny residues, so gloves are my artwork's silent, protective shield.
Safe Work Surfaces for Handling Art: A Foundation of Protection
It might sound overly meticulous, but where you handle your precious paper art is just as important as how you handle it. A moment of inattention on an unsuitable surface can lead to irreparable damage. Think of your workspace as a sterile operating theatre for your artworks.
- Clean, Flat, Stable: Always ensure your work surface is impeccably clean, perfectly flat, and completely stable. Any bumps, crumbs, or unevenness can transfer pressure to the artwork, causing creases, indentations, or tears. A wobbly table is an accident waiting to happen.
- Acid-Free Protection: Cover your work surface with a large sheet of archival blotter paper, acid-free mat board, or a clean, smooth, inert material like Mylar. This creates a soft, chemically neutral barrier between the artwork and your table, protecting it from residual dirt, oils, or acidic components that might be present on the table itself. I keep a stack of large archival blotter sheets specifically for this purpose.
- Ample Space: Ensure you have plenty of clear space around the artwork. Clutter increases the risk of accidental knocks, spills, or placing heavy objects on delicate pieces. It’s about creating a calm, controlled environment where your full attention can be on the artwork.
- Good Lighting: Work under stable, even lighting that allows you to clearly see the artwork's surface without shadows or glare. This helps in detecting subtle details, existing damage, and ensuring careful manipulation.
- Support, support, support: Never, ever pick up an unframed sheet of paper by one edge or corner. It's a recipe for a crease or a tear. Always support it from underneath with both hands, or even better, on a clean, rigid, acid-free board (often called a "support board" or "carrier board"). For larger works, the "sandwich method" is invaluable: place the artwork carefully between two rigid, acid-free boards and carry them together. For very large or particularly fragile unframed works, consider adding a third, slightly oversized rigid board at the top to act as a lid, securing the entire 'sandwich' with wide, soft archival straps or non-adhesive binder clips (only on the outer boards, away from the artwork's edges). This creates an even more robust, protective enclosure that prevents any flexing or shifting during transport, minimizing the risk of creases or tears on delicate, unsupported paper. It’s the ultimate protective embrace for your most vulnerable large-scale pieces. This provides complete support, preventing creasing, tearing, and accidental damage from flexing. It sounds obvious, but in a moment of haste, it's easy to forget, and a moment of regret can last a lifetime with a damaged piece. I still wince thinking of a fleeting moment of carelessness that resulted in a permanent dimple on a beloved print – a constant, gentle reminder to support, support, support!

The Framing Game: More Than Just a Pretty Border
This is where art truly meets science, and where a good framer becomes an indispensable partner. Proper framing is, in essence, an elaborately constructed protective bubble for your artwork, a meticulously engineered micro-environment designed to isolate it from external threats. Think of your framer not just as a craftsman, but as a key collaborator in preservation; their specialized expertise can literally make or break the longevity of your cherished paper art. For more profound insights into this crucial alliance, you might find a Q&A with an expert particularly enlightening, like the one found in our article on QA with an expert art framer.
- Archival materials only: This, my friends, is non-negotiable. Every single component touching your artwork – from the mat board that elegantly surrounds it, to the backing board that cradles it, to the delicate hinges that secure it – must be rigorously acid-free and lignin-free. Don't be shy about asking your framer. Look for terms like "museum board," "rag board" (made from the purest cotton rags), or "alpha cellulose." These superior materials are processed to maintain a neutral pH and, critically, will not leach harmful acids into your artwork over time. Regular cardboard or cheap mat board, on the other hand, will inevitably degrade, becoming a silent source of pernicious acids and lignin. These chemicals will relentlessly migrate into your artwork, causing irreversible yellowing, browning, and embrittlement – a process grimly known as "acid burn." It's a very real, and heartbreaking, phenomenon, leaving permanent discoloration and damage on your cherished pieces. I've seen vibrant whites turn a sickly ochre because of non-archival backing, and it's a sight you never forget. Think of it as a slow, internal chemical attack that silently eats away at the beauty you cherish, a permanent blemish on what was once pristine. Investing in archival materials is not merely a purchase; it's an act of profound foresight, a bulwark against this silent degradation. I learned this when a beautiful, unsigned drawing I acquired developed irreversible acid burn from a cheap, non-archival mat. The damage was truly heartbreaking.
- Give it space: The artwork should, under no circumstances, ever be in direct contact with the glass or acrylic glazing. Utilize a mat board (expertly cutting a "window" around the art) or subtle, hidden spacers to create an essential air gap. This vital space prevents the image from sticking to the glass, especially in humid conditions, where moisture can condense and adhere the artwork to the glazing, causing irreparable damage – a truly devastating outcome. This air gap also allows for crucial air circulation around the artwork, which helps prevent stagnant micro-climates from forming within the frame and significantly reduces the risk of mold growth. This seemingly tiny gap is a mighty, often overlooked, protector, preventing those silent destructive forces from gaining a foothold. It also plays a crucial role in preventing 'micro-climates' from forming within the frame, where stagnant air and temperature differentials could otherwise encourage mold or foxing. I've seen delicate watercolors adhere to glass, creating a phantom image on the glazing and tearing the artwork itself upon attempted removal. The air gap is your friend, a non-negotiable barrier.
- Hinging: The Art of Support and Freedom: The artwork should be hinged, and I emphasize hinged, to the backing board with meticulously chosen archival materials. This means traditional Japanese paper hinges expertly applied with a reversible wheat starch paste, or conservation-grade, water-activated linen tape. This method allows the artwork to expand and contract naturally, gracefully, with ambient changes in humidity, providing essential support while allowing for subtle, necessary movement, thereby preventing buckling or creasing. The key is reversibility: a conservator should be able to safely remove these hinges without damaging the artwork in the future. Never, ever, be tempted to glue it down, dry mount it, or use any form of pressure-sensitive tapes (and yes, that includes common Scotch tape, masking tape, or even many tapes marketed as "archival" but which aren't truly conservation-grade). These methods are irreversible crimes against art, and they will inflict significant, permanent damage over time, including adhesive staining, brittleness, and tears upon removal. My own heart still aches from a piece I acquired that had been brutally dry-mounted, its very essence flattened and forever altered, a permanent loss of its original texture and integrity.
- Seek a Certified Picture Framer: Just as you'd seek a specialist doctor, find a professional picture framer with a Certified Picture Framer (CPF) or Master Certified Picture Framer (MCPF) designation. These certifications, often through organizations like the Professional Picture Framers Association (PPFA), indicate a high level of expertise in conservation-grade framing practices and materials. They are your allies in ensuring your art is framed to museum standards.
- Seek a Certified Picture Framer: Just as you'd seek a specialist doctor, find a professional picture framer with a Certified Picture Framer (CPF) or Master Certified Picture Framer (MCPF) designation. These certifications, often through organizations like the Professional Picture Framers Association (PPFA), indicate a high level of expertise in conservation-grade framing practices and materials. They are your allies in ensuring your art is framed to museum standards.
Displaying in Public or High-Traffic Areas
While most collectors display art in their private homes, sometimes a piece might be destined for a more public or high-traffic environment—an office, a gallery, or a shared space. These locations present intensified risks, demanding even greater vigilance.
- Security Mounting: For any art displayed in a public or semi-public setting, prioritize security. Utilize specialized security hangers that deter theft and prevent accidental dislodgement. These often involve interlocking brackets that fix the artwork tightly to the wall, making it difficult to remove without special tools. Consider alarm systems or motion sensors for valuable pieces.
- Enhanced Glazing: In high-traffic areas where accidental impact is a risk, consider museum-quality acrylic glazing over glass. Acrylic is lighter and shatter-resistant, providing an essential layer of physical protection against bumps or impacts without sacrificing UV filtration or clarity. It's an added safeguard against the unexpected.
- Increased Environmental Monitoring: Public spaces often have less stable environments. Increase the frequency of environmental monitoring (temperature, humidity) using data loggers to catch any fluctuations that could impact the artwork. Ensure the space is free from direct sunlight, open vents, or heavy foot traffic that could cause vibrations. A more public life for an artwork demands a more public commitment to its protection.
Long-Term Love: Storage Solutions
Eventually, you might, like me, find yourself running out of wall space – a delightful problem, really. Or perhaps you're rotating pieces for exhibition, or simply safeguarding valuable works from incessant light exposure. This is precisely where thoughtful storage ascends from a mere convenience to a crucial necessity. It's not simply about tucking things away; it's about intentionally crafting a safe, stable haven where your artworks can rest, recuperate, and patiently await their next moment in the spotlight. Think of it as a long-term sanctuary, shielding them from the very elements we've meticulously discussed, a veritable spa for your paper treasures.
- Flat is best, always: For unframed works, flat storage is unequivocally preferred over any form of rolling or folding. Creases, once inflicted, are permanent scars, and even subtle bends can irreversibly weaken paper fibers. For monumental unframed works that simply defy flat storage, rolling them around a large-diameter, acid-free tube can be a last-resort option, but this should always be executed by a professional and only when absolutely essential, and never for extended periods. Ideally, this means investing in archival flat file cabinets (often found in specialized art supply stores or custom furniture makers), sturdy, acid-free solander boxes (also known as clamshell boxes), or large-format archival portfolios. Each has its merits: flat files offer immediate accessibility and high capacity for large collections; solander boxes provide robust, individual protection and are stackable for smaller collections; and archival portfolios are excellent for viewing and transporting a curated selection of unframed works. Choosing the right solution depends on the size of your collection, the dimensions of your artworks, and your personal viewing habits. These not only provide excellent physical protection but also create a remarkably stable micro-environment. For extra security, I monitor my flat files with discreet hygrometers. I’ve seen beautiful works scarred by careless rolling, the paper permanently set in a curve, almost as if it had suffered a spinal injury.
- Short-Term vs. Long-Term Handling: When retrieving works from flat files for short-term viewing, always use an intermediary support board. For longer-term access, like during an exhibition preparation, ensure you have a clean, large, flat surface to work on, and minimize the time the artwork is exposed to the open environment. The less handling, the better. I always remind myself that every touch, no matter how careful, carries a tiny risk, so purposeful handling is key.
- Short-Term vs. Long-Term Handling: When retrieving works from flat files for short-term viewing, always use an intermediary support board. For longer-term access, like during an exhibition preparation, ensure you have a clean, large, flat surface to work on, and minimize the time the artwork is exposed to the open environment. The less handling, the better. I always remind myself that every touch, no matter how careful, carries a tiny risk, so purposeful handling is key.
- Acid-free everything, inside and out: Store individual pieces in individual acid-free folders or sleeves. For an extra layer of protection, particularly if you're stacking works, diligently interleave artworks with sheets of acid-free tissue paper or inert Mylar. Then, and only then, place these folders into acid-free boxes or flat file cabinets. This multi-layered approach creates a robust, protected micro-environment, shielding the art from insidious dust, environmental pollutants, and physical damage. The interleaving prevents any abrasive contact between artworks and adds a crucial layer of chemical isolation. For a deeper dive into optimal organization and safety, I highly recommend exploring various art storage solutions for collectors. Think of it as creating concentric rings of protection, each layer adding another safeguard against unseen threats.
Optimizing Closet & Cabinet Storage
Not every collector has the luxury of dedicated flat file cabinets or museum-grade solander boxes. For those utilizing existing closet or cabinet space for storage, thoughtful optimization can significantly enhance protection.
- Interior Walls & Climate Control: Choose closets or cabinets on interior walls, away from exterior walls, windows, and bathrooms, as these spots tend to have more stable temperature and humidity. If possible, ensure the space is part of your home's main climate-controlled envelope.
- Elevate & Isolate: Never store art directly on the floor. Use shelving units (metal or sealed wood are preferable) to keep artworks elevated and away from potential floods or ground-level pests. Ensure artworks are not touching the back or side walls of the cabinet, as these can transfer moisture or pollutants. Creating a small air gap is crucial.
- Sealed & Ventilated: While you want to protect from dust, completely airtight enclosures can trap humidity. Aim for well-sealed cabinets that are periodically opened for air exchange, or consider adding a small, passive vent. Within cabinets, individual archival boxes and folders offer the primary line of defense. I even place a small hygrometer inside my art storage closet, a silent sentinel, to ensure the micro-climate remains stable.
- Environment, revisited, with a critical eye: Your storage area must meticulously mirror the display area's ideal conditions: cool, dry, dark, and stable. Basements, attics, and garages are, without exception, a monumental no-no due to their notorious temperature and humidity fluctuations, as well as being prime breeding grounds for pests. A climate-controlled closet, an interior room far from exterior walls, or a dedicated, professional art storage facility is vastly superior. Consistent temperature and humidity are even more critically important for storage, as artworks are often dormant for longer periods, rendering them even more susceptible to sustained environmental stress. Remember, stability is the ultimate goal; avoiding rapid shifts is often more important than hitting a perfect number. Achieving this often means implementing a multi-pronged strategy: good insulation in your home, strategic placement away from external walls and HVAC vents, and proactive use of humidifiers/dehumidifiers as seasonal conditions demand. Regularly checking your hygrometer readings and making small, gradual adjustments is far better than reacting to extremes. This consistent, gentle approach reduces the stress on paper fibers, preventing the constant expansion and contraction that leads to cockling and embrittlement. It’s a bit like maintaining a healthy blood pressure for your art—steady and within a reasonable range. And never, ever, forget about pest control; tiny, insatiable creatures like silverfish, booklice, and various beetles absolutely adore paper, especially in damp conditions.
Custom-Built Storage Solutions and Cabinetry: Tailoring to Your Collection
While commercially available flat files and archival boxes are excellent, for growing collections with unique sizes or specific needs, investing in custom-built storage solutions can be a profoundly rewarding and effective long-term strategy. It's about designing storage that perfectly fits your art, rather than forcing your art to fit the storage.
- Materials Matter: If commissioning cabinetry, insist on construction with inert, stable materials. Powder-coated steel or anodized aluminum are ideal for their stability, pest resistance, and fire resistance. If using wood, ensure it's a stable, sealed hardwood (like maple or birch plywood) and that all surfaces are finished with archival, low-VOC coatings that have fully off-gassed before art is introduced. Avoid particle board or MDF, which often contain formaldehyde and other harmful off-gassing chemicals.
- Design for Accessibility and Protection: Design drawers or shelves that allow for easy, non-abrasive access to artworks. Flat file drawers should glide smoothly and be deep enough to accommodate the thickness of your pieces without bending. Consider transparent drawer bottoms (made of archival acrylic) for quick viewing without opening, or pull-out shelves with lift-up lids for larger works.
- Environmental Integration: Custom storage can be designed to integrate seamlessly with your home's climate control, or even include passive environmental controls like sealed compartments with silica gel for targeted humidity management. Ensure good air circulation within the cabinetry to prevent stagnant micro-climates.
- Professional Consultation: Work with experienced cabinetmakers or exhibition designers who understand archival standards. They can guide you through material choices, construction techniques, and design elements that optimize both preservation and usability. It's a significant investment, but a custom solution can be the ultimate sanctuary for your cherished pieces.
Robust Labeling & Cataloging for Stored Works
Even with the most pristine storage, a disorganized collection is a vulnerable one. Meticulous labeling and cataloging for your stored works are not just about neatness; they are critical for efficient retrieval, condition tracking, and proactive preservation, preventing unnecessary handling that can lead to damage.
- External Labeling: Each archival box or portfolio should have a clear, acid-free label on the exterior (not adhered directly to the box, but in a slip pocket or tied on). This label should indicate the contents (e.g., "Watercolors, Small Format, A-G"), the number of pieces, and a unique inventory number for the box. This prevents you from having to open every box to find a specific piece.
- Internal Organization: Within boxes or portfolios, organize works logically—by artist, date, size, or medium. Each individual folder or sleeve should also have a discreet, soft-lead graphite pencil inscription (never ink!) indicating the artwork's unique inventory number and basic information, visible without removing the artwork itself. This minimizes unnecessary handling and direct contact.
- Digital Cross-Referencing: Link your physical labels and internal organization to your digital inventory system. This allows you to quickly locate any artwork, whether it's on display, in a specific storage box, or out on loan, acting as the ultimate command center for your collection. A well-indexed collection is a protected collection.
Vapor Barriers and Wall Construction: Building for Environmental Stability
In homes located in climates with significant humidity fluctuations, or for dedicated art spaces, considering the construction of your walls, particularly the inclusion of vapor barriers, can be a game-changer for long-term environmental stability. It's about building a robust shield against moisture intrusion.
- Understanding Vapor Barriers: A vapor barrier (or vapor retarder) is a material, typically a plastic sheeting or specialized paint, that slows or prevents the movement of moisture vapor through building assemblies. In humid climates, it's generally placed on the warm-in-winter side of insulation to prevent moisture from condensing within the wall cavity, which can lead to mold and structural damage.
- Impact on Art: If moisture gets trapped within walls or allows humidity from outside to easily penetrate, it directly impacts the micro-climate of your display and storage areas. Proper vapor barriers, combined with good insulation and air sealing, help to create a more stable internal environment, reducing the workload on your HVAC system and protecting your artworks from the insidious effects of fluctuating humidity.
- Professional Consultation: This is not a DIY project. Consult with an architect or building science expert to determine the appropriate type and placement of vapor barriers for your specific climate and wall construction. Incorrect placement can actually trap moisture and cause more problems. It's an investment in your home's structural health, which in turn benefits your collection. I once had a terrifying close call with silverfish in a forgotten box of old sketches – a lesson that solidified my vigilance against the tiny, insidious creatures that view your precious paper art as a gourmet meal. Keep storage and display areas scrupulously clean, dry, and cool. Avoid storing art directly on floors and consider using archival pest traps if you suspect an infestation, but always consult a conservator if you find actual damage. Think of it as a vigilant guardian for your treasured collection.
Robust Labeling & Cataloging for Stored Works
Even with the most pristine storage, a disorganized collection is a vulnerable one. Meticulous labeling and cataloging for your stored works are not just about neatness; they are critical for efficient retrieval, condition tracking, and proactive preservation, preventing unnecessary handling that can lead to damage.
- External Labeling: Each archival box or portfolio should have a clear, acid-free label on the exterior (not adhered directly to the box, but in a slip pocket or tied on). This label should indicate the contents (e.g., "Watercolors, Small Format, A-G"), the number of pieces, and a unique inventory number for the box. This prevents you from having to open every box to find a specific piece.
- Internal Organization: Within boxes or portfolios, organize works logically—by artist, date, size, or medium. Each individual folder or sleeve should also have a discreet, soft-lead graphite pencil inscription (never ink!) indicating the artwork's unique inventory number and basic information, visible without removing the artwork itself. This minimizes unnecessary handling and direct contact.
- Digital Cross-Referencing: Link your physical labels and internal organization to your digital inventory system. This allows you to quickly locate any artwork, whether it's on display, in a specific storage box, or out on loan, acting as the ultimate command center for your collection. A well-indexed collection is a protected collection.
Custom-Built Storage Solutions and Cabinetry: Tailoring to Your Collection
While commercially available flat files and archival boxes are excellent, for growing collections with unique sizes or specific needs, investing in custom-built storage solutions can be a profoundly rewarding and effective long-term strategy. It's about designing storage that perfectly fits your art, rather than forcing your art to fit the storage.
- Materials Matter: If commissioning cabinetry, insist on construction with inert, stable materials. Powder-coated steel or anodized aluminum are ideal for their stability, pest resistance, and fire resistance. If using wood, ensure it's a stable, sealed hardwood (like maple or birch plywood) and that all surfaces are finished with archival, low-VOC coatings that have fully off-gassed before art is introduced. Avoid particle board or MDF, which often contain formaldehyde and other harmful off-gassing chemicals.
- Design for Accessibility and Protection: Design drawers or shelves that allow for easy, non-abrasive access to artworks. Flat file drawers should glide smoothly and be deep enough to accommodate the thickness of your pieces without bending. Consider transparent drawer bottoms (made of archival acrylic) for quick viewing without opening, or pull-out shelves with lift-up lids for larger works.
- Environmental Integration: Custom storage can be designed to integrate seamlessly with your home's climate control, or even include passive environmental controls like sealed compartments with silica gel for targeted humidity management. Ensure good air circulation within the cabinetry to prevent stagnant micro-climates.
- Professional Consultation: Work with experienced cabinetmakers or exhibition designers who understand archival standards. They can guide you through material choices, construction techniques, and design elements that optimize both preservation and usability. It's a significant investment, but a custom solution can be the ultimate sanctuary for your cherished pieces.
Professional Art Storage Facilities: When to Consider Off-Site Solutions
For collectors with very large, extremely valuable, or highly sensitive collections, or for those facing space constraints or extended periods away from home, professional art storage facilities offer the highest level of environmental control, security, and specialized care. While a significant investment, they provide peace of mind that often outweighs the cost.
- Museum-Grade Climate Control: These facilities are engineered to maintain incredibly precise and stable temperature and relative humidity levels, typically within very tight tolerances (e.g., 20°C +/- 2°C, 50% RH +/- 5%). This consistency is far superior to what most residential environments can offer and is crucial for highly fragile or environmentally sensitive works.
- Enhanced Security: Professional facilities boast multi-layered security systems, including 24/7 monitoring, robust access controls, fire suppression systems, and often discreet, armed guards. This significantly mitigates risks from theft, vandalism, and environmental disasters.
- Specialized Storage Solutions: They offer a variety of storage options, from climate-controlled vaults to individual rooms, often with specialized racking, flat files, or custom crates designed for different art forms. They understand the nuances of storing paper art safely.
- Disaster Preparedness: These facilities have comprehensive disaster recovery plans in place, including emergency power, advanced fire suppression (e.g., inert gas systems that don't use water), and protocols for salvaging damaged collections.
- Logistics and Handling: Many facilities offer professional packing, crating, and transportation services, ensuring artworks are handled by trained specialists using archival materials throughout the entire chain of custody.
- When to Consider: If your collection outgrows your home, if you travel extensively, if you live in an area prone to natural disasters, or if you simply want the absolute highest level of protection for your most prized works, a professional art storage facility is an invaluable resource. It's a testament to ultimate stewardship, ensuring your art's legacy is secured for generations.
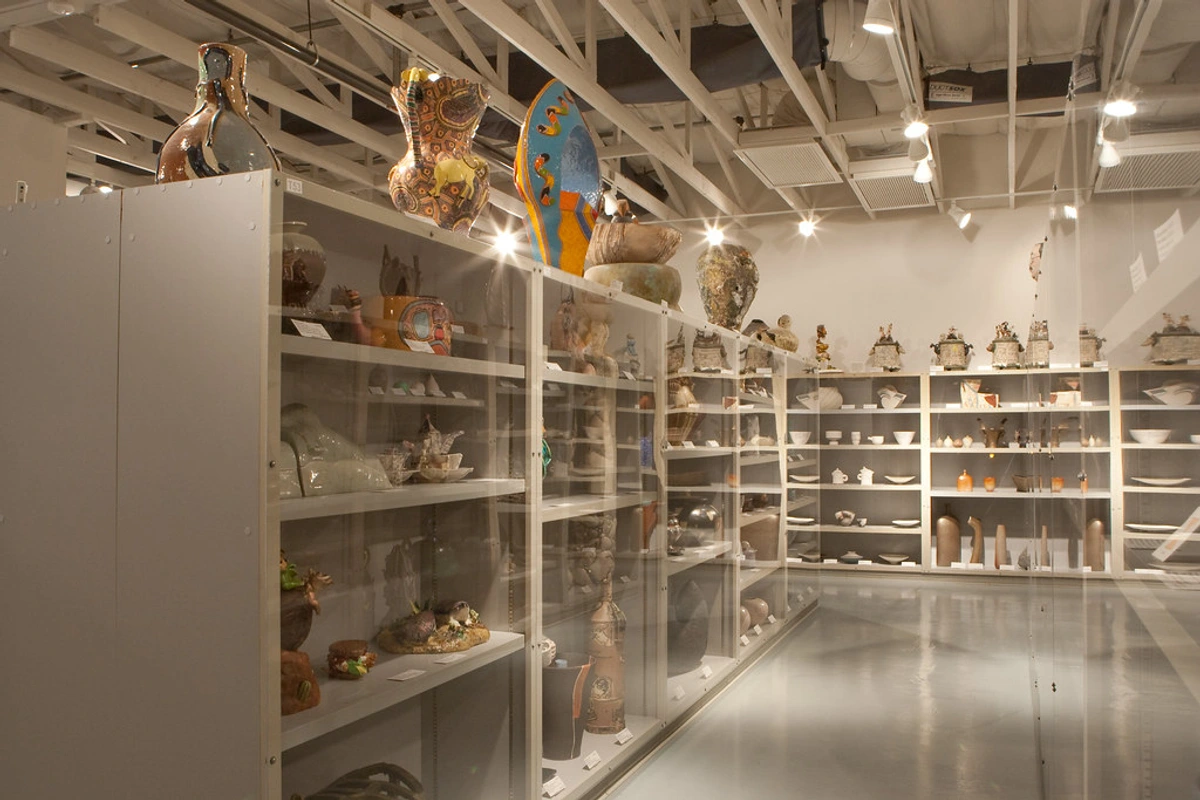
The Art of Conservation: Your Partner in Preservation
Despite our most diligent efforts, or perhaps because we acquire pieces that arrive with a pre-existing history, sometimes accidents happen, or issues inevitably arise. My most important piece of advice here is simple, unwavering, and comes from a place of hard-won experience: Do not, under any circumstances, try to fix it yourself. I repeat, with every fiber of my being, do not try to fix it yourself. The impulse is potent, I know. You might innocently think, "Oh, it's just a little tear, I can surely tape that," or "A bit of bleach will magically get rid of that spot." Resist! That impulse, that hubris, will almost certainly lead to more harm than good, creating irreversible damage that even the most skilled conservator might struggle to mitigate. I've witnessed more profound damage inflicted by well-meaning but untrained hands than by actual accidents; those well-intentioned DIY fixes often render professional repair far more complicated, and tragically, far more costly. I once bought a lovely 19th-century print that had a clumsy piece of Scotch tape applied to a tear. That tape, over decades, had yellowed, become brittle, and left a greasy, irreversible stain that completely devalued the piece. Paper conservation is not a hobby; it is a highly specialized scientific field, demanding specific scientific knowledge, meticulous training, specialized tools, and archival materials that are simply not available to the layperson. It's a blend of art, science, and a profound respect for history. Trust me, the momentary satisfaction of a DIY 'fix' is utterly dwarfed by the long-term, irreversible damage and the potential regret.
Preventative Conservation: Proactive Stewardship
While professional conservators are invaluable for treating existing damage, the best "conservation" is often preventative. It's about taking proactive steps to minimize risks and ensure your artwork never needs significant intervention. Think of it as a comprehensive wellness plan for your art. My journey has taught me that a little foresight goes a long, long way in avoiding heartbreak.
- Environmental Control: As we've extensively discussed, maintaining stable temperature (18-24°C / 65-75°F) and relative humidity (45-55%) is paramount. Minimize fluctuations, as these are more damaging than consistent (if slightly imperfect) conditions. It's about providing a steady, gentle environment, a calm harbor for your paper treasures.
- Light Management: Employ UV-filtering glazing, control ambient light levels, avoid direct sunlight, and consider rotational display for sensitive works. Every photon counts. Think of it as managing a delicate light diet for your art, ensuring it receives just enough to be appreciated, but never enough to suffer harm.
- Archival Materials: Insist on acid-free and lignin-free materials for everything that touches your artwork – frames, mats, backing, storage boxes, sleeves, and folders. This is your fundamental commitment to long-term preservation, ensuring that the very materials intended to protect your art aren't actually silently harming it.
- Proper Handling: Always use clean gloves, support works from underneath, and minimize physical contact with the artwork's surface. A moment of mindful intention can save a lifetime of regret for a damaged piece.
- Regular Inspections: Periodically (e.g., biannually) inspect your collection for any early signs of damage, fading, pest activity, or environmental stress. Early detection can prevent minor issues from becoming catastrophic. It's your ongoing health check-up for your collection, allowing you to catch whispers of trouble before they become roars.
- Documentation: Maintain meticulous records of provenance, condition, and any previous conservation treatments. This information is crucial for future care and valuation. Think of it as creating an incredibly detailed autobiography for each artwork, ensuring its story is never lost or misunderstood.
- Education: Continuously educate yourself about art care. Read, attend workshops, and consult experts. The more you know, the better guardian you become. This journey of learning is, for me, one of the most rewarding aspects of collecting, transforming ownership into true stewardship.
What a Professional Conservator Does: The Custodians of Art History
If you find yourself with a damaged work on paper, seeking out a professional art conservator is not a luxury, but an absolute necessity. They are the highly trained specialists, the quiet heroes, who can truly assess the damage, profoundly understand the intricate materials involved, and intervene safely, ethically, and reversibly. Beyond mere repair, they also offer invaluable advice on preventative conservation, guiding you in establishing practices that minimize future risks. Think of them as the custodians of art history, equipped with an impressive blend of scientific knowledge, an artist's meticulous hand, and an unwavering ethical compass. Their work is often invisible, a testament to its success. Their expertise can include:
The Conservation Assessment Process: What to Expect
When you bring a damaged artwork to a professional conservator, the first step is almost always a thorough, meticulous assessment. This isn't a quick glance; it's a diagnostic process akin to a doctor's examination for a complex patient, ensuring the most appropriate and least invasive treatment plan.
- Initial Consultation: You'll discuss the artwork's history, the nature of the damage, and any previous treatments. Be prepared to share any documentation you have (condition reports, purchase records, artist notes).
- Visual Examination: The conservator will perform a detailed visual inspection, often using magnification, raking light (light shone from the side to reveal surface topography), and transmitted light (light shone through the paper) to identify tears, creases, discoloration, mold, insect damage, and the overall structural integrity of the paper and medium. They'll also assess the stability of the medium itself.
- Documentation: This is crucial. The conservator will create a comprehensive written condition report, often accompanied by high-resolution photographs, meticulously detailing the artwork's current state. This document becomes the baseline for all subsequent work and is invaluable for insurance and provenance.
- Testing: In some cases, tiny, almost invisible samples may be taken for scientific analysis to identify pigments, paper fibers, or the composition of stains. This helps in selecting the safest and most effective treatment protocols.
- Treatment Proposal: Based on the assessment, the conservator will present a detailed treatment proposal outlining the recommended interventions, estimated costs, and expected outcomes. They will prioritize reversibility and minimal intervention, ensuring the artwork's integrity is respected above all else. This process can be lengthy, but it's a testament to the scientific rigor and ethical commitment underpinning professional paper conservation.
- **Surface Cleaning:
- Surface Cleaning: Meticulously removing accumulated dust, ingrained grime, and insidious environmental pollutants that can subtly, yet relentlessly, accelerate degradation, often using specialized brushes, erasers, or controlled suction. It's like a gentle, non-invasive spa treatment for your art, carefully lifting away the burdens of time.
- Surface Cleaning: Meticulously removing accumulated dust, ingrained grime, and insidious environmental pollutants that can subtly, yet relentlessly, accelerate degradation, often using specialized brushes, erasers, or controlled suction. It's like a gentle, non-invasive spa treatment for your art, carefully lifting away the burdens of time.
- Stain Reduction: Expertly minimizing or removing discoloration caused by water damage, those frustrating foxing spots, or the lingering residue of improper adhesives, using targeted, reversible chemical or aqueous treatments. This is often a delicate dance of chemistry and patience, slowly coaxing away the stains without harming the underlying artwork.
- Tear and Loss Repair: With almost surgical precision, mending tears and intricately reintegrating areas of loss using specialized archival papers and reversible adhesives, making the damage disappear as if by magic, often with the aid of a microscope for precision. It's truly astonishing, like a surgeon performing micro-surgery on paper, restoring integrity without a trace.
- Flattening and Humidification: Carefully relaxing and flattening cockled or creased paper, often a critical step for restoring its aesthetic and ensuring its long-term structural stability, using controlled humidity chambers and gentle pressure. It's a gentle persuasion, allowing the paper to slowly, safely, return to its intended flat form, erasing the visual distress of past environmental fluctuations.
- Mold and Pest Mitigation: Safely addressing biological infestations without causing further harm to the artwork, a delicate dance between eradication and preservation, which often involves controlled freezing, anoxic environments, or targeted dry cleaning. This is truly the unseen battle, where conservators act as careful, precise exterminators, protecting the artwork from tiny, destructive forces.
- Consolidation of Flaking or Friable Media: For artworks where the medium itself (e.g., pastel, charcoal, or even some unstable inks) is actively flaking or becoming powdery and detached from the paper surface – a condition known as "friable" – conservators perform a delicate process called consolidation. This involves carefully applying a very dilute, reversible adhesive (often a synthetic resin or natural protein like gelatin) to the affected areas, helping to re-adhere the media particles to the paper without altering their appearance or texture. It requires immense precision, often under magnification, to stabilize the surface and prevent further loss. This is one of those interventions where a DIY attempt would almost certainly lead to irreversible damage and loss of the artwork's integrity.
- Deacidification: For older, acidic papers, they can sometimes apply precise chemical treatments to neutralize the harmful acids, thereby dramatically extending the paper's lifespan and preventing further self-destruction, a complex process requiring careful pH monitoring. It’s like giving an aging artwork a chemical reset, halting the insidious 'slow fires' and offering it a new lease on life.
- Aesthetic Retouching and Inpainting: Restoring Visual Continuity: While the primary goal of conservation is preservation, sometimes aesthetic interventions are necessary to restore visual continuity, especially after repairs for tears, losses, or severe abrasion. Aesthetic retouching or inpainting involves carefully applying reversible, conservation-grade pigments to fill in areas of loss or discoloration, making the repair less noticeable. This is done with the utmost respect for the original artist's intent and is strictly confined to the areas of damage. The pigments used are chosen to be stable, lightfast, and, crucially, distinguishable from the original artwork under UV light, ensuring complete reversibility in the future. It's a nuanced art form in itself, requiring an artist's eye and a conservator's scientific rigor.
- Disaster Recovery: In the unfortunate event of fire, flood, or other disasters, conservators are trained in emergency salvage techniques to stabilize and assess damaged collections, offering the best chance for recovery and minimizing further loss. In these terrifying moments, a conservator is your artwork's most powerful advocate, often rescuing pieces that seem utterly beyond hope. Meticulously removing accumulated dust, ingrained grime, and insidious environmental pollutants that can subtly, yet relentlessly, accelerate degradation, often using specialized brushes, erasers, or controlled suction. It's like a gentle, non-invasive spa treatment for your art, carefully lifting away the burdens of time.
- Stain Reduction: Expertly minimizing or removing discoloration caused by water damage, those frustrating foxing spots, or the lingering residue of improper adhesives, using targeted, reversible chemical or aqueous treatments. This is often a delicate dance of chemistry and patience, slowly coaxing away the stains without harming the underlying artwork.
- Tear and Loss Repair: With almost surgical precision, mending tears and intricately reintegrating areas of loss using specialized archival papers and reversible adhesives, making the damage disappear as if by magic, often with the aid of a microscope for precision. It's truly astonishing, like a surgeon performing micro-surgery on paper, restoring integrity without a trace.
- Flattening and Humidification: Carefully relaxing and flattening cockled or creased paper, often a critical step for restoring its aesthetic and ensuring its long-term structural stability, using controlled humidity chambers and gentle pressure. It's a gentle persuasion, allowing the paper to slowly, safely, return to its intended flat form, erasing the visual distress of past environmental fluctuations.
- Mold and Pest Mitigation: Safely addressing biological infestations without causing further harm to the artwork, a delicate dance between eradication and preservation, which often involves controlled freezing, anoxic environments, or targeted dry cleaning. This is truly the unseen battle, where conservators act as careful, precise exterminators, protecting the artwork from tiny, destructive forces.
- Consolidation of Flaking or Friable Media: For artworks where the medium itself (e.g., pastel, charcoal, or even some unstable inks) is actively flaking or becoming powdery and detached from the paper surface – a condition known as "friable" – conservators perform a delicate process called consolidation. This involves carefully applying a very dilute, reversible adhesive (often a synthetic resin or natural protein like gelatin) to the affected areas, helping to re-adhere the media particles to the paper without altering their appearance or texture. It requires immense precision, often under magnification, to stabilize the surface and prevent further loss. This is one of those interventions where a DIY attempt would almost certainly lead to irreversible damage and loss of the artwork's integrity.
- Deacidification: For older, acidic papers, they can sometimes apply precise chemical treatments to neutralize the harmful acids, thereby dramatically extending the paper's lifespan and preventing further self-destruction, a complex process requiring careful pH monitoring. It’s like giving an aging artwork a chemical reset, halting the insidious 'slow fires' and offering it a new lease on life.
- Aesthetic Retouching and Inpainting: Restoring Visual Continuity: While the primary goal of conservation is preservation, sometimes aesthetic interventions are necessary to restore visual continuity, especially after repairs for tears, losses, or severe abrasion. Aesthetic retouching or inpainting involves carefully applying reversible, conservation-grade pigments to fill in areas of loss or discoloration, making the repair less noticeable. This is done with the utmost respect for the original artist's intent and is strictly confined to the areas of damage. The pigments used are chosen to be stable, lightfast, and, crucially, distinguishable from the original artwork under UV light, ensuring complete reversibility in the future. It's a nuanced art form in itself, requiring an artist's eye and a conservator's scientific rigor.
- Aesthetic Retouching and Inpainting: Restoring Visual Continuity: While the primary goal of conservation is preservation, sometimes aesthetic interventions are necessary to restore visual continuity, especially after repairs for tears, losses, or severe abrasion. Aesthetic retouching or inpainting involves carefully applying reversible, conservation-grade pigments to fill in areas of loss or discoloration, making the repair less noticeable. This is done with the utmost respect for the original artist's intent and is strictly confined to the areas of damage. The pigments used are chosen to be stable, lightfast, and, crucially, distinguishable from the original artwork under UV light, ensuring complete reversibility in the future. It's a nuanced art form in itself, requiring an artist's eye and a conservator's scientific rigor.
- Disaster Recovery: In the unfortunate event of fire, flood, or other disasters, conservators are trained in emergency salvage techniques to stabilize and assess damaged collections, offering the best chance for recovery and minimizing further loss. In these terrifying moments, a conservator is your artwork's most powerful advocate, often rescuing pieces that seem utterly beyond hope.
- Consultation with an Expert Conservator: For comprehensive guidance on specific conservation challenges or to understand the nuances of various treatments, seeking direct insights from a professional is invaluable. Our QA with an art conservator: preserving your valuable art collection offers a window into their expertise and the critical questions to ask.
Using Environmental Monitoring for Conservation
While we discussed environmental monitoring for preventative care, these same tools become even more critical when an artwork requires conservation. Conservators often integrate precise environmental data into their treatment plans and post-treatment recommendations.
- Pre-Treatment Analysis: Before any intervention, environmental data loggers can provide the conservator with a baseline understanding of the conditions the artwork has endured. This helps them identify potential causes of damage (e.g., chronic humidity fluctuations, sudden temperature spikes) and tailor treatments accordingly.
- During Treatment: For aqueous treatments (like stain reduction or flattening), conservators meticulously control humidity and temperature within specialized chambers. These environments are precisely monitored, often with highly sensitive sensors, to ensure the paper undergoes controlled expansion and contraction, preventing further stress or damage.
- Post-Treatment Recommendations: After conservation, the conservator will provide specific environmental guidelines for the artwork's future display and storage. This might involve recommending stricter humidity ranges, particular light limitations, or specialized framing—all informed by the artwork's inherent vulnerabilities and the nature of the treatment. Integrating your home monitoring with these recommendations ensures the longevity of the conservation work, protecting your investment for the long haul.
Their methods are characterized by precision, thorough documentation, reversibility, and an unwavering commitment to prioritizing the integrity and longevity of the artwork above all else.
Using Environmental Monitoring for Conservation
While we discussed environmental monitoring for preventative care, these same tools become even more critical when an artwork requires conservation. Conservators often integrate precise environmental data into their treatment plans and post-treatment recommendations.
- Pre-Treatment Analysis: Before any intervention, environmental data loggers can provide the conservator with a baseline understanding of the conditions the artwork has endured. This helps them identify potential causes of damage (e.g., chronic humidity fluctuations, sudden temperature spikes) and tailor treatments accordingly.
- During Treatment: For aqueous treatments (like stain reduction or flattening), conservators meticulously control humidity and temperature within specialized chambers. These environments are precisely monitored, often with highly sensitive sensors, to ensure the paper undergoes controlled expansion and contraction, preventing further stress or damage.
- Post-Treatment Recommendations: After conservation, the conservator will provide specific environmental guidelines for the artwork's future display and storage. This might involve recommending stricter humidity ranges, particular light limitations, or specialized framing—all informed by the artwork's inherent vulnerabilities and the nature of the treatment. Integrating your home monitoring with these recommendations ensures the longevity of the conservation work, protecting your investment for the long haul.
The Ethics of Conservation: Reversibility & Minimal Intervention
The practice of conservation is governed by a strict ethical code, particularly for works on paper, where the inherent fragility of the material demands profound respect. At its core, conservation aims to stabilize, preserve, and reveal the artwork's original intent, without imposing the conservator's hand.
- Reversibility: This is the paramount principle. All conservation treatments, insofar as scientifically possible, must be reversible. This means that any added materials (adhesives, infills, toners) should be removable in the future without causing further damage to the original artwork. The logic is simple: future generations may have better techniques or different ethical considerations, and we must not foreclose their options. My heart still aches for pieces irrevocably damaged by irreversible 'restorations' of the past.
- Minimal Intervention: The conservator's goal is to do only what is absolutely necessary to stabilize and preserve the artwork. They don't seek to "over-restore" or alter the artwork's historical integrity. This means accepting some signs of age or minor imperfections if their removal would compromise the original material. It's about respecting the artwork's journey through time.
- Documentation: Every single step of the conservation process, from the initial assessment to the final treatment, is meticulously documented with written reports and photographs. This creates an invaluable, transparent record for future conservators, scholars, and owners, ensuring the artwork's history and all interventions are fully understood.
- Respect for Original Intent: A conservator always strives to understand and respect the artist's original intent, choosing treatments that do not distort or misrepresent the artwork. This might involve extensive research into the artist's materials and techniques.
- Long-Term Stability: All materials and methods used in conservation are selected for their long-term stability and compatibility with the artwork. Conservators avoid any materials that might introduce new risks or accelerate degradation in the future.
- Reversibility: This is the paramount principle. All conservation treatments, insofar as scientifically possible, must be reversible. This means that any added materials (adhesives, infills, toners) should be removable in the future without causing further damage to the original artwork. The logic is simple: future generations may have better techniques or different ethical considerations, and we must not foreclose their options. My heart still aches for pieces irrevocably damaged by irreversible 'restorations' of the past.
- Minimal Intervention: The conservator's goal is to do only what is absolutely necessary to stabilize and preserve the artwork. They don't seek to "over-restore" or alter the artwork's historical integrity. This means accepting some signs of age or minor imperfections if their removal would compromise the original material. It's about respecting the artwork's journey through time.
- Documentation: Every single step of the conservation process, from the initial assessment to the final treatment, is meticulously documented with written reports and photographs. This creates an invaluable, transparent record for future conservators, scholars, and owners, ensuring the artwork's history and all interventions are fully understood.
- Respect for Original Intent: A conservator always strives to understand and respect the artist's original intent, choosing treatments that do not distort or misrepresent the artwork.
- Long-Term Stability: All materials and methods used in conservation are selected for their long-term stability and compatibility with the artwork. Conservators avoid any materials that might introduce new risks or accelerate degradation in the future.
Finding the Right Conservator
Choosing a conservator is a critical decision, akin to choosing a surgeon for a loved one. Look for professionals who:
- Are accredited by a recognized professional body, signaling adherence to strict ethical and professional standards, such as the AIC's "Code of Ethics and Guidelines for Practice," which prioritize reversibility, minimal intervention, and respect for the original artwork.
- Specialize specifically in paper conservation (as opposed to paintings, sculpture, or textiles), as it's a distinct discipline with unique challenges.
- Provide a detailed, written condition report and a clear proposed treatment plan before any work commences, outlining the methods and expected outcomes.
- Can offer solid references from other collectors or reputable institutions, providing peace of mind and demonstrating their track record.
Good conservation is an investment, yes, but it's an investment in the deep, long-term health and cultural survival of your cherished works. If you're ever curious about how such delicate work is displayed, a visit to a place like my museum in 's-Hertogenbosch can offer some fascinating insights into art preservation, and often provides examples of expertly conserved works that have been given a new lease on life.
FAQs: Just a Few More Thoughts
Sometimes, the simplest questions are the most important. Here are a few I've either asked myself or heard from others. Perhaps you've wondered about these too, as I certainly did when I started my collecting journey, navigating the bewildering world of art care.
- Is it safe to store my paper art in the attic or basement? This is one of the most common, and most disastrous, mistakes a collector can make. Attics are notoriously hot, dry, and prone to extreme temperature swings, which can embrittle paper and accelerate fading. Basements, conversely, are typically damp, humid, and prone to flooding, creating an ideal breeding ground for mold, mildew, and pests like silverfish. Both environments are fundamentally unsuitable for the long-term storage of delicate works on paper. Always seek a cool, dry, dark, and stable interior space for storage, ideally climate-controlled.
- Can I hang my print in the bathroom for a pop of color? Absolutely not. Bathrooms are notorious for high humidity and rapid temperature changes. It's a prime breeding ground for mold and a quick path to a warped, damaged artwork. Pick a different room! Trust me, the temporary aesthetic isn't worth the permanent damage.
- What if my artwork gets wet? Oh, the horror! My immediate, fervent advice: gently blot (do not rub!) any excess water with clean, absorbent paper towels, and then immediately consult a professional paper conservator. Lay the artwork flat on clean, dry blotting paper, changing the blotting paper frequently. Do not try to dry it with a hairdryer or iron, and absolutely do not attempt any DIY 'fixes.' Water damage is incredibly complex, involving potential staining, cockling (wavy deformation), mold growth (which can appear within 24-48 hours), and even reactivation of fugitive inks or mediums. A conservator is your only real hope for minimizing irreversible effects and stabilizing the artwork before further deterioration sets in. Time is of the essence in these situations.
- Can I use hairspray as a fixative for my drawings? Please, for the love of art, no! This is a pervasive myth that can lead to absolute disaster. Hairspray contains acids, polymers, and other chemicals that will yellow, become brittle, and ultimately inflict irreversible damage on your artwork over time, creating a sticky, unpleasant, and permanent mess. Always use artist-grade, archival fixatives, and even then, use them sparingly and in a well-ventilated area.
- How often should I re-mat my framed artwork? Even with archival mats, I'd recommend a visual check every 10-20 years, or sooner if you notice any changes like discoloration, acid burn on the artwork edges, or a breakdown of the mat's integrity. While museum-quality mats are designed for longevity, environmental factors can still take their toll. Re-matting allows you to inspect the artwork outside the frame, replace potentially degrading materials, and ensure the artwork is still securely and safely hinged. It’s a proactive step that maintains the pristine micro-environment of your framed piece.
- How often should I "check up" on my collection? It's a good habit to periodically inspect your works on paper, especially those on display. Maybe once or twice a year, gently remove the frame from the wall and check the backing, look for any signs of foxing, fading, or insect activity. Early detection is absolutely key. Think of it as a biannual health check-up for your art – proactive care saves heartache down the line.
- Are cheap frames really that bad? Yes, they are. Unequivocally. They almost always utilize non-archival materials that will inevitably harm your artwork, leading to that dreaded 'acid burn' we discussed. While the upfront cost might seem appealing, the long-term damage (and the potential, often exorbitant, restoration costs, if a conservator can even fix it) far outweigh any initial savings. Think of a good frame as an essential part of the artwork's longevity, not just a decorative accessory; it's the protective shield, not just the pretty border.
- Is it okay to use a roller blind or curtains for light protection? Absolutely! While UV-filtering glazing is paramount, supplementing it with light-blocking window treatments like roller blinds, heavy curtains, or even external awnings is an excellent, additional layer of defense. It gives you direct control over the total light exposure, especially during peak sunlight hours. Just ensure they don't brush against the artwork when operated.
- I've found old tape on the back of my artwork; can I remove it myself? Please, do not attempt to remove old tape from your artwork yourself. This is a task for a professional paper conservator, and a highly challenging one at that. Old tapes (especially common household tapes like Scotch tape or masking tape) will have degraded, becoming brittle, discolored, and leaving behind incredibly stubborn, acidic adhesive residues that have likely stained the paper irreversibly. Any attempt to peel or scrape them off will almost certainly tear the paper, lift delicate fibers, or spread the adhesive further, causing more damage. A conservator uses specialized solvents, tools, and techniques to safely reduce or remove these residues, often under magnification, and even then, complete removal without a trace is rarely possible. Your best course of action is to leave it untouched and seek expert advice.
- Can I use any old tape for hinging? Definitely not. This is a common, and often disastrous, mistake that I've seen devastate many pieces. Only use conservation-grade, acid-free tapes or proper Japanese paper hinges with wheat starch paste, applied by someone knowledgeable and experienced. Regular tape (scotch tape, masking tape, etc.) will yellow, become brittle, and leave permanent, stubborn adhesive stains and residue that are incredibly difficult, if not impossible, for a conservator to remove without further damaging the artwork. It will often pull off layers of paper or leave dark, irreversible marks, severely impacting the artwork's integrity and value.
- How do I clean my paper artwork? Short answer: You don't. Seriously, don't try to clean your paper art yourself, even if it just looks like surface dust. Attempting to dust, wipe, or rub a drawing or print can cause irreversible smudging, abrasions, or embed dirt deeper into the paper fibers. If your artwork appears dirty, consult a professional paper conservator. They have the expertise and specialized tools to safely assess and clean paper, often using dry cleaning methods or very controlled aqueous treatments that a layperson simply cannot replicate.
- What are the tell-tale signs that my paper artworks might have a pest infestation? Vigilance is key! Look for small, irregular holes or tunnels in the paper, often with accompanying "frass" (tiny, powdery insect droppings) or shed exoskeletons. Silverfish and booklice can leave silvery trails or surface abrasions. A musty odor can indicate mold, which booklice feed on. For larger pests, look for chewed edges, droppings, or actual nests (rodents love paper for nesting). Any unusual activity, new stains, or degradation on the edges or verso of the artwork should prompt immediate, careful inspection. Early detection is your best defense against widespread, irreversible damage.
- What about pest control? Tiny creatures like silverfish, booklice, and various beetles absolutely love paper, especially in damp conditions. They can munch through your precious artworks, leaving irreversible damage. Keep storage and display areas meticulously clean, dry, and cool. Avoid storing art directly on floors. Consider using archival pest traps if you suspect an infestation, but always consult a conservator if you find actual damage.
- How to safely move a framed artwork? When moving framed pieces, especially larger ones, support them from both sides and carry them vertically to distribute weight evenly. Never lift by the top wire or hook. Use acid-free packing materials and ensure the artwork is well-cushioned and protected from impacts and drastic environmental changes during transit. For long-distance moves, specialized art handlers are worth the investment.
- For very large or heavy framed works, should I hire professional art installers? Absolutely. For any significantly sized or heavy framed artwork, hiring professional art installers is not just a convenience, but a crucial safety and preservation measure. They have the specialized tools, knowledge of structural integrity (e.g., locating studs, using appropriate anchors for drywall), and experience to safely handle and securely hang large pieces without risking damage to the artwork, the frame, or your walls. Furthermore, they understand how to ensure the artwork is perfectly level and positioned, and can advise on optimal hanging heights. It's a small investment that prevents potentially catastrophic accidents and ensures your art is displayed securely and beautifully. I learned this the hard way after a DIY attempt at a large piece led to a wobbly frame and a nervous week!
- I've heard about the "reciprocity law" in relation to light damage. What does that mean for my art? The concept of "reciprocity law" (or reciprocity failure in photography) suggests that for light damage, it's the total accumulated light exposure that matters, rather than just the intensity. In simple terms: a high intensity of light for a short period can cause similar damage to a low intensity of light for a long period, assuming the total light "dose" is the same. For your art, this means that even seemingly "safe" indirect light, if sustained over decades, can cause just as much fading and degradation as a few years of direct sunlight. This is why concepts like "lux hours" (cumulative light exposure) and rotational display are so crucial. Every photon counts, and prevention is about managing that cumulative dosage over the artwork's lifetime.
- Should I display my art in direct artificial light? While artificial light sources are generally safer than natural sunlight in terms of UV, prolonged exposure to any intense light can still cause fading and degradation over time. Use low-UV LED lighting, keep the light levels moderate, and consider rotational display for highly sensitive works. Think about the cumulative effect, even from what seems like a 'safe' source.
- Is it safe to write on the back of my artwork for documentation? Only with an archival, soft-lead graphite pencil, and only very lightly on the extreme edges of the verso (back) of the support, never on the artwork itself or where it might create an impression. Never use ink, markers, or anything that could bleed through or leave acidic residues. Better yet, keep all documentation separate in an archival sleeve or database, linked by a non-invasive identifier.
- What is 'cockling' and what causes it? "Cockling" refers to the wavy, undulating, or buckling distortion of paper, often seen in works on paper that have been exposed to fluctuating humidity. Paper fibers are hygroscopic, meaning they absorb and release moisture from the air. When humidity levels change rapidly or drastically, different areas of the paper expand and contract unevenly, causing the paper to warp and ripple. It's like watching your delicate artwork breathe, but with potentially damaging consequences if the "air" it's breathing isn't stable. While some cockling can sometimes be reduced by professional humidification and flattening, it's often a difficult condition to reverse completely. Prevention through stable humidity control is key.
- What is 'acid burn' and how does it happen? "Acid burn" is a conservator's term for the irreversible yellowing, browning, or discoloration that occurs on paper when it comes into contact with acidic materials over time. It's often seen as a dark border around an artwork that was framed with non-archival mat board or backing. The acids from these materials literally migrate into the artwork, breaking down its cellulose fibers and leaving a permanent stain. It's a silent, insidious damage that can severely compromise the artwork's integrity and value. The only prevention is to use rigorously acid-free and lignin-free materials for everything that touches your artwork.
- What is 'foxing' and how do I prevent it? Foxing refers to those unsightly, reddish-brown spots on paper. It's often caused by impurities in the paper (like iron particles) reacting with humidity and airborne pollutants, often exacerbated by microscopic fungal growth. Prevention is primarily about humidity control (aim for 45-55% RH), good ventilation, and using acid-free materials. Once foxing appears, it’s best to consult a conservator; home remedies can cause irreversible damage.
- Can I restore faded artwork myself? Absolutely not. Restoring faded artwork is an extremely specialized and complex process that requires advanced chemical knowledge, specialized equipment, and extensive training. Attempting DIY restoration can easily cause more damage, further destabilize pigments, and render professional conservation much more difficult or even impossible. It’s akin to performing brain surgery without medical training – profoundly dangerous with catastrophic potential. Once pigments have faded, it's very difficult, if not impossible, to reverse that process completely, even for experts. A conservator might be able to stabilize the artwork and prevent further fading, and in some cases, undertake inpainting (a highly skilled, reversible process of adding pigment to areas of loss or significant discoloration) to restore visual continuity. But a true "restoration" of lost color is rarely possible. Leave it to the experts, and focus on preventing future fading through diligent light management.
- How do I transport artwork safely? For framed pieces, ensure the glass is protected with tape (not directly on the artwork!) to prevent shattering, wrap in acid-free materials, and then cushion thoroughly in a sturdy box. For unframed works, the "sandwich method" (between two rigid, acid-free boards) inside an an archival portfolio is ideal. For valuable or sensitive pieces, consider professional art handlers who specialize in climate-controlled, secure transport.
- How do I safely pack an artwork for shipping (domestic or international)? Packing art for shipping is a highly specialized task, and for valuable or fragile pieces, I strongly recommend using professional art packers and shippers. However, for less valuable or robust pieces, a basic approach involves:
- Framed Works: Protect the glass with painter's tape (applied to the glass, not the frame or artwork) in a starburst pattern to prevent shattering. Wrap the entire framed piece in acid-free glassine or archival tissue. Add a layer of padding (bubble wrap, foam sheeting), ensuring the bubble side is out if directly against the artwork. Create a "sandwich" of rigid foam core or plywood around the padded piece. Place this inside a sturdy, purpose-built art shipping box (often double-walled cardboard or wood). Fill any voids with packing peanuts or crumpled paper.
- Unframed Works: The "sandwich method" with two rigid, acid-free boards is paramount. Place the artwork within an archival sleeve, then between two slightly larger archival foam core boards, taping the edges of the boards (not the artwork). Wrap this package in acid-free paper and cushioning, then place in a sturdy, flat shipping box. Always label the box clearly as "Fragile Art" with "This Side Up" indicators. Crucially, ensure you have adequate insurance coverage for transit.
- What about insurance riders for art? Many standard homeowner's policies have severe limitations on fine art. An insurance "rider" (an addendum to your policy) specifically for your art collection can provide much better coverage. Even better, a dedicated fine art insurance policy often offers "all-risk" coverage, ensuring comprehensive protection beyond typical household policies. Speak to your insurer about your options.
- Is it safe to store art in rolled tubes? Generally, no, flat storage is always preferred. Rolling can introduce stress, creases, and make the paper prone to cockling once unrolled. If absolutely unavoidable for very large works, use a large-diameter (at least 6-8 inches) acid-free tube and roll loosely with the image side facing out to reduce stress on the medium. This should only be for temporary storage, and ideally, done by a professional.
- Are digital art prints (giclées) on paper considered "fine art" and do they require the same care? Absolutely! High-quality digital art prints, often referred to as giclées, are very much considered fine art, and they absolutely require the same meticulous care as traditional drawings, watercolors, or prints. Their longevity depends on the artist's choice of materials: pigment-based, archival inks are essential (dye-based inks will fade quickly), as is acid-free, lignin-free fine art paper. When properly made with archival materials, a giclée print can be incredibly stable and long-lasting. Treat them with the same respect: frame with UV-filtering glazing and archival materials, control light exposure, and maintain stable environmental conditions. Don't let the "digital" aspect fool you; they are physical artworks with unique vulnerabilities.
- Should I frame original posters differently than fine art prints? While fine art prints often warrant museum-grade archival framing, original posters, especially vintage ones, also benefit from archival protection due to their historical value and often more fragile, acidic paper. The core principles remain: acid-free materials, UV-protective glazing, and proper hinging. However, a conservator can advise on specific needs for poster restoration or display.
- How do I clean the glass on a framed piece? This is one of those seemingly simple tasks that can go horribly wrong if not done correctly. Always, always spray glass cleaner onto a soft, lint-free micro-fiber cloth first, never directly onto the glass. This prevents the cleaner from seeping behind the frame and potentially damaging the artwork, the mat, or the frame's materials. Use a gentle wipe, working from the top down, and avoid excessive pressure on the frame itself. For museum-quality anti-reflective glass or acrylic, use only cleaners specifically recommended for those surfaces, as abrasive cleaners can damage their delicate coatings. And never, ever use harsh chemicals near your art. Always spray glass cleaner onto a soft, lint-free cloth first, never directly onto the glass. This prevents the cleaner from seeping behind the frame and potentially damaging the artwork or the frame's materials. Use a gentle wipe, and avoid excessive pressure on the frame itself.
- Can I display artwork near a fireplace? Absolutely not, and I speak from personal regret here. Fireplaces, even when rarely used, are notorious for creating highly unstable micro-climates. The radiant heat from a fire, or even the residual warmth from a recently used chimney, causes extreme temperature fluctuations. This constant heating and cooling is disastrous for paper, leading to embrittlement, cockling, and accelerating chemical degradation. Furthermore, soot and particulate matter from the fireplace can permanently embed in the artwork's surface. Trust me, the aesthetic appeal is not worth the irreparable damage. Keep your paper art well away from any heat source.
- Is it ever okay to display my paper art outdoors or in an unconditioned space? In almost all cases, the answer is a resounding no. Works on paper are inherently fragile and extremely vulnerable to the elements. Outdoors or in unconditioned spaces like sheds or garages, artworks will be subjected to rapid and extreme fluctuations in temperature and humidity, direct sunlight, rain, dust, pollutants, and a host of pests. This environment is a recipe for accelerated degradation, including severe cockling, mold growth, fading, embrittlement, and physical damage. Even in a protected outdoor area, the risks are immense and the damage will be irreversible. Keep your paper art safely indoors, in a stable, climate-controlled environment. There are exceptions for specifically designed outdoor art (e.g., weatherproof sculpture), but never for traditional works on paper.
- How do I remove fingerprints from my artwork? My fervent advice: don't try to remove fingerprints yourself. Fingerprints leave behind skin oils and acids that can quickly become permanent stains, especially on absorbent paper. Any attempt to rub or clean them with household products will almost certainly spread the oil and embed the dirt deeper, causing irreparable damage. If a valuable artwork has a prominent fingerprint, consult a professional paper conservator immediately. They may be able to reduce its appearance using highly specialized, targeted methods, but even for experts, it can be a significant challenge. This is precisely why gloves are your artwork's best friend!
- How to safely pack an artwork for shipping (domestic or international)? Packing art for shipping is a highly specialized task, and for valuable or fragile pieces, I strongly recommend using professional art packers and shippers. However, for less valuable or robust pieces, a basic approach involves:
- Framed Works: Protect the glass with painter's tape (applied to the glass, not the frame or artwork) in a starburst pattern to prevent shattering. Wrap the entire framed piece in acid-free glassine or archival tissue. Add a layer of padding (bubble wrap, foam sheeting), ensuring the bubble side is out if directly against the artwork. Create a "sandwich" of rigid foam core or plywood around the padded piece. Place this inside a sturdy, purpose-built art shipping box (often double-walled cardboard or wood). Fill any voids with packing peanuts or crumpled paper.
- Unframed Works: The "sandwich method" with two rigid, acid-free boards is paramount. Place the artwork within an archival sleeve, then between two slightly larger archival foam core boards, taping the edges of the boards (not the artwork). Wrap this package in acid-free paper and cushioning, then place in a sturdy, flat shipping box. Always label the box clearly as "Fragile Art" with "This Side Up" indicators. Crucially, ensure you have adequate insurance coverage for transit.
- What about insurance riders for art? Many standard homeowner's policies have severe limitations on fine art. An insurance "rider" (an addendum to your policy) specifically for your art collection can provide much better coverage. Even better, a dedicated fine art insurance policy often offers "all-risk" coverage, ensuring comprehensive protection beyond typical household policies. Speak to your insurer about your options.
- Is it safe to store art in rolled tubes? Generally, no, flat storage is always preferred. Rolling can introduce stress, creases, and make the paper prone to cockling once unrolled. If absolutely unavoidable for very large works, use a large-diameter (at least 6-8 inches) acid-free tube and roll loosely with the image side facing out to reduce stress on the medium. This should only be for temporary storage, and ideally, done by a professional.
- Are digital art prints (giclées) on paper considered "fine art" and do they require the same care? Absolutely! High-quality digital art prints, often referred to as giclées, are very much considered fine art, and they absolutely require the same meticulous care as traditional drawings, watercolors, or prints. Their longevity depends on the artist's choice of materials: pigment-based, archival inks are essential (dye-based inks will fade quickly), as is acid-free, lignin-free fine art paper. When properly made with archival materials, a giclée print can be incredibly stable and long-lasting. Treat them with the same respect: frame with UV-filtering glazing and archival materials, control light exposure, and maintain stable environmental conditions. Don't let the "digital" aspect fool you; they are physical artworks with unique vulnerabilities.
- Should I frame original posters differently than fine art prints? While fine art prints often warrant museum-grade archival framing, original posters, especially vintage ones, also benefit from archival protection due to their historical value and often more fragile, acidic paper. The core principles remain: acid-free materials, UV-protective glazing, and proper hinging. However, a conservator can advise on specific needs for poster restoration or display.
- How do I clean the glass on a framed piece? This is one of those seemingly simple tasks that can go horribly wrong if not done correctly. Always, always spray glass cleaner onto a soft, lint-free micro-fiber cloth first, never directly onto the glass. This prevents the cleaner from seeping behind the frame and potentially damaging the artwork, the mat, or the frame's materials. Use a gentle wipe, working from the top down, and avoid excessive pressure on the frame itself. For museum-quality anti-reflective glass or acrylic, use only cleaners specifically recommended for those surfaces, as abrasive cleaners can damage their delicate coatings. And never, ever use harsh chemicals near your art. Always spray glass cleaner onto a soft, lint-free cloth first, never directly onto the glass. This prevents the cleaner from seeping behind the frame and potentially damaging the artwork or the frame's materials. Use a gentle wipe, and avoid excessive pressure on the frame itself.
- Can I display artwork near a fireplace? Absolutely not, and I speak from personal regret here. Fireplaces, even when rarely used, are notorious for creating highly unstable micro-climates. The radiant heat from a fire, or even the residual warmth from a recently used chimney, causes extreme temperature fluctuations. This constant heating and cooling is disastrous for paper, leading to embrittlement, cockling, and accelerating chemical degradation. Furthermore, soot and particulate matter from the fireplace can permanently embed in the artwork's surface. Trust me, the aesthetic appeal is not worth the irreparable damage. Keep your paper art well away from any heat source.
- Is it ever okay to display my paper art outdoors or in an unconditioned space? In almost all cases, the answer is a resounding no. Works on paper are inherently fragile and extremely vulnerable to the elements. Outdoors or in unconditioned spaces like sheds or garages, artworks will be subjected to rapid and extreme fluctuations in temperature and humidity, direct sunlight, rain, dust, pollutants, and a host of pests. This environment is a recipe for accelerated degradation, including severe cockling, mold growth, fading, embrittlement, and physical damage. Even in a protected outdoor area, the risks are immense and the damage will be irreversible. Keep your paper art safely indoors, in a stable, climate-controlled environment. There are exceptions for specifically designed outdoor art (e.g., weatherproof sculpture), but never for traditional works on paper.
- How do I remove fingerprints from my artwork? My fervent advice: don't try to remove fingerprints yourself. Fingerprints leave behind skin oils and acids that can quickly become permanent stains, especially on absorbent paper. Any attempt to rub or clean them with household products will almost certainly spread the oil and embed the dirt deeper, causing irreparable damage. If a valuable artwork has a prominent fingerprint, consult a professional paper conservator immediately. They may be able to reduce its appearance using highly specialized, targeted methods, but even for experts, it can be a significant challenge. This is precisely why gloves are your artwork's best friend!
- What's the difference between a conservator and a restorer? While often used interchangeably, there's a subtle but important distinction. A conservator focuses primarily on preserving the artwork's original state, stabilizing it, and preventing further deterioration, adhering strictly to principles of minimal intervention and reversibility. A restorer might take more liberties, aiming to return an artwork to an idealized previous appearance, which sometimes involves more extensive (and less reversible) interventions. Always seek a conservator for fine art.
- How to choose a reliable art appraiser? Choosing a qualified art appraiser is just as critical as choosing a conservator. Look for an appraiser with specific expertise in works on paper or the particular medium you own. Crucially, they should be accredited by a reputable professional organization like the Appraisers Association of America (AAA), the American Society of Appraisers (ASA), or the International Society of Appraisers (ISA). These accreditations signify adherence to strict ethical standards and rigorous valuation methodologies, ensuring you receive an objective, defensible appraisal for insurance, estate planning, or sale. Always ask for references and a written agreement outlining the scope of work and fees. For a deeper dive into this crucial process, consider our guide on understanding art appraisals: what every collector needs to know.
- My artwork has a tear; can I repair it with glue or tape? Under no circumstances should you attempt to repair a torn artwork with household glue, tape, or any adhesive yourself. This is a critical mistake that will cause irreversible damage, often making professional repair far more difficult or impossible. Glues can dry brittle, yellow, cause cockling, or bleed through the paper, creating permanent stains. Tape will degrade, stain, and leave sticky residues that are almost impossible to remove. If your artwork is torn, the immediate best action is to carefully flatten it (if safe to do so) and place it gently between two sheets of clean, acid-free paper, then between two rigid boards. Do not try to align the tear or apply pressure. Then, consult a professional paper conservator immediately. They have the specialized training, tools, and archival, reversible adhesives to repair tears seamlessly and safely, preserving the artwork's integrity.
- What should I do if my framed artwork falls? A fallen artwork is a collector's nightmare. First, ensure safety—if glass is shattered, handle with extreme care. Do not attempt to re-hang it immediately. Carefully pick up the artwork, supporting it from underneath, and place it on a clean, flat surface. Assess the damage: Is the frame broken? Is the glass shattered? Has the artwork itself been creased, torn, or smudged? If there's any damage to the artwork, do not attempt to clean it or
## My Final, Not-So-Humble Opinion: A Love Story of Stewardship
Caring for works on paper isn't merely a chore; it is, at its heart, an profound act of love and an unwavering commitment to stewardship. When you choose to invest in a piece of art, whether it's a small, intimate drawing or a significant, commanding print, you are not simply acquiring an object; you are consciously stepping into the role of a custodian of a slice of creative history. It might, at first glance, appear to be a daunting list of rules, but I assure you, once you surrender to the rhythm of it, these practices seamlessly become second nature, ingrained in your very approach to art. You can think of it as part of a larger, more holistic commitment to how to take care of your art in general, extending your appreciation far beyond mere aesthetics.
And honestly, there's a deep, abiding satisfaction, a quiet joy, in knowing you are doing your utmost to ensure these delicate beauties can be cherished and enjoyed by future generations. It’s an integral part of the grand journey of collecting, a journey I'm still passionately on, forever exploring new ways to create and, yes, to preserve. If you're interested in seeing some of the tangible results of that journey, you can always explore more of my work here or follow my artist timeline. It's all part of the story, and paper, despite its inherent fragility, plays an utterly crucial, resonant role within it. So, go forth, collect with passion, care for your paper treasures with the profound dedication they inherently deserve, and know that their longevity rests, quite literally, in your loving, vigilant hands. It’s a love story, after all, and you are its devoted guardian. So, go forth, collect with passion, care for your paper treasures with the profound dedication they inherently deserve, and know that their longevity rests, quite literally, in your loving, vigilant hands. The silent beauty, the whispered stories, and the enduring legacy of these works depend on your informed and heartfelt stewardship.


