
Plein Air Painting for Beginners: A Wobbly Brushstroke Guide to Outdoor Art
Ready for plein air painting? This personal guide covers essential gear (from easels to brushes), finding your perfect spot, mastering natural light, executing first strokes, navigating challenges (weather, onlookers, etiquette), and transforming outdoor studies into studio masterpieces. Let's paint outside!
Plein Air Painting for Beginners: My Honest Guide to Painting Outdoors, One Wobbly Brushstroke at a Time
I’ll be honest, the first time someone suggested I take my easel outside, my immediate thought was, “Why on earth would I want to do that?” My studio is warm, the light is predictable, and there are no curious dogs trying to lick my brush water. But then, something shifted. I saw others doing it, truly connecting with their surroundings, and a tiny spark ignited. It’s a bit like learning to ride a bike after years of walking; you might fall, you might get a few scrapes, but the freedom? Oh, the freedom is something else entirely. This isn't just about making art; it’s about experiencing the world in a profoundly different way, finding a rhythm with nature, and letting the unexpected guide your hand in a way that truly fuels my own abstract work. If you’ve been curious about what is plein air painting but felt a bit overwhelmed, trust me, I've been there. In this guide, we'll unpack it together, one wobbly brushstroke at a time, exploring not just the deeply personal 'why' behind painting outdoors, but also the essential 'how-to's' from gear to brushstrokes, and even how these fleeting outdoor moments feed into my larger abstract studio work. We’ll cover everything from what you actually need in your kit, how to pick a perfect scene, basic techniques to get started, tackling unexpected challenges from weather to curious strangers, and finally, how to bring the magic of your outdoor studies back into your studio practice.
The “Why” Before the “How” (My Personal Hook & History)
For me, the studio can sometimes feel a little too controlled, a bit…stale. I found myself relying on photographs, which, while useful, never quite capture the dynamic dance of light and shadow, the subtle shifts of color as a cloud passes. Plein air strips all that away. It forces you to make decisions quickly, to observe deeply, and to embrace the unpredictable. It’s a humbling, exhilarating challenge that has, honestly, made me a better artist. Beyond the technical skills, I've discovered a profound sense of mindfulness out there; all worries fade, replaced by the immediate task of observing light and color. It's less about a perfect finished piece and more about the raw, unfiltered experience of being there.
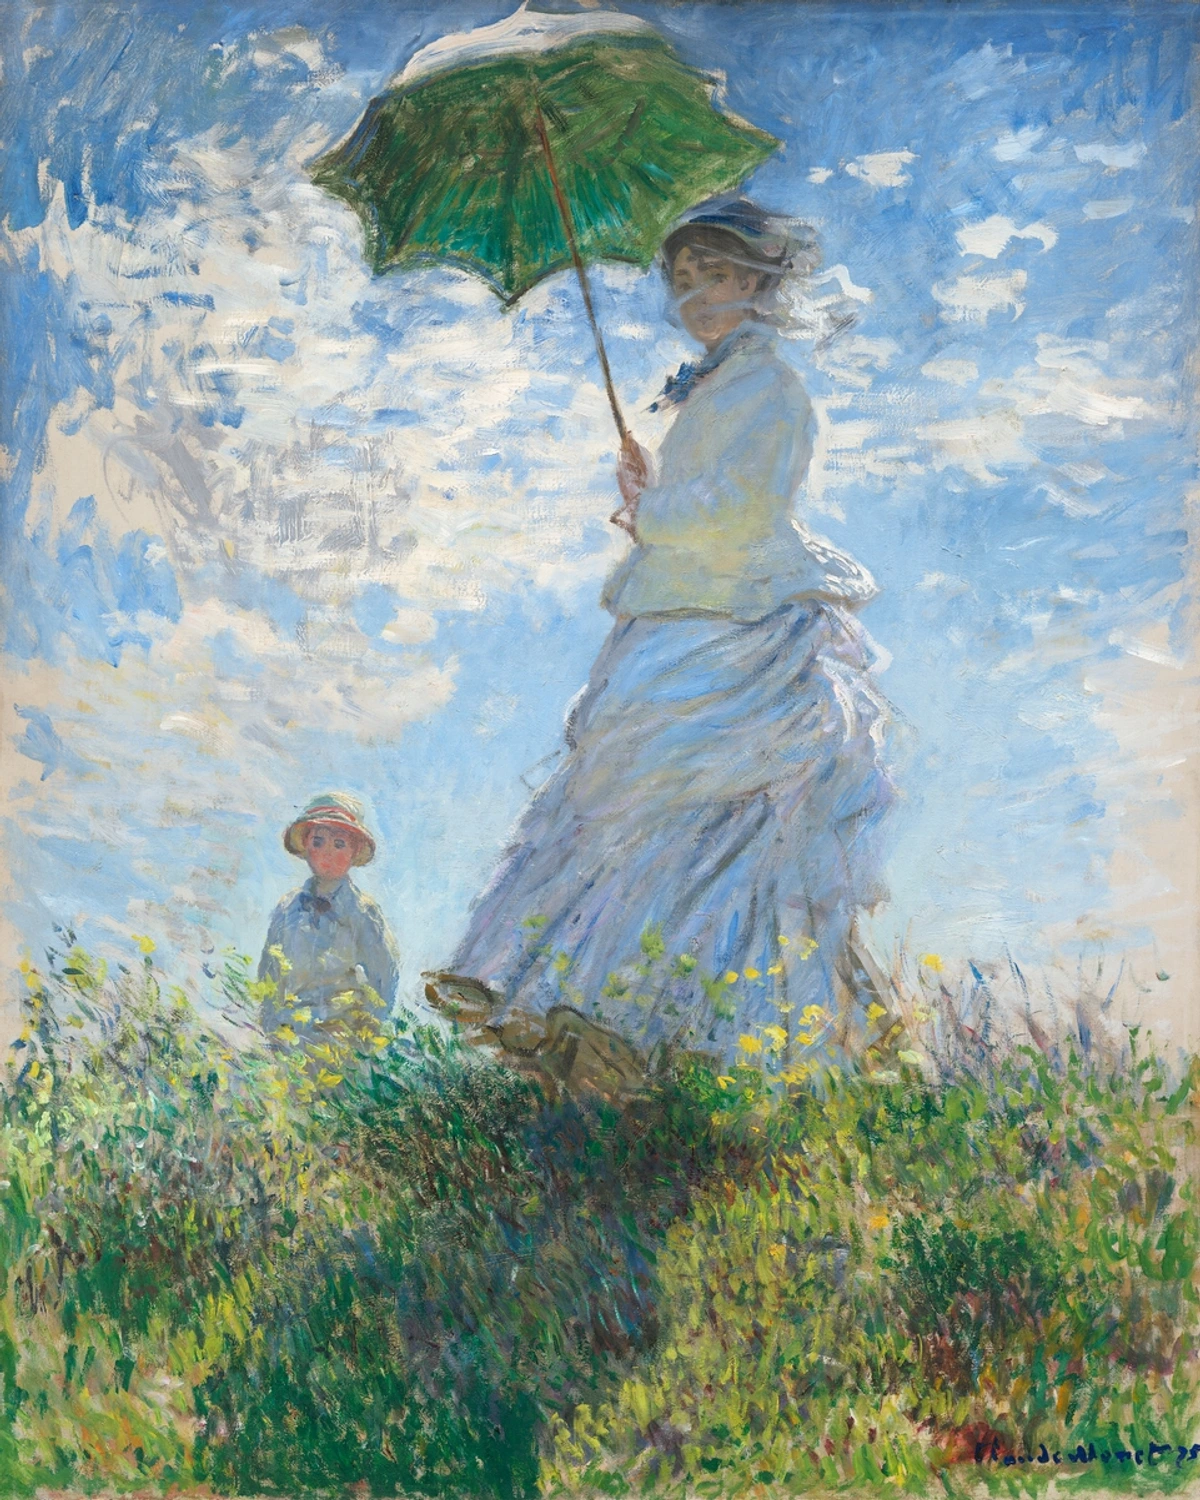
This dedication to capturing fleeting moments isn't new, of course. I remember being so inspired when I learned how artists like the Impressionists practically revolutionized painting by dragging their canvases outside, chasing the light, and turning quick observations into groundbreaking art. Think of Claude Monet and Pierre-Auguste Renoir, whose visionary work like Monet’s 'Impression, Sunrise' or Renoir's vibrant scenes of Parisian life directly benefited from their dedication to capturing light en plein air. Of course, it wasn't easy for them either; lugging cumbersome easels and wet canvases across fields wasn't exactly glamorous, and their loose, unpolished style initially faced criticism from the traditional art establishment. But they persisted, proving the profound value of direct observation.
And while the Impressionists are often seen as the poster children for this movement, I quickly discovered they weren't alone. Consider the Barbizon School artists like Jean-François Millet and Théodore Rousseau, who retreated to the Fontainebleau Forest to capture rural life directly, seeking an authenticity that felt vital. Or even later, the Group of Seven in Canada, who sought to define a national identity through their vivid depictions of the untamed wilderness, often battling extreme conditions. Even American artists of the Hudson River School or Luminism, while not strictly plein air, emphasized direct observation of nature to capture majestic landscapes with a sense of awe. Each group, in their own way, was seeking an authenticity and vitality that the studio couldn't provide, proving that painting outdoors is a timeless quest for direct experience. This rich history reminds us that there's a tradition of embracing this challenge, and every artist who steps outside is part of that lineage. Even today, contemporary plein air movements and events around the world continue this tradition, showing that the allure of capturing the present moment outdoors is as strong as ever.
Essential Gear: What You Actually Need (And What You Can Skip)
So, what do you actually need to haul out into the wild? Now that we’ve delved into the soul of plein air, let’s get practical: what you actually need to drag outside. Trust me, it’s less than you think. Look, the internet is full of fancy gear lists that will make your wallet weep. My advice? Start small. You don't need to break the bank to get started. I remember the dizzying overwhelm of thinking I needed all the things when I first started. Spoiler alert: I didn't. Think minimal, portable, and practical. My first setup? A cardboard box for an easel and a handful of student-grade tubes. It was more about getting out there than having the perfect kit, and honestly, that lesson stuck. You can even repurpose things like a sturdy cardboard box as a makeshift easel, or use old plastic food containers as water/solvent holders. The goal is to just start. Oh, and a small, foldable stool or portable chair? Absolute game-changer for those longer sessions – your back will thank you! Don't forget a sturdy bag or backpack; tackling uneven terrain with a wobbly setup is a pre-painting disaster waiting to happen. I once bought a super fancy, lightweight tripod easel that promised stability, only for it to wobble precariously in the slightest breeze – a humbling reminder that sometimes simple, sturdy solutions are best, or at least a good set of weighted clips for your canvas!
When it comes to easels, the choice can feel overwhelming, but it boils down to balancing stability, portability, and your working style. French easels are iconic; they're self-contained wooden boxes that hold your paints, palette, and can fold into a tripod. They're sturdy and classic, but often heavy. Pochade boxes are smaller, more compact versions, perfect for working on small panels or canvases, and incredibly portable for hiking. Then there are lightweight tripod easels (often aluminum) that are easy to carry and set up, though they might feel less stable in high winds. My first “ezel” was literally a cardboard box on a park bench, so don't let gear hold you back, but know that investing in a stable, comfortable setup will make a difference as you progress.
Easel Type | Pros | Cons | Best For |
|---|---|---|---|
| French Easel | Sturdy, self-contained, classic | Heavy, bulky, takes time to set up | Longer sessions, stable setup, traditionalist |
| Pochade Box | Compact, lightweight, very portable | Small canvases/panels only, limited storage | Hiking, quick studies, minimalist approach |
| Tripod Easel | Very lightweight, easy to carry | Less stable in wind, minimal storage | Beginners, general portability, quick setup |

credit, licence
My Bare-Bones Starter Kit:
- Something to paint on: A small pad of paper (oil-primed paper or canvas paper works wonders – they absorb less oil than plain paper, giving you a better, more stable surface for your paint). Or a couple of small canvases/boards. Don't go bigger than A4 for your first few outings; you'll thank me later. The challenge isn't just the subject, but the logistics of managing a large surface outdoors! And here’s a crucial tip: choose a subject that genuinely excites you. That passion will carry you through any logistical hurdles or unexpected challenges, truly translating into your artwork.
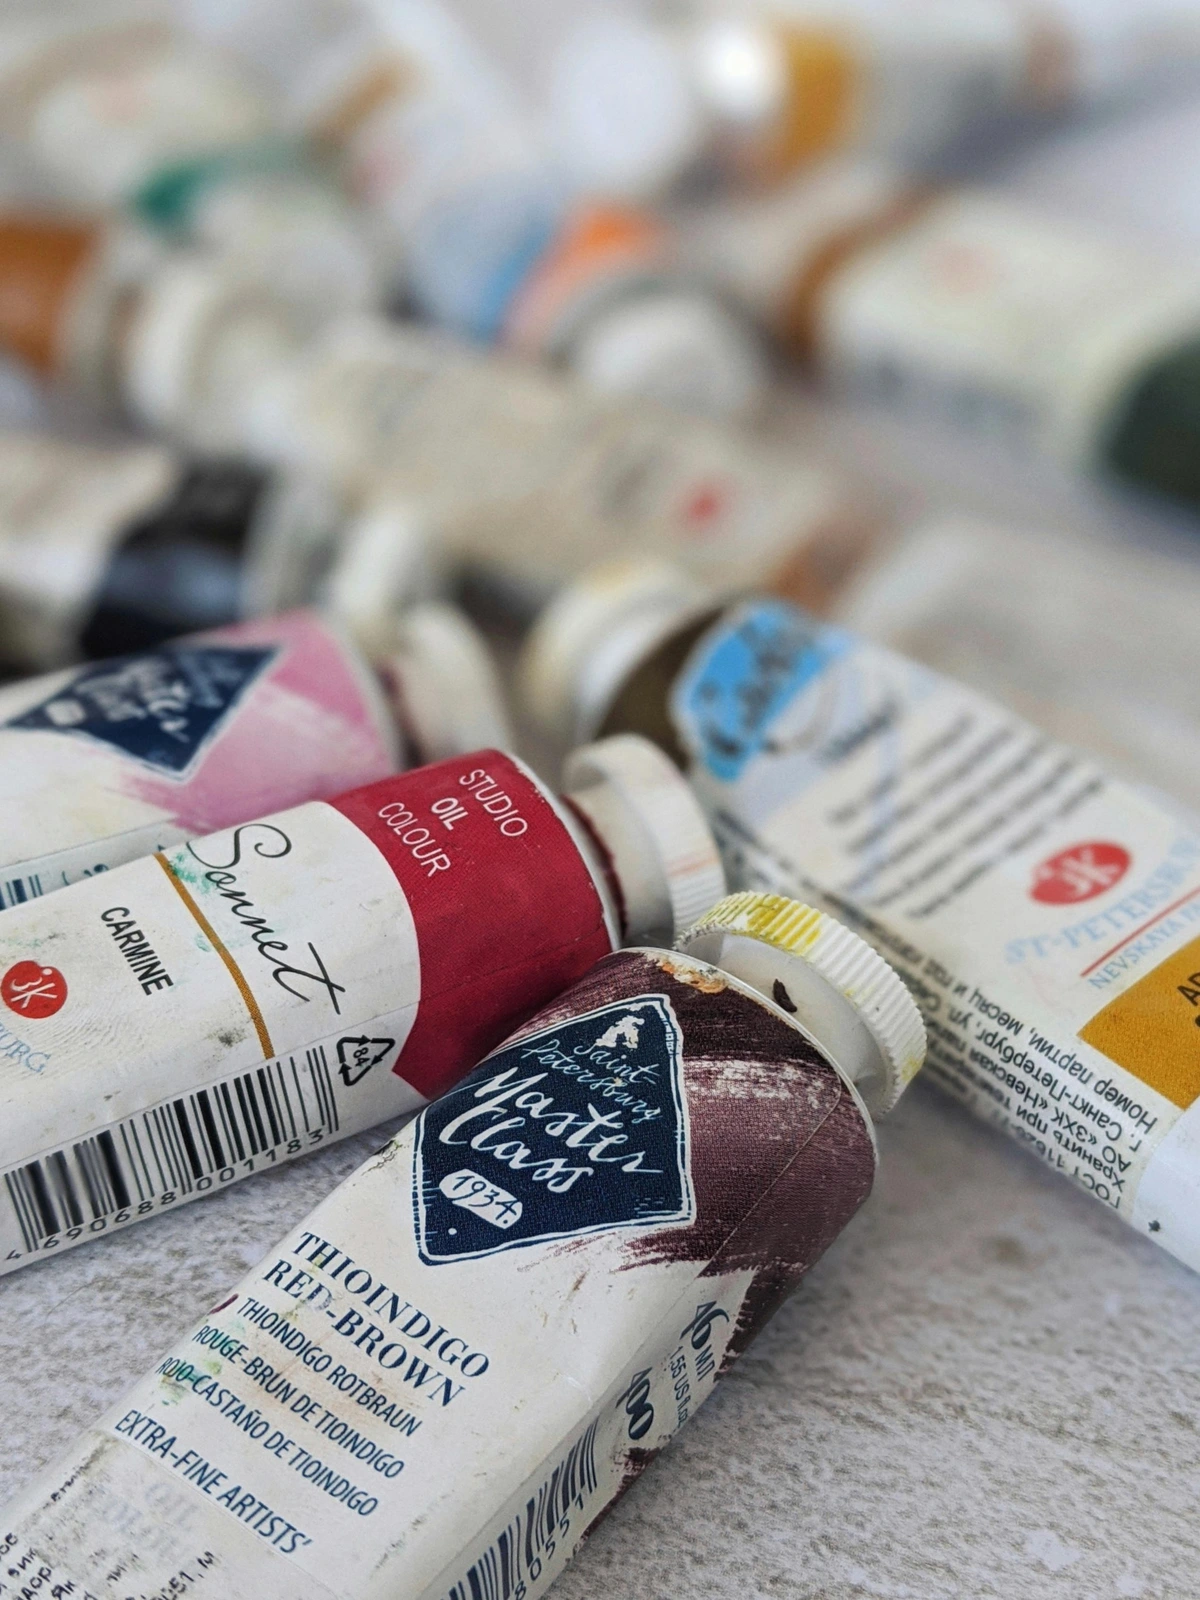
- A few tubes of paint: I usually start with a limited palette: a warm and cool red (think a fiery Cadmium Red Light and a deeper Alizarin Crimson), a warm and cool blue, a warm and cool yellow, white, and maybe a neutral dark. For oils, you get more working time, which is a blessing, allowing for extended blending opportunities even as the light shifts, and their rich opacity can build strong forms quickly. For cleanup, you’ll need solvent. Or, simplify your life with water-mixable oils which, as the name suggests, can be thinned and cleaned with water – a huge advantage for outdoor painting as you avoid carrying harsh chemicals! Watercolors and pastels are super portable and great for quick studies; the luminosity of watercolors is fantastic for capturing atmospheric effects, but they can be tricky with wind and unexpected rain; watercolors especially dry fast and can be hard to control in humid conditions, demanding swift decision-making. Acrylics, as I mentioned, dry incredibly fast outdoors, which can be a blessing for quick layering or a curse if you want to blend smoothly – though a spray bottle with water can help extend working time, as can adding a slow-drying medium or working on a stay-wet palette to give yourself more blending time. Their quick-drying nature is great for rapid, expressive strokes. Each medium offers a unique dialogue with nature, and finding what truly sings for you under the open sky is part of the adventure. And if you’re curious about basic brushstrokes for acrylic painting, we have a guide for that too. On the palette itself? My biggest tip for plein air color mixing is to simplify. Try to match the dominant hues and values you see, rather than getting caught up in endless permutations. Sometimes, less truly is more, especially when the light is shifting every minute.
- Brushes: Two or three brushes are plenty. For oils and acrylics, hog bristle brushes are durable and hold paint well, excellent for thicker applications and textured strokes. Synthetic brushes are softer, great for smoother blending and detail, and easier to clean, especially with acrylics. A small round brush for details, a medium flat brush for shapes and edges, and a larger flat or wash brush for broad strokes or washes are all you really need. Keep it simple.
- Palette: A flat plastic lid, a paper plate, or even a piece of cardboard will do. No need for a fancy wooden one yet. After all, it's going to get messy, and who wants to worry about wiping down a pristine wooden palette when the light is perfect?
- Easel/Support: As discussed above, choose what works for your budget and portability needs. The goal is to get outside.
- Water/Solvent: Depending on your medium. A small container for water (for acrylics/watercolors) or a small, sealed container for solvent (for oils). Don't forget a second container for clean water/solvent.
- Paper towels/rags: You'll need more than you think. Trust me on this one.
- A bag: To carry it all. A comfortable, sturdy backpack makes a huge difference, especially if your chosen spot is a bit of a hike. No one wants a wobbly setup before they even start.
- Sun protection: Hat, sunscreen. You'll be out there longer than you anticipate. And maybe a snack, because creative energy burns calories!
Comfort and Practicalities on Location:
Beyond your art supplies, a few extra items can drastically improve your outdoor painting experience. I've learned these the hard way: a small first-aid kit for unexpected scrapes or insect bites (because nature is, well, nature!), reliable insect repellent (nothing kills a creative flow faster than a swarm of mosquitoes!), a full portable water bottle to stay hydrated, and a small, sealable trash bag for all your used rags and wrappers. Remember, leave no trace behind – our goal is to enhance the environment, not add to it. These seem small, but they make a world of difference for endurance and enjoyment.
And that’s it! Really. Resist the urge to buy everything. You’ll figure out what you truly need as you go. Each outing is a lesson in minimalism and practical problem-solving. It’s part of the adventure, after all!
Finding Your Spot & Pre-Game Planning: The Art of Scouting and Sketching Your Scene
Ever wondered how artists choose that perfect, inspiring scene? With our essential toolkit assembled, the next crucial step is finding the perfect stage for our outdoor performance. This is half the fun! Don’t just plonk down anywhere. Take a few minutes to observe, almost like a hunter stalking its prey (but, you know, with brushes instead of arrows). I once spent twenty minutes just watching the light on an old oak tree before I even thought about setting up. Those moments of pure observation are crucial for developing your artistic eye and for quickly mapping out your composition. What tells the most compelling story? What draws your eye? Quickly sketch out a few options to see what clicks.
Here's what I look for:
- Light: How is the light falling? Is it too harsh? Too flat? Morning and late afternoon light are often the most dramatic and interesting. Watch how it changes even in a few minutes. This dynamic shift – the way shadows lengthen, highlights shift, and colors deepen or soften – is why plein air is so challenging and rewarding. It's like trying to capture a dance that never stops! And if you really want to understand how light affects your scene, try taking a quick black and white photo with your smartphone. It instantly strips away color and helps you see the pure value masses.
- Composition: What captures your eye? Don't try to paint the entire landscape. Look for interesting shapes, contrasting values, a focal point. Maybe it’s just a corner of a building, a tree, or the way the sky meets the horizon. Simplify, simplify, simplify. I remember trying to paint an entire mountain range once and ended up with a chaotic mess. The next time, I focused on just one prominent peak and the way the light hit its crest, and that became a much stronger piece. A simple viewfinder, even one you make with your fingers, can also be a game-changer for framing your composition before you even set up. Or a small thumbnail sketch pad to quickly jot down value studies – trust me, it saves a lot of wasted paint! For landscapes, a basic understanding of perspective will also do wonders for your composition, helping you create a sense of depth and realism, even if you’re just hinting at it.
- Values: Building on composition, let's talk about values – not just darks, mid-tones, and lights, but the relationship between them. Think of it like the skeleton of your painting, or the foundation of a building; without strong values, your art will struggle to find its structure, depth, and form, no matter how beautiful your colors. They're what give objects weight and volume! Think of visual weight as the perceived heaviness of an element in your composition. Darker values, higher contrast, saturated colors, and larger objects tend to have more visual weight, drawing the eye more forcefully. For instance, a dark, solitary tree trunk will have more visual weight than a cluster of light, airy leaves, anchoring your composition. Understanding this helps you balance your composition and direct the viewer's gaze, creating a clear focal point and preventing your painting from feeling lopsided or chaotic. It’s the conductor of your visual symphony, ensuring every element plays its part. A simple trick is to squint your eyes: objects with the same value will merge. Try to simplify the scene into 3-5 main value masses. This groundwork is far more critical than getting the exact shade of green right. And while you’re observing, pay close attention to color temperature. The quality of light, whether it’s warm and golden in the evening or cool and crisp in the morning, dramatically affects how colors appear. A shadow isn't just a darker version of a color; it often leans cooler (think blues, purples), while areas in direct sunlight will feel warmer (reds, oranges, yellows). Learning to see and exaggerate these subtle temperature shifts will bring so much life to your work. (And speaking of color, understanding how artists use color can really help here, even if you’re just starting!)
- Comfort & Safety: Can you sit or stand comfortably? Is it safe? Will you be in the way? I’ve learned the hard way that a comfortable setup makes a world of difference. Being cold, hot, or cramped will kill your motivation faster than a bad brushstroke. Also, consider accessibility. Sometimes the most beautiful spots are not the most practical. Before you set up, a quick check for local regulations or permissions for painting in public or private spaces can save you a headache later – better safe than sorry, especially if you’re in a national park or private estate.
The Power of a Quick Study: Your Reconnaissance Mission
Before you even touch paint, taking a few minutes for a quick sketch or value study can be an absolute game-changer. Think of it as your reconnaissance mission. I’ve learned the hard way that jumping straight into color often leads to frustration and wasted paint. A simple thumbnail sketch helps you quickly assess different compositions, identify your focal point, and map out those crucial value masses (remember, the light is changing!). By establishing your values first, you also set yourself up for better color mixing, as you can then focus on finding the correct hue and saturation for those established light and shadow masses, preventing muddy colors. You can even block in a basic horizon line to anchor your composition, especially vital for landscapes. This step isn’t about creating a masterpiece; it’s about solving problems on paper before you commit to paint. It saves time, conserves materials, and dramatically increases your chances of a successful study. Plus, it really makes you slow down and look deeply. It's a quick, almost meditative way to engage with your subject before the paint even comes out. Don't forget a small sketchbook; it's perfect for capturing fleeting impressions of color, mood, and composition even when you're not ready to set up a full easel.
Quick Scouting Checklist:
- What is the light doing right now (and how is it changing)?
- What is my primary focal point?
- What are the 3-5 dominant value masses?
- Am I comfortable and safe?
Understanding Light: More Than Just Bright or Dim
Now that you’ve scouted your location, considered composition, and perhaps done a quick value study, let's talk about the ever-changing language of light itself. Ever noticed how the world transforms under different skies? Becoming a student of light outdoors is an absolute game-changer, revealing so much about the forms and mood of your scene.
As you look across a landscape, objects further away tend to appear lighter, bluer, and less saturated due to the haze in the atmosphere. This natural phenomenon, atmospheric perspective, is something you’ll observe directly. You can powerfully convey depth in your outdoor paintings by exaggerating this effect – making distant elements lighter, cooler, and less distinct. This 'trick nature uses' is one we artists get to borrow, making our art feel more real and expansive. Conversely, foreground elements will appear warmer, more saturated, and with sharper details, further enhancing the illusion of depth.
- Midday harsh light: Often creates strong, high-contrast shadows and can flatten colors. The shadows will be short and stark, emphasizing geometric forms. It’s challenging but forces you to simplify and focus on strong value contrasts.
- Overcast, diffused light: Softens shadows and reveals subtle color nuances. This can be wonderful for capturing atmospheric effects and intricate details without battling intense shifts. Everything feels a little more connected, a little more understated, and shadows will be soft or nearly absent, creating a sense of volume without harsh edges.
- Dawn/Dusk dramatic light: The golden hour! Long, warm shadows and saturated colors. This is when the landscape truly sings, but it’s also the most fleeting, demanding rapid observation and bold decisions. Shadows will be long and dramatic, creating striking patterns and leading lines.
Beyond values and temperature, understanding light is intrinsically linked to achieving color harmony in your painting. Different lighting conditions naturally present harmonious palettes – the cool blues and muted greens of an overcast day, or the fiery reds and oranges of a sunset. By observing how light unites colors in a scene, you learn to select and mix colors that resonate with each other, creating a cohesive and visually pleasing artwork, rather than a jumble of discordant hues. It's a foundational principle, whether you're painting a realistic landscape or extracting the essence for an abstract composition. For a deeper dive, check out our definitive guide to understanding light in art.
Setting Up: The Great Unpack
With your ideal location secured and your mental notes from sketching in hand, the next step is the satisfying ritual of setting up your portable studio. This can feel a bit awkward at first, but with practice, it becomes a smooth, almost meditative process. Think of it as a small performance, a dance between you and your materials, and a commitment to the present moment, moving from preparation to active creation.
Before you even think about squeezing paint, prioritize stability. A wobbly setup isn't just annoying; it's an invitation for disaster, especially on uneven terrain or in a sudden gust of wind. Take a moment to ensure your easel is firmly planted and your supplies won't take an unexpected tumble.
- Easel first: Get it stable. No one wants their masterpiece blown into a pond. Or, worse, into a curious dog's fur.
- Palette next: Squeeze out just a little bit of paint. Remember, you can always add more. I usually lay out my limited palette, reserving a small area for mixing.
- Water/solvent: Set up your two containers. Keep them stable and away from errant feet.
- Surface: Secure your paper or canvas. Make sure it's at a comfortable height and angle for you to work without strain.
Take a deep breath. Look around again. You're ready.
First Strokes: Embracing Imperfection and Speed
This is not the time for photo-realistic perfection. This is about capturing the essence – that fleeting feeling, that moment of light, that particular mood. It’s like trying to catch a whisper on the wind. Your goal isn't a polished masterpiece, but a vibrant snapshot of observation and feeling. Remember, your first plein air pieces are studies, not finished works – and that's the whole point!

credit, licence
- Start with big shapes (Blocking In): This is where you lay down the foundational forms. Think of it like building a house – you get the frame up first. Use a larger brush and a limited palette for this initial stage to block in the major elements (sky, ground, large trees, main structures) and ensure color harmony. Don’t get bogged down in details yet. Squint your eyes; what do you see? You’re looking for the big masses of color and value, establishing the main composition quickly.
- Values before color: We talked about values earlier, and here’s where they truly shine. Get your darks, mid-tones, and lights established. This is far more important than getting the exact shade of green right. If your values are incorrect, your painting will lack structure, depth, and form. It gives your painting its backbone.
- Work fast: The light is changing! Your mood is changing! Everything is changing! Don't overthink it. Make quick decisions. Embrace the urgency. That fleeting quality is what makes plein air so special, and so challenging. Remember, every stroke is a conversation, a unique dialogue with nature, and even if the conversation feels a bit jumbled, you're learning the language. The beauty is in the attempt, not just the masterpiece.
- Don't be afraid to make mistakes: Every “failed” painting is a lesson learned. I still have a collection of plein air pieces I lovingly refer to as “What Was I Thinking?” studies. They're precious to me because they represent growth. Sometimes the biggest breakthroughs come from the messiest attempts, or from a particularly wobbly brushstroke leading to an unexpected texture.
The Unpredictable: Weather, Onlookers, and Self-Doubt
Ah, the joys of painting outdoors! What's an outdoor adventure without a little... unexpected drama? These aren't just obstacles; they're elements that can infuse your work with unique character and challenge you to grow as an artist. Think of them as opportunities, not setbacks. And let’s be honest, part of the charm is the feeling of the sun on your skin, the scent of damp earth after a shower, or the crispness of the air – these sensory details become part of the experience, and sometimes, part of the art.
- Weather & Environmental Distractions: Check the forecast, but be prepared for anything. A small umbrella can be a lifesaver, both for sun and light rain. Embrace the challenge; sometimes the most dramatic weather makes for the most interesting art. I once painted in a gentle mist, and the resulting piece had a haunting, ethereal quality I could never achieve in the studio. Just remember to secure everything, especially lightweight items, against a sudden gust. Beyond just the big weather changes, what about the smaller annoyances? I’ve found that a good bug spray is worth its weight in gold – nothing kills a creative flow faster than a swarm of mosquitos! Strong winds? Weighted clips for your canvas or board, and making sure your easel is firmly planted or even tethered, can save you from chasing your art across a field. Extreme temperatures, whether chilling cold or baking heat, demand smart layering and hydration; a thermos of hot tea in winter or ice water in summer can make a huge difference in your endurance and enjoyment. And wildlife? I even had a squirrel once try to make off with one of my smaller brushes – talk about unexpected collaborators! Remember, these aren't just annoyances; they're unique elements that make your plein air experience truly one-of-a-kind.
Modern Plein Air & Technology
Of course, while the Impressionists were lugging cumbersome gear, we modern plein air artists have a few advantages. A quick check of a weather app can save you from a surprise downpour, and your smartphone can be a great tool for snapping a quick reference photo to capture fleeting light or to remember a composition detail, though I always advocate for primary observation over photographic reliance. Some artists even use portable chargers for heated vests in winter or small fans in summer. It’s a contrast to the past, for sure, but the core challenge of direct observation remains.
- Onlookers & Noise: Most people are genuinely curious and kind. A simple smile and a brief, polite explanation often suffice. "Just enjoying the light!" or "Trying to capture this moment!" I vividly remember one time an elderly gentleman walked by, peered over my shoulder, and declared, "That tree looks like a potato!" I just smiled, agreed it was a particularly lumpy tree, and kept painting. That interaction actually made me look at the tree differently, focusing on its organic, almost humorous form – sometimes the best critiques come from unexpected places. If someone is intrusive, it's okay to politely say, "I'm really concentrating right now," or even just put on headphones. If someone offers an unhelpful critique, a cheerful "Thanks for the feedback! I'm just focusing on the light today" often does the trick. Beyond the occasional potato-tree-critic, sometimes you'll find yourself in surprisingly noisy or busy locations. I've learned to either embrace it as part of the scene (the energy of a city park, for instance) or find quieter pockets. Headphones with some calming music can also be a sanity saver!
Plein Air Etiquette
Speaking of interacting with the world, a quick word on how to be a good guest. Beyond respecting private property and protected areas, remember you're sharing the space. Be mindful of setting up in high-traffic areas where you might block paths or views. If you're painting near other artists, give them space and respect their concentration. Leave no trace behind – pack out all your trash, including paint-stained rags or solvent containers. Our goal is to enhance the environment, not leave a mess. And hey, sometimes being respectful also means just a friendly nod to a fellow painter, acknowledging that you're both out there, sharing this unique experience.
- Self-Doubt & Psychological Benefits: This one is a silent saboteur. It creeps in when your painting isn't going as planned, or when you compare your raw outdoor study to a perfectly polished studio piece. Recognize it for what it is – a normal part of the creative process. Plein air is about observation and experience, not perfection. Every stroke is a dialogue with nature. Beyond the artistic growth, I've found that being out there, battling the elements and the clock, has profound psychological benefits. It forces a deep state of mindfulness, where your worries fade into the background, replaced by the immediate task of observing light and color. It's a stress reducer, a mood lifter, and a reminder of the beauty in the everyday. There’s a quiet sense of accomplishment that comes from simply being present and creating, even if the painting itself isn't a masterpiece. Be kind to yourself. You're out there, learning, growing, and engaging with the world in a way most people don't. That alone is a victory.

Bringing it Home: Finishing Your Plein Air Studies
So, you’ve packed up, maybe a little windblown, a little paint-splattered, but hopefully buzzing with a quiet satisfaction. Now what? Your plein air pieces might not be finished paintings, and that’s perfectly okay. In fact, many artists use them as studies or 'sketches' for larger studio works. Consider them your raw observations, your visual diary entries. Once you’re back in the studio, take time to look at them. What did you learn? What worked? What didn’t? The light was changing, you were working fast – these are conditions that foster spontaneous, often powerful marks. Don’t be too quick to "fix" them." Sometimes, the raw energy of an outdoor study is its greatest strength, a direct imprint of that unique moment.
You might refine a few edges, add a highlight, or simply mount it and title it as a study. These studies are not just pretty pictures; they're rich creative fuel. You might find yourself extracting a particularly striking color palette from a sunset study, translating the dynamic line work of wind-swept trees into abstract gestures, or using the value mapping from a landscape to inform the spatial relationships in a non-representational piece. For example, the jagged lines of a stormy pine tree might spark a series of energetic, abstract strokes, or the subtle color shifts of a misty morning could become the foundation for a deeply atmospheric abstract work. Even the feeling of battling the wind or the sheer joy of a moment of perfect light can infuse your abstract paintings with an intangible energy or emotional depth that a photograph could never provide. They provide a direct, lived experience of light and form that a photograph simply can't capture, becoming the foundation for richer, more informed studio paintings. And here’s a tip I wish I’d known earlier: document your sessions. Snap a quick photo of your setup, the scene you’re painting, and your finished study. It’s not about judging your work, but creating a visual diary. These photos become invaluable resources for future reference, helping you track your progress, recall specific lighting conditions, or simply remember that incredible day you spent wrestling with a particularly stubborn cloud formation.
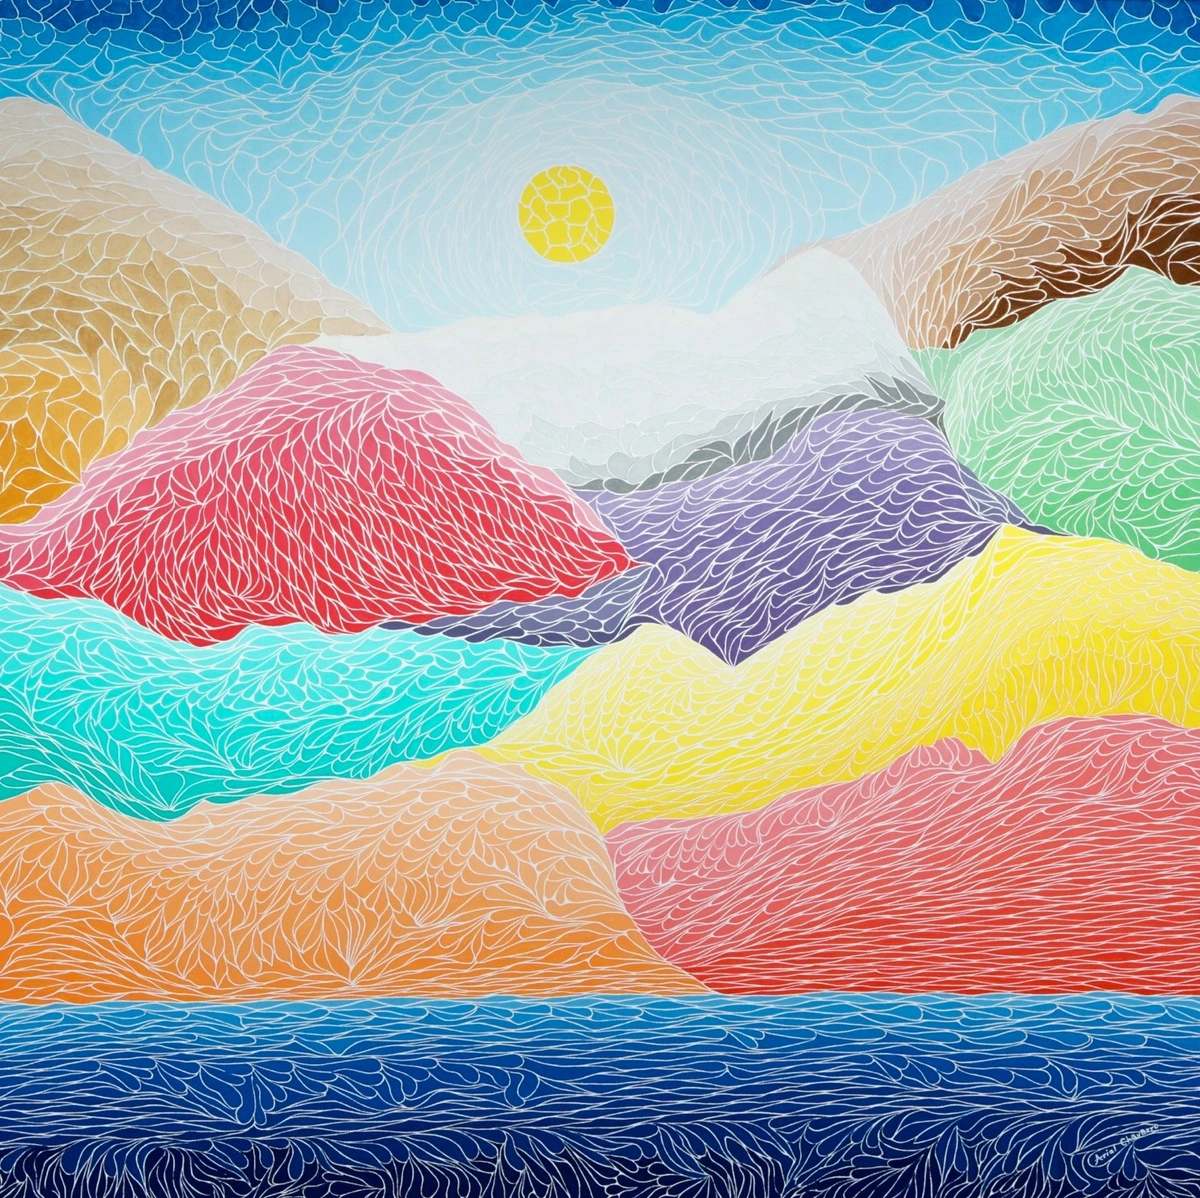
My own journey as an artist, creating the abstract and colorful pieces you might find for sale at my shop or on display at my museum in 's-Hertogenbosch, has been profoundly shaped by these outdoor observations. For instance, a particularly vibrant play of light and shadow on a forest floor during a plein air session once sparked an entire series of abstract paintings exploring interwoven organic forms and contrasting hues – the memory of that light, and the unexpected textures I observed, was more powerful than any photograph. Even if the final result looks very different from the original scene, the feeling and understanding gleaned outdoors infuse my work, bridging the gap between direct observation and abstract expression, much like my explorations in mixed media for abstract expression.

credit, licence
Embracing the Journey: A Final Thought
Starting plein air painting is less about mastering a technique and more about cultivating a mindset. It’s an invitation to slow down, observe, and connect with the world around you in a deeply personal way. It challenges you, humbles you, and ultimately, it makes you a more observant and adaptable artist. The lessons you learn out there, whether about values, light, or simply the sheer joy of creation amidst the elements, will infuse every aspect of your artistic practice. Don't worry about perfection; just show up, be present, and let the landscape teach you. Who knows where this journey will take you? Perhaps it will become a significant part of your own artistic timeline, shaping your unique artistic voice, much like it has mine, forever changed by those wobbly, exhilarating brushstrokes under the open sky. So go on, get outside, and start painting! The world is waiting for your unique perspective.


