Archival Wood Panel Prep: Ultimate Guide for Acrylic & Oil Painting
Master archival wood panel prep for acrylic and oil painting. This ultimate guide covers selection, sanding, sealing, and priming, ensuring your art lasts generations without warping or discoloration.
The Ultimate Archival Guide to Preparing Wood Panels for Painting: Your Art, Built to Last
I’ll be honest with you. The first time I tried painting on wood, it was a disaster, a true moment of artistic heartbreak. Are you tired of your vibrant paintings looking dull, cracking, or developing an unwanted warp after just a few years? The secret might not lie in your paint choice, but in the very foundation you build for it.
I’d found this beautiful piece of birch plywood, fell in love with its subtle grain, and in my naive excitement, just... started painting. No prep. A few weeks later, what was supposed to be my vibrant abstract was dull, slightly yellowed, and the panel itself had developed a gentle, unmistakable curve, like a very shallow bowl. My masterpiece was now a very expensive coaster, all because I hadn't yet learned the crucial art—the ritual, really—of wood panel preparation. It felt like a betrayal by my own chosen material. Trust me, I was frustrated enough to throw my brushes at the wall (I didn't, but the thought was there).
It was a hard lesson, but a necessary one. A wood panel isn't a pre-stretched canvas. It’s a living, breathing material, constantly reacting to its environment, and it needs a bit of convincing, a meticulous foundation, before it’s ready to hold your art for a lifetime. This prep work might seem like a lot, but trust me, it's an investment in your artwork's future. It’s the bedrock upon which everything else is built, ensuring your vision endures. So, let's walk through it together. No jargon, just what you actually need to do to transform a raw piece of wood into the perfect, archival painting surface. By the end of this guide, you’ll not only know how to select, sand, seal, and prime your wood panel, but you’ll understand the 'why' behind each crucial step, ensuring your artwork endures and truly shines for generations.

Why Even Bother with Wood? (A Brief, Gushing Sales Pitch for Longevity)
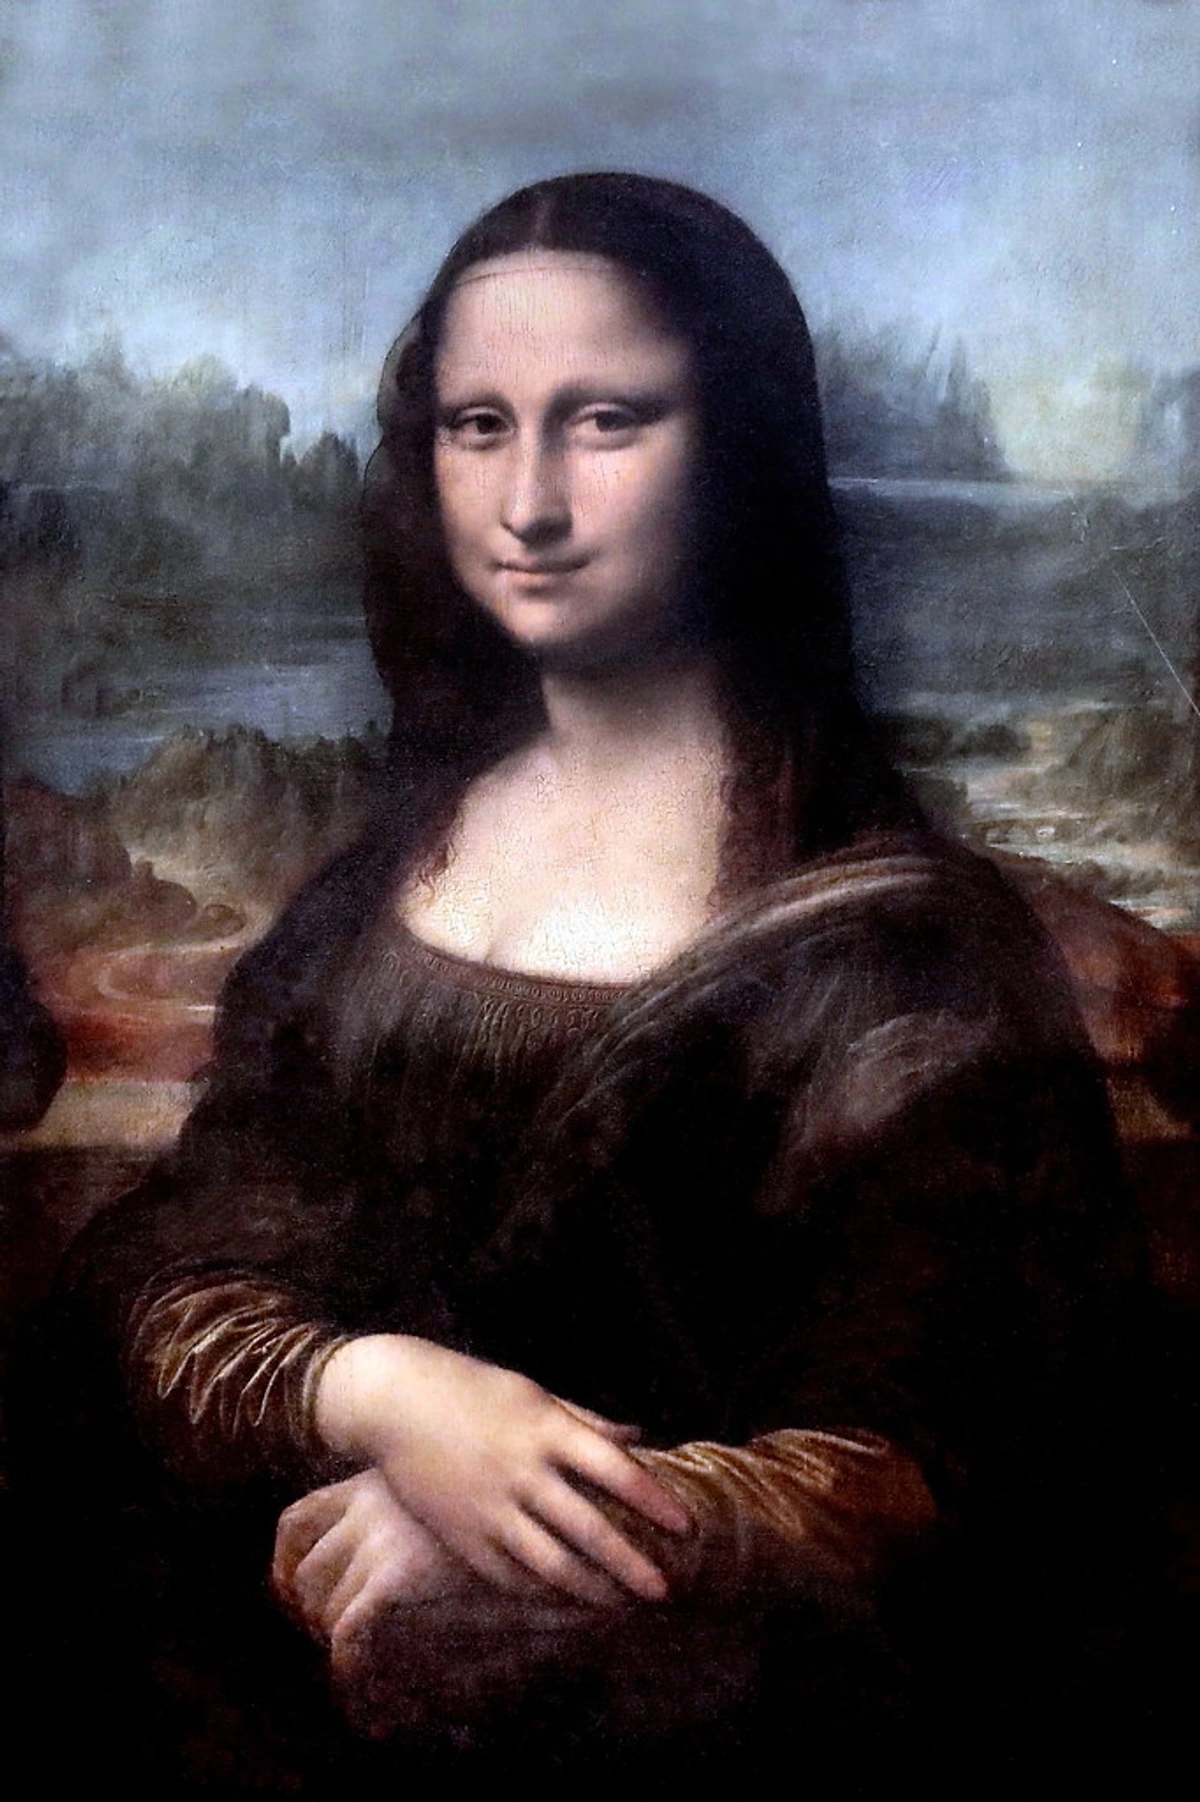
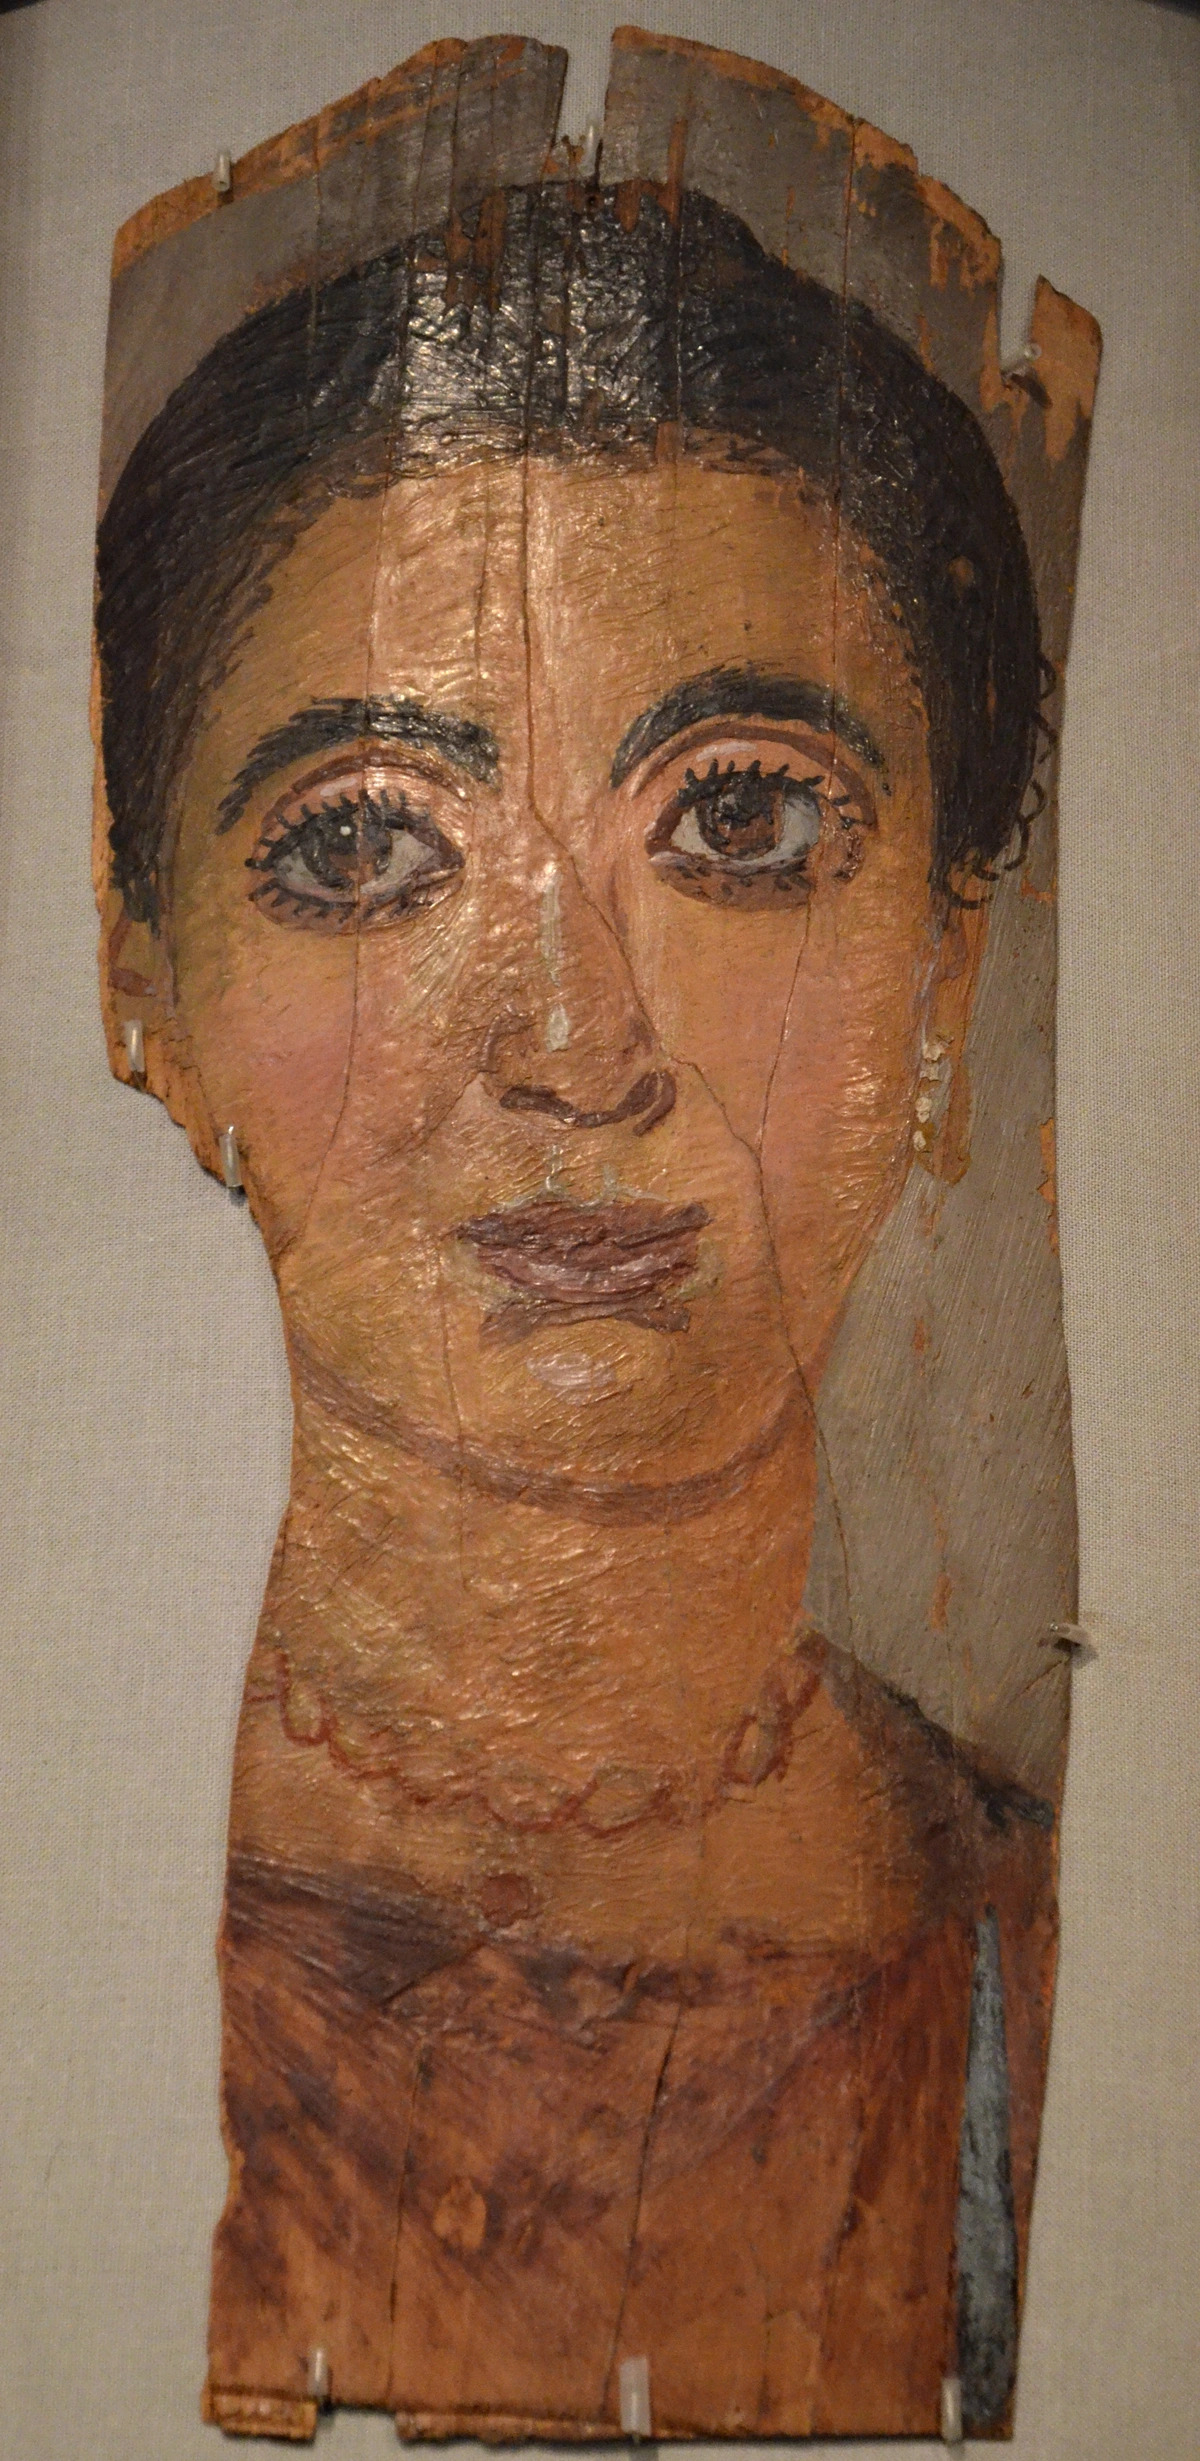
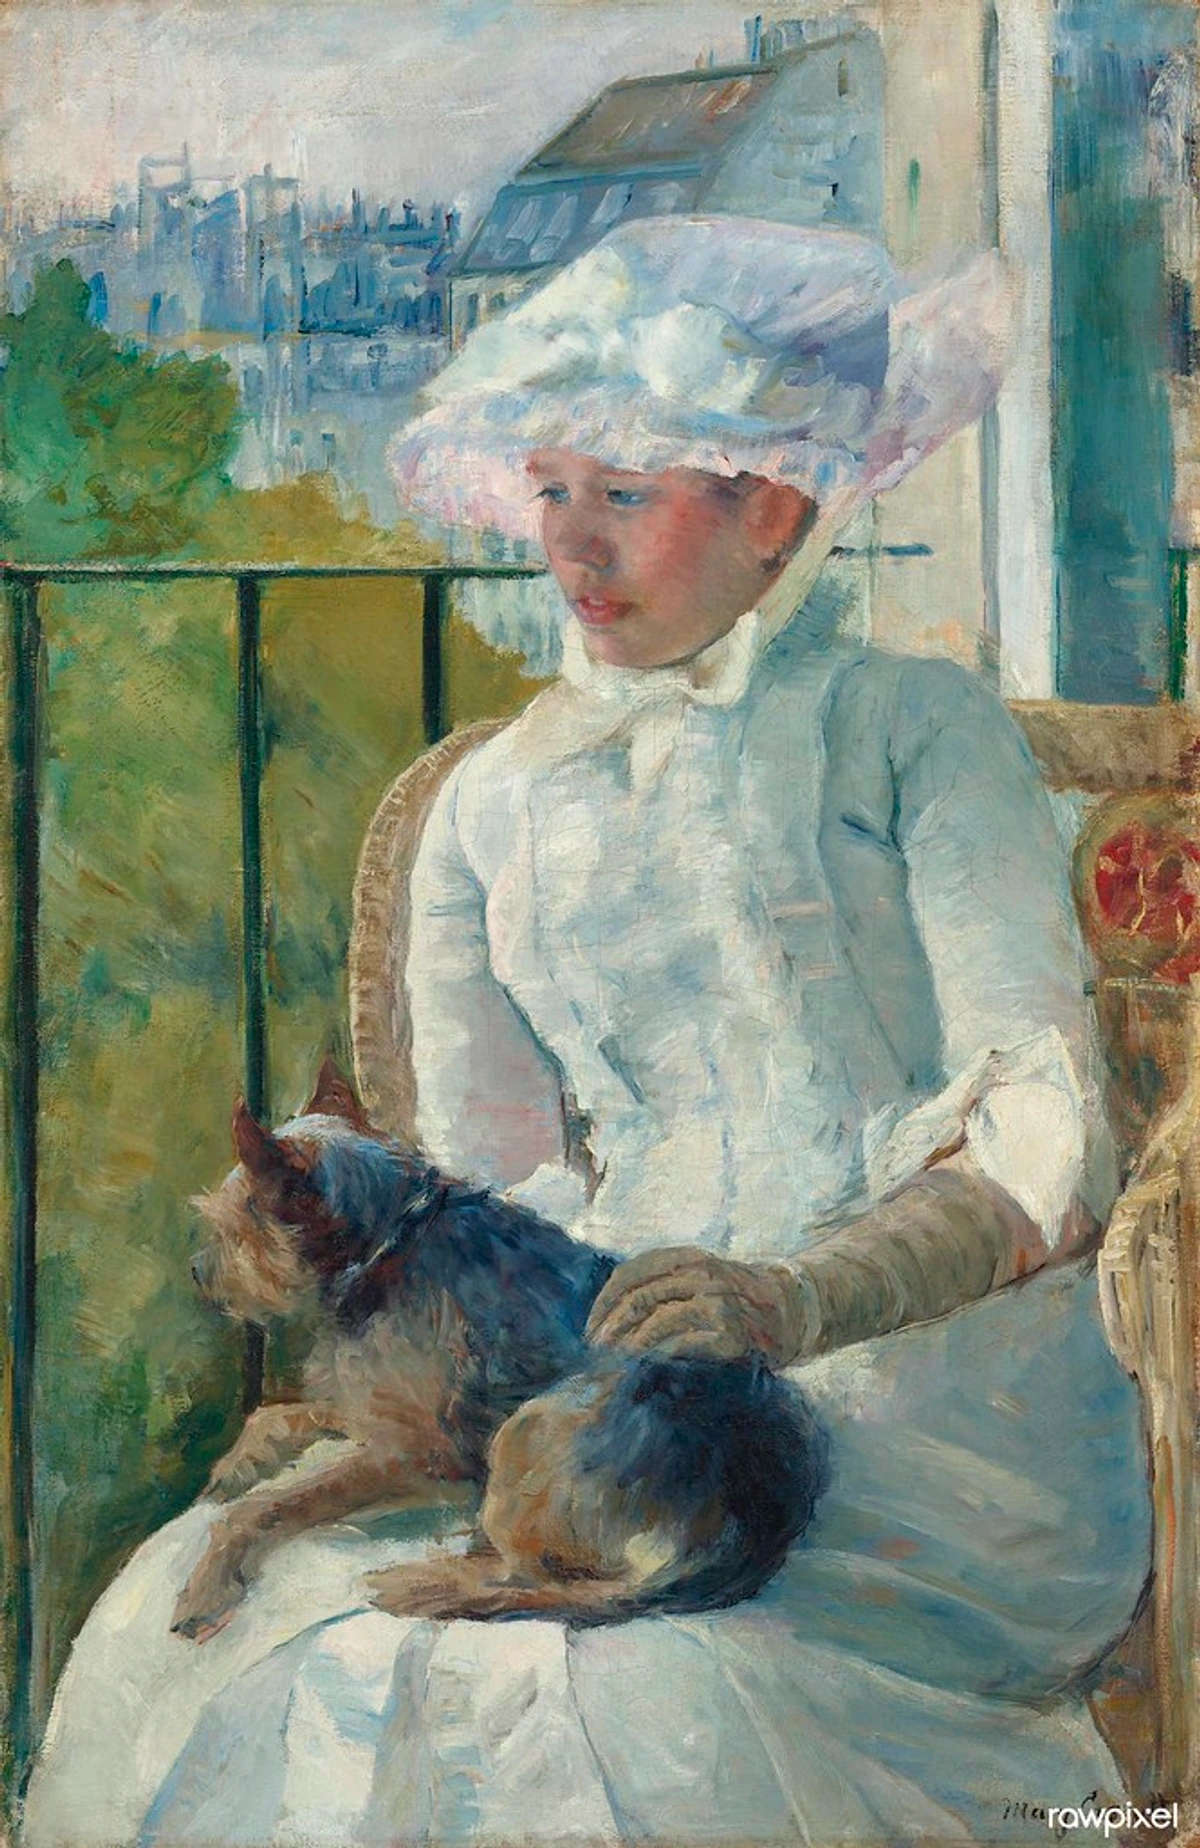
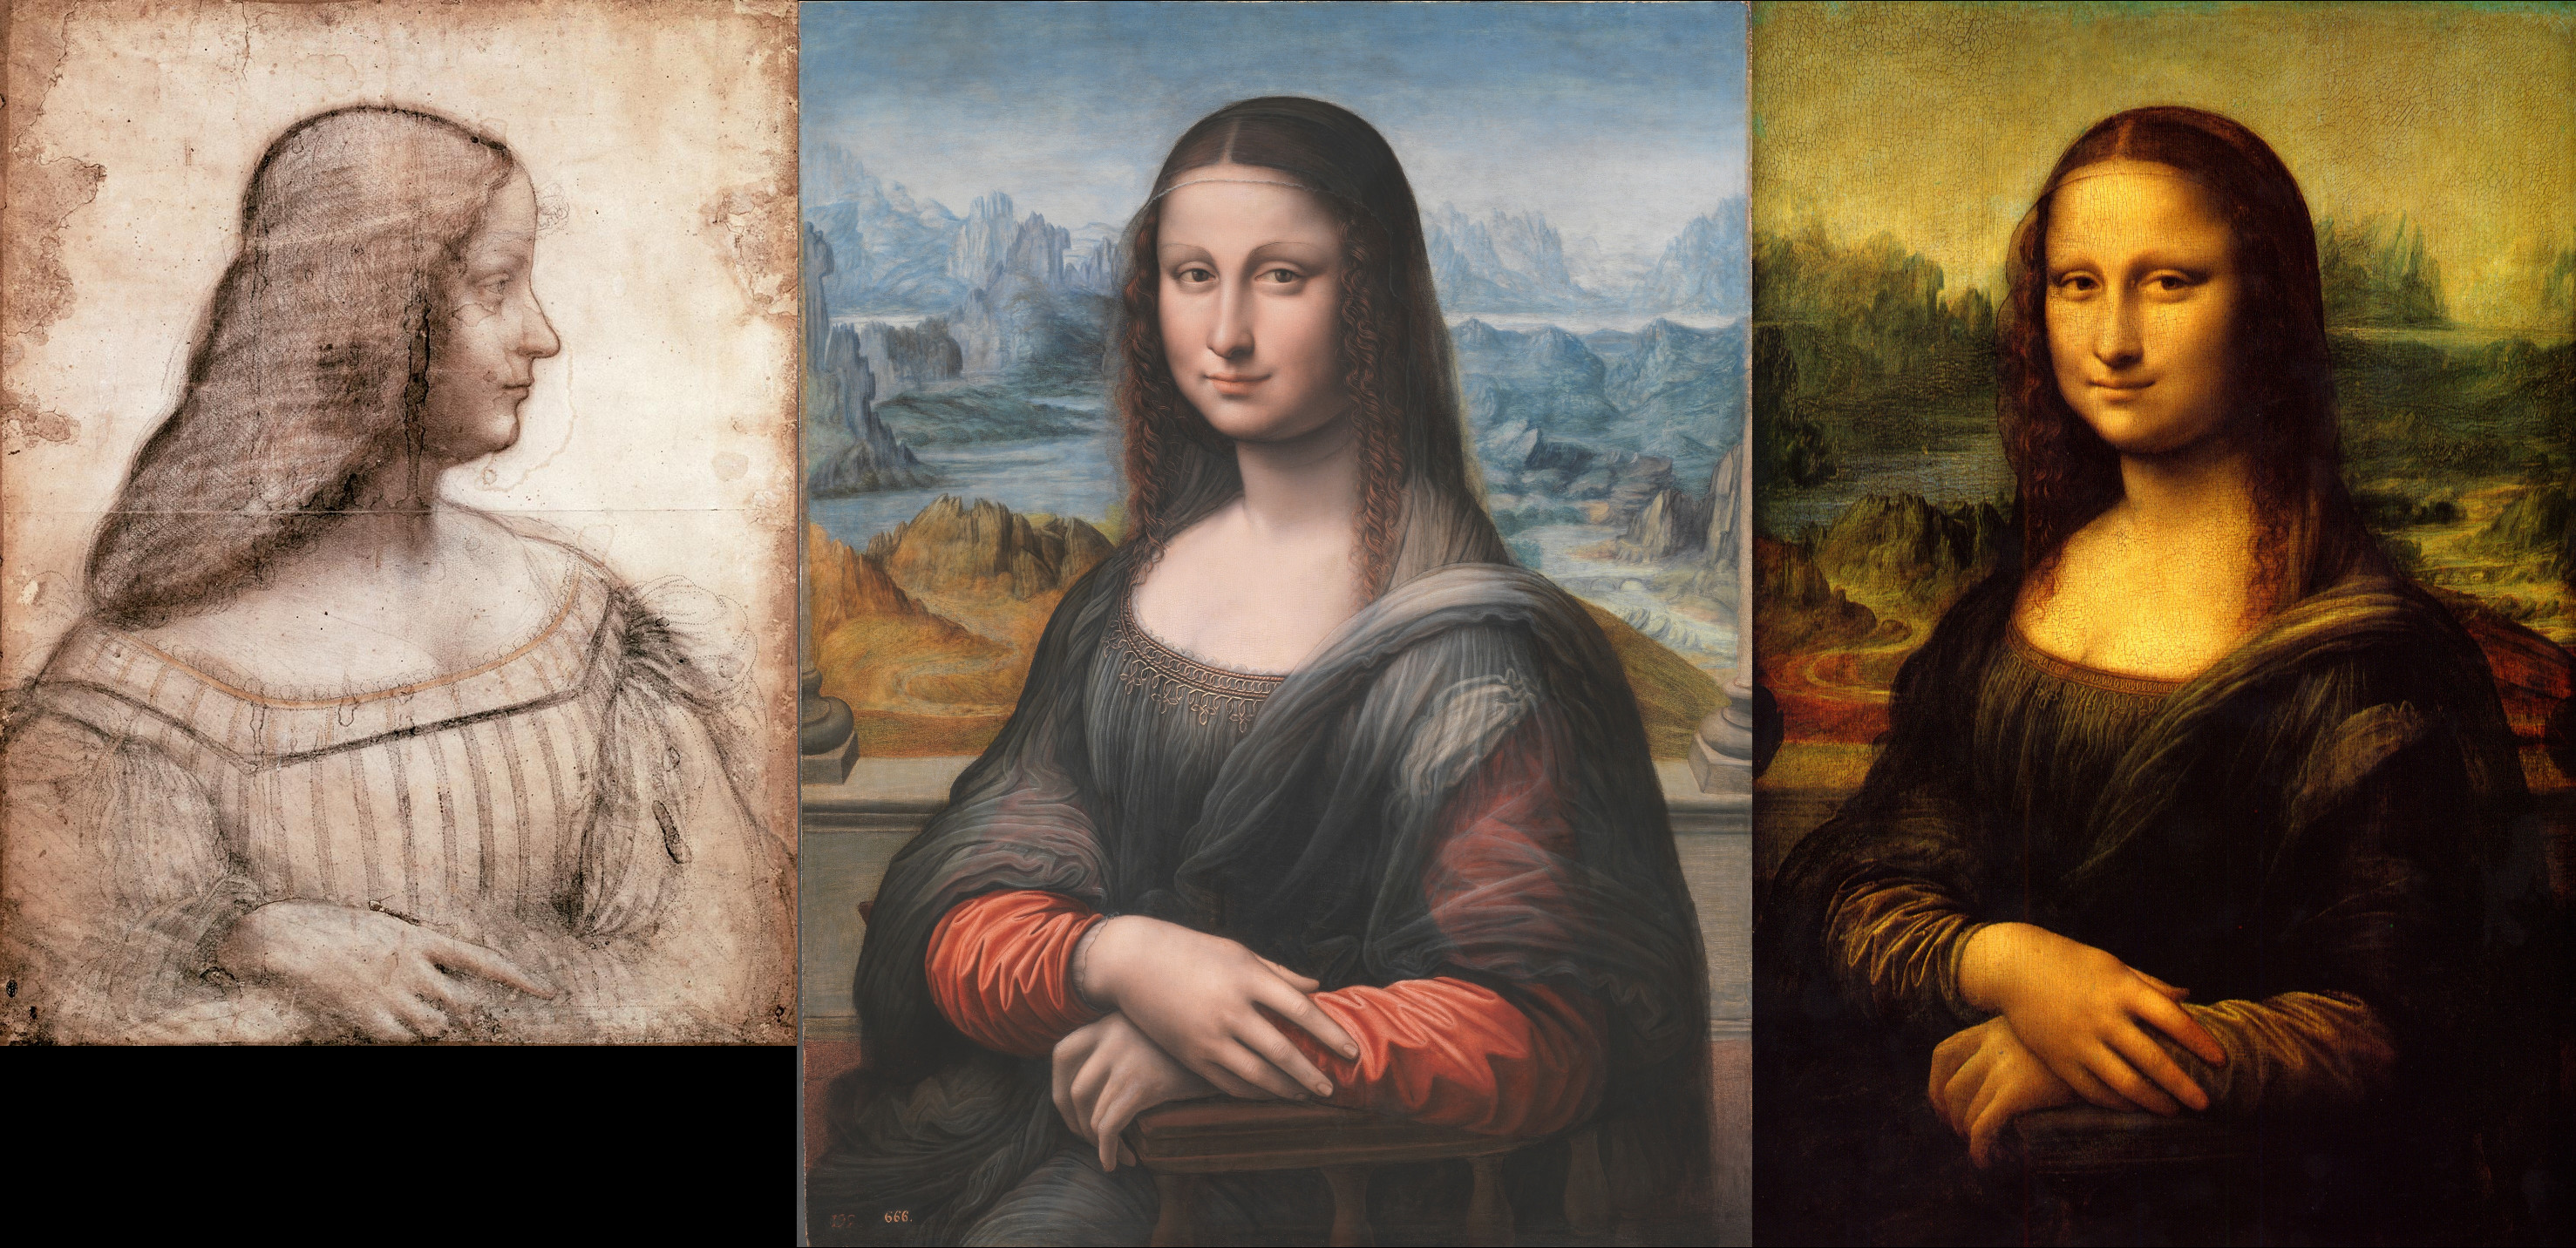
Before we get into the nitty-gritty, you might be asking, "Why not just stick to canvas?" And that's a fair question. I still use canvas, but wood panels offer a different kind of magic, one that many master artists from centuries past also embraced for its lasting qualities. Historically, wood panels were the go-to support. Think of the luminous detail and ultra-fine brushwork in Jan van Eyck's 'Arnolfini Portrait' (1434) or the intricate precision of Albrecht Dürer's masterful paintings (often on limewood or pine); their smooth, stable wood surfaces were perfectly suited for meticulous rendering of fabric and light. These works have survived with incredible vibrancy for centuries, a testament to the archival power of the foundation they were built upon.
Before the widespread adoption of canvas in the 16th and 17th centuries (driven by factors like cost-effectiveness for larger works, ease of transport, and industrialization), artists often painted on prepared walls (frescoes), stone, or meticulously prepared wooden supports. This tradition wasn't confined to Europe; in Asian scroll painting, for example, while paper and silk were common, wooden panels were also used for more rigid, portable formats or for painted screens. Historically, Chinese artists employed paulownia wood for lightweight, stable panels, while Japanese screens often utilized cypress or sugi (cryptomeria japonica) for their fine grain and stability. Their preparation involved intricate layering of natural pigments and binders, emphasizing longevity for detailed, enduring work. The shift to canvas didn't diminish wood's intrinsic qualities, but rather reflected changing artistic needs and economic realities.
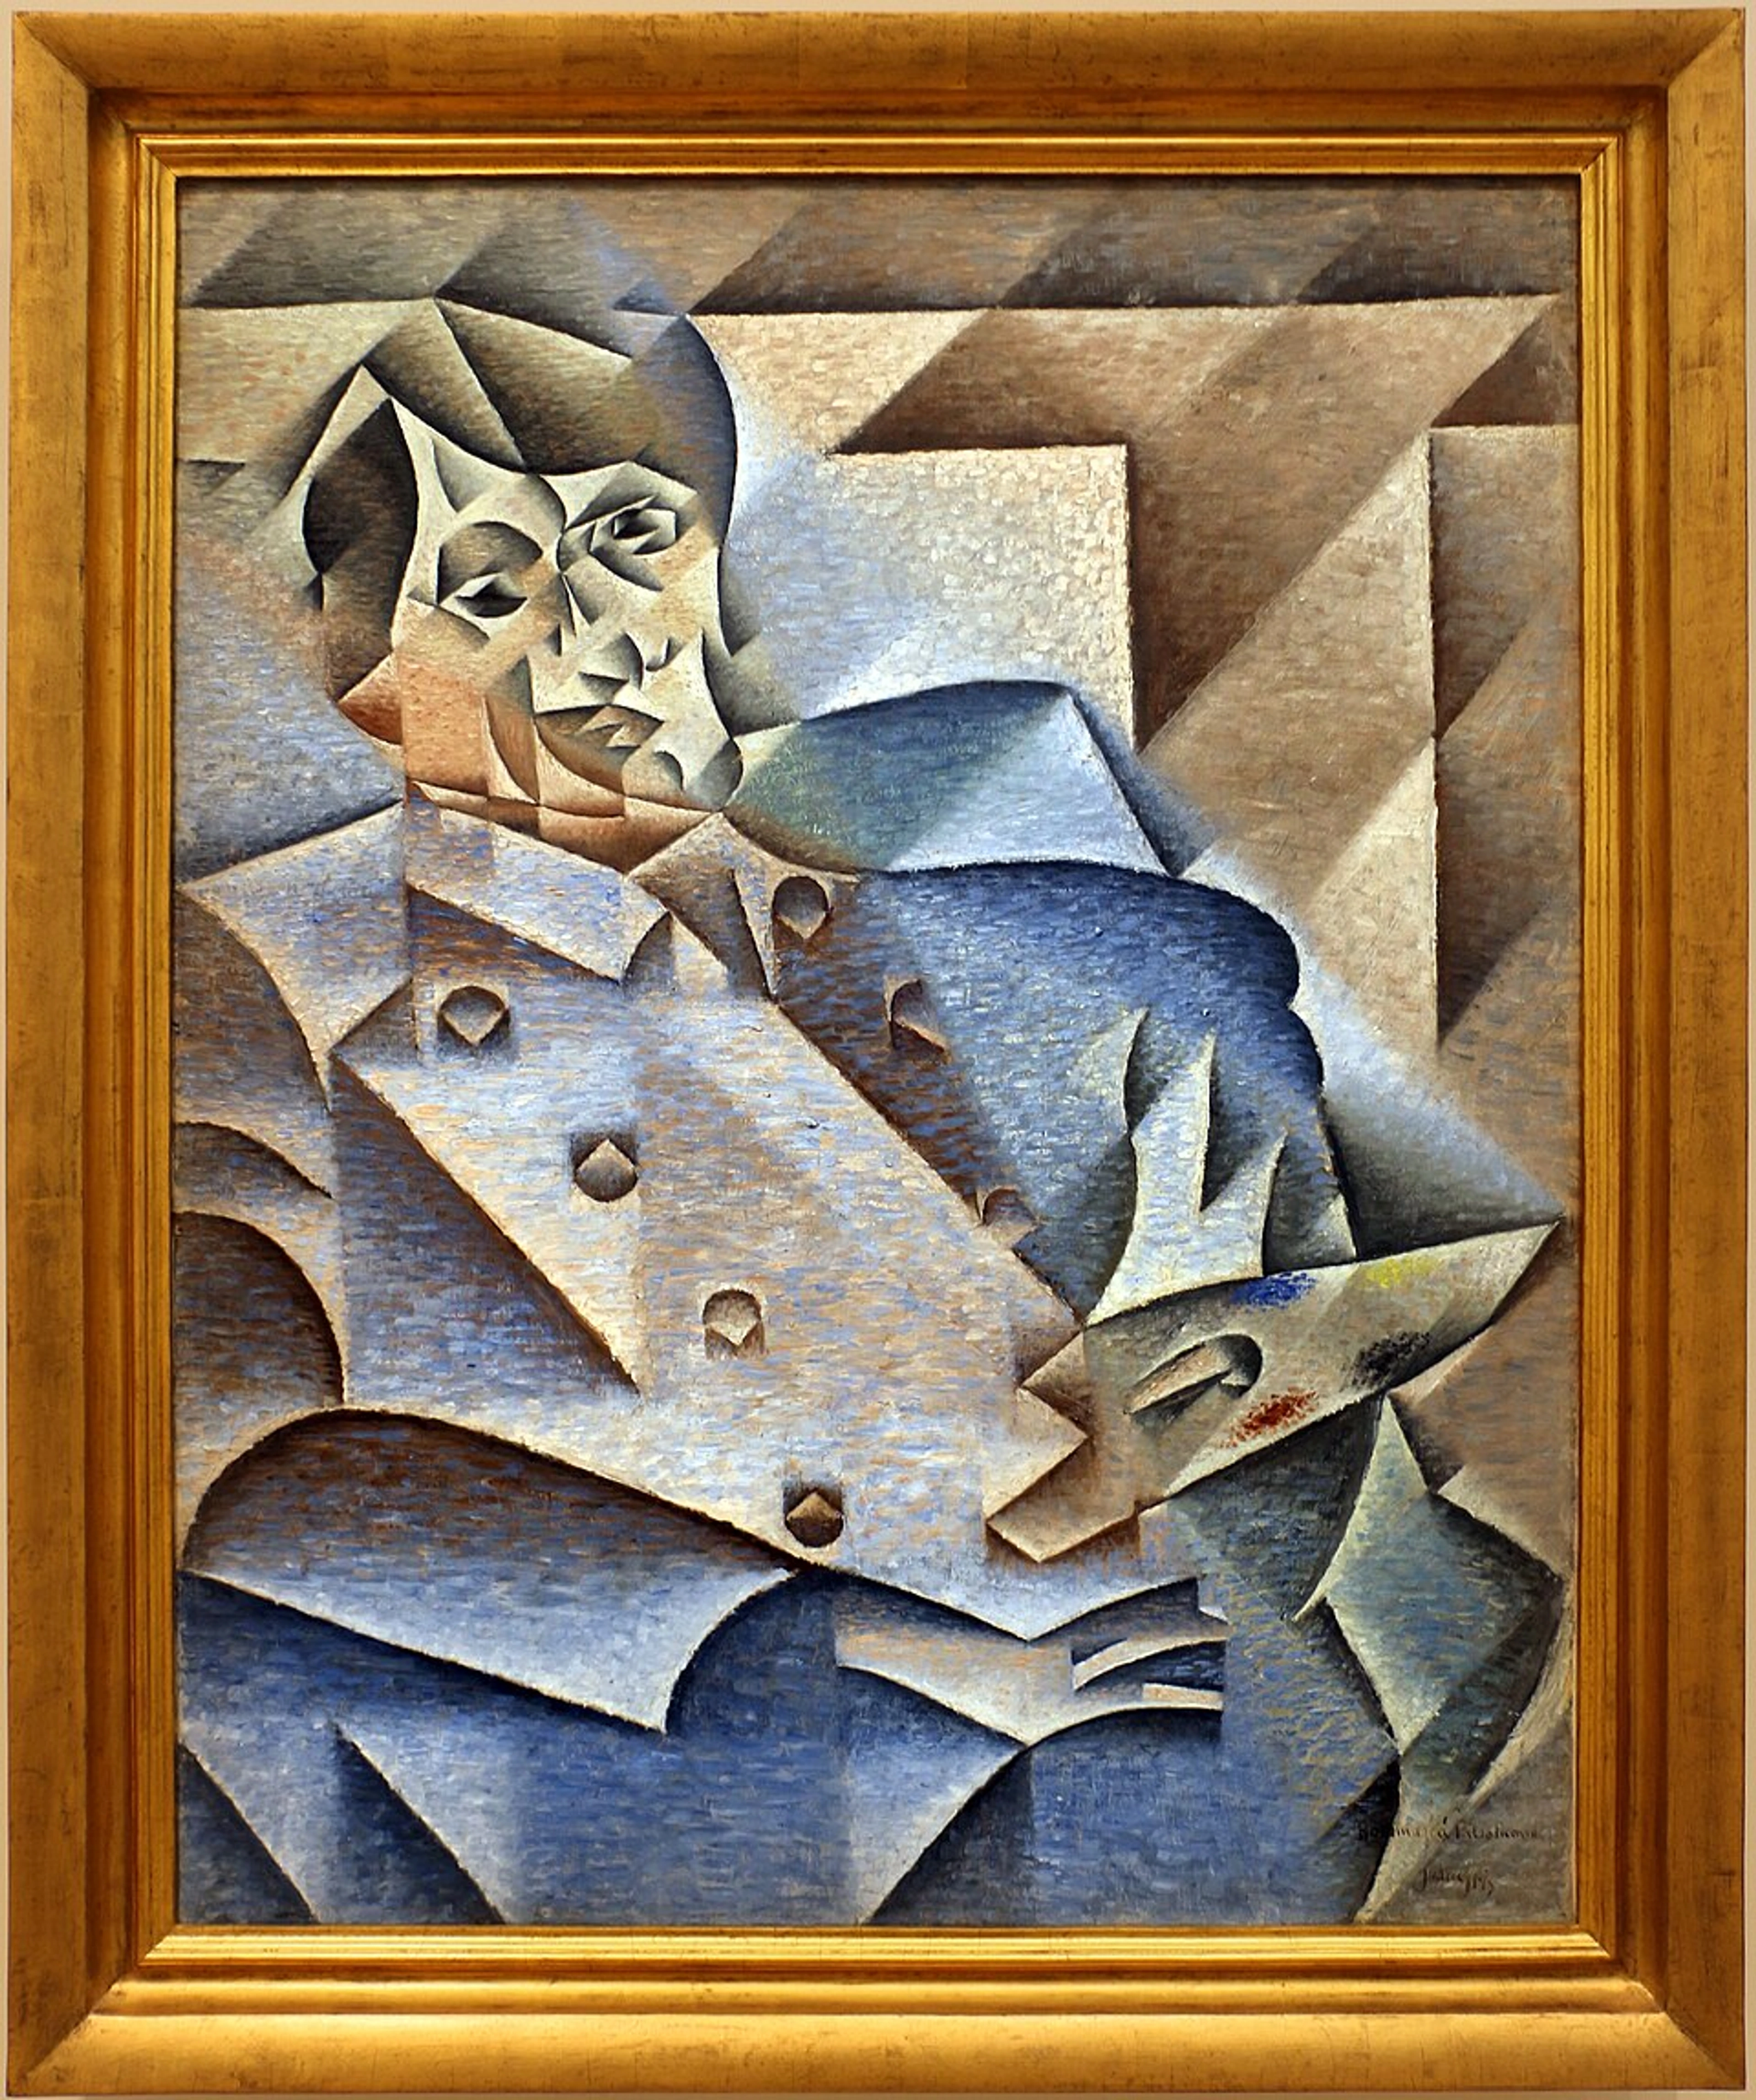
Even in the early 20th century, artists like Piet Mondrian, known for his abstract grids, often used wood panels for their stability and smooth surface, crucial for his precise geometric compositions. More recently, contemporary artists like Peter Doig often utilize panels for their robust qualities, allowing for textural build-up and a distinct surface interaction that influences their painting style. It's a testament to the enduring appeal of a solid, unyielding ground for serious art.

Here’s what I find truly captivating about painting on wood:
- Unmatched Smoothness: You can achieve a surface as smooth as glass. This is incredible for detailed work, subtle blending, and avoiding the distracting texture of canvas weave showing through. It truly encourages a more deliberate, precise approach to your brushwork, almost like painting on a pristine sheet of paper. This is especially vital for delicate glazes or hyperrealistic detail that would crack on a less stable surface.
- Durability and Rigidity: No sagging, no distracting flex, no risk of puncture. A wood panel is a rigid, robust support that feels substantial. This makes it fantastic for aggressive techniques like using a palette knife, heavy impasto painting, or sculptural applications, offering a solid resistance that a flexible canvas simply can't match. When working with thick paint, the firm, unyielding nature of a well-prepared wood panel allows for the application of sculptural paint passages without fear of the surface flexing and cracking the paint layers. It resists warping (when properly prepared, of course!) and protects your paint layers from cracking due to physical stress.
- Archival Quality: As mentioned, artists have been painting on wood for centuries. When prepared correctly, it’s one of the most stable supports you can use, designed to protect your art for generations. Archival quality means the artwork is built to resist degradation and retain its original appearance for a very long time (think 100+ years) under proper storage conditions. This makes it a superior choice to canvas for the sheer longevity and integrity of the paint film.
- The Feel: There's a unique, satisfying resistance when your brush moves across a solid panel. It's a completely different tactile experience that I find incredibly satisfying, almost meditative. It’s a distinct grounding, a firm connection between your hand, your brush, and the artwork. This tactile feedback can profoundly influence your brushwork, encouraging more deliberate, controlled marks and a heightened awareness of form and volume, almost like sculpting with paint. This physical interaction often changes how I approach my basic brushstrokes for acrylic painting, making each mark feel more impactful and deliberate. It's a subtle but profound difference.
Your Foundation: Selecting the Perfect Wood Panel
Walking into a hardware or art store, you'll see a few options. They're definitely not all created equal, and your choice depends on your budget, your project, and your patience. When I'm choosing, I always inspect my chosen panel meticulously for any surface voids (tiny holes, even small pinpricks), significant knots, cracks, or other imperfections. Even higher-quality plywood can have small pinprick holes; these can sometimes be filled with a bit of water-based wood filler or extra gesso, but major ones are best avoided from the outset. For larger voids or cracks, a more robust solution might be needed, such as carefully filling with a high-quality epoxy resin designed for wood, followed by sanding, for truly stable repairs, especially on high-value pieces.
Choosing the Right Thickness for Your Panel
Panel thickness is a practical consideration. Thinner panels (under 1/4 inch or ~6mm) are much more prone to warping if not perfectly sealed on all sides. They can also feel a bit flimsy, especially for larger works, offering less physical resistance if you're working with heavy impasto painting. Thicker ones (1/2 inch or more) offer significantly more stability and a substantial feel, but they add weight, which can be a factor for large pieces or shipping. For most applications, especially if you're just starting out, a 1/4 to 1/2 inch panel offers a good balance of stability and manageability.

Understanding Cradled Panels
Beyond simple thickness, you might also encounter 'cradled panels.' These are typically thin panels (like hardboard or birch plywood) mounted onto a thicker wood frame, or 'cradle.' This frame provides crucial extra rigidity, significantly prevents warping, and offers a finished, gallery-style edge, making them easier to hang without additional framing. They're a fantastic, often more expensive, option if you want built-in stability and presentation right off the bat. The cradle itself can be made from solid wood (often pine, poplar, or basswood) or a sturdy plywood. Even with cradled panels, the exposed edges of the frame still need proper sealing, just like a standard panel, to ensure balanced wood movement and prevent warping. This is critical because even the sealed frame can absorb or release moisture differently than the panel itself if not properly treated on all exposed surfaces.
To help you navigate these choices for your DIY wood panel for art or bought options, here’s a quick rundown of the usual suspects you'll find in art or hardware stores:
Panel Type | Pros | Cons | My Two Cents | Archival Suitability |
|---|---|---|---|---|
| MDF (Medium-Density Fiberboard) | Incredibly smooth, very stable (when dry!), and usually the cheapest option. | Very heavy. Swells dramatically if it gets wet and is unsuitable for high humidity or potential spills. Produces fine, irritating dust when sanded. Contains formaldehyde-based binders. | Great for practice or if you want a flawlessly smooth surface. You must seal it meticulously, and then seal it again – you can never have too much protection with MDF. Always wear an N95 mask when sanding! Consider a barrier coat of shellac before your acrylic sealant for extra moisture protection. | Less ideal due to swelling risk and binder off-gassing, but acceptable for studies if meticulously sealed. |
| Hardboard (Masonite) | Affordable, durable, often tempered (baked with linseed oil, making it more rigid, water-resistant, and less prone to fiber raising). Available in large sheets. Consistent surface. | The smooth surface must be sanded to give it tooth. Untempered hardboard is less rigid and more absorbent. | A solid, all-around workhorse. Most commercial "artist panels" are made of this, and for good reason. Just make sure it's tempered for best results and marketed specifically for art or hobby use. | Good, especially tempered. |
| Plywood (esp. Baltic Birch) | Very strong, relatively lightweight, and significantly warp-resistant. Baltic Birch plywood is highly recommended for artists due to its void-free core and consistent, fine grain. Excellent dimensional stability due to layered construction. | Can have minor surface texture/voids (especially non-Baltic varieties), more expensive than MDF/hardboard. | My personal favorite for larger works. The fine grain can be beautiful, even under gesso, and it offers excellent structural integrity. Always check for voids, even with Baltic Birch. A consistent veneer thickness across layers and clean, tight glue lines indicate good quality. This is often the best wood panel for oil painting and acrylics. | Excellent, especially Baltic Birch. |
| Solid Wood (Maple, Poplar, Basswood, Oak, Limewood) | Truly archival, beautiful natural grain can be integrated into the artwork, incredibly satisfying to work on. Unique tactile quality. | Prone to warping, cracking, or splitting if not perfectly seasoned and expertly prepared, as wood naturally expands and contracts with humidity changes (often called 'wood movement'). Very expensive and difficult to source properly. Requires specialized knowledge. | A specialty choice, echoing the Old Masters. Best for experienced artists who know how to manage its unique quirks, understand wood movement, and appreciate its natural character. Look for quarter-sawn lumber for greater stability. | Excellent, when expertly prepared. |
For most people starting out, or even seasoned artists on a budget, I’d recommend a good quality Baltic Birch Plywood or a tempered Hardboard panel from a reputable art supply store. They offer the best balance of stability, cost, and archival quality, especially for acrylic painting.

Sourcing and Preparing Raw Lumber (For the DIY Enthusiast)
If you're going the truly DIY wood panel for art route and cutting your own panels, ensure it's kiln-dried lumber – this process removes most of the moisture, stabilizing the wood significantly. When selecting solid wood, fine-grained, stable species like Maple, Poplar, or Basswood are excellent choices due to their even grain, light color, and lower tendency to warp. Limewood (also known as Basswood) was a favorite of Renaissance artists like Dürer for its soft, even texture and minimal grain. Oak, particularly European oak, was widely used in Northern European panel painting (e.g., by the Early Netherlandish masters) for its strength and fine grain, though it requires specific preparation due to its tannins.
Try to avoid highly resinous woods like Pine unless they've been specifically treated to remove resins. Why? Because knots and sap can bleed through your layers over time, causing unsightly yellow or brown stains in your artwork – a headache you definitely want to avoid. For larger solid wood panels, consider cross-grain bracing (using wood battens attached perpendicularly to the grain on the back) to further combat wood movement. Once sourced, always allow the lumber to acclimate to your studio environment for at least a week (or even longer, for solid wood) before you begin preparation, to minimize future movement.
Adhesives and Panel Construction
If you're constructing your own panels from multiple pieces, the choice of adhesive is crucial. Use high-quality, water-resistant wood glues (like Titebond III) and ensure joints are tight and clamped correctly. For traditionalists, hide glue was historically used, but it's hygroscopic and can be brittle; modern synthetic glues offer greater flexibility and moisture resistance. Standard household glues are often not designed for archival longevity and can degrade over time, compromising your panel's integrity. For complex panel assemblies, such as multi-part cradled panels or larger bespoke supports, proper joinery techniques (like dado joints, finger joints, or even mortise and tenon for cross-bracing) and archival glues are paramount to prevent future delamination or structural failure. This also applies to attaching the panel to its cradle; while glue is common, some prefer small, strategically placed screws (pre-drilled) to allow for minor independent movement if the panel and cradle are different wood types.
Preparing Your Studio Space for Panel Prep
Before you even touch that sandpaper, take a moment to set up your workspace. A little preparation here saves a lot of headaches later. You’ll want good lighting to spot imperfections, excellent ventilation (especially when sanding), and a clean, flat work surface. I usually lay down some old newspapers or a disposable plastic sheet to catch dust and spills. Think of it as creating a clean surgical theatre for your art materials – it truly makes a difference to the outcome and your peace of mind.
Essential Tools for Panel Preparation
Beyond your chosen panel, gather these basics:
- Dust Mask (N95 recommended): Absolutely non-negotiable for protecting your lungs from fine wood dust and gesso particles.
- Eye Protection: Safety glasses are a good idea, especially when sanding.
- Sanding Block: Ensures even pressure and prevents gouging when hand-sanding.
- Variety of Sandpaper Grits: 120-150 grit for initial keying, 220-400+ grit for smoothing gesso.
- Lint-Free Cloths: For wiping away dust between steps. Slightly damp for wood, dry for gesso.
- Artist-Grade Acrylic Polymer Medium (e.g., Golden GAC 100): Your sealant for wood panel sizing.
- Artist-Grade Acrylic Gesso (white or clear): Your primer. For an in-depth look, you can check out my article on what is gesso in painting.
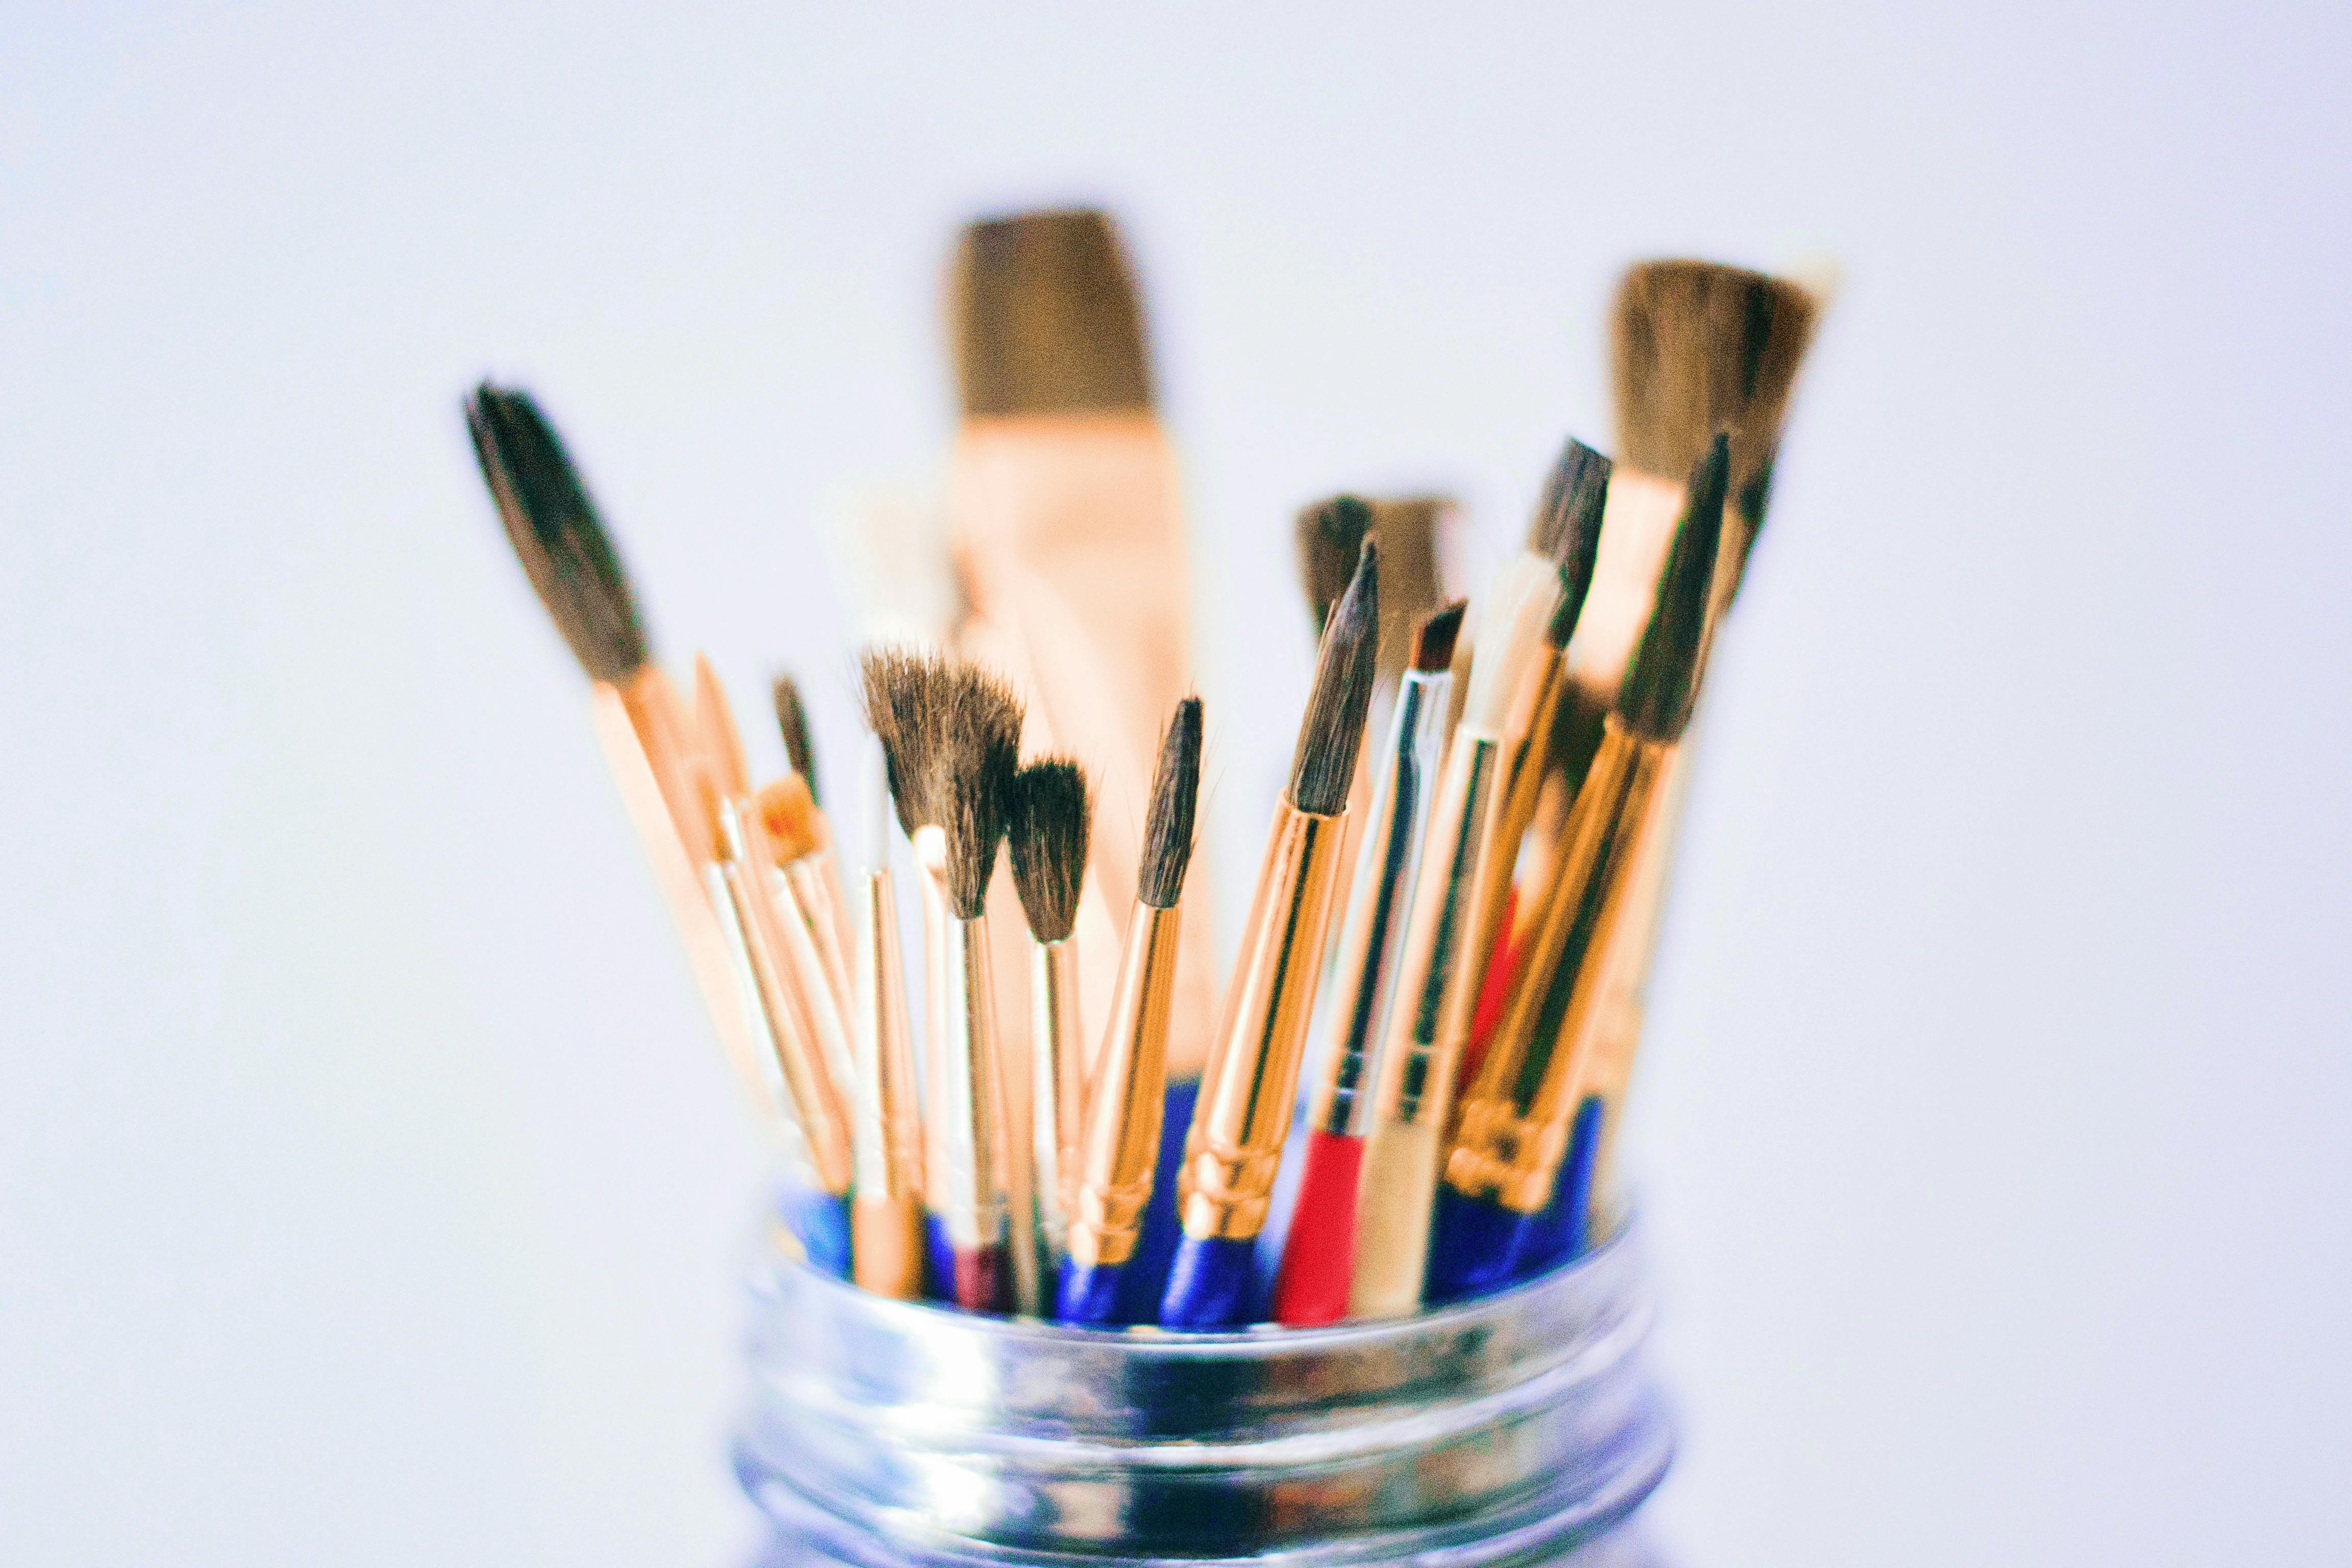
- Soft, Wide Brush or Foam Roller: For smooth application of sealant and gesso. A foam roller can help achieve a near-flawless finish with gesso.
- Heat Gun (optional, on cool setting): Useful for quickly drying dust after wiping, or for accelerating drying between thin coats of medium/gesso.
The Crucial Texture: Sanding for a Perfect Grip
Okay, you've got your panel. Even if it feels smooth to the touch, you absolutely need to sand it. The goal isn't just cosmetic smoothness; it's to create a fine, microscopic texture called "tooth." Think of tooth like tiny microscopic hooks, or a very fine, invisible Velcro, or even the subtle grit on fine-grade sandpaper itself. This tooth gives the subsequent layers of sealant and primer something physical to bond to, ensuring strong adhesion and preventing your paint layers from peeling off down the line. Trust me, a peeling painting is a headache you definitely want to avoid. I find that the feel of the wood after sanding tells me a lot. If it feels almost velvety to the touch, I know my subsequent layers will grab beautifully. If it still feels a bit slick, I might give it another pass.
(A quick, serious aside: always wear a dust mask – an N95 is best – and work in a well-ventilated area, ideally with cross-ventilation. Seriously. Wood dust, especially from MDF, contains binders and fine particles that are no good for your lungs and can cause long-term respiratory issues. Your future self will thank you for this simple precaution. And eye protection isn't a bad idea either!)

Here's how I approach the sanding ritual:
- Get the Right Grit: Start with medium-grit sandpaper, something around 120 to 150 grit. You don't need to be a hero and go coarser than that; we're just creating a keyable surface, not stripping varnish. This grit is perfect for roughing up the surface enough to create that crucial tooth without leaving deep scratches. Coarser grits (e.g., 80-100) can remove too much material and leave deep scratches, while finer grits (e.g., 220+) smooth the surface too much, leaving insufficient microscopic texture for optimal adhesion. If you're using an orbital sander, apply even, gentle pressure. For hand sanding, use a sanding block to ensure an even surface.
- Sand Evenly: Work in a consistent motion (circular or with the grain, depending on your preference), covering the entire surface of the front. Don't forget the edges! Any future paint you apply there will thank you for the extra effort.
- Clean Up: This step is crucial. Wipe the panel thoroughly with a slightly damp, lint-free cloth to remove all the dust. Let it dry completely. You'd be surprised how much dust you create, and you definitely don't want that turning into sludge or bumps in your first layer of sealant. Alternatively, a light blast from a heat gun (on a cool setting) can also help remove fine dust without adding moisture.
Sealing the Deal: Why Sizing is Non-Negotiable
This is the step I skipped all those years ago, and it's arguably the most important for archival longevity. Wood contains natural acids (like lignin, a complex polymer that provides rigidity but can break down over time) and other impurities. Over time, these can leach into your paint layers and cause yellowing, darkening of certain pigments (especially whites, blues, and greens), or even blotchy areas. This unpleasant phenomenon is called Support Induced Discoloration (SID). It can manifest as splotchy yellowing or browning, almost like a ghost appearing in your lighter paint areas, slowly rendering your once-brilliant artwork muddy and aged. If you've ever seen older oil paintings with dulling whites or muddiness in the shadows, SID might be the culprit. For oil painters, specifically, the raw wood can also degrade over time if the oil binders directly leach into it, as the oil can cause the wood fibers to rot. An acrylic barrier is absolutely essential here, making wood panel sizing a critical first step for preparing wood for painting.
Think of sizing as creating a flexible, non-porous shield between your wood panel and your painting layers. It’s a similar idea to how to prepare a canvas for acrylic painting, but even more critical with wood due to its inherent acidity and absorbency.
Your weapon of choice here is an artist-grade acrylic polymer medium. Something like Golden's GAC 100 is purpose-built for this, designed with specific polymer compositions that create a robust, flexible, and non-yellowing barrier against wood acids without becoming brittle. When choosing, look for mediums explicitly labeled as "archival," "non-yellowing," and "flexible" – these qualities are crucial for protecting your artwork long-term. A good quality polymer gloss medium will also work. Some people, especially those on a budget, use PVA glue. While general PVA (polyvinyl acetate) can create a barrier, typical craft or woodworking PVA glues are often less flexible and may be more susceptible to environmental changes or certain solvents than dedicated artist-grade polymer mediums, potentially impacting long-term archival stability and causing issues like a 'wax bloom' over time. If you do use PVA, ensure it's an archival-grade product (often found in bookbinding or conservation supplies) and test it thoroughly.
Crucial Warning: Resist the urge to use common wood finishes like Danish oil, polyurethane, or varnish as your sealant before applying acrylic medium or gesso. These products are designed for wood protection, not as an archival painting ground, and can cause severe adhesion issues and long-term instability for your artwork. Some oil-based polyurethane finishes, for example, can chemically react with acrylic binders over time, leading to adhesion failure or discoloration, and potentially developing a 'wax bloom' that repels paint due to their incompatible chemical compositions. They might look like they're doing the job, but their chemical compositions are entirely wrong for artists' paints. Stick to artist-specific products for best results. If you're experimenting with a new product, I always recommend testing it on a scrap piece of the same wood type first to reveal any unforeseen reactions or adhesion issues.
My Method (and why it's crucial for preventing warping):
- Apply one thin, even coat to the front, back, and all sides of the panel. And I mean all sides! This is absolutely crucial for preventing warping, which happens when wood absorbs or releases moisture unevenly. Wood movement is the natural expansion and contraction of wood with changing humidity; warping is the undesirable result when this movement is unbalanced. Imagine trying to dry a flat piece of paper by blowing hot air on only one side; it will curl. Sealing all surfaces creates an even barrier, allowing the wood to 'breathe' uniformly and preventing uneven expansion or contraction. This controls that natural wood movement. A thin coat should be somewhat translucent, allowing you to still see the wood grain slightly. Don't be afraid to take your time and ensure full coverage.
- Let it dry completely. Always refer to the manufacturer's instructions for drying times, but generally allow at least 1-2 hours between thin coats for optimal adhesion and curing before sanding or applying the next layer. You can often feel if it's still tacky. Patience is a virtue here. Ensure your workspace is well-ventilated during application, as some mediums can have fumes.
- Apply a second coat, following the same thin, even application. Let that dry thoroughly, perhaps even overnight. I'm usually a bit impatient, but I force myself to wait for this part because it makes such a difference.
Your panel is now properly sized and protected. It won't soak up the oily or liquid part of your paint, leaving your colors dull, and it won't betray you by yellowing your masterpiece prematurely. Once sized and primed, store your panels flat (or upright in racks, if large), away from extreme temperature or humidity fluctuations (ideally 40-60% relative humidity, with temperatures between 68-75°F or 20-24°C), to maintain their stability before you begin painting. Consistent environmental conditions minimize stress on the wood and prevent further movement, ensuring the integrity of your prepared surface.

Gesso Time: Building the Perfect Ground
Now for the fun part, where the panel truly starts to feel like a surface ready for art. Gesso is the bridge between the sealed panel and your paint. (A quick distinction: when we say 'gesso' today, we almost always mean modern acrylic gesso, which is an acrylic polymer primer specifically designed to create a painting ground with tooth. Traditional gesso, made from gypsum and animal glue, is a different beast and rarely used on flexible modern supports like these panels or canvas, and generally not recommended for beginners due to its brittleness and hygroscopic nature. It also tends to crack more easily with environmental shifts. For more on traditional applications, you can explore resources on how to make your own gesso a diy guide for artists.)

When it comes to gesso, you'll primarily find standard white artist-grade acrylic gesso, but there are also clear gessoes (great if you want the wood grain to show through, perhaps with a subtle color stain underneath, or over metallic elements), and absorbent gessoes. For most purposes, and certainly for beginners, standard white acrylic gesso is your champion. Remember, choose artist-grade gesso over student-grade or hardware store primers for superior pigment load, binder quality, flexibility, and archival longevity. Artist-grade gesso offers a much higher concentration of titanium dioxide (for opacity) and a more stable, flexible binder that resists yellowing and cracking over time, unlike many student-grade options or house paints, which prioritize coverage over flexibility.
The goal is to build up several thin layers to create a beautiful, evenly absorbent, and subtly gritty surface that your paint will adore. This is a process of patience, and it truly makes a difference to the final vibrancy and longevity of your work. It provides a stable surface that allows for optimal pigment saturation and ensures colors remain pure and vivid, uninfluenced by the underlying wood or environmental shifts. If your gesso feels too thick to apply smoothly, you can dilute it with a small amount of water (check manufacturer's instructions first, as some gessoes are not designed for dilution) to achieve a more fluid, easier-to-apply consistency.
Here’s the rhythm you’ll get into:

- First Coat: Using a soft, wide brush or a foam roller, apply a thin, even coat of gesso in one direction (say, horizontally). Don't try to get it perfect – we're building layers, not finishing. Ensure your workspace is well-ventilated.
- Dry: Let it dry to the touch (usually 30 minutes to an hour). It should feel cool and dry. Always refer to manufacturer drying times.
- Sand (Lightly!): With very fine sandpaper (I usually go for 220 grit or higher), lightly sand the surface. You're just knocking down any brushstrokes, tiny bumps, or raised wood fibers. This finer grit is essential for creating a perfectly smooth final finish without removing too much gesso. This is crucial for a smooth final finish, like a perfectly manicured nail file, or the smooth surface of a polished stone.
- Clean: Wipe away the dust with a dry, lint-free cloth. Don't skip this; those tiny particles will embed in your next layer. A light pass with a cool heat gun can also help.
- Second Coat: Apply another thin coat, this time in the perpendicular direction (vertically).
- Repeat: Repeat the dry-sand-clean-coat process 3 to 5 times (or more!). Yes, really. Each layer gets smoother and builds that perfect ground. Remember to clean brushes and rollers promptly with water.
For a detailed tutorial on the application itself, see my how to apply gesso to canvas: a beginner's guide — the technique is identical whether you're working on wood or fabric.
How many coats of gesso do I really need?
It depends entirely on the finish you want for your prepared wood for painting. Think of it as a spectrum:
- 2-3 coats: Good for a subtle, slightly textured, expressive feel. Ideal if you want a bit of raw character to show through or for looser styles.
- 4-5 coats: Creates a smooth, satin finish with excellent tooth. This is a versatile sweet spot for most detailed work.
- 6+ coats: With diligent sanding between each, this approaches an eggshell or polished surface, ideal for hyperrealism, fine detail, and seamless blending, allowing your brush to glide with precision.
More coats and more sanding equal a smoother, more refined surface, offering greater control and precision to your brushwork.
Preparing Pre-Primed Panels
What if you bought a panel that's already "pre-primed"? It’s a great shortcut, and brands like Ampersand, Art Panel, or Golden offer excellent ready-to-use options. However, even with these, I often give them a very light sanding with 220+ grit sandpaper and one or two extra coats of gesso myself. Why? Factory primers can sometimes be too smooth or not quite as absorbent as I'd like. That extra layer allows me to achieve the exact tooth and finish I desire, transforming a good surface into a truly exceptional one. It’s a small extra step that makes a world of difference for that ultimate archival quality and painting experience.

Oil vs. Acrylic: Important Considerations for Your Ground
This guide, with its acrylic polymer sizing and acrylic gesso, is perfectly suitable for both acrylic painters and most modern oil painters. Most contemporary artist-grade acrylic gessos are designed to be universal, providing a stable, non-absorbent, yet slightly textured surface that is excellent for oil paints. This robust, flexible ground ensures optimal paint adhesion, dimensional stability, and paint layer integrity, preventing cracking or delamination.

However, if you're an oil painter seeking maximum archival peace of mind and want to replicate traditional oil painting grounds more closely, there are a few extra considerations:

- Dedicated Oil Ground: After your acrylic-sealed panel is completely dry, you can apply a specific, oil-based primer (often called 'oil ground') on top. Brands like Gamblin or Williamsburg offer excellent oil painting grounds. These are typically composed of a chalk or marble dust filler with an oil binder (like alkyd resin or linseed oil) and create a traditional oil-painting surface that is less absorbent than acrylic gesso, allowing the oil paint to sit more on the surface. These typically require a longer curing time (weeks, not hours) before you can paint on them, so patience is key. This robust, flexible ground ensures optimal paint adhesion, dimensional stability, and paint layer integrity, preventing cracking or delamination.
- Ensure Gesso Suitability: If sticking with acrylic gesso for oils, ensure the product explicitly states it's suitable for oils and that it creates a sufficiently non-absorbent barrier. If your acrylic gesso is too absorbent, the oil binder from your paint can be drawn into it, potentially leading to dulling of colors or, over very long periods, compromising the flexibility of the acrylic binder itself. It's a key distinction in the eternal battle of what is the difference between acrylic and oil paint.
- Historical Alternatives (with caution): For a truly historical approach, some oil painters might use traditional rabbit skin glue (RSG) as a sizing, followed by a chalk or lead white ground. However, RSG is hygroscopic (meaning it readily absorbs and releases moisture), becomes brittle with age, and is generally not recommended for flexible modern supports or for use with acrylics. It's a complex material best left to experienced conservators or artists deeply familiar with its quirks and limitations.
Preparing for Different Art Styles and Media
The beauty of a well-prepared wood panel is its versatility. The way you prepare it can subtly (or dramatically) influence your painting experience and the final aesthetic. Here's how to tailor your wood panel preparation to your artistic vision:
- Hyperrealism & Fine Detail: For artists pursuing razor-sharp edges and seamless blends, the key is maximum smoothness. This means more layers of gesso (6+ coats), diligent sanding between every layer with very fine grits (320-400), and potentially even applying your final gesso layers with a palette knife or a very fine sponge roller to eliminate brushstrokes entirely. The goal is an eggshell-smooth finish where your brush glides effortlessly.
- Expressive & Impasto Work: If you love thick paint, texture, and bold basic brushstrokes for acrylic painting, you still need a good foundation, but you might opt for fewer gesso coats (2-3) and less aggressive sanding. A slight tooth is still beneficial for paint adhesion, but you don't need a perfectly smooth surface. The rigidity of the wood panel is particularly forgiving for heavy paint application, preventing cracking that might occur on a more flexible surface like canvas.
- Transparent Glazes: For delicate glazes, whether in oil or acrylic, a smooth, non-absorbent surface is crucial. This ensures your glazes sit on top, maintaining their transparency and luminosity, rather than sinking into an overly absorbent ground. A finely sanded gesso layer, or a dedicated oil ground for oil glazes, is ideal.
- Pastels & Charcoal: These dry media thrive on texture. After initial sizing, you would use an absorbent gesso or a specialized pastel ground. These contain fine particulate matter (like marble dust) that creates a gritty, sandpaper-like surface, providing the necessary 'tooth' to grab and hold dry pigments without smudging or falling off. Standard acrylic gesso is too smooth for optimal pastel adhesion. You can also explore specific grounds for these mediums, or learn more about other dry media in my guide to how to use colored pencils for beginners.
- Gouache & Watercolor: While traditionally on paper, you can adapt wood panels. After thorough sizing with an acrylic polymer medium to prevent SID, you would apply several coats of a dedicated absorbent ground gesso. This creates a porous, paper-like surface that allows watercolor and gouache to soak in and dry, achieving their characteristic matte finish without beading up. Learn more about what is gouache painting and how to use gouache.
Troubleshooting Common Panel Problems
Even with the best intentions, things can sometimes go awry. Here are a few common issues I've wrestled with, and my quick thoughts on how to tackle them:
- Warping after Sealing: If you notice a gentle curve forming – almost like your panel is smiling at you, but not in a good way – it almost always means one side (or the front) absorbed or released moisture differently from the back and sides. Did you seal all sides evenly? Prevention is key here: seal all sides consistently and store panels flat or upright in racks. If the warp is minor and happened soon after sealing, you might be able to correct it by re-applying a coat of sealant to the concave (shrunken) side only, and gently clamping it flat as it dries. For more severe warping, professional bracing might be needed, or sometimes, it's a lost cause – a harsh lesson in wood movement!
- Uneven Gesso Application/Brushstrokes: This is common, especially with the first few coats. Don't fret! That's precisely what the intermediate sanding steps are for. Use your fine-grit sandpaper (220 grit or higher) to gently smooth down any ridges or bumps. If it's very uneven, you might need an extra gesso coat or two to build up a smoother surface before your final sanding. If your gesso is consistently leaving heavy brushstrokes, consider slightly diluting it with water (if recommended by the manufacturer) for a more fluid application, or switch to a foam roller for a smoother finish.
- Fuzzy Fibers After Sealing/Gesso: Sometimes, especially with softer woods like pine or if your sandpaper grit was too coarse, the sealant or gesso can raise the wood fibers, creating a fuzzy texture. A very light sanding with 320-400 grit sandpaper after the layer is dry, followed by a thorough dust wipe, usually takes care of this. Then reapply a thin coat of sealant or gesso.
- Cracking of Sealant/Gesso: If your sealant or gesso layer cracks, it usually indicates it was applied too thickly, or the wood moved excessively during drying. The best solution is often to carefully scrape away the cracked layer (if minor), re-sand, and reapply the material in thinner coats. Always remember that multiple thin layers are superior to one thick layer.
- Paint Not Adhering Well: This is rare if you've followed the steps, but if paint feels slippery or doesn't bind, it might be due to insufficient sanding (not enough tooth) or a contaminated surface (oils from hands, wax from furniture polish, or residual dust). Try a very light sanding with fine grit (320-400), clean thoroughly, and then apply another thin coat of gesso to ensure a receptive surface.
- Ingrained Stains/Discoloration on Reused Panels: If reusing a panel, and you encounter deeply ingrained stains (e.g., from old paint bleed-through, water damage, or mold), simply sanding may not be enough. In minor cases, a shellac-based primer can act as a barrier to block stains from bleeding through new layers. For more severe or problematic stains, you might need to consider a chemical stripper (use with extreme caution and proper ventilation!) to remove old paint and stains down to the bare wood, followed by thorough cleaning, drying, and then re-sealing and priming as usual. Often, for highly valued new work, it's safer and less labor-intensive to start with a fresh, clean panel. Be particularly cautious if the previous artwork used lead-based paints or other potentially toxic materials, as these can pose health risks during sanding or stripping.
- Dealing with Very Large Panels: Large panels (e.g., over 30x40 inches) present unique challenges. They are heavier and much more prone to warping. For these, I highly recommend using cradled panels or constructing your own with robust cross-bracing (using thicker battens and secure joinery like mortise and tenon) on the back. Ensure excellent environmental stability in your studio. Professional solutions for very large works often involve aluminum bracing or honeycomb panels, but that's a whole other guide!
The Core Principles of Archival Panel Prep: A Quick Reference
Before you dive into painting, remember these foundational steps:
- Select Wisely: Choose a stable, flat wood panel (Baltic Birch plywood or tempered hardboard are great starting points). Inspect for imperfections.
- Sand for Tooth: Always sand the entire painting surface (front and all edges) with 120-150 grit sandpaper to create microscopic 'tooth' for adhesion.
- Seal All Sides (Crucial!): Apply 2 thin, even coats of artist-grade acrylic polymer medium to the front, back, and all edges. This prevents SID and warping.
- Prime in Layers: Apply 3-5 (or more) thin, even coats of artist-grade acrylic gesso, sanding lightly with fine grit (220+) and cleaning between coats.
- Patience is Key: Allow adequate drying time for each layer. Rushing can lead to adhesion issues and cracking.
FAQ - Your Wood Panel Questions, Answered
I get a lot of questions about wood panel preparation, and these are the ones that pop up most often. Let's tackle them head-on, so you can paint with confidence:

Can I just paint directly on raw wood?
I mean, you can, and many folk artists do, but I wouldn't recommend it for any serious or archival work. Your paint will soak in unevenly, the colors will become dull as the oily or liquid part of the paint is absorbed by the wood, and the acids in the wood (lignin!) will eventually yellow and degrade your painting (that dreaded SID). It's a recipe for disappointment, and frankly, a waste of your valuable creative energy. A properly prepared surface makes the painting process so much more satisfying and successful. If you want your art to last, prep your panel. Full stop.

Do I absolutely have to seal the back and sides?
Yes. 100%. This is your number one defense against warping. Wood constantly moves as humidity changes – it expands when it absorbs moisture and contracts when it releases it. This natural phenomenon is called wood movement. Sealing it on all sides helps it move uniformly, balancing the moisture exchange and preventing it from bowing, cupping, or splitting. If you only seal the front, the back remains exposed to environmental moisture changes, leading to an uneven pulling force that results in warping. This applies equally to cradled panels, whose exposed frame edges also need sealing if not already done by the manufacturer. Remember, imagine trying to dry a flat piece of paper by blowing hot air on only one side; it will curl. Sealing all sides ensures the wood dries and expands evenly, preventing this curling effect.
Can I reuse an old wood panel?
Generally, yes, with careful preparation. You'll need to sand down the existing paint layers significantly (sometimes even stripping them with a chemical stripper if the layers are very thick or problematic), then re-seal and re-prime as if it were a new panel. Ensure there are no structural issues or deeply ingrained stains from previous artworks. Be cautious of panels that previously had oil-based varnishes or certain chemical treatments that might be difficult to remove and could cause adhesion issues. It's a great way to recycle, but sometimes the effort might outweigh starting fresh, especially if the original artwork was very textured.

What are the environmental considerations of using wood panels vs. canvas?
This is a complex question with no easy answer, as both have environmental footprints. For wood panels, look for those certified by the Forest Stewardship Council (FSC) to ensure they come from sustainably managed forests. Consider the source of the wood and the glues/binders used in engineered panels, looking for low-VOC options. The embodied energy (energy used in production, transport, etc.) for wood and canvas can vary greatly. For canvas, consider organic cotton or linen, which have different agricultural and processing impacts (e.g., water usage, pesticide use). Ultimately, the most environmentally friendly option is to make art that lasts, reducing the need for new materials and waste. Proper preparation ensures that longevity.

How does the type of paint (oil, acrylic, gouache, watercolor) affect wood panel preparation?
- Oil paints require the most rigorous sealing to prevent the oil binders from deteriorating the wood over time. A robust acrylic sizing followed by either an acrylic gesso (artist-grade, suitable for oils) or a dedicated oil ground is crucial.
- Acrylics are more forgiving but still benefit greatly from proper sizing and gesso for color vibrancy and longevity.
- For gouache or watercolor, you'd still apply a sealant (acrylic polymer medium) to prevent SID, but you might then choose an absorbent ground gesso specifically designed to mimic paper's absorbency. This is due to a higher concentration of porous materials like chalk or marble dust, allowing the paint to sink in and achieve those beautiful transparent or matte effects, preventing the paint from becoming too 'sticky' or lifting in undesirable ways, mimicking how pigment sits on paper. It's important to remember that absorbent gesso is not the default for most acrylic/oil painters and its use is specific to these media. You can learn more about this medium in what is gouache painting or how to use gouache.

What are the best wood types for painting if I'm sourcing my own raw lumber?
If you're going the DIY route, fine-grained, stable woods are your best bet. Baltic Birch plywood is excellent for its consistent texture and minimal voids. Maple, Poplar, and Basswood (limewood) are also great choices among solid woods due to their even grain, light color, and lower tendency to warp compared to many other species. Try to avoid highly resinous woods like Pine unless it has been specifically treated to remove resins, as knots and sap can bleed through your layers over time. Always source kiln-dried lumber and let it acclimate to your studio. For solid wood, consider quarter-sawn lumber; this refers to how the wood is cut from the log, resulting in a straight, tight grain orientation that makes it significantly more stable and less prone to warping compared to plain-sawn lumber.
How to deal with knots or resinous areas in wood panels?
Ideally, avoid panels with significant knots or pitch pockets. If unavoidable, you can try to cut out the knot and patch it with water-based wood filler that can be sanded smooth, or more commonly, seal it aggressively. A shellac-based knotting primer or a specialized resin sealer can be applied directly to the knot (or even a few layers) before your acrylic medium to create an extra barrier against resin bleed-through. It's an extra step, but absolutely worth it for longevity and preventing unsightly stains from appearing years later.

Can I paint on particle board or other engineered wood products?
While technically possible, I strongly advise against using generic particle board or most other cheap engineered wood products for archival artwork. They often contain high levels of VOCs (Volatile Organic Compounds) from glues and binders, which can off-gas over time, degrade, and compromise the stability and longevity of your painting. These VOCs can also be harmful to your health in a confined studio space. MDF and hardboard (Masonite) are engineered specifically for structural stability and consistency and are generally considered artist-grade options when properly prepared, unlike generic particle board, which often has a weaker binder and is prone to crumbling, and should only be considered for practice or non-archival works.
Can I use hardware store primer instead of artist's gesso?
Technically, you could, but they're fundamentally different products designed for different purposes. Think of it like using house paint versus artist-grade oil paint – both apply color, but the quality, permanence, and interaction with other materials are vastly different. House primer is formulated to make house paint stick to a wall, often with a very flat, non-absorbent finish and may contain ingredients (like mildewcides or tinting agents) that are not archival for fine art. Some hardware store primers might be acceptable if they are water-based acrylic and explicitly state they are suitable for priming for art projects, but this is a gamble. Artist-grade gesso, on the other hand, is specifically formulated with a particular level of absorbency and tooth to interact beautifully with artist's paints, allowing for proper adhesion, layering, and longevity without compromising the pigments or binders. For lasting, professional results, I strongly recommend sticking with artist-grade gesso, or checking reviews of best gesso for canvas preparation review.
This sounds like a lot of work. What's the fastest way?
If you're really pressed for time, the fastest way is to buy a pre-primed artist panel! Brands like Ampersand, Art Panel, or Golden make excellent cradled wood panels that are ready to go right out of the wrapper. They are more expensive, certainly, but they save you all this prep time. Even then, I often give them a very light sanding with 220+ grit sandpaper and one extra coat of gesso myself, just to get the exact finish and tooth I want. Sometimes that extra step makes all the difference, transforming a good surface into a truly exceptional one.
How to care for finished wood panel paintings?
Once your masterpiece is complete and fully cured, maintaining its archival quality is key. Avoid hanging your artwork in direct sunlight or in areas with extreme temperature or humidity fluctuations (e.g., bathrooms, direct vents). Ideally, aim for a consistent environment of 40-60% relative humidity and 68-75°F (20-24°C). Dust gently with a soft, dry cloth. For more serious cleaning, consult a professional art conservator. Varnishing your finished painting (once thoroughly dry) offers an additional layer of protection against UV light, dust, and environmental pollutants, available in gloss, satin, or matte finishes to suit your aesthetic. Learn more about varnishing an oil painting at how to varnish an oil painting a step by step guide.
Environmental Considerations for Wood Panels
I think it's important to be mindful of where our materials come from. When sourcing wood panels, try to look for those certified by the Forest Stewardship Council (FSC). This certification ensures the wood originates from responsibly managed forests, promoting sustainable forestry practices. Additionally, when using engineered panels (like MDF or plywood), opt for products that use low-VOC (Volatile Organic Compound) glues and binders. This not only reduces your exposure to potentially harmful chemicals in your studio but also contributes to better indoor air quality and a more environmentally friendly production process. Some artists also explore using recycled or reclaimed wood for their panels, which can be an excellent sustainable option if the wood is properly stabilized and free of contaminants. Ultimately, the most environmentally friendly option is to make art that lasts, reducing the need for new materials and waste. Proper preparation ensures that longevity.
Glossary of Key Terms: Demystifying Panel Prep
- Acclimation: Allowing wood to adjust to the temperature and humidity of its environment before working with it, to minimize movement.
- Absorbent Ground Gesso: A type of gesso with a higher concentration of porous materials (e.g., marble dust) designed to create a gritty, absorbent surface, ideal for dry media like pastels, charcoal, or water-based paints like gouache/watercolor.
- Acrylic Gesso: A modern acrylic polymer primer specifically designed to create a receptive, absorbent, and stable painting surface with 'tooth' (see also: Gesso).
- Acrylic Polymer Medium: A liquid acrylic binder used as a sealant or to extend paints, crucial for sizing wood panels due to its flexibility and non-yellowing properties.
- Alkyd Resin: A synthetic resin often used as a binder in oil painting mediums and oil grounds, known for its faster drying time and flexibility compared to traditional linseed oil.
- Archival Quality: Materials and methods designed to ensure an artwork resists degradation and retains its original appearance for a very long time (100+ years) under proper storage.
- Binder: The glue-like component in paint or gesso that holds pigment particles together and allows them to adhere to a surface.
- Cradled Panel: A thin wood panel mounted onto a thicker wood frame (cradle) to provide extra rigidity, prevent warping, and offer a finished edge.
- Dado Joints: A woodworking joint where a groove (dado) is cut across the grain of one piece of wood to receive the end of another, providing strong, stable connections in panel construction.
- Finger Joints: A woodworking joint made by cutting a series of interlocking 'fingers' in two pieces of wood, providing a strong bond and increased surface area for glue.
- Gesso: (Historically: gypsum and animal glue; Modern: Acrylic Gesso) A primer applied to a support to prepare it for painting, creating a suitable ground with 'tooth'.
- Hide Glue: A traditional animal-based glue, historically used in woodworking and panel construction. It is hygroscopic and can be brittle, making modern synthetic glues often preferred for archival painting panels.
- Hygroscopic: A material's tendency to readily absorb and release moisture from the air.
- Impasto Painting: A technique where paint is laid on thickly, often creating visible brushstrokes or palette knife marks that add texture to the surface.
- Kiln-Dried: Wood that has been dried in a kiln to remove most of its moisture, significantly stabilizing it and reducing its tendency to warp or crack.
- Lignin: A complex polymer found in wood that provides rigidity. Its breakdown can release acids that cause discoloration in paint layers (SID).
- Mortise and Tenon: A traditional woodworking joint that connects two pieces of wood at an angle, where one piece has a projection (tenon) that fits into a hole (mortise) in the other, offering exceptional strength, often used for bracing large panels.
- Oil Ground: A specific oil-based primer applied after sizing, typically composed of chalk or marble dust with an oil binder, creating a traditional, less absorbent surface for oil paints.
- Pigment Load: The concentration of pigment particles in a paint or gesso, directly affecting its opacity, color strength, and covering power.
- Quarter-sawn Lumber: Wood cut in a specific way from a log, resulting in a grain orientation that makes it significantly more stable and less prone to warping than plain-sawn lumber.
- Rabbit Skin Glue (RSG): A traditional animal-derived glue historically used as a sizing for canvas and wood, known for its hygroscopic nature and brittleness, generally not recommended for modern flexible supports or beginners.
- Sizing: The initial layer of acrylic polymer medium applied to wood to seal it, prevent Support Induced Discoloration (SID), and control absorbency.
- Support Induced Discoloration (SID): The yellowing or browning of paint layers, especially lighter areas (like whites, blues, and greens), caused by acids and impurities leaching from the underlying support (like wood).
- Tempered Hardboard: Hardboard that has been impregnated with linseed oil and baked, making it more rigid, water-resistant, and dimensionally stable.
- Tooth: A fine, microscopic texture on a painting surface that provides a physical grip for paint layers, ensuring adhesion.
- VOCs (Volatile Organic Compounds): Organic chemicals that evaporate into the air, often found in glues, binders, and solvents. They can off-gas over time, contribute to indoor air pollution, and potentially impact both health and the longevity of artwork if they react with paints or binders.
- Wood Movement: The natural expansion and contraction of wood due to changes in environmental humidity and temperature.
- Warping: The undesirable bending, bowing, or twisting of wood, typically caused by uneven wood movement due to inconsistent moisture absorption or release across its surfaces.
Your Panel is Ready: Go Create Something That Lasts
And that's it. You've taken a simple piece of wood and, through a series of deliberate, mindful steps, transformed it into a stable, archival, and truly beautiful surface. It’s no longer just a panel; it’s a canvas with immense potential, an invitation to create, a blank page ready for your story. All that foundational work might seem tedious, but it’s an act of respect for your materials and for the art you're about to create. It's the silent partner, the unseen craftsmanship that ensures your artistic vision will endure. Beyond protecting your artwork, a perfectly prepared panel also enhances the painting experience itself, offering a satisfying surface that responds beautifully to your touch, allowing for greater control and precision.
With this solid foundation, your creative possibilities expand exponentially – from razor-sharp realism to dynamic impasto, every stroke will find its ideal home. Embrace the tactile joy, the archival security, and the enhanced vibrancy that this foundation provides. Now that the stage is set, go forth and create something beautiful. If you're curious about what a finished painting on a well-prepared panel looks like, and how these archival principles translate into lasting beauty, you can see some of my works available for purchase on my site at /buy.