
Your Art Studio: The Ultimate Guide to Crafting Your Creative Co-Pilot
Transform your art studio into your ultimate creative co-pilot. This comprehensive guide, rooted in personal experience, covers optimal lighting, air quality, ergonomics, workflow, storage, and sustainable practices for thriving art & well-being. Discover how to make your workspace a true sanctuary.
Your Art Studio: The Ultimate Guide to Crafting Your Creative Co-Pilot
I used to truly believe in the whole myth of the chaotic artist. You know the cliché: Hollywood’s tortured genius, a paint-splattered room, tripping over canvases and forgotten coffee mugs, where masterpieces supposedly emerge from pure, untamed inspiration, often just before a deadline. It's the stuff of movie montages and romanticized novels, isn't it? We see it in tales of the Romantic painters, who often prioritized intense emotion over pristine workspaces, or the Beat Generation writers fueled by spontaneous bursts. Honestly, I think this myth often serves as a convenient excuse for not prioritizing the very environment that nurtures creativity. It can make artists feel inadequate if their space isn't a beautiful mess, or worse, justify poor habits that hinder rather than help. It's a dangerous romanticism that can actively undermine your creative process, and frankly, a subtle form of self-sabotage.
My own early experiences were a stark contrast to this romanticized ideal, proving the myth was not only unhelpful but actively detrimental to my creative process. My first real studio was a corner of a bedroom, and the chaos wasn't inspiring; it was a constant archaeological dig just to find the right brush – often leading to me abandoning a project out of sheer exasperation. Imagine trying to mix a subtle shade of blue when you can't even find your palette! My current art, which you can explore on my /buy page, would simply not be possible in such an environment. I used to joke that my biggest artistic challenge wasn't a blank canvas, but simply finding it.
Over the years, I've learned that my studio isn't some passive container for my stuff. It's an active partner in my work. It’s my co-pilot. When the environment is right—and by "right" I mean working with me, removing friction—the ideas flow, problems resolve, and energy levels stay high. It’s like having a silent collaborator that anticipates your needs. When it's wrong—bad light, stuffy air, a layout that makes me walk a marathon to grab a tube of paint—it actively fights me, draining my creative battery before I even start. So, let’s talk about how to get your space, whether it’s a dedicated building or a corner of your kitchen, to truly work with you. This article aims to be the ultimate, comprehensive guide, providing actionable advice for every artist, regardless of space or budget. I've been there, making all the mistakes, so let me share what I’ve learned about making your studio your greatest ally, built on four core pillars: Light, Air, Ergonomics, and Flow.
The Fundamental Four: Illuminating Your Creative Canvas
Forget fancy equipment for a second. The most fundamental elements you need to master are the ones that are all around you. Get these right, and everything else becomes easier. This is where you lay the foundation for a studio that supports, rather than sabotages, your creative flow. Sometimes I think of it like setting up the perfect runway for ideas to take off, or ensuring your canvas is properly prepared before the first brushstroke.
Let There Be Light (But the Right Kind for Your Art)
Light is everything. It dictates how you see color, form, and texture. If you can't see accurately, you're flying blind. I once spent a week on a painting, absolutely in love with a subtle indigo I’d mixed. I took it to a different room to photograph, and my beautiful indigo was a muddy purple. The culprit? A cheap, warm, yellow-toned lightbulb above my easel. The disappointment was palpable; it felt like a betrayal. Ever spent hours perfecting a shade, only to see it completely wrong in another environment? It's infuriating. (And honestly, a huge waste of time and expensive pigments.) This isn't just about making things visible; it's about seeing them truly.
For sculptors and those working with three-dimensional forms, light plays a different, yet equally crucial, role. Directional natural light, or carefully placed artificial lights, can reveal the nuances of form and volume, constantly shifting as the day progresses. The play of light and shadow defines contours, emphasizes texture, and conveys depth, making accurate lighting essential for understanding your sculpture as it will be perceived in the real world. Think about how a change in light transforms the perceived emotion in a classical bust; it’s not just illumination, it’s interpretation.
Natural light is often the gold standard, especially consistent, diffuse north-facing light (in the Northern Hemisphere). It's revered for revealing subtle tonal shifts in watercolors or allowing you to see true colors without harsh shadows. Even north-facing light isn't perfectly static; its quality changes with the season, cloud cover, and time of day, requiring an artist to adapt or supplement. But let's be real, most of us can't just build a new wing on our house to optimize for natural light. We work with what we've got, and that means often supplementing or replacing natural light. The goal is to achieve consistency.
Artificial light is your controllable best friend. You need to pay attention to two things for the best studio lighting: Color Temperature (measured in Kelvin, K) and Color Rendering Index (CRI). And trust me, don't cheap out on these metrics; your art deserves to be seen in its true colors, and your clients deserve accurate work. Inaccurate lighting leads to inaccurate colors, which can lead to disappointment for both you and anyone else viewing or acquiring your art. A common pitfall for artists on a budget is buying the cheapest bulbs – a false economy that can cost you far more in wasted paint and rework. This isn't just technical jargon; it's about saving you from the frustration of seeing your hard work look completely different under bad light.
Light Characteristic | What It Is | Ideal for Artists | Why It Matters |
|---|---|---|---|
| Color Temperature | The warmth (yellow) or coolness (blue) of the light, indicating its hue. Think of a candlelight (warm, low K) vs. a clear sky (cool, high K). | 5000K - 6500K | This range mimics natural daylight by providing a balanced spectrum, ensuring your colors look true. Anything lower is too warm (yellowish); higher is too blue. Both distort your palette, leading to inaccurate color mixing and choices. Imagine mixing a subtle flesh tone for a portrait; a low Kelvin light could make your carefully balanced ochres and reds appear muddy, creating unexpected results when viewed under different conditions. |
| Color Rendering Index (CRI) | A scale of 0-100 measuring how accurately a light source reveals the true colors of objects compared to natural light. Think of it like a color's 'authenticity score' – a high CRI means it's showing up for work as its true self. An analogy: a low CRI light is like trying to pick out paint swatches in a dimly lit hardware store, while a high CRI light is like doing it under bright, clear daylight. | 90+ | A high CRI means you're seeing your reds as red, not a weird shade of orange. This is paramount for accurate color mixing, especially in mediums like oils or acrylics, and crucial for ensuring your finished pieces look the same in various viewing environments. Without it, you’re making color decisions based on faulty information, much like trying to pick out a specific paint tube in a dimly lit hardware store. |
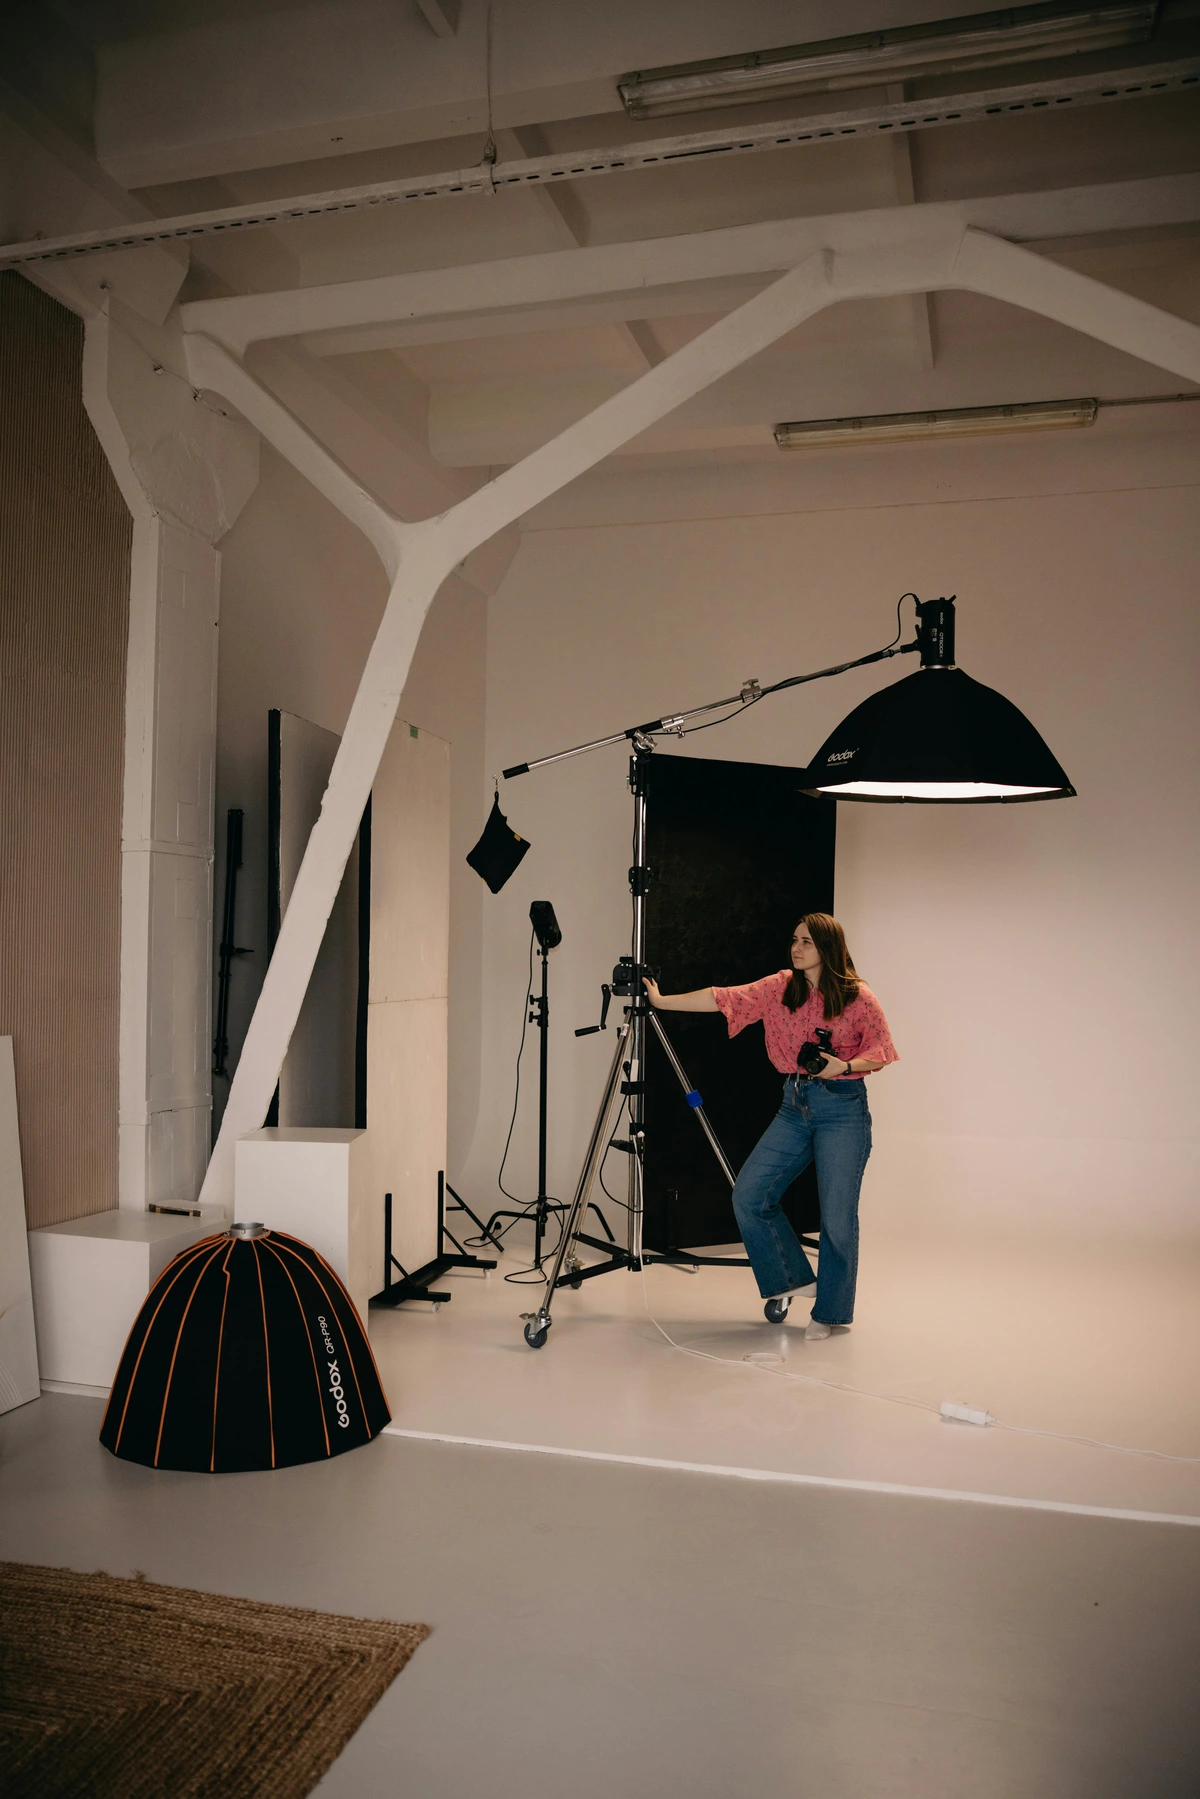
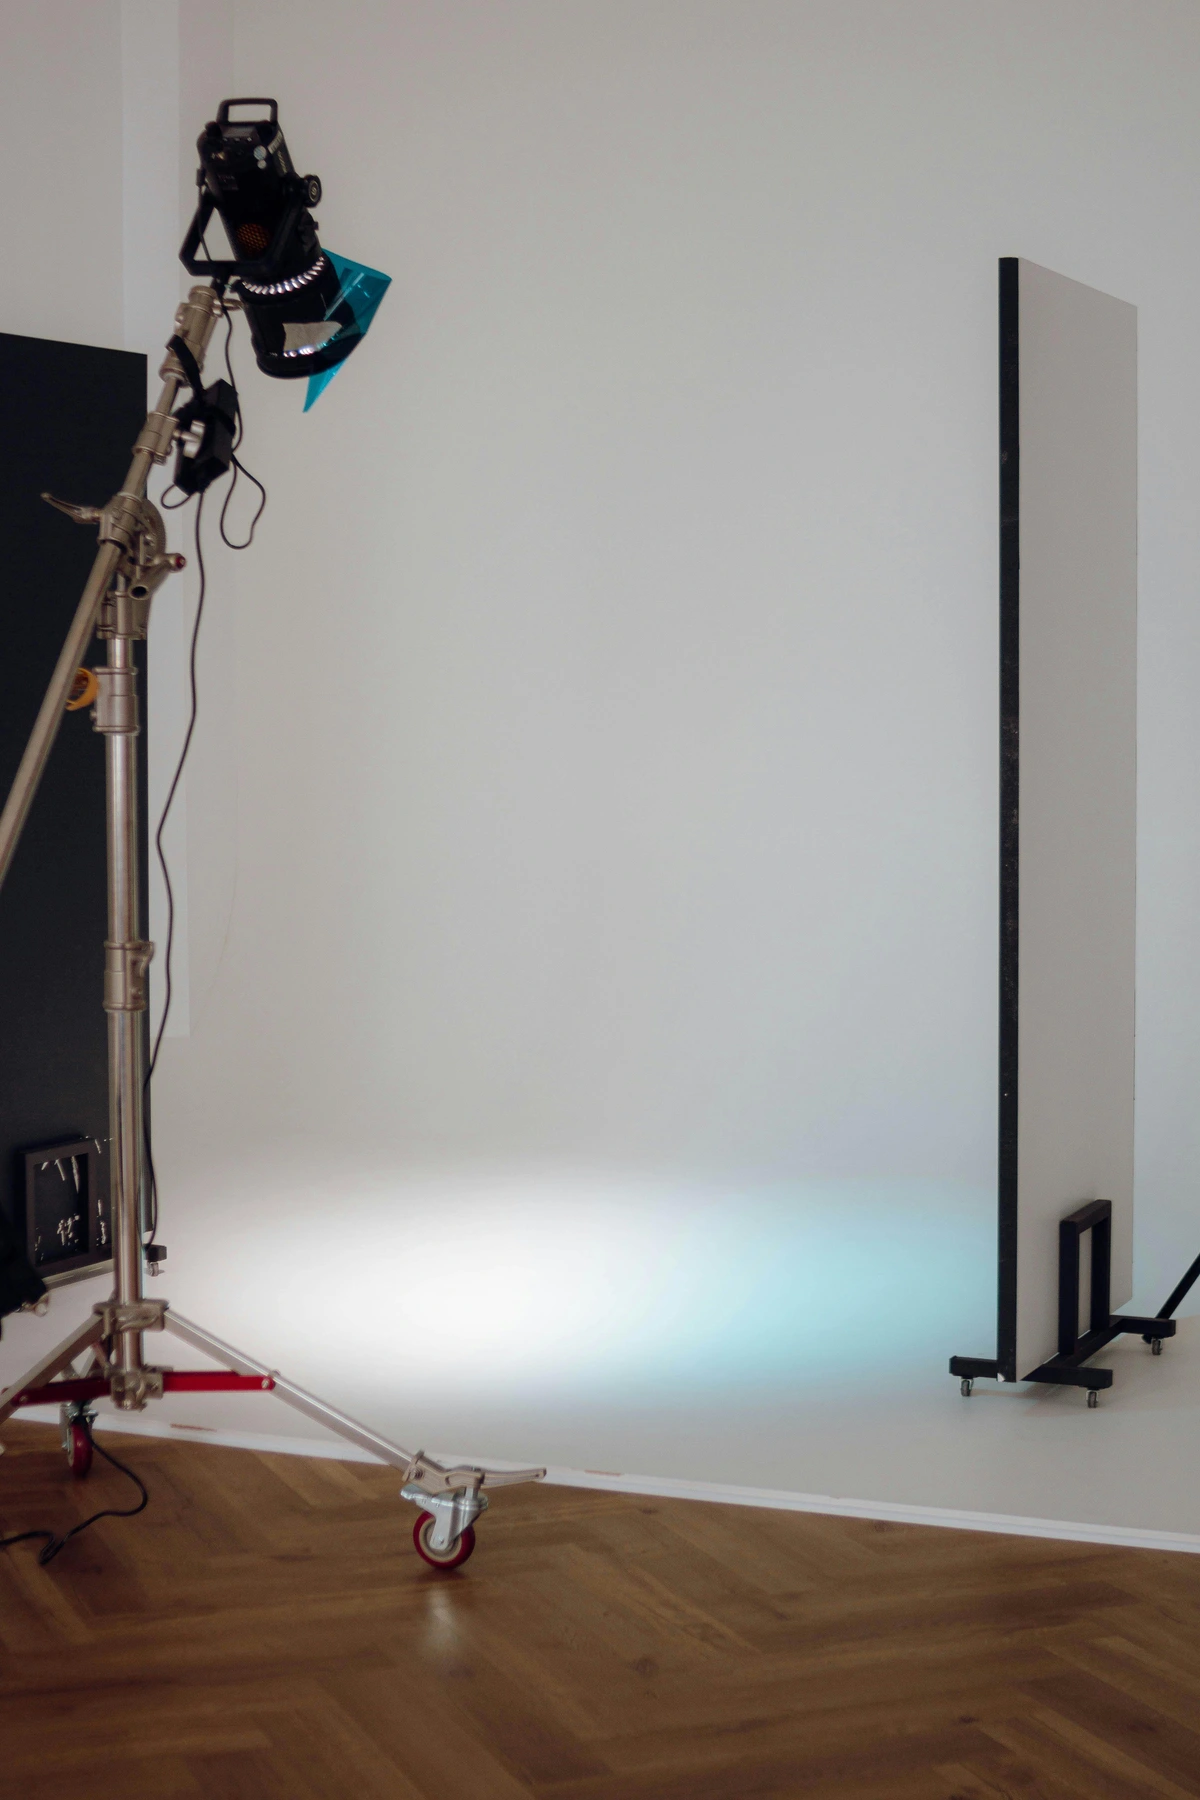
My setup is a mix: a large window with a sheer curtain to diffuse harsh afternoon sun, and two 5000K, 95+ CRI LED lamps on stands that I can move and direct. This control is a game-changer; it means my studio is a reliable co-pilot for accurate color. These aren't just clamp lights; they're often adjustable track lighting or dedicated studio lamps with flexible arms. For digital artists, the ambient studio light should complement your color-calibrated monitor, minimizing glare and ensuring your digital palette translates accurately to print. Don't forget that UV light from direct sunlight can also degrade certain pigments, dyes, paper, and varnishes over time, leading to fading and embrittlement. Consider UV-filtering films on windows or protective varnishes for finished work.
For those on a budget, you can achieve a surprisingly effective setup with a couple of clamp lights from a hardware store fitted with high-CRI (90+), daylight-balanced (5000-6500K) LED bulbs. Clamp them to shelves, easels, or tables to get light exactly where you need it for a very low cost. Understanding color is foundational, and you can read more about it in this definitive guide to color theory in art. You can also explore the language of light in abstract compositions for more artistic applications.

The Air You Breathe (And Your Art Does Too): Studio Air Quality Essentials
Air quality isn't just about your health (though that's obviously important); it affects your materials and finished pieces in sneaky ways. A toxic studio is a temporary studio, and a damp or dusty one can slowly degrade your work. I once had a series of drawings on archival paper buckle and warp slightly due to fluctuating humidity, and it was heartbreaking to see my creative co-pilot turn against me due to an invisible threat. It's like your art is slowly committing a quiet act of self-sabotage, and you're none the wiser until it's too late.
Temperature & Humidity: The Invisible Threat
These two are silent assassins of paper, canvas, and wood. High humidity can cause paper to buckle, canvas to sag, paints to dry slowly (leading to mold growth on surfaces or even within materials), and adhesives to fail. Low humidity can make wood panels crack, paints dry way too fast (especially acrylics), and fine art papers become brittle, increasing the risk of damage. It can even affect the longevity of certain mediums, like pastels or charcoals, making them more prone to smudging or crumbling. I keep a cheap little digital hygrometer in my studio. It tells me the temperature and humidity. My goal is to keep it between 40-55% humidity year-round. In the winter, I run a humidifier; in the summer, a dehumidifier. It feels like a bit much, but it's cheaper than losing a finished piece or expensive materials over time. Investing in this seemingly minor detail ensures your art's longevity, and protects materials like archival paper from irreversible warping or cracking.

Ventilation & Fume Management: Breathing Easy for You and Your Art
If you're using oils with solvents like turpentine or mineral spirits, resins, spray varnish, strong adhesives, certain printmaking inks, lacquers, or even some 3D printing filaments, you are not kidding around. You absolutely need to move that air. These products release VOCs (Volatile Organic Compounds), which are harmful gases that can cause immediate issues like headaches, dizziness, and respiratory irritation, and long-term exposure is linked to more serious health problems, including neurological damage and increased cancer risk. A simple box fan in a window pointing out can work wonders. Even better is a cross-breeze—opening two windows on opposite sides of the room. Why? Because a cross-breeze creates a continuous flow, actively drawing stale, fume-laden air out and replacing it with fresh air, rather than just stirring the air around. An air purifier with a carbon filter is excellent for capturing fumes (and dust!). Always check labels and ventilate accordingly. Even seemingly innocuous art materials can off-gas, so a general approach to good ventilation is always a smart investment in your health and your art's longevity.
Dust & Material Longevity: The Tiny Invaders
Dust is the enemy. It's a million tiny particles just waiting to embed themselves in your wet paint or varnish, creating a texture you did not ask for. For traditional artists, dust can attract pests that damage canvas or paper, settle into wet oil or acrylic paint creating unwanted bumps, or smudge delicate charcoal and pastel drawings. For digital artists, dust can clog sensitive equipment, leading to overheating or malfunctions. An air purifier with a HEPA filter is your best friend here, as is a regular, boring cleaning schedule. I wipe down surfaces before I start working, not after. Store canvases and paper covered. Learning to appreciate the definitive guide to understanding texture in art should be a conscious choice, not an accidental outcome of a dusty studio.
Understanding Medium-Specific Air Needs
Different art forms have distinct environmental considerations. While painting with solvents requires robust ventilation, other mediums have their own quirks. Knowing these helps your studio act as a truly informed co-pilot.
Medium | Primary Air Concern | Mitigation | Why it matters |
|---|---|---|---|
| Oils/Acrylics (with solvents) | VOCs, fumes from solvents, mediums, varnishes. | Cross-breeze, exhaust fan, carbon filter air purifier. | Protects respiratory health; prevents chemical interactions with paint; ensures proper drying and longevity of the artwork. |
| Ceramics | Particulate matter (clay dust), glaze fumes (during firing). | Dust masks during dry clay work, dedicated ventilation for kilns, good airflow during glaze mixing. | Prevents silicosis from fine silica clay dust, a serious and irreversible lung disease; protects against toxic fumes from glazes which can be carcinogenic and affect lung health. |
| Printmaking | Various chemical fumes (inks, solvents, acids for etching), paper dust. | Fume hood for etching, good cross-ventilation, respirators if handling strong chemicals. | Protects from acid burns and lung irritation; prevents degradation of paper and ink, ensuring print longevity and archival quality. |
| Woodworking/Sculpture | Sawdust, wood dust (can be fine and toxic), fumes from glues/finishes. | Dust collection system, respirators, good ventilation, eye protection during sanding/cutting. | Prevents respiratory irritation (some wood dust is carcinogenic); protects from harsh chemical fumes and eye injuries, ensuring long-term health and material integrity. |
| Textile Arts | Fiber dust, dye fumes, adhesive fumes. | Good ventilation, dust masks for fiber work, proper disposal of dye chemicals. | Prevents lung irritation from fibers; protects against skin and respiratory issues from dyes and adhesives, preserving health and material integrity and preventing dye bleed or fading. |
| 3D Printing | Fumes from melting plastic (especially ABS), particulate matter (ultrafine particles). | Enclosed printer with exhaust to outside, HEPA/carbon filter, good room ventilation. | Prevents exposure to harmful ultrafine particles and VOCs released during printing, which can impact neurological function and overall health. Ensures proper print adhesion and material consistency. |
| Photography (Darkroom) | Chemical fumes (developers, fixers, stop baths, toners). | Dedicated darkroom ventilation system (exhaust fans), chemical safety procedures. | Protects respiratory system from corrosive and irritating chemical fumes, essential for sustained darkroom work and preventing material degradation or staining of prints. |
Common Pitfall: The "Good Enough" Approach to Air. Many artists underestimate the long-term health and material damage from inadequate ventilation or uncontrolled humidity, often only ventilating when actively working with strong solvents. Don't fall into this trap; invest in your health and the longevity of your work. Even something as simple as strategically placed air-purifying plants (like Snake Plants or Pothos, though they have limitations in filtering VOCs) can contribute to a healthier atmosphere, alongside mechanical solutions. How about an "Air Quality Index" for your own creative sanity? Your creative co-pilot thrives in clean air.
Taming the Chaos: Ergonomics & Workflow for Creative Flow
How you arrange your studio dictates how you move, and how you move dictates your energy levels and focus. If you're constantly hunting for things, stretching, or contorting yourself to reach something, you're draining your creative battery. This is where ergonomics comes into play—designing your space to fit your body and work habits. It's about making your workspace a fluid extension of yourself, not an obstacle course. Are you working with your body, or against it? Your studio should be a co-pilot that guides you smoothly through your process, not one that constantly throws up roadblocks. I still remember the nagging ache in my shoulder after weeks of hunching over a tiny desk, or the frustration of walking across the room again for a specific pigment. Those little frictions add up, turning creative joy into a chore.
Think of your workspace like a chef's kitchen. There's a concept called the 'work triangle'—the sink, the stove, the fridge—which aims for efficiency. For me, the artist's triangle is a starting point, but I think about broader workflow zones. These zones aren't rigid lines on the floor; they're areas optimized for specific activities, minimizing wasted effort and preventing breaks in your creative flow:
- The Creation Station: My easel, sculpting stand, or primary work table. This should be the central hub, optimized for comfortable working posture and easy access to frequently used tools. Think adjustable easels, like sturdy H-frame easels for large canvases, portable French easels for plein air, or drafting tables that can be raised or lowered to suit standing, sitting, or even leaning postures. Maintaining a neutral spine and relaxed shoulders is key. I've found that a good hydraulic lift drafting table, for example, is a godsend for varying my posture throughout the day, preventing aches and keeping my energy up. You can find more about choosing the right setup in best easels for small spaces.
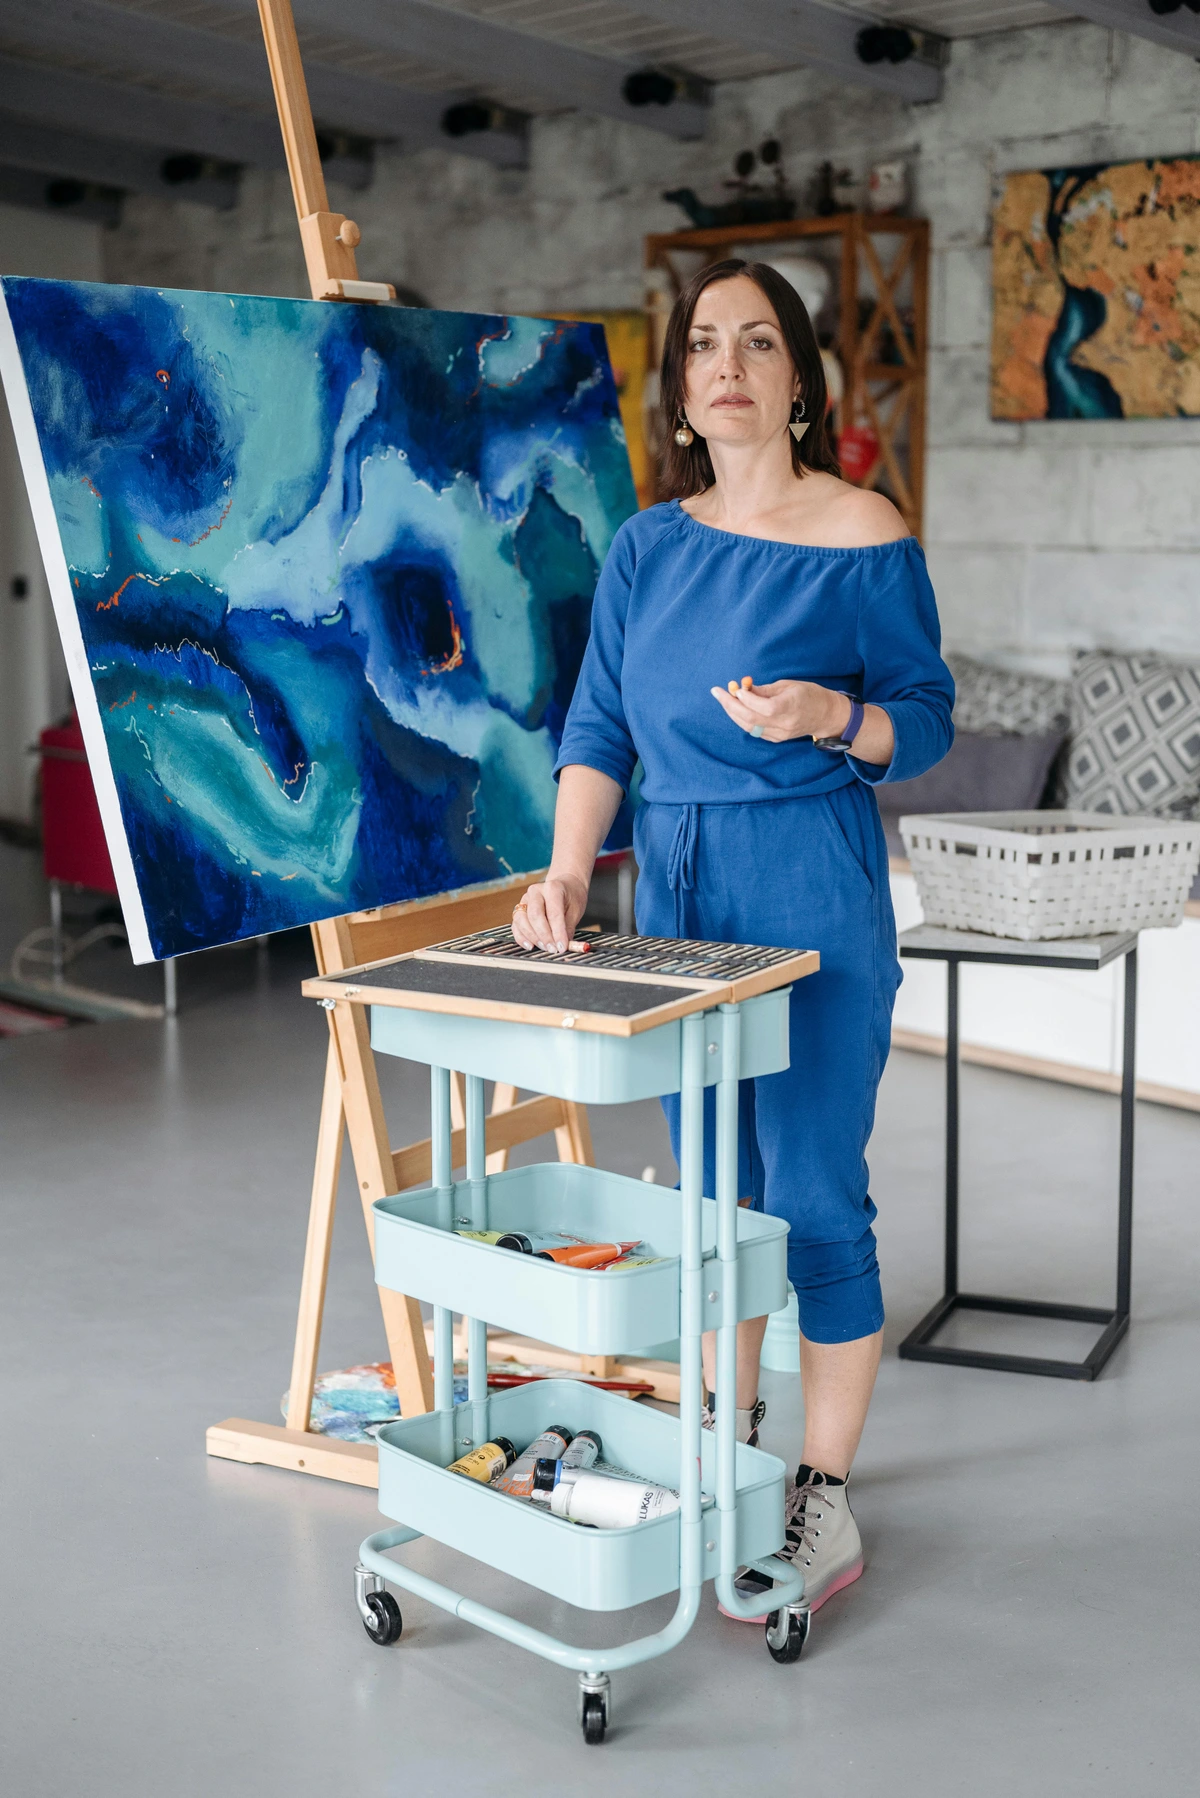
- The Supply Hub: My taboret or rolling cart with paints, brushes, and mediums for the current project. Keep it mobile or within an arm's reach. I'm a big fan of modular drawer units and clear containers here – if I can see it, I'll use it. This zone is your quick-access toolkit.
- The Cleaning Zone: My sink or bucket for cleaning brushes. Position it away from clean work but easily accessible. Don't make it a trek! No artist wants to clean brushes, so make it as painless as possible. This is where your co-pilot saves you from procrastination.
- The Inspiration & Research Zone: A dedicated nook for sketchbooks, mood boards, books, or a computer for research. This keeps the messy work separate from the contemplative. It's where I might have a small print of a Caravaggio, a fabric swatch that caught my eye, or a collection of smooth river stones. Artists like Frida Kahlo perfectly blended living, working, and inspiring spaces within her Casa Azul, illustrating how deeply interwoven these zones can be. This is where your co-pilot sparks new ideas.
- The Critique/Viewing Zone: A clear wall or space with good, consistent lighting where you can step back, place your work, and assess it from a distance. Sometimes, simply rotating a piece helps. This concept of stepping back and critically assessing your work from a distance is akin to understanding composition in art explained, but applied to your physical studio layout. Being able to see your work from afar, as if through a fresh set of eyes, is invaluable. Your co-pilot provides perspective.
- The Rest/Recharge Zone: Even a comfortable chair and a small plant can make a huge difference. A space to step away, relax, and let ideas simmer without being in the active workspace. It's a mental palate cleanser, a vital pit stop in your creative journey.
I try to keep the most active points (1-3) within a few steps of each other. It sounds laughably simple, but when you're in the zone, the last thing you want is a ten-foot trek for a paper towel to break your concentration. If your studio is tiny, go vertical! Use wall shelves, pegboards for tools (a great way to see everything at a glance!), and rolling carts that can be tucked under a desk. Get furniture that can do double duty, like a storage ottoman. Every single object should have a designated home. This prevents mental clutter, which is just as draining as physical clutter. Learning about understanding balance in art composition can also apply to balancing your studio space – a balanced space promotes a balanced mind.
The Digital Artist's Oasis: Ergonomics for Screens and Sensors
For digital artists, ergonomics isn't about paint tubes; it's about pixels, posture, and peripherals. Optimizing your digital setup is crucial for long-term health and productivity – your digital creative co-pilot needs careful calibration:
- Monitor Height & Distance: Your monitor(s) should be at arm's length, with the top of the screen at or slightly below eye level. This prevents neck strain and reduces eye fatigue. Consider a monitor arm or a simple monitor stand for easy adjustment. I used to just stack books, but a proper stand or arm is a game-changer – it's an investment in your neck and eyes! For multi-monitor setups, ensure continuity and minimal head turning.
- Keyboard & Mouse/Tablet: Use ergonomic versions and ensure your wrists are straight, not bent up or down. Consider a drawing tablet that allows for natural arm movement, and experiment with different stylus weights and grips. A standing desk converter can be a game-changer for varying posture throughout the day. Also, pay attention to the ergonomics of your tools – the click-feel of your mouse, or even the grip on a traditional pencil for hybrid artists.
- Chair & Posture: Invest in a truly ergonomic chair. Your feet should be flat on the floor, back supported, and arms resting comfortably. Don't just sit; actively support your body. Remember to take regular breaks, stretch, and give your eyes a rest (e.g., the 20-20-20 rule: every 20 minutes, look at something 20 feet away for 20 seconds). Consider apps that remind you to take micro-breaks.
- Cable Management: This might seem minor, but a tangle of cables is a visual distraction and a physical hazard. Use cable ties, sleeves, or cable management boxes to keep things tidy. It also aids in preventing dust buildup on sensitive electronics, which can lead to overheating. A clean digital space reflects a clear mind.
- Lighting for Screens: Position your screen to avoid glare from windows or overhead lights. Consider a monitor light bar to illuminate your desk without creating screen reflections. Proper studio lighting (as discussed earlier) helps bridge the gap between digital work and physical output, especially when considering the art of display.
Here’s a quick checklist to assess your ergonomic setup and ensure your creative co-pilot isn't causing you pain:
Area | Checkpoint | Ideal State | Your Current State |
|---|---|---|---|
| Work Surface Height | Can you work with relaxed shoulders and neutral wrists? | Adjustable desk/easel at elbow height when standing, or allowing forearms parallel to the floor when sitting. | |
| Chair Support | Does your chair support your lower back and allow feet flat on floor? | Full lumbar support, adjustable height and depth, arms that support without shrugging shoulders. | |
| Reach Zones | Are frequently used tools within easy, un-stretched reach? | Primary tools within a forearm's length, secondary within an arm's length. | |
| Light Position | Is light directed onto your work, minimizing shadows and glare? | Movable, balanced, high-CRI light sources that don't cast shadows from your hand or head. | |
| Digital Setup | Monitor at eye level, ergonomic keyboard/mouse/tablet, tidy cables, breaks scheduled? | Screen top at eye-level, neutral wrist position, minimal clutter, regular eye/stretch breaks. | |
| Tool Ergonomics | Do your frequently used hand tools feel comfortable and balanced? | Tools that fit your hand, minimize vibration, and are not overly heavy for prolonged use. |

credit, [licence]
Common Pitfall: Ignoring the "Little Aches." Don't dismiss that nagging shoulder pain or wrist discomfort. These are signals your body is sending. Addressing ergonomic issues early can prevent chronic problems like RSI (Repetitive Strain Injury) and prolong your creative career. I've learned this the hard way more times than I care to admit! What's your body telling you right now about your workspace? Listen to your creative co-pilot – it knows what it needs.
Beyond the Basics: Cultivating Sound and Soul in Your Sanctuary
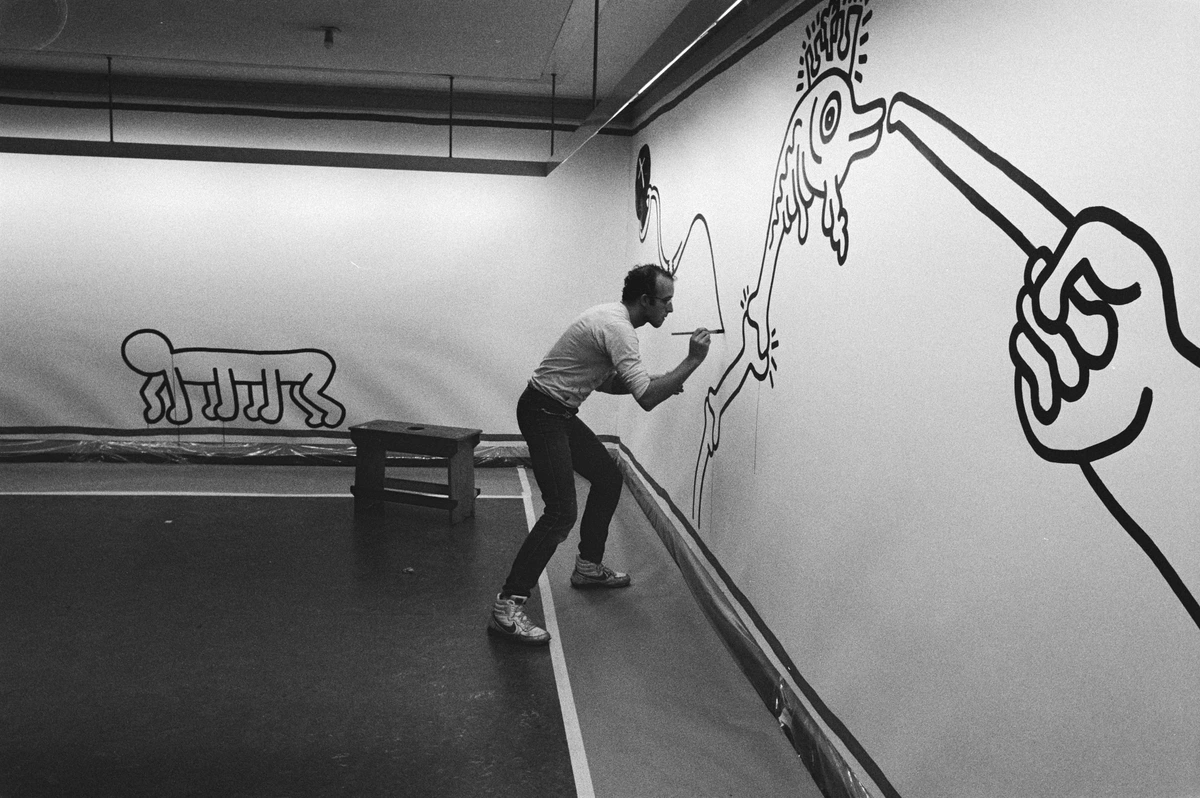
A functional studio is great. A studio that feels good is even better. This is about curating the intangible environment—the vibe—that deeply impacts your creativity and well-being. It's the difference between a workshop and a sanctuary, a place you don't just work in, but truly want to be. It’s where your creative spirit can truly flourish, just as it did for artists like Jackson Pollock, whose energetic movements were almost a dance with his canvases, a controlled chaos that was deeply personal to his artistic process. Even artists like Van Gogh, despite his personal struggles, found solace and immense productivity in the humble studio spaces he occupied, transforming them into intensely personal realms of creation. Your creative co-pilot isn't just about efficiency; it's about inspiration.
The Sonic Environment: What's Your Soundtrack?
What do you listen to? For intense, focused work, I often need instrumental music—ambient, classical, or lo-fi hip-hop beats often do the trick—or complete silence. For looser, more experimental phases, I'll put on a podcast or an energetic playlist. The sound becomes part of the atmosphere and can absolutely influence the marks I make, or how my thoughts develop. Pay attention to what sound does to your mood and energy, and use it as another tool in your co-pilot's arsenal. Sometimes, simply tuning into the sounds of the studio itself—the brush on canvas, the whisper of a pencil, the hum of an air purifier—can be meditative. If outside noise is a problem, consider sound-dampening panels (DIY versions can be made with insulation and fabric), heavy curtains, or even earplugs to create a more controlled sonic space. You can even explore my studio playlist for some inspiration, though remember: what works for me might not work for you!

The Vibe & Sensory Engagement: Crafting Your Sanctuary
Your studio should be a sanctuary, a place you want to go. Pin up things that genuinely inspire you: postcards, fabric swatches, quotes, your own old drawings that you're proud of, a print of a Caravaggio, or a small sculpture that makes you think. I have a tiny collection of smooth river stones on my windowsill that I just like to touch, a small reminder of nature's simple beauty. Add a plant (they clean the air too!). Have a comfortable chair that isn't your work chair, a true recharge zone for your co-pilot. This isn't just decoration; it's about creating a psychological space that signals to your brain, 'Okay, it's time to be creative.' Consider the smells—fresh paint (for some, I'm guilty!), a carefully chosen essential oil blend, or perhaps a favorite candle or incense (always with proper ventilation and safety in mind!). Think about the textures present—smooth canvas, rough wood, soft fabric. All these sensory inputs contribute to a space that can either invite or deter creative flow. Does your studio tell you, "Come in, create" or "Ugh, another chore"? My own journey as an artist, which you can see a bit of on my /timeline, has always been tied to the spaces I've worked in, each one a different creative co-pilot.

Practical Magic: Safety, Storage, and Maintenance
Okay, let's talk about the less glamorous but absolutely crucial stuff that makes all the fun stuff possible. Safety, storage, and maintenance are non-negotiable. Neglect these, and your co-pilot quickly becomes a chaotic adversary, not to mention a hazard. This is where the magic of organization happens, ensuring everything has a home and your creative flow is unobstructed. These are the unsung heroes of a functional studio.
A Quick Word on Safety: Protecting Yourself and Your Art
I'm not your parent, but please be smart. Read the labels on your materials. If it says "use in a well-ventilated area," it means it. Keep a small fire extinguisher handy, especially if you work with flammable solvents, rags soaked in oil (these can spontaneously combust due to the oxidation of certain oils generating heat, so store them in a sealed, fire-safe metal container filled with water!), or hot tools like in encaustic painting or torch work. If you're using power tools for woodworking or sculpture, always wear appropriate Personal Protective Equipment (PPE): safety glasses, dust masks (N95 or better), and hearing protection. Immediately clean up spills; hazardous materials like solvents and certain paints should never be poured down the drain but disposed of according to local hazardous waste regulations. A safe studio is a studio you can work in for a long, long time—and crucially, a studio that won't harm you or your art. Don't let a moment of carelessness jeopardize your health or your life's work. Your creative co-pilot needs a safe environment to operate.
Storing Your Tools and Treasures
Good storage isn't about hiding things; it's about making them accessible, keeping them safe from damage and environmental factors, and knowing exactly what you have (so you don't buy that fifth tube of viridian green, again). Your creative co-pilot thrives on efficiency. I'm a huge fan of vertical space. Tall shelves, pegboards for tools (a great way to see everything at a glance!), and wall-mounted racks get things off the floor and out of your way. For a budget-friendly solution, repurpose old dressers, kitchen cabinets, or even sturdy cardboard boxes. For example, old wine crates can be perfect for stacking pigments, and cutlery organizers can keep drawing tools separated and visible. Check out more art storage solutions for collectors for ideas that can scale down to your studio.
Item Type | Good Storage Solution | Why It Works | Common Pitfall to Avoid |
|---|---|---|---|
| Paper & Boards | Flat files or shallow under-bed boxes. | Prevents bending, warping, corner damage, and creasing. Keeps them flat and clean, protecting archival quality for future use or sale, ensuring your work endures. For pastels and charcoals, interleave with glassine or archival paper to prevent smudging. | Storing vertically or in rolls can lead to permanent curves, creases, or damaged edges, compromising the paper's integrity and archival value, making it difficult to frame or sell. |
| Paints & Mediums | Shallow drawers, rolling carts, or wall shelves (label everything!). Clear containers are a godsend. | You can see everything at a glance. No more buying a third tube of Ultramarine Blue because you couldn't find the first two. Ensures proper cap sealing and protection from light and temperature fluctuations, preserving material quality. Keep light-sensitive inks in opaque containers. | Leaving caps loose or tubes exposed to extreme temperatures, leading to dried-out or separated paint, or even contamination that spoils expensive materials, wasting money and effort. |
| Brushes | Upright in jars (bristle-side up!) or flat in a drawer after cleaning. | Protects the bristles from getting bent and ruined, prolonging their life and effectiveness. Storing bristle-side up allows them to dry properly, preventing ferrule rust and splayed hairs, saving replacement costs. | Storing bristle-side down, in water, or without thorough cleaning, which leads to splayed bristles and premature wear, rendering them useless and requiring constant replacement, frustrating your workflow. |
| Finished Work | Vertical racks with dividers, or stacked on a flat surface with glassine paper between each piece. | Protects the surfaces from scratches, dust, and sticking. Never lean unframed canvases against a wall for long periods—they will warp or get damaged. Crucial for long-term preservation and preparing for exhibition or sale, safeguarding your creative output. | Stacking without protection or leaning directly against walls, causing pressure marks, paint transfer, or dust embedding that's impossible to remove, potentially ruining months of work and making it unsellable. |
| Digital Gear | Dedicated, dust-free cabinets; cable ties; wall mounts for monitors; surge protectors. | Protects electronics from dust and accidental damage, reduces clutter, and ensures ergonomics for long creative sessions. Prevents overheating and extends equipment lifespan, saving on costly repairs or replacements and maintaining your digital workflow. | Exposing to excessive dust, tangled cables, or direct sunlight, leading to overheating, malfunction, or reduced lifespan, and being a fire hazard, disrupting your digital creative process. |
| Small Tools/Miscellaneous | Mason jars, repurposed drawer organizers, clear tackle boxes, magnetic strips. | Keeps tiny items visible and organized, prevents loss, and allows for quick access without rummaging, preserving valuable creative time and reducing frustration. | Tossing into a general drawer, leading to endless searching and potential damage to delicate tools, disrupting flow and causing frustration when you can't find what you need. |

Organizing Digital Art Files & Assets
For digital artists, digital asset management is as crucial as physical storage. Your digital co-pilot needs clear navigation. Develop a consistent naming convention for your files (e.g., YYYYMMDD_ProjectName_Version_Description.filetype like 20240315_PortraitSeries_V3_RefinedSketch.psd). Organize projects into logical folder structures (e.g., Client_Name/Project_Name/Sketches, Client_Name/Project_Name/Final_Files, Client_Name/Project_Name/Assets). Use cloud storage for backups and version control, and consider specialized Digital Asset Management (DAM) software for larger volumes. Regularly purge old, unused files and clear your digital desktop to keep your digital workspace clean and efficient. This prevents mental clutter and keeps your workflow smooth, ensuring you can always find that crucial layer or brush preset, and that precious finished artwork is never lost.

Studio on a Shoestring: Smart Budget Solutions
Creating an effective studio doesn't require a huge budget. Many solutions are cheap or even free, and often, the most creative solutions come from necessity: your creative co-pilot can be built from humble beginnings! Historical artists like Rembrandt or Van Gogh, despite their immense talent, often worked in incredibly modest spaces, proving that inspiration isn't measured in square meters.
- Repurpose & Upcycle: Old dressers, bookshelves, or kitchen cabinets from thrift stores or curb alerts can be transformed into excellent storage. An old door laid across two filing cabinets makes a spacious desk. Simple cardboard boxes can be surprisingly effective for organizing smaller items within drawers or on shelves. Old wine crates can be perfect for stacking pigments, and cutlery organizers can keep drawing tools separated and visible. Think outside the box, literally! For example, a simple plastic cutlery tray can keep your drawing pencils perfectly organized in a drawer. You can even use a simple tension rod and a shower curtain to create a temporary, dust-proof storage area for canvases.
- DIY Storage: Pegboards are incredibly versatile and inexpensive. PVC pipes can be cut to size for brush or tool storage. Mason jars are perfect for pens, pencils, or small supplies. Get creative with what you already have or can find for free. Wall-mounted spice racks can hold small tubes of paint. A simple wooden plank on bricks can create instant shelving.
- Prioritize Essentials: If funds are tight, focus on light and ventilation first. These have the biggest impact on your health and the quality of your work. You can always upgrade storage later. Cheap clamp lights with good bulbs (remember: high CRI, daylight balanced!) are a fantastic starting point. You can read more about how to buy art if you are thinking about acquiring some for your studio space, but also consider what existing pieces you already own that can inspire your space – inspiration is free!
Ongoing Studio Maintenance: Keeping Your Co-Pilot Primed
Setting up your studio is just the first step; keeping it a supportive co-pilot requires ongoing maintenance. This isn't glamorous, but it's essential for sustained creativity. Regularly declutter, put things back in their designated homes, and check your equipment. Replenish materials before you run out, not in the middle of a crucial creative breakthrough. A well-tended studio remains an inviting space, a place where you can find art inspirations without battling chaos. And remember, this applies to digital studio maintenance too – regularly back up files, update software, manage your digital assets, and clear your desktop to avoid creative roadblocks. Sometimes, the most mundane tasks are the ones that save your most important work. Think of it as tuning up your creative co-pilot before every journey.

Frequently Asked Questions About Artist Studios
Q: How do I make a studio in a small apartment? A: Go vertical! Use wall shelves, pegboards, and rolling carts. Define distinct workflow zones even if they're small. A folding desk or an old door on filing cabinets can create a dedicated workspace that can be packed away. Look for multi-functional furniture, like a storage ottoman. Some of the most profound art was created in incredibly humble spaces, proving that inspiration isn't measured in square meters.
Q: How much space do I really need for an art studio? A: Less than you think! What you need is enough space for your primary work (easel, desk, sculpting stand), and a small area for supplies. A tiny corner can suffice for drawing or digital art. Painters might need more room for canvas movement and drying. Focus on efficient layout and vertical storage rather than square footage. Some of the most profound art was created in incredibly humble spaces, proving that inspiration isn't measured in square meters.
Q: What are essential tools for any artist studio? A: Beyond your primary art materials, essentials include good lighting (high-CRI, daylight-balanced bulbs), a stable work surface (easel or desk), comfortable and ergonomic seating, basic cleaning supplies (rags, brushes, dustpan), and good storage (shelves, drawers). A small fan or air purifier is a wise investment for air circulation, and a digital hygrometer helps monitor humidity. These are the core tools that enable your creative co-pilot to function effectively.
Q: What are the best materials for studio flooring? A: Durable, easy-to-clean, and non-slip surfaces are ideal. Sealed concrete is great if available. Vinyl, linoleum, or painted plywood are good budget-friendly options. Avoid carpet, as it traps dust, paint, and chemicals. Consider anti-fatigue mats if you spend a lot of time standing, for both comfort and to reduce the impact of dropped tools (which, trust me, will happen).
Q: How do I soundproof my art studio? A: True soundproofing is expensive, but sound dampening is achievable. Heavy curtains, rugs, wall tapestries, bookshelves filled with books, and even acoustic panels (DIY versions can be made with insulation and fabric) can absorb sound. For external noise, weatherstripping around doors and windows helps significantly. Consider your neighbors if you're working with loud tools or music! Your creative co-pilot appreciates a peaceful workspace.
Q: How can I manage the cost of setting up and maintaining an art studio? A: Start small and prioritize. Invest in essential safety (ventilation, fire extinguisher) and crucial ergonomic tools first. Repurpose and DIY for storage. Buy used furniture. Seek out student discounts for materials. Budget for ongoing costs like materials, utilities, and minor repairs. Think of it as an investment in your creative output and well-being, but don't feel pressured to buy everything at once. Your creative co-pilot can grow with your budget.
Q: What's the difference between a hobbyist studio and a professional studio? A: Often, it's about scale, permanence, and specific needs. A hobbyist might use a corner with portable storage, while a professional might invest in dedicated ventilation, larger archival storage, and specialized equipment that facilitates output and long-term art preservation. The principles of light, air, ergonomics, and flow apply to both, but the implementation will vary based on commitment and output. Both, however, benefit from a good creative co-pilot.
Q: How can I manage my art studio when I have pets/children? A: Dedicated zones are key. Use gates or closed doors to keep pets/children out of hazardous areas. Store toxic materials, sharp tools, and delicate artwork in locked cabinets or high shelves. Keep surfaces clear when not actively working. Consider pet-friendly plants and non-toxic materials if they can't be fully separated from the space. A clear demarcation of "work time" and "family time" helps maintain boundaries and keeps your co-pilot safe.
Q: What are the legal considerations for setting up an art studio (e.g., zoning, business permits)? A: This varies widely by location. Check local zoning laws if you're running a business from home, especially if clients visit or you generate significant waste. Some municipalities require home occupation permits. For a more comprehensive approach, research specific business insurance for artists, which can protect against damage to work, equipment, or liability if clients visit. If you're renting, review your lease for restrictions on materials, ventilation, or structural changes. Always err on the side of caution and research local regulations to avoid unexpected issues.
Q: How do I choose the right easel for my needs? A: Consider your medium (oil, acrylic, watercolor), canvas size, and working style (standing, sitting, vertical, horizontal). H-frame easels are sturdy for large, heavy work. Tripod easels are portable and versatile. Tabletop easels are great for small spaces. For watercolors, you'll want an easel that can tilt flat. An adjustable easel is always a wise long-term investment, allowing your creative co-pilot to adapt to various projects.
Q: What's the best way to organize digital art files and assets?
A: Consistency is king. Use a clear, logical folder structure (e.g., by project, by year, by client). Implement a consistent naming convention (e.g., YYYYMMDD_ProjectName_Version_Description.filetype). Use metadata and tags if your software supports it. Back up regularly to cloud storage or an external hard drive. This is your digital studio inventory, and a well-organized one is crucial for a smooth digital co-pilot workflow.
Q: How do I protect my artwork from pests? A: Cleanliness is paramount. Store paper, textiles, and organic materials in sealed, archival boxes. Regularly vacuum and wipe down surfaces. Inspect new materials for signs of infestation before bringing them into the studio. Control humidity (low humidity discourages many pests). Avoid eating in the studio. For severe issues, consult a professional, but prevention is always best. A tidy creative co-pilot is a pest-free one.
Q: What are the benefits of natural light vs. artificial light for painting? A: Natural light offers true, broad-spectrum light that is ideal for color perception, and its subtle shifts can add dynamism to your work. However, it's inconsistent (time of day, weather) and can introduce UV damage. Artificial light, particularly high-CRI, daylight-balanced LEDs, offers consistent, controllable light that mimics natural light without the UV risk, allowing for consistent color mixing at any time. A combination is often ideal, leveraging the strengths of both for a truly versatile lighting co-pilot.
Q: What are the best colors for an artist studio wall? A: Generally, neutral colors like white, light gray, or very pale pastels are best. They don't reflect strong colors onto your work, which can distort your perception of your palette. A matte finish is preferred over glossy to minimize glare. While a vibrant color might inspire, it could also subtly interfere with accurate color judgment. It's a balance between aesthetic and practical utility, ensuring your walls act as a neutral visual co-pilot.
Q: How do I protect artwork from light damage? A: Store finished work away from direct sunlight and strong artificial lights. Use UV-filtering glass or acrylic for framed pieces. Apply UV-protective varnishes to paintings. For works on paper, use archival storage boxes that block light. Rotating displayed art can also minimize prolonged exposure. Remember, even indirect light can cause fading over time, so vigilance is key. Your creative co-pilot helps preserve your legacy.
Q: What about the environmental impact of my studio practices? A: Conscious choices matter! Seek out sustainable materials from brands committed to eco-friendly production. Reduce waste by maximizing material use, recycling appropriately, and disposing of hazardous materials (like solvents) at designated facilities, never down the drain. Consider using reusable rags instead of paper towels. A mindful approach to your studio's environmental footprint ensures your creative co-pilot is also an ethical one.
Your Studio, Your Sanctuary, Your Co-Pilot
Look, I know this all sounds like a lot. And maybe a bit overwhelming. But the truth is, creating your ideal studio isn't about perfection; it's about intention. It's about recognizing that your creative space isn't just four walls and a roof; it's an extension of your artistic self. By thoughtfully addressing light, air, ergonomics, flow, and the less tangible elements of sound and soul, you transform a mere workspace into a creative co-pilot that actively supports and inspires you. My own art, which you can explore on my /buy page or discover at the /den-bosch-museum, has been profoundly shaped by the environments I've cultivated. Every piece is, in a way, a testament to the relationship I have with my workspace.
So, don't try to tackle everything at once. Pick one thing – one small, annoying friction point in your current setup – and address it. Maybe it's finally getting a better light bulb, or simply clearing that pile of junk from your work surface. Even the smallest adjustment can have a ripple effect, making your studio less of a battleground and more of a launchpad for your next masterpiece. Your creative co-pilot is waiting; it just needs a little tuning. Make your studio a space that doesn't just hold your art, but actively helps you make it. Start today, and feel the difference.