Mastering Paint Film: Your Ultimate Guide to Art Problems & Prevention
Ever seen your art betray you with cracks or peels? This ultimate guide, forged from artistic frustration, diagnoses common paint film problems, offers practical fixes, and provides essential prevention strategies for lasting art. From cracking to chalking, learn how to build a resilient artistic legacy.
Mastering Paint Film: Your Ultimate Guide to Art Problems & Prevention
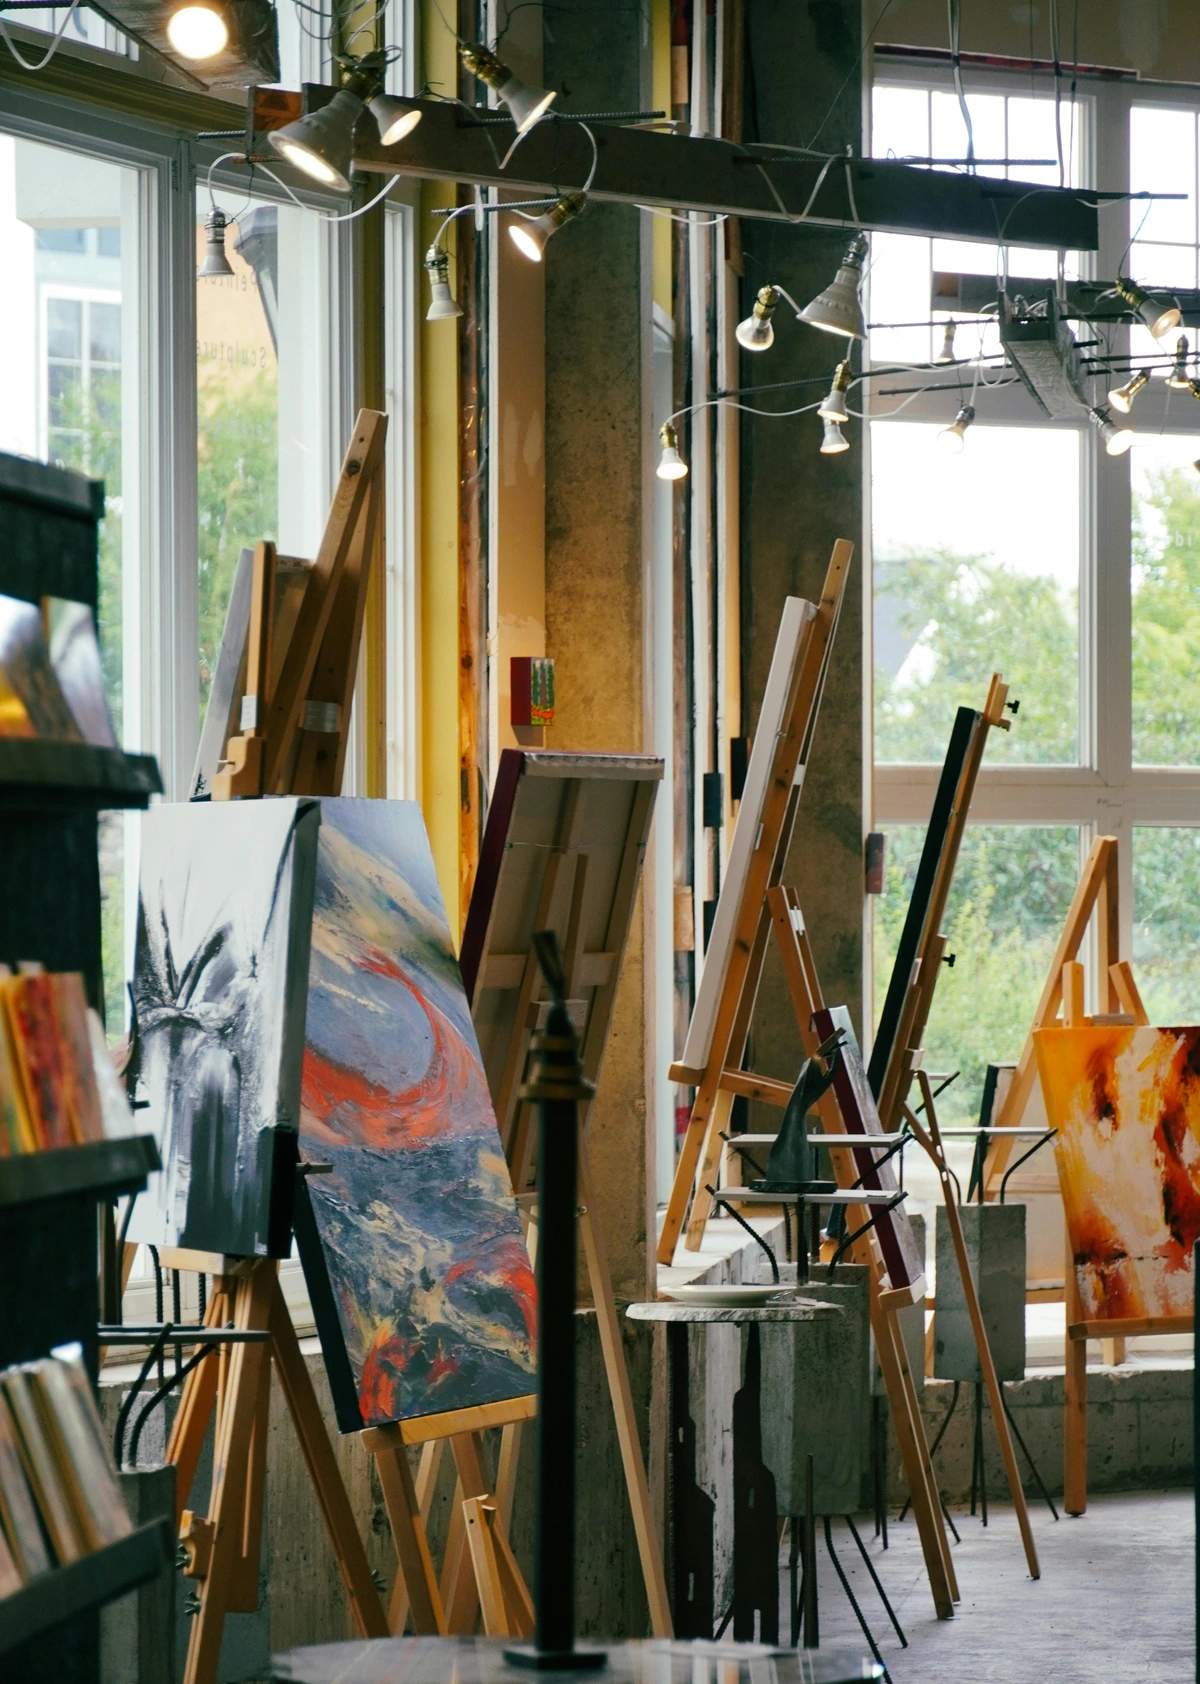
Ever stared at your masterpiece, only to see it betray you with a web of cracks or a sudden peel? That gut-wrenching feeling is a rite of passage for artists, a stark reminder that paint isn't just color – it's a complex material with a lifespan of its own. I've been there more times than I care to admit. I vividly remember one early abstract piece, a thick impasto texture I was so proud of, started to shrivel and crack like a desert floor overnight. My heart sank, along with the weeks I'd invested. Beyond the heartache, it's also a significant waste of precious materials and time. Understanding and preventing these issues isn't just about preserving your art; it's about preserving your sanity and resources.
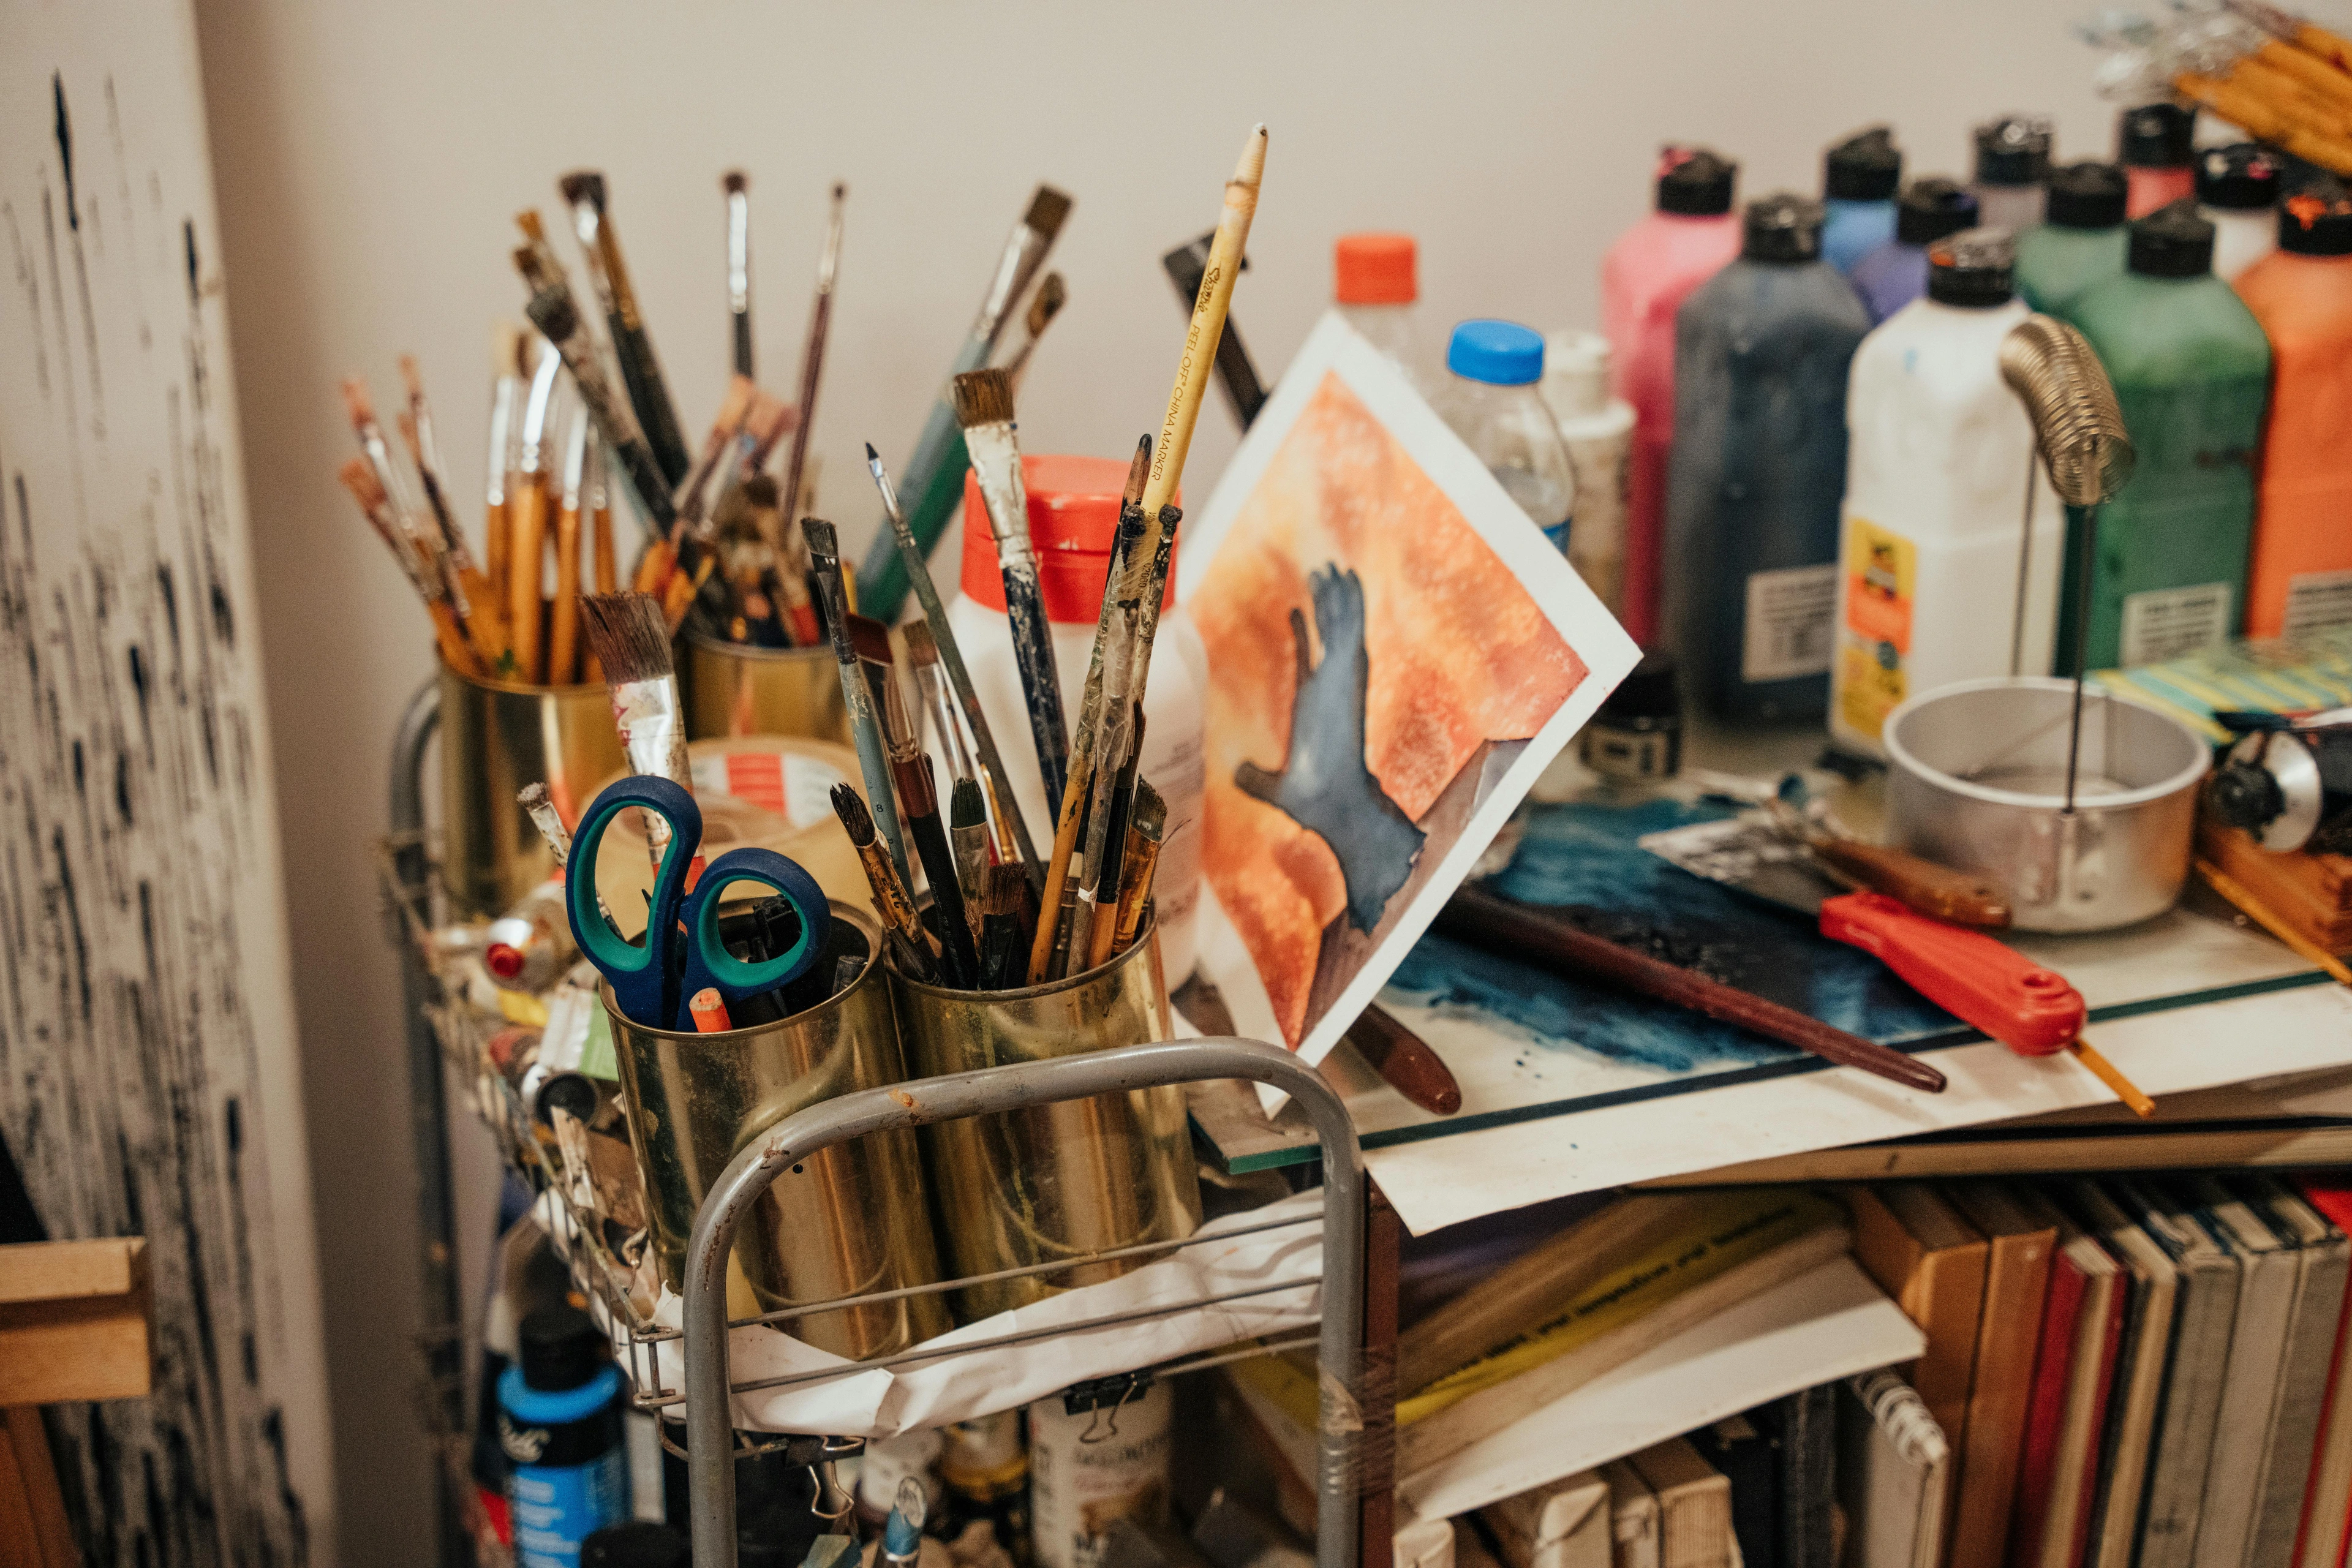
Before you throw your brushes out the window and declare yourself a sculptor (though I sometimes fantasize about it), let's talk about what's actually going on. This is all about the paint film—that continuous, integrated layer of dried paint that is your artwork. Think of it as the skin of your painting, or perhaps its very structure, a layered strata of your artistic intention. The binder within the paint is the unsung hero here, the scaffolding that holds all that glorious pigment in place, preventing your masterpiece from dissolving into a colorful dust cloud. And just like any complex structure, or even living skin, it can suffer if not treated with understanding and care. If the term "paint film" itself feels a bit mysterious, a quick dive into what a paint film even is might be a helpful starting point, but trust me, by the end of this, you'll have the comprehensive understanding needed to tackle any paint film challenge. This isn't some dry, scientific manual (though we'll touch on the science). This is a field guide from the trenches, forged in the fires of artistic frustration, designed to help you become a resilient artist. We're moving from diagnosis to treatment, exploring everything from material incompatibilities to environmental stresses. This isn't just about lamenting failures; it's about building a robust toolkit for lasting creation. I’ll walk you through the most common culprits—from cracking and peeling to blistering and fading—how to perform emergency surgery when things go wrong, and, most importantly, a solid prevention strategy to stop these paint film disasters from ever showing up again. Let's make sure your artistic legacy is built to last.
The Usual Suspects: Decoding Common Paint Film Disasters
Now that we've established what we're up against, let's put on our detective hats and diagnose the issues. When your painting's skin starts acting up, it's usually sending you a very clear message about what happened during its creation. Understanding these messages is the first step to becoming a more resilient artist.
1. Cracking (Alligatoring & Crazing)

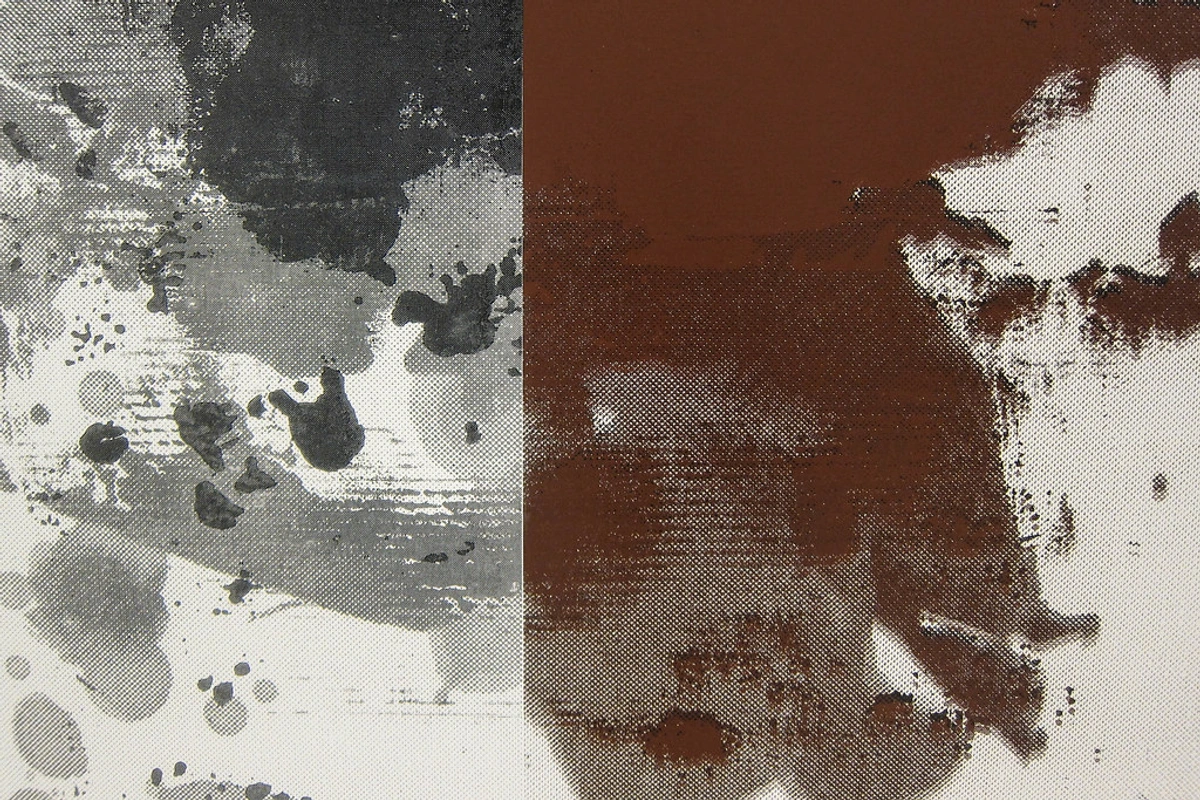
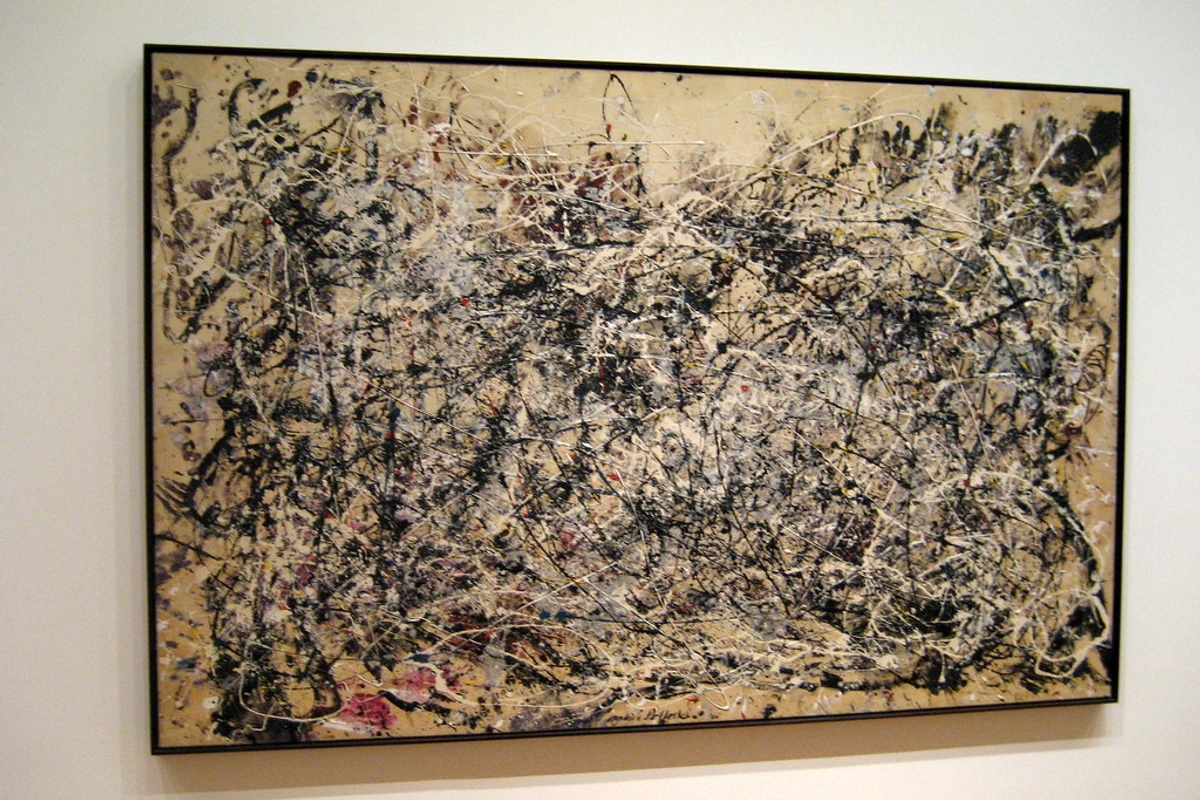
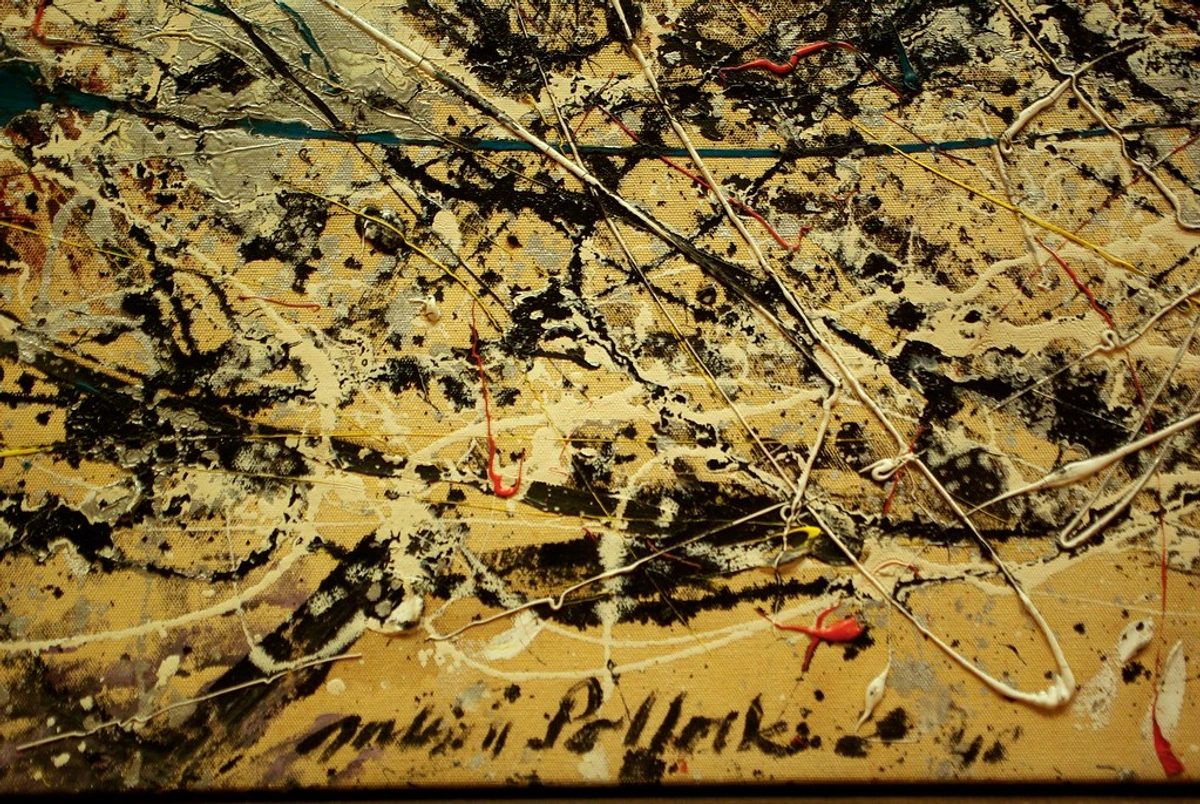
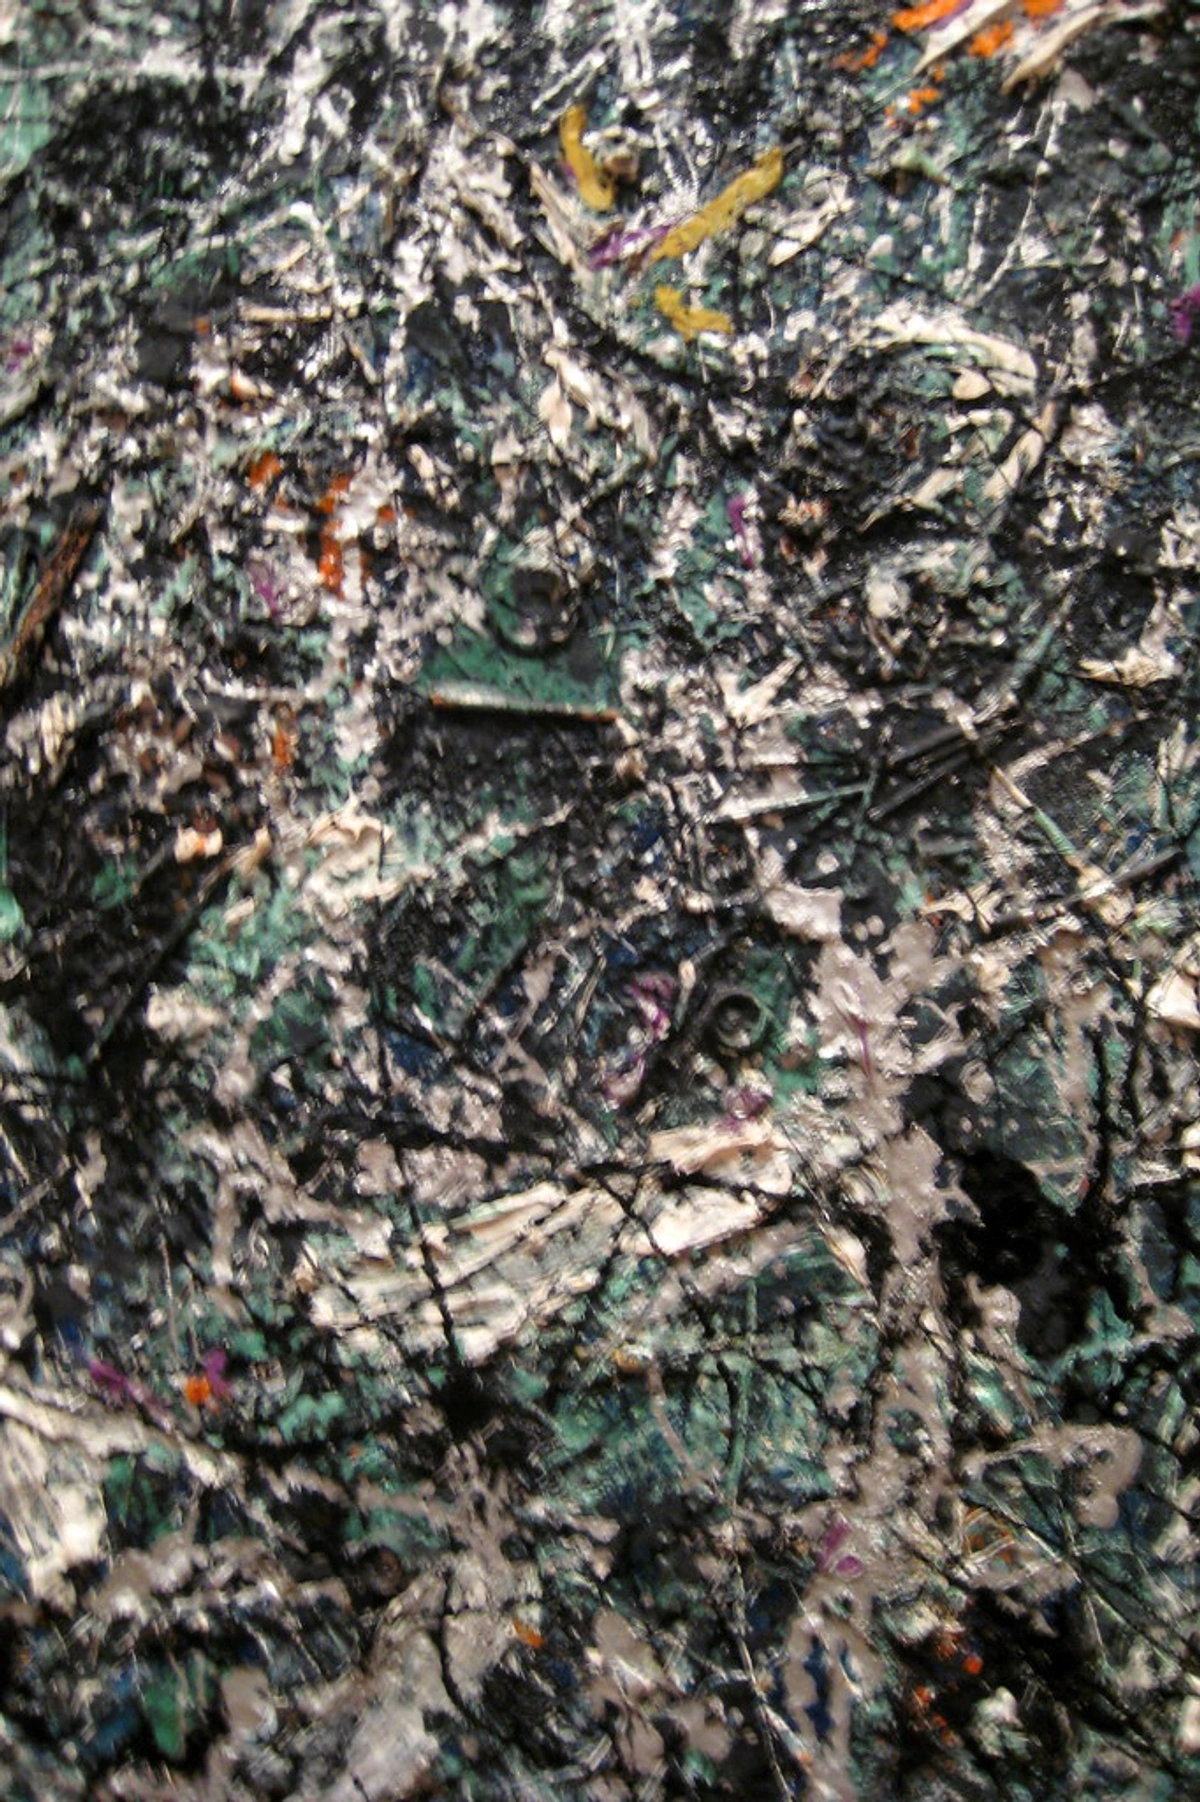
This is the big one, often the most heartbreaking. You see fine, delicate, spidery lines (crazing) or larger, more defined, scale-like cracks (alligatoring), and your heart sinks. It looks like a dried-up riverbed where a vibrant passage of color used to be, or an ancient, sunbaked ceramic. Artists have grappled with paint stability and cracking for centuries, often learning through frustrating trial and error (just like me). Even Renaissance masters, with their complex oil formulations, contended with the delicate balance needed for a stable paint film. Early tempera paintings, for instance, could become incredibly brittle, leading to fine network cracks if not handled with care. Gouache and watercolors, if applied too thickly or without proper sizing on their paper support, can also crack due to their inherent brittleness and reliance on water-soluble binders. The lessons learned from centuries of fractured masterpieces have directly informed the materials we use today. For example, some of Van Gogh's thick impasto works famously show cracking due to the differential drying of very thick paint layers. The inherent properties of pigments, such as their particle size and oil absorption, also play a subtle but crucial role in the overall flexibility and stress within a paint film.
What’s happening? At its core, cracking is about tension. Different layers of your paint are drying at drastically different rates, or with incompatible flexibility. Imagine the surface skinning over like cooling pudding while the depths are still molten – that's the kind of internal tug-of-war we're dealing with. The top layer dries and shrinks faster than the layer underneath it, causing it to pull apart and crack. It’s a classic sign that the paint film's internal stresses have overwhelmed its elasticity. Environmental factors like sudden temperature or humidity changes can also trigger this.
- Acrylics: Often caused by adding too much water (more than 30-40%), which severely weakens the acrylic binder and reduces its flexibility, or by forcing the paint to dry too quickly with a hairdryer or direct sun. Trust me, I've been there, impatient for a layer to dry, only to ruin it later. Crazing, in particular, is common in overly thinned or rapidly dried acrylics. For more on preparing your surface, check out how to prepare a canvas for acrylic painting.
- Oils: The cardinal sin here is violating the fundamental 'fat over lean' rule. This rule exists because different oils (like linseed, safflower, or poppy oil) dry at different rates and have varying degrees of flexibility. Painting a fast-drying, thin (lean, solvent-rich) layer over a slow-drying, oily (fat, oil-rich) layer is a guaranteed recipe for cracks. Your top layer is trying to sprint across a still-liquid bog, while the bottom layer is still tying its shoes, often leading to alligatoring as the underlayer continues to shrink beneath the rigid surface. This differential drying and flexibility create immense internal stress. I learned this lesson the hard way in my early days, and it feels like a betrayal when it happens. For a deeper dive, explore what is fat over lean in oil painting.
If cracking is your nemesis, I've poured all my lessons into a dedicated guide on how to prevent paint film cracking because it's such a common headache for artists.
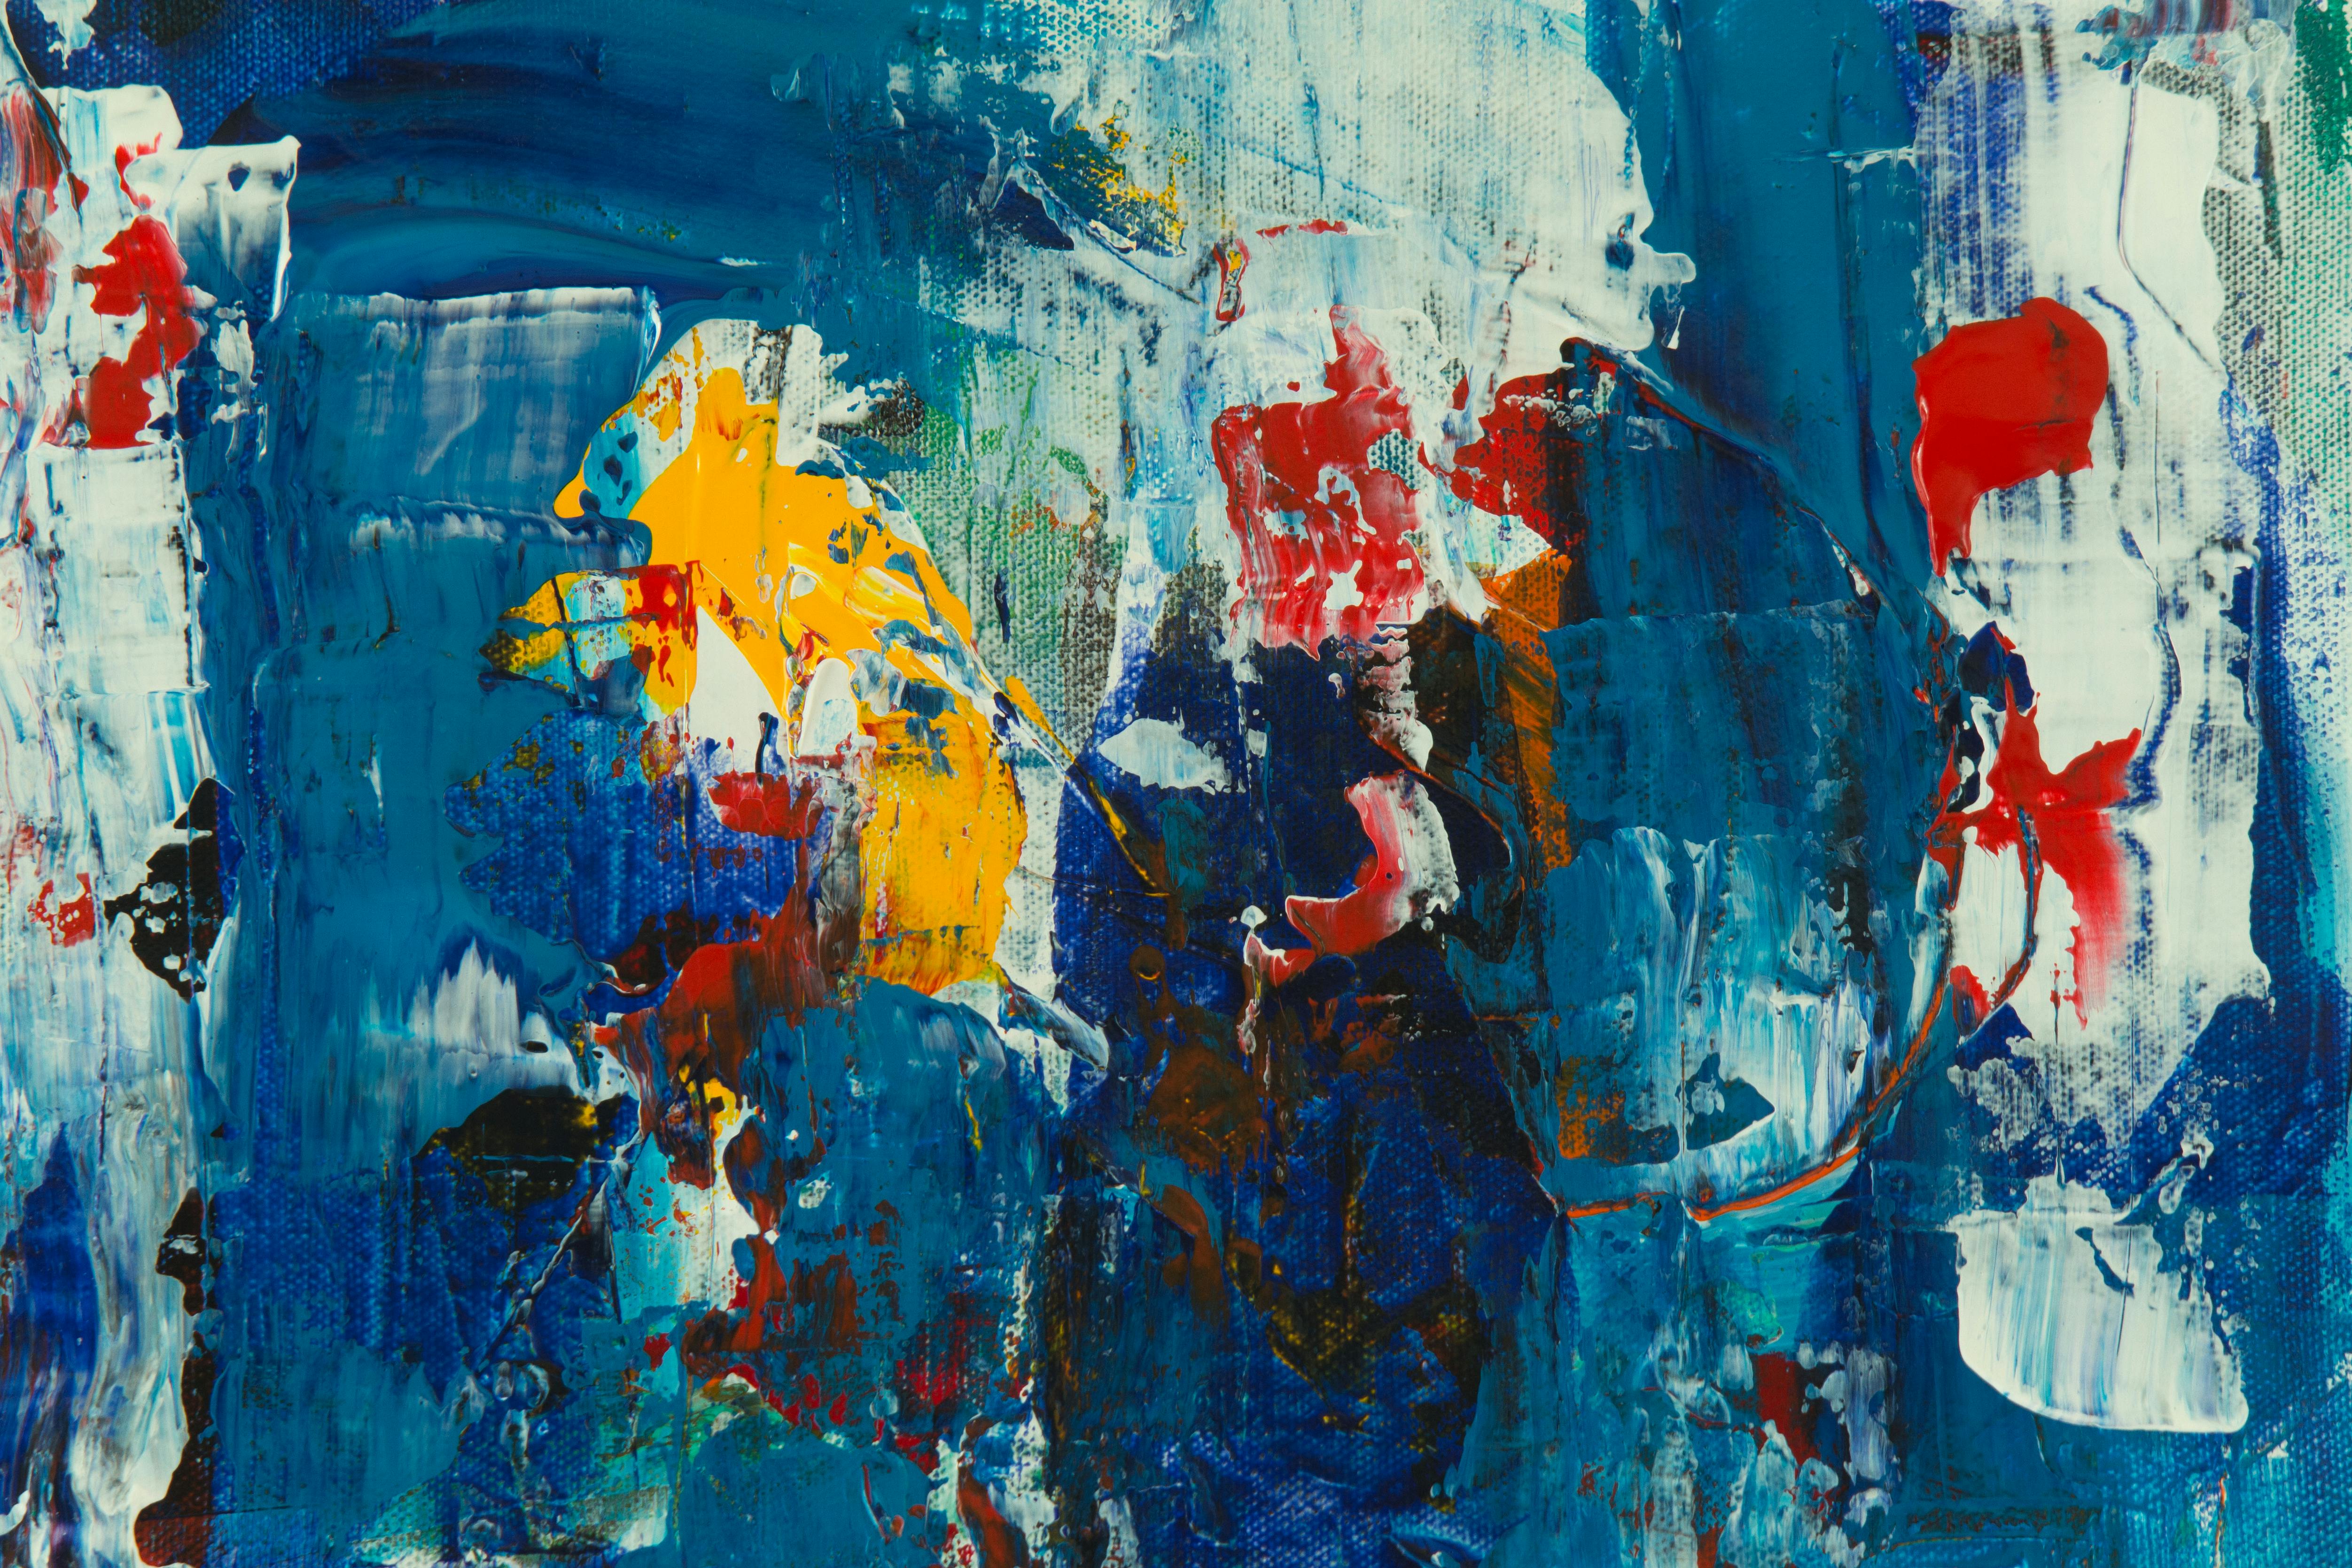
2. Blistering or Bubbling
This looks like your painting has broken out in hives or a strange skin rash. Little bubbles or blisters pop up on the surface, ruining that smooth, pristine finish you worked so hard to achieve.

What’s happening? Something is trapped beneath the surface trying to escape. Usually, it's moisture, air, or a solvent that becomes encapsulated as the top layer of paint forms a skin too quickly. Imagine trying to boil water in a sealed pot – the steam has nowhere to go but up, pushing against the lid. This can happen if you're painting:
- On a damp surface (e.g., a canvas that wasn't fully dry after priming or cleaning).
- In a really humid room where moisture is absorbed into the paint film before it can fully set. In acrylics, surfactants (chemicals that reduce surface tension) used in some formulations can contribute to micro-blistering, especially under conditions of rapid drying or high humidity, where they might not fully migrate out or integrate properly into the film. These micro-blisters might not be immediately visible but can compromise long-term stability.
- In oil painting, it often occurs if you trap solvent (like mineral spirits or turpentine) between layers without letting it evaporate properly from the previous layer, especially when applying a fresh, less-solvent-heavy layer over a still-gassing one. Solvents like turpentine evaporate relatively quickly, but if a new, thicker paint layer is applied too soon, the trapped evaporating solvent creates pressure, pushing up the fresh paint, like tiny, unwelcome volcanoes.
3. Flaking or Peeling
This is the nightmare scenario where your paint is literally jumping off the canvas, leaving unsightly bald spots. It means the paint never really grabbed onto the surface or the previous layer in the first place—a fundamental failure of the bond.
What’s happening? The issue is fundamentally one of adhesion. The paint film failed to form a proper, lasting bond with the layer underneath it, or with the initial painting surface. This almost always comes down to inadequate surface preparation or incompatible materials. For adhesion, you need tooth—a slightly rough texture that creates microscopic peaks and valleys for the paint to physically grip onto, increasing the surface area for a strong bond. Without that tooth, it's like trying to stick wet tape to a perfectly smooth, greasy window pane; it just won't hold.
- Contaminants: Was the canvas greasy (from skin oils, food, or manufacturing residues), waxy (some commercial canvases have a sizing that can be waxy and resistant to paint adhesion), or dusty? Any contaminants act as a barrier, preventing the paint from truly adhering. A thorough wipe-down with a lint-free cloth and sometimes a mild degreaser (like denatured alcohol for stubborn waxy residues) is essential. See how to clean and care for acrylic paintings for more insights.
- No Primer/Poor Ground: Did you skip the primer? Painting directly onto a raw, unprimed canvas without a proper ground like gesso is a common cause. Raw canvas is often too absorbent or too slick, and a good gesso provides the "tooth" that the paint needs to grip onto. Not sure about the difference? Check out Gesso vs. Primer: What's the Difference for Artists?. The sizing of the canvas, which seals the fibers to protect them from acidic oil paints and control absorbency, is also critical. Traditional rabbit skin glue sizing (animal glue) can become brittle and re-absorb moisture, while modern acrylic sizings offer greater flexibility and stability. The relationship between the sizing, the ground (gesso), the paint, and the substrate is a delicate ecosystem for long-term adhesion.
- Low-Quality Gesso: Sometimes the gesso itself is the weak link. Cheap gessos can have poor adhesive properties or an incorrect binder-to-filler ratio, leading to a weak foundation. A quality gesso should remain flexible and adherent over time. Getting your canvas prep right is half the battle, and knowing how to apply gesso to canvas is a fundamental skill. For the basics, see what is gesso in painting.
- Incompatible Materials: Beyond just poor gesso, sometimes the materials simply don't get along. For instance, trying to apply oil paint directly onto a very slick, non-absorbent plastic surface without proper priming, or certain types of enamel paints on flexible canvases, can lead to adhesion failure down the line. It's like trying to mix oil and water—they just repel each other.
4. Wrinkling
This one makes your paint film look like it's aged 50 years overnight, or like the surface of custard left out too long. The paint surface shrivels and forms unattractive ridges and furrows. A severe form of wrinkling is alligatoring, where larger, deeper cracks resemble alligator skin due to significant differential drying and shrinkage between layers.

What’s happening? You've applied the paint way too thickly in a single go. The very top surface, exposed to the air, dries and forms a skin. But the substantial amount of paint underneath is still wet. As that underbelly eventually tries to dry and cure, it shrinks. Since the top skin is already rigid, it gets pulled in various directions, causing it to buckle and wrinkle. I get it, sometimes you're impatient and want that thick, impasto texture now, but this is what happens when you rush the process. Forcing drying with heat can exacerbate this, as it just speeds up the surface skinning without allowing the underlying paint to dry evenly. This is particularly problematic with oil paints that contain a high amount of slower-drying oils or pigments, or when using viscous oils like stand oil or certain alkyd mediums in very thick applications without sufficient thin layers underneath. These oils are known for their strong film-forming properties and can skin over quickly, trapping wet paint beneath. The process of oxygenation during oil paint drying is complex, and when uneven, it creates precisely these internal stresses. I once tried to achieve a glassy smooth finish with an oil glaze, only to have it develop a cloudy, plastic-like film a few weeks later – turns out the solvent ratio was all wrong, and the humidity was through the roof. It’s a quiet betrayal, watching your vibrant reds slowly succumb to a pale blush, isn't it?
5. Chalking
You run your hand over an old painting, and a fine, powdery dust comes off on your fingers. That's chalking, and it’s a sign of material breakdown.
What’s happening? The paint binder—the 'glue' that holds the pigment particles together and adheres them to the surface—is breaking down. This is most commonly due to prolonged exposure to UV damage from sunlight or from using very cheap paint where the ratio of pigment to binder is off (too little quality binder, too much inert filler). When the binder fails, the pigment is left as a loose, powdery substance on the surface. Artist-grade paints often use higher molecular weight binders or specialized polymer emulsions that offer superior flexibility and UV resistance, not just a higher pigment-to-binder ratio, which makes a huge difference in longevity. This is why a cadmium yellow in a professional paint, with its robust binder, will likely outlast a student-grade alizarin crimson with a weaker binder, even if both are initially vibrant. Certain pigments, like some zinc whites, can also be prone to chalking due to their unique properties and interaction with specific binders. This is a good argument for using artist-quality paints, even if you're just starting out. The difference between student and professional grade paints is often stark, particularly in the quality and quantity of the binder, and resistance to UV degradation. Want to know more about the types of paint? Check out our definitive guide to paint types for artists.

6. Paint Degradation: The Long Game (Fading, Embrittlement, Discoloration)
Beyond immediate film problems, paintings can suffer from gradual degradation over time, which isn't always immediately obvious as "weird acting paint" but can be just as devastating. While our focus is often on acrylics and oils, it's worth noting that other mediums like gouache, watercolors, tempera, or even enamel paints can also face their own unique degradation challenges. This often involves the long-term interaction of pigments, binders, and the environment. Pastels, for example, can suffer from binder loss leading to dusting if not properly fixed and protected.
Lightfastness and Fading Due to Pigment Instability
Some pigments, especially older or lower-quality ones (often found in student-grade paints), are not lightfast. Lightfastness refers to a pigment's ability to resist fading or color change when exposed to light. Prolonged exposure to light (especially UV) causes their molecular structure to break down, leading to a loss of color intensity. This is distinct from chalking, where the binder fails. Natural organic pigments, for example, tend to be less lightfast than modern synthetic organic pigments or stable inorganic pigments like earth colors or cadmiums. Historically, artists have struggled with fugitive pigments; some of the vibrant reds and blues in early Impressionist paintings, like those by Renoir or Monet, have significantly faded over time, altering the artists' original color intentions. The synthetic organic pigment Alizarin Crimson, common in student paints, is notoriously fugitive, as are many natural plant-based dyes. Pigments are typically rated on an ASTM scale: ASTM I (Excellent Lightfastness), ASTM II (Very Good Lightfastness), and ASTM III (Fair Lightfastness). Always aim for ASTM I or II. It’s heartbreaking to see a vibrant piece slowly lose its soul because of a fugitive pigment, a lesson many of us learn the hard way.
Binder Embrittlement Over Time
Over many decades, particularly in oil paintings, the binder can become increasingly brittle, losing its flexibility. This makes the paint film highly susceptible to cracking and flaking from even minor impacts or shifts in the support. This is a common issue with older art, where the chemical properties of the oil itself change, or if cheap, impure oils were used. Think of an old rubber band that's lost its elasticity and snaps with the slightest stretch – that's your binder becoming brittle. The curing process of oil paints, which involves the formation of cross-linked polymer networks, can lead to embrittlement over centuries. Some historical binders, especially those undergoing "cold cure" (slow, ambient temperature polymerization) rather than faster "heat cure," are more susceptible. Different drying oils have different characteristics: Linseed oil is generally robust but can yellow over time; Safflower and Poppy oils yellow less but form a more brittle film and dry slower. Understanding the properties of what are painting mediums: a beginners guide is crucial for artists.
Discoloration from Chemical Reactions & Environmental Pollutants
Some pigments react chemically with others, or with their binder, leading to unwanted color shifts (e.g., some cadmium reds can darken over time if mixed improperly with certain sulfur-containing pigments; lead white can darken). Another common issue is the yellowing of the binder itself (common in older oil paintings or varnishes). Beyond humidity and temperature, environmental pollutants like acidic fumes, ozone, sulfur dioxide, and nitrogen oxides can also accelerate paint degradation by chemically attacking paint components, leading to discoloration or weakening of the film. The presence of certain metal ions (e.g., iron, copper) in pigments or even from the environment can also catalyze binder degradation. Airborne particulates like dust and soot don't just soil the surface; they can also contain reactive chemicals that initiate degradation. Constant physical vibration over many years can also contribute to embrittlement and subsequent cracking. It’s a delicate ecosystem, your painting. Restoring historically significant but degraded artworks often involves highly specialized techniques and materials to address these complex chemical changes without causing further damage.
7. Issues with Mediums and Varnishes
Sometimes, the "weirdness" isn't the paint itself, but the layers applied to it. Mediums modify paint properties, and varnishes protect. If they fail, they compromise the entire artwork. Early in my career, I experimented with varnishes, sometimes applying them too soon or too thickly, leading to tacky surfaces that collected dust like magnets. It was a frustrating but valuable lesson. Remember, varnish is the armor after the battle, not a magic potion to fix deep-seated structural issues.
What’s happening? Like paint, mediums and varnishes have their own chemical rules. Historically, artists used natural resin varnishes like dammar, which were known to yellow and become brittle over time. Modern synthetic varnishes are a significant improvement in terms of stability and non-yellowing properties.
- Yellowing Varnish: Historically, natural resin varnishes (like dammar) were prone to yellowing over time, obscuring the original colors of the painting. Modern synthetic varnishes (e.g., MSA varnishes based on mineral spirit acrylics, or acrylic polymer varnishes based on polymers like PMMA) are much more stable, flexible, and often offer UV protection. They are also typically reversible, meaning a conservator can remove them without damaging the paint layers underneath. It's important to distinguish between a retouch varnish (a temporary, thin varnish applied to resolve dull spots during painting) and a final varnish (applied once the painting is fully cured for permanent protection).
- Sticky Mediums/Varnishes: Applying a medium or varnish too thickly, or in incorrect environmental conditions (high humidity, cold temperatures), can result in a permanently tacky surface that attracts dust and dirt. Using incompatible mediums (e.g., mixing oil and acrylic mediums incorrectly) can also lead to instability. Getting familiar with the best acrylic mediums for abstract artists can help you avoid some of these pitfalls.
Medium Additives Beyond Varnishes
Many artists use mediums to alter the working properties of their paint – think alkyd mediums for speeding up oil drying, or impasto mediums for building texture. These aren't just inert additions; they become an integral part of the paint film. Using incompatible mediums, or using them in proportions not recommended by the manufacturer, can significantly impact the long-term stability and flexibility of your paint film, leading to issues like premature cracking, poor adhesion, or discoloration. Always read the labels and experiment on test swatches before committing to your masterpiece. The artist's technique, such as vigorous brushwork or heavy palette knife application, can also induce internal stresses in thick paint films if not properly supported by appropriate mediums, increasing the risk of cracking or delamination over time.
Environmental Control: The Unsung Hero of Paint Film Longevity
I’ve found that even if you do everything right with your materials, a hostile studio environment can undo all your hard work. Think of your painting as a delicate organism; it thrives in a stable climate. This is where environmental control becomes your secret weapon for preventing paint film disasters.

Ideal Conditions: For most artworks, particularly oils and acrylics, a stable temperature range of 68-72°F (20-22°C) and a relative humidity (RH) of 45-55% are generally recommended. Sudden, drastic fluctuations are often more damaging than a consistent, slightly off-ideal setting.
Why it Matters:
- Humidity: High humidity can slow down the drying of oils, increasing the risk of wrinkling and trapping moisture, which contributes to blistering. For acrylics, very high humidity can lead to a tacky surface and even prevent full curing. Conversely, extremely low humidity can cause fast drying, which contributes to crazing in acrylics and can make oil paint more brittle during curing.
- Temperature: High temperatures can accelerate surface drying, leading to skinning and wrinkling, especially in thick applications. Low temperatures can drastically slow down curing, making the paint film vulnerable for longer periods and potentially affecting the final strength and flexibility of the binder. Freezing temperatures, especially for water-based paints like acrylics, can cause permanent damage to the emulsion.
- Pollutants: Environmental pollutants beyond just general fumes, such as ozone (O3), sulfur dioxide (SO2), and nitrogen oxides (NOx), found in urban air, can chemically attack paint binders and pigments, leading to discoloration, embrittlement, or weakening of the film. Airborne particulates (dust, soot, pollen) don't just soil the surface; they can absorb moisture and pollutants, potentially initiating or accelerating degradation processes.
Practical Tips for Your Studio:
- Monitor: Invest in a good hygrometer/thermometer to keep an eye on your studio's conditions. Knowledge is power, right?
- Stabilize: Try to avoid placing paintings near radiators, air conditioning vents, or in direct sunlight streaming through a window. These are hotbeds for rapid environmental shifts.
- Humidify/Dehumidify: In very dry climates, a humidifier can be your friend. In damp environments, a dehumidifier can be a lifesaver. Just be sure to keep them clean and maintained.
- Ventilation: Good air circulation helps solvents and moisture evaporate evenly, reducing the risk of blistering and wrinkling. Just don't let it become a draft that speeds up surface drying too much.
Testing and Prevention Techniques: Your Studio as a Lab
As artists, we're often eager to dive straight into the masterpiece. But what if we treated our studio a bit more like a lab? Proactive testing and understanding your materials before they hit the final canvas can save you immense heartache. This is about building confidence in your chosen materials and methods.
- Test Swatches are Your Best Friend: Always create small test swatches using your chosen combinations of grounds, paints, and mediums. Apply them in varying thicknesses and under different drying conditions (e.g., one swatch air-dried, another lightly heated). Document everything. Observe them over days, weeks, or even months if you can. Look for signs of cracking, wrinkling, or tackiness.
- Controlled Exposure: Take a small test swatch and expose it to slightly harsher conditions than your finished work might encounter—e.g., a few hours of indirect sunlight, or a slightly more humid environment. This can reveal potential lightfastness issues or sensitivity to moisture that might not appear in normal studio conditions.
- Adhesion Scratch Test: Once a test layer is fully cured, try a gentle scratch test with your fingernail in an inconspicuous area. If the paint lifts easily, you have an adhesion problem with the underlying layer or ground. This simple test is a crucial indicator of future peeling.
- Manufacturer Guidelines: Read Them! This sounds basic, but how often do we actually do it? Manufacturers invest heavily in R&D to provide guidance on dilution ratios, drying times, and material compatibility. Their recommendations are your first line of defense against material failures.
The Fix-It Crew: A Practical Guide to Repairs and Prevention
It's easy to despair when your art goes awry, but I've found that knowing how to respond, or better yet, how to avoid the mess altogether, is half the battle. Think of this section as your field surgical unit—some wounds are deep, others merely scratches, but every situation offers a chance to learn and recover. This is where you might need the patience of a saint and the steady hands of a brain surgeon, with considerably less pay. For severe or extensive damage, professional art conservation is always the safest and recommended route.
Problem | Potential Repairs (Proceed with Extreme Caution) | Repair Difficulty/Severity | Proactive Prevention Strategies |
|---|---|---|---|
| Cracking | For very fine, stable crazing, a clear isolation coat followed by a flexible varnish might visually minimize them and add stability. For deep or alligatoring cracks, conservative action is key: stabilize the environment, and if necessary, carefully sand the area, re-prime, and repaint (risky, often requiring professional restoration). | Difficult / Professional Help Recommended | For oils, ALWAYS follow the 'fat over lean' rule, allowing sufficient drying time between layers. For acrylics, don't thin with more than 30-40% water or medium. Allow each layer to fully cure, not just touch-dry. Avoid sudden temperature or humidity changes in your studio. |
| Blistering | Wait for the paint to fully cure. You can then try to carefully pierce the blister with a needle, flatten it, and touch up the area. For larger or numerous blisters, gentle sanding of the affected area and careful repainting might be necessary after ensuring underlying layers are completely dry. | Moderate to Difficult | Ensure your painting surface (canvas, panel, primer) is 100% dry and clean before painting. Work in a well-ventilated space to allow solvents/water to escape. Avoid painting in high humidity. Allow adequate drying time for all layers, especially for oil paints with solvents. |
| Flaking/Peeling | This is typically the most challenging to fix. You must remove all loose paint, carefully sand the edges of the remaining paint, feathering them down to create a smooth transition and prevent further peeling, spot-prime the bare spots with a quality gesso, and then repaint to match the original. | Difficult / Professional Help Often Needed | EXCELLENT SURFACE PREPARATION IS PARAMOUNT! Clean your surface thoroughly to remove any grease, dust, or waxy mold release agents. Always use a quality gesso or primer appropriate for your paint type and ensure it has good adhesion to the support. Ensure good adhesion between paint layers too. See what is gesso in painting for the basics. |
| Wrinkling | You'll have to wait for the entire thick paint layer to dry completely (which could take weeks, months, or even a year for very thick oil paint), then very carefully sand down the wrinkled surface as much as possible and repaint. This is often an irreversible textural issue. | Difficult (often irreversible texture) | Apply thick paint in thinner layers, allowing each to dry sufficiently before adding the next. Alternatively, use a dedicated impasto medium specifically designed for building texture without wrinkling or cracking. Avoid excessive use of slow-drying oils like stand oil in thick layers. |
| Chalking | If not too severe, gently clean the powdery surface to remove loose pigment. Then, apply a high-quality, non-yellowing varnish (ideally with UV protection) to seal and stabilize the remaining pigment. This won't reverse the underlying binder breakdown but can protect the exposed pigment. | Moderate | Use high-quality artist-grade paints with stable binders and lightfast pigments (check ASTM ratings). Protect finished work from direct sunlight with a museum-quality, UV-protective varnish. |
| Degradation (Fading/Embrittlement/Discoloration) | Fading: Irreversible. For embrittlement, ensure stable environmental conditions (temperature/humidity) and careful handling. For discoloration, removal by a conservator might be possible if it's a surface contaminant or reversible varnish. Professional conservation is often required for severe cases. | Severe / Professional Conservation Essential | Use only lightfast pigments (check ASTM ratings I or II). Maintain stable, moderate temperature and humidity (around 68-72°F / 20-22°C and 45-55% RH). Avoid harsh environmental conditions, pollutants (smoke, fumes, ozone, SO2, NOx), and direct UV exposure. Ensure proper ventilation. |
| Medium/Varnish Issues | Yellowing: If it's a removable varnish, it can be carefully removed by a conservator and replaced with a modern non-yellowing synthetic varnish. Stickiness: May eventually dry fully if not too thick. If persistent, removal and reapplication might be the only option. | Moderate to Difficult | Use modern, non-yellowing synthetic varnishes (e.g., acrylic-based, MSA). Apply mediums and varnishes in thin, even coats under appropriate environmental conditions (avoid high humidity or extreme cold). Follow manufacturer guidelines precisely. Ensure proper distinction between retouch and final varnishes. |

Frequently Asked Questions (FAQ)
Q: Can I just paint over a cracked painting?
A: I wouldn't. Painting over an unstable or structurally compromised surface is like building a house on an earthquake fault line. The cracks will almost certainly reappear through the new layer of paint—a phenomenon frustratingly known as 'telegraphing'. You have to address the underlying structural issue first, as outlined in the "Fix-It Crew" table above. You need a stable foundation for lasting work. Trust me, I've tried to cheat this before, and it never ends well. The painting always tells its story eventually.
Q: Why is my acrylic paint peeling off my gessoed canvas?
A: This usually means there was an issue with the gesso itself or, more commonly, the surface underneath it. Even gessoed canvases from the store can sometimes have a waxy coating from manufacturing or inadequate sizing that prevents proper adhesion, regardless of the gesso's quality. Always give a store-bought canvas a light sanding and a thorough wipe-down with a lint-free cloth (and sometimes a bit of denatured alcohol if it feels particularly slick) before applying your own gesso layers or painting directly. This ensures the gesso (or paint) has something truly solid to grip. You need that tooth for strong adhesion. Also, ensure your acrylics aren't being applied over an oily or incompatible medium, as this can also prevent a proper bond.
Q: How long should I really wait between paint layers?
A: This is one of the most common questions, and patience is truly a virtue here. For acrylics, "touch dry" isn't enough; you want the layer to be "cured" or fully dry to its core. Even if a layer feels dry, internal moisture or solvents might still be trapped. Applying a new layer too soon can seal these in, interfering with adhesion, causing future blisters, or even micro-fractures as the trapped substances try to escape. In normal conditions, a thin acrylic layer might be ready in an hour, but thicker layers need much longer—sometimes 24 hours or more. For oils, it's far more variable. A thin, lean layer might be dry enough to overpaint in a day or two, while a thick, fat layer could take weeks, or even months, depending on the pigments used, the oil binder, and environmental conditions. Always consult manufacturer guidelines if unsure. When in doubt, wait longer; your future self will thank you. Remember, "touch dry" means the surface is dry to the touch, but "cured" means all solvents have evaporated and the binder has fully cross-linked or polymerized throughout the entire layer, providing maximum strength and stability. This is a critical distinction for paint film integrity.
Q: Will varnish fix or prevent these problems?
A: Varnish is a final protective layer, not a structural fix. I learned this the hard way after an early piece developed cracks and I hoped varnish would magically seal them away. It can help prevent future problems like chalking (if it has UV protection) and protects against dirt, dust, and scratches. It might visually minimize some very fine, stable cracks by filling them in, but it absolutely won't fix an underlying adhesion, blistering, or actively cracking problem. Think of it as the armor you put on after the battle is won and the structure is sound, not a magic potion to reverse deep-seated issues. Always ensure your painting is fully cured before applying a final varnish, and use a retouch varnish only as a temporary measure during the painting process if needed.
Q: Are certain artist brands more prone to these issues?
A: While all paints can fail if misused, the quality of the binder and the purity of the pigment vary significantly between brands. Student-grade paints, by nature, often contain less pigment and lower-quality binders or more inert fillers, making them generally less resilient to degradation and more prone to issues like chalking or poor adhesion over time. Professional-grade paints, while more expensive, use higher-quality binders and lightfast pigments, which are engineered for longevity and stability. So, it's less about a specific brand and more about the grade of paint you're using. I've found that investing in good materials ultimately saves you heartache and time in the long run. It's like buying good tools – they perform better and last longer.
Q: How do I choose archival quality materials beyond just paint?
A: This is a crucial question for any artist serious about longevity. "Archival quality" means materials are stable, durable, and designed to resist degradation over time. Here’s what to look for:
- Supports (Canvas, Paper, Panels): Choose acid-free and lignin-free options. Cotton and linen canvases are generally preferred for their strength and stability. Look for professional-grade wood panels that are properly braced and sealed. For paper, ensure it's 100% cotton rag or alpha-cellulose and acid-free. Check for certifications like ISO 9706.
- Primers and Grounds (Gesso): Use professional-grade acrylic gessos or traditional oil grounds specifically formulated for the paint type. Ensure they remain flexible and have excellent adhesive properties. Avoid cheap primers that might be overly brittle or poorly formulated.
- Mediums and Solvents: Stick to reputable artist-grade mediums and pure solvents. Avoid industrial-grade chemicals. For oils, use artist-quality drying oils (linseed, walnut, poppy, safflower) and avoid unrefined or impure varieties. For acrylics, use only acrylic-specific mediums. Ensure your mediums and solvents are compatible with your chosen paints.
- Varnishes: Always opt for removable, non-yellowing synthetic varnishes (e.g., MSA or acrylic polymer varnishes) with UV protection. Avoid natural resin varnishes for long-term preservation.
- Storage and Display Materials: Use acid-free mats, backing boards, and storage boxes. Frame artworks under UV-protective glass or acrylic. Maintain stable environmental conditions as discussed in this article. Looking for specialized art storage solutions for collectors can provide further guidance.
Q: Can these issues occur with different painting surfaces besides canvas?
A: Absolutely. While canvas is the most common support, paint film problems can manifest on wood panels, paper, metal, or any other rigid or flexible substrate. The principles remain the same: proper surface preparation, understanding paint drying rates, respecting fat over lean rules (for oils), controlling humidity, and using compatible materials are crucial, regardless of the support. Wood panels, for instance, need to be properly sealed (front and back) and gessoed to prevent absorption, cracking from differential moisture absorption, and to provide an even ground, much like canvas. Metal surfaces might require specific primers to prevent corrosion or ensure paint adhesion. Paper, if not archival quality or properly primed, can buckle, degrade, or allow paint to bleed. Primed versus unprimed surfaces, for example, have very different requirements, as discussed in primed vs. unprimed canvas: which to choose.
Q: What is the "Shelf Life" of painting materials?
A: Good question! Even unused materials have a lifespan. Paints, especially acrylics, can dry out or separate in the tube if old. Oils can become stringy or stiff. Mediums can change viscosity or lose their efficacy, and some primers can lose their adhesive qualities over time. Always check expiry dates if available, and if in doubt, do a small test swatch. Using expired or compromised materials is inviting paint film problems from the very start. It's a bit like cooking; fresh ingredients make for the best meal, and fresh materials make for the most resilient art.
Q: How do different types of pigments affect paint film stability?
A: Beyond their lightfastness, pigments play a significant role in paint film stability through their inherent properties and interaction with the binder. Some pigments (like certain earth pigments or cadmiums) are naturally more opaque and have a denser particle structure, contributing to a more robust and stable film. Others, like transparent organic pigments, can be more susceptible to binder breakdown or chemical shifts. Pigments also vary in their oil absorption, directly influencing drying times in oil paints and thus contributing to 'fat over lean' issues. For example, a pigment with high oil absorption will generally dry slower than one with low oil absorption. Furthermore, the chemical composition of pigments can lead to reactions with certain binders or other pigments over time, causing discoloration or structural weakness. Always consult the pigment information (often on the paint tube label) and choose high-quality, stable pigments for lasting work.

Key Terms for the Resilient Artist
Navigating the world of paint film issues means understanding the language. Here's a quick reference for the essential terms we've explored:
- Adhesion: The property of paint to stick to a surface or to another paint layer.
- Alkyd Medium: A synthetic resin medium often used with oil paints to speed drying and increase flexibility.
- Alligatoring: A form of cracking where the paint surface develops large, deep cracks resembling alligator skin, usually due to differential drying rates of thick layers.
- Binder: The liquid component of paint that holds pigment particles together and adheres them to a surface. Crucial for film integrity.
- Crazing: A form of cracking characterized by a network of fine, shallow, spidery lines on the paint surface.
- Curing: The process by which a paint film fully dries, hardens, and achieves its maximum strength and stability, involving chemical reactions beyond just the evaporation of water or solvent.
- Fat over Lean: A fundamental rule in oil painting dictating that each successive layer of paint should contain more oil (be 'fatter') and be more flexible than the layer beneath it (the 'lean' layer) to prevent cracking.
- Final Varnish: A permanent protective layer applied to a fully cured painting.
- Fugitive Pigment: A pigment that is not lightfast and will fade or change color over time when exposed to light.
- Gesso: A white acrylic polymer or traditional chalk-based primer applied to a surface (like canvas or wood) to prepare it for painting, providing tooth and reducing absorbency.
- Ground: The preparatory layer applied to a support (like canvas) to make it ready for painting, typically gesso.
- Impasto: A technique where paint is laid on thickly enough so that brushstrokes or palette knife marks are visible, creating texture.
- Lightfastness: A pigment's ability to resist fading or changing color when exposed to light, especially UV light.
- MSA Varnish: Mineral Spirit Acrylic varnish, a type of synthetic varnish known for its stability and non-yellowing properties.
- PMMA (Polymethyl methacrylate): A common acrylic polymer used in high-quality acrylic paints and varnishes, known for its clarity and durability.
- Pigment: The colored particles in paint, responsible for its hue.
- Retouch Varnish: A temporary, thin varnish applied to a partially dry oil painting to even out dull spots.
- Sizing: A thin substance applied to a raw canvas or other support to seal the fibers, reduce absorbency, and protect them from acidic paint components.
- Stand Oil: A thick, polymerized linseed oil used in oil painting to improve flow, increase durability, and create glossy films, though it can slow drying and increase wrinkling if applied too thickly.
- Surfactant: A chemical additive used in paint (especially acrylics) to reduce surface tension, aiding in pigment dispersion and flow, but which can sometimes contribute to blistering.
- Tooth: The slight roughness or texture of a painting surface that allows paint to physically grip and adhere strongly.
It’s All Part of the Process: Lessons from the Canvas
Look, paint is a physical, chemical substance, and like all materials, it has rules. Learning those rules isn't about restricting your creativity; it's about giving it a permanent, stable home to live in. Every artist, from the beginner to the seasoned professional, has a story about a painting that went wrong—a piece that cracked, blistered, or simply refused to adhere. It’s a rite of passage, a harsh but effective teacher. Don't let it discourage you. See it as the materials talking back to you, teaching you what they need and how they behave. Understanding these issues made me a better, more thoughtful painter. I've even started documenting my materials, drying times, and studio conditions, treating my studio like a bit of a lab to proactively troubleshoot. The vibrant, resilient paintings you see in my collection today are built on the lessons learned from many cracked, peeled, and bubbly disasters of the past. If you want to see my own artistic journey, check out my timeline and you'll witness the evolution, sometimes in spite of myself.
So, the next time your paint acts up, take a deep breath. You're not a bad artist. You're a scientist in a lab, and you just got a new result to learn from. Armed with this knowledge, you can approach your next canvas with confidence, knowing that the "weird acting" paint is just a puzzle waiting for you to solve, leading to even more resilient and vibrant artwork. As you return to your studio, carry this understanding with you. What will you build, and how will you ensure it stands the test of time? Now go make something that will last, perhaps even a piece that would feel at home in a museum in Den Bosch.
Further Reading & Advanced Insights
For those of you who've caught the bug for understanding your materials even deeper, here are a few areas you might want to explore:
- The Science of Polymers in Paint: A deeper dive into the chemistry of acrylic binders and how they cure and age, including specific polymer structures like PMMA.
- Specific Pigment Properties: Researching individual pigment characteristics, including their oil absorption rates, compatibility, lightfastness ratings, and historical usage, alongside their chemical interactions.
- Advanced Conservation Techniques: Exploring how professional conservators assess, treat, and restore damaged paint films, often using highly specialized techniques and materials to address complex degradation pathways and ensure minimal intervention.