Stretching Your Own Canvas: A Hands-On Guide to Artistic Independence
Ever wondered how artists get that perfectly taut canvas? Join me on a journey to stretch your own, explore the tools, techniques, and satisfaction of creating your perfect painting surface. This isn't just a tutorial; it's an invitation to elevate your art.
Stretching Your Own Canvas: A Hands-On Guide to Artistic Independence
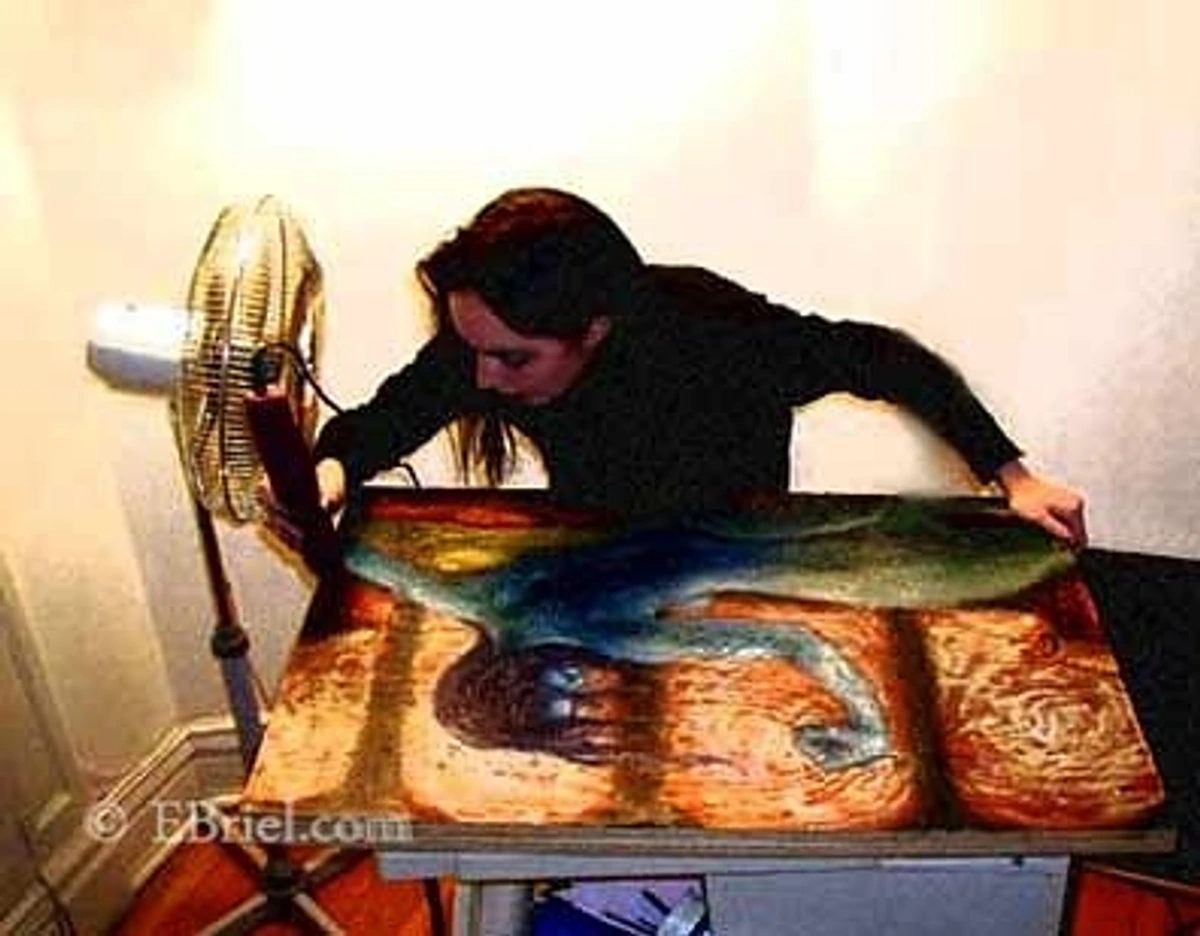
There's a quiet revolution happening in my studio, one that involves wood, fabric, and a whole lot of intention. For too long, like many artists, I relied on the convenience of pre-stretched canvases. They served their purpose, certainly – a quick fix when deadlines loomed, a forgiving starting point for a hesitant brush. But eventually, a deeper impulse took hold. It was a yearning for something more, a desire to infuse every fiber of my artistic process with personal involvement, right from the very beginning. That's when I made the leap into stretching my own canvases, and honestly, it's been nothing short of transformative. This isn't just about cutting costs (though that's a welcome bonus, especially for expansive pieces); it's about a profound understanding of your materials, mastering the perfect tension, and forging an intimate connection with the very foundation of your art. It feels akin to a musician meticulously crafting their instrument before composing a symphony – the bedrock of creation truly is everything. If you've ever felt that familiar tug of curiosity, that insistent urge to delve beyond the ready-made and into the realm of true craftsmanship, then you've come to the right place. We're about to demystify canvas stretching, and I assure you, it's far less intimidating than you might imagine. I'm here to share all the lessons I've gleaned, the occasional (and often comical) missteps, and the invaluable tricks that have empowered me to embrace a deeper artistic independence. Because, when you strip it all away, isn't art fundamentally about constructing something enduring, nurturing it from the nascent spark of an idea to the final, triumphant stroke of color? Stretching your own canvas isn't merely a practical step; it's a potent declaration of artistic sovereignty, a commitment to creating a surface that will not just cradle your paint, but also bear the full weight of your unique artistic vision for generations, perhaps even centuries, to come. This comprehensive guide, born from countless hours at my own workbench, is designed to empower you with the knowledge and confidence to embark on your own canvas-stretching journey. From selecting the perfect materials to mastering the subtle art of tension, we'll cover every detail, ensuring your artistic foundation is as strong and enduring as your vision.
Why Bother Stretching Your Own Canvas? The Unseen Advantages
I hear you, "Why add another step to an already elaborate process?" It's a fair question, one I asked myself many times. And honestly, for a while, I just accepted the convenience. But here's the thing: stretching your own canvas gives you an incredible amount of control and a deeper, more profound appreciation for the very foundation of your work. It's not just about the end result; it's about the journey of making. It's about setting an intention, truly understanding your materials, and investing a piece of yourself into the very support of your art. This hands-on approach isn't just for purists; it's for any artist who craves a more intimate connection with their craft and seeks to elevate the longevity and quality of their finished pieces. It really makes a difference to the feel of the canvas under the brush, and ultimately, to the artwork's presence.
The Tactile Experience: Beyond the Visual
There's a unique pleasure, a profound satisfaction, in the purely tactile engagement of stretching a canvas. It's the sensation of the raw fabric under your fingers, the resistance as you pull it taut, the rhythmic sound of the staple gun. This physical involvement creates a different kind of connection to the artwork, one that begins long before the brush touches the surface. It's a foundational act of creation that primes not just the canvas, but also your artistic spirit. I find this sensory input deeply grounding, almost meditative, as it pulls me fully into the present moment of making. It's an often-overlooked dimension of artistic practice that enriches the entire creative journey.
Environmental and Ethical Considerations: A Mindful Approach
Beyond the personal benefits, choosing to stretch your own canvas also opens up a dialogue about environmental responsibility and ethical sourcing in art. When you purchase raw materials, you often have more transparency regarding their origin and manufacturing processes. You can opt for organic cottons, sustainably forested stretcher bars, or even repurposed fabrics, making a conscious choice to minimize your ecological footprint. This mindful approach extends the intention of your art beyond the canvas itself, reflecting a broader commitment to sustainability that resonates with the themes of conscious living and creation. It's about being an artist not just with your hands, but with your values.

The Enduring Legacy: A Brief History of Canvas Stretching
Have you ever paused to consider how your chosen surface connects you to centuries of artistic tradition? The practice of stretching canvas, while seemingly modern in its meticulousness, has deep roots in art history, evolving alongside painting techniques and artistic movements. Before canvas became ubiquitous, artists primarily painted on rigid surfaces like wood panels, or directly onto walls as with frescoes, or even on parchment. The profound shift to canvas began gaining widespread prominence during the Italian Renaissance, especially in the bustling, humid port city of Venice. The damp Venetian climate proved unforgiving to wood panels, causing them to warp and crack, threatening the longevity of precious artworks. Canvas, with its inherent flexibility, offered a revolutionary alternative: it was lighter, far more portable, and significantly less susceptible to environmental damage. Initially, these early canvases were often unprimed or simply treated with basic animal glue. However, as artists like Jan van Eyck and Titian began to push the boundaries of oil painting with its richer pigments and slower drying times, the necessity for a protective, consistent ground became glaringly apparent. This demand spurred the development of sophisticated sizing and gesso techniques, remarkably similar to the foundational preparations we employ today. The invention of the stretcher bar itself, designed to ingeniously maintain tension and allow for eventual re-tensioning (a key innovation!), was a game-changer. It liberated artists from static supports, paving the way for grander, more ambitious compositions that could be easily transported and displayed. So, as you engage in the tactile process of pulling that canvas taut, take a moment to consider that you are directly participating in a continuous lineage of makers – from the old masters to contemporary visionaries – all of whom intrinsically understood the profound connection between a stable, thoughtfully prepared foundation and the creation of truly enduring art. It's a testament to human ingenuity and the persistent, universal quest for expressive freedom across the ages. This deep dive into history not only enriches our understanding but also informs our modern practices, ensuring we carry forward the best traditions while embracing new innovations. For a fascinating journey through another historical art form, you might enjoy exploring the history of oil painting: from ancient pigments to modern masterpieces.
The Evolution of Priming: From Animal Glues to Acrylics
While the concept of preparing a canvas is ancient, the materials have certainly evolved. Early primers often consisted of simple animal glues, like rabbit skin glue (RSG), which served as a basic sealant. Over time, artists experimented with various mixtures of gesso (typically gypsum or chalk mixed with animal glue) to create smoother, more uniform surfaces. The shift towards acrylic-based gessos in the 20th century was revolutionary, offering artists a non-toxic, flexible, and fast-drying alternative that was compatible with both oil and acrylic paints. This continuous innovation in materials has empowered artists with more choices, allowing for greater versatility and longevity in their work, without sacrificing historical integrity if they choose traditional methods. It’s a fascinating interplay between tradition and progress, wouldn't you say?
The Zen of the Stretch: A Meditative Foundation
For me, the act of stretching a canvas evolved into a deeply meditative practice. It’s a quiet, focused ritual, a deep breath taken before the glorious, sometimes chaotic, explosion of paint truly begins. There's something profoundly grounding in connecting with the raw materials themselves – feeling the coarse texture of the canvas beneath my fingers, inhaling the subtle scent of fresh wood from the stretcher bars. It’s an almost primal act of creation, a moment to be utterly present with the foundation, before diving headfirst into the expressive world of color and form. It’s an extension of my personal philosophy, really, this whole journey of creating and reflecting that you might also find resonates with the themes explored in my timeline, where every single step, every considered decision, contributes to the final narrative. It's like a moving meditation, allowing me to clear my mind and set an intention for the artwork to come, much like a dancer stretches before a performance; it prepares not just the body, but the spirit for what's next. This deliberate act of preparation, of bringing intention to the very support of the artwork, subtly influences the entire creative process that follows. It's a way to quiet the mind, to step away from the external world, and to fully immerse myself in the present moment of creation, setting a clear, expansive space for the abstract forms and vibrant colors that are to come. It’s akin to a chef sharpening their knives before preparing a feast; the act itself is part of the culinary art, setting the tone for the entire meal. This focused preparation isn't just mechanical; it’s deeply spiritual, allowing me to connect with the essence of my artistic purpose and infuse that calm, centered energy into the very fabric of the canvas. This intentionality, I've found, resonates through the layers of paint, creating a deeper, more resonant finished piece. I often find this meditative state carries over into the act of painting itself, fostering a greater sense of flow and presence, and ultimately, a more authentic artistic expression. It's a unique opportunity to slow down, be present, and infuse every fiber of your art with mindful intention.
Cost-Effectiveness, Especially for Larger Works: More Art, Less Expense
Let's be real, the cost of art supplies can climb quickly, sometimes alarmingly so! Raw canvas fabric and a bundle of stretcher bars are almost always significantly more budget-friendly than their pre-stretched, ready-to-hang equivalents, especially when you're scaling up to larger pieces. Imagine this: a substantial, say 48x60 inch, pre-stretched canvas might set you back hundreds of dollars. But buying the raw materials – a roll of canvas and a set of custom-sized stretcher bars – could easily cut that cost by 50% or more. This isn't just a small saving; it’s a substantial boost to your creative freedom, allowing you to invest in more paint, experiment with different brushes, or perhaps even finally snag that art history book you've been eyeing. It empowers you to create more, worry less about the budget, and really expand the scope of your artistic vision. These savings are particularly noticeable when working with non-standard or very large dimensions, which can be astronomically priced when pre-made. Think of it as opening up a new world of possibilities, where your budget stretches further, allowing for more ambitious projects and deeper artistic exploration. It's the kind of practical independence that fuels artistic freedom. Plus, if you're ever considering selling your work, a professionally stretched and prepared canvas immediately elevates its perceived value and readiness for display, making it a more attractive proposition for collectors. This isn't just about saving money; it's about investing in the professional presentation of your work, ensuring it commands the respect it deserves in the art market. It's a smart financial decision that directly impacts your ability to create more, and larger, art.
Longevity and Archival Quality: Building to Last
When you stretch your own canvas, you gain ultimate control over the archival quality of your artwork's foundation. This isn't just about making art; it's about making art that lasts. You can choose premium, acid-free canvas materials, select kiln-dried stretcher bars that resist warping, and ensure precise tension that will prevent sagging over time. Pre-stretched canvases, while convenient, often cut corners on these foundational elements. I've seen too many otherwise beautiful paintings compromised by flimsy stretcher bars or poor quality canvas that yellows or sags within a few years. By taking charge of the stretching process, you're actively ensuring that your artistic legacy is built on a stable, durable, and archival foundation, protecting your work for future generations to appreciate. Beyond sagging and yellowing, inferior materials can also lead to cracking, flaking paint, or even mold growth in humid conditions – all nightmares for any artist. By taking control, you’re actively mitigating these risks. It's a long-term investment in your art and your artistic journey, much like carefully choosing your paint types for artists or your best acrylic mediums for abstract artists for their lasting quality. Moreover, by knowing the provenance of your materials and the care with which they were prepared, you can confidently discuss the archival integrity of your work with collectors or galleries, adding another layer of professionalism to your practice. This deep understanding and control over your materials is what truly sets professional work apart.
Protecting Against the Elements and Time
Beyond the obvious benefits of strong materials and tension, stretching your own canvas allows for more nuanced archival considerations. You can apply specialized UV-protective varnishes to your primed canvas, especially if the artwork will be exposed to direct sunlight. Furthermore, understanding the specific properties of your chosen canvas (e.g., its acidity, its weave density) empowers you to anticipate and counteract environmental threats like atmospheric pollutants or drastic humidity changes. This foresight is crucial for preserving delicate paint layers and ensuring that the work maintains its original vibrancy and structural integrity for decades, even centuries. Think of it as being a proactive conservator of your own creations – an invaluable skill for any artist serious about their legacy.
Quality Control & Custom Sizes: Your Vision, Your Dimensions
Have you ever purchased a pre-stretched canvas only to discover it’s a bit slack, the corners aren't quite crisp, or the stretcher bars feel suspiciously flimsy? It's a frustrating experience that can really hamper the painting process. When you take on the task of stretching your own, you become the ultimate arbiter of tension, allowing you to achieve a drum-tight surface that is an absolute dream to paint on. There’s truly nothing worse than a flabby canvas that sags and pushes back against your brushstrokes, undermining your creative flow! Moreover, you're no longer constrained by the limited range of standard, mass-produced sizes. Do you envision a super tall, dramatically narrow canvas to capture a specific abstract narrative? Or a perfectly square series that demands precise, identical dimensions for a thematic collection? No problem at all. You become the master of your canvas's dimensions, meticulously tailoring the exact stage for your artistic vision. This liberation from standard sizing truly unlocks a whole new realm of compositional possibilities, allowing your art to dictate its own form rather than being confined by what's readily available on a shelf. It's about artistic freedom, plain and simple, letting your imagination run wild without being limited by what fits in a box. This is particularly liberating when you're envisioning a series of artworks with specific, interconnected dimensions, where consistency and unique sizing are paramount to the overall narrative. Imagine crafting a triptych with custom central and side panels, or an installation requiring a blend of very tall and very wide canvases – the possibilities truly become limitless. You can even experiment with non-rectangular shapes, creating ovals, circles, or irregular forms that push the boundaries of traditional canvas art. This level of customization ensures your artwork is presented exactly as you envision it.
The Impact of Surface Perfection on Artistic Style
The level of tension and the overall perfection of your canvas surface can profoundly influence your artistic style and the techniques you employ. For instance, hyperrealist painters often demand a flawlessly smooth, drum-tight surface to achieve their meticulous detail and optical illusions. Conversely, abstract artists working with heavy impasto or textural mediums might appreciate a canvas with a bit more inherent 'give' or a deliberately rougher texture. By stretching your own, you can precisely control this variable, tailoring the surface to perfectly complement your vision. It’s a subtle but powerful way to enhance your creative process, allowing the canvas itself to become an active participant in your artistic expression.

A Deeper Connection: Infusing Intention into Every Fiber
It really boils down to this: when you stretch your own canvas, you're not just buying a product; you're crafting the very stage for your art. You're imbuing the piece with a little extra piece of you right from the start, a personal touch that resonates from the foundation up. This intimate involvement creates a profound sense of ownership and connection to the artwork, long before the first stroke of paint touches the surface. It's an act of intention, a declaration of your artistic commitment. I find this especially true for my abstract works, where the energy and intention put into the preparation can subtly influence the entire flow of the painting. It’s a quiet promise you make to yourself and your art, a bond formed with the materials that carries through to the finished piece. Every subtle variation in the canvas, every intentional pull, becomes part of the artwork's hidden story, a narrative that begins long before the first vibrant stroke of paint.
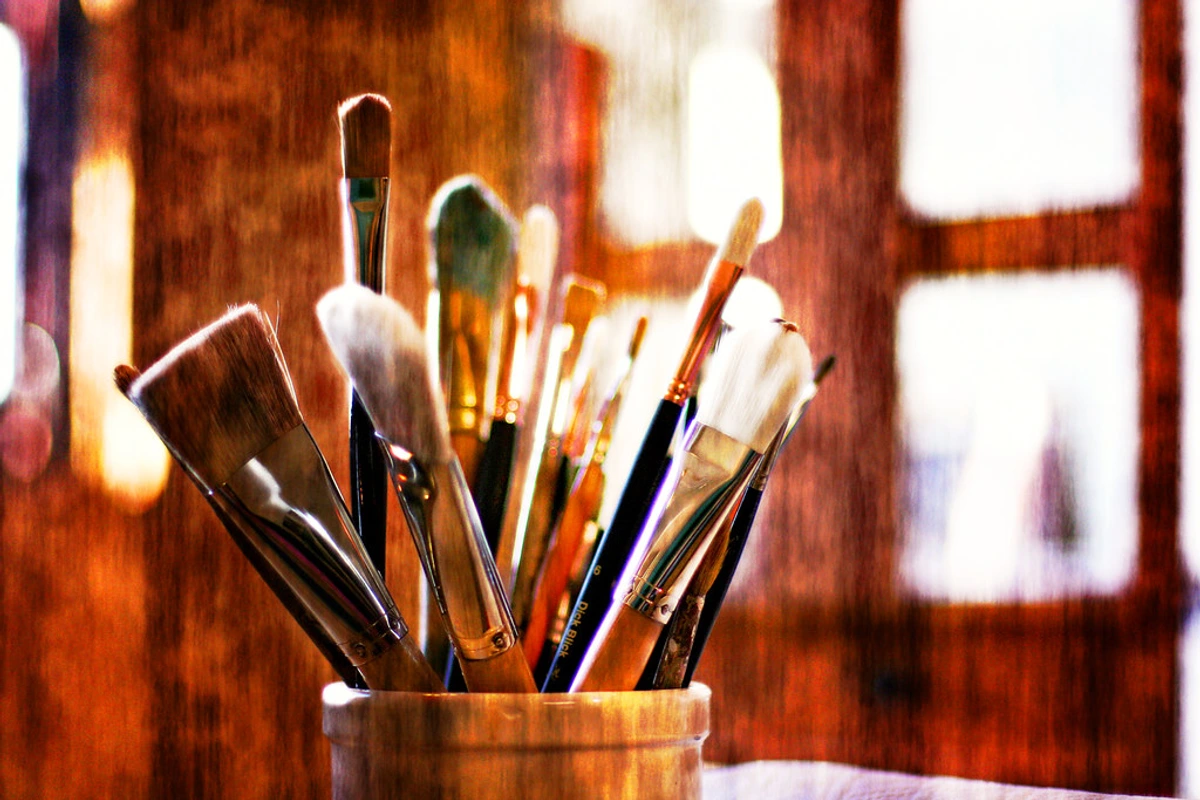
What You'll Need: The Essential Toolkit for Canvas Stretching
Before we dive into the nitty-gritty, let's gather our allies – the tools and materials that will make this process smooth and, dare I say, enjoyable. Don't worry, you don't need a full workshop; most of these are readily available and will serve you well for many projects to come. Think of this as your personal artist's arsenal, curated for efficiency and quality, a true extension of your creative intention.
Pro Tip: Invest in good quality tools. They make the process smoother, safer, and ultimately more enjoyable. Think of them as extensions of your artistic hand. | Tool/Material | Why You Need It | My Go-To Pick | Alternative (if any) | Cost Estimate | Notes | | :------------------- | :--------------------------------------------------------- | :------------------------------------------------ | :--------------------------------------------------------- | :------------ | :------------------------------------------------------------ | | Raw Canvas Fabric | The actual surface for your art; choose wisely for your paint type. | Cotton Duck (medium weight) | Linen (more expensive, very durable), Jute, Synthetics | $ | Available in rolls; buy more than you think you need. Consider the weave (tightness and pattern of threads), weight (heavier for larger works), and if it's primed or unprimed – each has its own unique charm and purpose. Some artists even pre-wash natural fiber canvases to pre-shrink them and remove manufacturing sizing, though this isn't always necessary with modern art canvas. Cotton is great for beginners and versatile, while linen offers superior strength and archival qualities, often preferred for oils due to its natural oils that prevent deterioration. Jute is coarser and less expensive, good for textural work or mixed media. Synthetics like polyester are dimensionally stable, resisting humidity changes, making them excellent for humid environments or outdoor installations. Learn more about choosing the right canvas for your medium in my guide on how-to-choose-the-right-canvas-for-acrylic-vs-oil. | | Stretcher Bars | The wooden frame that gives your canvas its structure. | Kiln-dried pine (with a slightly rounded edge) | Hardwood (stronger, heavier, e.g., Poplar, Oak, Maple), Aluminum (lightweight, stable, perfect for humidity) | $ | Ensure they are straight and warp-free. Kiln-dried wood prevents warping due to moisture changes, a common culprit in canvas sag! Look for bars with finger joints for a tighter, more stable connection, preventing gaps and ensuring a truly square frame. The slightly rounded or beveled edge (also called a 'raised lip') is crucial; it prevents a sharp crease from forming in the canvas over time, ensuring your paint surface isn't marred by the frame's edge. For very large canvases, you absolutely must also consider cross-braces (and sometimes even double cross-braces for monumental works) for added stability, inserted into pre-cut slots on the inside of the frame. These prevent bowing and maintain the integrity of your work, a non-negotiable for longevity. You can also find heavy-duty stretcher bars for larger works, which have a deeper profile, adding to their robustness. For a deep dive into alternative framing solutions for your finished canvas, you might enjoy my guide on a-guide-to-building-a-floating-frame-for-canvas-art. | | Staple Gun | To attach the canvas securely to the stretcher bars. | Heavy-duty (manual or electric) | Hammer & tacks (less secure, harder to get tension), Push-pin tool (for very delicate fabrics) | $ | An electric staple gun truly makes the process smoother, especially for larger works or if you're doing many canvases – your hands will thank you! However, a good quality manual heavy-duty staple gun is perfectly sufficient for most projects. Just make sure it can handle the depth of staple required and that it's comfortable to hold and operate for extended periods. The goal is to get consistent, firm staples without hand fatigue, which is crucial for even tension. | | Staples | The fasteners for your staple gun. | 1/2 inch (12-13mm) crown staples | Shorter staples (if using thinner bars/canvas), galvanized staples (for general use) | $ | Get stainless steel if you're in a humid environment to prevent rust and staining, which can leach into your canvas over time – a silent killer of archival quality! The 'crown' refers to the width of the staple's top, which helps distribute tension evenly and prevents the staple from pulling through the canvas fabric itself. Always ensure the staple length is appropriate for your stretcher bar depth to avoid them poking through the front – trust me, it's a frustrating discovery! | | Canvas Pliers | Crucial for gripping and pulling the canvas taut. | Wide-jaw, rubber-gripped | Heavy-duty ordinary pliers (with fabric padding), stretching clamps (for large, heavy canvases) | $-$ | Seriously, do not skip these! They are an absolute game-changer, the secret weapon for a truly drum-tight canvas. The wide, textured jaws grip the canvas without damaging it, and the leverage they provide allows you to achieve incredible tension without tiring your hands. Trying to do this with regular pliers is an exercise in futility and frustration; your hands will thank you for investing in proper canvas pliers. Some even come with a built-in 'lever' for extra pull, making the job even easier, allowing you to fine-tune that tension with precision. | | Measuring Tape/Ruler | For accurate cutting and measuring. | Steel tape measure | Any sturdy ruler | $ | Essential for straight lines and even cuts. Precision here saves headaches later. | | Scissors/Utility Knife | For cutting your raw canvas. | Heavy-duty fabric shears or a sharp utility knife | - | $ | Sharpness is key for clean edges. A dull blade can fray the canvas and make stretching more difficult. | | Pencil | For marking cuts and center points. | Any basic pencil | Chalk or fabric marker | $ | An indispensable tool for precise markings, helping you maintain symmetry and alignment. I often use a fabric marking pencil for darker canvases, as it shows up clearer and can be erased or washed away later. | | Wood Glue | (Optional, but highly recommended for permanent frames) For added stability to stretcher bar joints. | Titebond II or similar wood glue (ensure it's archival safe and acid-free if it might contact canvas) | - | $ | While not strictly necessary for all canvases, a small amount of wood glue in the joints of your stretcher bars can provide an exceptionally stable and rigid frame, especially for very large pieces or if you never intend to disassemble the frame. Just remember, once glued, the frame is not easily disassembled, so ensure it's perfectly square before the glue sets! This is a commitment, but it truly fortifies your foundation. |
| Safety Glasses & Gloves | To protect your eyes from staples and hands from rough canvas/pliers. | Basic safety glasses & sturdy work gloves | - | $ | Crucial for preventing mishaps, especially with staple guns. Safety first, always! | | Hammer/Mallet | For tapping in the stretcher bar keys (wedges) and assembling the frame. | Rubber mallet (prevents damage) | Standard hammer (use a cloth to protect wood) | $ | A rubber mallet is ideal for gently tapping stretcher bars together and inserting keys without marring the wood. Its soft head ensures you don't dent or damage your precious stretcher bars during assembly or key insertion. |
| Safety Glasses & Gloves | To protect your eyes from staples and hands from rough canvas/pliers. | Basic safety glasses & sturdy work gloves | - | $ | Crucial for preventing mishaps, especially with staple guns. Safety first, always! I learned the hard way that a stray staple can be a real pain (and a trip to the emergency room), so don't skip this one. | | Framing Square | To ensure your stretcher frame is perfectly at right angles. | Large framing square | Builder's square, Combination square | $ | This is non-negotiable. A perfectly square frame is the foundation of a perfectly stretched canvas. Don't skip checking this, as any deviation here will haunt you later in the process! I've learned that measuring twice (or even thrice!) with this tool saves countless headaches. | | Work Surface | A clean, flat, and stable area to assemble your frame and stretch your canvas. | Large sturdy table, covered with a mat or old blanket | Clean floor | $ | An often-overlooked 'tool,' a good work surface is critical for achieving even tension and preventing damage to your materials. A non-slip surface can be particularly helpful. | 
credit, licence ## Priming Your Canvas: The Essential Foundation for Longevity and Luster
Once your canvas is beautifully stretched, you might want to consider priming it. This step is crucial for the longevity and vibrancy of your artwork, creating an ideal surface for your paints. While some pre-primed canvases are available, stretching your own means you have full control over this vital preparation, allowing you to tailor the surface perfectly to your chosen medium and artistic vision. It's the difference between merely applying paint and truly building an archival work of art, a subtle but profound shift in your creative approach. This foundational step not only protects your canvas but also dramatically influences how your pigments interact with the surface, affecting everything from brushstroke fluidity to color saturation. Believe me, the effort here pays dividends in the vibrancy of your colors and the enduring quality of your finished piece. For a deeper dive, I highly recommend my comprehensive guide on how-to-apply-gesso-to-canvas-a-beginners-guide.
What You'll Need for Priming
| Material | Purpose | Notes | | :------------------- | :------------------------------------------------------------------------------------------------------ | :----------------------------------------------------------------------------------------------------------------------------------------------------------------------------------------------------------------------------------------------------------- | | Gesso | Seals and primes the canvas, providing a slightly absorbent, consistent surface for paint adhesion. | Available in white, black, or clear. Choose based on your desired ground color (e.g., black gesso for dramatic contrasts or an underpainting). Acrylic gesso is versatile for both acrylics and oils. You can also find specialized gessos like oil gesso (for oils only), sandable gesso (for ultra-smooth surfaces), or high-tooth gesso (for textural effects). You can even make your own if you're feeling adventurous! Explore what gesso is in painting in more detail here and learn about how-to-make-your-own-gesso-a-diy-guide-for-artists. | | Sizing | (For oil painters, on natural fiber canvas) Creates a barrier to prevent oil from penetrating canvas fibers. | Essential when using oil paints on raw canvas to protect the fabric from acidic oils. This barrier is crucial for archival quality. Traditional sizing uses rabbit skin glue (RSG), but modern acrylic alternatives (often called 'acrylic sizing' or 'clear gesso') are widely available and highly recommended for ethical, practical (less odor, easier cleanup), and archival reasons. Choose a pH-neutral sizing for best results. | | Wide Brush/Roller | For smooth, even application of gesso or sizing. | A 2-4 inch flat brush (a synthetic one is often best for gesso) or a foam roller works well. Ensure it's clean and doesn't shed bristles, as stray hairs can be a pain to remove from your primed surface. | | Fine-Grit Sandpaper | (Optional, but highly recommended) For creating an ultra-smooth surface between gesso coats. | 220-320 grit sandpaper is ideal. This step refines the surface, eliminating brushstrokes and creating a velvety smooth ground that is a dream to paint on, especially for detailed work or if you want minimal texture. Don't forget to wipe away dust! | | Damp Cloth/Sponge | For wiping away dust between sanding coats. | Clean, lint-free cloth or sponge | - | $ | Essential for ensuring a pristine surface for each subsequent coat of gesso. Dust can compromise adhesion and create unwanted texture. | | Drop Cloth/Protective Sheeting | To protect your work surface and surrounding area from gesso splatters. | Old sheets, plastic sheeting, or newspaper | - | $ | Trust me, gesso gets everywhere! A good drop cloth saves you a lot of cleanup time and protects your studio. It's the kind of practical foresight that keeps your creative space pristine. |

Quick Guide to Priming: Step-by-Step
- Sizing (Crucial for Oil Painters on Natural Fibers): If you're using oil paints on natural canvas (like cotton or linen), applying one to two thin, even coats of sizing is absolutely essential. This creates an impermeable barrier that prevents the acidic oils from directly contacting and eventually deteriorating the canvas fibers. Traditional wisdom often suggests rabbit skin glue for sizing, but I (and many contemporary artists) highly recommend modern acrylic-based sizings for their ethical considerations, ease of use, and superior archival properties. Always allow each coat to dry thoroughly according to the manufacturer's instructions – patience here is truly key, as rushing this step can compromise the barrier. For acrylics, you can typically skip this step, as acrylic gesso provides sufficient protection. This initial barrier is your canvas's first line of defense, ensuring your work lasts for generations.
- Gesso Application - First Coat: Apply your first thin, even coat of gesso. Use a wide brush or foam roller for the smoothest coverage. Many artists (myself included) prefer to apply gesso in perpendicular strokes (e.g., first coat horizontal, second coat vertical) to ensure truly even coverage and eliminate brush marks. Aim for a thin, consistent layer rather than a thick, clumpy one. Don't forget to apply gesso to the sides of your canvas if you're planning a gallery wrap! This first coat is about establishing an even, foundational surface.
- Drying & Sanding (The Smoothness Secret): Let the gesso dry completely – this can take a few hours depending on humidity and the thickness of your application. For a truly professional, smoother surface, lightly sand with fine-grit sandpaper (220-320 grit is ideal) between coats. I often use a sanding block to ensure even pressure and avoid creating divots. This step is a game-changer for achieving a professional finish, especially if you're aiming for a very smooth painting surface. After sanding, meticulously wipe away any dust with a clean, damp, lint-free cloth or sponge. You'll be amazed at the velvety difference this makes! For more on this, check out my full guide on how to apply gesso to canvas: a beginners guide.
- Multiple Coats & Final Finish: Apply 2-3 coats of gesso for acrylics, or more if you desire a very smooth, opaque surface, allowing each to dry and sanding if preferred. For oils, if you've sized, 2 coats of gesso are often plenty. The number of coats also depends on the desired texture – fewer coats for more tooth, more coats for a smoother, glass-like surface. For a deeper dive into preparing your canvas for specific mediums, I've got guides on how to prepare a canvas for acrylic painting and how to prepare a canvas for oil painting. It’s all about creating the perfect stage for your artistic expression. Remember, each layer builds on the last, so patience and precision here will truly pay off.
The Step-by-Step Process: Bringing Your Canvas to Life
This is where the magic (and a little elbow grease) happens. Take your time with each step; patience is truly a virtue here. Rushing can lead to frustration and a less-than-perfect canvas, so put on some music, clear your mind, and enjoy the process.
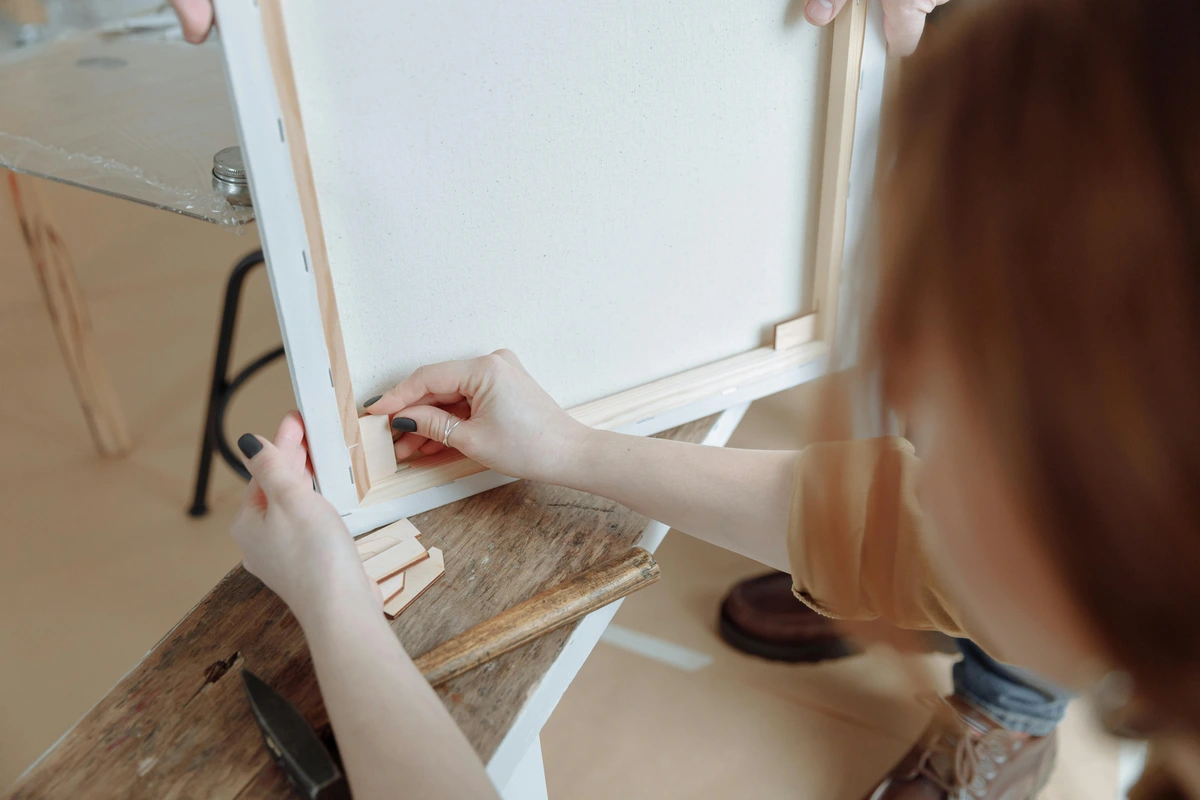
Step 1: Assemble Your Stretcher Bars and Square the Frame
Most stretcher bars come with interlocking joints. Lay them out on a clean, flat, and level work surface. Tap them together gently with your rubber mallet, ensuring they fit snugly and form a perfect rectangle (or square). This is where your trusty framing square comes in: use it to double-check that all corners are at a precise 90-degree angle. This is critical for a straight canvas, much like ensuring the blueprint for a building is perfectly aligned before you start construction. You absolutely do not want it crooked from the start! Any deviation here will be amplified as you stretch. For added long-term stability, especially if you're not planning to disassemble the frame, you can apply a small amount of wood glue to the joints before tapping them together. Just be sure your frame is perfectly square before the glue sets! For very large canvases, typically anything beyond 30x40 inches, you'll also want to insert cross-braces (sometimes called intermediate braces) into the slots on the inside of the frame. These are vital; they prevent the bars from bowing inwards or outwards over time, maintaining the structural integrity of your artwork and preventing dreaded canvas sag. For exceptionally large pieces, you might even need double cross-braces for maximum rigidity. The type of wood also matters here: hardwoods like maple or oak offer superior strength to pine, albeit with increased weight and cost. This structural foresight is especially important for how to frame oversized artwork, ensuring your monumental works remain stable for decades to come. When assembling, make sure the joints are tight, but don't force them – a little gentle tapping with a rubber mallet is usually all that's needed. I've found that sometimes, even with finger joints, a tiny gap can remain; a little wood glue will fill that gap and ensure a rock-solid frame.  credit, licence ### Step 2: Cut Your Canvas to Size
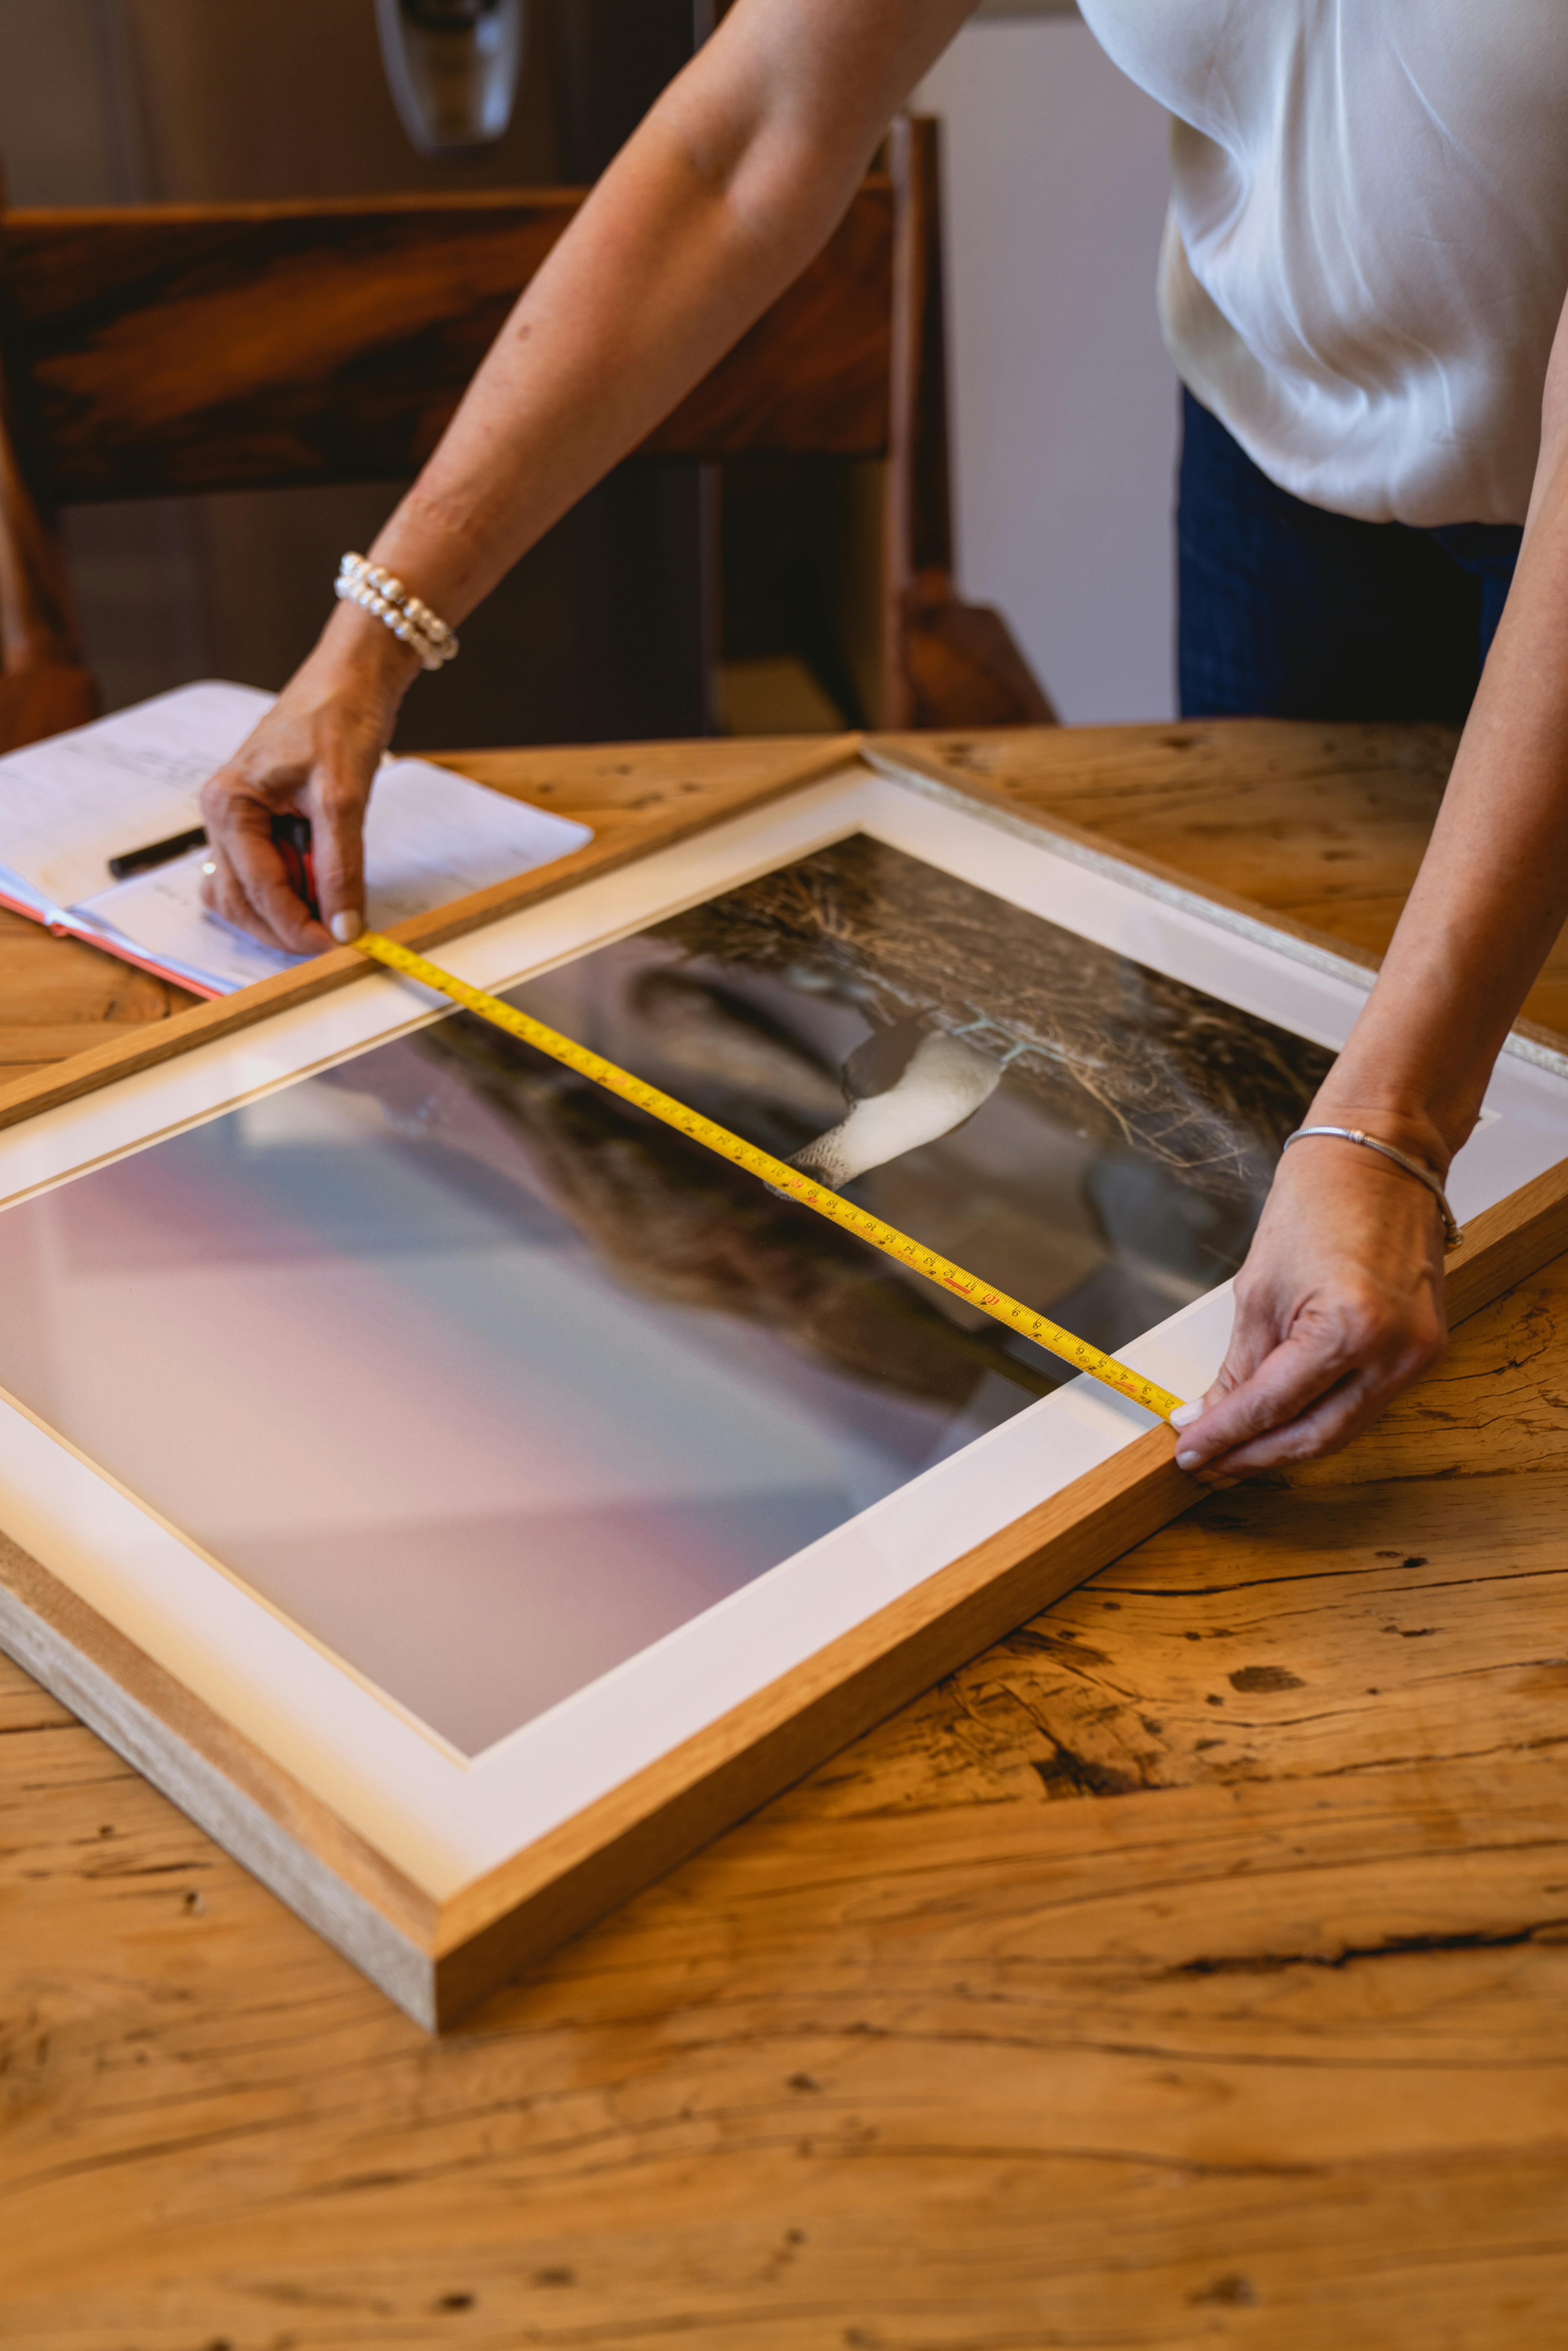
Lay your raw canvas face down on a clean, flat work surface – perhaps one covered with a non-slip mat or an old blanket to protect both your canvas and your table. Place your assembled stretcher frame squarely on top. Now, here's the important bit: you need enough excess canvas to pull, fold, and staple securely. I generally aim for an overlap of at least 3 inches (7-8 cm) on all sides beyond the outer edge of the stretcher bar. This generous allowance gives you plenty of material to grip with your canvas pliers and ensures you won't run short when trying to achieve maximum tension. Mark your cut lines precisely with a pencil, using your ruler or measuring tape for perfectly straight edges. Then, with your trusty heavy-duty fabric shears or a sharp utility knife, carefully cut out your canvas. Take care to make straight cuts; this seemingly small detail actually makes the subsequent steps much, much easier. A crooked cut can lead to uneven tension and a wonky final product, so a little precision here goes a long way. Take your time, measure twice, and cut once! Some artists, particularly those using traditional natural fibers like untreated linen or cotton, might pre-wash and pre-shrink their canvas fabric. This can help remove any manufacturing sizing and prevent future shrinkage or distortion, ensuring a tighter, more stable stretch over the long term. While less common with modern, pre-treated art canvas rolls, if you choose to do this, ensure the canvas is completely dry and ironed flat (or carefully steamed) before cutting and stretching to avoid any future surprises or uneven tension. It's an extra step, but for certain traditional techniques or very large pieces, it can make a noticeable difference. I've found that using a sharp utility knife against a metal ruler provides the cleanest, most precise cuts for a truly professional edge. For those who frequently work with fabric, a rotary cutter and a self-healing mat are game-changers for speed and accuracy.
credit, licence ### Step 3: Position the Canvas and Align the Grain
This sounds simple, but it's critically important. Place your cut canvas face down on your clean work surface. Center your assembled stretcher frame squarely on top of it. Now for a detail that often gets overlooked: ensure the warp (the lengthwise threads, running parallel to the selvage edge) and weft (the crosswise threads) of the canvas fabric are aligned as straight as possible with your stretcher frame. This might sound like a minor detail, but it's absolutely crucial for the long-term stability and appearance of your artwork. If the threads are skewed, your painting surface can develop uneven tension or even distort over time, leading to unsightly wrinkles or buckling that no amount of gesso can hide. I've seen perfectly good paintings ruined by this seemingly minor oversight! Taking a moment here to ensure perfect alignment will save you headaches down the line and ensure your canvas remains stable for years to come. I usually eyeball it, checking against the stretcher bar edges, but for perfectionists (and especially for larger canvases where even subtle distortions become magnified), a T-square or even a laser level can be invaluable in confirming the alignment with the frame. This foundational alignment isn't just about aesthetics; it ensures the canvas pulls predictably and evenly across its entire surface, which is critical for preventing future sags or bulges. I often like to do this check in good, even light, as raking light can sometimes reveal subtle misalignments that are otherwise invisible. This is the moment to be a detective, ensuring every thread is in its rightful place. ### Step 4: The First Staples (Centering is Key for Even Tension!)
Now for the staples! We're going to start with the center of each side. This is called "centering" and it ensures an even initial tension across the entire canvas. This step is foundational – get it right, and the rest flows smoothly.
Pro Tip: A little trick I’ve picked up, and one I highly recommend, is to mark the exact midpoints on all four sides of both your canvas (on the back) and your stretcher bars before you start stapling. This visual guide helps tremendously with initial alignment and ensures you’re truly pulling evenly from the center out, establishing the primary axes of tension. Without these clear center anchors, you're essentially guessing, and that's a recipe for unevenness that will haunt you later. Don't skip this!
- Mark Midpoints: A little trick I’ve picked up, and one I highly recommend, is to mark the exact midpoints on all four sides of both your canvas (on the back) and your stretcher bars before you start stapling. This visual guide helps tremendously with initial alignment and ensures you’re truly pulling evenly from the center out, establishing the primary axes of tension. Without these clear center anchors, you're essentially guessing, and that's a recipe for unevenness that will haunt you later. Don't skip this!
- First Staple: Pull the canvas tightly over the middle of one stretcher bar, aligning it with your midpoint marks, ensuring it's smooth, and place one staple in the center of that side. Aim for about half an inch (1.2 cm) from the inner edge of the stretcher bar, ensuring it catches securely in the wood.
- Opposite Side Tension: Move directly to the opposite side. This is crucial: pull the canvas very firmly across to match the tension of your first staple, and place a staple precisely in the center of that side. You're creating an initial, balanced tug-of-war across the canvas.
- Complete the Cross: Repeat this process for the remaining two opposite sides. You should now have four staples, one in the middle of each side, forming a balanced 'cross' pattern. This creates a balanced, initial tension that prevents major sags and ensures your canvas starts off square. Take a moment to check the front of your canvas – it should already look quite taut. ### Step 5: Pulling and Stapling (Working Your Way Out with Precision)
This is where your canvas pliers become your best friend, truly indispensable for achieving that drum-tight surface. Remember to wear your gloves to protect your hands from both the canvas and the pliers!
- Work Outwards: Starting from one of your initial center staples, move outwards about 2-3 inches (5-7 cm). This incremental approach helps distribute tension evenly.
- Grip and Pull Firmly: Grab the canvas with your pliers, pull it firmly (and I mean firmly – you want a taut surface, but not so much that you risk tearing the canvas!) over the stretcher bar, aiming slightly towards the corner. As you pull, ensure the canvas threads remain straight and don't distort. Then, staple it down, about half an inch (1.2 cm) from the inner edge of the bar.
- Alternate and Assess: Repeat this process, alternating between opposite sides, working your way systematically towards the corners. This alternating pattern is absolutely crucial for maintaining even tension across the entire canvas. Think of it like lacing up a shoe, or tightening a drum: slow, steady, and even. Each pull should feel consistent with the last. After every few staples, step back and critically look at your canvas, not just from directly above, but from different angles and in varying light. Turn it against a window, or shine a light across its surface – sometimes subtle imperfections are only revealed by raking light. Are there any subtle wrinkles? Any areas that appear noticeably looser or tighter than others? This constant visual assessment, combined with the leverage of those trusty canvas pliers, is where you truly finesse the tension. For larger canvases, I often employ a 'cross-pattern' stapling technique, where after completing the initial cross, I continue working from opposite centers towards the corners, consistently pulling diagonally to distribute the tension evenly and prevent localized stress points. It’s like tightening a drum skin, but with patience and strategic pulling rather than brute force. Don't be afraid to remove a staple and re-pull if an area feels off – better to correct it now than to have a saggy canvas later.
Step 6: The Corners (The Tricky Bit, Mastered!)
Ah, the corners. This is often where people get a little flustered, feeling like they're trying to wrap a wonky gift, but with a bit of practice and understanding, you'll absolutely master them. The overarching goal is to achieve a neat, flat fold that minimizes bulk, ensuring your canvas sits beautifully on the wall or within a frame. There are two primary approaches, dictating whether your staples are visible or hidden:
1. The Standard Wrap (Staples on the Side): Perfect for Framing
This method means the canvas is stapled to the sides of the stretcher bars, leaving the staples visible. It's often used if you plan to frame the painting, as the frame will elegantly cover the staples. Here's how I approach it:
- Once you've stapled most of the way to the corners on all four sides, leave about 3-4 inches (7-10 cm) unstapled at each corner. You'll tackle these last.
- Take one corner of the canvas. Pull the fabric firmly over the stretcher bar, ensuring a clean, straight edge on the front. Staple it directly to the side of the stretcher bar, approximately half an inch (1.2 cm) from the edge. This creates a simple, clean fold where the canvas wraps around the corner.
- Now, take the excess canvas from the adjacent side. Pull it taut, and neatly fold it over the first fold, tucking it in to create a flat, unbulky corner. Staple this second layer securely to the side of the stretcher bar. The aim is a flat, unbulky corner that will disappear behind a frame. It's like tailoring a perfect suit jacket corner, if you will.
2. The Gallery Wrap (Hidden Staples): My Preferred Modern Finish
This is my preferred method, especially for abstract art, as it allows the painting to extend seamlessly around the edges, creating a clean, contemporary, frameless look that literally pops off the wall. The staples are pulled all the way around to the back of the stretcher bars, rendering them invisible from the front and sides. This technique requires a bit more canvas overlap to ensure enough material to pull around. For my abstract works, the gallery wrap is a non-negotiable; it ensures the painting isn't confined by a frame, allowing the composition and energy to truly flow around the edges and creating a more immersive, sculptural experience for the viewer.
- As with the standard wrap, stop stapling about 3-4 inches (7-10 cm) from each corner on all four sides. These are your 'working zones'.
- Start with one corner. Pull the canvas firmly over the top edge of the stretcher bar and around to the back. Create a crisp diagonal fold on the side edge, just as you would when wrapping a gift. Pull this section taut and staple it to the back of the stretcher bar, about half an inch (1.2 cm) in from the outer edge.
- Next, take the excess canvas from the adjacent side. Pull it taut, fold it over the first diagonal fold, creating another neat, sharp corner fold. Tuck any remaining excess canvas neatly under the main fold, aiming for minimal bulk. Again, pull this final flap firmly and staple it securely to the back of the stretcher bar.
- Repeat this for all four corners, constantly checking the front of your canvas to ensure the corner folds are clean, symmetrical, and free of wrinkles. This creates a beautifully finished edge that allows the artwork to continue around the sides, much like the abstract works you can find in my collection, truly enhancing the three-dimensional presence of the painting.
Experiment with both techniques on smaller canvases to see which you prefer and which yields the cleanest results for you. What matters most is a flat, professional-looking corner that doesn't distract from the art – it's all part of the overall presentation. ### Step 7: Final Check and Adjustments – The Drum-Tight Test
Once all sides and corners are meticulously stapled, stand back and admire your handiwork. This is the moment of truth! Gently tap the surface with your knuckles. It should sound like a drum – firm, resonant, and without any slack. If you spot any minor sags or wrinkles, don't despair; this is where the 'adjustment' part comes in. You can often gently pry up a few staples in the problematic section, re-pull that area with your pliers, and re-staple. Remember to work incrementally and reassess.
Sometimes, especially with changes in environmental humidity, the canvas might slacken slightly. This is where the small wooden keys (also called wedges) that often come with stretcher bars are invaluable. Think of them as the final tuning pegs of your canvas instrument. Insert them into the slots on the inside corners of the frame and gently tap them with your rubber mallet to expand the frame ever-so-slightly, tightening the canvas. Just be careful not to over-tighten, as this can distort the frame or even tear the canvas! A little can go a long way, and it's best to tap opposing corners evenly to maintain squareness. Another trick from the old masters: for stubborn minor sags on natural fiber canvas, a very light, even misting of distilled water on the back of the canvas can sometimes help it tighten as it dries, as the fibers contract. Always test this in an inconspicuous area first and use sparingly, as too much water can cause warping or staining, and this technique doesn't work well on synthetic canvases. ### Step 8: Gesso (The Vital Surface Preparation)
You've got a beautifully stretched canvas! Now, if you're planning to paint with acrylics or oils, you'll almost certainly want to prepare your surface with gesso. This crucial step not only seals and protects the canvas fibers from your paint but also creates a wonderfully receptive, slightly absorbent surface that truly allows your colors to sing. Skipping gesso can lead to paint bleeding through, uneven absorption, and ultimately, a less vibrant and less archival artwork. I've poured a lot of my experience into a comprehensive guide on how to apply gesso to canvas: a beginners guide, which I highly recommend. It covers everything from application techniques to different types of gesso, and it's an absolutely vital step for the longevity and vibrancy of your finished artwork, whether you're using something like Liquitex Basics acrylic paint or rich oils. Remember, the quality of your gesso application can dramatically impact how your paint behaves and how your colors appear. For acrylics, 2-3 coats are usually sufficient, while for oils, after sizing, 2 coats are often plenty. Don't forget to sand lightly between coats for a silky-smooth finish, if that's what your artwork demands. This careful preparation truly elevates your art from merely applying paint to a surface, to building a lasting, intentional creation. For me, it transforms the act of painting into a dialogue with the materials, a deeper, more committed form of artistic expression. It's where the technical foundation meets the creative spirit, ensuring your artistic vision has the perfect ground to flourish.
credit, licence ## Tips for a Perfect Stretch: Lessons from the Studio
Based on my own trials and (many) errors, here are a few things I've learned that make a significant difference in achieving a professional stretch. These are the little insights that elevate your work from good to great:
- Work on a Non-Slip, Clean Surface: A rubber mat, a clean old blanket, or even a cutting mat can help keep your canvas and frame from sliding while you're pulling, allowing you to focus purely on tension. A clean surface is paramount to avoid transferring dirt or debris to your raw canvas.
- Mark Your Midpoints Religiously: Before any stapling begins, use your pencil to accurately mark the exact midpoints on all four sides of both your frame and your canvas. This visual guide is invaluable for initial alignment and ensures you're pulling evenly from the center outwards, which is the cornerstone of even tension.
- Practice Makes Perfect (and Reduces Frustration): Don't expect your first one to be gallery-ready perfect. Like any skill, it takes practice. Start with smaller canvases to get the hang of it. My first few were... character-building, let's say. But each one taught me something new, refining my technique. If you have spare canvas scraps, practice pulling and stapling on some extra wood to get a feel for the pliers and the amount of tension required without risking your actual art surface.
- Wear Gloves: Raw canvas can be surprisingly rough on the hands, and those canvas pliers can pinch! Sturdy work gloves will protect your hands and provide a better grip, making the process more comfortable and safer.
- Consider Bracing Larger Canvases (It's a Must, Not an Option): For very large canvases (typically anything over 30x40 inches), you absolutely must add cross-braces to prevent the frame from warping or bowing over time. This is a small investment of time and material that pays dividends in the longevity and stability of your artwork. A large, unsupported canvas is a recipe for future sagging.
- Consider the Climate and Storage: Humidity and temperature fluctuations can significantly affect canvas tension. If you live in a particularly humid environment, opt for stainless steel staples to prevent rust and consider stretcher bars made from more stable woods like poplar. Store your finished canvases vertically, ideally off the floor, in a consistent, climate-controlled environment to prevent future sagging or warping. Think of your stretched canvas as a living thing, reacting to its surroundings. This is an important consideration for the long-term preservation of your art.
- Listen to Your Canvas: As you stretch, pay attention to the subtle sounds the canvas makes. A gentle thrum when tapped indicates good tension. If it's silent or dull, it's likely too loose. It's a tactile and auditory experience that will become intuitive with practice.
- Don't Overstretch: While a drum-tight canvas is the goal, avoid applying excessive, aggressive force. Overstretching can actually weaken the canvas fibers or even tear the fabric, especially near the staples or corners. It's a fine balance between firm tension and brute force; think of it more as coaxing the canvas into submission rather than wrestling it. ## Advanced Techniques & Considerations: Pushing the Boundaries
Once you’ve mastered the basics, the world of canvas stretching offers even more avenues for customization and specialized approaches. It’s like discovering new tools in your creative arsenal – each one opening up fresh possibilities.
Double Stretching for Extreme Tension: The "Drum Head" Effect
For artists who demand an absolutely immovable, drum-tight surface (think hyperrealism or very heavy impasto), double stretching can be a game-changer. This involves stretching a secondary, lighter canvas to the back of your stretcher bars first, then stretching your primary canvas over the front. The initial layer provides an incredibly rigid foundation, allowing you to achieve extreme tension on the top layer without distorting the frame. It’s an extra step, yes, but for those specific artistic demands, the unparalleled tautness is worth it.
Using Keyless Stretcher Bars: A Streamlined Approach
While most stretcher bars come with keys for re-tensioning, some artists prefer keyless stretcher bars. These are designed for a more permanent, rigid assembly, often relying on stronger, custom-milled wood and precise joinery to maintain tension. The idea is to achieve perfect tension during the initial stretch, removing the need for future adjustments. This can be appealing for artists who prefer a "set-it-and-forget-it" approach once the initial meticulous stretching is complete. It places even greater emphasis on precision in the initial steps.
Custom Corner Construction: Beyond the Basic Fold
For truly bespoke pieces, particularly those with very deep profiles or unique dimensions, you might explore custom corner construction. This involves more intricate folding and securing techniques at the corners to create perfectly sharp, clean edges, or even to eliminate visible folds entirely. Some framers or conservators use specialized tools to achieve seamless corner wraps, particularly for artworks that will be viewed from multiple angles or without a frame. It’s a subtle detail, but one that speaks volumes about the craftsmanship of the finished piece.
Material Innovation: Beyond Traditional Fibers
The world of canvas is constantly evolving. Beyond traditional cotton and linen, artists are experimenting with new synthetic blends, metallized fabrics, or even unconventional surfaces that can be stretched. Each material offers unique properties – from extreme durability and weather resistance to novel textural effects or shimmering underlays. This exploration of alternative supports can open up entirely new artistic expressions, challenging what a "canvas" can truly be. It's about being open to innovation and letting your materials inspire new directions in your work.
Common Pitfalls and How to Avoid Them: Learning from My Mistakes
Even with the best intentions, stretching canvas can present a few challenges. Here's a rundown of common pitfalls I've encountered (and occasionally fallen into myself!) and how you can sidestep them, saving yourself a lot of frustration.

| Pitfall | How to Avoid It | My Own Experience | | :------------------------ | :----------------------------------------------------------- | :--------------------------------------------------------- | | Uneven Tension | Consistently pull with your pliers, alternating sides, and always work from the center outwards. Step back often (every few staples!) to assess the canvas from all angles, especially in different lighting, checking for subtle shadows or ripples that indicate unevenness. Run your hand across the surface; it should feel consistently firm. | I once had a canvas that looked like a trampoline on one side and a hammock on the other – a truly tragic sight, and a nightmare to paint on! Now, I make it a point to take my time, trust my eyes, and apply a consistent, firm pull, knowing that rushing this step will lead to regret later on. It’s all about building that even foundation, and sometimes that means a little extra patience and careful adjustment. | | Wrinkles/Sags | Ensure you're pulling tautly and consistently from the start. Prevention is key! When using keys, gently tap them in opposing corners to distribute tension evenly. For minor, stubborn sags on natural fiber canvases, you can try very lightly misting the back of the canvas with distilled water and letting it dry naturally, which can help natural fibers tighten as they dry – but use extreme caution and always test first in an inconspicuous area. Over-wetting can cause damage or warping. | I distinctly remember thinking I was pulling hard enough, only to find the paint behaving strangely, almost pooling in areas. It's truly disheartening. Now I aim for a canvas that truly sings when you tap it – really taut – and I'm not afraid to re-pull sections if I see any sign of a slack area, especially before priming. Sometimes a sag appears only after priming, so an initial drum-tight stretch is your best defense. | | Frame Warping | Always invest in good quality, kiln-dried, straight stretcher bars made from stable woods like poplar or maple (for larger sizes). Store finished canvases vertically, ideally off the floor, in an environment with stable humidity and temperature. Avoid leaning them against walls in damp basements or hot attics. If using glue, ensure your frame is perfectly square before it dries – once set, it's very hard to correct! | I had a truly disheartening experience with a cheap, poorly seasoned frame warping on me after only a few months. It twisted and bowed, taking the canvas with it and ruining the painting's structural integrity. Lesson learned the hard way: quality matters immensely, especially with the hidden structural elements like wood. Now I treat my stretcher bars like the precious skeletons they are, recognizing their crucial role in the longevity of the artwork. | | Staples Showing Through | Select staples that are the correct length for your stretcher bars; they should penetrate the wood securely without coming through the front. Crucially, always staple on the sides or back of the stretcher bars (for gallery wrap), never on the top edge that will be painted. Check staple depth carefully before starting. | Early on, in my eagerness and sometimes haste, I started stapling a bit too close to the top edge, and sure enough, after priming, you could see faint bumps where the staples were. Not exactly the smooth, pristine painting surface I was aiming for! It's a small detail, but one that significantly impacts the final professional look of your art. | | Canvas Tearing | This is a fine line to walk! While you want a taut canvas, avoid applying excessive, abrupt force, especially with thinner or more delicate canvas types. Always handle canvas pliers with care, ensuring the jaws grip only the fabric you intend to pull and aren't pressing too hard against the wood or an existing staple. Pull gradually and firmly, distributing the tension; never pull aggressively or with sudden, jerking motions. The goal is steady, even tension. | Oh, the agony! I was so singularly focused on achieving that perfect drum-tight surface on one of my early attempts that I actually over-pulled and tore a small, frustrating hole near a corner. It was a painful but effective lesson. Now, I apply firm, consistent pressure, but never aggressive, sudden force. It's about coaxing the canvas into submission, not wrestling it into place – a lesson in controlled power. | | Ignoring Grain Direction (Warp & Weft) | Always ensure the canvas's warp and weft threads are aligned straight with your stretcher bars before you start stapling. Check visually and adjust as needed in Step 3. | I once ignored this thinking it was a minor detail, and sure enough, after the painting was completed, the canvas started to subtly distort and buckle in a very unsightly way. The fibers were constantly fighting against the frame's tension. It's a foundational step that, if missed, can cause long-term instability and frustration. | | Dirty Work Surface | Always clean your work surface thoroughly before laying down your raw canvas. Use a clean sheet or mat to create a barrier. | I learned this the hard way after stretching a pristine white canvas only to discover a faint, greasy smudge from my workbench had transferred onto the back, then subtly bled through the fibers after priming. It's a small detail that can have a big impact on the final presentation of your art. | 
credit, licence ## When Not to Stretch Your Own Canvas: Practical Considerations
While I'm a huge advocate for stretching your own canvas, believing deeply in the benefits of control, connection, and cost-effectiveness, I'm also a realist. There are definitely times when it might not be the best option, and there's absolutely no shame in choosing convenience when it makes sense. Remember, the ultimate goal is to create art, not to make every step difficult or to gate-keep the process!
- Truly Monumental Canvases: For truly colossal or monumental works, where the sheer size and weight of the frame and canvas become unwieldy, stretching them solo can be incredibly challenging, even dangerous. At a certain scale, it genuinely becomes a professional job, often requiring specialized equipment and multiple people to handle safely. There's a point where DIY crosses into heavy-duty construction!
- Tight Deadlines: If you're up against a tight deadline for an exhibition or a commission, the time investment required for stretching and priming multiple canvases might be impractical. In these instances, a high-quality pre-stretched canvas is a perfectly valid and sensible choice. Sometimes you just need to get straight to the painting!
- Limited Space or Initial Budget for Tools: If you simply don't have the dedicated clear, flat space (especially for larger pieces) or the initial budget for the essential tools (like a good staple gun and canvas pliers), then investing in ready-made canvases might be a more feasible starting point. You can always gather tools and try stretching later, when your setup allows. Start where you are, with what you have.
- Specialized Materials or Techniques: Some very specialized materials, like extremely fine weaves, delicate fabrics, or unique synthetic blends, might require professional expertise or specialized equipment to stretch without damage. If you're experimenting with something truly unconventional, it might be wise to consult an expert or purchase it pre-stretched.
- Very Small Canvases: For canvases that are truly tiny (e.g., 8x10 inches or smaller), the effort and time required to stretch your own might simply outweigh the cost savings or creative benefits. Pre-stretched options are often very affordable at these sizes, and the intricate stapling on miniature frames can be more fiddly than fulfilling. Sometimes, convenience just wins.
Frequently Asked Questions
Q: How do I choose the right canvas type?
A: It truly depends on your chosen medium and the effect you're after! Cotton duck is wonderfully versatile and an excellent choice for both acrylics and oils, especially for beginners or general practice. It's readily available and forgiving. Linen is stronger, more expensive, boasts a beautiful fine, consistent weave, and is often preferred by oil painters for its archival qualities, natural oils that resist deterioration, and smooth surface. Some artists prefer unprimed canvas for specific raw, textural effects, or to apply their own custom ground, giving them absolute control. Don't forget about jute (coarser, more textural, excellent for abstract or mixed media with heavy body paints) or synthetic canvases (stable, resistant to humidity changes, ideal for outdoor or experimental work). My best advice? Experiment with different types to find your favorite, much like how you might choose between different paint types for artists or specific acrylic paint brands for their unique properties. Consider the 'tooth' or texture – do you want a smooth surface for fine detail or a rougher one to grab paint?
Q: Can I stretch old paintings or unstretched fabric art?
A: Yes, absolutely, but proceed with extreme caution and care! If you have an old painting on unstretched canvas or even a textile artwork that you want to display, you can definitely stretch it. The key is to be extra gentle to avoid cracking or damaging the dried paint layer, which can be brittle and prone to flaking. Work slowly, applying minimal, even tension. Consider very lightly dampening the back of the canvas with distilled water to make the fibers a little more pliable, but always test this in an inconspicuous area first, as some older paints or primers might react unexpectedly, leading to staining or blistering. It's a delicate operation, almost like forensic art restoration, but a rewarding one if done correctly, breathing new life into older pieces and preserving them for future enjoyment.
Q: What's the difference between gallery wrap and standard wrap?
A: This is a common and important distinction for how your finished artwork will look. Standard wrap means the canvas is stapled to the sides of the stretcher bars, and thus the staples will be visible if the artwork is not framed. This is typically chosen when you intend to put a decorative frame around the painting, which will cover the staples and the canvas edges. Gallery wrap, on the other hand, means the canvas is pulled all the way around to the back of the stretcher bars, so the staples are entirely hidden from the front and sides. This technique allows the painting to extend seamlessly around the edges, creating a clean, contemporary, frameless look that is often preferred for modern and abstract art. I almost exclusively use gallery wrap for my abstract art, as it allows for a continuous visual experience and a more sculptural presence on the wall, inviting the viewer to engage with the piece from all angles.
Q: Do I need to size the canvas before gesso?
A: If you're using oil paints on natural fiber canvas (cotton, linen, jute), applying a size (like traditional rabbit skin glue or, more commonly and ethically today, modern synthetic acrylic sizing) before gesso is not just recommended, it's virtually essential. This sizing creates a critical barrier that seals the canvas fibers and prevents the acidic oils from seeping through and eventually rotting the fabric, which can compromise the longevity of your artwork. For acrylic paints, gesso alone is usually sufficient as acrylics are not acidic, but sizing can provide an extra layer of protection and contribute to an even smoother, less absorbent surface if that's your preference. It can also enhance the 'pop' of colors by reducing absorption. It's a small extra step that offers significant long-term benefits, securing the archival integrity of your painting and ensuring your work endures.
Q: My canvas got a small tear while stretching. Can I fix it?
A: Possibly, for small tears! It's a frustrating moment, I know, I've been there. For minor tears (say, less than an inch), you can often apply a canvas patch from the back with a strong fabric adhesive or a robust gesso, ensuring it overlaps the tear by at least an inch on all sides. Make sure to apply it smoothly and firmly, pressing out any air bubbles, and allow it to cure completely. You might then need to lightly sand and re-gesso the front. For larger or more significant tears, it might be more challenging to achieve an invisible, archival repair, and it could potentially affect the long-term longevity and stability of the artwork. While it sounds harsh, sometimes it's genuinely best to learn from the mistake, salvage what you can (perhaps for a smaller piece or practice), and start fresh with a new canvas. It's all part of the artistic journey and refining your skills, right? Don't let a small mishap derail your enthusiasm – see it as a valuable lesson.
Q: How can I ensure my stretcher bars stay square?
A: Beyond initially checking with a framing square multiple times during assembly, there are several ways to ensure your frame remains perfectly square and stable. First, make sure your joins are tight and flush – well-milled, quality stretcher bars with precisely cut finger joints make a huge difference here. For very large canvases or frames you intend to keep permanently assembled, consider using corner braces (small metal plates, often available at hardware stores) on the back to reinforce the corners, screwing them into place. As mentioned earlier, good quality, kiln-dried wood also minimizes warping due to environmental changes. For extra peace of mind and maximum rigidity, some artists (myself included, for certain pieces) even glue their stretcher bar joints before assembling, using a strong wood glue like Titebond. This is a permanent commitment, making disassembling the frame for re-stretching or transport significantly more difficult, but it ensures rock-solid stability and prevents any future racking.
Conclusion: The Profound Satisfaction of the Handmade Foundation
So there you have it – my comprehensive guide to stretching your own canvas. It’s a skill that has truly transformed my approach to painting, infusing my work with a profound sense of accomplishment and a deeper connection to my art even before the first brushstroke touches the surface. There's something inherently rewarding, almost alchemical, about knowing you've built the very foundation of your artwork with your own two hands. It connects you not only to your materials but also to a long, rich tradition of artists throughout history who have mastered their craft from the ground up. This isn't just a technical skill; it's a profound act of artistic intention, a silent promise to the art you're about to create.
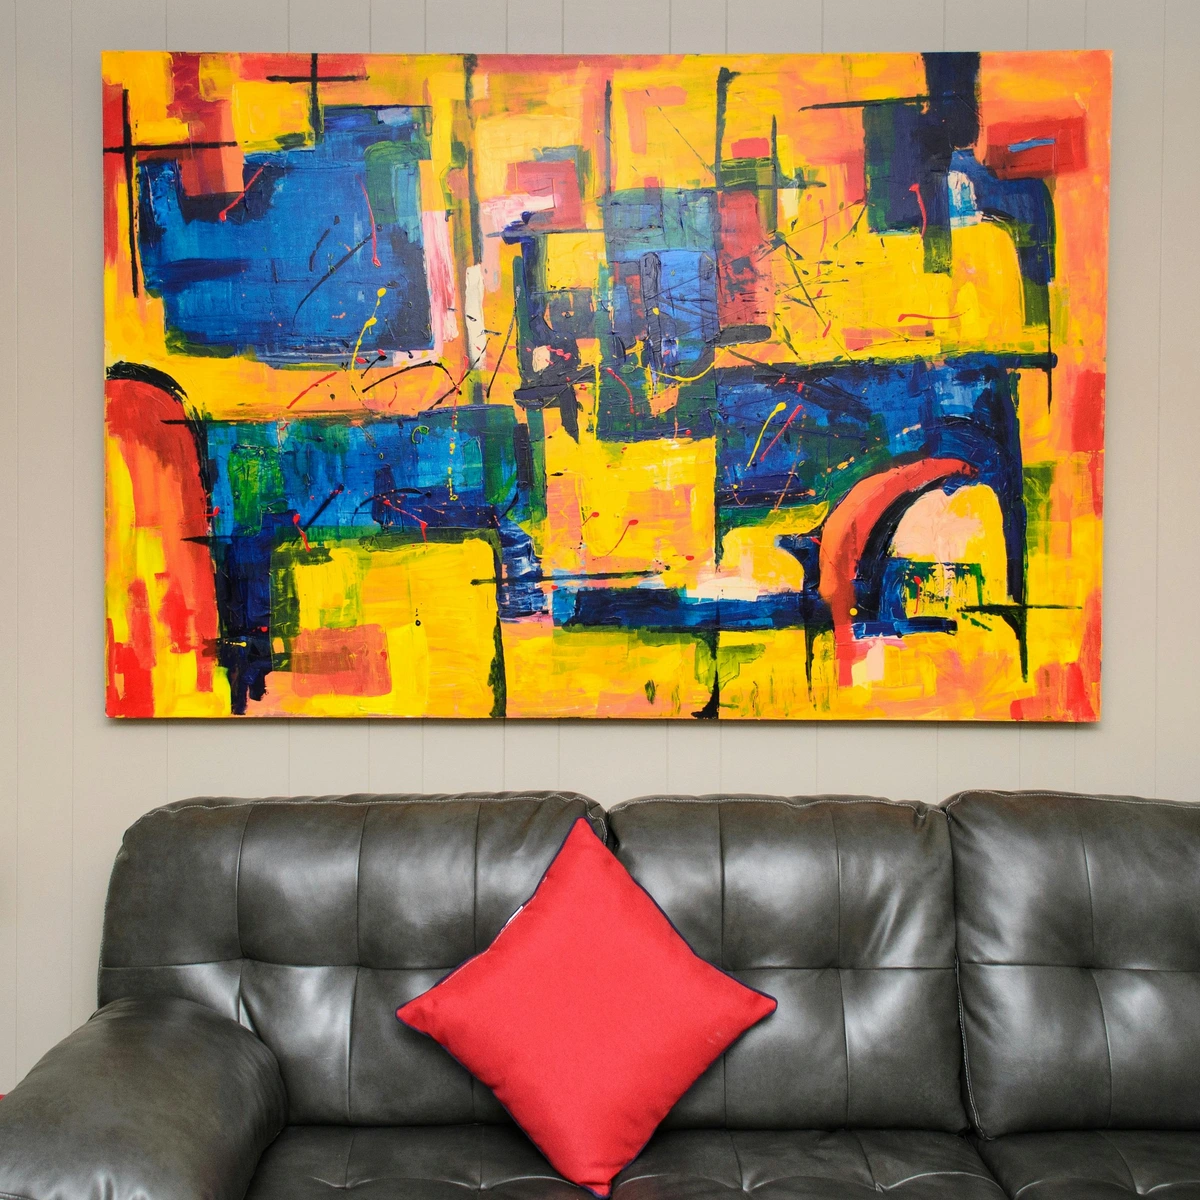
If you've been on the fence, perhaps feeling a little intimidated by the prospect, I wholeheartedly encourage you to give it a try. Start small, be patient with yourself, and embrace the learning curve. Your first attempt might not be perfect, and that's absolutely fine – it's part of the journey! But each canvas stretched will teach you something new, refining your technique, building your confidence, and deepening your understanding of the artistic process. You might just discover a new ritual that enhances your creative flow and ultimately deepens your love for art. And who knows, once you've stretched that perfectly taut, beautifully prepared canvas, you might be inspired to fill it with something truly spectacular – a masterpiece born from your own hands, from the very foundation up. Perhaps even a vibrant piece of abstract art that speaks to the soul, much like the ones you can find in my collection or explore at the Den Bosch Museum, where the handmade foundation is celebrated.
Happy stretching, and even happier painting! May your canvases always be tight, and your colors always sing.