From Earth to Canvas: My Personal Journey Making Natural Paint Pigments
Ever wondered where paint truly comes from? Join me on a deeply personal exploration of making natural paint pigments from the very earth beneath our feet. Discover the magic, the mess, and the profound connection to art's ancient roots.

From Earth to Canvas: Crafting Your Own Natural Paint Pigments – A Comprehensive Guide
There's a quiet rebellion stirring in my studio, a a palpable pull back to the very earth itself, to the raw, untamed source of every glorious color. While I'm deeply grateful for the incredible conveniences of modern art supplies, my mind often wanders to a time before tubes, before synthetic hues – a time when art was quite literally born from the ground beneath our feet. This primal connection isn't just a fleeting thought; it's a deep-seated fascination that ignited my personal journey into making natural paint pigments. It’s a path that is undeniably messy, frequently humbling, but profoundly rewarding, anchoring my artistic practice to art’s ancient, rhythmic heartbeat. And, if I'm being completely honest, transforming dirt into vibrant, expressive paint is just incredibly, wonderfully cool.
This isn't just another article you'll skim; it's a heartfelt invitation, a definitive guide to exploring the very essence of creation itself. We're going to unlock the earth's hidden palette and transform it into expressive, soul-stirring art. Join me as we delve into the magic, navigate the unique challenges, and discover the immense satisfaction of crafting your own colors, echoing the timeless traditions of countless artists who came before us. By the end of this journey, you’ll not only have a deeper understanding of color but also a tangible connection to the earth beneath your feet.
The Unseen Value of Homemade Colors
There’s a profound, almost spiritual satisfaction in consciously stepping away from the sterile aisles of a commercial art supply store and directly engaging with the earth as your primary palette. This deeper connection, this hands-on communion with nature, isn't merely romantic or nostalgic; it yields tangible, far-reaching benefits that enrich both your art and your life in unexpected ways. It’s about more than just aesthetics; it's about a holistic enrichment that touches creativity, well-being, and even our planet.
The Historical Echo: A Journey Through Time with Pigments
Before we dive into the nitty-gritty of collecting and crafting, let's take a moment to acknowledge the profound history embedded in every natural pigment. For millennia, artists relied solely on the earth's bounty – crushed minerals, vibrant clays, and extracted plant dyes – to create their masterpieces. For millennia, artists across every continent relied solely on the earth's breathtaking bounty – crushed minerals, vibrant clays, and meticulously extracted plant dyes – to create their masterpieces. Think about the stark, powerful ochre handprints adorning the ancient cave walls of Lascaux and Altamira, or the exquisite, almost otherworldly blues of ancient Egyptian frescoes, meticulously crafted from ground lapis lazuli. Consider the luminous, rich reds that gave Renaissance altarpieces their sacred glow, or the intricate, symbolic patterns of Indigenous American pottery, each hue speaking volumes about culture and cosmology. From the profound greens of Mayan murals derived from malachite, to the deep, stable blacks of African rock art made from charcoal and iron oxides, natural pigments have been the silent, yet most eloquent, narrators of human history and artistic evolution across diverse civilizations.
This journey we're embarking on isn't just about the mechanics of making paint; it's about forging a tangible connection with that unbroken, ancient lineage. It’s about understanding the astounding ingenuity and resourcefulness of our ancestors, and appreciating the enduring, almost mystical power of these elemental colors to tell stories that transcend time, language, and culture. It's a humbling thought, isn't it? That the very dirt beneath our feet, the plants reaching for the sun, and the rocks carved by millennia of geological forces once held, and still hold, the boundless potential for such profound expression, echoing across cultures and millennia. It makes me feel like a tiny, yet significant, part of a grand, ongoing conversation.
The Allure of Earthly Hues: Why Natural Pigments Call to Me
Why Bother with Dirt? My Personal Connection to Pigment
I know what you're probably thinking, and believe me, I ask myself this often, usually when I'm knee-deep in mud or painstakingly grinding a stubborn rock into a fine powder: "Why go through all that hassle when I can just buy a perfectly good tube of paint?" And it's a fair question! But the truth is, for me, there's an undeniable magic to it, a profound resonance. It's about understanding the very essence of color, of taking something utterly raw and transforming it, with my own hands, into something expressive and alive. It’s a bit like learning about the history of art, but through a deeply tactile, visceral experience.
This process, this patient alchemy, makes me appreciate every single tube of commercial paint I own in a new way. More importantly, it imbues my abstract art with an entirely new layer of meaning, a story etched deep into the pigment itself. It's a powerful connection, a primal link to the very first artists who smeared ochre on cave walls, echoing humanity's earliest expressions across millennia. This tangible connection to art history, felt literally in my hands, is a profound anchor in my practice. It’s not just about mixing color; it’s about participating in a universal human desire to create, to leave a mark, to tell a story that transcends time. Every scoop of clay, every methodical grind of a rock, feels like a quiet conversation with those ancient creators, a shared secret whispered across the ages. This tangible connection, this slow deliberate process, is what truly sets handmade pigments apart, giving each work a soul that echoes its origins.
There's a deep, quiet satisfaction in knowing the origin story of your colors. It's a slower, more deliberate process, a stark contrast to the instant gratification of modern art supplies, like the ones highlighted in discussions around the history of acrylic painting. As someone who often explores the emotional language of color in abstract art, connecting to the raw, untamed source of those colors feels incredibly authentic, almost essential.
But beyond the personal connection, there are broader reasons why delving into natural pigments feels so right in this modern age.
The Health-Conscious Choice: Safer Materials for the Studio
It's a stark reality that many modern art materials, particularly certain synthetic pigments and solvents, come with health warnings. Consider cadmium pigments, often used for vibrant reds and yellows, or cobalt pigments for intense blues – while beautiful, they contain heavy metals that require careful handling and disposal. Similarly, many conventional solvents used in oil painting contain volatile organic compounds (VOCs) that can cause respiratory issues and headaches. It's a stark reality that many modern art materials, particularly certain synthetic pigments and solvents, come with health warnings, and rightly so. Consider cadmium pigments, often used for vibrant reds and yellows, or cobalt pigments for intense blues – while undeniably beautiful, they contain heavy metals that require careful handling and responsible disposal. Similarly, many conventional solvents used in oil painting contain volatile organic compounds (VOCs) that can cause respiratory issues, headaches, and even more severe health problems with prolonged exposure. Even seemingly innocuous materials like some acrylics can release harmful fumes during certain applications.
While it's crucial to acknowledge that some natural pigments (which we'll discuss later) can indeed be toxic, a significant number of earth and plant-based colors are inherently safer to work with, especially when processed with proper care and awareness. This conscious shift towards non-toxic or low-toxicity materials fundamentally transforms my studio environment, significantly reducing exposure to these potentially harmful substances. For me, knowing that the vibrant hues I'm breathing in or getting on my skin are derived directly from nature, and that with proper handling, they pose minimal risk, brings a profound sense of peace and clarity to my creative practice. It's about nurturing my physical and mental well-being alongside my art, fostering a truly sustainable and healthy space for uninhibited creativity.
The Eco-Conscious Palette: Sustainability in Art
In a world increasingly aware of its ecological footprint, choosing natural pigments isn't just a trend; it's a small, yet profoundly significant, step towards cultivating a more sustainable and ethical art practice. By embracing the earth's palette, we are actively reducing our reliance on often energy-intensive industrial processes, harsh synthetic chemicals, and frequently, non-renewable resources that contribute significantly to pollution and resource depletion. Think critically about the pervasive microplastics found in some modern acrylics, which can wash into our waterways, or the complex, energy-intensive production of many synthetic hues that contribute to carbon emissions. These issues can be explored further in guides like the best eco-friendly art supplies for conscious artists.
With natural pigments, especially those responsibly foraged and processed with mindfulness, we elegantly circumvent many of these pressing environmental concerns. We embrace a truly regenerative and respectful approach to our materials, minimizing our impact. This approach aligns perfectly with the growing "slow art" movement, which encourages artists to thoughtfully engage with their materials, deeply understand their origins, and consciously minimize their environmental footprint. For me, it's about respecting the very earth that gifts us these incredible colors, and giving back by treading lightly. This practice often means a significant reduction in waste, as many foraged materials come with minimal or no packaging, and the processing often yields fewer detrimental byproducts than industrial manufacturing, contributing to a truly circular artistic economy that feels deeply connected to nature's cycles.
The Mindful Process: A Return to Basics
There’s an undeniable, almost spiritual mindfulness inherent in the entire process of making natural pigments – from the initial act of foraging and meticulous processing, all the way to the final stage of binding. It literally forces you to slow down, to observe with acute attention, and to connect with your materials on a fundamental, elemental level. I often find myself utterly lost in the hypnotic rhythm of grinding, the subtle, almost magical shifts of color during levigation, or the patient, almost tender coaxing of binder into powder. It’s more than just a task; it's a deep meditation, a cherished ritual that consistently brings me back to the core of what art-making is truly about – a practice steeped in ancient traditions.
This deliberate, hands-on creation stands as a profound counterpoint to the relentless, fast-paced digital world we inhabit. It's almost a quiet rebellion in its simplicity, offering a tangible, deeply grounding experience in a vast sea of fleeting pixels and endless notifications. I find myself utterly absorbed, pulled effortlessly into the present moment by the rhythm of the work, losing all track of time. There's a deep, almost meditative quality to foraging, to the physical act of crushing, and the meticulous process of binding. It feels like a profound return to basics, a deliberate deceleration that allows for genuine connection – not just with the materials themselves, but with my inner self. It's a practice steeped in ancient traditions, a quiet acknowledgment of the hands that shaped art long before the advent of industrial processes, offering a profound sense of peace, focus, and inner calm. This mindful engagement can extend to other aspects of an artist's practice, too, much like how one might approach cleaning and caring for your paint brushes – with intention, respect for the tools, and a quiet reverence for the craft.
The Unique Aesthetic: Hues Only Nature Can Create
Natural pigments, by their very nature, offer a subtle, nuanced, and truly unique palette that often stands in stark contrast to their synthetic counterparts. They possess a certain undeniable depth, an inherent earthiness, and sometimes a surprising, organic vibrancy that is genuinely difficult to replicate artificially. Many exhibit distinctive characteristics like natural granulation – where pigment particles separate and settle unevenly in washes, creating a beautifully mottled, almost sandy texture, often seen in genuine ultramarine or viridian hues. This granulation adds incredible texture and visual interest, creating micro-landscapes within your paint application.
Others showcase a specific translucency that allows for luminous layering and subtle, breathable glazes, akin to the historical sienna or umber pigments used by the Old Masters. This isn't just about color; it's about light and depth. Each batch is a singular entity, a direct reflection of its source, imbued with the geological or botanical history of its origin, giving your artwork an inimitable character and an undeniable, tangible connection to the natural world. Furthermore, you might encounter effects like flocculation, where pigment particles clump together in a wash, creating visible clusters of color, or a natural variation in opacity versus transparency, allowing for a richer range of expressive possibilities.
This inherent variability, while sometimes presenting minor challenges for absolute consistency across batches, is precisely what opens up a world of artistic possibilities. It encourages a more experimental and responsive approach to painting, celebrating the beautiful imperfections and the unique, unrepeatable offerings of nature. It means your art will literally carry the fingerprint of the earth.
Natural vs. Synthetic Pigments: A Quick Comparison
To truly appreciate the profound journey of natural pigment creation, it's incredibly helpful to first understand the broader landscape of paint itself. By comparing natural pigments with their modern, synthetic cousins, we can highlight their unique strengths, characteristics, and the distinct artistic experience each offers. It's not about declaring one superior, but understanding their individual merits and choosing what aligns best with your artistic vision and values. Here's how they stack up:
Feature  | Natural Pigments | Synthetic Pigments |
|---|---|---|
| Source | Earth (minerals, clays), plants, insects | Petroleum-based, chemical synthesis |
| Color Range | Earthy, nuanced, sometimes muted, specific to source | Vast, bright, often uniform, consistent |
| Lightfastness | Varies greatly (earth usually excellent, plant often poor) | Generally very good (many exceptions) |
| Toxicity | Varies (some minerals toxic, research is key) | Varies (some toxic, often clearly labeled) |
| Processing | Labor-intensive, hands-on, traditional | Industrial, consistent, laboratory-controlled |
| Environmental Impact | Minimal sourcing, local, sustainable (if done responsibly) | Resource extraction, chemical waste (varies by pigment) |
| Cost | Often free for raw material, time-intensive labor | Varies from affordable to very expensive |
| Drying Time | Highly variable depending on binder and pigment type | Generally consistent by binder, some accelerators |
| Binding Compatibility | Excellent with traditional and modern binders | Excellent with modern binders, less so traditional |
| Historical Significance | Basis of all art for millennia, profound connection | Modern innovation, widely adopted since 20th century |
| Particle Size | Often variable, can be coarse or fine, impacts texture | Highly uniform, micron-controlled, designed for smoothness |
| Chemical Purity | Contains trace minerals, organic matter, geological nuances | Chemically pure, synthesized for consistency |
| Batch Consistency | Unique variations per batch, reflects source | High consistency, uniform color and performance |
Setting Up Your Pigment Lab: Safety First!
Before we embark on the exciting journey of sourcing and processing, let's talk about setting up your workspace. This isn't just about efficiency; it's about safety. Working with raw materials, especially powders, requires a bit of foresight.
Essential Safety Gear: Your Personal Protection
Always prioritize your health. Fine dust particles from grinding, or potential irritants from certain plant or mineral sources, can be hazardous if inhaled or absorbed through the skin.
Gear Type | Purpose | Notes |
|---|---|---|
| Dust Mask (N95 or better) | Protects lungs from inhaling fine pigment particles. | Absolutely non-negotiable for any dry grinding or sieving. |
| Safety Goggles | Shields eyes from dust, splashes, and flying debris during crushing. | Crucial, especially during initial rock breaking or vigorous mixing. |
| Gloves | Protects skin from irritants, stains, and potential toxins. | Nitrile or heavy-duty rubber gloves are ideal. |
| Apron/Old Clothes | Prevents stains on clothing, which are often permanent. | Embrace the mess, but protect your everyday wear! |
| Dedicated Tools & Containers | Avoids cross-contamination with food or household items. | Never use pigment tools for cooking or eating. |
| First-Aid Kit | For minor cuts, scrapes, or irritations. | Always good to have on hand, including eye wash for pigment dust. |
| Emergency Contacts | List of emergency numbers and relevant medical information. | Crucial for solo work or in remote foraging locations. |
Workspace Ventilation: Breathing Easy
A well-ventilated area isn't just recommended; it's absolutely crucial. Fine dust particles from grinding, or potential fumes from certain processes (like heat treatment or plant extractions), demand proper air circulation. If you're working indoors, I always advise opening windows wide and using a fan to create a cross-breeze, ideally directing any dust or fumes away from your face and towards an open window with an exhaust fan. For more intensive processes, or if you're sensitive, investing in a small, portable fume hood or a dedicated respirator is a wise decision. Frankly, for the initial crushing and dry grinding of particularly dusty materials, working outdoors on a calm day is often the best and safest option. This minimizes airborne particles indoors and allows the wind to naturally dissipate dust away from your breathing zone.
Organization & Cleanliness: A Respectful Studio
Keeping your workspace meticulously tidy isn't just about aesthetics; it's a fundamental safety and quality control practice. This minimizes the risk of cross-contamination between different pigments, which can easily lead to muddied hues and wasted effort. I always keep a dedicated, clearly labeled bucket for pigment-related waste and a separate, damp rag specifically for wiping down surfaces. It's a small habit, but incredibly effective. A thorough cleaning after each session – wiping down all surfaces, tools, and even the floor around your work area – prevents airborne dust from settling and being re-disturbed, ensuring a clean slate for your next creative endeavor and preventing accidental inhalation of settled dust. This also extends the life of your tools and keeps your pigments pure.
By taking these precautions, your pigment-making journey will be not only rewarding but also safe and sustainable.
The Great Pigment Hunt: Sourcing My Materials
This is where the adventure truly begins! Think of yourself as an artistic scavenger. The world is full of potential pigments, just waiting to be discovered. It’s a wonderful excuse to get outside, to really look at the colors around you, to feel the textures under your feet. It's a journey of observation, a chance to see the world not just as a place, but as a vast, open-air art supply store. I've often found myself on hikes, not just admiring the scenery, but scanning the ground for that tell-tale glimmer of a promising color. It’s not just about finding material; it’s about engaging with the landscape in a new, profound way, seeing its hidden artistic potential.
Ethical Foraging: Respecting the Earth and Its Gifts
Before you grab your trowel and bucket, a crucial word on responsible foraging. Our goal is to connect with nature, not exploit it.
- "Leave No Trace": Only take what you need, and never strip an area bare. Leave plenty for the ecosystem to regenerate.
- Permits and Private Property: Always be aware of local regulations. Many parks, preserves, and private lands prohibit foraging. Research before you go.
- Contamination: Avoid areas near roadsides (car exhaust), industrial zones, or agricultural fields (pesticides). Seek out pristine, untouched locations.
- Identify Correctly: Ensure you can positively identify the material. For plants, mistaken identity can be dangerous; for earths, you want pure, vibrant material.
- Cultural Sensitivity: Be profoundly mindful of any sacred or culturally significant areas. Always respect indigenous lands and traditions, understanding that certain natural elements hold deep spiritual meaning for various cultures, and collecting from such sites may be deeply disrespectful or illegal.
- Sustainability Practices: Beyond just taking what you need, consider the long-term impact. Is this plant abundant? Is this rock formation stable? Practicing mindful harvesting ensures that these resources remain for future generations and the ecosystem.
Tools for the Trail: What I Bring on a Pigment Hunt
My foraging kit is pretty simple, but absolutely essential. It’s all about being prepared, comfortable, and respectful of the environment – treating each outing as a mini-expedition. Here’s what usually makes it into my backpack:
- Small trowel or sturdy spoon: This is my go-to for carefully digging small samples without causing undue disturbance to the surrounding ecosystem. A compact garden trowel or even a robust metal spoon works perfectly for gently loosening soil and extracting small, promising chunks of clay or soft rock. I always aim for minimal impact.
- Sturdy canvas or paper bags (multiple): Absolutely essential for collecting different materials separately and preventing cross-contamination, which can muddy your final colors. Unlike plastic, breathable canvas or paper bags help prevent moisture build-up, which can lead to mold or unwanted chemical reactions in your precious samples. Always label each bag clearly in the field with date, location, and initial observations!
- Gloves: Non-negotiable for protecting your hands from dirt, rough textures, potential irritants from certain plants or minerals, and sharp edges. I typically use sturdy gardening gloves for general digging and thicker nitrile gloves for good dexterity when handling more delicate or potentially irritating samples.
- Hand lens or magnifying glass: A tiny but mighty tool that brings the micro-world to life! This allows you to get a closer, detailed look at mineral structures, crystal formations, and the true, vibrant colors of tiny particles that might be hidden to the naked eye. It's amazing how much beauty and potential color this little lens reveals.
- Small brush: A soft paintbrush or even an old toothbrush works wonders for gently cleaning samples in the field, brushing away loose dirt and revealing the potential pigment beneath. This helps in making better collection decisions.
- Notebook and pencil (or waterproof field notebook): Crucial for recording vital data on the spot: the exact location (GPS coordinates if possible, or detailed landmarks), date of collection, geological observations (soil type, surrounding rocks, vegetation), weather conditions, and initial impressions of potential colors. This meticulous documentation is invaluable for future reference and for understanding the context and characteristics of your pigments.
- Water bottle: Essential for staying hydrated, of course! But also, a little water can be used to do a quick wet test on a sample in the field. Wetting the material often deepens the color significantly, giving you a much better idea of its true, vibrant hue, rather than its dusty, dry appearance.
- First-aid kit: A non-negotiable safety item! Minor cuts, scrapes, or insect bites can happen, especially when you're exploring off the beaten path. Better safe than sorry.
- Small chisel or rock hammer (for mineral foraging): If you're venturing into harder mineral collection (always with appropriate permits and safety gear, of course), a small geological hammer and chisel can be incredibly useful for extracting samples. However, always exercise extreme caution and wear eye protection.
This kit isn't just about collecting; it's about thoughtful engagement. It allows me to observe, identify, and gather respectfully, turning each hunt into a mini-expedition of discovery and deepening my connection to the earth's bounty.
By following these guidelines, your pigment hunt becomes an act of stewardship, not just collection, deepening your connection to the earth's bounty.
Where to Begin Your Search: A Treasure Map for Artists
So, you've got your ethical hat on and your trusty trowel in hand. But where exactly do you go? While a detailed geological map would be amazing, most of my best finds have come from simple observation and a bit of luck, coupled with a growing understanding of what to look for. Here are some prime locations to start your artistic treasure hunt:
- Exposed Earth: Look for riverbeds, stream banks, road cuts, construction sites (with permission!), and areas of recent erosion. These are natural windows into the earth's colored layers, revealing ancient geological processes.
- Cliffs and Rock Formations: Often reveal streaks or veins of different colored clays and minerals, exposed by natural forces.
- Garden Beds & Farm Fields: Sometimes, a freshly tilled garden or field can unearth unexpected ochres or clays. Always ask a landowner for permission before collecting!
- Walking Trails & Hiking Paths: Keep an eye on the exposed soil along trails, especially after rain, which can intensify colors. Just remember to stick to established paths and practice "leave no trace."
- Deserts & Arid Regions: These areas are often incredibly rich in iron oxides, leading to stunning reds, yellows, and oranges in the exposed soil, as minimal vegetation allows the earth's true colors to shine.
Understanding Soil Composition: What Makes the Earth Colorful?
The vibrant hues we seek in earth pigments are primarily due to the presence of mineral oxides, especially iron oxides. These compounds are incredibly common and stable, making them ideal natural colorants.
Mineral Oxide | Common Colors Produced | Notes |
|---|---|---|
| Hematite | Deep Reds, Red-Browns, Black | Very common, gives ochre its reddish tones. |
| Limonite | Yellows, Yellow-Browns | Hydrated iron oxide, often transforms into hematite when heated. |
| Goethite | Yellows, Ochres | Another form of iron oxide, contributes to yellow earth pigments. |
| Manganese Dioxide | Dark Browns, Blacks, Greenish-Browns | Found in umbers, contributes to their darker, cooler tones. |
| Clay Minerals | Whites, Greys, Pale Hues | Kaolinite, illite, and smectite are common clay types; they can lighten or mute colors significantly and provide body. |
| Organic Matter | Earthy Browns, Greys, sometimes Blacks | Decomposed plant and animal material, contributes to darker, richer soil colors, but can be less stable. |
So, you've got your ethical hat on and your trusty trowel in hand. But where exactly do you begin your search? While a detailed geological map would be a dream come true, most of my best finds have come from simple, keen observation and a bit of luck, coupled with a growing, intuitive understanding of what to look for. It's about developing an artist's eye for the nuances of the landscape. Here are some prime locations to start your artistic treasure hunt:
- Exposed Earth: These are natural windows into the earth's colored layers, often revealing ancient geological processes. Look for riverbeds, stream banks, road cuts (always with extreme caution and safety in mind!), construction sites (with explicit permission from landowners or project managers!), and areas of recent erosion. These are often rich hunting grounds.
- Cliffs and Rock Formations: These natural sculptures often reveal vibrant streaks or distinct veins of different colored clays and minerals, exposed over time by natural forces like wind and water.
- Garden Beds & Farm Fields: Sometimes, a freshly tilled garden or an actively farmed field can unearth unexpected ochres or clays that have been hidden beneath the surface. Always, always ask a landowner for explicit permission before collecting anything from private property!
- Walking Trails & Hiking Paths: Keep a keen eye on the exposed soil along established trails, especially after rain, which can dramatically intensify and reveal colors. Just remember to stick to marked paths and strictly practice "leave no trace" principles.
- Deserts & Arid Regions: These unique environments are often incredibly rich in iron oxides, leading to stunning, vibrant reds, yellows, and oranges in the exposed soil. The minimal vegetation in these areas allows the earth's true, unadulterated colors to truly shine through.
Remember, the key is observation and patience. The earth isn't always shouting its colors; sometimes, it's a subtle, almost silent whisper you need to patiently tune into. And sometimes, the most unassuming, humble spot can yield the most incredible, unexpected hue. It's a journey of quiet discovery.
Earth Pigments: The Original Palette
My absolute favorite, and probably the easiest to start with, are earth pigments. These are simply colored clays, ochres, and iron oxides found in soil. You can find them almost anywhere with a bit of geological luck! I remember hiking near my childhood home once, and noticing this incredible vein of deep red clay – it looked like something out of a geological textbook. I immediately knew it was calling to become paint. These are the pigments that adorned ancient cave walls, the foundational palette of humanity. Look for areas with exposed rock, erosion sites, dried riverbeds, fresh landslides, glacial deposits, or even construction sites (with permission, of course!) as these can reveal geological layers rich in color. Ancient riverbeds are often fantastic, as water erosion exposes different strata of earth. I've found some of my most vibrant ochres in unassuming road cuts where the layers of soil are laid bare, or even in natural clay deposits along certain coastlines. The key is observation: truly looking at the nuances of the earth beneath your feet, rather than just walking over it. Think like a geologist, but with an artist's eye for hue.
What I look for is quite specific, and it's a joy to train my eye for these details:
- Vibrant colors: Don't just settle for brown! Actively look for rich reds, sunny yellows, fiery oranges, and even subtle purplish hues. Sometimes, even understated greys, soft blues, or unique greens can be incredibly beautiful and yield surprising results. The intensity of the color often reveals the concentration of the desired mineral oxides, like iron or manganese.
- Clay-like texture: When wet, the material should feel a bit sticky and cohesive, not overly sandy or gritty. This indicates a good concentration of clay minerals that readily hold the color. A simple, yet effective, field test is to rub a small, damp sample between your fingers – it should feel smooth and almost buttery, not abrasive or like loose sand. A good clay content is absolutely crucial for the pigment to bind well with your chosen medium and create a smooth, consistent paint.
- Remote, uncontaminated spots: Always prioritize areas far from heavy foot traffic, agricultural fields (which often use pesticides), industrial zones, or road runoff (which can contain heavy metals). We are seeking nature's best – pure, uncontaminated material. Always be respectful of private property and local regulations when foraging. The cleaner and more pristine the source, the purer and more vibrant your pigment will ultimately be. Contamination can drastically affect the vibrancy, longevity, and even the safety of your handmade pigments.
Testing for Pigment Potential in the Field
Before I commit to collecting a larger sample, I do a few quick field tests to gauge its potential. This saves me a lot of time and effort back in the studio, preventing me from hauling home a bag of glorified dirt when I'm really after vibrant color!
- Wet Test: This is my go-to. Rub a small, damp sample between your fingers. Does it feel smooth and clay-like, or gritty and sandy? Smooth usually indicates finer particles and better pigment potential, as clay-rich materials often hold color better. The color also deepens significantly when wet, giving you a much better idea of its true, vibrant hue, rather than its dusty, dry appearance.
- Streak Test: If it's a harder rock or mineral chunk, try scratching it against an unglazed piece of ceramic (like the back of a tile sample, a broken pottery shard, or even a rough, lighter-colored stone). The color of the streak can be very different from the color of the rock itself, indicating the true pigment within. This is how geologists often identify minerals, and it's incredibly useful for artists too.
- Rub Test on Paper: Take a small, damp sample and rub it vigorously onto a piece of plain white paper or a smooth, light-colored rock. This helps assess its tinting strength and how easily the color transfers. A strong, clear mark is a good sign.
- Smell Test: While not always reliable for color, some clays have a distinct earthy, almost metallic smell when wet, indicating rich mineral content. It's an intuitive cue that I've learned to trust over time.
These simple yet effective field tests are my initial screening process, helping me decide if a particular material is truly worth the effort of bringing home and committing to the intensive processing. It’s like a quiet conversation with the earth, asking it to reveal its hidden secrets and potential before I commit to a longer-term, more intimate relationship with its colors.
Here are some common earth pigments and the colors they yield, each with its own fascinating story and chemical makeup:
Pigment Type | Chemical Composition | Notes | |
|---|---|---|---|
| Ochre | Yellows, Reds, Browns | Hydrated Iron Oxide (Goethite, Limonite) | Widely available globally, excellent lightfastness and opacity. Forms the core of many ancient palettes. Yellow ochre is hydrated, red ochre is often calcined (heated) yellow ochre. |
| Sienna | Yellow-Browns, Red-Browns | Hydrated Iron Oxide & Manganese Dioxide | Naturally occurring, often found in Italy. More transparent than ochre, becoming reddish-brown when calcined (burnt Sienna). |
| Umber | Dark Browns, Greenish-Browns | Iron Oxide & Manganese Dioxide | Contains a higher proportion of manganese dioxide, giving it a distinctive greenish undertone. Known for good drying properties and opacity. Turns a rich dark brown when burnt (Burnt Umber). |
| Terra Verde (Green Earth) | Soft Greens | Glauconite or Celadonite | Often semi-transparent. A subdued, natural green, historically used for underpainting flesh tones in frescoes and tempera paintings. |
| Clay | Whites, Greys, Reds, Pale Hues | Various Aluminosilicates, Kaolin for white | The color depends heavily on trace mineral content. Kaolin yields pure whites, while other clays offer a vast range of subtle, earthy tones. |
| Hematite | Deep Reds, Blacks | Iron Oxide (Fe2O3) | A common iron oxide mineral, often found in sedimentary rocks. Known for its strong tinting power and stability. |
| Limonite | Yellow-Browns, Ochre | Hydrated Iron Oxide (FeO(OH)·nH2O) | Often found alongside hematite. It's essentially a hydrated form of iron oxide, and heating it (calcining) will drive off the water to produce red ochre. This pigment tends to be semi-transparent. |
| Mica | Shimmering White, Silvery, Pale Hues | Silicate mineral (e.g., Muscovite, Biotite) | While not a colorant itself, finely ground mica adds a beautiful shimmer and luminosity to paints, often used as an extender or for special effects. |
Plant Pigments: A Fleeting Beauty, a Vibrant Challenge
Oh, plant pigments! These are a whole different beast. For centuries, long before synthetic dyes, plants were the primary source of color for textiles, inks, and even some early paints across countless cultures. Think of the rich blues of Mayan textiles from indigo, the vibrant reds of Renaissance tapestries from madder, or the golden yellows of traditional East Asian silks from turmeric and saffron. They're often less lightfast than earth pigments (meaning they fade over time), but their initial vibrancy is breathtaking. Think of the deep blues of indigo, the sunny yellows of turmeric, or the rich purples from berries. It's a much more involved process, often requiring a bit of chemistry (don't worry, basic chemistry!). We're usually extracting a dye rather than a solid, particulate pigment, which presents its own unique set of challenges and rewards. The beauty of plant pigments is their incredible vibrancy, but their Achilles' heel is often their fugitive nature – they can fade quickly with exposure to light. This makes working with them a delicate dance of chemistry and patience, a true test of an artist’s commitment to capturing fleeting beauty. It’s a challenge I find deeply rewarding, pushing me to understand color on a molecular level. It's a reminder that not all beauty is meant to last forever, and sometimes, the ephemeral nature of a color adds to its poignant charm.
Pigment vs. Dye: Understanding the Crucial Difference for Plant Colors
It's important to clarify the distinction when working with plant materials, as this lies at the heart of their unique processing challenges. A pigment is an insoluble, particulate solid that retains its color when mixed into a binder. Think of microscopic colored rocks or finely ground earth. These particles essentially sit on the surface of your substrate when painted. A dye, on the other hand, is a soluble colorant that dissolves in a liquid (like water or alcohol) and then penetrates and stains a material by chemically bonding with its fibers or surface. When we extract colors from plants, we're typically getting a dye, which if used directly, would simply wash away from a canvas or be absorbed into the paper, rather than sitting as a paint layer.
To transform a soluble dye into a usable, stable paint pigment, we often need to create a lake pigment. This involves using a mordant to chemically precipitate the soluble dye onto an inert, insoluble substrate (like alum or chalk). The mordant acts as a crucial chemical bridge, fixing the color molecules to the substrate particles, making the entire complex insoluble. This transformed substance then behaves like a true pigment, capable of being dispersed in a binder and applied as paint. This process is where the real alchemy of plant-based colors lies, attempting to capture their fleeting beauty in a stable form for artistic expression. This transformed substance then behaves like a true pigment, capable of being dispersed in a binder and applied as paint. This process is where the real alchemy of plant-based colors lies, attempting to capture their fleeting beauty in a stable form for artistic expression. It's a fascinating blend of art and basic chemistry, transforming the soluble into the insoluble, the ephemeral into the enduring.
The Science of Mordants: Anchoring Fugitive Colors
A mordant is essentially a chemical bridge, from the Latin mordere, "to bite." It creates a bond between the soluble dye molecules from the plant and an insoluble substrate, causing the dye to precipitate out of the liquid as a colored particle – our lake pigment. Without a mordant, many plant dyes would simply wash away or fade rapidly, making them unusable as permanent art materials.
Mordant Type | Common Uses | Notes on Safety & Application |
|---|---|---|
| Alum (Potassium Aluminum Sulfate) | General purpose, brightens colors | Most common and relatively safe. Yields clear, vibrant hues. Often used with madder and cochineal. Dispose of responsibly, but generally low toxicity. |
| Iron (Ferrous Sulfate) | Dulls, darkens colors, creates olives/greys | Can "sadden" or mute colors significantly. Can sometimes weaken fibers or pigments, so use sparingly. Iron is less toxic but can irritate skin. |
| Copper (Copper Sulfate) | Shifts colors towards green/blue, brightens greens | Handle with care, as copper salts are more toxic than alum and iron. Use gloves and good ventilation. |
| Tin (Stannous Chloride) | Brightens and intensifies colors | Produces very vibrant, clear colors, especially reds and oranges. Quite toxic, not recommended for beginners or without proper safety gear and disposal protocols. |
| Chalk (Calcium Carbonate) | Used as an inert base, helps neutralize pH | Often used in conjunction with other mordants as the primary substrate onto which the dye precipitates, making it denser and easier to settle. Generally safe and non-toxic, and readily available. |
| Tannins (from plant sources) | Natural mordant, especially with iron. Dulls colors. | Found in oak galls, tea, sumac. Can be used as a pre-mordant or in combination with metallic salts. Generally non-toxic but can stain. |
It's a delicate balance, and experimentation is key to understanding how different mordants interact with various plant dyes to produce a stable, usable pigment. Always research specific mordant properties and follow safety guidelines. Remember that the pH of your water can also influence the mordanting process, adding another layer to this intricate chemistry.
Foraging Specific Plants for Pigments: A Seasonal Quest
Foraging for plant pigments can be a seasonal quest, dependent on local flora and their peak color-yielding times. It's a wonderful way to connect with the cycles of nature and understand how different plants contribute to the vibrant tapestry of our world.
Plant Part | Examples of Plants | Colors Often Yielded | Notes |
|---|---|---|---|
| Roots | Madder, Turmeric, Bloodroot | Reds, Oranges, Yellows | Often yield deep, rich colors. Requires careful harvesting. |
| Leaves & Stems | Indigo, Woad, Spinach, Nettles | Blues, Greens, Yellows | Varying colorfastness. Indigo and woad require fermentation. |
| Flowers & Petals | Marigold, Coreopsis, Hibiscus, Rose | Yellows, Oranges, Pinks | Can be highly vibrant but often more fugitive. Delicate extraction. |
| Bark | Oak, Birch, Apple | Browns, Yellows, Reds | Requires simmering. Can be very colorfast. Ethical sourcing key. |
| Berries | Elderberry, Blackberry, Pokeberry | Purples, Reds, Blues | Tend to be less lightfast, good for ephemeral works or inks. |
| Nuts & Hulls | Walnut, Acorn | Browns, Greys | Excellent for deep, earthy browns and blacks, often requiring extended simmering. |
| Lichens | Yellows, Oranges, Browns | Requires specific (often ammonia-based) fermentation processes. Ethical sourcing is paramount, as some lichens are slow-growing or protected. |
I've dabbled in extracting blues from red cabbage (surprisingly effective, if a bit pH-sensitive!) and tried to get decent yellows from onion skins. The results are always a surprise, and that's half the fun. It makes me think about how my approach to color mixing can extend beyond the traditional palette, pushing boundaries with these ephemeral hues. What I've learned is that even if a plant pigment isn't perfectly lightfast, it can still serve a profound purpose in studies, sketchbooks, or works intended for digital reproduction where permanence is less of a concern. It encourages a different mindset, one that embraces the transient beauty of nature.
The pH Factor in Plant Colors: A Hidden Variable
Some plant pigments are natural pH indicators, meaning their color changes depending on the acidity or alkalinity of their environment. Red cabbage, for example, produces a beautiful purple in neutral conditions, but shifts to pink in acidic solutions and blue/green in alkaline ones. This can be a challenge but also a fascinating artistic opportunity! Understanding and controlling the pH of your dye bath and subsequent lake pigment creation is crucial for achieving consistent and desired hues. It adds another fascinating layer of scientific artistry to the process, offering a subtle, yet powerful, manipulation of nature's inherent chemistry. Imagine creating a spectrum of reds, purples, and blues from a single cabbage, just by adjusting the pH – it's like having a secret, alchemical dial for your plant palette!
Common Plant Pigment Sources and Their Colors:
Plant Source | Primary Colors | Notes & Historical Context |
|---|---|---|
| Indigo (from Indigofera tinctoria) | Deep Blues | Historically significant across Asia, Africa, and the Americas. Requires a complex fermentation process to extract the dye. Highly prized for its strong, stable blue. |
| Madder Root (Rubia tinctorum) | Reds, Pinks, Oranges | Used since antiquity, particularly in the Mediterranean and Middle East. Requires mordants to create stable, vibrant lake pigments. Known for its earthy reds. |
| Turmeric (Curcuma longa) | Bright Yellows | Easy to extract, but often poor lightfastness, making it more suitable for temporary works or inks unless heavily mordanted. Used in traditional Indian art and textiles. |
| Woad (Isatis tinctoria) | Blues | European alternative to indigo, with a similar, though often less potent, extraction process. Used in Celtic body paint and medieval textiles. |
| Onion Skins | Yellows, Oranges | Readily available kitchen waste! Can yield decent yellows and warm oranges with proper mordants. Surprisingly versatile. |
| Red Cabbage | Purples, Blues, Pinks | A fascinating natural pH indicator. Produces purples in neutral, pinks in acidic, and blues/greens in alkaline conditions. Excellent for experimental work. |
| Logwood (Haematoxylum campechianum) | Purples, Blacks, Greys | Native to Central America. Used historically for textiles and inks, and can create good lake pigments, particularly deep purples and grays. |
| Cochineal (Dactylopius coccus) | Vibrant Reds, Crimsons | An insect-derived dye from cacti, historically vital to Mesoamerican cultures and later Spain. Yields incredibly rich, stable reds when laked with alum, and was once a major trade commodity. |
| Buckthorn Berries | Yellows, Greens | Used historically for a range of yellows and greens. The berries need to be used fresh or carefully preserved. |
Mineral Pigments: The Alchemist's Dream (and Challenge)
Now, mineral pigments are a serious step up, and frankly, often outside the realm of casual DIY for most artists, myself included. We're talking about crushing rare rocks like lapis lazuli for ultramarine blue, or malachite for green. This is less a casual foraging trip and more a dedicated (and often expensive, sometimes dangerous) pursuit. For a DIY artist like me, it's usually beyond the scope of a weekend project, though I do dream of it sometimes, imagining the ancient alchemists at work. But knowing that these existed, and were the backbone of historical painting for centuries, fills me with awe. These are the jewel-toned hues that defined masterpieces – imagine the celestial blue of the Virgin Mary's robe in a Renaissance painting, often rendered with painstakingly ground lapis lazuli (ultramarine), a pigment so precious it was worth more than gold! Or the vibrant greens of Egyptian tomb paintings derived from malachite, a copper carbonate mineral. Their stories are as rich as their colors. Imagine the painstaking process of crushing lapis lazuli, a semi-precious stone, to yield the celestial ultramarine blue that graced Renaissance madonnas. Or the discovery of cinnabar, a mercury sulfide, that gave us brilliant vermillion reds, famously used in ancient Chinese lacquerware and Roman frescoes. These pigments were not just colors; they were expressions of wealth, power, and devotion, each with a fascinating geological origin and a human history of discovery, trade, and even danger. Their very existence is a testament to humanity's enduring quest for beauty, no matter the cost. Now, mineral pigments are, I'll be honest, a serious step up in complexity, and frankly, often outside the realm of casual DIY for most artists, myself included. We're talking about crushing rare and often difficult-to-source rocks like lapis lazuli for that celestial ultramarine blue, or malachite for a vibrant, crystalline green. This is less a casual foraging trip and more a dedicated (and often expensive, sometimes dangerous) pursuit, venturing into realms that require significant geological knowledge and specialized equipment. For a DIY artist like me, it's usually beyond the scope of a weekend project, though I do dream of it sometimes, imagining the ancient alchemists at work in their labs, coaxing color from stone.
But just knowing that these existed, that they were the very backbone of historical painting for centuries, fills me with profound awe. These are the jewel-toned hues that defined masterpieces – imagine the celestial, luminous blue of the Virgin Mary's robe in a Renaissance painting, often rendered with painstakingly ground lapis lazuli (ultramarine), a pigment so precious it was literally worth more than gold! Or the vibrant, almost living greens of Egyptian tomb paintings derived from malachite, a copper carbonate mineral. Their stories are as rich and captivating as their colors.
Imagine the painstaking process of crushing lapis lazuli, a semi-precious stone, to yield the celestial ultramarine blue that graced Renaissance madonnas. Or the discovery of cinnabar, a mercury sulfide, that gave us brilliant vermillion reds, famously used in ancient Chinese lacquerware and Roman frescoes. These pigments were not just colors; they were expressions of wealth, power, and devotion, each with a fascinating geological origin and a human history of discovery, trade, and even danger. Their very existence is a testament to humanity's enduring quest for beauty, no matter the cost. When I look at historical paintings, I often find myself thinking not just about the composition, but about the very earth from which those colors sprang – a silent, geological narrative unfolding on canvas, connecting us directly to geological time.
Notable Mineral Pigments and Their Historical Significance:
Mineral Pigment | Primary Color | Historical Use | Notes |
|---|---|---|---|
| Lapis Lazuli | Ultramarine Blue | Ancient Egypt, Renaissance Europe, highly prized | Ground from a semi-precious stone, incredibly expensive |
| Azurite | Blue | Medieval Europe, often mistaken for or used with lapis | Copper carbonate, can oxidize to green over time |
| Malachite | Green | Ancient Egypt, Renaissance, often seen in frescoes | Copper carbonate, distinct vibrant green |
| Cinnabar | Vermillion Red | Ancient China, Roman Empire, highly toxic | Mercury sulfide, replaced by less toxic synthetics |
| Realgar | Orange-Red | Ancient Egypt, China, highly toxic | Arsenic sulfide, rarely used today due to toxicity |
| Orpiment | Yellow | Similar to Realgar in toxicity and use | Arsenic sulfide, a vivid, deep yellow |
| Smalt | Blue | Ground cobalt glass, popular in medieval and Renaissance Europe | A glass-based pigment, less vibrant than lapis, but more affordable |
| Verdigris | Green | Copper acetate, historically used for brilliant greens | Can be corrosive and react with other pigments, handle with extreme care and ensure proper ventilation. |
| Orpiment | Vivid Yellow | Arsenic sulfide, used in ancient Egypt and China | Highly toxic, known for its brilliant yellow, rarely used today due to health risks. |
| Realgar | Orange-Red | Arsenic sulfide, often found with orpiment | Highly toxic, vibrant orange-red, similarly avoided in modern practice. |
A Crucial Note on Toxicity: Many historical mineral pigments are highly toxic (e.g., those containing mercury, arsenic, or lead). It's paramount to research any mineral thoroughly and exercise extreme caution – or ideally, avoid processing them yourself – if you're not an experienced chemist with proper safety equipment. My own explorations stick to the safer, earth-based materials for this very reason. I cannot stress enough: materials containing mercury (like cinnabar), arsenic (like realgar or orpiment), or lead (like lead white) are extremely hazardous and should never be processed by an amateur without specialized equipment and training. These substances can cause severe health problems, including neurological damage, organ failure, and even death. Always, always prioritize your health over a unique pigment.
Modern Considerations: Sustainability and Ethical Sourcing for Minerals
While the allure of mineral pigments is undeniable, modern artists must also consider the profound environmental and ethical implications of sourcing these materials. Many precious minerals come from mining operations with significant ecological footprints, contributing to deforestation, water pollution, and habitat destruction. Furthermore, these operations can, unfortunately, be linked to questionable labor practices, including child labor and unsafe working conditions in various parts of the world. For these crucial reasons, many contemporary artists, myself included, advocate for and opt for high-quality, ethically sourced synthetic alternatives that meticulously replicate the beauty and performance of traditional mineral pigments without the associated harm. It’s a way to honor the past while acting responsibly and consciously in the present. The pursuit of rare mineral pigments can inadvertently contribute to destructive mining practices, environmental degradation, and sometimes, unethical labor conditions in developing countries. Therefore, many contemporary artists, myself included, choose to explore the vast array of high-quality synthetic alternatives that meticulously replicate the beauty and stability of traditional mineral pigments without the associated harm. It’s a way to engage with the spirit of historical pigments, appreciating their allure, while ensuring our artistic practice aligns with modern ethical and environmental consciousness. While the allure of mineral pigments is undeniable, modern artists must also consider the profound environmental and ethical implications of sourcing these materials. Many precious minerals come from mining operations with significant ecological footprints, contributing to deforestation, water pollution, and habitat destruction. Furthermore, these operations can, unfortunately, be linked to questionable labor practices, including child labor and unsafe working conditions in various parts of the world. For these crucial reasons, many contemporary artists, myself included, advocate for and often opt for high-quality, ethically sourced synthetic alternatives that meticulously replicate the beauty and performance of traditional mineral pigments without the associated harm. It’s a way to honor the past while acting responsibly and consciously in the present.
This conscientious approach isn't about shunning tradition, but rather about evolving it, finding new ways to create beauty responsibly and mindfully. The pursuit of rare mineral pigments can inadvertently contribute to destructive mining practices, environmental degradation, and sometimes, unethical labor conditions in developing countries. Therefore, many contemporary artists, myself included, choose to explore the vast array of high-quality synthetic alternatives that meticulously replicate the beauty and stability of traditional mineral pigments without the associated harm. It’s a way to engage with the spirit of historical pigments, appreciating their allure, while ensuring our artistic practice aligns with modern ethical and environmental consciousness. This conscientious approach isn't about shunning tradition, but rather about evolving it, finding new ways to create beauty responsibly and mindfully.
The Alchemist's Lab: Processing Your Raw Materials
Once you've got your treasures, whether it's a handful of colorful clay or a bag of plant matter, it's time to turn them into something usable. This is where the real elbow grease comes in, and honestly, it can be quite meditative. There’s a profound satisfaction in the transformation, a dance between brute force and delicate refinement. It feels like you're unlocking the color from its raw prison.
Processing Earth Pigments: Grind, Wash, Dry
This is the most straightforward, yet immensely satisfying, part of the process for earth-based materials.
- Crush: This is the initial stage, breaking down larger chunks of earth, clay, or soft minerals into smaller, more manageable pieces. For me, a heavy-duty hammer and a sturdy canvas bag or old towel are surprisingly effective for the first few blows on harder, rock-like materials. Just be sure to wear safety goggles – tiny shards can fly! For softer clays, even just breaking them up by hand can work. For larger quantities, a dedicated rock tumbler (without grit, of course) or even a sturdy, old food processor (again, dedicated solely to pigments, never for food!) can assist in this initial breakdown. There’s something deeply satisfying about the initial brute force required to crack open a promising chunk of earth, revealing the hidden color within. This is the initial stage, breaking down larger chunks of earth, clay, or soft minerals into smaller, more manageable pieces. For me, a heavy-duty hammer and a sturdy canvas bag or old towel are surprisingly effective for the first few blows on harder, rock-like materials. Just be sure to wear safety goggles – tiny shards can fly! For softer clays, even just breaking them up by hand can work. For larger quantities, a dedicated rock tumbler (without grit, of course) or even a sturdy, old food processor (again, dedicated solely to pigments, never for food!) can assist in this initial breakdown. There’s something deeply satisfying about the initial brute force required to crack open a promising chunk of earth, revealing the hidden color within. This initial stage, however rugged, sets the foundation for the delicate refinement to come, transforming the raw into the refined.
- Grind: This is perhaps the most crucial and time-consuming step for achieving true pigment quality. You want a powder so fine it feels like silk or talc between your fingers, utterly free of any grit. A robust mortar and pestle (with a ceramic, unglazed porcelain, or hard stone surface) is ideal for small batches, offering excellent control. For larger quantities or when seeking truly microscopic particles, a dedicated electric coffee grinder can achieve impressive results (again, never use it for coffee again!), or for the ultimate in fineness, a ball mill is ideal, though a more specialized piece of equipment. The finer the grind, the more surface area the pigment has, leading to a smoother paint, a more intense and luminous color, and better dispersion within your chosen binder. This stage requires immense patience, a lot of elbow grease, and sometimes a good podcast to keep you company. I often grind in stages: initial coarse grinding, then a finer grind, checking the texture regularly by rubbing a tiny pinch between my thumb and forefinger. This is perhaps the most crucial and time-consuming step for achieving true pigment quality. You want a powder so fine it feels like silk or talc between your fingers, utterly free of any grit. A robust mortar and pestle (with a ceramic, unglazed porcelain, or hard stone surface) is ideal for small batches, offering excellent control. For larger quantities or when seeking truly microscopic particles, a dedicated electric coffee grinder can achieve impressive results (again, never use it for coffee again!), or for the ultimate in fineness, a ball mill is ideal, though a more specialized piece of equipment. The finer the grind, the more surface area the pigment has, leading to a smoother paint, a more intense and luminous color, and better dispersion within your chosen binder. This stage requires immense patience, a lot of elbow grease, and sometimes a good podcast to keep you company. I often grind in stages: initial coarse grinding, then a finer grind, checking the texture regularly by rubbing a tiny pinch between my thumb and forefinger. The difference a truly fine grind makes to the final paint's intensity and smoothness is truly remarkable; it's a testament to the power of patience and dedication to craft.
- Sieve (Optional but Recommended): After initial grinding, passing your dry pigment through a fine mesh sieve (e.g., 100-200 micron screen) can remove any remaining larger particles and ensure a consistent texture before levigation.
- Wash (Levigation): This ancient and ingenious process is how we truly refine our earth pigments, removing impurities and separating different particle sizes to ensure a pure, consistent color. I begin by putting the finely ground pigment in a jar with water, giving it a vigorous shake or stir. Then, I let it settle. The principle is simple: coarser, heavier particles sink faster, while the finer, purer pigment stays suspended longer in the water. After a short period (this timing is critical and varies by material, requiring experimentation!), I carefully pour off the suspended, colored water into another jar, leaving the heaviest grit behind. I then let that second jar settle for a longer period, pour off again, and repeat the process several times. It’s like a slow, deliberate dance of gravity, eventually leaving you with a beautifully refined sludge at the bottom of the last jar. This process can be repeated numerous times until the decanted water remains relatively clear after the desired particles have settled, indicating maximum purity. Don't be discouraged if the water never seems perfectly clear; some materials have incredibly fine particles or trace impurities that are difficult to eliminate entirely. The key is to get to a point where the majority of the coarser material is removed, leaving you with a beautifully concentrated sludge. This patience in refinement truly pays off in the vibrancy and consistency of your final pigment. This ancient and ingenious process is how we truly refine our earth pigments, removing impurities and separating different particle sizes to ensure a pure, consistent color. I begin by putting the finely ground pigment in a jar with water, giving it a vigorous shake or stir. Then, I let it settle. The principle is simple: coarser, heavier particles sink faster, while the finer, purer pigment stays suspended longer in the water. After a short period (this timing is critical and varies by material, requiring experimentation and observation!), I carefully pour off the suspended, colored water into another jar, leaving the heaviest grit behind. I then let that second jar settle for a longer period, pour off again, and repeat the process several times. It’s like a slow, deliberate dance of gravity, eventually leaving you with a beautifully refined sludge at the bottom of the last jar. This process can be repeated numerous times until the decanted water remains relatively clear after the desired particles have settled, indicating maximum purity. Don't be discouraged if the water never seems perfectly clear; some materials have incredibly fine particles or trace impurities that are difficult to eliminate entirely. The key is to get to a point where the majority of the coarser material is removed, leaving you with a beautifully concentrated sludge. This patience in refinement truly pays off in the vibrancy and consistency of your final pigment. I've often found that the water after levigation, even when still slightly cloudy, can be carefully evaporated to yield a very light, delicate pigment – a surprising bonus for subtle washes! This careful separation also allows for grading of pigments into different particle sizes, yielding varied textures in your paint.
- Dry: Spread the refined sludge thinly on a non-stick surface (a glass plate, ceramic tile, or even parchment paper works well). Allow it to air dry completely, away from direct sunlight, dust, and any potential contaminants. A food dehydrator on a very low setting can also speed up this process. Once dry, you'll have your pure, natural pigment powder – a true treasure, ready for its next transformation. Store it in airtight containers to prevent moisture absorption. I prefer spreading my refined sludge on unglazed ceramic tiles or glass plates, as these materials don't leach anything into the pigment and allow for even drying. A warm, dry environment with good air circulation is ideal, but keep it out of direct sunlight to prevent potential color degradation for more delicate hues. Once fully dry – and I mean bone dry, not a speck of moisture left – the pigment will often crack into beautiful flakes or can be gently scraped into a powdery form. This pure powder is your treasure, ready for its ultimate transformation. Spread the refined sludge thinly on a non-stick surface (a glass plate, ceramic tile, or even parchment paper works well). Allow it to air dry completely, away from direct sunlight (which can sometimes degrade delicate colors), dust, and any potential contaminants. A food dehydrator on a very low setting can also speed up this process, but ensure it's dedicated solely to pigments. Once dry, you'll have your pure, natural pigment powder – a true treasure, ready for its next transformation. Store it in airtight containers to prevent moisture absorption and maintain its purity. I prefer spreading my refined sludge on unglazed ceramic tiles or glass plates, as these materials don't leach anything into the pigment and allow for even drying. A warm, dry environment with good air circulation is ideal, but keep it out of direct sunlight to prevent potential color degradation for more delicate hues. Once fully dry – and I mean bone dry, not a speck of moisture left – the pigment will often crack into beautiful flakes or can be gently scraped into a powdery form. This pure powder is your treasure, ready for its ultimate transformation. Breaking up those dried flakes back into a fine powder might require another quick grind with the mortar and pestle, ensuring you maintain that silky texture. Always store in clearly labeled, airtight containers, away from light and moisture.
Processing Plant Pigments: Extraction & Mordants
This is a more delicate dance, as we're usually extracting a dye rather than a solid, particulate pigment. The goal is to capture the fugitive color molecules and make them stable enough to use in paint.
- Extract: This is where the plant's soluble color is liberated. You'll simmer your chosen plant material (leaves, berries, bark, flowers) in distilled water to create a strong dye bath. Think of it as making a very concentrated, deeply colored, inedible tea. The temperature and duration are crucial: a gentle simmer (avoiding aggressive boiling which can degrade delicate colors) for tough materials like bark or roots might take hours, while delicate flower petals might yield their best color with a gentle, cold infusion over several days. The goal is to coax out as much color as possible without destroying the dye molecules. Some materials, like indigo, require specific fermentation or reduction processes rather than simple simmering to release their color in a usable form, adding another layer of fascinating chemistry. This is where the plant's soluble color is liberated, and it's a deeply sensory experience. You'll simmer your chosen plant material (leaves, berries, bark, flowers, even roots) in distilled water to create a strong dye bath. Think of it as making a very concentrated, deeply colored, albeit inedible, tea. The temperature and duration are crucial: a gentle simmer (avoiding aggressive boiling which can degrade delicate colors) for tough materials like bark or roots might take hours, while delicate flower petals might yield their best color with a gentle, cold infusion over several days. The goal is to coax out as much color as possible without destroying the sensitive dye molecules.
Some materials, like indigo and woad, require specific fermentation or reduction processes rather than simple simmering to release their color in a usable form, adding another layer of fascinating, ancient chemistry. Each plant is a unique puzzle, and finding its optimal extraction method is a significant part of the exciting discovery process. And let me tell you, there's nothing quite like the smell of a dye bath simmering, a rich, earthy aroma filling the studio, hinting at the color magic to come – it's a scent that connects you to millennia of textile dyeing and artistic exploration. 2. Mordant & Lake Pigment Creation: This is the tricky, chemistry-heavy bit. A mordant (from the Latin mordere, "to bite") is a substance, usually a metallic salt, that helps a dye chemically bond to a material or, in our case, to an insoluble substrate. To create a lake pigment from a plant dye, you introduce the mordant (e.g., alum, chalk) to the dye bath. The dye molecules then attach themselves to the mordant, forming an insoluble precipitate – a tiny, colored particle that we can then collect and use as a pigment. This process often requires careful pH control and patience, as you wait for the "lake" to form and settle out of the liquid. It's truly a dance of basic chemistry, transforming a soluble color into a usable, solid paint component. This is the tricky, chemistry-heavy bit where we transform a soluble dye into a stable, insoluble pigment. A mordant (from the Latin mordere, "to bite") is a substance, usually a metallic salt, that acts as a crucial chemical bridge. It helps a dye chemically bond to a material or, in our case, to an inert, insoluble substrate. To create a lake pigment from a soluble plant dye, you introduce the mordant (e.g., alum, chalk, or even iron salts) to the dye bath. The dye molecules then attach themselves to the mordant, forming an insoluble precipitate – a tiny, colored particle that we can then collect and use as a pigment. This process often requires careful pH control and immense patience, as you wait for the "lake" to form and slowly settle out of the liquid. It's truly a delicate dance of basic chemistry, transforming a fleeting, soluble color into a usable, solid paint component. Think of it as inviting the color to sit down and stay a while, rather than just passing through your medium.
A Simplified Guide to Making a Basic Lake Pigment (e.g., from Turmeric)
Let's try a simple one: turmeric, for a brilliant yellow. Remember, this is a general guide, and proportions will vary!
- Prepare Dye Bath: Simmer 1 part turmeric powder in 4-5 parts distilled water for about an hour. Strain out the turmeric solids, leaving a clear, vibrant yellow liquid.
- Prepare Mordant Solution: Dissolve 1/4 part alum (potassium aluminum sulfate) in a small amount of warm distilled water.
- Combine & Precipitate: Slowly add the alum solution to the warm turmeric dye bath, stirring constantly. You should start to see fine yellow particles (the lake pigment) forming and clouding the liquid.
- Add Alkalinity (Optional but Recommended): Sometimes, adding a tiny pinch of baking soda (sodium bicarbonate) or a few drops of lye solution (use extreme caution!) will help with the precipitation and deepen the color. Monitor the pH, as shifts can change the hue.
- Settle & Collect: Let the mixture sit undisturbed. The lake pigment particles will slowly settle to the bottom. Carefully decant the clear liquid from the top.
- Wash & Dry: Gently wash the settled pigment several times with distilled water to remove excess mordant and unbonded dye. Spread the resulting sludge thinly and allow it to air dry completely. You'll be left with a beautiful yellow lake pigment powder.
This process, while seemingly complex at first, becomes remarkably intuitive with practice. It's a tangible, hands-on way to see basic chemistry at work, transforming everyday ingredients into artistic gold. Remember, precise measurements are your friend here, especially in the initial stages. Document everything – the plant source, the mordant type, the amount, the pH, and the resulting color. This empirical approach builds your personal knowledge base for future successful batches.
More on Mordants: Crafting a Palette of Possibilities
Beyond just fixing the color, different mordants can actually shift the hue of your plant dyes, adding another layer of artistic control and experimentation. For example, an iron mordant will often "sadden" or dull colors, turning bright reds into deeper maroons or purples, and yellows into olives or greens. Alum, on the other hand, tends to brighten and clarify. It's a fascinating interplay, where a simple chemical additive can dramatically alter the final aesthetic outcome. This means you can get a surprising range of colors from a single plant source, just by varying your mordant! Beyond just fixing the color, different mordants can actually shift the hue of your plant dyes, adding another fascinating layer of artistic control and experimentation. For example, an iron mordant will often "sadden" or dull colors, transforming bright reds into deeper maroons or purples, and vibrant yellows into muted olives or forest greens. Alum, on the other hand, typically tends to brighten and clarify hues, enhancing their vibrancy. Tin mordants are known for producing particularly brilliant reds and oranges.
It's a captivating interplay, where a simple chemical additive can dramatically alter the final aesthetic outcome. This means you can get a surprising range of distinct colors from a single plant source, just by varying your mordant! It's truly like having a secret dial for your plant palette, allowing you to turn and tweak until you find that perfect, nuanced shade you envision. This level of control opens up entirely new possibilities for your artistic expression, inviting you to become a true alchemist of color.
Common Issues in Pigment Processing: What Can Go Wrong (and How to Fix It)
As with any hands-on craft, pigment making has its share of challenges. Don't be discouraged by initial setbacks; they're part of the learning process!
Issue | Cause | Solution |
|---|---|---|
| Gritty Paint | Insufficient grinding or levigation. Coarse particles remain. | Grind longer and finer. Repeat levigation steps more times. |
| Dull/Weak Color | Impurities in raw material, insufficient concentration, or poor lightfastness. | Ensure clean source. Concentrate dye bath further. Research lightfastness before committing. |
| Color Fading (Plant Pigments) | Lack of proper mordant, incorrect mordant, or inherently fugitive dye. | Use appropriate mordant and follow instructions carefully. Accept some plants are for ephemeral work. |
| Mold/Mildew | Insufficient drying of pigment sludge, or storing wet. | Ensure pigment is bone dry before storage. Store in airtight, dry containers. |
| Binder Separation | Incorrect pigment-to-binder ratio, or poor mulling. | Adjust ratio, mull longer and more thoroughly. Ensure binder is suitable for pigment. |
| Cracking Paint | Too much binder, especially with tempera or certain oils. | Reduce binder amount. Ensure proper surface preparation. |
| Smelly Pigment | Organic impurities, mold, or bacterial growth. | Re-wash thoroughly with distilled water. Ensure full drying. Discard if odor persists and is foul, as it can indicate spoilage or harmful growth. |
| Inconsistent Color | Uneven grinding, improper levigation, or variations in raw material source. | Ensure uniform grinding. Repeat levigation steps. Source materials from a consistent location. |
| Difficulty Binding | Pigment particle size, surface properties, or incompatible binder. | Fine-tune grinding and levigation. Experiment with different binders or adjust binder-to-pigment ratio. |
Remember, patience and observation are your best allies. Each batch of pigment will teach you something new about the material and the process.
A Quick Note on Safety
Always, always, always work in a well-ventilated area, especially when grinding any dry pigments. Wear a dust mask (N95 or better), safety goggles, and ideally, gloves to protect your skin. Some natural materials can be irritating, and as we've seen with certain mineral pigments, some can be highly toxic. Avoid eating, drinking, or smoking in your workspace. Ensure proper disposal of any toxic residues, and never wash pigment-laden water down your household drain without proper filtration. When in doubt, research thoroughly, consult reliable sources on historical pigments, or simply avoid the material. Safety first, always! I can't stress this enough – no artwork is worth compromising your health. Always have a dedicated set of tools and containers only for pigment making, completely separate from anything used for food or household items. Wear an apron to protect your clothes, and always clean your workspace meticulously after each session. Proper ventilation is non-negotiable, even for seemingly innocuous materials, as fine dust particles can irritate lungs. And always have a plan for safe disposal of any hazardous waste; never just wash it down the drain. Always, always, always work in a well-ventilated area, especially when grinding any dry pigments or working with solvents. Wear a dust mask (N95 or better), safety goggles, and ideally, gloves to protect your skin. Some natural materials can be irritating, and as we've seen with certain mineral pigments, some can be highly toxic. Avoid eating, drinking, or smoking in your workspace. Ensure proper disposal of any toxic residues, and never wash pigment-laden water down your household drain without proper filtration. When in doubt, research thoroughly, consult reliable sources on historical pigments, or simply avoid the material. Safety first, always! I can't stress this enough – no artwork is worth compromising your health. Always have a dedicated set of tools and containers only for pigment making, completely separate from anything used for food or household items. Wear an apron to protect your clothes, and always clean your workspace meticulously after each session. Proper ventilation is non-negotiable, even for seemingly innocuous materials, as fine dust particles can irritate lungs. And always have a plan for safe disposal of any hazardous waste; never just wash it down the drain. This diligence is not just about avoiding harm, but also about cultivating a respectful relationship with your materials, acknowledging their power and presence in your creative space, and ensuring the longevity of your practice and your health.
Bringing it to Life: Binding Your Pigments into Paint
A pile of beautiful, finely processed powder is undeniably lovely, a visual feast, but let's be clear: it’s not paint yet! To truly unlock its expressive potential, to transform that raw color into a fluid medium ready for the canvas, you need a binder. The binder is the magical, often unsung, glue that holds the pigment particles together, allows them to be applied smoothly, and crucially, adheres them permanently to a chosen surface. This is the pivotal moment, where you consciously decide what kind of paint you're actually making – be it a luminous watercolor, a rich oil, or a vibrant tempera. It's the ultimate transformation, where all your diligent foraging and meticulous processing culminates in a truly usable, expressive artistic medium.
This choice of binder is as crucial as the pigment itself, dictating the paint's working properties (how it feels under the brush), its drying time, its inherent flexibility, and its ultimate finish. It's a fundamental artistic decision that profoundly impacts how your handmade color will behave on the canvas, much like choosing between traditional oil paints or delicate watercolor paints for a specific project. It’s here that the unique character of your pigment truly begins to shine.

The Essential Tools for Binding: Your Alchemical Arsenal
Before you start, gather your binding tools. These are the instruments that transform dry powder into luscious paint, making them indispensable in your alchemical arsenal. Good ventilation is also key, even with wet pigments, as some binders can have fumes or odors.
The Importance of a Clean Workspace
Just as with pigment processing, maintaining a clean and organized workspace is paramount during the binding stage. Pigment dust can easily cross-contaminate different colors, leading to muddied hues and wasted effort. Keeping your slab and tools meticulously clean between batches ensures the purity of each color and prevents accidental mixtures. I always have a dedicated rag and a spray bottle of water nearby for quick clean-ups, and at the end of a session, a thorough scrub-down of all surfaces and tools is essential. It's not just about aesthetics; it's about respecting the integrity of your materials and the vibrancy of your finished paints. A clean studio is a happy studio, and often, a more productive one!
Let's talk about the essential stars of the binding show – your indispensable alchemical arsenal:
- Glass Muller: This mushroom-shaped, heavy tool is your primary workhorse. Its flat, ground-glass base is meticulously designed to effectively disperse pigment particles within the binder, breaking up any stubborn aggregates and ensuring each tiny particle is fully coated. It's the absolute secret to achieving smooth, vibrant paint that flows beautifully and applies evenly. A good muller can feel like an extension of your hand, a true partner in the alchemical process, allowing you to intimately feel the paint's texture evolve under its weight, from gritty paste to luscious cream.
- Glass Slab/Palette: A perfectly flat, non-porous surface is utterly crucial for the mulling process. This is where the magic truly happens – where you mix and tirelessly mull your pigment and binder. Tempered glass, a smooth marble slab, or even a very fine, unglazed ceramic tile can work. I personally love the feel of a substantial glass slab; its smooth surface provides the necessary friction without being abrasive, allowing for incredibly efficient particle dispersion. The larger the slab, the more room you have to work, which is a real luxury, preventing spills and allowing for broader, more rhythmic strokes of the palette knife.
- Palette Knife: An indispensable, versatile tool for this stage. It's used for initially incorporating the dry pigment with the binder, for deftly scraping the mixture back into the center of your slab for continuous mulling, and for transferring your precious finished paint to storage containers. Look for one with a flexible, yet sturdy, stainless steel blade for ease of use and, crucially, for easy cleaning. I've found that a good quality palette knife is worth its weight in gold for its multitude of uses.
- Small Jars/Tubes: For carefully storing your precious handmade paints. Airtight glass jars with tight-fitting lids are excellent for watercolors and gouache, preserving their moisture and preventing premature drying or mold. Collapsible metal tubes (like those used for commercial oil paints) are the traditional choice for oil paints, protecting them from air and allowing for easy, controlled dispensing without waste. Proper storage ensures your hard-won efforts don't go to waste and keeps your unique colors vibrant and ready for future use.
- Droppers/Pipettes: These are vital for the precise addition of liquid binders. A single drop too much can drastically alter the paint's consistency, making it too fluid, too oily, or too thin. Precision is absolutely key here, as you walk the delicate line between science and intuition, ensuring you achieve that perfect, buttery, or creamy texture.
- Respirator/Dust Mask: While not directly used during wet binding, it's absolutely essential when handling and transferring dry pigment powders before they are mixed into a binder. Always, always protect your lungs from inhaling fine particles. Safety, for me, is the golden rule that underpins all artistic exploration.
- Gloves: To protect your skin from pigments and binders, some of which can be irritating, staining, or even toxic. Nitrile or latex gloves offer a good balance of protection and dexterity, allowing you to work with confidence. It's a small price to pay for artistic exploration and keeping your hands clean and safe.
Common Binders I've Used and Explored: Your Paint's Foundation
There's a fascinating history of binders, each offering unique working properties and aesthetic results. The choice of binder dictates not only how your paint handles but also its permanence and final appearance. Here are some of the most common, and a few I've dabbled with, reflecting a journey through art history itself:
Binder Type | Characteristics | Best For | Durability/Longevity | Reversibility | Historical Context |
|---|---|---|---|---|---|
| Egg Tempera (Egg Yolk) | Fast-drying, matte finish, vibrant, durable when cured. Opaque. | Traditional painting, fine detail, thin layers. | Excellent (when fully cured, very brittle) | Irreversible | Dominant painting medium during the Middle Ages and early Renaissance, known for its luminosity and precision. The history of tempera painting is truly rich. |
| Gum Arabic | Transparent/opaque (depending on pigment), re-wettable, smooth washes. | Watercolor, gouache, ink, light applications on paper. | Good (for paper, can crack in thick layers) | Re-wettable | Used for centuries, particularly in illuminated manuscripts, traditional watercolors, and calligraphy. |
| Linseed Oil | Slow-drying, rich, luminous finish, flexible, traditional oil paint. | Oil painting, impasto, deep, saturated colors. | Excellent (over time, darkens slightly) | Irreversible | The quintessential binder for oil painting since the 15th century, allowing for blending and glazing. Learn more in the history of oil painting. |
| Casein Glue (Milk-based) | Durable, opaque, milk-based, historical, good adhesion. Matte finish. | Murals, gesso-like applications, texture, porous surfaces. | Very Good (can become brittle) | Limited Reversibility | Used from Ancient Egypt to modern times, versatile for various applications due to its strong adhesive properties. |
| Honey | Humectant (keeps paint moist), enhances flow, re-wettable. | Watercolors (often combined with gum arabic for flexibility and re-wetting properties). | Varies (additive, not a standalone binder) | Re-wettable | Used since antiquity in watercolor formulations to prevent cracking and improve handling. |
| Rabbit Skin Glue | Strong adhesive, flexible, traditionally used as ground. | Gesso, sizing canvas, gilding. | Very Good (can re-activate with moisture) | Re-wettable | Primary ground preparation for canvas and panel until modern acrylic gesso became prevalent. |
| Acrylic Polymer Medium | Fast-drying, flexible, water-resistant, modern, versatile. | Contemporary acrylics, mixed media (a modern twist). | Excellent (highly durable, non-yellowing) | Irreversible | A 20th-century innovation, offering incredible durability, versatility, and compatibility with many surfaces. Its rise is detailed in the history of acrylic painting. |
| Stand Oil | Thickened linseed oil, slow-drying, smooth, levels brushstrokes. | Oil painting (glazing, smooth applications, detail work). | Excellent (very durable, less yellowing than raw linseed) | Irreversible | A traditional modifier for linseed oil, used for centuries to improve flow and reduce yellowing in oil paints. |
| Beeswax/Damar Resin | Waxy, translucent, used for encaustic painting. Creates texture. | Encaustic painting, cold wax medium, sculptural effects. | Excellent (durable, luminous, ancient medium) | Reversible | The binder for ancient encaustic painting, offering unique textural and luminous qualities, dating back to ancient Greece and Egypt. |

The Binding Process: A Delicate Balance of Science and Intuition
To make paint, you gradually mix your dry pigment powder with your chosen binder. I start by placing a small mound of dry pigment on my glass slab, then make a small well in the center. Into this well, I slowly add drops of binder. Using a palette knife for initial incorporation, I gently fold the binder into the pigment until a thick paste forms. Then comes the magic: with a glass muller, I begin to spread and grind the mixture across the slab in small, circular motions. This act of 'mulling' is crucial; it thoroughly disperses the pigment particles within the binder, breaking up any aggregates and ensuring each particle is fully coated. This prevents a grainy texture and maximizes color intensity. It’s a slow, deliberate process of incorporating just enough liquid to create a smooth, workable paint consistency.
The ideal consistency is a delicate balance, an intuitive dance I've learned through countless trials and (many!) errors. There's no exact recipe; each pigment absorbs binder differently due to its unique particle size, shape, and oil absorption rate, requiring an artist's touch to find that perfect, buttery consistency. For oil paints, this mulling process can take considerable time to ensure proper emulsification and a smooth, long-lasting paint. For watercolors, the goal is a smooth, re-wettable paste that dissolves easily with water. Each type of paint demands a slightly different touch and understanding of its unique characteristics, much like learning the nuances of different paint types.
Testing for Perfect Consistency
- The Muller Test: As you mull, lift the muller slightly. The paint should form a continuous, cohesive mass that sticks to the muller and slab, pulling smoothly without breaking or becoming stringy. If it crumbles, you likely need more binder.
- The Ridge Test: Draw the edge of your muller or palette knife through the paint. It should hold a clean, smooth ridge without breaking or flowing too readily. If it's too fluid, you have too much binder; too crumbly, too little.
- The Tint Test: Take a tiny amount of the freshly mulled paint and mix it with a small amount of white paint (if applicable to your medium). This quickly reveals the true tinting strength and smoothness of your pigment.
- Too much binder: The paint can become glossy, brittle, or less vibrant, as the binder dilutes the pigment, potentially leading to cracking, reduced covering power, or even issues with adhesion over time.
Testing for Perfect Consistency: The Artist's Intuition
Achieving the perfect consistency for your handmade paint is more than just following a recipe; it's an intuitive art honed by practice and keen observation. Here are a few simple tests I use to gauge whether my paint is just right:
- The Muller Test: As you meticulously mull your paint, lift the glass muller slightly from the slab. The paint should form a continuous, cohesive mass that sticks cleanly to both the muller and the slab, pulling smoothly without breaking or becoming stringy. If it crumbles and resists cohesion, you likely need a little more binder.
- The Ridge Test: Draw the sharp edge of your muller or palette knife through the paint on the slab. It should hold a clean, smooth, distinct ridge without immediately flowing back together or breaking apart. If it's too fluid and quickly collapses, you have too much binder; if it's too crumbly or resistant, you have too little.
- The Tint Test: This is a quick revelation. Take a tiny amount of your freshly mulled paint and mix it with a small amount of white paint (if applicable to your chosen medium). This instantly reveals the true tinting strength and smoothness of your pigment, indicating how well the particles are dispersed.
Common Pitfalls and Why Consistency Matters:
- Too much binder: The paint can become overly glossy, brittle, or appear less vibrant, as the binder effectively dilutes the pigment. This can potentially lead to cracking, reduced covering power (opacity), or even issues with adhesion over time, especially with certain binders. It's a common mistake that can compromise the archival quality of your work.
- Too little binder: The paint will be crumbly, difficult to apply, and simply won't adhere properly to your surface. This often results in a weak, powdery, or streaky paint film that easily rubs off, lacking the cohesion and vibrancy you desire.
It’s truly where the magic happens, transforming raw earth into liquid light, ready to tell its story on canvas.
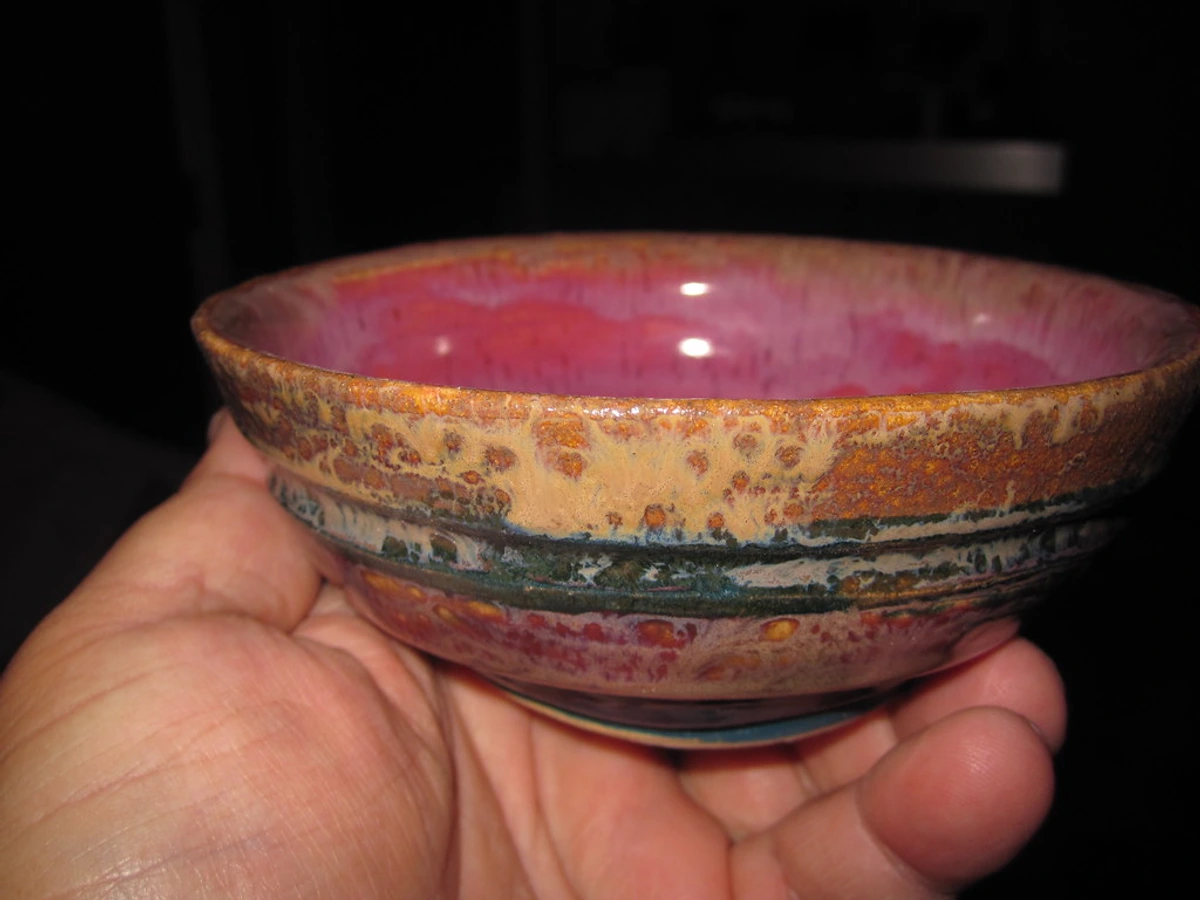
Troubleshooting Common Binding Issues
Even with the best preparation, you might encounter issues during the binding process. Here are a few common ones and how I typically approach them:
Issue | Symptom | Potential Cause | Solution |
|---|---|---|---|
| Paint is too runny | Flows off the palette knife too quickly, lacks body. | Too much binder, or pigment with very low oil absorption. | Gradually add more dry pigment, mulling thoroughly. Or, for future batches, start with less binder. |
| Paint is too stiff/crumbly | Doesn't spread smoothly, breaks apart on the slab. | Too little binder, or pigment with very high oil absorption. | Gradually add more binder, a drop at a time, mulling until smooth. |
| Paint is grainy/gritty | Feels like sand, not smooth under the muller. | Pigment not ground finely enough, or inadequate mulling. | Continue mulling vigorously. For future batches, ensure pigment is finer before binding, or levigate more. |
| Paint separates (oil-based) | Oil separates from the pigment, forms a "halo." | Insufficient mulling, or high oil absorption pigment. | Mull longer to fully emulsify. For future batches, ensure pigment is well-mulled and consider a stiffer binder. |
| Air bubbles in paint | Small pockets of air visible, especially after mixing. | Too vigorous mixing or mulling. | Mull more slowly and deliberately. For storage, gently tap containers to release bubbles. |
| Weak tinting strength | Color appears pale even when applied thickly. | Pigment not concentrated enough, or very large particle size. | For future batches, ensure thorough levigation and fine grinding for better concentration. |
| Glossy/Dull Finish | Incorrect binder choice, or uneven binder distribution. | Select binder appropriate for desired finish (e.g., gum arabic for matte, oil for glossy). Mull thoroughly for even distribution. | |
| Poor Adhesion | Insufficient binder, or incompatible pigment/surface. | Increase binder gradually, ensure thorough mulling. Test pigment with different surfaces. |
Patience is truly a virtue here. Don't be afraid to adjust as you go, and remember that every "mistake" is a valuable learning opportunity.
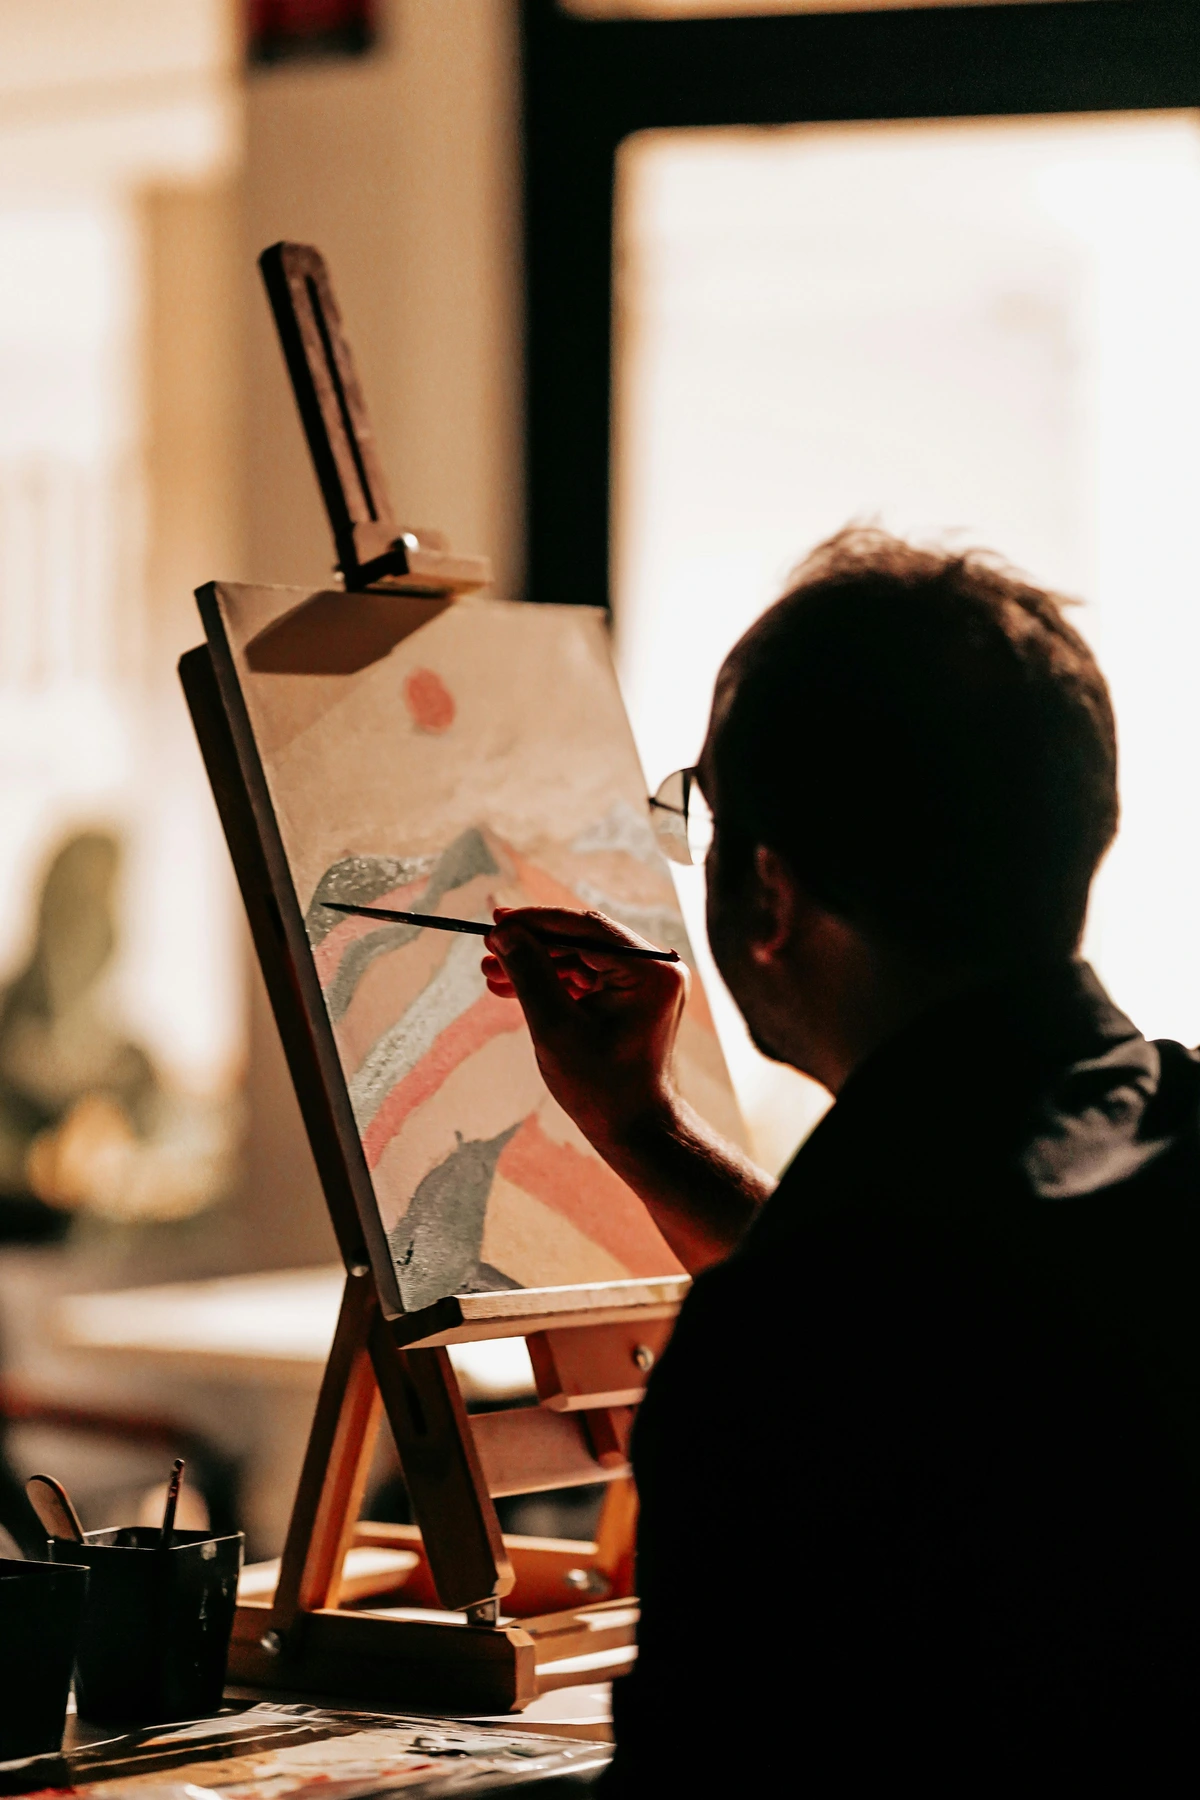
My Latest Earth-Pigment Project: A Journey in Red Ochre
I recently found this incredible vein of deep red ochre near a hiking trail – I swear, it was practically glowing, a pulsating stripe of crimson against the duller earth. It had that quintessential warm, earthy tone that just screams 'ancient cave painting,' but also a richness, a subtle, almost velvety undertone that I knew would look phenomenal in my abstract acrylics. The sun hit it just right, revealing a deep, almost fiery red that I simply had to bring home. This wasn't just a color; it felt like a narrative waiting to be unleashed, a primal energy that resonated with the raw emotion I often seek to express in my work.
I collected a good amount, brought it back to the studio, and began the process. Crushing it was exhilarating – hearing the crunch and seeing the vibrant powder emerge from the solid rock. The levigation process took patience, as always, watching the murky water slowly clear, leaving behind layers of progressively finer pigment. It felt like alchemy, turning something so rudimentary into this precious, velvety powder, like extracting pure color essence.
When it was finally dry, after days of patient waiting, I had this glorious heap of deep, earthy red. I decided to bind a small batch with egg tempera, a binder as ancient as the pigment itself. The distinct smell of the egg, the way the pigment greedily absorbed the binder, gradually transforming into a smooth, creamy paint – it was a moment of pure connection, a direct link to artists across millennia. Painting with it later, on a small wood panel, felt entirely different. There was a direct line from the earth, through my hands, to the canvas. It's a tactile experience that store-bought paints, for all their convenience, can't quite replicate. It adds a grounding, almost primal energy to the work, a whisper of deep history. The initial layers, built up thinly with the tempera, felt like an ancient fresco coming to life under my brush. The matte finish of the cured egg tempera gave the red ochre an unexpected depth, a velvety richness that absorbed light rather than reflecting it, creating a truly unique visual presence in my abstract acrylics. This direct, physical engagement with the material, from earth to pigment to paint, infuses the artwork with a narrative far deeper than any commercial color could convey. It's not just a painting; it's a testament to a connection, a story told from the ground up. This connection, this slow, deliberate process, is what truly sets handmade pigments apart, giving each work a soul that echoes its origins.
Above: A reminder of the synthetic world, where colors come pre-packaged and perfected. Below: The beauty of the handmade. Which path calls to you?
Challenges and Rewards: The Reality of Natural Pigments
Let's be real, this isn't always glamorous. There are muddy boots, dusty workspaces, and certainly more than a few failed experiments. I've spent hours processing a pigment only to find it's not lightfast enough for my taste, or that the color simply isn't as vibrant as I'd hoped. I remember one particularly stubborn clay that, no matter how finely I ground it, still felt gritty, refusing to yield a smooth paint. It can be frustrating, especially when you're used to the consistent quality of modern art materials, like the ones I review for the site, such as the Liquitex Basics acrylic paint review or even exploring the best acrylic mediums for abstract artists.
However, these challenges are part of the learning curve, and there are always ways to mitigate them or, at the very least, learn from them. For plant pigments with inherently poor lightfastness, consider using them for temporary works, studies, sketchbooks, or pieces displayed out of direct sunlight. Some artists even apply UV-protective varnishes, though this is a compromise. The occasional failure isn't a setback; it's a valuable lesson in the unique properties of natural materials. It teaches patience, resilience, and a deeper respect for the unpredictable beauty of the natural world. I've had plant pigments that faded within weeks, despite my best efforts with mordants, teaching me the delicate balance of lightfastness and the ephemeral nature of some hues. I've spent hours grinding a seemingly promising rock only to find the color was dull and lifeless when bound, forcing me to reassess my foraging techniques and perhaps re-evaluate the source material's potential. But these aren't truly failures; they are invaluable lessons, shaping my understanding of the materials and deepening my artistic intuition. This embrace of imperfection is, in itself, a form of art, much like exploring exploring texture in abstract art means embracing the unexpected. Let's be real, this isn't always glamorous or easy. There are muddy boots, dusty workspaces, and certainly more than a few failed experiments. I've spent hours processing a pigment only to find it's not lightfast enough for my taste, or that the color simply isn't as vibrant as I'd hoped. I remember one particularly stubborn clay that, no matter how finely I ground it, still felt gritty, refusing to yield a smooth paint. It can be frustrating, especially when you're used to the consistent quality and instant gratification of modern art materials, like the ones I review for the site, such as the Liquitex Basics acrylic paint review or even exploring the best acrylic mediums for abstract artists.
However, these challenges are not roadblocks; they are an intrinsic part of the learning curve, and there are always ways to mitigate them or, at the very least, learn profound lessons from them. For plant pigments with inherently poor lightfastness, I've learned to consciously choose to use them for temporary works, studies, sketchbooks, or pieces intended for display out of direct sunlight. Some artists even apply UV-protective varnishes, though this is a compromise I personally weigh carefully. The occasional 'failure' isn't a setback; it's an invaluable lesson in the unique, sometimes unpredictable, properties of natural materials. It teaches patience, resilience, and a deeper respect for the unpredictable beauty of the natural world. I've had plant pigments that faded within weeks, despite my best efforts with mordants, teaching me the delicate balance of lightfastness and the ephemeral nature of some hues. I've spent hours grinding a seemingly promising rock only to find the color was dull and lifeless when bound, forcing me to reassess my foraging techniques and perhaps re-evaluate the source material's potential. But these aren't truly failures; they are invaluable lessons, shaping my understanding of the materials and deepening my artistic intuition. This embrace of imperfection is, in itself, a form of art, much like exploring texture in abstract art means embracing the unexpected. It’s a powerful reminder that sometimes, the most profound learning comes from what doesn't quite go according to plan, pushing us to adapt and innovate and find creative solutions.
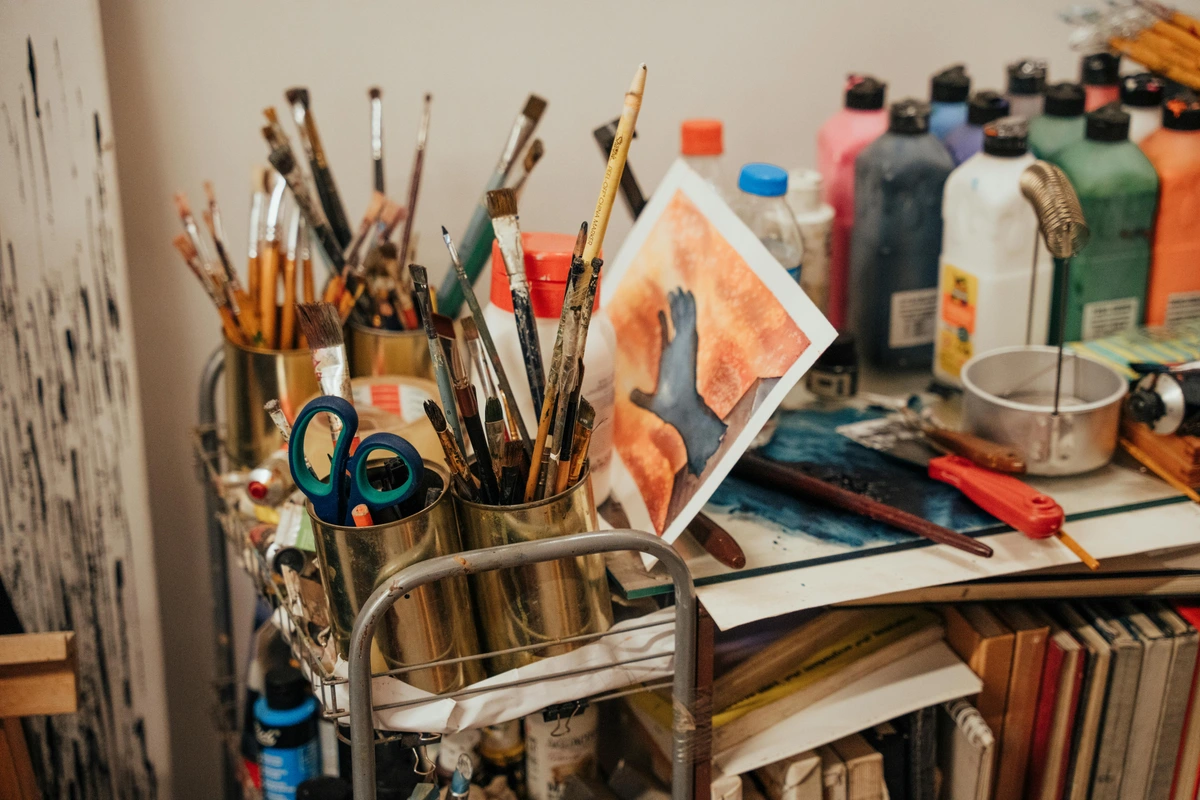
But the rewards? Oh, the rewards are immense. There's the deep satisfaction of self-sufficiency, of understanding your materials from the ground up. There's the unique color palette that nature provides, hues you won't find in any commercial tube, offering a distinct aesthetic that often aligns with the psychology of color in abstract art. And there's the profound connection to art history, to those countless artists who, for millennia, relied on these very same methods. It's a humbling, enriching experience that I wouldn't trade for anything. It makes me feel like I'm part of a continuum, a living timeline of artistic creation, echoing the enduring legacy of human creativity. It's not just about making paint; it's about connecting with something much larger than myself, something primal and enduring. This connection also extends to understanding the very foundations of various artistic traditions, from ancient cave paintings to the rich history of the history of tempera painting from ancient Egypt to modern revival.
Beyond the Canvas: Other Uses for Natural Pigments – A Spectrum of Creativity
While my primary focus is on transforming these treasures into paint, the beauty and versatility of natural pigments extend far beyond the canvas. Historically and even today, these vibrant materials find their way into a myriad of artistic and practical applications, reminding us of humanity's enduring desire for color:
- Textiles and Dyes: Many plant pigments, especially, are the basis for traditional fabric dyeing, creating rich, complex colors in natural fibers like cotton, wool, and silk. Think of the vibrant tapestries of ancient cultures, alive with colors painstakingly extracted from roots, leaves, and flowers, telling stories through threads.
- Cosmetics and Body Art: Earth pigments like ochres have been used for millennia in body paint, ceremonial adornment, and early cosmetics, offering natural coloration and cultural significance across diverse societies. From the striking red ochre used by Indigenous peoples to ancient Egyptian kohl, these pigments have graced human skin for centuries.
- Inks and Calligraphy: Ground pigments mixed with a suitable binder (like gum arabic or even a simple water-and-binder solution) can create beautiful, unique inks for calligraphy, drawing, and manuscript illumination. Imagine writing a letter or illustrating a journal with an ink you literally made from the earth – a truly personal touch, as explored in the history of calligraphy (though that article focuses on the scripts, the materials are intertwined!).
- Ceramics and Glazes: Certain heat-stable earth and mineral pigments can be incorporated directly into clays or used in glazes to create naturally colored pottery and ceramic art. This links the finished piece directly to the earth from which both the clay and the pigment originated, giving a primal hue to a timeless craft.
- Fresco Painting: Historically, earth and mineral pigments were absolutely crucial for fresco painting, a technique where dry pigments are mixed with water and applied to wet lime plaster. As the plaster dries, a chemical reaction occurs, permanently binding the pigment to the wall itself. This creates incredibly durable and luminous artworks, a testament to the longevity and beauty of natural colors, as detailed in what is fresco painting.
- Restoration and Conservation: In the delicate and precise field of art conservation and restoration, natural pigments are often indispensable. They are used to accurately match historical colors and ensure the integrity of antique artworks, allowing conservators to seamlessly repair and revitalize damaged masterpieces while maintaining historical authenticity. This is where their unique nuances truly shine.
While my primary focus is on transforming these treasures into paint, the beauty and versatility of natural pigments extend far beyond the canvas. Historically and even today, these vibrant materials find their way into a myriad of artistic and practical applications, reminding us of humanity's enduring, universal desire for color:
- Textiles and Dyes: Many plant pigments, especially, are the basis for traditional fabric dyeing, creating rich, complex colors in natural fibers like cotton, wool, and silk. Think of the vibrant tapestries of ancient cultures, alive with colors painstakingly extracted from roots, leaves, and flowers, telling stories through threads and patterns.
- Cosmetics and Body Art: Earth pigments like ochres have been used for millennia in body paint, ceremonial adornment, and early cosmetics, offering natural coloration and profound cultural significance across diverse societies. From the striking red ochre used by Indigenous peoples globally to ancient Egyptian kohl for eye definition, these pigments have graced human skin for centuries.
- Inks and Calligraphy: Finely ground pigments mixed with a suitable binder (like gum arabic or even a simple water-and-binder solution) can create beautiful, unique inks for calligraphy, drawing, and manuscript illumination. Imagine writing a letter or illustrating a journal with an ink you literally made from the earth – a truly personal touch, connecting you to the history of calligraphy on a fundamental level.
- Ceramics and Glazes: Certain heat-stable earth and mineral pigments can be incorporated directly into clays or used in glazes to create naturally colored pottery and ceramic art. This links the finished piece directly to the earth from which both the clay and the pigment originated, giving a primal, authentic hue to a timeless craft, celebrating the earth's inherent artistry.
- Fresco Painting: Historically, earth and mineral pigments were absolutely crucial for fresco painting, a monumental technique where dry pigments are mixed with water and applied to wet lime plaster. As the plaster dries, a chemical reaction occurs, permanently binding the pigment to the wall itself. This creates incredibly durable and luminous artworks, a testament to the longevity and beauty of natural colors, as detailed in what is fresco painting.
- Restoration and Conservation: In the delicate, precise, and highly skilled field of art conservation and restoration, natural pigments are often indispensable. They are used to accurately match historical colors and ensure the integrity of antique artworks, allowing conservators to seamlessly repair and revitalize damaged masterpieces while maintaining absolute historical authenticity and respect for the original artist's materials.
It reminds me that the desire to add color to our lives is a fundamental, deeply ingrained human drive, manifesting in countless forms and connecting us to a rich, global artistic heritage that spans all of recorded history.
The Therapeutic Power of Pigment Creation: A Mindful Retreat
Beyond the artistic and historical connections, there's a deeply therapeutic aspect to the entire process of making natural pigments that I've come to cherish. The slow, repetitive movements of grinding, the patient waiting during levigation, the focused intention of binding – all contribute to a profoundly meditative state. In a world saturated with digital distractions, constant notifications, and the relentless pace of modern life, this hands-on, tangible creation provides a grounding antidote. It's a form of active mindfulness, allowing worries and anxieties to recede as you immerse yourself completely in the elemental act of creation.
For me, it's a powerful stress reliever and a beautiful way to reconnect with a slower, more deliberate rhythm of life. The tactile sensations, the earthy smells, the visual transformation of raw material – all engage the senses in a way that is calming and centering. It’s almost a form of art therapy, without the formal setting, just you and the earth, engaged in a quiet, ancient dialogue. This process cultivates patience, fosters a deeper sense of presence, and instills a profound appreciation for the simple beauty of natural materials. Beyond the artistic and historical connections, there's a deeply therapeutic aspect to the entire process of making natural pigments that I've come to cherish. The slow, repetitive movements of grinding, the patient waiting during levigation, the focused intention of binding – all contribute to a profoundly meditative state. In a world saturated with digital distractions, constant notifications, and the relentless pace of modern life, this hands-on, tangible creation provides a grounding, soothing antidote. It's a form of active mindfulness, allowing worries and anxieties to recede into the background as you immerse yourself completely in the elemental act of creation. It's an opportunity for quiet introspection and sensory engagement.
For me, it's a powerful stress reliever and a beautiful way to reconnect with a slower, more deliberate rhythm of life, one that feels more in tune with nature. The tactile sensations of the materials, the earthy smells that fill the studio, the visual transformation of raw material into vibrant color – all engage the senses in a way that is profoundly calming and centering. It’s almost a form of art therapy, without the formal setting, just you and the earth, engaged in a quiet, ancient dialogue, a dance of creation. This process cultivates patience, fosters a deeper sense of presence, and instills a profound appreciation for the simple, unassuming beauty of natural materials. It teaches us to find joy in the process itself, not just the outcome, much like the meditative practice of making how to make your own gesso before a painting truly begins, establishing a sacred foundation for creativity.
Frequently Asked Questions About Making Natural Paint Pigments
These are some of the questions I often get asked, or indeed, have asked myself countless times on this fascinating, sometimes perplexing, journey into natural pigments. Think of this as a quick-fire, comprehensive round to demystify some of the most common queries, providing you with practical insights and a deeper understanding.
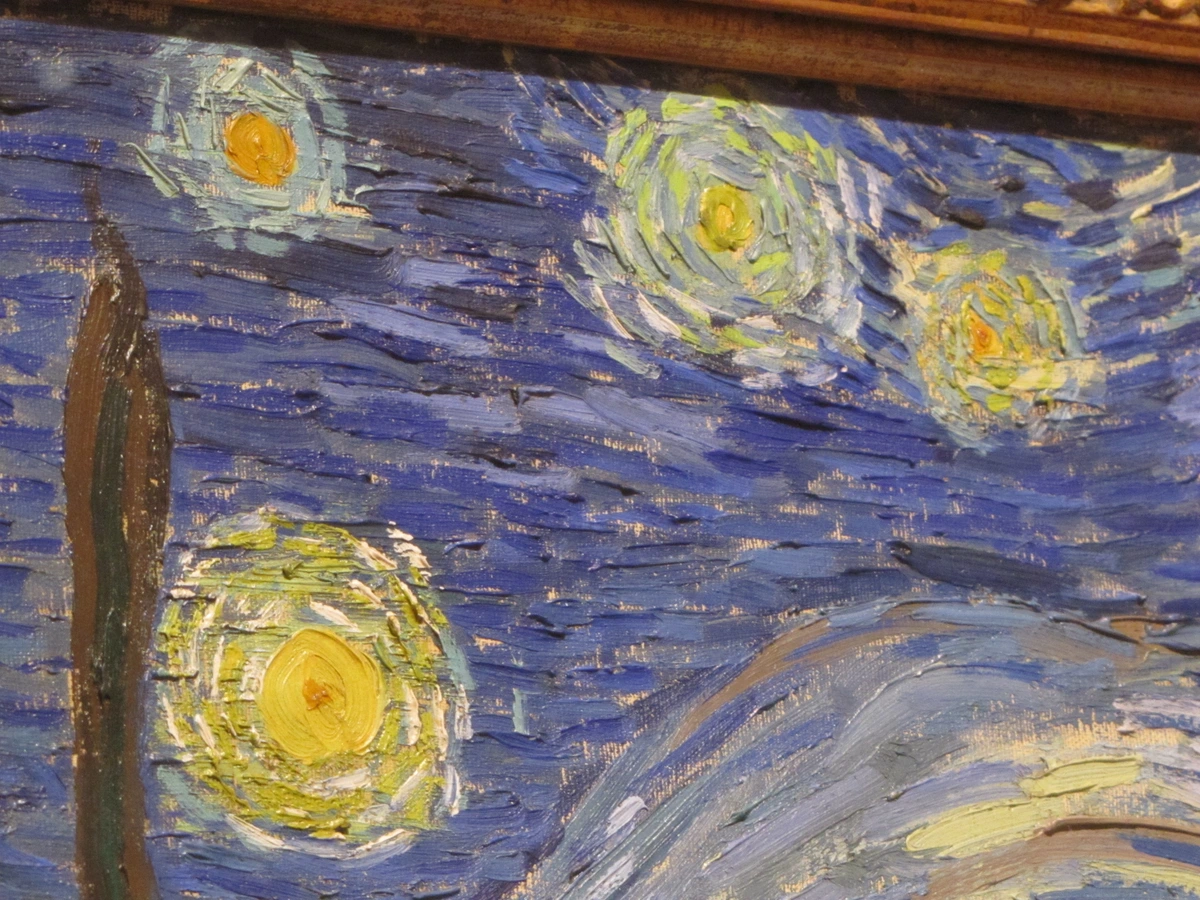
Q: How long do homemade natural paints last?
A: The shelf life of your homemade paints depends heavily on the binder you choose and how it's stored. Proper storage, meticulous cleanliness, and sometimes the addition of a natural preservative (like a tiny drop of clove oil or wintergreen oil, or a commercial broad-spectrum preservative) are absolutely key to maximizing their longevity. Always smell your paints before use – if they smell foul, rancid, or show any signs of mold growth, it's unequivocally best to discard them. Your health, and the integrity of your artwork, are paramount.
- Oil Paints (with Linseed Oil): If properly mulled and stored in airtight tubes or containers, oil paints can last for many months, even years. The oil prevents mold, and the airtight seal slows drying, but some colors might shift slightly over very long periods.
- Watercolors/Gouache (with Gum Arabic): These can last indefinitely in a dry, solid pan, and are easily re-wetted with water. If stored as a moist paste in an airtight jar, they might last a few weeks to a couple of months before potentially molding (especially in humid environments), so add a tiny amount of clove oil or a commercial preservative if you want to extend shelf life. I've had some watercolors last years in a pan, and others mold quickly in a damp jar – it's a bit of a lottery without preservatives.
- Egg Tempera & Casein: These are made with organic binders (egg yolk, milk protein) and are best made fresh for each use. They are highly perishable. Storing them in an airtight container in the refrigerator can extend their life for a few days, but they will eventually spoil.
Proper storage, cleanliness, and sometimes a natural preservative are key to maximizing their longevity. Proper storage, meticulous cleanliness, and sometimes the addition of a natural preservative (like a tiny drop of clove oil or wintergreen oil, or a commercial broad-spectrum preservative) are absolutely key to maximizing their longevity. Always smell your paints before use – if they smell foul, rancid, or show any signs of mold growth, it's unequivocally best to discard them. Your health, and the integrity of your artwork, are paramount.
Q: Is making natural paint pigments difficult for a beginner?
A: Not at all, if you start simple! Foraging for earth pigments and processing them (crushing, grinding, washing) is a fantastic entry point. The basic steps are quite intuitive, and the rewards are immediate. Plant pigments are a bit more involved due to extraction and mordant use, and mineral pigments are definitely for the more experienced or adventurous, given the complexity and potential toxicity. Don't be afraid to experiment! That's how I started, with a curious mind and a willingness to get a little dirty. Not at all, if you approach it with a sense of curiosity and start simple! Foraging for readily available earth pigments (like ochres or clays) and processing them (crushing, grinding, washing) is a fantastic and accessible entry point. The basic steps are quite intuitive, and the rewards are immediate and deeply satisfying. Plant pigments are a bit more involved due to the necessary extraction and mordant use, requiring a little more patience and basic chemistry knowledge. Mineral pigments, however, are definitely for the more experienced or adventurous, given their inherent complexity, rarity, and potential toxicity. Don't be afraid to experiment! That's how I started, with a curious mind, a willingness to get a little dirty, and an open heart for discovery. Remember, art-making is a lifelong journey of continuous learning and experimentation, much like learning how to make abstract art – start somewhere, and let curiosity lead the way.
Q: How can I test the lightfastness of my homemade natural pigments?
A: This is a crucial step for any artist concerned with the longevity of their work. A simple method is to create two swatches of your paint on paper. Expose one swatch to direct sunlight (e.g., taping it to a window) for several weeks or months, while keeping the other swatch in a dark, protected place. After the exposure period, compare the two swatches. Any noticeable fading or color shift in the exposed swatch indicates poor lightfastness. This is a crucial, non-negotiable step for any artist concerned with the longevity and archival quality of their work. A simple, yet effective, method is to create two identical swatches of your paint on a stable, archival paper (or your intended painting surface). Expose one swatch to consistent, direct sunlight (e.g., taping it to a sunny window, facing south if possible) for an extended period – several weeks, or even a few months. Keep the other swatch in a dark, protected place (like a closed drawer) as your control. After the exposure period, carefully compare the two swatches side-by-side. Any noticeable fading, darkening, or color shift in the exposed swatch clearly indicates poor lightfastness. For more precise, accelerated testing, you can expose swatches for varying durations or use a specialized UV lamp, but even a simple window test provides invaluable, practical information for your personal artistic practice. This data empowers you to choose the right pigments for the right projects, ensuring your work endures.
Q: What's the most common natural pigment found in nature?
A: Hands down, ochre. It's an earth pigment, rich in iron oxide, and can be found in a vast array of yellows, reds, and browns across the globe. It's what many ancient cave paintings were made with, and it's surprisingly easy to process. Hands down, ochre. It's an earth pigment, rich in stable iron oxides, and can be found in a vast array of yellows, reds, oranges, and browns across every continent. Its ubiquity is why it's what many ancient cave paintings were made with, serving as the foundational palette for humanity's earliest artistic expressions. It's surprisingly easy to identify and process, truly the bedrock of human artistic expression, and a fantastic starting point for any aspiring pigment maker. Its geological formation makes it incredibly stable, enduring for millennia without significant degradation.

Q: Are natural pigments archival? Will they fade?
A: This is the big question, isn't it? It completely depends on the pigment. Earth pigments (ochres, umbers, siennas) are generally very lightfast and archival, having lasted for thousands of years in cave art. Plant pigments, however, are notoriously prone to fading without specific mordants and often even with them. It's crucial to research the lightfastness of any specific natural material you're considering, especially if you plan to create lasting artworks. For my more permanent pieces, I usually blend my homemade pigments with professional-grade binders or use them for studies, knowing their limitations is part of respecting the material. The lightfastness of natural pigments can be influenced by many factors: the specific mineral or plant source, the quality of the processing, the type of mordant used (for plant pigments), and even the binder. Some natural pigments, like certain earth ochres, are incredibly stable and have graced ancient cave walls for tens of thousands of years. Others, particularly many plant-based dyes converted to lake pigments, can be quite fugitive. This knowledge empowers you to choose your materials wisely, matching them to the intended permanence of your artwork. This is the big question, isn't it? The answer is: it completely depends on the specific pigment. Earth pigments (like ochres, umbers, siennas, and many clays) are generally very lightfast and archival, having lasted for thousands of years in cave art and ancient frescoes. Plant pigments, however, are notoriously prone to fading without specific mordants, and often even with them. Their beauty can be ephemeral. It's absolutely crucial to research the lightfastness properties of any specific natural material you're considering, especially if you plan to create lasting artworks or pieces for sale. For my more permanent pieces, I usually blend my handmade pigments with professional-grade, proven archival binders or consciously choose pigments known for their stability. For fugitive plant pigments, I use them for studies, sketchbooks, or works intended for digital reproduction where permanence is less of a concern, knowing their limitations is part of respecting the material. The lightfastness of natural pigments can be influenced by many factors: the specific mineral or plant source, the quality of the processing, the type of mordant used (for plant pigments), and even the binder. Some natural pigments, like certain earth ochres, are incredibly stable and have graced ancient cave walls for tens of thousands of years. Others, particularly many plant-based dyes converted to lake pigments, can be quite fugitive. This knowledge empowers you to choose your materials wisely, matching them to the intended permanence of your artwork. Consider also that even modern, synthetic paints have varying lightfastness ratings (often indicated as ASTM ratings), so checking those labels is always a good practice, whether you're using store-bought or handmade, underscoring that permanence is a spectrum, not an absolute.
Q: What are some common mistakes beginners make when making natural pigments?
A: Oh, I've made them all! Here are a few common pitfalls and how to avoid them:
- Not grinding finely enough: This is probably the most common. Coarse pigment particles lead to gritty, dull paint. Patience is key here; grind, grind, grind!
- Ignoring safety precautions: Especially when working with dry powders. Always wear a mask, goggles, and gloves.
- Impatience with levigation: Rushing the settling process means you'll end up with impure, less vibrant pigment. Let gravity do its work.
- Expecting plant pigments to be perfectly lightfast: Many simply aren't. Accept their ephemeral beauty for studies or temporary works.
- Using too much or too little binder: This comes with practice. Start small, add gradually, and test consistency frequently.
- Cross-contamination: Using the same tools for different colors, or not cleaning thoroughly, can lead to muddy results. Dedicated tools are a game-changer.
- Foraging illegally or unsustainably: Always research local regulations and practice "leave no trace." Respect the earth!
Oh, I've made them all, and then some! Here are a few common pitfalls beginners (and even seasoned makers!) often encounter, and how I typically try to avoid or learn from them:
- Not grinding finely enough: This is probably the most common mistake. Coarse pigment particles lead to gritty, dull paint that lacks vibrancy and won't spread smoothly. Patience is absolutely key here; grind, grind, grind until it feels like silk!
- Ignoring safety precautions: Especially when working with dry powders. Always, always wear a mask (N95 or better), safety goggles, and gloves. Your health is not worth a unique hue.
- Impatience with levigation: Rushing the settling process means you'll end up with impure, less vibrant pigment that may also have poor binding qualities. Let gravity do its slow, diligent work.
- Expecting plant pigments to be perfectly lightfast: Many simply aren't, despite your best mordanting efforts. Accept their ephemeral beauty for studies or temporary works, or embrace the story of fading.
- Using too much or too little binder: This comes entirely with practice and intuition. Start small, add gradually, and test consistency frequently. It’s a delicate dance.
- Cross-contamination: Using the same tools for different colors, or not cleaning thoroughly between batches, can easily lead to muddy, unwanted results. Dedicated tools for each color, or meticulous cleaning, are a game-changer.
- Foraging illegally or unsustainably: This is a big one. Always research local regulations and practice "leave no trace." Respect the earth and its gifts, ensuring they remain for others and for the ecosystem. Don't be the person who ruins it for everyone.
Every mistake, every unexpected outcome, is a valuable learning opportunity. The journey of making pigments is as rewarding as the destination, even with a few detours and a fair share of muddy boots!
Q: How do I choose the right binder for my natural pigments?
A: Choosing the right binder depends entirely on the type of paint you want to make and the artistic properties you desire! If you're aiming for a vibrant, fast-drying matte finish for detailed work, traditional egg tempera might be your choice. For transparent, re-wettable washes ideal for paper, gum arabic (for watercolors or gouache) is perfect. If you crave rich, luminous, slow-drying colors for canvas, linseed oil is the classic choice for oil paints. For contemporary, flexible, and water-resistant applications, acrylic polymer medium is a versatile modern option. Each binder creates a unique working experience and final aesthetic, so think about your artistic vision first, then match it to the binder's characteristics. Consider diving into guides on the history of oil painting or the history of tempera painting to get a feel for different traditions. Choosing the right binder depends entirely on the type of paint you want to make and the specific artistic properties you desire! There's no single "best" binder, only the right one for your vision. If you're aiming for a vibrant, fast-drying matte finish for detailed work and historical techniques, traditional egg tempera might be your perfect choice. For transparent, re-wettable washes ideal for paper, gum arabic (for watercolors or gouache) is impeccable. If you crave rich, luminous, slow-drying colors for canvas and intricate glazing, linseed oil is the classic choice for oil paints. For contemporary, flexible, and water-resistant applications across various surfaces, acrylic polymer medium is a versatile modern option. Each binder creates a unique working experience and final aesthetic, so think deeply about your artistic vision first, then match it thoughtfully to the binder's characteristics and historical applications. Consider diving into guides on the history of oil painting or the history of tempera painting to get a feel for different traditions and their inherent qualities. It's a bit like choosing the right partner for a dance – some combinations just work better than others, and it's all about finding that perfect synergy between pigment and medium.
Q: Can I use natural pigments with any binder?
A: Broadly, yes! The beauty of dry pigment is its versatility. You can bind it with egg yolk for tempera, gum arabic for watercolor, linseed oil for oil paint, or even acrylic polymer medium for a homemade acrylic. The key is to find the right ratio and technique for each binder, as each creates a unique working property, much like learning the nuances of different paint types. The possibilities are truly endless, limited only by your imagination and a little bit of experimentation. While dry pigments are versatile, the choice of binder will also influence how well the pigment performs. For instance, some pigments with high oil absorption rates might require more linseed oil, making them unsuitable for very lean oil paint formulations. Similarly, a very gritty pigment might struggle to create a smooth watercolor with gum arabic. It’s a dynamic relationship, a constant conversation between pigment and binder that unfolds in your studio. Don't be afraid to experiment with small batches to find that perfect marriage of material and medium. Broadly, yes! The beauty of dry pigment is its incredible versatility. You can bind it with egg yolk for a beautiful tempera, gum arabic for luminous watercolors, linseed oil for rich oil paint, or even acrylic polymer medium for a truly homemade acrylic paint. The possibilities are truly endless, limited only by your imagination and a little bit of experimentation. The key, however, is to find the right ratio and technique for each binder, as each creates unique working properties and demands a slightly different approach, much like learning the nuances of different paint types.
While dry pigments are wonderfully versatile, the choice of binder will also influence how well the pigment performs. For instance, some pigments with very high oil absorption rates might require more linseed oil, potentially making them unsuitable for very lean oil paint formulations. Similarly, a very gritty pigment might struggle to create a smooth, transparent watercolor with gum arabic. It’s a dynamic relationship, a constant conversation between pigment and binder that unfolds in your studio. Don't be afraid to experiment with small batches to find that perfect marriage of material and medium. This experimentation is where you truly become the alchemist, understanding the subtle science behind the magic of color and its transformation.
Q: What exactly is a lake pigment and how is it different from a regular pigment?
A: A lake pigment is a colorant created by precipitating a soluble dye onto an insoluble base or substrate, typically a metallic salt like alum or chalk. So, you start with a dye (which would dissolve in your binder) and through a chemical process involving a mordant, you "fix" that color onto tiny particles, making it insoluble and therefore a usable pigment. A "regular pigment" (like earth or mineral pigments) is naturally insoluble; it's already a tiny colored particle without needing this chemical transformation. Lake pigments are commonly made from plant and insect dyes, allowing us to harness their vibrant hues in paint form. A lake pigment is a unique colorant created by chemically precipitating a soluble dye onto an inert, insoluble base or substrate, typically a metallic salt like alum, chalk (calcium carbonate), or even hydrated alumina. So, you start with a dye (which, on its own, would simply dissolve in your binder or wash away) and through a precise chemical process involving a mordant, you "fix" that color onto tiny, solid particles, making it insoluble and therefore a usable pigment. A "regular pigment" (like earth or mineral pigments), on the other hand, is naturally insoluble; it's already a tiny colored particle without needing this chemical transformation. Lake pigments are commonly made from vibrant plant and insect dyes, allowing us to harness their vivid, often fugitive, hues in a more stable paint form. This transformation is truly where the science of art comes alive, turning the ephemeral into the enduring, and offering artists a broader, more nuanced palette.
Q: Are there legal considerations for foraging natural materials?
A: Absolutely, and it's something I take very seriously. While the earth offers an abundance, it's crucial to be a responsible forager. Always research local laws and regulations regarding collecting natural materials. Many national parks, state lands, and even private properties have strict rules, or prohibit foraging altogether. Always ask for permission if you're on private land. The general rule of thumb is to "take only what you need, and leave no trace." This ensures the sustainability of the resource and respects the environment. Absolutely, and it's something I take very seriously, and urge you to as well. While the earth offers an abundance, it's crucial to be a responsible and respectful forager. Always research local laws and regulations regarding collecting natural materials in your specific area. Many national parks, state lands, protected areas, and even private properties have strict rules, or prohibit foraging altogether. Always, always ask for explicit permission if you're on private land – a simple conversation can prevent a lot of trouble. The general rule of thumb is to "take only what you need, and leave no trace," ensuring the sustainability of the resource for ecosystems and future generations. Be aware that some plants or minerals may be rare or protected, and their removal can harm local biodiversity. Ignorance of the law is no excuse, so always do your homework thoroughly before embarking on a pigment hunt!
Q: How should I store my homemade pigments and paints?
A: Proper storage is key to longevity. Dry pigments should be stored in airtight containers (glass jars with tight-fitting lids are ideal) in a cool, dry, dark place to prevent moisture absorption and light degradation. Label them clearly with the source and date. For finished paints, storage depends on the binder. Oil paints can be stored in small, airtight tubes or containers for months. Watercolors and gouache (made with gum arabic) can be stored in pans or small jars and re-wetted when needed. Tempera and casein paints have a shorter shelf life due to their organic binders and are best made fresh for each use, though refrigerating them in airtight containers can extend their life for a few days. Always ensure containers are clean and free of contaminants to prevent mold or bacterial growth. Proper storage is absolutely key to preserving the longevity and vibrancy of your homemade pigments and paints. Dry pigments should be stored in airtight containers (glass jars with tight-fitting lids are ideal) in a cool, dry, dark place to prevent moisture absorption and light degradation. Label them clearly and comprehensively with the source, date of collection, and any processing notes. For finished paints, storage depends on the binder. Oil paints, if properly mulled, can be stored in small, airtight metal tubes or glass containers for many months, sometimes years. Watercolors and gouache (made with gum arabic) can be stored indefinitely in solid pans and easily re-wetted when needed; if stored as a moist paste in airtight jars, they have a shorter shelf life (a few weeks to a couple of months) and may benefit from a natural preservative to prevent mold. Tempera and casein paints have a much shorter shelf life due to their organic binders and are generally best made fresh for each use, though refrigerating them in airtight containers can extend their life for a few days. Always ensure containers are meticulously clean and free of contaminants to prevent mold or bacterial growth. I've found that a good labeling system, with the date, exact foraging location, and any specific characteristics, is invaluable for future reference – a little bit of scientist in the artist, I suppose, but it pays off immensely in the long run!
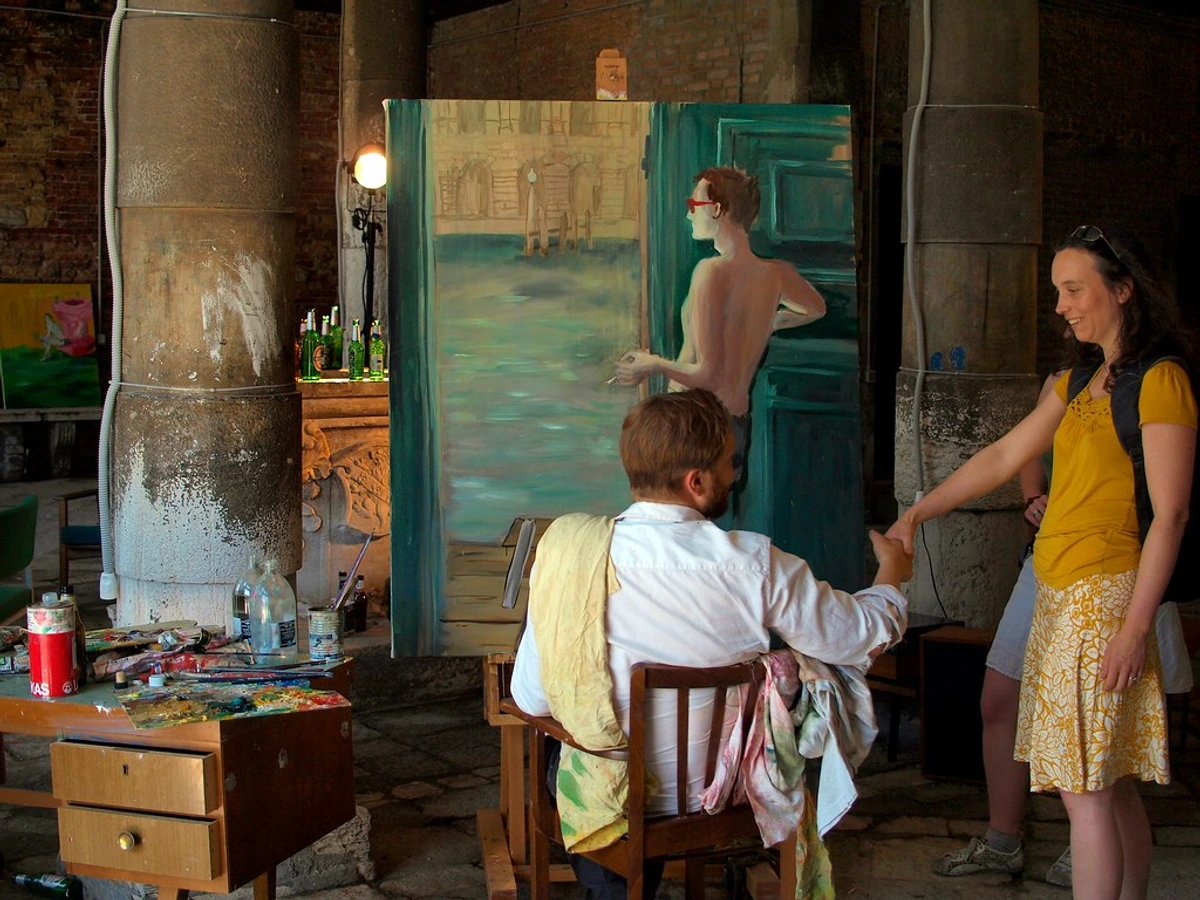
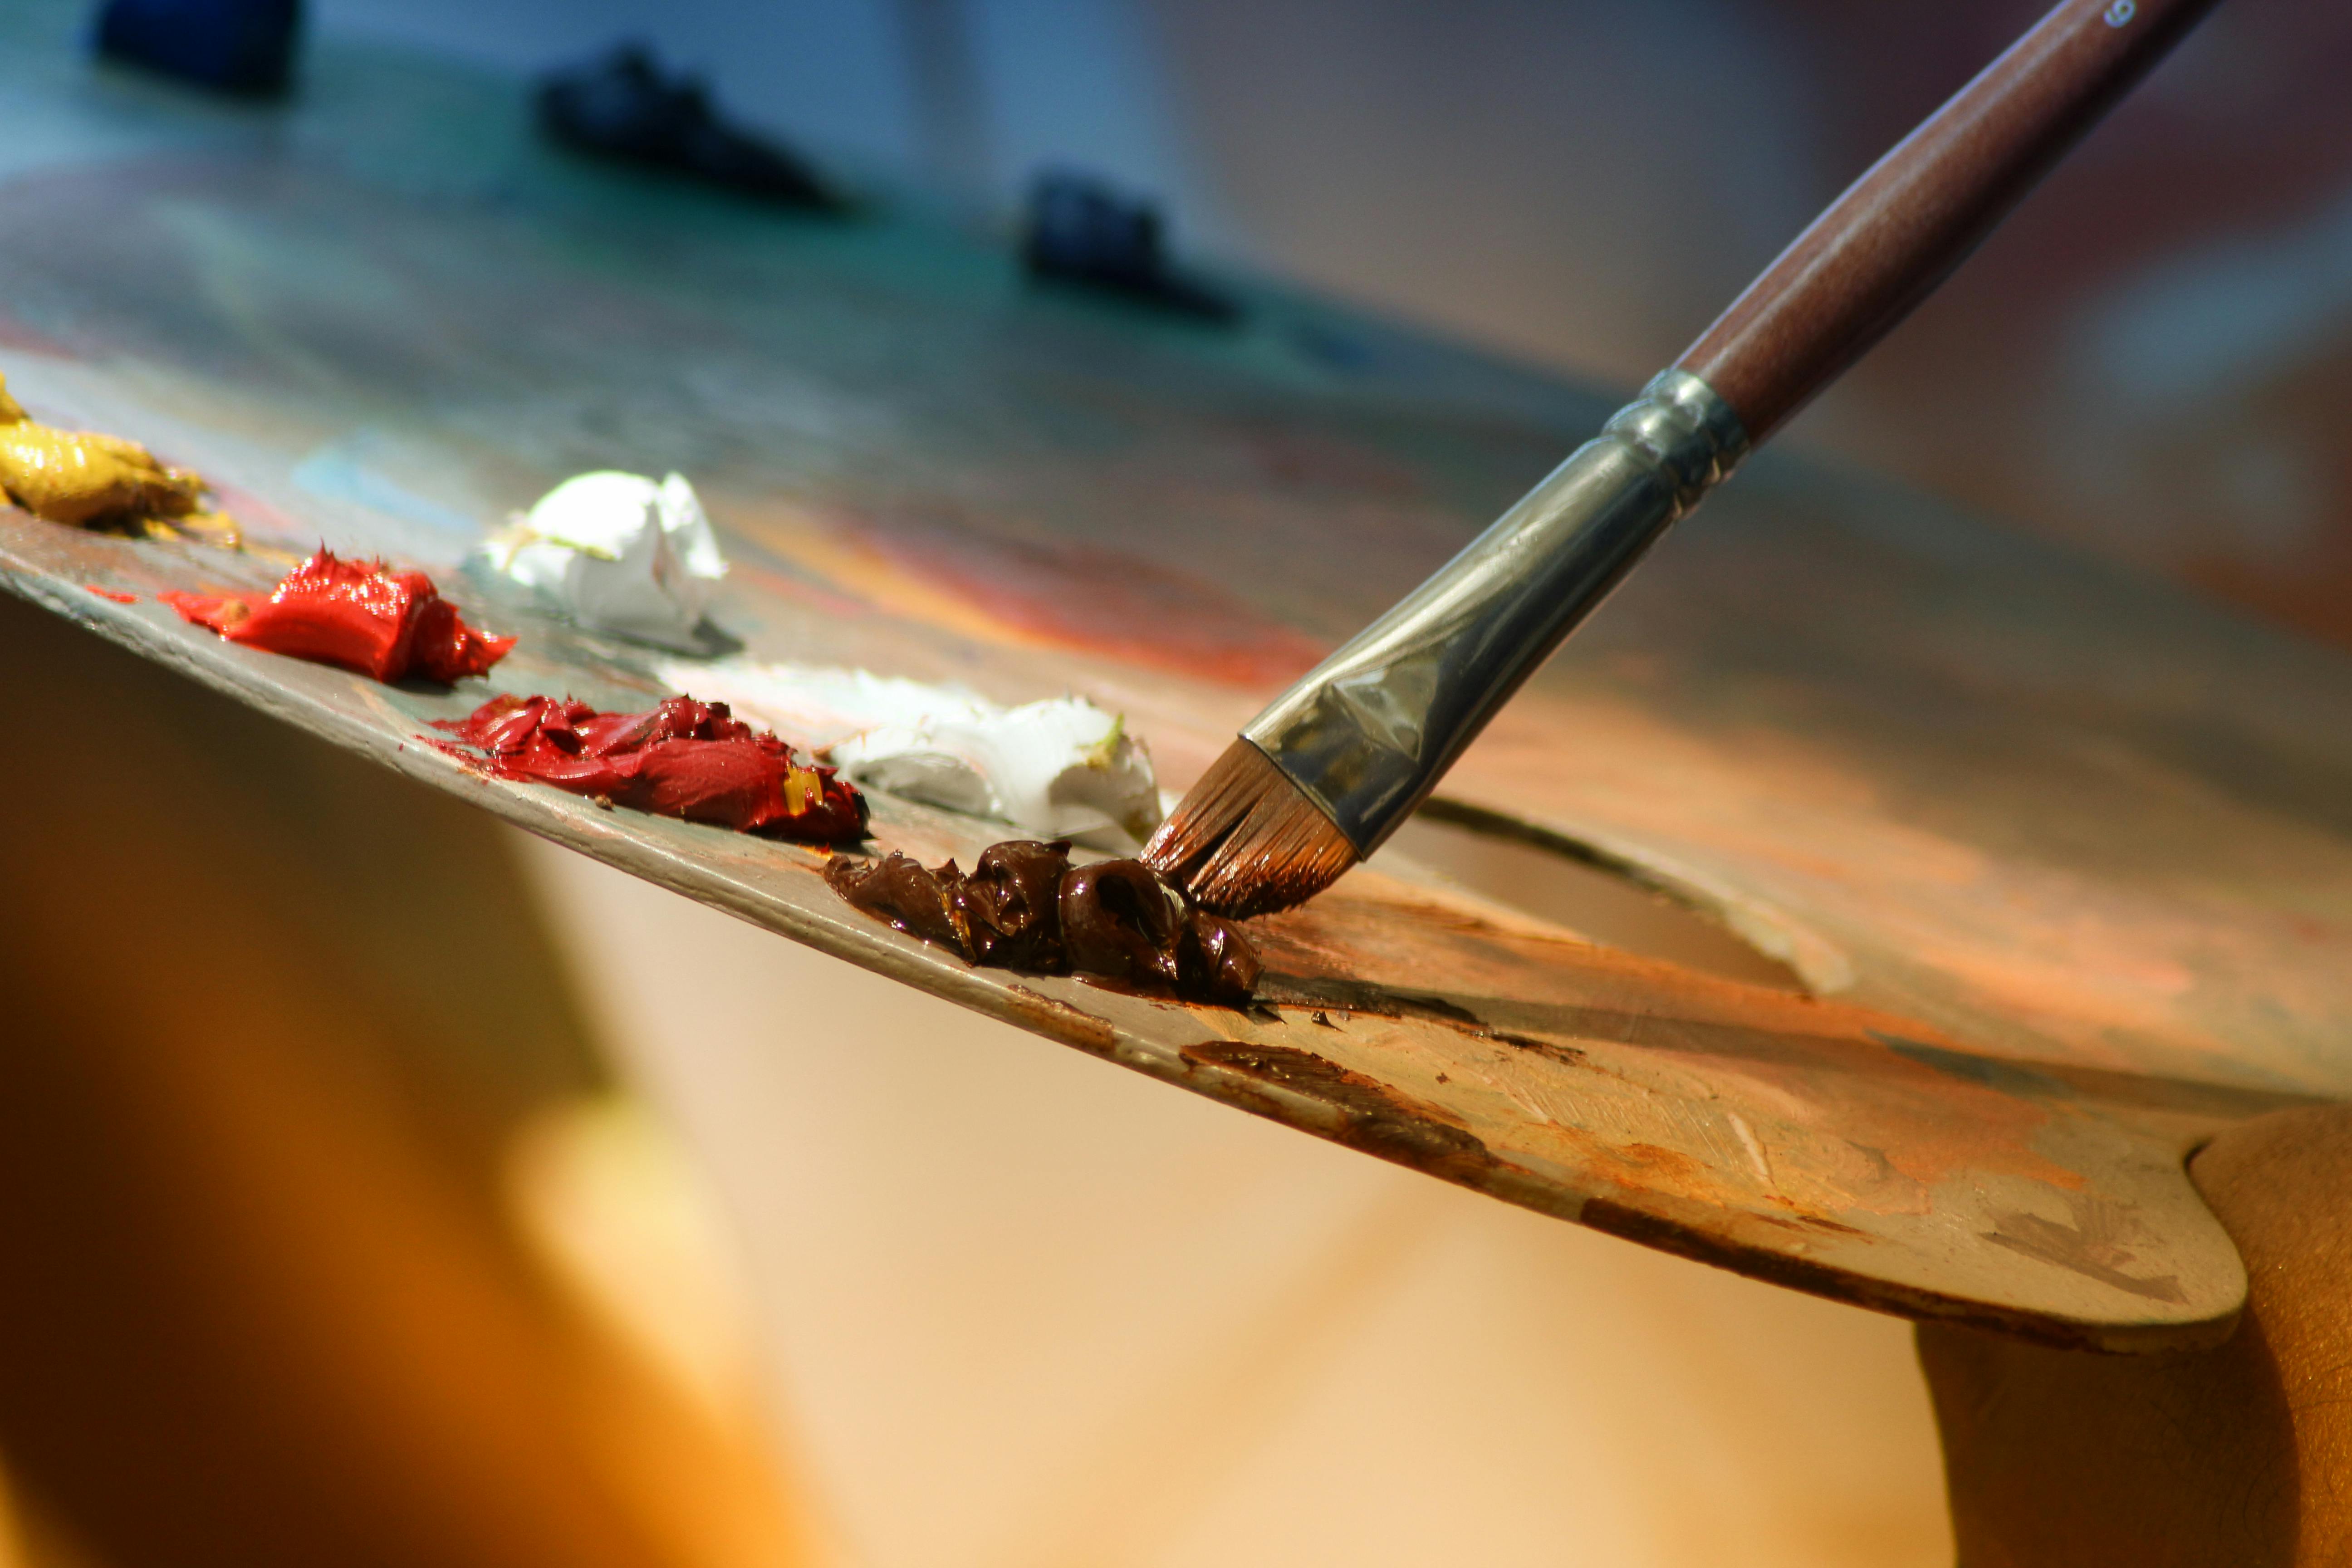

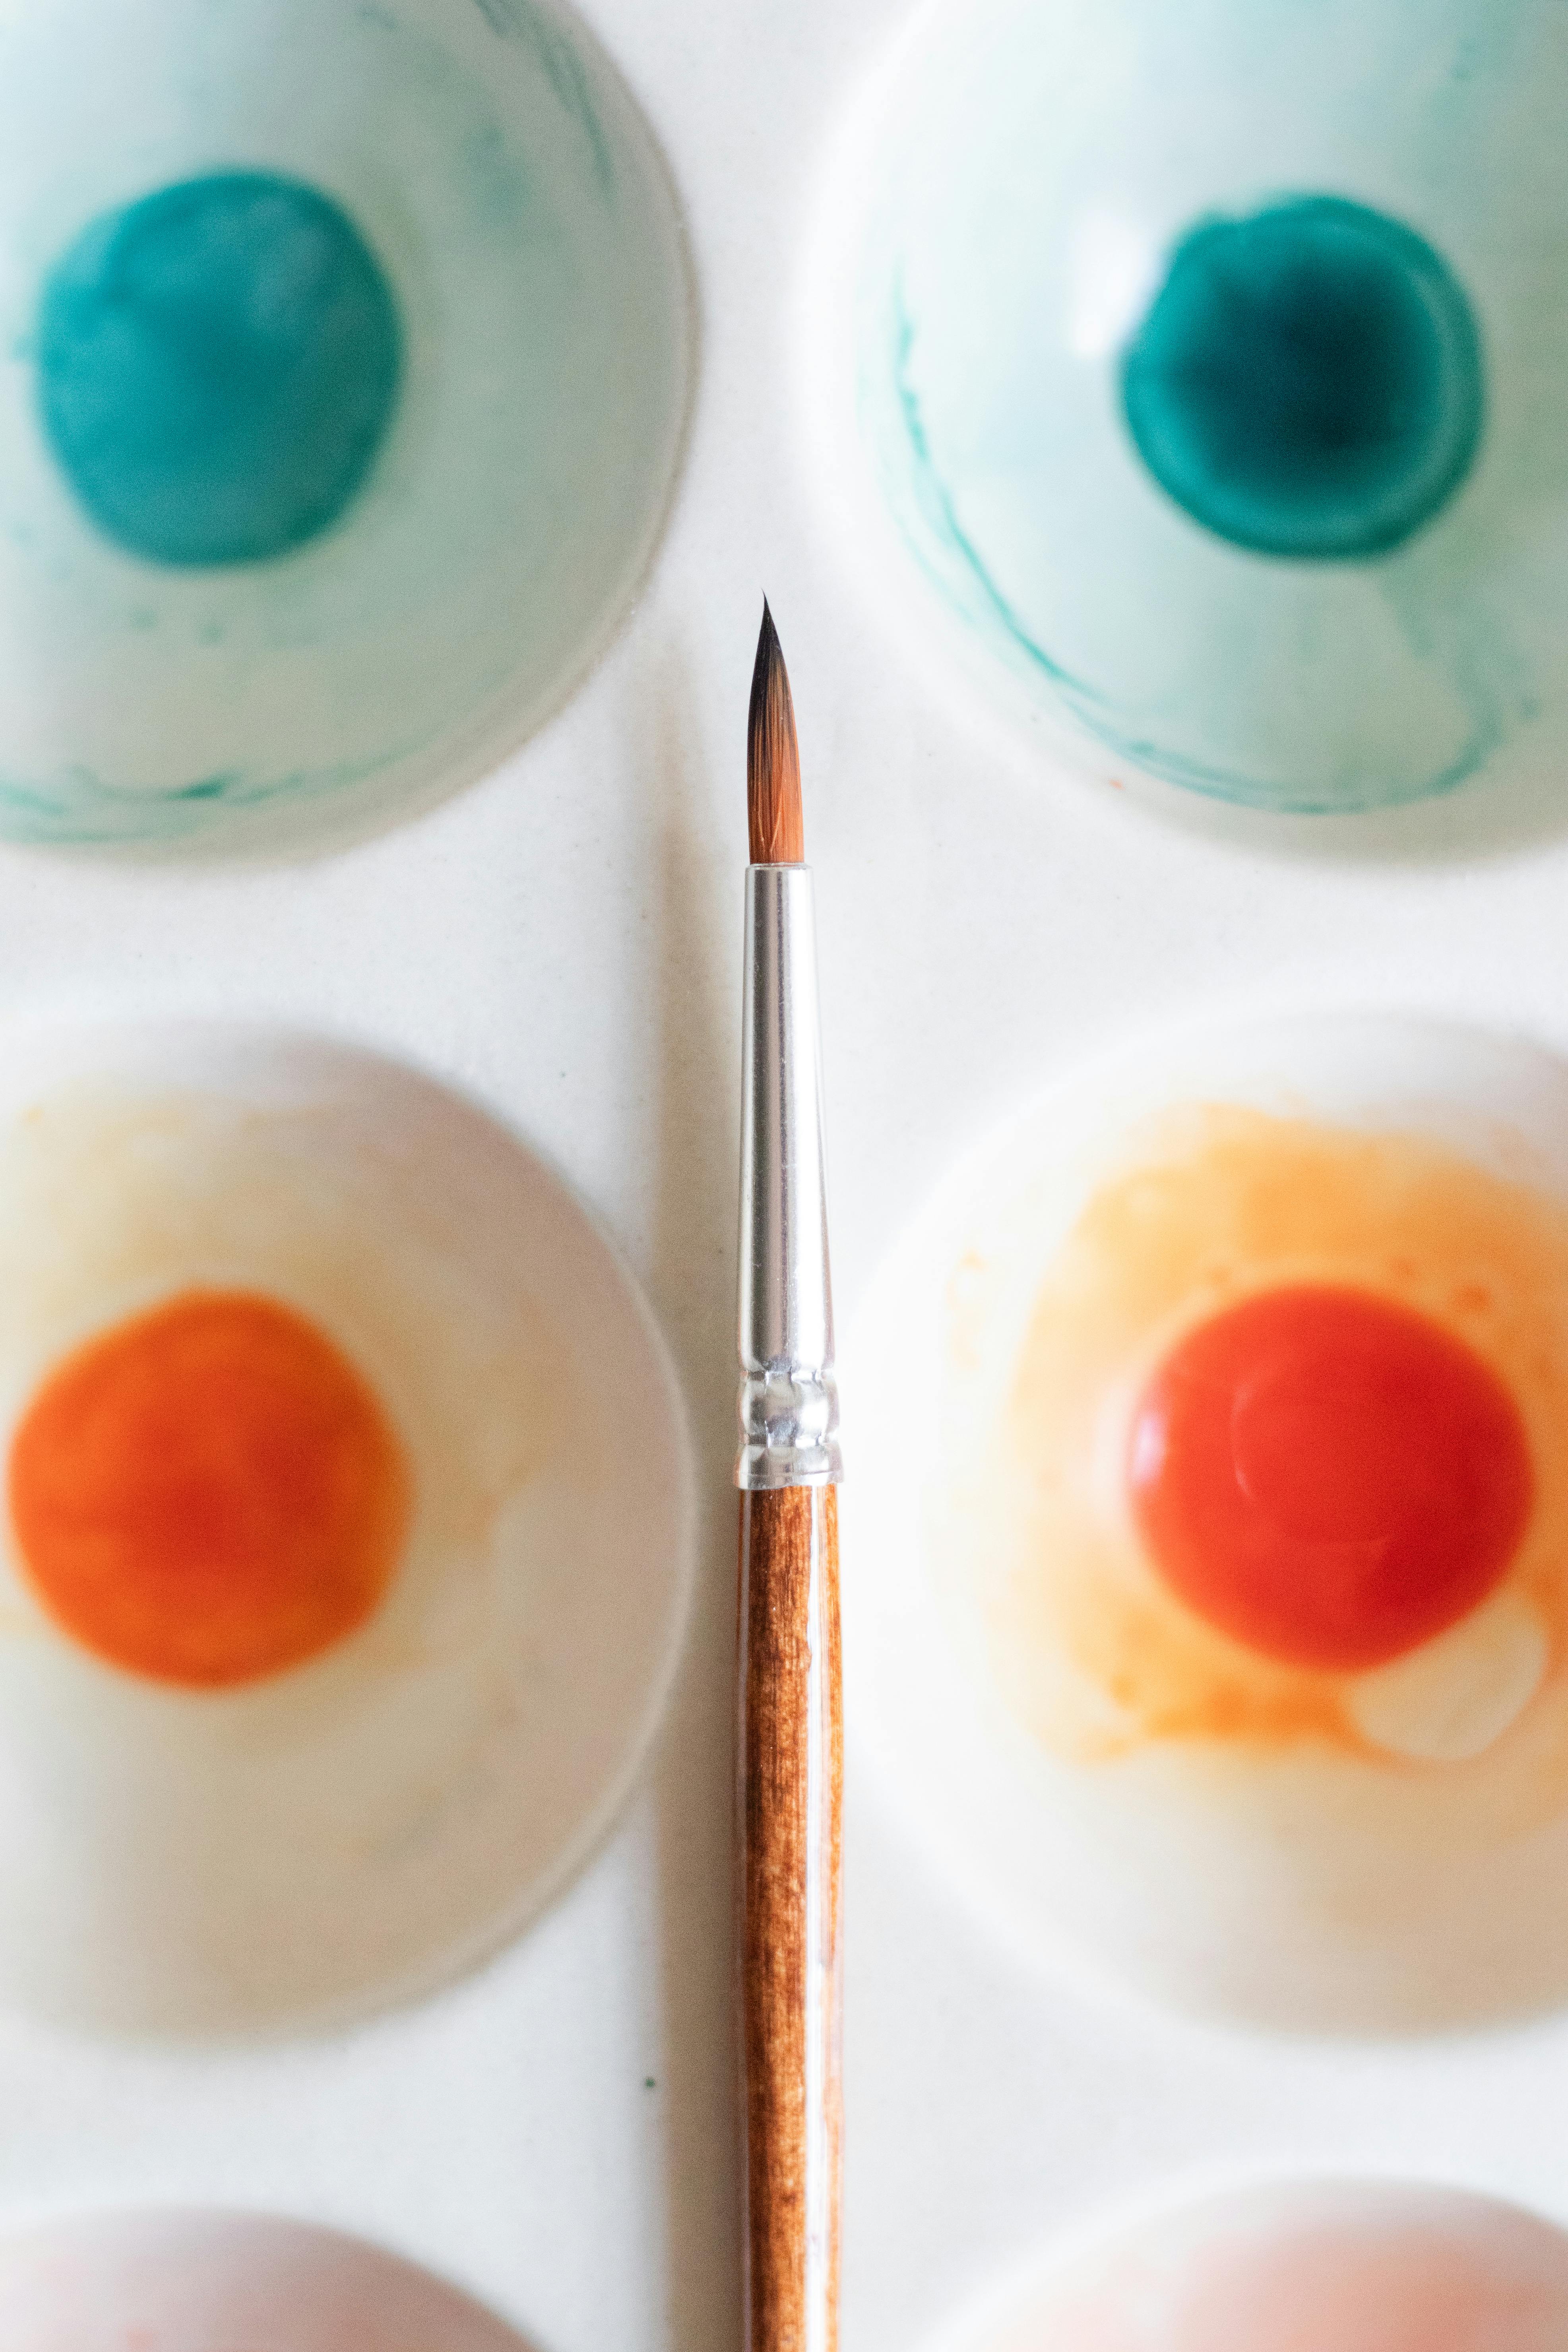








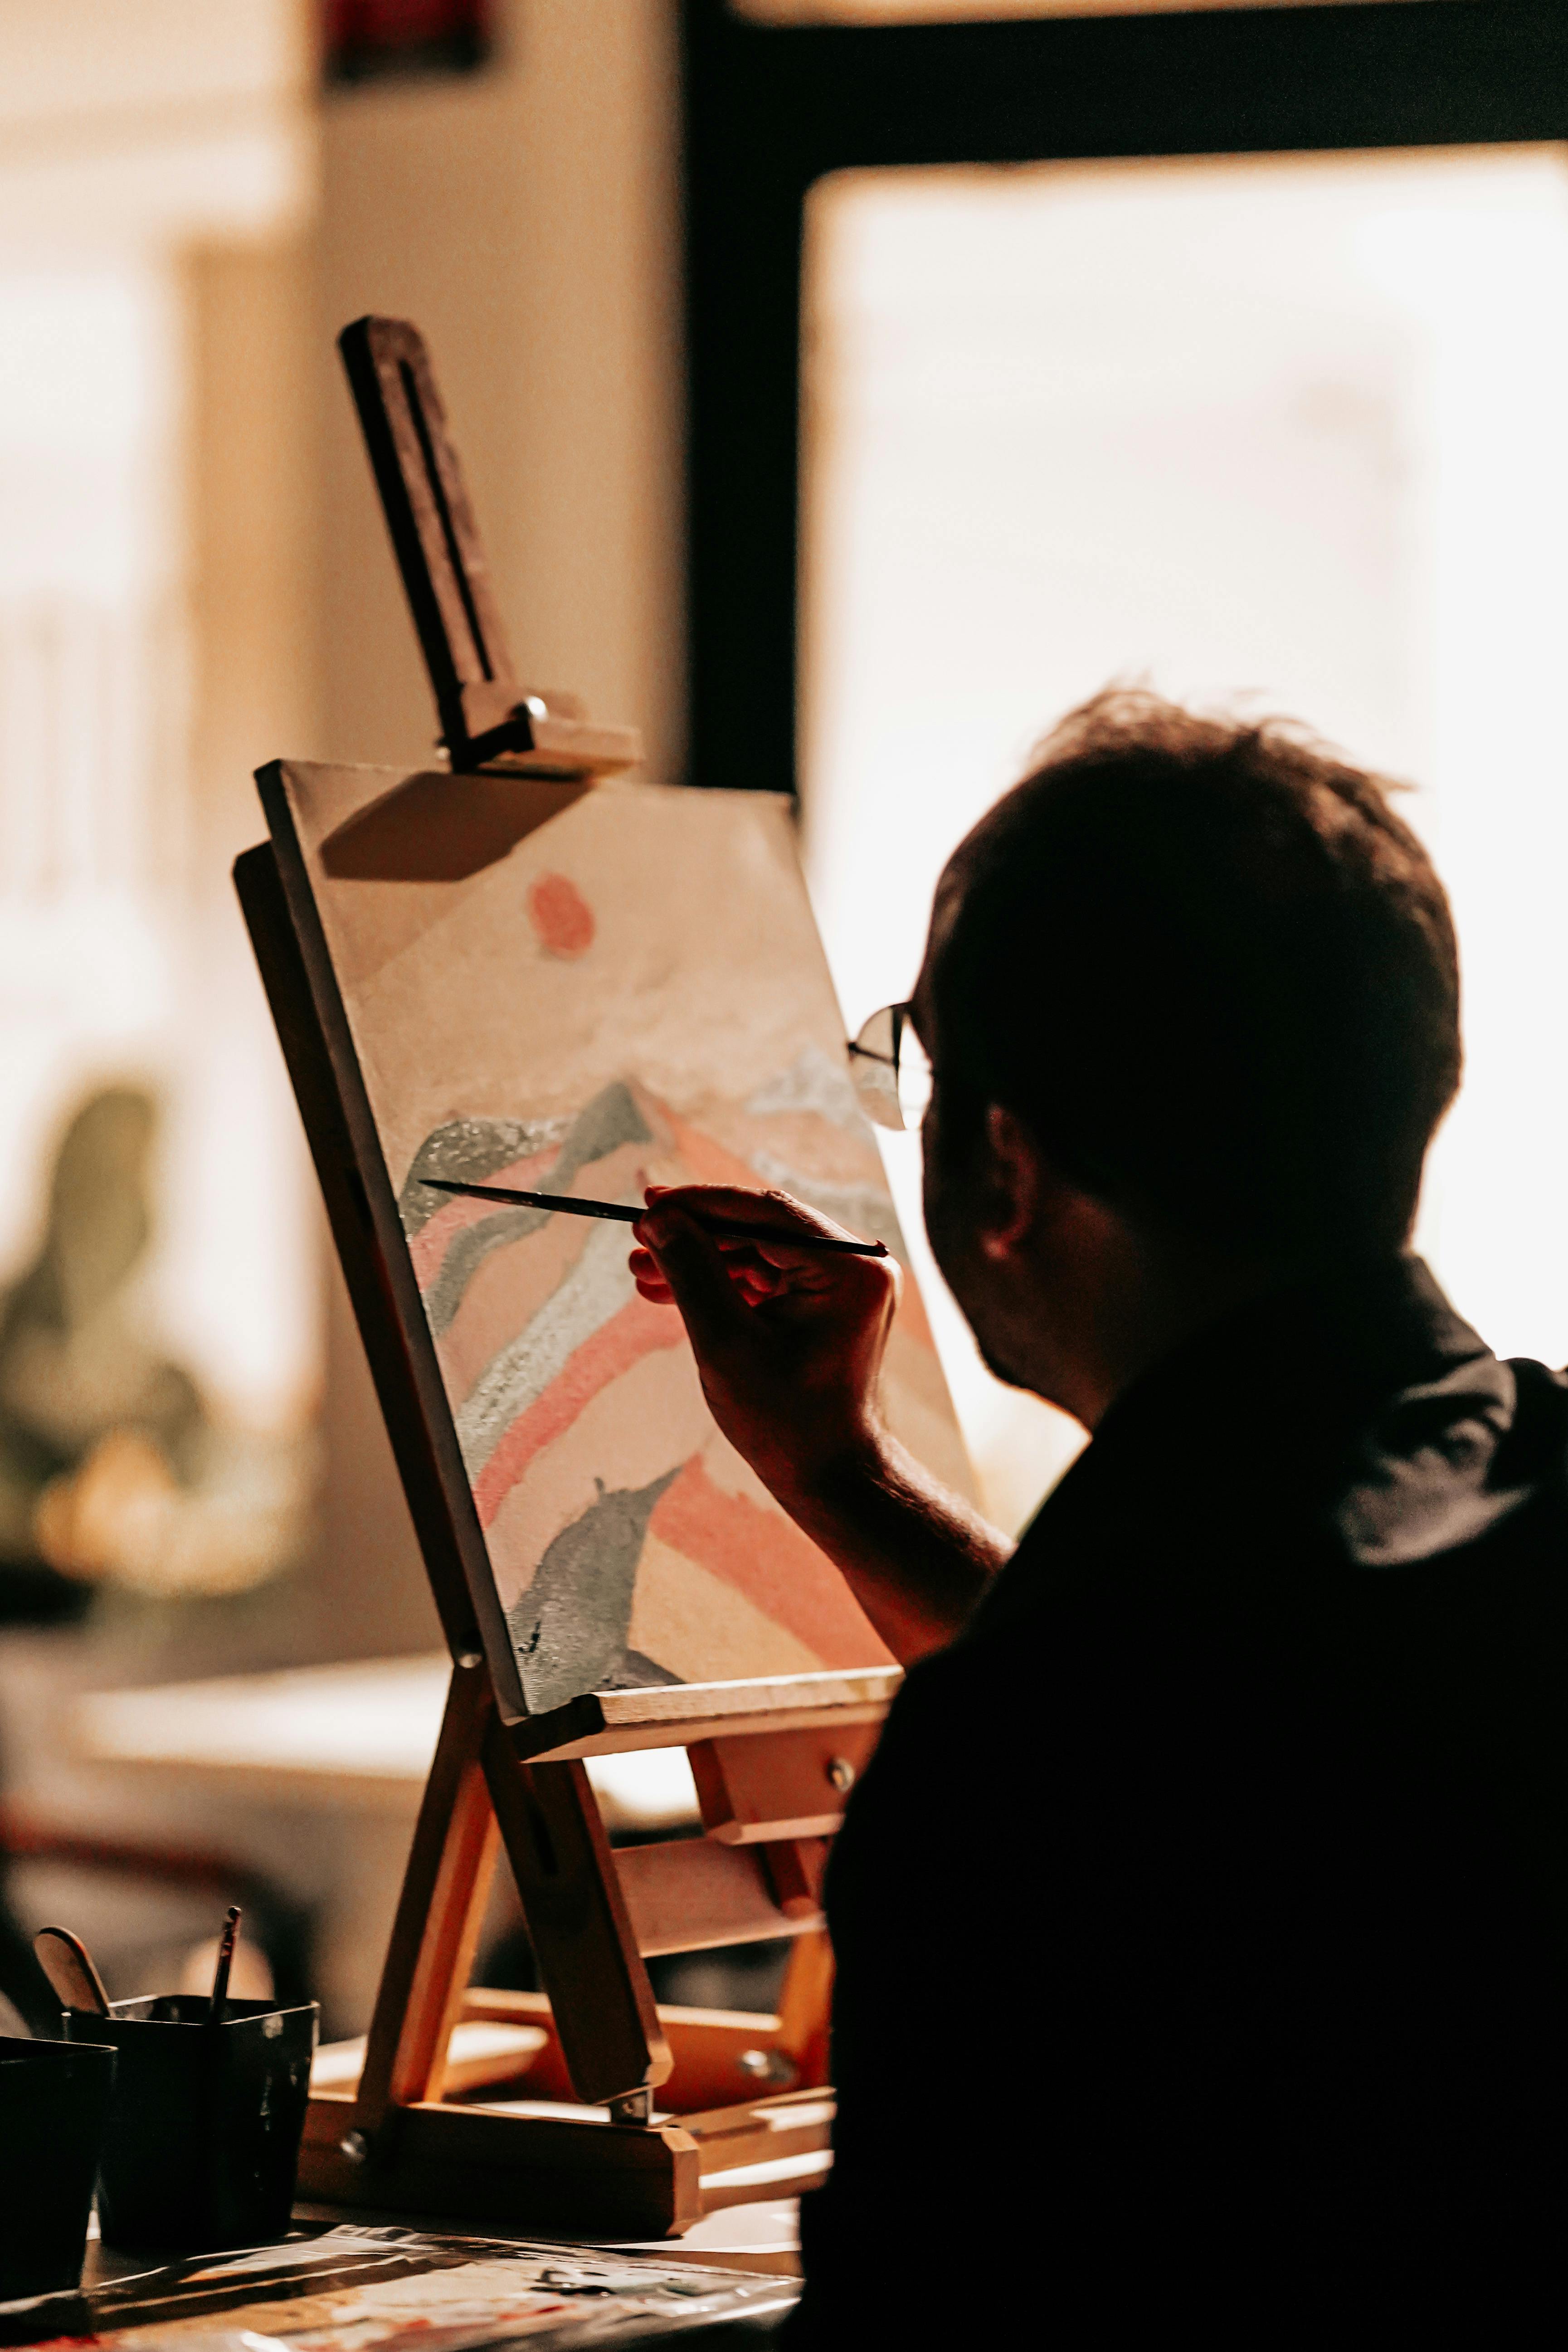


The Enduring Value: A Philosophy of Color
For me, making natural paint pigments isn't just a hobby; it's an extension of my artistic philosophy. It's about slowing down, connecting with the earth, and understanding the profound transformation that occurs when raw materials become a conduit for expression. It makes me feel more grounded, more present, and ultimately, more connected to the art I create. It's a reminder that beauty is everywhere, often hidden in plain sight, just waiting for us to uncover it. And sometimes, it just needs a little grinding and a good binder to shine. The journey from earth to canvas is a powerful metaphor for life itself – taking the raw, the unrefined, and through patient work, transforming it into something meaningful and beautiful. For me, making natural paint pigments isn't just a hobby; it's a profound extension of my artistic philosophy. It's about slowing down, connecting intimately with the earth, and understanding the deep, almost spiritual transformation that occurs when raw materials become a vibrant conduit for expression. It makes me feel more grounded, more present, and ultimately, more connected to the very essence of the art I create. It's a constant, beautiful reminder that beauty is everywhere, often hidden in plain sight, just waiting for us to uncover it. And sometimes, it just needs a little grinding and a good binder to truly shine. It's about finding the hidden narrative in every stone and leaf, and allowing that narrative to flow through my hands into my art.
The journey from earth to canvas is a powerful metaphor for life itself – taking the raw, the unrefined, and through patient work, transforming it into something meaningful and beautiful. This holistic approach to art-making, enriching every single brushstroke, connects me deeply to the ancient heartbeat of artistic creation, a rhythm that resonates through millennia and across cultures. It’s a way of feeling a part of something much larger, a quiet defiance against the fleeting trends of the modern world.
So, I extend this heartfelt invitation to you: next time you're out in nature, truly look, truly see. What colors are patiently waiting to be discovered beneath your feet, or in the rustling leaves above? What stories are they eager to tell, to unfold through your hands onto the canvas? Perhaps your next masterpiece, infused with a unique, earthy soul, is just a handful of earth away. This journey of creation, from earth to canvas, ultimately leads to a deeper, more profound appreciation for the boundless, vibrant palette of our world, and for the enduring, primal urge to create that connects all of humanity. If you're ever in Den Bosch, you might even spot some of these earthy tones subtly woven into my more abstract works, a quiet nod to their origins, their geological whispers adding depth to the visual narrative. It's a personal signature, a story embedded within the very colors I use.
For those who are truly committed to exploring natural materials further, consider experimenting with making your own how to make your own gesso – another foundational art material that connects you more deeply to the history and craft of painting. It's a wonderful, rewarding rabbit hole to fall down, leading to a deeper connection with your art and the world around you. This journey into natural pigments isn't just about making paint; it's about making a connection, to history, to nature, and to yourself as an artist.