
Master Drywall Art Hanging: My Ultimate Guide to Secure, Stunning Displays
Unsure how to hang art on drywall? My personal guide covers tools, the best anchors for any weight, step-by-step installation, and pro tips for flawless, secure art displays every time.
Hanging Art on Drywall: My Ultimate, No-Nonsense Guide to Perfect Placement
Alright, let's talk about hanging art. I know, I know. For many, it's right up there with filing taxes or assembling flat-pack furniture – a task fraught with anxiety and the potential for irreversible mistakes. And honestly, I've had my share of those moments. I still remember the time I thought a regular picture nail could hold a rather hefty framed poster from a local fair. Spoiler alert: it could not. The sound it made as it ripped a rather impressive gouge in the drywall still haunts my DIY nightmares. Patching holes? Oh, I've practically earned a second degree in it. But here's the thing I've learned from all those misadventures: it really doesn't have to be that way. Over the years, through trial, error, and a fair bit of spackle, I've found a rhythm, a system, that makes the whole process surprisingly satisfying. Consider this my personal, no-nonsense playbook for getting your art exactly where it belongs, safe and sound, on drywall. And trust me, if I can conquer the drywall dilemma, you absolutely can too.
The Drywall Dilemma: What Exactly Are We Dealing With?
Before we dive into the nitty-gritty, let's have a quick chat about what drywall actually is. Think of it as a gypsum plaster sandwich pressed between two sheets of paper. The gypsum core is somewhat brittle, and those paper layers, while offering some integrity, aren't exactly structural superheroes. It's fantastic for creating smooth, paintable walls quickly and affordably, which is why it's everywhere. But, and this is a big "but," it's not a structural material in itself. It's not like hanging art on solid brick or concrete (though I've got guides for that too, like how to hang art on brick walls and how to hang art on concrete walls). Those are solid blocks, capable of bearing immense weight directly. Drywall, by contrast, is more like a sturdy cardboard box – it holds its shape, but punch a hole in it with your thumb (don't, please!), and you'll quickly see what I mean. This means we can't just hammer a tiny nail willy-nilly and expect it to hold a substantial piece. Gravity is a cruel mistress, and your art deserves better than a dramatic floor crash.
The key is understanding the difference between hanging into a stud and hanging into the drywall itself. Studs are the vertical wooden or metal framing members that form the skeleton of your wall, running from floor to ceiling. They provide structural support for your house, and when you find one, you're golden – that's solid wood (or metal), baby, and it can hold a ton of weight with the right screw. When you can't, or don't want to, use a stud (because, let's be honest, sometimes the art just has to go there), then you need to employ clever devices called drywall anchors. These distribute the weight and create a more secure hold within the drywall itself. Simple as that.
Gathering Your Arsenal: Tools of the Trade (and My Personal Picks)
Before you even think about marking a wall, let's get our ducks in a row. Having the right tools isn't about being a professional contractor; it's about making your life easier and your results look professional. Trust me on this one – I've learned the hard way that skimping on tools often means more holes and more headaches.
The Essentials:
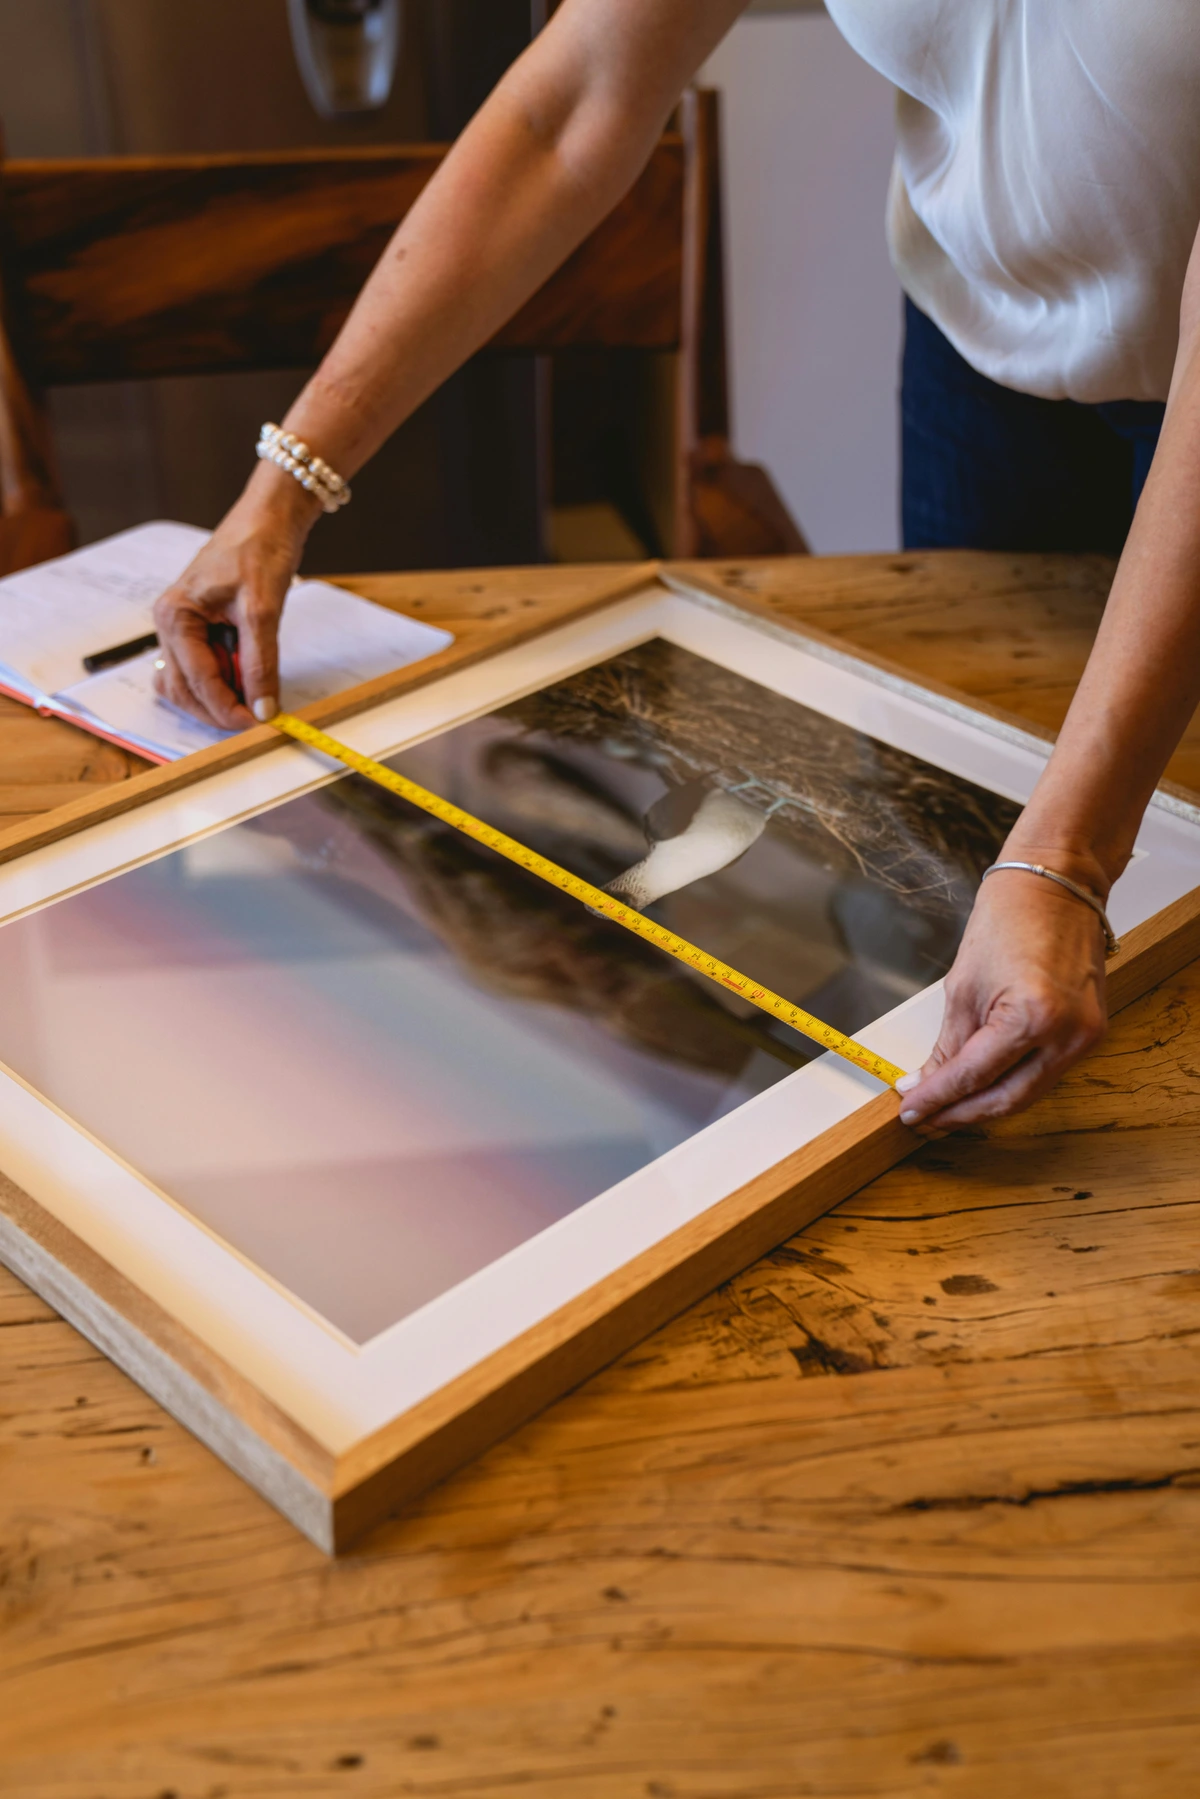
- Tape Measure & Pencil: Obvious, but crucial. Always measure twice (or thrice, if you're me and prone to overthinking). I like to mark not just where the hook will go, but also a light pencil line for the desired top edge or center of the artwork. It helps me visualize and avoid that sinking feeling when you realize you're off by an inch, necessitating an unsightly patch job.
- Level: A good old-fashioned spirit level is a must, or if you're feeling fancy, a laser level. For those of us who are visually… particular, a laser level is a game-changer, projecting a beam so straight it makes a spirit level look like it's had a few too many. It makes a world of difference for gallery walls or just ensuring that one painting isn't subtly tilting to the left, forever mocking your sense of equilibrium.
- Stud Finder: This is your best friend. A small, electronic device that detects studs, and sometimes even electrical wires and pipes (which, needless to say, you absolutely want to avoid). I once thought I could just "tap and listen" for a stud. My ear is not as good as a sensor, and the sound dampening of drywall often fools you into thinking solid when it's hollow. That resulted in an unnecessary hole and a frantic search for the spackle. Learn from my folly: get a stud finder. It's a small investment for massive peace of mind.
- Drill: Essential for pilot holes and installing some types of anchors. A cordless drill is a true luxury and saves your wrists. Make sure you have a few common drill bit sizes – you'll often need a specific size for pilot holes or for different anchor types.
- Hammer: For tapping in nails or picture hooks. Nothing too fancy required here, just a standard claw hammer will do.
- Painter's Tape: Great for temporarily marking layout, especially for multiple pieces. I also use it to mark the exact spot where a screw or anchor will go, which is super handy for planning gallery walls.
- Safety Glasses: Drywall dust in the eye is no fun. I once skipped them, only to have a tiny shard fly straight into my eye, convincing me for a solid five minutes I had a rogue abstract element permanently embedded in my retina. Just wear them. Please.
https://images.zenmuseum.com/article/how-to-frame-a-canvas-painting/b757ee70-bbc5-11f0-b345-5bb4f4208340.jpeg, licence
Choosing Your Hardware: More Than Just a Nail
This is where many people get tripped up. The world of hanging hardware is vast, but for drywall, we can narrow it down to a few trusty heroes. Your choice depends almost entirely on the weight of your art piece and whether you can (or want to) hit a stud. Always, always check the weight rating on the package for your chosen hardware – my numbers below are approximate and for guidance only!
Type of Hanger | Max Weight (Approx. Drywall Only) | Requires Stud? | Best Use Case | My Thoughts |
|---|---|---|---|---|
| Small Picture Hooks | 5-10 lbs | No | Very light frames, canvases, posters. | These are simple and effective for tiny stuff, using a tiny angled nail. But please, don't push it; that 10lb limit is real, and the nail offers minimal grip in drywall. |
| Adhesive Strips/Hooks | 1-15 lbs (check package!) | No | Temporary decor, very light pieces, renters. | Handy in a pinch, but I'm always wary. Heat and humidity can wreak havoc on the adhesive, softening it and leading to a surprise crash. Clean the wall thoroughly first, but for anything precious, I'd look elsewhere. |
| Self-Drilling Drywall Anchors | 10-25 lbs (per anchor) | No | Medium-weight framed art, mirrors. | My go-to for many pieces. They screw directly into the drywall (like screwing into a sturdy piece of wood) and provide a decent hold. Just don't overtighten; you'll strip the drywall and weaken the anchor, or even break the screw head. A drill on low torque helps. |
| Plastic Expansion Anchors | 10-25 lbs (per anchor) | No | Medium-weight items, usually require a pilot hole. | Reliable if installed correctly, but can be a bit fiddly. The key is getting the pilot hole the exact right size, or it will wobble. They expand behind the drywall to create a snug fit. |
| Toggle Bolts / Molly Bolts | 25-100 lbs+ (per anchor) | No | Heavy framed art, large mirrors, shelves. | The big guns for drywall-only hanging. These require drilling a specific size hole, then the bolt (or toggle) is pushed through. As you tighten, the wings spring open (like a tiny parachute!) behind the drywall, creating a super strong grip. A larger hole, but worth it. |
| Stud (Screw Directly In) | 50-100 lbs+ | Yes | Heaviest art, TVs, anything you absolutely cannot have falling. | Always the strongest option. If you can hit a stud, do it. Use a good, long screw that will penetrate the stud by at least an inch and a half for maximum security. |
| Monkey Hooks / Gorilla Hooks | 25-50 lbs (check package) | No | Medium to heavy art with a wire hanger. | Surprisingly strong for their size and minimal hole. My secret weapon for lots of pieces! They typically have a thin, strong hook that you push and twist into the drywall, hooking over the back of the plasterboard for support. |

My Step-by-Step Process: From Blank Wall to Masterpiece
Alright, tools in hand, coffee brewed (or tea, if that's your vibe). Let's get this art on the wall, and make it look like a pro did it.
Step 1: Prep and Placement – The Vision Board Comes Alive
This is arguably the most crucial step. Rushing here leads to those "oops" moments and unnecessary holes. Trust me, I speak from abundant personal experience.
- Visualize and Measure: Hold your art up to the wall. Step back. Look at it from different angles. Where does it feel right? Consider the furniture below it – for art above a sofa, for instance, you want it to be about two-thirds the width of the sofa, and typically 6-8 inches (15-20 cm) above the back of the sofa. For standalone pieces, I usually aim for the center of the art to be around eye-level, which is roughly 57-60 inches (145-152 cm) from the floor. This is a common gallery standard, and it just feels right because it's where our eyes naturally settle, making the art approachable and integrated. For rooms with very high ceilings, you might group art a bit lower to create a cozier feel; conversely, in rooms with lower ceilings, you might hang pieces slightly higher to draw the eye up.
- Mark it Up: Once you've got your spot, make a tiny pencil mark. If your art has a wire hanger, measure from the top of the frame to the taut wire when pulled up. That measurement, subtracted from the total height of the art from the top to your desired eye-level point, will give you where your hook needs to be from the top. For a D-ring or sawtooth hanger, you're marking directly where the hanger itself will sit. For a gallery wall, use painter's tape to map out your layout first, or even lay everything out on the floor beforehand. You can even cut out craft paper templates of each piece and tape them to the wall to visualize the exact arrangement. This is a total game-changer and saves so much grief.
Step 2: Find Those Elusive Studs! Seriously, don't skip this. Your stud finder is your oracle here.
- Scan the Area: Turn on your stud finder and slowly slide it horizontally across the wall where you plan to hang your art. It will typically beep or light up when it detects the edge of a stud. Mark both edges of the stud with a light pencil mark to find its center (usually about 1.5 inches wide). A useful cheat sheet: studs are often placed 16 or 24 inches (40-60 cm) on center from corners or around outlets/light switches.
- To Stud or Not to Stud?: If you find a stud exactly where you want your hanger, fantastic! Use a strong screw directly into the center of the stud. No anchor needed. This is always the most secure option. But what if the stud isn't in the ideal spot? Say it's a few inches off, and moving the art just wouldn't look right. In that case, it's often better to forgo the stud for that particular piece and use an appropriate heavy-duty drywall anchor to achieve perfect placement, rather than compromising your aesthetic. It's a balance, after all, between structural integrity and visual harmony. You can read more about ideal placement in articles like art above the sofa: a guide to perfect placement and scale or even how to decorate a wall.
Step 3: Installing Your Chosen Hanger
This step varies depending on the hardware you've selected, but here are the general vibes:
- For Small Picture Hooks: Simply place the hook on your mark and gently hammer the tiny nail(s) straight in at an angle. Easy peasy. The angle helps the nail get a better grip in the drywall.
- For Self-Drilling Drywall Anchors: Place the pointed tip on your mark. Using a Phillips head screwdriver or a drill (on a low torque setting!), screw the anchor directly into the drywall until it's flush. If it feels too tight, a small pilot hole with a drill bit slightly smaller than the anchor's shaft can help prevent stripping the screw head. Then, drive your screw into the anchor. Remember, don't overtighten!
- For Plastic Expansion Anchors: Drill a pilot hole of the specified size (this is crucial!). Push the plastic anchor into the hole until it's flush. Then, drive your screw into the anchor. As the screw goes in, it expands the plastic, creating a snug fit behind the drywall.
- For Toggle Bolts / Molly Bolts: These usually require a pilot hole. Drill the specified size hole, push the anchor through, and then tighten the screw. The "wings" will expand behind the drywall, creating a super secure grip. Hold the screw steady as you turn it to ensure the wings properly engage. These are fantastic for heavier pieces where a stud isn't an option.
Step 4: The Moment of Truth (and the Final Adjustments)
Now for the fun part! This is where your vision finally comes to life.
- Hang the Art: Carefully lift your piece and place its hanging wire or D-rings onto your chosen hook or screw. Take a moment to just let it hang naturally.
- Level Up: Grab your level. Adjust the art gently until it's perfectly straight. For wire hangers, sometimes it takes a little jiggle to get the wire to settle evenly. If your artwork has two D-rings or picture hooks, place the level directly on the top edge of the frame to ensure it's truly even.
- Bumper Pads: I always recommend adding small, self-adhesive bumper pads (felt or rubber) to the bottom corners on the back of your frame. They protect your wall from scuffs, help the art hang straight by creating a consistent, small gap at the bottom, and prevent it from shifting too much when someone walks by or closes a door.
- Step Back and Admire: Seriously, take a moment. You did it! A beautiful piece of art, perfectly hung, transforming your space. And if you're looking for more beautiful pieces to fill those walls, perhaps a peek at my art collection might spark some inspiration, or my latest works.
Common Pitfalls and How I've Avoided Them (Mostly)
I’ve made my share of mistakes, so you don’t have to! Learning from my blunders means fewer holes in your wall and less frustration for you.
- Overestimating Drywall Strength: This is the big one. Thinking a regular nail can hold your huge, glass-fronted print? Nope. It will fail. And usually spectacularly. I once tried this with a large, framed mirror. The sound it made as it crashed was truly unforgettable (and not in a good way). Always check the weight and use appropriate hardware. A large framed print with glass and matting, for instance, is far heavier than you'd think.
- Ignoring the Stud Finder: That "tap and listen" method? Yeah, no. Get a stud finder. It's a small investment for peace of mind and fewer holes to patch. I learned this the hard way when I drilled right into empty space multiple times trying to guess a stud location. My wall looked like Swiss cheese for a bit.
- Using the Wrong Hardware: A tiny picture hook for a medium mirror is a recipe for disaster. Conversely, using a heavy-duty toggle bolt for a feather-light canvas is overkill and leaves an unnecessarily large hole. Match the hardware to the weight. When in doubt, always go for a slightly stronger anchor than you think you need.
- Not Planning the Layout: Especially for multiple pieces or if you're trying to figure out how to decorate a wall with various sizes. Use painter's tape templates, lay everything out on the floor first. You can even try using a grid or a visual planning app if you're tech-savvy, but nothing beats seeing those paper templates on the actual wall. This saves so much grief and prevents those "I wish I'd put it slightly to the left" feelings after you've already drilled.
- The Dreaded "Oops" Hole: You will make a mistake. It happens. Don't panic. A small tub of spackle and a bit of paint will make it disappear like magic. Pro tip: before drilling for a final anchor, use a tiny finish nail or thumbtack to gently test the spot to ensure it's clear and not too close to a stud edge. It leaves a pinprick hole that's easy to fill if you're wrong.
What About Gallery Walls? A Quick Detour
If you're thinking of curating a collection of pieces – a gallery wall, perhaps with some abstract art for small spaces: maximizing impact in compact areas – the same principles apply, just on a larger scale. My advice here is paramount: lay everything out on the floor first to get your spacing and arrangement right. This is where those craft paper or painter's tape templates really shine. Tape those templates to the wall, step back, and adjust until your heart sings. This lets you visualize and adjust before making any holes. It's a game-changer, trust me. When it comes to spacing, 2-4 inches (5-10 cm) between frames is a good starting point, but let your eye be the ultimate judge.
Consider different gallery wall arrangements: a symmetrical grid for a formal look, an organic cluster for an eclectic vibe, or a linear arrangement if you're creating a focal point above a piece of furniture. You can mix and match frame styles for an artistic flourish or stick to a cohesive color palette for a more refined appearance. For more detailed guidance, check out how to make a gallery wall or how to hang a perfect gallery wall: a step-by-step guide.

https://images.zenmuseum.com/page/generic/displaying-and-viewing/art-paintings-gallery-architecture-buildings-a87061.jpg, licence
FAQ: Your Burning Questions, Answered
I get a lot of questions about hanging art, so let me tackle some of the most common ones that might be buzzing in your head right now.
- Q: Can I hang heavy art without a stud in drywall?
- A: Absolutely! But you must use the right type of heavy-duty drywall anchor. Toggle bolts and Molly bolts are designed for this exact purpose and can hold significant weight if installed correctly. Always check the specific weight rating of your chosen anchor, and if the piece is exceptionally heavy or valuable, err on the side of caution and perhaps use two anchors spaced appropriately, or even consider professional installation or wall reinforcement. Never just use a nail or a small picture hook for heavy pieces without a stud – that's a recipe for disaster.
- Q: How high should I hang my art?
- A: A general rule of thumb, especially in galleries, is to hang the center of the artwork at eye-level, which is typically 57-60 inches (145-152 cm) from the floor. This makes the art easily viewable and accessible. Of course, adjust for furniture (like decorating with art above a fireplace or a sofa) and ceiling height. For example, if hanging art above a bedside table, the bottom of the art should be about 6-8 inches (15-20 cm) above the tabletop.
- Q: What if I accidentally hit a pipe or electrical wire?
- A: This is precisely why a good stud finder that detects utilities is a lifesaver. Always scan the wall thoroughly. If you suspect a pipe or wire (e.g., near outlets, light switches, or plumbing fixtures), err on the side of caution. Don't drill deep if you're unsure. If you accidentally hit something, immediately turn off the power at the breaker box (for electrical) or the main water supply (for plumbing). For critical areas or if you have any doubt, it's always best to consult a professional electrician or plumber. This isn't a mistake you want to try to fix yourself.
- Q: Can I use Command Strips or adhesive hooks for all my art?
- A: For very light items like posters, small unframed prints, or temporary decorations, Command Strips can be convenient. However, I personally wouldn't trust them for anything with significant weight or sentimental value, especially in areas with humidity or temperature fluctuations. They're great in a pinch, but for permanence and security, traditional hardware is usually a safer bet. Remember, wall surface preparation is critical for Command Strips – they work best on clean, smooth, painted surfaces.
- Q: How do I patch a hole in drywall if I make a mistake?
- A: It's surprisingly easy! For small nail holes, a dab of spackle smoothed with a putty knife, then sanded lightly once dry with fine-grit sandpaper, and finally painted over. For larger holes (from, say, a toggle bolt), you might need a small drywall patch kit, which typically involves a self-adhesive mesh patch covered with spackle. There are tons of online tutorials for this, so don't despair! Just be sure to match your paint sheen for a seamless finish.
Conclusion
Hanging art on drywall might seem intimidating, but with the right tools, a little planning, and a dose of confidence (and maybe a bit of my own trial-and-error wisdom), it's a completely manageable and deeply rewarding task. It's about taking ownership of your space, making it truly yours, and bringing your unique vision to life, one perfectly placed piece at a time. The feeling of stepping back and seeing your carefully curated art transforming a room? Priceless.

So go ahead, measure twice, find those studs (or choose your anchors wisely!), and transform your walls into a personal gallery. And hey, if you're looking for that perfect piece to start your next hanging adventure, you know where to find me – just take a look at my latest works or browse the full collection. Happy hanging!


