Mastering Concrete Walls: How to Hang Art Safely & Stylishly
Conquer the challenge of hanging art on concrete walls! I'll guide you through the right tools & techniques, from drills to anchors, to display your artwork securely and beautifully.
# Mastering the Unyielding Canvas: A Personal Guide to Hanging Art on Concrete Walls
Ever stood in front of a sleek, modern concrete wall, a cherished piece of [art](/buy) in your hands, and felt that familiar pang of dread? I know I have. Those gorgeous, brutalist-inspired surfaces, so chic and minimalist, are often anything but when it comes to hanging something as simple as a picture frame. It feels like you need a construction crew, an engineering degree, and maybe a small miracle, right? Well, take a deep breath, because I'm here to tell you it's not nearly as intimidating as it seems. In fact, with the right knowledge and a dash of confidence, hanging art on concrete can be incredibly rewarding, creating a truly stable and impactful display that truly speaks to your personal style.
For years, I've battled with these unyielding canvases. From my first tiny studio apartment, where every single wall was solid concrete (a true trial by fire!), to later projects in various urban lofts and even helping friends with their industrial-style homes, it's been a journey of learning. But through countless drills, a few bent nails (don't ask about the early days!), and a lot of concrete dust, I've learned a thing or two about making friends with my hammer drill and mastering what initially felt like an impossible task. This guide distills all that hard-won experience, offering you a clear, step-by-step path to transforming that stoic concrete into the perfect gallery space for your beloved artworks – whether they're vibrant prints, delicate [sculptures](/finder/page/how-to-hang-art-on-concrete-walls), or powerful abstract pieces that truly demand attention.
Let's conquer this challenge together! You'll be amazed at the stability and aesthetic impact you can achieve, transforming what once felt like a barrier into a breathtaking backdrop for your personal collection.## Why Concrete Walls are a (Glorious) Challenge
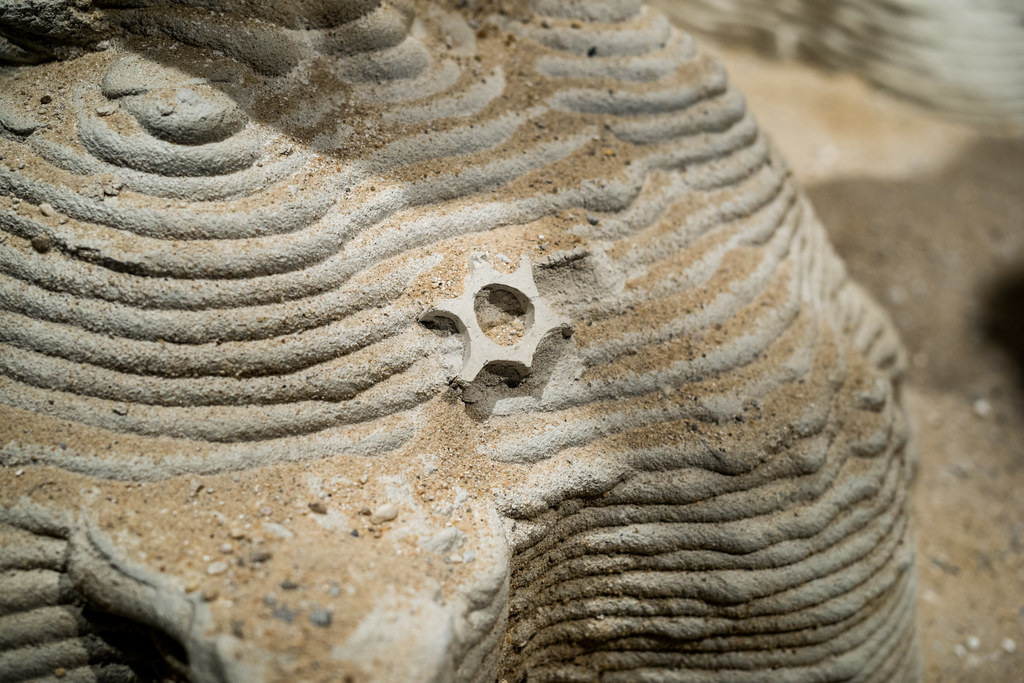
[credit](https://images.pexels.com/photos/7859311/pexels-photo-7859311.jpeg),
[licence](https://creativecommons.org/public-domain/)
First, let's truly appreciate why we even deal with concrete. It's not just a utilitarian material; it's a statement, a design choice, and often, a structural necessity. For me, there's a certain unvarnished honesty to it, a raw elegance that many other materials just can't quite replicate. It embraces a minimalist, brutalist, or industrial aesthetic with open arms, and it creates this incredible counterpoint to the vibrancy and detail of a well-chosen piece of art. Imagine a smooth, cool concrete wall, then picture a riot of color from a contemporary [abstract painting](/buy) against it – that contrast, that dialogue, is absolutely electrifying. Think about its inherent properties: incredible durability, fantastic thermal mass (hello, stable temperatures and lower energy bills, especially in those older loft conversions! I once lived in a loft where the concrete kept the temperature so steady, it felt like magic), and that undeniable, raw, often minimalist aesthetic that many of us adore. From chic urban lofts to industrial-style homes, modern galleries, and even commercial spaces, concrete is everywhere, and its popularity as both a structural element and a design feature isn't waning. It speaks of permanence, robustness, and a certain unvarnished beauty, creating a striking, often contrasting, backdrop for [contemporary art](/buy) that truly makes the artwork pop.
But here's the rub, the glorious challenge: it's incredibly hard. Unlike drywall or plaster, which are relatively forgiving, easy to penetrate with basic tools, and can be easily patched (I've certainly done enough of that in my time, let me tell you!), concrete requires a completely different kind of respect and a specialized approach. It's like trying to carve a diamond with a spoon – you need the right tools, the right technique, and a healthy dose of patience. You absolutely cannot just hammer a nail in and hope for the best. That, my friends, is a direct recipe for bent nails, frustrated sighs, potentially damaged artwork, and definitely a tiny, unsightly crater in your wall (ask me how I know – it involved a particularly stubborn picture hook and a moment of sheer, misguided optimism in my early days). Concrete, in essence, is a solid, unyielding canvas that demands the right tools and techniques.
To truly illustrate the difference and underscore why specialized methods are non-negotiable, here's a quick comparison:
| Feature | Drywall/Plaster | Concrete |
| :---------------- | :------------------------------ | :----------------------------------------------- |
| **Material** | Gypsum board, often hollow | Dense, composite material (cement, aggregate, water, sometimes rebar) |
| **Hardness** | Soft, easily damaged | Extremely hard, resistant to penetration, abrasive |
| **Tooling** | Hand tools, basic drill | **Specialized power tools required (hammer drill, rotary hammer, masonry bits)** |
| **Anchoring** | Toggle bolts, wall plugs, simple screws | **Heavy-duty anchors (plastic expansion, sleeve, wedge, chemical, drop-in)** |
| **Weight Support**| Light to medium (with right anchors, often limited by board strength) | **Heavy to very heavy (superior load bearing capacity, limited by anchor choice)** |
| **Repair** | Relatively easy to patch with spackle/joint compound | Requires specialized concrete fillers, epoxy, and matching techniques |
| **Aesthetic** | Neutral, paintable, traditional | Raw, industrial, minimalist, exposed, modern, brutalist |
| **Sound Insulation** | Moderate (can be improved with insulation) | Excellent (high density dampens sound effectively) |
| **Fire Resistance** | Good (gypsum core is fire-resistant) | Excellent (non-combustible, high thermal mass) |
| **Dust & Debris** | Minimal, easily contained | Significant, fine silica dust (hazardous) |
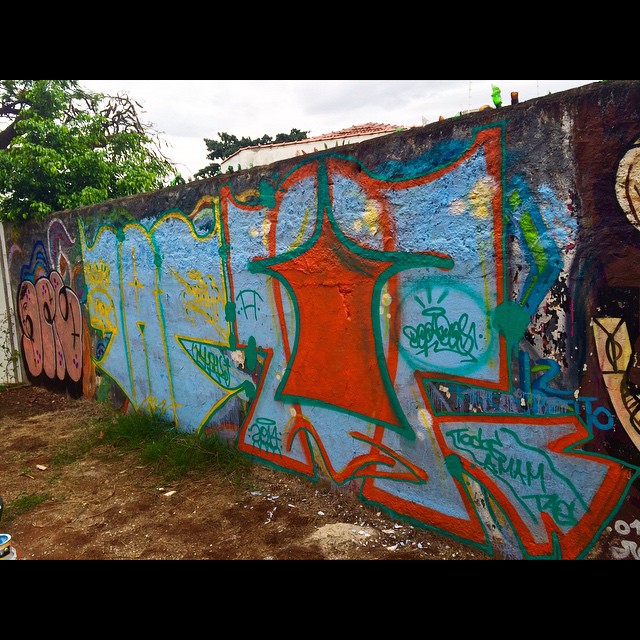
So, to avoid such mishaps, frustration, potential damage to your home, and even injury, we absolutely must turn to specialized tools and techniques. It's like how you can admire a vibrant piece of [street art](/finder/page/how-to-hang-art-on-concrete-walls) on a concrete canvas – it's often meant to last, to be a permanent fixture, facing the elements. That's precisely the attitude we need to adopt when hanging our own cherished art. It's about stability, longevity, preserving your artwork, and fundamentally respecting the material itself.
[credit](https://upload.wikimedia.org/wikipedia/commons/c/c6/Graffiti_in_Chicago_wicker_park.jpg), [licence](https://creativecommons.org/licenses/by-sa/3.0)## The Right Tools for the JobAlright, let's talk hardware. This is where most people get a bit overwhelmed, but honestly, once you understand the purpose of each item, it all clicks into place. You wouldn't use a paintbrush to chisel marble, would you? Same principle applies here.### Drill and Masonry Bits
This is your primary weapon, the absolute non-negotiable item for any concrete-hanging expedition. You absolutely **need a hammer drill** for concrete. Let me repeat: *a regular drill just won't cut it*. A standard rotary drill might spin and buzz, but it lacks the necessary oomph to effectively chip away at dense concrete; it'll just dull your bits, wear out its motor, and leave you frustrated (I once spent an hour trying to make a single shallow hole, utterly convinced my arms just weren't strong enough – spoiler: it was the drill!). A **hammer drill** is different; it adds a percussive, hammering action while it spins, literally pulverizing and chipping away at the concrete as it cuts. This combination of rotation and impact makes all the difference.
For occasional light-to-medium use (like hanging a few pieces of art), a standard **corded hammer drill** is perfectly adequate and often more powerful for its size than cordless versions. They're also generally more budget-friendly. However, for really tough, reinforced concrete, frequent use, or larger projects, a **rotary hammer drill** is an absolute dream. These specialized tools have a more powerful, dedicated hammering mechanism, making short work of even the most stubborn concrete. While usually overkill for hanging a single picture, if you live in a concrete jungle and plan many installations, it's worth considering renting or investing. Look for features like variable speed control, which gives you more precision, especially when starting a hole. Also, don't forget to give your drill a break if you're doing multiple holes – these tools work hard, and a little cool-down time can extend their life. Keep those air vents clear, too!

[credit](https://images.pexels.com/photos/6731909/pexels-photo-6731909.jpeg),
[licence](https://creativecommons.org/public-domain/)
Alongside your hammer drill, you'll critically need **masonry bits**. These are not your average drill bits designed for wood or metal; they're specifically engineered for tough, abrasive materials like concrete, brick, stone, and tile. They typically feature a hardened, often **tungsten carbide-tipped** head, which allows them to grind and chip through the material without dulling instantly. For particularly hard or reinforced concretes, or if you're drilling many holes, you might even consider **diamond-tipped bits**. While more specialized and expensive, they offer superior cutting power and longevity in extreme conditions. There are also specific bits for different hammer drill chuck types (SDS-plus, SDS-max), so always ensure compatibility – a wrong fit can damage both your drill and your bits.
**Crucial Point:** Always ensure the masonry bit size precisely matches the diameter of your chosen wall anchors. A slight mismatch can lead to a frustrating situation: a hole that's too small for the anchor, or worse, a hole that's too large, resulting in a loose, insecure anchor. Trust me, I've had both frustrations, and the latter means you're either patching and redrilling or living with a wobbly piece of art.
### Anchors and Screws: The Unsung Heroes
This is the true backbone of your art-hanging system, the critical interface between your art and the unyielding concrete. Concrete is far too dense and brittle for screws to grip directly and reliably, so we create a robust, secure sleeve or bond for them with specialized anchors. There's a surprising variety of these unsung heroes, and choosing the right one is absolutely critical for both the safety of your cherished artwork and your own peace of mind. Think of it as tailoring the perfect foundation for your [masterpiece](/buy). And a quick word to the wise: don't skimp on quality here. Cheap anchors are a recipe for disappointment and potential disaster. Invest in reputable brands; your art deserves it.
Here's a breakdown of the most common and effective types:
7. **Toggle Bolts (for hollow concrete block/brick):**
* **Best For:** Medium to heavy items (50-150 lbs, depending on size and block integrity) where the wall has a hollow core, such as concrete block (cinder block) or hollow brick. Not for solid concrete.
* **How They Work:** These anchors require a larger pre-drilled hole through which a spring-loaded metal toggle wing (or plastic toggle with internal threads) is inserted. Once past the wall surface, the wings spring open inside the hollow cavity. As you tighten the screw, the wings pull tight against the inside of the wall, distributing the load and creating a very strong, weight-distributing hold.
* **Pros:** Excellent holding power in hollow walls, distributes weight over a larger area, relatively easy to install once the hole is drilled.
* **Cons:** Requires a larger initial hole, and if the screw is removed, the toggle wing often falls into the wall cavity, making re-use difficult or impossible without retrieving it. Not suitable for solid concrete.
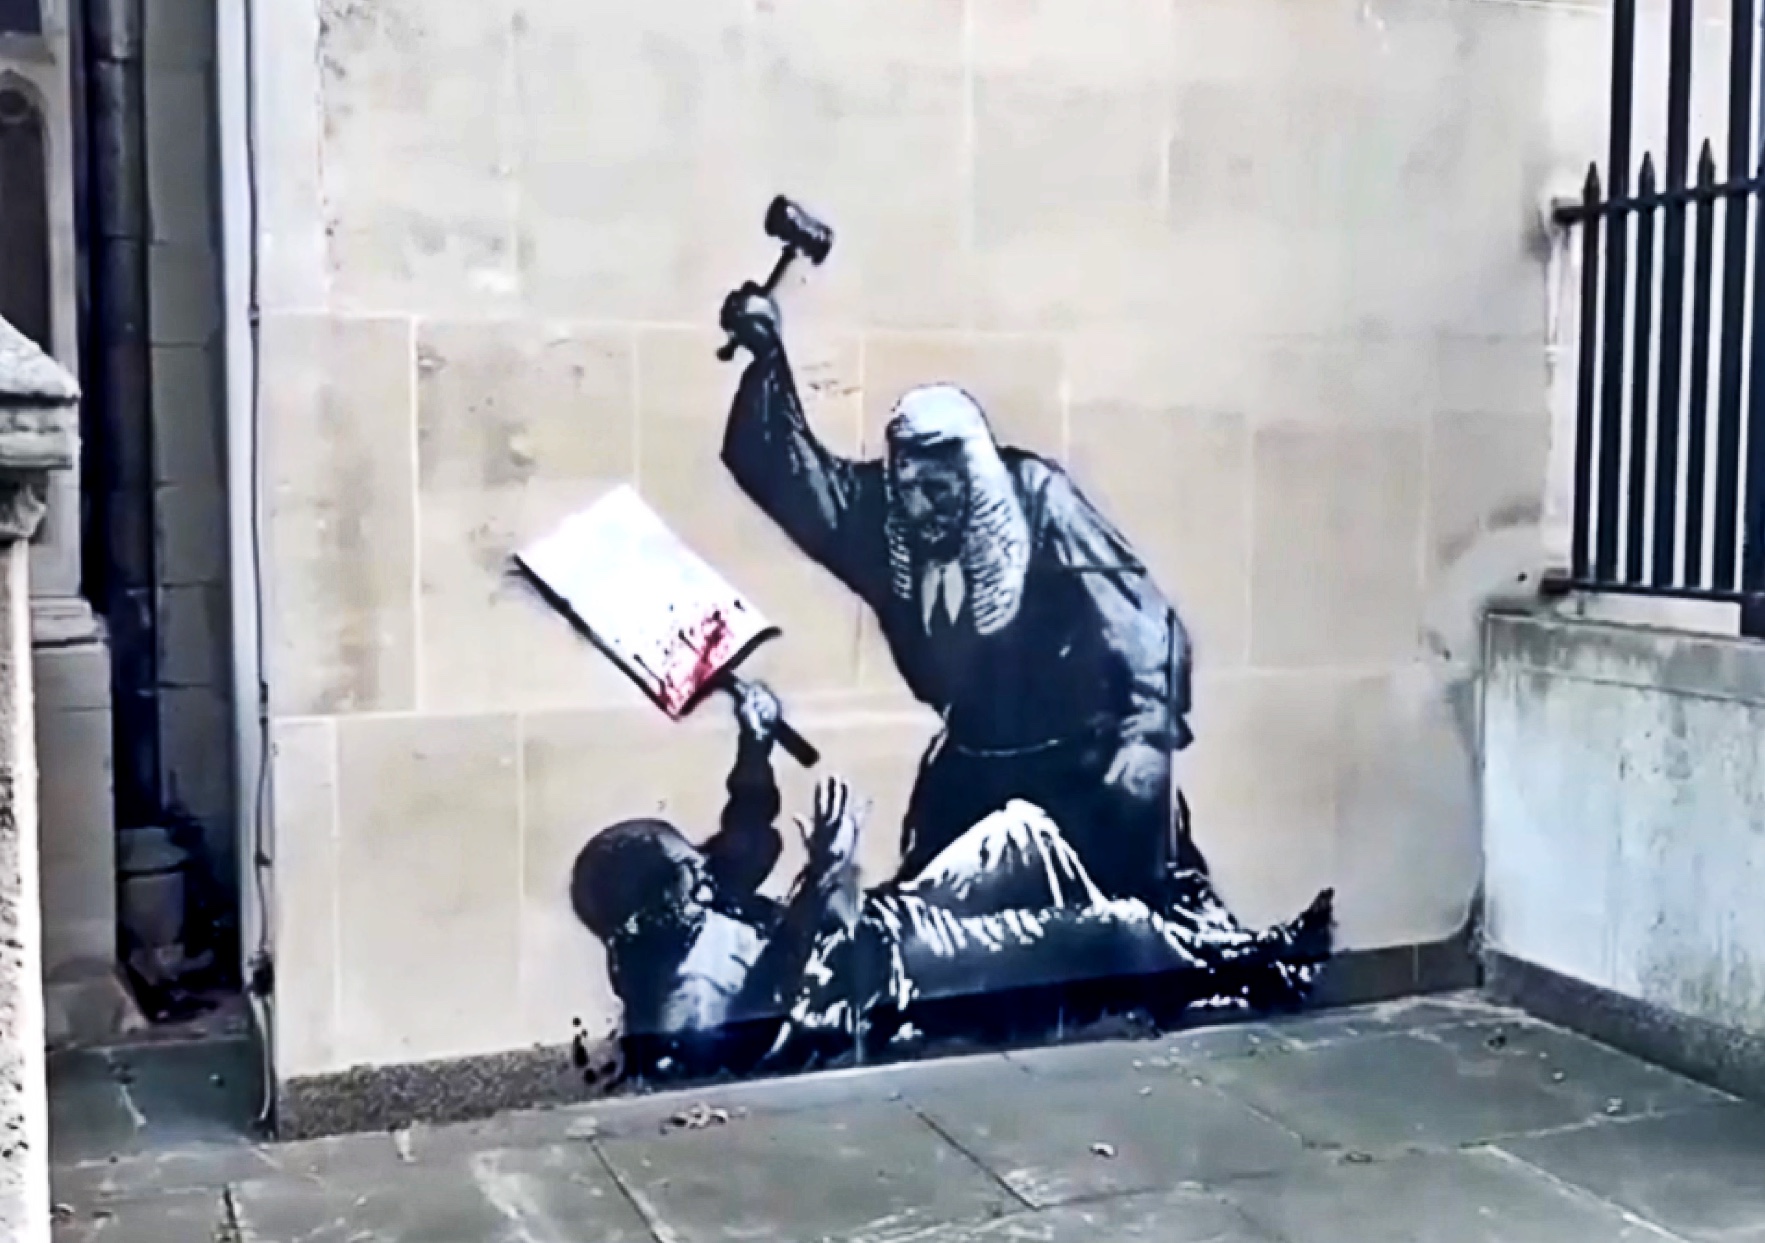
[credit](https://upload.wikimedia.org/wikipedia/commons/5/5f/British_street_artist_Banksy_has_painted_a_mural_on_London%27s_High_Court_depicting_a_judge_beating_a_protester.jpg),
[licence](https://creativecommons.org/licenses/by/4.0)
1. **Plastic Expansion Anchors (Often called Rawlplugs or Wall Plugs):**
* **Best For:** Lighter to medium-weight items (typically up to 20-50 lbs, though this varies significantly by anchor size, length, and the quality/density of the concrete). This is generally my go-to for most standard framed artwork, photographs, and smaller decorative pieces in my own home. They're incredibly versatile for everyday home use, especially if I anticipate changing my mind and moving things around (which, let's be honest, happens more often than I'd like to admit!).
* **How They Work:** These clever little plastic sleeves are inserted into a pre-drilled hole. As a screw is driven into the anchor, it forces the plastic to expand outwards, creating a tight, friction-based fit that grips the inside of the concrete hole securely. It's a simple yet effective mechanism.
* **Pros:** Inexpensive, widely available at any hardware store, relatively easy to use, and forgiving for minor variations in hole depth or diameter. They're also less destructive if you decide to remove them later.
* **Cons:** Definitely not for very heavy loads or critical structural applications. They can strip out if overtightened, losing their grip, and their holding power is less reliable in softer or crumbling concrete.
2. **Sleeve Anchors:**
* **Best For:** Medium to heavier items (typically 50-200 lbs, but check specific product ratings as this varies significantly by diameter and embedment depth). Think larger, heavier framed mirrors, robust shelving units, weighty wall-mounted planters, or even some substantial [sculptures](/finder/page/how-to-hang-art-on-concrete-walls). They offer a significant step up in holding power from plastic anchors.
* **How They Work:** A sleeve anchor consists of a threaded bolt or screw surrounded by an expandable metal sleeve. As you tighten the nut or screw on the exposed end, it pulls the tapered cone at the opposite end into the sleeve, forcing the sleeve to expand outwards. This creates a powerful, mechanical wedge action that bites firmly into the concrete.
* **Pros:** Very strong and reliable, offering high shear and tensile strength. The visible expansion often provides a satisfying sense of security during installation. Many versions come in galvanized or stainless steel for outdoor or high-moisture applications.
* **Cons:** They typically require a larger drill bit than plastic anchors. They can be harder to remove without causing noticeable damage to the concrete surface, making them more suitable for permanent installations. Installation needs a precise hole size to work effectively.
3. **Concrete Screws (e.g., Tapcons, Blue-Tip Screws):**
* **Best For:** Light to medium loads (often 10-50 lbs per screw), excellent for attaching furring strips, electrical boxes, conduit clips, or lighter art directly to concrete without an anchor.
* **How They Work:** These are specialized, hardened steel screws with a unique, aggressive thread design that actually cuts threads into the concrete as they're driven in. They don't require an anchor, just a pre-drilled pilot hole.
* **Pros:** Relatively quick and easy to install, removable, no separate anchor needed, very strong for their size.
* **Cons:** Requires a specific drill bit (often supplied with the screws), can snap if overtightened or if the pilot hole isn't perfectly sized, not for the heaviest loads. I often use these for smaller, direct mounts where I don't want the bulk of an anchor.
4. **Wedge Anchors:**
* **Best For:** Even heavier, truly substantial loads and deeper embeds (often 100-500+ lbs, or even more in industrial settings). These are the anchors you see used for mounting heavy machinery, structural supports, large commercial fixtures, or very large, permanent outdoor art installations.
* **How They Work:** A wedge anchor consists of a threaded bolt with an expansion clip at one end and a nut and washer at the other. After drilling a precise hole, the anchor is hammered into place. As the nut is tightened, it pulls the bolt upwards, forcing the tapered end of the bolt to expand the clip against the inside of the drilled hole, creating a powerful, non-removable friction fit.
* **Pros:** Extremely strong, offering exceptional shear and tensile strength. They are designed for demanding, permanent installations and can hold up against significant forces. Available in various lengths and diameters, including corrosion-resistant materials for outdoor use.
* **Cons:** Very difficult, if not impossible, to remove without significant concrete damage. The threaded stud often extends beyond the surface, which might require cutting flush if a clean finish is desired. Requires precise hole depth and diameter.
5. **Drop-in Anchors:**
* **Best For:** Flush installations where an internal, threaded connection is desired, allowing bolts or threaded rods to be repeatedly inserted and removed. They are excellent for applications where you want the anchor to be hidden or flush with the concrete surface, and are often used for overhead installations (like hanging conduit or suspended ceilings) but work equally well for wall art where a neat, flush internal thread is desired for medium to heavy loads (50-200 lbs).
* **How They Work:** A drop-in anchor is a pre-assembled, internally threaded steel anchor. It's inserted into a drilled hole flush with the concrete surface. A specific setting tool (which looks like a punch) is then used to drive an internal cone downwards, expanding the anchor within the hole and creating a secure, permanent grip. A threaded rod or bolt is then screwed directly into the anchor.
* **Pros:** Provides a very neat, flush finish that is aesthetically pleasing and prevents snagging. It allows for easy installation, removal, and re-installation of bolted items, which is fantastic if you anticipate changing your artwork frequently. Very strong and reliable once properly set.
* **Cons:** Requires a specific setting tool, which is an additional purchase. Can be trickier to install correctly than other anchors, as proper expansion is critical for its holding power. Not ideal for cracked or poor-quality concrete.
6. **Chemical Anchors (Epoxy/Resin Anchors):**
* **Best For:** The absolute heaviest loads and the most critical applications where maximum, long-term strength, vibration resistance, and reliability are paramount (we're talking hundreds to thousands of pounds). These are often used for structural connections, seismic zones, attaching heavy machinery, or permanently mounting extremely valuable, large-scale artworks outdoors. They offer an unparalleled bond.
* **How They Work:** This is where engineering meets art (or at least, art installation!). A specially formulated, high-strength resin (often epoxy, vinylester, or polyester) is injected into a thoroughly cleaned drilled hole. A threaded rod, rebar, or stud is then inserted into the wet resin. As the resin hardens and cures (a chemical reaction), it creates an incredibly strong, virtually inseparable bond between the rod and the concrete, filling any irregularities in the hole and distributing the load evenly.
* **Pros:** Unmatched strength, often exceeding the strength of the concrete itself. Ideal for cracked, poor-quality, or porous concrete where mechanical anchors might fail. Creates a watertight seal, making them excellent for outdoor or marine environments. Highly resistant to vibration and dynamic loads.
* **Cons:** More expensive and time-consuming to install due to mixing requirements and curing times. Requires meticulous hole cleaning to achieve optimal bond. They are truly permanent and virtually impossible to remove without destroying the concrete. Not a casual choice, but a powerhouse solution when needed.
### Choosing the Right Concrete Anchor: A Strategic Guide
Selecting the perfect anchor isn't just about weight; it depends on a strategic evaluation of a few critical factors. Here's how I usually approach it, thinking through the "what if" scenarios to ensure absolute security and suitability for the long term:
| Factor | Consideration | Recommended Anchor Types |
| :-------------------- | :--------------------------------------------------------------- | :-------------------------------------------------------- |
| **Weight of Artwork** | **Crucial!** Always overestimate if in doubt. Consider dynamic loads (e.g., if bumped or if there's an enthusiastic pet in the house!). For me, peace of mind always means going a size up. | <20 lbs: Plastic expansion, Concrete Screws; 20-50 lbs: Plastic (larger), Concrete Screws (multiple); 50-200 lbs: Sleeve, Drop-in; >200 lbs: Wedge, Chemical |
| **Concrete Condition** | Is the concrete solid, cracked, old, or crumbling? Poor quality reduces holding power. | Good condition: All mechanical types; Cracked/Poor condition: Chemical Anchors (best), Sleeve Anchors (with caution) |
| **Permanence** | Do you ever want to easily remove the art or move the anchor? Is the installation truly temporary or long-term? | Removable: Plastic, Concrete Screws; Semi-Permanent: Drop-in; Permanent: Sleeve, Wedge, Chemical |
| **Flush Finish Desired** | Do you want the anchor to be hidden or perfectly flush with the wall surface for aesthetics or safety? | Flush/Hidden: Drop-in, Plastic (if screw head covers); Low Profile: Concrete Screws; Exposed: Sleeve, Wedge (can be cut flush) |
| **Environmental Exposure** | Is it indoor, outdoor, exposed to moisture, chemicals, or significant temperature fluctuations? | Indoor: All types; Outdoor/Moisture: Galvanized/Stainless Steel options for Sleeve/Wedge/Concrete Screws; Chemical for watertightness & extreme conditions |
| **Vibration Resistance** | Will the artwork or fixture be subject to vibration (e.g., near heavy traffic, machinery)? | Chemical Anchors (superior); Wedge/Sleeve Anchors (good) |
| **Substrate Type** | Is it solid concrete, concrete block (hollow/solid), or brick? Specific anchors work best with specific substrates. | Solid Concrete: All; Hollow Block: Toggle Bolts (see FAQ), Chemical; Solid Block/Brick: Plastic, Sleeve, Wedge, Chemical |
I generally lean towards **plastic expansion anchors** for most standard framed artwork in my own home. They are versatile, forgiving for small projects, and easy enough to patch if I change my mind later (which, let's be honest, happens!). However, for anything substantial – say, a large framed mirror, a heavy, intricate [sculpture](/finder/page/how-to-hang-art-on-concrete-walls), a valuable family heirloom, or a piece of architectural salvage – sleeve, wedge, drop-in, or even **chemical anchors** are absolutely the way to go for peace of mind and absolute security. Never compromise when it comes to the safety of your art!### Other Essentials: The Supporting Cast

[credit](https://upload.wikimedia.org/wikipedia/commons/7/75/MOTHERS_public_art_installation_at_the_Museum_of_Contemporary_Art%2C_Chicago.jpg),
[licence](https://creativecommons.org/licenses/by-sa/4.0)
Don't forget the supporting cast! These seemingly minor items can truly make or break your concrete-conquering mission, often saving you from headaches, re-dos, or even injury. I've learned to never skip these steps.
* **Level and Tape Measure:** Absolutely vital for perfectly straight and centered art. Seriously, do not eyeball it, even if you *think* you have a good eye! A small torpedo level is fine for single pieces, but a **laser level** can be a godsend for accurately aligning multiple pieces, creating gallery walls, or ensuring a perfect horizon line. A good quality tape measure is equally crucial for precise placement and spacing between artworks.
* **Pencil/Marker:** To accurately mark your drill spots. I sometimes use a fine-tipped, brightly colored marker on darker concrete for better visibility against the gray, ensuring my mark isn't easily rubbed off before drilling.
* **Dust Mask and Safety Glasses:** **CRUCIAL!** This isn't optional, it's non-negotiable personal protection. Drilling concrete generates incredibly fine, abrasive dust (often containing **silica dust**, which is hazardous if inhaled) and potential flying chips or debris. Protect your lungs and eyes – always wear a high-quality N95 dust mask and robust safety glasses. Your future self will thank you profoundly.
* **Shop Vacuum and/or Compressed Air Can:** For immediate and thorough dust cleanup of the drilled hole. Because no one wants concrete dust coating their newly hung masterpiece, or worse, impeding anchor grip in the hole. A small **wire brush** (or better yet, a specialized hole-cleaning brush for concrete) is also invaluable for scrubbing the inside of the drilled hole to remove stubborn concrete particles before vacuuming, ensuring the anchor has a clean surface to expand against. I often use a narrow crevice attachment on my shop vac – it gets into those holes beautifully.
* **Chalk Line (for multiple pieces):** If you're planning a truly epic gallery wall or need a perfectly straight line across a large expanse, a chalk line is your secret weapon. Snap a perfectly straight line, and then use your level for fine-tuning.
* **Pencil Sharpener/Fine-Tip Marker:** For always having a crisp, visible mark on your wall. Sounds trivial, but a dull pencil can make all the difference in precision.
* **Stud Finder / Utility Scanner (Highly Recommended):** This is one I learned the hard way – and it could save you from disaster. Before drilling *anywhere* into a wall, especially near outlets, light switches, or plumbing fixtures, use a **utility scanner** (sometimes called a stud/wire/pipe finder) to check for embedded electrical wires, water pipes, gas lines, or even rebar. Hitting one of these isn't just a repair headache and an expensive bill; it's incredibly dangerous, risking electrocution, flood, or even explosion. While standard stud finders can be less reliable on dense concrete, specialized multi-scanners are designed for this. **Don't skip this safety step!**
* **Hammer/Mallet:** A rubber mallet or standard hammer is needed for gently tapping anchors flush into their drilled holes.
* **Small Wire Brush:** As mentioned, perfect for cleaning out stubborn debris from drilled holes, ensuring optimal anchor expansion.
When I'm thinking about the structural integrity and aesthetic presentation of a display, I sometimes draw inspiration from the raw beauty and deliberate planning of concrete in architecture. The Edo-Tokyo Museum, for example, uses concrete in such a deliberate, monumental way; it's a testament to precision and thoughtful design, much like the precision we aim for with our art installations. We want our art display to have that same thoughtful solidity and careful integration into its environment.
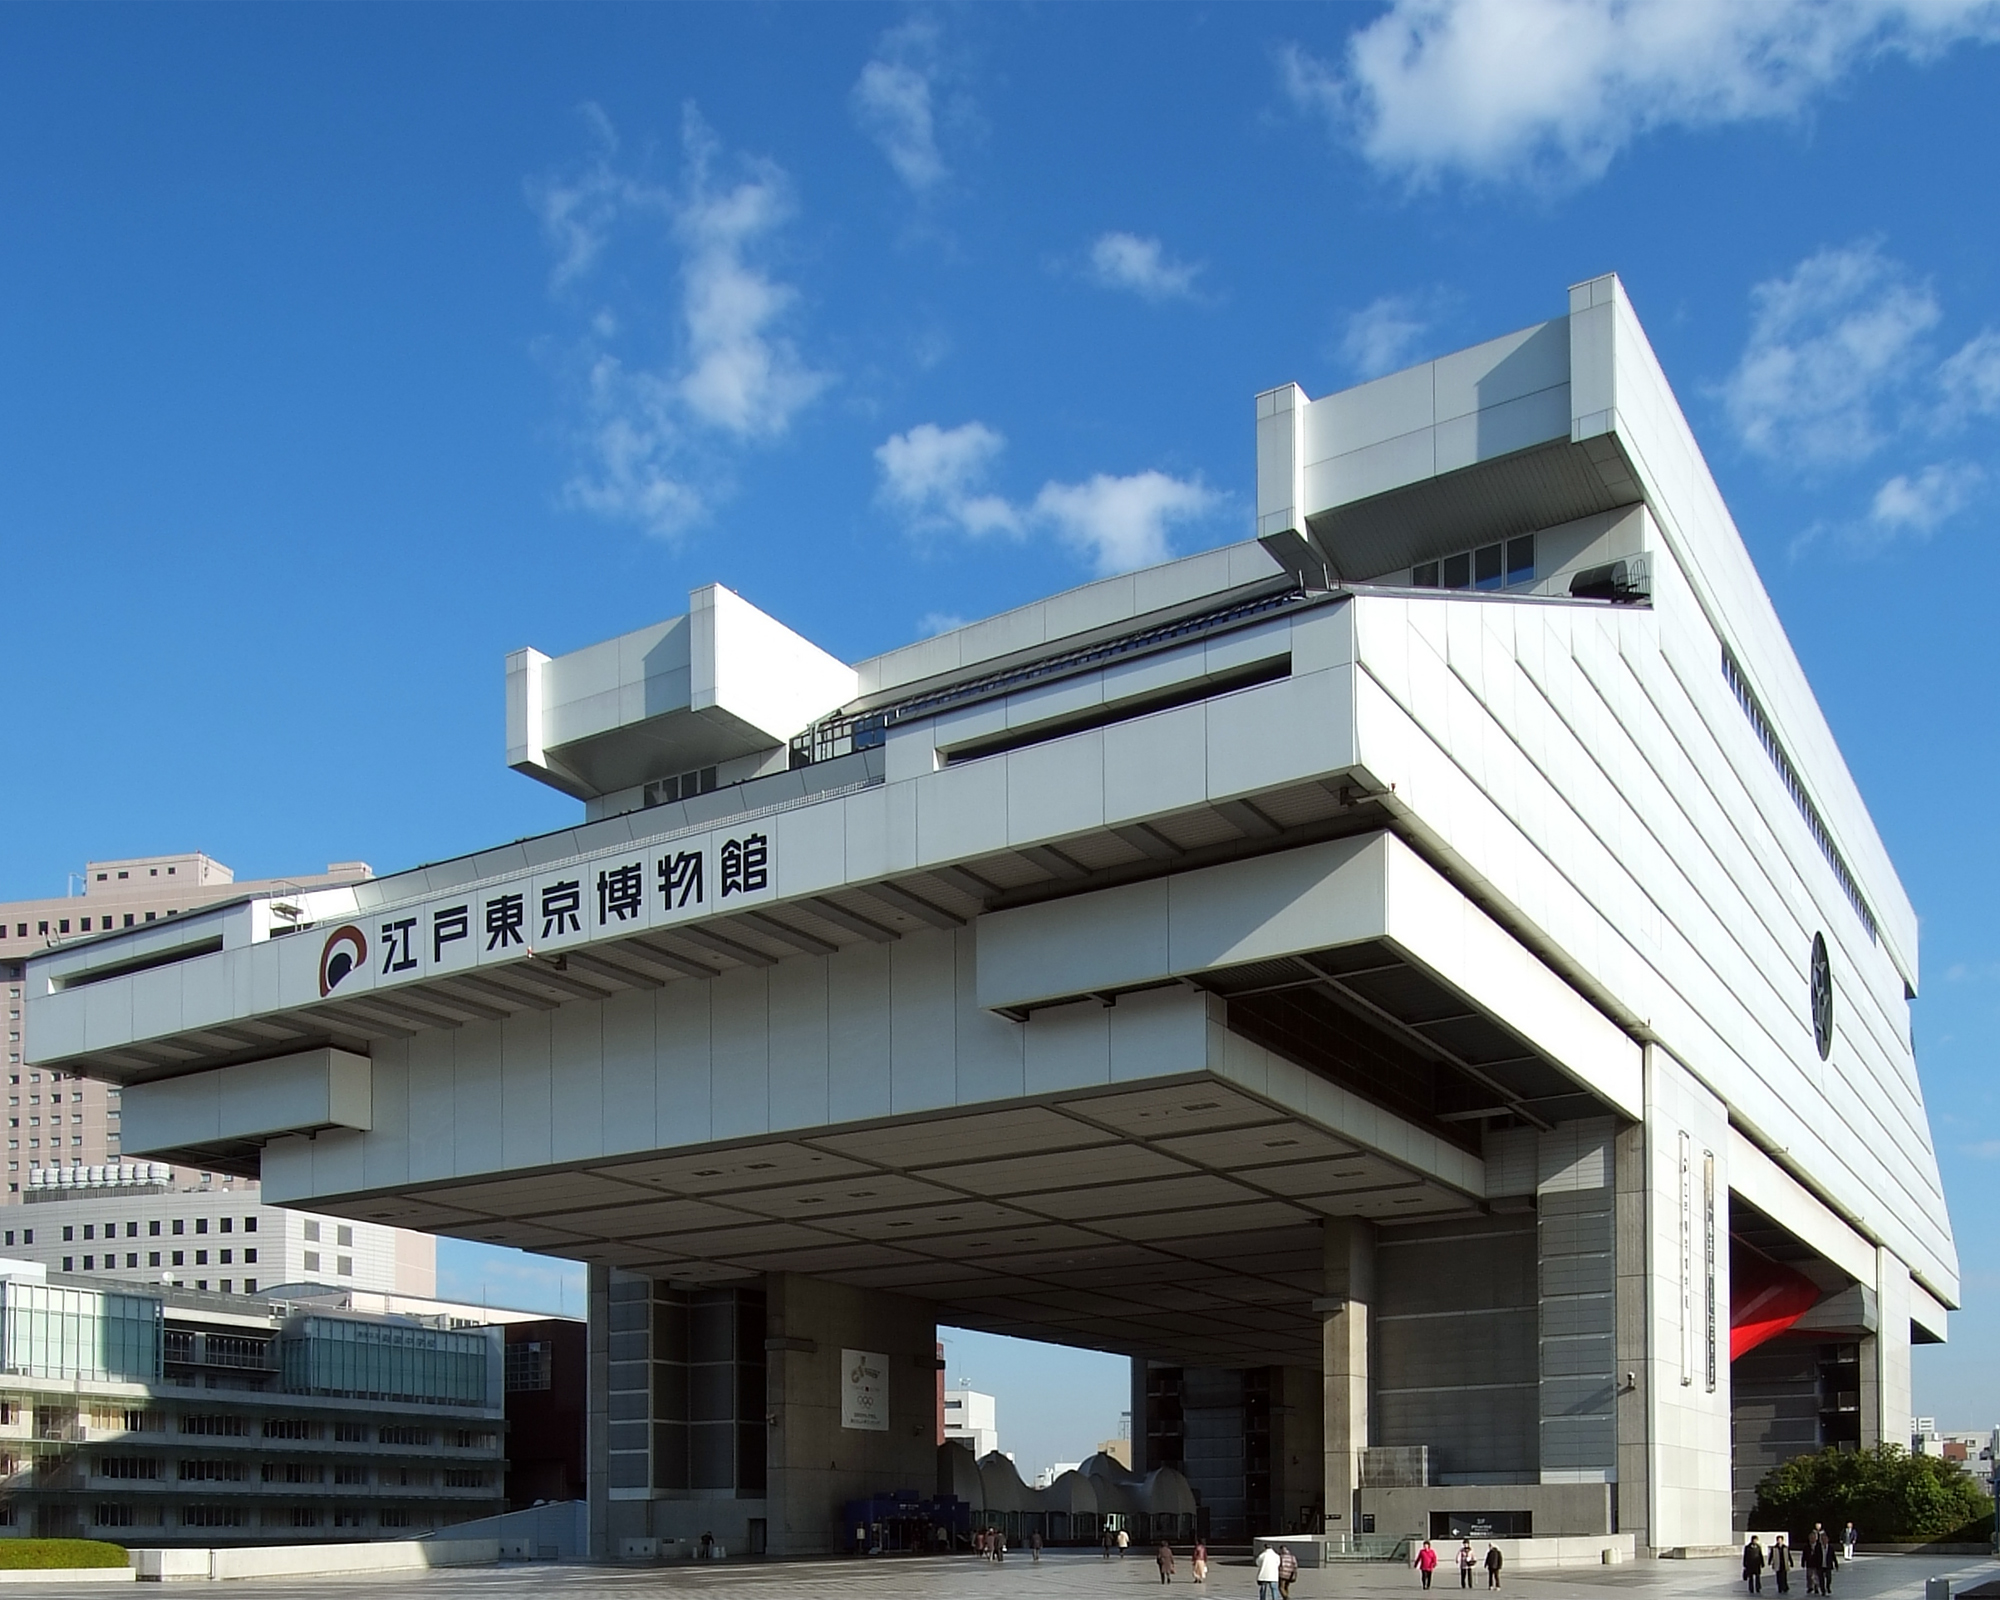
[credit](https://upload.wikimedia.org/wikipedia/commons/7/73/Edo-Tokyo_Museum.jpg), [licence](https://creativecommons.org/licenses/by-sa/3.0)### Understanding Your Concrete: Not All Walls Are Created Equal
Before we dive into the tool checklist, it's worth a quick moment to consider the type of concrete you're actually dealing with. Just like artworks, not all concrete walls are created equal! I once assumed a wall in an old workshop was solid poured concrete, only to discover it was a crumbly, hollow block – let's just say that anchor didn't hold, and I quickly learned the value of a little pre-drill investigation.
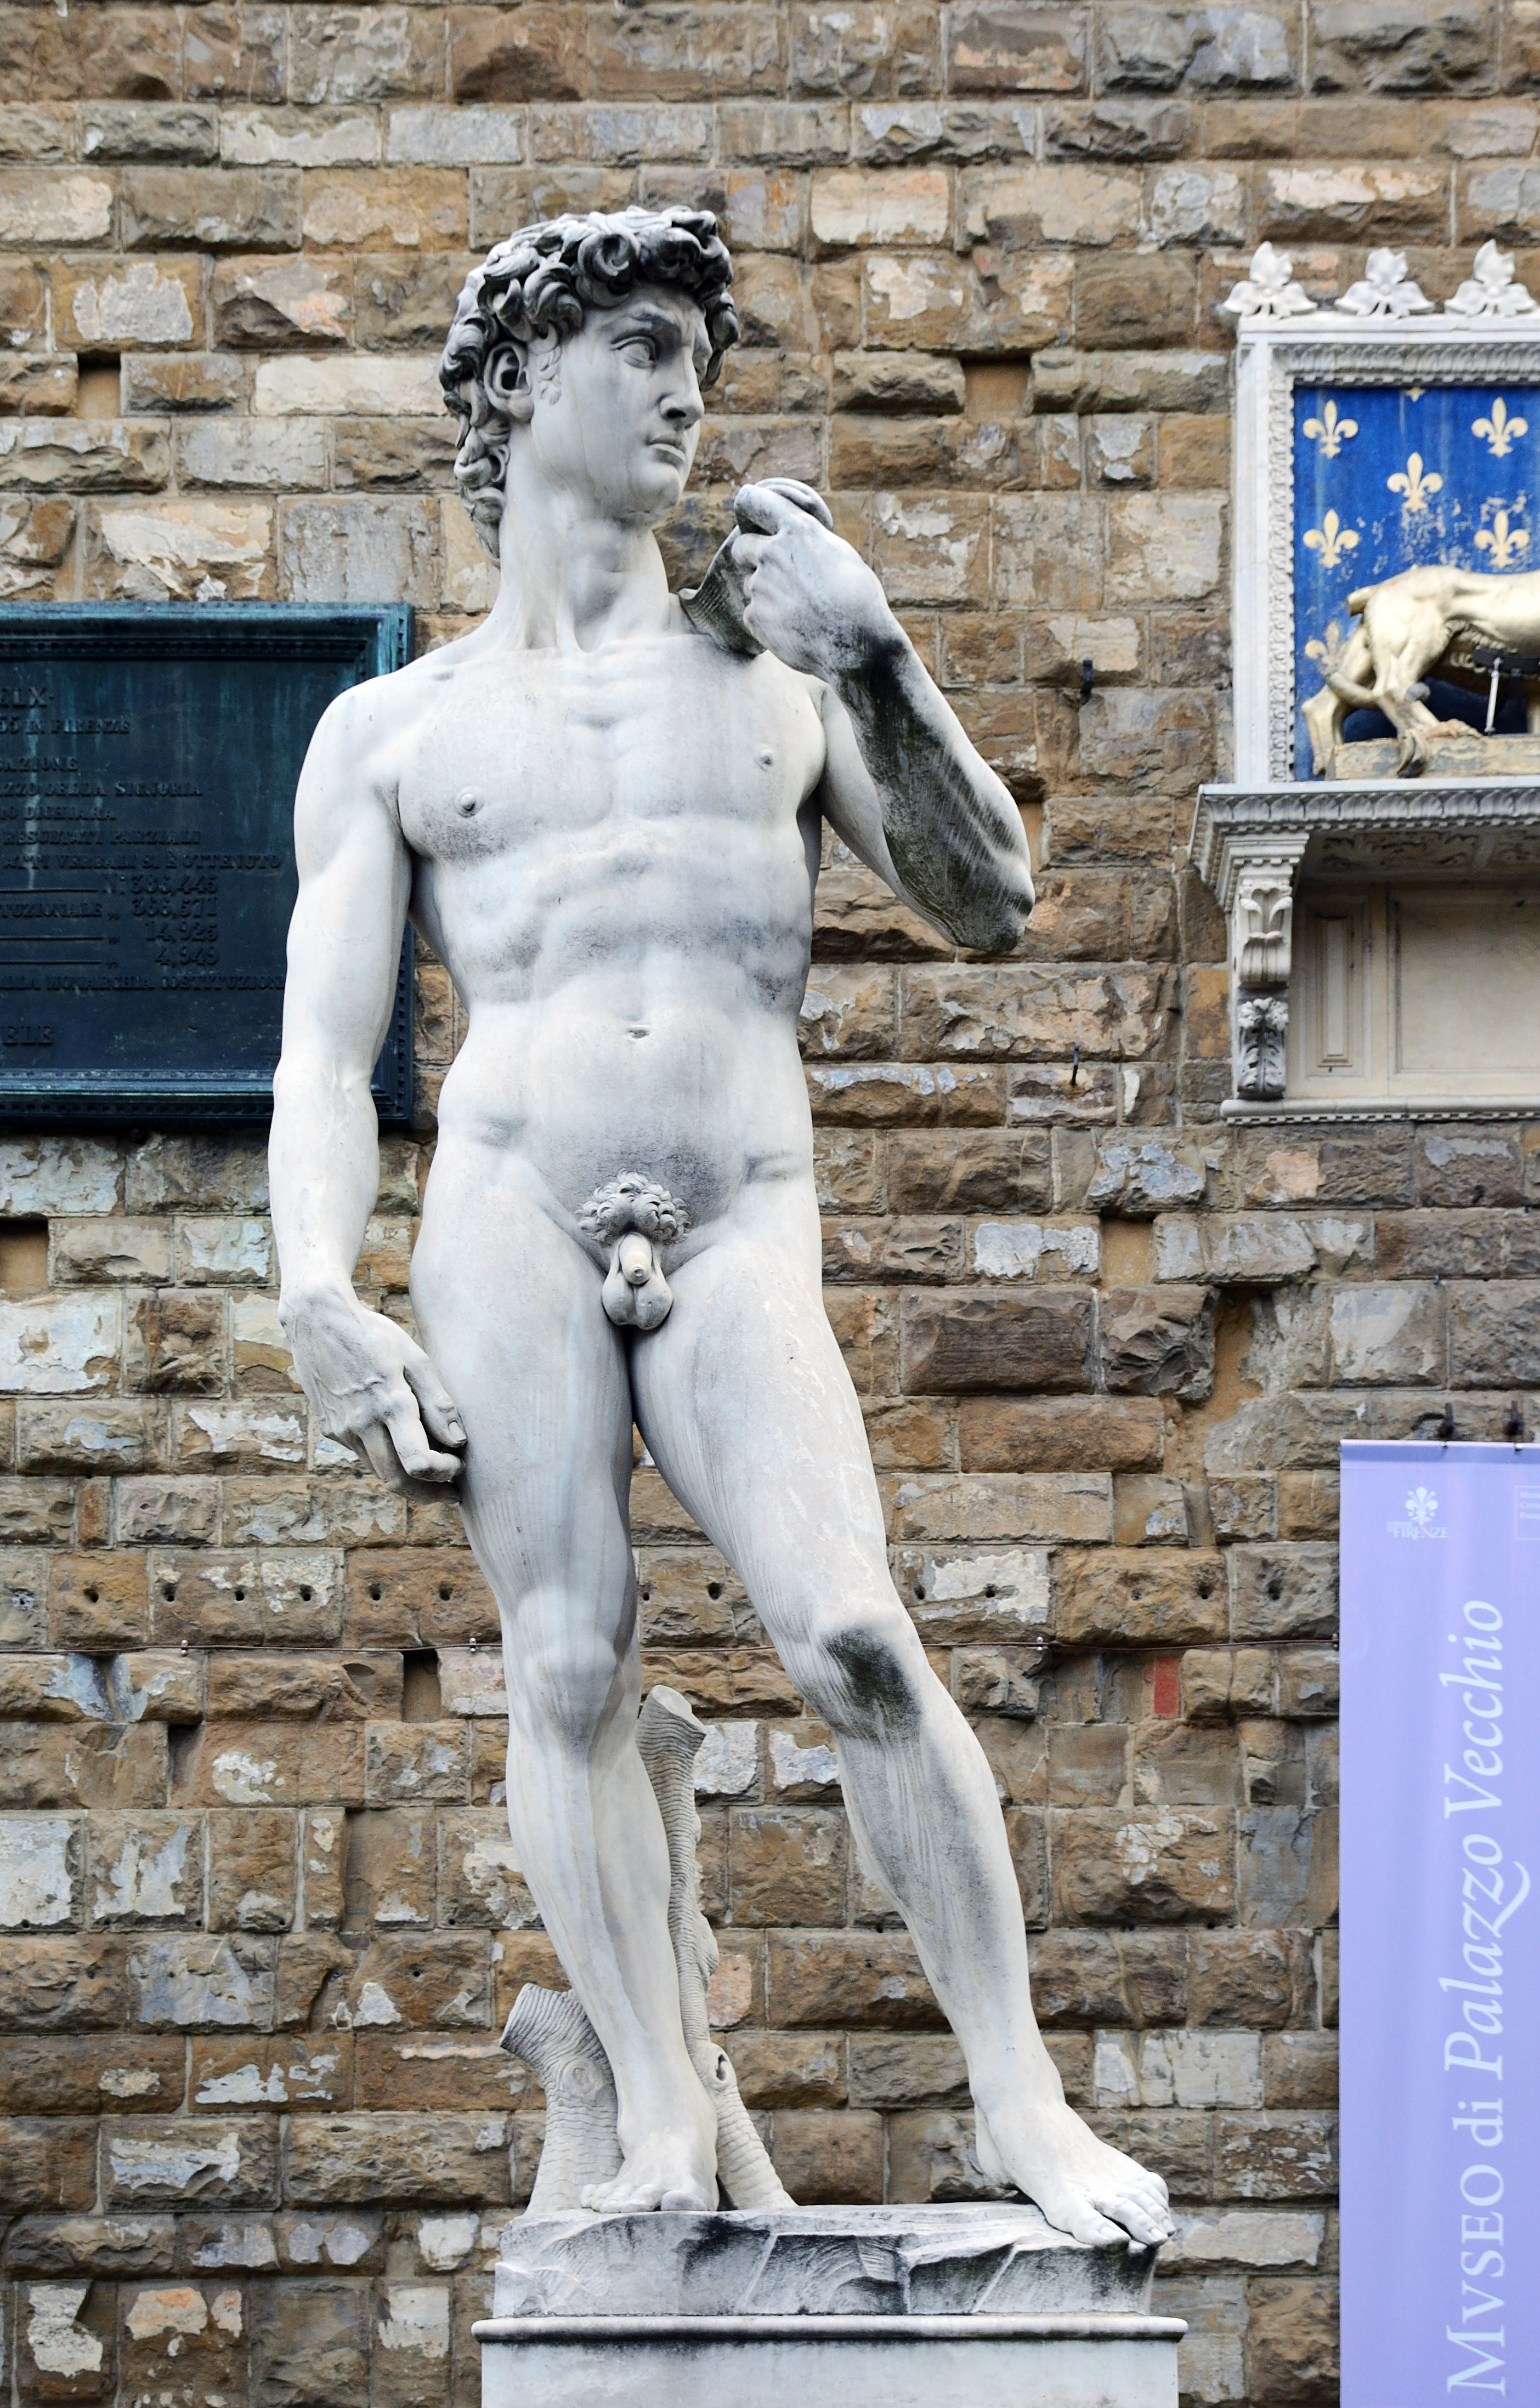
[credit](https://upload.wikimedia.org/wikipedia/commons/c/c0/Marble_replica_of_Michelangelo%27s_David_in_Florence.jpg),
[licence](https://creativecommons.org/licenses/by-sa/4.0)
* **Solid Poured Concrete:** This is the densest and most challenging, but also the strongest. Common in modern buildings, basements, and commercial structures. This is where your hammer drill and heavy-duty anchors truly shine. Visually, it's usually a smooth, uniform gray surface, and when you tap it, you'll hear a very solid, low thud.
* **Concrete Block (Cinder Block):** Very common in older homes, basements, and garages. These blocks often have hollow cores, which dramatically changes your anchoring strategy. While you'll still drill with a masonry bit, you'll likely need specialized **toggle bolts** or **hollow-wall anchors** (we'll cover these in the FAQ, and I've also added them to the anchors section) that can grip the backside of the block, rather than expanding within a solid material. A tap test here will give you a distinctly hollow sound, and you might even see the faint lines of mortar joints if the wall isn't painted.
* **Lightweight or Aerated Concrete:** Less common for structural walls but sometimes found in newer, energy-efficient constructions. This material is softer and easier to drill but requires specific anchors designed for its lower density to prevent pull-out. Visually, it might look almost porous or have a slightly "bubbly" texture, and it feels lighter when tapped compared to solid concrete.
* **Reinforced Concrete (with Rebar):** Any of the above types can be reinforced with steel rebar for added strength. Hitting rebar during drilling requires immediate caution and a change of plan (which we'll also discuss, because, trust me, it's a common and rather jarring surprise!). You won't often see rebar, but knowing it's a possibility will save you a lot of headache.
Understanding your wall's composition will guide your tool and anchor choices, ensuring a safe and successful installation. A simple tap test (listening for a hollow vs. solid thud) can give you a good initial clue!
### Tools Checklist: Your Concrete-Conquering Arsenal
Here's a consolidated checklist of everything you'll need. Gather these items before you start to avoid frustrating interruptions!
| Tool | Purpose | Key Details & Best Practices | Why it's Essential (My Take!) |
| :-------------------- | :------------------------------------------------------ | :----------------------------------------------------------------------------------------- | :------------------------------------------------------------------------------------------------ |
| :-------------------- | :------------------------------------------------------ | :----------------------------------------------------------------------------------------- |
| **Hammer Drill** | Essential for drilling into concrete, brick, block. | Don't even *think* about a regular drill! Consider a rotary hammer for very heavy-duty or frequent use. | Without it, you're just making noise and dulling bits. It's the muscle you need for this job. |
| **Masonry Drill Bits** | Specifically designed to pulverize and chip through concrete, stone, brick. | **Crucial:** Match bit size precisely to your chosen anchor's diameter. Look for carbide or diamond tipped for durability. | Your regular bits will just melt or snap. These are the sharp teeth for your hammer drill. |
| **Concrete Wall Anchors** | Provide a secure, load-bearing point for screws in concrete. | Choose type based on artwork weight, concrete type, and desired permanence (plastic, concrete screw, sleeve, wedge, drop-in, chemical). | This is the actual magic that lets your screw grip something so hard. Don't skip this! |
| **Screws** | To secure picture hangers, cleats, or art directly to anchors. | Ensure appropriate length and thread type for your anchor and item. | The final connection! Make sure they're sturdy enough for the job. |
| **Level** | For ensuring perfectly straight, even hanging and alignment. | A small torpedo level is handy, but a **laser level** is invaluable for gallery walls and precision. | Because crooked art is a crime against aesthetics. Trust me, you'll regret not using it. |
| **Tape Measure** | For precise placement, measuring distances, and spacing. | "Measure twice, drill once" is the mantra here. | Essential for symmetry and not ending up with a lopsided display. |
| **Pencil/Marker** | For clearly marking drilling points and layout. | A fine-tipped, contrasting color marker can be useful on dark concrete. | You can't hit a target you can't see, right? Clear marks save drilling mistakes. |
| **Dust Mask (N95)** | Protects lungs from hazardous silica concrete dust. | **Absolutely non-negotiable safety gear.** | Seriously, your lungs will thank you. Silica dust is no joke. |
| **Safety Glasses** | Protects eyes from flying chips, dust, and debris. | Always wear eye protection when drilling. | You only get one pair of eyes. Protect them from flying concrete shrapnel. |
| **Shop Vacuum/Air Can** | For immediate and thorough cleanup of drilled holes. | Essential for optimal anchor grip; also keeps your workspace tidy. | A clean hole means a strong hold. Plus, nobody likes concrete dust everywhere. |
| **Utility Scanner** | Detects electrical wires, water pipes, gas lines, rebar *before* drilling. | **THE most crucial safety step! Invest in a good one.** | This tool prevents literal disaster. Don't even think about drilling without it. |
| **Small Wire Brush** | For aggressively cleaning out drilled holes. | Ensures optimal anchor expansion and bonding by removing loose particles. | Gets that last bit of dust out, ensuring maximum grip for your anchor. |
| **Hammer/Mallet** | For gently tapping anchors flush into the wall. | A rubber mallet is often preferred to avoid damaging anchors or surfaces. | For a gentle nudge, not brute force. Essential for flush anchor seating. |
| **Pliers (Needle-Nose)** | Useful for removing old plastic anchors or gripping small items. | Always good to have in your toolkit. | Sometimes you need to remove an old anchor, or just hold something fiddly. |

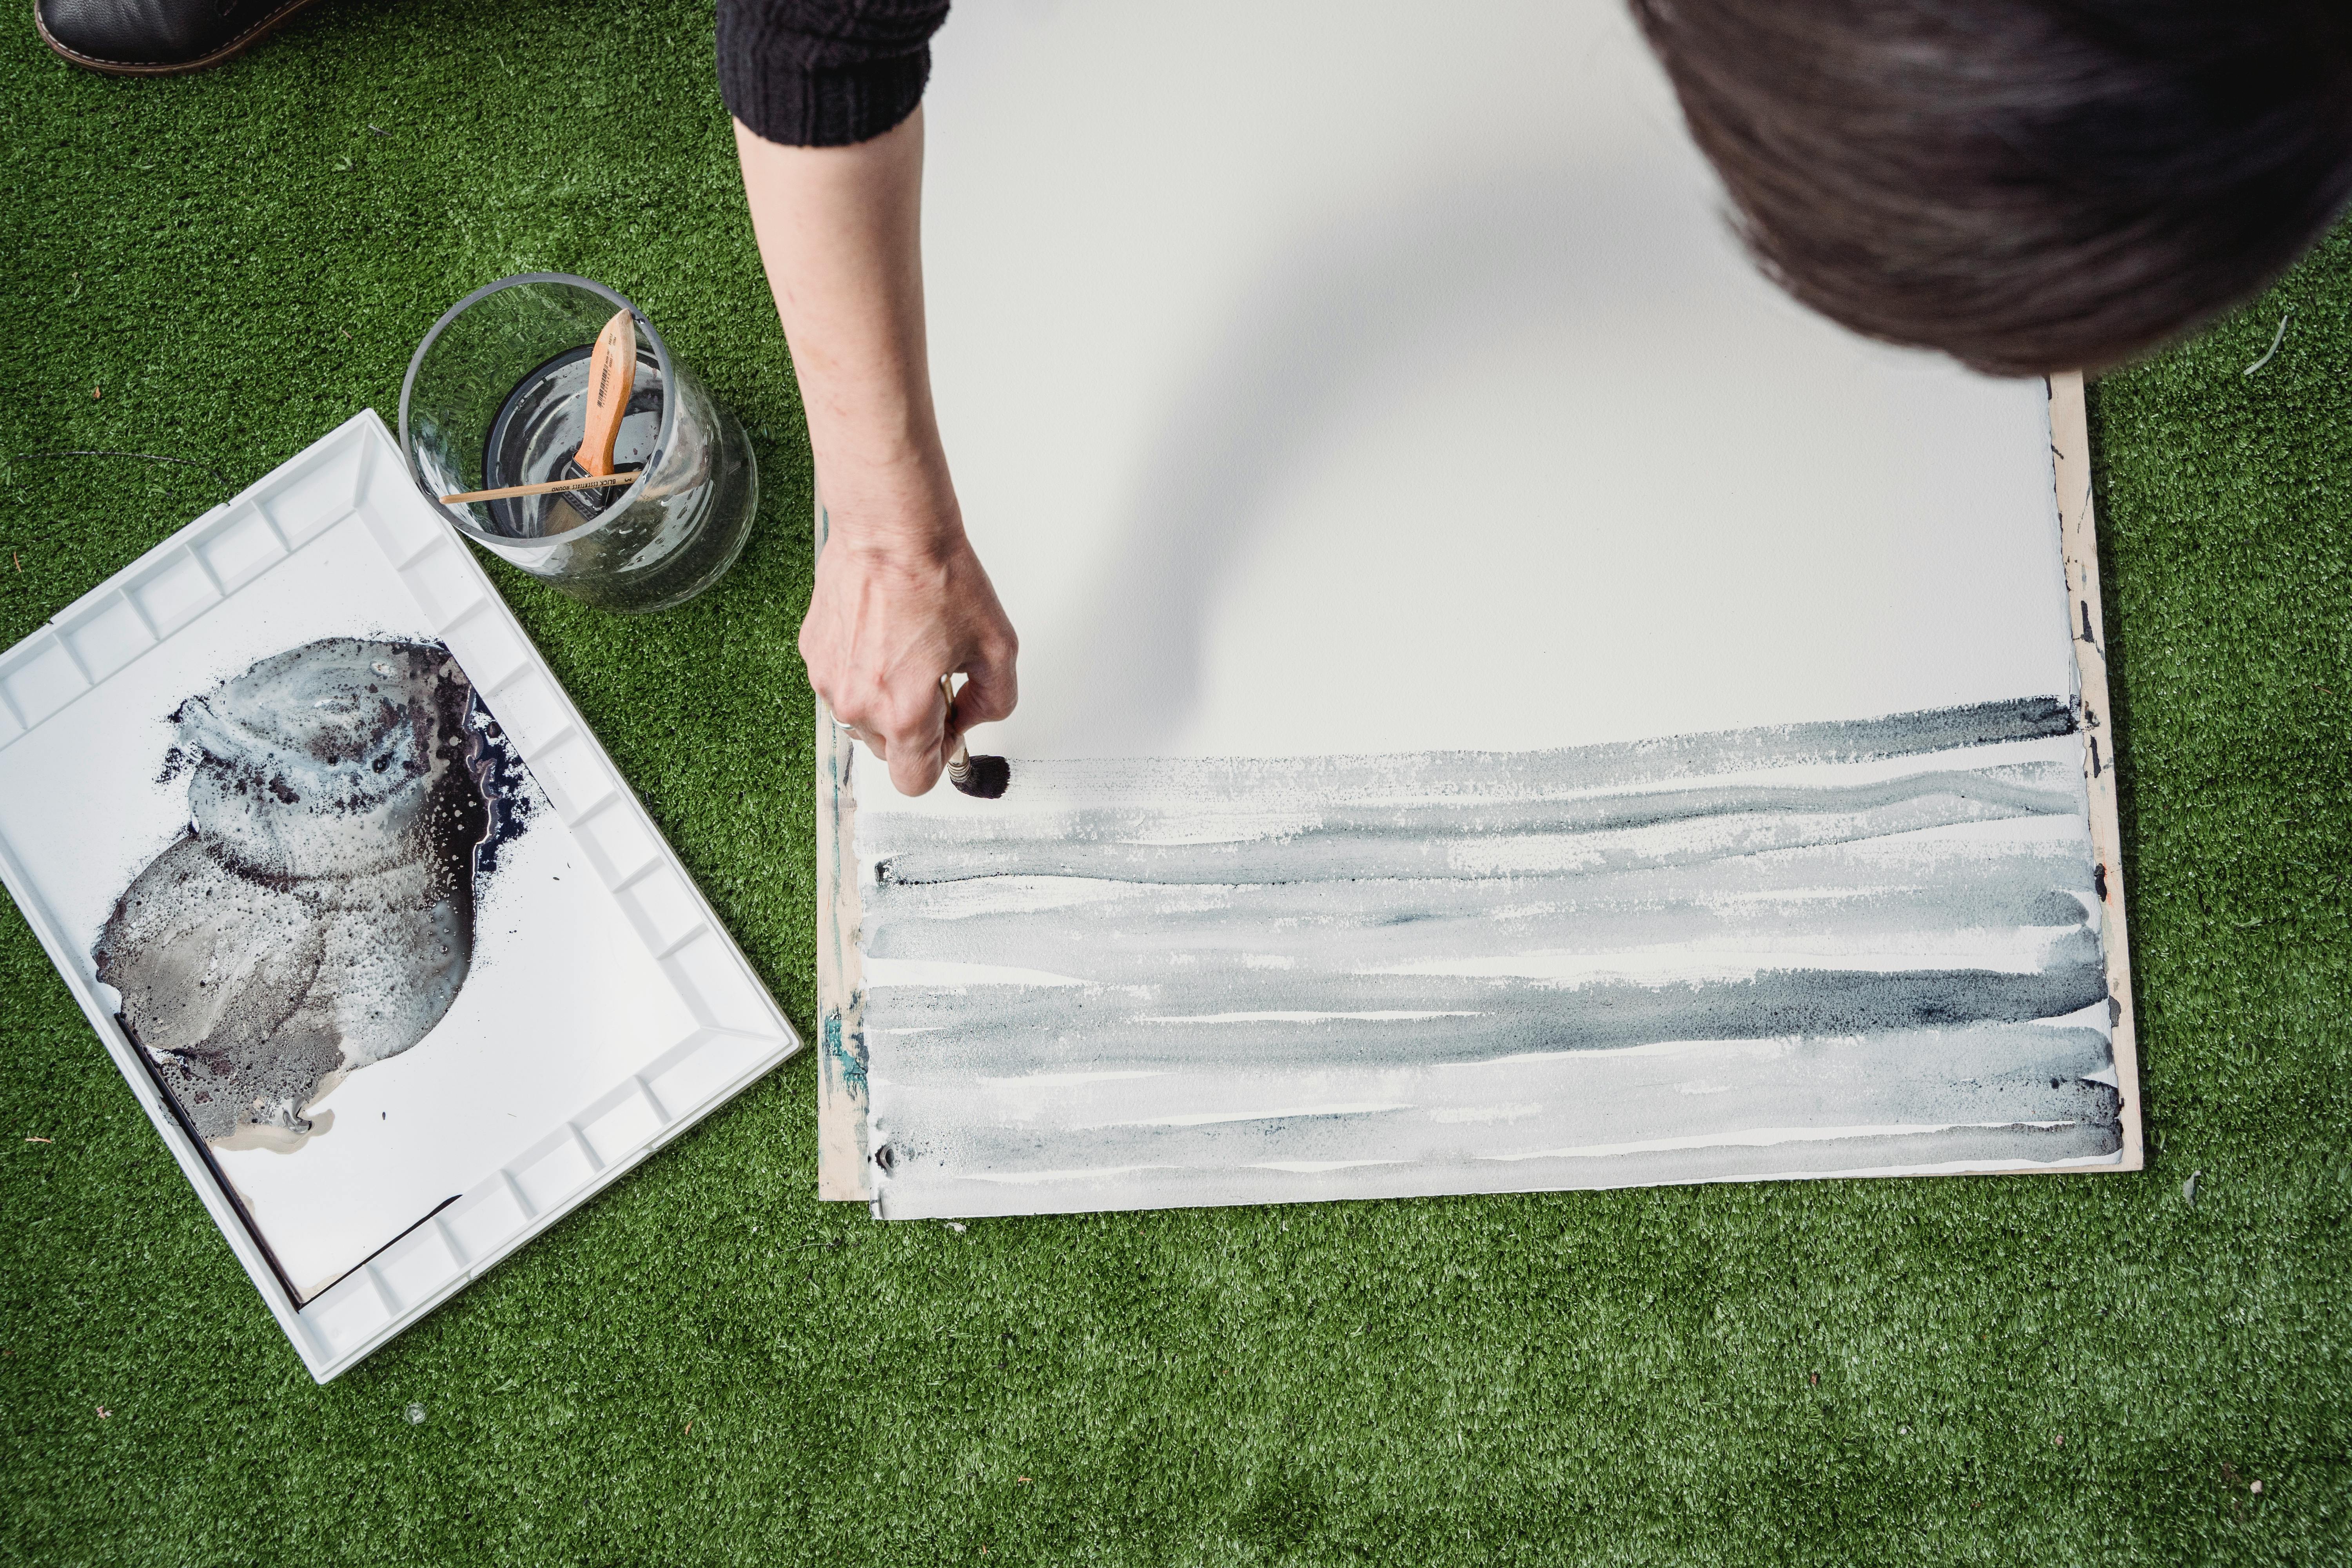
[credit](https://images.pexels.com/photos/18516626/pexels-photo-18516626/free-photo-of-man-painting-a-landscape.jpeg),
[licence](https://creativecommons.org/public-domain/)
## Step-by-Step: Conquering the Concrete Wall – Your Guided Journey
Ready to get your hands (a little) dirty? Don't worry, the satisfaction of a perfectly and securely hung piece of art on that once-impenetrable concrete is truly immense and well worth the effort! Here's how I approach this mission, breaking it down into manageable, confidence-building steps.
[credit](https://upload.wikimedia.org/wikipedia/commons/5/53/Gerberg%C3%A4sslein%2C_Basel%2C_Switzerland_-_panoramio.jpg),
[licence](https://creativecommons.org/licenses/by-sa/3.0)
### 1. Planning is Your Best Friend (and Time Saver!)
This step is absolutely vital. Seriously, do not eyeball it! I know the temptation, but a few extra minutes here can save hours of frustration, unsightly extra holes, and potentially costly patching later. Precision in planning prevents regret.
[credit](https://live.staticflickr.com/2286/1850765168_c032b90730_b.jpg),
[licence](https://creativecommons.org/licenses/by/2.0/)
* **Decide on Optimal Placement and Aesthetics:** Before touching a drill, visualize! Hold the art up, move it around, experiment. Where does it truly look best in the room? Consider factors like viewing height (a good general rule is eye-level for the center of the artwork, typically 57-60 inches from the floor), surrounding furniture, architectural features, and how it interacts with other pieces you might want to hang to create a cohesive [gallery wall](/finder/page/how-to-stretch-a-canvas-for-painting). Don't forget to factor in lighting, too – how does natural light hit it throughout the day? Do you need accent lighting? Sometimes a piece really comes alive when it's perfectly lit. For multiple pieces or complex arrangements, a fantastic trick is to use **paper templates** cut to the exact size of your artwork. Tape them to the wall with painter's tape to finalize your arrangement before drilling a single hole. This allows you to live with the layout for a bit, ensuring it feels right, and saves you from a mosaic of unwanted holes.
* **Mark Your Precise Spot(s):** Once you've finalized placement, use your pencil or marker to precisely mark where the screw(s) for your picture hanger, wire, or cleat system will go. If your art requires two hangers for a larger piece, measure the distance between them meticulously. Use your **level** – a small bubble level is fine, but a **laser level** is an absolute godsend for ensuring your marks are perfectly horizontal and accurately spaced, especially for gallery-style installations. Always measure from fixed points (floor, ceiling, corners) to ensure symmetry and proper alignment if that's your aesthetic goal.
* **Crucial Safety Check: Scan for Utilities:** As vehemently mentioned in the tools section, before *any* drilling commences, use your **utility scanner** to double-check every marked spot for embedded electrical wires, water pipes, gas lines, or even rebar. This is a non-negotiable, potentially life-saving safety step. I can't stress this enough – hitting a utility line is a nightmare you absolutely want to avoid. If your scanner gives you a warning, adjust your mark slightly and re-scan.
### 2. Drilling with Precision: Making Your Mark
Now for the moment of truth! This is where you and your hammer drill truly become one, turning an unyielding surface into a receptive one. Remember your safety gear!

[credit](https://upload.wikimedia.org/wikipedia/commons/9/9d/MASP_Brazil.jpg),
[licence](http://creativecommons.org/publicdomain/zero/1.0/deed.en)
* **Choose and Insert the Right Bit:** This cannot be stressed enough: **insert the correct size masonry bit into your hammer drill, and double-check the anchor packaging for the *exact* recommended drill bit diameter.** A deviation of even a millimeter can make the anchor useless – too small and it won't go in, too large and it won't grip. Ensure the bit is seated securely in the chuck.
* **Set Drill Depth Accurately:** This is critically important for proper anchor function. You want the hole to be slightly deeper than your anchor's length (typically an extra 1/8 to 1/4 inch or 3-6mm). Many hammer drills come with a depth stop attachment – use it! If yours doesn't, a simple but effective trick is to wrap a piece of electrical tape tightly around your drill bit to mark the desired depth. This prevents both drilling too deep (which risks hitting unseen utilities or structural elements) and too shallow (where the anchor won't sit flush or achieve full embedment).
* **The Drilling Technique: Slow, Steady, and Safe:**
1. **Safety First:** Don your safety glasses and dust mask *before* you even power up the drill.
2. **Start Slowly:** Place the tip of the masonry bit precisely on your marked spot. Begin drilling in a slow, controlled manner without the hammer function engaged (if your drill allows this). This helps create a small pilot dimple and prevents the bit from "walking" across the smooth concrete surface – a truly annoying occurrence that can scar your wall before you even get started! If your drill doesn't have a non-hammer setting, apply very light pressure initially, just enough to scratch the surface and keep the bit centered.
3. **Engage Hammer Function:** Once you have a stable starting point, press the drill firmly but not excessively hard against the wall. Engage the hammer function. Let the drill do the work; do not try to force it. Maintain a consistent, perfectly straight angle perpendicular to the wall.
4. **Clear Dust Frequently:** As you drill, pull the drill bit out of the hole occasionally (every 10-15 seconds) while the drill is still spinning. This clears accumulated concrete dust from the flutes of the bit and out of the hole. This prevents the bit from binding, allows for more efficient drilling, and prevents the hole from becoming clogged, which could impede anchor insertion.
5. **Listen and Feel:** Pay attention to the sound and feel of the drill. If you hit something unexpectedly hard, feel a sudden grinding, or the drill stops advancing (like hitting steel), stop immediately and release the trigger. You've likely hit rebar. Do **not** try to force your way through rebar with a standard masonry bit; you'll damage the bit and potentially compromise the rebar's integrity. Reassess your spot (we'll cover rebar in the FAQ).
Here’s a practical quick reference for common drill bit sizes for standard plastic expansion anchors (always, always consult your specific anchor's packaging for precise recommendations, as there can be slight variations):
| Anchor Diameter | Recommended Drill Bit Diameter | Metric Conversion |
| :-------------- | :----------------------------- | :---------------- |
| 1/4 inch | 1/4 inch | 6mm |
| 5/16 inch | 5/16 inch | 8mm |
| 3/8 inch | 3/8 inch | 10mm |
| 1/2 inch | 1/2 inch | 12mm |### 3. Inserting Anchors: The Heart of the Hold

[credit](https://images.pexels.com/photos/13600524/pexels-photo-13600524.jpeg),
[licence](https://creativecommons.org/public-domain/)
Once your hole is precisely drilled and at the correct depth, it's time for the anchor. This step is simpler than drilling, but still requires careful attention to detail for a truly secure hold.
* **Clean the Hole (Meticulously!):** This is absolutely non-negotiable. I cannot stress this enough: Use your shop vacuum (preferably with a crevice tool attachment) or a compressed air can to thoroughly clear out *all* the concrete dust and debris from the drilled hole. A truly clean hole is paramount because dust prevents the anchor from expanding or bonding properly, leading to a weak hold. I often use a small wire brush to scrub the inside of the hole to dislodge any stubbornly clinging particles, and then vacuum again. This ensures the anchor has a clean, solid surface to grip or bond with.
* **Insert the Anchor:** Gently tap the chosen anchor into the cleaned hole with a hammer or rubber mallet until it's perfectly flush with the wall surface. It should fit snugly – a slight resistance is good, indicating a precise fit.
* **Troubleshooting:** If the anchor is too loose and wiggles, your drill bit was likely too large, or your hole is uneven (a rare but frustrating occurrence). In this case, you'll need to patch the hole and redrill, or consider a larger diameter anchor if feasible. If it's too tight and won't go in with gentle tapping, do not force it; your bit might have been too small, or there's still debris in the hole. Remove it, re-clean, or check your bit size. Never try to hammer an anchor in with excessive force, as it can damage the anchor itself or even fracture the concrete around the hole. A rubber mallet is often kinder to the anchor than a metal hammer, preventing deformation.
### 4. Securing Your Art
With the anchors in place, you're almost there! This is the rewarding part.
[credit](https://live.staticflickr.com/4050/4658040756_bab8251942_b.jpg),
[licence](https://creativecommons.org/licenses/by-nc-sa/2.0/)
* **Attach Hanger/Screw:** Drive your screw into the anchor. If you're using a picture hook, screw that directly into the anchor. If your art has D-rings, eye-hooks, or a wire on the back, you might just drive a screw directly into the anchor, leaving enough exposed to catch the wire or ring.
* **Choosing the Right Hanger:**
* **D-rings with Wire:** Very common. Screw D-rings into the back of your frame, then string picture wire between them. This hangs on a single hook or screw in the wall. Best for moderate weights.
* **Two D-rings:** For heavier pieces, or to keep the art perfectly level, use two D-rings directly on the back of the frame, each hanging on its own anchor/screw in the wall. This distributes weight better.
* **Sawtooth Hangers:** For very light frames, these can work directly on a small screw. Not ideal for concrete without an anchor.
* **French Cleats:** Excellent for heavy, large pieces where a flush and extremely secure mount is desired. One angled piece attaches to the wall via anchors, and the other (reverse-angled) piece attaches to the artwork, interlocking securely.
* **Security Hangers:** For public installations or high-value pieces, these specialized hooks often incorporate a locking mechanism that prevents the art from being easily lifted off the wall.
* **Tighten Securely:** Tighten until snug and secure, but **do not overtighten**, especially with plastic anchors, as you can strip them out, rendering them useless. For metal anchors, tighten firmly but stop when you feel significant resistance.
* **Add Felt Pads (Optional but Recommended):** For framed art, I always recommend adding small felt pads to the bottom corners of the frame (on the back). This prevents the frame from scratching your beautifully exposed concrete wall, allows for a little airflow, and keeps the art from tilting against the wall.
And voilà! Your art is now securely hanging on that once-impenetrable concrete wall. It's a truly satisfying feeling, isn't it? It's like finding the perfect frame for your [canvas](/finder/page/how-to-stretch-a-canvas-for-painting), only this time, the canvas is your wall, transformed into a personal gallery space.
[credit](https://live.staticflickr.com/1932/31319653807_aea88119f0_b.jpg), [licence](https://creativecommons.org/licenses/by-nc-nd/2.0/)
### Step-by-Step Guide: Your Quick Reference Checklist
Here’s a concise summary of the process, a quick checklist to keep you on track:
| Step | Action | Key Details & Best Practices |
| :--------------------- | :---------------------------------------------------- | :---------------------------------------------------------------------------------------------------- |
| **1. Plan & Mark** | Decide art placement; mark drill spots precisely. | Use a level (laser recommended!) for accuracy; use paper templates for gallery walls. Consider viewing height & surrounding decor. |
| **2. Check Utilities** | Scan marked areas for wires, pipes, rebar, etc. | **THE MOST CRUCIAL SAFETY STEP! Do not skip this.** Use a reliable utility scanner. |
| **3. Drill Hole** | Use correct hammer drill & masonry bit to create hole. | Match bit *exactly* to anchor size; set depth; drill steadily, maintaining angle; clear dust frequently. Stop if you hit rebar. |
| **4. Insert Anchor** | Clean hole *thoroughly*; tap anchor flush with wall. | Use shop vac and wire brush. Ensure snug fit for optimal grip; avoid forcing or over-tapping. |
| **5. Secure Art** | Drive screw into anchor; attach appropriate hanger/wire. | Choose hanger based on art weight & desired stability (D-rings, French cleat, etc.). Tighten securely but **do not overtighten**. |
| **6. Final Check** | Gently test the artwork's stability and level. | Ensure no wobble, and that it's perfectly straight. Step back and admire! |## Common Pitfalls and How to Avoid Them: Learning from My (Many) Mistakes

[credit](https://upload.wikimedia.org/wikipedia/commons/c/c4/Interrior_view%2C_Art_Institute_of_Chicago.jpg),
[licence](https://creativecommons.org/licenses/by-sa/3.0)
Look, I've made my share of mistakes (and learned from them, mostly painfully!). Consider this section your personal cheat sheet, a way to skip my hard-won learning curve and avoid the common pitfalls that can turn a simple art-hanging project into a frustrating ordeal.
* **Using the Wrong Drill (The "Regular Drill" Trap):** As I've emphatically mentioned, a regular drill simply won't cut it for concrete. It's like trying to fell a tree with a butter knife. You'll wear yourself out, dull your bits prematurely, and potentially burn out your drill's motor. The outcome? A shallow, ineffective hole or no hole at all. **Solution:** Invest in or rent a **hammer drill**. For those truly tough jobs, a rotary hammer is a game-changer, but for most home projects, a good hammer drill suffices. It's an investment in your sanity and the safety of your walls.
* **Incorrect Bit Size (The Millimeter Misery):** This is a huge one, and surprisingly common. If your drill bit is even slightly too small, the anchor won't go in, or you'll have to force it, which can damage the anchor or fracture the concrete. Too large, and the anchor won't grip properly, leading to a loose, unsafe hanging. **Solution:** Always, always, *always* double-check the anchor packaging for the *exact* recommended drill bit size. It's a tiny detail with enormous consequences for the security of your artwork. Measure your bit if necessary!
* **Not Cleaning the Hole (The Dust Dilemma):** This seems minor, but it's a critical oversight. Concrete dust left in the hole prevents mechanical anchors from expanding or gripping properly, and it severely compromises the bond of chemical anchors. **Solution:** Take the extra 30-60 seconds to thoroughly clean out every speck of dust with a shop vacuum and/or compressed air. A small wire brush used inside the hole is incredibly effective at dislodging stubborn particles. This step is non-negotiable for a truly secure hold.
* **Ignoring Safety Gear (The "It Won't Happen To Me" Myth):** Concrete dust contains **silica**, which is seriously nasty if inhaled and can cause long-term respiratory issues. Flying concrete chips are dangerous for your eyes, potentially causing permanent damage. **Solution:** Seriously, wear your high-quality N95 dust mask and robust safety glasses. Every single time. Your lungs and eyes are irreplaceable, and your future self will thank you for taking these basic, crucial precautions.
* **Drilling Without Checking for Utilities (The Catastrophe Awaits):** This is arguably the most dangerous mistake you can make. Hitting an electrical wire, water pipe, or gas line embedded in the concrete can cause serious injury (electrocution), fire, flood, or even explosions. **Solution:** Always, always use a reliable **utility scanner** before drilling *anywhere*. Even if you think you know what's behind the wall, assume nothing. Scan the area, adjust your mark if a hazard is detected, and re-scan.
* **Overtightening Anchors (The Stripping Syndrome):** Especially with plastic expansion anchors and concrete screws, overtightening can strip the internal threads, deform the anchor, or cause it to lose its grip entirely. **Solution:** Tighten until the anchor feels snug and secure, then stop. For metal anchors, tighten firmly until you feel significant resistance, but avoid brute force. A little finesse goes a long way.
* **Hitting Rebar (The Unyielding Obstruction):** Sometimes, concrete walls have internal steel reinforcement bars (rebar). If your drill suddenly stops advancing and feels like it's grinding against metal, you've almost certainly hit rebar. **Solution:** Do *not* try to force your way through it with a standard masonry bit. You'll damage the bit, potentially weaken the rebar's structural integrity, and make a lot of noise for no progress. Stop, move your marked spot a couple of inches in any direction, and try again. If you absolutely cannot move the location, a specialized rebar cutter bit for a rotary hammer *might* be an option, but this is usually a job for a professional.
* **Misjudging Concrete Type (The Block Blunder):** Assuming all concrete is solid can lead to anchors failing in hollow block walls. **Solution:** Before starting, try a "tap test" (listening for a hollow vs. solid sound) or use your utility scanner to assess if you're dealing with solid concrete, concrete block, or brick. Adjust your anchor choice accordingly (e.g., toggle bolts for hollow block).
* **Not Testing the Hold (The "Hope and Pray" Approach):** Once your art is ostensibly hung, it's tempting to just walk away. Don't! **Solution:** Always gently, but firmly, test the artwork. Give it a slight tug, gently push it side to side. Does it feel utterly secure? Any wobble, any movement beyond what's expected from the hanger type, means something isn't right. Better to fix it now than when it's on the floor.
### Repairing Holes in Concrete Walls: When It's Time for a Do-Over
Mistakes happen to the best of us, or perhaps, like me, you just have an insatiable desire to rearrange your [art](/buy) every few months (a very common dilemma!). Repairing holes in concrete is indeed a bit different from the forgiving nature of drywall patching, but it's entirely doable with the right approach and materials.

[credit](https://live.staticflickr.com/65535/51476799673_ceca649da5_b.jpg),
[licence](https://creativecommons.org/licenses/by/2.0/)
1. **Remove the Anchor:**
* **Plastic Anchors:** Often, you can simply pull out the screw, then use needle-nose pliers or a small pry bar to extract the plastic anchor. If it's stubborn, sometimes screwing a screw partially in and then pulling on the screw head with pliers can help.
* **Concrete Screws:** These are generally easy to remove by simply unscrewing them.
* **Metal Expansion Anchors (Sleeve, Wedge, Drop-in):** These are trickier. For sleeve and wedge anchors, you might be able to unscrew the bolt and then try to collapse or chisel out the expanding sleeve/clip. For drop-in anchors, if the internal cone has expanded fully, removal is very difficult without damaging the surrounding concrete. Sometimes, the most practical (though slightly more aggressive) option for sturdy metal anchors is to cut them flush with the wall surface using an angle grinder (with *extreme caution*, a cutting wheel, and full safety gear – eye protection, gloves, hearing protection, and a dust mask are paramount!). Once cut flush, you can then fill over them.
2. **Clean the Hole (Again!):** Use a wire brush (especially a specialized hole-cleaning brush if you have one) and your shop vacuum to thoroughly remove all dust, loose debris, and any remaining anchor fragments. A clean, stable surface is essential for the patch material to bond effectively.
3. **Fill the Hole with the Right Stuff:** Don't reach for drywall spackle! You need a material specifically designed for concrete. Use a high-quality **concrete patch and repair compound**, a strong **epoxy-based filler**, or a specialized **concrete caulk** (for smaller holes/cracks). These materials are formulated to bond securely with masonry. Apply the compound with a putty knife or trowel, pressing it firmly into the hole and ensuring it's slightly overfilled to account for any shrinkage.
4. **Cure and Finish:** Allow the compound to cure fully according to the manufacturer's instructions. This is important; curing times can vary significantly (from hours to days) depending on the product and environmental conditions. Once completely cured, use a sanding block or power sander (with dust extraction!) to sand the patched area flush and smooth with the surrounding wall surface. For a truly seamless finish on exposed, unpainted concrete, the process is akin to a sculptor's touch: consider tinting the repair compound with a concrete colorant (often available in various shades of gray) to meticulously match the existing concrete's hue and texture. You might even use a damp sponge or a stiff brush to mimic the original texture of the concrete. This is an art in itself, but the results can be remarkably invisible. If you plan to paint the wall, ensure the patch is fully cured, smooth, and primer-compatible, otherwise, your paint might not adhere evenly or the patch might show through.## When to Call a Pro: Knowing Your Limits (and When to Get Expert Help)
Look, as much as I encourage the DIY spirit, sometimes a job is just too big, too complex, or you're simply not comfortable wielding serious power tools – and that, my friend, is perfectly fine! There is absolutely no shame in knowing your limits and recognizing when to bring in an expert. In fact, it's a sign of wisdom. Here are a few scenarios where I would wholeheartedly recommend calling in a professional handyman, a specialized art installer, or a structural engineer:

[credit](https://upload.wikimedia.org/wikipedia/commons/b/b5/Still_Life_with_Rayfish_MET_DT4177.jpg),
[licence](http://creativecommons.org/publicdomain/zero/1.0/deed.en)
* **Exceptionally Heavy or Oversized Artwork:** If you're dealing with a massive, very heavy mirror (think gym-sized!), a monumental multi-panel artwork, a delicate antique tapestry, or something like a large flat-screen TV mount (which, let's be honest, is a precision art installation in itself these days!), the stakes are significantly higher. Professionals have the specialized equipment (like lifting jacks, laser alignment tools, and heavy-duty rigging) and extensive experience with high-capacity, engineered anchoring systems. They can also assess the wall's load-bearing capacity more thoroughly.
* **Very Old, Crumbling, or Suspect Concrete:** If your concrete seems soft, sandy, visibly deteriorating, or you're unsure of its integrity (common in very old buildings or after water damage), standard anchors might not hold reliably. A professional can assess the structural soundness of the concrete and recommend the most appropriate, often specialized, solutions – possibly even advanced chemical anchors or custom reinforcement. Don't risk a collapse!
* **Significant Uncertainty About Utilities or Wall Composition:** While a utility scanner is a fantastic tool, if you have *any* lingering doubt about what's behind your wall (especially in older buildings with unknown wiring/plumbing layouts, or if your scanner gives ambiguous readings), a professional can often bring more advanced, high-precision scanning equipment or simply has the expertise to interpret complex situations and navigate these risks safely. Better safe than sorry when dealing with live wires or pressurized pipes.
* **Complex or High-Value Installations:** Thinking of creating an elaborate [gallery wall](/finder/page/how-to-stretch-a-canvas-for-painting) with dozens of pieces, installing a security system for highly valuable [art](/buy), or mounting art in a public/commercial space? Professionals specialize in aesthetic placement, complex layouts, precise alignment, and robust, often hidden, security mechanisms. They can also advise on lighting and presentation.
* **Lack of Tools, Time, or Confidence:** If you simply lack the necessary specialized tools (a powerful rotary hammer, specific anchor setting tools, etc.), don't have the time to dedicate to the learning curve and execution, or just don't feel genuinely confident wielding power tools safely, it is always safer, less stressful, and ultimately more cost-effective to hire someone. Your beautiful artwork deserves to be displayed safely and beautifully, and sometimes that means outsourcing the heavy lifting to an expert.
* **Structural Modifications:** If your art installation requires cutting into concrete (e.g., creating a niche) or involves supporting extreme loads that might impact the building's structure, a **structural engineer** should be consulted before any work begins.
* **Historical or Listed Buildings:** If you live in a building with historical significance or one that's officially "listed," there might be strict regulations about modifying walls, especially structural ones. Drilling can be a big no-no, or require special permits and techniques. A professional familiar with heritage properties can navigate these legal and practical complexities, saving you from fines or structural damage.
## FAQ: Your Concrete Art-Hanging Conundrums, Answered!
You've got questions, and I've got (hopefully!) comprehensive and helpful answers. These are some common dilemmas and burning questions I've encountered or been asked about over the years when tackling concrete walls.

[credit](https://images.pexels.com/photos/31651448/pexels-photo-31651448/free-photo-of-yellow-pumpkin-sculpture-on-naoshima-pier.jpeg),
[licence](https://creativecommons.org/public-domain/)
### What if I hit rebar while drilling into concrete?
Stop immediately! Seriously, release that trigger the moment you feel a sudden, jarring resistance or hear a distinct metallic grinding sound. Hitting **rebar** (steel reinforcement bar) is quite common in structural concrete, especially in load-bearing walls. Do **not** try to force your way through it with a standard masonry bit, as you'll not only damage your bit, but you could also weaken the rebar's structural integrity and risk serious injury. Your safest and most practical options are:
1. **Adjust Placement:** The easiest and most common solution is often to slightly adjust your drill spot. Move your mark a couple of inches (5-10 cm) in any direction – up, down, left, or right – and try again. Often, that's all it takes to clear the obstruction.
2. **Specialized Rebar Cutter Bit:** If you absolutely cannot move the location due to design constraints, you *might* need a specialized **rebar cutter bit**. These are designed for rotary hammers and can cut through mild steel rebar. However, they are expensive, require precise usage, and are generally a "call a pro" scenario, as improper use can still be dangerous or damage the rebar.
3. **Chemical Anchors (with caution):** For lighter rebar, a chemical anchor can sometimes work *around* the rebar if the hole is still deep enough to achieve adequate embedment without compromising the rebar's bond to the concrete. This needs careful assessment by someone experienced.
**Safety first – do not mess with rebar yourself beyond relocating your drill spot!**
### Can I hang very heavy items, like a large flat-screen TV mount, on concrete?
Absolutely, and concrete is actually an ideal substrate for very heavy items precisely because of its incredible load-bearing capacity, *provided you use the correct anchors and installation techniques*. For something like a large flat-screen TV, a heavy shelving unit, or a substantial piece of [sculpture](/finder/page/how-to-hang-art-on-concrete-walls), I would strongly recommend **sleeve anchors, wedge anchors, drop-in anchors, or even chemical anchors**. These are specifically designed for heavy-duty applications and offer superior pull-out and shear strength. Always ensure your chosen anchor's published weight rating far exceeds the total weight of your item (including the mount itself), and follow the manufacturer's instructions precisely. When in doubt, or for very valuable items, always call a professional installer; they deal with this regularly and have the right insurance!
[credit](https://upload.wikimedia.org/wikipedia/commons/e/e3/Street_Art_S%C3%A3o_Paulo.jpg),
[licence](https://creativecommons.org/licenses/by-sa/4.0)
### Are there any non-drilling methods for hanging lightweight items on concrete walls?
While I generally advise against adhesive methods for anything of significant value or weight, for truly **very lightweight items** (e.g., a small poster, a calendar, a temporary banner), some heavy-duty adhesive strips (like certain 3M Command Strips for brick/concrete) or specific concrete adhesive hooks *might* work as a very temporary solution. However, they are inherently prone to failure, especially if the concrete surface is dusty, uneven, unsealed, or exposed to humidity/temperature changes. The adhesive bond can degrade quickly. I would **never** trust them with cherished artwork, family photos, or anything that would cause distress if it fell. For a secure, long-term, and reliable solution on concrete, drilling with appropriate anchors is almost always the answer. Period.
[credit](https://live.staticflickr.com/1640/24944351291_9f85895834_b.jpg),
[licence](https://creativecommons.org/licenses/by-nc-nd/2.0/)
### How do I choose the right picture hanger or hook for my art once the anchor is in place?
This depends entirely on the artwork's frame type, its weight, and your desired aesthetic:
* **D-rings with Wire:** Very common and versatile. Screw sturdy D-rings into the back of your frame near the top two corners (never too close to the top edge), then string robust picture wire (braided steel wire is best for heavier pieces) between them. The art then hangs on a single hook or screw driven into your wall anchor. Best for moderate weights and offers a bit of flexibility for leveling.
* **Two D-rings Directly Mounted:** For heavier pieces, or to keep the art perfectly level and prevent any tilting, use two D-rings directly on the back of the frame, with each D-ring hanging on its own dedicated screw/anchor in the wall. This distributes weight exceptionally well and provides maximum stability.
* **Sawtooth Hangers:** These are typically for very light frames and work by hooking over a small nail or screw head. While they can technically work on a small screw driven into a plastic anchor, they offer less security and are generally **not recommended for concrete** for anything but the lightest, least valuable items, due to the minimal contact point.
* **French Cleats:** As mentioned earlier, these are excellent for heavy, large pieces where a flush and extremely secure mount is desired. One angled piece attaches to the wall via multiple anchors, and the other (reverse-angled) piece attaches to the artwork, interlocking securely. They offer tremendous load-bearing capacity and keep the art perfectly parallel to the wall.
* **Security Hooks/Hangers:** For public installations, high-traffic areas, or high-value pieces, these specialized hooks often incorporate a locking mechanism that prevents the art from being easily lifted off the wall, deterring theft or accidental dislodgement. They offer an additional layer of protection.
### What if my wall isn't solid concrete, but concrete block with hollow sections (cinder block)?
This is a very common scenario, particularly in older buildings, basements, garages, or some commercial properties! For concrete block (often called cinder block), which frequently has hollow cores, you'll need different types of anchors than those designed for solid concrete. While you'll still need your hammer drill and masonry bit for the initial hole, the anchoring mechanism fundamentally changes. My go-to choices for this are:

* **Toggle Bolts:** These are fantastic for hollow block. You drill a hole large enough for the collapsed toggle wing to pass through. Once inside the hollow core, the spring-loaded wings expand. As you tighten the screw, the wings pull tight against the inside surface of the block, creating a very strong, weight-distributing hold. They offer excellent weight capacity for their size.
* **Hollow-Wall Anchors (Molly Bolts):** Similar in principle to toggle bolts, but these are typically metal sleeves that expand and crumple behind the wall as you tighten a screw, creating a flange that grips the inside surface. They are good for medium loads and can be more easily removed than some other anchors.
* **Sleeve Anchors (for solid sections):** If you can locate a solid web or section of the concrete block (use a stud finder or tap test), a sleeve anchor can still be used, but this requires precision.
* **Chemical Anchors:** Can also be used in hollow block, but often require specialized mesh sleeves that hold the resin in place until it cures, preventing it from just flowing into the hollow space. This method provides an incredibly strong bond but is more complex.
The key is to ensure the anchor is specifically designed to either span the hollow section and grip the back side, or to expand reliably within a solid portion of the block. Always check the manufacturer's recommendations for weight limits and detailed installation instructions for these specialized anchors. Don't guess!
### How do I deal with uneven concrete surfaces?
Ah, the joys of real-world concrete! Not all concrete walls are perfectly smooth and plumb. You might encounter rough patches, slight undulations, or even some minor chipping. Here's how I usually tackle them:
* **Surface Preparation:** For minor unevenness, aggressive sanding with a concrete grinder (again, with proper safety gear!) can help smooth out high spots. For small chips or divots, use a concrete repair compound to fill and level the area.
* **Shims for Art:** If the unevenness is minor and your art isn't sitting perfectly flush, you can use small, discreet shims (often felt or plastic spacers) behind the artwork to bring it out slightly from the wall and ensure it hangs straight and parallel. This is especially useful for framed pieces.
* **French Cleats (The Leveling King):** For heavy or large pieces on an uneven wall, a French cleat system can be a lifesaver. While the wall cleat needs to be installed as level as possible, the design allows the artwork itself to hang perfectly parallel to the wall, effectively bridging over minor surface irregularities without causing the artwork to tilt or rock. You can even shim behind the wall cleat if necessary to ensure it's perfectly straight before mounting.
* **Chemical Anchors (for severe unevenness):** If you're dealing with very rough, porous, or crumbling concrete, mechanical anchors might struggle to get a consistent grip. Chemical anchors are excellent here because the resin fills all voids and irregularities, creating a solid, reliable bond even in less-than-perfect concrete.
## Conclusion: Embrace the Unyielding Canvas
And there you have it! What started as a daunting, unyielding canvas has hopefully been demystified, transformed into a surface you can confidently approach with your drill and a plan. Hanging art on concrete walls isn't about brute force; it's about understanding the material, respecting its unique properties, and choosing the right tools and techniques for the job.
I've been on this journey for years, from my early days of bent nails and questionable optimism to now confidently transforming stark concrete into vibrant art spaces. The satisfaction of seeing a beloved piece of [abstract art](/buy) or a cherished family photo securely displayed, perfectly level, and truly integrated into its environment, is immense. It's a small act of rebellion against the perceived limitations of a material, turning a challenge into an opportunity for creativity and stable beauty.
So, gather your tools, put on your safety gear, and approach that concrete wall not with dread, but with a newfound sense of purpose. You've got this. Go forth and create your perfect gallery, one perfectly placed anchor at a time. Your art deserves a solid foundation, and now you have the knowledge to give it one.
Ah, the joys of real-world concrete! Not all concrete walls are perfectly smooth and plumb. You might encounter rough patches, slight undulations, or even some minor chipping. Here's how I usually tackle them:
* **Surface Preparation:** For minor unevenness, aggressive sanding with a concrete grinder (again, with proper safety gear!) can help smooth out high spots. For small chips or divots, use a concrete repair compound to fill and level the area.
* **Shims for Art:** If the unevenness is minor and your art isn't sitting perfectly flush, you can use small, discreet shims (often felt or plastic spacers) behind the artwork to bring it out slightly from the wall and ensure it hangs straight and parallel. This is especially useful for framed pieces.
* **French Cleats (The Leveling King):** For heavy or large pieces on an uneven wall, a French cleat system can be a lifesaver. While the wall cleat needs to be installed as level as possible, the design allows the artwork itself to hang perfectly parallel to the wall, effectively bridging over minor surface irregularities without causing the artwork to tilt or rock. You can even shim behind the wall cleat if necessary to ensure it's perfectly straight before mounting.
* **Chemical Anchors (for severe unevenness):** If you're dealing with very rough, porous, or crumbling concrete, mechanical anchors might struggle to get a consistent grip. Chemical anchors are excellent here because the resin fills all voids and irregularities, creating a solid, reliable bond even in less-than-perfect concrete.
### How does humidity or temperature affect concrete anchors?
This is a great, often overlooked, question! Generally, concrete anchors are designed to be quite robust in various environmental conditions, but extremes can certainly have an impact.
* **Humidity:** High humidity environments (like basements, bathrooms, or certain outdoor locations) can contribute to corrosion of metal anchors over time, especially if they are not galvanized or stainless steel. This corrosion can weaken the anchor's integrity. For these areas, I always recommend choosing corrosion-resistant options like stainless steel sleeve or wedge anchors, or considering chemical anchors which create a sealed, watertight bond. Plastic anchors are less susceptible to corrosion themselves but can be impacted if the screw corrodes.
* **Temperature Fluctuations:** Significant and rapid temperature changes can cause expansion and contraction of both the concrete and the anchor material. While anchors are engineered to withstand a degree of this, extreme cycling can put stress on the bond, potentially leading to loosening over a very long period, particularly with mechanical expansion anchors. Chemical anchors, due to their adhesive bond and filling of irregularities, tend to be more resistant to these dynamic forces. For most indoor, stable environments, this isn't a major concern, but for outdoor installations in harsh climates, it's definitely something to factor into your anchor choice and possibly opt for a more resilient solution.
### Can I paint or finish exposed concrete walls after hanging art?
Absolutely! Exposed concrete can be beautiful on its own, with its raw, industrial charm, but it can also be painted or finished to complement your [art](/buy) and interior design. Think of it as another canvas, waiting for your creative touch!
### Preparing Concrete for Painting: It's All in the Prep!
Just like hanging art, preparation is key. You can't just slap a coat of paint on and hope for the best.
1. **Clean Thoroughly:** Any dust, dirt, grease, or efflorescence (those white, powdery salt deposits) will prevent paint from adhering. Use a stiff brush, a degreasing cleaner, and a power washer for outdoor surfaces. For indoor walls, a good scrub with a mild detergent and thorough rinsing is essential. Allow it to dry completely.
2. **Repair & Patch:** Fill any holes (as discussed in the "Repairing Holes" section!), cracks, or imperfections with a concrete repair compound. Sand smooth and ensure the patch is fully cured.
3. **Etching (Optional but Recommended):** For very smooth, dense concrete, a concrete etcher (usually an acid-based solution, use with extreme caution and proper PPE!) can create a slightly rougher profile, giving the primer and paint a better surface to grip. Follow manufacturer's instructions diligently.
4. **Prime, Prime, Prime:** A high-quality **concrete primer** is non-negotiable. It creates a barrier, prevents efflorescence from bleeding through, and ensures a uniform, long-lasting paint finish. Choose a primer specifically designed for masonry.
### Choosing the Right Paint & Finish for Your Concrete Wall
Once prepped, the fun begins!
* **Acrylic Latex Paint:** The most common and versatile choice for indoor concrete. It's breathable, durable, and comes in a vast array of colors. Look for exterior-grade acrylic latex if you're painting outdoor concrete walls for added weather resistance.
* **Epoxy Coatings:** For incredibly durable, hard-wearing, and water-resistant finishes (often seen in garages or basements, but can be stylish for an industrial look), a two-part epoxy paint is fantastic. It creates a tough, seamless surface that's easy to clean.
* **Elastomeric Paint:** Designed for exterior concrete, this paint is thick and flexible, allowing it to bridge hairline cracks and provide excellent waterproofing and protection against the elements.
* **Stains and Sealers:** If you love the natural look of concrete but want to enhance its color or protect it, concrete stains (which penetrate the surface rather than coating it) or clear sealers can be applied. Stains offer a translucent, varied finish, while sealers provide protection and can add a subtle sheen.
### Aesthetic Considerations: Beyond Basic Paint
Beyond a simple color, consider these options to truly make your concrete wall an artistic backdrop:
* **Textured Finishes:** Use specialized texture paints or techniques (like sponging or ragging) to add visual interest.
* **Accent Walls:** Paint just one concrete wall a bold color to make it a focal point, especially behind a significant piece of art.
* **Murals or Stenciling:** For the truly adventurous, your concrete wall can become a grand mural! Imagine a large, abstract geometric design that complements your hanging [art](/buy) – it can be a statement in itself, even before you hang a single picture.
Remember, a well-prepared and thoughtfully painted concrete wall can elevate your entire space, turning a utilitarian surface into a deliberate design element that enhances your cherished art collection.


