
DIY Canvas Guide: Crafting Your Own Professional Painting Surfaces
Unlock the profound satisfaction of making your own canvases. This ultimate artist's guide covers selecting materials, mastering stretching, sizing, and gessoing for durable, custom painting surfaces tailored to your unique artistic vision, all from an artist's personal perspective.
Crafting Your Own Canvas: A Deep Dive into DIY Painting Surfaces, from My Studio to Yours
There’s a unique hum, a quiet satisfaction that starts even before the first swipe of paint touches the surface. For me, it's in the very foundation – the canvas itself. I remember the early days, happily picking up pre-stretched canvases from the art store, believing that was just 'the way things were done.' And honestly, there's a lot to be said for convenience! It gets you to the fun part – the painting – much quicker. I mean, who wants to spend ages building a stage when you're ready for the show, right?
But then, an itch started. Perhaps I needed a size that didn't exist, a texture I couldn't find, or maybe I was just feeling a touch rebellious. I vividly recall a massive desert landscape I envisioned, a sweeping horizontal vista that simply refused to fit any standard store-bought canvas. "Why can't I make my own?" I thought, staring blankly at a blank wall, picturing a painting that demanded a unique stage. The idea felt monumental, like trying to build a spaceship from LEGOs. But then, as it often does, common sense kicked in: it’s essentially wood, fabric, and a few well-placed staples. For centuries, artists were their own canvas makers; it’s a tradition that grounds you.
Think of the Dutch Masters, like Rembrandt or Vermeer, who often prepared their own linen or wood panels, ensuring the perfect surface for their intricate glazes. This practice, of tailoring the ground (the prepared surface) to one's specific vision, continued through the ages, even as techniques evolved. During the Renaissance and Baroque periods, artists like Titian or Rubens were meticulous in selecting and preparing their supports, sometimes opting for fine linen for its smooth quality or even copper plates for incredibly detailed, jewel-like works. Impressionists, for example, sometimes favored rougher, more visible canvas textures to complement their expressive brushwork, while some modern artists have experimented with unprimed or unconventional surfaces entirely. This wasn't just about cost; it was about absolute quality control and tailoring the ground to their specific vision. The Industrial Revolution, with its mass production capabilities, later democratized canvas, making pre-stretched options widely available, but in doing so, it also distanced artists from the intimate act of creation that begins with the surface itself.
And the satisfaction of crafting a surface that’s truly yours? Unparalleled. It’s like the silent dialogue between artist and material, adding a whole new layer of intention to the art-making process. It’s less about just a surface, and more about baking your own bread instead of buying it; you know every ingredient, every fold, every bit of effort that went into it. The very texture, the subtle tension, it all feels different, more resonant, when your own hands have prepared it. That unique connection starts a story even before the first brushstroke.

The "Why Bother?" Question: The Unexpected Benefits of Crafting Your Own Canvas
I know what you're probably thinking, and believe me, I've asked myself the same question countless times: "Is it really worth the extra effort?" For a while, the answer felt like a firm 'maybe,' but once I truly dove into the process, the benefits started piling up in ways I never anticipated. Spoiler alert: yes, it absolutely is. Let me tell you why.
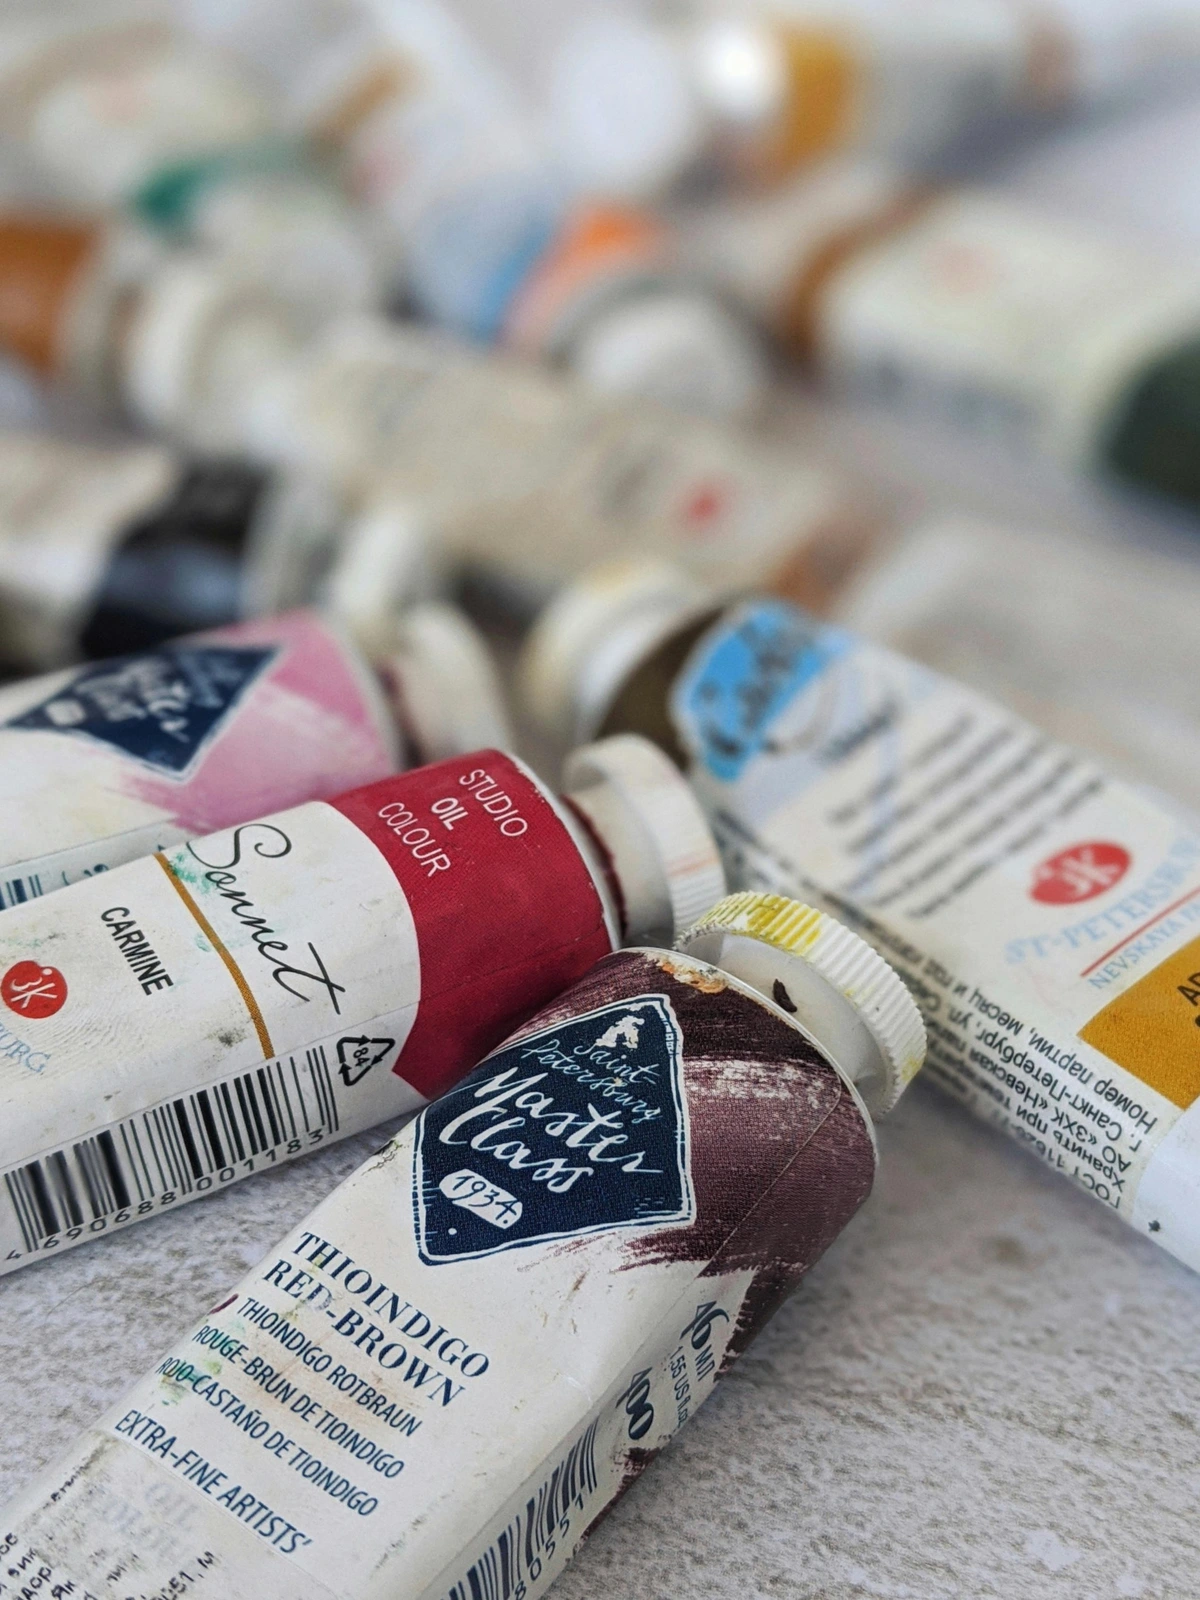
As my artistic ambitions grew, so did my desire for larger canvases, and quickly, so did the bill for buying them pre-made. That's when the penny really dropped for me on cost savings. Especially for those grander pieces that demand a commanding presence, breaking it down to the raw materials – stretcher bars, a roll of canvas, and a tub of gesso – makes a significant financial difference. For a 48x60 inch canvas, you might save well over 50% on materials alone compared to buying it pre-stretched. Imagine what you could do with that extra budget – invest in a gorgeous set of paints, finally take that workshop you've been eyeing, or maybe even treat yourself to a new art book. That $50 saved on a large canvas could buy you a tube of genuine Cadmium Red or a special glazing medium you've been eyeing. It's a little artistic bonus, if you will, directly impacting your creative output. While the initial investment in tools like a good staple gun and canvas pliers might feel like a hurdle, view it as a one-time cost that quickly pays for itself after making just a few canvases, transforming into a long-term investment in your artistic practice.
Then there’s the sheer freedom of custom sizes and shapes. We've all been there, right? An idea sparks, a vision for a painting that simply refuses to conform to a standard rectangle. I remember struggling to capture the sweeping horizontality of a desert landscape on a typical square canvas; crafting a long, narrow surface completely transformed how I approached the composition, making the painting breathe. Whether it’s a series of perfect squares for a multi-panel installation, an expansive panoramic for that specific wall in your home, a dramatic circular canvas, an unusual aspect ratio for a diptych, or even an adventurous irregular polygon (for when you’re feeling truly wild!), making your own means you're no longer confined by what’s collecting dust on a store shelf. This flexibility can truly unlock new creative avenues, pushing your art in directions you hadn't considered. Imagine a bespoke diptych tailored perfectly to a unique space, or a multi-panel narrative where each canvas is a distinct, yet interconnected, shape. This freedom is a game-changer.
And for me, perhaps the most profound benefit lies in quality control and archival longevity. You become the architect of your surface. You get to hand-pick the wood for its straightness and stability, the canvas fabric for its weave and durability, and the gesso for its specific properties and the ideal 'tooth' you desire. You decide how drum-tight the stretch is, how many layers of primer you apply, and what kind of tooth – that subtle, tactile texture that gives your paint something to grab onto – you want. This level of intentionality means you’re setting yourself up for success, creating a durable and responsive surface tailored precisely to your artistic vision. While commercial canvases offer convenience, a carefully crafted DIY canvas, using archival materials and proper techniques, can often exceed the archival standards of mass-produced options, ensuring your artwork endures for generations. It’s a deeper, more intimate connection to the entire journey of creating art, right from the very first decision. And as an added bonus, taking control of your materials often means less packaging waste, a small but meaningful step towards more sustainable art practices. It's a conversation with your materials from the very beginning, ensuring every element is exactly as you envision it.

credit, licence
What You'll Need: Gathering Your Canvas-Making Arsenal
Now that we understand the compelling reasons to go DIY, let's gather our arsenal! Before we get our hands gloriously dirty (or gesso-y, as the case may be), let's talk about the essentials. Think of this as your personal canvas-building toolkit. You don't need a full-blown carpentry workshop, but a few key items will make all the difference, trust me. Skimping here only leads to frustration later, and who needs that when you're trying to make art? I once tried to skimp on a staple gun, and let's just say the canvas won that round, leaving me with sore hands and a saggy surface. Learn from my errors!

Materials: The Raw Goodness
First, the raw goodness that will become your painting surface, meticulously chosen for durability and artistic potential:
Material | Type/Recommendation | Notes |
|---|---|---|
| Stretcher Bars | Pre-milled with mitered corners for beginners. Pine or fir (straight, knot-free). | These form the skeletal structure of your canvas. Look for different depths: 'standard wrap' (around 3/4 inch deep) or 'gallery wrap' (1.5 inches or deeper, offering a more contemporary look as the canvas wraps around the thicker edge, allowing you to paint on the sides). For very large canvases (over 30x30 inches), consider crossbars for added stability. Pine or fir are popular for their balance of strength, lightweight, and cost-effectiveness. Ensure they are kiln-dried (meaning the wood's moisture content has been significantly reduced in a heated chamber) to prevent future warping, twisting, or shrinking – knots and moisture are the enemies of a stable frame. Other options like poplar or basswood are also used for their stability. Alternative systems can include traditional keyed stretchers, which offer greater re-tensioning capabilities for large, historically accurate works, or French cleat systems for hanging very large panels. What NOT to Do: Never use green or wet wood; it will warp and ruin your canvas. |
| Canvas Fabric | Cotton duck canvas (8 oz for lighter work/sketching, 10-12 oz for general purpose and larger pieces, 14 oz for heavy-duty archival work or impasto). Linen (fine or medium weave). | This is the heart of your surface. Heavier weights are generally more durable and less prone to warping. Unprimed canvas (also known as raw canvas, meaning unprimed and unstretched fabric) is essential for DIY. While pre-primed canvases offer convenience, they limit your control over the primer layers and often use a single, generic primer. Cotton duck canvas is versatile and cost-effective, typically with a plain weave, offering good absorbency. It’s categorized by weight (e.g., 10oz, 12oz), with higher numbers indicating a tighter, smoother weave and greater durability. Linen, though pricier, is revered for its exceptional strength, smooth plain or twill weave (the diagonal pattern of a twill weave can affect texture and draping), and superior archival qualities, especially for oils due to its long, strong fibers and resistance to degradation. Historically, linen has been the preferred choice for master painters due to its longevity and strength. Linen also offers a beautiful, subtle patina over time. Always buy it unprimed and in a roll. Consider wearing mittens or gloves to prevent transferring skin oils to the raw canvas, which can create resist areas or discoloration, especially with oil paints. Synthetic canvases like polyester can be very strong and resistant to environmental changes, but gesso adhesion can be more challenging, and they are generally less preferred for traditional archival fine art due to their non-organic nature. |
| PVA Size | Archival quality, acid-free PVA (Polyvinyl Acetate) glue, diluted. | Crucial for oil painting! Applied to raw canvas before gesso, it creates a protective barrier, preventing oil paints from chemically interacting with and eventually rotting the canvas fibers – a process known as saponification. It's a modern, archival alternative to traditional rabbit skin glue, which required heating and was less stable over time. For acrylics, you can skip this step because acrylic paints and gesso are water-based and don't chemically degrade natural fibers like oils do. However, sizing with PVA can still provide a smoother, more uniform surface, reduce the amount of gesso needed, and enhance the overall archival quality of the finished work, preventing moisture penetration. |
| Gesso | Good quality acrylic gesso. | Your essential primer! It creates a barrier, prevents uneven absorption, and provides a consistent, slightly textured surface – what artists call 'tooth'. This 'tooth' is like a very fine sandpaper for your paint to grab onto, ensuring good adhesion. Different gessos (matte, satin, clear, absorbent) can offer varying degrees of tooth and properties. For example, a more absorbent gesso provides a matte finish, ideal for capturing dry brush effects, while multiple smooth layers are perfect for fine detail or glazing. The number of layers and your sanding technique directly control the final tooth, from a fine, almost silky surface for delicate glazes (ideal for detailed portraits or mastering glazing techniques in oil painting) to a robust, slightly textured surface for impasto. While acrylic gesso is standard for most, you can learn more about its application in my guide on how to apply gesso to canvas: a beginner's guide and explore its nature in what is gesso in painting. Specialized gessos like absorbent ground create a highly porous, matte surface for watercolor or pastel, while clear gesso preserves the raw canvas texture. |
| Wood Glue | Standard wood glue (e.g., Titebond). | For reinforcing the stretcher bar corners; adds extra peace of mind and prevents future wobbles. Opt for Titebond or similar quality brands. |
| Corner Keys/Wedges | Small wooden wedges (often included with stretcher bars). | These tiny heroes are inserted after stretching to tighten the canvas if it ever sags due to humidity changes. Don't underestimate them! They offer a form of secondary stretching or re-tensioning, allowing you to maintain your canvas's tautness over its lifetime. |
Comparison: Cotton Duck vs. Linen Canvas
Feature | Cotton Duck Canvas | Linen Canvas |
|---|---|---|
| Cost | More affordable | More expensive |
| Strength & Durability | Good, but fibers can be brittle over time | Excellent, very strong and durable, resistant to rot |
| Weave & Texture | Plain weave, varying weights (8-14 oz). Can be more irregular. | Plain or twill weave, fine to medium. Smoother, more uniform texture. |
| Absorbency | Good | Moderate, requires thorough sizing |
| Archival Quality | Good with proper sizing and priming | Superior, considered the gold standard for oils |
| Best For | General purpose, acrylics, studies, beginners, large-scale work on a budget | Oils, detailed work, fine art, long-term archival pieces, artists seeking a premium surface |
Wood Panels: A Rigid Alternative
While this guide focuses on stretched canvas, wood panels offer an unparalleled rigid support, especially for highly detailed work, encaustic, mixed media, or for artists who prefer a stable, unyielding surface. They eliminate concerns about sagging canvas or stretching techniques. Common types include:
- Birch Plywood: Stable, relatively smooth, and widely available. Requires sealing and gessoing.
- Tempered Hardboard (Masonite): Very smooth, dense, and inexpensive. Can be prone to warping if not properly sealed on both sides. Ideal for very fine detail.
- MDF (Medium-Density Fiberboard): Similar to hardboard but generally heavier and less prone to warping due to its consistent density. Requires sealing.
- Cradled Panels: These are wood panels mounted onto a support frame, much like stretcher bars, but permanently attached. They offer rigidity and a finished edge, making them ready to hang. They are often made from birch or other stable woods.
Preparation for Wood Panels: Requires thorough sanding (start with coarse, finish with fine grit like 220-320) to ensure good adhesion. Apply several coats of a wood sealer (e.g., GAC 100 or shellac) to prevent support-induced discoloration (SID) and to stabilize the wood. Follow with multiple coats of gesso, sanding between layers to achieve your desired 'tooth'. The rigidity of panels makes them an excellent choice for artists using impasto or aggressive brushwork, as there's no flex.
credit, licence
Tools: Your Trusty Companions
Now for the trusty companions that bring it all together. I've had my share of tool-related woes, so take it from me, the right gear makes a world of difference. Once, I tried to stretch a canvas with kitchen tongs, and let's just say the canvas won that round. Please, use proper tools. And always wear eye protection when using a staple gun – seriously, those things can bounce!
Tool | Description/Recommendation | Why it's Essential |
|---|---|---|
| Heavy-Duty Staple Gun & Staples | A good quality manual or electric staple gun that can drive staples deeply and reliably into wood. Staples: 1/4 inch to 3/8 inch long, with a narrow crown. | Your MVP for fastening. Do not skimp here! A woodworking staple gun offers more consistent power than a general craft staple gun. If your staples aren't going in all the way, your gun might be underpowered or your wood too hard. I remember a particularly frustrating afternoon where I spent more time prying half-driven staples out than actually stretching; it felt like wrestling a porcupine! Eye protection is non-negotiable! |
| Staple Remover | Specifically designed for removing staples without damaging the surface. | Trust me on this one. When you inevitably need to adjust a staple (or an entire section), this tool is a lifesaver. Trying to pry staples out with a screwdriver is a recipe for damaged canvas and bruised egos. My hands still remember the pain. |
| Canvas Pliers | Wide, textured jaws that grip the canvas firmly without damage, with a leverage point. | A total game-changer for achieving that satisfying drum-tight stretch. Seriously, once you use these, you'll wonder how you ever managed without them. |
| Measuring Tape & Metal Square/Ruler | For accurate measurements and ensuring your frame is perfectly square. A large metal square (carpenter's square) is indispensable. | Precision is key here. A crooked frame makes for a crooked painting, every single time. |
| Scissors or Utility Knife | A sharp blade makes life so much easier. Always cut on a protected surface. | For cutting your canvas fabric cleanly and efficiently. |
| Sandpaper | Fine grit (220-320). Sanding sponges for curved areas. | For smoothing any rough edges on your stretcher bars or for refining gesso layers. A splinter in your palm is not part of the artistic process. |
| Large Brushes or Roller | A wide foam roller can give a very smooth, consistent application, reducing brushstrokes. | For applying size and gesso smoothly and evenly. |
| Clamps (Optional but Recommended) | Will hold stretcher bars firmly and squarely while glue dries. | Prevents bowing and ensures your frame sets perfectly. A slightly bowed frame will haunt you. |
| Drop Cloth or Protective Surface | Absolutely essential to protect your workspace from glue, size, and gesso spills. | Keeps your studio clean and prevents accidental masterpieces on your floor. |
My Step-by-Step Guide to Building and Stretching Your Own Canvas
Alright, let's get down to business! This is where the magic (and a good deal of satisfying elbow grease) truly happens. Feel that anticipation? That's your canvas calling! Follow these steps, and you’ll soon have a professional-quality painting surface, brimming with the intention you poured into it, ready for your next creative masterpiece.
Step 1: Preparing the Stretcher Bars (Building Your Frame)
If you’ve opted for pre-milled stretcher bars – and I highly recommend this for beginners; no need to make things harder than they have to be – this step is mostly assembly.
- Lay them out and check the bevel: Find a clean, flat surface. Lay out your stretcher bars. You'll notice the mitered corners are designed to slot together snugly. Look closely at the bars themselves: if they have a slightly beveled edge, ensure this bevel faces outward or downward when assembled (away from the canvas front). This prevents the canvas from resting directly on a sharp inner edge, which could create a 'witness line' (a visible ridge or impression on the front of your finished painting) and potentially damage the canvas over time. Crucial quality tip: Remember to invest in decent quality, straight, knot-free, kiln-dried wood. Cheap, warped, or knotty stretcher bars are a recipe for frustration and will inevitably sag or twist.
- Glue (Optional but smart): I like to apply a tiny bit of wood glue to each joint before pressing them together. It just adds an extra layer of stability and ensures your frame won't wobble down the line. I once skipped this, and a large canvas developed a noticeable wobble after a few months – frustrating! Especially for larger frames, this step is practically non-negotiable.
- Square it up: Press the corners together firmly. This next bit is crucial: use a metal square to check that all corners are exactly 90 degrees. A skewed frame means a skewed painting, and nobody wants that kind of unexpected abstract art. If you have clamps, use them to hold the frame perfectly square while the glue dries completely. Patience here pays dividends! If your wood isn't kiln-dried or has knots, you might notice warping even at this stage – a good reason to choose quality materials upfront. What NOT to Do: Don't skip squaring! A slightly off-square frame will cause uneven tension and a wonky canvas.
- Smooth operators: Once assembled and dry, give the edges a quick once-over with fine-grit sandpaper. This removes any splinters or rough spots that could snag your canvas later. Think of it as giving your canvas a gentle welcome. A splinter in your palm is definitely not part of the artistic process. Use sanding sponges for curved areas.
Step 2: Cutting the Canvas Fabric (The Skin of Your Artwork)
Now for the fabric, the very skin of your future artwork! Handle your raw canvas – which means unprimed and unstretched fabric – with mittens or gloves if you're concerned about transferring skin oils, especially if you plan to oil paint (oils from your skin can create resist areas or discoloration over time).
- Lay it flat: Unroll your unprimed canvas onto a large, clean, and protected surface (your drop cloth!). Ensure it's as flat and wrinkle-free as possible. If it's a bit stiff, you can let it relax for a few hours. If it has creases, a very light mist of water and gentle stretching can help, but avoid over-wetting.
- Measure and mark: Place your assembled stretcher bar frame on top of the canvas. You need to leave a generous overhang on all sides – enough fabric to grip and stretch properly. I usually aim for about 3-4 inches (7-10 cm) of extra fabric beyond the frame on all four sides. This excess is your friend; it gives you leverage. Double-check that your canvas weave is running straight relative to your frame edges; a skewed weave can make stretching tricky and lead to an uneven final appearance.
- Cut with confidence: Using your sharp scissors or utility knife, cut the canvas. Aim for straight cuts; it makes stretching easier, but minor imperfections are easily hidden on the back, a little secret between you and your canvas.

Step 3: Stretching the Canvas (The Heart of the Process)
This is arguably the most crucial step, where a bit of tension (the good kind!) and practice come into play. The goal? A drum-tight canvas with no ripples or sagging, just waiting to sing under your brush. I often find myself getting into a rhythm here, almost like a dance with the fabric. The sound of a perfectly stretched canvas, when you tap it, should be a satisfying, resonant drum-like tone – like a well-tuned instrument. My first few canvases looked like they’d been stretched by a particularly enthusiastic toddler, all lumpy corners and uneven tension. Don't be discouraged! It's a physical skill that needs repetition.
- Anchoring the centers: Place your frame face down on the canvas. Fold one side of the canvas over the center of one stretcher bar. Pull it taut – but not super tight yet – and secure it with one heavy-duty staple in the middle of that side, about half an inch from the outer edge. Repeat this on the directly opposite side, pulling the canvas across the frame and stapling. Then, do the same for the remaining two sides. You should now have four staples, one in the center of each side, creating your initial anchor points. This is like setting the four corners of a tent before tightening the guy ropes. What NOT to Do: Don't over-tighten your initial staples; save the serious tension for the pliers.
- Working from the middle out: Now, working from your center staple, place another staple about an inch or two away, pulling the canvas firmly but evenly as you go. Crucially, alternate sides: if you place a staple on the top, do the next on the bottom, then the left, then the right. This alternating method ensures even tension, preventing the canvas from skewing or forming wrinkles. Keep working your way towards the corners, leaving the very corners unstapled for now. Troubleshooting Tip: If you notice any small puckers or wrinkles forming, remove the last few staples in that area with your staple remover (a lifesaver!), re-pull, and re-staple. Don't be afraid to take a few steps back – it's better to fix it now than have a saggy canvas later.
- Employing the canvas pliers: For serious, professional-level tension, those canvas pliers are your best friend. Grip the canvas firmly with the wide, textured jaws, pull with deliberate force, leveraging them against the stretcher bar, and then immediately staple while holding that tension. It’s a bit like wrestling a particularly stubborn blanket, but oh, the satisfaction when you get it right! If you notice any small bumps or staple marks trying to peek through from the front, you might need to adjust your stapling depth or remove and re-staple slightly using your staple remover. The goal is a uniform, unblemished surface.
- Mastering the corners: This is where the artistry of stretching really shows. Imagine neatly wrapping a gift. There are a few techniques, but I prefer a clean, minimal fold. Pull the corner fabric taut and fold it as if you’re making a hospital corner on a bed. The key is to ensure no excess bulk gathers on the front edge of the stretcher bar, which could show through your painting. Neatly fold the fabric inward, creating a clean mitered corner on the underside of the canvas. Staple the folds securely on the back, ensuring the staple points are hidden and don't protrude. Aim for flat, clean corners. A common alternative involves folding the excess fabric directly over the corner and then stapling it, creating a slightly bulkier but equally secure corner. Once you’ve stapled all around and folded the corners, go back over the canvas. If you find any slack spots, don't despair! You can carefully remove a staple (or two) with your staple remover, re-pull with your pliers, and re-staple. The finished canvas should feel firm and make a slight drumming sound when tapped. If it feels soft or looks wavy, you need more tension.
credit, licence
Step 4: Sizing and Priming with Gesso (The Perfect Surface)
With your canvas drum-tight and beautifully stretched, it’s time to prepare it for paint. This involves two vital steps: sizing and priming. While distinct, they both contribute to the longevity and quality of your artwork. Sizing creates a protective barrier for the canvas fibers, and priming (gessoing) establishes the ideal surface for paint adhesion and interaction.
A. Sizing the Canvas (Crucial for Oil Painters)
If you plan to use oil paints, this step is non-negotiable. Oil can rot natural canvas fibers over time through a chemical reaction called saponification, where the oil acids literally turn the canvas into soap. Sizing prevents this. For acrylics, you can skip this and go straight to gesso because acrylics are water-based and don't chemically degrade natural fibers like oils do. However, I often still size my canvases even for acrylics; it won't hurt, and can still provide a smoother, more uniform surface, reduce gesso consumption, and ensure a more archival result by preventing moisture penetration.
- Prepare your PVA size: Dilute your archival PVA size according to the manufacturer's instructions. It should be a thin, milky consistency.
- Apply a thin coat: Using a wide brush or roller, apply a thin, even coat of the PVA size to the front of the canvas. Work it into the weave, ensuring full saturation without excessive pooling. You want to seal the fibers.
- Let it dry: Allow the PVA size to dry completely, typically a few hours. The canvas should feel slightly stiffer and less absorbent. Do not apply gesso until the size is thoroughly dry. What NOT to Do: Don't apply gesso over wet size; this can trap moisture and compromise adhesion.
B. Priming with Gesso (Creating 'Tooth')
Now for the gesso! This creates the uniform, slightly absorbent, and textured surface your paint will love. The term 'tooth' refers to the subtle texture that allows paint to grab and adhere, much like a fine sandpaper would. Different levels of tooth suit different mediums and styles. For instance, a very smooth surface is ideal for detailed portraiture or delicate glazing techniques, while a coarser tooth is great for thick, expressive brushstrokes or impasto.
- First coat magic: Apply a thin, even coat of gesso across the entire canvas using a wide brush or roller. Work quickly and efficiently, trying to avoid thick drips or pooling. Watch out for "holidays" – missed spots or thin areas – which can lead to uneven absorption and patchy paint application later, potentially affecting the longevity of your artwork. If you see them, apply a little more gesso to that area. Let it dry completely. Gesso dries relatively fast, but I usually recommend waiting a few hours, or even overnight, to be absolutely sure. What NOT to Do: Avoid applying gesso too thickly in one go, as this can lead to cracking and an uneven surface.
- Sanding for smoothness (Optional but recommended): Once that first coat is dry, lightly sand the gessoed surface with fine-grit sandpaper (around 220-grit). This removes any pesky brushstrokes, bumps, or lint, creating a smoother, more refined surface. The grit you choose here will influence the final 'tooth' – a finer grit leads to a smoother surface, ideal for detailed work, glazing, or portraits, while a slightly coarser grit can offer more grab for thicker paints or impasto. Wipe off any dust thoroughly with a damp cloth – we want a pristine surface! Don't skip this if you're aiming for a professional finish.
- Building layers: Apply at least two more thin coats of gesso, letting each coat dry thoroughly and optionally sanding lightly between them. For a super smooth surface (ideal for detailed portraiture or glazing with oils), you might do four or five coats, sanding with even finer grit (e.g., 320-grit) on the final coats. For a bit more texture (or 'tooth'), three coats are usually sufficient. Make sure the edges of the canvas are also well-coated. Troubleshooting Tip: If your gesso seems to be cracking after drying, it might be applied too thickly in one go, or the canvas wasn't stretched tightly enough. Thin layers are key! If cracking occurs, you can often sand down the affected area and reapply thinner coats. Remember, proper gesso application is paramount for a beautiful painting experience. You can dive deeper into this critical step with my guide on how to apply gesso to canvas: a beginner's guide. You can also explore different paint types and how they interact with your newly prepared surface in my definitive guide to paint types for artists.
credit, licence
Step 5: Drying and Finishing Touches
You're almost there! That fresh, handmade canvas is so close to becoming your next masterpiece.
- Final drying: Once your final coat of gesso is dry to the touch, place your canvas in a clean, dust-free area to dry thoroughly. This might take another day or two, especially in humid conditions. Resist the urge to start painting immediately! A perfectly prepared canvas is worth the wait.
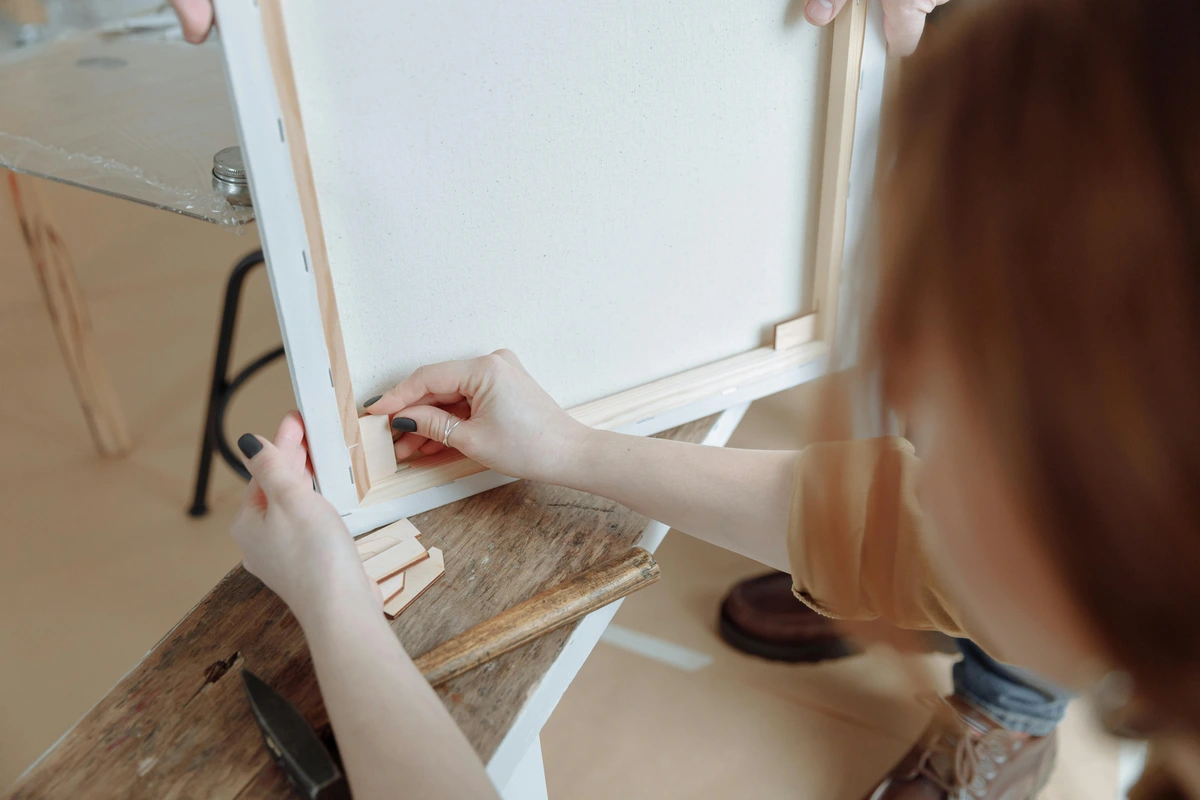
- Corner key activation: If your stretcher bars came with those little corner keys, now's the time for them. Gently insert them into the slots on the inner corners. These clever wedges allow you to slightly expand the frame (and thus re-tighten the canvas) if it ever sags due to humidity changes over time. Just a little tap with a hammer is all it usually takes, but be gentle – we’re finessing, not demolishing! This is a form of secondary stretching or re-tensioning, giving your canvas a new lease on life, much like tuning a guitar. For very large canvases that might also have a crossbar, check if there are wedges there too.
- Troubleshooting a sag or warp: If, despite your best efforts, your canvas develops a minor overall sag without corner keys, a very light spray of water on the back of the canvas and allowing it to air dry can sometimes tighten it up. Be careful not to over-wet it! If your canvas shows signs of warping (bowing inward or outward), it often points to inconsistent tension during stretching or poor quality stretcher bars. For minor warps, careful, localized re-tensioning can sometimes help, but prevention through good materials and technique is best. Significant warping is harder to fix, highlighting why quality materials and careful stretching are so important upfront. Remember, environmental factors are sneaky! Canvas is an organic material, and it reacts to its environment. High humidity can cause it to loosen, while very dry air can make it tighten excessively. I've found that storing finished canvases in a stable, climate-controlled environment, away from direct sunlight or extreme temperature fluctuations, helps maintain their tension. Periodically tapping your canvas to check its tautness is a good habit. You might even consider a simple hygrometer in your studio to monitor humidity; it's a small investment for peace of mind.
You’ve done it! You’ve built your own canvas. Give yourself a hearty pat on the back. There's a real thrill of accomplishment at this stage, knowing that the foundation for something new and exciting has been laid by your own hands. Now, go make some art! If you're pondering what surface works best for your chosen medium, I highly recommend checking out my guide: how to choose the right canvas for acrylic vs oil.
What NOT to Do: Common DIY Canvas Mistakes to Avoid
Through my own trials and (many, many) errors, I've picked up a few extra nuggets of wisdom that might save you some headaches and elevate your canvas-making game. Consider these the whispered secrets from one artist to another, especially the pitfalls to actively avoid.
- Don't Skimp on Stretcher Bar Quality: As mentioned, cheap, warped, or knotty wood will lead to frustration. Knots are weak points and can leak sap, and moist wood will warp and shrink. Actively source kiln-dried, straight wood from a reputable supplier. Your future self (and your artwork) will profoundly thank you.
- Don't Rush the Squaring Process: A frame that isn't perfectly square from the outset will lead to uneven tension and a wonky canvas. Use your metal square diligently and clamps if possible. Patience here saves hours of frustration later. A slightly off-square frame will cause uneven tension and a wonky canvas every single time.
- Don't Apply Gesso Too Thickly in One Go: This is a common beginner's mistake. Thick layers of gesso are prone to cracking, flaking, and creating an inconsistent surface. Always aim for multiple thin, even coats, allowing each to dry thoroughly. This is why you build layers!
- Don't Overlook Sizing for Oil Paints: Skipping the PVA size for oil paintings is a critical error. The oil will eventually degrade the canvas fibers through saponification, leading to your painting falling apart. It's a non-negotiable step for longevity. Seriously, don't skip this.
- Don't Ignore Uneven Tension During Stretching: Small puckers or ripples will only get worse. Don't be afraid to remove staples with your staple remover, re-pull with your canvas pliers, and re-staple. It's better to fix it now than regret it later, staring at that annoying wrinkle for the life of the painting.
- Don't Store Your Finished Canvas Poorly: Extreme fluctuations in temperature or humidity are the enemy of canvas tension. Store your artwork in a stable environment to preserve its tautness and archival integrity. A simple hygrometer can be your best friend here. Treat your canvas like a cherished instrument; it needs a stable climate.
Canvas Maintenance and Longevity: Keeping Your Masterpiece Pristine
Creating your own canvas is an investment in time and effort, and you want that investment to pay off for generations. Here's how to ensure your handmade surfaces stand the test of time:
- Stable Storage Environment: As I mentioned, canvas is an organic material and reacts to its surroundings. Always store your canvases (whether blank or painted) in a stable, climate-controlled environment. Avoid attics, basements, or garages where humidity and temperature can fluctuate wildly. Aim for moderate temperatures and consistent humidity (around 45-55%).
- Proper Handling: Always lift a canvas by its stretcher bars, not by the canvas fabric itself. Oils from your hands can transfer, and accidental bumps can damage the surface. When transporting, protect the painting face with glassine paper or a smooth, non-abrasive material, and ensure it's securely packed to prevent shifting or impact.
- Activating Corner Keys (Re-Tensioning): Periodically check the tautness of your canvases by gently tapping the surface. If it feels slack or you see minor ripples, it's time for those corner keys. A gentle tap with a hammer on the keys inserted into the inner corners of the stretcher bars can re-expand the frame and restore tension. Don't be shy; this is what they're for! It's a simple, effective form of secondary stretching that extends the life of your canvas.
- Minor Repairs: For small dents or dings in a gessoed but unpainted canvas, sometimes a light mist of water on the back of the dented area and gentle pressure from the front can help pop it out. For painted canvases, always consult a professional conservator for damage repair.
- Environmental Responsibility: By making your own canvases, you're already taking a step towards more sustainable art practices. Continue this by opting for sustainably sourced wood for your stretcher bars and purchasing canvas fabric in bulk rolls to minimize packaging waste. The longevity of a well-made DIY canvas also means less waste from discarded, inferior commercial alternatives.
FAQ: Your Burning Canvas Questions, Answered
Q: Is making my own canvas really cheaper?
A: Yes, absolutely, especially for larger sizes. The raw materials are significantly less expensive than buying pre-stretched canvases. The initial investment in tools (like a good staple gun and canvas pliers) might seem like a barrier, but they pay for themselves quickly if you make more than a couple of canvases. Think of it as an upfront investment in endless creative possibilities! For a large 48x60 inch canvas, you could easily save hundreds of dollars, freeing up your budget for other essential art supplies or even an original piece from my buy collection.
Q: Should I size my canvas before gessoing?
A: If you plan to use oil paints, absolutely yes! Sizing (with PVA size or traditional rabbit skin glue) creates a crucial barrier between the oil and the canvas fibers, preventing the oil from eventually degrading and rotting the fabric (saponification). For acrylics, sizing isn't strictly necessary as acrylic gesso forms its own barrier, but it can still help create a smoother, more uniform surface and is generally good practice for archival quality.
Q: Can I use any fabric?
A: Not just any fabric, no. You need something durable, tightly woven, and stable that can withstand tension and accept gesso without degrading. Traditional art canvases use cotton duck or linen. While you could experiment with heavy denim or duck cloth from a fabric store, results may vary significantly in terms of archival quality, paint adhesion, and how well it holds tension over time. Synthetic fabrics like polyester might stretch well, but their non-absorbent nature can make gesso adhesion tricky without specific preparation. For reliable, long-lasting results, stick to unprimed cotton duck or linen from a reputable art supply store. Your art deserves the best foundation.
Q: How do I remove wrinkles or sagging after the canvas is stretched?
A: If you stretched it properly and it still sags slightly (which can happen with humidity changes), those little wooden corner keys (if your stretcher bars came with them) are your best friend. Gently tap them into the slots on the inner corners of the frame. This slightly expands the frame and tightens the canvas, a process known as secondary stretching. For minor, overall sagging without corner keys, a very light spray of water on the back of the canvas and allowing it to air dry can sometimes tighten it up (just be careful not to over-wet it!). For significant wrinkles or persistent sags, you might need to carefully remove staples with a staple remover and re-stretch the affected area, applying more tension. For example, if a specific corner is loose, remove the staples around that corner, re-pull firmly with canvas pliers, and re-staple, gradually working outward. Sometimes, you just have to re-do it, and that's okay!
Q: What if my canvas warps after stretching?
A: Canvas warping (where the frame bows inward or outward) is usually a sign of inconsistent tension during stretching, or more commonly, using poor quality, non-kiln-dried stretcher bars. Prevention is key here: always choose straight, stable wood. For minor warps, careful, localized re-tensioning with corner keys or even slightly dampening the back of the canvas (if there are no keys) can sometimes help. However, significant warping is difficult to fully correct once it occurs, underscoring the importance of quality materials and meticulous stretching technique upfront.
Q: How long does the whole process take?
A: Building the frame is relatively quick, perhaps 10-20 minutes. Stretching the canvas can take anywhere from 30 minutes to an hour or more for your first few attempts, then gets much faster with practice. The longest part is waiting for the sizing and gesso coats to dry between applications. You'll likely spread the sizing and gessoing process over a day or two to ensure proper drying and layering. So, plan for a relaxed weekend project rather than an afternoon sprint. Art is a patient endeavor, after all.
Q: What if I mess up? Can I fix it?
A: Of course! Art is all about experimentation and learning from mistakes. If the stretch isn't quite right, you can carefully remove the staples with your trusty staple remover, re-cut a bit if needed, and try again. If the sizing or gesso is bumpy, you can sand it down more aggressively, apply another thin layer, or even carefully scrape it off and reapply (though that's a last resort!). The beauty of DIY is that you're in control, and every 'mistake' is just a valuable lesson learned for the next, even better canvas. Your first attempts might not be perfect, but they'll be yours – and that's what truly counts.
My Final Thoughts: The Canvas as a Part of Your Artistic Story
Building your own canvas is more than just acquiring a practical skill; it's a profound act of intention. It’s about being intimately involved with every single layer of your artwork, right from the very foundation. There’s a quiet pride, a deep satisfaction, in knowing you’ve prepared the surface with your own hands, setting the ultimate stage for the creative act to follow. The very texture and tension you've crafted become an integral part of your artistic expression, influencing every brushstroke, every pigment choice. It's a grounding experience, connecting you with centuries of artists who similarly honored their materials, shaping their supports to perfectly suit their evolving visions. This intentionality, this tactile connection, has profoundly influenced my own approach, leading to a series of works that explore the very texture and presence of the canvas itself.
It reminds me of the broader journey we undertake as artists – constantly learning, perpetually refining, always finding new ways to express the unutterable. Sometimes, that expression starts not with a delicate brushstroke, but with the satisfying thud of a hammer and the decisive click of a staple gun. So, I urge you, go ahead, give it a try. You might just uncover a new, deeply rewarding part of your artistic process, a new layer to your creative self. And who knows, perhaps one day, a piece born from your very own handmade canvas will find its way into someone's home, becoming a cherished part of their world, much like some of the pieces you can buy from my own collection. Or maybe, it will even grace the walls of a museum like the one in 's-Hertogenbosch, carrying your unique story and craftsmanship with it. It all starts somewhere, right? Perhaps this is just another exhilarating chapter in your timeline as an artist. What a truly exciting thought!


