
Hang Heavy Mirrors Confidently: The Ultimate Secure Guide to Gravity-Defying Style
Banish mirror hanging dread! This ultimate guide offers battle-tested methods and expert advice to securely hang any heavy mirror, from finding studs to choosing anchors, ensuring lasting safety and style for your cherished pieces. Conquer gravity and transform your space!

The Gravity-Defying Guide: How to Hang Any Heavy Mirror with Absolute Confidence and Lasting Style
I’ll never forget the sound. It wasn't the dramatic, cinematic crash, not even a sharp crack. It was a slow, sickening creak from behind the drywall, a sound that curdled my blood, followed by a soft thump, and then the inevitable, crystalline shatter. My beautiful, heavy, antique-style mirror, the one I’d spent weeks hunting for, lay in a thousand glittering pieces on the floor, having ripped a giant, jagged chunk of drywall out with it. All because I got impatient, thought I could eyeball it, and used the wrong hardware. A humbling, and rather expensive, mistake, I can tell you – one I still cringe recalling.
Have you ever stood paralyzed in front of a stunningly heavy mirror, a knot of dread in your stomach about how to possibly hang it securely? I know that feeling. Hanging anything truly substantial is nerve-wracking. It feels like a high-stakes gamble with gravity, and gravity, in my experience, usually wins. But here’s the crucial thing I learned from that expensive lesson: it’s not about luck or brute force. It's about understanding a bit of physics, a dash of practical engineering, and a good dose of know-how. This guide will equip you with the knowledge to confidently hang that gorgeous, statement mirror – whether it's an ornate family heirloom, a contemporary piece reflecting your world, or even art from our collection. You'll do it with the quiet confidence that it will stay exactly where you put it, transforming your space into a reflection of both beauty and strength. I’m going to walk you through it, step by meticulous step, so you don't have to learn the hard way like I did, ensuring your masterpiece stays put, forever. And before we get into the nuts and bolts (literally!), let's define what we're actually up against.

First, What Exactly Counts as 'Heavy'? Defining the Challenge (and the Physics)
This is a great question, and one I think people often underestimate. My personal, battle-tested rule of thumb is this: if you struggle to lift it comfortably by yourself, even for a moment, it's heavy. To get a bit more technical, because gravity doesn’t mess around, think of it in categories:
- Moderately Heavy Items (15-35 pounds / 7-16 kg): These can sometimes be secured using robust drywall anchors, but always opt for a stud if possible – that's your gold standard. Standard picture hangers are definitely out; think specialized hooks designed for medium loads. This is where many mirrors fall that aren't quite behemoths but still demand respect.
- Very Heavy Items (35+ pounds / 16+ kg): This is where we need to pay serious attention. A simple picture nail and hammer won't cut it. Forget it. For these substantial pieces, you absolutely cannot just hang them on the drywall; you need to anchor them securely to the structural elements behind the wall. Why? Because the force exerted by weight isn't just a straightforward downward pull; it's also creating a tricky dance of forces. Primarily, there’s rotational force or torque—imagine trying to turn a very stiff doorknob with only your fingertips – that's torque working against you, constantly trying to pry your hardware out and down from the wall. This is the insidious part that often leads to failure. Beyond that, you're dealing with shear strength (the resistance to a force trying to slice the anchor parallel to the wall, like a hook sliding down, or a shelf sagging) and tension strength (the resistance to a force trying to pull the anchor straight out of the wall, like a shelf pulling away). For heavy mirrors, you need robust solutions that handle all three of these forces effectively. Also, consider the angle: a mirror flush against the wall distributes load differently than one with a slight tilt; flush mounting can sometimes concentrate forces more intensely on the upper anchor points. Remember, the stated weight ratings for hardware are typically for static loads under ideal conditions. Dynamic loads (a bump, vibrations, even minor seismic activity) can temporarily exert significantly higher forces, which is why a substantial safety margin is non-negotiable.
This is why when assessing your mirror's weight, don't just guess. If it's not labeled, gently try to lift it; if it feels substantial, consider using a luggage scale (hook it onto the mirror's hanging wire if attached, or carefully under the frame) or, if you're feeling adventurous and don't have a helper, the bathroom scale trick (carefully place one edge on the scale while holding the other, then double the reading – it's not exactly the most elegant measurement, but gravity doesn't judge your decor choices!) to get a precise measurement. Knowing the true weight is the first step to absolute, gravity-defying security. Think of your wall like a person, a metaphor I often find useful when demystifying home projects. The drywall is the skin—it looks good, gives the room its aesthetic, but it can't support much weight on its own. The wooden or metal studs behind it are the bones. To hang something truly heavy, you need to connect directly to the bones. Anything less is, well, a gamble with potential shattering consequences. Crucially, also consider the weight capacity of the mirror frame itself; an ornate, heavy frame might look substantial, but if its internal structure is weak, it's a potential failure point before it even reaches the wall. Furthermore, understanding the mirror's center of gravity (its balance point) is key, especially for irregularly shaped pieces. If the weight is unevenly distributed, it will create additional torque, making strategic D-ring and anchor placement even more critical.

Your Toolkit: Essential Gear for Hanging Heavy Mirrors
Getting the right gear is truly half the battle, maybe even more. Trying to improvise here is precisely what leads to those shattering sounds I mentioned earlier. You don't need a professional workshop worthy of a museum conservationist, just a few key items. Trust me, skimping on these is a false economy, one I've personally regretted more than once, and frankly, it's just not worth the stress. It's about setting yourself up for success, not a struggle.

Tool/Material  | Why You Need It (and why I swear by it) | Key Features for Heavy Mirrors (and what to look for) |
|---|---|---|
| Stud Finder | This is your magic wand for peering behind walls, reliably finding the wooden or metal studs (the bones!). It’s absolutely non-negotiable if you want to hang a mirror securely and avoid that sickening creak. I've tried guessing; it never ends well, truly. | Look for models with deep scan mode for greater accuracy, especially if you have thicker drywall or older walls. Electronic stud finders are common and effective. For metal studs, a simple magnetic stud finder can sometimes work even better by locating drywall screws attached to the stud. |
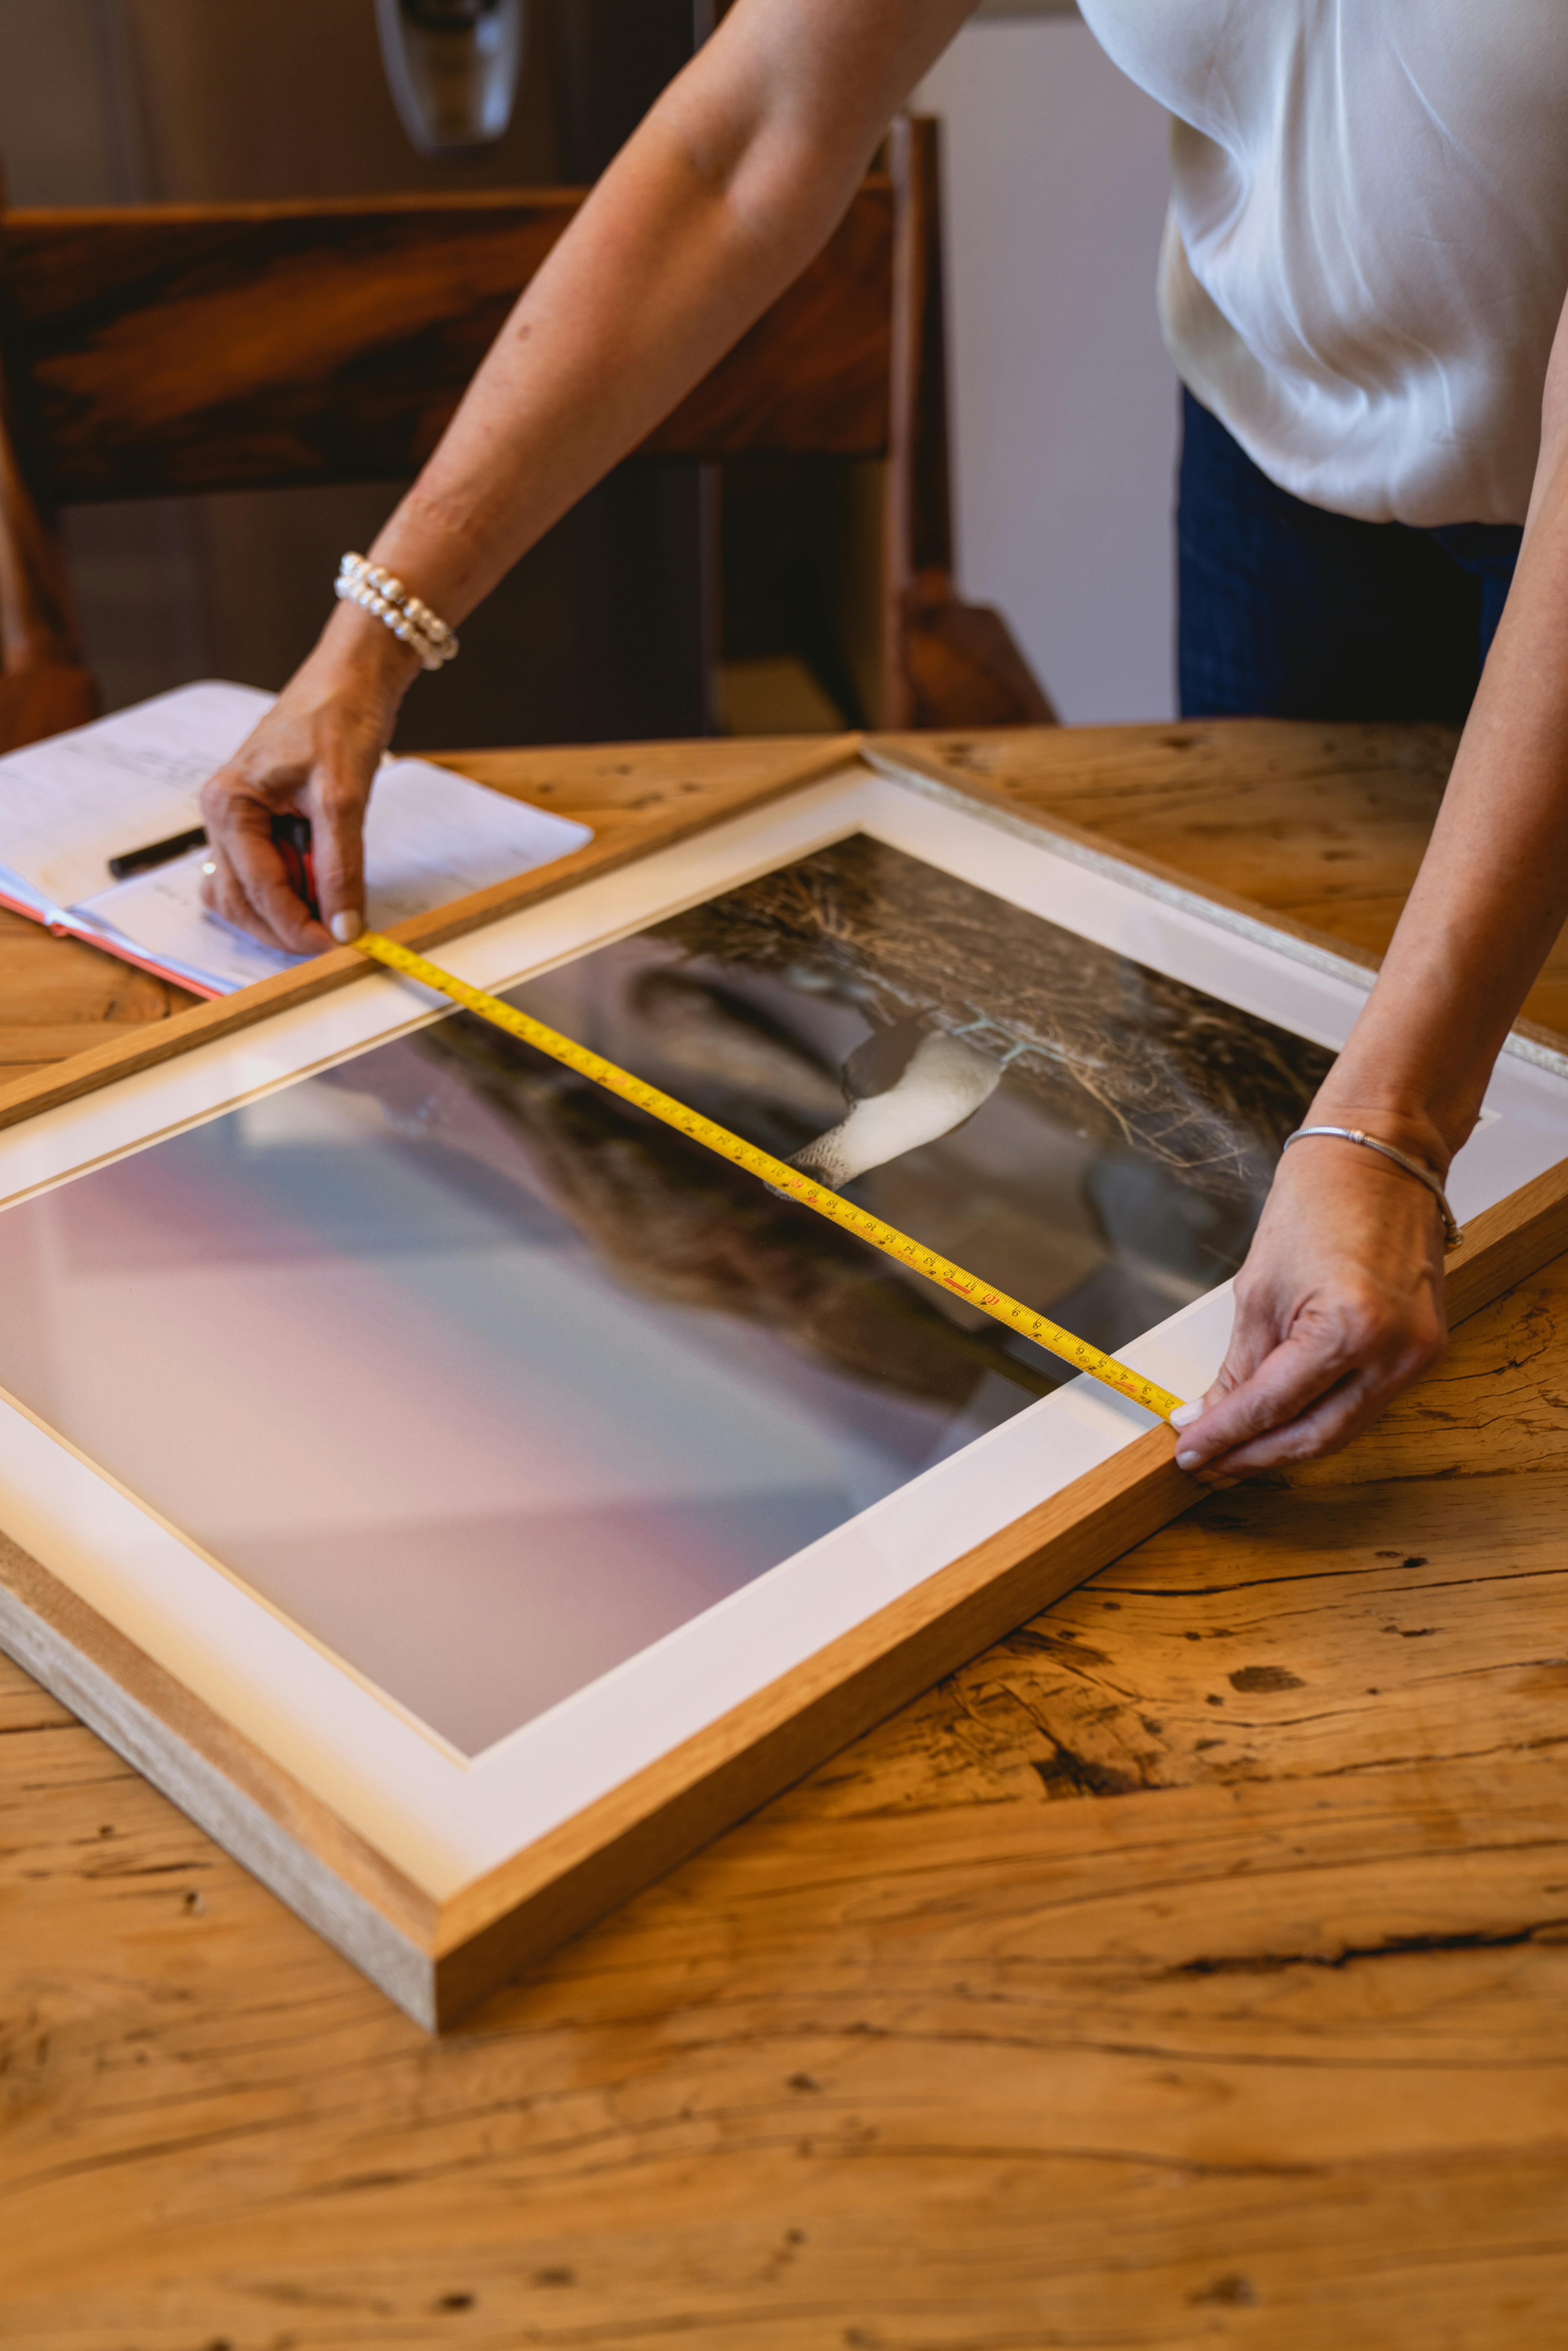
| Tape Measure | Crucial for centering your mirror, calculating eye-level height, and precisely marking where your hooks will go. My personal mantra: Measure twice, triple-check, then drill once! Your eyes will lie to you, especially at 3 AM when you're still obsessing over that slight tilt. My eyes have led me astray more times than I care to admit. | A retractable, locking tape measure is easiest to use solo. Ensure it's long enough for your wall and mirror dimensions, typically 25 feet (7.5 meters) is ample. |
| Level | A crooked mirror is a special kind of daily torture, a subtle misalignment that will slowly drive you mad. A 24-inch level is ideal for larger pieces, but even a smaller one is better than none. Don't trust your eyes alone – I've tried, and my eyes are terrible judges of perfect horizontality! | For very large mirrors, a digital level or a laser level offers superior precision and can project a perfect line across your wall. A traditional bubble level works wonders for most jobs. |
| Pencil | For marking your spots. Simple, yet profoundly crucial for accuracy. Make light marks, easily erased. This isn't the time for guesswork or a permanent marker; trust me, I've had to repaint for less. | Use a fine-point pencil for precise marking. A mechanical pencil with a hard lead (e.g., HB or 2H) helps avoid smudges. |
| Drill | To create pilot holes, drive in screws, and properly install heavy-duty anchors. Make sure it's charged and you have the right bits! A dull drill bit or a weak battery is a recipe for frustration – and for a lot of choice words from me. | A cordless drill offers flexibility. Ensure it has enough torque for tough jobs and a variety of drill bit sizes suitable for both wood and drywall anchors. For masonry, you'll absolutely need a hammer drill and appropriate masonry bits. |
| Heavy-Duty Picture Wire | This isn't the flimsy wire your mirror might have come with. Ensure it's rated for at least twice the actual weight of your mirror. Overkill is good here – it’s your peace of mind and protection against gravity’s relentless pull. | Look for braided steel wire or aircraft cable, typically 20-gauge or thicker, designed for significant loads. Avoid single-strand wire, which can kink and weaken. |
| D-Rings or Strap Hangers | These sturdy metal rings are screwed directly into the back of your mirror frame to hold the wire. Again, check their individual weight rating and ensure they are compatible with the frame material. Don't underestimate the strain on these small but mighty components. | Choose steel D-rings or strap hangers with multiple screw holes for maximum security, rated for the mirror's weight. Ensure the screws provided (or chosen) are appropriate for your frame material. |
| Heavy-Duty Wall Anchors or Hooks | This is the most critical part, the unsung hero of secure hanging. The specific type depends entirely on whether you're drilling into a stud or just drywall. Choosing wisely here is paramount; this is where most DIY hanging projects go wrong. This is where you transform flimsy drywall into a fortress. | Ensure anchors are rated for at least 2-3 times your mirror's weight. For drywall, toggle bolts or molly bolts (expansion anchors) are your best friends. For studs, strong wood screws or specialized heavy-duty screw-in hooks are ideal. |
| Screws/Hardware for Anchors | Don't assume. Some anchors come with screws, others require you to supply them. Ensure they're the right length and diameter for your chosen anchor and mirror. | Always check anchor packaging for required screw size. Opt for rust-resistant, sturdy steel screws, especially for humid environments like bathrooms (though heavy mirrors aren't always ideal there). |
| Molly Bolt Setting Tool (Optional) | For some types of molly bolts, a dedicated setting tool makes installation easier and ensures proper expansion, though often the screw itself can be used. If you plan on using many, or if a particular anchor is proving stubborn, this can save you a headache. | Consider if you plan to use many molly bolts or if installation feels difficult. It ensures the anchor expands evenly and securely. |
| Safety Glasses & Dust Mask (Highly Recommended) | Protecting your eyes from flying debris and your lungs from drywall dust is just plain smart. Trust me, a small shard of drywall in the eye is not a fun souvenir – I’ve learned that lesson too. | Look for comfortable, wrap-around safety glasses. A basic dust mask (N95 or similar) will protect you from fine drywall particles. |
Quick Checklist: Your Essential Heavy Mirror Hanging Kit
- Stud Finder: Don't guess!
- Tape Measure & Level: Precision, always.
- Pencil: For light, erasable marks.
- Drill & Bits: Power and accuracy.
- Heavy-Duty Picture Wire: Rated for 2x mirror weight.
- D-Rings/Strap Hangers: Secure frame attachment.
- Heavy-Duty Wall Anchors/Hooks: Matched to wall type & weight.
- Appropriate Screws: For anchors and D-rings.
- Safety Glasses & Dust Mask: Protect yourself!

Understanding Your Mirror: Types, Materials & Unique Needs
Now that you're armed with the right tools, let's scrutinize your specific masterpiece. When I encounter unique or unusually constructed mirrors, I know the standard approach sometimes needs a little finessing. Not all mirrors are created equal, and some might require a slightly different nuance in approach. This is where experience (and a bit of caution) really comes in handy – and why we talk about it before you even touch the wall! Just as an art curator meticulously plans the display of each piece, you too are considering the optimal presentation and long-term safety of your reflective artwork. To avoid a visual misstep, or worse, a disaster, let’s consider some common mirror types.
Frameless Mirrors: Sleek Design, Specific Challenges
These often come with specialized clips or adhesive systems. For heavier frameless mirrors, always consult the manufacturer's instructions first. Robust, adjustable mirror clips that screw directly into studs or heavy-duty anchors are usually the safest bet. Remember, even the clips themselves need secure anchoring. For peace of mind (and safety!), always consider applying a safety backing film to the back of frameless mirrors; this holds shards together if the glass ever breaks, preventing a dangerous cascade. This is a small, proactive step that can save a lot of heartache. If your frameless mirror has a mirrored frame or very thin glass edges, treat it with extreme care. The edges are highly susceptible to chipping and cracking. Specialized U-channel clips that support the glass along the bottom and sides, or professional installation, are often the wisest choices here.
Ornate or Antique Mirrors: History, Beauty, and Hidden Weaknesses
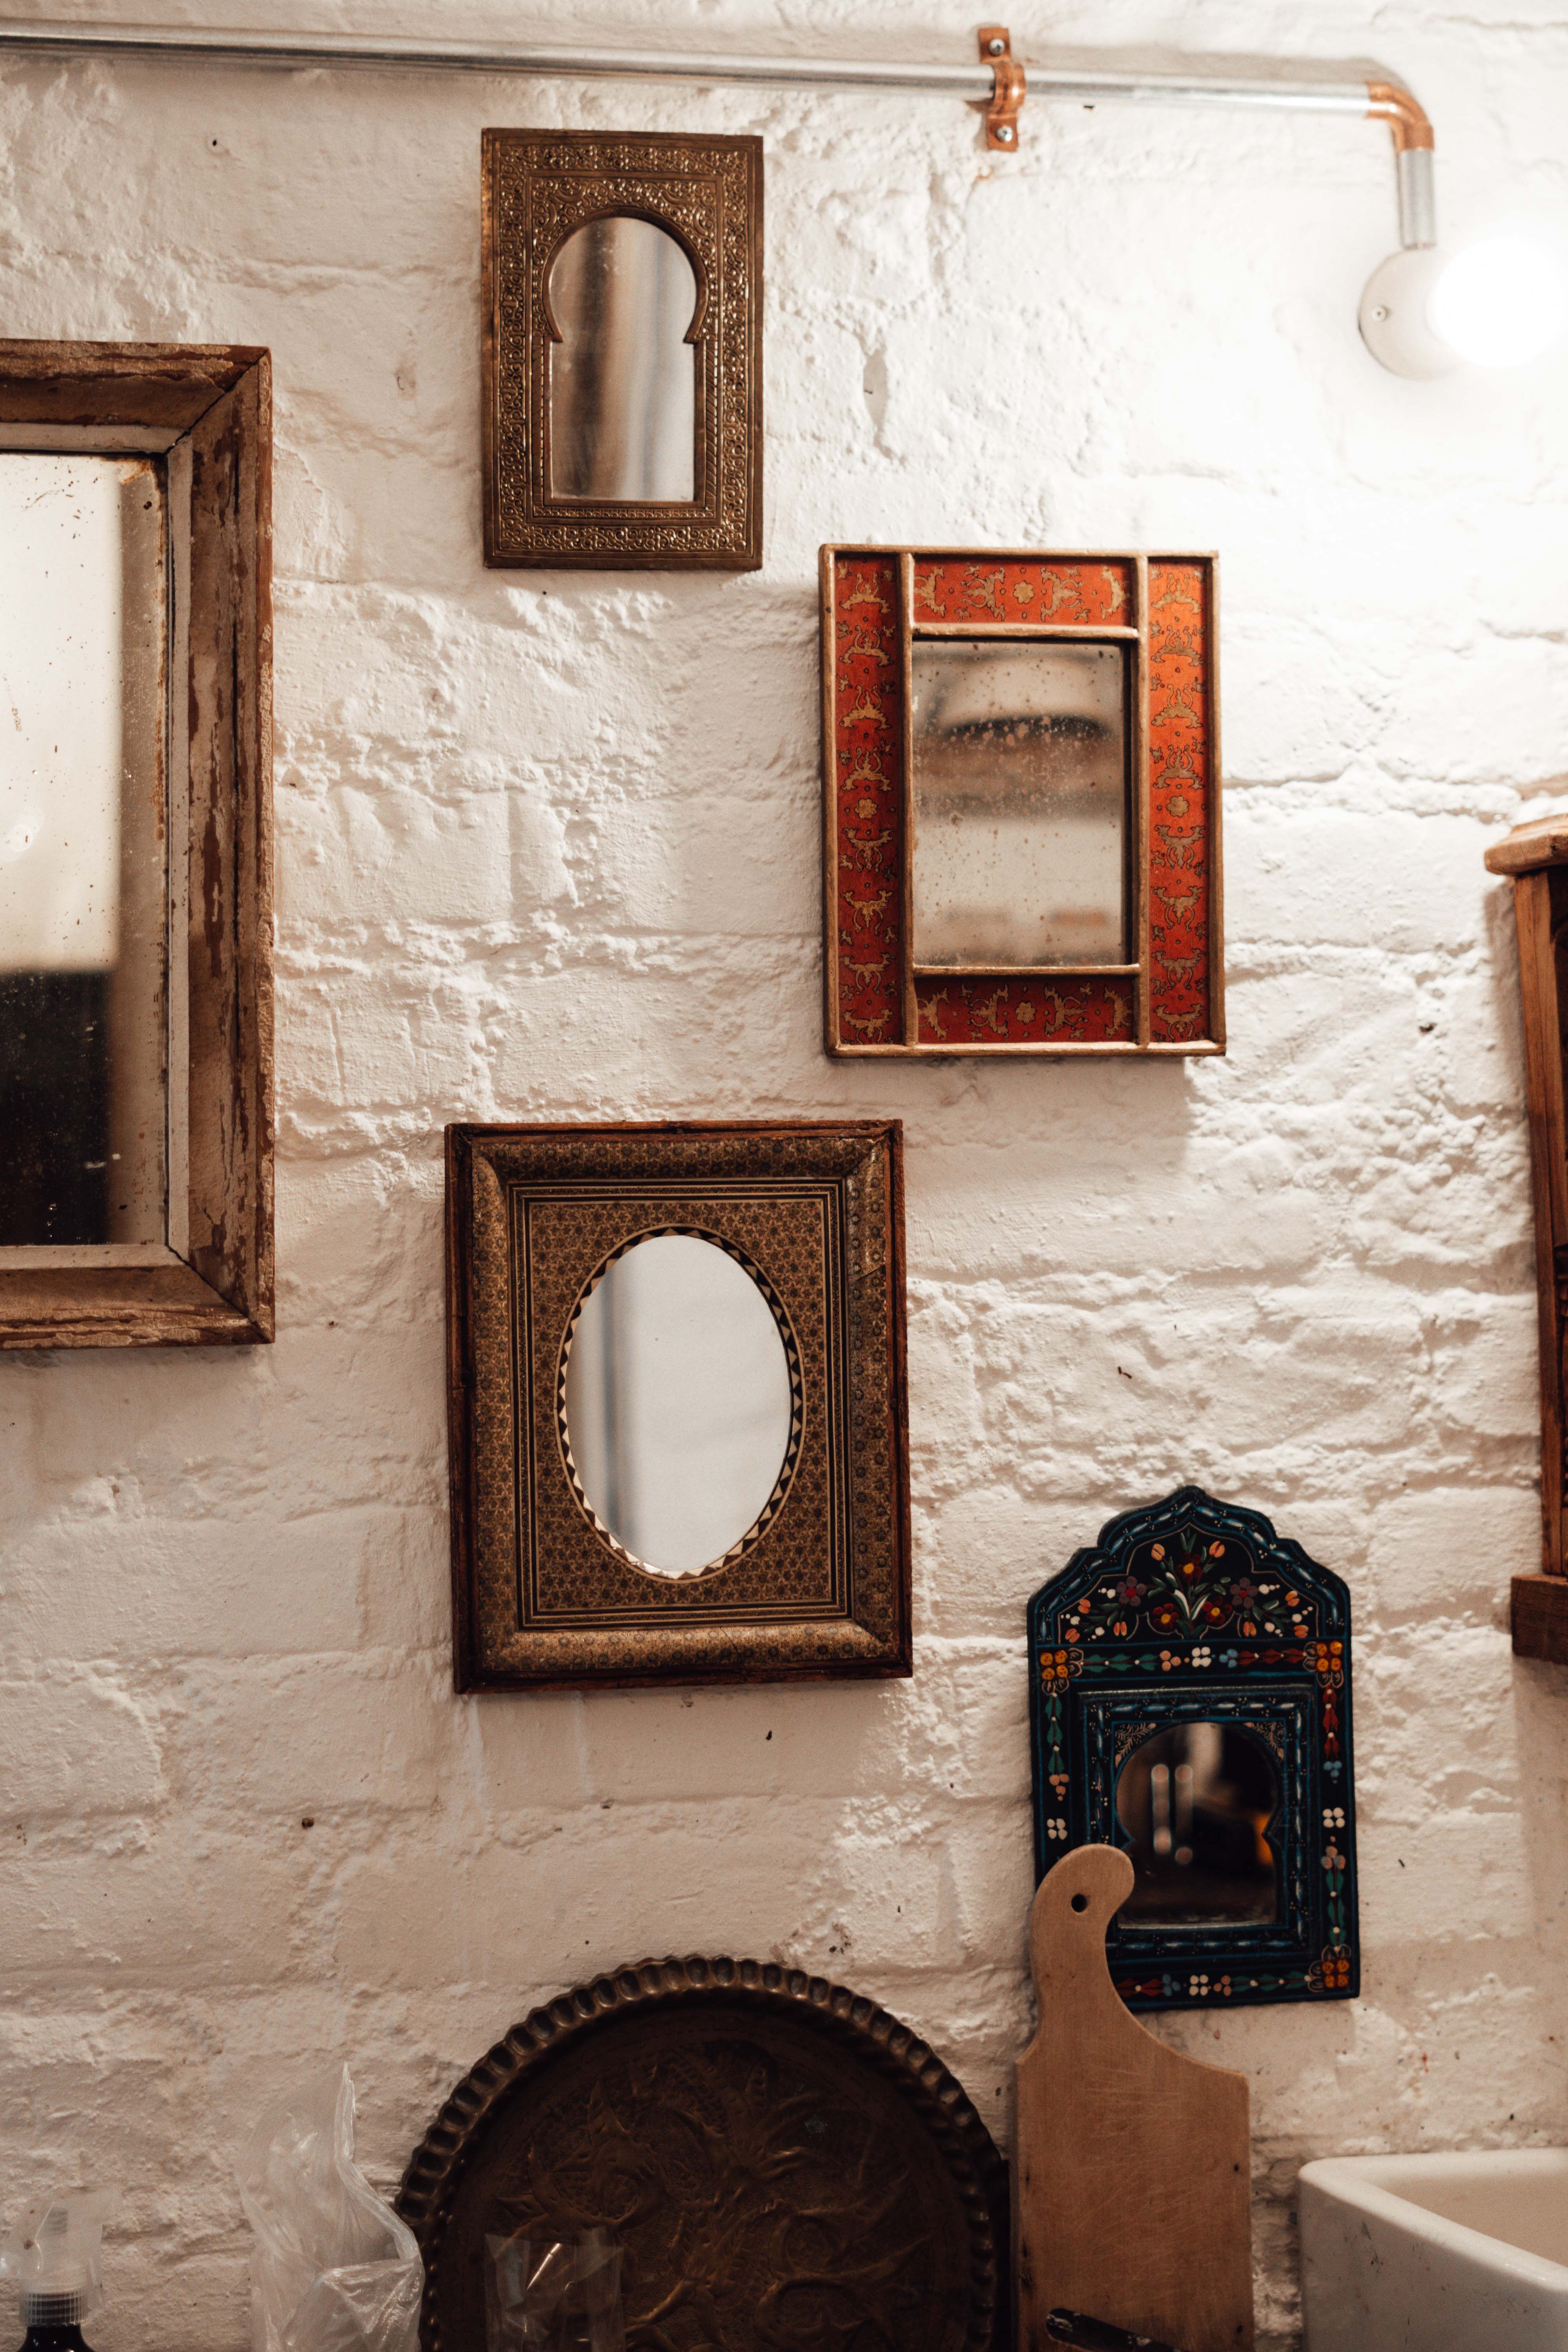
Just as a curator scrutinizes an artifact's provenance and condition, you'll scrutinize your antique mirror. While their weight is the primary concern, their delicate frames sometimes require extra care. Ensure D-rings are screwed into solid wood, not just decorative plasterwork, composite materials, or thin resin, which can crumble or split. Handle with utmost care to avoid chipping or cracking the frame itself. If the frame feels weak or has loose joints, a gentle repair (e.g., using a high-quality wood glue in corners, adding small corner braces) before attaching hardware can make a huge difference. This is where the historical value of a piece is truly tested, and a little preventative maintenance can save a treasure. Just as the frame is an extension of the artwork, its integrity is paramount to secure hanging.

Unique Mirror Shapes: Round, Oval, or Abstract
Mirrors don't always come in neat rectangles! Round, oval, or abstractly shaped mirrors can add a fantastic design element but sometimes require a different thought process for hanging. For these, the principle of even weight distribution and understanding the center of gravity becomes even more critical. Instead of just two D-rings along a top edge, you might need to:
- Place D-rings strategically: Aim for the top-most robust parts of the frame, often two D-rings angled slightly inward, just like with rectangular mirrors. This helps distribute load and prevent tilt.
- Use multiple anchor points: For larger, round mirrors, I often prefer a system with three or four anchor points on the wall, creating a wider, more balanced distribution of weight. Imagine a stable tripod, but on your wall.
- Consider a 'hidden' bracket system: Some manufacturers offer specialized circular or oval brackets that attach to the mirror's back and then hang on a single, heavy-duty wall anchor, but these need to be properly weight-rated. Always assess the frame material carefully before attaching anything.
Very Large or Wide Mirrors (and French Cleats): Spreading the Load
For exceptionally large and heavy mirrors (think professional-grade, or something you might see in a grand hall at the Den Bosch museum), a French cleat system might be the best option. This involves two interlocking wooden or metal strips with a 45-degree bevel; one attaches to the mirror, the other to the wall (ideally into multiple studs). It distributes weight horizontally across a much larger surface area and makes hanging very secure, though it adds a bit of depth to the mirror's projection from the wall.
French cleats can be made from sturdy wood (plywood is common, solid hardwood is even better for heavier loads) or aluminum. Wooden cleats are generally easier for DIYers to source and cut, can be painted to match the wall, and are excellent for most heavy mirrors when securely fastened into studs. Aluminum cleats offer superior strength for their thinner profile and are often preferred for monumental mirrors or when minimal projection from the wall is desired, though they may require specialized drilling and fastening hardware. Installing the wall cleat first (into as many studs as possible) and then hanging the mirror cleat onto it ensures an incredibly robust and nearly foolproof system. This is often my go-to for truly monumental pieces, as it's nearly impossible to hang them wrong once the cleat is secure.
For wide mirrors, even if not monumental, spreading the weight across multiple, perfectly level anchor points (using multiple D-rings and hooks/anchors) significantly increases stability and reduces stress on any single point. This creates a much more forgiving and secure system, making it far less likely for any one point to fail. Imagine a suspension bridge – its strength comes from distributing the load.
Frame Material Matters: Attaching Hardware Securely
The material of your mirror frame directly impacts how securely your D-rings or strap hangers can be attached. Ignoring this is a common mistake I've seen. To identify your frame material if it's not obvious, try a gentle tap test (solid wood makes a dull thud, hollow plastic/resin sounds hollower) or look for wood grain patterns. For metals, a magnet test can help distinguish steel/iron from aluminum. A very small, inconspicuous scratch test (on the back edge) might reveal plastic or soft wood.
- Solid Wood: This is the ideal scenario. Screws for D-rings bite securely and reliably. Always pre-drill pilot holes that are slightly smaller than your screw's diameter to prevent the wood from splitting, especially with antique, hardwood, or delicate frames. It's a tiny step that saves huge headaches.
- MDF/Particle Board: These engineered wood products don't hold screws as well as solid wood. Use slightly thicker, shorter screws, or consider using specialized threaded inserts designed for MDF to provide a more robust anchor for the screws. Ensure D-rings are placed where the material is thickest and most stable, avoiding edges. I've seen D-rings rip right out of flimsy MDF, and it's not a pretty sight – like trying to anchor into sand.
- Metal: Requires specialized hardware and care. You'll likely need to drill pilot holes suitable for metal screws (using appropriate metal drill bits), or use specific metal hangers designed to clamp onto the frame. This can be more complex and might be a job for a professional if you're unsure. Don't force wood screws into metal; you'll strip them and damage the frame.
- Plastic/Resin (often on ornate frames): Very delicate. Screwing directly into thin plastic can cause it to crack and crumble. Often, these frames are hollow. Seek out the most solid, thickest parts of the frame, or consider a French cleat system that distributes weight more broadly across the frame itself, rather than relying on small screw points. For very fragile ornate frames, professional advice is highly recommended. Sometimes, even a specialized adhesive (like a strong epoxy) might be needed in conjunction with screws to bolster the hold, but this is best left to experts.
Finding Wall Studs: The Cornerstone of Secure Hanging
Before you even think about marking or drilling, you need to find the studs. Most homes have walls built with either a wooden or metal frame, and these vertical supports are your absolute best friends. They're typically spaced 16 or 24 inches apart from center to center. However, in older homes, or with less conventional construction (e.g., renovations, non-load-bearing wall changes), this spacing can be, shall we say, creative. Always verify, because guessing is a recipe for disaster. This is where you become a detective of your own home.

- Use Your Stud Finder (Your Wall Whisperer): Turn it on, calibrate it if necessary (usually by holding it flat against the wall and pressing a button), and slowly slide it horizontally across the wall. It will beep, light up, or display an indicator when it detects a stud. Mark the left and right edges with your pencil, then find the center of those marks. That's your center of the stud – your absolute sweet spot. If your stud finder gives inconsistent readings, don't just pick a spot. Try scanning from above and below, and if still uncertain, a small finishing nail or tiny drill bit can be used in an inconspicuous area (like in a closet or a spot that will be entirely covered by the mirror) to probe for solid wood. This is a last resort, but it beats a shattered mirror. For metal studs, a strong magnet can often locate the screws holding the drywall to the studs. There are generally three types of stud finders:
- Magnetic Stud Finders: These react to the metal screws or nails used to fasten drywall to studs. They are simple, battery-free, and very reliable for metal studs but can be slower.
- Electronic Edge Finders: The most common type, these detect changes in the wall's density, indicating the edges of a stud. They need calibration but are generally fast and effective.
- Electronic Deep-Scan Stud Finders: Similar to edge finders but can penetrate thicker walls (e.g., 5/8-inch drywall or over lath and plaster). Essential for older homes.
- The Knock Test (The Old-School Method): As a reliable backup, lightly knock on the wall. A hollow sound means you're over empty space. A solid, dull thud, often accompanied by less reverberation, means you've likely found a stud. It takes a little practice to differentiate, but it's surprisingly effective. It's like listening to the wall's heartbeat.
- Look for Clues: Electrical outlets and light switches are almost always mounted directly to a stud. Finding one can give you a starting point to measure out 16 or 24 inches in either direction (standard stud spacing). This is your secret shortcut. Also, internal load-bearing walls (those typically supporting joists above) are always framed with studs, and exterior walls are also always studded. Non-load-bearing interior walls might have less consistent stud placement. Plumbing pipes (especially for sinks or toilets) and HVAC ducts are often run alongside or through studs, providing further clues, but exercise extreme caution near these areas.
Beyond Drywall: Other Wall Types & Considerations
While this guide focuses on standard drywall, the principles are similar for other surfaces. If you're dealing with walls made of plaster, concrete, or brick, the core idea of finding solid support remains, but the hardware will differ significantly. And remember, thicker walls and complex structures might hide electrical conduits, plumbing pipes, or HVAC ducts – always proceed with extreme caution and consider a professional if there's any doubt, especially if you plan to drill deeply.
- Plaster Walls: These are notoriously tricky and brittle. Even specialized plaster anchors can cause crumbling if not installed perfectly. For heavy mirrors on plaster, professional help is often advisable due to its delicate nature and the risk of significant damage. If you proceed yourself, use anchors specifically designed for plaster (e.g., expanding anchors or plaster-specific toggle bolts), and be prepared for a potentially messy job. Studs can be harder to find behind lath and plaster, often requiring more investigative probing. It's like working with an ancient, fragile artifact.
- Concrete and Brick Walls: These require robust solutions and specialized tools. You'll need a hammer drill and masonry bits to create pilot holes. For fasteners, look for lead anchors, sleeve anchors, or concrete screws (Tapcons). This is a more advanced DIY project, and for very heavy or valuable mirrors, consulting a professional for these materials is highly recommended. These walls are formidable, and your hardware needs to be equally so.
- Drywall Thickness and Type: Standard drywall comes in varying thicknesses (typically 3/8-inch, 1/2-inch, or 5/8-inch). This matters, especially for toggle bolts and other expansion anchors, which often require a minimum thickness (e.g., 3/8 inch or 10mm) for their wings to deploy properly behind the wall. Always check your anchor's packaging against your wall's thickness. Beyond standard drywall, you might encounter moisture-resistant (greenboard), fire-rated (Type X), or soundproof drywall. While these typically have similar structural properties for anchors as standard drywall, their increased density or specific compositions might require a slightly more powerful drill or a different pilot hole size, so always proceed with a test if unsure. And remember, it's always wise to check local building codes for regulations concerning heavy wall-mounted fixtures, especially in rental properties.

Step-by-Step: The Main Event - Securing Your Statement Piece
Alright, you've got your tools laid out, you understand your mirror's quirks, and you've mapped out your wall's hidden anatomy. Now, for the moment of truth. Let's hang this thing like pros, with the quiet triumph of a perfectly hung piece.

Step 1: Prep Your Mirror for Hanging – The Foundation of Security
Carefully turn your mirror over, ideally onto a soft, clean surface like a moving blanket or thick towels, to protect the frame and glass. First, inspect any existing hanging hardware. Many mirrors come with wire or D-rings already attached; check if they look sturdy enough for the mirror's weight. If the wire is flimsy, frayed, or the rings seem weak, replace them without hesitation. Even if they look okay, I often upgrade to be safe; a little paranoia goes a long way here.
If it doesn't already have them, you need to install two (or more, for wider mirrors) D-rings or strap hangers. Screw them in about 2-3 inches down from the very top edge of the frame, one on each side. Why this specific placement? It helps the wire nestle securely without showing above the frame and distributes the weight more effectively, preventing the top of the mirror from tilting too far forward. I recommend angling them slightly inwards and upwards; this helps the wire form a secure 'V' shape that snugly sits on the hook, preventing slippage and distributing the weight more effectively – imagine creating a little "pocket" for your hook. Ensure the screws are long enough to bite firmly into the frame (considering the frame material as we just discussed) but not so long they pierce through to the front. Always pre-drill pilot holes – tiny holes slightly smaller than your screw's diameter – to prevent splitting, especially with wooden frames. This is a non-negotiable step to avoid heartache.
Now, string your heavy-duty picture wire between them. You want the wire to be taut, but not so tight it's like a banjo string, nor too slack. When you pull up on the center of the wire, forming an inverted V-shape, it should reach about 2-3 inches from the very top of the mirror frame. This creates the optimal angle for strength and stability. Too slack, and the mirror will tilt forward excessively and place undue stress on the top of the frame; too tight, and the stress on the D-rings can be extreme, potentially ripping them out. It’s a delicate balance.
Step 2: Choose Your Location & Mark It Up with Precision – Becoming the Curator
This is where you become the curator of your own space! Where will your mirror make the most impact? A large mirror can be a game-changer for decorating a large wall, visually expanding a smaller room, or making a grand statement in an entryway. A good rule of thumb for optimal viewing height is to hang it so the center of the mirror is at average eye level, typically around 57-60 inches (145-152 cm) from the floor. If it's going above furniture like a console table or a sofa, leave about 6-8 inches (15-20 cm) of clear space between the bottom of the mirror frame and the top of the piece below. This ensures it doesn't feel squashed or visually heavy. And for an artistic touch, consider the rule of thirds – imagine dividing your wall into nine equal sections; placing key elements (like the mirror's center) along these lines or intersections can create visual harmony. I always play around with the placement for a surprisingly long time before committing – a well-placed mirror can transform a room, a poorly placed one can just feel… off. Just like art from our collection, placement is everything.

Once you've decided on the perfect spot, enlist a helper! Have someone assist you in holding the mirror against the wall. Use your level on top of the frame to ensure it's perfectly straight. When it's precisely where you want it, make a light pencil mark on the wall at the exact center top of the mirror frame. Now, carefully measure the distance from the top of the mirror frame to the taut picture wire (when it's pulled up in that inverted V). Let's say this distance is 3 inches. Then, measure 3 inches down from your center mark on the wall. This is the precise spot where your hook or anchor needs to go. I often make a small, temporary mark directly on the wire itself, lined up with the top center of the mirror when I'm holding it, just to eliminate any guesswork and prevent the dreaded "too high" or "too low" mistake. Remember, it's always worth taking a moment to adjust for perfect placement; you'll be looking at this mirror every day!
Step 3: The Wall Strategy - Studs vs. Anchors (The Critical Decision Point)
Now, look at your final pencil mark. This is where your careful planning pays off. Are you hitting a stud, or are you in plain drywall? Your approach changes dramatically based on this crucial decision point. Remember, a stud is always your best bet, but modern anchors are truly miraculous.
Remember: A stud is always best. No stud? A proper heavy-duty anchor is your next best friend.

- Scenario A: You Hit a Stud (The Dream Scenario) If your mark lands squarely on a stud, you're golden. Drill a small pilot hole – one that is slightly smaller than your screw's diameter. This is crucial because it prevents the wood from splitting and ensures the screw goes in straight and bites firmly. Then, screw in a heavy-duty picture hook (one designed to screw into wood) or a sturdy, appropriately sized wood screw. Tighten it until it's snug and secure. Give it a good tug to test its strength. Done. If your mark is almost on a stud but not quite centered, I'd recommend adjusting the hanging point slightly to ensure a full, solid bite into the center of the stud, even if it means tweaking your initial mirror placement a tiny bit. It's always worth it for security; don't compromise here.
- Scenario B: No Studs in Sight (The Reality for Most of Us) Don't panic! This is precisely what heavy-duty wall anchors were invented for. They're magical little devices that expand or brace behind the drywall to distribute the weight over a larger surface area, making that flimsy drywall surprisingly strong by spreading the load. For heavy mirrors, you absolutely need a heavy-duty anchor. I predominantly recommend toggle bolts, molly bolts, or snap toggles, often referred to as 'expansion anchors'. Think of them as giving your drywall skin some serious structural reinforcement, like a prosthetic bone.The physics here is simple: anchors increase the surface area over which the mirror's weight is distributed. Instead of the weight pulling on a tiny screw thread, it's spread across a much larger section of drywall behind the wall, significantly increasing the anchor's pull-out strength (resistance to being pulled straight out) and shear strength (resistance to being pulled downwards parallel to the wall).| Anchor Type | How It Works | Best For & Key Considerations | Minimum Drywall Thickness | | :--- | :--- | :--- | :--- | | Toggle Bolt | You drill a larger hole, and the spring-loaded 'wings' fold to go through it, then spring open flat against the back of the drywall. When you tighten the bolt, these wings pull firmly against the interior surface, distributing weight widely. | Very heavy items (approx. 50+ lbs / 22+ kg and up). The gold standard for maximum weight capacity in drywall. Imagine a tiny parachute opening behind your wall. Once inserted, if you remove the bolt, the toggle falls inside the wall. | Typically 3/8 inch (10mm) to 5/8 inch (16mm) | | Molly Bolt (Metal Expansion Anchor) | You drill a pilot hole, insert the metal sleeve, and as you tighten the screw, the sleeve expands and 'claws' itself firmly into the back of the drywall, creating a very secure hold. Some require a specific setting tool for optimal expansion, others can be set by tightening the screw. | Heavy items (approx. 30-50 lbs / 13-22 kg). Reliable and often a bit easier to install than toggle bolts, though still incredibly strong. The screw can usually be removed and reinserted without losing the anchor within the wall. Choose a type with a sturdy flange to prevent it from spinning. | Varies by design, often 1/2 inch (13mm) for standard, some for thinner | | Snap Toggle / Strap Toggle | Similar to traditional toggle bolts, but often easier to install with a plastic strap that helps position the toggle behind the wall. The strap breaks off once the toggle is secured. | Very heavy items (approx. 50+ lbs / 22+ kg and up). Offers similar strength to traditional toggles but with a more user-friendly installation. Often provides an even larger contact surface behind the drywall. The bolt can be removed and reinserted without losing the anchor. My personal favorite for ease of use and strength. | Typically 3/8 inch (10mm) to 5/8 inch (16mm) |
Crucially: Always follow the specific instructions on your chosen anchor's packaging to the letter. This includes the precise drill bit size, which is paramount for the anchor to work correctly. Using the wrong size can either prevent the anchor from expanding or cause it to pull right through the hole. And remember, choose an anchor with a weight rating that far exceeds the actual weight of your mirror (e.g., if your mirror is 40 lbs, pick an anchor rated for 80-100 lbs or more!). This provides a critical safety buffer, creating multiple layers of security. It’s about building in safety margins so you can truly enjoy your mirror without a nagging doubt.
Step 4: The Moment of Truth - Hanging Your Mirror & Final Touches
This is absolutely a two-person job. Please, don't try to be a hero; it's just not worth the risk (or the chiropractor bill). Each of you should take a side of the mirror, lift it carefully and steadily, and guide the picture wire onto the hook or screw you've installed. Gently let it rest against the wall. Grab your level one last time and place it on top of the mirror. Nudge it just so until it's perfectly straight. Take a step back (or five!) and admire your work. You did it! The sense of accomplishment is surprisingly satisfying, isn't it? For exceptionally large or cumbersome mirrors, you might consider a technique called 'blind hanging,' where you mark the exact anchor points, install the hardware, and then, using careful measurements and a helper, guide the mirror directly onto the pre-set wall anchors without a full 'lift and hold.' This takes extra precision in marking (measuring from the top of the mirror to the wire, then marking that distance down from your desired mirror top line on the wall) but can be safer for truly massive pieces.

Quick Recap of Key Steps:
- Prep Mirror: Inspect/install D-rings and heavy-duty wire, ensuring optimal wire slack, secure frame attachment, and considering frame material.
- Choose & Mark Location: Determine eye-level or furniture-relative height, use a helper and a level, mark the hook placement accurately, integrating artistic considerations.
- Wall Strategy: Locate a stud if possible; otherwise, select and install the correct heavy-duty drywall anchor (toggle, molly, or snap toggle bolt), always considering the mirror's weight and drywall thickness.
- Hang Mirror: With a helper, carefully lift and place the mirror onto the installed hook/anchor, then level and admire your perfectly secure statement piece!
Refer back to this guide anytime you need a refresher; I'll be here! Your space is now a testament to both beauty and strength – a silent guardian of your aesthetic vision.
When to Call a Pro: Knowing Your Limits (and When to Get Insurance)
While I've armed you with a formidable toolkit and knowledge, there are moments when even the most confident DIYer needs to know when to bring in the cavalry. Sometimes, the peace of mind (and insurance coverage!) of a pro is worth every penny. Consider hiring a professional installer if:

- Your mirror is exceptionally heavy or valuable: Think over 75 lbs (34 kg), an irreplaceable antique, or a custom-built piece. The cost of potential damage (to the mirror, your wall, or your floor) far outweighs a professional fee. For truly monumental art from our collection, I’d certainly call in a specialist.
- You're dealing with challenging wall materials: Plaster, uneven brick, or unique commercial-grade walls can be tricky. Plaster, in particular, can be very brittle and unforgiving, often crumbling under stress. Professionals have specialized tools and techniques for these surfaces.
- The wall layout is complex or uncertain: If you suspect hidden pipes, electrical conduits, or HVAC elements behind the wall, drilling can be incredibly risky and expensive if you hit something. A professional has tools (like borescoping cameras or advanced scanners) and expertise to navigate these obstacles safely. For areas prone to earthquakes, a professional can advise on or install seismic-rated hardware for additional security, which is a specialized field.
- The mirror has no existing hardware and a complex frame: Metal frames, very thin, highly ornate, or fragile frames often require specialized attachment methods or custom fabrication that might exceed typical DIY tools or skills. Don't risk damaging a precious frame by experimenting. If your mirror has integrated hanging hardware that cannot be easily replaced or moved (e.g., molded directly into a resin frame), a professional can assess its integrity and suggest the safest, most appropriate wall-mounting solution. Professionals can also offer custom solutions like specialized wall mounting systems or bespoke brackets tailored to unique mirror designs.
- You lack confidence or the necessary tools: No shame in admitting when a job is beyond your current comfort level or equipment. Safety first, always! A professional might charge anywhere from $75 to $300 (or more for very large/complex jobs), but this investment can save thousands in repairs and countless hours of stress.
The Insurance Angle: Protecting Your Investment
It's a good idea to understand your homeowner's or renter's insurance policy before embarking on a heavy mirror project. Most standard policies cover accidental damage from things like falling objects. However, if the damage is deemed to be caused by gross negligence or a clear disregard for proper safety procedures (e.g., using a tiny picture hook for a 50lb mirror), your claim might be denied. A professional installer, especially one who is bonded and insured, often provides an extra layer of protection. They typically carry their own liability insurance, which would cover damage caused by their installation error. While it adds to the upfront cost, it's a valuable peace of mind, especially for very expensive mirrors or in situations where damage could be extensive.

Maintenance & Longevity: Keeping Your Mirror Secure for Years
Congratulations, your heavy mirror is up! But the work isn't entirely done. To ensure it stays securely in place for decades, a little periodic maintenance is a good idea. Consider it like tuning an instrument – small adjustments keep it playing beautifully.
- Check Hardware Periodically: Especially in areas prone to temperature fluctuations, humidity (like bathrooms, though heavy mirrors aren't ideal there), or vibration (e.g., from a busy hallway, nearby appliances, or slamming doors), the wall materials can expand and contract. Every year or so, gently jiggle the mirror or carefully inspect the hardware for any signs of loosening. Don't pull too hard, but look for small gaps forming around the screw heads or anchors. A little wiggle room is fine, but any significant movement needs attention.
- Inspect the Wire: Over many years, even heavy-duty wire can fray, corrode, or weaken. If you ever take the mirror down for cleaning or repainting, inspect the wire for any wear and tear. Replace it if it looks compromised. It's a cheap replacement for priceless peace of mind, and honestly, why risk it?
- Anchor Lifespan & Wall Integrity: While modern heavy-duty anchors are designed for longevity, if you notice any sagging or instability over many years, don't hesitate to re-evaluate. It's rare, but sometimes the drywall itself around an anchor can degrade under constant stress, especially if it was a near-miss on a stud or the drywall type wasn't ideal for the anchor. Look for hairline cracks radiating from the anchor point. If an anchor feels loose and can no longer be tightened, it likely needs to be removed and replaced, possibly with a larger or different type of anchor in a slightly different spot. For art from our collection, we'd want it to be securely displayed forever, so regular checks are non-negotiable.
- Check the Frame: For antique or ornate mirrors, periodically inspect the mirror frame itself for any developing cracks, weakening joints, or signs of material degradation. A sturdy frame is just as important as sturdy wall hardware. Don't let a beautiful frame become a weak link. For delicate or gilded frames, avoid harsh chemical cleaners; a soft, dry cloth is often best. For more robust frames, use cleaners appropriate for their material, but always test in an inconspicuous spot first.
- Clean Your Mirror Safely: Once installed, clean your mirror with a soft, lint-free cloth and a non-abrasive, ammonia-free glass cleaner. Spray the cleaner onto the cloth, not directly onto the mirror, to avoid liquid seeping behind the frame and potentially damaging the silvering or frame material. For very delicate antique mirrors, simply use a damp cloth followed by a dry one.
- High-Traffic Area Considerations: If your mirror is in a busy hallway or near a frequently used door, consider adding transparent corner protectors or even small felt pads to the corners that touch the wall to absorb minor impacts. For maximum stability in such areas, a French cleat is often the superior choice.
Remember, a securely hung mirror is not just decor; it's a testament to good planning and respect for your home's structure. And it means you can enjoy that reflection without a nagging fear in the back of your mind – a truly priceless feeling, a silent guardian of your aesthetic vision.

FAQ: Your Burning Questions Answered about Hanging Heavy Mirrors
Still pondering some details? You're not alone! Here are answers to a few common questions I get about hanging heavy mirrors, distilled from years of trial, error, and thankfully, eventual success. The more you know, the more confident you'll feel. And there you have it – a treasure trove of insights to ensure your mirror-hanging journey is smooth, secure, and ultimately, satisfying.
Q: Can't I just use two hooks instead of one to distribute the weight? How many hooks should I use?
A: Absolutely, and it's often a great idea, especially for wider mirrors! Using two properly spaced hooks provides more stability and distributes the load even further, minimizing stress on any single point. For very wide mirrors, you might even consider three or four anchors. The crucial caveat is that all hooks must be perfectly level with each other, and each must be either securely screwed into a stud or installed with appropriate heavy-duty anchors. To determine ideal spacing, a common rule of thumb for two hooks is to place them roughly one-third of the mirror's width in from each side. For irregular shapes, aim for visual balance, typically placing hooks where the frame offers substantial support and roughly adhering to that one-third principle relative to the widest part. This provides wide support without being too close to the edge, creating a stable 'tripod' effect with the wall. For exceptionally wide or heavy pieces where stud spacing doesn't align, a horizontal wooden cleat or metal bar can be securely screwed into multiple studs, and then your mirror's hanging hardware (like D-rings) can attach to this cleat. This effectively 'bridges' the studs and creates a super-strong, continuous anchor point.
Takeaway: Multiple hooks are better for stability and weight distribution, but only if perfectly level and securely anchored. Consider a horizontal cleat for very wide mirrors.
Q: How high should I hang a mirror? What's the best height for a heavy mirror?
A: The standard gallery height, often cited for art, is to have the center of the piece at around 57 inches (145 cm) from the floor (which is average eye level). However, rules are made to be broken, especially in design. If your mirror is above a sofa, console table, or bed, its relationship to the furniture is more important than a rigid eye-level rule. Aim for a balanced look, usually leaving 6-8 inches (15-20 cm) of clear space between the bottom of the mirror and the top of the furniture. This ensures it doesn't feel squashed or visually heavy. Think of it as composing a piece of art on your wall. Always take a few steps back and view the mirror in context with the entire room and other furniture before committing.
Takeaway: Eye-level is a good starting point, but always prioritize visual balance with surrounding furniture.
Q: What is the single biggest mistake people make when hanging a heavy mirror?
A: Trusting the wrong hardware, or trusting flimsy hardware that came with the mirror. It's almost always one of two things: either people use a hook that isn't weight-rated for their mirror (e.g., a 20lb hook for a 50lb mirror), or they put it into plain drywall without any heavy-duty anchor. This is how you guarantee a disaster, often with a theatrical crash and significant damage. It’s a classic case of hoping for the best instead of planning for the worst – and gravity always wins that gamble. I've learned this the hard way more times than I care to admit.
Takeaway: Inadequate hardware or skipping heavy-duty anchors in drywall are recipes for disaster.

Q: So you really can hang a heavy mirror on drywall without a stud? Is that safe?
A: Absolutely, yes, it's safe – provided you use the correct, high-quality, heavy-duty wall anchor, like a toggle bolt, molly bolt, or snap toggle, that is rated for well above the mirror's actual weight. The anchor is what gives the drywall its superhuman strength by distributing the load across a larger area of the wall. Without the right anchor, drywall is useless for heavy items. With it, it's a miracle worker. Just remember that critical minimum drywall thickness for certain anchors, as mentioned in the guide. Always verify the weight rating and installation instructions. I've successfully hung many substantial pieces this way, and they've stayed put for years.
Takeaway: Yes, but only with the right heavy-duty anchor, correctly installed, and rated for significantly more than the mirror's weight.
Q: What if my mirror has pre-drilled holes in the frame that don't align with studs or ideal anchor points?
A: This is a common and frustrating issue! Your best bet is usually to ignore the pre-drilled holes (unless they happen to align perfectly with studs or ideal anchor spots). Instead, install new D-rings or strap hangers on the back of the frame, following Step 1 of this guide, and then proceed with finding your wall studs or using heavy-duty anchors at the best possible locations on the wall. For very large or frameless mirrors with embedded pre-drilled holes, you might need to consider a French cleat system or custom hanging brackets that can bridge the distance to secure points. Installing new, properly placed hardware is almost always safer and easier than trying to force a bad fit. Think of it as adapting, not compromising. It's a bit more work up front, but far less heartache later.
Takeaway: Don't rely on inconvenient pre-drilled holes; install new, appropriate hardware for optimal wall placement.

Q: Can I use Command Strips or similar adhesive hooks for heavy mirrors?
A: An unequivocal NO for heavy mirrors. Command Strips and similar adhesive products are generally fantastic for lightweight items, small frames, or temporary decorations. However, they are not designed or rated for the significant, long-term static load of a heavy mirror. The adhesive can fail over time, especially with temperature/humidity changes or humidity (like in a bathroom), leading to the mirror falling and likely shattering, causing significant damage to your wall and floor. Please, for your safety and sanity, never rely on adhesives for heavy items. It’s a gamble you will almost certainly lose.
Takeaway: Never use adhesive strips for heavy mirrors – they will fail.
Q: What are the risks of hanging a mirror incorrectly, beyond just it falling down and breaking?
A: Beyond the obvious heartbreak of a shattered mirror and potential injury, an improperly hung heavy mirror can cause significant damage to your home. This includes: large holes or ripped-out sections of drywall that are costly to repair; damage to flooring (hardwood, tiles, carpet) if the mirror falls; damage to furniture or other items directly below; and in rare cases, if it falls with extreme force, even minor structural damage or damage to adjacent walls. It's not just about the mirror; it's about the entire environment you’ve carefully curated. The financial and emotional cost can be far-reaching.
Takeaway: Incorrect hanging risks extensive and costly damage to your home and other belongings, not just the mirror.











Q: Does the material of my mirror frame (wood, metal, plastic) affect how I hang it?
A: Yes, it absolutely can. While the principles of finding wall support remain the same, the frame material primarily impacts how you attach the hanging hardware (D-rings, picture wire eyelets) to the mirror itself. We covered this in detail earlier, but here’s the quick refresher:
- Solid Wood: Ideal. Screws for D-rings bite securely. Always pre-drill pilot holes to prevent splitting.
- MDF/Particle Board: Can be tricky. These materials don't hold screws as well as solid wood. Use slightly thicker, shorter screws, or consider using specialized threaded inserts designed for MDF. Ensure the D-rings are placed where the material is thickest and most stable.
- Metal: Requires specialized hardware. You'll likely need to drill pilot holes suitable for metal screws, or use specific metal hangers designed to clamp onto the frame. This can be more complex and might be a job for a professional if you're unsure.
- Plastic/Resin (often on ornate frames): Very delicate. Screwing directly into thin plastic can cause it to crack. Often, these frames are hollow. Seek out the most solid parts of the frame, or consider a French cleat system that distributes weight more broadly across the frame itself, rather than relying on small screw points. For very fragile ornate frames, professional advice is highly recommended.
Takeaway: Frame material dictates hardware attachment to the mirror; always adapt your approach or seek professional help for challenging materials.
Q: Does the type of wall finish (e.g., wallpaper, textured paint) affect the hanging process?
A: Generally, no, the type of wall finish doesn't fundamentally change the hanging process or the anchors you choose. The anchor still needs to be secure in the underlying drywall, stud, or masonry. However, you do need to exercise extra care. When drilling, especially with wallpaper or delicate textured paint, use a sharp drill bit and proceed slowly to minimize tearing or chipping around the hole. For wallpaper, you might want to score a small X or circle where the drill bit will enter to prevent the paper from ripping outwards. If the anchor expands behind the wall, the finish on the surface generally won't impact its load-bearing capacity, but proper technique will minimize visible damage. A careful approach here preserves the beauty of your wall as much as your mirror.
Takeaway: Wall finish doesn't change core hanging mechanics, but requires extra care during drilling to prevent cosmetic damage.
Q: Can I hang a mirror on a slanted ceiling?
A: This is a highly specialized and generally ill-advised DIY project for a heavy mirror. The physics of weight distribution and anchorage on a sloped surface are significantly more complex than on a vertical wall. Gravity will exert different shear and tension forces that standard anchors or cleats are not typically designed to handle in this orientation. For any mirror hanging on a slanted ceiling, especially a heavy one, professional consultation and installation are absolutely essential. You would likely need custom-fabricated, robust brackets designed to account for the angle and the specific weight, securely fastened into multiple structural elements (joists or rafters) behind the ceiling. Attempting this yourself is a recipe for catastrophic failure and serious injury.
Takeaway: Hanging heavy mirrors on slanted ceilings is extremely risky and requires professional expertise and custom solutions. Do NOT DIY this.