
Mastering Art Photography: The Artist's Definitive Guide to Essential Gear & Techniques
Elevate your art's digital presence. This comprehensive guide details essential photography gear, lighting setups, color management, and post-processing techniques for artists, ensuring accurate, archival-quality reproductions for web and print.
Beyond the Click: The Artist's Definitive Guide to Essential Art Photography Gear: Capture & Preserve Your Masterpiece
Ever felt that gut-wrenching moment when your vibrant, soulful painting looks flat, dull, and utterly wrong in a digital photo? I certainly have. For years, I’d just prop my contemporary abstract paintings against a wall, pull out my phone, and hope for the best. I still wince remembering how I lost out on a potential commission once because the client just couldn't connect with the piece online; those vivid blues looked purple, and the rich impasto appeared as flat as a pancake. All that passion, all that intricate detail, reduced to a dull, distorted image. Can you imagine the frustration? I remember trying to capture a large, textured abstract with iridescent pigments, and the photo made it look like dull, muddy plastic. The client even asked if the 'shimmer' was a special effect, not realizing it was the actual medium! I swear, my early attempts looked like my camera had a personal vendetta against good lighting. This struggle isn't unique to me; it's a silent hurdle for countless artists trying to share their vision. It felt like a betrayal of my own hard work.
But let me tell you, the feeling of seeing your carefully layered glazes appear as a flat smear, or the subtle texture of your canvas weave disappear into a blurry mess, that's what truly stung. It's not just about the loss of detail; it's the loss of the soul of the piece. I used to think, "The art is paramount, and the photo is just a necessary evil." And while yes, the art is paramount, how we present it, how we document it, is a form of art in itself – a crucial bridge between your studio and the wider world. After all, if your art isn't seen, how can it truly exist beyond your walls? This realization, that good photography isn't just a chore but an extension of the artistic process, was a turning point for me. It made me think of how artists centuries ago had to rely on painstaking drawings and copies to document their masterworks for posterity, often limited by the technology of their time. Think of the daguerreotypes of early portraiture, where artists struggled with long exposures to capture a fleeting likeness, or the way pioneering photographers like Anna Atkins used cyanotypes to meticulously document botanical specimens, pushing the boundaries of what 'art' meant while simultaneously creating scientific records. This echoes the broader history of photography as fine art, showcasing its evolving and critical role. The journey to accurately capture and disseminate art has a long, rich history, from early engravings, lithographs, and woodcuts used in art catalogs and early exhibition records to the pioneering photographic reproductions that brought masterpieces to a broader public. It's a continuous quest for fidelity, really. So, if you're looking to empower your art and give it the digital life it deserves, we’re going to dive into the essential gear and techniques that will make all the difference, from the humble background to the final digital polish. This guide is about transforming that digital cry for help into a confident declaration of your art's true beauty and ensuring your vision is truly seen.
So, I dove headfirst into the rabbit hole of essential equipment for art photography. And I know what you’re probably thinking: “Another thing to buy!?” Believe me, I get it. It felt like I was constantly wading through an ocean of specs and acronyms, desperately trying to find a life raft. But consider this an investment, not just in gear, but in the longevity and reach of your creative work. It's about empowering your art, giving it the best possible chance to connect with someone, perhaps even find a new home in someone's collection (and yes, you can always explore my own art for sale).
The Unsung Hero: Your Background
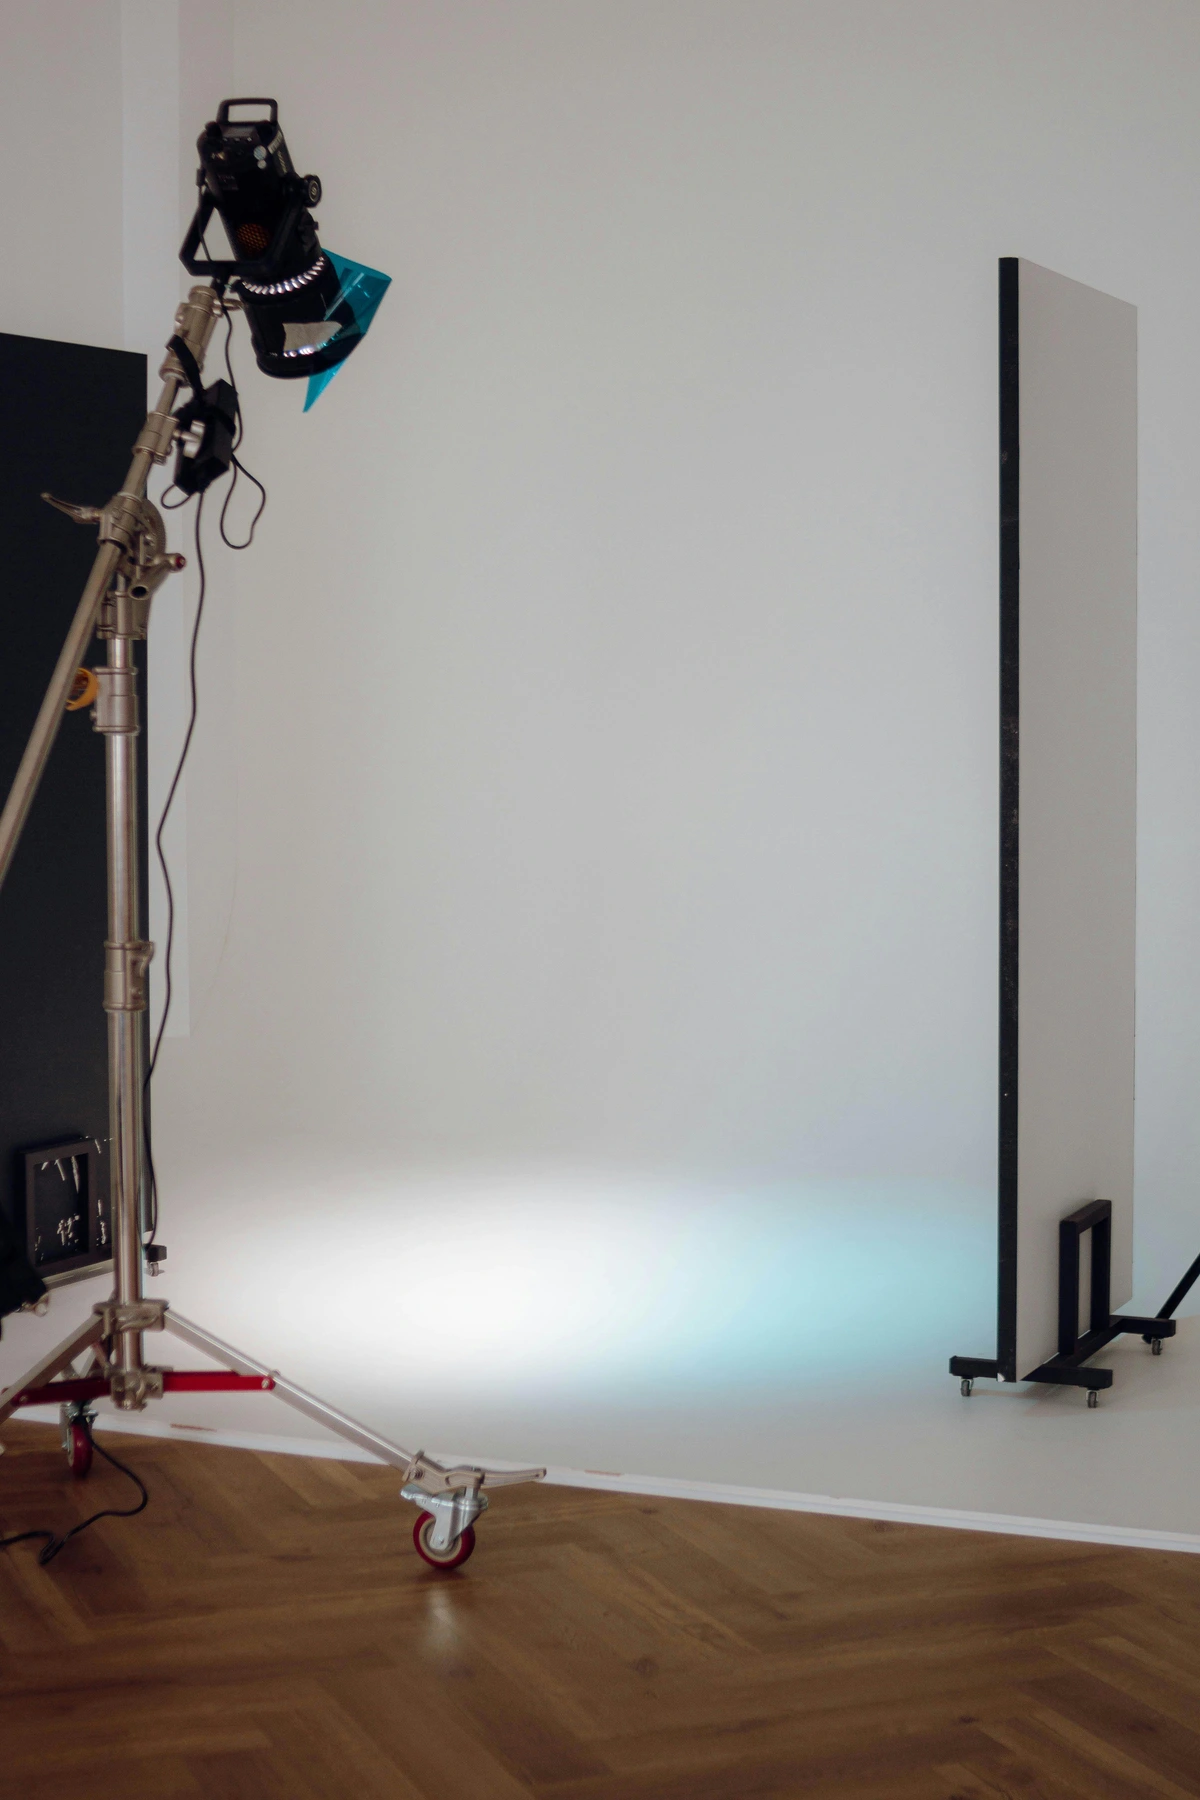
Before we even think about the camera, lens, or lights, let’s talk about something incredibly simple but profoundly impactful: what’s behind or under your artwork. I’ve seen my share of distracting backgrounds – a cluttered studio corner, a patterned sheet, even a pile of polka-dotted socks I once tried to crop out after a marathon painting session, only to find a rebellious stripe peeking out from behind a delicate watercolor. These visual intrusions pull the viewer's eye away from your masterpiece, subtly undermining its presence and betraying your artistic intent. My simple rule now? A neutral, non-distracting stage. Think a large piece of matte white, black, or grey foam board, or a plain, seamless fabric like heavy cotton or velvet. Matte surfaces are critical here, as glossy ones will introduce unwanted reflections and glare, competing directly with your art. Fabric backdrops offer flexibility and portability but might require steaming to avoid wrinkles, while foam boards are rigid but can be cumbersome for very large works. Sometimes, a subtle texture in your background (like a lightly textured fabric) can actually complement certain artworks, adding a tactile quality without distracting, especially if you're documenting printmaking, textile art, or pieces with a raw, tactile quality. You can even experiment with a subtly colored background if it harmonizes with your artwork's palette, but proceed with caution – neutrality is always the safest bet. It’s about creating a clean, focused environment that lets your art breathe and ensures nothing competes with its true form. Who knew a simple piece of foam board could be so crucial? It sets the foundation for everything else we're about to discuss, acting like a silent frame that supports your art, not competes with it. With that solid foundation in place, ensuring nothing detracts from your art, let's make sure our camera is as steady as possible. And remember, sometimes the best backdrop is the one that simply disappears, letting your vibrant work truly sing, like an artist’s palette, full of potential, but not distracting from the finished piece.

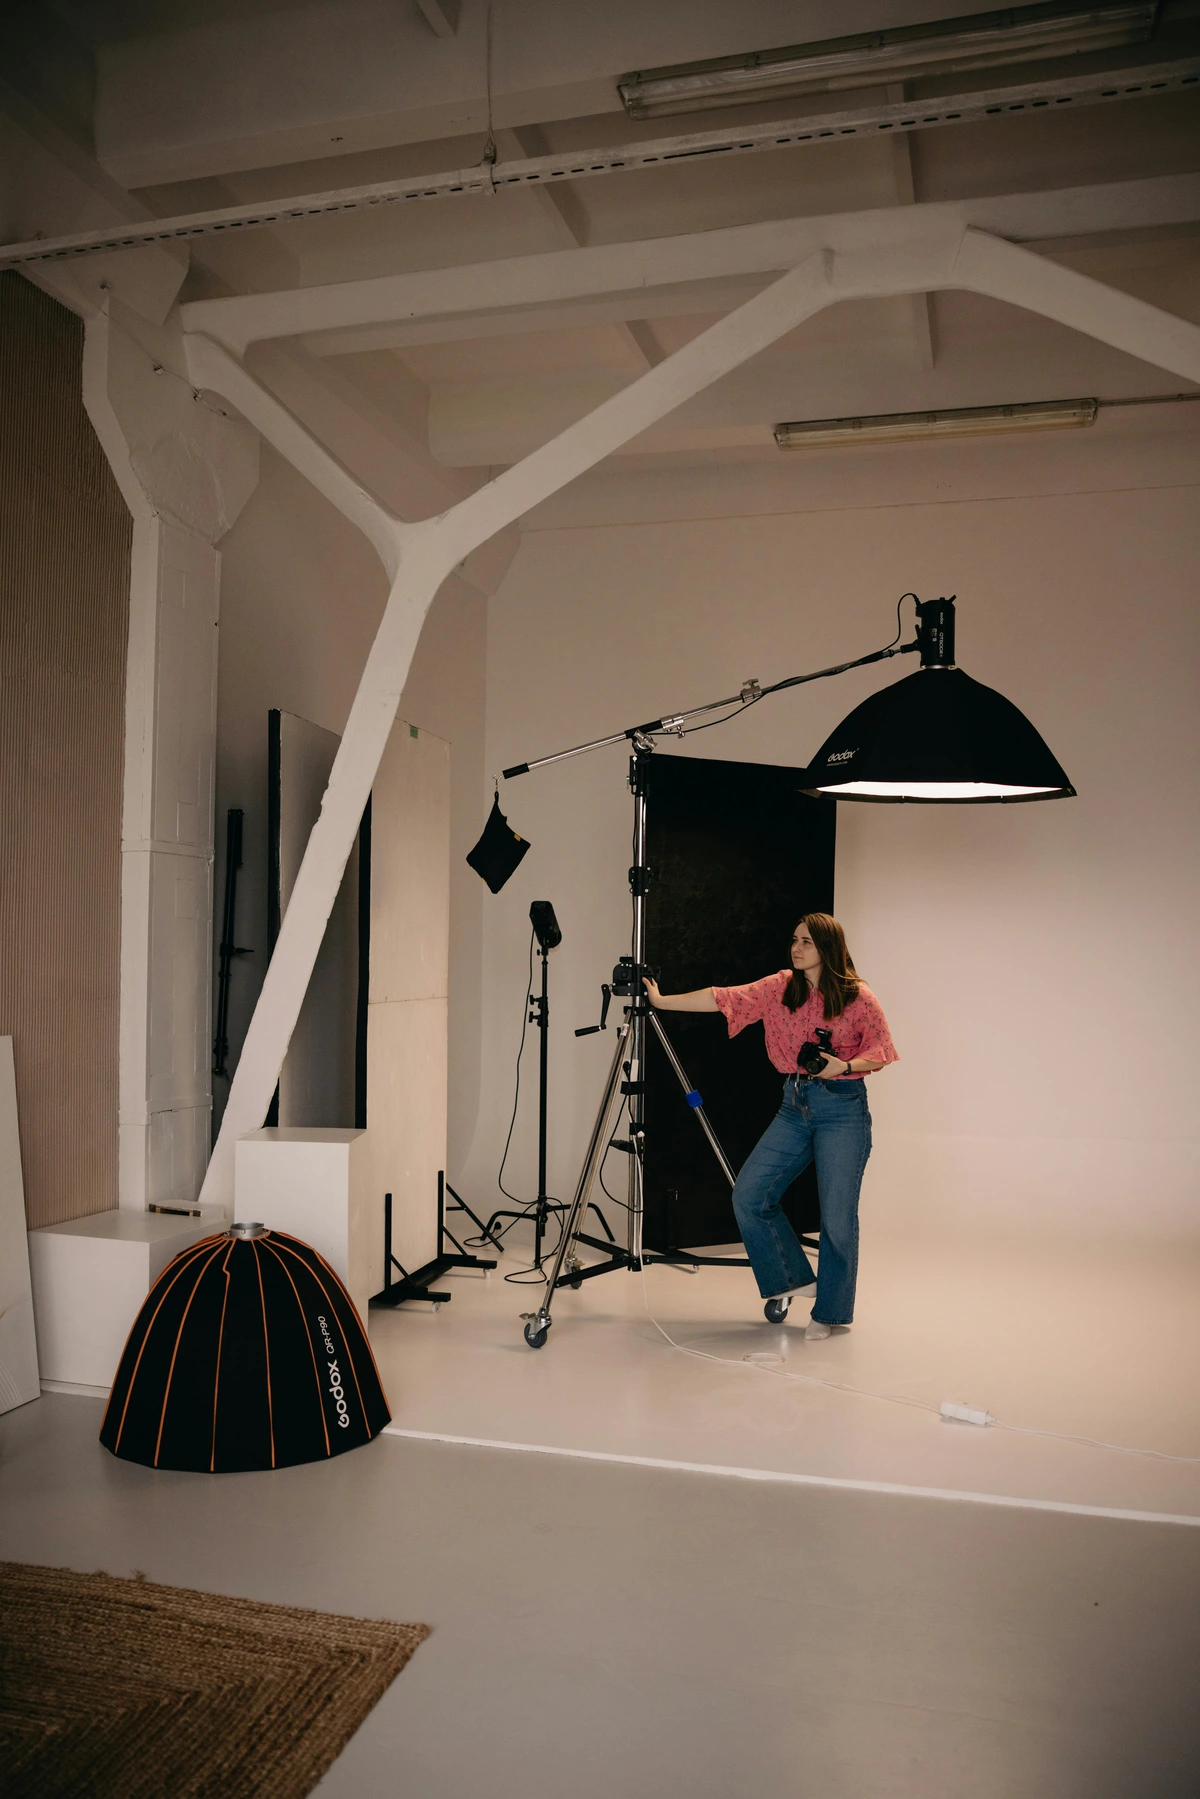
Stabilization & Control: The Steadfast Hand
Building on that unwavering foundation, it's now time to ensure the very instrument capturing your vision stands as still as the art itself. Remember how I said precision is key? Well, this is where your tripod comes in, my steadfast companion in the quest for sharpness. Hand-holding a camera, no matter how steady you think you are, will introduce a slight blur, especially in lower light conditions or when trying to capture fine details. A sturdy tripod keeps your camera perfectly still, allowing for longer exposures if needed, and ensuring consistent framing for multiple shots—which is invaluable if you ever need to stitch several photos together for a very large artwork or ensure a consistent look across a series. It’s like giving your camera a perfectly stable easel. When choosing a tripod head, a pan-tilt head with precise horizontal and vertical adjustments can be particularly beneficial for aligning flat artwork, offering more controlled movement than a ball head.
Along with a tripod, grab a remote shutter release (wired or wireless). Pressing the shutter button, even gently, can introduce tiny vibrations that can subtly compromise sharpness. A remote eliminates this completely, ensuring the sharpest possible image every time. It’s a small, inexpensive tool that makes a huge difference in achieving absolute clarity and consistency. Together, these tools provide the steady hand your art deserves, ensuring every pixel is precisely captured, laying the groundwork for truly accurate reproductions.
The Camera: Your Digital Eye to the Soul of Your Art
With your setup as steady as a surgeon's hand, let's be honest, the camera is where most people start, and often get overwhelmed. DSLR or Mirrorless? Full-frame or crop sensor? Megapixels? It can feel like deciphering ancient hieroglyphs, a language I certainly didn't speak fluently when I started. I swear, sometimes I felt like I needed a degree in astrophysics just to buy a lens! (My apologies to actual astrophysicists). Honestly, all those specs still give me a slight headache, but understanding them is truly worth the effort.
From my experience, the camera body itself is important, but perhaps not as critical as the lens (we'll get to that next). What you absolutely need is a camera that gives you full manual control over aperture, shutter speed, and ISO. This is absolutely essential if you're serious about art reproduction. Auto mode is a lovely friend for snapshots, but for capturing the nuances of your art, you need precision, control, and the ability to fine-tune every aspect of the exposure. Beyond these core controls, look for a camera with Live View functionality (so you can see your composition and focus on the screen) and the ability to tether it to a computer. Tethering allows you to see your shots immediately on a larger screen, making critical adjustments in real-time and ensuring perfect focus and framing. While modern phones are impressive, I've found they typically have fixed apertures that limit depth of field control, offer only digital zoom (which crops and reduces detail), and often lack the ability to shoot true RAW format, making them less ideal for archival-quality art reproduction. Plus, their smaller sensors generally struggle to capture the subtle tonal gradations and broad dynamic range that truly reflect the richness and depth of your physical artwork. They are great for quick social media posts, but not for archival-quality documentation or high-resolution prints where fidelity is paramount.
Many entry-level DSLRs or mirrorless cameras will do the job perfectly well to start. What’s often more critical for art reproduction is the resolution – the number of megapixels. More megapixels generally mean more detail, which is crucial for capturing every brushstroke and texture. We're talking about the ability to "pixel peep," where you zoom in to inspect individual pixels, ensuring your digital file holds all the intricate data your physical art offers. This becomes incredibly important for archival purposes and high-quality prints. Beyond just megapixel count, consider pixel density, which is essentially how tightly packed those megapixels are on your sensor. Think of it like trying to read a finely printed map versus a billboard from the same distance; the map, with its higher pixel density, reveals far more intricate detail within a smaller area. Similarly, a sensor with higher pixel density can capture finer details. While more dots (megapixels) generally mean more detail, how they're arranged (density) also matters for how well they capture light and detail. A camera with high pixel density on a smaller sensor can capture excellent detail, but a lower pixel density on a larger, full-frame sensor often means larger individual pixels. And here's the crucial bit: these larger individual pixels are like bigger light-gathering buckets, which means they can collect significantly more light. This is why full-frame sensors generally excel in low-light conditions, producing cleaner images at higher ISOs, and offer a much wider dynamic range – capturing more nuanced detail in both the brightest highlights and deepest shadows of your artwork. It’s about each pixel having a bigger 'canvas' to absorb light information, if you will. Dynamic range, in essence, is your camera's ability to capture the full spectrum of light, from the brightest whites to the deepest blacks, without losing detail in either extreme. Imagine a painting that features both bright, shimmering highlights and deep, velvety shadows; a good dynamic range ensures both are captured with all their intricate detail, preserving the artist's original intent.
Here’s a quick comparison to help wrap your head around sensor types for art reproduction:
Feature | Full-Frame Sensor | Crop Sensor (e.g., APS-C) |
|---|---|---|
| Detail/Resolution | Often higher megapixel counts, excellent detail. | Very capable, often offering high megapixel counts, excellent detail. |
| Low-Light Performance | Generally superior, cleaner images at higher ISOs. | Good, but may show more noise at higher ISOs. |
| Dynamic Range | Wider, capturing more detail in shadows and highlights. | Good, but slightly less range than full-frame. |
| Cost | Higher upfront investment in body and lenses. | More affordable, offering great value. |
While the primary benefit of full-frame (the shallower depth of field) is less critical for photographing flat art, the superior detail, cleaner images at higher ISOs, and broader dynamic range can make a noticeable difference in the fidelity of your reproductions, especially for large works or archival masters. However, don't let this deter you; a good crop sensor camera (like many APS-C models) is more than capable for most situations, particularly when paired with a good lens. For archival quality and potential high-resolution prints, more megapixels never hurt. For the ultra-high-end, some artists even explore medium format sensors, which offer even larger physical sensor sizes and often incredibly high megapixel counts, but these come with a significant cost and are typically reserved for professional applications or very specific, large-scale archival needs.
Speaking of resolution, always capture your images at the highest possible resolution your camera offers. This provides maximum detail, crucial for fine art reproduction, especially if you intend to create high-quality prints or allow for significant cropping later without pixelation. And when it comes to saving those precious pixels, shoot in RAW format if your camera allows. RAW files capture all the uncompressed data from the sensor, often at a higher bit depth (e.g., 14-bit compared to JPEG's 8-bit), giving you exponentially more tonal information and far more flexibility in post-processing for white balance, exposure, and color correction than compressed JPEG files. Think of RAW as your digital negative – untouched and ready for careful development. By understanding these nuances, you're already taking a significant step towards capturing your art with the fidelity it deserves. Now that we've explored the camera body, the vessel for your digital vision, let's turn our attention to the true eye of your camera: the lens.
Lenses: The Window to Unveiling Detail and Truth
Ah, lenses. This is where I truly saw a difference, and it was a bit of an eye-opener (pun intended). A cheap kit lens, while versatile, often introduces distortion and isn't as sharp as you need for art reproduction. Distortion, for instance, can be a silent saboteur. Imagine a perfectly rectangular canvas subtly bowing outward (barrel distortion) or pinching inward (pincushion distortion). It fundamentally misrepresents your composition, almost like a subtle, digital forgery, betraying your artistic intent. For a while, it felt like the camera was playing tricks on my art, subtly altering its perceived proportions and making it feel off. And for a while, the sheer number of options felt like navigating a labyrinth, each turn promising a new headache – and a new set of acronyms that made my brain hurt even more than the camera specs. For me, finally investing in a proper prime lens was a game-changer; it felt like I'd finally cleaned the smudges off my camera's spectacles, and my art instantly looked... right.
My top recommendation? A prime lens (fixed focal length) between 50mm and 100mm. Why prime? They're generally sharper because they have a simpler optical design with fewer moving parts and glass elements compared to zoom lenses. This often leads to better overall image quality, less chromatic aberration (color fringing), and wider apertures (though you’ll likely shoot stopped down for maximum sharpness across the entire plane of your art). These focal lengths are ideal for flat art because they offer a balanced perspective, closely mimicking how the human eye naturally perceives objects at a comfortable viewing distance. This natural perspective is key to minimizing perspective distortion (that annoying effect where objects closer to the lens appear larger or lines bow outward) without introducing the excessive compression of very long telephoto lenses. This distance helps approximate the ideal perspective, minimizing parallax errors – those subtle shifts in perspective when the camera moves slightly – and ensuring your art's geometry remains true to life. Think of it this way: standing further back with a longer lens flattens the perspective, making lines appear straighter and proportions more accurate, as if you're viewing the art head-on without any visual tricks. Remember, lens quality matters immensely; even within this recommended focal length range, seek out lenses known for their sharpness and minimal distortion, reading reviews from trusted sources that specifically test for "flat field" performance. These reviews are critical for identifying lenses that render flat subjects with geometric accuracy, which is paramount for art reproduction.
A 50mm f/1.8 (often called the "nifty fifty") is an incredibly affordable and high-performing option for many, especially for medium-sized works. For larger pieces, or to minimize perspective distortion even further, a longer focal length like an 85mm or 100mm can be fantastic. Using a longer lens means you can stand further back, which naturally reduces the angle of view and minimizes perspective distortion, making your artwork appear more geometrically accurate, free from the subtle bowing or bulging that wider-angle lenses can create.
Crucially, you need a lens that renders your art as flat as possible. Macro lenses, in particular, excel at capturing the minutiae – the impasto of paint, the weave of canvas, the specific texture of a brushstroke – with incredible fidelity. They are like a magnifying glass for your artwork, allowing you to showcase its physical presence in exquisite detail, making them ideal for truly showcasing the physical presence of your artwork. Even if you don't need macro capabilities, many good primes will deliver excellent results. For the ultimate geometric accuracy and lack of distortion, some specialized 'flat field' lenses or even more specialized 'telecentric' lenses are designed. Flat field lenses ensure sharpness and minimal distortion across the entire plane of your artwork by making light rays parallel, optimizing for flat subjects. Think of it like ensuring your artwork is captured on a perfectly flat digital canvas, not a subtly curved one, with every detail in perfect focus from edge to edge. Telecentric lenses take this a step further, engineered for extreme precision, ensuring that objects appear the same size regardless of their distance from the lens – these specialized lenses are engineered for absolute geometric accuracy, ensuring your artwork's lines and planes are rendered perfectly flat, which is the pinnacle of fidelity for reproduction. These are usually a significant and specialized investment, far beyond what most artists need, but their existence highlights the absolute importance of optical flatness for professional art reproduction. Investing in a good lens is investing in the truthfulness of your art's digital twin.
Lighting: Sculpting Your Art with Lumens
This might be the most overlooked, yet absolutely critical, piece of the puzzle. Poor lighting can completely misrepresent your artwork, making colors dull, textures invisible, or creating distracting glare. I've wasted countless hours trying to edit bad lighting, and trust me, it’s a losing battle. Get it right in camera. I once spent an entire afternoon photographing a piece only to realize later that the subtle blues looked purple, simply because my ambient light was too warm. My initial struggles with color casts and uneven illumination were, shall we say, enlightening (pun absolutely intended). It felt like chasing a digital phantom, only to realize the problem was right there in front of me, literally! It was like trying to clean a window with a dirty cloth – frustrating and utterly ineffective.
Natural light can be gorgeous, but it's fickle. Clouds, time of day, shadows—it’s a constant battle. If you use it, aim for an overcast day or indirect light from a large window. Never direct sunlight, unless you're specifically going for harsh shadows for a sculptural piece. The lack of consistency makes it incredibly hard to get repeatable, accurate results across multiple artworks or even different sessions for the same piece. And speaking of consistency, even with artificial lights, be mindful of ambient light sources from windows or household lamps that can introduce unwanted color casts if not controlled. I've found that even a seemingly innocent desk lamp in the corner can subtly contaminate your carefully set lighting, throwing off your blues or dulling your reds. For deeper insights, you might want to check out my guide on mastering art lighting.
For consistency, I swear by artificial lighting. You'll want two continuous light sources (not flashes, unless you're very comfortable with them and have specific diffusion and calibration tools). Why continuous lights over flashes? Because with continuous light, what you see is what you get. You can immediately judge the light's placement, intensity, and how it reveals textures and colors, making adjustments in real-time. Flashes, on the other hand, require more advanced techniques and can introduce inconsistent color temperatures unless carefully calibrated, making them far more challenging for artists seeking simple, repeatable results. Look for LED panels with a high CRI (Color Rendering Index) of 95 or above. This ensures the light accurately reproduces colors – lower CRI lights can subtly shift colors, making your blues look purpler or your reds duller, and older or cheaper LEDs can also exhibit a 'color shift' over time. Also, pay attention to color temperature, measured in Kelvin (K). Aim for light sources with a consistent color temperature, typically around 5000-5500K for a neutral "daylight" balance, to prevent your blues from looking purple or your reds from looking orange. To give you a reference, a typical incandescent household bulb might be around 2700-3000K (warm, yellowish), pushing your blues towards green or making pure whites appear creamy, while direct midday sunlight can be upwards of 6500K (cool, bluish), which could mute vibrant reds into dull oranges. Crucially, if you're using two lights, make sure their color temperatures and intensities are matched; even slightly different lights can introduce subtle color casts or uneven illumination that are difficult to correct later. A simple way to check is to point both lights at a white surface and observe if there are any distinct color differences or brightness variations.
Position your lights on light stands at a 45-degree angle to your artwork, one on each side. This setup minimizes glare and reflections, especially important for highly reflective surfaces like glossy paints or varnishes, ensuring you don't end up with distracting 'hot spots' that obliterate crucial details. It also provides even illumination, revealing textures without harsh shadows. Use diffusers (like softboxes or umbrellas) to soften the light. Hard light creates hotspots and reflections; soft, even light is your best friend here. Additionally, consider using flags or barn doors (adjustable metal or fabric panels that attach to your lights to block or shape light) on your light sources to control light spill, ensuring light only hits your artwork and not the background or other distracting elements. A simple reflector (even a white foam board) opposite a single light source can also help fill in shadows and provide more even illumination. Proper lighting truly sculpts your art, ensuring its integrity is maintained in the digital sphere, shaping form and texture in just the right way. Getting your lighting right in camera is one of the most empowering things you can do for your art photography!
Lighting for Different Mediums:
- Glossy Paintings/Varnishes: This is the nemesis of many art photographers. The 45-degree angle is paramount here. You might also experiment with slightly higher angles to avoid direct reflections from the light source. Think about how the light hits the artwork and how you would see it from the viewer's position – this angle is key to avoiding glare. A polarizing filter on your lens can also work wonders to cut down glare on glossy surfaces and metallic paints.
- Heavily Textured Art (Impasto, Mixed Media): For pieces with significant texture, like rich impasto or woven elements, a subtle shift from the strict 45-degree angle to a slightly shallower angle (known as raking light) can dramatically emphasize the dimensionality and texture. This creates gentle shadows that define the physical presence of the brushstrokes or materials without being overly harsh. However, a word of caution: too much raking light can sometimes flatten out very subtle textures by creating overly strong, contrasting shadows, so it’s all about finding that perfect, delicate balance.
- Works Behind Glass (Watercolors, Prints): Glass is incredibly reflective. The 45-degree angle is critical, but you may need to position your lights even further out from the artwork, at a very shallow angle to the artwork's surface, to minimize direct reflections. A polarizing filter is almost essential here. Be especially wary of Newton's Rings, those iridescent, rainbow-like patterns that can appear when glass presses tightly against an artwork. Careful lighting and potentially using spacers or museum-quality anti-reflective glass can help mitigate this.
- Delicate Works on Paper (Charcoal, Pastels, Watercolors): These mediums are incredibly delicate and prone to smudging, requiring careful handling. For photography, soft, highly diffused lighting is key to avoid harsh shadows that might misrepresent subtle tones or textures. Too much direct light can also create glare on the paper's surface, particularly with watercolors, obscuring delicate washes. A slightly more frontal, very diffuse light might be preferable to strong raking light to protect the nuanced surface. And, as always, avoid physical contact with the artwork itself!
- Works with Subtle Gradients or Smooth Color Transitions: For pieces like airbrush paintings, ink washes, or digital prints with very subtle shifts in color or tone, perfectly even and consistent lighting is absolutely crucial. Even slight variations in light intensity or color temperature can create visible banding or patchy areas in your photograph, which weren't present in the original. Use large diffusers and ensure your light sources are perfectly matched in intensity and color temperature.
- Sculptures & 3D Art: This is a different beast entirely! You'll likely need to use multiple lights from various angles to define form, shadow, and texture. Often, a three-point lighting setup (key, fill, and back lights) is ideal. The angles will depend on the form and desired mood, focusing on defining volume and depth rather than flatness. For 3D pieces, ensuring a clean, seamless background (like a photography sweep or plain backdrop) is crucial to isolate the subject and prevent distractions.
- Textiles/Fiber Art: Similar to textured art, raking light can highlight weaves and stitches. However, be careful with strong shadows if the fabric has an uneven surface. Sometimes, very soft, diffuse front lighting is best to show overall color and pattern.
- Ceramics/Pottery: These can be tricky due to their curves and often reflective glazes. Use large diffusers and multiple lights to create smooth transitions of light and shadow, defining the form without harsh hotspots. A black or white sweep can help define edges.
- Jewelry / Small Reflective Objects: For these intricate pieces, a light tent or light cube can be a godsend. These provide incredibly soft, even, and omnidirectional lighting, minimizing reflections and creating beautiful, consistent illumination without harsh shadows, which is paramount for highlighting fine details and reflective surfaces.
Color Management: Honesty in Hues
Once your lighting is dialed in, the next critical step is ensuring the colors captured are true to your original artwork – because, let's be honest, color accuracy is the bedrock of representing your work with integrity. This is where we get a little nerdy, but trust me, it’s crucial for conveying the true essence of your art. Have you ever uploaded a painting only for the blues to look purple, or the reds to look orange, or seen a subtle green shift where you swore you only had pure blue? That’s a color management issue, and frankly, a betrayal of your artistic intent. This is the foundation for reliable representation, transforming the often-frustrating digital color world into one of consistency and truth. Historically, artists and early photographers grappled with accurately representing color, often relying on hand-tinting or complex chemical processes like the laborious three-color carbon print process. Imagine the painstaking effort to achieve accurate hues when every step was a manual, chemical gamble! I remember the sheer frustration of seeing my carefully mixed blues turn into muddy purples on screen, despite knowing they were perfect in real life. Our modern tools make it far easier, but the principle of fidelity remains paramount. Early innovators painstakingly tried to capture the true spectrum, much like we do today with advanced digital tools. For a deeper dive into color itself, check out my definitive guide to color theory in art.
Before you even bring out any charts, an often-overlooked but crucial first step is to work with a calibrated monitor. Even with perfect camera capture, an uncalibrated screen will display colors inaccurately, leading you to make incorrect adjustments during post-processing. A good monitor calibration device ensures what you see on screen is an accurate representation of your file, and thus, your artwork. Once your monitor is trustworthy, then consider a grey card or, even better, a color checker chart (like an X-Rite ColorChecker Passport). Ensure your artificial light sources are consistent in their color temperature (e.g., all 5500K) and that you've minimized any external ambient light (like a changing window light) that could introduce additional color casts. A color checker can only correct for the colors present in the light it sees, not inconsistent light sources themselves. Once your lighting is stable, place this chart in the same lighting conditions, take a photo of it, and then use that image in your post-processing software to establish a true white balance and color profile. This ensures that the colors in your photographs are as close as possible to the actual colors of your physical artwork. It’s about honesty and accuracy, allowing visitors to my Den Bosch museum to recognize the true tones if they visit in person.
Remember, cameras, monitors, and printers all have different color gamuts – the specific range of colors they can capture, display, or reproduce. Think of it like the difference between a child's small box of 12 crayons and a professional artist's palette with thousands of carefully mixed shades; the color gamut defines the breadth of colors available. And here's a crucial distinction: screens use an additive color model (RGB – Red, Green, Blue) to create colors, while printers use a subtractive model (CMYK – Cyan, Magenta, Yellow, Key/Black). Understanding this fundamental difference is key to grasping why managing color gamuts and profiles is so important for consistent output across digital and print mediums. Different monitor technologies (e.g., IPS, OLED) and even calibrations mean some screens can display a much wider range of colors than others. For web, sRGB is the standard because of its broader compatibility and faster loading times, ensuring most web browsers and devices display your art consistently. For print, Adobe RGB (or ProPhoto RGB for very specific, high-end applications) offers a wider color gamut, capable of capturing more vibrant and nuanced hues, especially in greens and cyans, which can be crucial for richer, more accurate print reproductions. Beyond just color gamuts, the concept of color profiles (often ICC profiles) ensures consistency by providing a standardized description of a device's color characteristics. Choosing the right color space and applying the correct profile for your intended output is essential for consistency across your digital workflow. A color checker helps bridge these differences, creating a consistent pipeline from your artwork to its digital representation.
Consider documenting your art at its actual size or at a known scale. This means taking measurements and perhaps including a ruler or scale bar (removed in post-processing) in an initial shot. This is essential for archival purposes and for accurate reproduction in publications or exhibitions where exact dimensions are critical. When I talk about "archival quality," I mean creating a digital file that is robust and detailed enough to last for decades, serving as a definitive record of your work. This involves shooting in 16-bit color depth (if your camera allows, capturing a wider range of tones), using lossless file formats like TIFF or DNG to preserve all image data, and embedding comprehensive metadata (artist, title, dimensions, creation date, medium, copyright info) directly into the file. This metadata ensures that if your image is used in a gallery catalog, your name and artwork title are automatically associated with it, or if it appears online, copyright information is embedded for protection. "High-resolution prints" means you can produce large-format, crisp reproductions without any pixelation or loss of detail, opening up possibilities for selling quality prints or exhibiting digitally. Historically, artists and conservators meticulously documented artworks with precise measurements and detailed records, recognizing that even before photography, accurate information was paramount. Today, we have more powerful tools, but the principle remains the same. Mastering color management gives your art the accurate digital voice it deserves.

Post-Processing Software: The Digital Polish (Not a Paint Job!)
After capturing your art with precision, a touch of post-processing is essential to refine its digital representation and ensure it shines – but remember, we're giving it a digital polish, not a paint job! Once you have your well-lit, sharp, color-calibrated photos, a little post-processing is often necessary. The goal here isn't to fundamentally change your art, but to refine its digital representation. Think of it as presenting your masterpiece on its best day, not repainting it. This is where you give your accurate captures their final sheen.
Software like Adobe Lightroom, Capture One, or even free options like GIMP or Darktable can help. Crucially, focus on non-destructive editing, meaning any changes you make are applied as adjustments rather than altering the original image data. It’s like putting a transparent filter over your original artwork – you can adjust the filter, remove it, or swap it out, but the original piece underneath remains untouched. This way, you can always revert to your initial capture. Focus on:
- Cropping and Straightening: Ensure your artwork is perfectly aligned and without distracting backgrounds. This is also where you can fix slight lens distortion (barrel or pincushion) using built-in lens profiles or manual adjustments.
- White Balance Adjustment: Use your grey card reference to nail the accurate colors.
- Exposure and Contrast: Minor tweaks to ensure your image isn't too dark or blown out, and that it has appropriate depth.
- Minor Dust Removal: It happens. Imagine a tiny, almost invisible speck of dust on your canvas; magnified on screen, it looks like a miniature asteroid crater. On heavily textured or glossy surfaces, dust can be especially problematic, requiring careful isolation to remove without flattening details or creating unnatural smudges. The spot healing brush is your digital lint roller, seamlessly erasing such imperfections using tools like the spot healing brush or clone stamp tool to seamlessly remove specks without altering the underlying artwork.
- Chromatic Aberration Correction: Check for and correct any chromatic aberration (color fringing) that might appear, especially around high-contrast edges. This often manifests as subtle red, green, blue, or magenta halos, like the faint purple or green halo around a bold black signature on a pristine white background, betraying the crispness of your lines or edges.
- Judicious Sharpening: A tiny touch of sharpening can bring out crucial details like texture and brushstrokes. Think of it as enhancing existing details, not creating new ones. Overdo it, and your art will look artificial, pixelated, or even "crunchy," creating unsightly halos around edges or unnatural smoothness that betrays the original texture. Apply sparingly and zoom in to check the effect, using tools like an unsharp mask with careful radius and amount settings. Remember, the goal is always a subtle enhancement, a digital polish, not a digital paint job.
Remember, your art speaks for itself. The photograph is just the messenger. Don't let the messenger distort the message. With these digital refinements in place, your artwork is truly ready to be presented to the world, shining brightly and truthfully.

The Artist's Ethical Compass: Representing Your Vision with Integrity
This might seem like a lot, and for a while, it felt daunting to me too. But taking the time to understand and invest in these essential pieces of equipment has been transformative for how I present my work. It’s allowed me to confidently share my creations with the world, knowing that they are seen as accurately and beautifully as possible, fulfilling an ethical responsibility to represent my work with integrity. The sheer relief and pride I feel now, knowing my digital art truly reflects my studio work, is immeasurable. This is another step in my own artistic timeline of growth and learning, and frankly, a game-changer for my online presence. These high-quality images also become the foundation for any reproduction rights discussions or prints you might want to sell, making accuracy all the more important. Your art is unique, and its presentation should reflect that care and quality. Make the investment; your art, and your audience, will thank you.
Essential Checklist & Key Considerations for Optimal Art Photography
Beyond just the gear, here's a quick checklist of critical camera settings and environmental factors for optimal results:
- Aperture: For flat artwork, aim for an aperture of f/8 to f/11. I've found this range provides the sweet spot for maximizing depth of field (ensuring everything from the closest brushstroke to the furthest background is in sharp focus) and achieving optimal lens sharpness across the entire plane of your artwork, from edge to edge.
- ISO: Keep your ISO at the lowest possible setting (typically 100 or 200) to minimize digital noise, which is crucial for archival quality.
- Shutter Speed: With your camera on a tripod, shutter speed is less critical, but ensure it's fast enough to avoid any subtle vibrations (e.g., 1/60th second or faster).
- Focusing Techniques: Beyond using Live View, leverage Live View magnification to zoom in on critical details and achieve pinpoint focus, ensuring that even the tiniest brushstroke is perfectly sharp. Some cameras also offer manual focus peaking, which highlights in-focus areas, making precision focusing even easier.
- Custom White Balance: While a grey card in post-processing is powerful, setting a custom white balance directly in your camera using the grey card can provide an excellent starting point and reduce post-processing time.
- Clean Environment & Artwork: Before you even hit the shutter, ensure your shooting area is as dust-free as possible. I usually give my artwork a gentle once-over with a soft, clean brush or a blower bulb. Dust on your artwork, lens, or even the sensor will show up in your photographs and create unnecessary post-processing work. Trust me, it’s far easier to prevent it than to clone it out later!
- Material Properties & Preservation: Be mindful of your artwork's material properties. Is it sensitive to light or heat? For very old, delicate, or light-sensitive pieces, minimize exposure time and avoid intense, hot lighting. Crucially, always avoid physical contact with the artwork itself, especially with delicate mediums like pastels, charcoal, or watercolors, to prevent smudging or damage. Prioritizing the preservation of your physical artwork is paramount.
- File Organization & Backup: Establish a consistent file naming convention (e.g., 'ArtworkTitle_YYYYMMDD_Portrait.tif' or 'ArtworkTitle_Landscape.dng'). This might seem small, but it's a lifesaver for organization. Crucially, back up your high-resolution RAW and TIFF files to multiple locations (e.g., an external hard drive and cloud storage) to protect your valuable digital assets.
- Intended Orientation: Trust me on this one: always photograph your artwork in its intended orientation (portrait or landscape). It sounds obvious, but you'd be surprised how often I've seen pieces uploaded sideways! This is how your work is meant to be seen, preserving your artistic vision. You can also explicitly include orientation information in the image's metadata or filename (e.g., 'ArtworkTitle_Portrait.tif' or 'ArtworkTitle_Landscape.dng') to ensure clarity for anyone viewing or using your digital files.
- Sculptures & 3D Art: For those working with sculptures or 3D art, the same core principles of lighting and distortion apply, but you'll adapt by using multiple lighting setups to define form and taking several images from different angles to convey dimensionality, sometimes even employing focus stacking to ensure deep depth of field throughout the piece. For 3D pieces, ensuring a clean, seamless background (like a photography sweep or plain backdrop) is crucial to isolate the subject and prevent distractions, making your sculpture truly pop. While technical accuracy is paramount, don't forget the artist's eye; you, as the creator, have the deepest understanding of your work's unique qualities. Let that understanding subtly guide your photographic interpretation to best convey its essence – perhaps a slightly shallower raking light to emphasize a specific texture, or a particular background color that harmonizes perfectly – without ever compromising its integrity.
Consider this not just a guide, but an invitation to elevate your craft, ensuring your art shines online with the same brilliance it holds in your studio. This journey from 'digital cry for help' to a confident declaration of your art's true beauty is within your reach, and trust me, it's worth every bit of the effort.
Frequently Asked Questions (FAQ) About Art Photography Equipment
After diving deep into the technicalities, it's natural to have a few lingering questions. Here are some of the most common ones I hear from fellow artists, and my thoughts on them:
Q: Do I really need a dedicated camera, or can my phone work?
A: Ah, the age-old question! For truly professional-looking results and accurate color reproduction, a dedicated camera with full manual controls and optical zoom is highly recommended. While modern phones are impressive, some advanced smartphone apps can offer RAW capture and manual controls, but they often struggle with consistent lighting, true optical zoom (leading to digital crop and loss of detail), fixed focal lengths, fixed apertures (limiting true depth of field control), and ultimately, their smaller sensor sizes and simpler lenses limit the professional-grade results achievable. These smaller sensors are particularly challenged when trying to capture the subtle tonal gradations and broad dynamic range that truly reflect the richness and depth of your physical artwork. They are great for quick social media posts, but not for archival-quality documentation or high-resolution prints where fidelity is paramount.
Q: What's the most important piece of equipment if I have a limited budget?
A: This is a tough one, and I've wrestled with it myself! If I had to pick, your camera's ability to offer full manual control over aperture, shutter speed, and ISO is the absolute prerequisite for serious art reproduction; without it, you simply can't achieve the precision needed. Then, honestly, a sturdy tripod would be my very next essential; it eliminates camera shake and ensures consistent framing, which is crucial for sharp results and fidelity, even more so than a slightly better lens initially. After the tripod, good lighting (two high-CRI LED panels with diffusers) would be my first splurge, and then a sharper prime lens. Think of it as building a foundation: control, then stability, then light, then optics. That order has saved me a lot of headaches.

Q: How important is a tripod?
A: Very important! A tripod eliminates camera shake, ensuring your images are tack-sharp, especially when using longer shutter speeds for optimal exposure in controlled lighting. It also ensures consistent framing across multiple shots, which is helpful if you need to stitch images together for very large artworks or maintain a consistent look for a series of pieces. Think of it as the steady hand your art deserves.
Q: Should I use natural light or artificial light?
A: For consistency and control, artificial light (like high-CRI LED panels) is generally preferred. Natural light can be beautiful but is unpredictable, changing with time of day and weather, making it hard to get repeatable, accurate results. For art reproduction, consistency is king. If you must use natural light, aim for an overcast day or indirect light from a large, north-facing window, ensuring no direct sunlight hits your piece.
Q: Why do I need a grey card or color checker?
A: These tools help you achieve accurate color representation. Your camera's auto white balance isn't always perfect, and different light sources have varying color temperatures. By photographing a grey card or color checker under your actual lighting, you create a precise reference point for your post-processing software to correct colors, ensuring they match your physical artwork as closely as possible and truly reflect your artistic intent. It's about honesty in hues.
Q: Why is shooting in RAW format so important for art photography?
A: RAW files capture all the uncompressed data from your camera's sensor, often at a higher bit depth (e.g., 14-bit compared to JPEG's 8-bit), acting like a digital negative. This gives you immense flexibility during post-processing for critical adjustments like white balance, exposure, and color correction without degrading image quality. Unlike compressed JPEG files, RAW preserves maximum detail and data, which is crucial for archival-quality reproductions and high-resolution prints, and even allows you to re-process your files years later with new software or techniques. Plus, DNG, an open-source RAW format, offers excellent universal compatibility and smaller file sizes while still embedding all original sensor data. This ensures your art's digital twin can truly stand the test of time.
Q: What resolution should I use for my art photographs for web vs. print?
A: Always capture at the highest possible resolution your camera allows. This gives you maximum flexibility for various uses. Here's a quick guide:
Usage | DPI (Dots Per Inch) | Primary Consideration |
|---|---|---|
| Web | Often 72 DPI (but not primary concern) | Pixel Dimensions (e.g., ~1500-2500 pixels longest side for optimal loading/display) |
| 300 DPI or more | Physical Dimensions (to ensure crisp detail at desired print size) | |
| Archival | 300 DPI or more | Full Physical Dimensions (a definitive, long-term record) |
For web display, you'll typically downscale to specific pixel dimensions, often around 1500-2500px on the longest side at 72 DPI, for clarity and faster loading. However, it's the pixel dimensions that primarily dictate web display quality and loading speed, with DPI being more of a descriptive tag than a functional constraint here. For high-quality prints, publications, or archival purposes, you'll need significantly higher resolution, often 300 DPI or more, at the artwork's full physical dimensions, to ensure crisp detail when reproduced without any pixelation or loss of detail. DPI (dots per inch) is crucial for print because it dictates the density of tiny ink dots per physical inch on paper, directly impacting perceived sharpness and detail. Starting with the highest resolution ensures you have the data for any future need, enabling you to produce stunning, large-format reproductions. For archival purposes, the goal is to capture your artwork at its actual physical dimensions at 300 DPI or higher, providing a definitive record of your work.
Q: How important is photographing my artwork at its actual size or a known scale?
A: This is incredibly important for archival purposes and for any situation where accurate physical dimensions are critical, such as reproductions in catalogs, exhibitions, or for client reference. It means your digital file serves as an exact record of the physical piece. To achieve this, you can include a ruler or scale bar in an initial reference photo (removed later in post-processing for the final image) or use a camera setup that allows for precisely measured subject distance, ensuring a 1:1 reproduction ratio in your digital capture. For some advanced setups, a macro lens can help achieve precise 1:1 magnification, ensuring every physical detail is rendered digitally at scale. For very large works that exceed a single frame, a technique called stitching (taking multiple overlapping photos and combining them in post-processing) is often used to achieve a high-resolution capture of the entire piece at scale.

Q: How do I photograph artwork with challenging textures or finishes, like impasto or metallic paint?
A: Oh, this is where the fun begins! Each medium has its quirks, and it's all about adapting your lighting and setup. For heavily textured art (like rich impasto), a gentle raking light (light at a shallower angle than 45 degrees) can really bring out the dimensionality, but be mindful not to overdo it, as too strong a raking light can sometimes flatten subtle textures rather than enhance them. For metallic paints or highly reflective surfaces, sticking to the 45-degree lighting rule is key, and a polarizing filter on your lens becomes almost indispensable for cutting down glare and boosting color saturation. When dealing with works behind glass, watch out for those pesky Newton's Rings; using spacers or museum-quality anti-reflective glass, alongside very shallow lighting angles, can help tremendously. For delicate works on paper (charcoal, pastels), soft, highly diffused front lighting is often best to preserve subtle tones and avoid harsh shadows. And for intricate jewelry or small reflective objects, a light tent or cube can be an absolute game-changer, providing beautifully even, omnidirectional light to control reflections and highlight fine details. For larger sculptures or 3D art, a three-point lighting setup is usually your best friend to define form and depth. Essentially, it's about understanding how light interacts with the specific surface and adjusting accordingly – sometimes a little experimentation is your best teacher!
Q: What is focus stacking and why is it useful for 3D art or sculptures?
A: Focus stacking is a technique where you take multiple photos of the same subject, each focused on a different part of the object from front to back. Then, you use specialized software (like Adobe Photoshop, Helicon Focus, or Zerene Stacker) to combine these images into a single photograph where everything from the foreground to the background is in sharp focus. For 3D art or sculptures, this is incredibly useful because it allows you to achieve a deep depth of field throughout the entire piece, showcasing all its intricate details and dimensionality, which is very difficult to do with a single shot, especially for larger or more complex forms.
Q: What's the best file format for archiving my artwork images?
A: For archival purposes, lossless formats are key. TIFF (Tagged Image File Format) is a long-standing industry standard, widely supported, and can store images with 16-bit color depth, making it universally compatible. Why 16-bit? Because it captures vastly more tonal information (65,536 tones per channel, compared to 256 in 8-bit JPEGs), allowing for smoother gradients and far greater flexibility in editing without introducing banding or posterization – essential for preserving every nuance of your art. DNG (Digital Negative) is Adobe's open-source RAW format, which is also excellent as it preserves all original sensor data and often results in smaller file sizes than uncompressed TIFFs while maintaining maximum flexibility for future editing. Both are superior to JPEG for archival, as JPEGs use lossy compression, meaning some image data is permanently discarded to reduce file size – it's like throwing away a few puzzle pieces to make the box lighter, but you can never get them back. TIFFs and DNGs, on the other hand, are lossless, preserving every single piece of data, something we definitely want to avoid for art archiving. Choosing either TIFF or DNG ensures maximum quality and longevity for your digital art records.
Q: Why is embedding metadata important for my artwork images?
A: Embedding metadata directly into your image files (e.g., using your camera or post-processing software) is crucial for several reasons. It permanently attaches vital information like the artist's name, artwork title, dimensions, creation date, medium, copyright details, and contact information. This ensures that even if the image is separated from its original context, its provenance and essential details remain intact. Beyond pure record-keeping, embedded metadata can significantly aid in SEO (Search Engine Optimization). Search engines can read this information, helping your artwork become more discoverable online when people search for specific artists, mediums, or themes. It's invaluable for copyright protection, intellectual property rights, future licensing or reproduction discussions (e.g., ensuring a client knows the exact dimensions and medium needed for a print license, or confirming artist attribution), and simply maintaining an organized, professional archive of your work. Think of it as the digital fingerprint and dossier for your art.
Q: What's the difference between a "photography sweep" and a seamless backdrop for 3D art?
A: Both aim to create a clean, uncluttered background, but a photography sweep typically refers to a large piece of paper or fabric that curves smoothly from the vertical background down onto the horizontal surface where your artwork sits, forming a continuous, seamless backdrop without any visible horizon line or crease. The curve is the key element here, as it eliminates any harsh lines that would visually separate the background from the surface the art rests on, creating the illusion of your subject floating in space. A seamless backdrop is a more general term that could refer to any plain, unbroken background, which might still have a visible corner or floor-to-wall transition if not specifically 'swept' into a curve. For 3D art, the sweep is generally preferred for its elegant, shadow-minimizing effect.
Q: How can I mitigate the impact of ambient light on color accuracy when using artificial lights?
A: Even with a perfectly set artificial lighting system, ambient light from windows, overhead room lights, or other uncontrolled sources can introduce unwanted color casts and reduce color accuracy. The best approach is to minimize or eliminate ambient light as much as possible. Close blinds or curtains, turn off all other room lights, and ideally, photograph in a dedicated space with controlled lighting. As an extra trick, I sometimes use a dark, non-reflective cloth or piece of cardboard to shield the camera's lens and viewfinder, blocking any stray ambient light from entering the camera during the exposure. If complete elimination isn't possible, use a custom white balance in-camera with a grey card under your artificial lights, and carefully check your color checker chart after shooting to ensure no subtle color shifts have occurred due to remaining ambient light contamination. Consistent lighting across your entire setup is your best defense against unwelcome color surprises.

Your Art, Digitally Reborn
At the end of the day, your art deserves to be seen in its truest form, both in your studio and across the digital expanse. Investing in the right gear and understanding these techniques isn't just about pixels and settings; it's about honoring your creative vision, extending your reach, and securing the legacy of your work. So go forth, artists, equip yourselves, and let your masterpieces shine with the authenticity they truly deserve. The digital world is waiting.